Universelle Vorlagen und Erweiterungen
Bei der Wahl der passenden Vorlage können Sie sich auch für eine universelle Vorlage entscheiden. Dabei handelt es sich um vordefinierte Banana-Dateivorlagen, die sich in jedem Land problemlos verwenden und individuell anpassen lassen – mit beschreibenden Konten für ein besseres Verständnis.
Statt numerischer Konten enthalten die universellen Vorlagen beschreibende Kontobezeichnungen. Sie sehen also keine Nummern oder Codes, sondern klar formulierte Beschreibungen – das erleichtert den Einstieg und macht die Buchhaltung deutlich intuitiver.
Hier ein Beispiel für einen Kontenplan einer Buchhaltungsdatei mit Einnahmen und Ausgaben:

Accounting Templates and Extensions | Universal
Accounting Templates and Extensions | UniversalAlongside country-specific options, Banana Accounting also offers Universal templates that can be easily adapted to your country and needs. They use descriptive account names instead of numerical codes, making accounting simpler and easier to understand.
Here is an example of a chart of accounts for an income and expenses accounting file:
Choose the template that best suits your needs from the drop-down menu on the left, or directly in Banana Accounting (File > New).
Business (Universell)
Universelle Buchhaltungsvorlagen ohne MWST/USt
商店会计
商店会计 feiSimple Accounting for a Shop
Simple Accounting for a Shop michaelIncome & Expense Accounting for a Corporation
Income & Expense Accounting for a Corporation michaelIncome & Expense Accounting for Property Management
Income & Expense Accounting for Property Management michaelComptabilité multidevise pour PME
Comptabilité multidevise pour PMEModèle idéal pour la gestion de la comptabilité des sociétés anonymes. Le plan comptable est structuré selon le schéma PME et présente les registres clients/fournisseurs. Il y a des comptes en devises étrangères et des centres de coûts.
Comptabilité pour sociétés anonymes
Comptabilité pour sociétés anonymes caterinaComptabilité pour sociétés de personnes morales avec les registres clients/fournisseurs
Comptabilité pour sociétés de personnes morales avec les registres clients/fournisseursModèle idéal pour la gestion de la comptabilité des sociétés anonymes. Le plan comptable est structuré conformément au régime des PME. Il y a des centres de coûts.
Comptabilité pour sociétés de personnes morales avec les registres clients/fournisseurs
Comptabilité pour sociétés de personnes morales avec les registres clients/fournisseursModèle idéal pour la gestion de la comptabilité de personnes morales. Le plan comptable est structuré conformément au régime des PME. Il y a des centres de coûts et la gestion des clients et fournisseurs.
Comptabilité pour Entreprise jusqu'à 500'000 CHF chiffre d'affaires
Comptabilité pour Entreprise jusqu'à 500'000 CHF chiffre d'affairesPlan comptable structuré pour gérer une entreprise dont le chiffre d'affaires annuel n'excède pas 500'000 CHF. Avec TVA et des centres de coûts.
公司会计 (含中英文报表)
公司会计 (含中英文报表) feiComptabilité pour Entreprises Individuelles
Comptabilité pour Entreprises IndividuellesPour gérer les comptes d'une petite entreprise individuelle. Le plan comptable est structuré avec des groupes et sousgroupes et centres de coût.
Comptabilité pour Entreprises individuelles
Comptabilité pour Entreprises individuellesPour gérer les comptes d'une petite entreprise individuelle avec TVA et centres de coût.
Buchhaltung und Einnahmen-/Ausgabenverwaltung für Yachten, Boote und Kreuzfahrten – mit Budget und Liquiditätsplanung
Buchhaltung und Einnahmen-/Ausgabenverwaltung für Yachten, Boote und Kreuzfahrten – mit Budget und Liquiditätsplanung tizianaDouble-Entry Accounting for a Corporation
Double-Entry Accounting for a Corporation michaelBuchhaltung mit Budget für ein Restaurant | Beschreibende Konten
Buchhaltung mit Budget für ein Restaurant | Beschreibende KontenBudget für ein Restaurant erstellen
In jedem Betrieb ist es entscheidend, im Laufe des Jahres fundierte Entscheidungen über die wirtschaftliche und finanzielle Lage treffen zu können – idealerweise mit der Möglichkeit, frühzeitig einzugreifen, bevor es zu spät ist. Aus diesem Grund bietet Banana Buchhaltung in seinen Vorlagen die Funktion "Budget", mit der Sie ganz einfach den Finanzplan für Ihr Restaurant erstellen können.
Wir begleiten Sie Schritt für Schritt bei der Budgetplanung. Folgen Sie einfach den nachstehenden Anleitungen – es ist schnell und unkompliziert, sodass Sie sich direkt wieder auf Ihr Geschäft und Ihre Gäste konzentrieren können!
1. Einnahmen eingeben
Beginnen Sie mit der Erfassung der fixen Einnahmen. Als Orientierung können die Einnahmen des Vorjahres dienen.
In der Regel setzen sich die Einnahmen aus folgenden Bereichen zusammen:
- Lebensmittelverkäufen
- Getränkeverkäufen
Gerade bei Restaurants empfiehlt es sich, die Umsätze für Speisen und Getränke monatsweise zu planen, da diese je nach Feiertagen und Jahreszeit stark schwanken können. Selbstverständlich können Sie die Verkaufspositionen individuell anpassen – z.B. durch eine weitere Untergliederung nach Art der Speisen oder Getränke.
Darüber hinaus gibt es möglicherweise Einnahmen, die nicht direkt aus dem Tagesgeschäft Ihres Betriebs stammen, zum Beispiel:
- Mieteinnahmen aus Immobilien
- Zinserträge von Bank- oder Postkonten
Eine Anleitung zur technischen Eingabe der Budgetdaten im Banana-Programm finden Sie auf unserer Webseite unter Tabelle Budget.

2. Fixe und variable Ausgaben eingeben
Listen Sie alle Ausgaben auf, die im Laufe des Jahres zu erwarten sind. Auch hier können Ihnen die Werte des Vorjahres als Orientierung dienen. Überlegen Sie dabei, ob sich Änderungen abzeichnen, und passen Sie die Beträge entsprechend an.
Zu den wichtigsten Ausgabeposten zählen:
- Waren- und Rohstoffeinkauf (z.B. Lebensmittel und Getränke)
- Löhne und Gehälter
- Ausrüstung und Ausstattung
- Sozialversicherungsbeiträge
- Versicherungen (z.B. für Personal, Maschinen, Sachwerte)
- Miete, Hypotheken, Zinsen
- Steuern und Abgaben
- Energie- und Betriebskosten (Strom, Wasser, Gas)
- Telefon- und Internetkosten
- Reinigungsdienste
- Werbung und Marketing
Gerade bei Lebensmitteln und Getränken ist es sinnvoll, die Ausgaben monatsweise zu planen, da sich die Kosten je nach Saison oder Feiertagen deutlich verändern können.

3. Einnahmen und Ausgaben vergleichen
Nachdem Sie alle geplanten Einnahmen und Ausgaben aufgelistet haben, sollten Sie diese miteinander vergleichen, um zu erkennen, ob Sie Ihr angestrebtes Gewinnziel realistisch erreichen können.
Für diesen Vergleich benötigen Sie einen Budgetbericht. Wenn Sie eine Vorlage von Banana Buchhaltung verwenden, wählen Sie im Menü Berichte > Formatierte Bilanz nach Gruppen den gewünschten Budgetbericht aus – in der Regel ist der Jahresbudget-Bericht hier besonders hilfreich.
Beim Prüfen des Budgets sehen Sie, wie hoch Ihre Liquidität, Ihre Verbindlichkeiten und Ihr Gesamtvermögen auf Basis der eingeplanten Einnahmen und Ausgaben ausfallen werden.
Mit diesem Gesamtüberblick können Sie besser einschätzen, ob bestimmte Posten über- oder unterschätzt wurden.
Sollte sich eine Verlustsituation abzeichnen, empfiehlt es sich, frühzeitig mögliche Sparpotenziale zu prüfen: Überarbeiten Sie Ihre geplanten Ausgaben und passen Sie die Beträge entsprechend an, um Ihre finanziellen Ziele abzusichern.

4. Überprüfung mit der Bilanz zum Jahresende
Am Ende des Jahres, wenn alle Buchungen erfasst sind, können Sie einen Bericht erstellen, der die Endbestände aller Konten anzeigt und diese mit den budgetierten Werten vergleicht. So prüfen Sie zuverlässig, ob Ihre zu Jahresbeginn erstellte Planung realistisch war – und ob Sie den angestrebten Gewinn tatsächlich erreicht haben.
Für den Vergleich der geplanten Werte mit den tatsächlichen Endsalden wählen Sie im Menü Berichte > Formatierte Bilanz nach Gruppen den Befehl Jährlicher Ausdruck mit Budgetvergleich.
Bei grösseren Abweichungen können Sie analysieren, bei welchen Einnahmen oder Ausgaben Ihre ursprünglichen Schätzungen ungenau waren – und die entsprechenden Beträge im Budget für das neue Jahr gezielt anpassen.

Double-Entry Accounting for a Corporation with foreign currencies
Double-Entry Accounting for a Corporation with foreign currencies michaelPayPal Templates | Double-entry
PayPal Templates | Double-entryPayPal import transaction
Banana has an import filter that allows you to directly import the PayPal transactions data in your accounting file.
The attached files are predefined with the accounts so that you can start immediately using it.
There are two template example files you can download and open in Banana:
Files suitable for
These template files are especially suitable in case you have only one PayPal preferred currency.
The imported transactions will automatically be imported to the currency account, so that you can separately see all transactions.
If in PayPal you keep balances in different currencies, it will be more suitable to use a PayPal accounting in Multicurrency.
Even if you use another accounting software, you will find that is very efficient to keep a separate accounting in Banana and keep your PayPal accounting in it. Instead of recording all transactions in your accounting solution, you can keep a separated accounting in Banana and once a month or when needed, only record the summary movement for the period in your accounting solution .
Further adapting the file
The file can easily be adapted to suit your needs.
Adding new accounts and new currencies
-
In the Accounts table, add new accounts for other currencies or for different Income or Expense types.
Changing to another Basic currency
This file can easily be converted into one with another Basic currency.
- Change the Basic currency in the File properties.
Add VAT/Sales Tax, change language or convert into another type
Use Convert to new file to add more options or change the accounting file settings.
Contabilità Ristorante (Multi-Moneta)
Contabilità Ristorante (Multi-Moneta)Come fare il preventivo per un ristorante
Segui passo per passo la nostra guida alla pagina Come fare il preventivo per un ristorante che ti insegna come creare e gestire un budget familiare.
PayPal Templates | Multi-currency accounting
PayPal Templates | Multi-currency accountingPayPal import transactions
Banana has an import filter that allows you to directly import the PayPal transaction data into your accounting files.
The attached files are predefined with the accounts so that you can immediately start using it.
There are two template example files that you can download and open in Banana:
- Multi currency accounting with EUR as a Basic Currency
- Multi currency accounting with USD as a Basic Currency
Files suitable for
These example files are especially suitable in case you have PayPal transactions in different currencies and especially if you have set up your PayPal account to use and keep different currencies (see also PayPal template for Double-entry accounting) .
The imported transactions will automatically be imported to the currency account, so that you can see all transactions separately and have a balance in the currency.
Even if you use another accounting software, you will find that is very efficient to keep a separate accounting in Banana and keep your PayPal accounting in it. Instead of recording all transctions in your accounting solution, you can keep a separated accounting in Banana and once a month or when needed, only record the summary movement for the period in your accounting solution .
Further adapting the file
The file can easily be adapted to suit your needs.
Adding new accounts and new currencies
-
In the Accounts table, add new accounts for other currencies or for different Income or Expense types.
-
Add new currencies in the Exchange rates Table
Changing to another basic currency
This file can easily be converted into one with another Basic Currency
- Change the Basic currency in the Accounting properties.
- Adapt the Exchange Rates table with the appropriate currencies and exchange rates.
- In the Accounts table, change the currency for the accounts that need to be in Basic currency.
Add VAT/Sales Tax, change language or convert into another type
Use the Convert to new file command to add more options or change the accounting file settings.
Universal Accounting Templates VAT
商店会计
商店会计 feiLibro de caja para un Comercio con IVA (con transacciones)
Libro de caja para un Comercio con IVA (con transacciones) barbaraDouble-Entry Accounting for a Corporation with VAT/Sales tax
Double-Entry Accounting for a Corporation with VAT/Sales tax michaelDouble-Entry Accounting for a Corporation with foreign currencies and VAT/Sales tax
Double-Entry Accounting for a Corporation with foreign currencies and VAT/Sales tax michael公司 (含中英文报表)
公司 (含中英文报表)使用Banana财务会计软件,做专业的复式记账会计,一键生成资产负债表,损益表。多语言多汇率,使用中文做账一键点击生成外文报表。
创建您的文件
- 从该模板开始,创建一个新文件(模板编号+10680),使用在文中所解释的任何一种方式。
- 文件菜单→文件和账户属性命令,设置公司名称,会计期间及本位币。
- 文件菜单→另存为命令保存文件。以公司名称和年份作为文件名很有用。
例如“公司-2020.ac2”
文件和账户属性
- 账套
此标签可以编辑账套的信息,账套名称,开账日期和结账日期,以及记账本位币。 - 选项
此标签可以激活会计发生业务所需的功能。 - 地址
此标签中可以填入该会计账套的公司或个人信息,这些信息会做为本公司信息显示在给客户开具的发票中。 - 外汇
此标签中选择汇兑损益的会计科目代码。 - 增值税
此标签中选择应交增值税的会计科目代码。 - 其它
此标签中选择做账的语言和出报表的语言。 - 密码
此标签中设置账套密码。 - 文字
此标签中可以输入额外的信息,比如会计的名字。
编辑账户表
账户表格内显示有资产负债表及损益表的账户。
- 资产负债表显示所有资产账户的余额,即资产和负债。资产与负债之间的差额决定了个人资本。
- 损益表显示所有收入和费用的账户,它们的差额决定会计年度的损益状况。
所有的账户都可以根据您的需求进行客制化的编辑。例如,可以更改账号或摘要,可以在期初列内输入初始的余额,可以添加账户并且删除那些不需要的账户。
创建您的预算
在预算表格内,您可以输入指定年份的预估收入和费用。
- 列出每月费用和收入
例如,在办公室的租金中输入日期,重复,摘要,费用,借方账户,贷方账户和金额。
也可以会月收入执行相同的操作,并输入预估的收入。
输入会计发生业务
在会计发生业务表格中,输入实际的会计发生业务。
- 日期
- 摘要
- 借方账户
输入相对应的账户科目 - 贷方账户
输入相对应的账户科目 - 金额
对所有的会计发生业务执行同样的操作。
导入银行对账单
为了加快这些操作的进程,您可以导入银行对账单的数据并将其链接到数字收据。可以使用报表菜单→导入到账套命令。
报告和预算的比较
在输入会计发生业务后,程序将自动更新账户余额,您可以立即将其与预算余额进行比较。可随时查看并比较过去,现在和未来的会计数据。
外贸公司 (含中英文报表)
外贸公司 (含中英文报表) feiGlobal Accounting Chart - IFRS
The global accounting chart for SME is a IFRS compatible accounting chart specially conceived especially for SME (Small and Medium Enterprises).
- Easy to understand thank to the fact that accounts number follow the presentation.
- Groups numbering have the same sequence of the account numbers.
- Complete but not complex. It covers all the necessities SME, but don't have the complexity typical of accounting charts for large companies.
- Balance sheet and Income and Expenses.
- IFRS (International Financial Reporting Standard) SME compliant.
The Accounting chart structure and presentation is conform to the rule of the International Financial Reporting Standard for SME. - Easily adaptable.
- Fully tested.
This chart of account has been developed by the largest accounting association in Switzerland especially for SME. It has demonstrated to be easy to use and give all important results to companies owners and managers.
Global accounting templates for SME
The global accounting chart is the base for building the Banana Global accounting templates for Small and Medium Enterprise.
- Double entry accounting.
- Multi-currency accounting.
- The templates are available in many languages.
- It can be easily translated if necessary.
- There is a template with many languages together. So you can have the financial statements in different languages.
UndeeUse if Suitable for many countries
Use it in case your country authorities do not mandate a specific accounting chart. Many countries require accounting reporting to be conform to the IFRS rules, but they do not mandate a specific accounting plan or numbering.
A company that desire to keep their accounting in a modern way can adopt this accounting chart and adapt to their own needs.
More information
- Introduction IFRS for SME
- Structure of IFRS for SME
- Reclassification IFRS with Banana
- Excel file structure
- Free Excel model for the IFRS-SME
Balance Sheet - Statement of Financial Position
In SME the cash position is very important, so the presentation start with the account 1000 for Cash.
The group 100 is for Cash and cash equivalents and 10 for Current assets.
- 1. Assets
- 10. Current assets
- 100. Cash and cash equivalents
- 106. Short-term Assets listed in Stock Exchange
- 109. Transfer accounts
- 110. Accounts receivable
- 114. Other short-term receivables
- 120. Inventories
- 130. Prepaid Expenses
- 14. Fixed Assets
- 140. Financial assets
- 148. Investments
- 150 . Tangible assets
- 160. Tangible fixed asset management
- 170. Intangible fixed assets
- 180. Capital or non-paid Foundation capital
- 10. Current assets
- 2. Liabilities and Equities
- 20. Short-term third party capital
- 200. Suppliers or creditors
- 210. Short-term onorous debts
- 220. Other short-term debts
- 230. Accruals and deferred income
- 24. Long-term third party capital
- 240. Long-term onorous debts
- 250. Other long-term debts
- 260. Provisions and similar statutory posts
- 28. Equity
- 280. Capital or capital of the foundation
- 290. Legal reserves
- 295. Legal reserve from profit
- 296. Optional reserves from profit
- 297. Profit / Loss from Balance Sheet
- 298. Treasury stock, shares, rights of investment (negative)
- 20. Short-term third party capital
Statement of Comprehensive Income
The Income and Expense account start with 3000 for revenues and 3 for the Revenue Groups.
The structure is sufficient detailed to satisfy the need of a statement presentation. Depending on the situation other accounts and groups can be added, to provide a better look of the situation.
- 3. Revenues from supplies and services
- 30. Net revenues from supplies and services
- 39. Change in inventories and Non-invoiced services
- 4. Costs for material, goods, services and energy
- E1. Gross operating result after deducting costs for materials and goods
- 5. Personnel expenses
- E2. Gross operating result after deducting personnel expenses
- 6. Other operating expenses, depreciation, value adjustments and financial results
- 60. Rental
- 61. Maintenance, repairs and replacement of tangible assets
- 62. Vehicle and transportation expenses
- 63. Insurance for damage of items
- 64. Energy and disposal costs
- 65. Administrative and IT costs
- 66. Advertising
- 67. Various costs for the financial year
- 6. Other operating expenses, depreciation, value adjustments and financial results
- E3. Operating result before depreciation and value adjustments, financial results and taxes (EBITDA)
- 68.Depreciation and value adjustments of fixed assets
- E4. Operating result before financial results and taxes (EBIT)
- 69. Financial costs and revenue
- E5. Operating result before taxes (EBT)
- 7. Non-operating items
- 8. Results of extraneous, extraordinary or unique character, or for other accounting periods
- E6. Profit or loss before taxes
- 89. Direct taxes
- E7. Annual profit or loss
Full accounting Chart
| Section | Group | Account | Description |
| * | BALANCE SHEET | ||
| 1 | ASSETS | ||
| 1000 | Cash on hand | ||
| 1020 | Bank account | ||
| 100 | Cash and cash equivalents | ||
| 1060 | Bonds and stocks | ||
| 106 | Short-term Assets listed in Stock Exchange | ||
| 1090 | Internal transfers | ||
| 1091 | Transfer account for salaries | ||
| 1099 | Amounts to be clarified | ||
| 109 | Transfer accounts | ||
| 1100 | Due from Clients or Debtors | ||
| 1109 | Provision for Doubtful Debts | ||
| 110 | Accounts receivable | ||
| 1140 | Advances and loans | ||
| 1176 | Withholding tax | ||
| 1180 | Receivables from social insurances and social security institutions | ||
| 1188 | Source tax | ||
| 1190 | Various short-term receivables | ||
| 1199 | Securities | ||
| 114 | Other short-term receivables | ||
| 1200 | Goods for resale | ||
| 1210 | Raw materials | ||
| 1220 | Auxiliary material | ||
| 1230 | Consumables | ||
| 1260 | Finished products | ||
| 1270 | In-process products | ||
| 1280 | Non-invoiced services | ||
| 120 | Inventories | ||
| 1300 | Prepaid expenses | ||
| 1301 | Accrued income | ||
| 130 | Prepaid Expenses | ||
| 10 | Current assets | ||
| 1400 | Bonds and stocks | ||
| 1440 | Loans | ||
| 1460 | Loan to share-holder | ||
| 140 | Financial assets | ||
| 1480 | Investments | ||
| 148 | Investments | ||
| 1500 | Machinery | ||
| 1510 | Office furniture and equipment | ||
| 1520 | Office machinery, information and communication technology | ||
| 1530 | Motor vehicles | ||
| 1540 | Tools and equipment | ||
| 150 | Tangible assets | ||
| 1600 | Commercial buildings | ||
| 160 | Tangible fixed asset management | ||
| 1700 | Patents, know-how, licences, rights and development | ||
| 1710 | Brands | ||
| 1712 | Models | ||
| 1770 | Goodwill | ||
| 170 | Intangible fixed assets | ||
| 1850 | Share capital, rights not paid or non-paid Foundation capital | ||
| 180 | Capital or non-paid Foundation capital | ||
| 14 | Fixed Assets | ||
| 1 | Total Assets | ||
| 2 | LIABILITIES | ||
| 2000 | Suppliers or creditors | ||
| 2030 | Deposits received | ||
| 200 | Suppliers or creditors | ||
| 2100 | Due to banks short/term | ||
| 2120 | Financial leasing commitments | ||
| 2140 | Other onerous debts | ||
| 210 | Short-term onorous debts | ||
| 2206 | Withholding tax | ||
| 2208 | Direct taxes | ||
| 2210 | Other short-term debts | ||
| 2260 | Due to share-holders | ||
| 2261 | Dividends | ||
| 2270 | Social insurances and social security institutions | ||
| 2279 | Source tax | ||
| 220 | Other short-term debts | ||
| 2300 | Accrued expenses | ||
| 2301 | Next year's revenues collected | ||
| 2330 | Short-term provisions | ||
| 230 | Accruals and deferred income | ||
| 20 | Short-term third party capital | ||
| 2400 | Due to banks | ||
| 2420 | Financial leasing commitments | ||
| 2430 | Debenture loans | ||
| 2450 | Loans | ||
| 2451 | Mortgage | ||
| 240 | Long-term onorous debts | ||
| 2500 | Other long-term debts (non-onorous) | ||
| 250 | Other long-term debts | ||
| 2600 | Provisions | ||
| 260 | Provisions and similar statutory posts | ||
| 24 | Long-term third party capital | ||
| 2A | Third party capital | ||
| 2800 | Share capital, rights, foundation capital | ||
| 280 | Capital or capital of the foundation | ||
| 2900 | Legal reserves | ||
| 2940 | Revaluation reserves | ||
| 290 | Legal reserves | ||
| 2950 | Legal reserve from profit | ||
| 295 | Legal reserve from profit | ||
| 2960 | Optional reserves from profit | ||
| 296 | Optional reserves from profit | ||
| 2970 | Profit / Loss carried forward | ||
| 29A | Profit / Loss for the year | ||
| 297 | Profit / Loss from Balance Sheet | ||
| 2980 | Treasury stock, shares, rights of investment (negative) | ||
| 298 | Treasury stock, shares, rights of investment (negative) | ||
| 28 | Equity | ||
| 2 | Total liabilities | ||
| * | PROFIT & LOSS STATEMENT | ||
| 4 | |||
| 3000 | Earnings from own products | ||
| 3200 | Earnings from resale | ||
| 3400 | Earnings from services rendered | ||
| 3600 | Other revenues and services | ||
| 3710 | Own consumption | ||
| 3800 | Decrease in revenues | ||
| 3805 | Losses on accounts receivable, credit variation | ||
| 30 | Net revenues from supplies and services | ||
| 3900 | Change in inventories of in-process products | ||
| 3901 | Change in inventories of finished products | ||
| 3940 | Non-invoiced services variations | ||
| 39 | Change in inventories and Non-invoiced services | ||
| 3 | Revenues from supplies and services | ||
| 4000 | Raw materials | ||
| 4200 | Expenses for goods for resale | ||
| 4400 | Third party expenses | ||
| 4500 | Energy consumption for production | ||
| 4900 | Reduction of costs | ||
| 4 | Costs for material, goods, services and energy | ||
| E1 | Gross operating result after deducting costs for materials and goods | ||
| 5000 | Salaries | ||
| 5700 | Contribution to old age insurance and unemployment | ||
| 5710 | Family equalization fund | ||
| 5720 | Contribution to pension funds | ||
| 5730 | Contribution to accident insurance | ||
| 5740 | Contribution to voluntary daily benefits insurance | ||
| 5790 | Source tax | ||
| 5800 | Other personnel expenses | ||
| 5810 | Training of personnel | ||
| 5820 | Travel and entertainment expenses effective | ||
| 5830 | Travel and entertainment expense allowance | ||
| 5900 | Temporary staff | ||
| 5 | Personnel expenses | ||
| E2 | Gross operating result after deducting personnel expenses | ||
| 6000 | Rental | ||
| 6040 | Cleaning of facilities | ||
| 60 | Rental | ||
| 6100 | Maintenance, repairs and replacement of tangible assets | ||
| 6105 | Leasing costs tangible assets | ||
| 61 | Maintenance, repairs and replacement of tangible assets | ||
| 6200 | Repairs | ||
| 6210 | Fuel | ||
| 6220 | Car insurance | ||
| 6260 | Car leasing and rental | ||
| 6270 | Car costs - private part | ||
| 6282 | Transportation expenses | ||
| 62 | Vehicle and transportation expenses | ||
| 6300 | Insurance for damage of items | ||
| 63 | Insurance for damage of items | ||
| 6402 | Electricity | ||
| 6410 | Heating expenses | ||
| 6430 | Water | ||
| 6460 | Garbage | ||
| 64 | Energy and disposal costs | ||
| 6500 | Office supplies | ||
| 6503 | Technical magazines, newspapers, periodicals | ||
| 6510 | Telephone / internet | ||
| 6511 | Hosting at third-party | ||
| 6513 | Postal charges | ||
| 6570 | IT charges including leasing | ||
| 6580 | Licenses and updates | ||
| 6583 | Consumables | ||
| 65 | Administrative and IT costs | ||
| 6600 | Advertising | ||
| 6642 | Gifts to customers | ||
| 66 | Advertising | ||
| 6700 | Various costs for the financial year | ||
| 67 | Various costs for the financial year | ||
| 6 | Other operating expenses, depreciation, value adjustments and financial results | ||
| E3 | Operating result before depreciation and value adjustments, financial results and taxes (EBITDA) | ||
| 6800 | Depreciation and value adjustments of fixed assets | ||
| 68 | Depreciation and value adjustments of fixed assets | ||
| E4 | Operating result before financial results and taxes (EBIT) | ||
| 6900 | Costs for bank interest | ||
| 6940 | Bank costs | ||
| 6950 | Financial revenue | ||
| 69 | Financial costs and revenue | ||
| E5 | Operating result before taxes (EBT) | ||
| 7000 | Non-operating revenue | ||
| 7010 | Non-operating costs | ||
| 7500 | Corporate real estate revenues | ||
| 7510 | Corporate real estate costs | ||
| 7 | Non-operating items | ||
| 8000 | Extraneous costs | ||
| 8100 | Extraneous revenue | ||
| 8500 | Extraordinary, unique costs or costs relating to other accounting periods | ||
| 8510 | Extraordinary, unique revenue or revenue relating to other accounting periods | ||
| 8 | Results of extraneous, extraordinary or unique character, or for other accounting periods | ||
| E6 | Profit or loss before taxes | ||
| 8900 | Direct taxes | ||
| 89 | Direct taxes | ||
| E7 | Annual profit or loss |
Definition and principles of IFRS for SME
Definition of IFRS for SME
They are a set of accounting standards adopted globally for the financial statements of small to medium-sized companies with the goal of ensuring transparency, reliability, and comparability of the companies’ financial information.
They were issued by the International Accounting Standards Board (IASB), an independent organization based in London, composed of a group of experts with the function of defining accounting principles, preparing, reviewing, or using financial statements, and in accounting training.
When the IASB releases a new standard, there must be approval from the European Union, in the specific approval process, the responsibility lies with the European Commission with other consumptive entities.
IFRS Purposes
The main purpose is to create a common accounting framework for most companies operating within the European Community, offering the advantage of greater simplicity and transparency in relation to the balance sheets and financial information.
The objectives are characterized in various aspects as follows:
Transparency:
provide stakeholders with clear and detailed information on the company's financial status and performance.
Reliability:
financial reports that correspond to the business reality and are trustworthy.
Uniformity:
to report financial information that is comparable on a global scale.
Relevance:
to ensure that important information is provided to potential investors and other stakeholders.
Fundamental Principles IFRS SME
The characteristics of IFRS standards are based on principles as explained below:
Full Disclosure
All relevant information must be fully disclosed.
Substance over Form Principle
Transactions must be accounted for and presented based on their economic substance and reality, not just their legal form.
Principle of Prudence
Uncertainties and risks must be duly considered.
Fair Value Measurement
Numerous balance sheet items must be measured at their fair value, rather than at their historical cost.
Qualitative characteristics of financial information
Understandability
The presentation of financial statement information should be understandable in terms of the company’s commercial and economic activities. This principle does not allow for the omission of important information as it would become difficult to understand for some users.
Comparability
Information about an entity is useful if it can be compared with similar information from other entities. This characteristic allows stakeholders to identify and understand similarities and differences in business accounting realities.
Verifiability
Verifiability helps ensure a faithful representation of the company’s accounting and financial information. Quantified accounting information does not necessarily have to be an exact estimate to be verifiable.
Timeliness
Timeliness means having information available in time to make decisions. In this sense, the older the information, the less useful it is. There are exceptions, it is emphasized that for some information it can also be less timely since there is an evaluation over a longer period of time to study and identify trends.
References:
Composition of IFRS for SME
Introduction
According to Article 3.17 of the document "Exposure Draft IFRS for SMEs® Accounting Standard - Third edition of the IFRS for SMEs Accounting Standard - September 2022", it must include all of the following documents in order to have a complete set of financial statements:
- Financial statement.
- Income Statement.
- Statement of changes in equity.
- Cash flow.
- Notes.
References
Statement of financial position
It is a document that represents the balance sheet and financial situation of a company. The balance sheet is separated into current and non-current assets, and consists of assets, equity, liabilities.
Current assets comprise resources that are expected to be liquidated or used as part of usual business operations within one year from the date of the balance sheet. The distinction is particularly useful for investors who distinguish between net working capital and capital used for long-term operations in an operating cycle.
There is also another presentation, it is based on the degree of liquidity, but is suitable for banks and financial institutions that do not provide goods or services within an identifiable operating period.
Non-current assets are corporate resources that are expected to remain in use for an extended period beyond twelve months after the balance sheet date.
Short-term (current) liabilities are those due within the usual operating cycle or within twelve months after the balance sheet date. Trade payables must always be classified as short-term liabilities even if their settlement occurs beyond the normal operating cycle or more than twelve months after the balance sheet date.
Long-term (non-current) liabilities are those due beyond the normal operating cycle or more than twelve months after the balance sheet date.
Income statement
The income statement is the representation of the profit and loss account and is classified according to the by nature of expense method.
The classification by nature is one of the options available from the IFRS for SMEs, and since it is the simplest and most flexible for different business realities, it was decided to implement this approach.
The concept is that costs are aggregated according to their nature, such as depreciation, purchases of materials, transportation costs, etc.
There is also the classification by cost destination, where costs are distinguished between cost of goods sold and other costs, which provides more meaningful information but requires a considerable degree of discretion on the part of the financial statement preparer.
Statement of changes in equity
The statement of changes in the equity of a company between two financial years reflects the variations in the net equity due to the increase or decrease of its net assets for the period or the wealth generated, based on the specific valuation criteria implemented and indicated in the financial statements.
Cash flow
The IFRS for SMEs stipulates that entities must categorize their transactions into three distinct activities:
- Operating.
- Investing.
- Financing.
It further permits entities to present their operating cash flows using either the direct or indirect method. Ultimately, the framework’s goal is to furnish decision-useful information to users, aiding them in making informed economic choices.
Notes
The notes to the financial statements represent a fundamental part of financial reporting under IFRS for SMEs. They provide additional and detailed information that integrates and explains the data presented in the main financial statements.
Furthermore, they play a crucial role in ensuring the transparency and completeness of financial reporting, allowing users of the financial statements to fully understand the company's financial position, performance, and cash flows.
In conclusion, the notes to the financial statements are therefore an essential tool for improving the transparency and comparability of financial reporting at an international level.
Reclassification IFRS with Banana
Reclassification IFRS with BananaIntroduction
On this page, there is a brief explanation of the templates created with the Banana accounting software and how to use them to print the income statement and balance sheet report according to IFRS standards for SMEs.
At the bottom of the page are links to download the templates.
Template IFRS SME
The template file is set up with the IFRS SME chart of accounts in which the Statement of financial position, Income statement and Statement of changes in equity are present.
This file refers to the document "Reclassification IFRS SME" to print the report according to the IFRS SME setting, with the use of the financial statements embellished by groups.
For more information on financial statement enhanced balance sheet with groups:
- Video of how-to do enhanced balance sheet with groups.
- Documentation about enhanced balance sheet with groups.
- Documentation about reclassification of financial statement and Income statement.
Reclassification IFRS SME
The document contains the basic settings to print the page layout (document title, company master data), amounts, totals, subtotals of the Statement of Financial Position and Income Statement accounts.
The accounts will be printed even if the amount is zero. If you want to change the setting of this printout or the style you can do so within this file.
Report creation with Statement of financial position and Income statement
To create a report with the Statement of Financial Position and Income Statement documents, follow the next steps:
- Open the template file and record all case-specific accounting transactions.
- Click on Reports -> Enhaced balance sheet with groups
- Enter the important data relating to the reference company (e.g. document name, company master data) in the Page-Header and Footer section.
- You can make other settings by reading the details on Banana's site on the enhanced balance sheet.
- Click OK.
At the end of the process a new file will be opened with the Statement of Financial Position and Income Statement inside.
Download IFRS SME per Banana
We make the models available without any liability, as stipulated in our Terms and Conditions of Use.
Excel file structure
Introduction
On this page, there is a full explanation of how to use the file, what to find in it and its logic.
In addition, there are illustrations and sample figures to help explain how to use the Excel file. The amounts shown in these images are purely for illustrative purposes and do not necessarily reflect actual or significant values.
Documentary reference
For the creation of the accounting structure within the Excel file, the indications of the documentation related to the IFRS standards for SMEs were followed.
Specifically, the documentation is:
- Accounting principles, notes and other: "Exposure Draft IFRS for SMEs Accounting Standard" of September 2022".
- The presentation of the accounts and the explanatory notes: "IFRS Taxonomy Illustrated IFRS Accounting Taxonomy 2023".
Description structure file
The Excel template is divided into ten main parts:
- General information.
- Financial Statement.
- Income Statement.
- Financial Statement detailed.
- Income Statement detailed.
- Statement of changes in equity.
- Cash flow indirect.
- Notes of financial statements.
- Notes of income statement.
- Notes of cash flow statement.
In order to have a complete set of IFRS financial statements for SMEs, it is mandatory to complete the sheets on General information, Financial statement and Notes of financial statements, Income statement and Notes of income statement, Statement of changes in equity and Cash flow indirect and Notes of cash flow statement.
The Financial Statement detailed and Income Statement detailed sheets, are an alternative to the compilation procedure specified above, as they integrate the entire aspect of the Financial Statement and Income Statement, with all accounts detailed by the notes, having a direct view of the composition and structure of an account with the notes.
Organitation of the file
File content
The file contains seven fields:
- Main field.
- Main account.
- Sub-category of the main account.
- Code.
- Formula.
- Note.
- Account amount.
In the main field, you specify the name of the main account, the document reference and generic company information.
The main account is the name of the main account.
The sub-category of the main account can only be displayed if the Statement Financial detailed and Statement Income detailed sheet is used. It is an account taken from the notes and serves to detail the structure of an account, as required in the IFRS notes for SME.
The code is used for Banana's accounting model and serves to identify the account.
The formula is applied for account totals and subtotals.
The note is account-specific and is entered for some accounts as per the IFRS documentation for EMS.
The account amount is a number to two decimal places without currency indication.
Some fields are not editable as they are an essential part of the file structure. The only part to be changed are the amounts to be entered for the various accounts and the descriptions in the note sheet.
The legend below summarises what the fields correspond to and which are and are not editable.
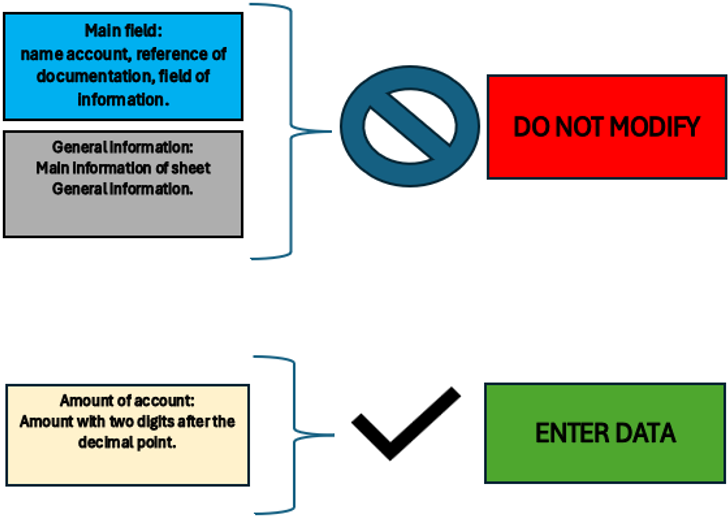
Figure of Excel in the sheet Legend
In the General information sheet, the essential information required by IFRS for SME is entered.
The essential information is useful to understand the biographical data of the company, the relevant accounting period, the currency used, the main activities and the content of this file, which is the complete structure of the financial statement.
Certain information such as company name, company name, domicile and accounting period is reported on all sheets specifically for the Identifying information of company.
General information
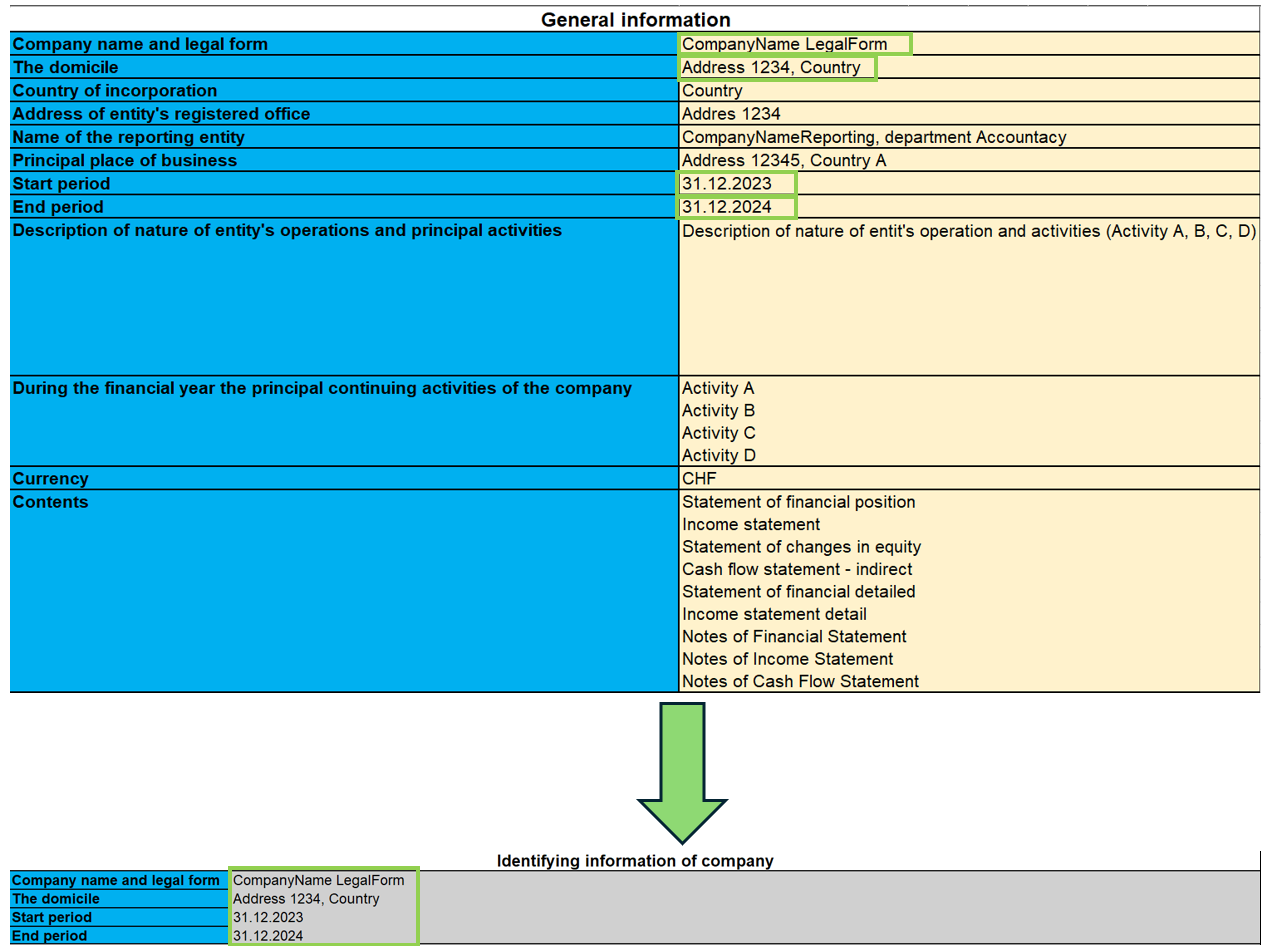
As shown in the image, the information entered on this sheet is carried over to all sheets, so that the company can be identified on each IFRS document, such as: the full name of the company, the address and registered office, and the beginning and end accounting year to be taken into account for accounting purposes.
Statement of financial position
The Financial Statement contains all account items relating to the current and non-current positions of the business for the years 2023 and 2024.
In this part you are required to enter the budget amounts in the specific accounts. Totals and subtotals are calculated automatically by the formulas.
It should also be noted that for some accounts it is mandatory to complete the Notes. This is done by entering the amounts and other descriptive notes in the ‘Notes of Finacial Statement’ sheet.
If an account has notes, its amount for the last year refers to the corresponding cell of the account total put in the notes, so it is necessary to fill in the amounts in the notes first.
For the notes, there is also the possibility of consulting the documentation indicated in the ‘Reference documentation’ field, specifying the page and section where the information on the notes can be found.
Finally, there is a final check part to see if the total assets and liabilities are equal.
Modalities of use
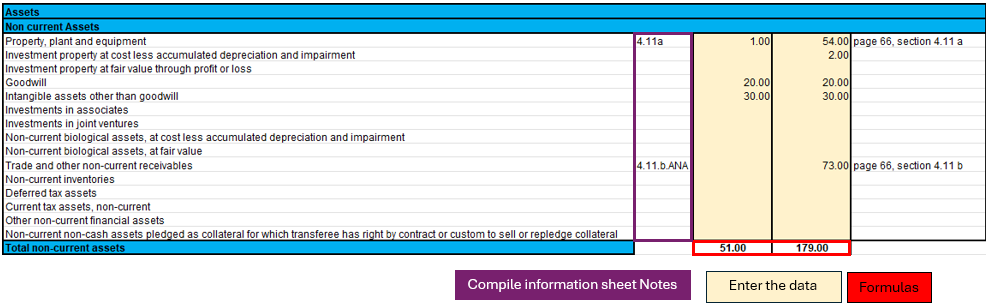
In the picture shown, a part of the Statement of Financial Position is selected as an illustrative example to guide the user. There are three highlighted parts in the image:
- Notes.
- The formulas.
- The data to be filled in.
Each part has its own specific function and in some cases the data are directly linked to each other.
Specifically, if an account has notes, it means that in the ending balance (31.12.xx) there will be the total of the amount calculated in the ‘Notes of financial statement’ sheet. This implies that in order to change that amount, one must fill in the account data on the "Notes of financial statement" sheet.
In this sheet one must therefore:
- Verify that the account is not linked to notes and enter the amount in the account.
- If there are notes, then only the ‘Notes of financial statement’ part of the sheet must be filled in.
The formulas integrated in this sheet will make the totals and subtotals of the accounts in the Statement of financial position.
Income Statement
The income statement is presented according to the classification ‘by nature of expense’.
This classification is an aggregation of costs according to their nature (e.g. depreciation, purchase of materials, transport costs, salaries, advertising costs, etc.) and are not allocated according to their purpose within the company.
The implementation of this classification was decided upon because it is simple and widely applicable for SMEs. The other classification was according to costs by function, where a distinction was made between costs of sales versus other costs (e.g. distribution costs or administrative costs) and this representation requires a considerable degree of discretion on the part of the end user.
As previously done for the Financial Statement, there are the amounts to be entered while the totals are already calculated by means of the formulas applied in the sheets.
In addition, a further breakdown has been made for EBIT (earnings before interest and tax) and EBT (earnings before interest).
Modalities of use
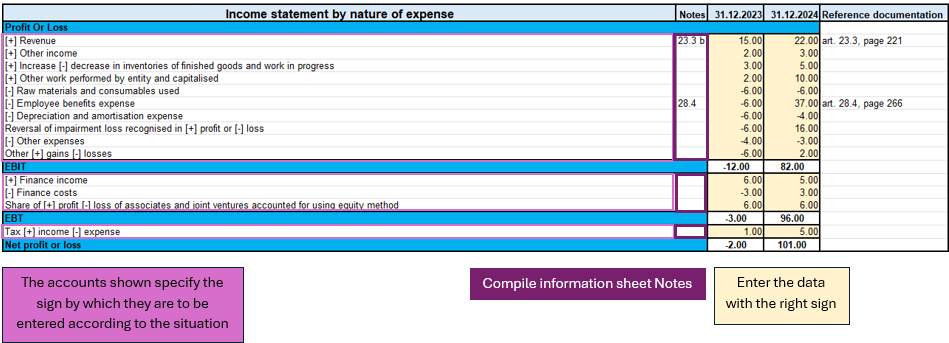
This figure highlights the important parts of the income statement.
Looking at the accounts, there are indications of the signs (+/-) to be used in the various circumstances, which implies that for accounts that have both positive and negative signs, there is an assessment of the positive or negative impact of that amount on the result of the income statement.
As previously seen in the ‘Statement of financial position’, there are also notes to be entered in the relevant sheet ‘Notes of income statement’ in order to be able to correctly define the amount, as the latter depends on the total in the notes.
In summary, what you need to do on this sheet are the following steps:
- Evaluate the circumstances of the account with both positive and negative sign and understand whether you are in a situation where it has a positive or negative impact on the result.
- Verify that the account is not linked to notes and enter the corresponding amount with the correct sign.
- If the account is correspondent with the notes, then only the ‘Notes of income statement’ sheet must be completed.
Statement Financial detailed
This document differs from the Statement of financial position in that there is more detail on the accounts. The official presentation of the accounts can be found in the ‘Statement of financial position’ sheet in terms of how the accounts are summarised; in this sheet, however, we have more detail, with the aim of avoiding filling in the notes directly in the specific sheet. The use of this sheet excludes the use of the ‘Statement of financial position’ sheet because they refer to the same notes.
The main difference is that not only the main accounts required as a presentation by IFRS for EMS are shown, but they are detailed in sub-categories of accounts that are the same as those found in the notes, so that using this document one can avoid filling in the notes, using only the sub-categories of accounts, except in some cases where the account requires descriptive textual type details, without using calculation formulas or amounts. For this reason, not all parts of notes are integrated, as some accounts require a textual type description.
To distinguish the main accounts from the sub-categories of accounts, the main categories are coloured dark, while the light categories are the accounts related to the notes.
If there are no subcategories of accounts (coloured light), then it is sufficient to go to the specific Notes of Statement or financial position sheet.
Modalities of use
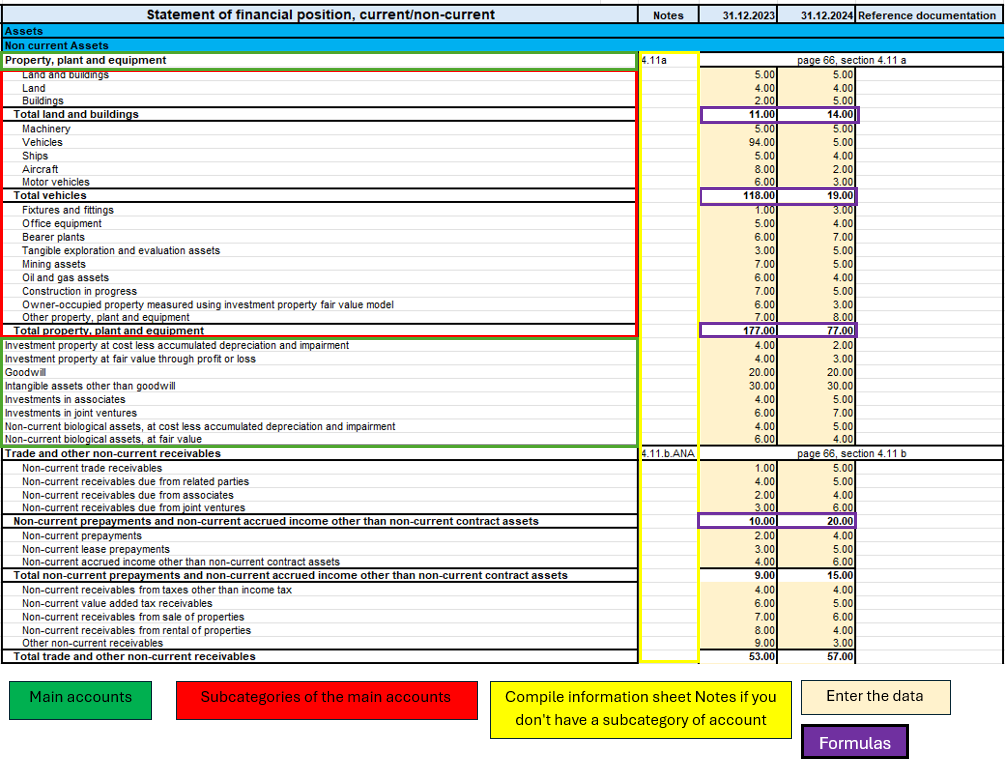
In this image, you can see four essential parts of the document:
- Main accounts.
- Subcategories of the main accounts.
- Notes.
- The amounts to be entered.
- The formulas.
This part, there is more detail only if an account has notes, otherwise it is the same as the Statement of Financial Position. What requires attention is the verification of an account if it is an account with notes and has no sub-categories of accounts, if you find yourself in this situation then it means that the account requires an additional textual description to define some peculiarities in the ‘Notes of financial statement’ sheet.
On the other hand, for accounts that have notes but also account sub-categories, only the amounts of the sub-categories of the specific account need to be filled in. In this way, having filled in all the amounts of the sub-categories of the account, the formulas applied to the sub-categories will calculate the subtotals and the total of the main account.
So to summarise, the procedure for filling in this sheet is:
- I enter the amounts in the main accounts if there are no notes to refer to.
- If the main account has notes, I check that it has sub-accounts, if it does not, then I go to the ‘Notes of financial statement’ sheet and fill in the text description.
- If, on the other hand, the main account has notes and has the subcategories of accounts, then I only fill in the amounts of the subcategories.
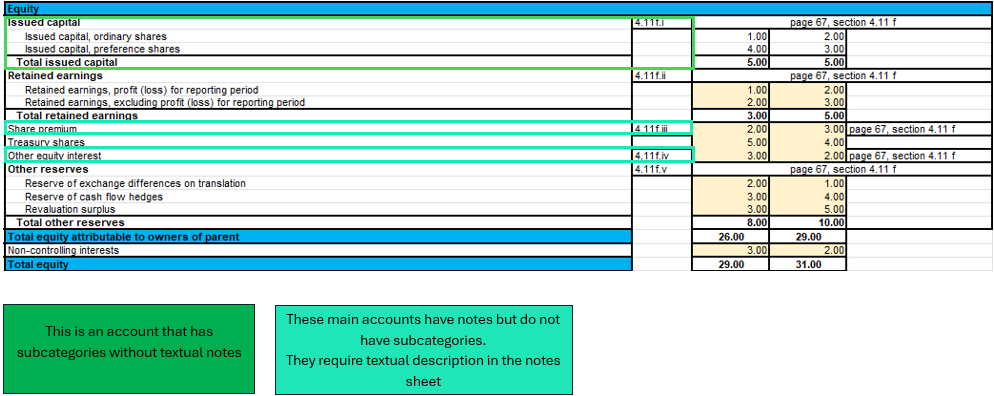
In this example image in the Equity part, a case is illustrated where an account has notes but no account subcategories, which requires a textual description in the ‘Notes of financial statement’ sheet, and a normal case where there are notes with account subcategories.
Income statement detailed
Income statement detail is based on the same logic as the Statement of financial detailed, with the aim of providing a single document for its function, detailed by the accounts of the notes, without having to fill in the Notes of income statement.
There are the main accounts and when there are notes, they are detailed by the sub-categories of accounts that are part of them.
Modalities of use
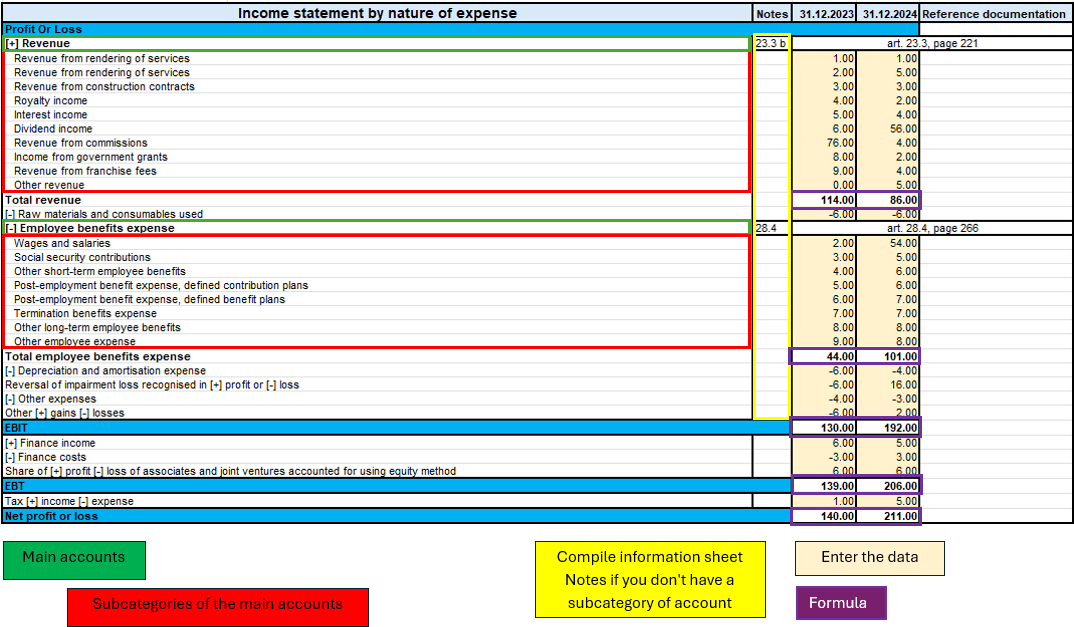
As illustrated in the figure above, there are four equal parts to the ‘Statement of financial detailed’ sheet with the same logic.
The only difference is that there are no descriptive notes, so all accounts with notes are already with their sub-categories without requiring additional compilation on the ‘Notes of income statement’ sheet.
Therefore, to summarise, it is essential to follow these steps:
- Enter the amounts of the main accounts if they have no notes.
- If the main account has notes, enter the amounts only in the subcategories of the account.
The Statement of Changes in Equity
The Statement of Changes in Equity reflects changes in equity.
This part provides insight and transparency into decisions and their effect on the value of equity. It is also a useful tool for investors and other stakeholders to understand how the company has generated and utilised equity capital.
Modalities of use
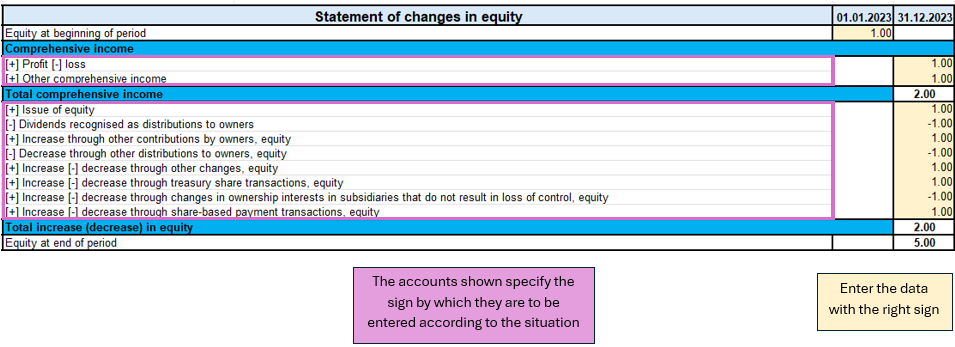
In the sheet ‘Statement of changes equity’ as shown in the image, there is one part to pay attention to.
The first is the evaluation of the change in the account item, whether it increases or decreases, and then according to the sign (+/-) the amount must be written with the correct sign.
Unlike other documents, this one does not require notes.
So the process of completing the document is:
- Evaluate the account change and follow the indications on the sheet on the sign to be taken in the various circumstances (increase or decrease in the account).
- Enter the amount with the correct sign.
Cash flow indirect
This document draws up the entity in four parts:
1. Cash flow from operating activities;
2. Cash flow from investing activities;
3. Cash flow from financing activities;
4. Net cash flow.
The document is independent of the other sheets, so you have to do your own calculations to deduct the various amounts to be included in the cash flow items.
The accounts are taken from the IFRS for SME taxonomy, first there are the profit or loss adjustments and then the operating activities are calculated.
Investing activities are characterised by the purchase or sale of fixed assets such as equipment, real estate, joint venture participations and others.
Cash flows from financing activities are related to the company's sources of financing, such as leasing, share issues, debt repayments or financing income. There is also the payment of dividends to shareholders.
In the last part of cash flow there are some clarifications to be made. The net change in cash is assessed in two steps, the first is calculated before the effect of the exchange rate change and the second after this change. In addition, as a form of control, the change in liquidity is also calculated, showing the changes in the period of activity, by calculating the difference between the initial and final liquidity balance.
Modalities of use
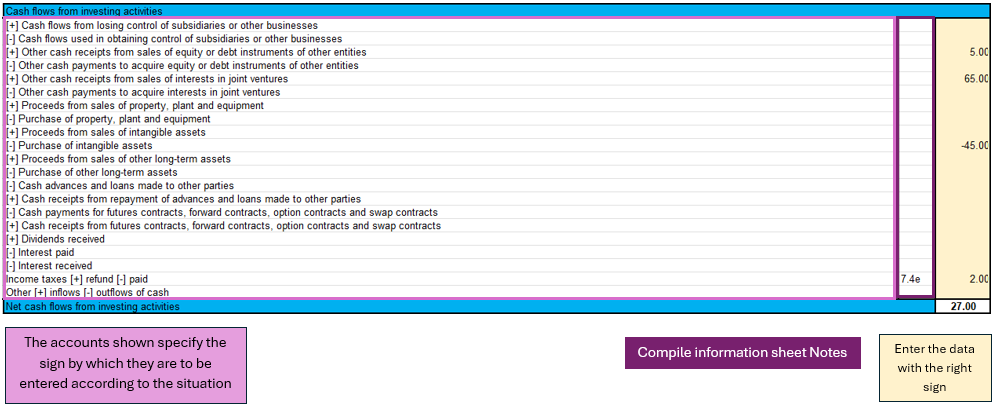
As shown in the figure of the cash flow for investing activities, three main components can be identified:
- The main accounts show the sign depending on the situation.
- For some accounts, the notes of cash flow statement are required.
- Entering the amounts requires attention with respect to the sign.
In the cash flow statement, reasoning on the implications of the balance sheet and profit and loss accounts is required in order to conclude which amount to enter in the specific item of the cash flow statement, so the conclusion depending on which cash flow statement has been analysed, could be an increase or decrease of an asset, a payment for property purchase, payment of dividends to shareholders,...
There is no sheet for this purpose, the user must reason with the amounts available, entered in the balance sheet and profit and loss account, and come to his own conclusions.
Next, having an amount, one must distinguish the situation as indicated in the sheet, in order to enter the amount with the correct sign.
Finally, in the event that it is required, fill in the notes of cash flow statement with the specific amounts in the case.
Notes
The notes are divided by the three IFRS documents:
- Notes to the Financial Statement.
- Notes of the Income Statement.
- Notes to the Cash Flow Statement.
As mentioned in the introductory section, the notes serve to supplement the information taken from the financial documents.
The note sheet contains four essential parts: the note code, reference account, amount and notes (text).
The note code is the reference for each part of the documents that serves to understand in which account the notes are to be completed.
The account represents the account taken from the document (Financial Statement, Income Statement, Cash Flow) to be detailed in the notes.
The amount is singular for the detailed account and is not always required because in some cases only a textual description is needed.
Notes as text are necessary if there are cases where only a description or more detailed customisation is required to explain an account.
Modalities of use
Case for the Financial Statement
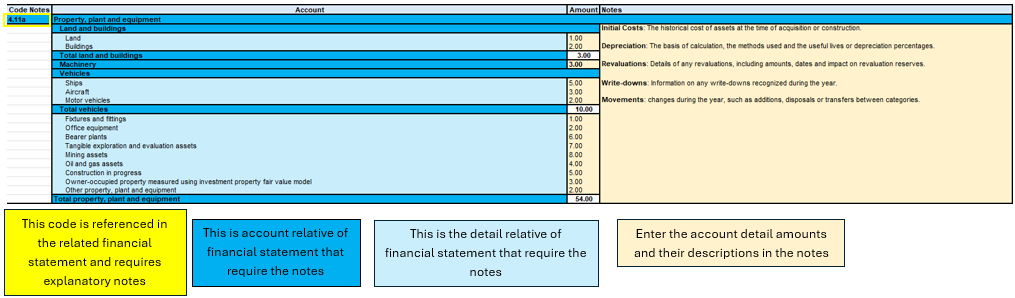
Figure of Excel in the sheet Notes of financial statement
In this image, four main components can be seen, the account reference code, the account, the detail grouping the sub-categories of accounts, the amounts to be entered with any textual notes.
The starting point for completing this sheet is then the financial statement, where we list which accounts need more detail, and then move on to complete the information in the notes sheet.
The data entry part concerns the amount of the detail account and any descriptive text.
The account totals and subtotals are calculated from the formulas, the account total is shown on the main sheet of the financial statement, so it is essential that if an account needs notes, it is only on the notes sheet.
Case for the Income Statement
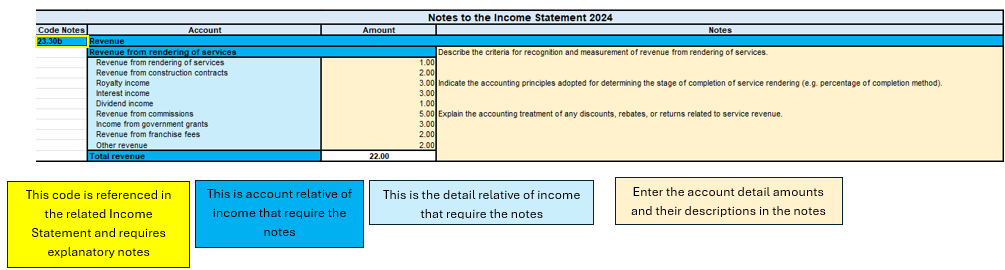
Figure of Excel in the sheet Notes of income statement
As seen above, the structure does not change for the Income statement notes. The main parts are always the same, as also for the cash flow notes.
To summarise therefore in this process one must:
- Depending on which sheet you are compiling, you must check that the analysed account of the financial statement, income statement or cash flow note is there.
- All the necessary data and information must be filled in.
- If there is a sub-account in the notes that is not needed or not used, you can simply leave it blank or enter a zero amount.
Objectives of the file
The process of creating the IFRS structure for SMEs took the official documentation and reconstructed a structure in the Excel template, with the aim of allowing the user to follow the IFRS reporting logic by entering the main information in the parts of the file.
The basic characteristics of such a file is the completeness of the document by having all the main parts required for IFRS, the usefulness of preferring the most widely used models that are more suitable for several companies, and excluding other more specialised models only in certain contexts.
The end result is to have a financial and economic view of the company's situation in the specific period, in compliance with the IFRS standards for SMEs.
In addition, the aim of IFRS for SMEs is to improve the comparability of financial data between different companies, to facilitate the analysis and interpretation of financial results by stakeholders outside the company, and to promote the adoption of IFRS for SMEs by providing a practical and accessible tool.
Free Excel model for the IFRS-SME
We make the model available without liability as per our Terms and Conditions of Use.
Cash Flow Statements and Financial Ratios [BETA]
Cash Flow Statements and Financial Ratios [BETA]Die Erweiterung ist in deutscher Sprache verfügbar, die zugehörige Dokumentation steht jedoch nur auf Englisch zur Verfügung. Siehe Dokumentation (in Englisch).
Vergleichen Sie historische Daten über mehrere Jahre hinweg sowie Prognosewerte mit dem aktuellen Geschäftsjahr.
Introduction
What is exactly the financial statement analysis?
Financial statement analysis is an accounting tool that provides an assessment of a company's economic, financial and asset condition. It is based on the financial statements and reports the data. It contains the profits and losses of a company and therefore serves to derive the general performance of the company.
Why is this activity very important for your SME ?
Until recently there were few SMEs that often used a financial statement analysis as larger companies could use it.
Today, times have changed. Reading the numbers well can make a difference within the strategy and management of an enterprise. Understanding which products it is worth investing in and which jobs can be neglected determines the difference between the growth or decline of a company.
This activity can be a source of interest for various subjects, external or internal to the company. Entities or external individuals can analyse their solvency profile (current or potential lenders), capacity to provide an adequate return on capital (for those who want to buy shares for example) or even just obtain information on the company's situation with respect to competition in the sector.
Through the comparative balance sheet analysis of the various elements available, it is possible to arrive at the following formulation of a "judgement" on the health of the company in all its dimensions:
- Economic
- Asset
- Financial
How it works
The financial statement analysis is based on two fundamental documents for a company:
- The Balance sheet
- The Profit and loss statement
In order to perform a correct analysis, it is always necessary to start from the reclassification of the accounts, which includes 3 phases in particular.
- Group the account items into groups
- Order such groups
- Bringing out intermediate results
The reclassification allows for a slightly cleaner first view of the company's situation and is already useful information can be obtained from it.
Analysis by Indexes
Once the intermediate results have been obtained, it is possible to proceed with the calculation of the indices useful for the analysis. The financial statements analysis by means of indexes is a very powerful tool that allows you to use indicators capable of providing a very concise assessment of one's own situation.
How should the data be interpreted?
Better results in terms of interpretation and evaluation are therefore achieved by analysing a series of balance sheets and studying the trend over time of the significant balance sheet ratios, so as to understand in which management is moving the company (dynamic financial statements analysis).
How do I evaluate them?
- Temporal evolution
- Comparison with average values of the sector
- Comparison with "normal" values i.e. with the benchmark
- Comparison with objectives
Response to results
This is the last activity of the analysis cycle, where the "relay" passes into the hands of those who deal with the Management of the Company, with data that speak clearly, the Manager will have to plan how to proceed using the right Project Management techniques.
The report contain errors?
If you notice incorrect data within the report or find that for some reason the calculated amounts do not match, please follow the steps below:
- Check that the data in your accounts are correct.
- Check that you have set up the groups correctly in the settings dialog.
If the errors persist, contact us via our feedback form and send us an example accounting file (*.ac2), even with little data, but allowing us to reproduce the possible problem and correct it.
Multi-language
The extension is available in the following languages:
- English
- Italian
- French (translation currently not complete)
- German (translation currently not complete)
And will adapt according to the language in which the application is set up. For all other languages, the standard version in English will be displayed.
Save your analysis
You can save the report in the following formats:
- Html
- Excel
- Latex
Settings Dialog
Dialog is accesible:
- By going to the Extensions menu→Cash Flow Statements and financial Ratios →Financial Reports.
- By going to the Extensions menu→Cash Flow Statements and financial Ratios →Settings.
Set up the groups
The first and most important step is to enter the groups or accounts number you are using in your account table.
Once you enter the groups the report and calculations are all done automatically, except for some specific transactions for the Cash Flow Statement.
- Groups must be entered manually
- Groups must be separated by a semi-colon ';'
- Both groups and accounts can be entered
- It is important to make sure that you include elements that exist in your chart of accounts, if are entered groups or accounts that do not exist in your chart of accounts, a message will be displayed on the row of the grouping concerned, returning those elements for which a match was not found in the chart of accounts. Once corrected, you only need to run the dialogue again and the message will disappear.
- By default, the groups within the dialogue refer to the Swiss SME chart of accounts, and it is possible to return to the base scenario by clicking the Restore Defaults button. Beware, however, that in this way the customisations made will be lost, and will be replaced with the default values.
.png?raw=true)
All the necessary elements must be inserted within the different groupings defined in the dialogue (Liquidity, Fixed Asset,Owned base capital,...).
Assets
They show the total employment of a company, so the investments to which the company has allocated
the means found in carrying out its activity.
- Liquidity: Must include groups or accounts that define liquidity in the company, such as cash or bank
- Credits: Must include groups or accounts within which are recorded all the operations
concerning money due to buyers who didn’t paid yet for their purchases - Stocks: Must include groups or accounts with all goods for resale in the ordinary course of business.
- Fixed assets: Must include groups or accounts containing fixed assets elements, as:
- Buildings
- Computer equipment
- Computer software
- Furniture and fixtures
- Intangible assets
- Land
- Leasehold improvements
- Machinery
- Vehicles
Liabilities and Equity
Shows where company's resources come from. In general, the funds at the company's disposal are
classified in a way to distinguish between own funds (which flow into equity) and those from third parties.
- Short-term debt capital: Must include groups or accounts representing the company commitments that must be fulfilled, without any particular cancellation, in the current year.
- Long term debt capital: Must include groups or accounts containing that kind of capital that the company can have at its disposal for several years, on a fixed basis, and that can usually only be withdrawn within a set time limit.
- Own Base capital: Must include groups or accounts those group referring to the company's own capital.
- Reserves and Profits: Must include groups or accounts within which are recorded the amounts to be paid to reserves or designated as profits.
Revenues
Indicates what is produced by the company during a financial year. Whether it is an increase in the value of products or semi-finished products in the course of production or services in progress, revenue from the sale of products or services or the increase in the value of fixed assets thanks to own resources, all these heterogeneous factors add up.
- Sales turnover: Must include groups or accounts within which is recorded what is produced by the company during a financial year. Whether it is an increase in the value of products or semi-finished products in the course of production or services in progress.
Costs
- Costs of Merchandise and services: Must include those groups or accounts in which all costs relating to goods and services consumed during the annual financial year are recorded.
- Personnel Costs: Must include all those accounts referring to a cost due to personnel, such as:
- Salaries
- Social charges
- Severance Pay
- Pension and similar treatment
- Other costs
- Different Costs: Must include all other groups or accounts relating to costs during the operating period.
- Interests: Must include groups or accounts containing the costs of financing sources, such as bank interest payable or interest on loans.
- Depreciation and Adjustments: Must include groups or accounts where are registered possible revaluations and write-downs of equity investments, as well as of financial fixed assets and securities included in current assets that are not equity investments.
- Final Result: The group containing the difference between the costs and the revenues at the end of the year.
Average Number of employees
This information is useful for calculating efficiency ratios, enter the average number of employees in the company and find out information such as the average company revenue per employee.
Printing Preferences
To make the Analysis as close as possible to your needs you can set some preferences, and choose about the details of printing and analysis
.png?raw=true)
Printing Details
- Page header: Include the header in the report, the header is composed with the information retrieved from the properties of the file.
- Logo: Choose whether to include your company logo in the report. for information on how to set up a logo visit this Logo set up page.
- Background color of headers: Choose the colors for the table headings
- Text color of headers: Choose the color for the texts in the table headings
- Report Without colors: Check the box for no colours in the report.
Analysis Details
- Number of previous years: Set the number of previous accounts (years) to be included in the analysis, which will be added to the current year and the Budget (if present and included).If you don't know how to set the previous year to a file, go to “File→File and Accounting Properties→Options Tab.
- Number of decimals: Choose how many numbers after the decimal point you want for the digits in the report, if you don't want to have decimals you only need to insert a zero 0.
- Include Budget: If you are using the Budget table for your financial planning, you have the possibility to include it in the analysis.
- Include Budget to date column: Include the columns showing the values of the budget up to that day, compare the values with those of the year-to-date.
- Include Current year projection column: You can include the projection for the current year. The programme uses the values in the budget table to return what could be the values at the end of the year.
- Current Date: Insert the current date. If no date is entered, the date of the day is taken automatically
- Include DuPont Analysis: Choose whether to include the Dupont Analysis
- Include Control Sums: Choose whether to include the table with the control sums, useful to inform in case of errors on the totals (assets/liabilities, operating result).
- Show the formulas column: Choose whether to show the column with the calculation formulas.
- Show the acronym column: Decide whether or not to show the acronym column, which is useful for identifying the elements used for formulas.
The columns of acronyms and formulas are complementary, that's beacuse the acronym column is useful to uderstand how the formulas are composed. if you dont need these columns, just uncheck the checkbox.
Set the benchmarks
Benchmarking is a method of assessing an organisation's competences based on comparison with the "best
in class", whatever sector it belongs to. So the Benchmark is a key performance indicator on the basis of
which a company assesses its performance with regarding to products, services and business processes.
You can customise these values depending on your company:
- Sector
- Size
- Targets
These values are only representative, which means that the figures you enter are not used in the analysis but are shown as they are. In the report, they are displayed in the Benchmark column, in the indexes tables, so that you can quickly assess the situation.
.png?raw=true)
It's also possible to call the dialog from the opened report and change the parameters. The values of the
analysis will be updated automatically.
Cash Flow Statement
Cash Flow is an analytical tool that helps to visualise the positive and negative changes in liquidity as a result of management, with reference to a given period of time: it is in fact the reconstruction of monetary flows, then the difference between all the monetary income and expenditure of a company.
Cash Flow analysis is not subject to accounting rules and many investors use the data to assess the strength of the company.
Essentially, if the Cash Flow is positive, it shows the financial availability for the company within the reporting period, whereas if the cash flow is negative, it means that more resources have been absorbed than have been received.
Special Cash Flow transactions
The first step to obtain the Cash flow Statement i its to setup the account groups in the settings dialog, Most value needed for preparing the Cash Flow Statement can be calculated based on the changes of the standard account classification. Identifying Disinvestments, Revaluations, transactions and other specific movements effecting the cash flow, would require a restructuring of the account plan. We have therefore opted to identify these values, by adding a special code to the description of a transaction.
It is important that these transactions are made using the recommended account type or group, because the program searches for cashflow amounts in certain groups, so if an entry is made using another account type, there could be an error as the amount may not be found.
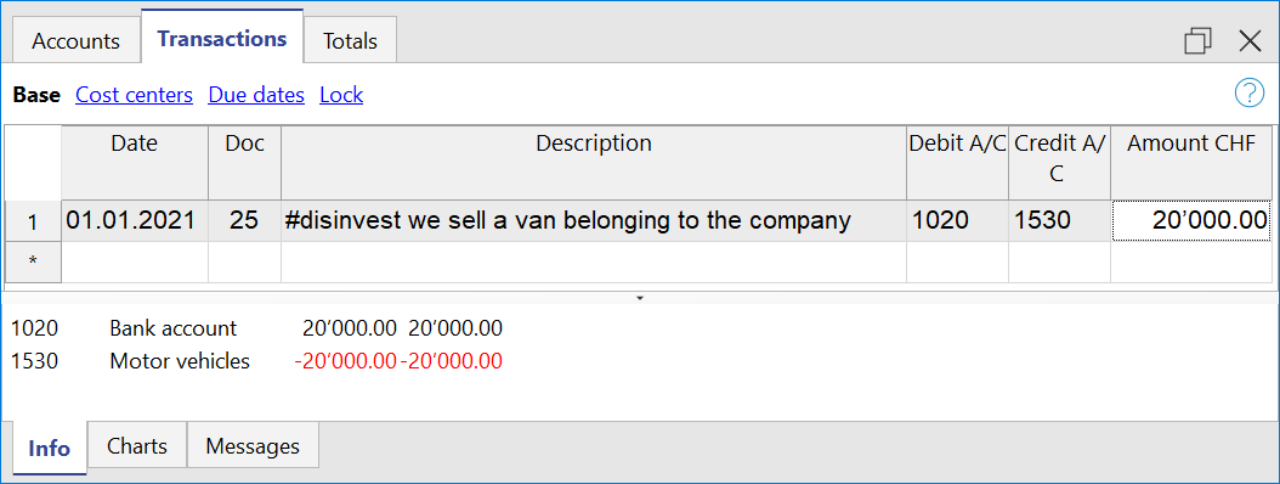
If we talk about entering a fixed asset account, the account must belong to one of the groups entered in the fixed assets section of the dialogue. For example, if I disinvest by selling a vehicle and I use the standard chart of accounts for SMEs, I can use the account Vehicles '1530', which is part of the group 150, which in the dialogue is entered under the section 'Tangible Assets' in the fixed assets.
- Disinvestments (#disinvest)
- A disinvestment simply represents the sale of a fixed asset such as a vehicle or machinery. When recording a disinvestment.
- Debit Column: Insert the account where you will collect the money from the sale, such as the post or the bank.
- Credit Column: Insert a fixed asset account that relates to the item sold.
- Knowing the amount of disinvestments, the program is able to calculate in detail the real amount of investments that have been made during the year. For an SME, the number of disinvestments during the accounting period usually remains quite small, whereas investment activities are much more frequent operations, which is why it is very important to find the real amount net of all other movements.
- A disinvestment simply represents the sale of a fixed asset such as a vehicle or machinery. When recording a disinvestment.
- Revaluations of fixed assets (#revaluations)
- Revaluation of a fixed asset is the accounting process of increasing the carrying value of a company's fixed asset or group of fixed assets to account for any major changes in their fair market value.
- Debit Column: Enter the account of the fixed asset item you are revaluing to increase its value.
- Credit Colum: Enter an income account, if you don't have a particular one you can enter it as extraordinary income.
- Revaluation of a fixed asset is the accounting process of increasing the carrying value of a company's fixed asset or group of fixed assets to account for any major changes in their fair market value.
- Devaluations of fixed assets (#devaluations)
- It works in the same way as a revaluation, but instead of increasing the value of the fixed asset it decreases it, which means that the accounting entry is also reversed, i.e. the income becomes a cost.
- Debit Column: Enter a cost account, if you don't have a particular one you can enter it as extraordinary cost.
- Credit Colum: Enter the account of the fixed asset item you are revaluing to increase its value.
- It works in the same way as a revaluation, but instead of increasing the value of the fixed asset it decreases it, which means that the accounting entry is also reversed, i.e. the income becomes a cost.
- Dividends (#dividends)
- Dividends are fees paid to shareholders and usually depend on the profit made. The payment of a dividend must be recorded in a specific liability account, and should appear under short-term liabilities.
- Debit Column: Enter the reported balance sheet Profit / Loss carried forward account.
- Credit Colum: Enter the specific account for dividends.
- Dividends are fees paid to shareholders and usually depend on the profit made. The payment of a dividend must be recorded in a specific liability account, and should appear under short-term liabilities.
Cashflow Statement
Cash flow is divided into three main components:
- Operating cash flow which originates from the core business operations of a company.
- Cash flow for the company, which is the cash flow available to all investors in the company.
- Cash flow available to shareholders, which only considers the cash flows that are due to the shareholders, resulting from the net of all payments made and received, including from debt holders.
Adding up all the totals you find the amount that corresponds to the change in liquidity for the period, which in turn when added to the value of the liquidity at the opening of the period should give you the current liquidity balance.
If the results do not match, an error message is displayed.
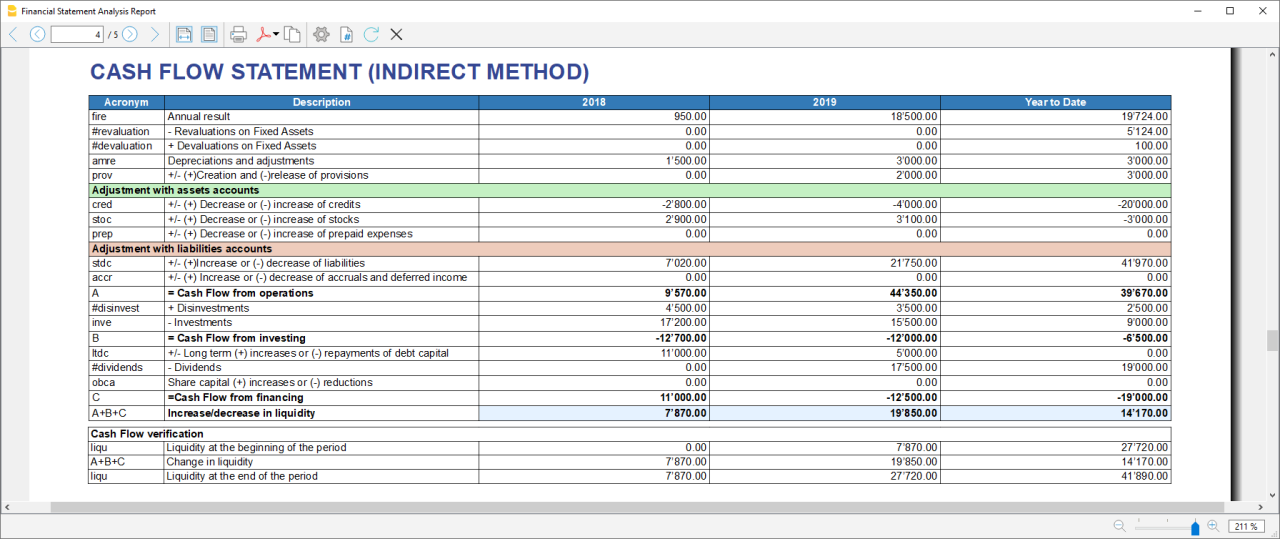
Acronym column
In the acronym column of the cashflow, the reference to the account taken into account in the calculation is entered, or in the case of special entries, the prefix of the entry, so that it is easy to see which item of the balance sheet or income statement a certain movement relates to.
Cash Flow verification
This table shows any differences between the change in cash flow calculated in the cashflow and the actual cash flow in the accounts, which in an optimal situation should match. If there is a difference in one of the years of analysis the amount in question is printed in red on a line below.
Usually, when an error occurs, the first thing to do is to check whether the amounts in the balance sheet and profit and loss statement are correct or whether there are differences between the assets and liabilities, for checking them, control sums are very useful because they immediately show whether there is a difference.
if you realise there is some error but you dont know exactly where, you can check the amounts by comparing the ones in the report with those in the chart of accounts.
The differences are generally due to an error when entering groups in the settings dialog, which can occur in two ways:
- One or more groups were not included
- One or more groups were entered under the wrong heading
In case the balance and profit and loss amounts are correct but the cashflow displays an error, is probably due to the fact that a group has been inserted in the wrong place.
Retained Earnings Statement
This table shows the movements made with the annual profit achieved. Starting from the reported annual profit it adds the profit for the period and adjusts the value by taking into account the payment of dividends and the creation or dissolution of reserves. The last two rows show the total undistributed profit, and the undistributed profit realised in the current year.

This information is somewhat supportive of Cash Flow but since earnings management does not directly affect cash, it is presented in a separate statement.
Record Transactions
It is useful to first record the transfer of the profit for the year from the profit and loss account to the profit shown in the balance sheet as shown in the example image.
In order to record the payment/discharge of reserves and the payment of dividends, it is sufficient to use the specific account of one of the above items and to decrease or increase the profit account shown in the balance sheet. The remaining amount (not allocated to reserves or dividends) then increases the retained earnings.

Cash Flow Ratios
In addition to the ratios already present, those ratios are added just below the Cashflow table and in the Charts
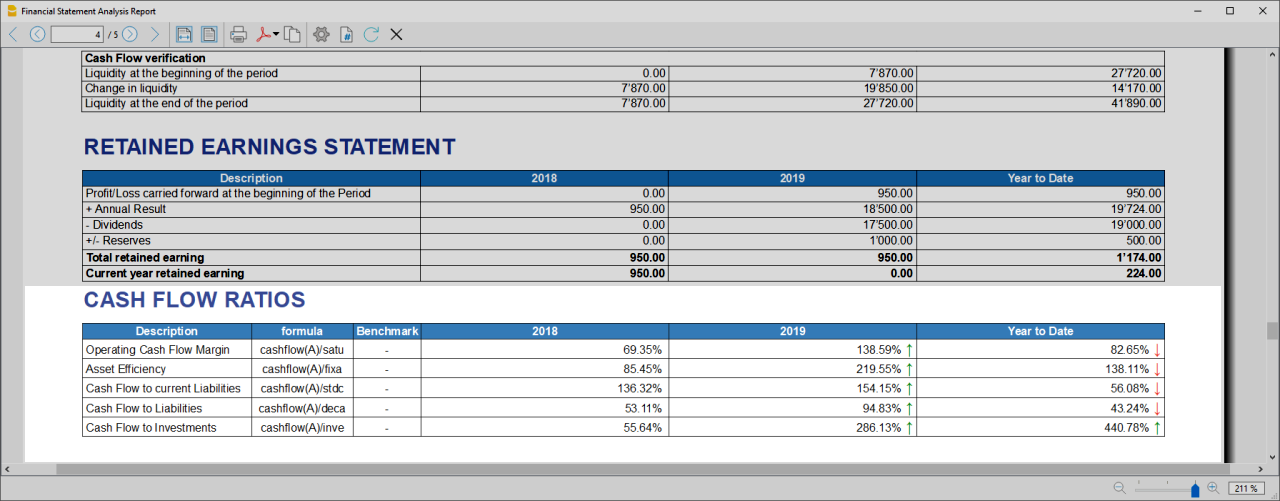
- Cashflow margin: Measures the amount of revenue a firm can convert into operating cash flow. When a firm is thriving, operating cash flow should grow alongside revenue. While profit margins measure a firm's pricing power; a declining cash flow margin also measures the health of customer and supplier relationships.
- Asset Efficiency Ratio: This is a basic ratio to show you how well the company uses its assets to generate cash flow. It’s best used to view the historical trend as well as to compare with competitors.
- Cashflow to current Liabilties: This ratio gives you an idea about the company’s debt management practices.It’s also a better indicator of the company’s ability to pay current liabilities than the current ratio or quick ratio
- Cashflow to Liabilities: Measures the amount of operating cash flow a firm generates on each dollar of total liabilities. Businesses that can't produce operating cash flow to pay off all their liabilities cannot continue to operate indefinitely, making this ratio an important indicator of liquidity as well as solvency
- Cashflow to Investments: Measures the amount a company outlays for capital assets for each dollar of cash dollar it generates from those investments.
Why Is Cash Flow Analysis Important?
Performing cash flow calculations in combination with constant monitoring of the company's cash flows is the winning formula for effective treasury management, and is useful for making the best use of available cash.
Thanks to the ability to generate cash flow and the financial solvency of the company, you gain confidence from banks and suppliers, as it symbolises a certain control over your business: the calculation of cash flow is in fact a way to detect the actual availability of the company, giving the possibility to face unexpected events or to plan consistently the future of projects.
For more information on Cashflow Analysis, please refer to the following page.
Balance Sheet and Profit and Loss Reclassification
Generate the Report by going to the Extensions menu→Cash Flow Statements and financial Ratios →Financial Reports.
The Report contains all the analysis data processed by the extension:
- Reclassified balance sheet
- Reclassified Profit and Loss Statement
- Control Sums table
Reclassified Balance Sheet
The reclassification of accounts allows for the display of a series of values, results and intermediate margins that contain more information than the traditional structure.
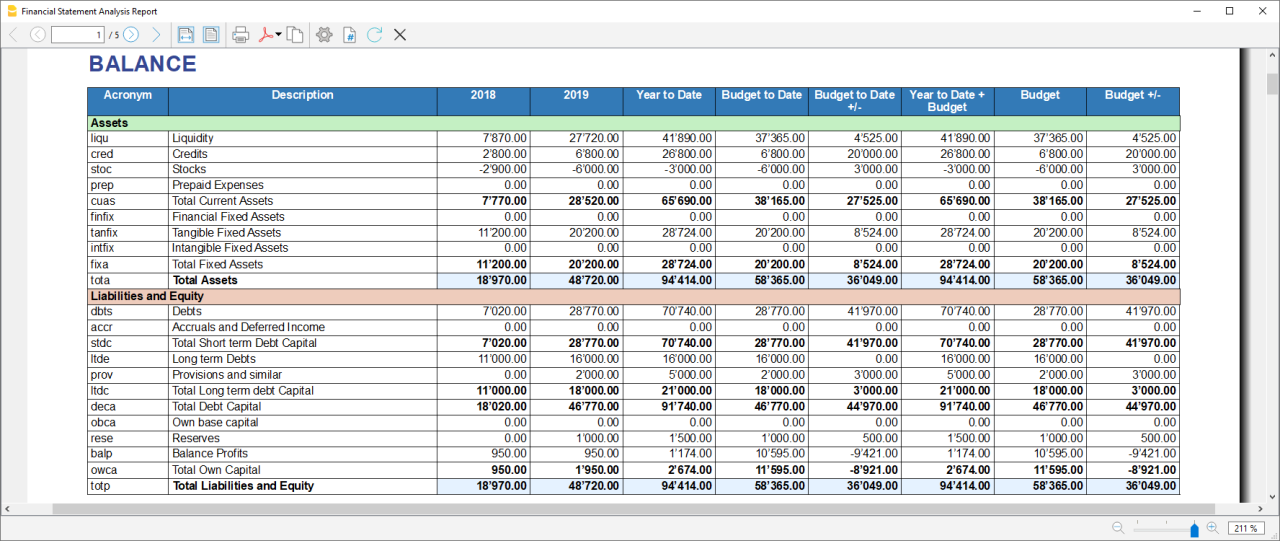
- Current Assets: All the assets of a company that are expected to be sold or used as a result of standard business operations over the next year.
- Fixed Assets: Items, such as property or equipment, a company plans to use over the long-term to help generate income.
- Total Assets: The sum of current assets and fixed assets.
- Debt Capital: Is the capital that a business raises by taking out a loan. It is a loan made to a company, typically as growth capital, and is normally repaid at some future date.
- Own Capital: It is the capital owned by the company.
- Total Liabilites and equity: The sum of Debt Capital and Own Capital.
Reclassified Profit and Loss Statement
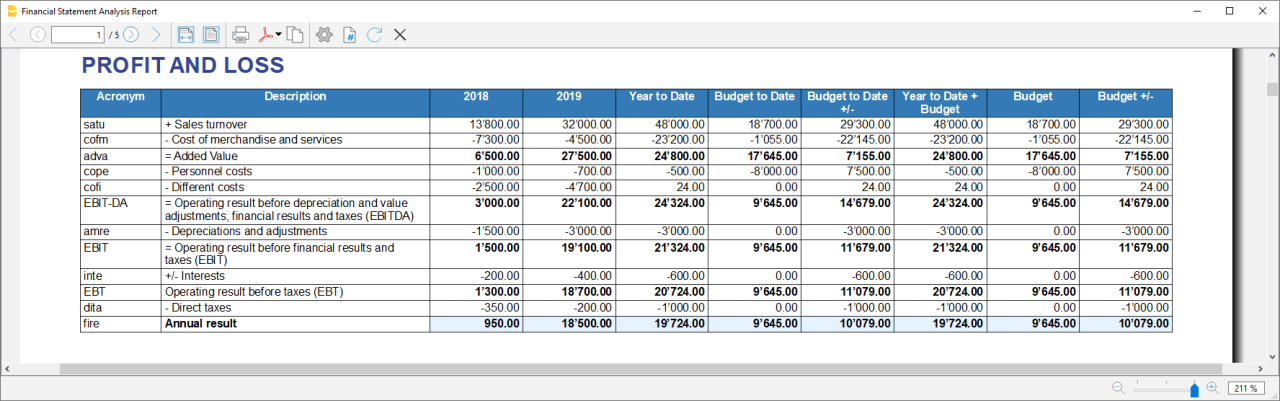
- Added value: The difference between operating costs and operating revenues incurred for resources outside the company, expresses the company's ability to create wealth and then remunerate the various production factors and stakeholders.
- MOL /EBITDA: "Earning Before Interests, Taxes, Depreciation and amortization" is obtained by subtracting from production revenues the costs of production (including internal costs such as personnel costs), without considering provisions and depreciation. As it does not contain economic items without monetary movement, its value assumes very important information for financial investors.
- EBIT :"Earning Before interests and Taxes", helps to understand whether the company is also able to cover the financial charges arising from its financial commitments.
Control Sums
Resumes the totals of the reclassified accounts (Assets, Liabilities and Equity , Annual Result). Checks that the sums calculated in the analysis match the totals in the accounting sheets and that Assets and Labilities and equity match.
- Accounting Total column: Represents the actual total in the accounts.
- Calculated Total column: Represents the total calculated by the program based on the groups entered.
- Difference column: Represents the difference found between the total in the accounts and the calculated total for each year. The value equal to 0, otherwise will be displayed an error message, which means that there may have been an error in entering the accounts/groups .In this case it is useful to check in the dialogue that you have entered the groups correctly.
Financial Ratios
Generate the Report by going to the Extensions menu→Cash Flow Statements and financial Ratios →Financial Reports.
The balance sheet ratios are formulas calculated on financial, economic and asset values. These ratios are derived from the income statement and balance sheet data. Balance sheet indices are important analysis tools that provide essential indications for the entrepreneur's activity.
It is widely used by all professionals who are interested in assessing the soundness of a company for their work.
In fact, banks use the balance sheet indexes to evaluate company loan applications.
the indexes are divided into four main types
- Liquidity ratios:
- Financing ratios
- Profitability ratios
- Efficiency ratios
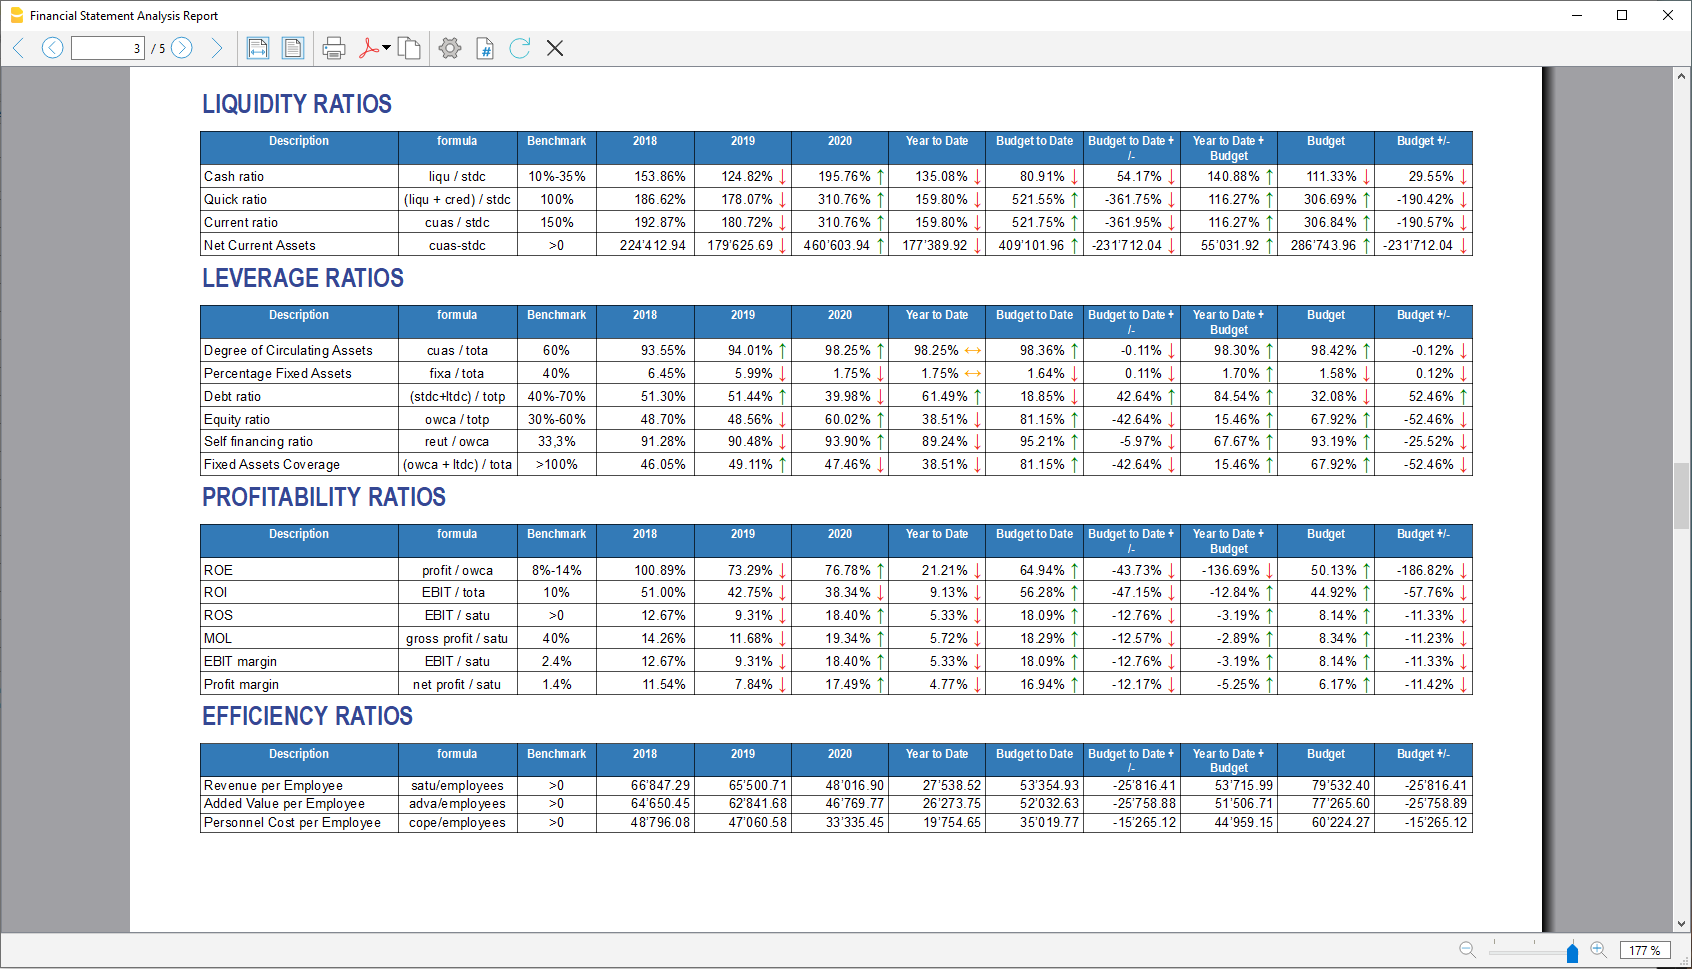
Liquidity ratios
An important class of financial metrics used to determine a debtor's ability to pay off current debt obligations without raising external capital. Liquidity ratios measure a company's ability to pay debt obligations and its margin of safety through the calculation of metrics.
- Cash ratio: Indicates the extent to which the company is able to repay its debts at the end of the term.
- Quick ratio: Indicates the extent to which the company is able to pay its debts when due.
- Current ratio: Indicates the extent to which the company is able to pay its short-term debts without touching fixed assets.
- Net Current Asset: Indicates the part of the current assets free of short-term commitments, which can therefore be used in the activity.
Financing ratios
They look at how much capital comes in the form of debt (loans) or assesses the ability of a company to meet its financial obligations.
- Degree of Circulating Assets: It allows us to understand whether there is a balance within the company's assets, a judgement can only be made if we have the average data for the same line of business.
- Percentage Fixed Assets: It is complementary to the previous one.
- Debt ratio: Indicates the extent to which the company has had to resort to external financing, the judgement depends very much on the branch of activity.
- Equity ratio: Is complementary to the previous one, equity ratio has the advantage of being less expensive.
- Self-Financing ratio: Indicates the extent to which the company has been able to accumulate undistributed profits.
- Fixed Asset coverage: The fixed assets must absolutely be financed from equity or possibly from long term capital, otherwise major repayment problems could occur.
Profitability ratios
Are useful to assess a business's ability to generate earnings relative to its revenue, operating costs, balance sheet assets, or shareholders' equity over time, using data from a specific point in time.
- Return on equity (ROE): By comparing the percentage obtained with the rates commonly applied for other investments, it is possible to understand whether the equity invested by the company gives a sufficient return or not.
- Return on investment (ROI): Identifies the return on invested capital. Basically it serves to understand how much the invested capital returns in terms of income.
- Gross Operating Margin (MOL) :Is a value that measures the profitability of a company. In other words, it measures the ability to make profit margins: Indicates the company's return on sales made.
- EBIT margin: Is the ratio of EBIT to turnover of a company. This ratio provides information on its profitability and helps to compare different companies and sectors.
- Profit margin: It represents what percentage of sales has turned into profits.
Efficiency ratios
Express the degree of efficiency of the company's factors of production, those chosen by us give us an indication of the relationship between the number of employees and the various margins of the profit and loss account. Efficiency indicators are related to profitability indicators, as higher productivity generates an improvement in profitability indicators.
- Revenue per Employee: An increase indicates greater efficiency of the company and a lowering of the break even point. Its increase is certainly an indicator of the good health of the company itself.
- Added Value per Employee: Gives evidence of efficiency in terms of cost reduction (e.g. economies of scale). If the revenue per capita index remains stable and the value added per capita index increases, this is evidence of cost efficiency.
- Personnel Cost per Employee: Highlights the trend in average personnel costs.
Within the tables and also visible the calculation formula of each index.
Dupont Analysis and Altman index Z-Score
Dupont Analysis
The Dupont model is a technique that can be used to analyse the profitability of a company using
traditional performance management tools. To enable this, the model integrates the elements of the Profit
and Loss Account and Balance Sheet.
Altman index Z-Score
The Z-Score is an index of the discriminating analysis used to determine the probability of bankruptcy of a
company within 2 years using statistical techniques.
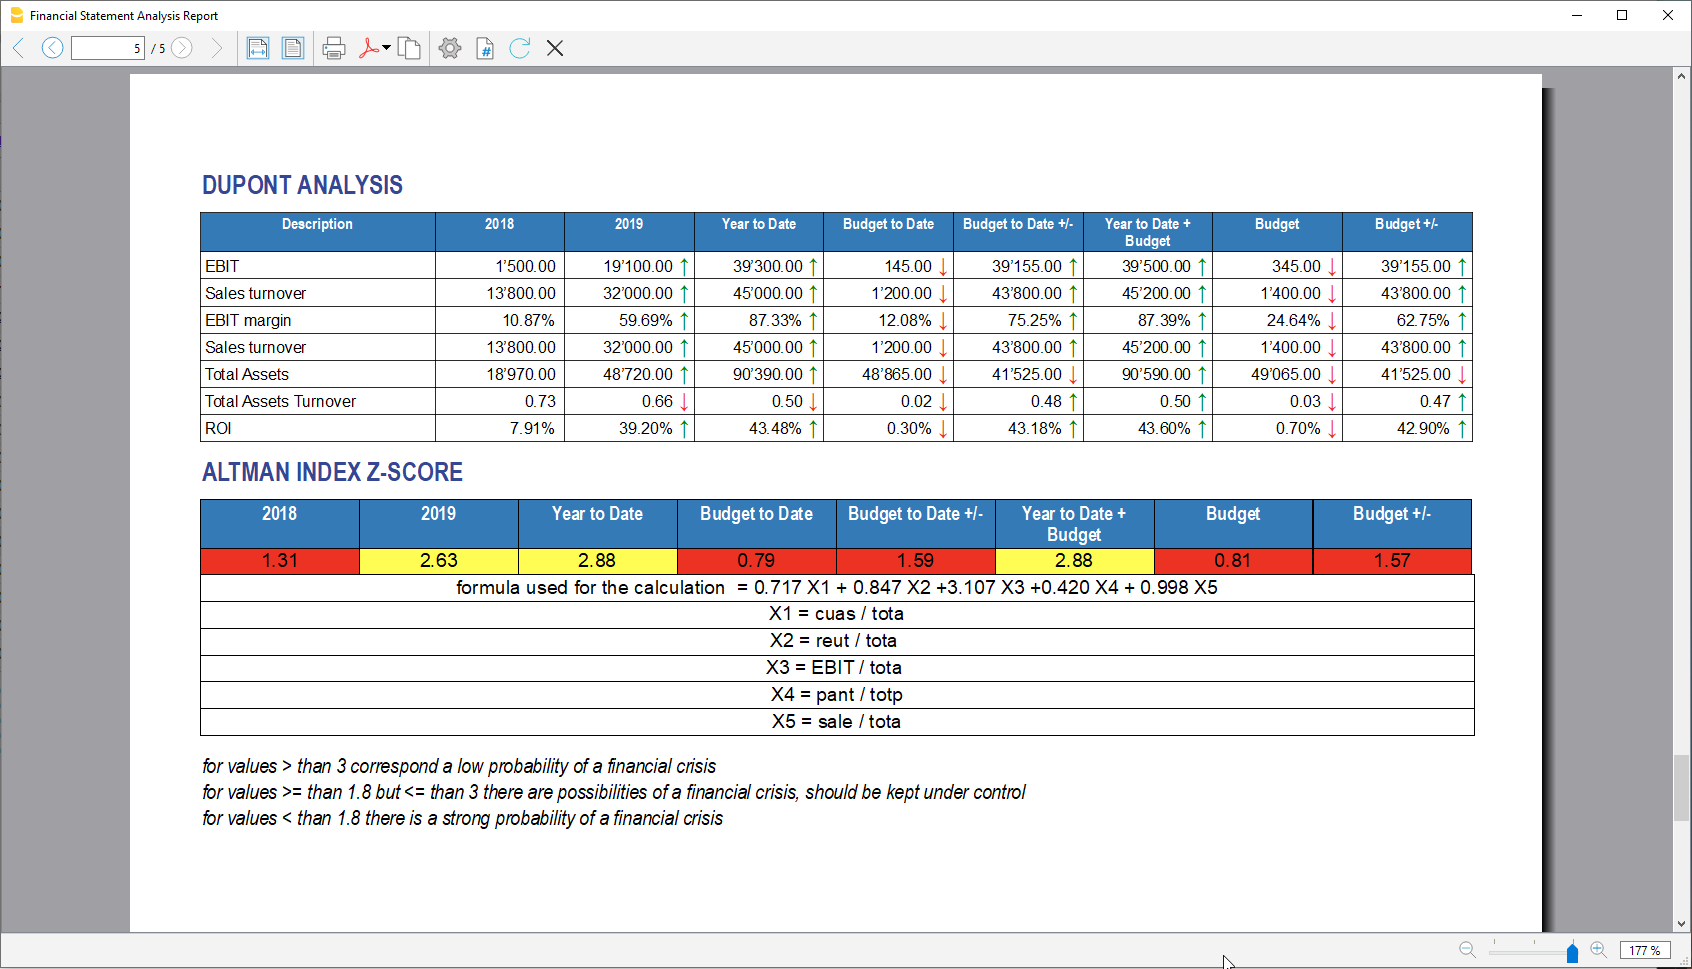
Financial Charts
It’s possible to access to the charts by going to the Extensions menu→Cash Flow Statements and financial Ratios →Financial Charts.
Charts allow you to read the same information as you can find in the report but in a clearer and more
intuitive way. Once the dialogue is open, you can move between the various elements thanks to a drop-down menu.
Ratios charts
- Financing ratios evolution
- Liquidity ratios evolution
- Profitability ratios evolution
- Efficiency ratios evolution
- Cashflow ratios evolution
These charts represent the evolution of the indexes over time. For each type of index there is a bar chart,
within which there is a section that represents the evolution over time of each index for each year included
in the analysis.
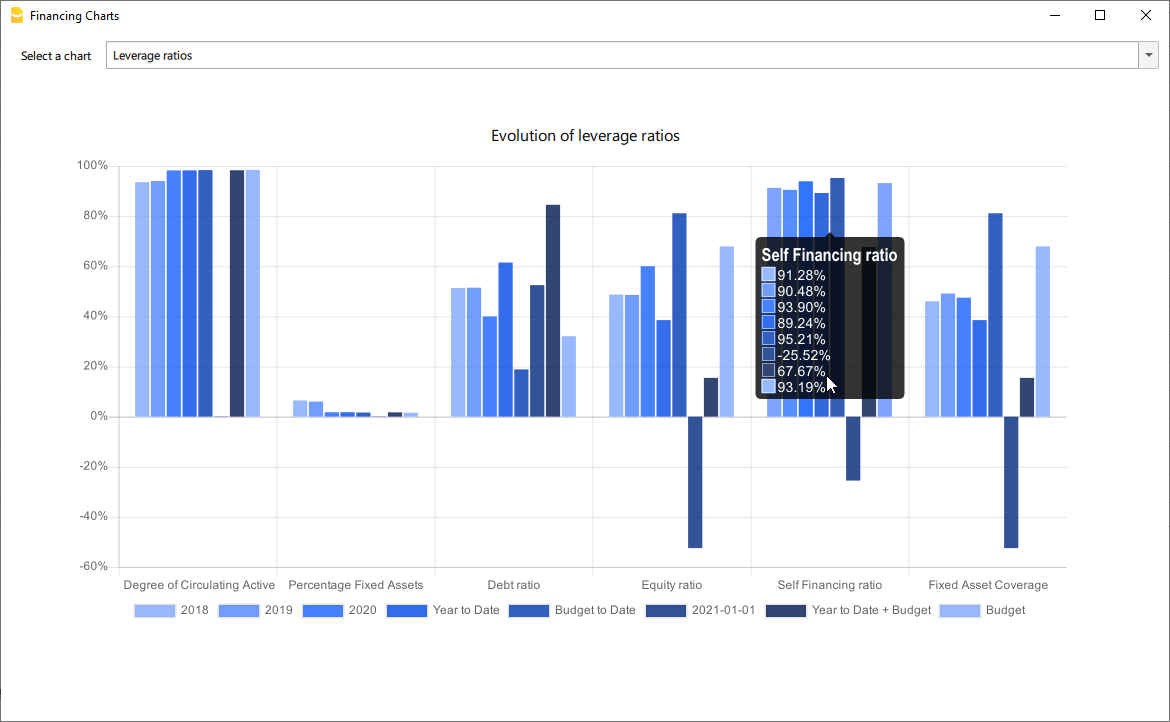
Reclassified Elements charts
- Reclassified asset variation
- Reclassified liabilities and equity variation
These charts show the time evolution of the reclassified assets, and reclassified liabilities, using stacked
chart. It is possible to see how and in what quantity the groups make up the total of assets and liabilities (in
percentage %)
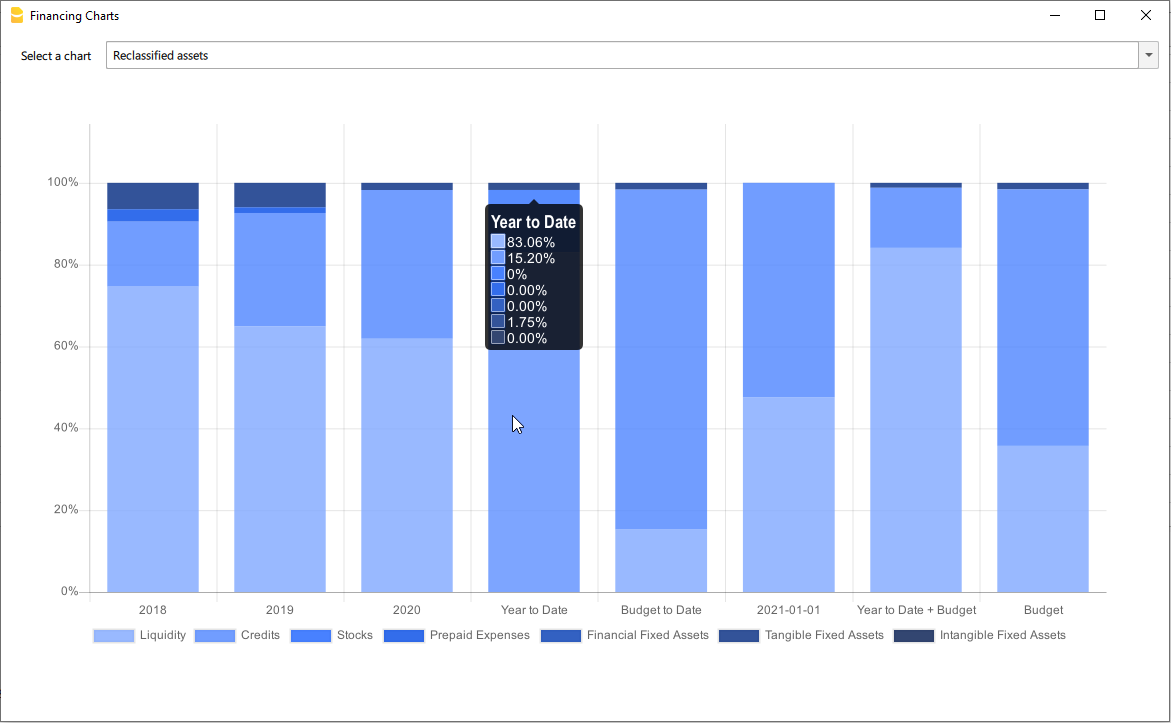
Reclassified profit and loss variation
Shows by using histogram the value of the intermediate totals (EBIT,EBIT-DA,..) of the reclassified profit and loss account ,and their evolution over the time.
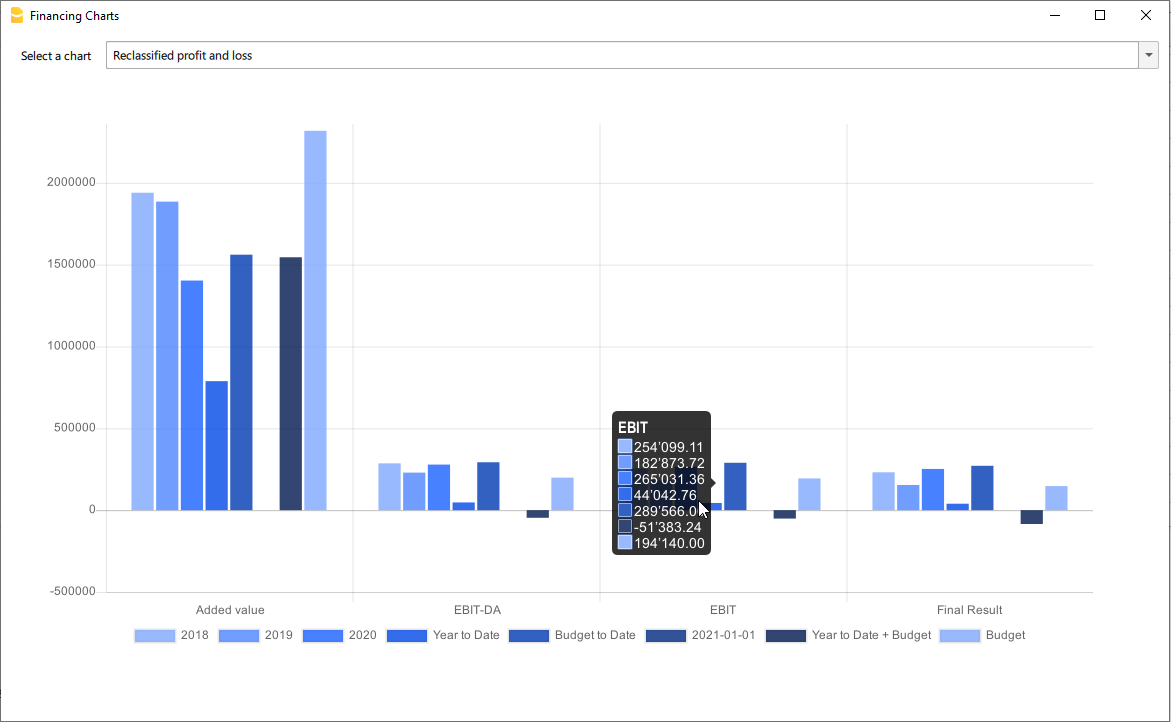
Airbnb, Booking.com, Vrbo and similiar hosting platform templates
Those who have an Airbnb rental business and are looking for a simple and efficient way to manage their finances will find the ideal solution in Banana Accounting Plus templates for several reasons.
With the templates, you can manage and track all expenses and income for all the rooms, apartments or houses you rent without any limits.
Moreover, you can manage the budget for your business in a flexible and personalized way. Whether you have multiple rooms, apartments or houses, you can keep track of specific income and expenses either collectively or divided for each individual rental unit. Additionally, you can set the budget according to irregular or regular deadlines such as monthly, quarterly, semi-annually or annually. This way, you can adapt the budget to your financial and business planning needs.
Through the budget feature in the templates, you can also make financial forecasts for your short-term rental business. You can gain a clear and detailed overview of your future income and plan ahead for all your activities.
Inventory management is another useful and powerful functionality offered by Banana Accounting Plus. You can keep track of all the items relevant to your business, categorizing them by room, apartment or rented house. This way, you will always be aware of what you own and easily manage the purchase or replacement of any necessary assets. With Banana Accounting Plus, you can create all the accounting files you need without limitations.
Regarding the management of income from hosting platforms such as Airbnb, Booking.com, Vrbo and others, the templates provide you with the option to record both the actual income deposited into your bank account and all other rental-related income, especially the commissions paid to the platforms. This information is crucial for tax purposes as it allows you to comply with the rules of the country where you operate your business.
For those who have an Airbnb business and are looking for a simple and efficient way to manage their finances, Banana Accounting Plus templates provide the ideal solution for other several reasons too.
Available templates
There are two templates available for short-term rental hosts on Airbnb, Booking.com, Vrbo or similar platforms.
The completely free template is suitable for those without accounting knowledge who want to manage the finances of their business. The second template is designed for those with double-entry accounting knowledge and who manage a business using multiple assets and possibly different currencies:
- Free template based on Banana Accounting Plus Cash Manager.
- Double-entry and multi-currency template.
All the functionalities and features described in the free template are also included in the double-entry multi-currency template.
In each template, you can easily view some sample accounting entries.
Manage Airbnb reservations
With Banana Accounting Plus templates, you have complete control over your reservations even before they are paid. This allows you to keep track of all bookings in your file, ensuring you are always up to date on availability and key dates. You can input reservations into the system and monitor them, making planning and management of your rental properties easier.
In addition to managing reservations, the templates also allow you to record payment receipts and income. This is particularly useful for monitoring and ensuring compliance with maximum nights allowed regulations in your country. You will have an accurate record of guest stays and corresponding income, providing clear and transparent documentation for regulatory compliance purposes.
Manage Airbnb Experiences
Banana Accounting Plus templates also enables you to manage and track Airbnb experience reservations. If you offer unique experiences such as sailing trips, mountain bike tours, tastings or others, you can record these specific bookings and efficiently monitor them. You will have a comprehensive overview of your Airbnb experience activities, including booking details and corresponding income.
With Banana Accounting Plus templates you simplify the financial management of your Airbnb rental business. You can take advantage of all the features offered and gain a clear and organized view of your finances.
Manage Airbnb business budget and financial forecasts
The Budget table in all Banana Accounting Plus files provides a comprehensive tool for creating your business budget and forecasting future financials.
This feature, always accessible through the Tools > Add/Remove functionalities menu, allows you to generate cash flow statements, liquidity plans and investment plans.
For more advanced needs, you can create budgets using formulas and automatic calculations. Additionally, you can obtain monthly, quarterly and annual financial forecasts as well as projections for multiple years.
Explore the full documentation on budget management and financial forecasting with Banana Accounting Plus.
Manage inventory along with their corresponding receipts
On all files, Banana Accounting Plus allows the display of the Link column in the Transactions table, enabling you to attach supporting documents to each accounting entry.
If needed, there are other predefined columns that you can easily show in your accounting file.
Additionally, with Banana, you can add your custom columns, additional tables, and link them to existing ones. Refer to the documentation on enabling the display of predefined columns and adding columns and new tables to your file.
The ability to add new tables and create custom columns also allows you to integrate the inventory of items in the rooms and apartments you rent into your file and attach relevant documentation, which can be useful, for example, for warranty or insurance purposes.
If you prefer you can create a dedicated new file to create and manage the inventory of your rooms and rented apartments. With all Banana Accounting Plus subscription plans, there are no limits on the number of files you can create and manage.
Handle the accounting recording of the fees you pay to platforms
Using a spreadsheet like Excel or Google Sheets doesn't always allow for proper management of income received from platforms such as Airbnb, Booking.com, Vrbo or similar ones. Often, the income received in your bank account does not include the commissions you need to pay to the platforms.
These platforms deduct the commissions before making payments, but there are countries where you are required to declare the gross income for tax purposes, including the deducted commissions.
With Banana Accounting Plus you can record the gross income you receive, ensuring that everything is accurately accounted for and that your bank balance always matches the actual balance in your account.
Check the example entries in the provided templates pages to see how this accounting record is done.
Free Airbnb template for income and expenses management: ideal also for Booking.com and Vrbo
Free Airbnb template for income and expenses management: ideal also for Booking.com and VrboManage your accommodation on Airbnb, Booking.com, Vrbo or the platforms you use with this free template and keep track of your finances easily and efficiently.
The Banana Accounting Plus template is superior to an Excel spreadsheet or a Google Sheet but avoids potential errors and time loss due to formula management. This way, you have a completely free accounting management template specifically designed for hosts.
With Banana Accounting Plus, unlike Excel or Google spreadsheets, there are no limits on the number of rooms, apartments or houses you can manage, and it allows you to easily track income and expenses for each individual rental property and your entire short-term rental business.

With this template, you can record and monitor all your income and expenses quickly and easily, providing you with a clear and detailed snapshot of your finances and how to optimize expenses. The accounting management template on Banana Accounting Plus offers a simple and effective way to organize and analyze all the financial data that is important for hosts.
Here are some of the key features and benefits of the free accounting management template:
- Easy to use: the template is designed to be intuitive and user-friendly, even for those who are not accounting experts. No technical skills or in-depth knowledge of Excel spreadsheets are required to use it. Banana Accounting also has extensive online documentation in multiple languages readily available.
- Startup budget: create, manage and update the budget of your startup to generate detailed and useful reports and forecasts for the success of the business.
- Income tracking: record all income generated from bookings, including payments from platforms, booking fees and reimbursement of cleaning expenses for rooms, apartments or houses, with all the necessary tracking details.
- Expense management: keep track of all expenses associated with your properties, such as utilities, cleaning, maintenance and supplies. Choose the level of detail you prefer for each expense associated with your rental properties. Add, edit, group and customize expenses you want to monitor without limitations.
- Track rental property information: easily track guest names, rented room, apartment or house, check-in and check-out dates, total nights stayed, number of guests per booking, the source of guests' bookings and payment dates from platforms.
- Automatic calculations: the template performs calculations automatically for you, without the potential errors of Excel or Google Sheet formulas, providing a clear overview of your cash flow, profits and expenses for your entire business or for a single room, apartment or house you manage.
- Detailed reports: generate comprehensive and professional financial reports, including profit and expense statements, balance sheets and more. These reports will help you make informed decisions and have detailed control over your finances.
- Manage hosting platform Experiences: easily and quickly manage the Experiences you offer on Airbnb, Vrbo or other similar platform.
- Customizable: the template can be easily customized to fit your specific needs. You can add custom categories, modify, group and personalize all the details you want to monitor according to your preferences.
- Privacy: it's important to note that the data entered into Banana Accounting is not used for commercial purposes. Your information remains confidential, offline and is not repurposed in any way.
This free template for income and expense accounting management for hosts managing their short-term rental properties simplifies the management of your finances, saves you valuable time, and provides you with a clear and comprehensive overview of your income and expenses professionally.
Banana Accounting is a highly versatile and customizable accounting software that can be used for broader accounting purposes beyond managing hosts on Airbnb, Booking.com, Vrbo and other hosting platforms.
Totally free
This template is based on the Cash Manager feature of Banana Accounting Plus, which can be used for free and without limitations with the free subscription plan.
Create and save the file
You can open and save your new file to start either through Banana Accounting Plus Web or by downloading and installing the software on your computer:
- Download and install Banana Accounting Plus.
- Click on File > New.
- Select Cash Manager.
- Search for the Category Business.
- Select the template "Income and expenses management template for Airbnb or similar platforms".
- Click on Create.
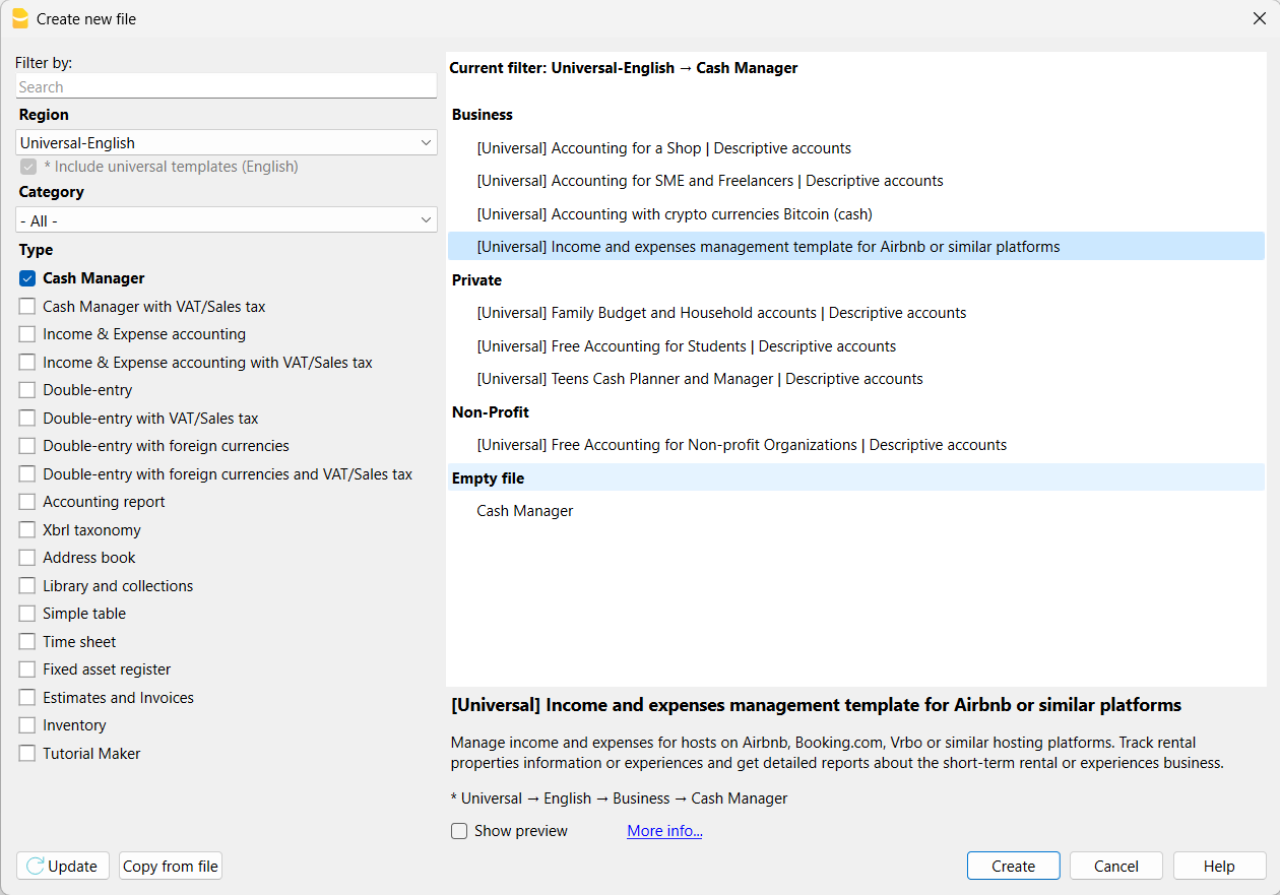
If you click on the text "More info...", you will be directed to this specific documentation page for the template. On this page, you can always find the tutorial file including sample records.
Using the command File > File Properties, set your references, the accounting period with opening, closing dates and the base currency. In the Address section, fill in the fields for the entity managing the rental properties. If necessary, change the base currency of the accounting file in the Accounting section.
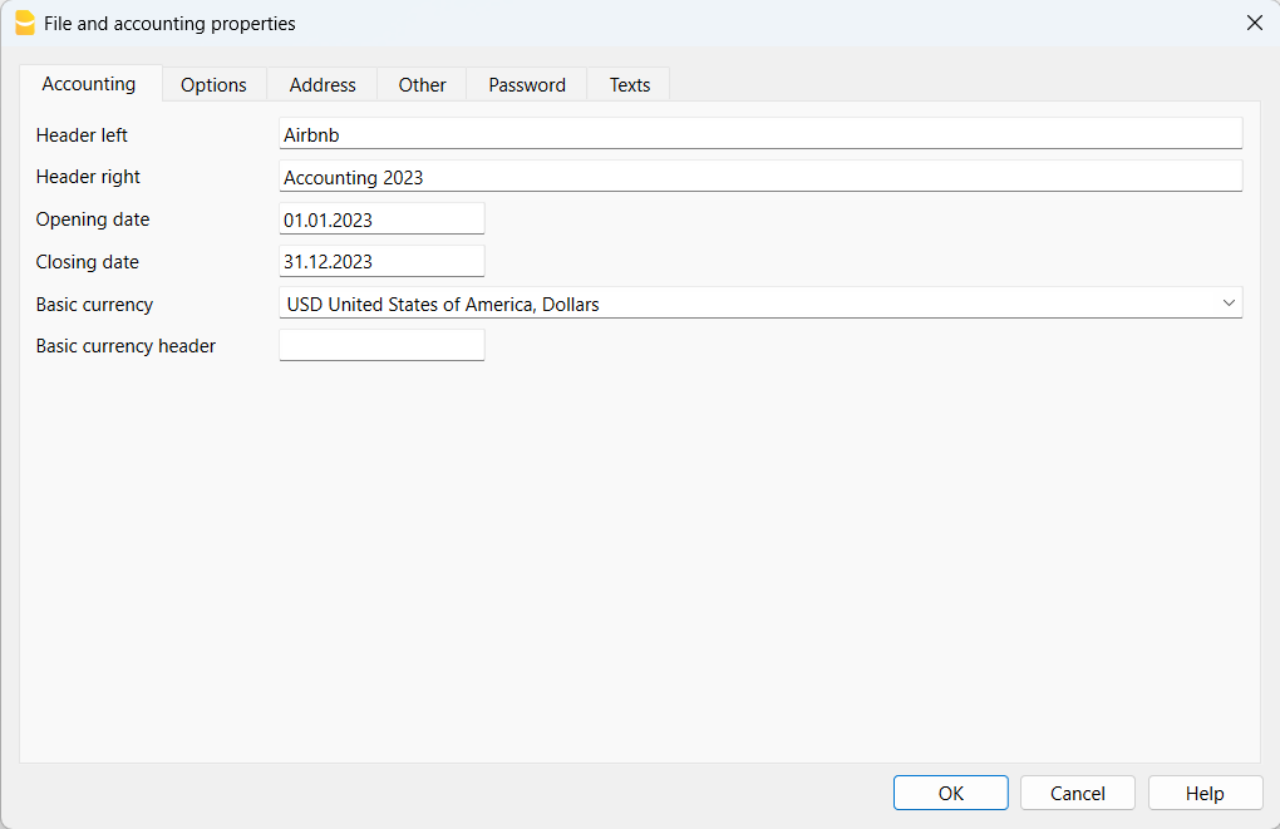
With the command File > Save As, save the file. It is useful to include the name of your business and the year in the file name. For example, "BusinessName-2023.ac2".
Also, refer to the article on organizing accounting files locally, on a network, and in the cloud.
Banana Accounting Plus Web Access
When you have downloaded and saved your new accounting file to open and use it from the web, you can bookmark the following link to access Banana Accounting Plus Web. However, it is recommended to download and install Banana Accounting Plus on the computers where it is needed, because Banana Accounting Plus Web does not yet have all the features available.
Create the budget
With Banana Accounting Plus, you can easily create a startup budget for your new short-term rental business on Airbnb, Booking.com, Vrbo and other platforms, and forecast all the costs you'll need to deal with. Consult all the relevant documentation on how to create a budget with Banana Accounting for detailed information.
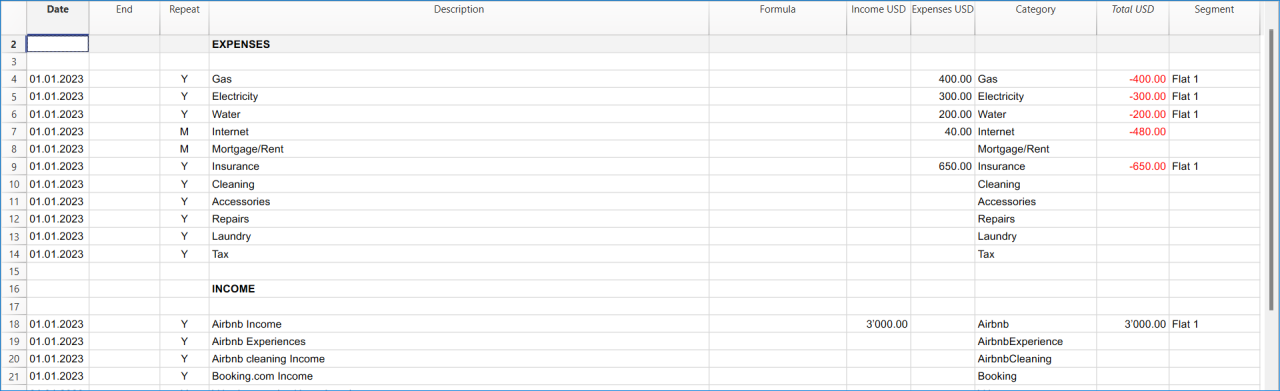
Customize and categorize expenses
If you prefer, you can group similar costs into categories and maintain the detail for each type of expense:
- Properties costs: mortgage payments, repairs and insurance coverage.
- Initial setup expenses: spending on furniture and household utensils.
- Bills: electricity, gas and water expenses.
- Supplies: expenses for items like linens, toiletries and cleaning products.
- Business expenses: costs related to accounting, software and taxes.
- Other costs: payments for cleaners, laundry services and ads.
See how you can easily create accounts groups.
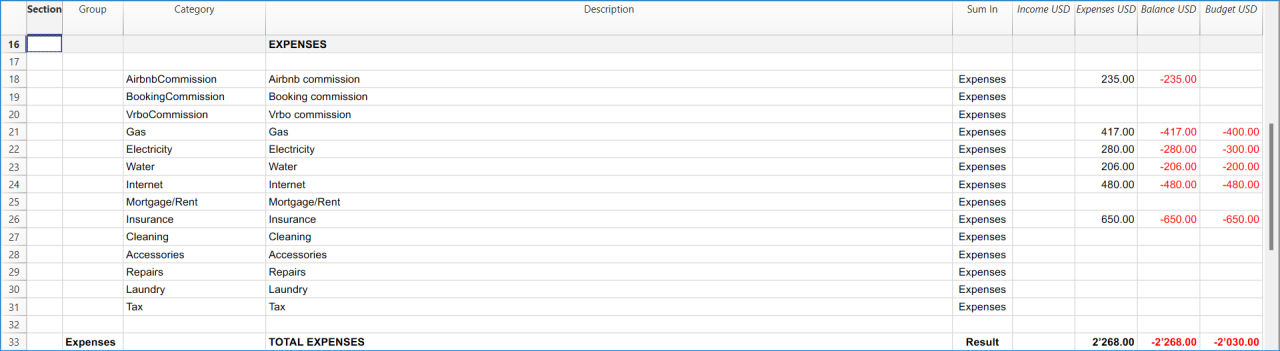
Recording transactions
In the Transactions table, record all transactions in chronological order, including debtor payments and invoice payments, as well as other types of transactions. The recordings can always be sorted and viewed instantly. You can highlight rows, correct any mistakes and copy and paste previously entered transactions.
To expedite data entry, we suggest using the various features of Banana:
- The auto-completion data entry feature automatically retrieves previously entered data.
- The recurring transactions feature (in the Actions menu) allows you to store frequently recurring transactions in a dedicated table.
- You can import data from bank statements, automatically capturing all bank transactions.
- You can link each recording to its corresponding digital document, and with a simple click, you can view the document. Refer to accounting files and digital documents for better document organization.
- Use the sort recordings command to arrange rows in chronological order.
- Use the print/preview command to print or export the journal in PDF format.
Bank transactions import
You can import bank statements, eliminating the need for manual entry.
Additionally, with the Advanced plan, it also allows for easy management of rules to automate accounting according to your specified criteria. This significantly reduces the effort required for accounting management, resulting in unmatched time savings.
Print financial statements or accounting reports
To view and print the financial statements at any time, click on the Report menu > Enhanced financial statements with groups. You can customize them or have an accounting report for a specific period.
Obtain detailed and customizable reports on all expenses and revenues of your business with Airbnb. You can compare them with the budget to always keep track of the performance of your startup.
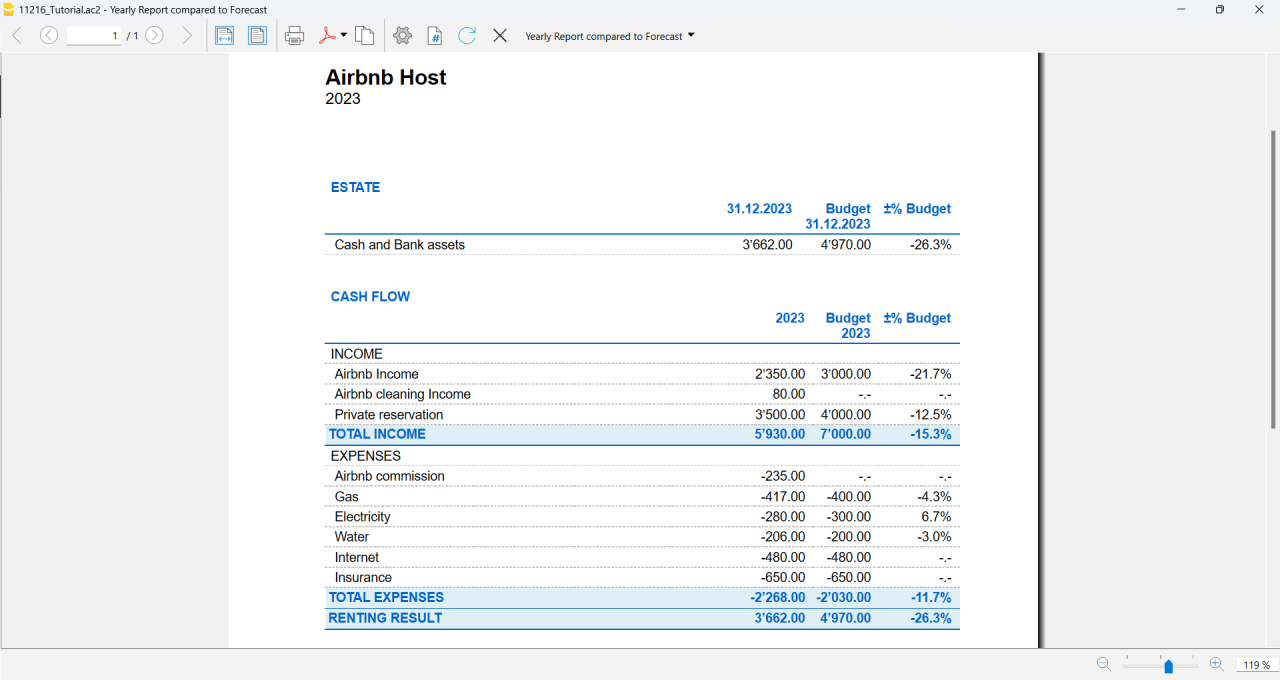
If you manage multiple rooms, apartments or rental properties, you can keep track of expenses and revenues allocated to each individual property you rent. You can also create room-specific budgets and compare the results with the actual expenses and earnings whenever you want.
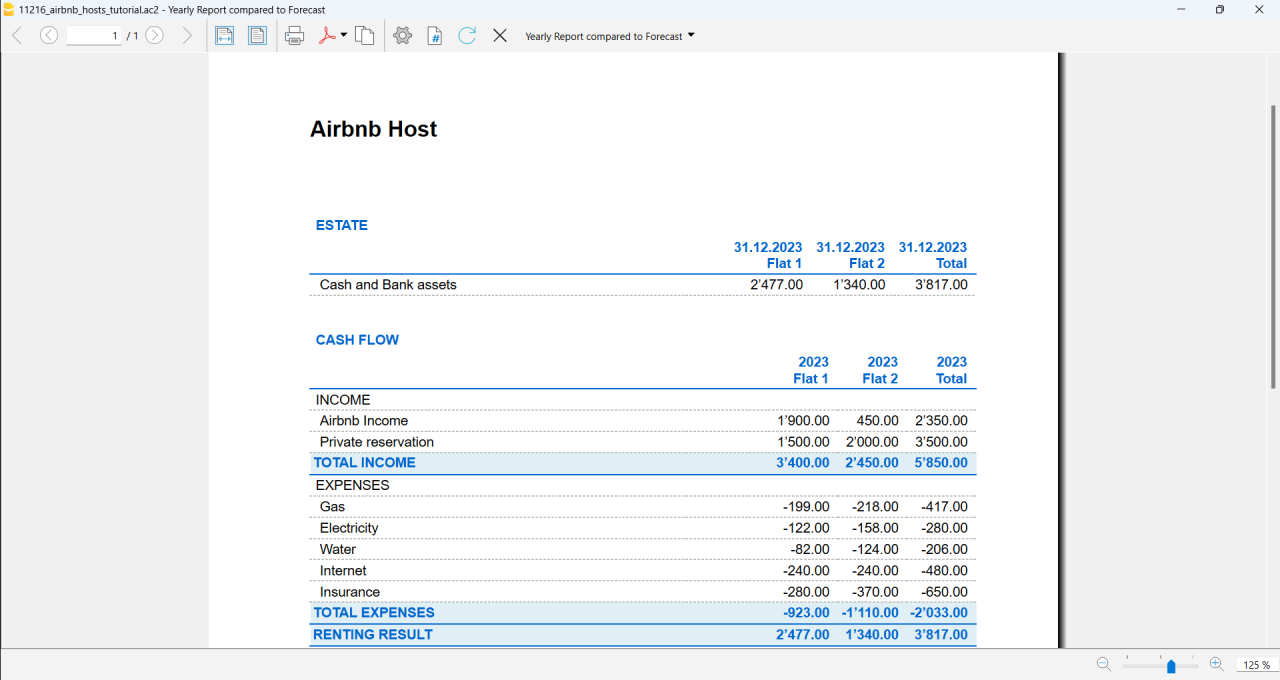
Advanced management
If you want, you can manage your Airbnb business in an advanced and optimized way through the rental management view called Manage Rentals. This allows you to keep track of all the necessary information about the reservations you receive. For those who offer Airbnb Experiences, there is the experiences management view, called Manage Experiences, available to track guest bookings related to experiences.
Navigate between the various available views to keep all the relevant data under control.
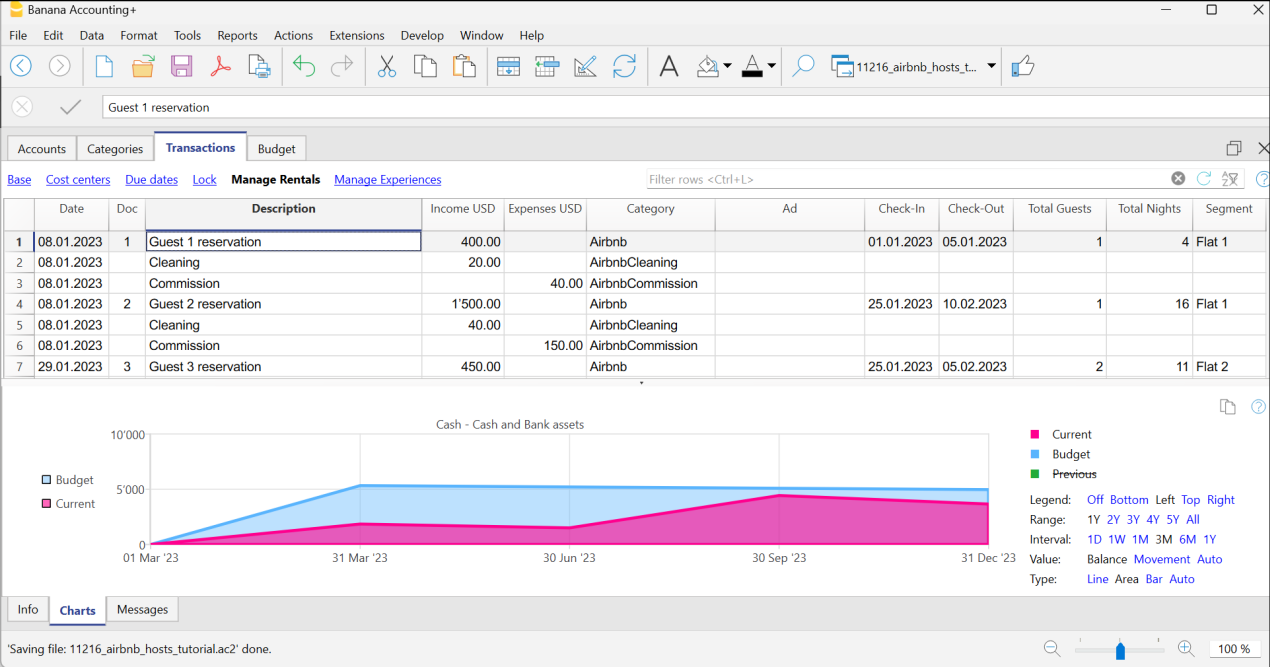
Questions or specific requests
Do you have any questions or specific requests regarding this template for Airbnb hosts or other short-term rental platforms? Please e-mail us.
Sample records for managing income and expenses for Airbnb hosts or other hosting platforms
Here are the sample accounting records for this template.
Recording an Airbnb or other platform revenue transaction
Record revenue from online platforms such as Airbnb, where you receive booking fees, with the preferred breakdown of the collected amounts and platform commissions. If you want, keep track of the ad from which the guest made the reservation, the check-in and check-out dates, the number of guests for the booking, the booked nights, the room or flat rented and the date of payment from the online platform.
To print the receipt to be given to the guest upon arrival, enter the receipt number in the Doc column and use the designated printer extension. You can also attach the receipt to the corresponding revenue record using the Link column.

Recording an expense for your short-term rental business
Record the expenses you incur for your Airbnb business by indicating the date of the expense, a description of the purchase, the amount incurred, the expense category, and the room or flat associated with your monetary outflow. You can always attach your receipts using the Link column.

Airbnb template for multi-currency accounting management
Airbnb template for multi-currency accounting managementThis template is useful for comprehensive and efficient accounting management for Airbnb hosts who need a system that supports double-entry bookkeeping and handles multiple currencies. Banana Accounting Plus provides a wide range of features to track the income and expenses of your short-term rental business.
Banana Accounting Plus is an advanced accounting software that is superior to Excel, yet it is simpler and more cutting-edge, catering to the common needs of Airbnb hosts. The accounting template has been specifically designed to offer a comprehensive and customizable solution for the financial management of your Airbnb properties. It allows you to track expenses, record income, monitor cash flow and much more.
The key features of this accounting template for Airbnb include:
- Asset Management: this template encompasses all the features of the free template for Airbnb, Booking.com, Vrbo and similar hosting platforms and provides an advanced solution for those with greater needs. It allows you to manage unlimited assets compared to the free template.
- Double-Entry Bookkeeping: the template adheres to the fundamental accounting principle of double-entry bookkeeping, ensuring the accuracy and correctness of your financial records.
- Multi-Currency Management: if you manage Airbnb properties using different currencies, Banana Accounting enables you to record and track income and expenses in different currencies, simplifying international financial management.
- Advanced Reporting: the software offers the ability to generate detailed reports on your finances, including profit and loss statements, account statements, balance sheets and detailed budgets. These reports provide you with a comprehensive overview of the performance of your Airbnb properties.
- User-Friendly: the software is designed to be user-friendly, even for those new to double-entry bookkeeping or without extensive accounting experience. The accounting template is intuitive, and the extensive available online documentation guides you step-by-step in managing your finances.
Banana Accounting Plus is intuitive, easy to use and simplifies your accounting management for Airbnb.
Example of a multi-currency income transaction for hosts
Here's how to use the multi-currency feature of Banana Accounting Plus:
- Set the desired currency exchange rate through the Exchange Rates table.
- Perform the accounting entry by entering date, description, bank of the currency received, income account, amount in the currency received and specify the currency received. Banana Accounting Plus will automatically calculate the amount in the main currency used for managing your Airbnb accounting.

Image of the Exchange Rates table

Image of the Transactions table where to record the income received from Airbnb or similar platform.
Accounting templates with crypto currencies
Accounting with crypto currencies Bitcoin (cash)
Accounting with crypto currencies Bitcoin (cash) tizianaIncome & Expense Accounting with crypto currencies Bitcoin
Income & Expense Accounting with crypto currencies Bitcoin tizianaDouble-Entry Accounting with crypto currencies Bitcoin
Double-Entry Accounting with crypto currencies Bitcoin tizianaDouble-Entry Accounting for digital currencies Bitcoin and Ethereum (Base Currency ETH)
Double-Entry Accounting for digital currencies Bitcoin and Ethereum (Base Currency ETH) tizianaDouble-Entry Accounting for digital currencies Bitcoin and Ethereum (Base currency USD)
Double-Entry Accounting for digital currencies Bitcoin and Ethereum (Base currency USD) tizianaEssential Expense Manager PDF report with embedded receipts
Essential Expense Manager PDF report with embedded receiptsImproving how employee expenses are managed is crucial for all businesses.
Whether employees are traveling for work or working from home, keeping track of their expenses and making sure they get reimbursed correctly has become a complex task.
Banana Accounting expense manager functionality to create a PDF dossier is essential and cost-effective for the majority of small and medium-sized businesses. It helps track expenses, improves transparency and makes it smoother for employees to interact with the company's accounting department.
All in one PDF report with embedded receipts
Banana Accounting create a PDF report with embedded receipts. The PDF file includes everything is necessary for reporting, approval and reimbursement.
- The list of expenses with all information necessary and the link to receipt.
- The report of the categorized expenses, for accounting purposes.
- The scanned receipt's files.
PDF file can embed other files. If you don't know just open this example PDF file and click on the link (look the link icons on the left in the image below), so that the receipt document will directly open (some browser don't show the files, better use Adobe Acrobat Reader that is free to use).
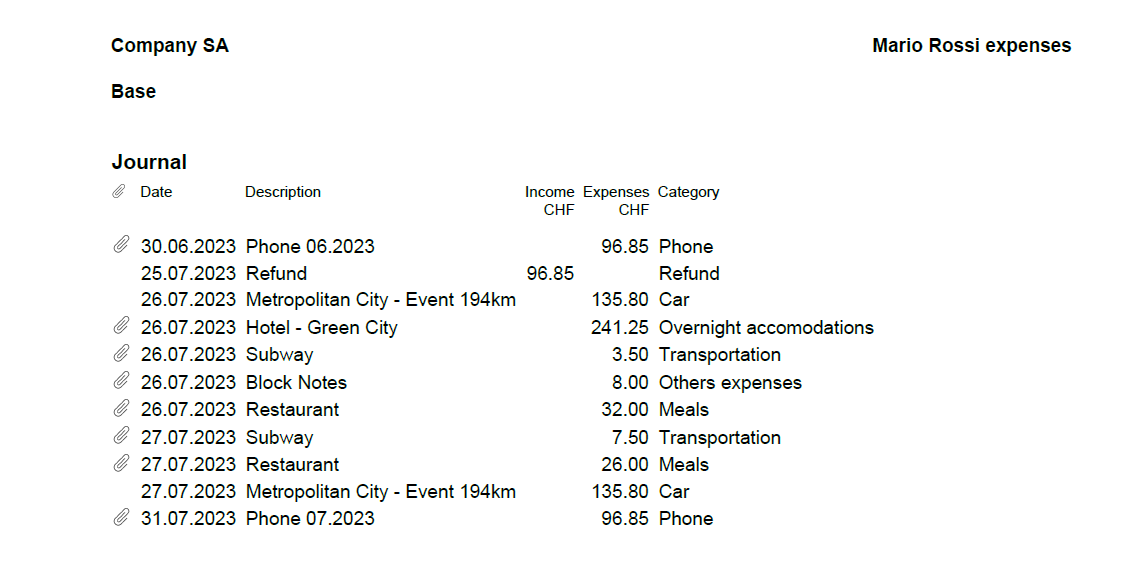
Totally free for up to 70 expense entries
The Banana Accounting template is designed to benefit companies of all sizes. The expense manager template is a software entirely free for up to 70 expense entries, making it a very accessible solution.
How to start
Using this Banana Accounting functionality allows you to obtain your PDF dossier with expenses categorized and embedded in a simple and immediate way:
- Install Banana Accounting
- Open the template file and save to a directory, where you also scan your documents.
- Scan your receipts or invoices (Banana Accounting does not perform the scanning).
- Enter the incurred expenses in the Transaction table and add a Link to the scanned receipt file.
- With File menu > Create Pdf Dossier create the PDF report (check the Include attachments).
- Transmit the file for reimbursement.
Now you'll be ready to send your PDF dossier by email to the accounting department, for approval and reimbursement.
This workflow is essential and cost-effective for the majority of small and medium-sized businesses.
Add the payment methods used by employees
If you wish, you can manage the payment methods used for expenses through the CC3 column.
To enable it, double-click on the column headers in the Transactions table. In the window that opens, on the left, enable the display of the Cc3 column and confirm with the Ok button.
Manage the different payment methods from the Categories table by adding the accounting accounts with a semicolon in front. You can add as many payment methods as you prefer.
Add the quantity columns to manage travel kilometers
To manage travel expenses based on the distance traveled, it could be useful to enable the display of columns related to quantities.
To enable them, double-click on the column headers in the Transactions table. In the window that opens, on the left, enable the display of the columns Quantity, ReferenceUnit, UnitPrice, and confirm with the Ok button.
Remember to enter Unit Price in the Transactions table with a negative sign.
Additional features of the Essential Expense Manager
Easy Expense Logging: the core of this tool is a user-friendly interface. Employees can quickly record their expenses by entering the date, category, amount and payment method. This reduces mistakes and ensures accurate data entry.
Digital Receipts: instead of using paper receipts, the software lets employees attach digital copies of receipts. This prevents losing receipts and keeps expense records secure.
Detailed PDF Reports: the software is great at creating comprehensive expense reports. These reports include all embedded receipts in a single PDF file, which can be easily shared with accountants through email. The reports break down expenses, categories and receipts, promoting transparency.
Customizable Categories: the software lets administrators customize expense categories to fit the company's needs. This ensures that expenses are organized in a way that matches the company's reporting and analysis requirements.
Easy Access: the expense manager can be shared through email, which is helpful for remote employees or those who often travel for work.
Data Privacy: it's important to note that the data entered into Banana Accounting is not used for commercial purposes. Your information remains confidential, offline and is not repurposed in any way.
WooCommerce-Produkteexport/-import [BETA]
WooCommerce-Produkteexport/-import [BETA]Beschreibung WooCommerce-Erweiterung
Diese Erweiterung zum Importieren und Exportieren von Produkten, die im WooCommerce-Onlineshop verkauft werden, vereinfacht und optimiert die Integration zwischen Ihrem Onlineshop und der Software Banana Buchhaltung.
Die Erweiterung ermöglicht entweder den Export von Produkten, die bereits in Ihrer Lagerverwaltung aufgelistet sind, aus Banana Buchhaltung in Ihren WooCommerce Onlineshop, oder sie wird zu einer intuitiven und effizienten Lösung, die es Ihnen ermöglicht, Produkte direkt aus Ihrem Onlineshop in Banana Buchhaltung zu importieren.
Banana Buchhaltung ist Excel überlegen. Die Software ermöglicht es Ihnen, die Produktdaten jederzeit schnell zu bearbeiten und garantiert, dass die Informationen mit Ihrem Online-Shop in WooCommerce übereinstimmen.
Die Banana Buchhaltung Erweiterung bietet Ihnen die Möglichkeit, Produktdaten, die bereits in Ihrem Banana Buchhaltungsbestand vorhanden sind, in einem Format zu exportieren, das bereits für den Import in WooCommerce vorbereitet ist. Dies vereinfacht die Eingabe und/oder die Verwaltung der Produkte in Ihrem Online-Shop und ermöglicht es Ihnen, die Kohärenz und Konsistenz zwischen den beiden Plattformen aufrechtzuerhalten und den Online-Verkauf reibungsloser zu gestalten.
Da es von entscheidender Bedeutung ist, die Produktinformationen in Ihrem Online-Shop und Inventar genau und mühelos zu verwalten, ermöglicht Ihnen diese Erweiterung, dies auf einfache und sichere Weise zu tun. Mit der Exportdatei, die Sie von der Plattform WooCommerce erhalten, können Sie Ihr Inventar in Banana Buchhaltung einfach erstellen oder bestehende Produkte direkt in Banana Buchhaltung aktualisieren, um sie mit denen in Ihrem Online-Shop abzugleichen.
Beide Funktionen machen langwierige und komplexe manuelle Verfahren überflüssig und verringern das Risiko von Übertragungsfehlern, wodurch Datengenauigkeit und Effizienz gewährleistet werden.
Diese Lösung eignet sich für diejenigen, die das Inventar auf einfache Weise verwalten und jederzeit in WooCommerce exportieren oder importieren möchten. Sie ist nicht geeignet für diejenigen, die eine Cloud-Lösung suchen, die die Lagerverwaltung automatisch mit WooCommerce synchronisiert.
Hauptmerkmale von Banana Buchhaltung
Einfach: Einfach: Banana Buchhaltung ist einfach zu bedienen und jede Datei kann per E-Mail ausgetauscht werden, was auch für einen einfachen Support hilfreich ist.
Datenschutz: Es ist wichtig zu wissen, dass die in Banana Buchhaltung eingegebenen Daten nicht zu kommerziellen Zwecken verwendet werden. Ihre Daten bleiben vertraulich, offline und werden in keiner Weise weiterverwendet.
Beta-Version
Diese Erweiterung wird in der BETA-Version veröffentlicht. Wir empfehlen, eine Sicherungskopie der Inventardatei zu erstellen. Regelmässige Dateisicherungen sind in jedem Zusammenhang nützlich. Für diese WooCommerce-Erweiterung ist ein Advanced-Abonnementsplan für Banana Buchhaltung Plus erforderlich.
Verwendeter Primärschlüssel
Die ID-Spalte der Artikel-Tabelle von Banana Buchhaltung wird exportiert und als Primärschlüssel für den Import verwendet. Sie muss die SKU-Referenz des Produkts aus dem WooCommerce-Onlineshop enthalten.
Diejenigen, welche bereits eine Lagerbuchhaltung in Banana Buchhaltung führen, können die Codes in der Spalte ID mit der Funktion Umbenennen aus dem Menü Daten von Banana ersetzen. Mit dieser Funktion wird der Wert ID auch in der Buchungen-Tabelle automatisch ersetzt.
Produkte aus WooCommerce erstellen/aktualisieren
Die Funktion Produkte aus WooCommerce erstellen/aktualisieren erstellt die aus WooCommerce exportierten Produkte (Format CSV) in der Artikel-Tabelle der Lagerverwaltungsdatei von Banana Buchhaltung, falls sie noch nicht vorhanden sind. Wenn es bereits Produkte mit demselben ID-Wert gibt, werden die Werte in den Spalten Beschreibung, Quantität Anfang (Anfangsmenge) und Preis/Einheit (Einheitspreis) in der Artikel-Tabelle mit den Informationen aus der exportierten Datei von WooCommerce aktualisiert.
Produkte für WooCommerce exportieren
Die Funktion Produkte für WooCommerce exportieren exportiert die Daten aus den Spalten ID, Beschreibung, Quantität Saldo und Preis/Einheit (Einheitspreis) der Artikel-Tabelle von Banana Buchhaltung in ein CSV-Dateiformat, welches in WooCommerce importiert werden kann.
Vereine, NGOs und Stiftungen im Non-Profit-Bereich (universell)
Für Vorlagen von Vereinen und Non-Profit-Organisationen konsultieren Sie bitte die folgende Webseite:
Noprofit Universal Templates
Free Excel Standard INPAS Template
[This page is currently being updated]
INPAS key accounting documents
This page is dedicated to the chart of accounts template that conforms to the INPAS standard. The INPAS standard is designed to improve the transparency and accuracy of nonprofit associations' financial statements. It is also possible to download a complete Excel template that facilitates the compilation of all the documents required to comply with the standard.
The chart of accounts has been designed and interpreted based on the INPAS drafts and may require adjustments once the final guidance is published in 2025.
The compliance of the accounting with the INPAS standard always depends on the accountant and the auditor working on the accounts.
Updates may be possible following the final publication of INPAS in 2025.
Statement of Financial Position
The balance sheet is an essential document that provides a detailed view of your organization's financial health, clearly showing assets, liabilities and net worth. Because of the flexibility of the INPAS standard, you can present the financial statements either vertically or horizontally, tailoring them to the specific needs of your nonprofit.
This document can be generated easily using Banana Accounting+ template.
Statement of Income and Expenses
This document shows your organization's income and expenses during a period. Proper management of the income statement is crucial to demonstrate how resources were used to achieve missionary goals.
This document can be generated easily using Banana Accounting+ template.
Statement of Changes in Net Assets
This document is critical to understanding the changes that have occurred in net assets during the fiscal year. The INPAS standard provides a sequence of elements that transparently reflects the changes, making clear the impact of financial activities on the organization's assets.
Statement of Cash Flows
The cash flow statement, which shows cash flows, is essential for monitoring your organization's liquidity and ability to fund its activities. With our INPAS template, you can present this information in a clear and accessible way, improving transparency to donors and board members.
Explanatory notes
Explanatory notes offer crucial details to fully understand the numbers presented in other accounting documents. They provide a clear description of adopted accounting policies and significant changes, contributing to a deeper and more accurate analysis of the institution's financial position.
Excel template to download
To facilitate the accounting management of associations, a complete Excel template can be downloaded to provide all the necessary documents according to the INPAS standard. In fact, this versatile and easy-to-use tool also allows you to create the Statement of Changes in Net Assets, Statement of Cash flows and Explanatory notes, completing the documentation with the Balance Sheet and Statement of Income and Expenses you can easily obtaine through Banana Accounting+.
Download the INPAS Excel Template
Statement of Financial Position
This document can be generated easily using Banana Accounting+ template. Here is what the statement of financial position must contain.
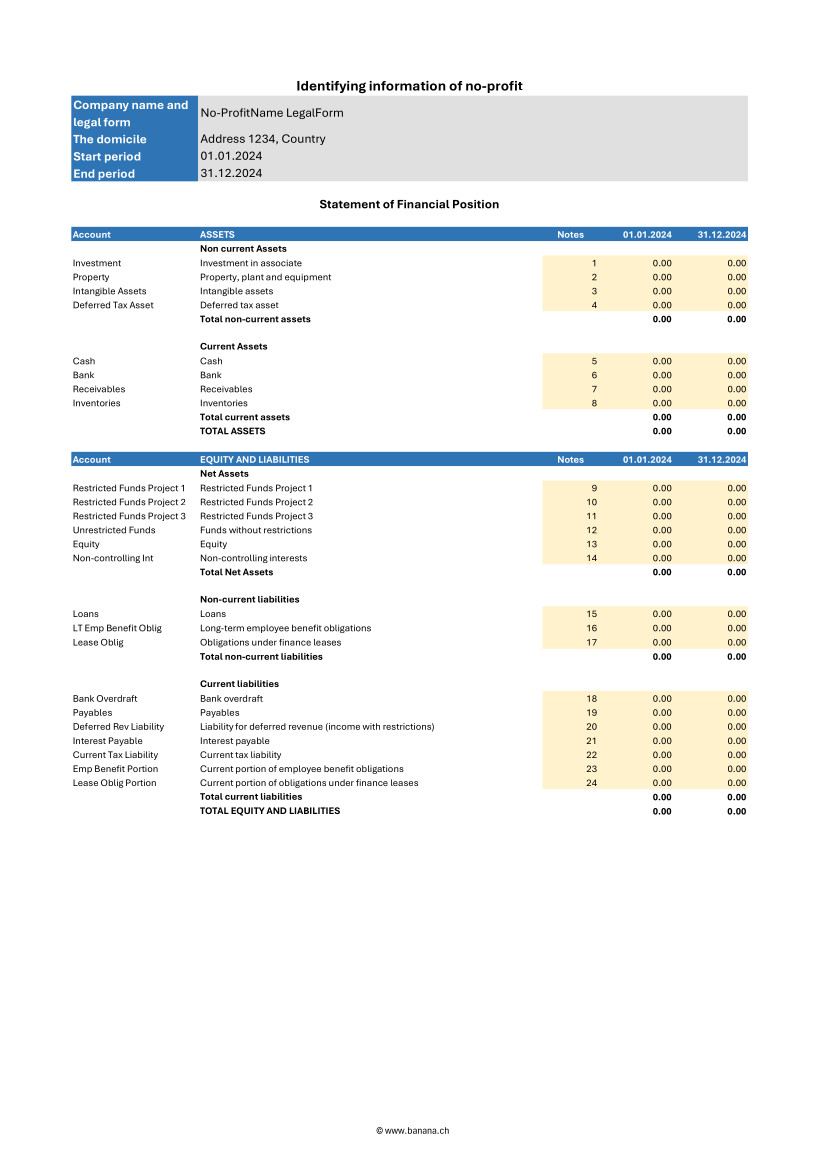
Current and non-current assets
Assets should be distinguished into current and non-current. Current assets are those that are expected to be converted to cash or used within one year. They include accounts such as cash and cash equivalents, short-term receivables, and inventories. Non-current assets, on the other hand, are those that are expected to be held for periods longer than one year and may include tangible assets, intangible assets, and long-term investments.
Current and non-current liabilities
Liabilities must also be classified into current and noncurrent. Current liabilities are payables and obligations that are expected to be settled within one year, such as accounts payable, accrued expenses, and other short-term liabilities. Non-current liabilities represent long-term commitments that the organization does not expect to settle within the next year, such as long-term debts and mortgages.
Shareholders' Net Assets
Net Assets represents the difference between the organization's total assets and total liabilities. In financial statements according to the INPAS standard, net assets should be divided into three main categories:
- Unrestricted funds: resources available for general use and not subject to specific restrictions. These funds may be used at the discretion of the organization to fund any activity or operational need.
- Restricted funds:
- Temporarily restricted funds: resources subject to restrictions imposed by donors or temporary conditions. These funds may be used only for specific purposes and for a specified period, after which, if conditions are met, they may be reclassified as unrestricted funds.
- Permanently restricted funds: resources that must be kept intact indefinitely, often to ensure a continuous source of income for the organization. These funds are typically associated with permanently restricted donations.
Statement of Income and Expenses
This document can be generated easily using Banana Accounting+ template. Here is what the statement of activities must contain.
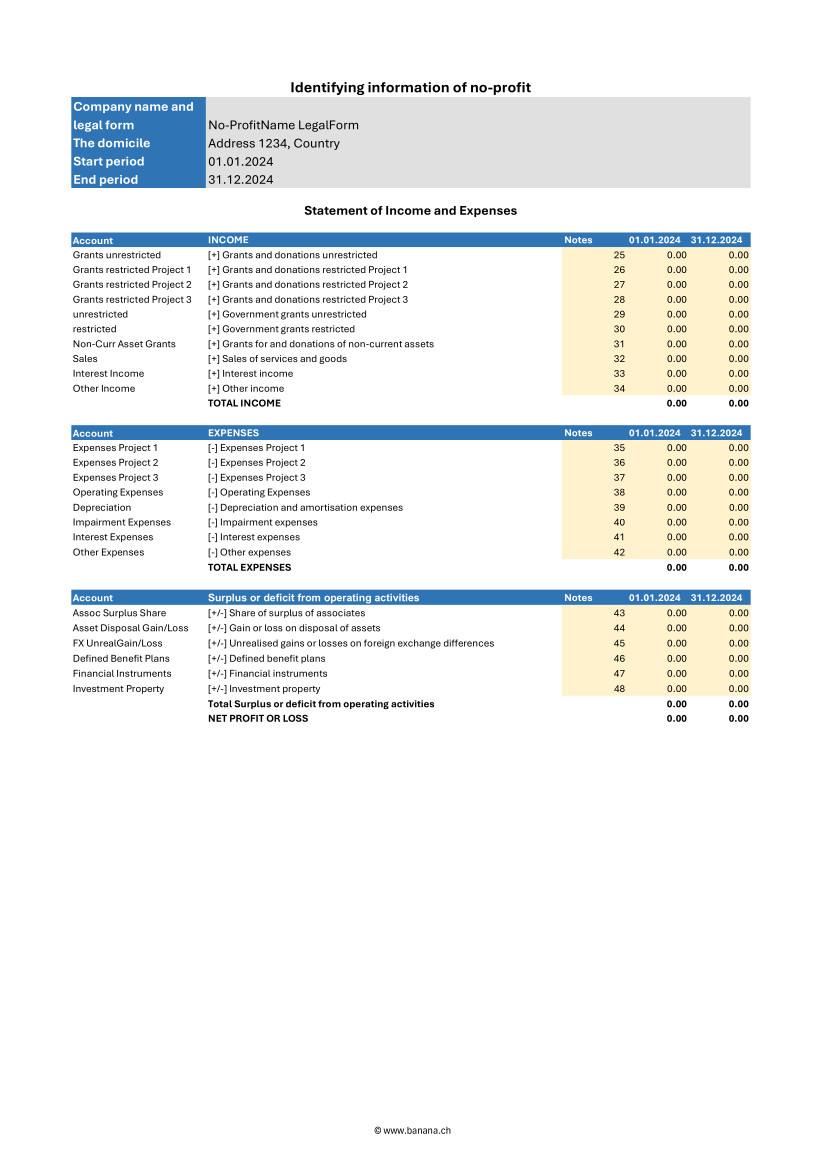
Revenue
Income should be divided between restricted and unrestricted to reflect donor or regulatory restrictions. This distinction is crucial to understanding the organization's flexibility in the use of funds received.
- Restricted income: funds earmarked for specific purposes, such as particular projects or specific periods. These funds may come from donations, grants, or funding with donor-imposed conditions limiting their use.
- Unrestricted income: funds that can be used at the discretion of the organization for any operational need. These include general donations, proceeds from nonspecific fundraising events, and other income that has no special restrictions.
Expenses
Expenses should be broken down into major categories to give a clear view of how resources are allocated. This breakdown helps to better understand the organization's priorities and efficiency in managing funds.
- Programmatic expenses: costs directly associated with the implementation of the organization's core programs and activities. These include salaries of operational staff, costs of materials and equipment used in projects, and other expenses directly related to the organization's missions.
- Fundraising expenses: costs incurred for fundraising activities, including events, marketing campaigns, and salaries of dedicated fundraising staff. This category highlights the investment made to secure future financial resources.
- Administrative expenses: general costs of running and administering the organization. These include administrative staff salaries, office rent, consulting fees, and other overhead costs necessary for the day-to-day operation of the organization.
Changes in shareholders' Net Assets
The income and expenses statement should report changes in net worth during the reporting period, broken down by fund category:
- Unrestricted funds: changes resulting from the use or appropriation of unrestricted revenues and non-programmatic expenditures.
- Restricted funds:
- Temporarily restricted funds: changes due to the use of restricted funds according to donor-imposed conditions and their eventual transfer to unrestricted funds once conditions are met.
- Permanently restricted funds: changes related to new permanently restricted gifts or changes in the investment policies of permanent assets.
Statement of Changes in Net Assets
Here is what the statement of changes in net assets must contain.
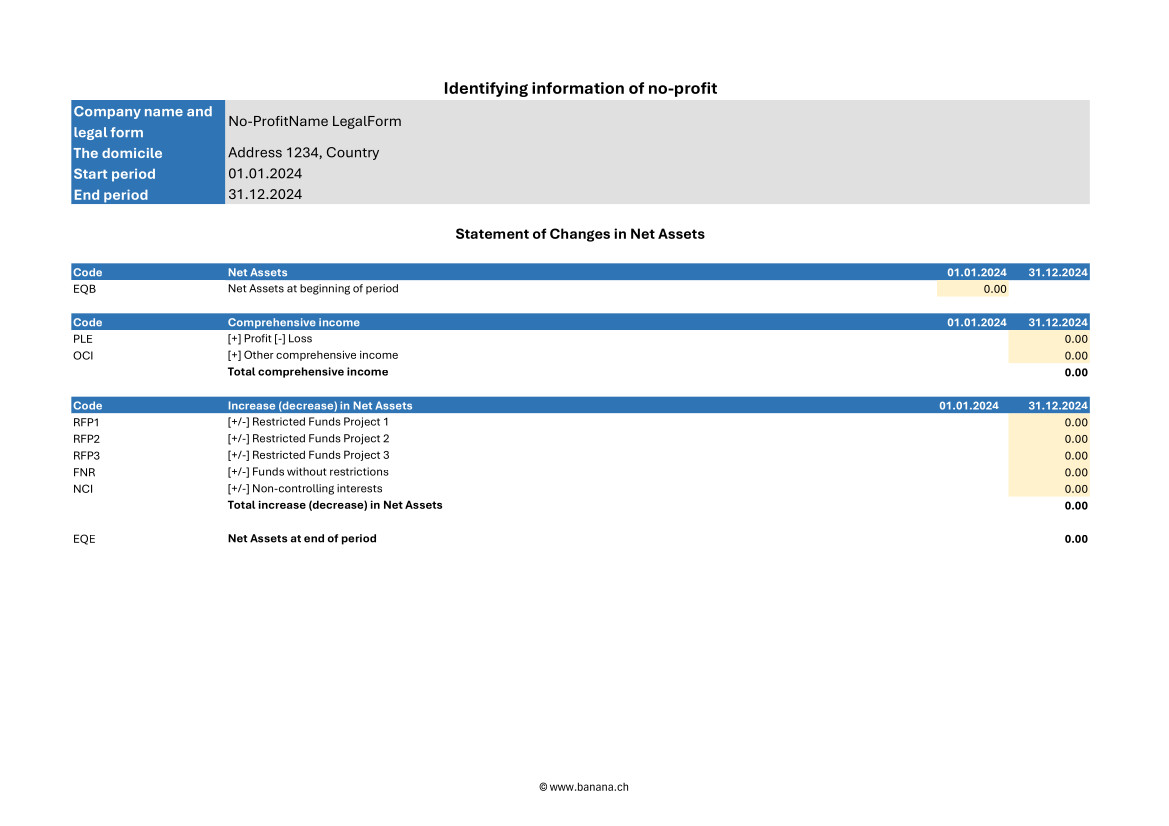
Changes in shareholders' Net Assets by period
The statement should report all changes in net assets broken down by period, clearly showing increases and decreases in the various funds.
- Increases in net assets: these may result from new donations, contributions, grants received, or other sources of income. Each increase should be specified in terms of restricted and unrestricted funds to highlight restrictions on the use of funds.
- Decreases in net assets: decreases may result from the use of funds to cover programmatic, fundraising, and administrative expenses. Again, it is important to specify whether the decreases involve restricted or unrestricted funds.
Details on contributions, donations and other sources of funding
The statement should include a detailed description of all funding sources received during the period, broken down by type and restriction.
- Contributions and donations: specify donations received, indicating whether they are restricted or unrestricted, and describe any conditions or restrictions imposed by donors.
- Grants and funding: detail grants obtained, including conditions of use and periods of application.
- Other income: include any other sources of funding, such as income from fundraising activities, investment income, or income from ancillary activities, detailing any applicable restrictions.
Use of funds under restrictions
The statement should clearly show how funds have been used according to donor or regulatory restrictions, ensuring transparency and compliance.
- Restricted funds:
- Temporarily restricted funds: describe how these funds were used for specific projects or programs, and whether any restrictions were met, allowing the funds to be reclassified as unrestricted.
- Permanently restricted funds: highlight the use of income generated by these funds to support the organization's activities, keeping the principal capital intact according to the conditions set by the donors.
- Unrestricted funds: indicate how these funds have been allocated for general operating expenses and other needs without specific restrictions.
Mandatory elements of the statement of changes in Net Assets
- Beginning balances
- The beginning balances of each component of net assets at the beginning of the accounting period must be reported.
- Example: share capital, reserves, retained earnings.
- Changes for each component
- Detail all changes for each component of net assets during the accounting period.
- These changes may include:
- Profits or losses for the year.
- Increases in capital stock.
- Reductions in capital stock.
- Dividend distributions (if applicable).
- Contributions and distributions from owners
- If applicable, indicate contributions made by owners and distributions made to owners.
- Reserves
- Any changes in reserves, such as legal reserves, extraordinary reserves, revaluation reserves, etc.
- Ending balance
- Report the ending balances of each component of net assets at the end of the accounting period.
Steps to implement the statement of changes in Net Assets
- Identification of the components of shareholders' Net Assets
- Determine all components of net assets that should be reported in the statement, such as share capital, reserves, and retained earnings.
- Collection of initial data
- Collect the beginning balances of all components of net assets from the last closed financial statements.
- Recording of changes
- Record all changes that have occurred during the accounting period, such as capital increases, recorded gains or losses, dividend distributions, and other changes in reserves.
- Calculating ending balances
- Calculate the ending balances of each component of net assets taking into account the changes recorded.
- Preparation of schedule
- Compile the statement of changes in net worth with all the information collected, making sure that the totals are correct and that all changes are adequately explained.
Statement of changes in funds
The Statement of Changes in Funds is a crucial accounting document that illustrates the changes in an organization's funds during an accounting period. According to the INPAG standard, the Statement of Changes in Funds must include a detailed set of information to ensure transparency and accuracy in reporting.
Here are the required elements of the statement of changes in funds.
- Initial balances of funds
- The initial balances of each fund at the beginning of the accounting period must be reported.
- Revenue by fund
- Detail the income received for each fund during the accounting period.
- Expenditures by fund
- Detail the expenditures made for each fund during the accounting period.
- Transfers between funds
- Information on any transfers of resources between different funds.
- Ending fund balances
- Indication of the ending balance of each fund at the end of the accounting period.
- Variations in funds with restrictions
- Specific details on changes in time-restricted or donor-restricted funds.
Statement of Cash Flows
Here is what the cash flow statement must contain.
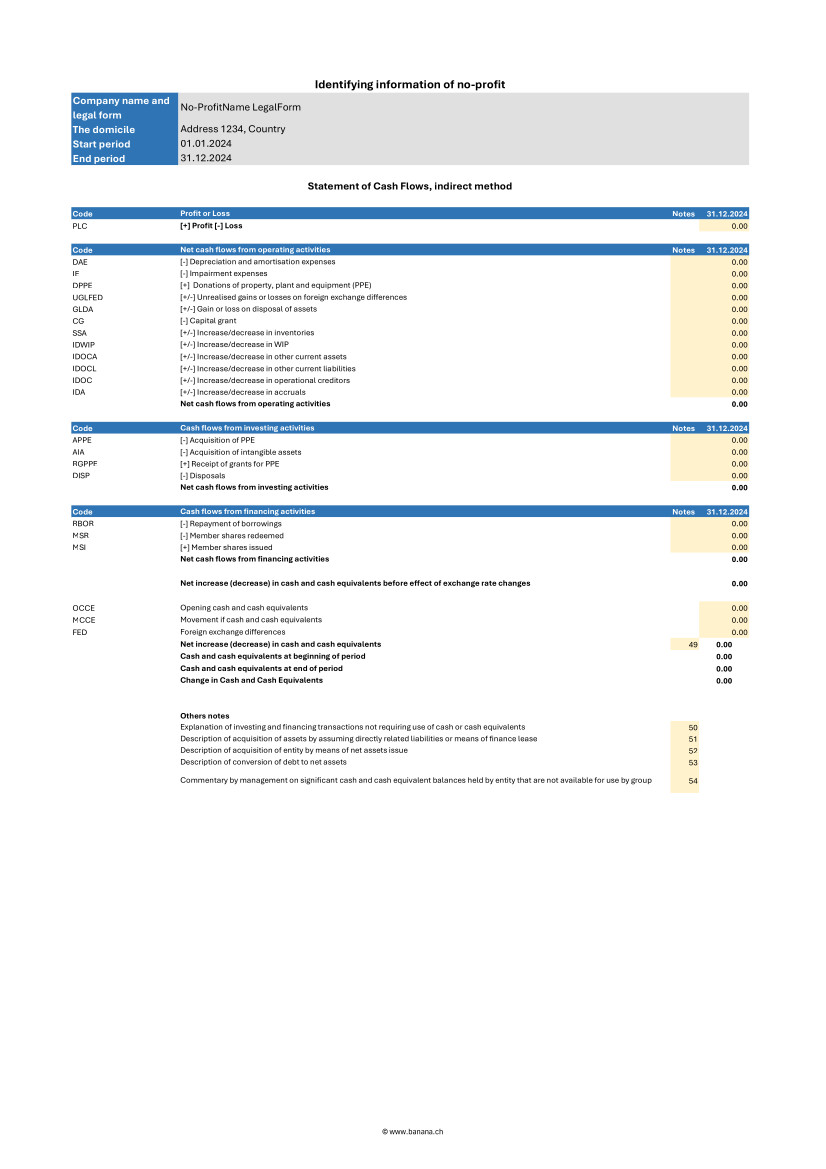
Cash flows from operating activities
This section reports cash flows generated or used by the daily operations of the organization. It must include:
- Income from donations and grants: cash flows from donations, grants, and other funding sources not specifically tied to investments or financing.
- Payments for operating expenses: cash flows used to cover programmatic, fundraising, and administrative expenses, including salaries, supplies, and other operating costs.
- Receivables collections and payables payments: cash flows associated with the management of short-term receivables and payables.
Cash flows from investing activities
This section covers cash flows related to the purchase and sale of long-term assets and other investments. It must include:
- Purchases of fixed assets: cash flows used to purchase tangible fixed assets, such as buildings, equipment, and intangible fixed assets.
- Income from sales of fixed assets: cash flows generated from the sale of long-term assets.
- Financial investments: cash flows related to acquisitions or disposals of financial investments, such as securities and other investment instruments.
Cash flows from financing activities
This section reports cash flows associated with the organization's financing activities, including changes in restricted and unrestricted funds. It must include:
- Receipts from long-term restricted loans and donations: cash flows from donations and loans restricted specifically for long-term purposes.
- Repayment of long-term debts: cash flows used to repay long-term debts and obligations.
- Interest payments and other financing costs: cash flows related to interest payments and other financing-related costs.
Reconciliation of net income to net cash flow from operating activities
This section is critical to linking net income with actual cash flows from operations. It must include:
- Net income: the net economic result of the organization for the period.
- Adjustments for nonmonetary items: for example, depreciation and amortization.
- Changes in financial statement balances: changes in accounts receivable, accounts payable, inventories and other operating items.
- Extraordinary items: any extraordinary non-recurring cash inflows or outflows.
Explanatory notes
Explanatory notes should include detailed information regarding the accounting policies adopted, explanations of major items in the financial statements, and details of material subsequent events that could affect the understanding of the financial statements.
Here is what the explanatory notes must contain.
Information on accounting policies adopted
The notes to the financial statements should provide a detailed description of the accounting policies followed by the organization. This information helps users of financial statements understand the principles on which the figures reported are based.
- Principles of recognition and measurement: description of the criteria used to recognize and measure assets, liabilities, income, and expenses.
- Depreciation methods: explanation of the methods used to depreciate tangible and intangible assets.
- Valuation policies: information on valuation policies for inventories, receivables, and liabilities.
- Revenue recognition: criteria adopted for revenue recognition, including restricted and unrestricted donations.
Additional details on items in the balance sheet and income statement
Explanatory notes should provide additional details that help to better understand the items presented in the balance sheet and income statement.
- Analysis of principal items: detailed explanation of major items of assets, liabilities, income, and expenses. For example, a breakdown of fixed assets, long-term debt, and major revenue categories.
- Significant transactions: description of significant transactions that occurred during the period, such as acquisitions, sales of fixed assets, or extraordinary events.
- Significant changes: explanation of significant changes from previous periods, providing a context for understanding changes in financial data.
Information on possible risks and uncertainties
Explanatory notes should include information on any risks and uncertainties that could affect the organization. This information helps assess the financial strength and risk management of the institution.
- Financial risks: description of key financial risks, such as credit risk, liquidity risk, and market risk, and the policies adopted to manage them.
- Contingencies and contingent liabilities: information on legal contingencies, contingent liabilities, or other uncertain events that could have a significant financial impact.
- Risk management: details of the risk management strategies and policies implemented by the organization to mitigate the effects of such risks.
Segment reporting if applicable
If the organization operates in different industries or geographic areas, the explanatory notes should include segment reporting information to provide a more detailed view of financial and operational performance.
- Information by segment: details on revenues, expenses, assets, and liabilities for each operating or geographic segment.
- Aggregation criteria: explanation of the criteria used to aggregate data for different segments.
- Performance by segment: analysis of the financial and operational performance of each segment, highlighting differences and relative contributions to the overall performance of the organization.
Accrual accounting requirement
The INPAG standard requires that all transactions be recorded on an accrual basis. This means that transactions must be recognized in the period in which they occur, regardless of actual cash flows. Adopting accrual accounting provides a more accurate and realistic view of an organization's financial position and performance, improving the transparency and reliability of financial information.
Examples for Income from donations
When a donation is promised but has not yet been received insert:
- in Debtor Account column the account Debtors from donations.
- in Creditor Account column the account Income from donations.
- in the Amount column the promised amount.
This record recognizes the income as a debt, reflecting the promise of the donation, even though the money has not yet been received.
When the donation is actually received insert:
- in the Debtor Account column the account Bank.
- in the Creditor Account column the account Donation debtor.
- in the Amount column the received amount.
This recording adjusts the accounts once the money is actually received, eliminating the previously recorded debt.
Examples for project expenses
When an invoice for project services is received but not yet paid insert:
- in the Debtor Account column the account Project expenses.
- in the Creditor Account column the account Creditors.
- in the Amount column the invoice total amount.
This entry recognizes the expense when the invoice is received, regardless of whether it has been paid or not.
When the invoice is actually paid insert:
- in the Debtor Account column the account Creditors.
- in the Creditor Account column the account Bank.
- in the Amount column the paid invoice total amount.
This entry reduces creditors once the invoice has been paid, reflecting actual cash flow.
Benefits of accrual accounting
Adopting accrual accounting, as required by the INPAG standard, ensures that revenues and expenses are recorded in the correct period. This approach provides a more accurate view of the organization's financial activities, facilitating better resource management and more accurate planning. Nonprofit organizations that follow these accounting practices can demonstrate greater transparency and accountability, increasing the trust of donors, board members and other stakeholders.
Accounting for restricted grants and donations
INPAG requires that funds be distinguished between restricted and unrestricted funds. This distinction should be visible in the financial statements or notes.
Accounting for grant and donation income according to the INPAG standard requires a specific structure to ensure proper recording and recognition. The accounting process includes the following steps:
- Identify whether there is an enforceable agreement that confers rights and obligations.
- Identify the enforceable obligations in the agreement.
- Determine the amount of the transaction.
- Allocate the transaction amount to the enforceable obligations.
- Recognize the revenue when (or while) the enforceable obligation is satisfied.
- These steps ensure that revenue is recognized appropriately, accurately reflecting the economic activity of the organization.
Example of accounting transactions for restricted donations
Receipt of a grant for a specific project with implementing obligations.
When you receive the amount insert:
- in the Debtor Account column the account Cash/Bank or Donation debtor if the donation was promised.
- in the Creditor Account column the account Liabilities for grants.
- in the Amount column the amount received.
At this stage the amount received is recorded as a liability because the organization has an obligation to meet the conditions of the grant.
When you fulfill the executive obligation insert:
- in the Debtor Account column the account Expense1.
- in the Creditor Account column the account Bank.
- in the Amount column the paid amount.
The second transaction must be insert:
- in the Debtor Account column the account Liabilities from grants.
- in the Creditor Account column the account Income from grants.
- in the Amount column the paid amount.
Once the enforceable obligation is fulfilled, the liability is reduced and the amount is recognized as revenue, reflecting the completion of the project or condition fulfilled.
Accounting for unrestricted donations
Unrestricted donations, which do not impose specific obligations on the organization, follow a simpler accounting process than donations with enforceable obligations. These receipts can be recognized immediately upon receipt.
Example of an unrestricted donation
When you receive the amount insert:
- in the Debtor Account column the account Cash/Bank or Donation debtor if the donation was promised.
- in the Creditor Account column the account Income from donations.
- in the Amount column the received amount.
In this case the amount is immediately recognized as income since there are no specific obligations to be met.
Foreign currency conversion
Managing foreign currency transactions is an essential part of accounting, especially for nonprofit organizations that receive international grants and donations. The INPAS standard establishes precise rules for managing these transactions, including disclosure of foreign exchange gains and losses and retranslation of foreign currency monetary assets and liabilities related to grant agreements.
Foreign currency transactions must be translated into the functional currency using the exchange rate in effect on the date of the transaction. Monetary items, such as debtors and creditors, must be retranslated at the balance sheet date to reflect current exchange rates.
Example of transactions for foreign currency conversion
Receipt of 10'000$ grant when the exchange rate is 1$ = 0.90€.
Initial acknowledgement:
- in the Debtor Account column the account Cash/Bank.
- in the Creditor Account column the account Liabilities for grants.
- in the Amount column the amount 9'000€ (10'000$ * 0.90€ = 9'000€).
In this case the grant is recorded in euros at the exchange rate in effect at the time of the transaction.
Retranslation on the balance sheet date with the exchange rate 1$ = 0.85€.
- in the Debtor Account column the account Loss on exchange.
- in the Creditor Account column the account Cash/Bank.
- in the Amount column the lost amount 500€.
At the balance sheet date the grant must be retranslated at the new exchange rate. The difference between the initial value and the retranslated value is recorded as an exchange loss.
Treatment of exchange rate changes on grants
Exchange rate differences on monetary items related to grants should be treated in a manner consistent with the nature of the transaction. For example, if a grant received is to be spent on a specific project and the exchange rate varies, the amount to be reimbursed could differ due to exchange rate fluctuations.
For example a grant received of 10'000$ must be spent on a specific project. If the exchange rate varies and the grant must be partially repaid due to exchange rate differences.
No INPAS adoption for certain transactions
When an organization chooses not to apply INPAS standard for certain transactions, it is essential to provide a clear explanation and details of the accounting management adopted. The INPAS standard requires disclosure of the following information to maintain transparency and understandability in financial statements.
Mandatory disclosures in the case of no INPAS adoption
- Disclosure of transactions not compliant with INPAS
- The organization must specify which transactions do not follow INPAS standards.
- Example: “Donations in kind were not accounted for in accordance with INPAS standards.”
- Accounting treatment adopted
- The alternative accounting treatment used for these transactions must be described.
- Example: “In-kind donations were recorded at appraised value rather than market value according to INPAS guidelines.”
- Rationale for non adoption of INPAS
- It is necessary to explain the reasons why INPAS standards were not applied.
- Example: “Valuation of in-kind donations according to INPAS standards required specialized skills that the organization does not currently possess.”
- Impact on budgets
- It must be indicated how the financial statements would differ if INPAS requirements had been applied.
- Example: “If in-kind donations had been valued according to INPAS, the total value of income would have increased by €10,000.”
- Quantification of differences
- Where possible differences between the accounting treatment adopted and that provided by INPAS should be quantified, without excessive costs.
- Example: “Donations in kind were recorded at €5,000, while according to INPAS the correct value would have been €15,000, resulting in a difference of €10,000.”
References
- International Financial Reporting For Non Profit Organisations: www.ifr4npo.org
International Non-Profit Accounting Guidance - INPAS Standard Template
International Non-Profit Accounting Guidance - INPAS Standard Template[This page is currently being updated]
The INPAS International template for associations provides a comprehensive framework for organizing financial transactions and reporting for associations adhering to international standards.
This chart of accounts template is designed to streamline accounting processes, ensure consistency in financial reporting and facilitate compliance with regulatory requirements. With a user-friendly format and customizable accounts name, associations can efficiently track income, expenses, assets and liabilities, enabling clear and transparent financial management. Whether managing donations, membership dues or program expenditures, this template offers flexibility and adaptability to suit the unique needs of diverse associations while promoting transparency and accountability in financial operations.
The chart of accounts has been designed and interpreted based on the INPAS drafts and may require adjustments once the final guidance is published in 2025.
The compliance of the accounting with the INPAS standard always depends on the accountant and the auditor working on the accounts.
Updates may be possible following the final publication of INPAS in 2025.
Using Banana Accounting Plus you can manage the balance sheet and the income statement. All other documents are easily obtained thanks to the Excel template.
Create your file
- Create a new file, starting from this template (Template ID +11255), using one of the methods explained.
- With the command File → File properties, set the period, the association name and the basic currency.
- With the command File → Save as, save the file. Enter the association name and year in the file name.
For example "no-profit-2024.ac2".
See also Organize accounting files locally, online or in the cloud
Customize the Accounts table
Once you have entered the transactions, you can check the Accounts table. You will have an overview of your assets, liabilities, income and expenses, which allows you to keep your balance under control.
Customize the Accounts table to suit your needs: you can add, delete and edit accounts, groups or descriptions.
Enter Opening Balances
In the Opening column enter the opening balances of the Accounts. Negative asset account amounts are entered with a minus sign in front.
Enter the balances of the previous year
If you are creating a new accounting and you want the amounts of the previous year to appear in the statements to be printed, you must insert the values in the appropriate column. Go to the Previous view and in the Previous Year column enter the values.
Enter the Transactions
Register the accounting transactions in the journal. Enter the date, the document number and the description. Enter the destination account into the Debit account column, and the account of origin in the Credit account. Then add the amount.
You can modify the journal at any time.
Manage funds, grants and donations, project and operating expenses
Manage funds in the Balance Sheet divided by project.

Manage grants and donations in the Income Statement.
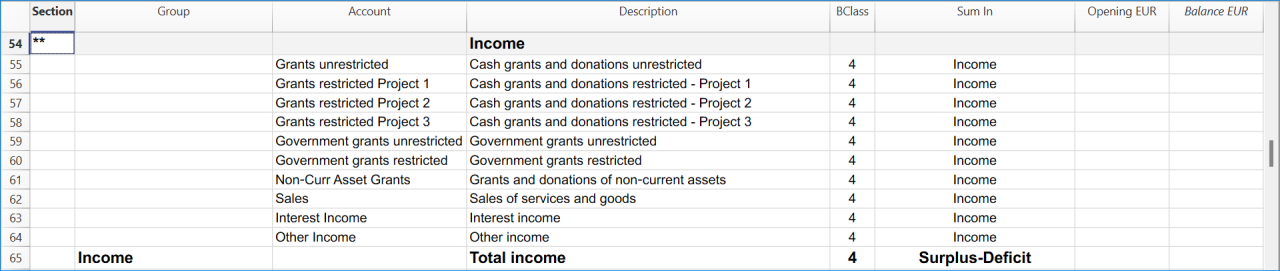
Manage projects expenses and operating expenses in the Income Statement.

Get the Statement of Financial Position and the Income Statement
At any time of the year you can create your Balance sheet, which is a financial report of your assets, liabilities and equity and the Profit and Loss statement, which includes income and expenses. You will achieve optimal reports because you can always modify the data until they are perfect. You have the possibility to print out your statements or save them in PDF format.
Complete the documentation using the Excel Template
When you get the balance sheet and the income statement, complete the Excel template to get all the documents needed to comply with the INPAG standard.
Income & Expenses: INPAS Standard Template
Income & Expenses: INPAS Standard Template[This page is currently being updated]
The chart of accounts has been designed and interpreted based on the INPAS drafts and may require adjustments once the final guidance is published in 2025.
The compliance of the accounting with the INPAS standard always depends on the accountant and the auditor working on the accounts.
Updates may be possible following the final publication of INPAS in 2025.
Free Excel Standard INPAS Template
Free Excel Standard INPAS Template timoCash Manager Accounting for Non-profit Organizations
Cash Manager Accounting for Non-profit OrganizationsThis template has only one Cash account and descriptive income & expense categories, that facilitate data entry. Get the Income Statement and Balance Sheet quickly, manage members and projects.
For more information on solutions for associations go to the Accounting for non-profit organizations page.
Create your File
- Create a new file, starting from this template (Template ID +10936), using one of the methods explained.
- With the command File → File properties, set the period, the company name and the basic currency.
- With the command File → Save as, save the file. Enter the company name and year in the file name.
For example "association-2022.ac2".
See also Organize accounting files locally, online or in the cloud
Enter the Transactions
Register the liquidity transactions in the journal. Enter the date, the document number, the description, the category and the amount.
You can modify the journal at any time.
Click here to learn more about transactions.

Check and customize the Categories table
Once you have entered the transactions, you can check the Categories table. You will have an overview of your income and expenses, which allows you to keep your balance under control.

Get the Profit and Loss Statement
At any time of the year you can create your profit and loss statement, which includes income and expenses. You can also compare your current situation with the budget to understand if and where you are spending excessive amounts of money.

Income & Expenses Accounting for Non-profit Organizations
Income & Expenses Accounting for Non-profit OrganizationsThis template presents a synthetic chart of accounts with descriptive accounts that facilitate data entry. Get the Income Statement and Balance Sheet quickly, manage members and projects.
For more information on solutions for associations go to the Accounting for non-profit organizations page.
Create your File
- Create a new file, starting from this template (Template ID +10623), using one of the methods explained.
- With the command File → File properties, set the period, the company name and the basic currency.
- With the command File → Save as, save the file. Enter the company name and year in the file name.
For example "association-2022.ac2".
See also Organize accounting files locally, online or in the cloud
Enter the Transactions
Register the liquidity transactions in the journal. Enter the date, the document number, the description, the account and the amount.
You can modify the journal at any time.
Click here to learn more about transactions.

Check and customize Accounts and Categories
Once you have entered the transactions, you can check the Accounts table and the Categories table. You will have an overview of your assets, liabilities, income and expenses, which allows you to keep your balance under control.

Get the the Profit and Loss Statement and the Balance Sheet
At any time of the year you can create your profit and loss statement, which includes income and expenses. You can also compare your current situation with the budget to understand if and where you are spending excessive amounts of money.
Double-Entry Accounting for Nonprofit Organizations
Double-Entry Accounting for Nonprofit OrganizationsThis template presents a synthetic chart of accounts with descriptive accounts that facilitate data entry. Get the Income Statement and Balance Sheet quickly, manage members and projects.
For more information on solutions for associations go to the Accounting for non-profit organizations page.
Create your file
- Create a new file, starting from this template (Template ID +10619), using one of the methods explained.
- With the command File → File properties, set the period, the company name and the basic currency.
- With the command File → Save as, save the file. Enter the company name and year in the file name.
For example "association-2022.ac2".
See also Organize accounting files locally, online or in the cloud
Enter the Transactions
Register the accounting transactions in the journal. Enter the date, the document number and the description. Enter the destination account into the Debit account column, and the account of origin in the Credit account. Then add the amount.
You can modify the journal at any time.

Check and customize the Accounts table
Once you have entered the transactions, you can check the Accounts table. You will have an overview of your assets, liabilities, income and expenses, which allows you to keep your balance under control.
Customize the Accounts table to suit your needs: you can add, delete and edit accounts, groups or descriptions.

Enter Opening Balances
In the Opening column enter the opening balances of the Accounts. Negative asset account amounts are entered with a minus sign in front.
Enter the balances of the previous year
If you are creating a new accounting and you want the amounts of the previous year to appear in the statements to be printed, you must insert the values in the appropriate column. Go to the Previous view and in the Previous Year column enter the values.
Get the Profit and Loss Statement and the Balance Sheet
At any time of the year you can create your Balance sheet, which is a financial report of your assets, liabilities and equity and the Profit and Loss statement, which includes income and expenses. You will achieve optimal reports because you can always modify the data until they are perfect. You have the possibility to print out your statements or save them in PDF format.


Multi-Currency Accounting for Nonprofit Organizations
Multi-Currency Accounting for Nonprofit OrganizationsThis template presents a brief chart of accounts with descriptive accounts that facilitate data entry. Get the Income Statement and Balance Sheet quickly, manage members and projects.
For more information on solutions for associations go to the Accounting for non-profit organizations page.
Create your file
- Create a new file, starting from this template (Template ID +10621), using one of the methods explained.
- With the command File → File properties, set the period, the company name and the basic currency.
- With the command File → Save as, save the file. Enter the company name and year in the file name.
For example "association-2022.ac2".
See also Organize accounting files locally, online or in the cloud
Enter the Transactions
Register the liquidity transactions in the journal. Enter the date, the document number and the description. Enter the destination account into the Debit Account column, and the account of origin in the Credit Account column. Then add the amount and specify the currency.
You can modify the journal at any time.
Click here to learn more about transactions.

Check and customize the Accounts table
Once you have entered the transactions, you can check the Accounts table. You will have an overview of your assets, liabilities, income and expenses, which allows you to keep your balance under control.

Get the Profit and Loss Statement and the Balance Sheet
At any time of the year you can create your balance sheet, which is a financial report of your assets, liabilities and equity and the profit and loss statement, which includes income and expenses. You can also compare your current situation with the budget to understand if and where you are spending excessive amounts of money.


非营利组织
非营利组织 fei非营利组织会计
非营利组织会计 feiReligious Entities Universal Templates
Banana Accounting offers a few universal templates available for free for the Religious organizations accounting are the following:
Income & Expense Accounting for a Religious Organization
Income & Expense Accounting for a Religious Organization michaelKirchgemeinde | Einnahmen-Ausgaben-Rechnung
Kirchgemeinde | Einnahmen-Ausgaben-RechnungDiese Vorlage enthält einen HRM2-Kontenplan mit den typischen Konten und Kategorien für die Buchhaltung einer Kirchgemeinde. Einnahmen und Ausgaben lassen sich einfach erfassen – auch ohne Kenntnisse der doppelten Buchhaltung oder der Unterscheidung zwischen Soll und Haben.
In der Tabelle Konten sind die Bilanzkonten aufgeführt, während die Tabelle Kategorien der Erfassung von Einnahmen und Ausgaben dient.
Die Einnahmen und Ausgaben sind in mehrere Untergruppen gegliedert. Zudem stehen in der Tabelle Kategorien zwei Arten von Kostenstellen zur Verfügung, mit denen sich die Kosten der Kirchgemeinde und des Oratoriums getrennt verwalten lassen.
Konten und Kategorien können individuell angepasst und auf die spezifischen Bedürfnisse Ihrer Buchhaltung zugeschnitten werden.
Für erweiterte Anforderungen empfehlen wir die Vorlage Doppelte Buchhaltung für Kirchgemeinde.
Weitere Details finden Sie in unserer Dokumentation, insbesondere zu folgenden Themen:
Double-Entry Accounting for a Religious Organization
Double-Entry Accounting for a Religious Organization michaelMulti-Currency Accounting for a Religious Organization
Multi-Currency Accounting for a Religious Organization michael非营利协会或组织会计
非营利协会或组织会计 feiSpendenbescheinigung für Vereine (Banana+)
Spendenbescheinigung für Vereine (Banana+)Diese Erweiterung für Banana Buchhaltung Plus ermöglicht die einfache Erstellung von Spendenbescheinigungen für in der Tabelle Konten erfasste Spender. Eine Spendenbescheinigung bestätigt eine freiwillige Spende an einen Verein. Vereine stellen ihren Mitgliedern und Unterstützern solche Bescheinigungen aus, da Spenden häufig steuerlich abzugsfähig sind.
Damit die Spendenbescheinigungen korrekt erstellt werden können, müssen die Mitglieder bzw. Spender in der Buchhaltung als Kostenstelle KS3 erfasst werden.
Voraussetzungen
Für die Nutzung dieser Erweiterung benötigen Sie:
- Banana Buchhaltung Plus (Version 10.1.7 oder höher).
- Einen Professional- oder Advanced-Plan von Banana Buchhaltung Plus.
Installation und Verwendung der Erweiterung
- Installieren Sie die Erweiterung Spendenbescheinigung für Vereine (Banana+).
Weitere Informationen zur Installation von Erweiterungen finden Sie auf der Seite Erweiterungen verwalten. - Nach der Installation steht die Erweiterung im Menü Erweiterungen zur Verfügung und kann von dort aus gestartet werden.
Spendenbescheinigung erstellen
Gehen Sie wie folgt vor, um eine Spendenbescheinigung zu erstellen:
- Erfassen Sie in der Buchhaltungsdatei unter Datei > Eigenschaften (Stammdaten) > Registerkarte 'Adresse' die Angaben des Vereins.
- Wählen Sie im Menü Erweiterungen die Erweiterung Spendenbescheinigung für Vereine (Banana+) aus.
- Geben Sie im geöffneten Dialogfenster die gewünschte Periode an und bestätigen Sie mit OK.
- Füllen Sie im Einstellungen-Dialog die erforderlichen Felder aus und klicken Sie anschliessend auf die Schaltfläche OK.
Dialogfenster Einstellungen
Sie können verschiedene Angaben der Spendenbescheinigung individuell anpassen.
Starten Sie die Erweiterung über das Menü Erweiterungen > Spendenbescheinigung für Vereine (Banana+).
Nach der Eingabe der gewünschten Periode öffnet sich der Einstellungen-Dialog. Hier können Sie die für die Erstellung der Spendenbescheinigung erforderlichen Angaben erfassen und die gewünschten Einstellungen vornehmen.
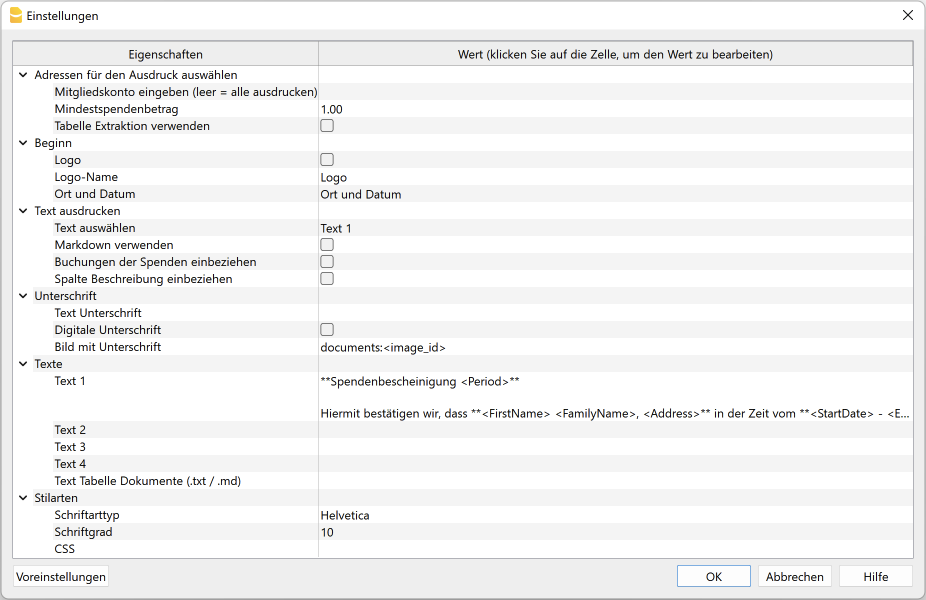
Für die Eingabe eines Werts klicken Sie in der Spalte Wert auf die gewünschte Zeile. Dadurch wird das Eingabefeld geöffnet.
Die Einstellungen sind in folgende Gruppen unterteilt:
- Adressen für den Ausdruck auswählen
- Legen Sie fest, für welche Mitglieds- bzw. Spenderkonten die Spendenbescheinigung erstellt werden soll.
- Beginn
- Definieren Sie das Logo für die Kopfzeile sowie den Ort und das Ausstellungsdatum.
- Text ausdrucken
- Legen Sie den Text der Spendenbescheinigung fest und bestimmen Sie, ob die einzelnen Spendenbuchungen aufgeführt werden sollen.
- Unterschrift
- Definieren Sie den Text und das Bild für die Unterschrift (Signatur).
- Texte (des Briefes)
- Erfassen Sie bis zu 4 Textzeilen oder übernehmen Sie einen in der Tabelle Dokumente gespeicherten Text.
- Stilarten
- Legen Sie die Schriftart und die Schriftgrösse für den Brieftext fest.
Anhand der eingegebenen Daten wird die Spendenbescheinigung erstellt. Diese kann anschliessend gespeichert und ausgedruckt werden.
Adressen für den Ausdruck auswählen
Hier legen Sie fest, für welche Mitglieder bzw. Spender (Kostenstellen KS3) die Spendenbescheinigung erstellt werden soll.
- Mitgliedskonto eingeben (leer = alle ausdrucken)
- Geben Sie das Konto eines Mitglieds bzw. Spenders ein (z.B. 10001).
- Um mehrere Konten auszuwählen, geben Sie diese durch Kommas "," getrennt ein (z.B. 10001,10002,10005).
- Bleibt das Feld leer, werden Spendenbescheinigungen für alle Mitglieder bzw. Spender erstellt.
- Mindestspendenbetrag
- Konten mit einem Saldo unter dem angegebenen Betrag werden nicht berücksichtigt. Standardmässig ist der Wert 1.00 eingestellt. Dadurch werden Konten mit einem Saldo von 0.00 ausgeschlossen.
- Geben Sie "0.00" ein, um auch Konten mit einem Nullsaldo (0.00) einzuschliessen.
- Tabelle Extraktion verwenden
- Verwendet die in der Tabelle Extraktion enthaltenen Konten.
- Führen Sie dazu zuerst den Befehl Daten > Zeilen extrahieren und sortieren… aus, um die gewünschten Konten in die Tabelle Extraktion zu übernehmen.
Beginn
Hier legen Sie das Logo für die Kopfzeile sowie den Ort und das Ausstellungsdatum der Spendenbescheinigung fest.
- Logo (Kontrollkästchen aktivieren)
- Aktivieren Sie diese Option, um ein Logo in die Kopfzeile einzufügen. Das Logo kann über das Menü Datei > Logo einrichten definiert werden.
- Logo-Name
- Geben Sie den Namen der zu verwendenden Logo-Anpassung ein, sofern mehrere Logos definiert sind.
- Ort und Datum
- Geben Sie den Ort und das Ausstellungsdatum der Spendenbescheinigung ein.
Text ausdrucken
Hier legen Sie fest, welcher Text auf der Spendenbescheinigung gedruckt wird und ob zusätzlich eine Übersicht der Spendenbuchungen eingefügt werden soll.
- Text auswählen
- Wählen Sie den gewünschten Text aus der Liste aus.
- Informationen zum Erfassen eines Textes finden Sie im Abschnitt Texte.
- Markdown verwenden (Kontrollkästchen aktivieren)
- Aktivieren Sie diese Option, um den ausgewählten Text als Markdown zu interpretieren. Diese Funktion steht mit dem Advanced-Plan von Banana Buchhaltung Plus zur Verfügung.
- Spendenbuchungen einbeziehen (Kontrollkästchen aktivieren)
- Aktivieren Sie diese Option, um eine zusammenfassende Tabelle mit den Spendenbuchungen aus der Tabelle Buchungen in die Spendenbescheinigung einzufügen.
- Spalte Beschreibung einbeziehen (Kontrollkästchen aktivieren)
- Diese Option ist nur verfügbar, wenn Spendenbuchungen einbeziehen aktiviert wurde. Aktivieren Sie sie, um zusätzlich den Buchungstext (Spalte Beschreibung) im Ausdruck anzuzeigen.
Unterschrift
Hier legen Sie fest, welcher Unterschriftstext und welches Bild mit der digitalen Unterschrift auf der Spendenbescheinigung gedruckt werden sollen.
- Text Unterschrift
- Geben Sie den Vor- und Nachnamen der Person ein, welche die Spendenbescheinigung ausstellt.
- Digitale Unterschrift (Kontrollkästchen aktivieren)
- Aktivieren Sie diese Option, um eine digitale Unterschrift (Bild) in die Spendenbescheinigung einzufügen.
- Bild mit Unterschrift
- Das Bild mit der Unterschrift kann auf zwei Arten eingefügt werden:
- Aus der Tabelle Dokumente: Verwenden Sie die Syntax documents:<name_id>, um ein in der Tabelle Dokumente gespeichertes Bild mit der Unterschrift zu übernehmen. Ersetzen Sie <name_id> durch den Wert aus der Spalte ID (ID-Wert) der Tabelle Dokumente (z.B. "documents:unterschrift").
- Aus einer Bilddatei: Verwenden Sie die Syntax file:document/<bildname.png>, um ein Bild einzufügen, das sich im selben Verzeichnis/Ordner wie die Buchhaltungsdatei (.ac2) befindet. Unterstützt werden die Formatet .png und .jpg (z.B. "file:document/unterschrift.png").
- Das Bild mit der Unterschrift kann auf zwei Arten eingefügt werden:
Texte
Geben Sie hier den Text für die Spendenbescheinigung ein. Sie können bis zu vier verschiedene Texte erfassen oder einen in der Tabelle Dokumente gespeicherten Text übernehmen.
- Text 1, Text 2, Text 3, Text 4
- Geben Sie den gewünschten Text ein, der auf der Spendenbescheinigung erscheinen soll. Der Text kann aus mehreren Zeilen bestehen.
- Die Texte können als Text oder im Markdown-Format erfasst werden.
- Sie können bis zu vier verschiedene Texte hinterlegen und später auswählen, welcher verwendet werden soll.
- Text 1 enthält einen Standardtext, den Sie bei Bedarf anpassen oder ersetzen können.
- Text aus der Tabelle Dokumente (.txt / .md)
- Um einen in der Tabelle Dokumente gespeicherten Text zu verwenden, geben Sie dessen ID-Wert ein (z.B. "Brief", "Brief.txt", "Brief.md" usw.).
- Es können sowohl Texte als auch Markdown-Texte verwendet werden.
- Bei Markdown-Texten muss der ID-Wert in der Tabelle Dokumente mit der Endung .md versehen sein. Auch der vollständige Dateiname muss mit ".md" enden (z.B. "Brief.md").
Stilarten
Hier legen Sie die Schriftart und die Schriftgrösse für die Brieftexte fest.
- Schriftart
- Wählen Sie die gewünschte Schriftart aus.
- Standardmässig wird "Helvetica" verwendet.
- Schriftgrösse
- Geben Sie die gewünschte Schriftgrösse ein.
- Der Standardwert ist "10"
- CSS (optional)
- Mit eigenen CSS-Stilen können Sie das Erscheinungsbild der Spendenbescheinigung individuell anpassen, beispielsweise die Textformatierung, Schriftarten, Abstände oder die Positionierung von Elementen.
Geben Sie dazu den ID-Wert des CSS-Dokuments ein, das Sie zuvor in der Tabelle Dokumente erstellt haben. Diese Funktion erfordert den Advanced-Plan von Banana Buchhaltung Plus.
- Mit eigenen CSS-Stilen können Sie das Erscheinungsbild der Spendenbescheinigung individuell anpassen, beispielsweise die Textformatierung, Schriftarten, Abstände oder die Positionierung von Elementen.
Vordefinierte CSS-Stile
/* Donation Statement (Banana+) predefined CSS */

@page {
   margin-top: 0.0cm;
   margin-bottom: 0.0cm;
   margin-left: 0.0cm;
   margin-right: 0.0cm;
}

body {
   font-family: $font_family;
   font-size: $font_size;
}

.bold {
   font-weight: bold;
}

.right {
   text-align: right;
}

.center {
   text-align: center;
}

.header_address_row_1 {
   font-family: $font_family;
   font-size: $font_size_header;
}

.header_address_row_2_to_5 {
   font-family: $font_family;
   font-size: $font_size;
}

.header_text {
  margin-top: 1.2cm;
  margin-left: 1.2cm;
  margin-right: 1.2cm;
  text-align: right;
  position: absolute;
}

.logo {
  margin-top: 1.2cm;
  margin-left: 1.34cm;
  margin-right: 1.2cm;
  position: absolute;
}

.address {
  top: 4.5cm;
  left: 12.3cm;
  width: 7.5cm;
  position: absolute;
}

.date {
   margin-top: 4.6cm;
   margin-left: 1.5cm;
   position: absolute;
}

.text {
   margin-top: 8.5cm;
   margin-left: 1.5cm;
   margin-right: 1.0cm;
}

.transactions_details {
   margin-top: 0.5cm;
   margin-left: 1.65cm;
}

.transactions_rows {
   border-bottom:thin solid black;
}

.transactions_total {
   font-weight: bold;
   border-top:thin solid black;
   border-bottom:thin solid black;
}

.signature {
   margin-top: 1.5cm;
   margin-left: 12.3cm;
}

.image-signature {
   height: 15mm;
   margin-left: 12.3cm;
}
Tabelle Extraktion (Befehl Zeilen extrahieren und sortieren)
Mit der Funktion Zeilen extrahieren und sortieren... können Sie die Mitglieds- bzw. Spenderkonten auswählen, für die eine Spendenbescheinigung erstellt werden soll. Dies ist besonders nützlich, wenn Sie die Spendenbescheinigung nur für bestimmte Mitglieder oder Spender erstellen möchten, ohne deren Konten direkt in den Einstellungen der Erweiterung angeben zu müssen.
Wenn Sie Ihre Mitglieder bzw. Spender in der Tabelle Konten verschiedenen Gruppen zugeordnet haben, können Sie über den Menübefehl Daten > Zeilen extrahieren und sortieren... gezielt die Konten einer oder mehrerer Gruppen extrahieren. Im folgenden Beispiel werden die Mitglieder bzw. Spender der Gruppen S1 und S3 ausgewählt.
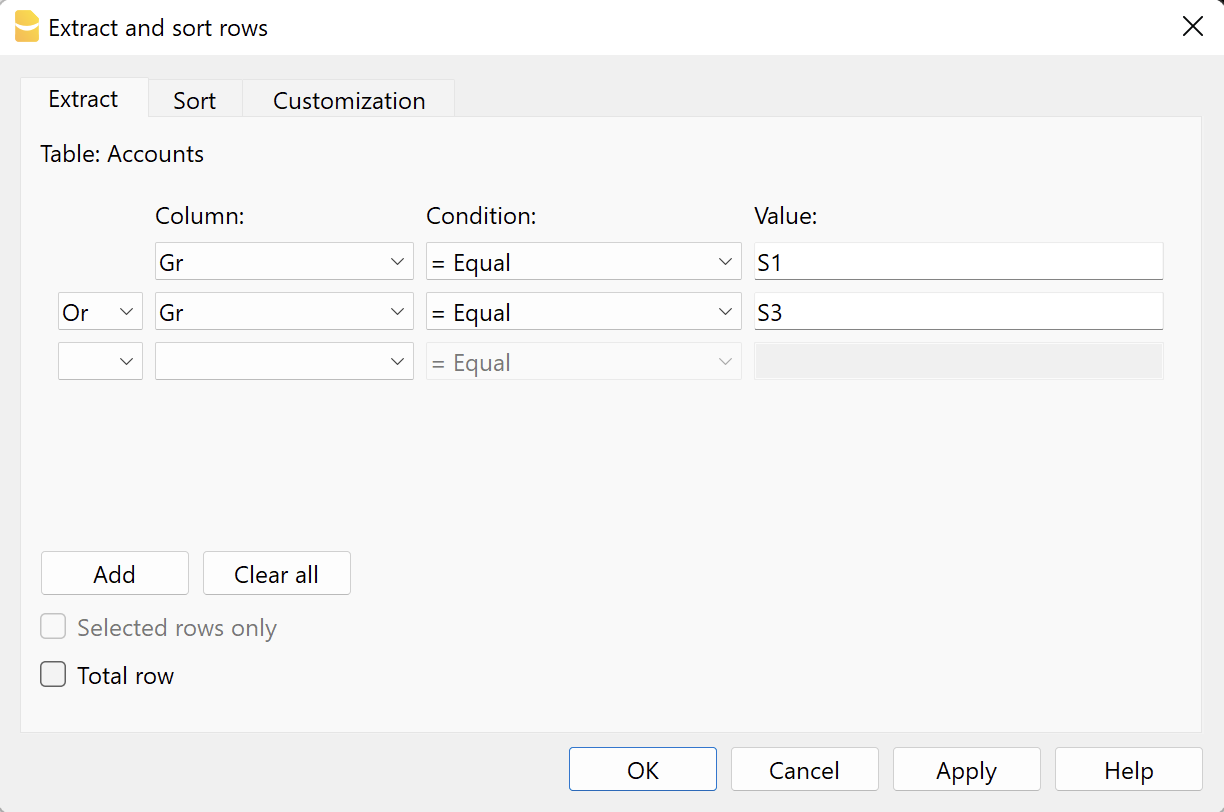
Um die extrahierten Zeilen zu verwenden, gehen Sie wie folgt vor:
- Extrahieren Sie die gewünschten Zeilen über den Menübefehl Daten > Zeilen extrahieren und sortieren...
- Führen Sie die Erweiterung aus und aktivieren Sie im Abschnitt Adressen für den Ausdruck auswählen des Dialogs Einstellungen das Kontrollkästchen Tabelle Extraktion verwenden.
Wurden vor dem Erstellen der Spendenbescheinigung keine Zeilen extrahiert, wird eine Warnmeldung angezeigt und die Spendenbescheinigung für alle Mitglieder bzw. Spender erstellt.
Spendenbescheinigung mit Standardtext
Es gibt zwei Möglichkeiten, einen Standardtext für die Spendenbescheinigung zu verwenden:
- Text direkt im Einstellungen-Dialog erfassen
- Geben Sie den gewünschten Text in einem der Felder Text 1, Text 2, Text 3 oder Text 4 ein.
Der Text kann aus mehreren Zeilen bestehen und umfasst maximal 4 Textzeilen. - Wählen Sie unter Text ausdrucken > Text auswählen den gewünschten Text aus.
Wichtig: Aktivieren Sie unter Text ausdrucken die Option Markdown verwenden nicht, wenn Sie einen Standardtext verwenden.
- Geben Sie den gewünschten Text in einem der Felder Text 1, Text 2, Text 3 oder Text 4 ein.
- Text in der Tabelle Dokumente erfassen
- Fügen Sie in der Tabelle Dokumente ein Dokument vom Typ Standardtext (text/plain) hinzu.
Es können beliebig viele Standardtexte gespeichert und später verwendet werden.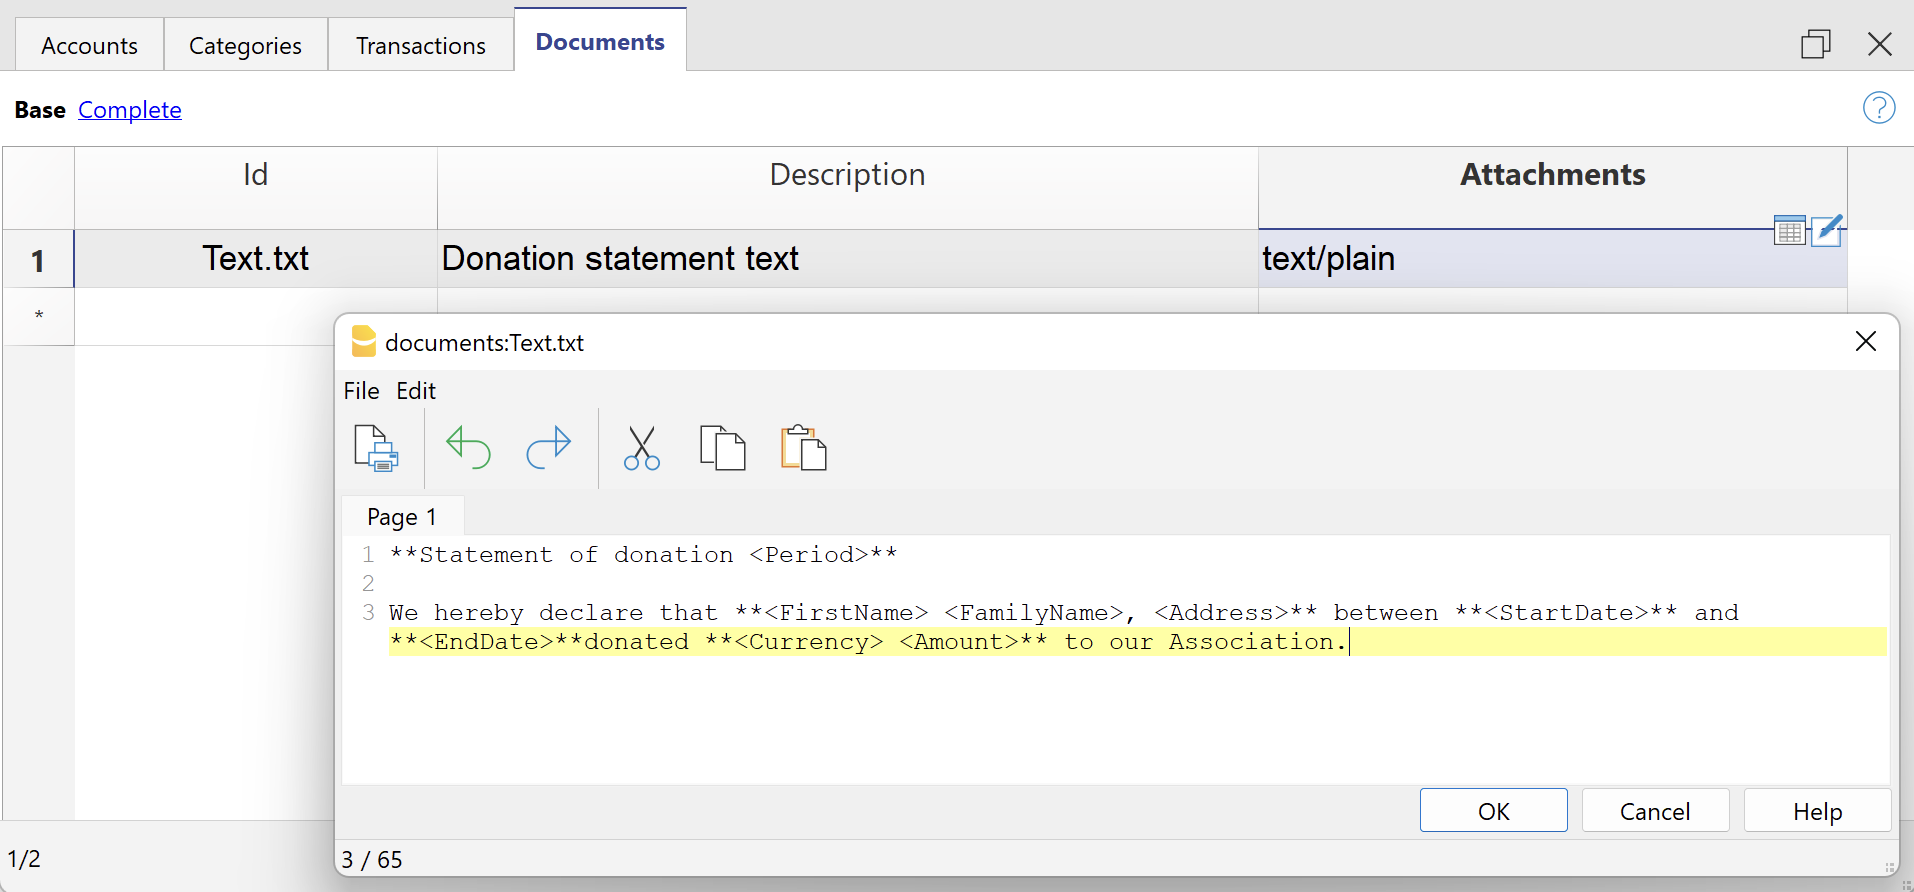
- Fügen Sie in der Tabelle Dokumente ein Dokument vom Typ Standardtext (text/plain) hinzu.
- Im Einstellungen-Dialog:
- Wählen Sie unter Text ausdrucken > Text auswählen die Option Text Tabelle Dokumente (.txt / .md) aus. Um diese Option anzuzeigen, führen Sie auf dem Feld 'Text 1' einen Doppelklick aus. Daraufhin wird ein Dropdown-Menü mit den verfügbaren Texten angezeigt.
- Geben Sie unter Texte > Text Tabelle Dokumente (.txt / .md) den ID-Wert des Markdown-Textes ein, der in der Tabelle Dokumente hinterlegt ist (z.B. "text.txt").
Für alle Textzeilen:
- Sie können einzelne Wörter oder Textabschnitte fett hervorheben. Setzen Sie dazu den gewünschten Text zwischen zwei Sternchen **.
Beispiele:- **text** = text
- **textA textB** textC = textA textB textC
- Werden in den Textzeilen die folgenden Werte (in Englisch) verwendet, ersetzt die Erweiterung diese automatisch durch die entsprechenden Werte:
- <Period> : Ausgewählte Periode
- <Account> : Mitgliedskonto
- <NamePrefix> : Höflichkeit/Anrede (z.B. Herr, Frau, Dr. usw.)
- <FirstName> : Vorname des Mitglieds
- <FamilyName> : Nachname des Mitglieds
- <OrganisationName> : Organisation (z.B. Verein, Stiftung oder andere Organisation)
- <Address> : Adresse des Mitglieds
- <AddressExtra> : Adresszusatz
- <Region> : Kanton, Region oder Provinz
- <Country> : Land
- <StartDate> : Anfangsdatum der ausgewählten Periode
- <EndDate> : Enddatum der ausgewählten Periode
- <Currency> : Währung
- <Amount> : Gesamtsumme aller Spenden
Spendenbescheinigung mit Markdown-Text
Markdown ist eine einfache Auszeichnungssprache, mit der formatierter Text in einem gewöhnlichen Texteditor erstellt werden kann. Die leicht lesbare Syntax ermöglicht es, Überschriften, Listen, Hervorhebungen und weitere Formatierungen ohne spezielle Textverarbeitungssoftware zu erstellen.
Für die Verwendung von Markdown ist der Advanced-Plan von Banana Buchhaltung Plus erforderlich.
Es gibt zwei Möglichkeiten, einen Markdown-Text zu erfassen und zu verwenden:
- Markdown-Text direkt im Einstellungen-Dialog erfassen
- Geben Sie den gewünschten Text in den Feldern Text 1, Text 2, Text 3 oder Text 4 ein.
Es können bis zu vier Textzeilen hinzugefügt werden. - Wählen Sie unter Text ausdrucken > Text auswählen den gewünschten Text aus.
- Aktivieren Sie anschliessend die Option Markdown verwenden.
- Geben Sie den gewünschten Text in den Feldern Text 1, Text 2, Text 3 oder Text 4 ein.
- Markdown-Text in der Tabelle Dokumente erfassen
- Verwenden Sie den Markdown-Editor, um ein neues Dokument zu erstellen, und wählen Sie als Dokumenttyp Markdown-formatierter Text (text/markdown) aus.
Sie können beliebig viele Markdown-Texte hinzufügen. - Der Dateiname in der Spalte ID muss mit der Endung ".md" versehen sein (z.B. "text.md").
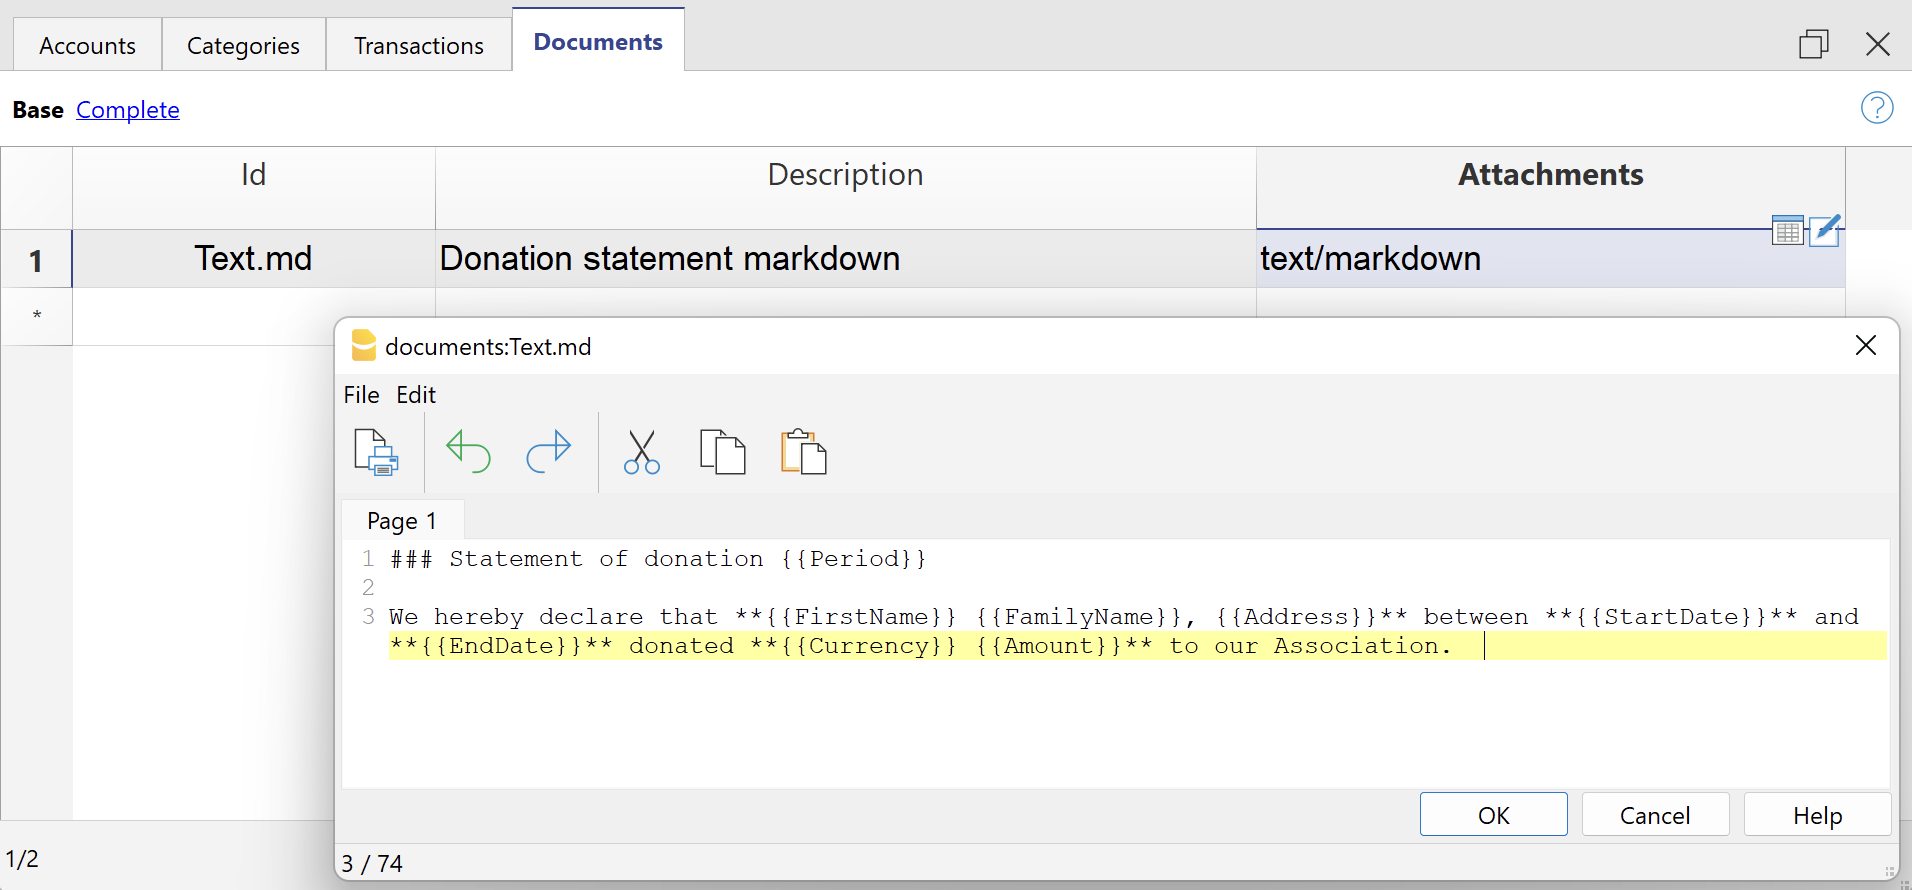
- Im Einstellungen-Dialog:
- Wählen Sie unter Text ausdrucken > Text auswählen die Option Text Tabelle Dokumente (.txt / .md) aus.
- Geben Sie unter Texte > Text Tabelle Dokumente (.txt / .md) den ID-Wert des Markdown-Textes ein, der in der Tabelle Dokumente hinterlegt ist (z.B. "text.md").
- Verwenden Sie den Markdown-Editor, um ein neues Dokument zu erstellen, und wählen Sie als Dokumenttyp Markdown-formatierter Text (text/markdown) aus.
Für alle Textzeilen:
- Werden die hierauf folgenden Werte (in Englisch) in den Textzeilen eingegeben, so werden sie mit den entsprechenden Werte ersetzt:
- {{Period}} : Ausgewählte Periode
- {{Account}} : Mitgliedskonto
- {{NamePrefix}} : Höflichkeit/Anrede (z.B. Herr, Frau, Dr. usw.)
- {{FirstName}} : Vorname des Mitglieds
- {{FamilyName}} : Nachname des Mitglieds
- {{OrganisationName}} : Organisation (z.B. Verein, Stiftung oder andere Organisation)
- {{Address}} : Adresse des Mitglieds
- {{AddressExtra}} : Adresszusatz
- {{Region}} : Kanton, Region oder Provinz
- {{Country}} : Land
- {{StartDate}} : Anfangsdatum der ausgewählten Periode
- {{EndDate}} : Enddatum der ausgewählten Periode
- {{Currency}} : Währung
- {{Amount}} : Gesamtsumme aller Spenden
Beispiel eines Berichtes
Spendenbescheinigung mit Details zu den Buchungen: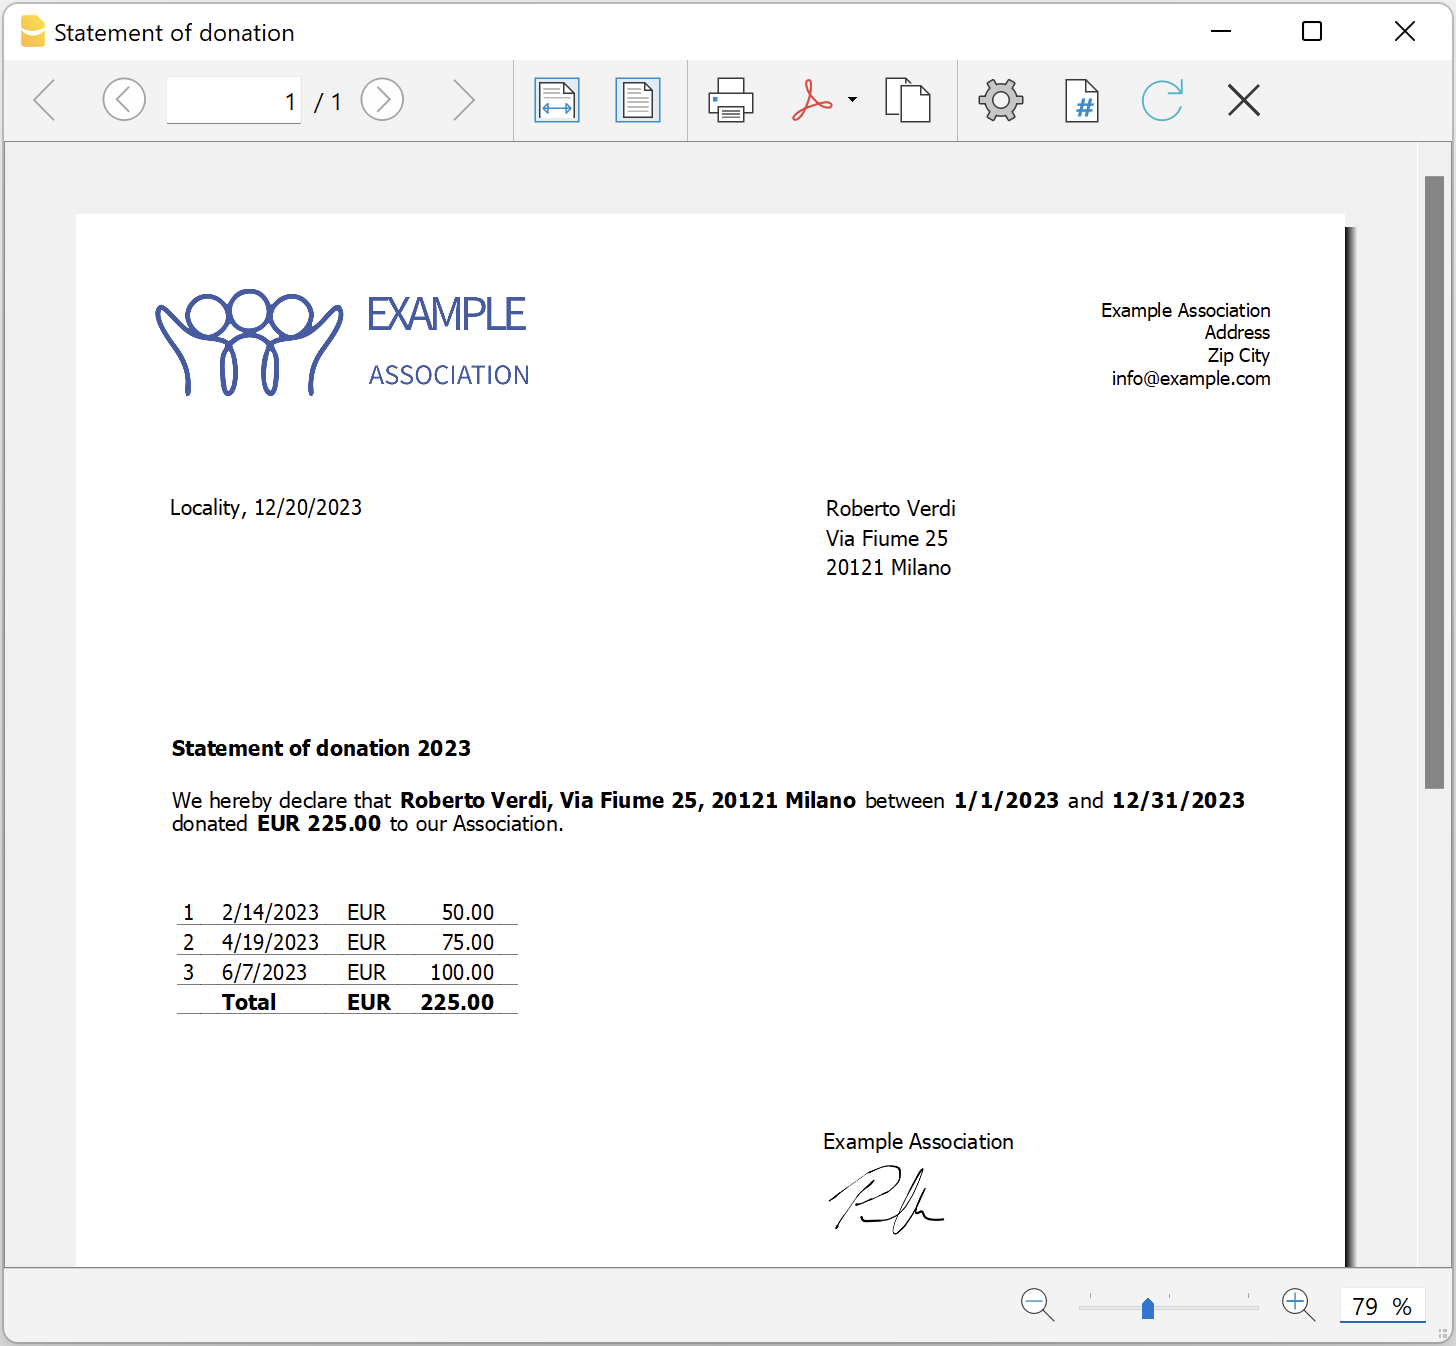
Spendenbestätigung für Vereine (Banana 9)
Spendenbestätigung für Vereine (Banana 9)Eine Spendenbestätigung bestätigt eine freiwillige Zuwendung an einen Verein. In der Regel stellen alle Vereine ihren Mitgliedern und freiwilligen Helfern eine Spendenbestätigung aus, da diese häufig steuerlich abzugsfähig ist.
Die unten vorgestellte Erweiterung ermöglicht es, eine Spendenbestätigung für in Banana Buchhaltung erfasste Spender (Tabelle 'Konten') zu erstellen.
Es ist wichtig, dass die Mitglieder bzw. Spender mit Kostenstellen erfasst werden, wobei die Kostenstelle KS3 zu verwenden ist.
Installation und Anwendung der Banana-Erweiterung
- Banana Buchhaltung (ab Version 9.0.5) installieren.
- Die Banana-Erweiterung Spendenbestätigung für Vereine installieren (siehe hierzu die Seite Erweiterungen verwalten).
- Sobald die Erweiterung installiert ist, erscheint sie im Menü 'Erweiterungen', wo sie ausgeführt werden kann.
Vorgehen zum Ausstellen einer Spendenbestätigung
- In der Buchhaltungsdatei unter Stammdaten > Registerkarte 'Adresse' (Menü Datei) die Angaben des Vereins erfassen.
- Im Menü 'Erweiterungen' die Banana-Erweiterung Spendenbestätigung für Vereine ausführen.
- Im daraufhin erscheinenden Dialogfenster die gewünschte Periode eingeben und mit OK bestätigen.
- Die folgenden Dialogfelder ausfüllen und anschliessend auf die Schaltfläche OK klicken.
Einstellungsdialog
Für die Eingabe der Daten einen Doppelklick unterhalb der Spalte 'Wert' ausführen, um das Eingabefeld zu öffnen.
- Mitgliedskonto eingeben (leer = alle ausdrucken):
- Das Konto des Mitglieds eingeben (z.B. "10001" oder "MEYER").
- Mehrere Mitgliedskonten können durch ein Komma "," getrennt eingegeben werden (z.B. "10001,10002,10005" oder MEYER,EUGSTER,WEISS").
- Wenn nichts eingegeben wird, werden alle Mitglieder ausgedruckt.
- Mindestspendenbetrag: Konten mit einem Kontostand unter dem angegebenen Betrag werden nicht berücksichtigt. Der Standardwert ist "1.00" (z.B. werden Konten mit Nullsaldo ausgeschlossen). Geben Sie "0.00" ein, um auch Konten mit einem Saldo von null einzuschliessen.
- Texte:
- Standardtexte wiederherstellen: Wenn diese Option aktiviert ist, werden die Standardtexte übernommen (die aktuell vorhandenen Texte werden dabei überschrieben).
- Titel (optional): Den Betreff des Schreibens eingeben.
- Text 1 (optional): Den Text des ersten Abschnitts eingeben.
- Text 2 (optional): Den Text des zweiten Abschnitts eingeben.
- Text 3 (optional): Den Text des dritten Abschnitts eingeben.
- Text 4 (optional): Den Text des vierten Abschnitts eingeben.
- Spendendaten angeben: Wenn eine zusammenfassende Spendenbestätigung erstellt werden soll, muss dieses Feld aktiviert sein.
Für alle Textzeilen:
Es ist möglich, ein oder mehrere Wörter oder auch den gesamten Text fett darzustellen.
Um ein bestimmtes Wort fett zu markieren, setzen Sie am Anfang und am Ende des Wortes jeweils zwei Sternchen (z.B. **Wort**).
Um den gesamten Text fett zu formatieren, setzen Sie zwei Sternchen am Anfang des Absatzes (z.B. **Absatz...).
Wenn die nachfolgenden Werte (in Englisch) in den Textzeilen eingegeben werden, werden sie automatisch durch die entsprechenden Inhalte ersetzt (z.B. <Account> wird mit MEYER ersetzt):
<Period>: Bestimmte Periode
<Account>: Mitgliedskonto
<FirstName>: Vorname des Mitglieds
<FamilyName>: Nachname des Mitglieds
<Address>: Mitgliedsadresse
<StartDate>: Anfangsdatum der ausgewählten Periode
<EndDate>: Enddatum der ausgewählten Periode
<Currency>: Währung
<Amount>: Gesamtsumme aller Spenden.
- Unterschrift: Vor- und Nachname der Person eingeben, die die Spendenbestätigung ausstellt.
- Ort und Datum: Ort und Ausstellungsdatum angeben.
- Unterschrift als Bild ausdrucken: Um die Unterschrift als Bild zu übernehmen, diese Option aktivieren.
- Unterschrift Bild: Das gewünschte Bild eingeben.
- documents:<unterschrift>: Dient zum Einfügen eines in der Tabelle Dokumente gespeicherten Bildes der Unterschrift (<unterschrift> entspricht dem 'ID-Wert'). Beispiel: "documents:unterschrift".
- file:document/<bildname.png>: Um ein Bild aus dem Verzeichnis zu übernehmen, in dem sich die Buchhaltungsdatei (.ac2) befindet. Das Bild muss im .png- oder .jpg-Format vorliegen (z.B. "file:document/bildname.png").
- Bildhöhe (mm): Je nach eingegebenem Wert wird das Bild vergrössert oder verkleinert. Die Höhe ist in Millimetern anzugeben.
- Stilarten:
- Logo: Ein Logo in die Kopfzeile einfügen. Das Logo kann unter Menü Datei > Logo einrichten definiert werden.
- Logo-Name: Den Namen der zu verwendenden Logo-Anpassung eingeben, falls mehrere Logos definiert sind.
- Schriftarttyp: Legt die Schriftart fest. Standard ist "Helvetica".
- Schriftgrösse: Legt die Schriftgrösse fest. Standard ist "10".
Basierend auf den eingegebenen Daten wird ein Bericht erstellt, der gespeichert und ausgedruckt werden kann.
Beispiel des Dialogfensters:
Beispiel eines Berichtes:

Detailliertes Beispiel eines Berichts: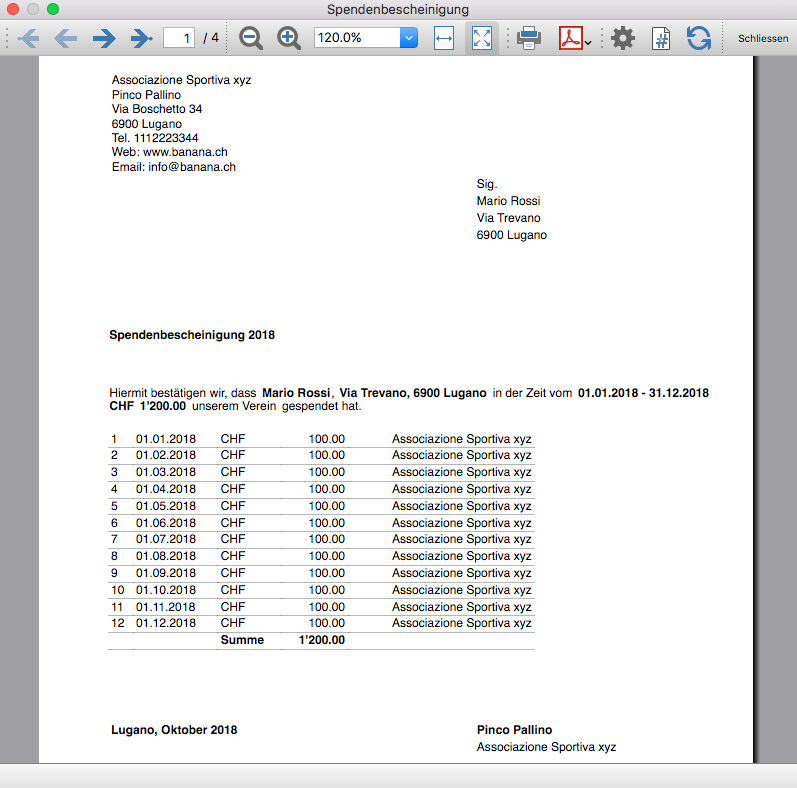
非营利协会或组织会计
非营利协会或组织会计 feiHow the Agile method can help NGO projects
Learn what Agile methodology is and how it can lead to effective and dynamic implementation of projects related to NGOs and international cooperation.
Nowadays, inside an NGO it is common to see project management that follows very defined and rigid models. But what are the effects of the Agile applied in the cooperation field? Banana Accounting offers a complete example on how Agile, slowly integrated in a non-profit project, can simplify its management. As a result, you can also obtain more flexibility, adaptability, and efficiency.
Discover the numerous advantages of Agile integration with us. Our experience with the goal to offer accounting training to all the young students in Congo, shows how Agile can be effective also for NGO projects.
Introduction
Most certainly, you already heard about the Agile methodology, often opposed to rigid project management models. In particular, companies mainly focused on making profits prefer to apply this model. But mostly, start-ups and software development companies cannot renounce to Agile for its numerous advantages.
And what do non-governmental organizations think about an agile project management? Unfortunately, at the moment they seem to lack trust on this innovative method. In addition, the institutions that financially support the projects keep adopting the traditional methodology. As a result, it becomes difficult to obtain some money that is used, as it happens in start-ups, to experiment with method procedures from small to large scale.
Yet Agile methodology could be a solution to simplify international cooperation projects, which usually have complicated management. In fact, they often operate in very difficult contexts, with precarious logistical situations, limited financial resources and in very different cultures and environments. The lack of predictability is similar to the one found in dynamic and innovative fields, such as software development and start-ups. But Agile could be integrated with current NGOs models to lead to a smooth management and greater flexibility.
Agile methodology has been applied since the 1990s, however different non-profits are reticent or not very familiar with this option that could be combined with traditional models without disrupting the current management system, thus leading to a better projects achievements.
With this Agile dossier, we would like to present you a project in which Banana.ch plays a relevant role. Being a company that develops software, we always apply the Agile method in our projects. Thanks to it, we have achieved continuous success. But at one point we asked ourselves:
"What if we apply the same model, little by little, in an industry where rigid models are the norm?".
In 2017, we began a collaboration as technology partners with the Ministry of Education of the Democratic Republic of Congo, with the goal to better the teaching of accounting. This aim was clearly quite different from the ones we usually set. But, even in this case, we decided to use the Agile methodology, with the approval of the client who, although unfamiliar, was open to the possibility for a dynamic management. With the Agile methodology we made progress, overcame several difficulties and obtained important results, despite the difficulties in terms of logistics and available resources. In general, we achieved several goals on the accountants training project, managed by the Ministry of Primary, Secondary and Professional Education of Congo.
The method proved to be very suitable for this cooperation project, which operates in complex situations that require great flexibility and adaptability. The educational project was not stopped by cultural differences, the distance between the various stakeholders, very limited resources, unforeseen events and scarce funding. And that's due, in large part, to the adoption of a methodology that is not very known in the non-profit field. Agile was not imposed and the application was gradual so the commissioner could get familiar without getting wary of this alternative management model. After overcoming the initial wariness, thanks in part to the enthusiasm of the Ministry of Education, we were working with management almost based on Agile.
Our journey into Agile methodology for NGOs and non-profits will start by explaining the principles and history. Then we will move on to the accounting education project in Congo. You will discover together with us how Agile can be the solution for an efficient, flexible and optimal management for projects in the nonprofit sector, this to the benefit of all stakeholders involved, but most importantly to all people who will see an improvement in their lives.
It is good to underline that Agile does not have to be broadly applied to the NGO sector. It can be used to manage certain projects, or alongside traditional models and it certainly doesn't have to disrupt the current cooperation frameworks. However, by using the Agile method here and there, you will slowly discover the advantages and features also for the non-profit sector.
As you will see from our example, gradually opening up to new management possibilities can help you achieve certain goals without huge changes.
We will start our journey into Agile methodology for NGOs and non-profits by explaining the principles and history. Then, we will move on to the accounting education project in Congo. You will discover with us how Agile can be the solution for an efficient, flexible and optimal project management in the non-profit sector, to the benefit of all involved stakeholders, and most importantly for people who will benefit from it.
The agile methodology: birth and characteristics
You can manage projects inside profit and non-profit oriented companies by following different methodologies.
The model we're going to explore in depth originates from the software development industry. The Agile methodology has been developed since the 90s thanks to the Agile movement initiated by a group of computer scientists.
The Agile method contrasts with the Waterfall method, one of the classic project management models. Let’s take a look at a real example of Waterfall: a house construction. As the first step, the architect prepares the detailed drawings. Next, the enterprise will get a quote, plan all work phases and deliver the house, as designed. The planning follows a series of clear steps: it will start with the preparation of the site, continue with the excavation and the creation of the basement and the roof. The interiors will be built and the technical systems, fixtures and fittings will be installed in a well-defined sequence and with a progress status that is predicted with precision. This model, however, has great limits, for example a major change in progress is problematic and leads to a high increase in costs. Moreover, the house will stay the same for years.
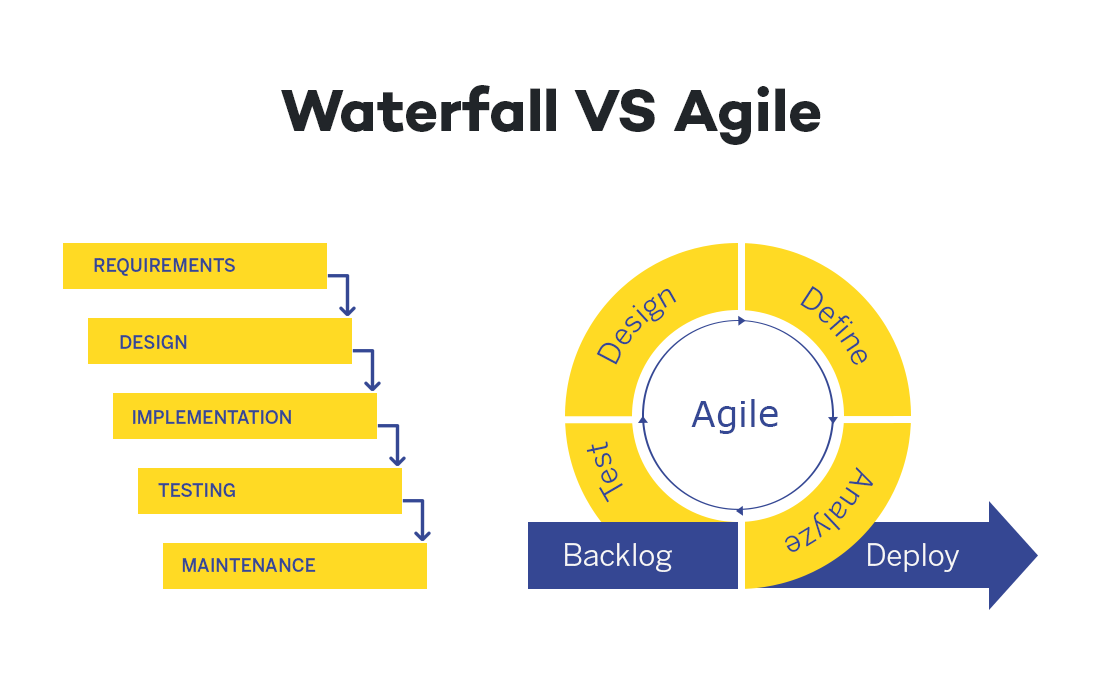
This waterfall model was the standard in the field of software development. Until, in 2001, some "anarchist" developers decided to make a big change in the software industry by publishing the Agile Manifesto. Their purpose is to create organizational models "based on people, collaboration, and building communities in which we would like to work."
The foundations of Agile
Currently, the four principles of the Agile methodology are being applied outside of the world of IT. Let's take a look at these values:
- Individuals and interactions over processes and tools
The Agile method encourages direct communication between people, so as to reduce possible misunderstandings. There must be a reduction of steps and obstacles between the different members working on the project. - A satisfactory product over detailed documentation
The main indicator of project success is when the product meets the needs of the client. Documentation of the procedure and steps is relevant, but the product is more important. - Collaboration with clients over contract negotiation
Customers usually know their needs better than the software developer or any other product. Therefore, collaboration is essential to determine the next steps in product development. This point is central to the Agile methodology. - Responding to change over following a plan
Updates and changes are inevitable and encouraged. With each round of feedback, the product will be more responsive to customer needs. You need to be flexible and responsive first, the plan is secondary.
In the Agile method you define a goal, but requirements are stated and implemented step by step. Development occurs in several cycles called "sprints", in which product changes happen quickly. This is obviously in contrast with a project that shows the full solution right away.
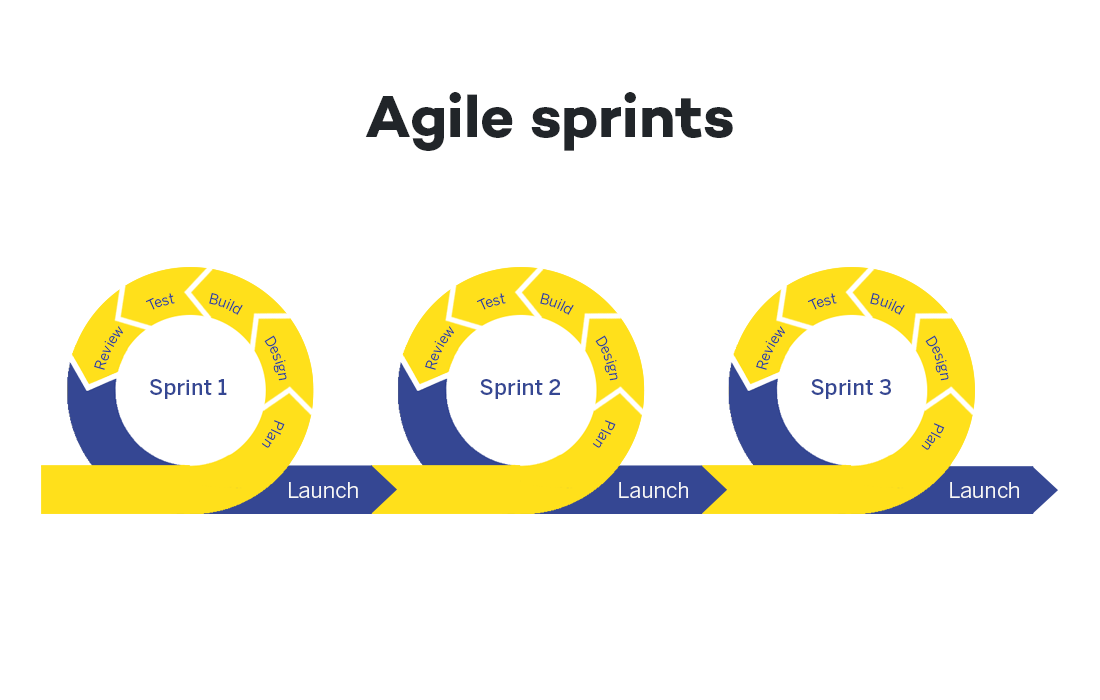
Usually projects related to the digital world do not have a predefined sequence and the product is often not physical, so Agile is an ideal method. Initially what matters is a Minimum viable product, which is a first version of the product with minimum requirements. The client then interacts with the developers, provides feedback, reports problems and prioritizes. The final result comes from all the interactions and changes that occur in the different cycles.
A concrete example: website design
Obviously, Agile requires a careful organization of the project. You have to divide it in different phases and find a logical order to implement them. In that way, you can go from the minimum working product to the final product.
To better understand how the methodology works, let's take as an example a company that wants its own website.
- To create an online presence, the firm decides not to ask the website design company to deliver the final product. Instead, following the Agile model, the firm will start by defining its key needs and resources. The choice will probably fall on creating company presentation pages with minimal content.
- In a very short time, the company will have a functional product (i.e. website) and will start collecting data on users.
- These statistics will then be used to determine, in close cooperation with the client, the further development. By assessing the needs, capabilities and resources, it will be possible to define what to achieve in the next "sprint". For example, priority is given to the creation of technical content, or the video presentation, or a online shop or integration with the management system.
- The result may look completely different from what you initially imagined, and the website next improvements will then continue by using Agile.
A methodology that helps all start-ups
The Agile methodology is also very suitable for tackling complex problems, where there isn’t yet a clear final solution. After being applied in the software industry, Agile has become the preferred project management method for start-ups and has also been adopted by large companies to manage projects in very innovative areas.
Start-ups need to be very flexible, so they usually never implement their projects by rigidly fix everything from the beginning. In fact, these young companies proceed step by step, setting up a product prototype to see if the technology works. Then they move on making the MVP to understand if it can meet customer needs. Later, the start-up will improve the product, at some point bring it to market, and so on.
Typically, start-ups work with little resources, so you are constantly checking if you are following the right path and investing in the right places. Thanks to the Agile method, if you don't achieve the expected results or face unexpected problems, it will be quite easy to adapt to a different approach. Experience and results from different project cycles will help set new goals, plan next steps, and decide what investments to make.
Progressive financing
Among its many advantages, Agile uses funding in a way that well adapts to the start-up world, often faced with great variability and unpredictability, always keeping risks to a minimum. An innovative company like a start-up does not receive funding to run the project in one go, but in a series of rounds.
- It starts by funding a prototype. If the prototype meets expectations, then an MVP (Minimum Viable Product) is financed. The solution can now be on the market and the start-up verifies the interest and response of the first customers.
- You move on to the next round, where you improve the product and, through a marketing strategy, expand the customers’ number. The initial amounts are limited and are generally available without special procedures. The idea, its potential and the capabilities of the start-up team are now evaluated. It often happens that the start-up decides to explore products or markets different from the ones initially imagined.
- In the following rounds there is an increase of funding, but only if the previous rounds were successful. If the start-up fails to realize the prototype or the product finds little customer interests, the investments are suspended.
Use of Agile methodology in non-profit organizations
We saw that Agile methodology is effective not only for software development companies, but also for the start-up world and in large companies as well. Two decades after the publication of the Agile Manifesto, this model has led to the success of many companies and has been widely used by all kinds of profit-oriented organizations.
Unfortunately, at the moment Agile is not well known among non-profit organizations. In this context the Agile methodology and also other methodologies that use similar concepts such as Design Thinking can be easily adopted and bring important benefits.
In the context of international cooperation the issue is more complicated, because there are public actors, laws, references and others that are difficult to adapt. There is a strong static nature and in addition, unlike the business environment, communication between the different levels: NGOs, funders, local partners and project beneficiaries, is much more complicated and cannot be easily simplified and sped up. However, there are also attempts to introduce new methodologies in this area, one of which is Adapting Development. Normally, established working standards such as Logical Framework Methodology and Theory of Change are used in the context of cooperation. In order to ensure a successful outcome, it is important to define the phases in as much detail as possible and to set up monitoring and control systems in advance. However, this leads to projects becoming more complex, expensive and less able to adapt to actual circumstances,
In the field of international cooperation, it is unlikely that Agile can supplant existing methods. However, Agile methodology can certainly be very useful as a complement, to manage certain phases of projects. The Agile method could help to:
- Move forward in a progressive way
- Collect feedback constantly
- Plan objectives and approaches in a more informed way
- Cope with problems and unexpected events in a fast and flexible way.
Introducing more dynamism at certain stages of projects would also help improve transparency, communication and trust between the different parties involved.
We now want to present you a well-detailed case of a Banana project created and implemented in collaboration with an NGO.
From "profit projects" to NGOs: the Banana case
Fortunately, over the last few years, the drive to manage "agile" projects has also arisen within some non-profit organizations. They take the experiences of companies that use the Agile methodology as an example, and they noticed that small changes can bring benefits. Even a partial application of the Agile model gives the ability to effectively react to the uncertainty of emergency situations.
Agile methodology could bring numerous benefits to NGOs and more generally, it makes high operational flexibility possible.
- You obtain important feedback on every cycle to adjust the program integrity
- Identify new operating ways that meet humanitarian goals better
- Understand what could be the future developments and respond quickly
- Ability to make mistakes without regret, and learn from them to improve strategy
- Administration and accounting that quickly adapts to change
- Nurture trust among the various stakeholders involved in the project through increased transparency and communication
Among the many Banana.ch projects, we also have a strong example on how the Agile model applies almost perfectly to a project related to non-profit organizations.
In 2017, Banana.ch took part to a project as a technology partner in the Democratic Republic of Congo.
Before explaining the details and developments, we'll start by giving you a context in which Banana.ch had to fit it.
Congo and the education of students in the digital world
The Democratic Republic of Congo (DRC) is a nation with a vast territory located in the center of Africa and it has over 100 million inhabitants. Like other countries in sub-Saharan Africa, the DRC is faced with a large number of difficulties, including logistical, financial and health problems. The population is very young and one of the main challenges is strengthening the educational system and adapt it to digital transformation, so as to reduce the existing technological gap.
In Congo, schools are managed and funded by the counties. On the other hand, the Ministry of Primary, Secondary and Professional Education (MEPST), based in the capital Kinshasa, is responsible for the education coordination in the whole country and is in charge of defining the curricula and teaching materials.
After joining the Organization for the Harmonization of African Business Law (OHADA) in 2012, the RDC adopted the common accounting rules and the Ministry of Education modified the training programs in accordance with the new modalities. Taking into account that most Congolese firms keep or will keep their accounts digitally, the MEPST decided to review the accounting training in professional schools. For this reason, they introduced the use of computers, productivity software (spreadsheets such as Excel, word processors) and accounting programs.
Unfortunately, with the current system it is not possible to solve the digital divide. Currently, students only learn theoretical concepts. This means that once they start working, they have to be trained to use computers and software. Instead, students should receive comprehensive training on some IT tools. This would not only facilitate the access in the working life, but the students themselves could become the promoters of digital modernization in the Congo companies and public agencies.
The Cellules's plan facing a major limitation
In order to solve the digital divide, the Ministry of Education entrusted in 2015 the Cellules des Branches Commerciales of the Direction des Programmes Scolaires et Matériel didactique (also called Cellules) to implement a plan to improve digital skills in more than 4 thousand schools. This project is part of the Ministry's broader strategy to promote digitalization, which also involves the primary, secondary and professional sectors.

Unfortunately, there was one major limitation: a large number of the schools did not have computer classrooms. In addition, the Government of DRC, as well as its provinces, has limited financial resources, and free education for pupils is already a great challenge. However, it remains essential that schools are equipped with computers, especially if students want to get familiar with certain software.
Accounting in Congo: the OHADA system
Among the various steps of the educational project, the Cellules had to select an accounting software, which complies with OHADA regulations and is also suitable for teaching. Thus, in 2017 they contacted our company Banana Accounting.
Our software caught their attention since it is suitable for small businesses, it is used in several countries and has obtained very important references in the field of accounting. Besides that, Banana software is also available in French, the official language of Congo, and offers a free license for educational purposes. The Cellules realized that Banana Accounting software was well suited for teaching in Congolese schools.
Another essential aspect in the selection was the compatibility with the accounting system, therefore the program must be aligned with chart of accounts and the reporting used by OHADA. This system is used by large companies, has a specific numbering and also includes fixed schemes for the balance sheet presentation, the profit and loss account and the capital flow account. During the preliminary stages, the Cellules requested the collaboration of the Conseil Permanent de Comptabilité au Congo (CPCC). From then on, the Banana's project to train students on our accounting software has begun.
The begin of the project and the first difficulties faced with Agile
In normal situations, we organize meetings between the different stakeholders and the developers. In that way, we can clearly define the project functionalities
But the project with the Cell did not start in a smooth way. Domenico Zucchetti, CEO and founder of Banana.ch traveled to Nairobi (Kenya) for a brief training session, but later on, it was no longer possible to meet in person. Other means of communication were very limited, so it was not easy to efficiently collaborate and carry out the project. Therefore, we proposed the integration of an alternative solution.
Within Banana.ch we have always applied the Agile methodology for any project, it is normal for us to follow a progressive, tackling one problem at a time. We are aware that going step by step, with close interaction between stakeholders is essential to work remotely and with very different cultural and operational contexts. That is why we decided to suggest a new method for the project in Congo, and we convinced the Cellules to apply Agile.
Thanks to the Agile modeling, Banana.ch and the Cellules of the Minister of Education have been able to face the hard project path. Slowly, this methodology was applied to each phase of the project.
Regarding the first phase, that is developing a software that meets OHADA's accounting rules, we solved the various snags thanks to Agile.
- COMMUNICATION
As the main contact, Zucchetti turned to Didier Kinano, the Cellules Director. Directives were typically reported via email and phone calls. In turn, the Banana Accounting CEO explained the Banana functionalities to achieve certain results and then he gave directions to his software development team. - THE FIRST CRITICAL STEPS
Even though there was a good collaboration, the division of tasks was too complex and the communication possibilities were not fully exploited. In addition, we had to face limited work progressions. After numerous iterations, the chart of accounts was finally completed with the corresponding balance sheet printouts and income statement. - THE COMPLEX PHASE
Banana.ch then tackled the most complex part, that is the creation of the capital flow account, with the related revision of the chart of accounts. Mr. Kinano gave instructions and then checked the results’ correctness. - A FLEXIBLE VERIFICATION SYSTEM
Having reliable test is an important element of the Agile methodology. In the case of the project with the Cellules, our developers had difficulties because they were not familiar with the OHADA system and did not know how to test the functionalities. Hence, Kinano had to prepare accounts that were used as tests. This facilitated rapid progression because the developers could avoid regressions, without being in contact all the time. - A NEW DEVELOPER
Banana.ch was also able to make progress at the level of capital flow reporting. Later, we started a collaboration with a developer based in Kinshasa, who received instructions directly from Kinano and turned to Banana.ch for the programming part. - THE LAST STEPS
Finally, Banana.ch was able to realize other reports and to implement the management and printing part of the VAT statement according to the templates required by the local tax authorities.
Agile: winning collaboration for the accounting project in Congo
Using the Agile method to implement the accounting project in Congo turned out to be a winning choice.
Our role was limited to technical assistance for the installation and use of Banana Accounting, as well as the adaptation to the OHADA System. Moreover, not being on site, we had a very limited view of what was going on and we were not particularly familiar with the educational system of Congo. Although we did not have a clear management view (the Ministry was in charge), the Agile method allowed us to achieve goals.
Didier Kinano had become our reference person. The talks were focused on technical aspects, but sometimes we discussed the project in a broader way. Little by little, Domenico Zucchetti got a better view of the various stakeholders, the context in which they operated and their available resources. At one point we could start with the implementation of the new digital accounting system in Congo.
The implementation of the digital accounting system in Congo
As a first step, the Ministry's plan was to provide schools with computers, then install the software and train teachers and students. However, most of the schools did not have computer rooms, and some did not even have electricity!
The available resources were very limited and it was not possible to ask more from the Congo Government, since it was already busy ensuring the free basic education. Support from third parties was also unlikely, so the prospect to have more computers appeared remote. There was a lot of concern on the project realization. But with Zucchetti's suggestion, something began to change:
"The situation didn't seem that bad to me. In fact, the Ministry was in the same situation as many start-ups, where you find very ambitious and transformative ideas, united by great motivation and capacity, but with many obstacles and very limited financial resources. I told that it would probably be very beneficial if the Ministry adopted start-up-like operation modes, that aims to make the most of existing resources."
Unexpectedly, this remark aroused a lot of interest, which is quite uncommon in government departments that have operating modes very different from the start-ups ones. Instead, in the following meetings, the Ministry became open to approach problems in a different way.
One reason for this acceptance of the Agile may lie in the different level of predictability between Europe and Africa. In Europe, the degree of unpredictability is very low and, especially, there is little flexibility in public administration. On the contrary, in Africa, the population and public officials are faced with great unpredictability. Unforeseen difficulties force them to come up with new solutions. In essence, Banana.ch saw that in Congo people are more willing to adopt and use the Agile methodology.
Exploiting available resources for great results
The next step in the project included defining the path implementation through existing resources.
The Democratic Republic of Congo has a large territory, even though most schools did not have appropriate infrastructure, a few of them had computer classrooms. As we could expect, there weren’t the next generation of computers, but they were perfectly suited to install and use Banana Accounting.
We then provided the software in some schools in the capital Kinshasa. The accounting teachers showed great interest and requested training in order to familiarize with Banana Accounting. The Cellules prepared the informative material, being very competent in its role. Thus, in a short time, they set up a 13-day training course, both for the software and for the OHADA system. The teachers who attended the course were very satisfied, so, the Ministry set a plan to train more teachers with the existing resources.
Thanks to the gradual change in methodology towards Agile, the project progressed without major hiccups. We didn’t have to wait for all schools to be equipped with computers. With time, Banana Accounting was installed in several computers and the number of trained teachers was raising too. We then moved on to the phase of teaching to students, with considerable success. Installation and software training expanded to other provinces, always with great interest.
New issues arose regularly, but by applying the Agile methodology, the Ministry was able to solve them shortly. We developed small-scale solutions, making adjustments quickly and then implementing them in other schools. For example, Congo's program involved using handwriting for exams. The Ministry then introduced the option to have exams with computer to schools with suitable classrooms. This experience then served as a basis for solving new or similar problems, improving the system and then introducing it to other schools. The strategy was constantly improved sprint after sprint, reducing unforeseen problems and making the best use of available resources.
From small goals towards a long-term vision
Usually Agile helps achieving short-term results, but it is also extremely effective for a long-term vision.
Keeping in mind that technological development rapidly evolves, we are aware that some solutions can become obsolete in no time. Therefore, it is very important to update the long-term project vision and check whether we are going in the right direction.
In large-scale projects such as the accounting in Congo, one of the most important tasks of the technological partner (Banana.ch) is to find lasting solutions to integrate new technologies. In this case, as seen above, the main problem was the difficulty to equip all Congolese schools with computer classrooms.
How to solve the IT classrooms’ problem
Banana.ch has been providing its software to Swiss schools for many years. However, in Switzerland a shortage of computer rooms is not a problem at all; moreover, all the students of professional schools already have a laptop. So, in Switzerland, schools are adopting the Bring Your Own Device (BYOD) model and are no longer investing in IT classrooms. On the other hand, in Congo the situation is different because the buying power is lower and teachers and students cannot afford a laptop.

Working closely with ministry officials, we came up with an alternative scenario. In the DRC, all teachers and students from professional schools have a cell phone. Thanks to technological advances, we predicted that students will soon have smartphones as well. So, we adapted to their current situation and we have focused on:
- Improvements of Banana Accounting on the mobile operating systems (Android and iOS) until it is almost in line with the desktop version.
- Possibility, also on mobile, to keep the accounting without connecting to the Internet, since in Congo the connections are not always fast and have significant costs.
Keeping accounts on a cell phone is certainly not the ideal solution. But knowing that learners will have a smartphone, we are sure they will keep accounts by using ERP functions (enterprise resource planning software), even without connecting to the Internet. As a result, by the time students find a job, they will already be ready to use accounting software.
We have noticed an increase in the use of the mobile version of Banana.ch in Congo, a sign that the strategy is working.
Adaptation to new technologies: the BYOD model in Congolese schools
At the moment, we see a convergence between the use of mobile and desktop software. The Ministry of Education in Congo presented a new technology available, for now, on high-end smartphones. Teachers can activate the Android Desktop Mode by connecting a monitor and keyboard to the latest generation smartphone. The small device is thus transformed into a real computer.
In the years to come, thanks to technological progress, this feature will certainly be available also for less expensive smartphones. Even Congolese students will have the chance to use a phone that becomes a computer. In that way the BYOD model can be adopted, and we will eliminate the problem of computer classrooms.
This scenario seems more and more realistic, and the Ministry is looking for a new plan to train teachers with the new modalities. In the future, when desktop mode will be possible on smartphones, Ministry officials should be ready to deliver a training that fits this new technology.
The MEPSP has already set up a plan for training several people in the different provinces, who in turn will train teachers on the OHADA accounting system and on the use of Banana Accounting.
With time, the Agile methodology has become integral in the collaboration with the various stakeholders, but we also used it to experiment with new technologies and new interesting solutions. You don’t need to change the current NGO project management system to see results with Agile, but in our case a wide application made the achievement of many objectives a lot easier.
Financing the project in Congo
In the case of the educational project in Congo financing, the Ministry had not a lot of money source. Then there was the COVID pandemic in 2020, which brought the finances of many states, including the DRC, to their knees. We had to find other ways, so we decided to present the project to possible financing entities. Following the Agile method, we develop a documentation and fundraising structure starting with very limited funding, necessary to offer the training and to find new solutions. Then, in later stages, these solutions can eventually be applied on a larger scale. We divided the project for extending the training in new provinces into blocks, making the figures affordable for many foundations and organizations.
| Indicative budget for seminary in the provinces |
| Activities | Cost |
|---|---|
| Accommodation for 2 educators (13 nights) | $ 800 |
| Catering for 2 educators | $ 400 |
| Lunch break for 52 participants (12 days) | $ 6.000 |
| Remuneration 2 educators (14 days) | $ 4.000 |
| Round trip 2 educators | $ 1.500 |
| Total investment for 1 seminary | $ 12.700 |
| Total investment for the 37 provinces | $ 427.000 |
| Fundraising (50% of costs) * | $ 223.500 |
However, we encountered a major limitation: the Agile methodology is not well known in the international cooperation sector, and funding is usually granted for complete projects, with rather complex and bureaucratic decision-making processes.
In our case, all the stakeholders could see that the project managed with Agile was valid and suitable. In fact, the different phases made possible the consolidation of the existing school system. The positive impact of the project is evident because the beneficiaries, or the new generations of students, will be better prepared for their job and will have a greater chance of finding employment.
Despite the results, at the moment we have not yet found support from foreign funding. The amounts required are small, but unfortunately in the cooperation world it is still complicated and expensive to develop funding strategies, since planning is only done with the waterfall method. Contrary to the world of start-ups, there is not yet a predisposition on granting support in a progressive manner, open to the development of new solutions.
A perspective towards widespread use of agile in NGOs
The successful project management of digital accounting in Congo is just one of the examples that show the effectiveness and suitability of Agile in the non-profit area. We are not there yet, but so far we have considerably progressed in a difficult context. This model made possible to make the most from available resources, skills and organizations that are already well structured and widely present in the area.
Agile applied to NGOs opens perspectives that were unthinkable a few years ago. Surely, the integration of this method will be very useful to international cooperation projects, all characterized, more or less, by a high degree of difficulty, variability and unpredictability. Agile can become a project management option, without affecting the currently-used non-profit methodologies.
We hope that this project in which we are involved demonstrated you the high potential of the Agile methodology. NGOs could consider to apply it to improve the effectiveness of interventions and to facilitate the granting of small amounts for humanitarian projects.
With the hope that Agile will be integrated in many non-profit projects, we invite you to reach us if you have any questions on the educational accounting project in Congo or about the use of Agile in the cooperation sector.
References
Helms, B. (2019, 10 settembre). Can the Development Community Adopt Agile?. DAI. https://dai-global-developments.com/articles/can-the-development-community-adopt-agile.
Manifesto for Agile Software Development. (2001). Agile Manifesto. https://agilemanifesto.org/
Modernisation de la formation en comptabilité au Congo RDC. (2020, gennaio). Banana.ch. https://www.banana.ch/fr/formation/comptabilite-rdc.
Terbeche, M., Carrier, M. (2019, 26 marzo). An “Agile Manifesto” for humanitarian and development projects. Groupe URD. https://www.urd.org/en/review-hem/an-agile-manifesto-for-humanitarian-and-development-projects/.
(2018, 2-4 ottobre). Humanitarian Aid on the Move No. 20. [Relazione a convegno]. Groupe URD. Autumn School on Humanitarian Aid. https://www.urd.org/en/review-hem/humanitarian-aid-on-the-move-n20/.
Shafiq, M., & Soratana, K. (2019). Lean and Agile paradigms in humanitarian organizations' logistics and supply chain management. LogForum, 15 (1).
Trish. ( n.d.). Agile for Nonprofits: A Project Management Method. Springly. https://www.springly.org/en-us/blog/agile-method-project-management-method-nonprofit/.
Vorlagen für die Familienverwaltung in Banana Buchhaltung (Universal)
Banana Buchhaltung bietet eine Auswahl praxisbewährter Vorlagen/Modelle, die Familien, Studierende und junge Erwachsene bei der Verwaltung ihrer persönlichen Finanzen unterstützen. Ob Familienhaushalt, erste Sparversuche von Jugendlichen oder Budgetplanung im Studium – für jede Lebenssituation stehen einfache und zugleich effiziente Werkzeuge bereit.
Cash Manager: Familien / Jugendliche / Studierende
Modelle, die ausschliesslich auf der Liquiditätsverwaltung basieren – also auf Bargeld, Bankkonten und Karten. Ideal, um tägliche Ausgaben einfach im Blick zu behalten.
- Keine Buchhaltungskenntnisse erforderlich
- Einfache Erfassung von Einnahmen und Ausgaben
- Automatisch erstellte Grafiken und Zusammenfassungen zur Ausgabenanalyse
- Verschiedene Versionen, abgestimmt auf die jeweilige Zielgruppe (Familien, Jugendliche, Studierende)
Einnahmen/Ausgaben: Familie
Dieses Modell richtet sich an Personen, die ihre Haushaltsfinanzen etwas detaillierter überwachen möchten – mit der Möglichkeit, Bilanzberichte zu erstellen, und dennoch in einer benutzerfreundlichen Struktur.
- Übersichtliche Kontrolle der Ausgabenkategorien (z.B. Lebensmittel, Transport, Wohnen)
- Periodische Auswertungen
- Unterstützung bei der Planung des Familienbudgets
Doppelte Buchhaltung: Familie
Für Familien, die eine präzisere Buchhaltungsführung wünschen, bietet das Modell der doppelten Buchhaltung eine umfassende Sicht auf Vermögen, Schulden, Forderungen und Geldflüsse.
- Höhere Genauigkeit und Nachverfolgbarkeit
- Vollständige, individuell anpassbare Bilanz- und Erfolgsrechnungen
- Ideal für die Verwaltung von Liegenschaften, Darlehen oder Nebeneinkünften
Buchhaltung mit mehreren Währungen: Familie
Ideal für Familien, die häufig reisen oder Konten in verschiedenen Währungen führen.
- Integrierte Verwaltung mehrerer Währungen (z.B. EUR, USD, CHF)
- Automatische Umrechnung in die Basiswährung
- Praktisch für Auslandsaufenthalte oder Fremdwährungskonten
Jedes Modell lässt sich flexibel an individuelle Bedürfnisse anpassen und bietet eine solide Grundlage für mehr finanzielles Bewusstsein und Kontrolle im Alltag.
Kostenlose Buchhaltung für Jugendliche - Lernen, wie man Geld verwaltet, um Ziele zu erreichen
Kostenlose Buchhaltung für Jugendliche - Lernen, wie man Geld verwaltet, um Ziele zu erreichenEin guter Umgang mit Geld ist die Grundlage für nachhaltiges finanzielles Wohlbefinden. Deshalb ist es wichtig, diese Fähigkeit schon in jungen Jahren zu entwickeln. Um zu sparen und künftig über mehr finanzielle Mittel (Liquidität) zu verfügen, können Sie lernen, Ihre Ausgaben im Voraus zu planen – indem Sie falsche Gewohnheiten erkennen und unnötige Ausgaben vermeiden.
Banana Buchhaltung unterstützt Sie auf diesem Lernweg mit einfachen, praktischen Schritten.
Zielgruppen dieses Modells und ihre Vorteile
- Eltern und Lehrkräfte: Der kompetente Umgang mit Geld ist eine zentrale Lebenskompetenz – wird jedoch in der Schule nur selten vermittelt, obwohl er im Alltag unerlässlich ist. Banana Buchhaltung wird deshalb zu einem wertvollen Begleiter für Eltern und Lehrkräfte, die junge Menschen beim Umgang mit Taschengeld oder dem ersten eigenen Einkommen unterstützen möchten. Das Ziel: Kinder und Jugendliche frühzeitig für den Wert des Geldes zu sensibilisieren und ihnen Verantwortung für ihre Ausgaben zu vermitteln. So lernen sie, sich selbst zu disziplinieren und Schritt für Schritt finanzielle Unabhängigkeit zu entwickeln – etwa beim Verwalten kleiner Einkommen, Geldgeschenken oder der ersten Gehälter aus Ferienjobs.
- Jugendliche: Die Hauptnutzniesser dieses Modells sind die Jugendlichen selbst. Mit Banana Buchhaltung behalten sie ihre Einnahmen und Ausgaben einfach, übersichtlich und eigenständig im Blick – ganz ohne ständig die Eltern um Geld bitten zu müssen.
Sparen war noch nie so einfach: Dank der integrierten Budgetfunktion lassen sich persönliche Ausgaben – etwa ein Urlaub mit Freunden – gezielt planen. So stellen Jugendliche sicher, dass ihre Ersparnisse für ihre Ziele ausreichen und lernen ganz nebenbei den verantwortungsvollen Umgang mit Geld.
Digitale Kompetenzen stärken
Digitale Fähigkeiten sind heute unverzichtbar – sie ermöglichen den sicheren, bewussten und selbstverständlichen Umgang mit moderner Technologie.
Mit Banana Buchhaltung erweitern Sie nicht nur Ihr Wissen im Bereich Finanzen und Buchhaltung, sondern stärken gleichzeitig auch Ihre digitalen Kompetenzen. Sie lernen, wie man eine Software professionell nutzt, mit digitalen Dokumenten und Links arbeitet – und dabei ganz nebenbei Papier und Zeit spart. Diese Fähigkeiten lassen sich vielseitig anwenden – sowohl im Berufsleben als auch im privaten Alltag.
Eigene Buchhaltungsdatei anlegen
- Öffnen Sie die gewünschte Vorlage mit der WebApp von Banana Buchhaltung.
- Wählen Sie im Menü Datei > Eigenschaften (Stammdaten) und legen Sie Folgendes fest: den Zeitraum Ihrer Buchhaltungsdatei, den Familiennamen (zur besseren Identifikation), die gewünschte Basiswährung (Sie können Ihr Budget in jeder beliebigen Währung führen).
- Verwenden Sie zum Speichern den Menübefehl Datei > Speichern unter. Dabei empfiehlt es sich, im Dateinamen den Familiennamen sowie das Jahr anzugeben – z. B.: "Andreas-Schmid-20xx.ac2".
ACHTUNG: Wenn Sie den Browser schliessen, ohne die Datei zu speichern, geht Ihre Arbeit verloren. Speichern Sie die Datei daher immer auf Ihrem Computer.
Um eine gespeicherte Datei wieder zu öffnen, klicken Sie auf Datei > Öffnen.
Grundfunktionen: So verwenden Sie Banana Buchhaltung in wenigen Schritten
Kasse
Das Kassenkonto zeigt Ihnen, wie viel Bargeld Sie aktuell zur Verfügung haben – so behalten Sie Ihre Finanzen jederzeit im Griff.
Um mit der Verwaltung Ihres Geldes zu beginnen, richten Sie zunächst das Kassenkonto ein. Klicken Sie dann auf die Tabelle Konten – dort finden Sie bereits ein Konto mit dem Namen "Kasse". In der Spalte Beschreibung können Sie persönliche Hinweise oder Notizen eintragen. Tragen Sie in der Spalte Eröffnung den aktuellen Bargeldbestand (Anfangssaldo) ein.

Kategorien
Rechts neben der Tabelle Konten finden Sie die Tabelle Kategorien. In diesem Bereich werden sowohl Einnahmen als auch Ausgaben erfasst – also das Geld, das Sie erhalten oder verdienen, und das Geld, das Sie ausgeben. Die Kategorien sind für beide Bereiche – Einnahmen und Ausgaben – vorgesehen und helfen Ihnen dabei, die Art Ihrer Bewegungen auf einen Blick zu erkennen.
In der Vorlage, die Sie auf dieser Seite durch einen Klick auf "Vorlage herunterladen“ abrufen können, haben wir bereits einige Beispielkategorien eingefügt, die Ihnen als Orientierung dienen: Bei den "Einnahmen" finden Sie z.B. Taschengeld, Geschenke von den Grosseltern, Einnahmen aus Arbeit (Sommerjob) und sonstige Einnahmen. Bei den "Ausgaben" sind Beispiele wie Essen, Kleidung, Ausgang mit Freunden (Kino), usw. enthalten. Natürlich können Sie die vorhandenen Kategorien und deren Bezeichnungen nach Belieben ändern oder neue hinzufügen, indem Sie einfach weitere Zeilen in der Tabelle einfügen.

Buchungen
Buchungen sind einfache Notizen/Einträge über das Geld, das Sie erhalten oder ausgeben.
Es ist wichtig, diszipliniert alle Ausgaben und Einnahmen einzutragen – denn nur so stimmt der tatsächliche Kontostand mit dem im Programm angezeigten Saldo überein.

Klicken Sie auf die Tabelle Buchungen, um neue Einträge vorzunehmen. Geben Sie anschliessend das Datum, eine Beschreibung (z.B. "Pizza mit Freunden") und in der Spalte Ausgaben den Betrag ein, den Sie ausgegeben haben. Für Einnahmen gehen Sie genauso vor, nur dass Sie den Betrag in die Spalte Einnahmen eintragen. Sobald Sie mit der Eingabe der Kategorie beginnen, zeigt das Programm automatisch eine Liste mit passenden Vorschlägen (Autovervollständigung) an – basierend auf zuvor verwendeten Begriffen/Wörtern.
Ab diesem Zeitpunkt übernimmt das Programm die Berechnungen für Sie. Sie können zur Tabelle Konten zurückkehren, um Ihren automatisch aktualisierten Saldo zu überprüfen, oder in die Tabelle Kategorien wechseln, um Ihre Einnahmen und Ausgaben nach Kategorie übersichtlich einzusehen.

Überprüfen und kontrollieren
Wenn Sie sicherstellen möchten, dass Ihnen beim Erfassen keine Fehler unterlaufen sind, hilft Ihnen Banana Buchhaltung mit einer praktischen Kontrollfunktion. Diese Funktion erkennt Fehler automatisch und zeigt Ihnen genau an, in welcher Zeile ein Problem vorliegt – zum Beispiel, wenn Sie vergessen haben, einen Betrag oder eine Kategorie einzutragen.
Um die Prüfung durchzuführen, wählen Sie im Menü Aktionen > Buchhaltung nachkontrollieren.
Vergessen Sie nicht, die Datei auf Ihrem Computer zu speichern.
Kurz gesagt: Warum Banana Buchhaltung verwenden?
- Kostenlose Webanwendung – keine Installation erforderlich
- Einfach und schnell zu bedienen
- Ziele setzen leicht gemacht – dank integrierter Planungsfunktionen
- Sparen lernen und zum eigenen Finanzmanager werden
Referenzen:
Hello Family (Coop) Sackgeld für Kinder: So viel sollte es sein. (Hellofamily.ch)
Kinder-Cash. Taschengeld: Wieviel - Ab wann - Warum - Taschengeldtabelle 2020.
Pro Juventute. Unsere Empfehlungen zum Thema Taschengeld. (Projuventute.ch)
Familienbudget und Haushaltskonten führen | Cash Manager (Gratis)
Familienbudget und Haushaltskonten führen | Cash Manager (Gratis)Ein Haushaltsbudget mit Banana Buchhaltung zu erstellen ist so einfach wie mit Excel – nur schneller, sicherer und völlig kostenlos. Dank der Vorlage mit bereits vordefinierten Konten können Sie sofort loslegen – Sie müssen nur noch Ihre Daten eingeben.
Erstellen Sie schnell eine Übersicht Ihrer Finanzen und sehen Sie, wo Sie sparen können und welche Zahlungen sich verschieben lassen. Erfassen Sie Ihre Einnahmen und Ausgaben im Handumdrehen – so wissen Sie sofort, ob Sie im Budget liegen und ob Sie Ihre Rechnungen am Monatsende bezahlen können. Keine Sorge: Sie brauchen keine Buchhaltungskenntnisse, um mit Banana Buchhaltung Ihre Finanzen zu verwalten. Und sobald Sie Ihre Ausgaben im Griff haben, blicken Sie dem Monatsende mit mehr Gelassenheit und weniger Stress entgegen.
Das Modell enthält bereits alle typischen Einnahmen und Ausgaben eines Haushaltsbudgets – Sie müssen nur noch die Beträge eingeben, und schon erhalten Sie eine Vorschau Ihrer finanziellen Entwicklung. Wir haben auch eine Schritt-für-Schritt-Anleitung vorbereitet, die Ihnen hilft, ein realistisches Familienbudget zu erstellen und finanzielle Schwierigkeiten zu bewältigen.
Wenn Sie der Anleitung sorgfältig folgen, werden Sie es schaffen – denn Sie können jederzeit Änderungen und Korrekturen vornehmen. So lassen sich Ihre Prognosen einfach aktualisieren, und Sie holen das Beste aus Ihrem Geld heraus, während Sie gleichzeitig möglichst viel zur Seite legen können.
So verbessern Sie Ihre finanzielle Situation in wenigen Schritten:

Nur wenn Sie alle drei Schritte befolgen, lernen Sie, Ihre Finanzen optimal zu verwalten – und legen damit den Grundstein für langfristigen Erfolg. Anfangs braucht es etwas Einsatz, aber sobald Sie das Prinzip verstanden haben, geht alles ganz leicht.
Sind Sie bereit? Dann starten Sie jetzt!
Eigene Buchhaltungsdatei anlegen
- Öffnen Sie die gewünschte Vorlage mit der WebApp von Banana Buchhaltung.
- Wählen Sie im Menü Datei > Eigenschaften (Stammdaten) und legen Sie Folgendes fest: den Zeitraum Ihrer Buchhaltungsdatei, den Familiennamen (zur besseren Identifikation), die gewünschte Basiswährung (Sie können Ihr Budget in jeder beliebigen Währung führen).
- Verwenden Sie zum Speichern den Menübefehl Datei > Speichern unter. Dabei empfiehlt es sich, im Dateinamen den Familiennamen sowie das Jahr anzugeben – z. B.: "Familie-Schmidt-20xx.ac2".
ACHTUNG: Wenn Sie den Browser schliessen, ohne die Datei zu speichern, geht Ihre Arbeit verloren. Speichern Sie die Datei daher immer auf Ihrem Computer.
Um eine gespeicherte Datei wieder zu öffnen, klicken Sie auf Datei > Öffnen.
Tabellen "Konten" und "Kategorien" anpassen
Bevor Sie Ihr eigenes Budget erstellen, müssen Sie das Konto und die Kategorien an Ihren Bedürfnisse anpassen.
Tabelle Konten
In der Tabelle Konten ist ausschliesslich das Liquiditätskonto enthalten (z.B. Kasse, Bankkonto, Postkonto, ...) – also das verfügbare Guthaben, das sich tatsächlich in Ihrem Besitz befindet.
Sie können dieses Konto individuell anpassen, indem Sie die Kontonummer, die Beschreibung sowie den Anfangsbestand nach Ihren Bedürfnissen ändern.
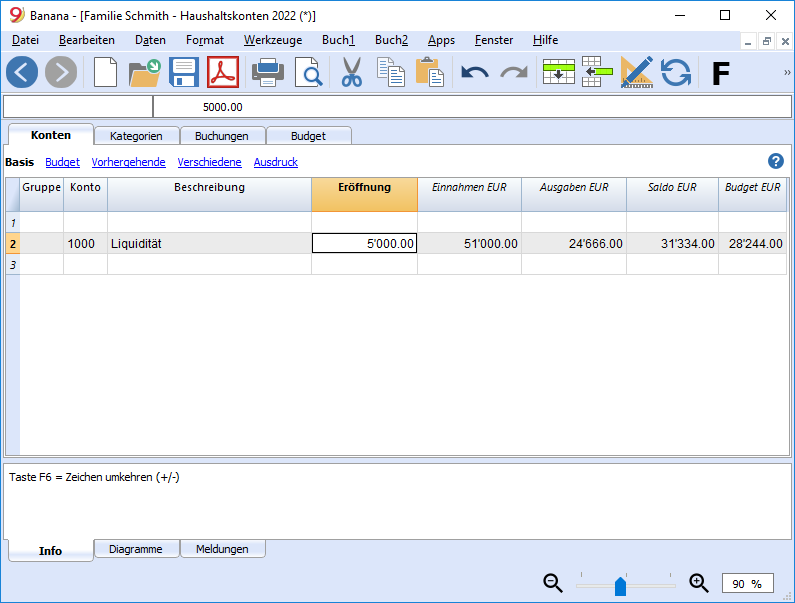
Tabelle Kategorien
Die Tabelle Kategorien enthält sämtliche Ausgaben- und Einnahmenkategorien, deren aktuelle Salden Sie jederzeit einsehen können. Zusätzlich gibt es Kostenstellen, mit denen Sie die Ausgaben und Einnahmen jedem einzelnen Familienmitglied zuordnen und im Detail auswerten können.
Die Kategorien sind nach derselben Struktur aufgebaut, die im folgenden Abschnitt Eigenes Budget erstellen erklärt wird:
- Einnahmen
- Feste Ausgaben
- Variable Ausgaben
Die Kategorien und Kostenstellen können jederzeit angepasst werden – etwa durch das Hinzufügen weiterer Ausgaben- oder Einnahmepositionen, das Überschreiben bestehender Kategoriekonten, das Löschen nicht benötigter Zeilen oder das Umstrukturieren der Reihenfolge nach individuellen Bedürfnissen.
Eigenes Budget erstellen
Geben Sie Ihre geplanten Ausgaben und Einnahmen ein
Jetzt ist der richtige Zeitpunkt für die Planungsphase: Tragen Sie Ihre voraussichtlichen Ausgaben und Einnahmen in die Budget-Tabelle ein.
Ein Budget zu erstellen ist wirklich einfach – Sie müssen lediglich die erwarteten Beträge für das Jahr eingeben und jeder Buchung eine passende Ausgabenkategorie zuweisen.
- In der Vorlage finden Sie bereits vorbereitete Zeilen für verschiedene Ausgabenkategorien, die Sie einfach mit Ihren eigenen Beträgen ergänzen können.
- Wiederkehrende Vorgänge (z.B. monatliche Ausgaben) werden einmalig eingegeben – mit dem entsprechenden Wiederholungscode.
Wenn Sie einen Fehler machen, ist das kein Problem: Sie können jederzeit Änderungen vornehmen, bis Ihre Prognose perfekt passt!
In nur 3 einfachen Schritten zum vollständigen Finanzplan:
- Einnahmen erfassen
- Feste Ausgaben eintragen
- Variable Ausgaben oder Sonderposten/Extras hinzufügen
Weitere technische Informationen finden Sie auf der Dokumentationsseite zur Tabelle Budget.
Einnahmen eingeben
Beginnen Sie damit, über Ihre festen Einnahmen und deren Beträge nachzudenken – also über regelmässige Einkünfte, die Ihnen bereits bekannt sind. Das Gehalt ist dabei meist die Hauptquelle, doch es kann auch weitere Einnahmen geben – abhängig von Ihrer Tätigkeit und Ihrem Vermögen.
Zu den möglichen Einnahmen zählen zum Beispiel:
- Gehalt
- Mieteinnahmen aus Immobilien
- Unterhaltszahlungen
- Zinsen von Bank- oder Postkonten
Tipp: Verlassen Sie sich bei Ihrer Planung nur auf fixe und gesicherte Einnahmen, die Sie bereits kennen.

Ausgaben eingeben
Jetzt ist der richtige Zeitpunkt, um über alle festen Ausgaben nachzudenken. Dazu zählen sowohl monatliche als auch jährliche Fixkosten. Für die Schätzung können Sie sich an den Ausgaben des Vorjahres orientieren.
Bei Ausgaben, die von Monat zu Monat leicht schwanken, empfiehlt es sich, einen Durchschnittswert zu verwenden – und den Betrag im Zweifel nach oben aufzurunden, um auf der sicheren Seite zu sein. Es ist besser, zu Jahresbeginn eine grobe, aber realistische Schätzung vorzunehmen und diese später bei Bedarf anzupassen, als im Laufe des Jahres von unerwartet hohen Kosten überrascht zu werden.
Um beispielsweise die monatliche Mietausgabe einzutragen, müssen Sie folgende Angaben machen: das Anfangsdatum (in der Regel der Jahresanfang), die Wiederholung (wie oft diese Ausgabe anfällt), eine Beschreibung, den Betrag in der Ausgaben-Spalte sowie die passende Kategorie der Ausgabe.
In der Vorlage finden Sie bereits einige Beispiele für feste Ausgaben, die Sie ganz einfach anpassen oder löschen können – je nach Ihren Bedürfnissen. Es ist jederzeit möglich, neue Einträge hinzuzufügen.
Feste Ausgaben können folgende Posten umfassen:
- Miete oder Hypothek für Wohnung bzw. Haus
- Steuern und Abgaben
- Versicherungen
- Medizinische Kosten (z.B. Krankenkassenprämien)
- Fernsehgebühr
- Strom, Wasser und Gas
- Nahrungsmittel (Grundversorgung)
- Transportkosten (Treibstoff, Monats- oder Jahresabo für öffentliche Verkehrsmittel)
- Persönliche Pflege (z.B. Körperpflege, Haushalts- und Hygieneartikel)
- Bildungskosten (z.B. Studien- bzw. Universitätsgebühren, Schulbücher, Zeitungsabonnements).

Variable oder zusätzliche Ausgaben (Extras) eingeben
Nun erfassen Sie auch die Ausgaben, die nicht unbedingt lebensnotwendig sind. Diese werden oft als zusätzliche Nebenkosten bezeichnet und fallen im Laufe des Jahres in der Regel unregelmässig bzw. variabel an.
Zu den variablen Ausgaben zählen zum Beispiel:
- Reisen
- Mahlzeiten und Getränke in Restaurants und Bars
- Kino, Theater, Streaming...
- Einkäufe (z.B. Kleidung, Freizeitbedarf...)
- Verschiedene Geschenke
- Reparaturen im Haushalt
- Reparaturen und Service am Auto
- Hobbys
- Bücher
Auch in diesem Fall sollten Sie eine realistische Schätzung der voraussichtlichen Kosten (Extras) vornehmen. Überlegen Sie dabei, wie oft jede Ausgabe voraussichtlich anfällt und mit welchem Betrag zu rechnen ist.
Tipps:
- Legen Sie für jede zusätzliche Ausgabe einen monatlichen Höchstbetrag fest, den Sie nicht überschreiten möchten. Wenn Sie sich daran halten, können Sie Ihre variablen Ausgaben gut kontrollieren.
- Unvorhergesehene Ausgaben (z.B. Autor- oder Haushaltsreparaturen) sollten jährlich geschätzt, durch 12 geteilt und dann monatlich im Budget berücksichtigt werden.

Finanzprognose für jeden Monat ansehen

Eine oft unterschätzte, aber sehr hilfreiche Massnahme ist die regelmässige Kontrolle der geplanten Einnahmen und Ausgaben. So sehen Sie frühzeitig, ob Ihr Geld gut eingeteilt ist – und ob Sie etwas anpassen sollten.
So einfach rufen Sie die Monatsprognose auf: Gehen Sie zu Berichte > Formatierter Ausdruck nach Gruppen und wählen Sie in der erscheinenden Liste den Bericht Jahresbudget aus (dies ist der wichtigste Bericht, den Sie in dieser Situation verwenden sollten). Klicken Sie auf OK, um den Bericht zu öffnen.
Das Programm zeigt Ihnen – für jeden Monat und für das gesamte Jahr:
- den Liquiditätsstatus
- die Gesamtsumme der Einnahmen und Ausgaben
- den monatlichen Überschuss oder das Defizit.

Zusätzlich zur Monatsprognose (unter Menü Berichte > Formatierter Ausdruck nach Gruppen) können Sie auch Jahres-, Quartals- oder 4-Jahresberichte anzeigen – oder sogar eigene Berichte erstellen.
Finanzen optimieren
Ihr Ziel ist es natürlich, so viel wie möglich zu sparen. Prüfen Sie daher die Zeile Ergebnis (im obigen Bild rot markiert) und stellen Sie sicher, dass der Wert positiv ist - besonders am Jahresende. In diesem Fall bedeutet das, dass Sie eine Sparrücklage aufbauen, und das ist sehr erfreulich!
Ist der Betrag hingegen negativ, (d.h. die Ausgaben übersteigen die Einnahmen, dann verwalten Sie Ihr Geld bislang nicht optimal. Analysieren Sie die Situation und nehmen Sie entsprechende Anpassungen in Ihrer Planung vor. Mit einem Klick auf den Befehl Buchhaltung nachkontrollieren (Menü Aktionen) berechnet das Programm die Prognose neu – unter Berücksichtigung Ihrer vorgenommenen Änderungen.
Analyse und Optimierung Ihrer Budgetplanung:
- Schauen Sie, ob es Monate mit einem Defizit gibt.
- Prüfen Sie, in welchen Monaten Ihre Liquidität sinkt; dies kann auf eine finanzielle Unstimmigkeit hinweisen.
- Analysieren Sie, welche Ausgaben zu diesem Defizit führen.
- So können Sie gezielt gegensteuern:
- Nicht notwendige Ausgaben streichen.
- Ausgabenbeträge reduzieren.
- Ausgaben auf einen späteren Zeitpunkt verschieben.
- Möglichkeiten zur Erhöhung Ihrer Einnahmen prüfen.
Buchungseinträge erfassen
Mit dem Budget stets im Blick – inklusive Ihres "Sparziels" – beginnt nun die Umsetzungsphase: Sie erfassen die täglichen Geldbewegungen und vergleichen diese regelmässig mit den im Budget geplanten Werten.
Diese Bewegungen tragen Sie in die Tabelle Buchungen ein. Für jeden Eintrag geben Sie – wie bereits im Budget – das Datum, eine Beschreibung, den entsprechenden Einnahme- oder Ausgabebetrag sowie die passende Kategorie ein. Ganz einfach, nicht wahr?
Tipp: In der Spalte KS1 (Kostenstelle) können Sie zusätzlich ein Kürzel für das jeweilige Familienmitglied angeben. So sehen Sie automatisch, wie viel jede Person ausgibt – eine praktische Funktion zur internen Auswertung.
Transaktionen über Kontoauszüge anzeigen
Beim Erfassen Ihrer Buchungen ist es sinnvoll, regelmässig zu überprüfen, wie sich bestimmte Ausgabenkategorien oder Ihr Liquiditätskonto über die Zeit verändern. Nutzen Sie dafür die Funktion Kontoauszug.
Wenn Sie z.B. den Auszug für das Konto "Liquidität" wählen, erhalten Sie eine Übersicht über alle damit verbundenen Buchungen. Ein Klick auf das Diagramme-Fenster am unteren Bildschirmrand bietet Ihnen zusätzlich einen schnellen visuellen Überblick über den Kontoverlauf.
Tipp: Kontrollieren Sie Ihr Liquiditätskonto mindestens einmal pro Monat, um frühzeitig zu erkennen, wie sich Ihr Kontostand entwickelt – und vergleichen Sie ihn mit den Vormonaten.

Aktuellen Saldo mit dem Budget kontrollieren
Für eine noch bessere Kontrolle Ihrer finanziellen Entwicklung wechseln Sie zur Tabelle Kategorien und werfen Sie einen Blick in die Spalte Diff.Budget. Dort wird für jede Kategorie die Differenz zwischen dem tatsächlichen Saldo und dem von Ihnen geplanten Budgetwert angezeigt. So erhalten Sie einen zusätzlichen Hinweis darauf, ob Sie Ihren Haushalt im Griff haben – und können Ihre finanziellen Entscheidungen gezielter treffen.

Abgleich zwischen Budget und Jahresbericht
Im Verlauf des Jahres können Sie jederzeit Ihre aktuelle finanzielle Situation mit dem Budget vergleichen, um zu erkennen, ob und wo Sie mehr ausgeben als geplant. So lassen sich Ihre Konsumgewohnheiten rechtzeitig anpassen – und Sparpotenziale besser nutzen.
Am Jahresende vergleichen Sie Ihre tatsächlichen Ausgaben mit dem ursprünglich geplanten Budget – und sehen, ob Sie Ihr Sparziel erreicht haben.
So erstellen Sie den Kontrollbericht: Unter Menü Berichte > Formatierter Ausdruck nach Gruppen > Jährlicher Ausdruck mit Budgetvergleich auswählen. Klicken Sie auf OK, um den Bericht zu generieren.

Auch in diesem Fall können Sie – wenn Sie eine detailliertere und gezieltere Auswertung wünschen – Berichte mit einer monatlichen Aufschlüsselung erstellen, die zusätzlich die Abweichung zwischen dem tatsächlichen Ergebnis und dem Budget jedes einzelnen Monats enthalten. So erkennen Sie auf einen Blick, in welchen Monaten Sie mit finanziellen Engpässen zu kämpfen hatten – und in welchen Sie besonders viel gespart haben.
Am Jahresende ist es Zeit, ein neues Budget für das kommende Jahr zu planen – und dabei wie gewohnt Schritt für Schritt vorzugehen. Ein neues Sparziel wartet bereits auf Sie!
Methode 'Einnahmen-Ausgaben-Rechnung' ausprobieren
Sie arbeiten bereits erfolgreich mit dem Kassenbuch-System, möchten aber zusätzlich auch weitere Konten wie ein Bank- oder Postkonto verwalten? Dann ist der Buchhaltungstyp 'Einnahmen-Ausgaben-Rechnung' genau das Richtige für Sie. Er funktioniert ähnlich wie das Cash Manager (Kassenbuch) – ist jedoch strukturierter und vielseitiger.
Vorlagenseite: Familienbudget und Haushaltskonten mit Einnahmen-Ausgaben-Rechnung
Für die Einnahmen-/Ausgabenbuchhaltung gilt in der kostenlosen Version ein Limit von 70 Buchungszeilen und 20 Budgetzeilen. Wenn Sie dieses Limit überschreiten und Banana Buchhaltung uneingeschränkt nutzen möchten, können Sie ein Jahresabonnement (Lizenz) erwerben und alle verfügbaren Buchhaltungsarten frei verwenden.
Kostenlose Buchhaltungslösung für Schüler und Auszubildende – Lernen Sie zu sparen, um Ihre Ziele zu erreichen
Kostenlose Buchhaltungslösung für Schüler und Auszubildende – Lernen Sie zu sparen, um Ihre Ziele zu erreichenEntdecken Sie, wie Sie Ihre Finanzen clever verwalten und mühelos sparen können.
Das Leben als Studentin oder Student ist nicht immer einfach. Nach dem Schulabschluss beginnt ein neuer Lebensabschnitt – mit mehr Freiheit, aber auch mehr Verantwortung. Eine der grössten Herausforderungen: der Umgang mit Geld.
Für viele Studierende, die auswärts wohnen oder ihr Studium mit einem Nebenjob selbst finanzieren, ist es oft schwierig, den Überblick über Miete, Studiengebühren, Rechnungen und alltägliche Ausgaben zu behalten.
Banana Buchhaltung Plus unterstützt Sie dabei – mit einer einfachen und intuitiven Software, die Sie durch Ihren Finanzalltag begleitet und Ihnen hilft, Ihre Zukunftsprojekte zu verwirklichen.
Warum sollten Sie Banana Buchhaltung als Student oder Auszubildender nutzen?
- Behalten Sie Ihre Finanzen stets im Griff: Eine der wichtigsten Funktionen von Banana Buchhaltung ist die Möglichkeit, Ihre Einnahmen und Ausgaben kontinuierlich zu verfolgen. So behalten Sie Ihre Ausgaben unter Kontrolle – und vermeiden es, am Monatsende plötzlich ohne Geld dazustehen. Gerade für Studierende ist das besonders wichtig: Wer nur über ein kleines Budget verfügt, einen kantonalen Studienkredit aufnimmt oder sich sein Studium selbst finanziert, muss genau wissen, wohin das Geld fliesst.
- Planen und sparen: Dank der Budgetfunktion von Banana Buchhaltung können Sie Ihre Ausgaben endlich gezielt planen – sei es für Ihr Studium, den Kauf eines Autos oder die Rückzahlung eines Kredits. Mit dem Budget sehen Sie genau, wie viel Geld Ihnen in einem bestimmten Zeitraum zur Verfügung stehen wird.
- Einfach und schnell: Wenn Sie mit Ihrer Buchhaltung starten möchten, laden Sie einfach die auf dieser Seite verfügbare Vorlage herunter. Sie enthält bereits alle Kategorien, die Sie als Student benötigen. Sie müssen nur noch die Beträge eintragen – den Rest übernimmt das Programm für Sie.
- Ihre digitalen Fähigkeiten stärken: Digitale Kompetenzen sind wichtig, um neue Technologien sicher und bewusst zu nutzen. Mit Banana Buchhaltung lernen Sie nicht nur die Grundlagen der Buchhaltung und den Umgang mit Geld, sondern erweitern gleichzeitig Ihre digitalen Fähigkeiten. Sie lernen, eine neue Software effizient zu nutzen, mit digitalen Dokumenten und Verlinkungen zu arbeiten – und sparen dabei Papier und Zeit. Diese digitalen Kompetenzen können Sie in vielen Lebensbereichen anwenden – sei es im Studium, im Beruf oder im privaten Alltag.
Was bietet Banana Buchhaltung mehr als andere Programme?
Im Vergleich zur Buchhaltung in Excel oder anderen Programmen ermöglicht Ihnen Banana Buchhaltung, Ihr Budget mit wenigen Klicks zu erstellen – schnell, einfach und effizient. Zusätzlich steht Ihnen ein integrierter Liquiditätsplan zur Verfügung: ein leistungsstarkes Werkzeug, das die Entwicklung Ihrer finanziellen Mittel im Zeitverlauf nachverfolgt. So erkennen Sie frühzeitig potenzielle Engpässe oder Liquiditätsprobleme – und können rechtzeitig Gegenmassnahmen ergreifen.
Eigene Buchhaltungsdatei anlegen
- Öffnen Sie die gewünschte Vorlage mit der WebApp von Banana Buchhaltung
- Wählen Sie im Menü Datei > Eigenschaften (Stammdaten) und legen Sie Folgendes fest: den Zeitraum Ihrer Buchhaltungsdatei, den Familiennamen (zur besseren Identifikation), die gewünschte Basiswährung (Sie können Ihr Budget in jeder beliebigen Währung führen).
- Verwenden Sie zum Speichern den Menübefehl Datei > Speichern unter. Dabei empfiehlt es sich, im Dateinamen den Familiennamen sowie das Jahr anzugeben – z. B.: "Andreas-Schmid-20xx.ac2".
ACHTUNG: Wenn Sie den Browser schliessen, ohne die Datei zu speichern, geht Ihre Arbeit verloren. Speichern Sie die Datei daher immer auf Ihrem Computer.
Um eine gespeicherte Datei wieder zu öffnen, klicken Sie auf Datei > Öffnen.
Erfassung tatsächlicher Einnahmen und Ausgaben
Kommen wir nun zur praktischen Erfassung Ihrer Buchungen. Tragen Sie in der Tabelle Buchungen das Datum, eine Beschreibung, den Betrag sowie die passende Kategorie ein. Um Ihnen die Auswahl der richtigen Kategorie zu erleichtern, schlägt Ihnen das Programm automatisch passende Einträge vor, sobald Sie den Anfangsbuchstaben des Begriffs eingeben.
Wichtig: Achten Sie darauf, die Beträge in die richtige Spalte einzutragen: Einnahmen (Geldeingang) in die Spalte Einnahmen – Ausgaben (Geldausgang) in die Spalte Ausgaben.

Studienkredit und Stipendien
Falls Sie einen kantonalen Studienkredit aufgenommen haben oder ein Stipendium erhalten, sollten Sie diese separat erfassen – so können Sie klar zwischen eigenem Einkommen und externen finanziellen Unterstützungen unterscheiden.
Bei einem kantonalen Studienkredit können Sie zusätzlich auch die Rückzahlungen eintragen und behalten so stets den Überblick darüber, wie viel Sie noch zurückzahlen müssen.

Rechnungen, Quittungen und Lohnabrechnungen anhängen
In der Tabelle Kategorien bietet Banana Buchhaltung die Möglichkeit, PDF-Dateien wie Quittungen, Rechnungen, Belege oder Lohnabrechnungen direkt anzuhängen. Klicken Sie in die Zelle der Spalte DokLink und wählen Sie die gewünschte Datei aus. So haben Sie jederzeit einen Nachweis über Ihre Ausgaben und Einnahmen – inklusive aller Details.
Um die Spalte DokLink hinzuzufügen, gehen Sie ins Menü Daten > Spalten einrichten und aktivieren Sie dort DokLink.

Kontrollieren und überprüfen
Wenn Sie sicherstellen möchten, dass Ihnen keine Fehler unterlaufen sind, unterstützt Sie Banana Buchhaltung mit einer besonders hilfreichen Kontrollfunktion. Das Programm weist Sie automatisch auf mögliche Fehler hin und zeigt genau, in welcher Zeile sie auftreten – etwa wenn Sie vergessen haben, eine Kategorie oder einen Betrag einzutragen.
Um die Prüfung durchzuführen, wählen Sie im Menü Aktionen > Buchhaltung nachkontrollieren.
Vergessen Sie nicht, die Datei auf Ihrem Computer zu speichern.
Buchhaltung einfach erklärt
Was ist Buchhaltung – und wozu dient sie?
Das Wort "Buchhaltung" klingt zunächst kompliziert und abstrakt. In Wirklichkeit ist es aber viel einfacher, als man denkt. Ganz allgemein bedeutet Buchhaltung nichts anderes als das Erfassen und Überwachen von Geldbewegungen – sei es für sich selbst, für jemand anderen oder für ein Unternehmen. Mit "Einträgen" (Buchungen) sind dabei die Einnahmen und Ausgaben gemeint – also das Geld, das eingeht, und das Geld, das ausgegeben wird.
Die Kontrolle von Einnahmen und Ausgaben ist ein zentraler Bestandteil der Unternehmensführung. Ziel eines Unternehmens ist es, die Einnahmen zu maximieren und gleichzeitig die Kosten zu minimieren. Durch die Buchhaltung erhält man sofortige Informationen über die wirtschaftliche Entwicklung – und kann bei Bedarf schnell Strategien zur Korrektur oder Optimierung der Unternehmensführung umsetzen, um künftige Ziele zu erreichen.
Auch das Ausfüllen der Steuererklärung wird durch eine gut geführte Buchhaltung deutlich einfacher – denn Sie haben jederzeit einen klaren Überblick über Ihre Einnahmen und Ausgaben: woher Ihre Einkünfte stammen, wofür Sie Geld ausgegeben haben und wie es um Ihr aktuelles Konto steht.
Buchhaltung ist jedoch nicht nur für grosse und kleine Unternehmen nützlich, sondern auch für Einzelpersonen im Alltag. Sie hilft zum Beispiel dabei, die Haushaltsausgaben im Blick zu behalten oder grössere und kleinere Projekte zu planen – etwa den Kauf eines Hauses.
Kurz gesagt: Buchhaltung ermöglicht es jedem von uns, zum eigenen Finanzunternehmer zu werden.
Grundbegriffe der Buchhaltung
Budget / Finanzplanung
Ein Budget – auch Finanzplan genannt – ist eine Vorausschau auf Ihre erwarteten Einnahmen und Ausgaben, jeweils mit Zuordnung zu einer Kategorie. Mit einem gut erstellten Budget behalten Sie den Überblick und stellen sicher, dass Ihre Ausgaben Ihre Einnahmen nicht übersteigen. So können Sie gezielt sparen und unnötige Ausgaben vermeiden.
Um ein solides Budget zu erstellen, sollten Sie zu Beginn des Jahres alle voraussichtlichen Einnahmen sowie festen und variablen Ausgaben erfassen. Dadurch gewinnen Sie von Anfang an eine klare Übersicht über Ihre finanzielle Lage und können Ihre Ausgaben gezielt steuern. Sie vermeiden es, mehr auszugeben, als tatsächlich zur Verfügung steht – und können Ihre Ersparnisse gezielter planen und optimieren.
Ein weiterer Vorteil des Budgets: Es ermöglicht den Vergleich zwischen Planung und tatsächlicher Entwicklung. So erkennen Sie frühzeitig, in welchen Bereichen Sie mehr ausgeben als geplant – und können gezielt gegensteuern.
Liquiditätsplan (Kassenplan)
Der Liquiditätsplan zeigt, wie sich Ihre Einnahmen und Ausgaben im Laufe der Zeit tatsächlich entwickeln. Mithilfe der Kategorien in Banana Buchhaltung können Sie genau nachvollziehen, woher Ihr Geld stammt (z.B. aus einem Teilzeitjob), wofür Sie es ausgeben (z.B. ein Disco-Abend mit Freunden) und zu welchem Zeitpunkt diese Bewegungen stattfinden.
Prognose des Geldflusses (Cashflow-Vorschau)
Mit dem Budget (Finanzplan) können Sie Ihre zukünftige Liquidität voraussehen – also die erwartete Entwicklung Ihres Kontostands. In Banana Buchhaltung haben Sie die Möglichkeit, für jede Buchung ein Datum anzugeben. So lassen sich Ausgaben nicht nur gezielt planen und optimieren, sondern vor allem potenzielle Engpässe frühzeitig erkennen - und durch rechtzeitige Massnahmen, wie das Streichen unnötiger Ausgaben, vermeiden. Steht beispielsweise eine grössere Anschaffung wie ein neues Smartphone an, zeigt Ihnen die Vorschau genau, wann und wie viel Geld Sie zur Verfügung haben müssen, um sich diese Ausgabe leisten zu können.
Der Liquiditätsplan und das Budget sind zwei ergänzende Werkzeuge, mit denen Sie lernen, Ihre Finanzen bewusst zu steuern. Sie helfen Ihnen, Ihre Ausgaben zu optimieren oder rechtzeitig anzupassen, um bestimmte Ziele zu erreichen. So tätigen Sie Ihre Ausgaben überlegt – und vermeiden es, plötzlich ohne Geld dazustehen.
Mehr zum Thema Buchhaltung? Jetzt entdecken!
Kurz gesagt: Warum Banana Buchhaltung verwenden?
- Kostenlose Webanwendung – keine Installation erforderlich
- Einfach und schnell – dank der vorgefertigten Vorlage
- Planen, um persönliche Ziele zu erreichen
- Sparen lernen und zum eigenen Finanzmanager werden
Referenzen:
Burek, Owen. How to Budget at University. Save The Student (2019).
Segal, Troy. Money Management for College Students. Investopedia (2020).
Familienbudget und Haushaltskonten | Einnahmen-Ausgaben-Rechnung
Familienbudget und Haushaltskonten | Einnahmen-Ausgaben-RechnungVerwalten Sie Ihre Haushaltskonten ganz einfach mit Banana Buchhaltung und reduzieren Sie Ihre Familienausgaben dank eines klaren, gut strukturierten Familienbudgets.
Ein Budget ist der Schlüssel, um Ihre Haushaltsfinanzen unter Kontrolle zu halten und gezielt zu sparen. Die Planung von Einnahmen und Ausgaben ist heute nicht mehr nur für Unternehmen wichtig – auch Familien und Privatpersonen profitieren enorm davon.
Deshalb bietet Banana Buchhaltung in seinen Vorlagen die praktische Funktion "Budget", mit der Sie Ihr persönliches Haushaltsbudget schnell und intuitiv erstellen können. Sie fragen sich, wie Sie ein Familienbudget erstellen? Kein Problem! Mit unseren Schritt-für-Schritt-Anleitungen erstellen Sie im Handumdrehen Ihr eigenes Budget und behalten Ihre Haushaltsfinanzen jederzeit im Blick.
Eigene Buchhaltungsdatei anlegen
- Erstellen Sie eine neue Datei auf Basis dieser Vorlage (Vorlagen-ID +11108).
- Wählen Sie im Menü Datei > Eigenschaften (Stammdaten) und legen Sie den Zeitraum, den Familiennamen sowie die Basiswährung fest (Sie können Ihr Budget und Ihre Buchhaltung in jeder gewünschten Währung führen).
- Speichern Sie die Datei über den Menübefehl Datei > Speichern unter. Es empfiehlt sich, im Dateinamen den Familiennamen und das Jahr anzugeben (zur besseren Identifikation), z.B. "Familie-Schmidt-20xx.ac2".
ACHTUNG: Wenn Sie den Browser schliessen, ohne zu speichern, geht Ihre Arbeit verloren. Speichern Sie die Datei daher stets auf Ihrem Computer.
Um eine gespeicherte Datei wieder zu öffnen, wählen Sie den Menübefehl Datei > Öffnen.
Tabellen "Konten" und "Kategorien" anpassen
Bevor Sie Ihr eigenes Budget erstellen, sollten Sie die Konten und Kategorien an Ihre persönlichen Bedürfnisse anpassen.
Tabelle Konten
In der Tabelle Konten finden Sie alle Konten, die Sie für die Verwaltung Ihrer Bankverbindungen, Ihres Postkontos, Ihrer Kasse sowie Ihrer Forderungen (z.B. Darlehen) und Verbindlichkeiten (Schulden) benötigen.
Sie können diese Konten individuell anpassen, indem Sie die Beschreibung (und/oder die Kontonummer) ändern, zusätzliche Konten hinzufügen oder nicht benötigte Konten löschen. Tragen Sie ausserdem in der Spalte Eröffnung den aktuellen Betrag ein, der auf dem jeweiligen Konto vorhanden ist.

Tabelle Kategorien
Die Tabelle Kategorien enthält sämtliche Einnahmen- und Ausgabenkategorien. Zusätzlich stehen Kostenstellen zur Verfügung, mit denen Sie einzelne Ausgaben und Einnahmen gezielt den jeweiligen Familienmitgliedern zuordnen und später im Detail auswerten können.
Die Kategorien folgen derselben Struktur, die im nächsten Abschnitt Eigenes Budget erstellen näher erläutert wird:
- Einnahmen
- Feste Ausgaben
- Variable Ausgaben
Die Kategorien und Kostenstellen lassen sich jederzeit anpassen – etwa durch das Hinzufügen neuer Einnahme- oder Ausgabepositionen, das Überschreiben bestehender Kategorien, das Löschen nicht benötigter Zeilen oder das Anpassen der Reihenfolge nach Ihren individuellen Bedürfnissen.
Eigenes Budget erstellen
Jetzt beginnt die eigentliche Planungsphase: Tragen Sie Ihre voraussichtlichen Ausgaben und Einnahmen in die Budget-Tabelle ein. Ein Budget zu erstellen ist wirklich einfach – geben Sie dafür einfach die erwarteten Jahresbeträge ein und ordnen Sie jede Buchung der passenden Ausgabenkategorie zu.
Wenn Ihnen dabei ein Fehler unterläuft, ist das kein Problem: Sie können Ihre Einträge jederzeit anpassen, bis Ihre Planung vollständig stimmt.
In nur 3 einfachen Schritten zum vollständigen Finanzplan:
- Einnahmen erfassen
- Feste Ausgaben eintragen
- Variable Ausgaben oder Sonderposten/Extras hinzufügen
Weitere technische Informationen finden Sie auf der Dokumentationsseite zur Tabelle Budget.
Einnahmen eingeben
Beginnen Sie damit, über Ihre festen Einnahmen und deren höhe nachzudenken – also über regelmässige Einkünfte, die Ihnen bereits bekannt sind. Das Gehalt ist dabei meist die Hauptquelle, doch je nach Tätigkeit oder Vermögen können weitere Einnahmen hinzukommen.
Typische Einnahmen sind zum Beispiel:
- Gehalt
- Mieteinnahmen aus Immobilien
- Unterhaltszahlungen
- Zinsen von Bank- oder Postkonten
Tipp: Planen Sie nur mit fixen und verlässlichen Einnahmen, die Sie tatsächlich erwarten können.

Ausgaben eingeben
Jetzt ist der richtige Zeitpunkt, um über alle festen Ausgaben nachzudenken. Dazu gehören sowohl monatliche als auch jährliche Fixkosten. Für die Schätzung können Sie sich an den Ausgaben des Vorjahres orientieren.
Bei Ausgaben, die von Monat zu Monat leicht schwanken, empfiehlt es sich, einen Durchschnittswert zu verwenden – und diesen im Zweifel etwas nach oben aufzurunden, um auf der sicheren Seite zu sein. Es ist besser, zu Jahresbeginn eine grobe, aber realistische Schätzung vorzunehmen und diese später bei Bedarf anzupassen, als im Laufe des Jahres von unerwartet hohen Kosten überrascht zu werden.
Um beispielsweise die monatliche Miete einzutragen, geben Sie folgende Angaben ein: das Anfangsdatum (in der Regel der Jahresbeginn), die Wiederholung (wie oft die Ausgabe anfällt), eine Beschreibung, den Betrag in der Ausgaben-Spalte sowie die passende Ausgabenkategorie.
In der Vorlage finden Sie bereits einige Beispiele für feste Ausgaben, die Sie je nach Bedarf einfach anpassen oder löschen können. Natürlich können Sie jederzeit neue Einträge hinzufügen.
Typische feste Ausgaben sind zum Beispiel:
- Miete oder Hypothek für Wohnung bzw. Haus
- Steuern und Abgaben
- Versicherungen
- Medizinische Kosten (z.B. Krankenkassenprämien)
- Fernsehgebühr
- Strom, Wasser, Gas
- Nahrungsmittel (Grundversorgung)
- Transportkosten (Treibstoff, Monats- oder Jahresabo für öffentliche Verkehrsmittel)
- Persönliche Pflege (z.B. Körperpflege, Haushalts- und Hygieneartikel)
- Bildungskosten (z.B. Universitätsgebühren, Schulmaterial, Zeitungsabos).

Variable oder zusätzliche Ausgaben (Extras) eingeben
Nun wiederholen Sie den Vorgang für alle Ausgaben, die nicht zwingend notwendig sind – also für jene Extras, die im Laufe des Jahres meist unregelmässig und in unterschiedlicher Höhe anfallen.
Typische variable Ausgaben sind zum Beispiel:
- Reisen
- Mahlzeiten und Getränke in Restaurants und Bars
- Kino, Theater, Streaming-Dienste
- Einkäufe (z.B. Kleidung, Freizeitbedarf...)
- Geschenke
- Haushaltsreparaturen
- Reparaturen und Service am Auto
- Hobbys
- Bücher
Auch hier ist es wichtig, eine realistische Schätzung der voraussichtlichen Ausgaben (Extras) vorzunehmen. Überlegen Sie dabei, wie häufig jede Ausgabe im Laufe des Jahres anfällt und mit welchem Betrag zu rechnen ist.
Tipps:
- Legen Sie für jede zusätzliche Ausgabe einen monatlichen Höchstbetrag fest, den Sie nicht überschreiten möchten. So behalten Sie Ihre variablen Kosten gut unter Kontrolle.
- Unvorhergesehene Ausgaben (z.B. Auto- oder Haushaltsreparaturen) sollten Sie auf Jahresbasis schätzen, durch 12 teilen und dann als monatlichen Betrag im Budget berücksichtigen.

Kontrollieren Sie die budgetierten Einnahmen und Ausgaben
Um Ihr Budget zu vervollständigen, bleibt nur noch ein letzter – aber sehr wichtiger – Schritt: der Vergleich Ihrer geschätzten Einnahmen und Ausgaben. Damit gleichen Sie Ihre tatsächliche Finanzsituation mit Ihrer Planung ab.
Die Auswertung ist ganz einfach: Im Menü Berichte > Formatierter Ausdruck nach Gruppen auswählen und in der Liste den Bericht Jahresbudget wählen – dies ist der wichtigste Bericht für Ihre Analyse. Anschliessend auf OK klicken, um ihn anzuzeigen.
Ihr Ziel ist es natürlich, so viel wie möglich zu sparen. Prüfen Sie daher die Zeile Ergebnis (siehe Abbildung unten) und achten Sie darauf, dass der Wert positiv ist – besonders am Jahresende. Das bedeutet, dass Ihre Einnahmen höher als Ihre Ausgaben sind und Sie eine Sparrücklage aufbauen können – ein sehr erfreuliches Ergebnis!
Sollten hingegen Ihre Ausgaben die Einnahmen übersteigen, verwalten Sie Ihr Geld möglicherweise nicht optimal – oder es hat sich ein Fehler bei der Budgeterstellung eingeschlichen. Überprüfen Sie in diesem Fall, ob einzelne Ausgaben zu hoch angesetzt sind, und korrigieren Sie diese realistisch. Alternativ können Sie gezielt eine oder mehrere variable Ausgaben (Extras) reduzieren, um Ihre Kosten im Laufe des Jahres wieder unter Kontrolle zu bringen.

Buchungseinträge erfassen
Mit dem Budget stets im Blick – inklusive Ihres persönlichen "Sparziels" – beginnt nun die Umsetzungsphase: Sie erfassen Ihre täglichen Geldbewegungen und vergleichen diese regelmässig mit den im Budget geplanten Werten.
Die erfassten Bewegungen tragen Sie in die Tabelle Buchungen ein. Für jeden Eintrag geben Sie – wie bereits im Budget – das Datum, eine Beschreibung, den entsprechenden Einnahme- oder Ausgabebetrag sowie die passende Kategorie an.
Tipp: In der Spalte KS1 (Kostenstelle) können Sie zusätzlich ein Kürzel für das jeweilige Familienmitglied eintragen. So sehen Sie auf einen Blick, wie viel jede Person ausgibt – eine sehr praktische Funktion für interne Auswertungen.
Um Ihnen den Einstieg zu erleichtern, enthält die Tabelle Buchungen bereits einige Beispielbuchungen (siehe Abbildung). Diese können Sie ganz einfach löschen oder an Ihre eigenen Bedürfnisse anpassen.

Prognose mit dem Jahresbericht vergleichen
Im Laufe des Jahres können Sie Ihre aktuelle finanzielle Situation jederzeit mit dem Budget abgleichen, um zu erkennen, ob – und in welchen Bereichen – Sie mehr ausgeben als geplant. Auf diese Weise können Sie Ihre Ausgabengewohnheiten rechtzeitig anpassen und gezielt sparen.
Zum Jahresabschluss empfiehlt sich ein abschliessender Vergleich zwischen dem tatsächlichen Ergebnis und dem zu Jahresbeginn erstellten Budget, um festzustellen, ob Sie Ihre Sparziele erreicht haben.
So erstellen Sie den Kontrollbericht: Im Menü Berichte > Formatierter Ausdruck nach Gruppen ausführen und anschliessend den Bericht Jährlicher Ausdruck mit Budgetvergleich auswählen.

Wenn das Jahresende näher rückt, ist es an der Zeit, das kommende Jahr neu zu planen – mit einem Budget nach derselben Vorgehensweise wie bisher. Ein neues Sparziel erwartet Sie bereits!
Buchhaltung für private Aktivitäten/Haushalt
Buchhaltung für private Aktivitäten/Haushalt caterinaFamilienbudget und Haushaltskonten | Doppelte Buchhaltung
Familienbudget und Haushaltskonten | Doppelte BuchhaltungSo erstellen Sie ein Haushaltsbudget
Lernen Sie mit unserer Schritt-für-Schritt-Anleitung auf der Seite Familienbudget und Haushaltskonten, wie Sie Ihr Haushaltsbudget einfach erstellen und erfolgreich verwalten.
Familienbudget und Haushaltskonten | Fremdwährungen
Familienbudget und Haushaltskonten | FremdwährungenSo erstellen Sie ein Haushaltsbudget
Lernen Sie mit unserer Schritt-für-Schritt-Anleitung auf der Seite Familienbudget und Haushaltskonten, wie Sie Ihr Haushaltsbudget einfach erstellen und erfolgreich verwalten.
Die Organisation persönlicher Finanzen
Banana hat ein Haushaltsbuch entwickelt, das das Verwalten der Konten zu Hause erleichtert. In Kürze:
- Sofortiger und vollständiger Überblick über die finanzielle Situation
- Detailansicht der zukünftigen Entwicklung der Finanzen
Im Gegensatz zu anderer Buchhaltungssoftware ermöglicht Ihnen unsere Methode, in die Vergangenheit, die Gegenwart und die Zukunft zu blicken.
Vorteile unserer Vorlagen für die Verwaltung der Finanzen zu Hause
In Banana Buchhaltung wird die Kakebo-Methode mit einer eigenen Technologie kombiniert, damit Sie auch die Finanzen im Haushalt besser verwalten können.
Die Methode Banana hat folgende Vorteile:
- Ordnungsgemässe und genaue Klassifizierung der Ausgaben je nach Bedürfnis
- Prognose der Ausgaben und Einnahmen
- Täglicher Überblick über die Ausgaben für ein besseres Konsumverhalten
- Hilft sparen zu lernen
- Fördert die Selbstdisziplin
- Sie sind entspannt, weil Sie nie mehr ausgeben, als zur Verfügung steht.
Klassifizierung der Einnahmen und Ausgaben
Banana übernimmt von der Kakebo-Methode die Struktur der Kategorien (Ausgaben), mit Hinzufügen einer Business-Kategorie, um die mit einer Nebentätigkeit verbundenen Kosten unter Kontrolle zu halten.
Die Struktur der Ausgabeposten ist nur ein Ausgangspunkt; sie kann zu Beginn oder während des Jahres angepasst werden, um besser auf Ihre Bedürfnisse und deren Entwicklung einzugehen (wenn Sie z.B. Immobilien besitzen und diese vermieten, ist es sinnvoll, eine Gruppe zu bilden, in der alle Einnahmen und Ausgaben im Zusammenhang mit der Immobilie zusammengefasst sind).
- Einnahmen
Alle Einnahmen jeglicher Art - Ausgaben
Die Ausgaben werden so klassifiziert:- Fixe Ausgaben
Sind die Ausgaben, die regelmässig anfallen und die nicht umgangen werden können (wie Miete, Hypothek, Versicherung, Telefonabonnements, öffentliche Verkehrsmittel, Fitnessstudio, Sozialversicherungsbeiträge) - Veränderliche Ausgaben
Ausgaben, die mehr oder weniger nötig sind, wobei die Möglichkeit besteht, selber Produkte aufgrund des Preises auszuwählen- Alltag
Die üblichen, unvermeidbaren Ausgaben für Lebensmittel, Gesundheit, Verkehr oder andere Zwecke - Fakultativ
Ausgaben für Freizeit und Vergnügen - Kultur
Ausgaben, die Geist und Körper bereichern - Extra
Alle Ausgaben, die nicht in andere Kategorien fallen oder die langzeitig sind.
Bei der Einnahmen/Ausgaben-Rechnung sowie der doppelten Buchführung werden langzeitige Ausgaben wie Investitionen behandelt und als Aktiva gebucht - Business.
Ausgaben im Zusammenhang mit Nebentätigkeiten
- Alltag
- Fixe Ausgaben
Effektive Ausgaben und Einnahmen buchen
In der Tabelle Buchungen werden alle Ausgaben angegeben. Neben Datum, Beschreibung und Betrag definiert man die Kategorie einer Ausgabe
- Bewegungen können aus dem Kontoauszug der Bank importiert werden.
- Belege erhalten eine fortlaufende Nummer in der Spalte Beleg
So ist es einfach, Dokumente wieder zu finden - Buchung können an ein digitales Dokument gebunden sein, das gescannt und auf Ihrem Computer gespeichert ist
In der Tabelle Kategorien haben Sie einen sofortigen Überblick über Ihre finanzielle Situation.
Finanzplanung
In der Tabelle Budget können Sie Bewegungen eingeben, die Sie voraussehen.
Die Daten werden zu Beginn des Jahres eingegeben, aufgrund von dem, was Sie erwarten zu verdienen und auszugeben; periodisch können Sie alle Ausgaben und Einnahmen überprüfen und mit dem Budget vergleichen. So können Sie eine detaillierte Finanzplanung erstellen und wissen, wie sich Ihre Finanzen im laufenden und in den folgenden Jahren entwickeln werden.
- Sich wiederholende Bewegungen, geben Sie sie nur einmal ein
- Alle festen Ein- und Ausgaben, die sich nie ändern
- Sie müssen die variablen festen Ausgänge schätzen.
- Die anderen Ausgaben können Sie auch schätzen und als wiederkehrende Ausgaben eingeben
- Wichtige Ausgaben, wie z.B. der Kauf eines Autos, müssen Sie vorhersagen und auch das voraussichtliche Datum angeben
Sie werden augenblicklich wissen, wie sich Ihre Finanzen entwickeln werden
- Sie sehen sofort, ob Sie genug Geld für Ihre Ausgaben haben
- Sie sind in der Lage, Liquiditätskrisen frühzeitig zu erkennen
- Bei grösseren Ausgaben können Sie simulieren, wie sie sich auf Ihre Finanzen auswirken würden
Die Art der Buchhaltung, die Ihren Bedürfnissen am besten entspricht
Sie können die Art der Buchhaltung wählen, die Ihren Bedürfnissen am besten entspricht. Es stehen gebrauchsfertige Vorlagen mit Konten und Kategorien zur Verfügung:
- Kassenbuch
Für eine einfache und effiziente Kontrolle der Ausgaben und der Finanzplanung
Alle Einnahmen und Ausgaben werden so betrachtet, als ob sie von einem einzigen Konto stammen - Einnahmen-und Ausgabenrechnung
Neben dem Ausgabeposten wird auch das Herkunfts- oder Bestimmungskonto angegeben. Ausserdem haben Sie einen klaren Überblick über Ihr Vermögen, Ihre Bankkonten und Kreditkarten. Sie können auch andere Aktiva wie Investitionen, Autos, Möbel, Wohnungen und sogar kurz- oder langfristige Darlehen im Auge behalten. - Doppelte Buchführung
Das ist die professionelle Art und beruht auf internationalen Standards. Buchungen werden eingegeben, indem man das Konto Soll und Haben angibt. - Doppelte Buchführung mit Fremdwährungen.
Wird verwendet, wenn Sie Konten und Ausgaben in verschiedenen Währungen verwalten möchten.
Wenn sich Ihre Bedürfnisse ändern, können Sie Ihre Buchhaltung auch während des Jahres in eine andere umwandeln. (Z.B. von der Einnahmen-Ausgabenrechnung auf die Doppelte Buchhaltung übergehen).
Geschichte und Struktur unserer Methode für Hauskonten
Die Banana Methode für Haushaltskonten basiert auf der Kakebo-Methode, einem innovativen japanischen System, das Anfang des 19. Jahrhunderts entwickelt worden ist. Die Kakebo-Methode kombiniert die Planung von Ausgaben für den Haushalt mit dem Erfassen von Ausgaben. Zu Beginn des Monats werden Einnahmen, fixe Ausgaben, die variablen Ausgaben und Sparziele definiert. Während des Monats werden die tatsächlichen Ausgaben erfasst, so dass am Ende des Monats Ihre finanzielle Situation und erreichten Ziele leicht zu erkennen sind. Diese ständige Arbeit von Voraussehen und Kontrolle ermöglicht es Ihnen, eine ganze Reihe von Wissen zu erwerben, das es Ihnen ermöglicht, Ihre finanzielle Situation besser zu managen.
Die Methode Banana verfolgt das gleiche Konzept, indem sie die Planung mit der tatsächlichen Datenerfassung kombiniert, aber im Gegensatz zur Kakebo-Methode bietet sie neben dm Anzeigen der monatlichen festen Einnahmen und Ausgaben auch eine vollständige Planung mit allen Einnahmen und Ausgaben für das nächste Jahr oder die nächsten Jahre. Diese Zukunftsvision ermöglicht es Ihnen, Ihre Ressourcen besser zu kontrollieren und wichtige Entscheidungen mit grösserer Sicherheit zu treffen. Während Sie Ihre tatsächlichen Ausgaben buchen, sind Sie immer auf dem neuesten Stand Ihrer finanziellen Situation und können sehen, wie weit Sie gekommen sind.
Die Finanzplanung von Banana basiert auf der Buchführung. Prognosen werden mit den gleichen Ausgabepositionen und durch Erfassen von Budgetbuchungen erstellt. Es besteht eine totale Symbiose zwischen Prognose- und effektiven Daten, die eine effiziente Kontrolle der Ausgaben und eine Verbesserung der Prognosen ermöglicht.
Offensichtlich ist die Methode Banana optimiert, um die Konten mit dem Computer zu verwalten. Alle Rechnungen und Projektionen werden von der Software Banana Buchhaltung durchgeführt. Das ist einfacher und Sie verfügen immer über aktuelle Informationen. Die für Banana typischen Funktionen erleichtern die Buchführung und erlauben, einfach und schnell machen.
Buchhaltung Ausbildung
Vorlagen für Grundbildung
Doppelte Buchführung für Buchhaltungsunterricht
Doppelte Buchführung für BuchhaltungsunterrichtDieses Modell hat einen sehr einfachen Kontenplan, der ideal für das Lehren der Grundlagen der doppelten Buchführung mit Aktiven, Passiven, Aufwand, Ertrag und ohne Untergruppen ist.
Weitere Informationen zur Schulung finden Sie auf:
Um zu erfahren, wie man Banana Buchhaltung verwendet:
Kontenplan
In der Tabelle "Konten" ist der Kontenplan mit Bilanz und Gewinn- und Verlustrechnung auf einen Blick sichtbar.
Es kann angepasst werden, indem Konten je nach Bedarf geändert, hinzugefügt oder gelöscht werden. Weitere Details zur Einrichtung des Kontenplans sind in der Online-Lektion Der Kontenplan verfügbar.
Ein wichtiger Aspekt ist, dass Buchhaltungssoftware aus informatischer Sicht in der Regel auf der Gleichung "Soll = Haben" basiert, die als "Soll - Haben = 0" umgeschrieben wird. Die Programmierer haben sich dafür entschieden, diese Form beizubehalten. Daher werden Soll-Beträge vom System mit einem Pluszeichen "+" versehen, während Haben-Beträge mit einem Minuszeichen "-" versehen werden.

Eröffnungssaldi
In der Spalte Eröffnung werden die Anfangssalden der Aktiva und Passiva eingetragen. Die Passivsalden werden mit einem Minuszeichen vorangestellt.
Buchungsjournal und Buchungen
Die Tabelle Buchungen ist der Kern von Banana Buchhaltung und wird für die Eingabe von Buchungen im Rahmen der doppelten Buchführung verwendet. Hier führen die Studierenden alle Operationen durch: Sie üben das Eingeben von Daten, überprüfen sie und können Fehler jederzeit korrigieren.
Um Buchungssätze einzugeben, müssen die folgenden Spalten ausgefüllt werden:
- Datum, eventuelle Dokumentennummer
- Beschreibung
- Sollkonto
- Habenkonto
- Betrag
Die einzelnen Buchungen können entweder in einfacher Form, d.h. auf einer einzigen Zeile, oder in zusammengesetzter Form, d.h. auf mehreren Zeilen (wenn mehr als zwei Konten beteiligt sind), erfasst werden. Dies entspricht genau dem, was in der traditionellen Papierform geschieht, jedoch schneller durch den Einsatz des Computers.
Nach jeder Buchung werden die Kontostände automatisch in der "Konten"-Tabelle aktualisiert. Dadurch können die Studierenden sofort die Auswirkungen jeder Operation erkennen, und die Buchhaltung bleibt stets geordnet.

Spalte Saldo
Durch die Spalte Saldo können die Studierenden sofort erkennen, ob es eventuelle Buchhaltungsfehler oder Abweichungen gibt und sie können die eingegebenen Daten sofort korrigieren.

Kontoauszüge
Die Kontoauszüge entsprechen den Hauptbuchblättern und zeigen daher die Bewegungen jedes einzelnen Kontos. Sie enthalten den Anfangssaldo, die Änderungen aufgrund der im Journal erfassten Buchungen und den resultierenden Endsaldo.
Bilanz und Gewinn- und Verlustrechnung
Nach Eingabe der Buchungen kann die Bilanz und die Gewinn- und Verlustrechnung erstellt werden. Der Kontenplan, der bereits automatisch und sofort mit den Endsummen abgeschlossen ist, zeigt bereits die endgültige Bilanz und Gewinn- und Verlustrechnung.
Mit dem Menü Berichte > Formatierte Bilanz nach Gruppen kann eine ordentliche und sorgfältig gestaltete Präsentation der Bilanz und Gewinn- und Verlustrechnung erstellt werden, die als PDF gespeichert oder gedruckt werden kann. Dadurch werden sie in traditionellem Stil "verschönert" und präsentiert.
Die Berichte können angepasst werden, indem man die zu druckenden Abschnitte, den Zeitraum, die Aufteilung des Zeitraums und andere Optionen auswählt.

Bilanzanalyse
Mit Hilfe einer spezifischen Erweiterung aus dem Menü Erweiterungen > Flusskonten und Bilanzindizes (Cash Flow Statements and Financial Ratios) können Sie automatisch einen Bericht im PDF-Format erhalten, der Folgendes enthält:
- Liquiditätskennzahlen (Cash Ratio, Quick Ratio, Current Ratio)
- Rentabilitätskennzahlen (ROE, ROI, ROS, ...)
- Effizienzkennzahlen
- Cash Flow
- DuPont-Analyse und Altman Index Z-Score
Schülerdatei zur automatischen Korrektur von Buchhaltungsübungen und -prüfungen
Schülerdatei zur automatischen Korrektur von Buchhaltungsübungen und -prüfungen patrickLehrerdatei für die automatische Korrektur von Buchhaltungsübungen und -prüfungen
Lehrerdatei für die automatische Korrektur von Buchhaltungsübungen und -prüfungen patrickÜbungen mit der Buchhaltungssoftware
Die Studierenden werden auf die Verwendung der Buchhaltungssoftware hingewiesen und übernehmen sie, um praktische Buchhaltungsübungen durchzuführen. Die Lehrkräfte haben die Möglichkeit, Buchhaltungsübungen einfach zu teilen und sie automatisch und mühelos zu korrigieren.
Einführung in die Benutzung der Software
Die Tabellen von Banana Buchhaltung sind ähnlich wie die von Excel und sind leicht verständlich. Die Studierenden verstehen die Verwendung der Software einfach, indem sie sie während des Unterrichts verwenden oder die ihnen zugewiesenen Buchhaltungsübungen durchführen.
Zum Beispiel kann der Lehrer während des Unterrichts den Kontenplan vorstellen und dessen Struktur erklären. Das Gleiche gilt für das Buchen von Buchungen.
Nach einer kurzen Einführung in die Programmnutzung können die Schüler alleine oder in Gruppen das Programm und den während des Unterrichts vorgestellten Kontenplan verwenden und Übungen durchführen.
Vorbereitung des Unterrichts und der Buchhaltungsvorlagen für Übungen
Der Lehrer erstellt Buchhaltungsdateien, die sowohl zur Erläuterung theoretischer Themen als auch zur Verfolgung des Unterrichts und der Praxis dienen. Die Dauer dieser Phase hängt von der Länge des Studienprogramms ab.
Der Lehrer
- Buchhaltungsdateien für jeden Lernschritt vorbereiten
- Liefert theoretische Erklärungen und zeigt gleichzeitig, wie sie in die Praxis umgesetzt werden
- Übungen für die Studierenden vorbereiten
Das Programm auf dem Computer des Schülers installieren
Der Lehrer gibt Anweisungen, wie jeder Schüler das Programm auf seinem Computer installieren kann.
- Es ist am besten, diese Informationen im Voraus zu geben, damit jeder Student Zeit hat, das Programm selbständig zu installieren.
Es ist immer problematisch, wenn alle Schüler das Programm gleichzeitig im Unterricht installieren, da es die Verbindungen verlangsamt. - Die Informationen zur Installation müssen für die verschiedenen Betriebssysteme zur Verfügung gestellt werden:
- Banana Buchhaltung Plus kann auf Windows-, Mac- und Linux-Computern installiert werden. Es ist hilfreich, die Download-Seite und die Systemanforderungen zu erwähnen.
- Die Installation erfolgt vollautomatisch, aber die Studenten sollten darauf aufmerksam gemacht werden, dass sie im Computeradministrator-Modus arbeiten müssen, um die Software zu installieren.
- Wenn die Schüler langsame Verbindungen haben, kann die Schule die Installationsdatei im Netzwerk der Schule herunterladen.
In diesem Fall sollte darauf geachtet werden, die Dateien zu aktualisieren, damit die Schülerinnen und Schüler immer die neueste Version installieren. - Ermutigen Sie die Studenten, das Programm zu starten, damit sie überprüfen können, ob die Installation erfolgreich war.
- Banana Contabilità ha anche una versione per Android all'interno del Play Store. Cercare Banana Accounting Mobile e installare l'app.
- Es gibt auch eine iOS-Version im App Store. Suchen Sie nach Banana Accounting Mobile und installieren Sie die App.
- Banana Buchhaltung Plus kann auf Windows-, Mac- und Linux-Computern installiert werden. Es ist hilfreich, die Download-Seite und die Systemanforderungen zu erwähnen.
- In der nächsten Lektion überprüft der Lehrer, ob alle Schüler das Programm installiert haben
Den Studenten die Buchaltungsübungen zur Verfügung stellen
In der Regel stellt die Lehrkraft für jede Übung Buchhaltungsdateien zur Verfügung, die die Schülerinnen und Schüler auf ihre Computer hochladen.
- Die Art und Weise, wie die Übungsdateien an die Schülerinnen und Schüler gelangen, hängt von der Computerstruktur der Schule ab. In dieser Phase brauchen die Studenten eine Verbindung.
- Es ist gut, wenn die Studenten Zeit und Internet-Verbindung haben, um diese Dateien herunterzuladen.
- Dank der neuen Banana Accounting Plus Community können Schulen und Lehrer ihre Kontenrahmen-Vorlagen direkt innerhalb des Banana Accounting Plus Programms hochladen. Auf diese Weise haben alle Schüler Zugriff auf die Dateien, die für Buchhaltungslektionen oder -übungen benötigt werden.Workflow für Übungen, die von Studenten durchgeführt werden
Workflow für die von den Studenten durchgeführten Buchhaltungsübungen
Sobald die Teilnehmer Banana Buchhaltung installiert und die vom Lehrer zur Verfügung gestellte Übungsdatei hochgeladen haben, ist keine Internetverbindung mehr nötig.
Es gibt mehrere Möglichkeiten, die Studenten zum Lernen zu bewegen:
- Jeder Student arbeitet an seiner eigenen Buchhaltungsdatei, während der Lehrer erklärt
- Die Übungen im Unterricht durchführen, in der von der Lehrkraft zugewiesenen Zeit
- Ausführen von Übungen außerhalb der Schulzeit
Hier ist der Arbeitsablauf für die Buchhaltungsübungen des Studenten und die anschließende Korrektur der Übungen durch den Lehrer.
Die Arbeitsweise des Schülers
Jeder Student arbeitet an seiner eigenen Buchhaltungsdatei und führt die ihm zugewiesenen Arbeiten aus
Am Ende der Übung schickt jeder Schüler die Datei an den Lehrer. Die Art der Übertragung hängt von der Verwaltungsinfrastruktur der Schule ab. Im Allgemeinen werden die Dateien auf die E-Learning-Plattform oder das Netzwerksystem der Schule oder in die dafür vorgesehene Cloud (Google Drive, Dropbox, I-Cloud, One drive) hochgeladen.
Die Korrektur der Buchhaltungsübungen
Der Lehrer öffnet die Schülerdatei und überprüft, ob die Übung korrekt durchgeführt wurde. Um diese Arbeit zu erleichtern, können Sie auch die automatische Erweiterung zur Korrektur der Übungen verwenden.
Die Lehrkraft kann Zeilen farblich hervorheben und sie mit Notizen und Kommentaren versehen, um auf eventuelle Fehler hinzuweisen
Danach kann der Student die korrigierte Datei vom Lehrer auf seinen Computer herunterladen und das erzielte Ergebnis sowie die entsprechenden Korrekturen des Lehrers anzeigen.
Insegnare Contabilità
Libro “Funzionamento e logiche dei programmi di contabilità”
Scopri il libro che svela le logiche alla base dei software di contabilità, pensato per chiunque voglia comprendere a fondo il funzionamento dei programmi contabili. Questo testo offre una guida completa e accessibile, partendo dalla storia della contabilità fino alle tecnologie digitali più recenti, per mostrare come i software moderni automatizzano operazioni complesse di bilancio, calcolo e reporting.
A chi è indirizzato?
Il libro è rivolto a una vasta gamma di lettori: professionisti, sviluppatori di software, docenti, studenti e chiunque si avvicini alla contabilità per la prima volta. È ideale per chi utilizza software di contabilità senza una formazione specifica, fornendo una comprensione più profonda delle logiche e dei meccanismi che facilitano la gestione contabile e permettono di sfruttare al meglio questi strumenti.
Perché leggere questo libro?
L'automazione dei software contabili ha semplificato notevolmente il lavoro di contabilità, ma spesso ha anche nascosto i meccanismi fondamentali della contabilità a partita doppia. Questo libro è stato scritto per colmare questa lacuna, offrendo una guida chiara che permette ai lettori di comprendere come i software gestiscono automaticamente diverse operazioni contabili. La comprensione delle logiche di base dietro questi strumenti consente di usare i software in modo più consapevole e di sfruttarne al massimo il potenziale.

Domenico Zucchetti, contabile, giurista e programmatore, è un pioniere nello sviluppo di soluzioni per la contabilità digitale. Con oltre 40 anni di esperienza nel settore, ha fondato Banana.ch SA e creato Banana Contabilità, uno dei software più accessibili per la gestione contabile. Zucchetti ha dedicato la sua carriera a rendere la contabilità intuitiva e automatizzata, focalizzandosi sulle esigenze delle piccole imprese e sull’efficacia didattica dei suoi strumenti. La sua profonda conoscenza dei principi contabili e delle tecnologie emergenti lo rende una figura di riferimento per chiunque voglia migliorare la gestione finanziaria aziendale.
Condividi la tua opinione
Siamo sempre interessati a conoscere le opinioni dei nostri lettori. Dopo aver letto “Funzionamento e logiche dei programmi di contabilità” ti invitiamo a condividere i tuoi feedback e suggerimenti. Facci anche sapere se dovessi trovare che alcuni argomenti vadano spiegati in maniera più semplicistica. Le tua opinione è preziosa e ci aiuta a migliorare continuamente la qualità del nostro lavoro.
Puoi inviare il tuo feedback tramite questo modulo. Grazie per il tuo contributo!
Automatic Corrections for Accounting Exams: Erweiterung zur Vorbereitung und Korrektur von Übungen [BETA]
Automatic Corrections for Accounting Exams: Erweiterung zur Vorbereitung und Korrektur von Übungen [BETA][Diese Erweiterung und diese Dokumentation befinden sich in Entwicklung und sind nicht in ihrer endgültigen Form]
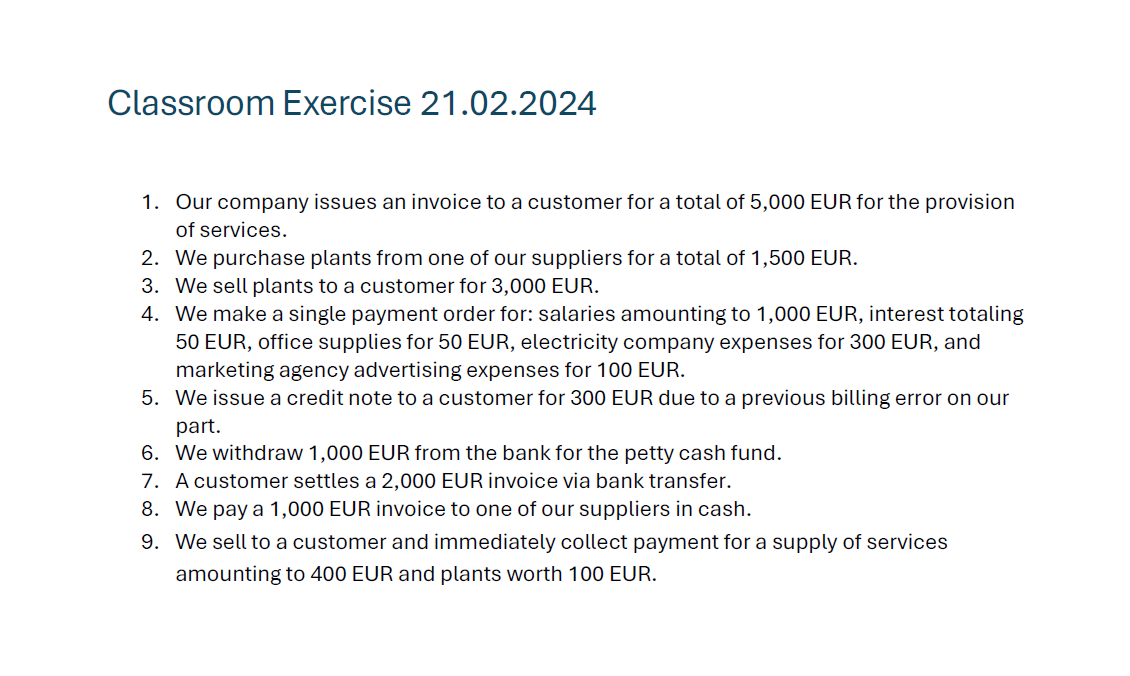
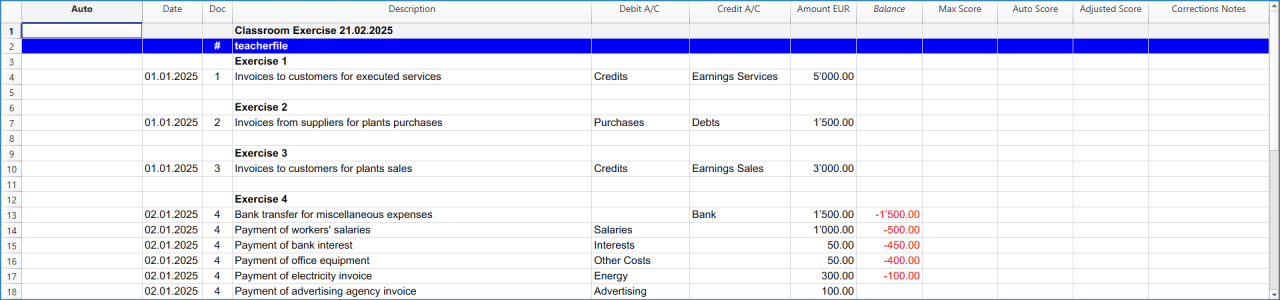
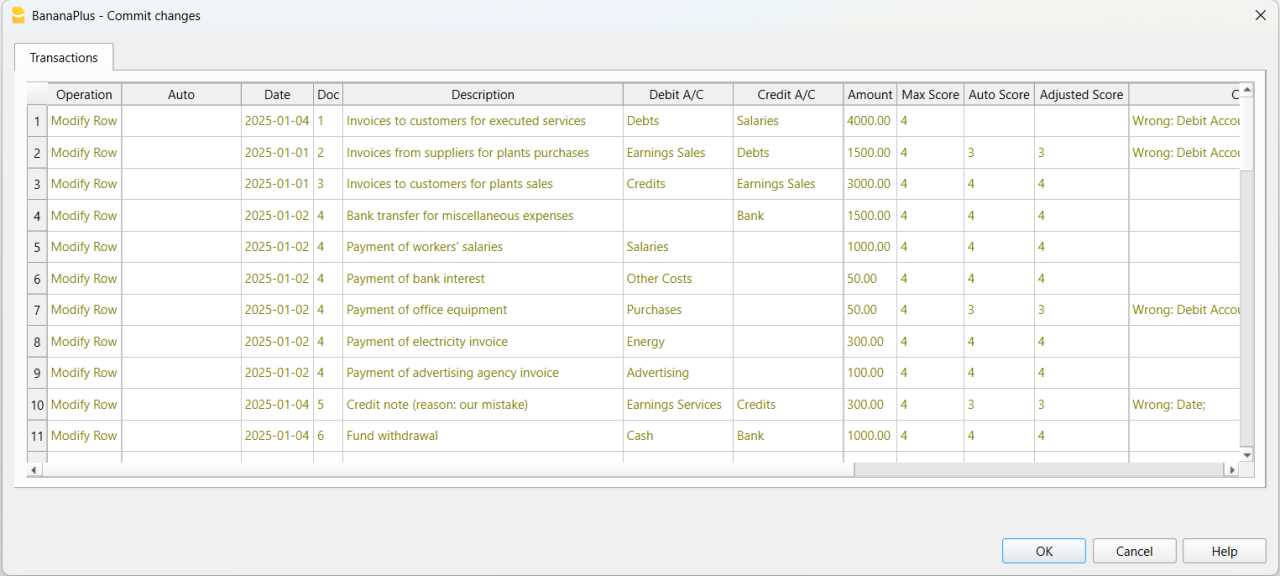
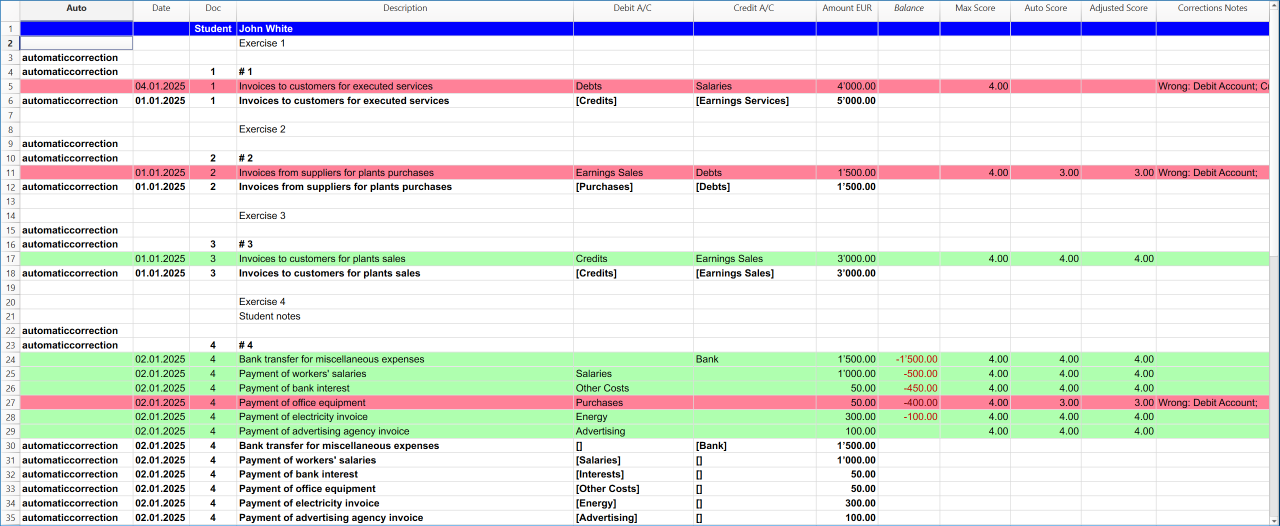
Eine bestehende Vorlage für automatische Übungskorrekturen anpassen
[Diese Erweiterung und diese Dokumentation befinden sich in Entwicklung und sind noch nicht in ihrer endgültigen Form]
Die Erweiterung Automatische Korrekturen für Buchhaltungsprüfungen kann bestehende Dateien anpassen oder die direkt in Banana Accounting+ verfügbaren Kontenplan-Vorlagen verwenden. Dadurch eignet sie sich sowohl für Schulungszwecke als auch für Übungen und Prüfungen in der doppelten Buchführung.
- Erstellen oder öffnen Sie eine Datei für die doppelte Buchführung.
- Klicken Sie im Banana-Menü auf Erweiterungen.
- Klicken Sie auf Automatische Korrekturen für Buchhaltungsprüfungen.
- Klicken Sie auf Dateivorbereitung.
- Die Erweiterung fordert Sie auf, entweder eine Lehrpersonen-Datei oder eine Studierenden-Datei vorzubereiten.
- Wählen Sie den Dateityp aus, den Sie vorbereiten möchten, und klicken Sie auf die Schaltfläche OK.

- Klicken Sie in dem angezeigten Fenster auf die Schaltfläche OK. Die in der untenstehenden Abbildung dargestellten Änderungen werden anschließend auf die Datei angewendet.
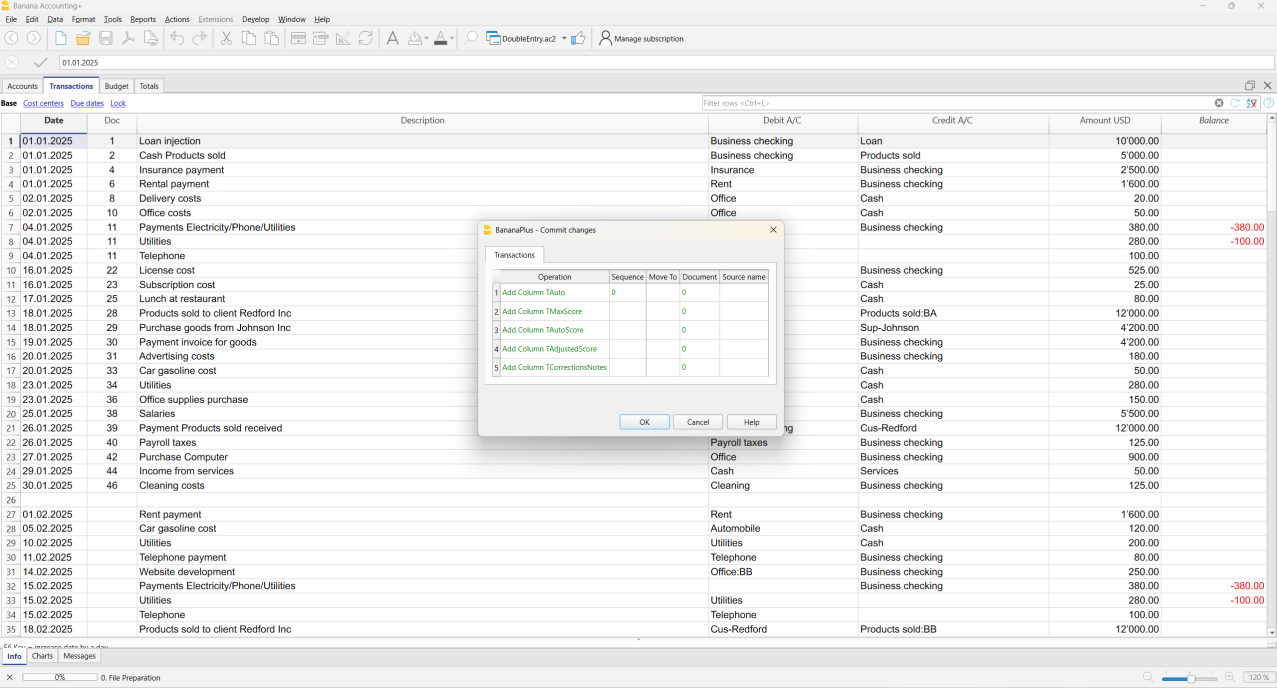
Die Erweiterung fügt dem File automatisch die erforderlichen Spalten hinzu, wobei Ihre bestehenden Buchungen erhalten bleiben.
Sind die erforderlichen Spalten bereits vorhanden, werden sie nicht erneut hinzugefügt. Ist das File bereits vorbereitet, nimmt diese Funktion keine Änderungen vor.
Wenn Ihr File bereits einsatzbereit ist, werden durch diese Funktion keine Modifikationen vorgenommen.
Folgende Spalten werden hinzugefügt:
- Auto (erste Spalte ganz links).
- Max Score.
- Auto Score.
- Adjusted Score.
- Corrections Notes.
Diese Funktion ist nur für Vorlagen der doppelten Buchführung verfügbar.
Hinzugefügte Anweisungen für die Lehrpersonen-Datei
In der Spalte Doc der Tabelle Buchungen wird ein Rautezeichen (#) eingefügt.
In der Spalte Beschreibung wird der Schlüssel teacherfile hinzugefügt (ohne Anführungszeichen und vollständig in Kleinbuchstaben geschrieben).
Hinzugefügte Anweisungen für die Studierenden-Datei
Das Wort Student wird in der Spalte Doc hinzugefügt (ohne Anführungszeichen und mit großem Anfangsbuchstaben).
Übungen korrigieren
[Diese Erweiterung und diese Dokumentation befinden sich in Entwicklung und sind noch nicht in ihrer endgültigen Form]
Die automatische Korrektur kann ausschließlich auf der Studierenden-Datei ausgeführt werden:
- Sie ist nicht verfügbar, wenn sie auf der Lehrpersonen-Datei ausgeführt wird.
- Sie kann nur durchgeführt werden, wenn zuvor noch keine automatischen Korrekturen auf die Studierenden-Datei angewendet wurden.
- Ist eine zweite Korrektur erforderlich, müssen die bestehenden automatischen Korrekturen zunächst mit der Funktion Korrekturen löschen entfernt werden.
Überprüfung der Lösung
Dies ist der Arbeitsablauf zur Durchführung einer automatischen Korrektur mit der Erweiterung:
- Wählen Sie im Menü Aktionen > Buchhaltung neu berechnen. Das Programm informiert Sie, falls Probleme in der Datei vorhanden sind.
- Führen Sie den Befehl Erweiterungen > Automatische Korrekturen für Buchhaltungsprüfungen > Übungen korrigieren aus.
- Dieser Befehl führt spezifische Prüfungen durch, zum Beispiel die Überprüfung von Kontonummern und anderen Daten.
- Enthält eine Buchung einen Fehler, erscheint eine Meldung in der Spalte Corrections Notes.
- Die Spalte Auto Score wird mit dem berechneten Punktestand aktualisiert.
- Dieser Befehl führt spezifische Prüfungen durch, zum Beispiel die Überprüfung von Kontonummern und anderen Daten.
Gesamtpunktzahl neu berechnen
[Diese Erweiterung und diese Dokumentation befinden sich in Entwicklung und sind noch nicht in ihrer endgültigen Form]
Diese Funktionalität steht nur zur Verfügung, wenn zuvor automatische Korrekturen mit dem Befehl Übungen korrigieren ausgeführt wurden.
Die Spalte Adjusted Score ermöglicht es der Lehrperson, den automatisch berechneten Punktestand bei Bedarf manuell anzupassen. Nach den Anpassungen kann die Lehrperson über das Menü der Erweiterung den Gesamtpunktestand für die gesamte Übung neu berechnen.
Die letzte Zeile, in der der Gesamtpunktestand angezeigt wird, wird anschließend mit dem endgültigen, von der Lehrperson festgelegten angepassten Punktestand aktualisiert.
Korrekturen löschen
[Diese Erweiterung und diese Dokumentation befinden sich in Entwicklung und sind noch nicht in ihrer endgültigen Form]
Diese Funktion entfernt die Zeilen, die während des Korrekturprozesses automatisch von der Erweiterung hinzugefügt wurden.
Die ursprünglichen Zeilen der Studierenden bleiben in der Datei erhalten, jedoch werden alle farblichen Hervorhebungen, Punktestände und Fehlermeldungen entfernt.
Auf diese Weise wird die Datei der Studierenden in ihren ursprünglichen Zustand zurückgesetzt.
Die Funktion kann nur ausgeführt werden, wenn zuvor eine automatische Korrektur durchgeführt wurde, und sie gilt ausschließlich für die Studierenden-Datei.
Einstellungen
[Diese Erweiterung und diese Dokumentation befinden sich in Entwicklung und sind noch nicht in ihrer endgültigen Form]
Mit den Einstellungen können Sie festlegen, ob eine automatische Bewertung vergeben werden soll, und die Punkte für jede überprüfte Bedingung definieren.
Alle Einstellungen müssen in der Lehrpersonen-Datei konfiguriert werden und werden beim Bewerten der Studierenden-Dateien automatisch angewendet.
Verfügbare Einstellungen in der Lehrpersonen-Datei
Die derzeit verfügbaren Einstellungen und deren Beschreibungen sind folgende:
- Punktebasierte Bewertung: aktiviert oder deaktiviert die automatische Punktevergabe für die Buchungen der Studierenden.
- Punkte für korrektes Datum: vergibt Punkte, wenn das vom Studierenden eingegebene Datum mit dem Datum der Lehrperson übereinstimmt.
Auf null setzen, wenn dieses Feld nicht bewertet werden soll. - Punkte für korrektes Sollkonto: vergibt Punkte, wenn das eingegebene Sollkonto korrekt ist.
Auf null setzen, wenn dieses Feld nicht bewertet werden soll. - Punkte für korrektes Habenkonto: vergibt Punkte, wenn das eingegebene Habenkonto korrekt ist.
Auf null setzen, wenn dieses Feld nicht bewertet werden soll. - Soll- und Habenkonto getrennt bewerten: ermöglicht eine getrennte Punktevergabe für Soll- und Habenkonto.
- Ist das Kontrollkästchen aktiviert, wird die Punktzahl getrennt vergeben, auch wenn eines der beiden Konten (Soll oder Haben) falsch ist.
- Ist das Kontrollkästchen nicht aktiviert, ist die Punktzahl null, wenn sowohl Soll- als auch Habenkonto falsch sind oder wenn eines der beiden Konten falsch ist.
- Ist das Kontrollkästchen nicht aktiviert, werden Punkte nur vergeben, wenn sowohl Soll- als auch Habenkonto korrekt sind.
- In diesem Fall werden die Punkte für Sollkonto und Habenkonto addiert und als endgültige Punktzahl für den Studierenden vergeben.
- Punkte für korrekten Betrag: vergibt Punkte, wenn der eingegebene Betrag korrekt ist.
Auf null setzen, wenn dieses Feld nicht bewertet werden soll. - Punkte für MWST-Code: vergibt Punkte, wenn der eingegebene MWST-Code korrekt ist.
Auf null setzen, wenn dieses Feld nicht bewertet werden soll.
Die Punkte für den MWST-Code werden nur bei Vorlagen mit aktivierter MWST-Funktion berücksichtigt. - Punkte für Fremdwährungsbetrag: vergibt Punkte, wenn der eingegebene Fremdwährungsbetrag korrekt ist.
Auf null setzen, wenn dieses Feld nicht bewertet werden soll.
Die Punkte für den Fremdwährungsbetrag werden nur bei Mehrwährungs-Vorlagen berücksichtigt. - Punkte für Währung: vergibt Punkte, wenn die eingegebene Währung korrekt ist.
Auf null setzen, wenn dieses Feld nicht bewertet werden soll.
Die Punkte für die Währung werden nur bei Mehrwährungs-Vorlagen berücksichtigt. - Punkte für Wechselkurs: vergibt Punkte, wenn der eingegebene Wechselkurs korrekt ist.
Auf null setzen, wenn dieses Feld nicht bewertet werden soll.
Die Punkte für den Wechselkurs werden nur bei Mehrwährungs-Vorlagen berücksichtigt. - Betrag nur bewerten, wenn Soll und Haben korrekt sind: vergibt Punkte für den Betrag nur dann, wenn die eingegebenen Soll- und Habenkonten korrekt sind.
Am unteren Rand ist eine Abbildung des Einstellungsfensters in der Lehrpersonen-Datei zu sehen, die zeigt, wie diese Optionen konfiguriert werden.
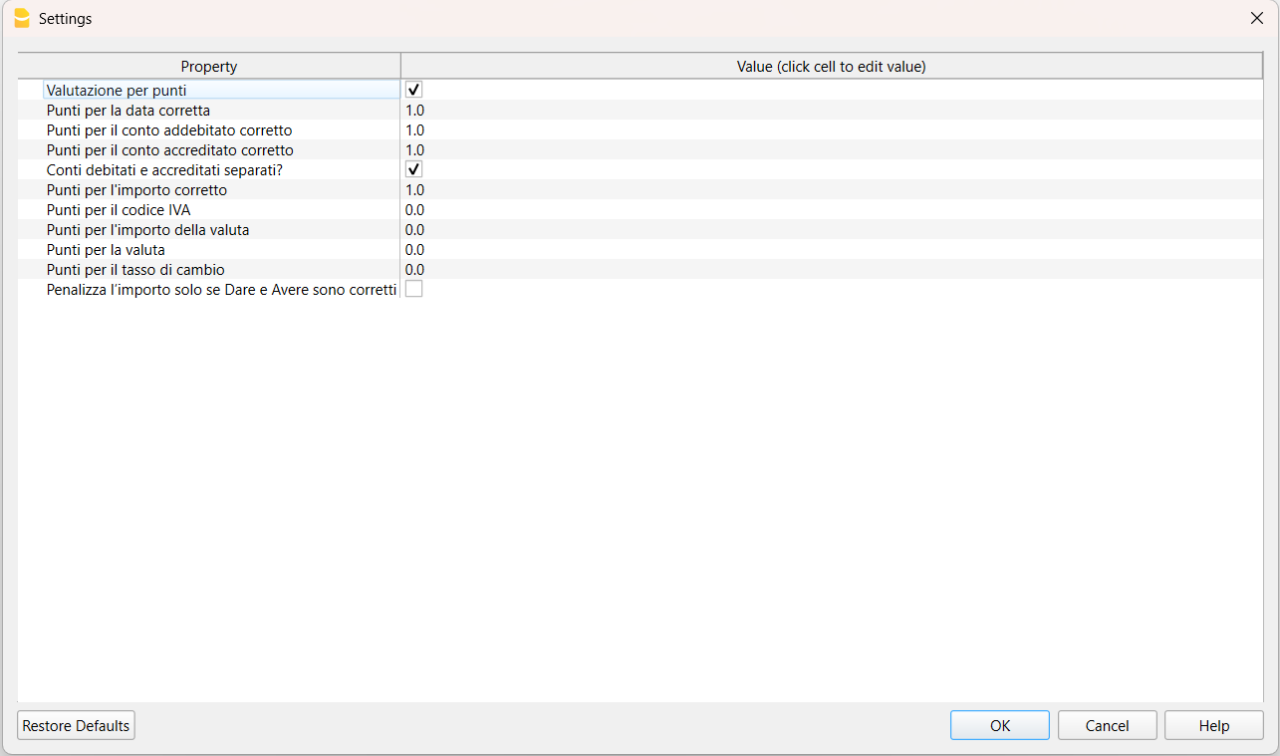
Banana Investment Accounting
Banana Investment Accounting allows you to manage shares, bonds, funds, and other investments in multiple currencies directly within your accounting file. It combines double-entry Financial Accounting with the detailed tracking of individual investments, including quantities, prices, book values, and market values.
Investment transactions update both the accounting records and the related investment data, providing an integrated view of your investments and their impact on the Balance Sheet and Income Statement.
The Investment Accounting Extension adds specialized commands and reports for tasks such as calculating realized gains or losses, creating valuation adjustments, checking balances, and preparing investment reports.
Templates
We provide two predefined accounting templates to help you get started:
Both templates are preconfigured with sample Investment Balance Sheet Accounts and account groups, providing a ready-to-use starting point for managing investments with Banana Investment Accounting. The chart of accounts can be customized to suit your specific requirements.
The Double-Entry Accounting template is suitable for managing investments in the base currency only.
The Multi-Currency Accounting template allows you to manage investments denominated in foreign currencies. The Exchange Rates table is used to define the currencies and exchange rates, while the Accounts table includes the accounts required to record exchange rate gains and losses.
Double-Entry Accounting Example For Integrated Investment Accounting
Double-Entry Accounting Example For Integrated Investment Accounting michaelDouble-Entry Multi-Currency Accounting Example With Investment Accounting
Double-Entry Multi-Currency Accounting Example With Investment Accounting
For more information see:
Use for your accounting
This template is conceived to experiment with the Portfolio extension and it contains example of investments and transactions.
The accounts list is very limited, but if you want to use as a base of your accounting simply:
- Delete all transactions
- Delete the opening amount in the Accounts table
- Delete the opening values in the Items table.
Erweiterung für die Wertschriftenbuchhaltung [BETA]
Erweiterung für die Wertschriftenbuchhaltung [BETA]Es handelt sich um ein Banana-Erweiterungspaket, welches die Integrierte Wertpapierverwaltung in Banana Buchhaltung ergänzt.
Dokumentation auf Englisch verfügbar:
- Accounts settings
- Update market prices
- Calculate unit price
- Calculate sales data
- Create adjustment transactions
- Check balances report
- Reconciliation report
- Security card report
- Evaluation of investments report
So beginnen
- Öffnen Sie Banana Buchhaltung Plus
- Öffnen Sie Ihre Banana-Buchhaltungsdatei (.ac2) mit Ihrer Wertpapierbuchhaltung oder erstellen Sie eine neue Wertpapierbuchhaltung (Portfolio) aufgrund einer schon vorhandenen Vorlage (Seite aktuell nur in Englisch verfügbar).
- Installieren Sie über das Menü Erweiterungen > Erweiterungen verwalten die Erweiterung Wertschriftenbuchhaltung.
Voraussetzung für die Verwendung
Um diese Erweiterung zu benutzen, wird Banana Buchhaltung Plus mit dem Advanced-Abo-Plan vorausgesetzt.
Accounts settings
The Accounts Settings dialog allows you to specify the accounts used for different investment transactions, such as sales, valuation adjustments, and other investment-related entries.
These accounts are used by the Investment Accounting extension when it automatically calculates or creates accounting transactions, ensuring that the appropriate accounts are used for each type of operation.
You do not need to specify every account, only those required for your accounting setup. The accounts entered in the dialog must exist in the Accounts table. If an account does not exist, the program displays an error message when you try to confirm the settings.
Sections in the Dialog and Account Usage

The dialog is divided into three main sections.
Balance Accounts
This section contains the Balance Sheet accounts associated with investments and other investment-related balances.
- Assets
Contains the accounts used to record investment assets.
The first time you open the dialog, the program automatically fills this field with the Investment Balance Sheet Accounts specified in the Asset Account column of the Items table. - Liabilities
Contains the accounts used for investment-related liabilities, such as margin loans or other financial obligations.
Value Changing Accounts
This section contains the accounts used to record realized and unrealized gains and losses, exchange rate differences, and other adjustments affecting the value of investments.
- Realized Gain: Account for recording realized gains from investment sales.
- Realized Loss: Account for recording realized losses from investment sales.
- Unrealized Gain: Account for recording unrealized gains due to an increase in the market value of investments.
Used by the Create adjustment transactions command. - Unrealized Loss: Account for recording unrealized losses due to a decrease in the market value of investments.
Used by the Create adjustment transactions command. - Realized Exchange Rate Gain: Account for recording realized exchange rate gains arising from the sale of investments denominated in a foreign currency.
- Realized Exchange Rate Loss: Account for recording realized exchange rate losses arising from the sale of investments denominated in a foreign currency.
- Unrealized Exchange Rate Gain: Account for recording unrealized currency gains due to favorable exchange rate movements.
- Unrealized Exchange Rate Loss: Account for recording unrealized currency losses due to unfavorable exchange rate movements.
- Depreciations: Account for recording investment depreciation adjustments, if applicable.
- Other Value Changing Costs: Account for miscellaneous expenses affecting the value of investments.
- Other Value Changing Income: Account for miscellaneous income affecting the value of investments.
- Rounding Differences: Account for small discrepancies due to rounding or decimal precision differences.
Profit and Loss Accounts
This section contains the accounts used to record income and expenses related to investment activities.
- Charges: Account for general investment-related charges and fees.
- Commissions: Account for broker or bank commissions on investment transactions.
- Interest Earned: Account for interest income from bonds or other financial instruments.
- Interest Paid: Account for interest expenses related to investment loans or margin trading.
- Dividends Income: Account for dividend income received from investments.
- Other Income: Account for any additional investment-related income not classified elsewhere.
- Other Costs: Account for any additional investment-related costs not classified elsewhere.
Error Messages
- Account XXX not found in the Accounts table: The account entered does not exist in the Accounts table.
- Add the account to your Accounts table.
- Select the “Ignore warnings/errors” checkbox at the bottom of the dialog to ignore the error.
Update market prices
This command updates the current market prices of investments in the Items table. Market price data can be imported from a CSV file or from the clipboard.
Before applying the changes, Banana Accounting displays a preview in the Commit changes dialog. Once the changes are confirmed, the imported prices are entered in the Price Current column of the Items table.
Price Current Column
The Price Current column in the Items table contains the current market price used to calculate the current value of the investment.
You can update Price Current manually, by copying and pasting values into the Items table, or by using the Update market prices command to import prices for multiple investments.
When market prices are imported and the changes are confirmed, the command updates the Price Current column of the corresponding Items.
Prepare Current Market Price Data
Current market prices can be obtained from financial information providers and prepared in an Excel or CSV file for import.
For each investment, provide:
- the ISIN or other identifier used to identify the investment
- the corresponding current market price.
Make sure that the identifier used in the import data corresponds exactly to the identifier entered for the investment in the Items table.
File Format
The extension expects the data to be in the following two-column format, with ISIN and current market price separated by a semicolon (;):
US123456789;11.04873
IT000792468;10.98732
...
- First column: The ISIN or other investment identifier.
- Second column: The current market price, without thousands separators and using a period (".") as the decimal separator.
Import Procedure
You can import the data in two different ways.
Import *.csv File
- Choose Extensions > Investment accounting > Update market prices.
- Select the *.csv file.
- Review the changes in the Commit changes dialog and confirm them.
Import from Clipboard
- Choose Actions > Import to accounting and select the Import File option.
- Select the extension to be used, in this case 2. Update market prices.
- Open the Excel file, select the data, and copy it to the clipboard.
- In the import dialog, select Import data from clipboard.
- Click OK.
- Review the changes in the Commit changes dialog and confirm them.

Error Messages
- Unrecognised *.csv file format: The format of the *.csv file you are trying to import does not match the required format.
- Make sure that you selected the correct file.
- Check that the data follows the format described in the File Format section above.
- Items table not found: The Items table is not present in the accounting file.
- Add the Items table to the accounting file.
- Asset: XXX not found in the Items table: The identifier contained in the imported data does not correspond to an investment in the Items table.
- Check that the identifier is correct and corresponds to the one entered in the Items table.
- If the investment has not yet been defined, add it to the Items table before importing its market price.
Calculate sales data
The Calculate sales data dialog allows you to calculate the realized gain or loss resulting from the sale of an investment and, when required, create the related accounting transactions.
The dialog provides two main functions:
- Calculate the Sale Result – Click Calculate profit or loss to preview the realized gain or loss based on the data entered in the dialog or automatically retrieved from the accounting file. No accounting transactions are created. This function can also be used without starting from the sale transaction row in the Transactions table.
- Create the Sales Record – Click Create sales record to create the accounting transactions required to complete the sale recording. To use this function, start from the sale transaction row in the Transactions table that records the net proceeds from the investment sale.
Start from the Sale Transaction Row
When creating the sales record, the program needs to identify the transaction to be completed with the additional entries required to record the sale, such as charges, realized gains or losses, and exchange rate differences. Therefore, you must start from the transaction row that records the net proceeds from the investment sale.
If this row already includes:
- Item (security ID)
- Quantity
- Unit Price (Market Price)
- Exchange Rate (for multi-currency accounting)

The dialog retrieves this information automatically. Otherwise, you need to enter the missing information in the dialog.
The sale transaction row is the only row that must be entered manually. Once this row is available, the program can automatically create the additional entries required to complete the sale recording.
How to use the dialog
When you execute this command, a dialog titled Calculate book profit/loss on sale opens.

Enter or review the information required for the sale:
- Security Data:
- Id (ISIN): Select the security from the dropdown.
- Type: Displays whether the security is a Stock or a Bond.
- Quantity/Nominal Value: Enter the quantity or nominal value of the investment being sold.
- Current Price: Enter the price per unit at which the investment is being sold.
- Current Exchange Rate: For investments denominated in a foreign currency, enter the exchange rate applicable to the transaction.
- Bank Charges: Enter any bank charges related to the sale. If no amount is entered, the corresponding transaction is not created.
- Other Charges: Enter any additional costs related to the sale. If no amount is entered, the corresponding transaction is not created.
- Accrued Interests: For bonds, enter any accrued interest related to the sale. This field is enabled only for bonds.
- Results Preview: Once the required data is entered, click Calculate profit or loss to generate a preview showing:
- Actual Quantity: The quantity held before the sale.
- Book Value per Unit: The current book value per unit of the investment.
- Total Book Value: The book value of the investment quantity being sold.
- Total at Current Price: The value of the investment quantity being sold at the entered Current Price.
- Book Profit/Loss: The difference between the book value and the sale value.
- Exchange Rate Profit/Loss: For investments denominated in a foreign currency, the gain or loss resulting from exchange rate differences.
Amounts are displayed using the number of decimal places defined for the corresponding columns in the Transactions table.
When you enter an amount in the dialog, make sure to use the local number format (for example, “1'234.56” in Switzerland), as this is the format expected by the program.
Recording the Sale
Once you are satisfied with the preview, click Create sales record to create the accounting entries required to complete the sale recording. The program displays a confirmation dialog showing the entries to be added or modified, allowing you to review them before applying the changes.

- Upon confirmation, the program updates the accounting records with the new or modified entries.
- If the quantity is zero or the calculated profit/loss is zero, no transaction is created.
- The program adds a transaction identifier to the ExternalReference column of both the original sale row and any newly created rows. This prevents duplicate entries if the command is run multiple times on the same sale row.
- If the program detects an existing record for this sale, it will ask whether you want to overwrite it.
This procedure helps ensure that investment sales are correctly recorded while allowing you to review the accounting entries before they are applied.

In the example shown in the image, placeholder accounts are used. These are used when the corresponding accounts have not been defined in the Accounts Settings dialog.
The extension uses a neutral number (±123.00) in the Quantity column when recording the realized gain or loss. A neutral quantity does not change the quantity held but allows the amount of the realized gain or loss to be associated with the investment and its corresponding unit value to be shown in the Unit Price column. This is especially useful for investment funds and ETFs.
Error Messages
- Items table not found: The Items table is not present in the accounting file.
- Add the Items table to your file.
- Asset: XXX not foun: The selected Asset does not exist in the Items table.
- Asset: XXX without assigned Asset Account: No Asset Account has been assigned to this Asset in the Items table.
- Define an account in the Asset Account column for the Asset in the Items table.
- Asset: XXX without assigned type: No Asset Type has been defined for this Asset.
- The selected row does not contain the Asset ID: The selected row does not contain a valid Asset ID. To create the sales record, the selected row must contain the ID of an Asset defined in the Items table.
- The selected row does not contain a valid sale Quantity: The selected row does not contain a valid quantity for an investment sale. The sale quantity must be negative. Check that the quantity is preceded by a minus sign (-) and that you have selected a sale row rather than a purchase row.
- The selected row in the Transactions table is not correct: The selected row does not correspond to the investment sale row required to create the sales record.
- The selected row in the Transactions table is not valid: The selected row in the Transactions table is not a valid transaction row.
Create adjustment transactions
This command automatically creates adjustment transactions to align the book value of investments with their current market value and, for investments denominated in a foreign currency, with current exchange rates. Adjustment transactions can be created multiple times during the year. For year-end adjustments, see Investment Accounting Opening and Closing the Year.
Define Current Market Values
Set Up the Current Prices
In the Items table, enter the current market price for each investment in the Price Current column.
You can:
- Enter the current prices manually, including only for the investments for which you want to create adjustment transactions.
- Use the Update Market Prices command to import and update current prices for multiple investments.
Current Exchange Rates
For investments denominated in a foreign currency, the current value in base currency is automatically calculated using the current exchange rate defined for the corresponding currency in the Exchange rates table.
The current exchange rate is the exchange rate entered without a specific date. For more information, see Items Table with Investments List.
Adjustment Transactions Dialog
When you run the Create adjustment transactions command, a dialog asks you to enter the date to be used for the adjustment transactions. By default, the current date is suggested.
All adjustment transactions created by the command are recorded with the specified date.

Commit Changes Dialog
Before the adjustment transactions are recorded, the Commit changes dialog displays a preview of all the transactions that will be created, allowing you to review them before confirming the changes.

Adjustement Transactions
Adjustment transactions are generated and grouped by investment. If both a market price adjustment and an exchange rate adjustment are required for the same investment, the corresponding transactions are kept together.
Adjustment transactions are recorded using the Asset Account defined for the investment in the Items table, increasing or decreasing its book value. The offsetting entry is recorded in the corresponding gain or loss account.
If the following accounts are defined in the Accounts Settings dialog, the program uses them to record the adjustments:
- Unrealized Gain / Unrealized Loss for market price adjustments.
- Unrealized Exchange Rate Gain / Unrealized Exchange Rate Loss for exchange rate adjustments.
If the required accounts are not defined in the Accounts Settings dialog, the program inserts descriptive placeholder accounts in the generated transactions.

Once the adjustment transactions have been recorded, verify that the balances of the Asset Accounts match the current values of the corresponding investments in the Items table. For more information, see Create Adjustment Transactions.
In the following cases, no adjustment transactions are created:
- The book value already corresponds to the current market value and, for investments denominated in a foreign currency, the book exchange rate corresponds to the current exchange rate.
- The investment has a current quantity of zero.
- No current market price is defined for the investment.
Error Messages
- Items table not found: The Items table is not present in the accounting file.
- Add the Items table to your file.
- No Asset found in the Items table: The Items table does not contain any valid Assets.
- Add Assets to the Items table.
- A valid Asset must have an ID and an Asset Account.
- No Asset with current price found in the Items table: No Asset with a valid current price was found in the Items table.
- The carrying amounts are already aligned with the current market prices. No unrealized gains or losses have been generated: The book values of the investments are already aligned with their current market values and, where applicable, current exchange rates. No adjustment transactions are required.
Check balances report
The Check Balances report verifies that the values of individual investments are consistent with the balances of the Asset Accounts to which they are assigned.

This check is particularly useful at the beginning of a new accounting year to verify that:
- Opening and closing balances have been recorded correctly.
- The values of individual investments are consistent with the balances of their corresponding Asset Accounts.
Currently, the check is performed only for the current accounting year.
Why Use This Report?
The report helps you:
- Identify discrepancies between investment values and the balances of the corresponding Asset Accounts.
- Verify that investments and their assigned Asset Accounts remain consistent.
- Check the consistency of balances after year-end closing.
The report can be exported and saved at any time. For more information, see Printouts/preview.
Error Messages
- Items table not found: The Items table is not present in the accounting file.
- Add the Items table to your file.
- No Asset found in the Items table: The Items table does not contain any Asset.
- Add Assets to the Items table.
- A valid Asset must have an ID and an Asset Account.
- No Asset accounts found in the Items table: No Asset Accounts have been assigned to the Assets in the Items table.
- Define an Asset Account for each Asset using the Asset Account column. in the Items table.
Reconciliation report
The Reconciliation Report provides a detailed overview of the transactions recorded for investments and verifies that the balance of each Asset Account in the accounting records is consistent with the balance calculated from the transactions of the investments assigned to that account.
At the end of the report, a reconciliation summary shows the opening balance, the net change during the period, and the closing balance, allowing you to verify that the Asset Account balance matches the balance calculated from the corresponding investment transactions. Any differences are shown in the Differences fields, with the corresponding amounts highlighted in red.
Selection Dialog
Select the Asset Account(s) for which you want to generate the reconciliation report.

Report Structure
The structure of this report is similar to the Security Card report, as it lists the transactions for each investment assigned to the selected Asset Account.
For each selected Asset Account, a separate table is generated on a new page of the report.

Saving and Exporting the Report
The report can be exported and saved at any time. For more information, see Printouts/preview.
Error Messages
- Items table not found: The Items table is not present in the accounting file.
- Add the Items table to your file.
- No Asset found in the Items table: The Items table does not contain any Asset.
- Add Assets to the Items table.
- A valid Asset must have an ID and an Asset Account.
- No Asset accounts found in the Items table: No Asset Accounts have been assigned to the Assets in the Items table.
- Define an Asset account for each Asset in the Items table using the Asset Account column.
Security card report
The Security Card report provides a detailed overview of all transactions recorded for a specific investment. Its structure is similar to the Account Card, but the report is filtered by investment and also shows how the quantity held and the book value change after each transaction.
Selection Dialog
Select the investment for which you want to generate the Security Card report. By default, the dialog displays the list of investments defined in the Items table.
If the selected investment is not found in the Items table, an error message is displayed. Make sure that the investment is correctly defined in the table.

When you reopen the dialog, the investment selected the last time is displayed again.
Report structure
- Date: Transaction date.
- Doc: Transaction number.
- Description: Transaction description.
- Debit (item Currency): Debit amount in the item currency.
- Credit (item Currency): Credit amount in the item currency.
- Quantity:
- Purchased: No sign.
- Sold: With minus '-' sign.
- Neutral: With neutral number symbol: '±'.
- Unit Price (item Currency): purchase or sale (unit) price of the investment.
- Balance (item Currency): Balance amount in the item currency.
- Quantity Balance: Current quantity of securities.
- Book value per unit (item Currency): Current book value per unit of the investment.
- Debit (Base Currency): Debit amount in base currency.
- Credit (Base Currency): Credit amount in base currency.
- Balance (Base Currency): Balance amount in base currency.

Saving and Exporting the Report
The report can be exported and saved at any time. For more information, see Printouts/preview.
Error Messages
- Items table not found: The Items table is not present in the accounting file.
- Add the Items table to your file.
- Asset: XXX not found: The selected Asset has not been found in the Items table.
- No Asset found in the Items table: The Items table does not contain any Asset.
- Add Assets to the Items table.
- A valid Asset must have an ID and an Asset Account.
Evaluation of investments report
The report provides a comprehensive overview of your current investments. It is divided into two main sections:
- Appraisal Report: Offers a snapshot of your investments, comparing the book value of each investment with its current market value.
- Investment Accounting Transactions: Displays a detailed list of all transactions carried out for each investment.
Appraisal Report
The Appraisal Report helps you quickly assess the situation of your investments. It displays key information such as book value, current market value, and any unrealized gains or losses for each investment.
To obtain an up-to-date appraisal, enter the current market price for each investment in the Price Current column of the Items table.
- Type/Security: Name of the group or investment.
- ISIN: ISIN or other identification number of the investment.
- Currency: Currency in which the investment is denominated.
- Current quantity: Current quantity of the investment held.
- Book value per unit: Current book value per unit of the investment.
- Book value: Total book value of the investment.
- Market value per unit: Current market price per unit of the investment, as defined in the Price Current column of the Items table.
- Market value: Current market value of the investment.
- % of Port: Percentage of the total portfolio represented by the investment.
- Un.Gain or Loss: Unrealized gain or loss on the investment.
- % G/L: Ratio of the unrealized gain or loss to the market value.
Investment Accounting Transactions Report
The report summarises the accounting transactions recorded for each investment.

Saving and Exporting the Report
The report can be exported and saved at any time. For more information, see Printouts/preview.
Error Messages
- Items table not found: The Items table is not present in the accounting file.
- Add the Items table to your file.
- No Asset found in the Items table: The Items table does not contain any Asset.
- Add Assets to the Items table.
- A valid Asset must have an ID and an Asset Account.
Management accounting and Cash Management
Banana Accounting is a sophisticated a flexible accounting solution designed to complement existing accounting systems with powerful tools for Cash and Management Accounting.
It enhances and does not replace statutory or tax accounting typically structured around fiscal deadlines and compliance requirements.
Management Accounting
Banana Accounting supports a management-driven approach to accounting, starting with one of the most critical aspects of business control: liquidity management.
Effective financial management requires up-to-date information on cash availability, expected inflows, and planned payments. Liquidity control cannot rely solely on accounting prepared for tax deadlines or year-end reporting. It requires regular and systematic updates so that management always has a clear and reliable view of the company’s financial position. Banana Accounting enables continuous cash monitoring and forward-looking planning, helping organizations anticipate cash shortages and make timely decisions.
Beyond liquidity, Banana Accounting supports full Management Accounting functions. Companies can analyze costs and revenues by project or cost center, compare budget and actual figures, and generate customized management reports for any period. This makes it possible to monitor performance throughout the year and adjust strategies based on current data.
The objective is not only compliance, but control. Instead of focusing exclusively on statutory and tax-driven accounting, Banana Accounting complements existing solutions by providing timely financial insight that strengthens internal management and supports informed, proactive decision-making.
Trust Accounting
Double-Entry Accounting for Trust
Double-Entry Accounting for Trust jessica.mattiMulti-Currency Accounting for Trust
Multi-Currency Accounting for Trust jessica.mattiForensic Accounting, Reconstruction, Auditing and Cleanup of Financial Records
Banana Accounting Software helps accounting professionals quickly rebuild, verify, reconcile, and reorganize financial records in a clear, reliable, and professionally structured environment. It combines the flexibility of a spreadsheet with the control of double-entry accounting, making complex cleanup, reconstruction, and audit work faster and more effective.
With its table-based structure, Banana Accounting greatly reduces the time needed to rebuild accounting records and makes it much easier to view the data. The powerful filtering tools let you quickly find information and categorize movements. It generates professional financial reports, including balance sheets, income statements, account cards, and detailed transaction listings. It also includes advanced features such as investment accounting, which are not available in standard ERP systems.
Use in Investigative Units
Banana Accounting is used with satisfaction by several Swiss investigative units for accounting reconstruction in the context of financial investigations.
A Precious Tool for Accounting Professionals
For many accounting professionals, Banana Accounting has become a very valuable tool that complements accounting systems and Excel. It allows them to take on complex and interesting assignments and make them economically worthwhile while ensuring full client satisfaction. The professionalism and efficiency demonstrated often become the starting point for consulting activities and other value added services that are highly appreciated and well paid.
This documentation introduces the principles of forensic accounting and the cleanup and reconstruction of financial records, and explains how Banana Accounting can be used to support these activities effectively.
Accounting Cleanup
Accounting cleanup refers to the systematic correction and reorganization of financial records that have become inaccurate, inconsistent, or incomplete during normal business operations. It is commonly required when a CPA takes over a new client, prepares year-end financial statements, or discovers discrepancies during routine review work.
Typical cleanup tasks include reconciling bank and credit card accounts, resolving unexplained balances, correcting misclassified transactions, rebuilding opening balances, clearing suspense or temporary accounts, and ensuring that receivables, payables, and tax liabilities are properly stated. In some cases, it may also involve partially reconstructing prior periods to restore continuity and accuracy.
The objective of accounting cleanup is to re-establish a coherent and internally consistent accounting structure that produces reliable financial statements. Unlike daily bookkeeping, cleanup work focuses on identifying accumulated errors and restoring confidence in the underlying data before further reporting, advisory, or tax activities can proceed.
Auditing of Accounting
The auditing process often requires checking the accounting data managed with the company’s accounting software. In many cases, the accounting software does not provide the tools needed for this work. As a result, auditors often export the data and rebuild the accounting situation in Excel.
A useful alternative is to import the chart of accounts and the transactions into Banana Accounting. The program is based on double entry accounting logic and rebuilds the accounting situation from the start. This makes it possible to verify that the results match correctly.
Once the data is in Banana Accounting, it becomes easier to perform additional checks, filter the information, and export the data to other formats.
Accounting Reconstruction
Accounting Reconstruction is the rapid and systematic restoration and analysis of financial information in cases of fraud, legal disputes, insolvency, data loss, or abrupt management changes, when reliable accounting records are missing, incomplete, or inconsistent. It may also be necessary to obtain more detailed information when the current system does not allow it, for example during an M&A due diligence process.
The primary objective is to swiftly rebuild a structured and verifiable accounting system from available source documents, including bank statements, invoices, contracts, and tax filings. By organizing transactions through the double-entry bookkeeping method, Backlog Accounting Reconstruction ensures internal data consistency, highlights discrepancies, and restores full operational control over financial records.
The final output is a clear, accurate, and legally defensible representation of the organization’s financial position—including the Balance Sheet, Income Statement, and detailed transaction ledgers—enabling informed decision-making in legal, financial, or operational contexts.
Emergency accounting is the rapid reconstruction and analysis of financial information in crisis situations, such as fraud, disputes, insolvency, data loss, or sudden management changes, when reliable accounting records are missing, incomplete, or inconsistent.
Forensic accounting
Forensic Accounting is the application of accounting and auditing techniques to legal, judicial, and investigative matters. The goal is to reconstruct the financial truth when data is missing, incomplete, manipulated, or suspicious. Financial investigations often analyze existing accounting records and require a solid understanding of accounting practices. They are usually conducted by experienced accountants, often with specific training.
The popularity of crime investigation series like CSI has led to associating the term "forensic" mainly with crimes such as fraud or money laundering. In reality, it also includes the collection of evidence and investigations in civil matters, such as shareholder or inheritance disputes, or in tax cases like overdue taxes.
Forensic accounting includes all investigative activities related to reconstructing financial situations, such as:
- Legal audits, assessments, financial consulting, damage quantification, and analysis.
- Bankruptcies, company liquidations, and financial restructurings.
- Disputes between partners, inheritance transfers, or checks during due diligence.
- M&A due diligence.
- Legal and tax compliance failures.
- Fraud, bankruptcy, or money laundering.
- Monitoring the use of funds, illegal expenses, and corruption.
- Lack of access to or problems with the original IT system.
Shortcomings of Pre-Existing Tools
Professional accountants and CPAs already rely on established tools such as ERP systems, accounting platforms, and spreadsheets. These solutions are highly effective for routine bookkeeping, compliance, payroll processing, and periodic reporting.
However, situations involving reconstruction, cleanup, data verification, due diligence, or other non-recurring operations present different requirements. These tasks are exploratory, corrective, and often temporary in nature. They require flexibility, transparency, and the ability to reorganize data without disrupting operational systems.
In these contexts, traditional tools may reveal structural limitations.
Shortcomings of ERP and Standard Accounting Systems
Enterprise accounting software and ERP systems are designed primarily for structured, ongoing operations. They are optimized for efficiency, internal control, and compliance within a stable workflow.
In reconstruction or cleanup scenarios, these characteristics can become constraints:
- Rigid process flows and approval structures.
- Complexity caused by the need to cover all requirements.
- Multiple integrated modules that do not communicate well with each other.
- Reduced transparency and control due to increased automation.
- Standardized charts of accounts and predefined reporting formats.
- Emphasis on periodic tax and regulatory reporting.
- Many constrains importing and reorganizing raw transactional data.
- Risk associated with modifying historical records in live systems.
- Difficulty testing alternative classifications or adjustments without affecting official books.
- Vendor lock-in, with the need to move to a more expensive version to access certain features.
Such systems are excellent for daily operations but are not specifically designed for investigative, corrective, or one-time analytical work.
Shortcomings of Excel
When faced with reconstruction or cleanup tasks, many professionals turn to Excel because it allows rapid data collection, filtering, and analysis. Spreadsheets are flexible and familiar, and they support quick experimentation.
However, Excel lacks the structural safeguards of accounting software:
- It requires careful management of formulas and links.
- It does not enforce double-entry accounting logic.
- It does not automatically ensure that debits and credits balance.
- Categorization is manual and not inherently based on accounting rules.
- Standard financial statements must be built manually.
- Errors can remain undetected in complex models.
Excel is a powerful analytical tool, but it was not designed to function as a controlled accounting system.
Banana Accounting for Reconstruction and Cleanup
Reconstruction, cleanup, and other non-recurring accounting tasks require a working environment that combines flexibility with accounting control. Banana Accounting provides a structured and independent space where financial data can be reorganized, verified, and recalculated without affecting the operational system.
Unlike ERP systems, it is not constrained by rigid workflows. Unlike spreadsheets, it enforces double-entry consistency automatically.
Banana Accounting allows professionals to:
- Work in a separate accounting file without modifying the client’s live system.
- Import and reorganize raw transactional data quickly.
- Use a fully customizable chart of accounts.
- Automatically ensure debit/credit balance and internal consistency.
- Detect discrepancies through built-in double-entry controls.
- Test reclassifications and adjustments safely.
- Instantly generate balance sheets, income statements, and detailed account cards.
- Present results in a clear and professionally recognized accounting format.
By combining spreadsheet flexibility with accounting discipline, Banana Accounting bridges the gap between rigid ERP systems and unstructured Excel files, making it particularly suited for reconstruction and cleanup work.

Similar to Excel
Banana Accounting is similar to Excel, does not require specific training, and offers great flexibility. It is therefore a very useful tool for reconstructing financial situations and managing accounting for forensic analysis.
- The accounting is a file that contains multiple tables.
- The tables are similar to Excel sheets: you can move freely, insert and select cells, copy and paste.
- You can create as many files as you want, each with its own settings.
- The file can be saved and moved wherever you want.
Local data management
Unlike other accounting software that operates only in the cloud, Banana Accounting allows you to choose where to save and store your accounting file. This way, you can keep your data locally without uploading it to cloud systems, avoiding the need for specific authorizations. Accounting records can be easily linked to digital supporting documents stored on your computer, allowing you to quickly and thoroughly check the reason for specific expenses during data analysis.
This feature can be especially useful in the preliminary analysis phase, not only for privacy reasons but also because it makes it easier to share information and reuse data in later stages.
Importing data
Banana Accounting is based on tables, so it is quite easy to import existing data, whether it concerns the chart of accounts, customers or suppliers, product or investment lists, VAT codes, or other information. For more information, please refer to the page:
- Importing data from other programs.
- Once you have imported the data you can complete it and modify.
- You can filter, select multiple cells, copy and paste, search and replace, and fix multiple rows almost instantly.
- You can undo and redo operations.
Ideal for various fields
Banana Accounting is not a specialized forensic analysis software, but it can be extremely helpful for professionals such as:
- Accountants and auditors.
- Family offices.
- Fiduciary, financial, and real estate management firms.
- Lawyers and law firms.
- Restructuring specialists.
- Court-appointed or party-appointed technical consultants.
- Inspectors or experts working within legal teams.
- Departments of large organizations.
Try Banana Accounting with the WebApp
If you want to see how easy it is to collect and categorize accounting data:
- See how to get started with double-entry accounting, including a short explanatory video.
- Try the Banana Accounting WebApp, which runs directly in your browser (no registration required):
it’s the fastest way to test, set up an accounting file, and start entering data.
These links launch the WebApp and open one of the universal templates, not tied to any specific country:
To manage accounting regularly and completely, we recommend using the desktop version of Banana Accounting (to download and install on your computer). The Free plan of Banana Accounting lets you create accounting files and use most features, with a saving limit of 70 transactions. It's the ideal way to get started and see if the tool fits your needs.
Our customer service is available for more information. Our specialists can also advise you on how to proceed with data recovery or other specific needs.
Use Banana Accounting for Reconstructing the Financial Situation
Below you’ll find an explanation of how to use Banana Accounting to reconstruct accounting records for forensic accounting activities.
Keep in mind that reconstruction can be done in two phases:
- Preliminary data collection and analysis to assess the situation.
- Data collection and analysis with more specific goals.
The financial reconstruction, whether preliminary or final, is generally structured as follows:
- Defining the objectives of the investigation.
- Collecting documents, bank statements, and other financial information.
- Re-entering transactions into an accounting system, completing and categorizing them.
- Verifying, evaluating, and analyzing the data.
- Presenting the financial information.
- Economic and legal evaluations, with preparation of reports.
Create accounting starting from a template
What makes Banana Accounting particularly suitable for forensic accounting is that it is a professional international accounting tool, not designed solely for corporate accounting. It is modular, so you can have double-entry accounting setups for foundations, associations, individuals, in different currencies and languages. For simpler situations, you can also use the income & expense method, which can still manage the balance sheet.
To start a new accounting file, use a predefined template for a specific purpose:
- Menu File > New.
A dialog will appear where you can choose a template by region and type of accounting. - Templates for specific regions.
These are set up according to national accounting standards.
The chart of accounts usually has numerical account IDs. - Universal templates.
These are for more general use. The account IDs are usually descriptive text.
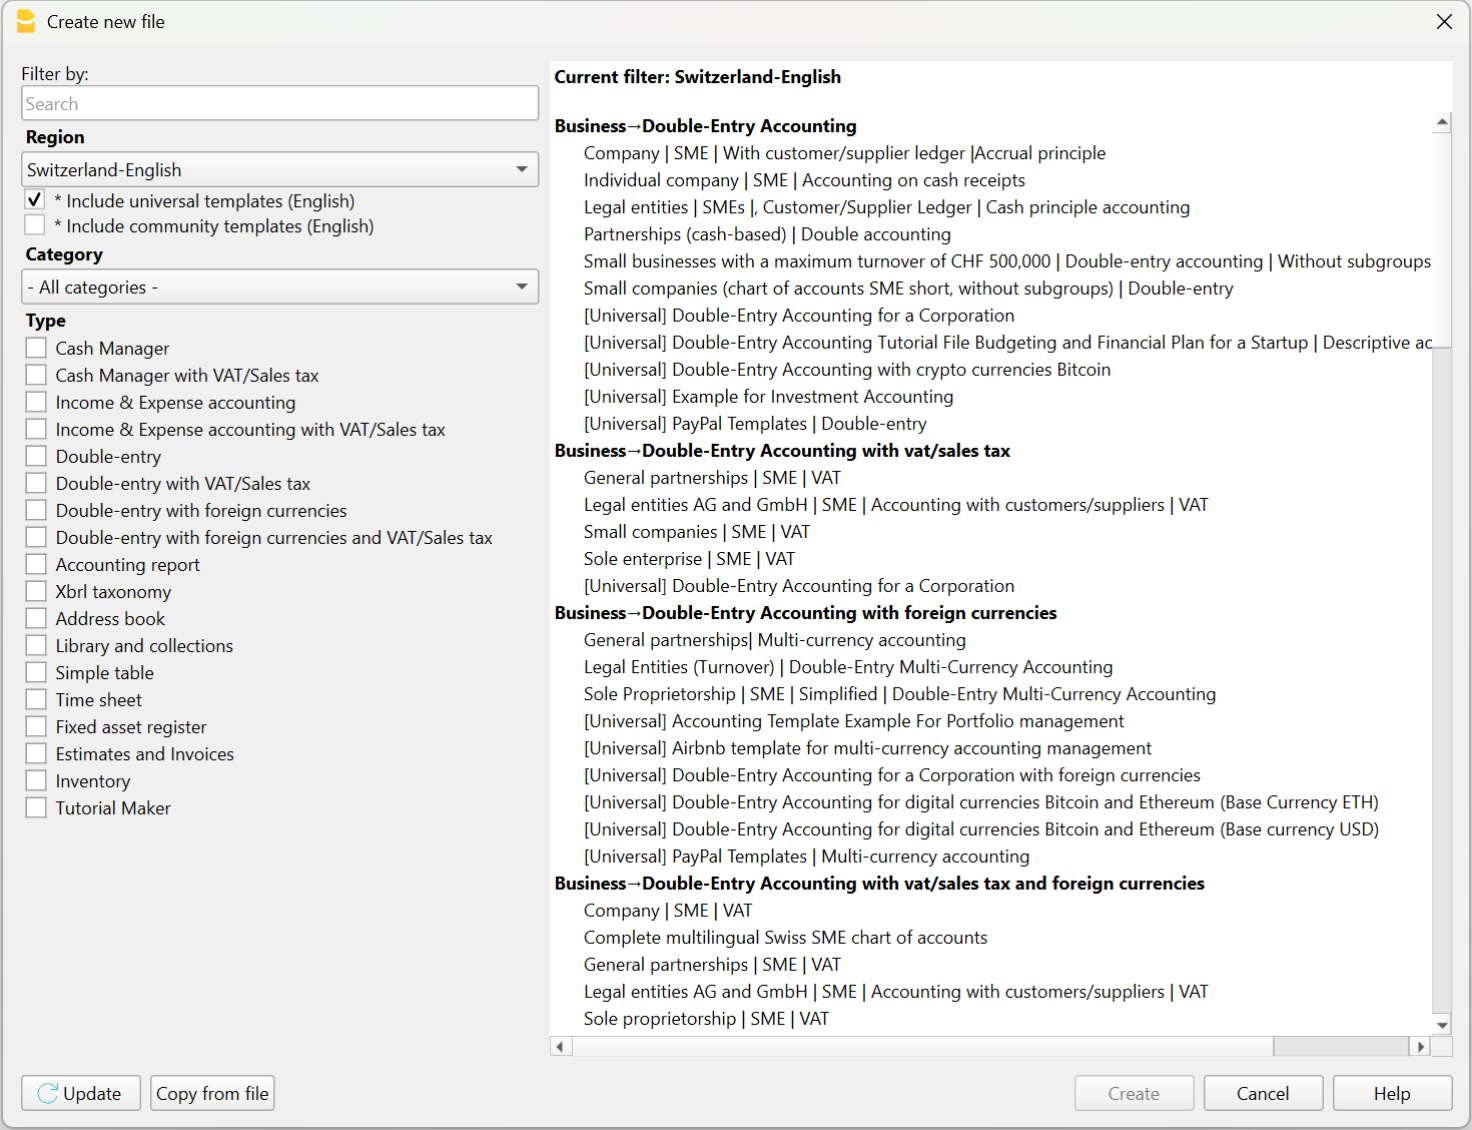
Chart of accounts and opening balances
After choosing the template that best suits your needs, you will need to customize the Accounts table by modifying, adding, or removing accounts. You can adjust the chart of accounts and grouping structure at any time.
You can create account plans with grouping structures that reflect those used in existing accounting systems managed with other software.
If you're reconstructing an accounting file, you will likely need to enter opening balances using the “Opening” column in the Accounts table.
Note that in Banana Accounting’s double-entry system, amounts are displayed according to the logic of accounting programs, so Debit amounts are positive and Credit amounts are negative. Opening balances in Credit must therefore be entered as negative values.
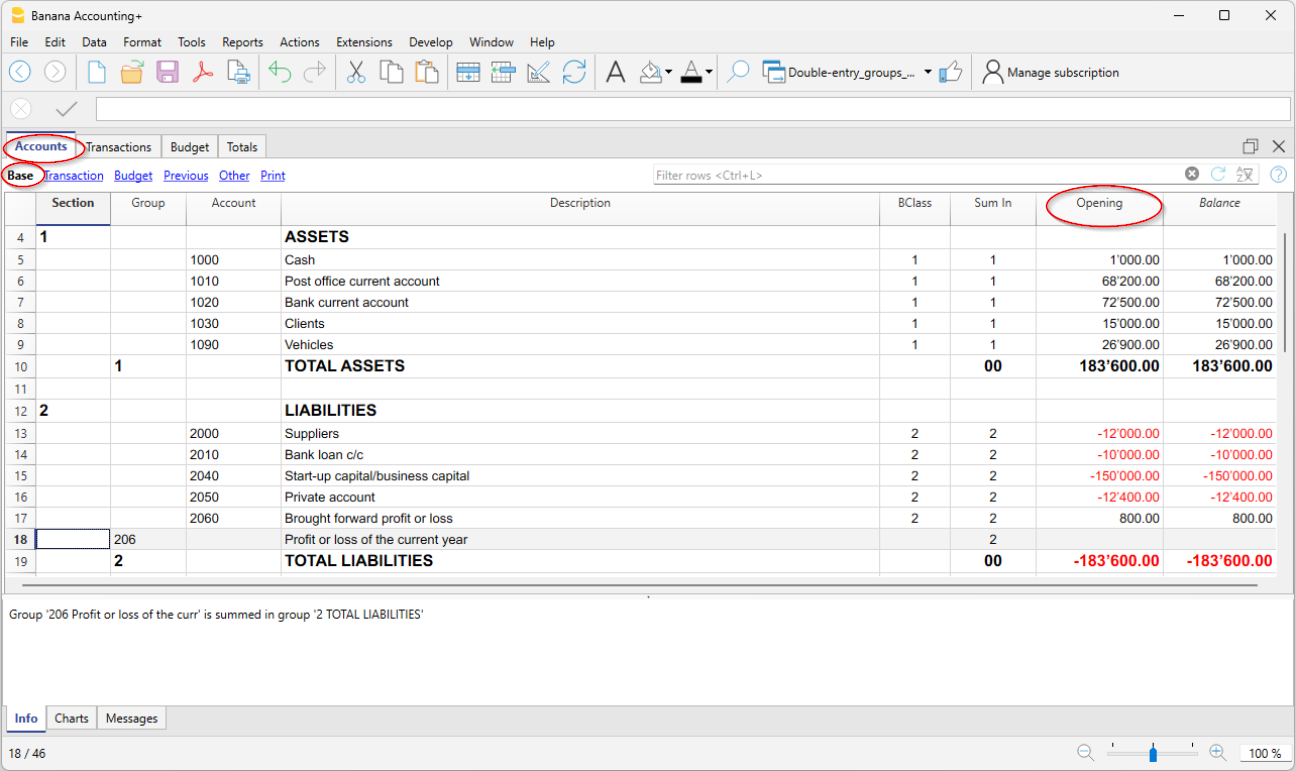
Entering and importing transactions
In the Transactions table you enter accounting transactions:
- You can enter and edit them manually.
- Entering and modifying data within the tables is very easy.
- You can copy and paste from Excel or other programs.
- In the Recurring Transactions table you can set up repeating entries.
- You can import data:
- You can import from CSV or other file formats.
- You can import digital bank statements.
- Several import extensions are available.
- You can create Import Rules that automatically complete the offset account and other elements.
- Modify and complete the transactions:
- When you enter or import transactions, the software will alert you to any errors or differences.
- You can apply rules for automatic completion.
- You can modify the transactions.
Banana Accounting was designed for small businesses, but in theory, there are no limits to the number of transactions or accounts you can manage. The software keeps all data in memory, so performance depends on your computer’s RAM and processor. Some clients successfully manage very large accounting files, with tens of thousands of accounts and hundreds of thousands of entries.
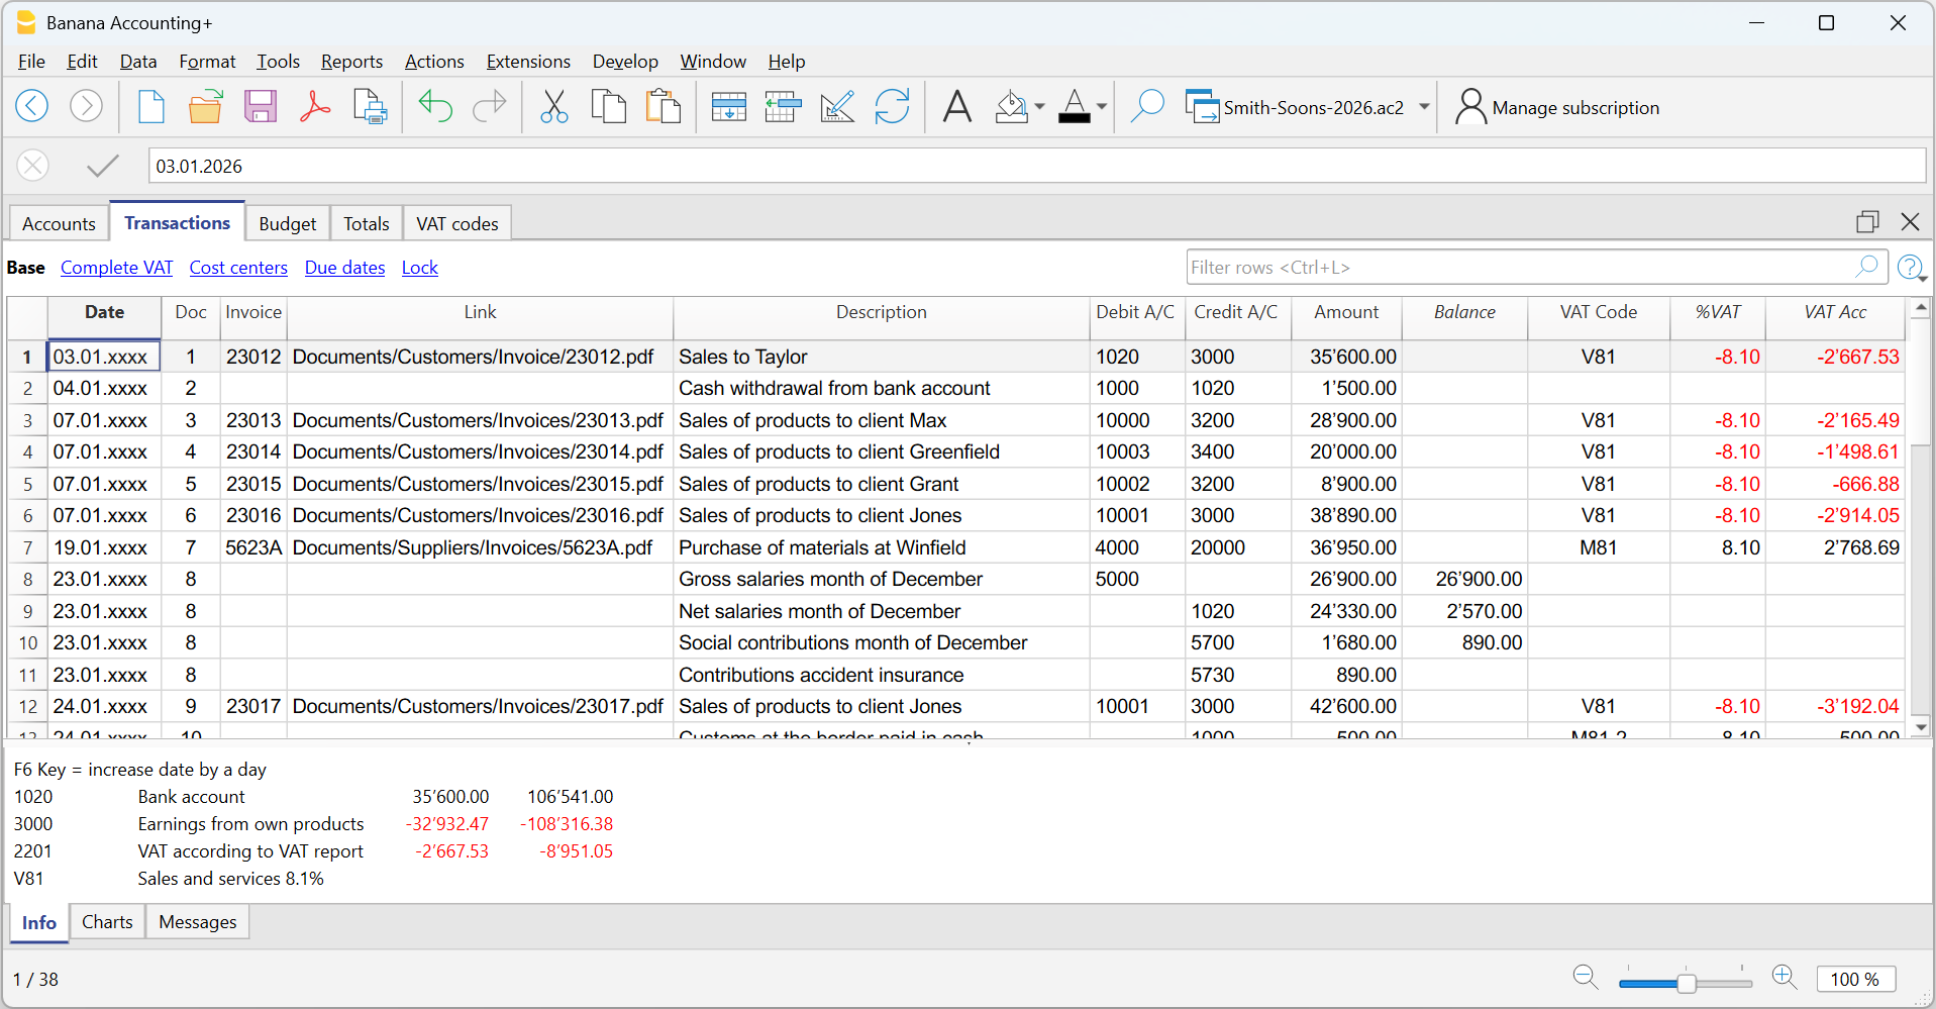
Automatic transaction categorization
Banana Accounting provides a deterministic rule system, configured by the accountant, to automatically categorize and complete transactions imported from bank statements. Thanks to these rules, you can quickly process large volumes of data. The applied rules are always visible in the Recurring Transactions table, where they can be printed and reviewed by auditors. Still, it is good practice to always check individual account statements.
There are many tools that digitize paper documents and, through artificial intelligence, extract information, analyze, and categorize content based on probabilistic logic. These tools can be very helpful and save time. However, it's important to note that categorization based on probabilistic logic is not a reliable source and always requires thorough verification.
AI-based tools often allow data export in CSV or Excel format, so you can easily import the data into Banana Accounting for manual review, corrections, and completion.

Review and add additional information
Once transactions are imported, you can review, edit, and complete them manually with the information you need:
- You can highlight and color rows, bold them, or change font size.
- Using the Data > Arrange Columns menu:
- You can show pre-configured columns (e.g. Notes, Links),
- You can add new types of columns.
- You can add links to supporting digital documents.
- You can use:
- Cost and profit centers – to categorize transactions in different ways.
- Segments – to divide activity by areas, branches, or other categories.

Error detection, reconciliation, and closing procedures
Banana Accounting provides built-in tools for identifying errors, performing reconciliations, and preparing adjusting entries and period-end closings. Thanks to the double-entry structure, inconsistencies are immediately visible, and the accounting check function systematically verifies the chart of accounts and all recorded transactions.
Bank and account reconciliations are simplified through clear account cards, transaction filtering, balance controls, and automatic calculation of differences. This makes it easier to detect missing entries, duplicated postings, or incorrect classifications.
The structured framework also supports the preparation of accruals, deferrals, provisions, and other adjusting entries required for accurate financial reporting. As a result, period-end closings can be completed efficiently and with a high level of reliability, even in complex reconstruction or investigative contexts.
Filtering and other useful features
There are many useful features that allow you to analyze and complete data quickly, including:
- The Balance column in the Transactions table indicates if there is an imbalance between Debit and Credit, due to account coding errors or unbalanced multi-account entries.
- The Temporary row filter function shows only the rows containing a specific text. There is also advanced syntax available for more powerful searches.
When the filter is active, you can edit transaction content, select, copy, and paste cells just like in Excel. - With Temporary row sorting, you can view rows in ascending or descending order based on a column. You can remove the temporary sort to return to the original order.
- Find and replace.
- The Copy rows command copies the selection with column headers. When you paste into Excel, the headers are already included so you can easily apply filters or create pivot tables.
- The Check accounting tool rechecks the chart of accounts and all entries and alerts you if there are errors or discrepancies.

Balance sheet and Account cards
The main advantage of Banana Accounting compared to Excel is that, once transactions are entered, you automatically get the Balance Sheet, the Income Statement, and the account cards for each account.
In the Accounts table, you have an immediate view of all accounts and groups, with updated movements and balances. This way you instantly see the current situation of your Balance Sheet and Income Statement. Of course, it’s essential to verify that bank balances match those in your accounting.

Additional accounting features
At any time, you can adapt your accounting setup and add or remove features. See:
Extensions
Banana Accounting, like Excel, provides a programming language that allows you to perform all kinds of processing.
It is commonly used to create custom reports, but it can also be used, for example, to create import extensions or modify existing data:
- Create extensions for Banana Accounting
- Information on importing data into Banana Accounting
- Information on exporting data from Banana Accounting
We have also created ChatGPT assistants to help you create extensions for generating reports. The extensions run locally in Banana, so you don’t need to send your data to the cloud AI assistant.
Analisi e revisione dei dati contabili
Banana Contabilità permette di analizzare e revisionare facilmente i dati contabili. L’impostazione a tabelle, simile a Excel, consente di visualizzare e ricercare con immediatezza tutte le informazioni. Inoltre, i dati sono strutturati secondo le regole della contabilità in partita doppia, quindi il programma esegue automaticamente una serie di controlli, segnala eventuali errori e mette a disposizione tutti gli strumenti e i report necessari per l’analisi contabile.
Comando Controlla contabilità
Quando si ricostruisce una contabilità capita spesso che non tutte le operazioni possano essere completate, vengano lasciate in sospeso e che magari si cambi anche in modo importante la struttura del piano dei conti.
Banana Contabilità mette però a disposizione il comando che permette di lavorare con la massima libertà e tranquillitaà.
Che azzera tutti i valori e ricalcola e ricontrolla il piano dei conti e tutte le operazioni come se si stessero inserendo manualmente. Se ci sono operazioni in sospeso, errori o differenze queste vengono nuovamente segnalate.
Filtra righe
È certamente una delle funzioni più utili nella ricostruzione contabile, poiché consente di ricercare e modificare rapidamente le operazioni di interesse.
Offre inoltre comandi di filtro avanzati, per esempio per visualizzare solo le righe colorate o le celle che contengono un testo specifico.
Un aspetto molto importante è che, anche quando si applica un filtro o un ordinamento temporaneo, è possibile continuare a utilizzare le funzioni di selezione e copia-incolla. Si possono, per esempio, cercare tutte le righe che contengono un determinato nome e sostituire il conto di tutte le righe in un’unica operazione.
Scheda conto
Il vantaggio principale di Banana Contabilità rispetto a Excel è che, una volta inserite le registrazioni, ottieni in automatico il Bilancio, il Conto Economico, le schede con i movimenti di ogni conto, principale o centro di costo o profitto.
L'estratto conto è ovviamente uno strumento insostituibile in contabilità, perché puoi vedere l'elenco di movimenti specifici che sono stati categorizzati in un preciso conto e quindi avere tutti i dettagli.
Bilanci e Conto economico
Nella tabella Conti hai una visione immediata di tutti i conti e i gruppi, con i movimenti e i saldi aggiornati. Così vedi a colpo d'occhio la situazione aggiornata del Bilancio e del Conto economico. Rimane naturalmente fondamentale verificare che i saldi bancari corrispondano a quelli registrati in contabilità.
Estensioni
Banana Contabilità, come Excel, mette a disposizione un linguaggio di programmazione che consente di effettuare elaborazioni di ogni genere.
Viene generalmente usato per creare dei report personalizzati, ma può anche essere usato ad esempio per creare estensioni di importazione o che modificano i dati esistenti:
- Creare estensioni per Banana Contabilità (in inglese)
- Informazioni per importare dati in Banana Contabilità (in inglese)
- Informazioni per esportare dati da Banana Cobtabilità (in inglese)
Abbiamo anche creato degli assistenti in ChatGPT che ti permettono di creare delle estensioni per generare report. Le estensioni vengono poi eseguite localmente da Banana, pertanto non si devono inviare i dati all’Assistente AI cloud.
Ricostruzione della situazione contabile e finanziaria
Questa pagina introduce alle particolarità dell'attività di ricostruzione contabile finanziaria, dette anche di Forensic Accounting, che pur avendo molte similirità con la tenuta contabile abituale, presenta molte diversità,.
Spiega i come usare al meglio Banana Contabilità in questo ambito e ottere velocemente i risultati desiderati.
Particolarità della ricostruzione contabile
L'attività di ricostruzione contabile è un progetto a se stante, che, da un punto di vista operativo, si differenzia dalla normale tenuta contabile:
- Ha degli obiettivi più specifici (non necessariamente strumento di controllo di gestione).
- Il lavoro viene svolto da un numero limitato di specialisti che ha generalmente accesso illimitato ai dati (situazione diversa rispetto a un ERP).
- Gli specialisti possono non avere o avere poche conoscenze circa l'attività da investigare.
- L'attività viene svolta in un periodo di tempo definito e non ha carattere ricorrente.
- Si ha la possibilità e necessità di elaborare tutti i dati in blocco.
- I dati da trattare non sono stati necessariamente predisposti per servire allo scopo e devono quindi essere rielaborati.
Queste particolarità aiutano a comprendere perché non tutti i software di contabilità, e in particolare gli ERP, siano adatti.
Banana Contabilità, invece, grazie alla sua flessibilità e modularità, è un software ideale per le ricostruzioni contabili e finanziarie di qualsiasi genere.
Fasi per la ricostruzione della situazione finanziaria
La ricostruzione finanziari e generalmente strutturata in più fasi:
- Definizione degli obiettivi dell’indagine.
- Raccolta documenti, estratti conti bancari e altre informazioni finanziarie.
- Ripresa dei movimenti in un sistema contabile, completamento e categorizzazione.
- Verifica, valutazione e analisi dei dati.
- Presentazione delle informazioni economico finanziarie.
- Valutazioni economico e legali, con preparazione dei rapporti.
Durante la fase di verifica e valutazione dei dati, può rilevarsi un'insufficienza di elementi e la necessità di raccogliere ulteriori dati e informazioni.
Organizzare i dati del progetto
La ricostruzione contabile consiste principalmente nel categorizzare i movimenti finanziari relativi a una determinata attività, con l’obiettivo di accertare la provenienza dei fondi o il modo in cui sono stati utilizzati. Si tratta quindi di esaminare documenti che testimoniano i movimenti finanziari, individuare gli elementi più rilevanti e inserirli in un sistema contabile, affinché possano essere classificati ed elaborati per ottenere le analisi e i report necessari.
La ricostruzione contabile parte dunque da un insieme di informazioni digitali o cartacee, che potranno eventualmente essere digitalizzate. Nel corso di un’indagine ci si troverà a gestire una quantità significativa di informazioni digitali, e quindi di file. Idealmente, è opportuno creare una cartella di progetto nel proprio sistema informatico, all’interno della quale salvare tutti i documenti, organizzandoli in sotto-cartelle. Si presume che la gestione degli accessi avvenga tramite le funzioni del sistema operativo, e che gli utenti con accesso ai file siano anche autorizzati a prenderne visione. Se così non fosse, sarà necessario creare cartelle separate, in modo da suddividere i dati e regolare l’accesso in base alle autorizzazioni.
Banana Contabilità è un software che lavora localmente e presuppone che i file contabili su cui opera siano accessibili localmente, direttamente o tramite collegamenti di rete o sistemi di sincronizzazione:
Ovviamente la situazione di un’indagine è generalmente diversa, ma è utile tenerne conto per comprendere la logica di funzionamento del programma e il collegamento con i giustificativi.
Raccolta e digitalizzazione dei documenti
Ogni contabilità si basa su dei giustificativi contabili e quindi il primo passo per avviare un'indagine finanziaria è quello di raccogliere tutti i dati necessari, come
- Giustificativi contabili, come ricevute, fatture, note spese e tutte le informazioni che certificano un cambiamento nella situazione finanziaria.
- Estratti conto bancari, dei clienti o dei fornitori.
- Contratti di diverso genere.
È inutile evidenziare che i risultati di un indagine dipendono in larga misura dalla possibilità di avere informazioni il più possibile precise e dettagliate. Queste devono poi essere valutate e categorizzate, generalmente facendo uso di software atti alla ricostruzione contabile.
Se le informazioni non sono disponibili in formato digitale, sarà necessario riprenderli, tramite degli scanner e software in grado di trasformare delle immagini in dati che possono essere più facilmente trattati. Se il volume di dati è limitato, come può essere il caso di una situazione di un'anziano, i datti possono anche essere ripresi manualmente. Se invece si l'indagine richiede di valutare una grande quantità di informazioni ecco che saranno indispensabili degli strumenti che possano ridurre i tempi e contenere i costi.
Ci sono molti software che si concentrano sulla digitalizzazione e l'estrazione di dati da documenti esistenti, per poi mettere a disposizioni le informazioni in un formato leggibile da Excel, programmi di analisi o software di contabilità.
Creazione del file di contabilità
Il primo passo consiste nel creare un file di contabilità che conterrà il piano dei conti e nel quale saranno registrati e categorizzati i movimenti finanziari. Ciò che rende Banana Contabilità particolarmente adatto all’ambito del forensic accounting è il fatto di essere uno strumento contabile professionale di livello internazionale, modulare e altamente flessibile, che consente di creare contabilità perfettamente adattate alle esigenze specifiche delle indagini, rendendo il lavoro più semplice, rapido e accurato.
È possibile creare un numero illimitato di contabilità, ognuna in lingue e valute diverse, utilizzando sia il metodo delle Entrate e Uscite sia quello della Partita Doppia. Si tratta di una soluzione molto efficace, poiché permette di utilizzare lo stesso strumento per ricostruire qualsiasi tipo di situazione finanziaria: di imprese, fondazioni, associazioni o privati, oppure per analizzare in modo mirato attività specifiche, come la gestione dei fondi di un singolo progetto.
Banana Contabilità è stato concepito per contabilità di piccole imprese, ma teoricamente non esistono limiti al numero di registrazioni o conti che si possono gestire. Il programma tiene tutti i dati in memoria, quindi le prestazioni sono dipendenti dalla quantitià di memoria (RAM) del computer e dalla potenza del processore. Alcuni nostri clienti gestiscono con successo contabilità molto estese, con anche decine di migliaia di conti e centinaia di migliaia di movimenti.
Creare una contabilità partendo da un modello
Il modo più veloce per creare una contabilità è quello di scegliere un fra i tanti modelli disponibili nel Template store:
- Menu File > Nuovo.
Ti appare un dialogo dove scegliere il modello in base alla regione e tipo di contabilità. - Modelli per specifiche Regioni.
- Sono impostati secondo degli schemi contabili nazionali.
- Il piano dei conti ha l’identificativo dei conti generalmente numerico, usato nella nazione.
- Modelli Universali.
- Sono per un uso più generale.
- L’identificativo dei conti è generalmente testuale (conti descrittivi).
Il periodo contabile e numero di file
Generalmente con Banana Contabilità si crea un file di contabilità per ogni anno contabile, pertanto nei dati base della contabilità, la data inizio e fine corrisponderà all'anno civile o fiscale.
Per una ricostruzione contabile che riguarda più anni, può comunque risultare più facile tenere un file unico con tutte le registrazioni. In questo modo si potranno vedere e modificare direttamente tutte i movimenti. Ai fini della reportistica si sceglierà poi il periodo di reporting.
Tenere dei file separati per più anni può risultare utile, specialmente se vi è una gran mole di dati. Con più file separati più persone possono dividersi il lavoro e ciascuno può lavorare così indipendentmente dagli altri. In questi casi è comunque utile tenere un piano dei conti che è identico, così che si può anche creare un file riassuntivo nel quale sono integrati tutti gli anni contabili.
Impostazione del Piano dei conti
Dopo aver scelto il modello più adatto alle tue esigenze, dovrai personalizzare la tabella Conti, modificando, aggiungendo o rimuovendo conti. L’adattamento del piano dei conti e la modifica dei raggruppamenti possono essere eseguiti in qualsiasi momento.
Puoi creare dei piani dei conti con strutture di raggruppamento che riprendono quella di una contabilità esistente gestita con altri programmi.
Inserimento dei saldi d'apertura
Se stai ricostruendo una contabilità dovrai probabilmente inserire i saldi iniziali utilizzando la colonna “Apertura” nella tabella Conti.
Considera che Banana Contabilità, nella contabilità in partita doppia, visualizza gli importi esattamente seguendo la logica interna dei programmi di contabilità, quindi gli importi in Dare sono in positivo e gli importi in Avere sono in negativo. I saldi di apertura in Avere devono quindi essere inseriti in negativo.
Multi-moneta, Criptocurrency, Gestione titoli e altro
Come accennato in precedenza, Banana Contabilità è uno strumento estremamente modulare. Si possono creare contabilità molto semplici, con solo gli elementi essenziali, ma, quando necessario, è possibile aggiungere un’ampia gamma di funzionalità aggiuntive, tra cui la gestione:
- Gestione Clienti e fornitori.
- Gestione IVA.
- Gestione quantitativi e magazzino integrata in contabilità.
- Contabilità Titoli.
Questa funzionalità è generalmente disponibili sono il software contabili specializzati e con costi molto alti. - Tabelle note.
Puoi integrare direttamente in contabilità informazioni che hai raccolto.
Inserire e importare registrazioni
Una volta impostato il file di contabilità, ti rimane la parte principale del lavoro di ricostruzione finanziaria, ovvero importare o inserire nella tabella Registrazioni i movimenti contabili, competandoli e categorizzandoli:
- Puoi inserirli e modificarli manualmente.
- Nella tabella Registrazioni ricorrenti puoi impostare movimenti che si ripetono.
- Puoi copiare e incollare da Excel o altri programmi.
Vedi Riprendere dati da altri programmi. - Puoi importarli da file CSV o di altro genere.
- Puoi importarli da estratti bancari digitali.
- Ci sono diverse estensioni di importazioni.
- Puoi creare delle Regole di importazione che completano in automatico la contropartita e altri elementi.
In poco tempo la contabilità è fatta! Quando inserisci o importi i movimenti, il programma ti segnala eventuali errori o differenze.
Categorizzazione dei movimenti
Elemento centrale di un'indagine forense è la categorizzazione dei movimenti. Se si sospetta una frode i movimenti leciti verranno registrati sui conti considerati leciti, mentre quelli sospetti su altri conti specifici. Se invece se dovrà ricostruire la contabilità per delle indagini tributarie, si dovrà categorizzare i movimenti in base alle specifiche necessità di rendicontazione.
Il primo livello di categorizzazione offerto da Banana Contabilità è quello relativo ai conti impostati nel piano dei conti. I movimenti bancari verranno quindi registrati sul conto apposito e poi si sceglierà il conto di contropartita. Se un'importo deve essere assegnato a più conti di spesa o entrata, la registrazione dovrà usare più righe, ciascuno con il proprio conto e importo.
Con questa categorizzazione tipica di tutti software contabili si avranno già importanti informazioni relativamente alla situazione patrimoniale (Bilancio) e all'evoluzione finanziaria (Conto Perdite e Profitti). Ovviamente si avrà poi l'estratto conto che mostra tutti i movimenti del conto. Se si necessitano di categorizzare con un maggiore livello di dettaglio si possono creare più conti, per esempio, creare un conto "Benzina", in aggiunto a quello "Spese auto" e modificare le registrazioni di conseguenza.
Banana Contabilità consente però anche di categorizzare contemporaneamente gli importi anche usando altre logiche. Ci sono diversi possibilità.
- Puoi evidenziare e colorare le righe, oppure metterle in grassetto o cambiare la dimensione del carattere.
- Centri di costo e profitto,
Permettono di categorizzare i movimenti logiche diverse da quelle contabili.
Sono certamente quelli più adatti per una ricostruzione contabile, perché sono facilmente utilizzabili e danno una visione immediata di certe situazioni. - Segmenti
Permettono di suddividere l’attività per ambiti, succursali o altro. - Colonne Note e altre predefinite.
Con il comando Menu Dati > Disponi colonne puoi rendere visibili diverse colonne predisposte per inserire altre informazioni, come la data valuta, note, ecc. - Sempre con Menu Dati > Disponi colonne puoi aggiungere nuovi tipi di colonne.
Collegamento ai documenti digitali
Ogni riga di qualsiasi tabella ha una colonna già predisposta dove inserire il collegamento a un documento digitale.
- Collegamenti ai documenti (giustificativi) digitali.
- Con un semplice click puoi visualizzare la fatura o la ricevuta collegata a un movimento.
Se vuoi collegare più documenti, puoi aggiungere altre colonne per collegamenti.
Completamento e categorizzazione automatica
Banana Contabilità mette a disposizione un sistema di regole deterministiche, impostate dal contabile, per categorizzare e completare in automatico i movimenti importati dagli estratti conto bancari. Grazie a queste regole, è possibile processare velocemente un grande volume di operazioni. Le Regole applicate sono sempre visibili nella tabella Registrazioni ricorrenti, dove possono essere stampate e verificate da periti. Rimane comunque una buona prassi controllare sempre le singole schede.
Esistono numerosi programmi che digitalizzano documenti cartacei e che, grazie all’uso dell’intelligenza artificiale, estraggono informazioni, analizzano e categorizzano i contenuti basandosi su logiche probabilistiche. Questi strumenti possono essere molto utili e permettere un notevole risparmio di tempo. Bisogna però considerare che la categorizzazione fondata su logiche probabilistiche non rappresenta una fonte sicura e richiede sempre una verifica puntuale.
Gli strumenti basati sull’AI danno la possibilità di esportare i dati in formato CSV o Excel, così da poterli facilmente importare in Banana Contabilità per poi essere controllati, modificati e completati manualmente.
Verifica e modifiche a mano
Gli strumenti di automazione sono molto utili, ma non possono di certo sostituire il controllo e la verifica dei dati da parte dello specialista. Il fatto di essere simile a Excel, di potere vedere tutti i conti, i movimenti e gli estratti conti e molti report disposti in tabella rende le verifiche molto più facile.
Si possono infatti scorrere i dati Banana Contabilità, selezionare celle e completare o apportare modifiche molto velocemente, grazie anche a delle funzionalità che pochi software di contabilità hanno:
- La funzione Filtro righe temporaneo ti mostra solo le righe che contengono un determinato testo. C’è però anche una sintassi avanzata, che permette ricerche molto più potenti.
Quando il Filtro è attivo, puoi modificare il contenuto dei movimenti, selezionando e copiando e incollando celle esattamente come fai con Excel. - Con l'Ordine temporaneo delle righe
Visualizzi le righe nell’ordine ascendente o discendente di una colonna. Diversamente da Excel, dove il sort è definitivo, con Banana Contabilità puoi togliere l'ordine temporaneo per ritornare alla sequenza originale delle righe. - Cerca e sostituisci.
- Il comando Copia e Incolla.
- Il comando Copia righe che è un anche un copia incolla potenziato, in quanto include anche le intestazioni colonne. Così quando incolli i dati in Excel, hai già le intestazioni per applicare facilmente filtri o creare tabelle pivot.
- La colonna Saldo nella tabella Registrazioni indica se vi è uno sbilancio fra Dare e Avere, dovuto ad errori nella codifica dei conti oppure a registrazioni su più conti che non si compensano.
- I grafici nella finestrra Info che mostrano l'evoluzione di un conto o gruppi nel tempo.
Filtra righe
È certamente una delle funzioni più utili nella ricostruzione contabile, poiché consente di ricercare e modificare rapidamente le operazioni di interesse.
Offre inoltre comandi di filtro avanzati, per esempio per visualizzare solo le righe colorate o le celle che contengono un testo specifico.
Un aspetto molto importante è che, anche quando si applica un filtro o un ordinamento temporaneo, è possibile continuare a utilizzare le funzioni di selezione e copia-incolla. Si possono, per esempio, cercare tutte le righe che contengono un determinato nome e sostituire il conto di tutte le righe in un’unica operazione.
Comando Controlla contabilità
Quando si ricostruisce una contabilità capita spesso che non tutte le operazioni possano essere completate, vengano lasciate in sospeso e che magari si cambi anche in modo importante la struttura del piano dei conti.
Banana Contabilità mette però a disposizione il comando che permette di lavorare con la massima libertà e tranquillitaà.
Che azzera tutti i valori e ricalcola e ricontrolla il piano dei conti e tutte le operazioni come se si stessero inserendo manualmente. Se ci sono operazioni in sospeso, errori o differenze queste vengono nuovamente segnalate.
Revisione e analisi dati
Banana Contabilità permette di analizzare e revisionare facilmente i dati contabili grazie all’impostazione a tabelle, simile a Excel, che consente di visualizzare con immediatezza tutte le informazioni. Inoltre, i dati sono strutturati secondo le regole della contabilità in partita doppia, quindi il programma esegue automaticamente una serie di controlli, segnala eventuali errori e mette a disposizione tutti gli strumenti e i report necessari per l’analisi contabile.
Crea una contabilità con i dati di una contabilità preesistente
Banana Contabilità è un software molto flessibile e modulare, che consente di creare facilmente una nuova contabilità partendo dai dati di una contabilità esistente gestita con un altro programma. Avere tutti i dati della contabilità disponibili in Banana Contabilità può essere molto utile in divesti ambiti e specialmente per indagini nell'ambito del forensic accounting.
Di seguito viene illustrata la tematica e come procedere in modo efficace, fornendo anche rimandi alle informazioni utili per ogni fase.
Perché riprendere i dati in Banana Contabilità
Banana Contabilità visualizza tutti i dati contabili in forma tabellare, permettendo di scorrerli, ricercarli rapidamente e ottenere immediatamente i report contabili. Consente inoltre di modificarli, aggiungendo informazioni o categorizzando i movimenti secondo criteri personalizzati. In molti casi riprendere una contabilità esistente in Banana Contabilità può essere molto utile:
- Si dispongono dei dati contabili, ma il software originale con cui era stata tenuta la contabilità non è più disponibile, oppure riattivarlo risulterebbe troppo complesso o costoso.
- La ricostruzione contabile ha uno scopo limitato e non giustifica la riattivazione dell’intera applicazione.
- Le persone che svolgono l’indagine non possono accedere all’applicativo contabile oppure dispongono di un accesso molto limitato, che restringe le possibilità di analisi.
- L’accesso ai dati contabili in modo strutturato facilita attività di controllo, audit, analisi e permette di estrarre nuovamente informazioni o stampare rendiconti.
- Il software originario è ancora operativo, ma non offre sufficiente flessibilità nelle indagini, né consente di aggiungere facilmente nuove informazioni o riclassificare i dati.
- L’impresa desidera un metodo più flessibile per accedere ai propri dati contabili.
- È necessario conformarsi a un obbligo legale che prevede la disponibilità continua dei dati contabili.
- Si vuole abbandonare l’altro software e utilizzare Banana Contabilità, proseguendo il lavoro già iniziato.
La ripresa dei dati contabili risulta utile anche per indagini finanziarie di forensic accounting, per attività ispettive o di revisione dei conti, oltre che per facilitare analisi e ricerche.
I dati preesistenti
Gli elementi principali di una contabilità sono:
- Informazioni circa la società, periodo contabile e altro.
- Il piano dei conti, con la relativa classificazione.
- I movimenti contabili.
- I giustificativi contabili.
In Banana Contabilità ci si limita a mettere un link che collega la registrazione al documento. - Informazioni supplementari circa gestione IVA, clienti e fornitori, fatture.
Queste informazioni possono essere già disponibili in un formato che può essere trasformato o importato in Banana Contabilità. Se non è il caso si dovrà procedere alla trasfromazione.
Probabimlente non si andrà a riprendere tutti i dati, ma solo quelli che sono necessari per lo scopo che ci si prefissa.
I passi per creare una contabilità e riprendere i dati
Per potere arrivare ad trasferire tutti i dati in Banana Contabilità ci sono dei passi da seguire:
- Creare un nuovo file di contabilità.
Generalmente è utile partire da un modello esistente, configurato in modo simile a quello che sono le proprie necessità. - Impostare i dati base.
Nome della ditta, moneta base, periodo contabile e altro necessario. - Impostare o importare il piano dei conti sulla base di quello esistente.
Si stratta di riprendere nella Tabella Conti il piano dei conti. - Impostare altre informazioni, come per esempio la tabella dei codici IVA.
- Importare i movimenti contabili nella Tabella Registrazioni.
È utile ovviamente automatizzare il più possibile questa operazione.
I dati importati potranno comunque anche essere aggiustati manualmente. - Controllo e verifica.
Si deve controllare che i saldi della contabilità corrispondano a quella originale.
Creazione contabilità e ripresa dati in un passo unico
Se i dati della contabilità sono disponibili in un formato che contiene tutte le informazioni necessarie è possibile creare un'estensione che crea, in base alla struttura dati esistenti, la nuova contabilità e vi traferisce tutti i dati in modo automatico.
Il presupposto è che l'applicativo originale salvi o esporti i dati in un file unico e che vi sia un'estensione di Banana Contabilità predisposto per questo scopo, tipo:
- Audit file for Taxation
- È un formato file XML concepito appositamente per archiviare i dati di una contabilità in modo standard, così che possano essere resi facilmente accessibili alle autorità tributarie, per dei controlli e verifiche
- In certe nazioni, è pure obbligatorio salvare i dati in questo formato per scopi di archiviazione.
- Banana Contabilità ha delle estensioni in grado di leggere in automatico taluni di questi file e ricreare in automatico la contabilità.
- Formati file proprietari
- Ci sono applicativi contabili in grado di salvare tutti i dati della contabilità in un formato proprietario.
Per creare un nuovo file si usa:
- Comando: Menu Strumenti > Crea File da dati esterni
- La programmazione dell'estensione avviene tramite le funzionalità File Creator Extensions.
Ripresa dati in blocco
Il processo di ripresa dei dati viene fatto in due tempi:
- Creazione e impostazione del file di contabilità in modo manuale.
- Importazione dei dati in blocco usando il comando
- Menu Azioni > Importa in Contabilità > Importa file
Questo approccio viene usato per esempio per:
- Italia: Estensione importazione delle fatture scaricate dal cassetto fiscale dell'Agenzia delle entrate.
L'estensione in automatico crea i conti dei clienti e dei fornitori e aggiunge i movimenti contabili.
Le estensioni che usano questo approccio usano la Document Change API di Banana Contabilità che permette di apportare modifiche a più tabelle.
Ripresa dati in più fasi
Il processo di ripresa dei dati viene fatto in diversi tempi:
- Creazione e impostazione del file di contabilità in modo manuale.
- Importazione o impostazione del piano dei conti.
- Importazione o ripressa dei dei movimenti.
L'automazione del processo si concentra sull'importazione die movimenti.
Questo approccio è quello più comunemente usato, anche perché
- Vi sono diverse estensioni già predisposte per l'importazione dei movimenti.
- L'importazione dei dati può essere fatta in modo semi automatico trasferendo prima i dati in Excel e poi copiandoli in Banana Contabilità.
Vedi: Riprendere dati da altri programmi.
The Standard Audit File for Taxation (SAF-T)
The Standard Audit File - for Taxation (SAF-T) is a file format that specify how to package all the most important accounting data in a standard format. The SAF-T is a recommendation of the OECD’s Committee on Fiscal Affairs (CFA). The file format makes it easier for taxpayers to provide their electronic records to tax auditors in support of their tax return and for auditors to review accounting records.
Import SAF-T Files
Banana Accounting allows you to export and import accounting data in various national SAF-T formats. See:
Main SAF-T Uses
There are different uses for the SAF-T files:
- Auditing purpose.
Every Auditor or VAT inspector has the discretion to demand the file at the occasion of an audit. Accounting software should be able to generate the SAF-T file when auditors require it.SAF-T allows auditors ready-access to data to perform compliance and substantive testing. - Archival purpose.
The SAF-T format is used to store the accounting data for archival purpose. Accounting data is therefore available over the times in a standard format. This use case is especially important for cloud service solution, that makes the data available only until they pay the subscription.
Using the SAF-T file for archival purpose is a very intelligent way to have always access to the accounting data.
SAF-T is the standard archival format in Norwegian for companies with a minimun revenues. - Analytics purpose.
You can use the accounting data for analytics and reporting that your current accounting solutions does not offer. - Moving data to other solutions.
The SAF-T file allows companies that switch solution to more easily move their accounting data to other solutions.
The structure of the SAF-T
The SAF-T file is an XML file that has been conceived to structure all the accounting data in a standard format. The SAF-T format has been conceived in a way that allows countries to create localized version that best support the local
The forma include the most important accounting data:
- Header information.
Company information - Master Files
- General ledger Accounts (GeneralLedgerAccounts)
All the accounts used within the accounting solutions, with- AccountId and Description
- Account grouping, account type and account standard id for country specific categorisation.
- Opening and closing balance.
- Accounting Taxonomy (Taxonomies)
Information for grouping the accounts for reporting. - Customers (Customers)
List of all the customers:- Address and company information.
- AccountId and grouping.
- Opening and closing balance.
- Suppliers (Suppliers)
List of all the suppliers:- Address and company information’s.
- AccountId and grouping.
- Opening and closing balance.
- TAX table (TaxTable)
Information regarding the VAT or Sales Tax.- Tax Code
- Percentages and applicability date.
- Inventory (PhysicalStock)
- Products list
- Quantities, opening and closing values.
- Fixed Assets
- Id and descriptions
- Acquisition information
- Valuation
- General ledger Accounts (GeneralLedgerAccounts)
- General Ledger Entries
Journal Entries- Transactions date, type
- Source documents
- Account id, customer or supplier info
- Debit and credit amount
- Tax information
- Analysis (Cost, projects, amounts)
- Source Documents (SourceDocuments)
- Sales Invoice
- Purchase invoice
- Payments
- Movements of goods
- Assets transactions
Currently Products, Source documents and other data is not imported.
Standard Audit File for Payroll (SAF-P)
The SAF-P (AuditFilePayroll) is aimed at saving data relative the payroll. The SAF-P is structured in this way.
- Header
With company information. - MasterFiles
With data for Employees, Branches. - TransactionsFiles.
For more information see the OECD Guidance document for SAF-P version 1.0 (2010).
Banana Accounting currently does not provide a reader for SAF-P files.
References
- SAF-T Wikipedia page
- OECD (FTA - Forum on Tax Administration)
- Guidance for accounting software developers concerning auditing requirements.
- FTA Guidance Notes on E-Auditing Standards
- SAF-T Version 2.0 (2010)
- SAF-T Version 1.0 (2005)
- SAF-T and SAF-P overview and governing bodies.
- TJC Group - SAF -T
- Czechia: VAT Control Statement
Standard Audit File Reader
How to view the content of a SAF-T file
Follows this simple steps.
- First use
- Install and run the Banana Accounting Insider Preview.
- Menu->Extensions->Manage Extensions install the Import extension for your audit file.
See the list of country specific import extensions.
- View the audit file
- Menu->Tools->Create file from external data.
- Select the audit file you want to import.
- You should have an audit file created with a country specific accounting software.
- Select the correct extension (*.xml or *.*) to show the file on disk.
Banana will create a in memory new accounting file and import all the data. Depending on the size of the audit file, after some time, you will see all the data in the Transactions and Accounting table.
Once the data is converted you can save the file and access the data later at any time without the need to convert.
In order to import all the data you need the Advanced Plan. With the free plan or professional plan only 70 transactions will be imported.
See how the SAF-T Reader work
If you don't have any audit file and you want to see how the SAF-T Reader work, we make available some test file you can experiment with.
- Download a test file
- Install the audit file country specific import extension.
- Proceed as explained above.
Country specific SAF-T file
Each country has their own specification that is usually a derivation of the OECD SAF-T 2.0 standard.
Currently Banana Accounting has import extensions for this SAF-T format:
Other file import
There are also extensions that import data from other country specific file types.
- German DATEV
- Import accounts
- Import transactions
- Electronic invoices Italy
It allows to import customer's invoice from a XML files (Cassetto fiscale).
In order to import the content of this kind of file you should proceed as explained before under import in existing files.
Structure of the accounting data in Banana
In Banana is a flexible accounting software based on the double entry accounting method. The SAF-T reader recreate a complete accounting file. In Banana Accounting the data is contained in tables that are like Excel sheets.
- Accounts table.
It contains the account plan, including:- The general ledger accounts
- The customers and suppliers accounts with address.
- The groups and grouping structure that form the Balance sheet and Profit & Loss statements.
- The opening balance and current balance calculated based on the transactions.
- Transactions table
It contains all the journal movements including the VAT information.
View and analyze the accounting data
Once the SAF-T data is loaded in Banana, you can view the content and use the accounting specific commands. Here are some suggestion on the use the converted accounting data. Kindly let us know if you have any feedback or suggestion on getting the max out of your accounting data.
View the content
- Scroll the Transactions and Accounts tables.
- The Data->Find command let you search for any text.
- The Data->Extract command to filter and sort content.
See graphic trend
- Select the Charts window.
- Select the account or group you are interested in seeing the graphical performance of.

Copy and paste to Excel
- Select the cell of the table you want to copy and paste in Excel.
- Select the rows and use the command Edit->Copy rows and when pasting in Excel you will also have the column header, for simple filtering.
Print or export
- Preview and print the content of the table or any reports.
- Export to pdf, html or any other format.
Accounting reports
The conversion process recreates a complete accounting file. So, you can use all the double entry reporting functionalities, like:
- The Actions->Account card give you the reconstructed card with all the transactions of any account or group.
- Within the Accounts table you have the recalculate balance of each accounts and groups that form the Balance Sheet, Profit & Loss Statement.
- With Reports->Advanced Balance Sheet with groups, you can print and customize the balance sheet and profit and loss statement. You can also have reporting by periods.
- With Reports->Accounting report you get the data in table format, for period or other parameters.
Adding comments or other information
Once you have the SAF-T data in the accounting file you can add other information.
- Make the column Notes visible.
- Use Cost centers columns to group transactions.
- Add any other column you need.
- Add a linked table for further categorisation.
- Mark the lines with colors to quickly retrieve some transactions.
Javascript extraction and reporting
The integrated Javascript interpreter let you create script:
- Select and extract data.
- Use the Banana Accounting API for
- Create any type of reports.
Organizing files of more years
If you have to do analysis on more than one account years it make sense to save the data in the Banana Accounting and connect the file of the previous year. Later you quickly open the files and create reports with data of multiple years.
- Convert the SAF-T to Banana Accounting and save the file.
- Set the file of the previous year.
File->File Properties->Options.
Importing SAF-T In an Existing Banana Accounting File
You can also import the SAF-T in an existing accounting file.
- Open your accounting file.
- Menu->Action->Import
- Import file
- Install and select the import extension for the specific country.
Feedback and contacts
The SAF-T Reader is a new product. We welcome any feedback on how to improve it or to provide extensions that could make auditing and analytics more easy.
Kindly contact our costumer service specifying "audit file" and the country extension you are using. Also briefly indicate your question or suggestion.
Universal Business plan templates
Wie Sie mit dem kostenlosen Cash Manager eine Liquiditätsprognose erstellen
Wie Sie mit dem kostenlosen Cash Manager eine Liquiditätsprognose erstellenEine Liquiditätsvorschau mit Banana Buchhaltung zu erstellen ist wie mit Excel, aber schneller, sicherer und völlig kostenlos. Dank der Vorlage mit vorgefertigten Konten können Sie sofort loslegen, Sie müssen nur noch die Daten eingeben.
Sie wissen im Voraus, wie viel Liquidität Sie haben und wie lange diese reichen wird, wann und welche Ausgaben auf Sie zukommen und mit welchen Einnahmen Sie rechnen können. Sie können die Reduzierung der Ausgaben simulieren und sehen, welche Auswirkungen dies auf die Liquidität und die Rentabilität hat, Sie können die zukünftigen Umsatzvolumina verstehen und wissen, ob genügend Kapital vorhanden sein wird.
Wir haben diesen Richtlinien zusammengestellt, um Ihnen zu helfen, die Liquidität zu prognostizieren und Ihre finanziellen Probleme zu lösen. Wenn Sie sich genau daran halten, werden Sie es schaffen, denn Sie können Ihre Prognose jederzeit bearbeiten und korrigieren.
Ihre Datei erstellen
- Erstellen Sie eine neue Datei aus dieser Vorlage (Template ID +11045) mit einer der erläuterten Methoden.
- Mit dem Befehl Datei → Eigenschaften (Stammdaten) stellen Sie die Periode, den Namen und die Basiswährung ein (Sie können Budget und Buchhaltung in jeder beliebigen Währung ausführen).
- Speichern Sie die Datei mit dem Befehl Datei → Speichern unter... Es ist nützlich, im Dateinamen, den Familiennamen und das Jahr anzugeben. Zum Beispiel "Unternehmen-2022.ac2".
Sehen Sie auch Organisieren von Dateien lokal, im Netzwerk und in Cloud
Passen Sie die Tabellen Konten und Kategorien an
Bevor Sie Ihren Cashflow erstellen, müssen Sie das Konto und Ihre Kategorien schnell an Ihre spezifischen Bedürfnisse anpassen.
Tabelle Konten
In der Tabelle Konten gibt es nur das Konto Liquidität, das Sie anpassen können, indem Sie den Namen, die Beschreibung und den Anfangssaldo ändern.

Tabelle Kategorien
Diese Tabelle enthält die Kategorien Einnahmen, Ausgaben und Kapitalveränderungen. Sie können die Kategorien ändern, indem Sie neue hinzufügen, den Namen und die Reihenfolge ändern und die nicht benötigten Kategorien löschen. Sie können jederzeit den aktualisierten Saldo jeder Kategorie einsehen.

Dank der Sektionen Kapitalerträge und Kapitalkosten können Sie buchen:
- Eingaben und Rückzahlungen von Darlehen
- Bareinzahlungen und -auszahlungen durch Eigentümer
- Verkäufe und Käufe von festen Vermögenswerten
Um jederzeit zu wissen, wie hoch Ihr aktueller Cashflow ist (wenn Sie mit dem Eingeben der Buchungen beginnen), brauchen Sie nur den Wert in der Zeile "Netto-Cashflow-Variation" zu betrachten. Auf diese Weise wissen Sie auf einen Blick, ob es sich um eine Erhöhung oder Verringerung handelt und wie hoch der genaue Betrag ist.

Erstellen Sie Ihre Liquiditätsprognose
Eine interessante Neuigkeit von Banana Buchhaltung ist die Möglichkeit, Cash-Flow-Prognosen zu erstellen, um die Liquidität zu kontrollieren und zeitnahe Entscheidungen für Ihr Unternehmen zu treffen.
Aus diesem Grund empfehlen wir Ihnen, eine Cashflow-Prognose erstellen. Wählen Sie die Tabelle "Budget" aus: Diese Tabelle enthält alle zu erwartenden Geldzuflüsse und Geldabfluss im Laufe des Jahres.
Für eine korrekte Prognose:
- Betriebliche Erträge eingeben
- Betriebskosten eingeben
- Kapitalzufluss eingeben
- Kapitalauslagen eingeben
Weitere technische Informationen finden Sie auf der Seite in der Dokumentation, welche die Tabelle Budget erklärt.
Betriebserträge eingeben
Beginnen Sie mit einer Auflistung aller Betriebseinnahmen, die Sie haben werden, und deren Höhe. Barverkäufe sind die Haupteinnahmequelle, aber es kann, je nach Unternehmen, auch andere geben.
Zu den Betriebseinnahmen können gehören:
- Barverkäufe
- Diverse Bareinnahmen
- Einnahmen aus Kundendarlehen
- Zinsen
Um eine Buchung im Budget einzugeben, müssen Sie das Datum (wann Sie diesen Ertrag erwarten), das Enddatum (falls erforderlich), die Wiederholung (wie oft dieser Ertrag zu erwarten ist, ob wöchentlich, monatlich oder jährlich), die Beschreibung, den Betrag in der Spalte Einnahmen und die Kategorie der Einnahme eingeben.
In der Vorlage finden Sie bereits Beispiele von Budgetbuchungen, die Sie bearbeiten und, je nach Bedarf, löschen können. Sie können auch neue Buchungen einfügen.
Um bei den Schätzungen so genau wie möglich zu sein, schauen Sie sich die Werte des letzten Jahres an und runden Sie diese Werte ab, wenn Sie vorsichtiger sein wollen.
Tipps:
- Nur sichere Einnahmen berücksichtigen
- Gruppieren Sie die Einnahmen entsprechend ihrer Wiederholung (wöchentlich, monatlich, jährlich)

Betriebskosten eingeben
Jetzt ist es an der Zeit, alle operativen Kosten aufzulisten. Wie bei den Einnahmen müssen Sie auch hier Ihre Ausgaben schätzen, indem Sie sich die Ausgaben des Vorjahres ansehen, aber sie aufrunden, wenn Sie vorsichtiger sein wollen. Es ist besser, zu Beginn des Jahres eine ungenaue Vorhersage zu machen und sie danach zu revidieren, anstatt böse Überraschungen bei den Ausgaben zu erleben.
Zu den Betriebskosten können gehören:
- Löhne
- Sozialleistungen
- Miete
- Versicherungen
- Marketing
- Spenden für gemeinnützige Zwecke
- Reisen
- Telefon
- Dienstleistungen der Bank
- Zinsen
- …
Tipps:
- Sortieren Sie die Kosten entsprechend ihrer Wiederholung (wöchentlich, monatlich, jährlich, ...)

Kapitaleinnahmen und -ausgaben eingeben
Diese Sektion ist sehr nützlich, um einen Netto-Cashflow und nicht nur einen betrieblichen zu haben. Sie müssen die geschätzten Kapitalbewegungen für die Einnahmen und Ausgaben, Investitionen und Desinvestition von fester Substanz eingeben.
Eingehendes Kapital kann beinhalten:
- Einnahme von Darlehen
- Eingang von Bargeld von den Eigentümern
- Verkauf von fester Substanz
Ausgehendes Kapital kann beinhalten:
- Rückzahlung von Darlehen
- Auszahlung von Bargeld für Eigentümer
- Kauf einer festen Substanz

Überprüfen Sie Ihre Liquiditätsprognose
Es ist wichtig, sofort zu wissen, ob Ihr Unternehmen aufgrund Ihrer Schätzungen einen positiven Cashflow erwirtschaftet oder nicht. Sie sind neugierig, nicht wahr? Der Prognosebericht ist die Antwort!
Diese Prüfung ist sehr einfach: Gehen Sie einfach zu Berichte → Formatierter Ausdruck nach Gruppen, und wählen Sie aus der angezeigten Liste den Bericht Jahresbudget aus. Wählen Sie OK, aus um den Prognosebericht anzuzeigen.
Jede Aktivität erstrebt einen positiven Cash-Flow, denn nur so kann man überleben, oder besser gesagt, Lieferanten bezahlen, Schulden zurückzahlen, ... Überprüfen Sie die Position Nettoveränderung der Liquidität (am Ende des Berichts) und stellen Sie sicher, dass Sie ein positives Ergebnis (Zufluss) haben. Wenn ja, dann können Sie glücklich sein, denn Sie führen Ihr Unternehmen gut!
Wenn Sie andererseits einen negativen Netto-Cashflow (Abfluss) haben, bedeutet dies, dass Ihr Unternehmen leider Schwierigkeiten hat, die Liquidität zu managen. Was Sie in diesem Fall tun müssen, ist zunächst einmal, sowohl Ihre Einnahmen als auch Ihre geschätzten Ausgaben zu überprüfen, abwägen, ob es Anpassungen oder Fehler gibt, die korrigiert werden müssen, um den Cash-Flow zu verbessern. Wenn Sie immer noch einen negativen Cashflow haben, müssen Sie darüber nachdenken, was Sie ab dem nächsten Jahr oder zu Beginn des Prognosezeitraums tun können, um Ihr Liquiditätsmanagement zu verbessern. Höchstwahrscheinlich müssen Sie versuchen, Ihre Betriebskosten zu reduzieren.

Zusätzlich zur Jahresprognose, können Sie immer in Berichte → Formatierter Ausdruck nach Gruppen, die Berichte wählen, die monatlich, vierteljährlich oder vierjährlich erscheinen, oder Sie können einen personalisierten Bericht erstellen, um eine noch detailliertere Kontrolle über die Liquiditätsentwicklung zu haben (z.B. wie sie sich im Laufe des Jahres verhält).


Buchungen eingeben
Wenn die Cashflow-Prognose unter Kontrolle ist, ist es möglich, mit Buchen der verschiedenen aktuellen Liquiditäts- Bewegungen zu beginnen und sie von Zeit zu Zeit mit den geschätzten Werten zu vergleichen.
Buchungen der Liquidität eingeben
Tägliche Buchungen müssen in die Tabelle Buchungen eingegeben werden. Das Verfahren für diese Buchungen ist gleich wie für die Prognose in der Tabelle Budget (der einzige Unterschied besteht darin, dass Sie die Spalte Wiederholen nicht haben). In der Tabelle gibt es auch einige Beispiele, die Sie löschen und bearbeiten können.

Bewegungen mit den Kontoauszügen kontrollieren
Während des Eingebens Ihrer Buchungen kann es sinnvoll sein, zu prüfen, wie sich Ihr Liquiditätskonto oder eine bestimmte Kategorie von Ausgaben im Laufe der Zeit entwickelt hat. Zu diesem Zweck können Sie den entsprechenden Konto/Kategorieauszug anzeigen.
Wenn Sie zum Beispiel den Kontoauszug Liquidität auswählen, erhalten Sie eine Zusammenfassung aller Bewegungen. Wenn Sie auch auf die Option Grafiken (unten) klicken, erhalten Sie einen noch unmittelbareren Überblick über die Entwicklung des Kontos.
Tipp: Überprüfen Sie das Konto Ihrer Liquidität mindestens einmal im Monat, um sofort zu sehen, wie es sich entwickelt, und vergleichen Sie es mit den vergangenen Monaten.

Prüfen Sie die Differenz zwischen dem tatsächlichen Saldo und dem Budget
Für eine bessere Kontrolle über Ihre Einnahmen können Sie die Tabelle Konten oder Kategorien auswählen, die Ansicht Budget und die Spalte Diff.Budget anzeigen, die die Differenz zwischen den tatsächlichen Salden und den von Ihnen budgetierten Werten anzeigt. Auf diese Weise erhalten Sie einen zusätzlichen Indikator, um zu sehen, ob Sie das Budget gut verfolgen und bessere Entscheidungen treffen können.

Vergleichen Sie und erstellen Sie eine neue Prognose
Während des Jahres können Sie jederzeit Ihre aktuelle Situation mit den Prognosen vergleichen, um zu sehen, ob und wo Sie mehr Geld ausgeben, um zeitgerechte Entscheidungen zu treffen. Am Ende des Jahres können Sie den endgültigen Vergleich zwischen dem effektiven Bericht und der Prognose vornehmen, um zu sehen, ob Sie den erwarteten Netto-Cashflow erreicht haben.
Erstellen Sie den Kontrollbericht im Menü Berichte → Bilanzausdruck mit Gruppen → jährlicher Ausdruck mit Budgetvergleich.

Wenn Sie eine präzisere und gezieltere Ansicht wünschen, können Sie monatliche oder vierteljährige Berichte erstellen, die die Differenz zwischen dem Saldo und dem geschätzten Wert jedes Monats enthalten. So erhalten Sie einen Überblick über die Monate oder Quartale, in denen Sie die meisten Liquiditätsprobleme hatten und die, in denen Sie am meisten verdient haben.

Am Jahresende haben müssen Sie eine neue Liquiditätsprognose für das neue Jahr erstellen, so wie Sie es bisher getan haben. Hören Sie nicht auf, nur so können Sie Ihre Liquidität ständig verbessern!
Finanzplanung einer Start-Up (mit Einnahmen-Ausgaben-Rechnung)
Finanzplanung einer Start-Up (mit Einnahmen-Ausgaben-Rechnung)Luca's Bar - Cashflow berechnen
Im folgenden erklären wir, wie man einen Finanzplan einrichtet für eine Startup, nach dem Muster Einnahmen-Ausgaben-Rechnung.
Siehe auch Präsentation der Befehle für die Finanzplanung
Luca beabsichtigt, im 2022 eine Bar mit Restaurant zu eröffnen und bereitet einen Finanzplan mit allen nötigen Details vor.
- Die Finanzierung erfolgt mit Eigenmitteln und Darlehen.
- Im Januar 2022 mietet er die Räumlichkeiten, richtet die Bar ein und beginnt mit seiner Tätigkeit.
- Geplant wird der Zeitraum Januar 2022 bis Dezember 2025.
Nach dem Eingeben der Einnahmen und Ausgaben kann man einen formatierten Ausdruck nach Gruppen erstellen (Liquidität und anderes) und Aufwand und Ertrag berechnen, mit der Entwicklung der Finanzen während des Jahres, unterteilt nach Vierteljahr oder nach Periode.
Im Besonderen kann man aus der Entwicklung des Bankkontos ersehen, ob die Liquidität reichen wird.

Beispieldatei öffnen
Dieses Muster herunterladen und es mit Banana Buchhaltung öffnen (mehr Informationen auf Seite ein Muster verwenden).
Ist die Datei geöffnet, geben Sie in der Tabelle 'Budget', die voraussichtlichen Einnahmen und Ausgaben Ihrer beruflichen Tätigkeit ein, so bekommen Sie augenblicklich einen Finanzplan mit der Liquidität.
Die Dateieigenschaften
Im Menü Datei -> Eigenschaften (Stammdaten) die allgemeinen Informationen eingeben.
Anfangsdatum ist der 1. Januar 2022 und Schlussdatum der 31. Dezember 2025.
Das ist auch der Zeitraum der Berechnung für die Spalte Totalsumme im Budget.

Der Kontenplan
Ein Beispiel zum Erklären, wie man budgetiert.
- Der Kontenplan wird möglichst vereinfacht.
- Der Einfachheit halber sind Namen als Konten verwendet worden.
- Eröffnung: Die Tätigkeit beginnt mit Null, es gibt keine Anfangssaldi.
- Budget. Es ist das gesamte Budget am Ende der buchhalterischen Periode.
Den Bilanzausdruck und die Erfolgsrechnung erhält man am Schluss des Jahres der Prognose.
Wenn die Tätigkeit nicht zu komplex ist, kann man diesen Kontenplan ändern.
Mit einem strukturierten Kontenplan ist es besser, mit einem der vielen Muster, die zur Verfügung stehen, zu beginnen und die Tabelle 'Budget' nachher hinzuzufügen.
Tabelle Konten
In der Tabelle 'Konten' wird das Vermögen (Aktiven und Passiven) eingegeben.
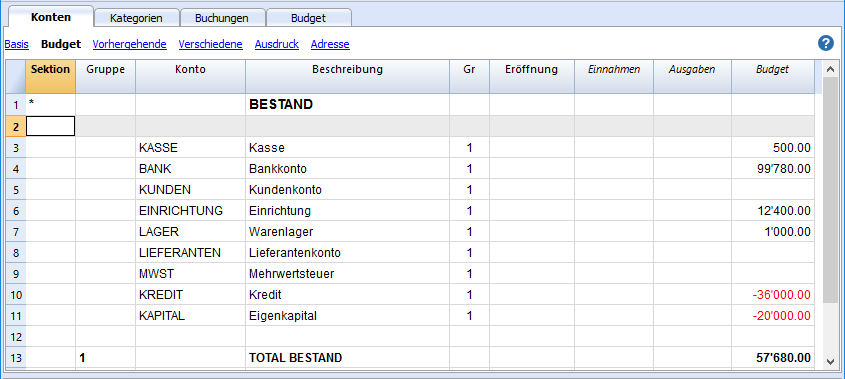
Tabelle Kategorie
In der Tabelle 'Kategorien' werden die Posten Einnahmen und Ausgaben eingegeben.
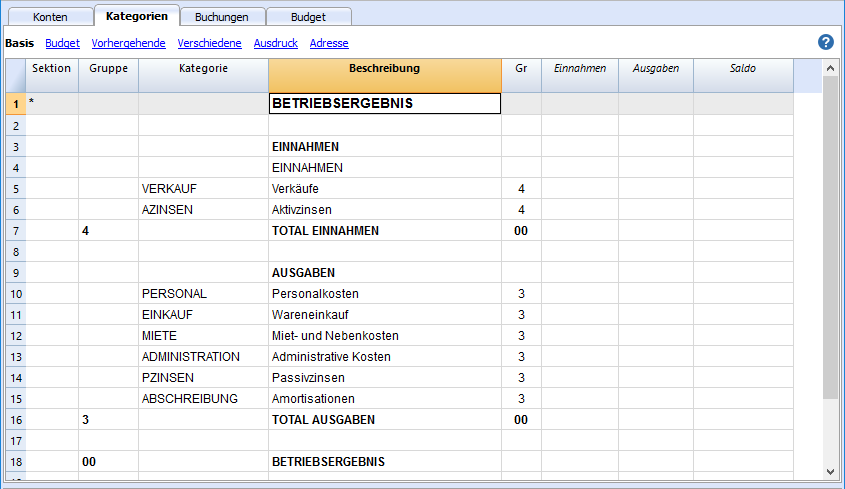
Die Tabelle Budget
In der Tabelle Budget (siehe auch Informationen zu den Spalten) werden Buchungen eingegeben, die geplant sind.
Der Finanzplan wird vorbereitet, indem in der Tabelle Budget Buchungen eingegeben, die geplant sind. Sie werden wie normale Buchungen von Einnahmen und Ausgaben eingegeben.
Die Wiederholung
Die Ereignisse können von zwei Arten sein:
- Einmalig, d.h. sie treten an einem bestimmten Datum auf.
- Sie wiederholen sich mit einer bestimmten Frequenz.
In diesem Fall wird der Buchungssatz nur das erste Mal eingegeben, wobei auch ein Wiederholungscode anzugeben ist.
Für eine automatische Prognose über mehrere Jahre ist es sinnvoll, mit der jährlichen Wiederholung 'Y' (Year) alle Vorgänge, die jährlich wiederholt werden, einzugeben.
Um anzuzeigen, dass die Bewegung wiederholt wird, werden die folgenden Spalten verwendet:
- Wiederholen
Wird ein 'M' = Monatlich (Month) eingetragen, ist es, als hätten Sie die Buchung bereits für alle folgenden Monaten eingegeben.
Wenn kein Wiederholungscode eingegeben wird, wird der Vorgang nur einmal ausgeführt. - Enddatum (Datum)
Wird zusammen mit der Wiederholung verwendet und gibt das letzte Datum an, an dem der Vorgang wiederholt wird. - Total (Totalsumme)
Der Gesamtbetrag, der im laufenden Jahr gebucht worden ist.
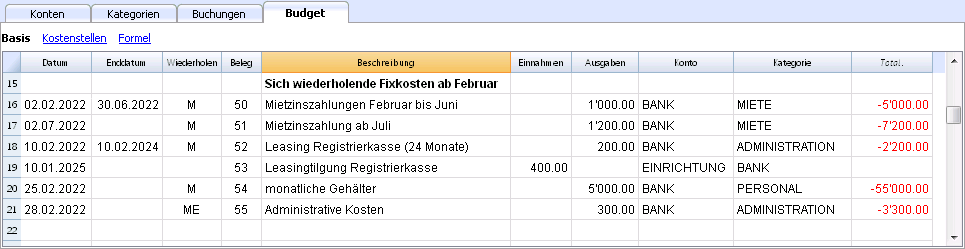
Die Wiederholung ist der zentrale Punkt der Planung in Banana Buchhaltung und ist aus den folgenden drei Gründen nützlich:
- Die Planung geht sehr schnell, da sich wiederholende Bewegungen wie Miete, Bankgebühren, Gehälter und mehr mit nur einer Buchungszeile erfasst werden können.
Der Benutzer gibt den Buchungssatz beim ersten Mal an und diese wird danach vom Programm automatisch wiederholt. - Das Programm ist in der Lage, Finanzprognosen für mehrere Jahre zu erstellen.
- Wiederholende Vorgänge sind nicht nur solche, die jeden Monat oder jedes Quartal wiederholt werden, sondern auch solche, die sich jährlich wiederholen. Die Wiederholung mit dem Code 'Y' (Year) zeigt alle Vorgänge an, die jedes Jahr wiederholt werden.
- Abschreibungen und andere Transaktionen am Jahresende.
- Andere Beträge, welche sich regelmässig jedes Jahr wiederholen.
- Wiederholende Vorgänge sind nicht nur solche, die jeden Monat oder jedes Quartal wiederholt werden, sondern auch solche, die sich jährlich wiederholen. Die Wiederholung mit dem Code 'Y' (Year) zeigt alle Vorgänge an, die jedes Jahr wiederholt werden.
- Die Wiederholung kann mit einer Formel kombiniert werden, um eine Progression zu erzeugen.
Prognosen mit Mengen und Preisen (Verkäufe)
Der Ertrag wird je nach Art der Tätigkeit angegeben.
Ertrag und Warenkauf sind als monatliche Beträge eingegeben worden. Es gibt wichtige monatliche Variationen.
Es wäre besser, Details für den Umsatz für Getränke und Küche einzugeben, sowie die Spalten 'Quantität' und 'Einheitspreis' zu benutzen, um die Anzahl der servierten Speisen und diejenigen der einzelnen Einnahmen anzugeben. Dadurch erhalten Sie eine genauere Vorstellung von den Elementen, aus denen sich die Planung zusammensetzt.
Budgetbuchungen
Der in der Spalte "Beleg" erfassten Wert dient als Referenz für die den Abbildungen folgende Erklärung.
Monat Januar buchen
Es sind Buchungen, die denen in der Tabelle Buchungen ähnlich sind, denn es gibt keine Wiederholung.
Es ist der erste Monat der Tätigkeit der Bar, es wird das Eigenkapital gebucht, die Möblierung und die Kreditaufnahme.
Die folgenden Buchungen, z.B. Miete vom Januar, sind nicht als Buchungen eingegeben worden, die sich wiederholen, um Buchungen zu zeigen, die sich nicht wiederholen.
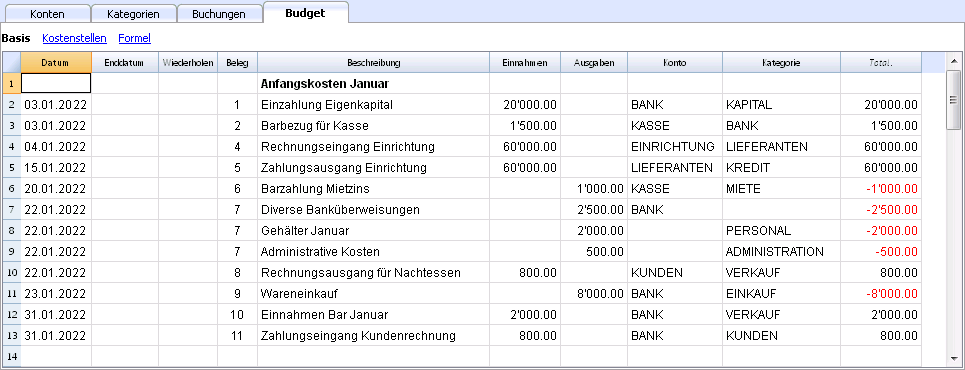
Buchungen, die wiederholt werden, Monat Februar
Im Februar werden Buchungen eingegeben, die monatlich wiederholt werden.
- Die Miete Januar bis Juni beträgt Fr. 1'000, ab Juli 1'200 pro Monat.
- Dok 5:
Die erste Miete ist mit der Kasse bezahlt worden. Eventuell ist auch eine Mietkaution deponiert werden. - Dok 50:
Geplant wird der Betrag für die Miete von 1'000 von Februar bis Juni.- Am 2. Februar wir die Miete über die Bank bezahlt.
In den folgenden Monaten wird immer am 2. des Monates das Bezahlen der Miete gebucht. - Schlussdatum ist der 30. Juni.
Der letzte Mietbetrag von 1'000 wird am 2. Juni bezahlt. - In der Spalte Wiederholen steht M = monatlich
- Totalsumme 5'000 (5 x 1'000) wird automatisch berechnet, Gesamtbetrag dieser Buchung während der Zeitspanne.
- Am 2. Februar wir die Miete über die Bank bezahlt.
- Dok 51:
Es wird der Mietbetrag ab Juli geplant.- Datum 2. Juli.
In den Folgemonaten wird immer am 2. des Monates die Miete von 1'200 gebucht. - Ende
Da kein Datum angegeben ist, wird diese Ausgabe jeden Monat bis auf weiteres gebucht werden. - Wiederholen. M = monatlich.
- Totalsumme 7'200 (6 x 1'200) automatisch berechnet.
Die sechs Mietbeträge von Juli bis Dezember.
- Datum 2. Juli.
- Dok 5:
- Dok 52:
Der Leasing-Betrag für die Kasse.- Datum ist der 10. Februar.
- Ende ist der 10. Februar 2024. Das ist die letzte Rate, die für das Leasing fällig ist.
- Wiederholen mit M = jeden Monat
Die Buchung wird jeden Monat wiederholt werden, das letzte Mal im Februar 2024. - Konto die Bank.
- Kategorie administrativer Aufwand
- Betrag 200.00 die monatliche Rate des Leasing.
- Totalsumme 5'500.00 (500 x 11 Monate)
- Dok 53:
Betrag für das Ablösen vom Leasing.
Die Buchung betrifft das Jahr 2025, aber sie wird hier eingegeben, denn sie gehört zum monatlichen Leasing.- Datum ist der 10. Februar 2025.
- Konto die Bank.
- Kategorie administrativer Aufwand
- Betrag 400.00 der Ablösungsbetrag.
- Totalsumme leer, denn im laufenden Jahr gibt es keine Ausgabe.
- Dok 54:
Monatliche Löhne.- Datum: 25. Februar.
- Wiederholen M = monatlich
Die Buchung wird an jedem 25. des Monates wiederholt werden. - Totalsumme 55'000 (5 x 11 Monate).
- Dok 55:
Administrativer Aufwand (diesen Posten müsste man in Telefonkosten und anderes aufteilen.).- Datum ist der 28. Februar
- Wiederholen ist ME = Ende Monat (Month End).
Die Buchung wird jeden folgenden Monat am letzten Tag wiederholt.
Im März ist es der 31. Tag, im April der 30. und so weiter. - Betrag 300.00
- Totalsumme 3'300 (300 x 11 Monate)
Planen von Ertrag und Warenkauf
Der Ertrag wird je nach Art der Tätigkeit angegeben.
Ertrag und Warenkauf sind als monatliche Beträge eingegeben worden. Es gibt wichtige monatliche Variationen.
Es wäre besser, Details für den Umsatz für Getränke und Küche einzugeben.
Für den Monat Februar haben wir keine Wiederholung angegeben, denn im nächsten Jahr sehen wir einen höheren Betrag voraus. Mehr geben wir später an.
Für die Monate ab März, denken wir, dass der Umsatz bezeichnend für die nächsten Jahre sein wird.
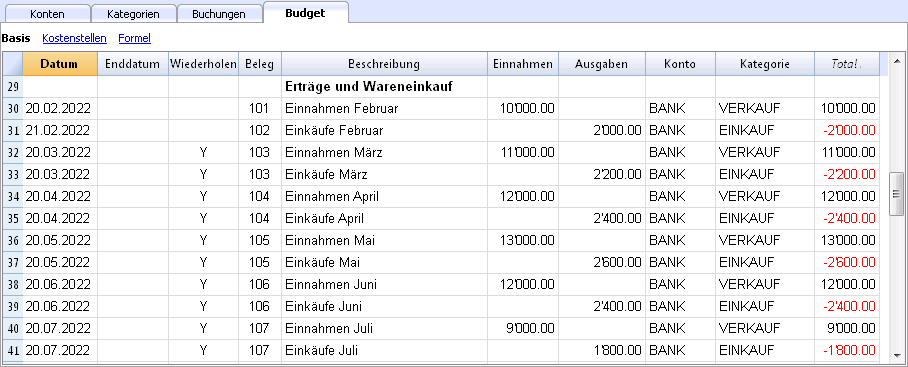
Die geplanten Erträge und Kosten für Warenkauf wird monatlich berechnet.
- Dok 101:
Wir geben die Einnahmen vom Februar an- Datum: 20. Februar
Die Einnahmen erfolgen jeden Tag des Monates. Wir geben einen Tag um Mitte Monat an, damit der Liquiditätsplan allgemeiner wird. - Wiederholen: leer (kein Wiederholen)
Wir denken, dass der Umsatz nächstes Jahr grösser sein wird, deshalb erfassen wir das erst nächstes Jahr. - Konto BANK wir buchen die Einnahme direkt in der Bank.
- Kategorie VERKÄUFE Herkunft ist die Kategorie Verkäufe.
- Betrag: 10'000.00.
- Totalsumme 10'000.00 die nächste Buchung wird erst nächstes Jahr erfolgen, deshalb wird der Betrag nur einmal in Betracht gezogen.
- Datum: 20. Februar
- Dok 102:
Die monatliche Ausgaben für die Ware eingeben, als 20% der monatlichen Verkäufe- Datum 21. Februar. Der Tag nach dem Buchen der Verkäufe.
- Wiederholen leer (kein Wiederholen).
Die Buchung wird jeden 21. des Monats wiederholt werden.
Also werden die Einkäufe für jeden Monat als Prozentsatz der Bewegung des Konto Verkäufe berechnet. - Konto BANK das Bezahlen der Kosten für die Ware über die Bank.
- Kategorie EINKÄUFE die Warenkosten werden in der Kategorie Einkäufe gebucht.
- Dok 103:
Zwei Zeilen, ähnlich wie 101 und 102, aber für den Monat März.- Wiederholen Y jedes Jahr. Der Umsatz und die Kosten für den Monat März auch in den folgenden Jahre.
- Dok 104 bis Dok 112
Immer am 20. des Monats werden die geplanten Verkäufe für die verschiedenen Monate des Jahres angegeben.
Ertrag nächstes Jahr
Wir zeigen, dass man Buchungen auch für die nächsten Jahre eingeben kann.
Diese Daten werden gebraucht, um das Budget der nächsten Jahre zu erstellen.
Spalte Totalsumme bleibt leer, denn es handelt sich um Werte ausserhalb der buchhalterischen Periode, deshalb werden sie nicht in der Spalte Totalsumme angegeben, die sich auf die laufende Periode bezieht.
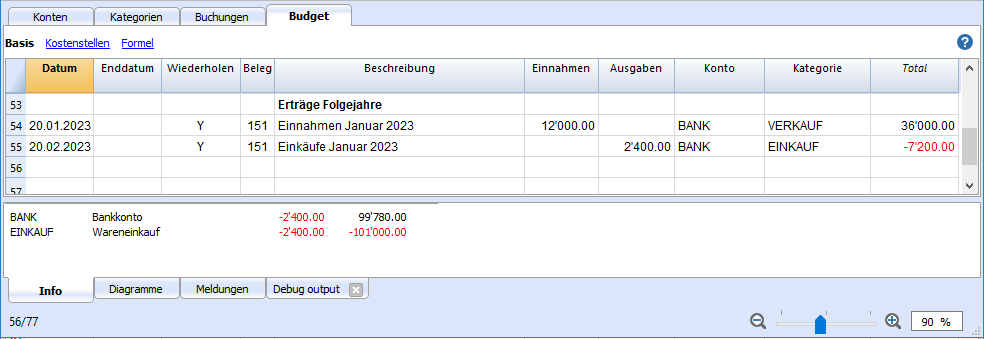
- Dok 151:
Ähnliche Buchungen wie die vom Vorjahr- Datum 20. Januar
- Wiederholen Y = jährlich
Für die nächsten Jahre ist es diese Wiederholung - Totalsumme leer (automatisch berechnet).
Diese Buchung liegt ausserhalb des Buchhaltungsjahres, deshalb gibt es für dieses Jahr noch keine Beträge.
Ende Vierteljahr
Hier zeigen wir einige typische Buchungen, die am Schluss aller Vierteljahre wiederholt werden.
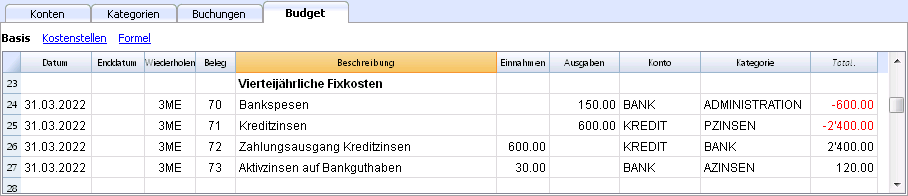
- Dok 70:
In diesem Beispiel werden die Spalten Quantität und Preis benutzt.- Datum 31. März.
- Wiederholen 3ME drei Monate Ende Monat (3 Month End).
- Kategorie ADMINSPESEN Administrative Ausgaben.
- Betrag 150 (automatisch berechnet) Quantität mit Stückpreis multiplizieren.
- Totalsumme 600 (automatisch berechnet) die 150 Vierteljahre bis Ende Jahr.
- Dok 71:
Zinsen für den Kredit, die wir vierteljährlich bezahlen müssen.- Datum 31. März
- Wiederholen 3MO drei Monate Ende Monat (3 Month End).
- Konto KREDIT die Zinsen erhöhen den Kredit.
- Kategorie ZINSPAS die Kategorie passive Zinsen.
- Betrag die Zinsen für dieses Vierteljahr.
- Totalsumme die Interessen für das laufende Jahr.
- Dok 72:
Die auf dem Konto Kredite anfallenden Zinskosten, sie werden über die Bank bezahlt.- Datum 31. März
- Wiederholen 3MO drei Monate Ende Monat (3 Month End).
- Konto KREDIT das Konto passive Zinsen.
- Kategorie BANK das Konto zum Bezahlen der Zinsen.
- Formel "Zins" der Inhalt des variablen Zinssatzes (Wert gespeichert im Arbeitsgang Dok 71.
- Betrag das Resultat der Formel, beziehungsweise die Zinsen für dieses Vierteljahr.
- Totalsumme die Zinsen für das laufende Jahr.
- Dok 73:
Aktive Zinsen, die auf dem Bankkonto angefallen sind..- Datum 31. März
- Wiederholen 3MO drei Monate Ende Monat (3 Month End).
- Konto BANK das Bankkonto.
- Kategorie INTAKT die aktiven Zinsen.
- Betrag die aktiven Zinsen für dieses Vierteljahr.
- Totalsumme die aktiven Zinsen für das laufende Jahr.
Ende Jahr
Ende Jahr gibt es gewisse Arbeitsgänge. Bei Wiederholen steht "Y", damit diese Arbeitsgänge auch die nächsten Jahre ausgeführt werden.
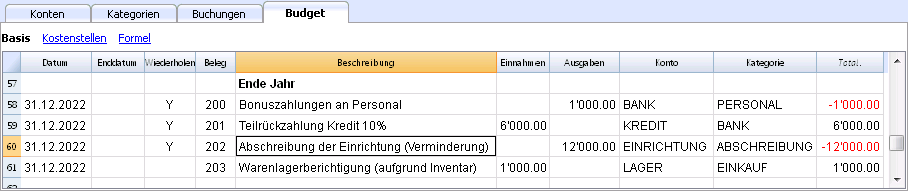
- Dok 200:
Dem Personal eine Provision von 1% auf die Verkäufe des Jahres zukommen lassen- Datum 31. Dezember.
- Wiederholen Y Jahr wird alle Jahre wiederholt werden.
- Konto BANK
- Kategorie PERSON das Konto Personalkosten.
- Betrag die Provision, die wir dem Verkaufspersonal bezahlen.
- Totalsumme wie der Betrag.
- Dok 201:
Wir geben 10% des noch offenen Kredites zurück.- Datum 31. Dezember.
- Wiederholen Y Jahr wird alle Jahre wiederholt werden.
- Konto KREDIT das Konto Kredite (Kredit zurückzahlen)
- Kategorie BANK die Mittel für die Rückzahlung des Kredites kommen von der Bank.
- Betrag 6'0000 entspricht 10% des aktuellen Kredites.
- Totalsumme wie der Betrag.
- Dok 202:
Mit dieser Buchung amortisieren wir das Mobiliar. - Dok 203:
Mit dieser Buchung bewerten wir das Inventar neu.
Ist nicht repetitiv, denn die Neubewertung sollte aufgrund der Werte des Inventars berechnet werden.
Finanzpläne (Buchhaltungsreports)
Die Finanzpläne sind Buchhaltungsreports, die folgende Merkmale aufweisen:
- Im Berechnungszeitraum wird ein zukünftiges Datum angegeben.
- Es werden die für das "Budget" berechnete Werte angezeigt.
Kompositionen
Wir haben den Befehl Neue Kompositionen erstellen gebraucht, sodass wir Ausdrucke mit Druckparameter bekommen, wie sie schon im formatierten Ausdruck nach Gruppen eingerichtet worden sind.
So können Sie auch die gewünschten Ausdrucke einrichten.
Wenn Sie verstanden haben, wie die Kompositionen funktionieren, können Sie damit auch verschiedene personalisierte Ausdrucke erstellen.
Bericht in der Tabelle Konten
In der Tabelle Konten, Ansicht Budget, sehen Sie die aktualisierten Beträge des Budgets.
Finanzplan und Liquidität des ersten Jahres
Mit Befehl
- Buch1 -> Vierteljährliche Prognose 1. Jahr wir ersehen die Entwicklung im ersten Jahr.
Die Komposition wird angezeigt nach
- Unterteilung nach Periode -> Vierteljahr.
Auf den beiden Ausdrucken sehen wir
- Die wirtschaftliche (Aufwand und Ertrag) und finanzielle Prognose des laufenden Jahres.
- Die Entwicklung der Liquidität. Man sieht die Entwicklung des Bankkontos im Detail.
Wenn man eine Komposition ändert oder eine neue erstellt, bekommt man die Unterteilung nach Monat.
Nach Monat

Finanzplan und Liquidität über 4 Jahre
Mit Befehl
- Buch1 -> Prognose 4 Jahre
Die vordefinierte Komposition anzeigen mit:
- Periode vom 01.01.2022 bis 31.12.2025
Im Bericht ist es möglich, eine andere Periode anzugeben, als die der Buchhaltung.
Das Programm zeigt die Daten für die angegebene Periode an. - Unterteilung nach Jahr.

Kontoauszug
Wenn man den Auszug "BANK" anzeigt in der Tabelle 'Budget', bekommt man den Auszug des Budgets der Bank, mit allen Budgetbuchungen.
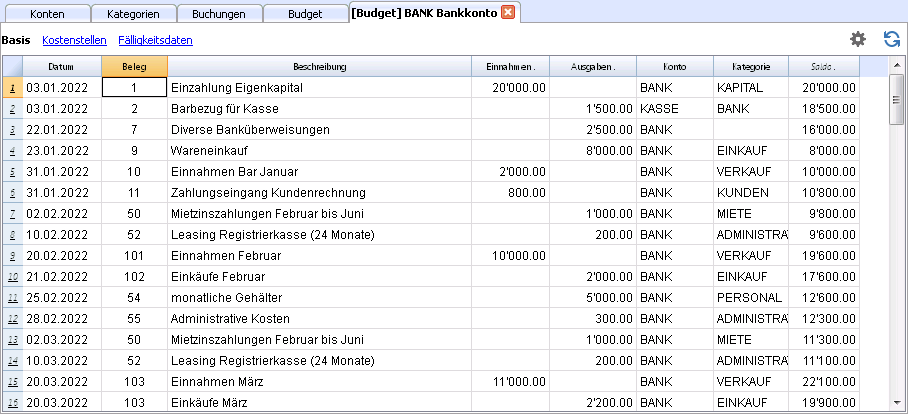
Finanz- und Liquiditätsplanung eines Start-ups (mit doppelter Buchhaltung)
Finanz- und Liquiditätsplanung eines Start-ups (mit doppelter Buchhaltung)Die einfache Lösung für die Erstellung professioneller Liquiditätspläne
Falls Sie darüber nachdenken, ein neues Business zu starten oder gerade einen Businessplan erstellen, ist es wichtig, einen Liquiditätsplan zu erstellen. Vor allem zu Beginn einer Aktivität braucht es wenig, sich in einem finanziellen Engpass zu befinden.
Das Programm Banana Buchhaltung bietet Ihnen die Möglichkeit auf einfache Weise sehr genaue Finanzpläne zu erstellen und diese auf aktuellstem Stand zu halten.
Banana Buchhaltung erlaubt Ihnen, eine Buchhaltung der Zukunft zu führen. Sie werden hierzu Buchhaltungsposten erfassen, welche die kommenden Jahre betreffen. Nach erfolgter Eingabe der vorgesehenen Kosten und Erträge erhalten Sie alle typischen Berichte der Buchhaltung: Bilanz, Erfolgsrechnung und detaillierte Kontoauszüge - bezogen auf die Zukunft.
Bei der folgenden Abbildung handelt es sich um ein Beispiel eines Monatsplans, welchen Sie mit der Software Banana Buchhaltung auf einfache Weise erhalten können.
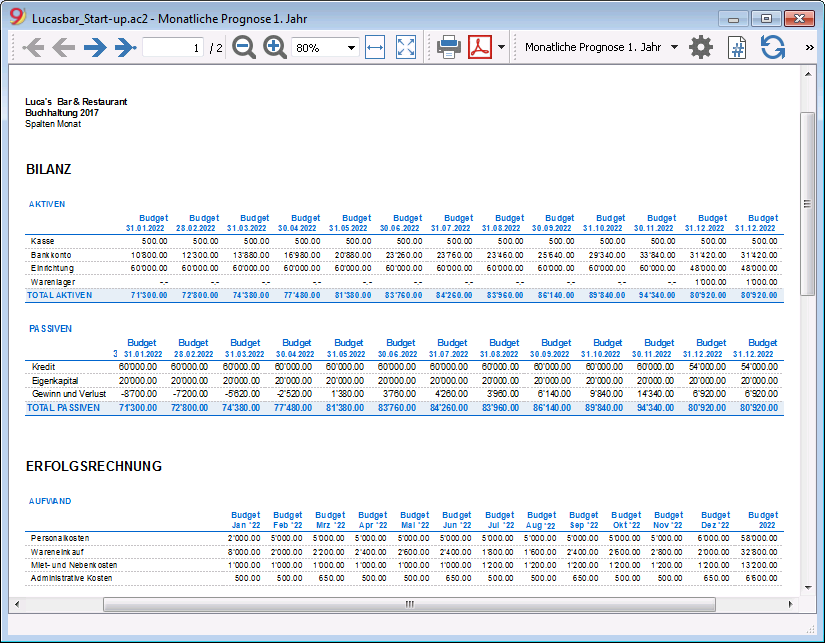
Finanz- und Liquiditätsplan für Luca's Bar
Folgend wird mit dem Beispiel einer Eröffnung einer Bar erklärt, wie ein Finanzplan erstellt wird.
Der Sinn davon ist, das System und die Funktionen, welche Banana Buchhaltung hierzu offeriert, zu erklären.
Luca beabsichtigt im 2022 eine Bar/Restaurant zu eröffnen und bereitet hierfür einen Finanzplan mit allen notwendigen Details auf.
- Die Finanzierung erfolgt mit eigenen Mitteln sowie einem Kredit von Dritten.
- Auf Januar 2022 mietet er ein Lokal, möbliert die Bar und beginnt mit der Aktivität.
- Der Zeitraum der Finanzplanung erstreckt sich von Januar 2022 bis Dezember 2024.
Wirtschafts- und Liquiditätsprognose
Diese Musterdatei hilft, die unterschiedlichen Funktionen des Programms Banana Buchhaltung für die Finanzplanung zu erlernen.
Einige Funktionen wie z.B. Formeln werden in fortgeschrittenen Fällen verwendet. Die Eingabe von Formeln ist ausschliesslich mit Banana Buchhaltung Plus - Advanced Plan möglich. Jetzt aktualisieren!
- Gebrauch von Budget-Buchungen.
- Sich wiederholende Geschäftsvorfälle.
- Gebrauch von Anzahl und Preis.
- Gebrauch von Formeln.
- Variablen.
- Berechnung von Aktiv- und Passivzinsen.
- Übernahme Kontosaldo.
- Übernahme Kontobewegungen.
- Budget für ein Jahr, unterteilt nach Quartalen, mit Resultaten sowie Entwicklung der Liquidität
- Budget für mehrere Jahre, mit Resultaten sowie Entwicklung der Liquidität.
Eigenschaften (Stammdaten)
Das Anfangsdatum ist der 1. Januar 2022 und das Enddatum der 31. Dezember 2022.
Es handelt sich hierbei ebenfalls um den Berechnungszeitraum, welcher für die Spalte 'Total' der Tabelle Budget verwendet wird.
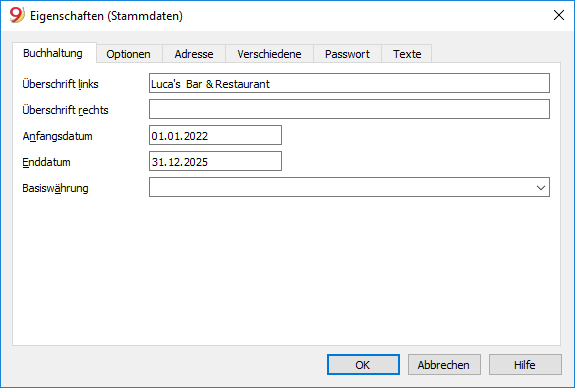
Der Kontenplan
Anhand dieses Beispiels wollen wir die Funktion der Prognosen erklären.
- Der Kontenplan wurde so einfach wie möglich gehalten.
- Es wurden Kontobezeichnungen verwendet, welche Erklärungen erleichtern.
- Eröffnung: Die Aktivität startet bei Null; somit gibt es keine Eröffnungssaldi.
- Beim Budget handelt es sich um das Gesamtbudget am Ende der buchhalterischen Periode.
Wie ersichtlich ist, verfügt man über die Bilanz und die Erfolgsrechnung am Ende des Prognosejahres.
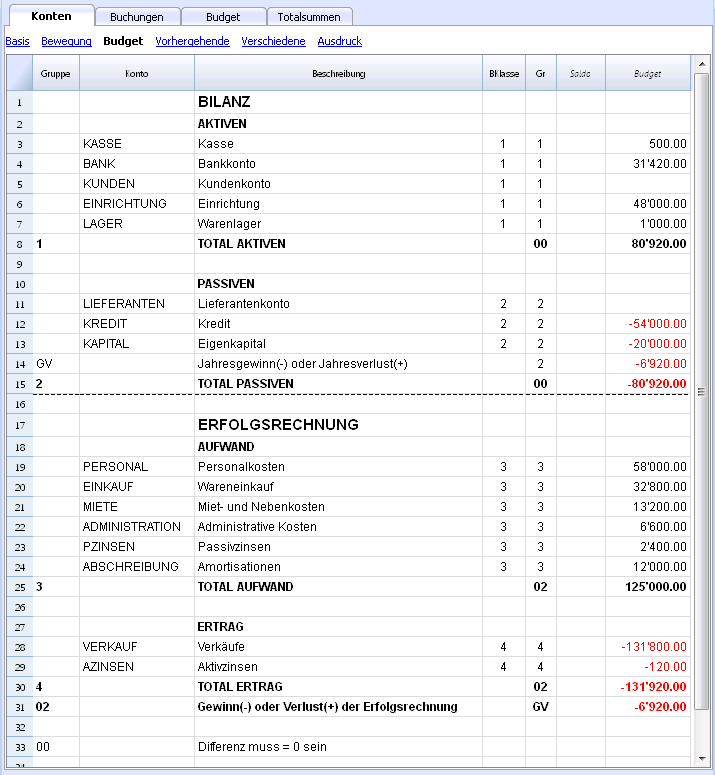
Einen eigenen Kontenplan erstellen
Der Kontenplan definiert die Kosten-, Ertrags- und Investitionselemente. Wird eine zusätzliche Unterteilung der Kosten gewünscht, so sind weitere Konten hinzuzufügen.
Anstatt mit einem sehr einfachen Kontenplan zu beginnen und Konten und Gruppen hinzuzufügen ist es wohl einfacher, mit einem strukturierterem Kontenplan anzufangen.
Banana Buchhaltung stellt diverse voreingestellte Beispiels-/Musterkontenpläne (Menü Datei, Befehl Neu) zur Verfügung und wir empfehlen, denjenigen auszuwählen, welcher am besten den persönlichen Bedürfnissen entspricht und diesen mittels Menü Werkzeuge, Befehl Neue Funktion hinzufügen und die Tabelle Budget hinzuzufügen.
Die Budget-Tabelle
Die Buchungen für die Planung sind in der Tabelle 'Budget' (sehen Sie auch die Ausführungen der einzelnen Spalten) einzugeben.
Der Finanzplan wird erfasst, indem normale Buchungen der Doppelten Buchhaltung in der Budget-Tabelle eingegeben werden. Die Tabelle Budget bietet zusätzliche Spalten, welche die Vorbereitung des Finanzplans-Start erleichtern.
- Wiederholen.
Wird z.B. "M" (= monatlich) eingebeben, ist dies, als ob dieselbe Buchung für alle folgenden Monate erfasst würde.
Wird die Spalte 'Wiederholen' leer gelassen, so wird der Geschäftsvorfall nur ein einziges Mal ausgeführt. - Enddatum.
In Verbindung mit der 'Wiederholung' wird das letzte Datum, an welchem sich dieser Geschäftsvorfall wiederholt, angegeben. - Total.
Der Gesamtbetrag, der für das aktuelle Jahr registriert wurde. - Quantität, Preis.
Diese zwei Spalten erlauben eine Kombination von Werten anzugeben, aufgrund welcher der Betrag berechnet wird.
Die Spalten 'Quant.' und 'Preis' können über Menü Daten, Befehl Spalten einrichten angezeigt werden, indem die Optionen 'Quantität' und 'Einheitspreis' aktiviert werden. - Formel.
Ermöglicht, eine Formel für die Berechnung des Betrages anzugeben.
Die Formel hat Priorität für die Berechnung des Betrages.
Die Spalte 'Formel' kann über Menü Daten, Befehl Spalten einrichten angezeigt werden, indem die Option 'FormelBetragBasiswährung' aktiviert wird.
Buchungen für Januar
Diese Buchungen sind denjenigen der Tabelle Buchungen sehr ähnlich, da sie keine Wiederholungen haben.
Es handelt sich um den ersten Monat der Aktivität der Bar. Während diesem wird das Kapital eingezahlt, die Möbel bezahlt und ein Kredit aufgenommen.
Die Buchungen (inkl. Mietzins) für den ersten Monat wurden ohne Wiederholungen erfasst, um die Erfassung simpler Budgetbuchungen, welche sich nicht automatisch repetieren, aufzuzeigen.
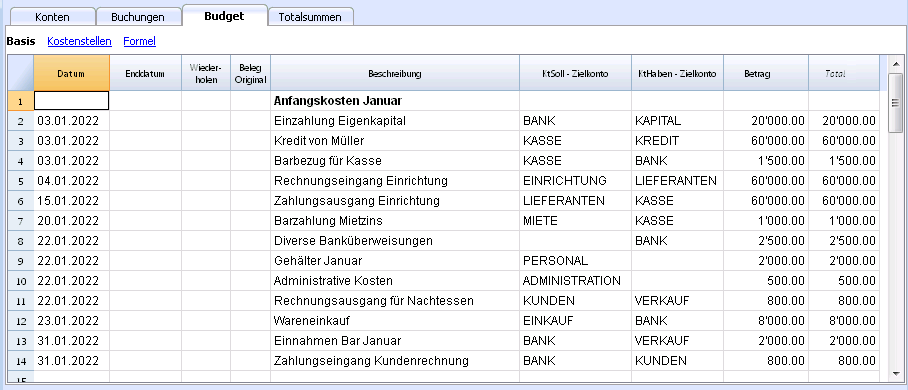
Sich wiederholende Buchungen für Februar
Für den Monat Februar wurden Buchungen mit monatlichen Wiederholungen erfasst.
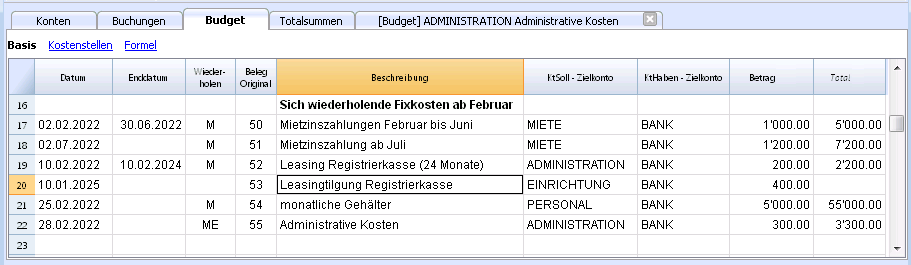
- Der Mietzins beträgt von Januar bis Juni CHF 1'000.00 und ab Juli CHF 1'200.00.
- Beleg 5:
Die erste Miete wurde bar (Kasse) beglichen. Wahrscheinlich wäre auch ein Mietzinskaution zu leisten... Hierauf wurde hier verzichtet. - Beleg 50:
Es wird der Mietzins von CHF 1'000.00 von Februar bis Juni budgetiert.- Am 2. Februar wird dieser per Banküberweisung bezahlt.
In den kommenden Monaten figuriert am 2. des Monates die Mietzinszahlung. - Das 'Enddatum' ist der 30. Juni.
Der letzte Mietzins zu CHF 1'000.00 wird am 2. Juni bezahlt. - 'Wiederholen' M ist = monatlich.
- Das 'Total' von CHF 5'000.00 (5 x CHF 1'000.00) wird automatisch kalkuliert und entspricht dem Gesamtbetrag dieses Zeitraums.
- Am 2. Februar wird dieser per Banküberweisung bezahlt.
- Beleg 51:
Es wird der Mietzins ab Juli budgetiert.- 'Datum': 2. Juli.
In den dem 2. Juli folgenden Monaten wird jeweils am 2. des Monates die Bezahlung der Mietzinszahlung von CHF 1'2000.00 figurieren. - 'Ende'
Es wurde kein Datum angegeben; somit wiederholt sich diese Ausgabe jeden Monat der kommenden Jahre. - 'Wiederholen': M ist = monatlich.
- Das 'Total' von CHF 7'200.00 (6 x CHF 1'2000.00) wird automatisch kalkuliert.
Es handelt sich um die sechs Monate Mietzins (Juli bis Dezember).
- 'Datum': 2. Juli.
- Beleg 5:
- Beleg 52:
Das Leasing der Registrierkasse.- 'Datum' ist der 10. Februar.
- 'Ende' ist der 31. Januar 2024. Dann wird die letzte Leasingrate bezahlt werden.
- 'Wiederholen': M ist = monatlich.
Der Geschäftsfall wiederholt sich jeden folgenden Monat und das letzte Mal im Januar 2024. - 'KtSoll': Administrativer Aufwand.
- 'KtHaben': Bank.
- 'Betrag': CHF 200.00 entspricht der monatlichen Leasingrate.
- 'Total': CHF 5'500.00 (CHF 500 x 11 Monate)
- Dokument 53:
Die Zahlung der Leasingtilgung.
Es handelt sich hierbei um einen Geschäftsvorfall von 2024. Wir geben sie hier ein, weil sie mit der monatlichen Leasingrate verknüpft ist.- 'Datum' ist der 10. Februar 2024.
- 'KtSoll': Administrativer Aufwand.
- 'KtHaben': Bank.
- 'Betrag': CHF 400.00 entsprechen dem Tilgungsbetrag.
- 'Total': Leer, da für das betreffende Jahr keinerlei Ausgaben vorgesehen sind.
- Dokument 54:
Monatliche Gehälter.- 'Datum': 25. Februar.
- 'Wiederholen': M ist = monatlich.
Der Geschäftsfall wiederholt sich jeden 25. der folgenden Monate. - 'Total': CHF 55'000.00 (CHF 5'000.00 x 11 Monate).
- Dokument 55:
Administrativer Aufwand (Richtigerweise wären die Kosten dieses Postens detailliert in Telefon und weitere erwartete Administrative Kosten aufzuteilen).- 'Datum': 28. Februar.
- 'Wiederholen': ME = Monatsende (Month End).
Der Geschäftsfall wiederholt sich jeden Monat und zwar am letzten Tag des Monats.
Im März wird es am 31. sein, im April am 30. usw. - 'Betrag': CHF 300.00.
- 'Total': CHF 3'300.00 (CHF 300.00 x 11 Monate)
Prognose der Erträge und des Wareneinkaufs
Je nach Aktivität wird die passendste Vorgehensweise für die Bestimmung der Erträge gewählt.
Aufgrund von starker monatlicher Schwankungen wurden Erträge und Wareneinkäufe folgend als monatliche Beträge eingefügt.
Es könnte sinnvoller sein, Umsatzdetails für Getränke und Küche zu erstellen.
Für den Monat Februar haben wir keine Wiederholung erfasst, da für das Folgejahr ein grösserer Betrag zu erwarten ist. Deshalb haben wir dies wie folgt gemacht.
Für die Monate ab März hingegen, denken wir, dass der Umsatz für die Folgejahre ausschlaggebend ist.

Die Prognose der Erträge und der Warenkosten wird monatlich berechnet.
- Dokument 101:
Geben die Einnahmen für Februar wieder.- 'Datum': 20. Februar.
Für die Liquidität wählen wir weder das Monatsende noch den Monatsbeginn. - 'Wiederholen': Leer (keine Wiederholung).
Für das Folgejahr sehen wir einen grösseren Umsatz voraus; wir werden das kommende Jahr eine Buchung machen. - 'KtSoll': BANK - Wir lassen die Einnahmen direkt in der Bank figurieren.
- 'KtHaben': VERKAUF - ursprünglich Verkaufskonto.
- 'Betrag': CHF 10'000.00.
- 'Total': CHF 10'000.00 - der nächste Geschäftsfall erfolgt im kommenden Jahr, weshalb wir dieses Jahr den Betrag nur einmal berücksichtigen.
- 'Datum': 20. Februar.
- Dokument 102:
Wir geben die monatlichen Warenkosten als 20% des monatlichen Umsatzes an.- 'Datum': 21. Februar. Am Tag nach der Registrierung der Verkäufe.
- 'Wiederholen': Leer (keine Wiederholung).
Der Vorfall wird sich am 21. jedes Monats wiederholen.
Somit werden für jeden Monat die Einkäufe aufgrund des Umsatzes des Verkaufskontos manuell berechnet und als Budgetbuchung erfasst. - 'KtSoll': EINKAUF - die Warenkosten werden auf dem Konto Einkaufkonto registriert.
- 'KtHaben': BANK - Die Bezahlung der Warenkosten erfolgt mittels Bankvergütung.
- Dokument 103:
Es sind 2 Zeilen, welche den Buchungen mit Beleg 101 und 102 für den Monat März ähnlich kommen.- 'Wiederholen': Y ist = jeder Jahr. Der Umsatz sowie die Warenkosten des Monats März werden auch für die folgenden Jahre erwartet.
- Dokument 104 bis Dokument 112:
Immer am 20. des Monats wurden die erwarteten Verkäufe für die diversen Monate des Jahres angegeben.
Erträge der Folgejahre
Hier will aufgezeigt werden, dass auch Geschäftsvorfälle für die folgenden Jahre angegeben werden können.
Diese Daten werden für die Erstellung des Budgets für die folgenden Jahre verwendet.
Die Spalte 'Total' bleibt leer, da es sich um Werte ausser der buchhalterischen Periode handelt, welche nicht in der Spalte 'Total' angegeben werden, welche sich auf den aktuellen Zeitraum bezieht.
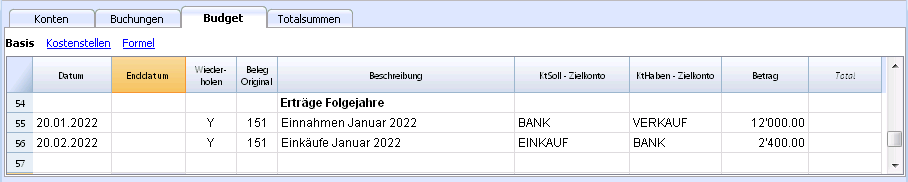
- Dokument 151:
Ähnliche Budgetbuchungen wie diejenigen des Vorjahres- 'Datum': 20. Januar
- 'Wiederholen': Y ist = jährlich (yearly).
Für alle Folgejahre wird diese Wiederholung gemacht. - 'Total': leer (automatisch berechnet).
Dieser Geschäftsvorfall ist ausserhalb des Buchhaltungsjahres; somit gibt es für dieses Jahr keinen Betrag.
Quartalsende
Folgend werden einige typische Budgetbuchungen angegeben, welche sich an Quartalsenden wiederholen:
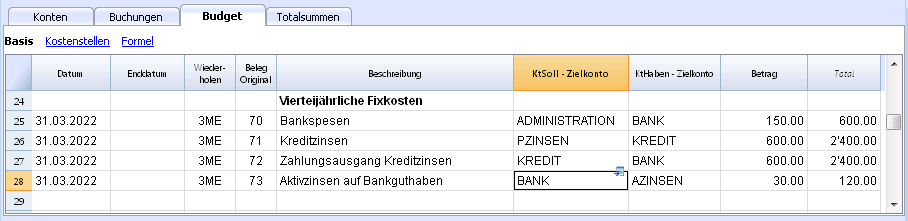
- Dokument 70:
Ein Beispiel, das die Spalten 'Anzahl' und 'Preis/Einheit' verwendet.
Es ist uns bekannt, dass die monatlichen Bankspesen CHF 50.00 betragen und somit geben in der Spalte 'Anzahl' den Wert 3 und in der Spalte 'Preis/Einheit' den Wert 50.00 an.- 'Datum': 31. März.
- 'Wiederholen': 3ME ist = Drei Monatsende (3 Month End).
- 'KtSoll': Administrativer Aufwand - normalerweise hätte man hierfür ein Konto Bankspesen- oder Finanzaufwandkonto.
- 'Betrag': CHF 150.00 - Das Programm berechnet diesen automatisch, indem es Anzahl mit Preis multipliziert.
- 'Total': CHF 600.00 - Das Programm berechnet dieses automatisch. Es handelt sich um die vierteljährlichen CHF 150.00 bis zum Jahresende.
- Dokument 71:
Zinsen für Kredit, welche vierteljährlich bezahlt werden müssen.- Datum: 31. März
- 'Wiederholen': 3ME ist = Drei Monatsende (3 Month End).
- 'KtSoll' Zinsaufwand, das Konto für Passivzinsen.
- 'KtHaben' KREDIT - die Zinsen erhöhen den Kredit.
- 'Betrag': Die Zinsen für dieses Quartal.
- 'Total': Die Zinsen für das aktuelle Buchhaltungsjahr.
- Dokument 72:
Die auf dem Kredit aufgelaufenen Zinsen werden vom Bankkonto bezahlt.- Datum: 31. März
- 'Wiederholen': 3ME ist = Drei Monatsende (3 Month End).
- 'KontoSoll': KREDIT - das Konto auf dem die Passivzinsen belastet werden.
- 'KtHaben': BANK - das Konto, welches für die Bezahlung der Zinsen benutzt wird.
- 'Betrag': Das Resultat der Formel, oder die Zinsen für dieses Quartal.
- 'Totale' entspricht den Zinsen für das laufende Jahr.
- Dokument 73:
Auf dem Bankkonto aufgelaufene Zinserträge (Aktivzinsen).- 'Datum': 31. März
- 'Wiederholen': 3ME ist = Drei Monatsende (3 Month End).
- 'KontoSoll': BANK - das Bankkonto.
- 'KtHaben': AZINSEN - die Aktivzinsen.
- 'Betrag': Dies sind die Aktivzinsen für dieses Quartals.
- 'Totale' entspricht den Aktivzinsen für das laufende Jahr.
Ende Jahr
Ende Jahr fallen Transaktionen an. Hier benutzen wir für 'Wiederholen' den Wert "Y", um diese Transaktionen auch in den kommenden Jahren auszuführen.
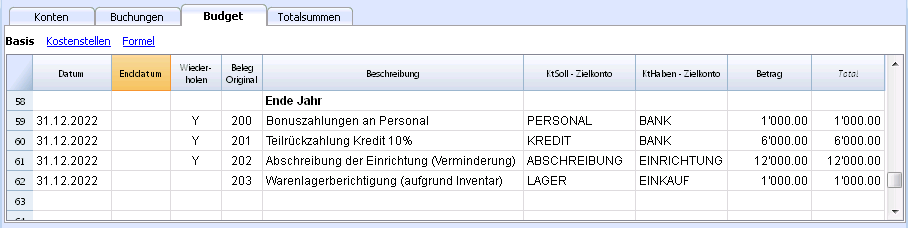
- Dokument 200:
Wir legen für das Personal einen Bonus von 1% auf den Jahresverkäufen fest.- 'Datum': 31. Dezember
- 'Wiederholen': Y - wird jedes Jahr wiederholt.
- 'KontoSoll': PERSONAL - das Personalkosten-Konto.
- 'KtHaben': BANK.
- 'Betrag': Dies ist der Bonus, welchen wir dem Verkaufspersonal vergüten.
- Totale' entspricht dem 'Betrag'.
- Dokument 201:
Wir erstatten 10% des noch vorhandenen Kredits zurück.- 'Datum': 31. Dezember
- 'Wiederholen': Y - wird jedes Jahr wiederholt.
- 'KontoSoll': KREDIT - das Kreditkonto (Rückzahlung Kredit)
- 'KtHaben': BANK - die Gelder für die Kreditrückzahlung stammen vom Bankkonto.
- 'Betrag': 6'000.00 entspricht 10% des aktuellen Kredits.
- Totale' entspricht dem 'Betrag'.
- Dokument 202:
Mit dieser Transaktion amortisieren wir die Einrichtung. - Dokument 203:
Mit dieser Transaktion berichtigen wir das Warenlager (Inventar).
Es wird keine Wiederholung vorgesehen, da die Korrektur aufgrund den jeweiligen Werten des Inventars erfolgt.
Kompositionen
Wir haben im Dialog 'Formatierte Bilanz nach Gruppen' (Menü Buch1, Befehl Formatierte Bilanz nach Gruppen) unter 'Komposition' auf die Schaltfläche 'Neu' geklickt, um über neue Kompositionen von Ausdrucken mit bereits eingestellten Druckeinstellungen für die Formatierte Bilanz nach Gruppen zu verfügen.
Ebenso können andere gewünschte Ausdrucke voreingestellt werden.
Wird das Funktionieren der Kompositionen verstanden, so können diese mit anderen Befehlen zur Erstellung von Ausdrucken oder anderem aufgrund der persönlichen Bedürfnisse verwendet werden.
Bericht in der Tabelle Konten
In der Ansicht Budget der Tabelle Konten sind die aktuellen Budgetbeträge ersichtlich.
Finanz- und Liquiditätsplan für das erste Jahr
Über
- Menü Buch1 -> Befehl Formatierte Bilanz nach Gruppen -> Komposition 'Budget 1 Jahr' sehen wir die Entwicklung während des ersten Jahres.
Diese Komposition hat unter 'Unterteilung' folgende Einstellung:
- 'Unterteilung nach Periode' -> '3 Monate (Quartal)'.
Diese zwei Ausdrucke (Bilanz und Erfolgsrechnung) erlauben:
- Die wirtschaftliche (Kosten und Erträge) und finanzielle Prognose für das laufende Jahr.
- Die Entwicklung der Liquidität. Die Entwicklung des Bankkontos ist detailliert ersichtlich.
Durch Bearbeitung oder Erstellung einer neuen Komposition kann man die Unterteilung pro Monat erhalten.
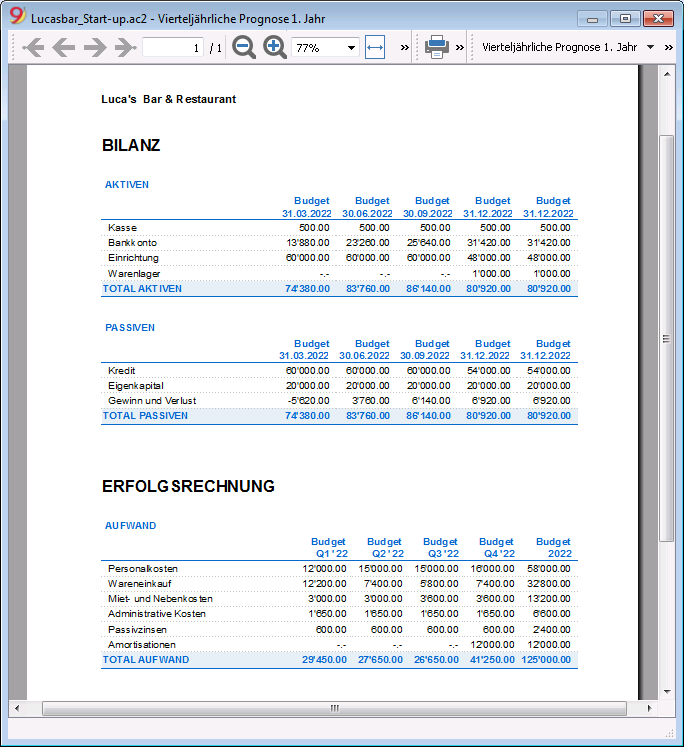
Pro Monat:
Finanz- und Liquiditätsprognose auf 4 Jahre
Mit
- Menü Buch1 -> Befehl Formatierte Bilanz nach Gruppen -> Komposition 'Budget 4 Jahre'
zeigt man die vordefinierte Komposition mit folgenden Einstellungen an:
- 'Periode': 'Bestimmte Periode' mit 'Anfangsdatum': 01.01.2022 und 'Enddatum': 31.12.2024
Für den Bericht kann ein Zeitraum, der von derjenigen der Buchhaltung abweicht, eingegeben werden.
Das Programm macht hiermit eine Projektion für die angegebene Periode. - 'Unterteilung': 'Unterteilung nach Periode': 'Jahr'.
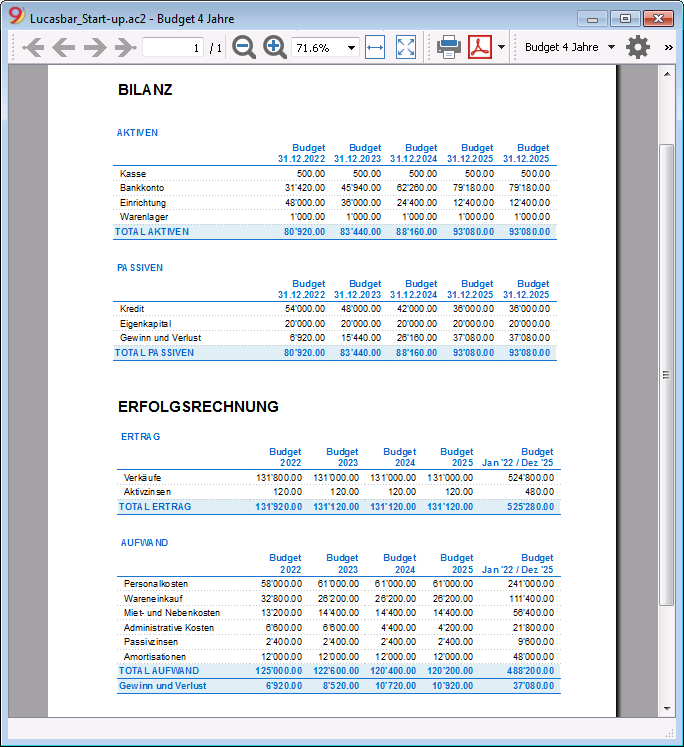
Kontoauszug
In der Tabelle 'Budget' kann man Kontoauszüge erhalten, indem man mit der linken Maustaste auf die Zelle eines Kontos (z.B. BANK) klickt, und hierauf auf das blaue Symbol klickt, das oben rechts in der Zelle erscheint, klickt. So erhalten wir z.B. den folgenden Budget-Kontoauszug für das Bankkonto, mit allen voraussichtlichen Transaktionen:
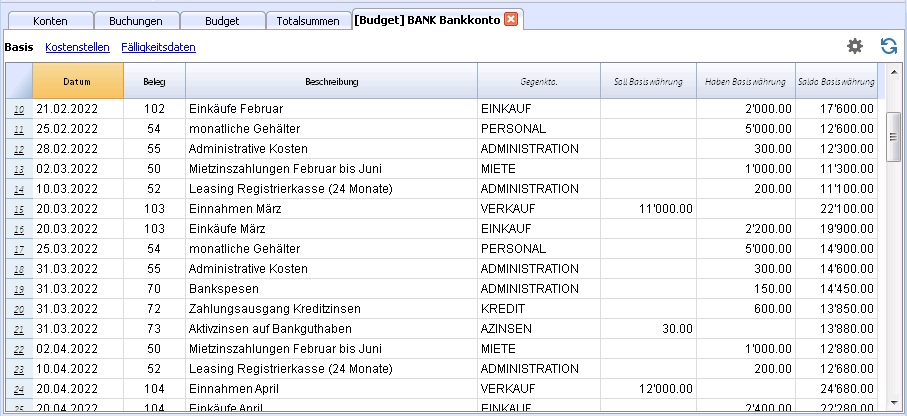
Tutorial file for amortisation and interest calculation with budget's formulas
Tutorial file for amortisation and interest calculation with budget's formulasThe possibility to enter formulas is available in Banana Accounting Plus only with the Advanced plan. Update now!
Businessplan und fortgeschrittene Finanzplanung mit Formeln
Businessplan und fortgeschrittene Finanzplanung mit FormelnDie Eingabe von Formeln ist ausschliesslich mit Banana Buchhaltung Plus - Advanced Plan möglich. Jetzt aktualisieren!
Diese Datei enthält Beispiele von Buchungen in der Tabelle Budget, welche von der Spalte Formeln sowie den Spalten Anzahl und Einheitspreis Gebrauch machen.
Für Anleitungen betreffend der Tabelle Budget und deren Spalten, sehen Sie bitte die Seite Tabelle Budget.
Insbesondere ist darauf zu achten, dass die Reihenfolge der Berechnungen nach Datum erfolgen und nicht in der Reihenfolge, in der die Budgetbuchungen eingegeben wurden.
Spalten Anzahl und Einheitspreis
In der Ansicht Formeln sind auch die Spalten Quant. und Einheitspreis ersichtlich.

- Beleg 10: Die Spalte Quant. enthält die Menge der in einem Monat verkauften Kaffees und die Spalte Preis die Einnahmen für einen einzigen Kaffee.
Das Programm berechnet den Betrag (Spalte Betrag). - Die Werte in den Spalten Quant. und Preis können auch mit Minuszeichen eingegeben werden, aber der Betrag wird in positiv umgewandelt.
Formel in JavaScript-Sprache

In der Spalte Formel können die Berechnungsausdrücke in JavaScript-Sprache erfasst werden.
- Wenn das Ergebnis der Formel eine Zahl ist, wird es als Betrag übernommen.
- Belege 21, 22 und 23: Es können Zahlen oder mathematische Ausdrücke angegeben werden.
- Belege 40 und 41: "//" zeigt an, dass der Text ein Kommentar ist.
- Beleg 42: Der Text zwischen /* und */ ist ein Kommentar und wird nicht als Teil der Formel berücksichtigt.
Fehler in den Formeln

Falls Fehler vorhanden sind:
- Die Zeile worin sich der Fehler befindet, erscheint in rot.
- Die Beschreibung des Fehlers erscheint im Fenster "Meldungen".
Um stetige Meldungen zu vermeiden, werden in der Beispielsdatei die Fehler kommentiert (beginnend mit "//").
Trennzeichen Strichpunkt ";"

Im JavaScript wird jeder Befehl mit "," beendet. Die Ausdrücke können auf einer Zeile verkettet werden. Der Rückgabewert ist das Ergebnis des letzten Ausdrucks.
Trennzeichen Komma ","

Im JavaScript wird das Komma verwendet, um die Argumente in einer Funktion zu trennen. Das Trennzeichen Komma trennt in diesem Falle die verschiedenen Ausdrucksformen und das Ergebnis ist dasjenige des letzten Ausdrucks.
Das Kommazeichen ist nicht als Trennzeichen von Dezimalzahlen zu verwenden, da es in der Formel als Trennzeichen von Argumenten interpretiert und demzufolge ist der Zahlenwert abgeschnitten.
Dezimaltrennzeichen "."

JavaScript verwendet den Punkt "." als Dezimaltrennzeichen. Unabhängig von den Einstellungen der Dezimalstellen, welche im Betriebssystem festgelegt wurden, wird somit immer der Punkt verwendet.
Einfache mathematische Berechnungen

In der Formel können mathematische Berechnungen eingegeben werden, welche aus einfachen Zahlen bestehen.
Texte und Variablen

- Die Texte sind Werte zwischen Anführungs- und Schlusszeichen oder Zitate.
- Die Variablen sind Elemente, die den Wert, welcher ihnen zugeteilt wurde übernehmen.
- Der Name von Variablen muss mit einem Buchstaben oder mit einem Unterstrich beginnen.
- Die Variablen müssen zuerst mittels Zuordnung "namevariablen = 100" definiert werden.
Beispiele:
- Beleg 70:
"Banana" zwischen Anführungszeichen ist ein Text - Beleg 101:
Der Variable Betrag wird der Wert 100 zugeteilt. - Beleg 102:
Es wird der Inhalt der Variable Betrag übernommen. - Belegk 103:
Der Inhalt der Variable Betrag wird übernommen und danach 10 hinzugefügt. - Beleg 104:
Der Variable Betrag wird der Inhalt der Variable Betrag mit Zusatz von 10 zugeteilt.
Die Variable Betrag wird gleich 110 sein. - Beleg 105:
Diese Formel wird monatlich durchgeführt "Repeat = M".- Das erste Mal 110 + 10 = 120.
- Das zweite Mal 120 + 10 = 130 und so weiter.
- Beleg 106:
Wird der Kommentar entfernt, erscheint eine Warnung, dass die Variable Betrag 1 nicht definiert wurde. - Beleg 110:
Wir weisen der Variable Namen den Text "Banana" zu.
Durchflussregler if .. then .. else
Es können alle Bedingungsausdrücke von JavaScript verwendet werden. Das Thema ist breit und wir verweisen Sie auf die Dokumentationen der JavaScript-Sprache.
Bitte beachten Sie nur jenes, das JavaScript betrifft:
- Das Gleichheitszeichen "=" wird verwendet, um einer Variable einen a-Wert zuzuweisen "a=10".
- Zum Vergleichen hingegen, werden zwei aufeinanderfolgenden Gleichheitszeichen verwendet "==". If (10==10) {1};

- Belege 200, 201, 202 und 203:
Trifft die in den runden Klammern nach dem Wort "if" angegebene Kondition zu "(10==10)", wird im Betrag das Resultat des nachfolgenden Ergebnisses, welches zwischen geschweiften Klammern steht "{1}", angezeigt.
Trifft sie nicht zu "(10==9)", wird der Wert des Betrages Null sein.
Eigenschaften und Funktionen

Es können die vordefinierten Funktionen von JavaScript verwendet werden, wie z.B. die der Math-Bibliothek.
Um eine Funktion aufzurufen, wird deren Name gefolgt von den Funktionsparametern, welche in Klammern geschrieben werden, eingeben.
Die Anzahl der Parameter hängt von der Funktion ab.
- Beleg 220:
Math.min. (10, 30, 2) gibt den Minimalwert der angegebenen und durch Komma getrennten Werte an.
Zeilenobjekt für die aktuelle Zeile "row"

Das Objekt row des Typs Banana.Document.Row bezieht sich auf die aktuelle Zeile.
Die Funktion value gibt durch Angabe des xml-Spaltennamens den Inhalt der spezifischen Spalte zurück.
Vordefinierte Funktionen debit und credit

Die Formel erlaubt als Resultat nur positive Werte.
- Die Funktion debit gibt den als Parameter angegebenen Wert an, sofern dieser positiv ist.
- Die Funktion credit gibt den als Parameter angegebenen Wert mit invertiertem Zeichen an, wenn der angegebene Wert negativ ist.
Buchhaltungsfunktionen für den gesamten Zeitraum

Werden die spezifichen Budgetfunktionen ohne Angabe eines Zeitraums angewendet, wird der Werte bezogen auf die gegenwärtige Situation zurückgegeben.
Es ist zu beachten, dass die Verarbeitung der Zeilen nach dem Datum erfolgt und es somit keine dem der Datum der Zeile in Bearbeitung folgenden Werte gibt.
Buchhaltungsfunktionen auf einen Zeitraum begrenzt

Hier werden die Funktionen für einen bestimmten Zeitraum verwendet.
Die Funktion budgetBalance für den laufenden Zeitraum ist dieselbe wie die von der Funktion ohne Zeitraum, weil die Funktion budgetBalance den Saldo am Ende des Zeitraumes wiedergibt und in jedem Falle ist die bearbeitende Zeile ebenfalls die letzte des gegenwärtigen Zeitraums.
Für die Funktionen budgetOpening und budgetTotal wird hingegen auch das Anfangsdatum berücksichtigt und demzufolge ist die Periode wichtig.
Funktionen für die Zinsberechnung

Die Funktion budgetInterest berechnet den Zins auf dem angegebenem Konto unter Berücksichtigung der effektiven Tagen (365/365) vom angegebenem Datum an.
Um die Zinsen vom laufendem Monat zu berechnen, ist als Datum dasjenige des Monatsendes anzugeben.
- Beleg 500:
Der zweite Parameter ist der Zinssatz. Die 5 bedeutet 5%. Ist er positiv, werden die Zinsen für die Tage berechnet, in denen der Saldo im Soll war. - Beleg 520:
Hier ist der Zinssatz negativ, demzufolge wird der Zins für die Tagen berechnet, in denen der Saldo im Haben war (z.B. -5).
Funktionen für die Berechnung der Gewinnsteuer

- Beleg 600:
Die Gewinnsteuer wird auf der Bewegung der Endgruppe "budgetTotal" der Erfolgsrechnung (in diesem Fall die Gruppe 02) während dem Zeitraum berechnet.
credit(budgetTotal("Gr=02","YC"))*0.10- Sie erhalten die Bewegung der Gruppe während dem laufenden Jahr
budgetTotal("Gr=02","YC") - Die Funktion credit() gibt den Wert nur falls negativ zurück und konvertiert ihn in positiv.
credit(budgetTotal("Gr=02","YC")) - Das Resultat wird mit 0.10 (Prozentsatz 10%) multipliziert.
- In der Spalte KtSoll ist das Steuerkonto der Erfolgsrechnung anzugeben.
- In der Spalte KtHaben ist das Bankkonto oder das Kreditorenkonto für die Steuer anzugeben.
- Sie erhalten die Bewegung der Gruppe während dem laufenden Jahr
Benutzerdefinierte Funktionen
Der Tabelle Dokumente wurde eine Datei "_budget.js" hinzugefügt, wo Javascript-Funktionen definiert werden können, welche in der Spalte Formel aufgerufen werden können.
Berechnung der Gewinnsteuer mit progressivem Satz
- Beleg 610:
Zuerst wird der Gewinn berechnet und der Variable zugeordnet. - Beleg 611:
Der Gewinn wird der Funktion calcolaimposte() weitergegeben, welche den Steuerprozentsatz aufgrund des Betrages verwendet und den zu bezahlenden Steuerbetrag wiedergibt.
Andere benutzerdefinierte Funktionen
- Beleg 620:
Die Funktion test() wird aufgerufen, welche ebenfalls im Dokument _budget.js definiert wurde und einfach einen Wert zurückgibt.
Verwendung von Variablen für nachfolgende Berechnungen

Die Variablen sind sehr nützlich, um Werte zu speichern, welche für die nachfolgenden Berechnungen benötigt werden.
- Belege 700, 701, 702, 703 und 704:
Indexierung des Umsatzes- Beleg 700:
Wir setzen den Index auf 1 (100%).
Wir verwenden weder das Haben-Konto, noch das Soll-Konto, weil diese Zeile nur zum Speichern des Index gebraucht wird. - Beleg 702:
Der Umsatz ist multipliziert um 1000 vom Preisindex Wert.
Wir benutzen die Variable Umsätze auch um die Einkaufskosten zu berechnen, indem sie um (0,2 = 20%) multipliziert wird. - Beleg 704:
Ab dem 1. März wird der Index um 0,1 pro Monat erhöht.
Ab diesem Zeitpunkt wird der Wert der Verkäufe schrittweise erhöht.
- Beleg 700:
- Belege 720, 721 und 722:
Wir weisen der Variable vmonat (Verkäufe Monat) den Verkaufswert des Monats zu.
Hierauf wird die Kommission berechnet.
Spalte JRepeatNumber

Im Feld JRepeatNumber des "row"-Objektes der aktuellen Zeile gibt man die Anzahl Wiederholungen ein.
- Die erste Wiederholung ist 0.
- Die zweite Wiederholung ist 1 und dann fortlaufend.
Der Wert von JRepeatNumber wird verwendet, wenn keine normale Variable möglich ist, weil der Wert aufgrund der Wiederholung bereits überschrieben wurde.
Durch die Verwendung von JRepeatNumber als Parameter eines Objektes können alle Sequenzen registriert und zu einem späteren Zeitpunkt wieder aufgerufen werden.
Businessplan und fortgeschrittene Finanzplanung mit Formeln und Fremdwährungen
Businessplan und fortgeschrittene Finanzplanung mit Formeln und FremdwährungenDie Eingabe von Formeln ist ausschliesslich mit Banana Buchhaltung Plus - Advanced Plan möglich. Jetzt aktualisieren!
Hier erfahren Sie mehr über fortgeschrittene Funktionen der Doppelten Buchhaltung mit Fremdwährungen im Zusammenhang mit der Business. und Finanzplanung. Es werden vordefinierte Felder benutzt oder neue Funktionen zur Verwendung von Variablenberechnungen erstellt.
Formeln in Fremdwährung
Mit diesem Beispiel wird erläutert, wie die Formeln für spezifische Funktionen der Doppelte Buchhaltung mit Fremdwährungen zu verwenden sind.
Für weitere Informationen verweisen wir Sie auf die folgenden Seiten:
- Dokumentation der Formeln der Tabelle Budget
- Beispiele:
Berechnung des Betrages in Basiswährung
Die Formel berechnet zuerst den Wert in der Währung des Kontos und dann den relativen Wert in der Basiswährung.
Wechselkurse und historische Kurse

- Beleg 10 und 12:
Wird in der Wechselkursspalte ein Wechselkurs angegeben, berechnet das Programm den Betrag in der Basiswährung (in diesem Fall EUR) unter Verwendung des in dieser Zeile angegebenen Wechselkurses. - Beleg 11 und 13:
Wenn kein Wechselkurs angegeben wird, wird das Programm den Wechselkurs von der Wechselkurstabelle für diese, sowie für die nachfolgenden Zeilen verwenden, falls eine Wiederholungsfunktion angewendet wird. - Falls Archivwechselkurse in der Wechselkurstabelle definiert sind, indem ein Datum eingegeben wurde, verwendet das Programm den Wechselkurs bezogen auf das Datum oder auf das vorherige, zuletzt angewendete Datum.
Verwendung von Formeln in der Basiswährung

In der Spalte Formel können alle Formeln, die in der Tabelle Budget verfügbar sind, angewendet werden.
Die Beispiele zeigen, dass der Wert in der Basiswährung (EUR) anhand einer Formel berechnet wird.
- Beleg 21:
Der Wert der Variable Verkäufe wird mit dem Wert der Formel EUR multipliziert. Der Wechselkurs in der entsprechenden Spalte wird ignoriert. - Beleg 22:
Wie im vorherigen Beispiel, aber der Wert der Spalte 'Betr.Währung' (AmountCurrency) ist das Ergebnis der Formel. Der Wechselkurs in der entsprechenden Spalte wird ignoriert. - Beleg 23:
In der Tabelle Dokumente, "budget.js" haben wir eine Wechselkurs-Funktion() definiert, welcher den Wert anhand den Zeileninhaltes berechnet.
Mit diesen Funktionen ist es möglich, Wechselkurs-Simulationen zu erstellen.
Beispiel für Wechselkursfunktion
Diese Funktion berechnet den Wechselkurs anhand der Fremdwährung und des Datums der Zeile.
Der USD-Wechselkurs wird monatlich definiert.
Für den GBP hingegen wird immer der selbe Wechselkurs verwendet.
Die Funktion gibt den in AmountCurrency enthaltenen Betrag multipliziert mit dem Wechselkurs zurück.
  function cambio() {
      var importo = row.value("AmountCurrency");
      var cambio = 1;
      var moneta = row.value("ExchangeCurrency");
      var data = Banana.Converter.toDate(row.value("JDate"));
      var mese = data.getMonth() + 1;
      if (moneta == "USD") {
          cambio = 0.95;
          if (mese == 1)
              cambio = 0.96;
          else if (mese == 2)
              cambio = 0.97;
      }
      if (moneta == "GBP") {
          cambio = 1.30;
      }
      return importo * cambio;
  }
Formeln für die Berechnung der Wechselkursdifferenzen
Weitere Informationen zur Berechnung der Wechselkursdifferenzen entnehmen Sie bitte den Informationen zu den Buchungen mit Fremwährungen und der Seite Wechselkurs-Differenzen.

- Die Währung ist immer die Basiswährung.
- Es dürfen keine Beträge in der Währung des Kontos eingegeben werden.
- Der Wechselkurs bleibt leer und wird ignoriert, auch wenn ein Wert eingegeben wird.
- Die Funktion budgetExchangeDifference berechnet die Wechselkursdifferenz für ein Konto. Dieser Wert entspricht dem nicht realisierten Wechselkursgewinn oder -verlust.
- Die Funktion gibt bei einem Wechselkursverlust einen positiven Wert und bei einen Wechselkursgewinn und einen negativen (credit) zurück.
Demzufolge müssen Wechselkursgewinne und Wechselkursverluste in zwei verschiedenen Zeilen eingegeben werden. - Beim zurückgegebene Betrag handelt es um die notwendige Neubewertung in Basiswährung; dies um sicherzustellen, dass der Kontostand in Basiswährung mit dem Saldo des Kontos in der Währung, umgerechnet zum dem für die Berechnung der Wechselkursdifferenzen verwendeten Wechselkurs, übereinstimmt.
- Die Funktion gibt bei einem Wechselkursverlust einen positiven Wert und bei einen Wechselkursgewinn und einen negativen (credit) zurück.
- Der erste Parameter "CUSD" der Funktion budgetExchangeDifferences ist das Konto in Fremdwährung, für das die Wechselkursdifferenz berechnet wird.
- Der zweite Parameter ist der anzuwendende Wechselkurs.
- Wird kein Wechselkurs angegeben, wird der historische Umrechnungskurs, bezogen auf das Datum der eingegebenen Buchung verwendet.
- Wenn "current" verwendet wird, wird der Wechselkurs ohne Datum der Wechselkurstabelle verwendet.
- Ein Wechselkurs kann auch angegeben werden. Das Dezimaltrennzeichen muss der Punkt "."sein.
  credit(budgetExchangeDifference("CUSD"))
  credit(budgetExchangeDifference("CUSD", "current"))
  credit(budgetExchangeDifference("CUSD", "0.95"))
Tutorial zur Finanzplanung fuer Buchhaltungsexperten
Tutorial zur Finanzplanung fuer BuchhaltungsexpertenDie präzise Finanzplanung ist eine Methode, um die finanzielle Zukunft des Unternehmens mit derselben Genauigkeit wie die reale Buchhaltung aufzubauen.
In Banana Buchhaltung ist die Planung nicht getrennt, sondern in dieselbe Buchhaltungsdatei integriert.
In diesem Tutorial sehen Sie, wie Sie eine vollständige Planung erstellen, indem Sie zukünftige transactions erfassen und automatisch Bilanz, Erfolgsrechnung und Liquiditätsplanung erhalten. Sie können auch verschiedene Szenarien simulieren.
Einführungsvideo
Um das System in Aktion zu sehen, schauen Sie sich unser folgendes Video an:
Zielgruppe
Dieses Tutorial richtet sich an:
- Buchhaltungsexperten
- Treuhandgesellschaften
- Berater und Treuhänder
Das Ziel ist es, Ihnen zu zeigen, wie Sie schnell eine vollständige Finanzplanung in derselben Buchhaltungsdatei erstellen können, einschliesslich:
- Geplante Erfolgsrechnung
- Geplante Bilanz
- Entwicklung der Liquidität
- Vergleich zwischen Budget und Ist-Werten.
Sie können die Finanzplanung sowohl für Ihr eigenes Unternehmen als auch für Ihre Kunden vorbereiten und dabei einen Mehrwert für Ihre Beratungsleistungen bieten, der über die reine Buchhaltungsführung hinausgeht.
Struktur der Planung
Mit Banana Buchhaltung müssen Sie nichts Neues erstellen. Das bedeutet, dass Sie arbeiten mit:
- demselben Kontenplan
- derselben Soll/Haben-Logik
- denselben Analysewerkzeugen
Um Budget-transactions zu erfassen, verwenden Sie:
- die Tabelle Budget, in der Sie die transactions erfassen, die Sie im Laufe des Jahres erwarten:
- Sie erfassen die Buchung nur einmal
- Sie definieren die Häufigkeit
- Sie können festlegen, dass eine Buchung in einem bestimmten Zeitraum erscheint, definiert durch ein Anfangs- und Enddatum.
Kontenplan
Die verwendeten Konten sind bereits im Kontenplan verfügbar. In der Tabelle Konten können Sie die Spalte Budget anzeigen, um die geplanten Salden jederzeit zur Verfügung zu haben:
- Menü Daten > Columns setup > Budgetspalte aktivieren
Aktiven und Passiven (Bilanz)
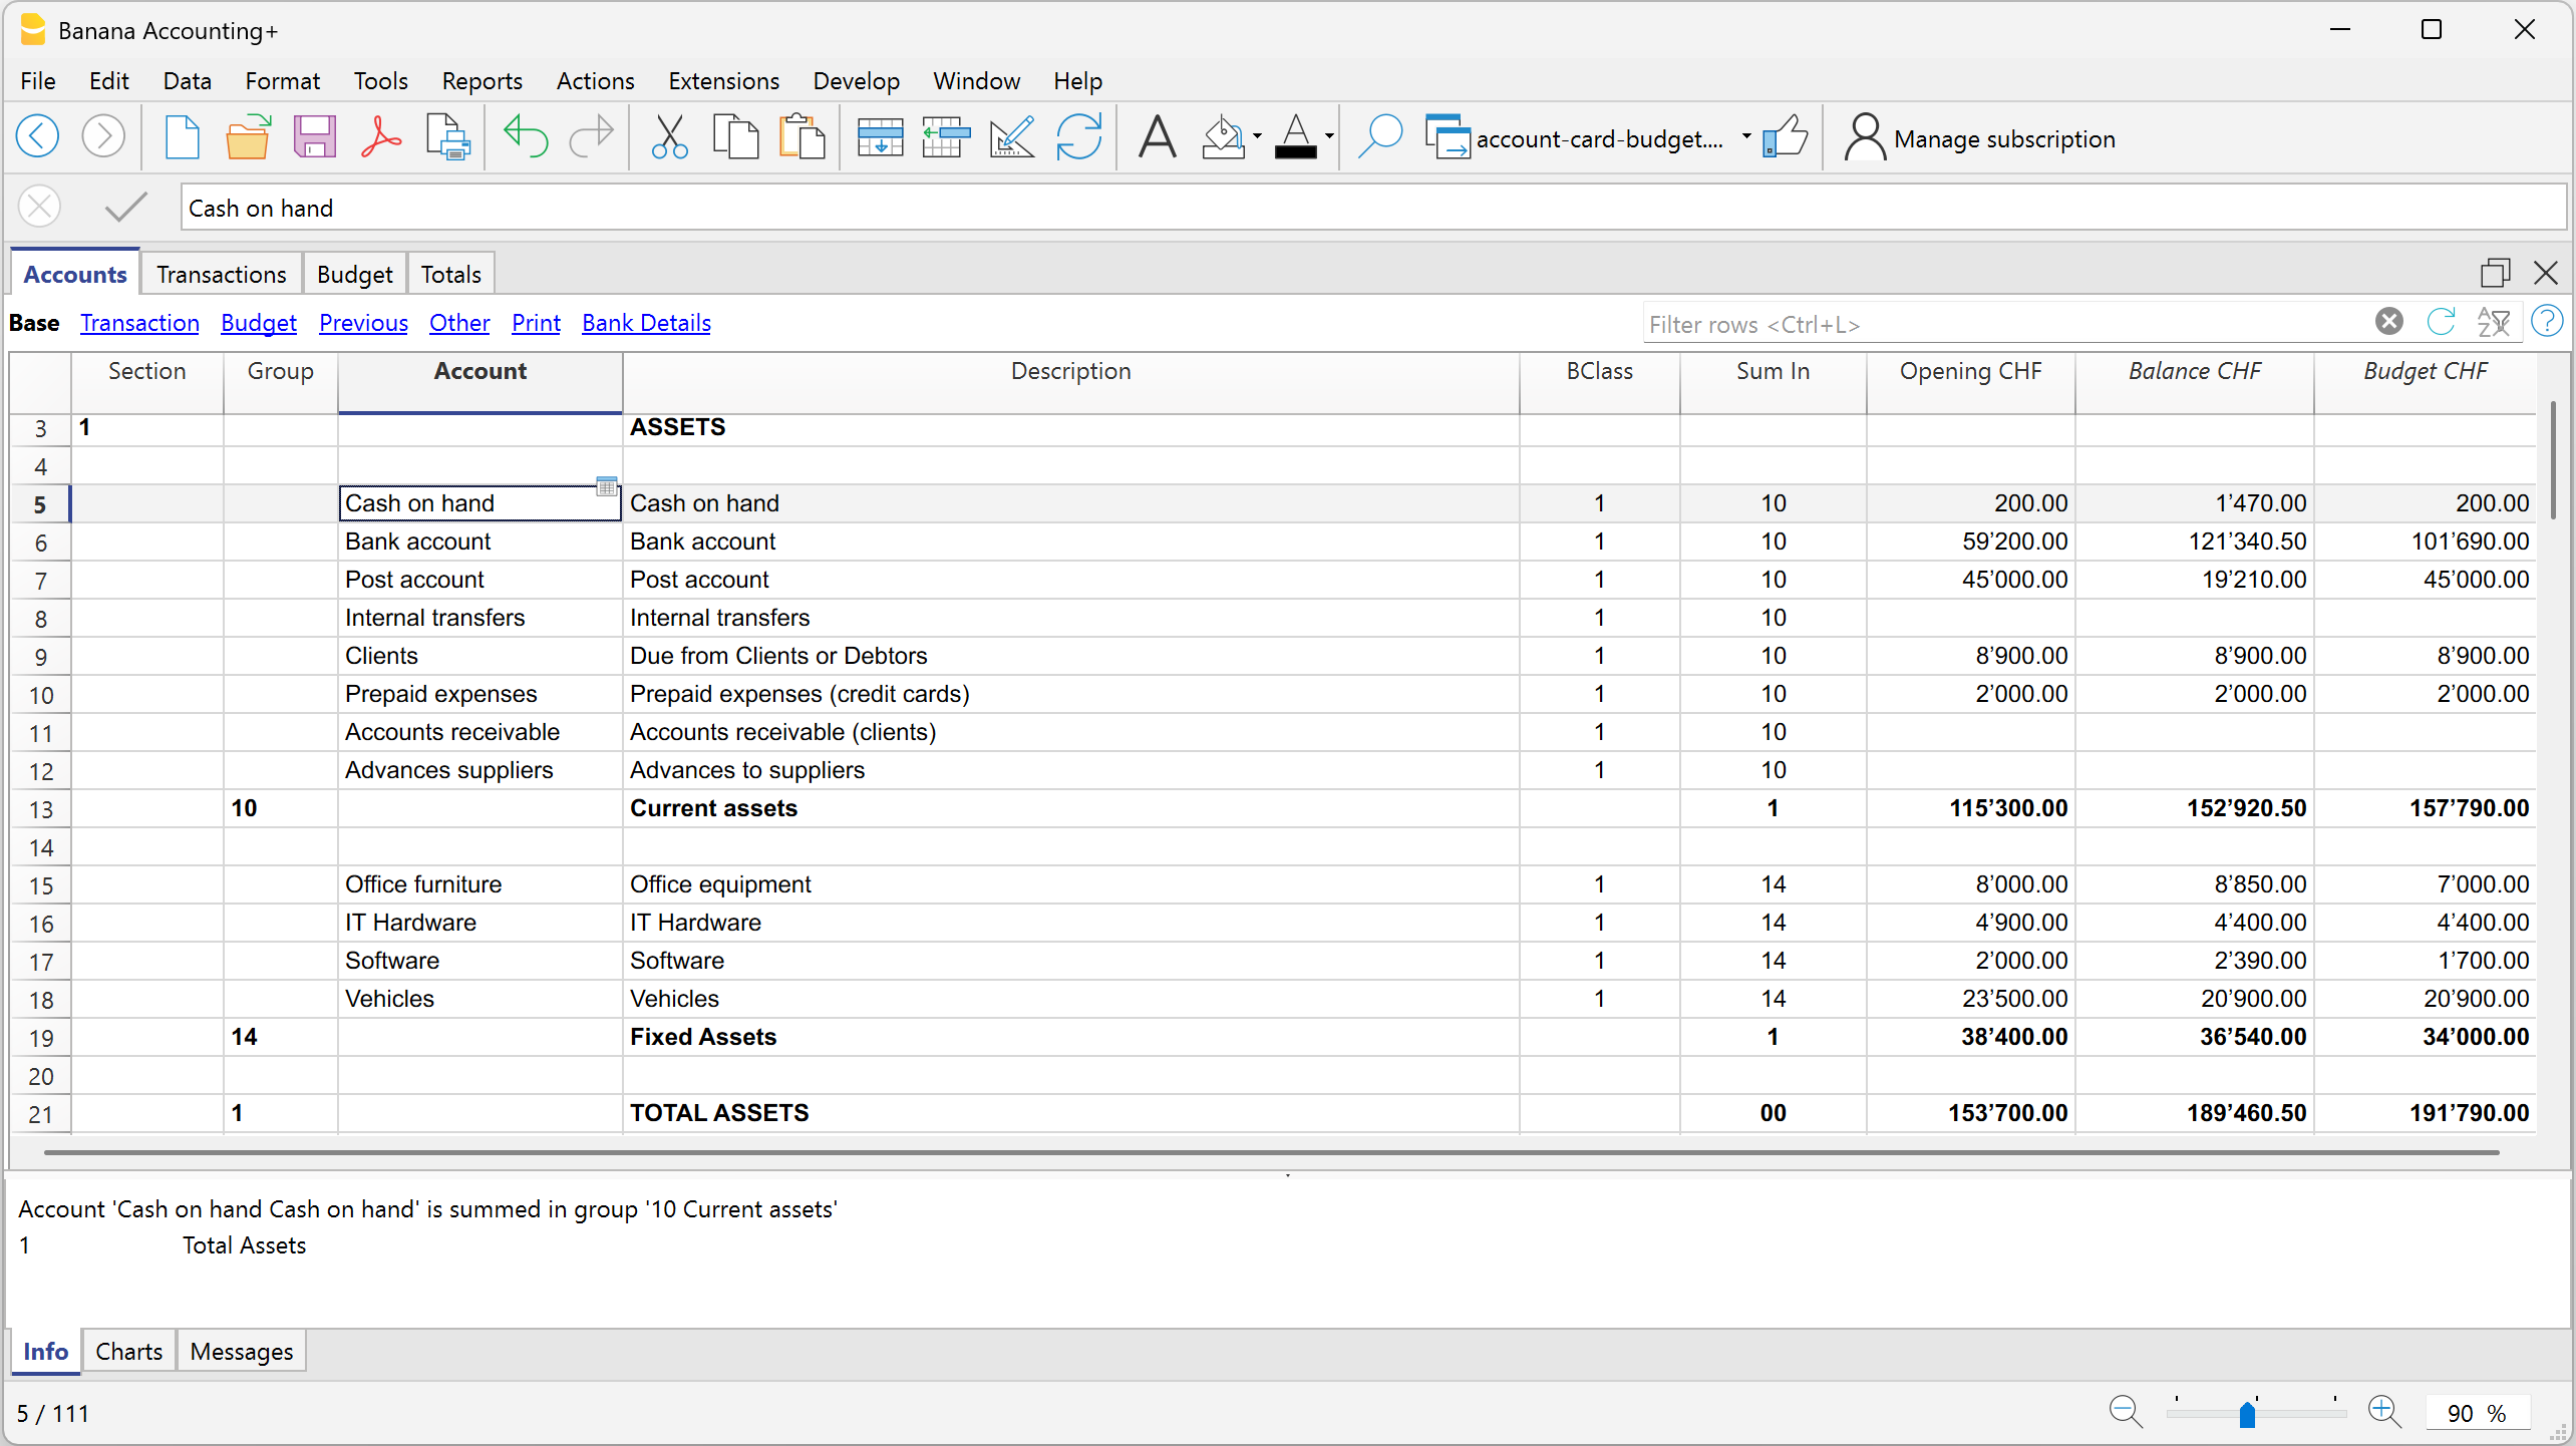
- Kosten und Erträge (Erfolgsrechnung)
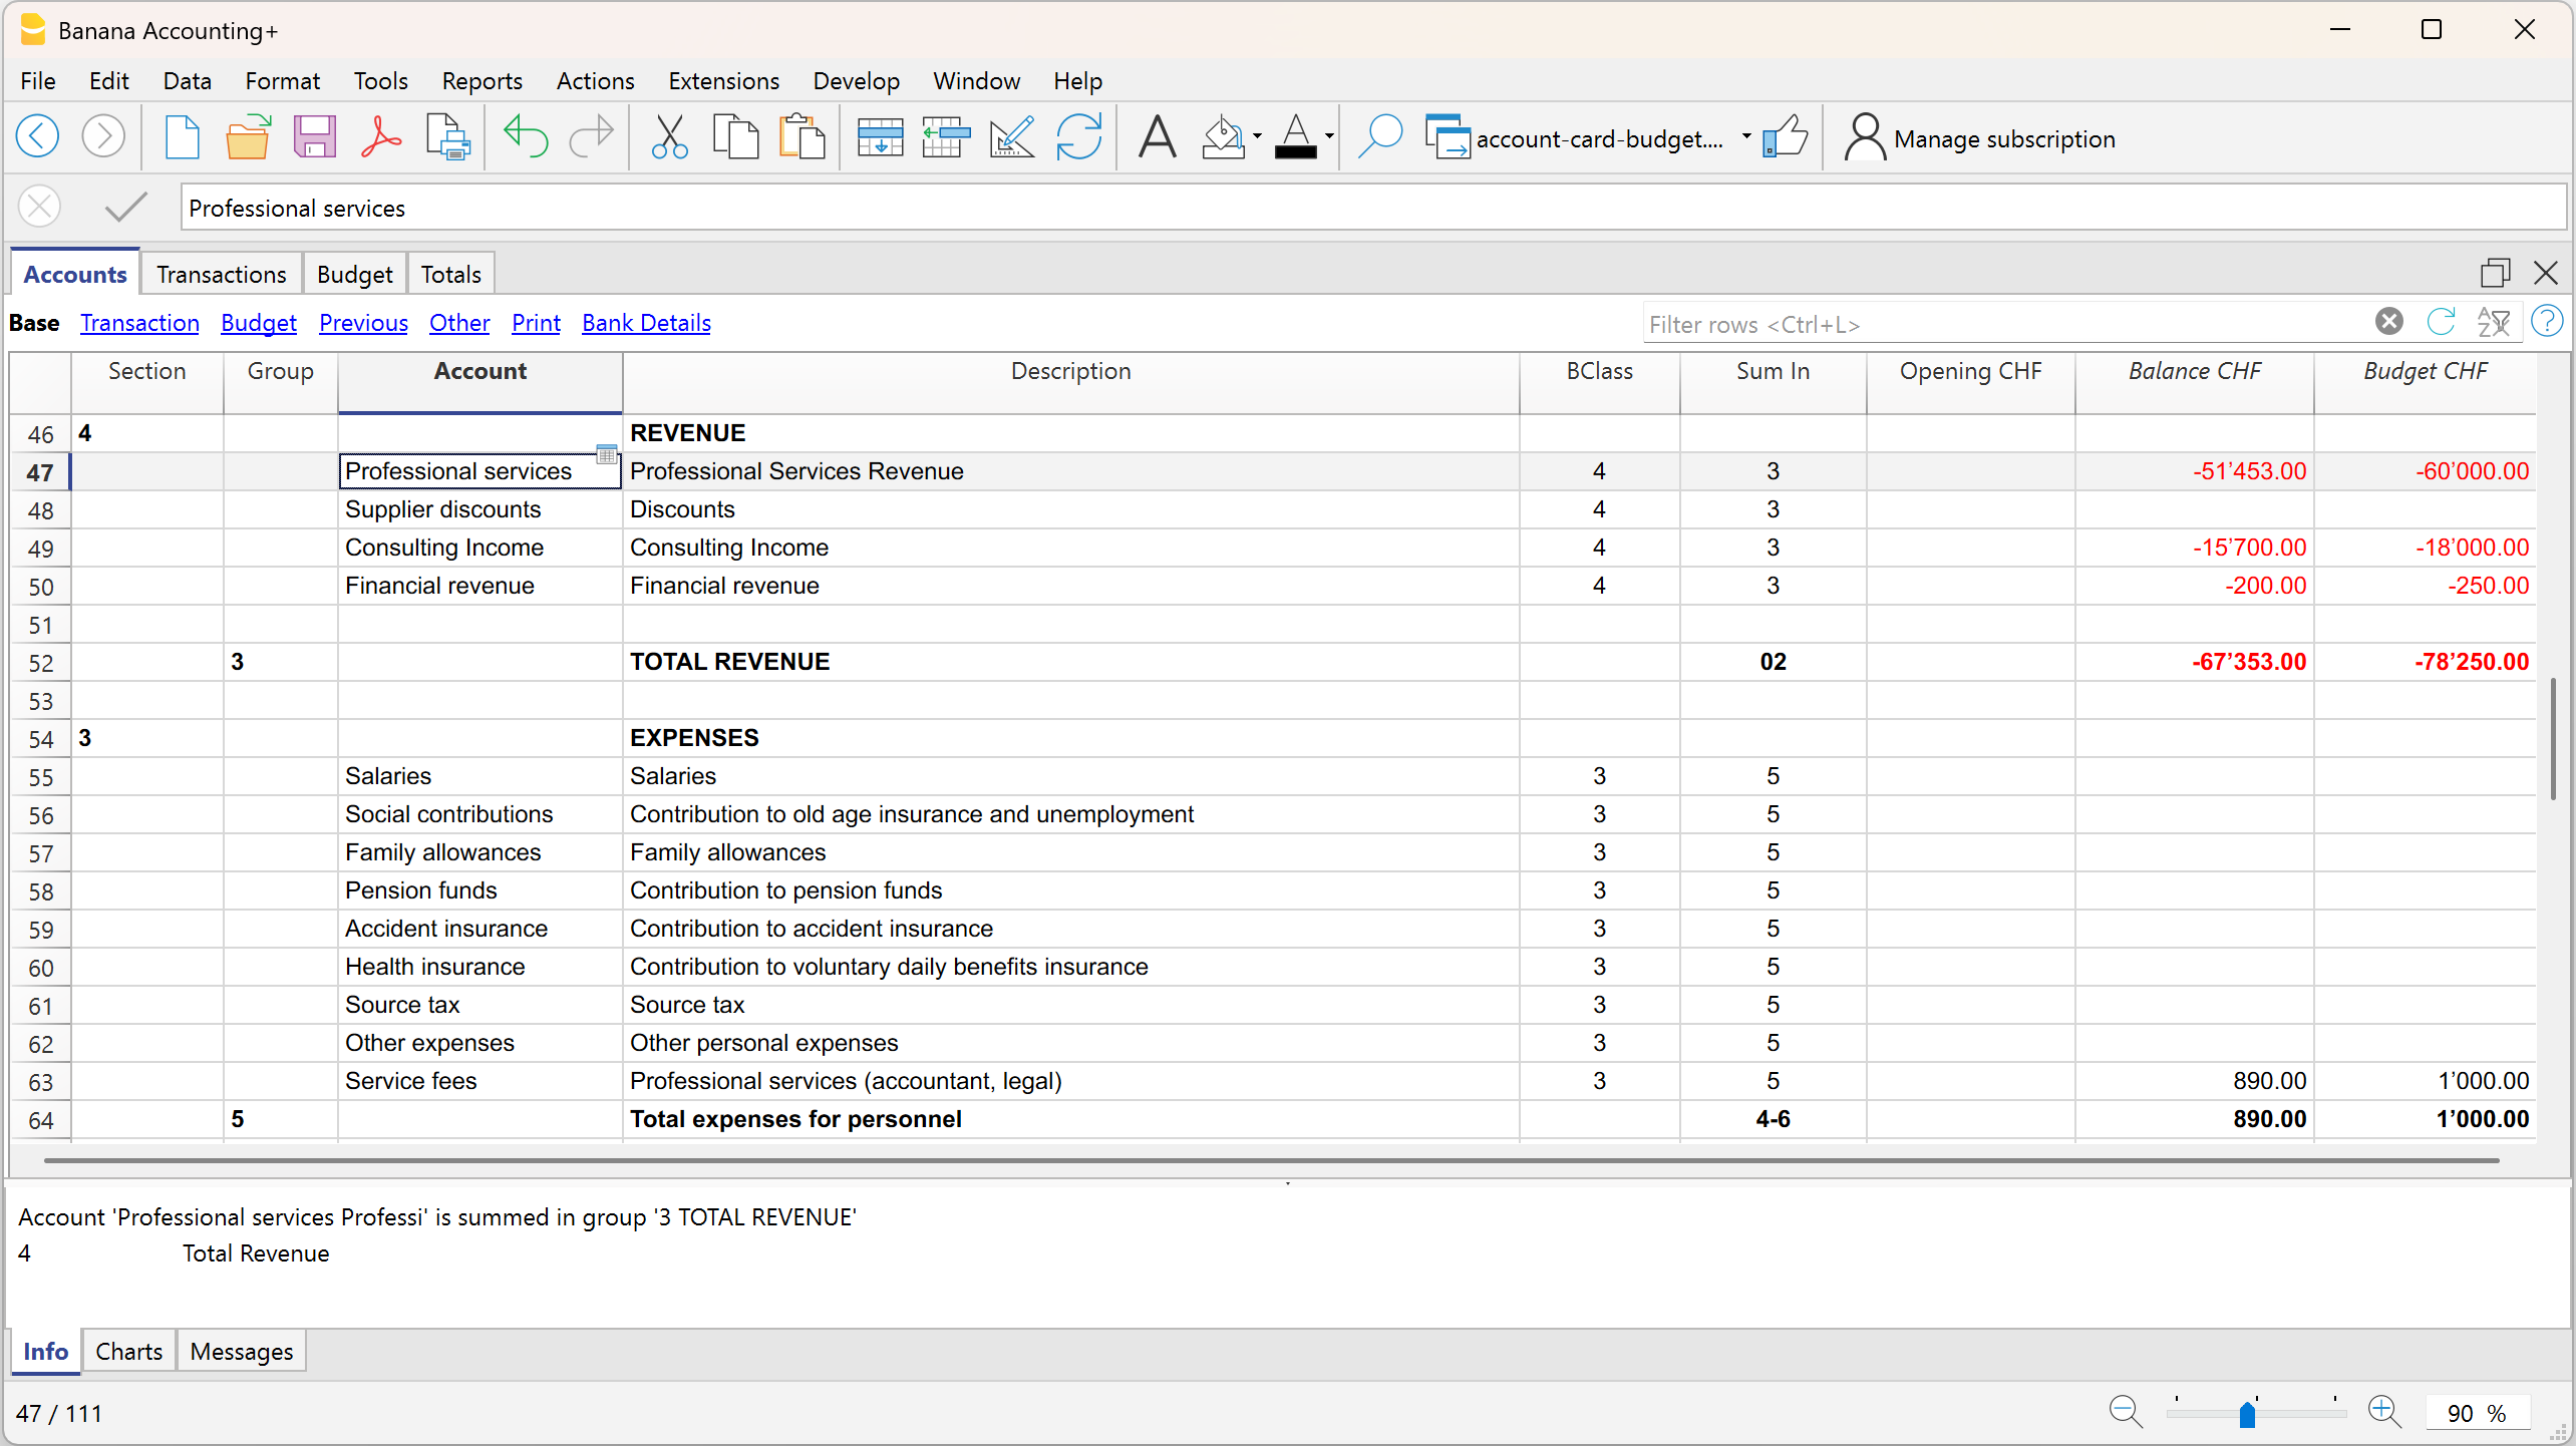
Für eine detailliertere Planung empfehlen wir Ihnen, falls noch nicht vorhanden, Folgendes einzurichten und zu verwenden:
Budgettabelle
Die Budgettabelle ist das Herzstück des Planungssystems, in dem Sie die transactions erfassen, die Sie während des Jahres oder in einem bestimmten Zeitraum erwarten.
Für jedes zukünftige Ereignis erfassen Sie die Daten in den folgenden Spalten:
- Anfangsdatum: das Datum, an dem die Buchung beginnt
- Enddatum: das letzte Datum, an dem die Buchung endet (es kann ein Datum eines oder mehrerer Folgejahre angegeben werden).
Handelt es sich um eine Buchung, die sich jedes Jahr wiederholt, müssen Sie kein Datum eingeben. - Wiederholen: die Wiederholungshäufigkeit (Tag, Monat, Quartal, Semester, Jahr)
- Beschreibung: die Beschreibung der Buchung
- Soll-/Habenkonto: verfügbare Konten aus dem Kontenplan
- Betrag: Betrag der Buchung
Falls vorgesehen, können Sie auch MWST-Code, Segmente oder Kostenstellen eingeben.
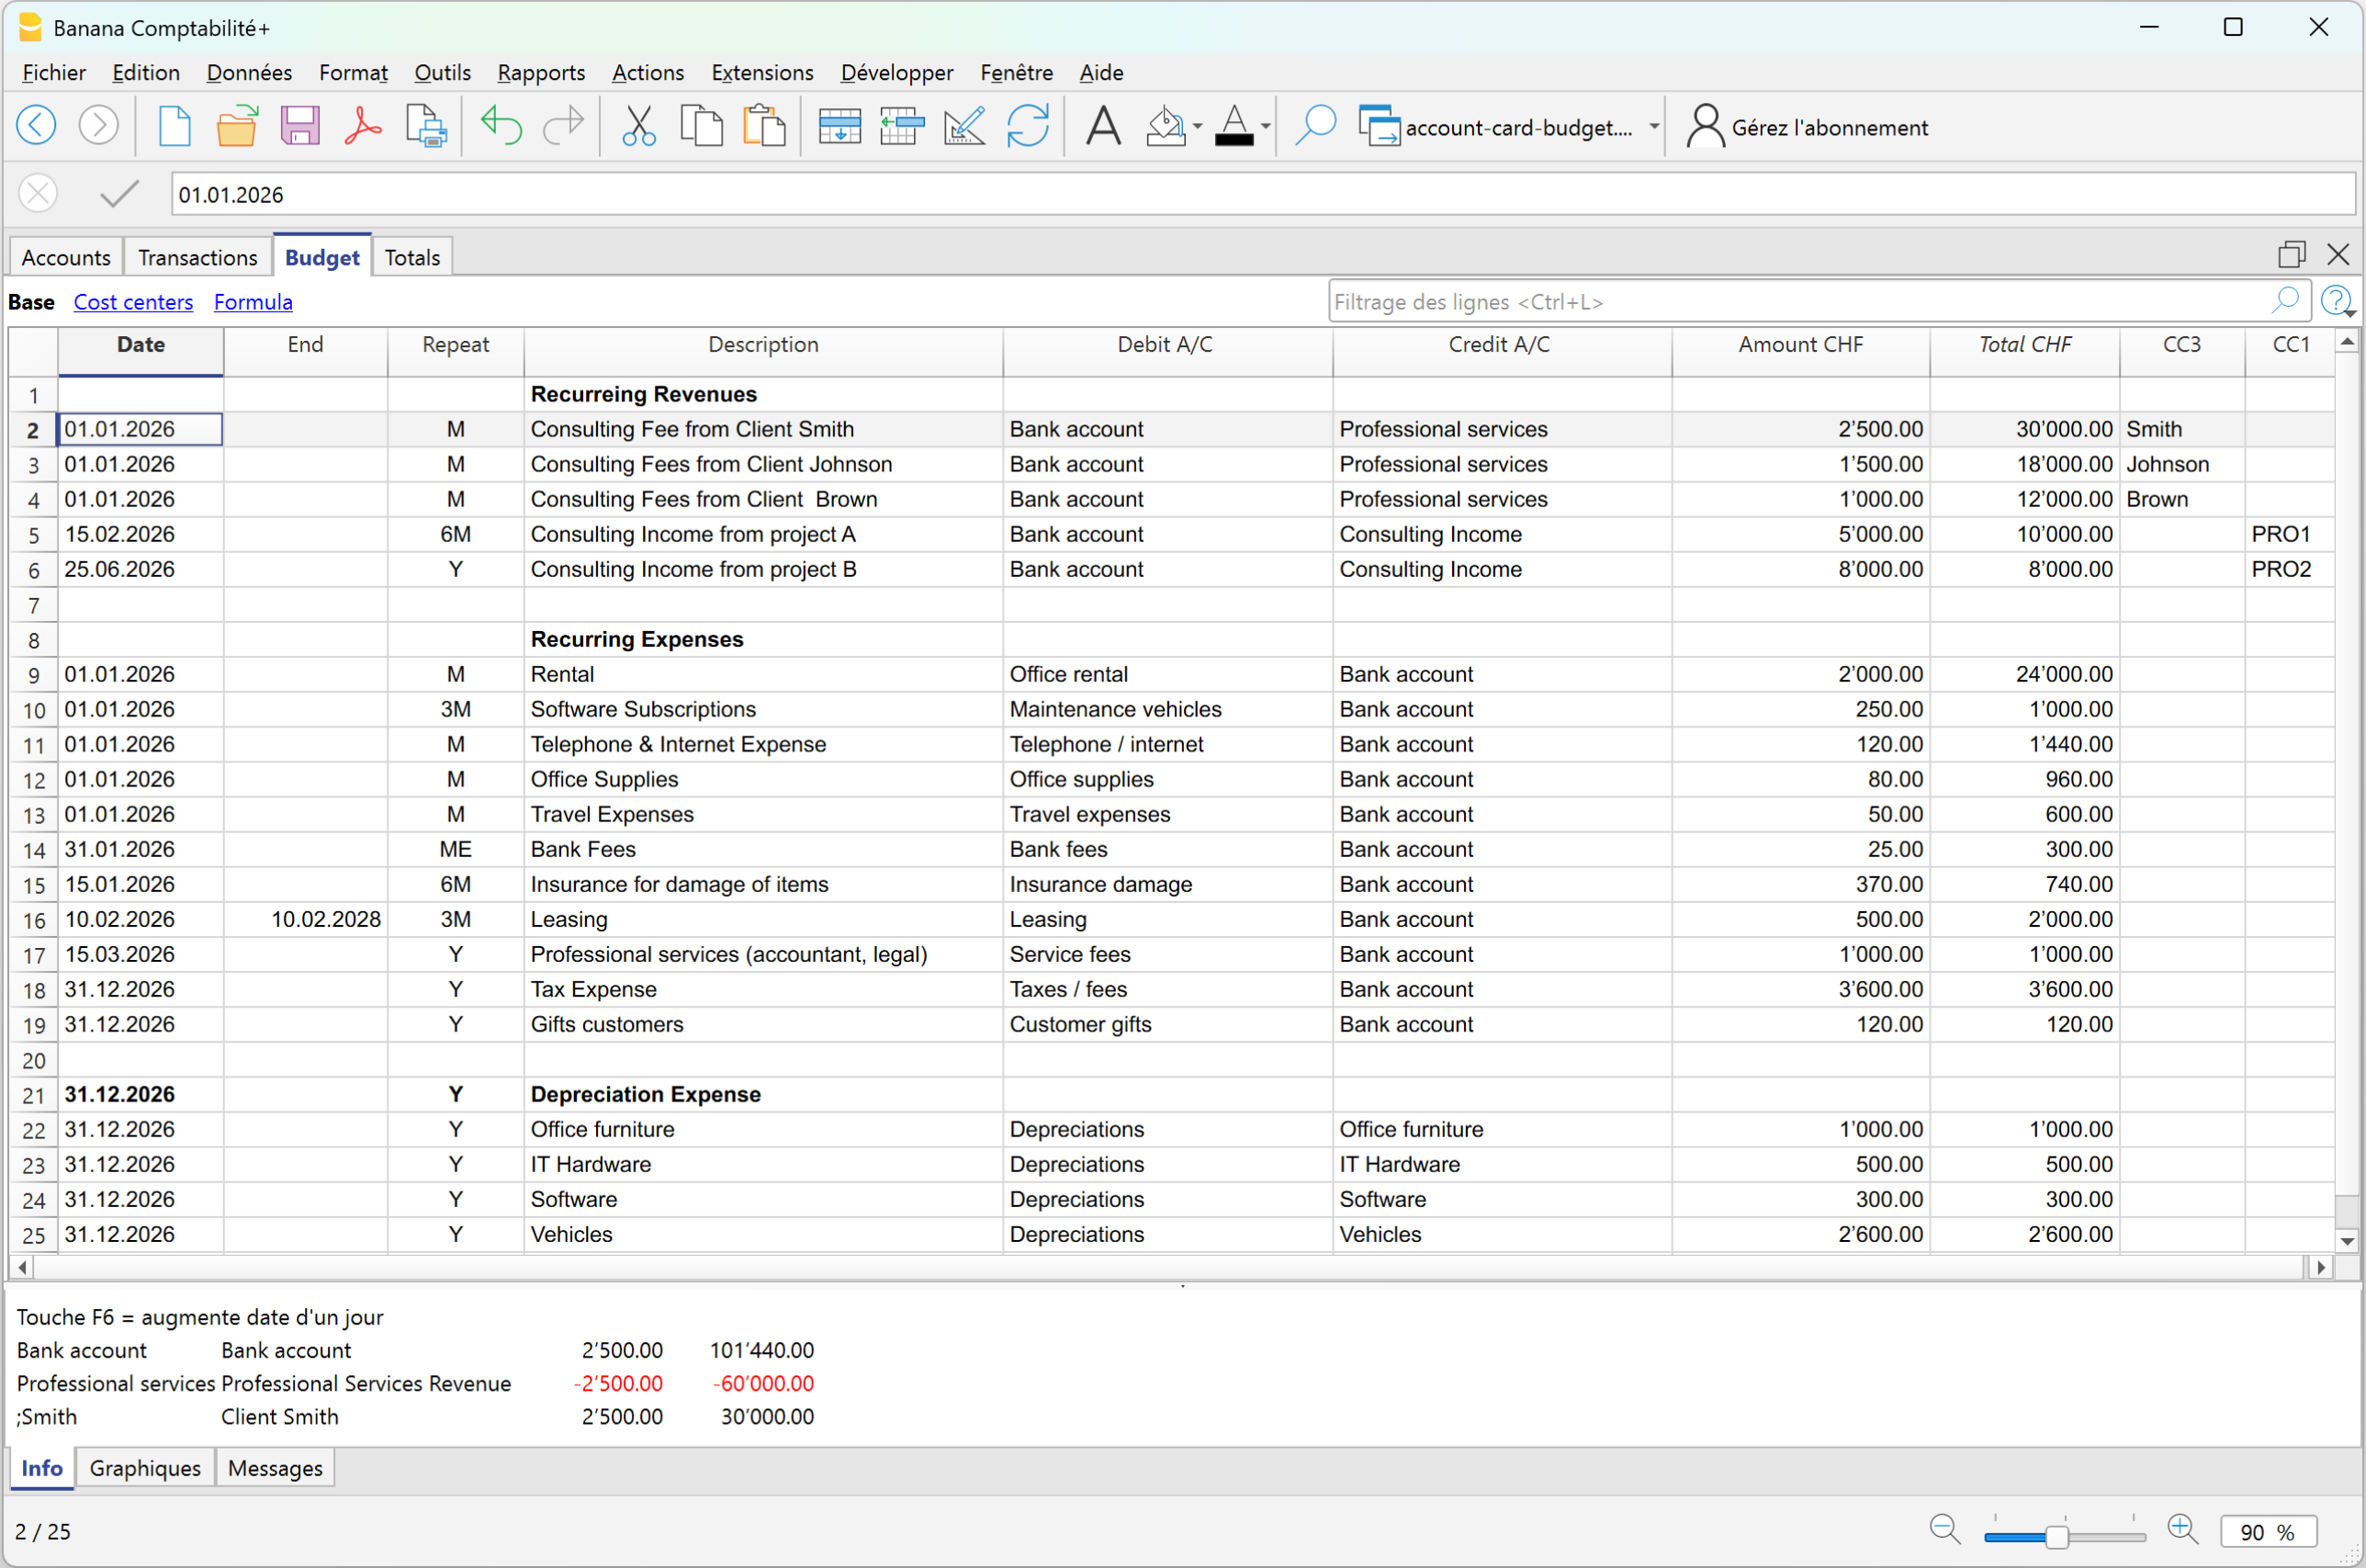
Basierend auf den erfassten transactions erstellt das Programm automatisch alle Berichte mit derselben Schnelligkeit und denselben Optionen wie im Enhanced Balance sheet with groups und übernimmt die Salden in die Spalte Konten in der Ansicht Budget.
Vollständige Planungsberichte und Vergleich mit Ist-Daten
Mit den Planungsberichten erhalten Sie nicht nur aggregierte Jahresprognosen. Sie können die Daten auch für bestimmte Zeiträume analysieren: Wenn sich ein Aufwand oder Ertrag nur in bestimmten Monaten ergibt, stellt das System dies genau in den richtigen Zeiträumen dar.
Zum Beispiel: Wenn ein Aufwand nur in den Monaten Juni, Juli und August anfällt, wird in der Budgettabelle durch die Definition der entsprechenden Daten der Betrag im Planungsbericht genau dem entsprechenden Zeitraum zugeordnet, ohne Verteilung auf andere Monate.
Um die geplante Bilanz und Erfolgsrechnung zu erhalten:
- Im Menü Berichte > Enhanced Balance sheet with groups > im Bereich Kontenplan > Spalten, Budget aktivieren
Im Enhanced Balance sheet with groups erhalten Sie sofort eine Gesamtübersicht, wenn Sie die Spalten für Ist-Werte, Budget und Budgetdifferenzen anzeigen:
Bilanz mit Ist-Werten, Budget und Differenzen
Die Planung in Banana Buchhaltung ist kein separates Dokument, sondern integriert sich mit den Buchhaltungsdaten und entwickelt sich gemeinsam mit der realen Buchhaltung weiter.
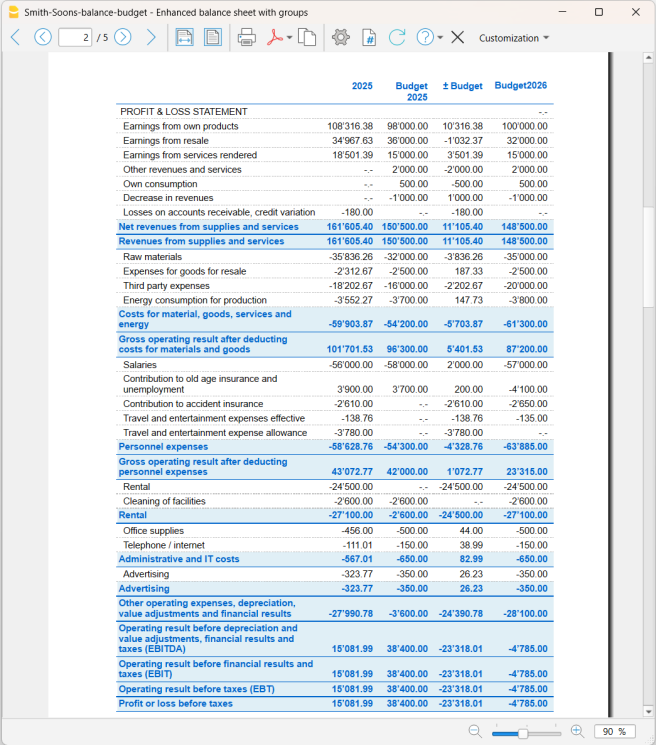
Erfolgsrechnung mit Ist-Werten, Budget und Differenzen
Mit dieser Darstellung der Berichte können Sie beurteilen, ob das Unternehmen rentabel sein wird, und mögliche Probleme frühzeitig erkennen.
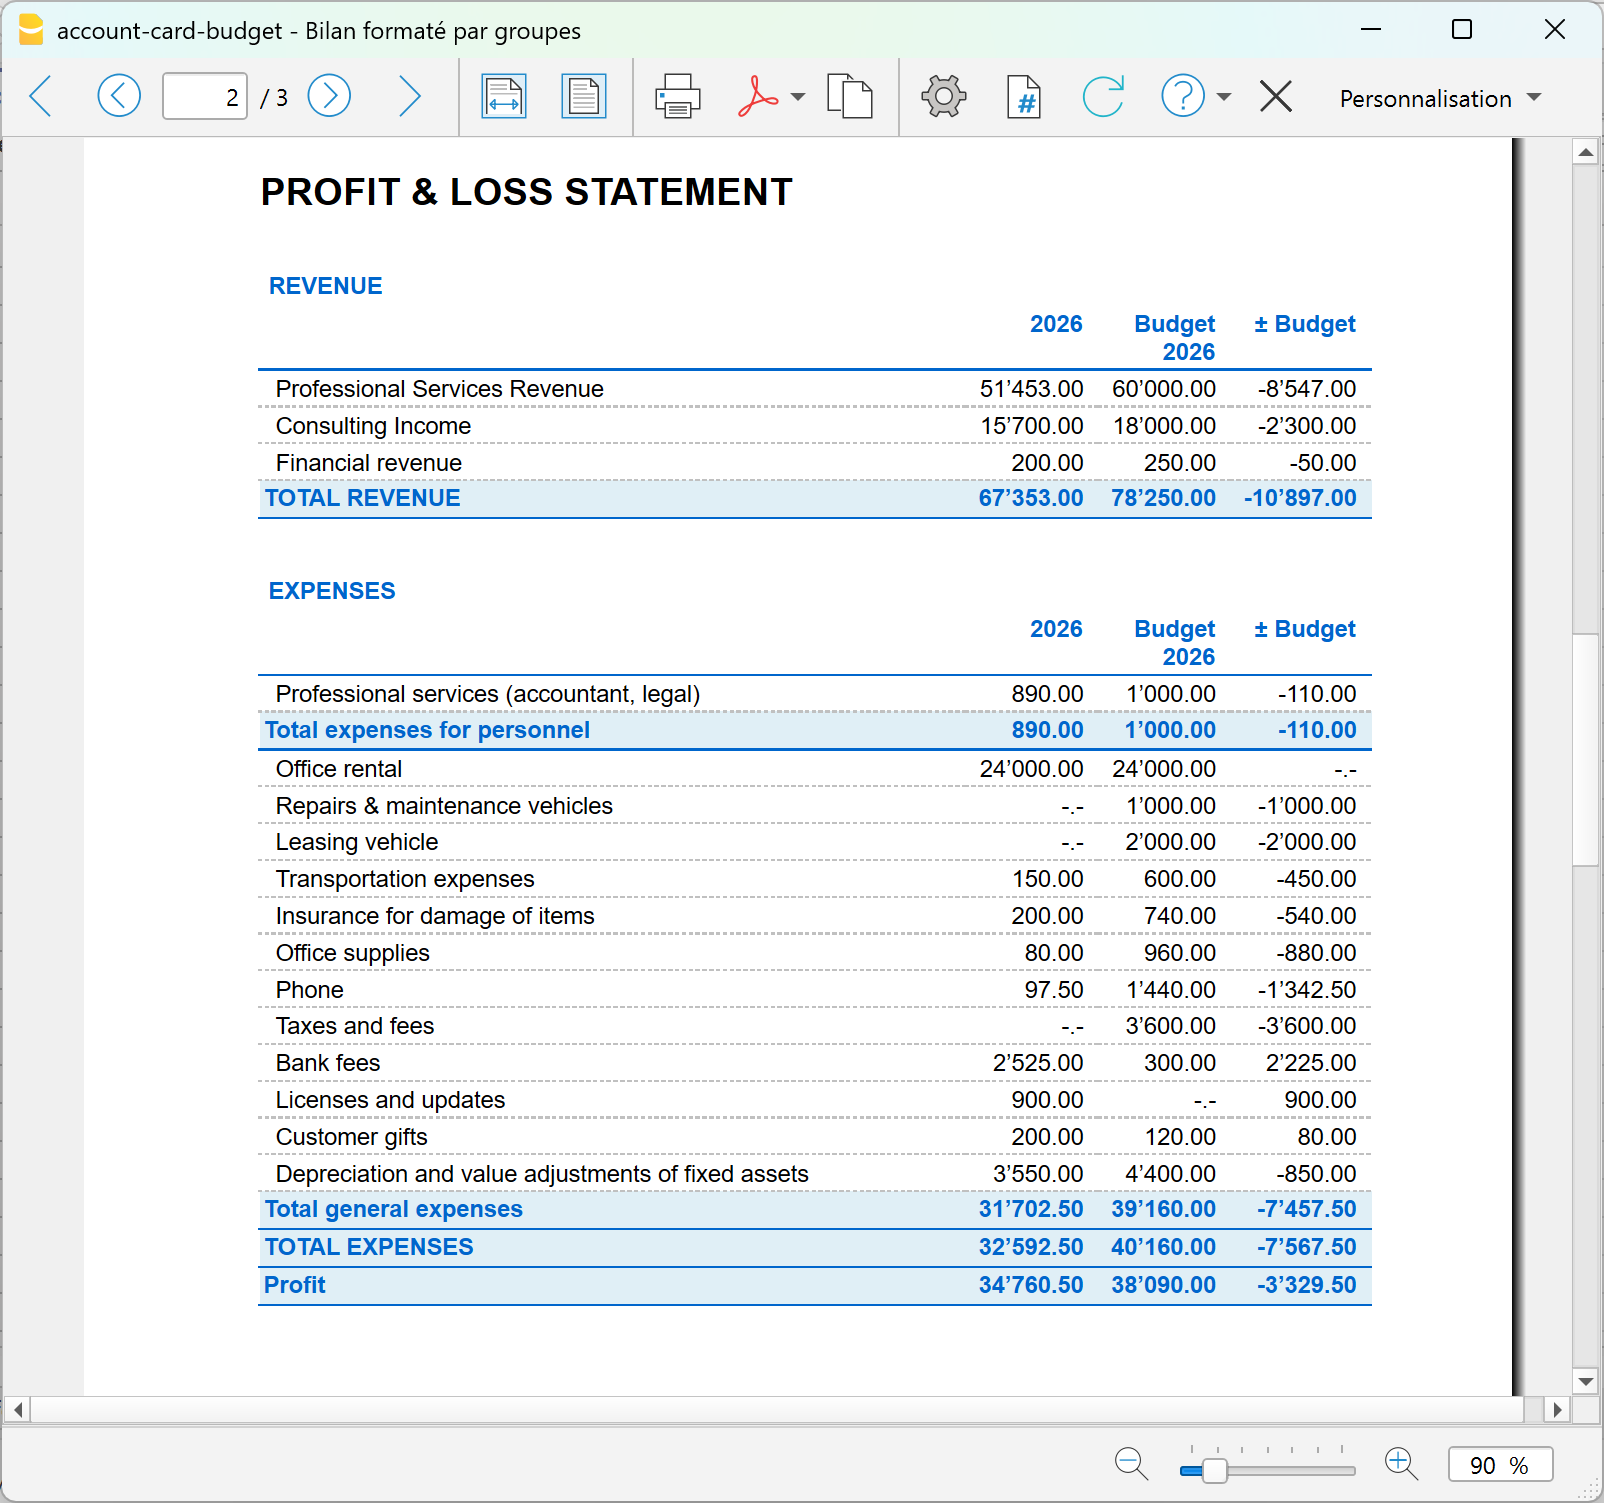
Vergleich Kontoblatt Ist-Werte vs Budget
Mit der Finanzplanung von Banana Buchhaltung können Sie über die üblichen Prognosen hinausgehen. Mit der neuen Erweiterung Account card: Current vs/Budget (Beta-Version) können Sie das Kontoblatt eines Kontos sowohl mit den Ist-transactions als auch mit den Budget-transactions vergleichen.
Dies ist eine absolute Neuheit, die Ihnen ermöglicht:
- die Ist-transactions im Detail mit den budgetierten transactions zu vergleichen
- die Abweichungen in der Spalte Differenzen einfach zu erkennen.
- Ihre Planungsfähigkeit schrittweise zu verbessern.
Vorteil: Kundenkontoblatt mit Ist-Werten und Budget
Mit Banana Buchhaltung haben Sie für jeden Kunden ein vollständiges Kontoblatt, das Folgendes integriert:
- Ist-Daten → ausgestellte Rechnungen und tatsächliche Zahlungseingänge
- Planungsdaten → zukünftige Rechnungen und erwartete Zahlungseingänge
Mit Banana zeigt das Kundenkontoblatt nicht nur, was passiert ist, sondern auch, was passieren wird – mit allen bereits integrierten Verwaltungsdetails. In einer einzigen Ansicht sehen Sie Vergangenheit, Gegenwart und Zukunft.
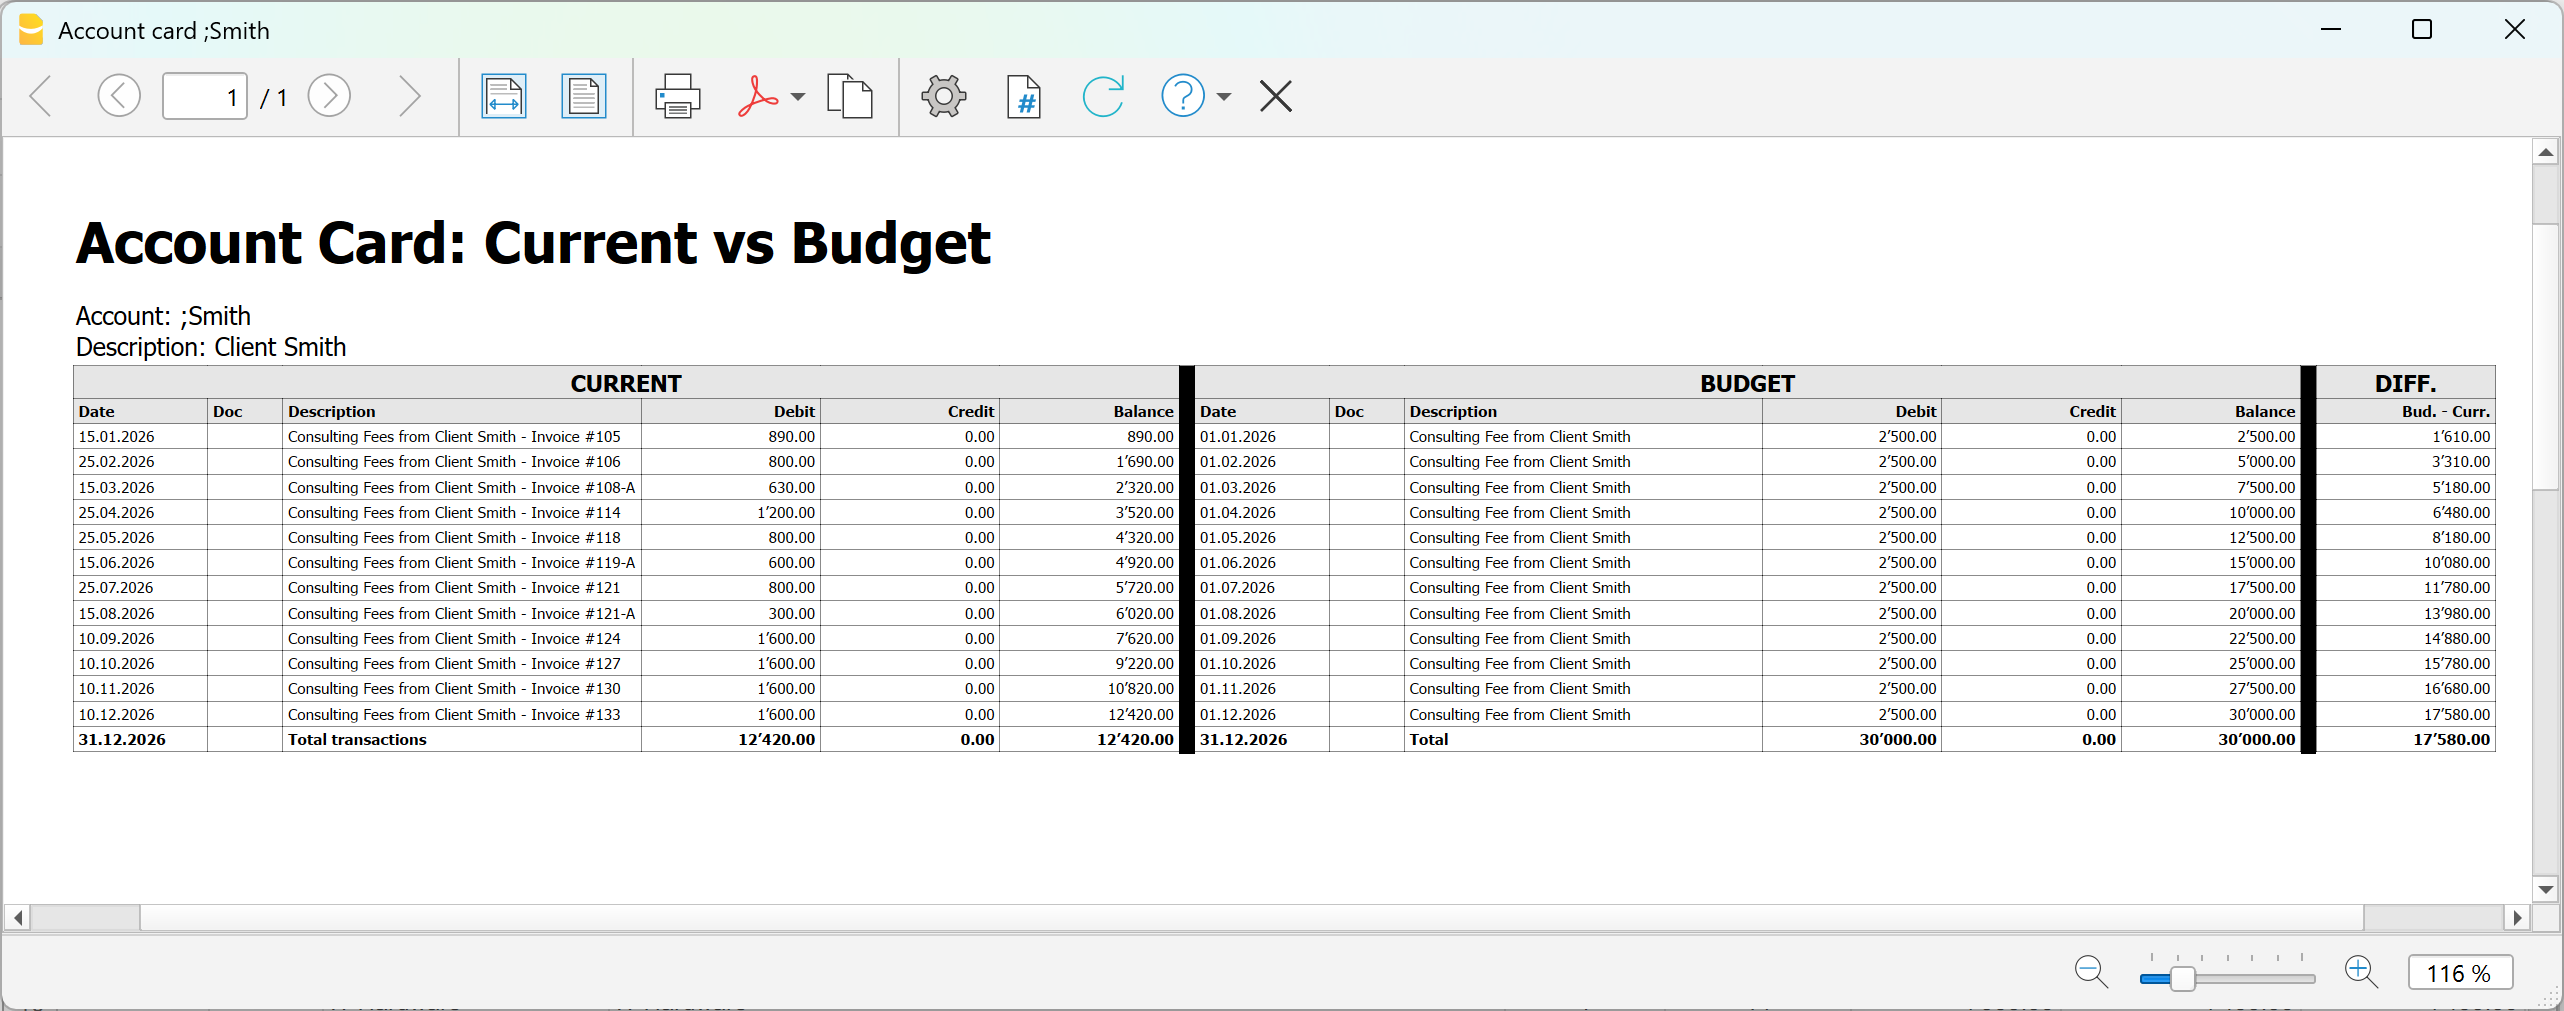
Mit der neuen Erweiterung für das Kontoblatt, die Ist- und Budget-transactions vergleicht, können Sie im Detail analysieren:
- Kunde
- Projekt
- Kostenstelle
- Segment
Um die Vergleichsansicht zwischen Ist-Werten und Budget eines Kontos zu erhalten, müssen Sie:
- Die Erweiterung Account card current vs budget (Beta-Version) installieren
- Im Menü Erweiterungen > Erweiterungen verwalten > Accout card: current vs budget (Beta-Version)
- Im sich öffnenden Dialogfenster:
Doppelklicken Sie auf Konto und wählen Sie aus der Kontenliste das Konto (oder die Kategorie), die Kostenstelle- Es werden zwei nebeneinanderliegende Kontoblätter desselben Kontos angezeigt
- In der letzten Spalte des Budget-Kontoblatts wird die Spalte Differenz angezeigt, die Zeile für Zeile die Betragsunterschiede zwischen Ist-Werten und Budget hervorhebt.
Zusammenfassung
Mit der präzisen Finanzplanung können Sie:
- detaillierte Prognosen Buchung für Buchung erfassen
- automatisch alle Berichte erhalten
- Liquidität und Rentabilität kontrollieren
- Planung und Realität vergleichen
- Entscheidungen schrittweise verbessern
Es geht nicht nur darum, ein Budget zu erstellen, sondern ein integriertes System zu verwenden, um die finanzielle Zukunft mit professionellen Buchhaltungswerkzeugen zu planen und zu verwalten.
Account Card: Current vs Budget (BETA)
Account Card: Current vs Budget (BETA)The report provides:
- detailed transaction data
- progressive balances
- differences between actual and planned values
Prerequisites
To use this extension you must download and install Banana Accounting Plus.
Create the report
Run the extension from the menu Extensions > Account Card: Current vs Budget.
The extension Settings dialogue will open. From here you can choose some options to create the report.
- Account
Select the account to analyze (populated automatically from the Accounts table). - Subdivision by period
Select the period subdivision (none, by month, by quarter).- None: shows all transactions in chronological order.
- By month: groups transactions by month; each month is visually separated.
- By Quarter: groups transactions by quarter (Q1, Q2, Q3, Q4); each quarter is visually separated.
- Print in landscape
Prints the report in landscape orientation.
The report will be generated and shown in preview.
Report content
The report is structured into three main sections:
- Current account card
Displays current account card transactions with the columns Date, Document, Description, Debit, Credit, Balance. - Budget account card
Displays budget account card transactions with the columns Date, Document, Description, Debit, Credit, Balance. - Difference (between budget balances and current balances).
For each row, the difference is calculated as: Budget balance – Current balance.
This column highlights deviations between planned and actual values.
Each row or the report includes:
- current transaction (if available)
- budget transaction (if available)
- updated balance
- difference between balances
When one side has no data, the last available balance is carried forward. This ensures continuous and consistent comparison.
Report example:
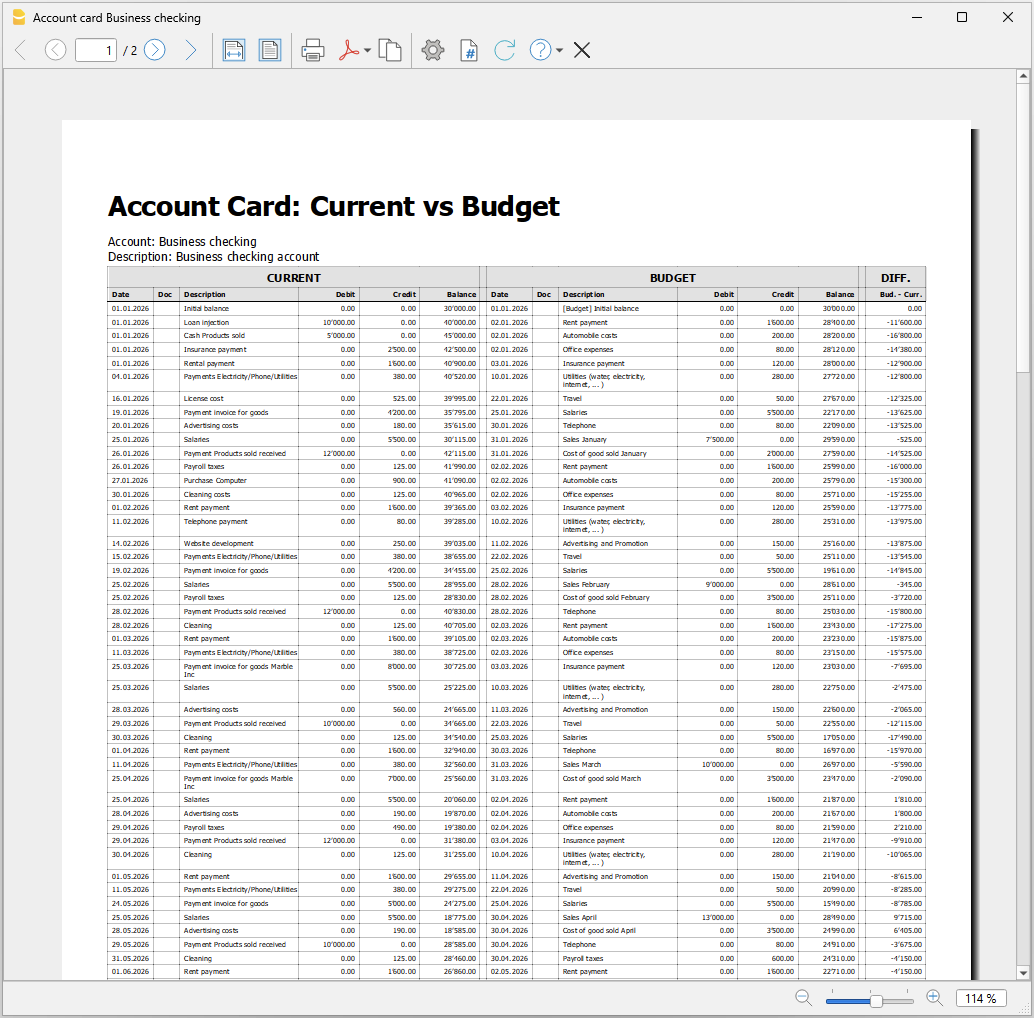
Accounting software for Accountants, Fiduciaries and Auditors
Banana Accounting complements the accounting software you already use, giving you the flexibility to handle special cases and offer services that go beyond traditional bookkeeping.
From investment portfolio accounting and financial forecasting to forensic accounting, trusts and international mandates, Banana helps you turn your accounting expertise into new opportunities for your practice.
The modern accountant: turning change into opportunity
The role of the accountant has evolved. Accounting and tax compliance remain essential, but digitalisation, cloud solutions and AI are making many operational tasks faster and increasingly accessible to clients themselves.
As clients take care of more of their day-to-day bookkeeping, the accountant's expertise becomes valuable in new ways: reviewing their work, interpreting financial data, anticipating problems and helping them make better decisions.
This shift creates new opportunities. By spending less time on repetitive tasks, accountants can manage more clients while focusing their expertise on higher-value advisory and specialised services — from financial analysis and planning to more sophisticated mandates for businesses and private clients with complex needs.
This is what we call the "poliedrico" accountant: a versatile professional who combines accounting expertise, technology, analysis and advisory skills, adapting them to very different clients and situations.
Banana Accounting is designed for precisely this kind of flexibility.
Add flexibility to the software you already use
You don't need to replace your existing accounting or management system. Banana Accounting works alongside it whenever you need more flexibility, customisation or specialised functionality.
Its table-based approach combines the freedom of a spreadsheet with the controls and logic of professional accounting software. You can adapt the chart of accounts, settings and structure to each mandate, start from ready-to-use templates and customise them to the specific needs of each client.
With a single Banana Accounting subscription, you can also create and manage an unlimited number of accounting files, with no additional cost for each new client, company or mandate.
This gives you the freedom to take on very different types of work and develop specialised services that strengthen your expertise and your relationship with your clients.
Here are some of the high-value services you can add to your practice with Banana Accounting:
Accounting reviews and controls
Let your clients manage their day-to-day bookkeeping while you provide the professional oversight.
Banana's accounting checks and verification tools help you review accounts efficiently, identify problems and prepare reports or VAT statements. Clients gain greater independence while you remain their professional point of reference.
Investment portfolio accounting
Help private clients, foundations and organisations gain a clear overview of their financial investments. With Banana Investment Accounting, you can manage shares, bonds, funds and other securities directly within the accounting system, including multi-currency portfolios.
- You always know the quantity and book value of your investments.
- The program automatically calculates gains and losses on sales transactions.
"I oversee several foundations and had to manage investment portfolios with Excel. Every update required time, manual checks, and continuous verification. With Banana Accounting I integrated investment portfolio management and now work faster, with a clear overview of investments." - anonymous user

Precision financial forecasting
Banana's financial forecasting is based on double-entry accounting logic. Create detailed forecasts for liquidity, balance sheet and profit and loss, develop different scenarios and continuously compare forecasts with actual figures. Give entrepreneurs and organisations a clearer basis for decisions about investments, financing and future cash requirements.
Liquidity management and cash flow analysis
Give your clients an up-to-date view of their liquidity and cash flows, helping them understand where their money comes from, where it goes and how their financial position is evolving.
With Banana's Rules for the automatic completion of imported transactions, you can quickly update the accounts with the latest bank transactions and provide cash flow analysis based on data that is current up to the previous day — turning liquidity monitoring into a valuable ongoing advisory service.
Forensic accounting and accounting reconstruction
Special situations require the freedom to work directly with the data. Banana's transparent table-based approach makes it particularly suitable for reconstructing incomplete accounts, analysing transactions, identifying inconsistencies and cleaning up accounting data. It provides accountants and auditors with a professional alternative to complex Excel spreadsheets for unusual or investigative cases.
Trusts, foundations and special mandates
Not every client fits into a standard company structure. Adapt charts of accounts, currencies, reports and accounting structures to trusts, foundations, associations, real estate, entities in other jurisdictions, parallel accounts and other non-standard situations.
Ready-to-use templates provide a starting point and can be customised to each client's requirements with relatively little effort.
Explore all Banana Accounting features for accounting experts...
Why Banana instead of Excel?
When traditional accounting software cannot handle a particular case, Excel is often the natural fallback. It offers flexibility, but formulas must be created and maintained, accounting consistency is not guaranteed and errors can be difficult to detect.
Banana retains the freedom of working in tables while adding accounting intelligence:
- automatic accounting controls
- reliable calculations without complex formulas
- transparent and traceable data
- easy filtering, copying and editing
- professional reports
- files that can be understood and worked on by others
You remain free to work with the data without giving up the safeguards of professional accounting software.
Your clients' data remains under your control
Confidentiality is fundamental when dealing with financial information.
Banana Accounting works locally and does not require you to upload your clients' accounting data to Banana servers. You decide where files are stored: on your computer, your firm's infrastructure or the cloud storage solution of your choice. Your clients' sensitive financial information remains under your control.
Try Banana Accounting
Discover how Banana Accounting can work alongside the tools you already use and help you expand the services you offer your clients.
The advanced features designed for accounting professionals are included in the Banana Accounting Advanced plan, at CHF 179/year.
Would you like to see how they could fit into your practice? We’ll be happy to provide you, upon request, with a free trial period of the advanced features, so you can explore them with your own accounting needs and workflows.
Useful links
Auditing companies using Banana Accounting
Auditing companies that use Banana Accounting take usually less time then when using other accounting software.
- The auditor can install the Banana Accounting software on his computer.
It is free, as with the Free Version that you download and install, you can open any accounting file and you can navigate through the accounting data. - With the full version, you can save changes (colored rows, added cost centers, selections to copy data in Excel).
- Ask your client to give you their accounting file.
You can copy it on your computer and you have access to all accounting data.
If possible, you might even ask for the files of the previous years, so you can have access to historic data. - If your client uses digital documents, ask them also for these data, so you don't need them to bring you all the paper folders.
When you are on a specific transaction or in the account card, a simple click lets you open the document relative to the transaction. - Use the command "Check accounting" and the software will inform you if there are any imbalances or differences.
- You can check if the digital seal of the blockchain is the same same as the one archived.
If it is, you can be sure that the content of file has not been altered. - In the Accounts table, you see all accounts and you drill down and see all transactions.
- You can extract the transactions for a specified period of your choice.
- You can color transactions that need further inquiry.
- You can add other information (columns auditors note) or Cost centers for reconciliation.
- You can select and extract data.
Banana Accounting will do the sums for you, without worries about possible errors. You do not have to do reconciliations with Excel. - You can copy the data from Banana and paste in Excel.
- When you select an account or a group, you can see the chart with the evolution of the balance at the bottom of the window.
You immediately can have an overview of the evolution. If the Cash account gets negative, you will notice immediately.
Using Banana Accounting for auditing purposes
Using Banana for auditing companies that use other accounting software
When you are auditing companies that use other software, you usually do not have full access to the accounting data on their computers. The auditors usually receive pdf files and in some cases a limited access to the accounting solution.
Excel is a very important tool for auditors. They use it to do reconciliations and create specific reports.
This requires a lot of attention from the auditors. Errors in formulas can be difficult to discover.
Where there is quite a lot of data to reconcile, auditors can create a new accounting file in Banana and import the data from the original accounting file.
With Excel you can read CSV files, adjust and copy and paste into Banana Accounting.
You will immediately know if there are any imbalances and you can have access to all account cards and print the Profit & Loss statement and Balance sheet. You have full access to the data and in most cases, you don't need to setup reconciliations in Excel.
Importing data in Banana Accounting
See the documentation available:
Finanzmanagementbericht für Bauprojekte [BETA]
Finanzmanagementbericht für Bauprojekte [BETA]Laden Sie zunächst die Vorlage Finanzmanagement von Bauprojekten herunter, richten Sie Ihre Buchhaltung ein und nutzen Sie die Erweiterung, um die Projektkosten zu kontrollieren und zu vergleichen. Erstellen Sie Berichte, indem Sie im Dialogfenster gezielt die anzuzeigenden Spalten auswählen – so sehen Sie nur die Daten, die für Sie wirklich relevant sind.
▶ Video: Verwaltung von Bauprojekten
Wie es funktioniert
Verwalten Sie alle finanziellen Aspekte Ihres Bauprojekts auf einfache Weise. Alles ist bereits vorbereitet – Sie müssen die Vorlage nur an Ihr spezifisches Projekt anpassen und die relevanten Daten eingeben.
- Für jedes Bauprojekt erstellen Sie eine eigene Buchungsdatei.
- Sie beginnen mit einer vordefinierten Vorlage, in der die wichtigsten Konten und Kategorien bereits eingerichtet sind.
- Sie können auch die Tutorial-Vorlage mit Beispieldaten öffnen, um den Einstieg zu erleichtern.
- Sie können beliebig viele Projekte gleichzeitig verwalten.
- Kostenvoranschlag – die Planungsphase
In der Planungsphase ist es entscheidend, einen Überblick über die voraussichtlichen Kosten zu haben.- In der Tabelle 'Kategorien' erfassen Sie das grobe Budget – gegliedert nach Ausgabentypen. Sie können Kostenpositionen bearbeiten, hinzufügen oder gruppieren, ganz nach Ihren Bedürfnissen.
- Sie erhalten einen klaren Überblick über die Gesamtkosten des Projekts.
- Optional lassen sich zusätzliche Spalten einfügen, um Varianten oder Alternativen zu berücksichtigen.
- Zuweisungen – die Vergabephase
Nach Abschluss der Projektplanung folgt die Ausschreibung und die Vergabe der Aufträge an die ausführenden Unternehmen.- In der Tabelle 'Konten' erfassen Sie für jedes beteiligte Unternehmen eine Zeile mit dessen Kostenstelle.
- In der Tabelle 'Budget' weisen Sie den jeweiligen Ausgabenkategorien die vereinbarten Beträge und das verantwortliche Unternehmen zu.
- Ein Bericht zeigt Ihnen auf einen Blick: Budgetierte Werte, Zuweisungen an Unternehmen und Abweichungen vom ursprünglichen Budget.
So erkennen Sie frühzeitig mögliche Budgetüberschreitungen.
- Tatsächliche Ausgaben – die Zahlungsphase
Erhalten Sie von Unternehmen Anzahlungen oder Rechnungen:- erfassen Sie die entsprechenden Zahlungen in der Tabelle 'Buchungen'.
- Anschliessend erhalten Sie einen detaillierten Bericht über die tatsächlich gezahlten Beträge, übersichtlich aufgeschlüsselt nach Ausgabenkategorie und Unternehmen.
Abweichungen von den zugewiesenen oder budgetierten Werten sind sofort sichtbar – so erkennen Sie frühzeitig Kostenüberschreitungen bei bestimmten Leistungen oder Anbietern und können gezielt gegensteuern.
Die wichtigsten Vorteile
- Excel-ähnliche Bedienung: Vertraute Tabellenstruktur für einen schnellen Einstieg.
- Einfache Nutzung: Basierend auf der klassischen Einnahmen- und Ausgabenrechnung, die jeder kennt.
- Jederzeit aktuelle Finanzübersicht: Sie behalten stets den Überblick über die finanzielle Lage Ihres Bauprojekts.
- Alle Phasen des Projekts werden vollständig unterstützt – von der Budgetierung über die Vergabe bis zu den Zahlungen.
- Verwaltung von Ausgaben und Einnahmen: Inklusive Kapitalzuführungen, Beiträgen und anderen Einnahmequellen.
- Frühzeitige Erkennung von Abweichungen: Sie sehen in jeder Phase auf einen Blick, ob geplante Budgets überschritten werden.
- Detaillierte und aussagekräftige Berichte – gruppiert nach:
- Ausgaben- oder Einnahmenkategorie
- Unternehmen
- Grobes Budget
- Zugewiesene Beträge
- Tatsächlich gezahlte Beträge (Vorauszahlungen und Rechnungen).
- Abweichungen werden farblich gekennzeichnet, wenn Mehrkosten oder Einsparungen vorliegen.
- Dokumentensammlung.
Wenn Sie eine Zuweisung oder Zahlung erfassen, können Sie den Buchungseintrag direkt mit dem zugehörigen digitalen Dokument (z.B. Rechnung, Vertrag) verknüpfen. Schnell und einfach überprüfbar – Anhänge lassen sich per Mausklick öffnen. - Bankkontobewegungen im Blick. Übersicht über alle Zahlungsvorgänge Ihrer Projektkonten – inklusive Kontoauszug.
- Bereits erfasste Informationen können ohne zusätzlichen Aufwand für spätere Auswertungen genutzt werden.
Voraussetzungen für die Nutzung der Erweiterung
Um die Erweiterung nutzen zu können, benötigen Sie Banana Buchhaltung Plus mit dem Advanced Plan. Laden Sie die Software herunter, installieren Sie sie auf Ihrem Gerät und stellen Sie sicher, dass der erforderliche Plan aktiviert ist.
File setup of project accounting
Create new file
To create a new File, go to the File menu and click the New command.
This command opens the window for creating a new file. From this window you can search for the template you are interested in, in this case choose the Construction Project Accounting template.
Basic properties
The main parameters of the accounting file are defined in the file and accounting properties, such as the header, the opening and closing date of the project. You can change the properties from the File menu → File and accounting properties.
This data is included in the report and can be printed.
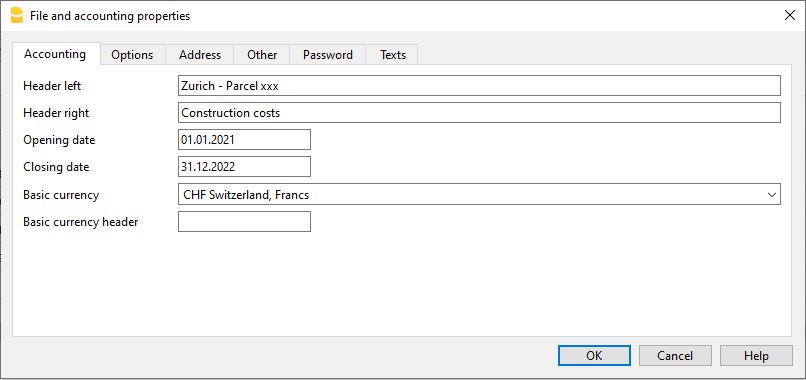
Create a project folder
You can manage your documents and receipts in digital format by linking them to transactions so you have everything well organized and can view them with one click.
It is therefore useful that you create a folder to save the accounting file you have created.
Then create subfolders for documents of deliberations, receipts, and others. See how to organize digital documents.
Categories and Estimate Budget
Categories Table
The Categories table is where you set the elements of the work to be performed. Cost categories can be changed or personalized in any moment, if you have particular requirements you can decide to change the structure of grouping of the elements, or use the one proposed by the template.
Estimate Budget Column
In this column you define the amount of the estimate for each Cost category. You can change the amount whenever you want.
Variants of Budget
You can add additional columns to enter the amounts relating to any variants of the estimate. Use the Data menu → Columns setup command, and add a column of Amount type to make sure that the values are totalized.
Additional columns
In Banana Accounting terminology, the Budget column is the one that contains the values calculated on the basis of the movements contained in the Budget table.
In project management, the Budget table has been renamed to "Assignments " and is used to insert assignments . This can create a moment of confusion.
Assignments column
Contains the values shown in the Assignments table.
Expenses column
It contains the values calculated on the basis of the movements in the Transactions table.
Expenses-Assignments column
Calculates the difference between the values obtained with the movements in the Transactions table and the amounts in the Assignments .
Use your own structure
You can freely create a structure of Categories as you wish, also taking up standard structures.
- Create categories.
You can use numbers or descriptors. - Create the groupings.
You can use as many levels as you like.
Additional groupings
For tax authorities or other needs you may find it useful to group the Categories entries by other criteria. You can use the Gr1 column for this purpose or add additional columns as needed.
Assignments
Movements relating to the assignment of work are entered in the Assignments table.
When entering a assignment, the Company account and the category to which it refers must also be entered.
Once you have entered the data, you can use the report to see the overall situation and deviations from the estimate budget. You can also see the assignment amounts in the Categories table, they are listed in the 'Assignments ' column so that you can have a quick comparison with the other values.
Create assignments movements
You can create Assignments transactions in an easy and fast way. From the Extensions menu choose Construction Project Statement→Create transactions for assignments . The extension takes the data from the Categories table and for each cost category you have defined creates a transaction with the following fields:
- Date: Current Date.
- Description: Description present in the column of the same name in the Categories table.
- Expenses: Amount of the estimate budget. At the time you define the exact amount of the assignment, you can change the amount.
- Category: Name of the category.
- Company: Initially, each assignment is assigned a default "Unassigned" company, as soon as the assignment is assigned to a company, enter the correct name, referring to the companies you have defined in your chart of accounts.
When you start the extension, a dialog is shown with a summary of the changes that will be made, by pressing OK, the changes will be confirmed and executed. On the contrary, if you press Cancel the operation will be cancelled. You can execute this command every time when you add new categories to which you assign an estimate budget, starting the extension again will create the movements of the assignment only for the new elements.
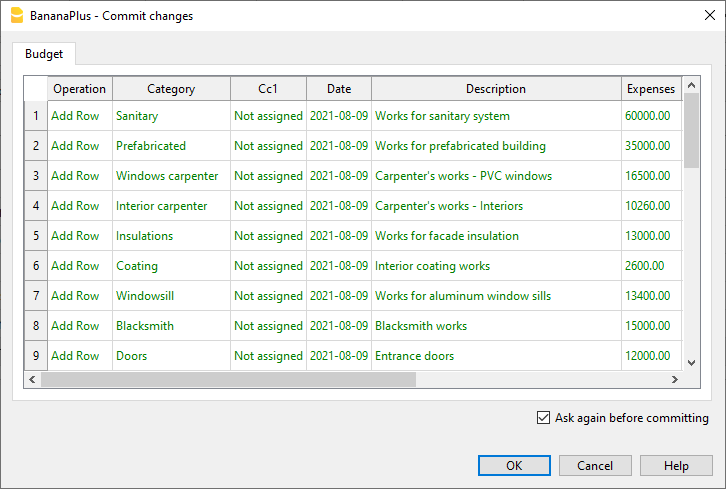
Alternatively, you can always choose to record the assignment manually.
Companies and Accounts
Accounts Table
The program allows you to manage the origin of the funds that are used to make payments. It indicates the accounts with which you are going to pay the artisans and other accounts of origin of the funds (own contributions).
Typically in a construction project there will be the construction bank account.
There are also preset accounts for:
- Disputed Invoices.
- Record the part of the invoice amount, which is not considered due.
- Invoices awaiting payment. Invoices received that have not yet been paid.
- Work in Progress. To record work that has been done, but for which you have not yet received the invoice.
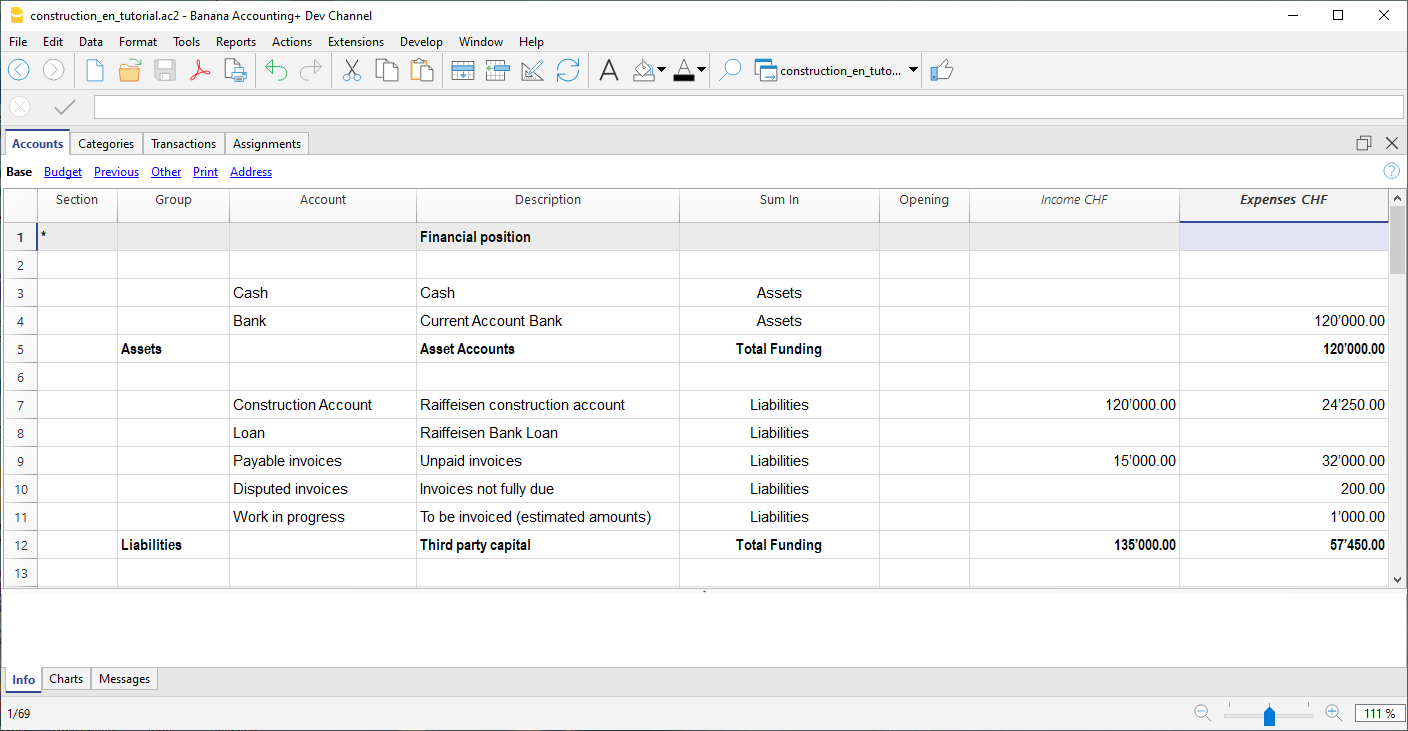
However, you can also create other accounts used to make payments or those of mortgages, used for the consolidation of the project.
Company accounts
For each company to which a job is assigned, you must first create an account of type cost center 1 (preceded by ".").
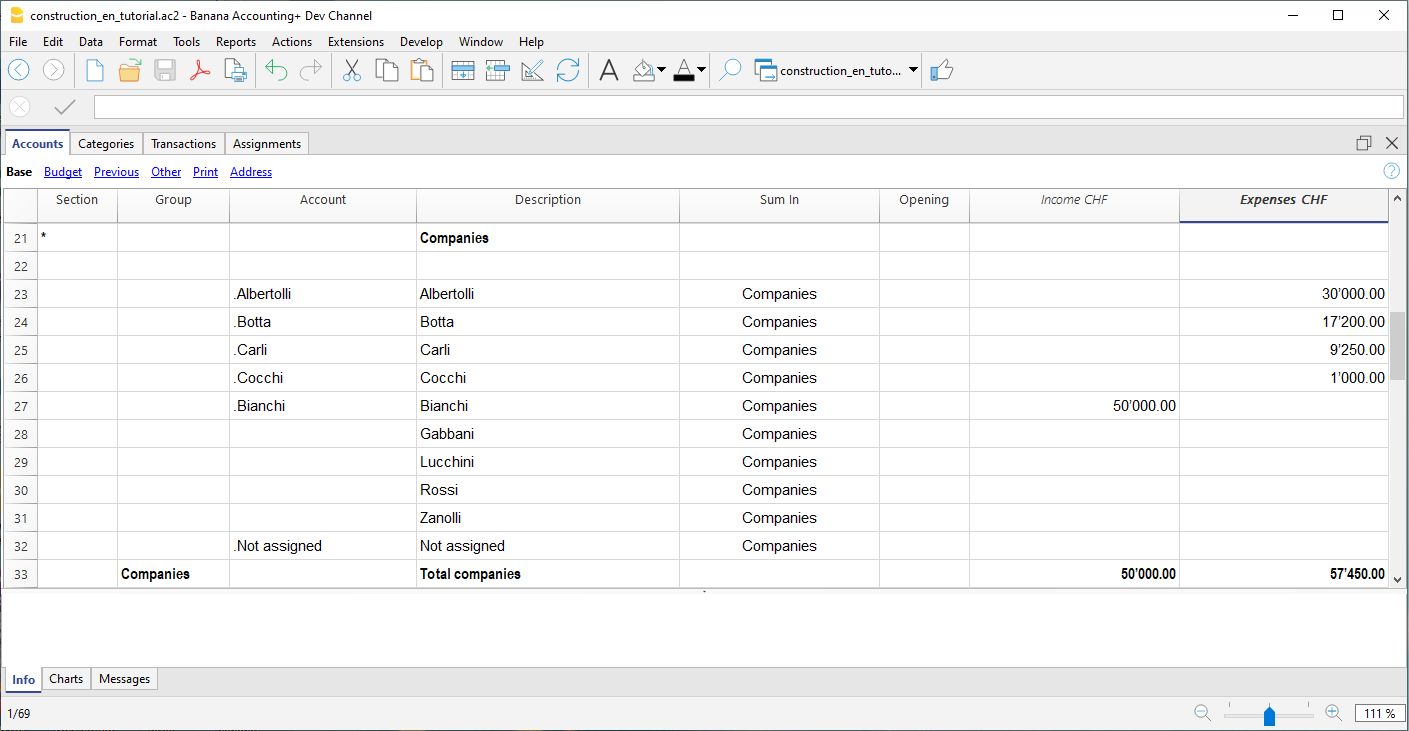
With the address view you can also enter the personal data, contacts and other information relating to the company.
Segments
Payments and Transactions table
Transactions table
In the transactions table, record the payments that are made for the project. For each transaction, in addition to the account, it also indicates the company and the category to which it refers. In the Expenses column indicates the amount of the payment, this value is also included in the Categories table.
Advance payment and invoices
The advance payment or invoice payment is recorded, indicating the date, the amount, the account used for the payment, expense category and the company's account.
You can also link the transaction row to the digital slip, so that you can view it with one click.
Receipt of invoice
The accounting management is carried out on the amounts actually been paid. To have an updated situation, it is possible to insert also the receipt of the invoice. In the account column you will have to insert the invoice account to be paid.
When you subsequently make the payment, the invoice receipt transaction must be overwritten with the payment information. If the payment is partial, you will need to create another transaction and split the amounts manually.
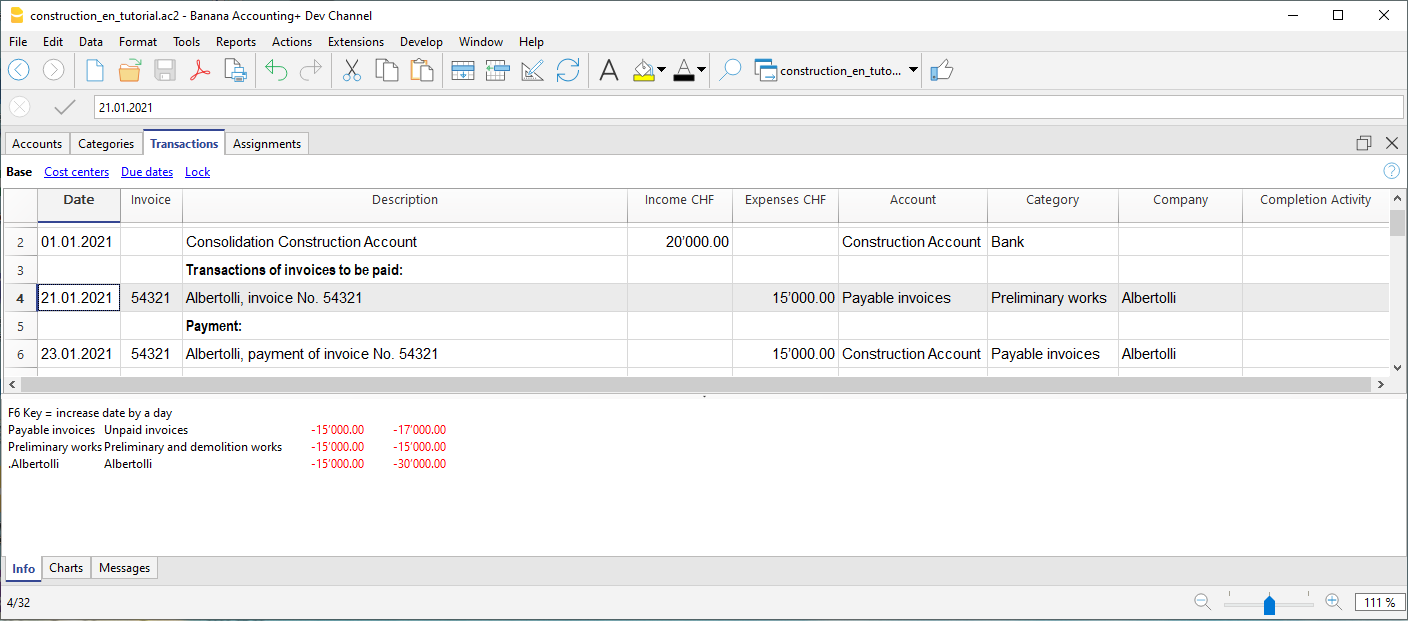
Disputed works
Records as if it were a payment, but using the account, disputed invoices.
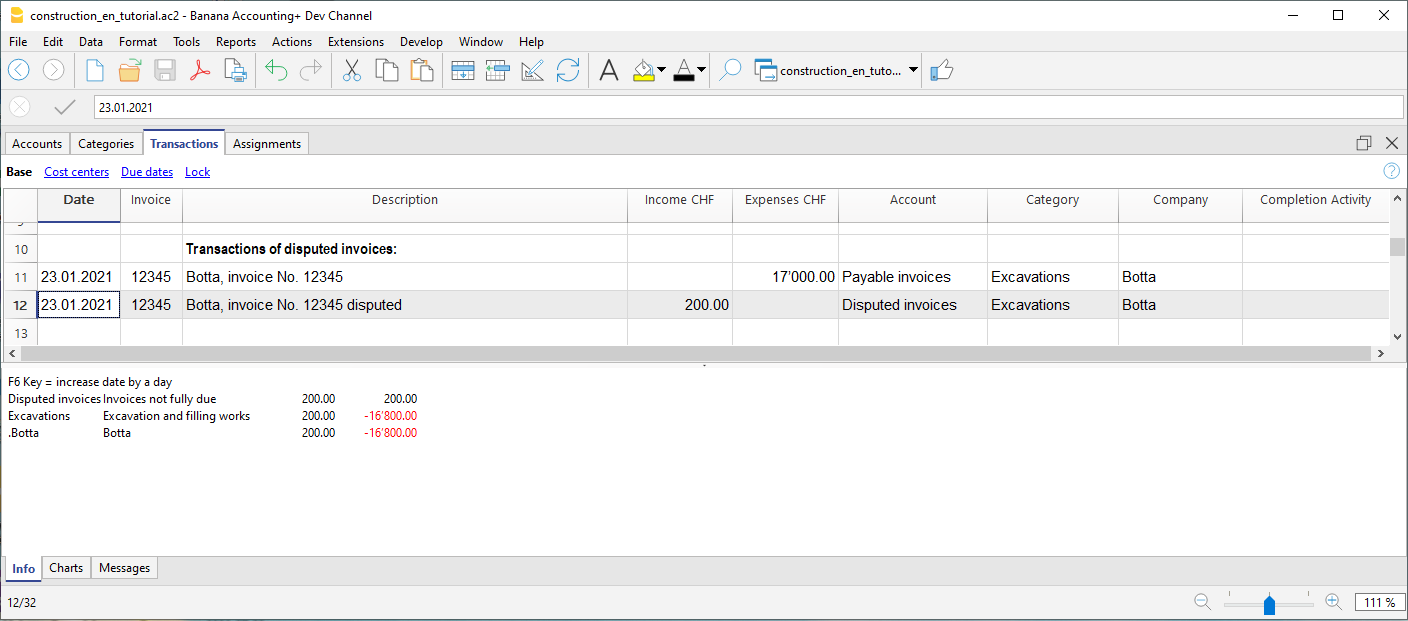
Work in progress
You can enter registrations, similar to payments, but indicating the work in progress account. The amount will be estimated by the construction management. In this way, you can have a progression of the works. You can also color these rows with a particular color, so that you can easily distinguish them from the others.
When the invoices arrive, you will need to replace the invoice.
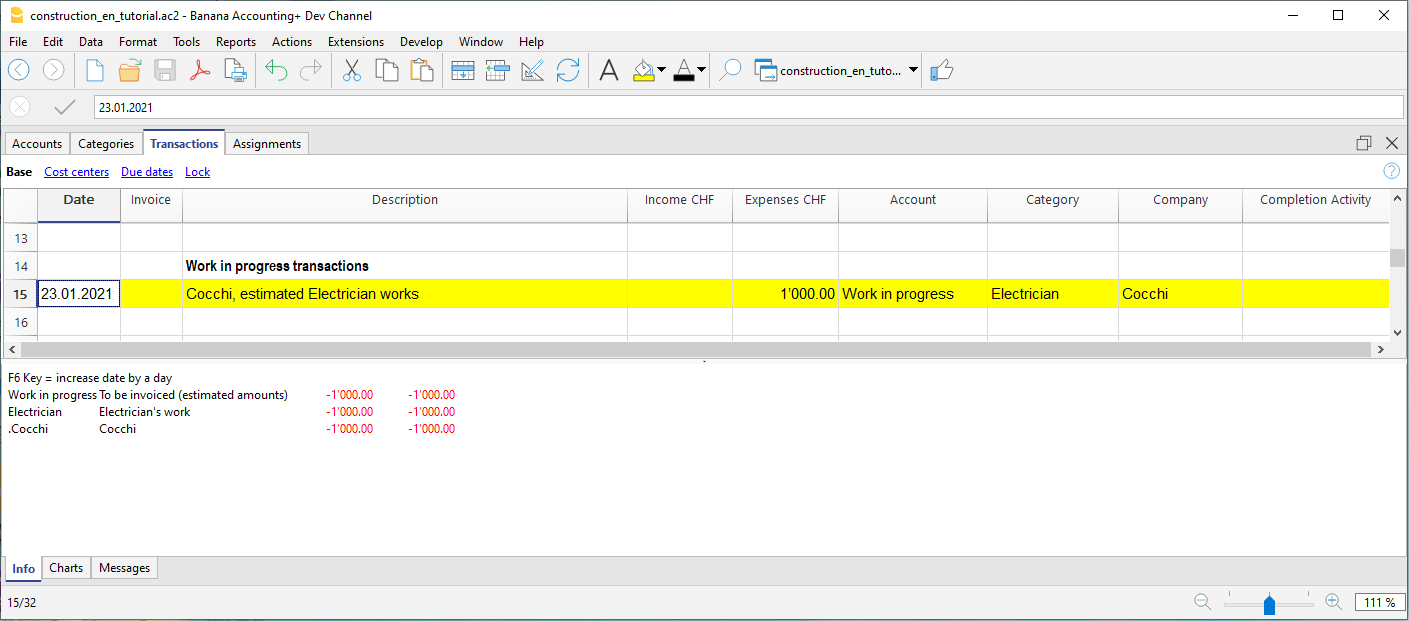
Income and financial transactions
In the transactions table you can also enter income such as subsidies or other financial transactions, capital payment or construction account consolidation.
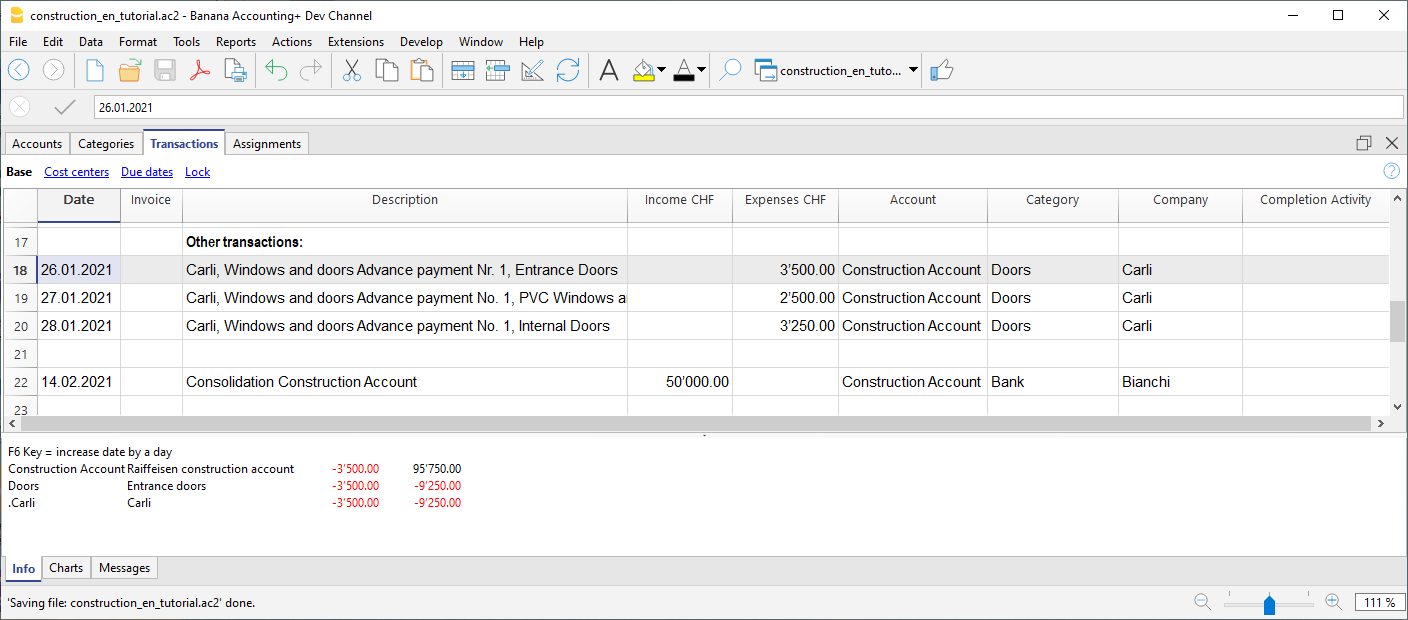
Percentage of work progress
Use the transactions table also to record manually the percentage of work progress. Define if the transaction is related to a company or a category, and the percentage. In the report you can evaluate the progress with the costs incurred.
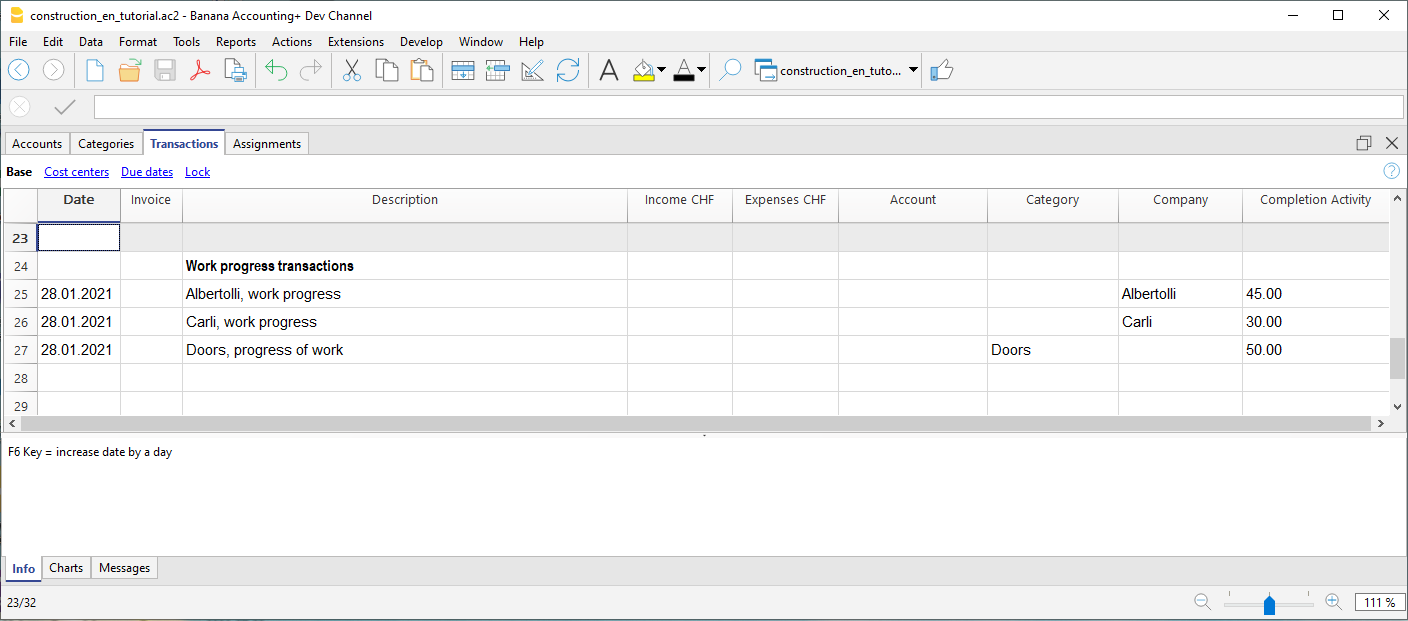
Reports by Categories and Companies
Heading
The extension takes the following information that you have defined in the file properties:
- Header left: Indicates for example the area, or the city with the mapping where the work will be performed.
- Header right: Indicates the project title.
- Opening/Closing Date: Indicates when the project started or when it will be concluded.
Dialog
When the extension is launched, a dialog window appears in which you can define the columns you want to display. For example, you can initially decide to show in the report only the columns of the estimate budget and the assignments , and then add the columns of the expenses later.
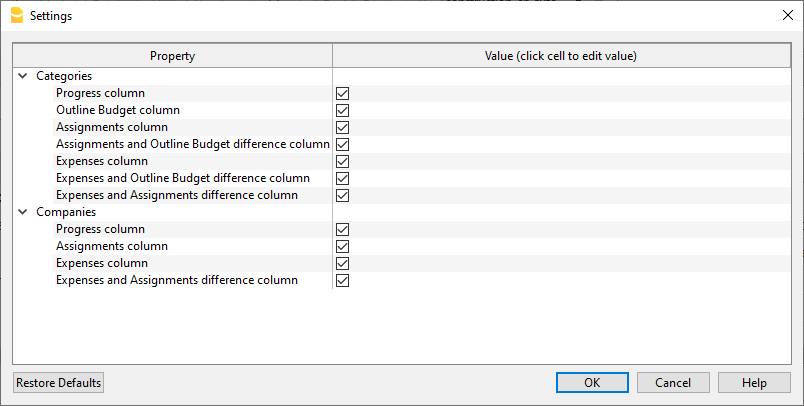
Report by Category
Inside the first table, the report shows the expenses divided by cost category, all the categories you have defined in the Categories table are included.
The columns you can view are as follows:
- Category: Name of the category, taken directly from the Categories table.
- Progress %: Resumes the last recorded work completion percentage, attributed to a specific category.
- Estimate Budget: This is the amount defined in the Estimate Budget column in the categories table.
- Assignments : Assignments are defined in the "Budget" table.
- Diff. Assign./Budg.: It is the difference between the assigned amounts and the budget, if the assigned amounts are less than the budget, it means that the costs will be lower than initially estimated budget, in this case a green icon is shown, if the assign is greater than the budget instead, then the icon appears red, if the amount is equal it remains yellow.
- Expenses: They are the actual expenses recorded in the transactions table.
- Diff. Exp./Budg.: This is the difference between the actual expenses and the estimate budget; if the estimate budget is greater than the expenses, then a green icon is shown because the actual expenses were less than the budgeted amount for that work. If the amounts are equal, then the icon remains yellow.
- Diff. Exp./Assign.: This is the difference between the actual expenses and the assigned amounts, if the assignments are greater than the expenses, then a green icon is shown as the actual expenses were less than the assigned amount for that work. If the amounts are equal, then the icon remains yellow.
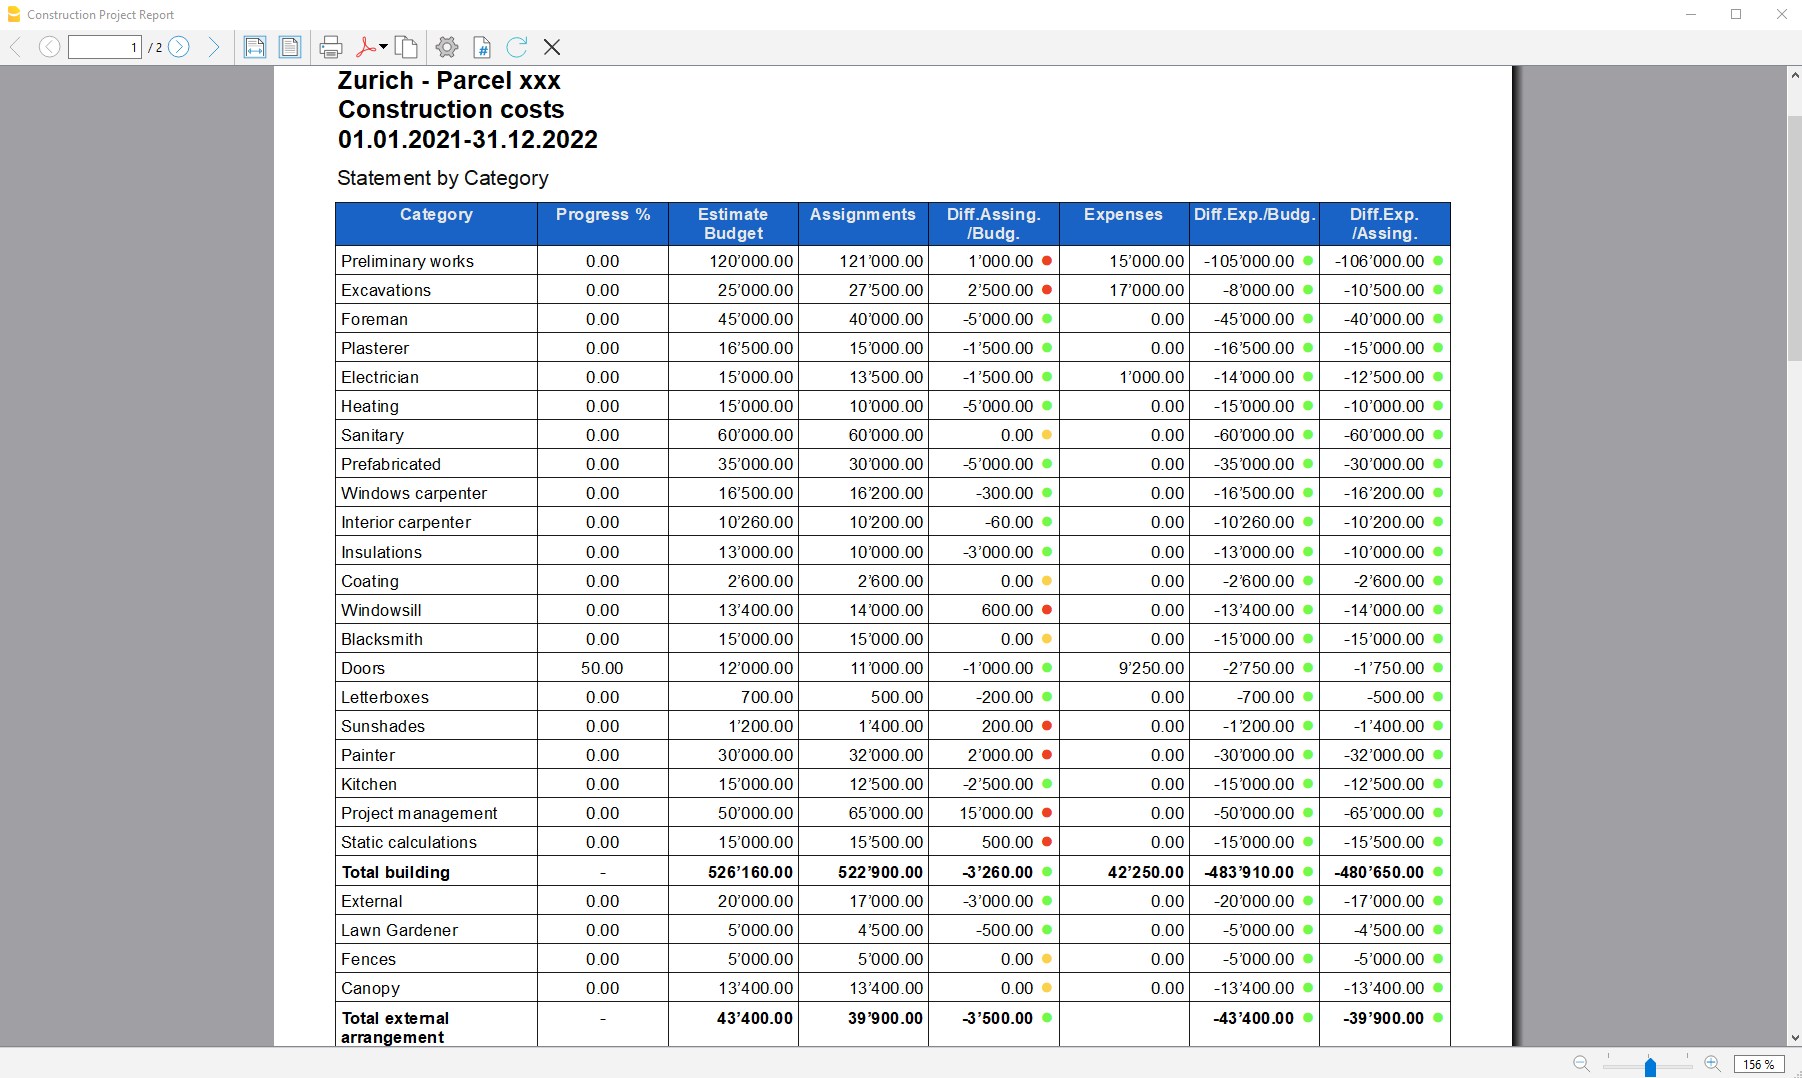
Report by Company
The second table shows the expenses divided by company, the companies are defined in the Accounts table.
The columns you can view are as follows:
- Company: Company name, taken from the account table.
- Progress %: Resumes the last recorded work completion percentage, attributed to a specific company.
- Assignments : The assignments are defined in the "Budget" table, make sure you have assigned a company to the assignments , otherwise no amount will be displayed (see template).
- Expenses: These are the actual expenses recorded in the transactions table.
- Diff. Exp./Del.: This is the difference between the actual expenses and the assigned amounts for each company, if the assignments are greater than the expenses, then a green icon is shown as the actual expenses were less than the assigned amount for that work. If the amounts are equal, then the icon remains yellow.
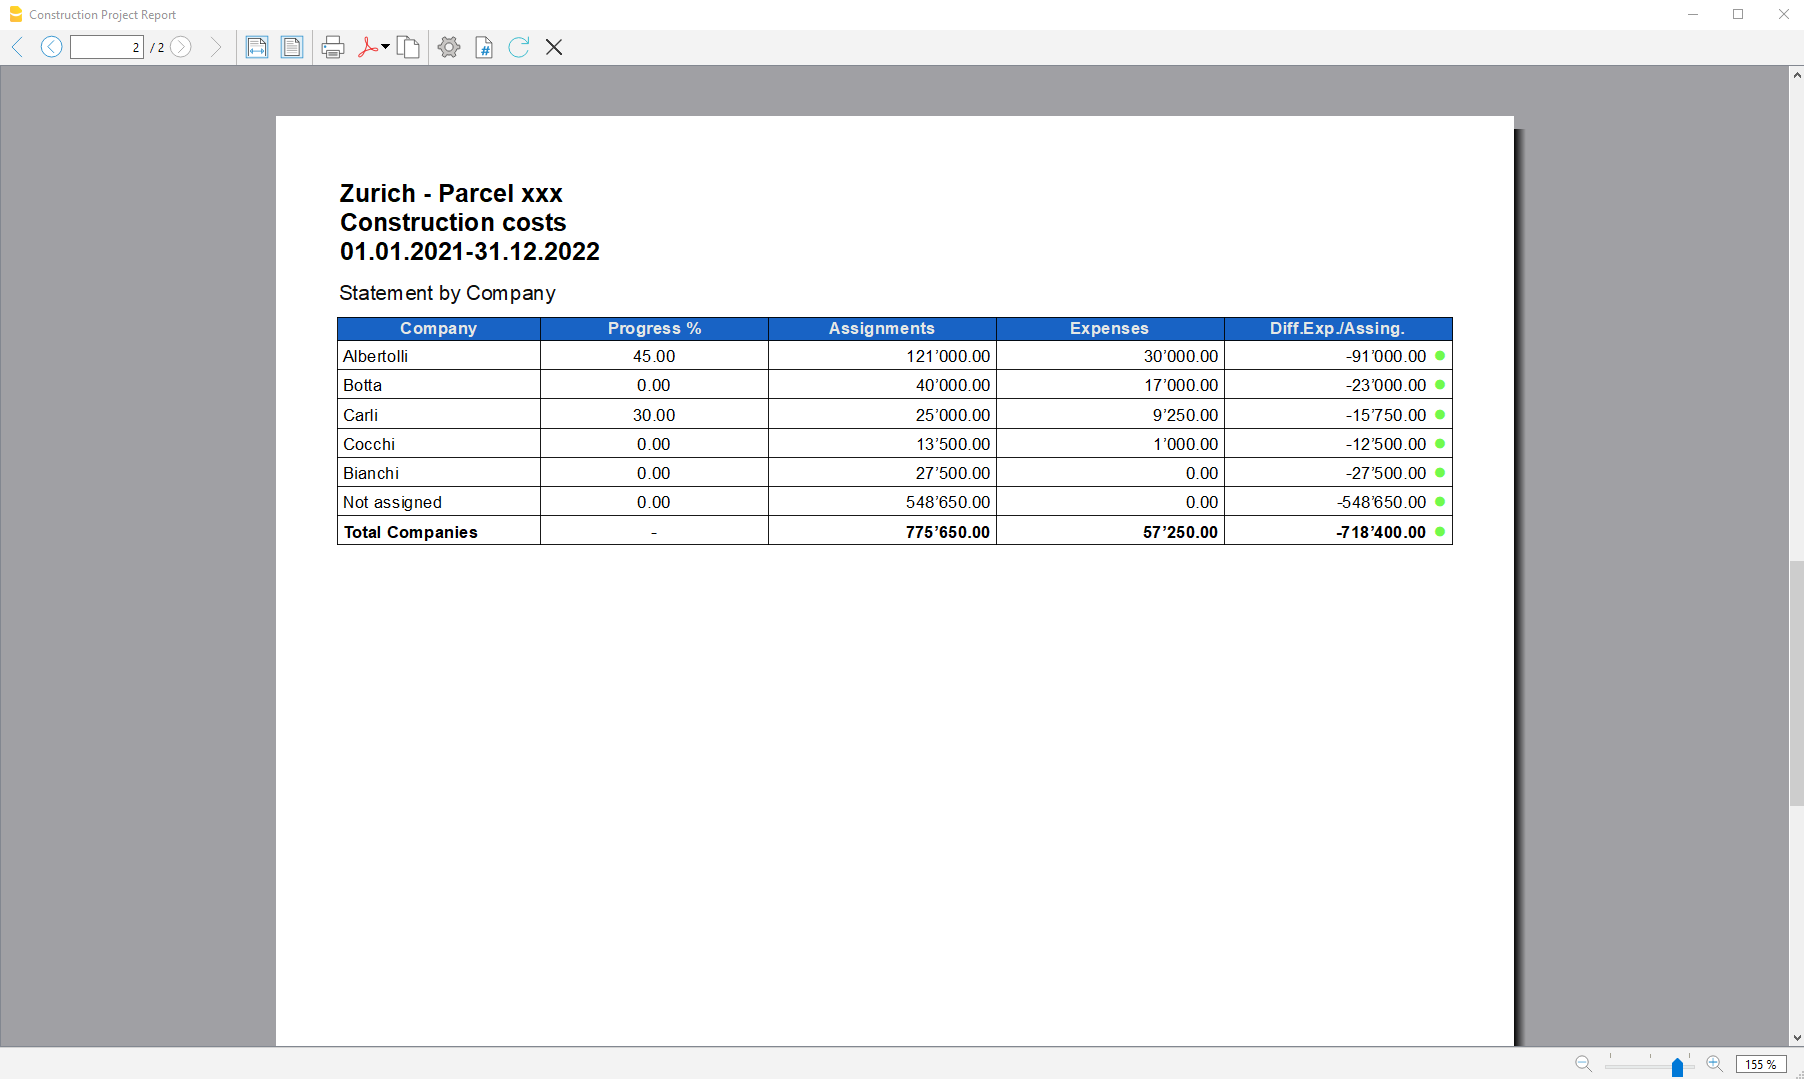
Accounting Extensions
Universelle Import-Erweiterungen
Mit Banana Buchhaltung können Sie Daten aus verschiedenen Dateiformaten importieren.
SEPA/ISO 20022 – Import von Kontoauszügen
Das camt/ISO 20022-Format ist der aktuelle Standard für elektronische Kontoauszüge und wird von den meisten Schweizer Banken verwendet.
- Erweiterung 'Bankauszug SEPA/ISO 20022 (Schweiz)' - zum Import von Daten aus elektronischen Kontoauszügen im camt-Format.
Import von PayPal-Transaktionen
Mit dieser Erweiterung können Sie Ihre PayPal-Transaktionen direkt in Banana Buchhaltung importieren – schnell und effizient.
Import von Revolut-Buchungen
Diese Erweiterung ermöglicht den Import von Transaktionen aus der Revolut-Plattform – sowohl für Privat- als auch Geschäftskonten (Private & Business) – direkt in Banana Buchhaltung.
- Erweiterung zum Import von Revolut-Transaktionen (Seite in Englisch)
Bankauszug SEPA/ISO 20022-Import
Bankauszug SEPA/ISO 20022-ImportDatenimport in eine bestehende Buchhaltung
Der Datenimport ist eine in die Banana Buchhaltungssoftware integrierte Funktion. Bitte wie für Befehl In Buchhaltung importieren (Menü Aktionen) beschrieben vorgehen.
Mit diesem Befehl können Sie auch komprimierte Dateien (z.B. ZIP) öffnen. In diesem Fall fordert das Programm Sie auf, die konkrete Datei innerhalb des Archivs auszuwählen, aus der die Daten importiert werden sollen.
Anzeige des Inhalts vor dem Import
Um den Inhalt einer Datei vor dem Import einzusehen, verwenden Sie die Funktion ISO 20022 anzeigen.
Der ISO 20022-Standard für Kontoauszüge.
Mit der Einführung des SEPA-Standards (Single Euro Payment Area) wurde der ISO 20022-Standard am 1. Januar 2014 in Europa verpflichtend. Er ersetzt das frühere SWIFT MT940-Format für elektronische Kontoauszüge.
Die Finanzbuchhaltungssoftware Banana Buchhaltung unterstützt die ISO 20022-Formate camt.052, camt.053 (einschliesslich der Versionen 4 und 8) sowie camt.054.
Technische Anmerkungen zur ISO 20022-Konversion
Der ISO 20022-Standard kodiert die Buchhaltungsdaten von Kontoauszügen auf präzise und strukturierte Weise. Gleichzeitig bietet er eine gewisse Flexibilität, zusätzliche Informationen zu Konten und Transaktionen einzubinden – was je nach Bank und System unterschiedlich umgesetzt werden kann.
Beim Einlesen der ISO 20022-Datei passt sich Banana Buchhaltung flexibel an die Struktur und Formatierung der jeweiligen Datei an. Die Software erkennt automatisch die relevanten Felder und konvertiert sie in Buchungsbewegungen.
- Anfangssaldo – Erkennung von Feldern mit gleichbedeutender Kodierung als Anfangssaldo.
- Schlusssaldo – Ebenso werden Felder mit entsprechender Kodierung als Schlusssaldo-Information interpretiert.
- Alle enthaltenen Bewegungen werden ausgelesen und in Buchungen umgewandelt. Dabei werden folgende Informationen berücksichtigt:
- Transaktionen (Datum)
- Valutadatum
- Betrag der Bewegung (positiv oder negativ)
- Beschreibung – Derzeit fasst Banana Buchhaltung mehrere Beschreibungselemente automatisch zu einem einzigen Textfeld zusammen.
In Zukunft soll es möglich sein, diese Informationen gezielter zu extrahieren und bestimmten Spalten individuell zuzuordnen.
SumUp - Bewegungen im .csv-Format importieren (Banana+ Advanced)
SumUp - Bewegungen im .csv-Format importieren (Banana+ Advanced)Mit dieser Importerweiterung können Sie Transaktionen von der Plattform SumUp im .csv-Format direkt in Banana Buchhaltung importieren.
Weitere Informationen finden Sie in der englischsprachigen Dokumentation: SumUp - Import movements .csv
Chase - Import von Bewegungen im .csv-Format (Banana+ Advanced)
Chase - Import von Bewegungen im .csv-Format (Banana+ Advanced)Mit dieser Importerweiterung können Sie Transaktionen von der Plattform Chase im .csv-Format direkt in Banana Buchhaltung importieren.
Weitere Informationen finden Sie in der englischsprachigen Dokumentation: Chase - Import movements .csv
PayPal Import *.csv (Banana+) [BETA]
PayPal Import *.csv (Banana+) [BETA]Mit dieser Erweiterung können Sie in Banana Buchhaltung Ihre PayPal-Transaktionen importieren. Sie funktioniert nur mit Banana Buchhaltung Plus.
Separate Buchhaltung für PayPal-Transaktionen
PayPal-Transaktionen bestehen in der Regel aus kleinen Beträgen und haben viele Besonderheiten (Rückerstattung, Gebühren usw.).
Es kann teuer und zeitaufwendig sein, alle diese Buchungen innerhalb der Hauptbuchhaltung des Unternehmens zu erledigen.
Wir haben verschiedene Vorlagen vorbereitet, die Sie sofort verwenden können:
In vielen Fällen ist es angemessener, die PayPal-Transaktionen in einer separaten Buchhaltungsdatei zu verwalten und einmal im Monat die zusammenfassenden Daten (Bewegungen für den Monat) in die Hauptbuchhaltung zu übernehmen.
Diese Lösung ermöglicht es auch, dass eine Drittperson die Verantwortung für die PayPal-Buchhaltung übernimmt.
Wenn Sie Banana Buchhaltung für eine PayPal Buchhaltungs-Lösung verwenden, können Sie:
- Eine Buchhaltungsdatei für ein bestimmtes PayPal-Konto erstellen
- Über einen Kontenplan verfügen mit
- Ein anderes Konto für jede verwendete Währung
- Verschiedenen Konten für Einnahmen und Ausgaben
- Importieren Sie die PayPal-Transaktionen und lassen Sie alle Konten, Ausgaben, Einnahmen und PayPal-Gebühren automatisch zuweisen sowie die Währung in die Basiswährung umrechnen.
- Verbuchen Sie die Transaktionen auf den entsprechenden Konten für
- Banküberweisungen
- Einnahmen mit unterschiedlichen Umsatzsteuercodes
- Verschiedene Spesenarten
- Rückerstattungen und Rückbuchungen
- Hinzufügen weiterer Informationen für spezielle Berichte (Kostenstellen, Segmente, Kunden usw.)
- Importieren Sie die Daten regelmässig (Woche, Monat, Quartal) in die Hauptbuchhaltung, entweder durch
- Ausdrucken einer Zusammenfassung und manuelles Verbuchen
- Oder Export der Daten für den Zeitraum sowie Import in das Hauptsystem.
- Drucken Sie jederzeit das Journal und die erforderlichen Berichte zur Prüfung oder Kontrolle aus.
- Wenn Sie viele Transaktionen haben, können Sie evtl. den Importfilter (JavaScript) so anpassen, dass bestimmte Transaktionen auf bestimmten Kontennummern verbucht werden.
Innerhalb der Banana PayPal-Buchhaltung können Sie ganz einfach die gesamte Historie aufbewahren und haben sofortigen Zugriff auf alle Daten, die für einen guten Kundenservice erforderlich sind.
Aktivieren Sie die Import-PayPal-Transaktion
Zuerst müssen Sie die Importfilter in Banana Buchhaltung Plus aktualisieren. Siehe auch Erweiterungen verwalten.
- Starten Sie hierzu Banana Buchhaltung Plus
- Öffnen Sie Ihre Buchhaltungsdatei
- Wählen Sie aus Menü Aktionen > In Buchhaltung importieren > im Pulldownmenü Importieren: Buchungen auswählen
- Klicken Sie auf die Schaltfläche Erweiterungen verwalten
- Klicken Sie auf die Schaltfläche Erweiterungen aktualisieren
- Aktivieren Sie die Erweiterung "PayPal Importieren (*.csv)" und deaktivieren Sie die anderen Filter, die Sie nicht benötigen.
- Schliessen Sie das Dialogfenster.
Download PayPal-Transaktionen
PayPal - Anpassen von Feldern zum Herunterladen
Beachten Sie, dass die Standard-Download-Datei von PayPal nicht alle Felder enthält, die für den Import in Banana erforderlich sind.
Sie müssen die Einstellungen in PayPal anpassen, damit Sie einen korrekten Download erhalten.
Geschäftskunden
- Öffnen Sie PayPal und melden Sie sich mit Ihren Zugangsdaten an.
- Gehen Sie zu Aktivitäten.
- Klicken Sie auf Alle Berichte
- Klicken Sie unter Berichte auf Aktivität herunterladen.
- Wählen Sie den Transaktionstyp, den Datumsbereich und das CSV-Dateiformat aus.
- Klicken Sie auf Berichtsfelder anpassen und vergewissern Sie sich, dass alle Felder markiert sind oder markieren Sie alle verfügbaren Felder.
- Klicken Sie auf Bericht erstellen.
- Wenn der Bericht fertig ist, klicken Sie auf Herunterladen.
Privatkunden
- Öffnen Sie PayPal und melden Sie sich mit Ihren Zugangsdaten an.
- Gehen Sie zu Aktivitäten.
- Klicken Sie auf das Symbol der Download-Schaltfläche.
- Klicken Sie auf Benutzerdefiniert.
- Klicken Sie unter Berichte auf Aktivität herunterladen.
- Wählen Sie den Transaktionstyp, den Datumsbereich und das CSV-Dateiformat aus.
- Klicken Sie auf Berichtsfelder anpassen und vergewissern Sie sich, dass alle Felder markiert sind oder markieren Sie alle verfügbaren Felder.
- Klicken Sie auf Bericht erstellen.
- Wenn der Bericht fertig ist, klicken Sie auf Herunterladen.
PayPal-Sprachcodierungseinstellungen (nur für Geschäftskunden )
Wenn Sie eine lokale Codierung verwenden, stellen Sie sicher, dass die Codierung Ihre lokale Computercodierung widerspiegelt.
Der Import in Banana Buchhaltung Plus funktioniert besser, wenn Sie Ihre Dateicodierung in UTF-8 festlegen.
So ändern Sie Ihre Sprachcodierungseinstellungen in PayPal:
- Melden Sie sich in PayPal an.
- Mein Konto → Kontoeinstellungen → Webseite-Zahlungslösungen.
- PayPal-Schaltfläche Sprachkodierung (klicken Sie auf Bearbeiten).
- Unter Weitere Optionen können Sie die UTF-8-Kodierung in der Listbox einstellen.
Diese Einstellung kann den folgenden Fehler beheben: "Dateiheader kann nicht übersetzt werden: Konvertieren Sie die Paypal-Datei in die Codepage Latin1 oder verwenden Sie eine neue Version von Banana Buchhaltung"
Importieren PayPal-Transaktionen
Siehe auch Bewegungen importieren
- Öffnen Sie Ihre Buchhaltungsdatei.
- Wählen Sie aus Menü Aktionen > In Buchhaltung importieren > im Pulldownmenü Importieren: Buchungen auswählen
- Wählen Sie PayPal Import (*.csv) aus
- Geben Sie den Dateinamen und den Pfad des PayPal-Downloads (oder Blättern) ein.
- Klicken Sie auf OK.
- Geben Sie in den Einstellungsdialog ein:
- Wählen Sie das Datumsformat für das PayPal-Datumsformat.
Wenn Sie die Fehlermeldung "Datum Format nicht gültig" erhalten, öffnen Sie die Datei, die Sie von PayPal heruntergeladen haben, mit dem Notepad und überprüfen Sie, wie die Daten geschrieben werden, und wählen Sie dann das entsprechende Format aus. - Geben Sie die Kontonummern für das PayPal-Konto (PayPal Account) ein.
- Geben Sie die Kontonummern ein, in der Einnahmen registriert werden sollen (PayPal In).
- Geben Sie die Kontonummern ein, in der Ausgaben registriert werden sollen (PayPal Out).
- Geben Sie die Kontonummern ein, in der PayPal-Gebühren registriert werden sollen (PayPal Fee).
- Wenn es sich um eine Buchhaltung mit mehreren Währungen handelt, werden auch die Wechselkurse festgelegt.
- Wählen Sie das Datumsformat für das PayPal-Datumsformat.

Nachdem Sie die Transaktionen importiert haben, können Sie den Vorgang rückgängig machen oder die importierten Daten ändern.
Dies ist der Fall, wenn Sie möchten, dass einige Einnahmen oder Ausgaben auf einem anderen Konto registriert werden.
Passen Sie Ihre Buchhaltungsdatei für den Import an
Anstatt das PayPal-Konto beim Start des Skripts anzugeben, können Sie im Kontenplan von Banana Buchhaltung angeben, welche Konten verwendet werden sollen. Diese Methode ist auch notwendig, wenn Sie für jede Währung unterschiedliche Konten haben möchten.
- Die Basiswährung in den Eigenschaften (Stammdaten) aus Menü Datei sollte auf eine gültige Währung eingestellt werden.
- Vor dem Import sucht und verwendet das Programm Konten mit der folgenden Beschreibung:
- "PayPal Konto": das Konto für PayPal
- "PayPal Eingang": das Einkommenskonto
- "PayPal Ausgang": das Spesenkonto
- "PayPal Fee": das Konto für die PayPal-Gebühren.
- Legen Sie den Eröffnungssaldo der PayPal-Konten fest.
Für jede Währung können Sie ein Konto angeben. Alle Transaktionen für diese Währung werden auf dem angegebenen Konto erfasst. Sie haben auch die Währungsumrechnungstransaktionen zwischen den verschiedenen Währungen.
- Für eine Buchhaltungsdatei, die NICHT in Multi-/Fremdwährung ist, geben Sie den Währungscode in die Kontobeschreibung ein:
- PayPal-Konto EUR
- PayPal Konto USD
- PayPal Konto CHF
- PayPal Konto GBP
- Für eine Buchhaltungsdatei mit Multi-/Fremdwährung sucht das Programm nach dem Konto, bei dem die Beschreibung mit "PayPal Konto" beginnt, und verwendet dann das Währungssymbol der Währung Spalte.
Wenn für die Währung kein Konto angegeben wurde, wird der Betrag auf das Konto in Basiswährung überwiesen.
PayPal-Währungseinstellungen und Kontoführungseinstellungen
Es ist geeignet, dass Ihre PayPal-Währungseinstellungen (Mein Konto → Profil → Mein Geld→ PayPal Saldo → Währungen) mit denen der Buchhaltungsdatei übereinstimmen:
- PayPal "Primärwährung" ist die gleiche wie Ihre Basiswährung.
- Wenn Sie PayPal so eingerichtet haben, dass es mehrere Währungen (Hinzufügen Währung) verwendet, sollten Sie die Doppelte Buchhaltung mit Multi-Währung verwenden.
Sie können für jede Währung im ursprünglichen Wert ein separates Konto führen.
Mit dem Befehl Datei in neue konvertieren können Sie eine vorhandene Buchhaltungsdatei in eine Datei mit mehreren Währungen konvertieren. - Für die Mehrwährungsbuchhaltung sollten die Konten "PayPal Eingang", "PayPal Ausgang", "PayPal Fee" vorzugsweise in Basiswährung sein.
Transaktionsaufteilung und -auswahl
Jede PayPal-Transaktion beinhaltet den Bruttobetrag, den Gebührenbetrag und den Nettobetrag. Wenn sich der Nettobetrag vom Bruttobetrag unterscheidet, generiert das Programm 3 Zeilen:
- Linie mit dem Bruttobetrag, der auf dem PayPal-Konto registriert ist
- Linie mit dem auf dem Einnahmen- oder Spesenkonto registrierten Nettobetrag
- Linie mit dem auf dem Gebührenkonto registrierten Gebührenbetrag.
Buchungen bereits importiert
Die Spalten "ExternalReference" der Tabelle Buchungen werden mit der eindeutigen PayPal-Transaktions-ID gefüllt.
Beim nächsten Import werden Transaktionen mit demselben ID vom Import ausgeschlossen. Die Informationen aus den älteren Transaktionen werden für die Währungsumrechnung und -gruppierung verwendet.
Letzter Saldo
Der Import fügt auch eine Zeile mit Informationen über die letzte PayPal-Saldo für jede verwendete Währung hinzu. Wenn Sie diese Informationen nicht benötigen, löschen Sie die importierten Zeilen.
Ändern der importierten Transaktionen
Sobald die Transaktionen importiert wurden, können Sie die Transaktionen nach Belieben ändern.
- Erfassen Sie die Überweisungen zum und vom Bankkonto auf einem "Internen Überweisungskonto (Giro-Bankkonto)".
Tun Sie dasselbe, wenn Sie Ihre Bankkonto Transaktionen importieren.
Der Saldo des "Internen Überweisungskontos (Giro-Bankkonto)" sollte kompensiert und auf Null gehen. - Einnahmen aus Verkäufen können auf bestimmten Konten basierend auf der angewandten Umsatzsteuer oder auf der Grundlage der Art des Umsatzes registriert werden.
Sie müssen Ihren Buchhaltungsplan entsprechend anpassen. - Sie können Segmente oder Kostenstellen hinzufügen.
Passen Sie die Ansicht der Spalten so an, dass alle Spalten sichtbar und in der besten Reihenfolge zum Ändern der Daten angezeigt werden.
Gewinn aus Wechselkurs und Verlust
Die Salden der PayPal-Konten in der Währung stimmen mit dem Saldo des PayPal-Kontos überein.
Die Salden in Basiswährung können sich aus folgenden Gründen unterscheiden:
- Die Wechselkurse für die Transaktionen variieren im Laufe der Zeit.
- PayPal hat unterschiedliche Wechselkurse für den Verkauf oder Kauf einer bestimmten Währung.
Sie sollten die Basiswährung von Zeit zu Zeit mit dem Befehl Buchungen Wechselkurs Differenzen erstellen
Multi-Währungs-Umrechnung
Wenn es verschiedene Transaktionen in verschiedenen Währungen in der Datei gibt, werden die Beträge gemäss dieser Regel und Reihenfolge in Basiswährung umgerechnet:
- Basiswährung
- PayPal Währungsumrechnung
Buchungen, die zum selben Block gehören, verwenden die gleiche Umrechnung, so dass der Betrag in Basiswährung für den gleichen Betrag und die gleiche Transaktion immer derselbe ist. - Wechselkurs aus Währungsumrechnung des gleichen Datums
- Wechselkurse aus der Datei Buchhaltung (Tabelle Wechselkurse) entnommen
- Wechselkurs, der aus der PayPal-Währungsumrechnung stammt.
Die Umrechnung keinen gültigen Wechselkurs für eine Währung finden kann, macht Sie eine Meldung und fragt nach einem Wechselkurs für die Währung.
Importieren anderen PayPal-Feldern
Sie können andere Informationen, die in der PayPal-Datei enthalten sind, in Banana Buchhaltung importieren.
- Fügen Sie eine neue Spalte mit dem Namen "PayPal" + dem Spaltennamen der PayPal-Datei ein.
Zum Beispiel "PayPalTimeZone", "PayPalSalesTax", "PayPalTip".- Geben Sie den Spaltentyp an (Text, Nummer, Betrag, Datum, Zeit).
- Geben Sie für Betrag und Nummer auch die Dezimalstelle an.
- In den Konten haben die Spalten des Typs Betrag ebenfalls eine Endsumme.
- Im PayPal-Downloadverlauf mit "Customize Download Fields" können Sie die Spalte zum Herunterladen angeben.
- Die verfügbaren Spalten (Name in englisch, ohne Leerzeichen und in CamelCase) sind:
Time, TimeZone, Typ, Name, Status, Subject, Currency, Gross, Fee, Net, Note, FromEmailAddress, ToEmailAddress, TransactionId, PaymentType, CounterpartyStatus, ShippingAddress, AddressStatus. ItemTitle, ItemId, ShippingAndHandlingAmount, InsuranceAmount, SalesTax, Tip, Discount, SellerId, Option1Name, Option1Value, Option2Name, Option2Value, AuctionSite, BuyerId, ItemUrl, ClosingDate, ReferenceTxnId, InvoiceNumber,SubscriptionNumber, CustomNumber, ReceiptId, Balance, ContactPhoneNumber, BalanceImpact, AddressLine1, AddressLine2, State, Town, Zip, Country.
Wenn Sie die Transaktionen importieren, werden die PayPal*-Spaltenzellen mit dem Inhalt der PayPal-Datei vervollständigt.
Banana-PayPal-Importerweiterung
Die Konvertierung vom PayPal-Format in das Buchhaltungsformat ist ein JavaScript-Programm.
Das Programm ist "Open-Source-Software" und kann bestenfalls an die Bedürfnisse des Benutzers angepasst werden.
Um die Erweiterung zu ändern, ändern Sie zunächst die folgenden Werte, damit sie nicht mit dem Banana PayPal-Filter in Konflikt gerät:
- Verwenden eines anderen Dateinamens
- Verwenden eines anderen @id
- Verwenden Sie eine andere Beschreibung.
Lizenz Begriffe
Die PayPal-Dokumentation deckt nicht alle möglichen Transaktionen ab. Das Importskript wurde aufgrund Anwendungsfällen entwickelt und es ist möglich, dass nicht alle Möglichkeiten abgedeckt wurden und das Skript weiter verbessert werden muss.
PayPal kann auch das Datenformat ändern und die Skriptergebnisse sind möglicherweise nicht identisch.
Achten Sie beim Import darauf und überprüfen Sie immer, ob der Kontensaldo dem PayPal-Guthaben entspricht.
Die Verwendung des Importskripts wird durch die Apache 2.0-Lizenz geregelt, die Datei kann frei modifiziert werden.
Durch die Verwendung des Skripts akzeptieren Sie die Lizenz und die Haftungsausschlussbedingungen.
Problembehandlung
Wenn Probleme auftreten, aktualisieren Sie zuerst den Importfilter auf die neueste Version unter Erweiterungen verwalten.
- Rundungsproblem.
Es kann vorkommen, dass die PayPal-Datei ein Dezimalformat verwendet, das sich von dem Ihres Computers unterscheidet. Beträge werden daher abgeschnitten (12,34 wird zu 12 oder es wird 1234).
PayPal weist Ihnen ein bestimmtes Format für die Sprachcodierung basierend auf Ihrem Land zu (siehe Erläuterungen zur PayPal-Sprachcodierung).- Stellen Sie sicher, dass der PayPal-Download mit Ihren Computereinstellungen übereinstimmt
- Oder melden Sie sich in Ihrem PayPal-Konto an und ändern Sie die PayPal-Sprachkodierungseinstellung (https://www.paypal.com/cgi-bin/customerprofileweb?cmd=_profile-language-encoding).
Mit der Schaltfläche Mehr Option können Sie schliesslich die UTF-8 auswählen, die am besten für den Datenaustausch geeignet ist.
- Die Fehlermeldung "Dateiheader kann nicht übersetzt werden: .."
- Versuchen Sie, die Version Banana Buchhaltung Plus zu verwenden.
- Ändern Sie Ihre Download-Einstellungen wie oben in der "PayPal-Sprachcodierungseinstellung" angegeben
- Stellen Sie sicher, dass Sie die ursprüngliche CSV-Datei verwenden, die von PayPal heruntergeladen wurde, und nicht eine, die mit Excel geöffnet und gespeichert wurde.
- Die Fehlermeldung "Währung nicht konvertiert" weist darauf hin, dass für die Konvertierung keine Wechselkurse verfügbar waren.
- Es ist möglich, dass Sie Ihre Basiswährung nicht eingerichtet haben
- Sie haben PayPal so eingerichtet, dass mehr als eine Währung beibehalten wird. Die PayPal-Datei rechnet keine Währung um und Sie sollten daher eine Buchhaltung mit Fremdwährungen verwenden.
- Wenn der letzte Saldo vom Konto abweicht
- Überprüfen Sie, ob Sie einen korrekten Eröffnungsbetrag haben (den Saldo vor der ersten importierten Transaktion)
- Ihr Konto ist nicht in derselben Währung.
Wenn Ihr PayPal-Konto für die Verwendung anderer Währungen oder in einer anderen Währung als der Basiswährung eingerichtet ist, ist es geeignet, ein Konto mit mehreren Währungen zu verwenden.
- Wenn Sie ein Nachrichtenfeld "BalanceImpact nicht in Headern gefunden" oder die gleiche Nachricht mit einem anderen Feldnamen erhalten, liegt dies daran, dass die PayPal-Verlauf Datei kein Feld enthält, das für den Import benötigt wird.
- Melden Sie sich in PayPal an und gehen Sie zum Download-Verlauf
- Bevor Sie die PayPal-Verlaufsdatei herunterladen, klicken Sie auf "Mein Verlauf Download anpassen"
- Sie sehen eine Liste des verfügbaren Feldes und überprüfen dasjenige, das fehlt
Der "Saldo Impact" ist gegen Ende des Liste.
PayPal speichert die Einstellung. Beim nächsten Herunterladen, wird das Feld enthalten sein. - Downloaden Sie wieder die Verlaufsdatei.
- Wenn Sie eine Fehlermeldung "AccountDebit" und "AccountCredit" nicht gefunden haben, haben Sie eine Datei mit dem Namen der alten Spalten.
Verwenden Sie den Befehl Werkzeuge-> Kopie Datei erstellen, um eine Kopie der Datei mit den richtigen Spalten zu erstellen.
Referenz
PayPal-Dokumentation
Änderungen
- 2021-03-24 Neu Version für Banana Buchhaltung Plus
- Komplette Chronologie
Feedback
Lassen Sie uns bitte wissen, was Sie von dem Importskript halten oder wie wir das Skript noch verbessern könnten.
Revolut - Import movements .csv (Banana+ Advanced)
Revolut - Import movements .csv (Banana+ Advanced)Mit dieser Importerweiterung können Sie Transaktionen von der Plattform Revolut (Personal & Business) direkt in Banana Buchhaltung importieren.
Weitere Informationen finden Sie in der englischsprachigen Dokumentation: Revolut - Import movements .csv
Stripe - Import movements .csv (Banana+ Advanced) [BETA]
Stripe - Import movements .csv (Banana+ Advanced) [BETA]Mit dieser Importerweiterung können Sie Transaktionen von der Plattform Stripe direkt in Banana Buchhaltung importieren.
Weitere Informationen finden Sie in der englischsprachigen Dokumentation: Stripe - Import movements .csv
Wise - Import transactions (*.csv)
Wise - Import transactions (*.csv)Mit dieser Importerweiterung können Sie Transaktionen von der Plattform Wise (Personal & Business) direkt in Banana Buchhaltung importieren.
Weitere Informationen finden Sie in der englischsprachigen Dokumentation: Wise - Import transactions (*.csv)
Yokoy - Import movements .csv (Banana+ Advanced) [BETA]
Yokoy - Import movements .csv (Banana+ Advanced) [BETA]Mit dieser Importerweiterung können Sie Transaktionen von der Plattform Yokoy direkt in Banana Buchhaltung importieren.
Weitere Informationen finden Sie in der englischsprachigen Dokumentation: Yokoy - Import movements .csv
CiviCRM Contributions - Import movements .csv (Banana+ Advanced) [BETA]
CiviCRM Contributions - Import movements .csv (Banana+ Advanced) [BETA]You can install the extension from the menu Extensions > Manage Extensions.
Requirements for Use
Banana Accounting Plus with the Advanced Plan.
Send us a feedback
This extension is a BETA version, we welcome suggestions for improvement.
It may happen that the format of the csv file is updated and as a result the filter no longer functions correctly. Send us feedback and attach an example file (.csv) with the new format and we will proceed to update the filter.
OFX - Open financial exchange transactions import filter (*.ofx *.ofc *.xml)
OFX - Open financial exchange transactions import filter (*.ofx *.ofc *.xml)Import extension (*.ofx *.ofc *.xml). Install this filter via the menu command Extensions → Manage Extensions.
The file is an import extension for Banana Accounting 8 and following.
It allows the software to:
Read OFX (Open Financial Exchange) files
Extract financial transactions
Convert them into Banana’s Transactions table
What Is OFX?
OFX (Open Financial Exchange) is a structured financial data format used by banks and software such as:
Quicken
Microsoft Money
It is more reliable than QIF because it includes:
Unique transaction IDs (FITID)
Structured account information
Statement balances
Currency data
What the Script Does
The OFX import extension:
Parses the OFX file structure
Extracts transaction blocks (<STMTTRN>)
Reads key fields:
Date (<DTPOSTED>)
Amount (<TRNAMT>)
Description (<NAME>)
Memo (<MEMO>)
Transaction ID (<FITID>)
Converts them into Banana transaction rows
Prevents duplicate imports using FITID
Typical OFX Transaction Structure
<STMTTRN>
  <TRNTYPE>DEBIT
  <DTPOSTED>20260301
  <TRNAMT>-125.50
  <FITID>20260301001
  <NAME>Vendor Payment
  <MEMO>Invoice 4587
</STMTTRN>
Export from Online Banking (Recommended)
Many banks in USA allow transaction export.
Steps:
Log into your online banking portal
Go to transaction history
Select Download / Export
Choose format:
OFX
or QFX
Select date range
Download the file
Export from Financial Software
Software like Quicken allows exporting to OFX:
Open your account
Choose Export transactions
Select OFX format
Save the file
Quicken Interchange Format import filter (*.qif)
Quicken Interchange Format import filter (*.qif)It allows Banana Accounting to read and convert data from QIF (Quicken Interchange Format) files into Banana’s internal accounting structure (Transactions table, Accounts, Categories).
The script:
- Parses QIF records (such as date, amount, payee, memo, category)
- Transforms them into Banana-compatible transaction rows
- Handles different QIF types (Bank, Cash, Credit Card, etc.)
- Ensures correct formatting for dates and amounts
In short, it enables importing bank or financial transaction data exported in QIF format into Banana Accounting.
How to Export Data in QIF Format
QIF is an older financial exchange format originally used by Quicken.
Exporting from Financial Software
If your software supports QIF export:
Open your accounting or banking software
Go to Export or Data Export
Select:
Format: QIF (Quicken Interchange Format)
Account type: Bank / Cash / Credit Card
Choose date range
Save the
.qiffile
Exporting from Online Banking
Some banks still allow QIF export:
Log in to your online banking portal
Open the transaction history
Choose Download / Export
Select format:
QIF (if available)
Otherwise: CSV (you would need conversion)
Many banks today provide CSV or OFX instead of QIF.
Basic QIF Structure Example
A QIF file looks like this:
!Type:Bank
D03/01/2026
T-125.50
PPayment to Vendor
MInvoice 4587
LExpenses:Office
^Export Extensions
Export Address data in the VCard format
Export Address data in the VCard formatUsing the extension to export vCards
This extension is compatible only with the following file types:
- Address book
- Library and collections
- Estimates and Invoices
To generate and export vCards, the extension uses data from the Contacts table in the file. Specifically, it reads the following columns:
- First Name
- Family Name
- Street
- Zip
- Locality
- Country Code
- Country
- Mobile Phone
- Home Phone
- Email Home
Ensure that your file is of a supported type and that the required columns are filled in correctly to guarantee a successful export.
Install the extension
To install the extension:
- Open Banana Accounting Plus.
- Menu Extensions > Manage Extensions.
- In the search field enter Export Address data in the VCard format.
- From the extensions list select Export Address data in the VCard format.
- Select the extension and click Install.
- Click Close to close the window.
Export address data in vCard format
To export the vCard with the addresses data:
- Open the Banana file.
- From the Extensions menu select Export Address data in the VCard format.
- Enter the contact ID. You can export a vCard containing all contacts or just specific ones.
- Save the vCard.
The generated .vcf file contains a structure like the following one:
BEGIN:VCARD
VERSION:3.0
N:Pallino;Pinco
FN:Pinco Pallino
TEL;type=CELL:1234567890
TEL;type=HOME:1234567890
ADR;TYPE=HOME:;;Via Trevano 7a;Lugano;;6900;
LABEL;TYPE=HOME:Via Trevano 7a Lugano,6900
REV:2017-02-07T14:07:54.694Z
END:VCARD
Export vCard for unsupported file types
If you're using a file type that is not supported by this extension (e.g., a double-entry accounting file, an income/expense accounting file, etc.), you can still export the data for members, customers and suppliers by following these steps:
- Copy the contact information from your current accounting file.
- Create a new file of type Address book and paste the copied data into the appropriate columns.
- Run the extension to export the vCards in the new file.
Journal Export (Banana 9)
Journal Export (Banana 9)How to use it
In order to use this app you have to:
- Install the app
- Menu Apps → Manage Apps...
- Select Universal as country.
- Select english as language.
- Select Online → Productivity.
- From the apps list select Journal Export.
- Click Install to install the app.
- Click Close to close the window.
- Run the app
- Menu Apps → Journal Export.
- Export the content
- From the top bar select Copy to Clipboard.
- Copy into Excel
- Open Excel and paste the copied content.
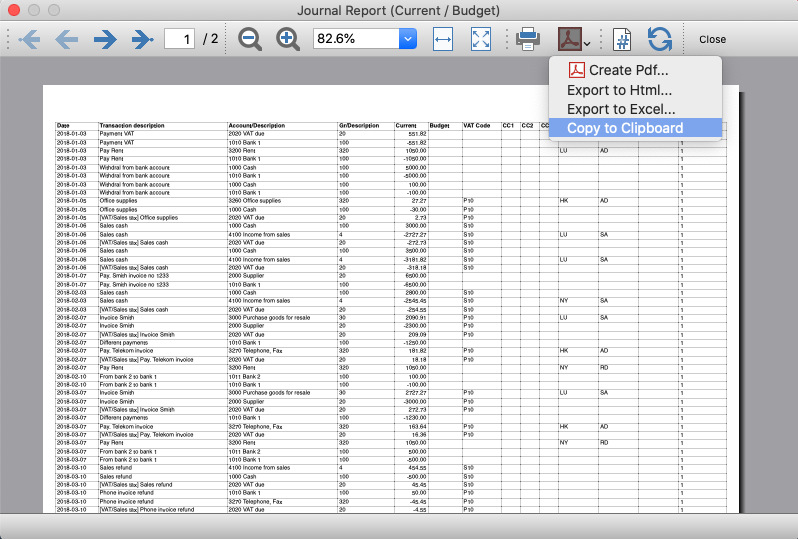
Journal Export (Banana+)
Journal Export (Banana+)Prerequisites
To use this extension you must download and install Banana Accounting Plus.
Install the extension
To install the extension:
- Open Banana Accounting Plus.
- Menu Extensions > Manage Extensions
- Select Universal as country.
- Select english as language.
- Select Online > Productivity.
- From the extensions list select Journal Export (Banana+).
- Click Install to install the extension.
- Click Close to close the window.
Create the journal report
To creare and export the journal:
- Open an accounting file.
- From the Extensions menu select the Journal Export (Banana+).
- In Settings dialogue choose the journal columns you want to display, then click OK.
- From the Print Preview of the report select the Copy to Clipboard command in the top bar.
- Open Excel and paste the copied content. Columns headers and data will be copied in Excel. From there you can use it to create your own reports.
Settings dialogue
Run the extension from the menu Extensions > Journal Export (Banana+).
The extension Settings dialogue will open. From here you can choose the journal columns you want to include in the report.
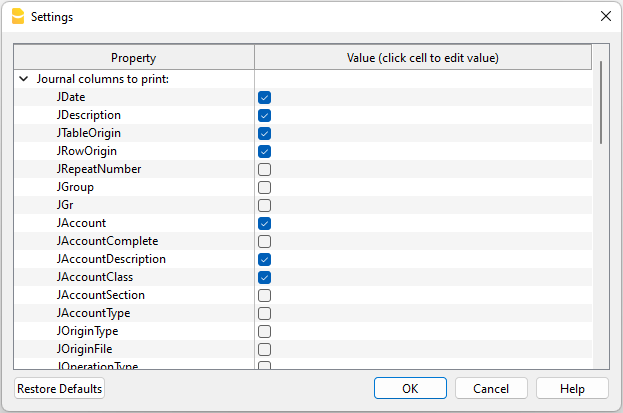
You can find more information about the journal columns in the Journal’s API documentation.
Print example
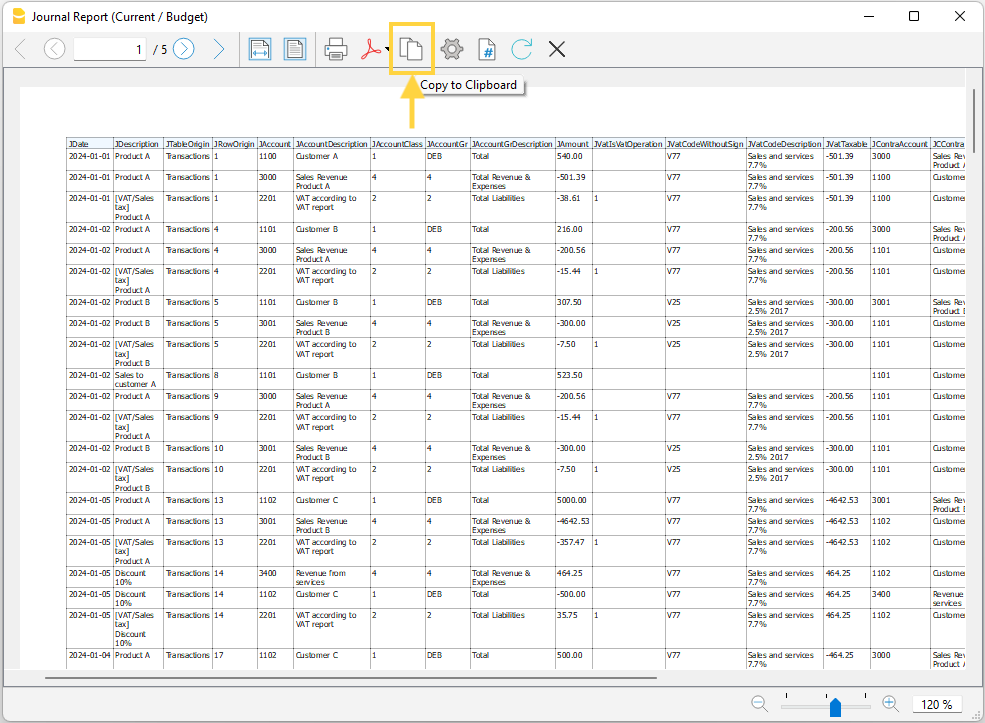
Time Sheet Export
Time Sheet ExportPrerequisites
- Download and install Banana Accounting Plus (or Banana Accounting 9, version 9.0.5).
Install the extension
To install the extension:
- Open Banana Accounting Plus.
- MenuExtensions > Manage Extensions.
- Select Universal as country.
- Select english as language.
- Select Online > Productivity.
- From the extensions list select Time Sheet Export.
- Click Install.
- Click Close to close the window.
Export the time sheet columns
To export the columns of the time sheet table:
- Open a time sheet file type.
- From the Extensions menu select the Time Sheet Export.
- In Settings dialogue choose the time sheet columns you want to export, then click OK.
- From the Print Preview of the generated report select the Copy to Clipboard command in the top bar.
- Open Excel and paste the copied content. Columns headers and data will be copied in Excel. From there you can use it to create your own reports.
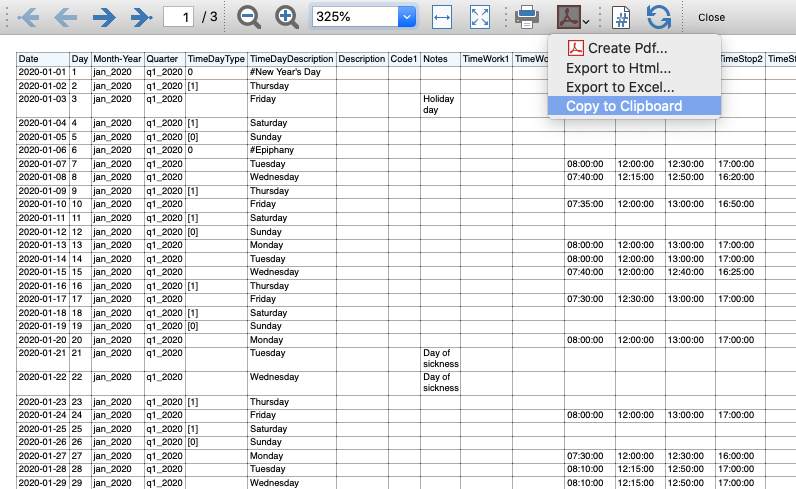
Report Extensions
Account Statement Letter
Account Statement LetterInstall the extension
To install the extension:
- Open Banana Accounting Plus.
- Menu Extensions > Manage Extensions.
- In the search field enter Account Statement Letter.
- From the extensions list select Account Statement Letter.
- Select the extension and click Install.
- Click Close to close the window.
Create the report
To creare the report:
- Open an accounting file.
- From the menu File > File and accounting properties > Address, enter the sender address.
- In the Accounts table (Address view) enter the receiver address for the account.
- From the Extensions menu select the Account Statement Letter.
- Enter the account number.
Example of account statement report:
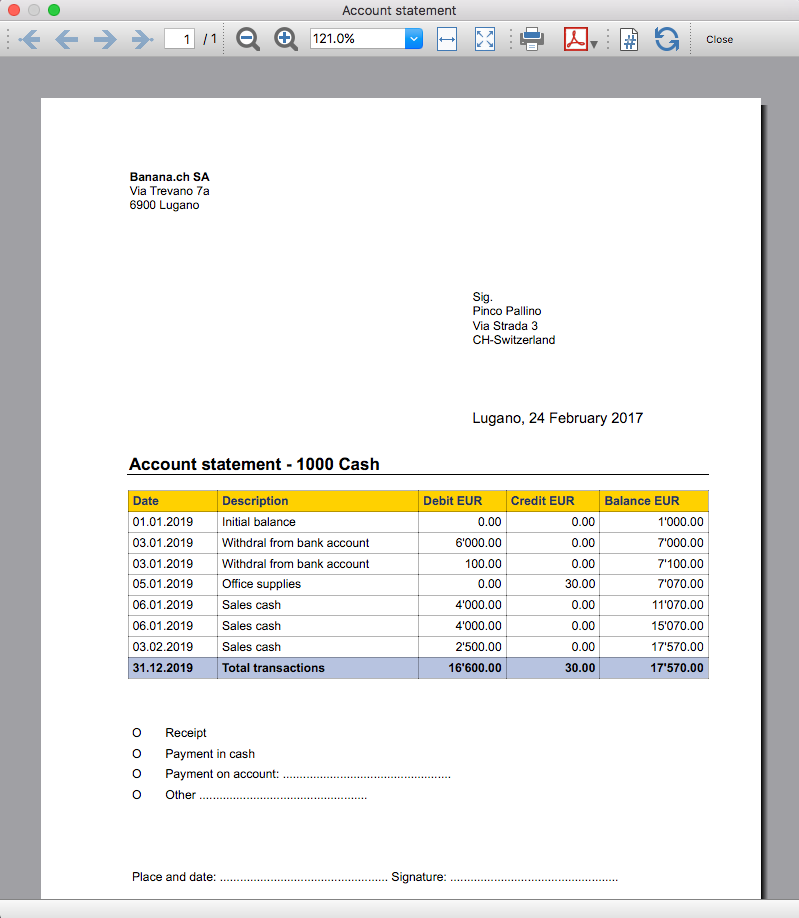
Account balance by day within a period
Account balance by day within a periodInstall the extension
To install the extension:
- Open Banana Accounting Plus.
- Menu Extensions > Manage Extensions.
- In the search field enter Account balance by day within a period.
- From the extensions list select Account balance by day within a period.
- Select the extension and click Install.
- Click Close to close the window.
Create the report
To creare the report:
- Open an accounting file.
- From the Extensions menu select the Account balance by day within a period.
- Enter the account number.
- Select the period.
A window with results is displayed. You can copy, save and print the results.
Account balance for all days in a month
Account balance for all days in a monthInstall the extension
To install the extension:
- Open Banana Accounting Plus.
- Menu Extensions > Manage Extensions.
- In the search field enter Account balance for all days in a month.
- From the extensions list select Account balance for all days in a month.
- Select the extension and click Install.
- Click Close to close the window.
Create the report
To creare the report:
- Open an accounting file.
- From the Extensions menu select Account balance for all days in a month.
- Enter the month number.
- Enter the account number.
A window with results is displayed. You can copy, save and print the results.
Audit Reports [BETA]
Audit Reports [BETA]The main purpose of this extension is to provide reports that can be easily copied into excel, summarising and showing the main accounting data that are normally taken as a basis by auditors when preparing their analysis.
Useful reports for Banana users who need to send their auditor accounting data, but also for auditors who use Banana themselves, as these reports are based on the functionalities already offered by Banana and therefore facilitate and speed up the collection of accounting data.
Reports
The following reports can be generated:
- General Ledger: Shows the transactions for each account, like in the account card.
- Journal: Shows the details of each transaction.
- VAT Journal: Shows the details of each VAT transaction.
- Trial Balance: Shows the balance of all accounting items in two columns (debit and credit).
- Customers And Suppliers: Shows list of customers and suppliers and information about them.
Through a dialogue it is possible to decide the time of year to be taken into account in the reports.
Adding extra columns
Through the command "Columns Settings" additional columns can be inserted in each report, except for the trial balance, which remains as it is. To add a column to the report, simply enter its xml name in the dialogue. To add several columns, separate them with a semicolon ";" as shown in the example.

The columns you can add are the same present in the Transactions table, except for the Customers and Suppliers report, for which you find the data in the Accounts table.
If you accidentally add a column that is not contained in the tables mentioned, no error is currently raised, the column will be added but no value will be present.
Copy to Excel
Reports are easily copied to Excel, when the report preview is generated, just click on the "copy" icon and paste the copied table into an Excel sheet.

Once the whole table has been copied, you can arrange the file as you want and customise your report with Excel tools.

Messages
- Total debit and total credit are different: The total Debit and total Credit do not match, check if the same error is present in your Accounting file, if it is only present in the report send us a feedback
Brief mit freiem Text (Banana+) [BETA]
Brief mit freiem Text (Banana+) [BETA]Mit dieser Erweiterung können Sie einen Brief mit freiem Text für Mitglieder erstellen, die in der Konten-Tabelle von Banana Buchhaltung registriert sind.
Es ist wichtig, dass die Mitglieder mit Kostenstellen eingerichtet werden, wobei die Kostenstelle KS3 zu verwenden ist.
Voraussetzungen
Um diese Erweiterung zu benutzen, müssen Sie:
- Banana Buchhaltung+ herunterladen und installieren (Version 10.1.7 oder neuer).
- Den Advanced-Plan von Banana Buchhaltung Plus haben.
Beta-Version
Die Erweiterung ist derzeit als Betaversion freigegeben. Dies bedeutet, dass sich einige Details ohne vorherige Ankündigung ändern können.
Installation und Anwendung der Erweiterung
- Banana Buchhaltung Plus Dev-Channel installieren.
- Banana-Erweiterung Brief mit freiem Text (Banana +) installieren (siehe hierfür die Seite Erweiterungen verwalten).
- Sobald die Banana-Erweiterung installiert ist, wird sie im Menü Erweiterungen sichtbar sein, wo sie ausgeführt werden kann.
Einen Brief erstellen
- In der Buchhaltungsdatei unter Stammdaten -> Registerkarte 'Adresse' (Menü Datei), die Daten des Vereins eingeben.
- Aus Menü Erweiterungen die Banana-Erweiterung Brief mit freiem Text (Banana +) auswählen.
- Die hierauf folgenden Felder des Einstellungen-Dialog ausfüllen und danach auf die Schaltfläche OK klicken.
Einstellungen-Dialog
Starten Sie die Erweiterung über das Menü Erweiterungen > Brief mit freiem Text (Banana +).
Es öffnet sich ein Dialogfenster mit den Einstellungen der Erweiterung, wo Sie die erforderlichen Informationen für den Ausdruck des Briefes festlegen.
Für die Eingabe der Daten unterhalb der Spalte Wert einen Klick erteilen, um das Eingabefeld zu öffnen.
Die Einstellungen sind in die folgenden Gruppen unterteilt:
- Adressen für den Ausdruck auswählen
- Definieren Sie die Mitgliedskonten, für die der Brief erstellt werden soll.
- Beginn
- Legen Sie das Logo für die Kopfzeile, den Ort und das Datum des Schreibens fest.
- Text ausdrucken
- Definieren Sie, welcher Text verwendet werden soll.
- Unterschrift
- Definieren Sie den Text und das Bild für die Unterschrift (Signatur).
- Texte (des Briefes)
- Sie können bis zu 4 Textzeilen erfassen oder einen aus der Tabelle Dokumente gespeicherten Text übernehmen.
- Stilarten
- Legen Sie die Schriftart und -grösse für den Brieftext fest.
Aufgrund der eingegebenen Daten wird der Bericht generiert, welcher gespeichert und ausgedruckt werden kann.
Adressen für den Ausdruck auswählen
Hier können Sie entscheiden, für welche Mitglieder mit Kostenstellen KS3 der Brief erstellt werden soll.
- Mitgliedskonto eingeben (leer = alle ausdrucken)
- Konto des Mitglieds eingeben (z.B. "10001").
- Mehrere Mitgliedskonten eingeben, die durch ein Komma "," zu trennen sind (z.B. "10001,10002,10005").
- Wird nichts eingegeben, werden alle Mitglieder ausgedruckt.
- Tabelle Extraktion verwenden
- Die aus der Tabelle Extraktion herausgezogenen Konten verwenden.
- Es ist erforderlich den Befehl Daten > Zeilen extrahieren und sortieren... auszuführen, um die Zeilen mit den Konten zu extrahieren, die Sie verwenden möchten.
Beginn
Hier legen Sie das Logo für die Kopfzeile, den Ort und das Datum des Schreibens fest.
- Logo (Kontrollkästchen aktivieren)
- Fügen Sie ein Logo in die Kopfzeile ein. Das Logo kann unter Menü Datei > Logo einrichten definiert werden.
- Logo-Name
- Geben Sie den zu verwendenden Namen der Logo-Anpassung ein, wenn mehr Logos definiert sind.
- Ort und Datum
- Geben Sie den Ort und das Datum des Schreibens ein.
Text ausdrucken
Hier können Sie entscheiden, welcher der eingegebenen Texte im Brief gedruckt werden soll.
- Text auswählen
- Wählen Sie den gewünschten Text aus der Liste aus.
- Für das Einfügen eines Textes sehen Sie bitte den Absatz Texte.
- Markdown verwenden (Kontrollkästchen aktivieren)
- Der markierte Text wird als Markdown-Text interpretiert (erfordert Banana Buchhaltung Plus - Advanced-Plan).
Unterschrift
Hier können Sie entscheiden, welcher Text und welches Bild (mit digitaler Unterschrift) im Brief gedruckt werden soll.
- Text Unterschrift
- Sie geben den Vor- und Nachnamen der Person ein, die den Brief ausstellt.
- Digitale Unterschrift (Kontrollkästchen aktivieren)
- Hierfür ist ein Bild mit der digitalen Unterschrift zu benutzen.
- Bild mit Unterschrift
- Das gewünschte Bild kann auf zwei Arten eingefügt werden:
- documents:<name_id>: Dient zum Übernehmen eines in der Dokumente-Tabelle gespeichertes Bild mit der Unterschrift, wobei <name_id> dem Namen entspricht, welcher in der Spalte 'ID' ('ID-Wert') der Tabelle 'Dokumente' steht (z.B. "documents:unterschrift").
- file:document/<immagine>: Um ein Bild zu übernehmen, welches ausserhalb der Banana-Buchhaltungsdatei gespeichert worden ist, sich jedoch im selben Verzeichnis/Ordner wie die .ac2-Datei befindet. Es ist auch das Bildformat .png oder .jpg (z.B. "file:document/bildname.png") anzugeben.
- Das gewünschte Bild kann auf zwei Arten eingefügt werden:
Texte
Geben Sie den Text Ihres Schreibens. Es ist möglich, bis zu 4 Textzeilen einzugeben oder einen aus der Tabelle Dokumente gespeicherten Text zu übernehmen.
- Text 1, Text 2, Text 3, Text 4
- Text der Tabelle Dokumente (.txt / .md)
- Um die eingegebenen Texte zu verwenden, müssen Sie sich in die Tabelle Dokumente begeben.
- Geben Sie den ID-Wert des Dokuments ein (z.B. "Brief.txt", "Brief", "Brief.md" usw.).
- Die Texte können vom Typ Text und Markdown sein.
- Bei Texten vom Typ Markdown, muss der ID-Wert in der Dokumente-Tabelle mit ".md" enden; wobei auch der vollständige Name mit ".md" enden muss (z.B. "Brief.md").
Stilarten
Hier definieren Sie die Schriftart und -grösse für die Brieftexte fest.
- Schriftartyp
- Definiert die Schriftart
- Der Standardtyp ist "Helvetica"
- Schriftgrösse
- Definiert die Schriftgrösse
- Die Standardgrösse ist "10"
- CSS
- Opzional
- Sie können Ihren Ausdruck noch weiter anpassen, indem Sie eigene CSS-Stile erstellen, mit denen Sie das Erscheinungsbild des Briefes ändern können (Textformatierung, Positionierung von Elementen usw.). Erfordert Banana Buchhaltung Plus - Advanced-Plan!
- Siehe Dokumentation Erstellung von CSS-Stilen (Dokumentation auf Englisch).
Tabelle Extraktion (Befehl Zeilen extrahieren)
Mit der Funktion Zeilen extrahieren und sortieren... können Sie die Mitgliedskonten auswählen, für die der Brief erstellt werden soll. Dies ist besonders nützlich, wenn Sie z.B. einen Briefe nur für bestimmte Mitglieder ausdrucken wollen, ohne die Liste der Konten direkt in den Einstellungen der Erweiterung eingeben zu müssen.
Wenn Sie beispielsweise Mitglieder in verschiedene Gruppen gruppieren (Tabelle Konten), können Sie mit dem Befehl Daten > Zeilen extrahieren und Zeilen sortieren... die Zeilen der Mitglieder extrahieren, die nur zu bestimmten Gruppen gehören (im Beispiel Mitglieder, die zu den Gruppen S1 und S3 gehören).
Um die extrahierten Zeilen anzuwenden, so vorgehen:
- Die gewünschten Zeilen mittels Menübefehl Daten > Zeilen extrahieren und sortieren... extrahieren.
- Die Erweiterung ausführen und im Abschnitt Adressen für den Ausdruck auswählen des Einstellungen-Dialog das Kontrollkästchen Tabelle Extraktion verwenden aktivieren.
- Wenn vor dem Druckvorgang keine Zeilen extrahiert wurden, wird eine Warnmeldung angezeigt und es werden alle Mitglieder ausgedruckt.
Text des Briefes (Standardtext)
Es gibt zwei Möglichkeiten, einen Standardtext einzugeben und zu verwenden. Sie können... :
- den Text direkt im Einstellungen-Dialog eingeben.
- Geben Sie den gewünschten Text in den Feldern Text 1, Text 2, Text 3 oder Text 4 ein.
Es können bis zu 4 Textzeilen hinzugefügt werden. - Wählen Sie unter Text ausdrucken > Text auswählen den zu verwendenden Text aus.
- Wichtig: Aktivieren Sie unter Text ausdrucken NICHT die Option Markdown verwenden.
- Geben Sie den gewünschten Text in den Feldern Text 1, Text 2, Text 3 oder Text 4 ein.
- den Text in der Tabelle Dokumente erfassen.
- Fügen Sie ein Dokument des Typs Standardtext (text/plain) hinzu.
Es gibt keine Einschränkungen; es können beliebig viele Texte hinzugefügt werden. - Im Einstellungen-Dialog:
- Unter Text ausdrucken > Text auswählen die Option Text Tabelle Dokumente (.txt / .md) auswählen. Um diese Option anzuzeigen, müssen Sie einen Doppelklick auf das Feld 'Text 1' auszuführen, wobei ein Dropdown-Menü mit den verfügbaren Textzeilen angezeigt wird.
- Unter Texte > Text Tabelle Dokumente (.txt / .md) den ID-Namen des in der Dokumente-Tabelle angegeben Textes eingeben (z.B. "text.txt").
- Fügen Sie ein Dokument des Typs Standardtext (text/plain) hinzu.
Für alle Textzeilen:
- Mit einer speziellen Anmerkung können Sie bestimmte Texte fett markieren. Fügen Sie dazu die gewünschten Texte zwischen zwei Sternchen ** ein.
Beispiele:- **text** = text
- **textA textB** textC = textA textB textC
- Werden die hierauf folgenden Werte (in Englisch) in den Textzeilen eingegeben, so werden sie mit den entsprechenden Werte ersetzt:
- <Account> : Mitgliedskonto
- <NamePrefix> : Höflichkeit/Anrede (Herr, Frau, Doktor oder anders)
- <FirstName> : Vorname des Mitglieds
- <FamilyName> : Nachname des Mitglieds
- <OrganisationName> : Organisation (z.B. gemeinnützige Vereine, Stiftungen usw.)
- <Address> : Mitgliedsadresse
- <AddressExtra> : Zusatzadresse
- <Region> : Kanton/Region/Provinz
- <Country> : Nation/Land/Bundesland
- <Currency> : Währung
- <Amount> : Gesamtsumme aller Spenden
Text des Briefes (mit Markdown-Text)
Markdown ist eine Sprache, mit der formatierter Text mit einem gewöhnlichen Textverarbeitungsprogramm (Texteditor) und einer leicht zu lesenden Syntax erstellt werden kann.
Um den Markdown zu benutzen, ist der Advanced-Plan von Banana Buchhaltung Plus erforderlich.
Es gibt zwei Möglichkeiten, einen Markdown-Text einzufügen und zu verwenden. Sie können... :
- den Text direkt im Einstellungen-Dialog erfassen.
- Geben Sie den gewünschten Text in den Feldern Text 1, Text 2, Text 3 oder Text 4 ein.
Es können bis zu 4 Textzeilen hinzugefügt werden. - Wählen Sie unter Text ausdrucken > Text auswählen den zu verwendenden Text aus.
- Aktivieren Sie unter Text ausdrucken die Option Markdown verwenden.
- Geben Sie den gewünschten Text in den Feldern Text 1, Text 2, Text 3 oder Text 4 ein.
- den Text in der Tabelle Dokumente eingeben.
- Verwenden Sie den Markdown-Editor, um ein Dokument hinzuzufügen, indem Sie den Markdown-formatierten Texttyp (text/markdown) auswählen.
Es gibt keine Einschränkungen; es können beliebig viele Texte hinzugefügt werden. - Der Dateiname in der Spalte ID muss mit ".md" enden (z.B. "text.md").
- Im Einstellungen-Dialog:
- Unter Text ausdrucken > Text auswählen die Option Text Tabelle Dokumente (.txt / .md) auswählen. Um diese Option anzuzeigen, müssen Sie einen Doppelklick auf das Feld 'Text 1' auszuführen, wobei ein Dropdown-Menü mit den verfügbaren Textzeilen angezeigt wird.
- Unter Texte > Text Tabelle Dokumente (.txt / .md) den ID-Namen des in der Dokumente-Tabelle angegeben Markdown-Textes eingeben (z.B. "text.md").
- Verwenden Sie den Markdown-Editor, um ein Dokument hinzuzufügen, indem Sie den Markdown-formatierten Texttyp (text/markdown) auswählen.
Für alle Textzeilen:
- Werden die hierauf folgenden Werte (in Englisch) in den Textzeilen eingegeben, so werden sie mit den entsprechenden Werte ersetzt:
- {{Account}} : Mitgliedskonto
- {{NamePrefix}} : Höflichkeit/Anrede (Herr, Frau, Doktor oder anders)
- {{FirstName}} : Vorname des Mitglieds
- {{FamilyName}} : Nachname des Mitglieds
- {{OrganisationName}} : Organisation (z.B. gemeinnützige Vereine, Stiftungen usw.)
- {{Address}} : Mitgliedsadresse
- {{AddressExtra}} : Zusatzadresse
- {{Region}} : Kanton/Region/Provinz
- {{Country}} : Nation/Land/Bundesland
- {{Currency}} : Währung
- {{Amount}} : Gesamtsumme aller Spenden
Beispiel eines Ausdruckes
Printing receipts from cash book transactions
Printing receipts from cash book transactionsThis extension prints payment receipts based on transactions from cash book accounting file.
Example of a payment receipt:
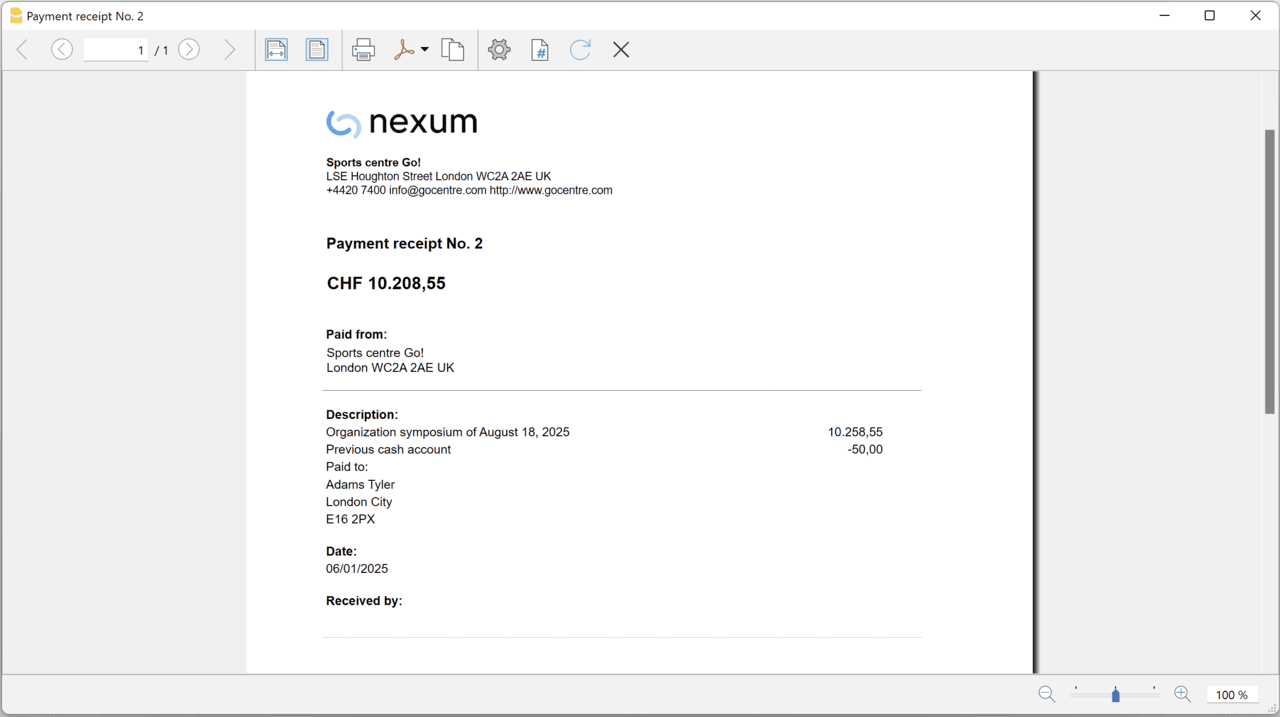
The program prints the receipt using the following logic:
- It takes all the lines with the same Doc Number, of the lines where the cursor is positioned.
- It prints the document number in the "Payment receipt No: "
- It prints the amount by summing all the amounts.
- It prints the Descriptions in different lines.
with the text of the Description column of all the transactions that have the same doc number.
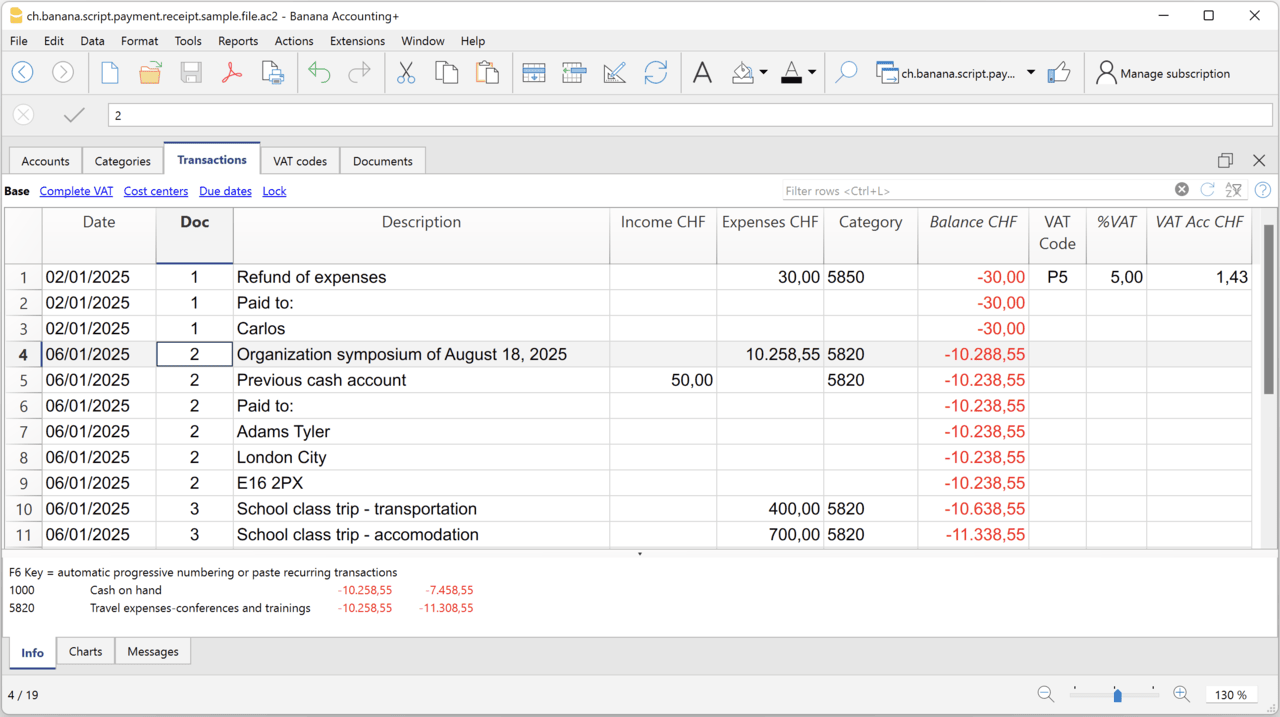
Example file
To created the receipts:
- Open a Cash Book file:
- Or download the example ch.banana.script.payment.receipt.sample.file.ac2 and open it.
- Positions on the line of the transaction group you wish to print.
- From the Extensions menu select the Printing receipts from cash book transactions.
Settings and properties
Prior to printing the receipt you can set the
Extension properties
You can set the following parameters from the menu Extensions > Manage Extensions, select the Printing receipts from cash book transactions extension and click on Settings.
- Include page header (1=yes, 0=no)
The logo and the address information can be included as header of the page. - Automatic date (1=yes, 0=no)
The date of the transaction is used. - Font type
The font type of the texts (Arial, Helvetica, Times New Roman, ...)
Address
Set your address from the menu File > File and accounting properties > Address.
Header logo
A logo for the header can be added as attachment in the Documents table.
- Add the Documents table to the Banana Accounting file.
If it is not already present you need to add the Documents table in the Banana document with the menu command Tools > Add new features > Add document table. - Add a row in the Documents table.
- In the ID column, enter "logo".
- In the Attachments column, double click on the cell and select Image, then choose the logo image you want to use.
Entering transactions
Cash book transactions are entered as usual in the Transactions table.
- Transactions are considered to belong to the same group when they have the same doc number.
- Paid to
- You can enter the text you want to display on the printout (e.g. "Paid to:").
- You can also enter text in bold by enclosing it in double asterisks ** (e.g. **Paid to:**)
- You can enter the text "#paidto" (without quotes) to let the program insert a blank line followed by the text in bold and in the language of the accounting file (it, fr, de, en, nl).
Report Balance and Profit & Loss with transactions details
Report Balance and Profit & Loss with transactions detailsThis extension creates a Balance Sheet and Profit & Loss report with transactions details for each account.
Install the extension
To install the extension:
- Open Banana Accounting Plus.
- Menu Extensions > Manage Extensions.
- In the search field enter Report Balance and Profit & Loss with transactions details.
- From the extensions list select Report Balance and Profit & Loss with transactions details.
- Select the extension and click Install.
- Click Close to close the window.
Create the report
To creare the report:
- Open an accounting file.
- From the Extensions menu select the Report Balance and Profit & Loss with transactions details.
- Select the financial report you want to print:
- Assets / Liabilities
- Income / Expenses
- All
Example of assets details:
Example of liabilities details:
Example of income details: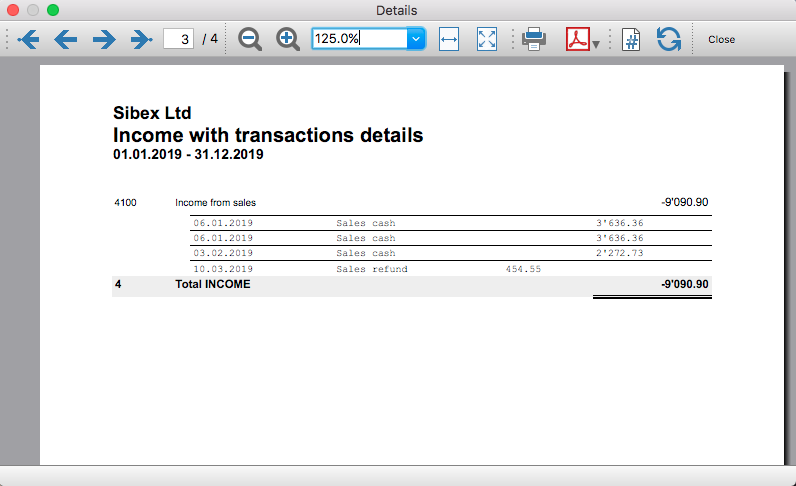
Example of expenses details: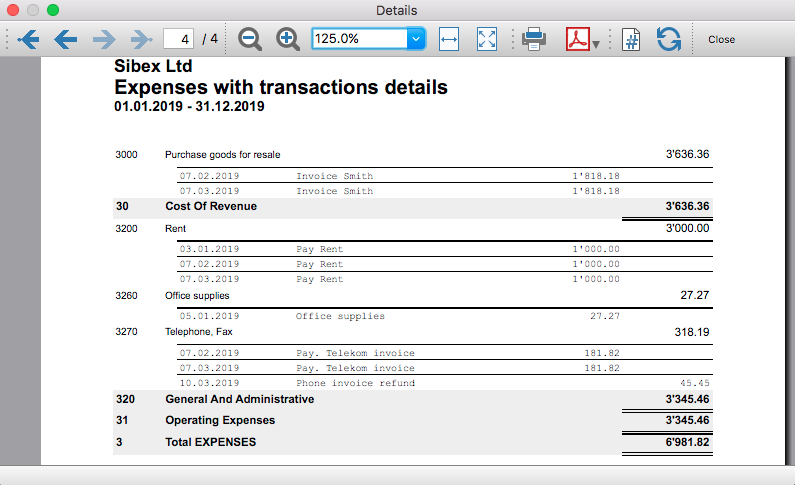
Transaction Voucher (Banana+)
Transaction Voucher (Banana+)Accounting settings
From menu File > File and accounting properties > Accounting Tab, enter the project number/name in the Header Left field.
How it works
- For each transaction of the Transactions table enter the voucher number in the Doc column.
- From the Transactions table of the accounting file select a row with the desired voucher number you want to create the report.
The voucher number is taken from the selected row where the cursor is positioned, but you can also change it manually into settings dialog. - Launch the extension from the menu Extensions > Transaction Voucher (Banana+).
- In the settings dialog window enter the required information.
- Logo
Check to include the logo in the header.
The logo is defined with the command File > Logo setup where you can also set the size, choose how to align it (left, centre, right). - Logo-Name
Enter the name of the logo customisation defined in the menu File > Logo setup, respecting upper and lower case. - Title
- Voucher number
- Paid to
- Paid in
- Cheque No.
- Payment Received by
- Paid by
- Prepared by
- Verified by
- Recommended by
- Approved by
- Logo
- All the values entered are saved and proposed the next time.
- The extension will print the information entered in the dialog plus the data of the transaction with the specified Voucher / Doc number.
Transaction Voucher (Helvetas model)
Transaction Voucher (Helvetas model)How it works
- From the Transactions table of the accounting file select a row with the desired Doc number.
- Launch the extension from the menu Extensions > Transaction Voucher (Helvetas model).
- A dialog window requesting some information will appear.
The voucher number is taken from the row selected where the cursor is positioned, but you can change it manually.
Complete all the remaining fields by entering your data and click Ok.
The values entered are saved and proposed the next time. - The extension will print the information entered in the dialog plus the data of the transactions with the specified Voucher / Doc number.
Example of Voucher report:
Transaction Voucher (Swiss Red Cross model)
Transaction Voucher (Swiss Red Cross model)Accounting settings
Two settings are required:
- the Header Left
- click menu File > File and accounting properties > Header Left.
The Header Left field must contain the project number and the project name divided by the "-" character (example: "1234 - Abc")
- click menu File > File and accounting properties > Header Left.
- add a small image/logo
- Add the Documents table to the Banana Accounting file.
If it is not already present you need to add the Documents table in the Banana document with the menu command Tools > Add new features > Add document table. - In the Id column, of the documents table insert transaction_voucher_image.
- In the Attachments column, double click on the cell, select Image and add the desired image.
- Add the Documents table to the Banana Accounting file.
How it works
- From the Transactions table of the accounting file select a row with the desired Doc number.
For example: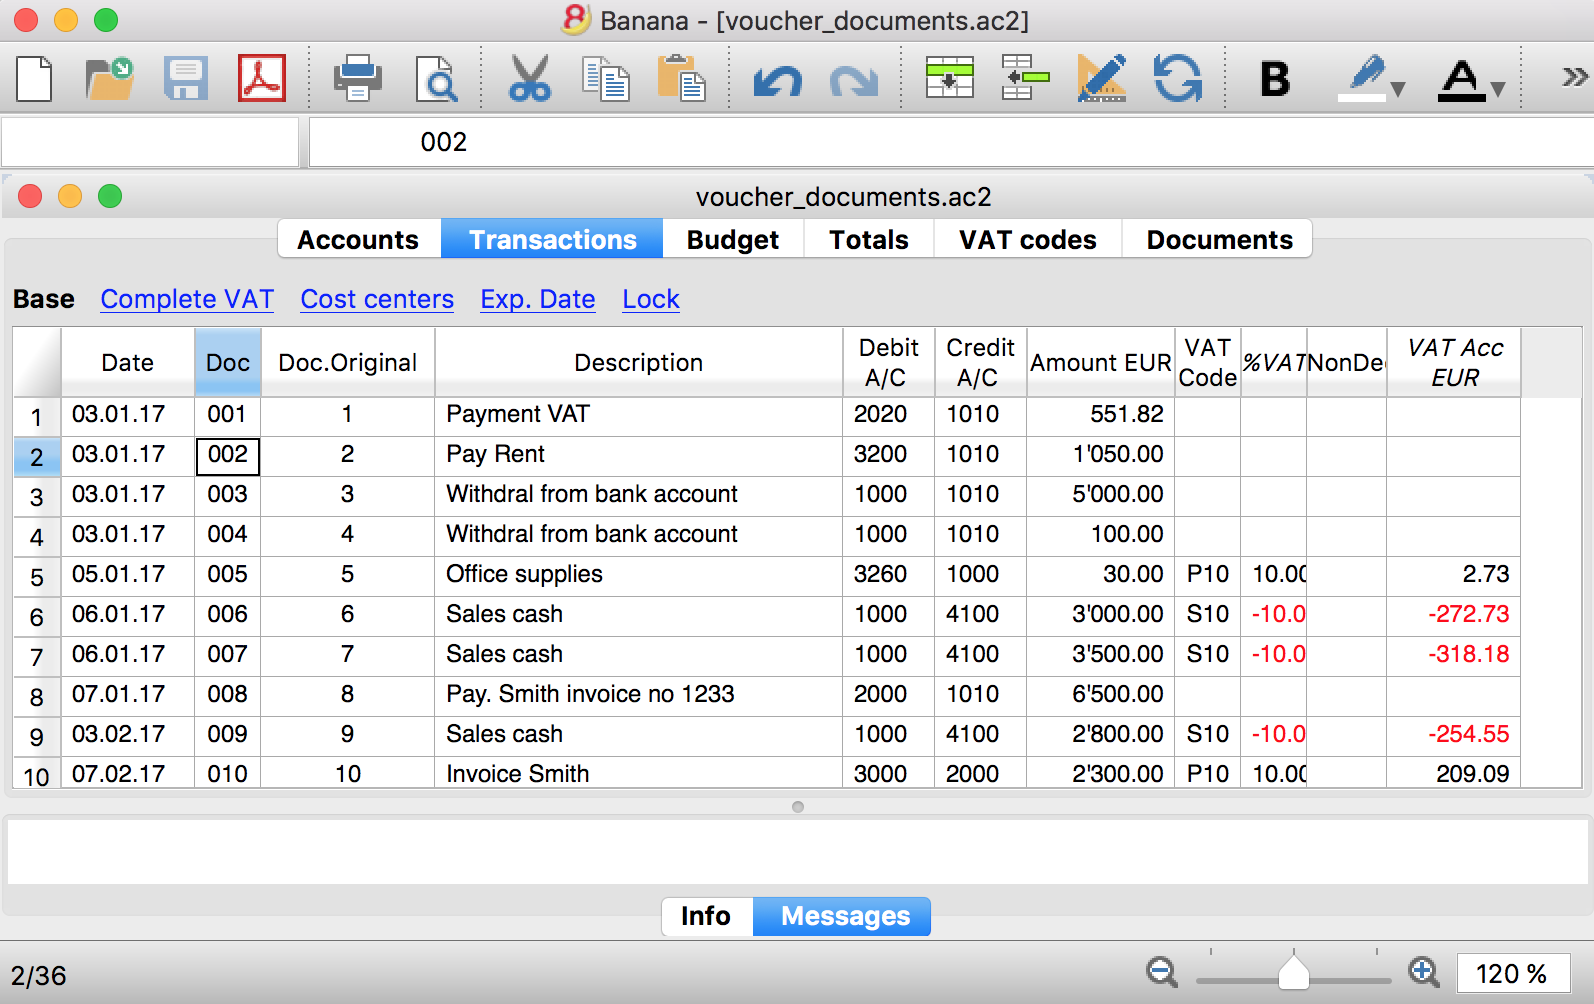
- Launch the extensions from the menu Extension > Transaction Voucher. A dialog window requesting some information will appear.
- The voucher number is taken from the row selected where the cursor is positioned, but you can change it manually.
- Complete all the remaining fields by entering your data and click Ok.
The values entered are proposed the next time.
Dialog example:
- The extension will print the information enterd in the dialog plus the data of the transactions with the specified Voucher / Doc number.
For example:
Trial Balance
Trial BalanceInstall the extension
To install the extension:
- Open Banana Accounting Plus.
- Menu Extensions > Manage Extensions.
- In the search field enter Trial Balance.
- From the extensions list select Trial Balance.
- Select the extension and click Install.
- Click Close to close the window.
Create the report
To creare the report:
- Open an accounting file.
- From the Extensions menu select the Trial Balance.
- Select the period.
For the given period, display a Trial Balance report containing:
- Balance sheet
- Profit & Loss
The details displayed are the following:
- Account
- Account description
- Debit amounts
- Credit amounts
Example of Trial Balance report:
Trial Balance and Blockchain (Quarter periods)
Trial Balance and Blockchain (Quarter periods)This extension creates a report containing the table Accounts and at the end the blockchain for the selected quarter period.
Prerequisites
To use this extension you must download and install Banana Accounting Plus.
Install the extension
To install the extension:
- Open Banana Accounting Plus.
- Menu Extensions > Manage Extensions
- Select Universal as country.
- Select Online > Productivity.
- From the extensions list select Trial Balance and Blockchain (Quarter periods).
- Click Install to install the extension.
- Click Close to close the window.
Create the report
To creare the report:
- Open an accounting file.
- From the menu File > File and accounting properties, in the Header left and Header right fields enter the texts to be printed on the left and right in the page header.
- From the Extensions menu select Trial Balance and Blockchain (Quarter periods).
- In Settings dialogue select the period, set the header texts, the title and font, then click OK to create the report.
The texts of the settings dialog and column headers in the printout are fixed and are in the same language as the Banana file (defined from the menu File > File and accounting properties > Other > Current language). The languages that can be used are Italian, French, German and English.
Settings dialogue
Run the extension from the menu Extensions > Trial Balance and Blockchain (Quarter periods).
The extension Settings dialogue will open. From here you can choose some parameters to print the report.
- Period.
Select a period from the list. The periods are divided into three quarters. - Header left text.
Insert another text to be printed on the left side of the page header. - Header right text.
Insert another text to be printed on the right side of the page header. - Title.
Insert text to be printed as title of the page. - Font family.
Insert the font type. - Font size.
Insert the font size for all the page texts. - Title font size.
Insert the font size for the title.
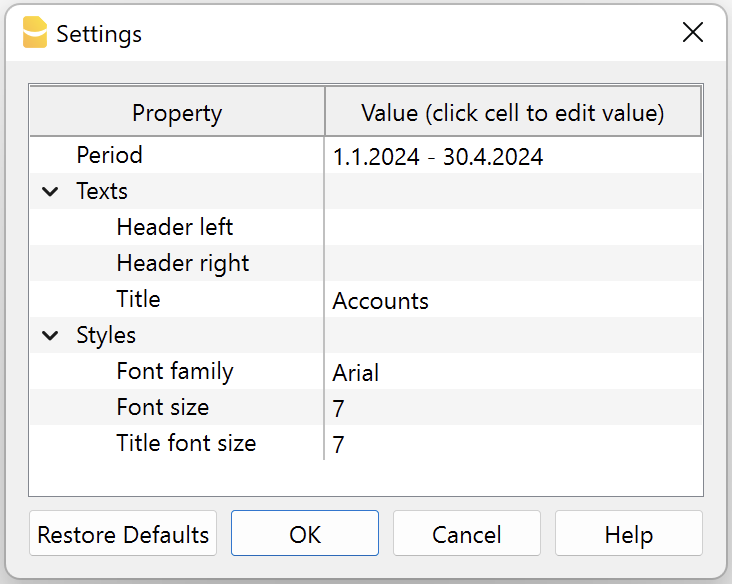
Print example
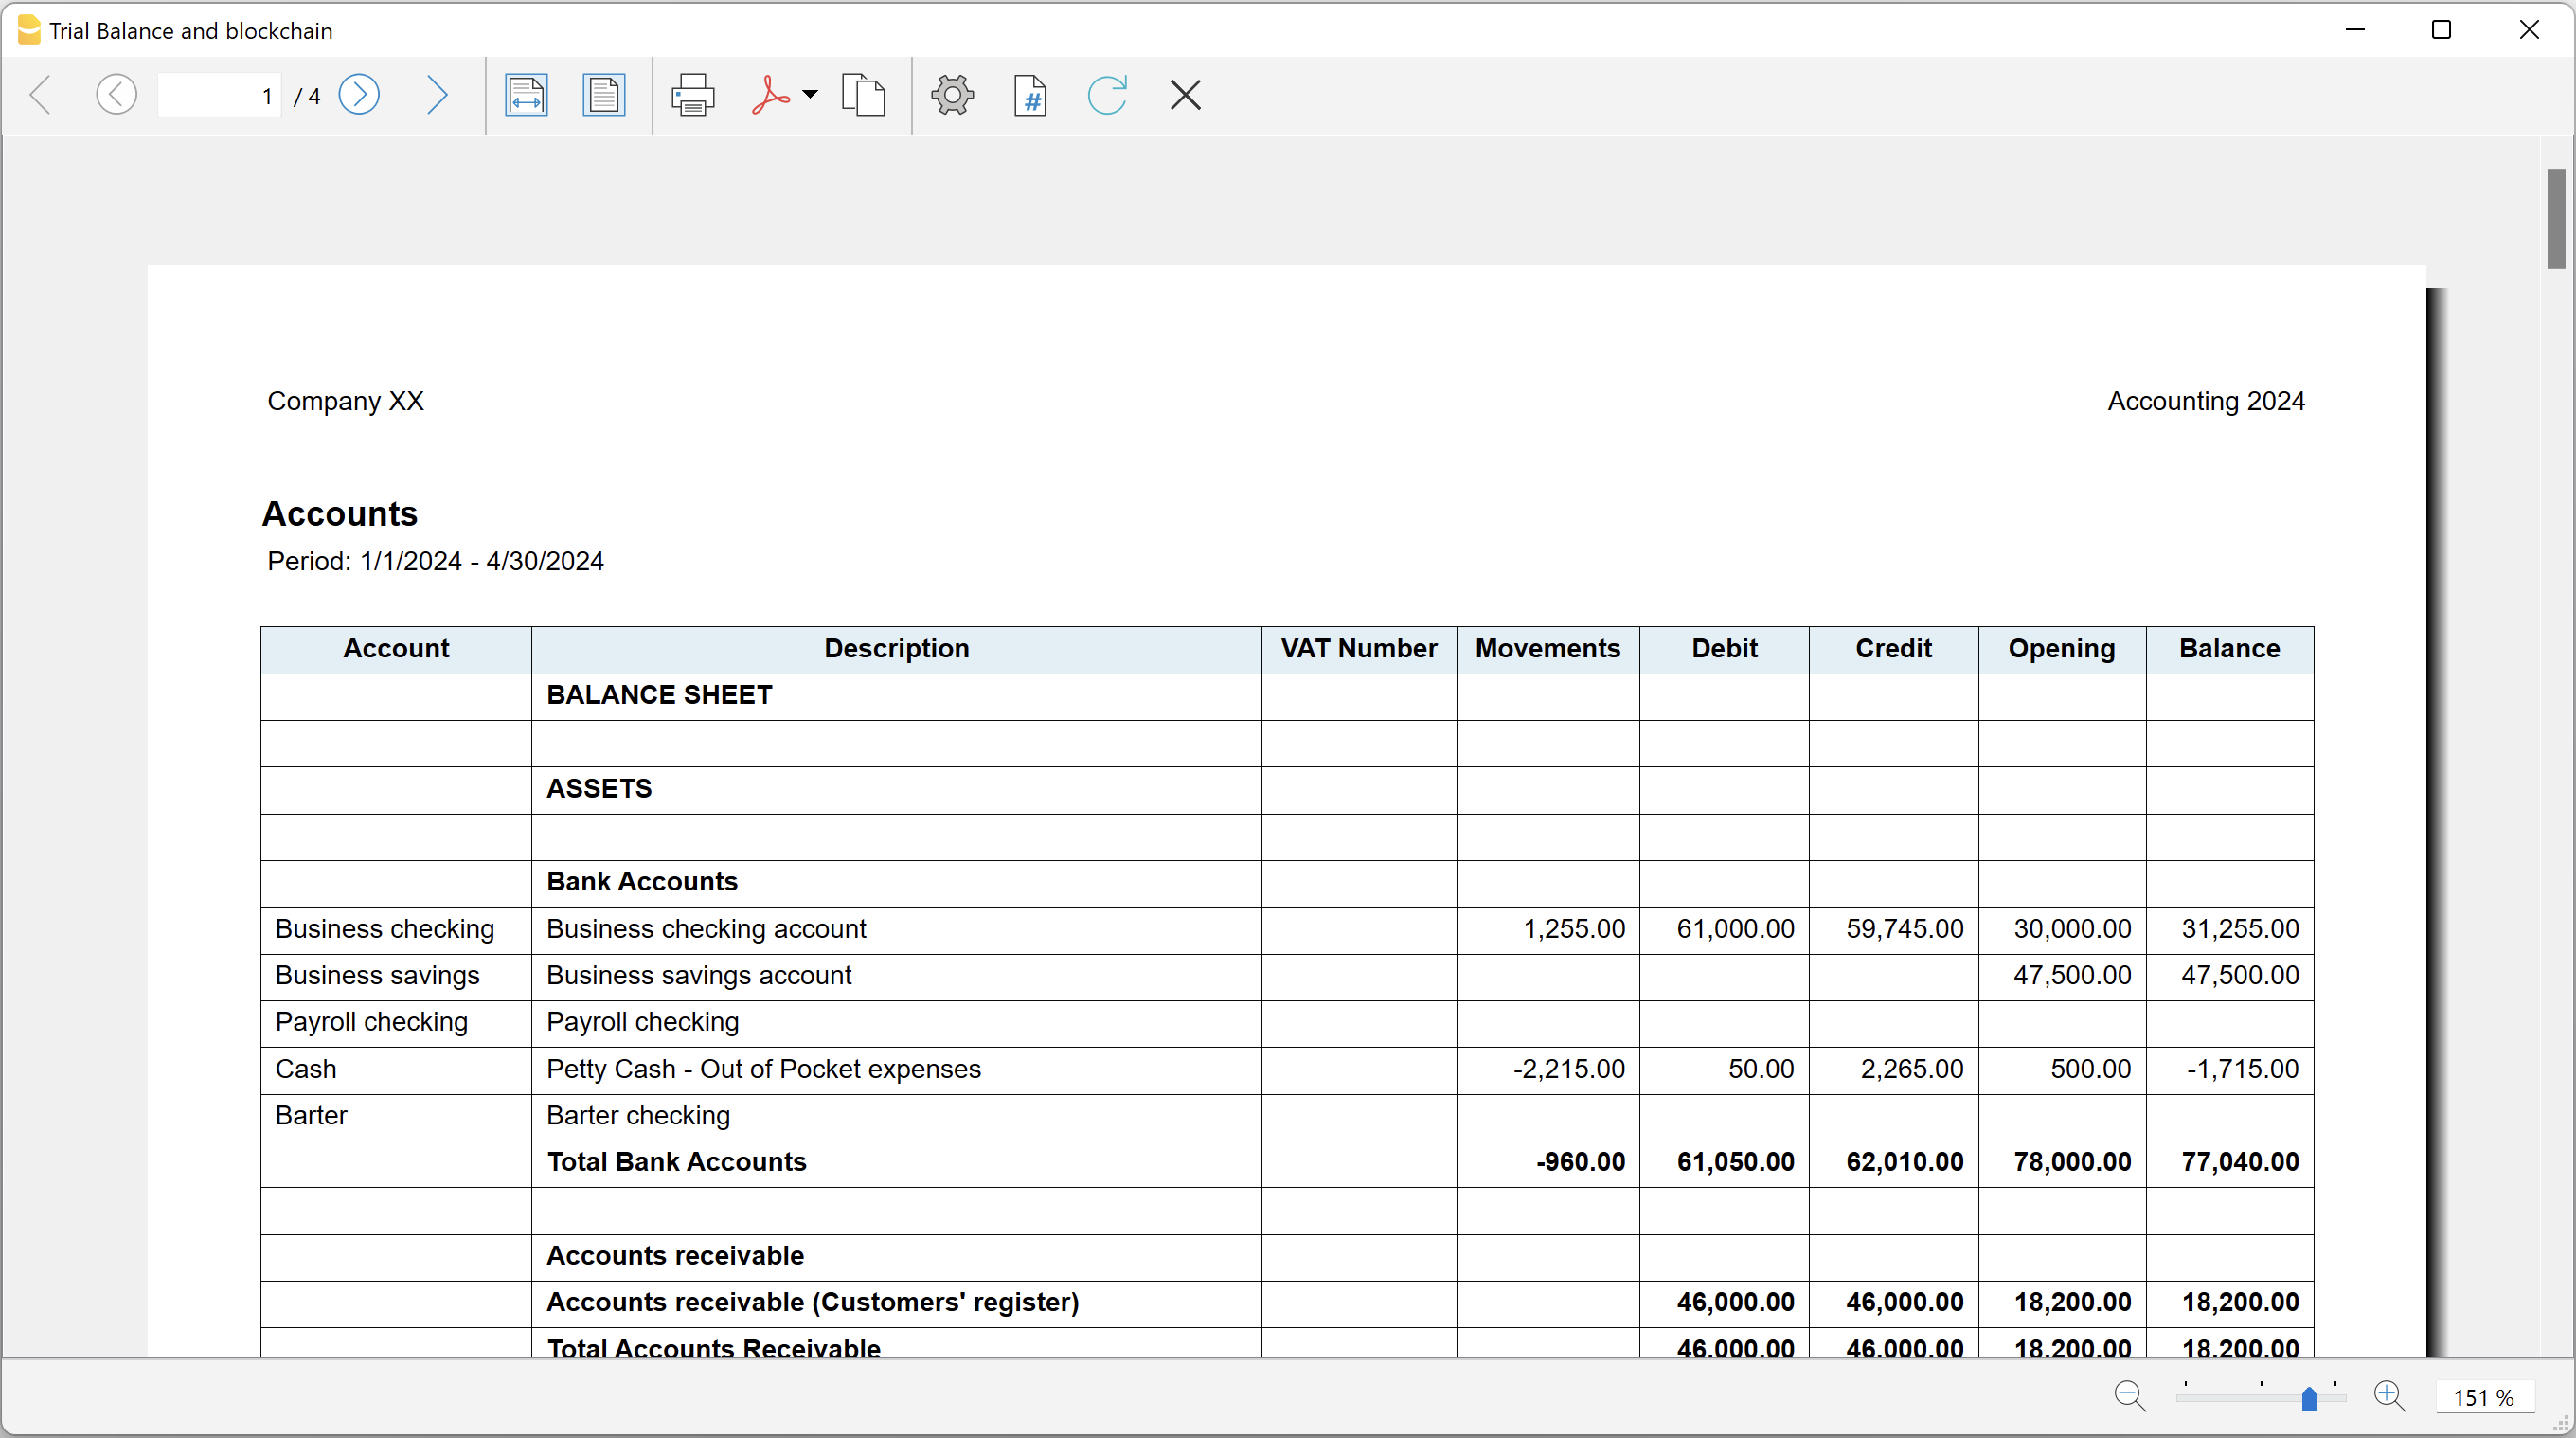
Trial Balance with transaction's lock blockchain information
Trial Balance with transaction's lock blockchain informationThe extension creates a report containing the table Accounts and the blockchain information regarding the transaction lock of the previous period and of the current period.
This printout has been conceived for a customer that has central SAP accounting and use Banana Accounting locally, to keep accounting for at more than 40 schools. Each school keep their own accounting and every 4 months the data is integrated in the main accounting system.
In order to assure that the information is perfectly synchronized:
- The school lock the transactions so that each movement is marked with a blockchain.
- The school print the report using this extension, with the data and the blockchain info of the current and last period.
- Prior to entering the data in the main system, the responsable verify that the blockchain of the last period already entered is the same as the one printed on the current report.
Personal at the schools can easily manage their finance locally and have more details and better control over the spending. Data is only entered in the main system periodically. The organisation have a better accounting system and save a lot of money in training and SAP licenses.
Install the extension
To install the extension:
- Open Banana Accounting Plus.
- Menu Extensions > Manage Extensions
- Select Universal as country.
- Select Online > Productivity.
- From the extensions list select Trial Balance with transaction's lock blockchain information.
- Click Install to install the extension.
- Click Close to close the window.
Create the report
To creare the report:
- Open an accounting file.
- From the menu File > File and accounting properties, in the Header left and Header right fields enter the texts to be printed on the left and right in the page header.
- From the Extensions menu select Trial Balance with transaction's lock blockchain information.
- In Settings dialogue set header texts, title and font as you want, then click OK.
- In Period dialogue select a period and confirm with OK to create the report.
The texts of the settings dialog and column headers in the printout are fixed and are in the same language as the Banana file (defined from the menu File > File and accounting properties > Other > Current language). The languages that can be used are Italian, French, German and English.
Settings dialogue
Run the extension from the menu Extensions > Trial Balance with transaction's lock blockchain information.
The extension Settings dialogue will open. From here you can choose some parameters to print the report.
- Header left text.
Insert another text to be printed on the left side of the page header. - Header right text.
Insert another text to be printed on the right side of the page header. - Title.
Insert text to be printed as title of the page. - Font family.
Insert the font type. - Font size.
Insert the font size for all the page texts. - Title font size.
Insert the font size for the title.
Print example
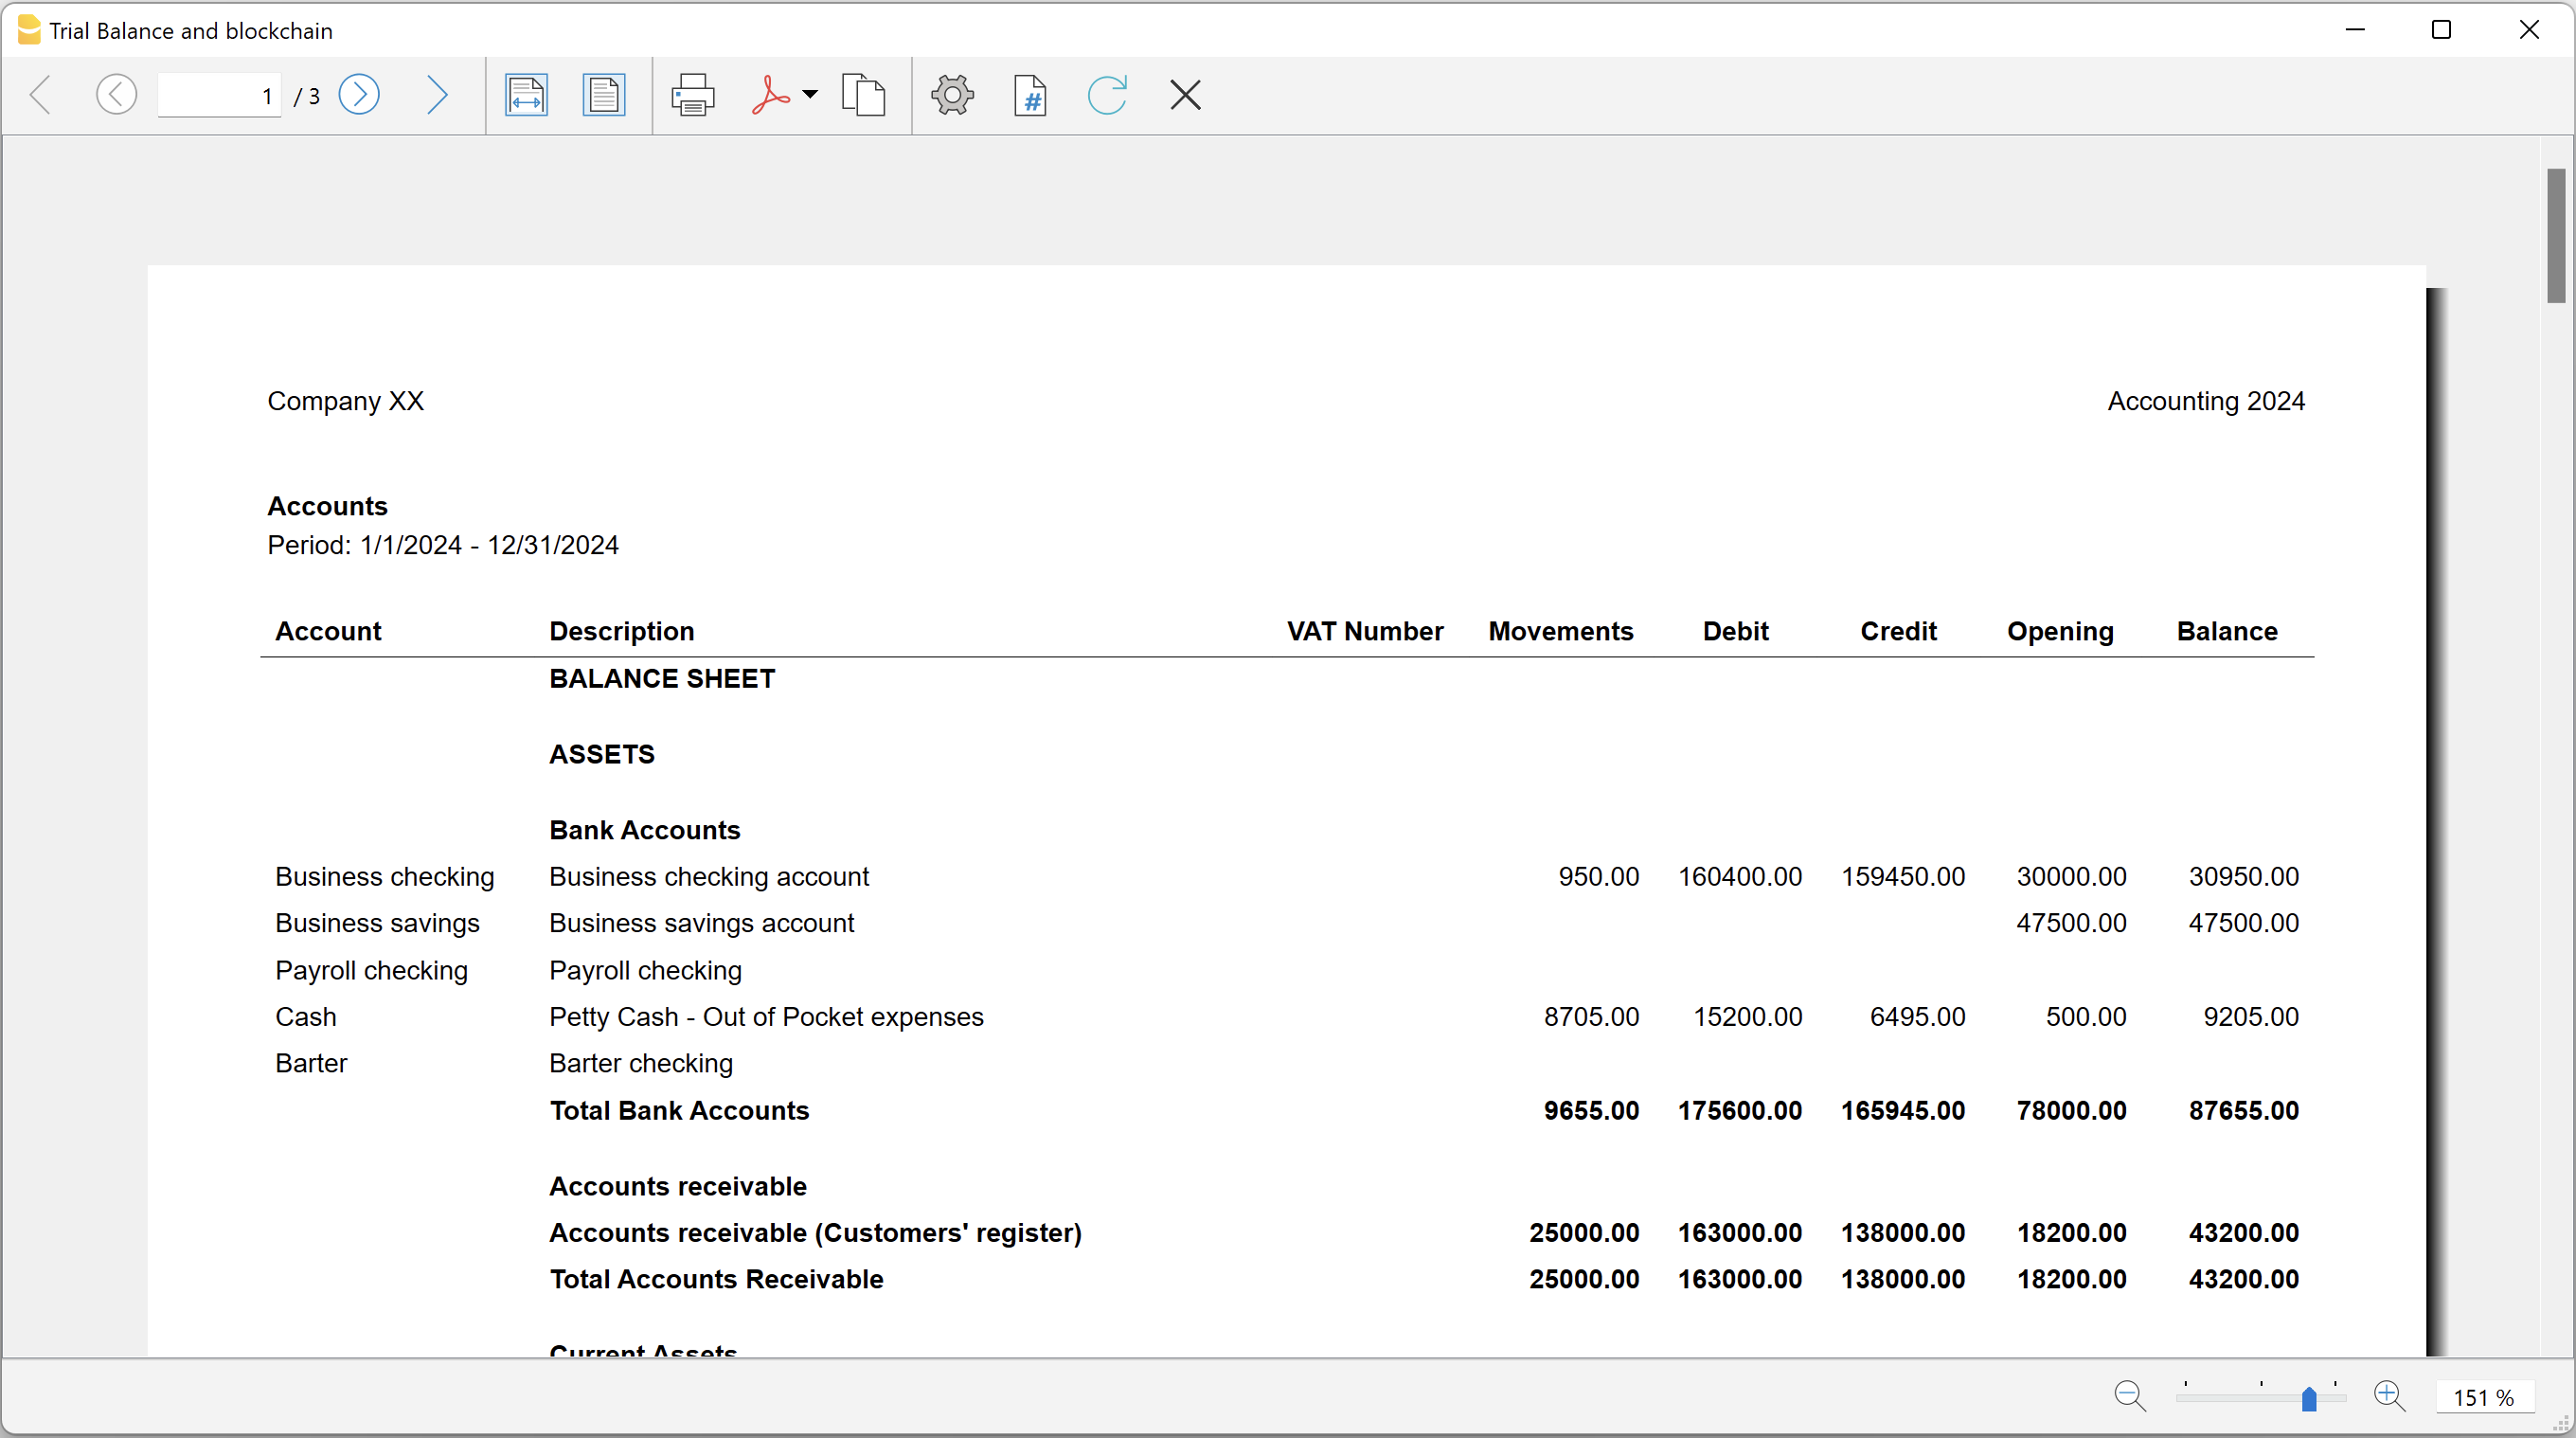
Blockchain row explanation:
- Date until which transactions are locked.
- Date of the last transaction.
- Number of locked transactions.
- Progressive hash of last locked transaction.
Utilities Extensions for accounting
This section covers general utility extensions for accounting.
Table of contents
- Compare current with other accounting file
- Calculate interest on account (exact days 365/365)
- Update Dates in the accounting file
- Invoice from member fee (Banana 9)
- Invoice from member fee (Banana+)
- Printing receipts from cash book transactions
- Reconcile account with mt940/ISO20022 file
- Duplicate transaction checking
Calculate interest on account (exact days 365/365)
Calculate interest on account (exact days 365/365)Install the extension
To install the extension:
- Open Banana Accounting Plus.
- Menu Extensions > Manage Extensions.
- In the search field enter Calculate interest on account (exact days 365/365).
- From the extensions list select Calculate interest on account (exact days 365/365).
- Select the extension and click Install.
- Click Close to close the window.
Create the report
To creare the report:
- Open an accounting file.
- From the Extensions menu select Calculate interest on account (exact days 365/365).
- Enter the account number.
- Select the period.
- Enter the interest rate on debit balance.
- Enter the interest rate on credit balance.
A window with results is displayed. You can copy, save and print the results. The transactions list can be paste into the table Transactions.
Compare current with other accounting file
Compare current with other accounting fileInstall the extension
To install the extension:
- Open Banana Accounting Plus.
- Menu Extensions > Manage Extensions.
- In the search field enter Compare current with other accounting file.
- From the extensions list select Compare current with other accounting file.
- Select the extension and click Install.
- Click Close to close the window.
Compare two accounting files
To compare two accounting files:
- Open an accounting file.
- From the Extensions menu select Compare current with other accounting file.
- Select a second accounting file to compare.
The differences are reported as messages, when you click on it you go to the row.
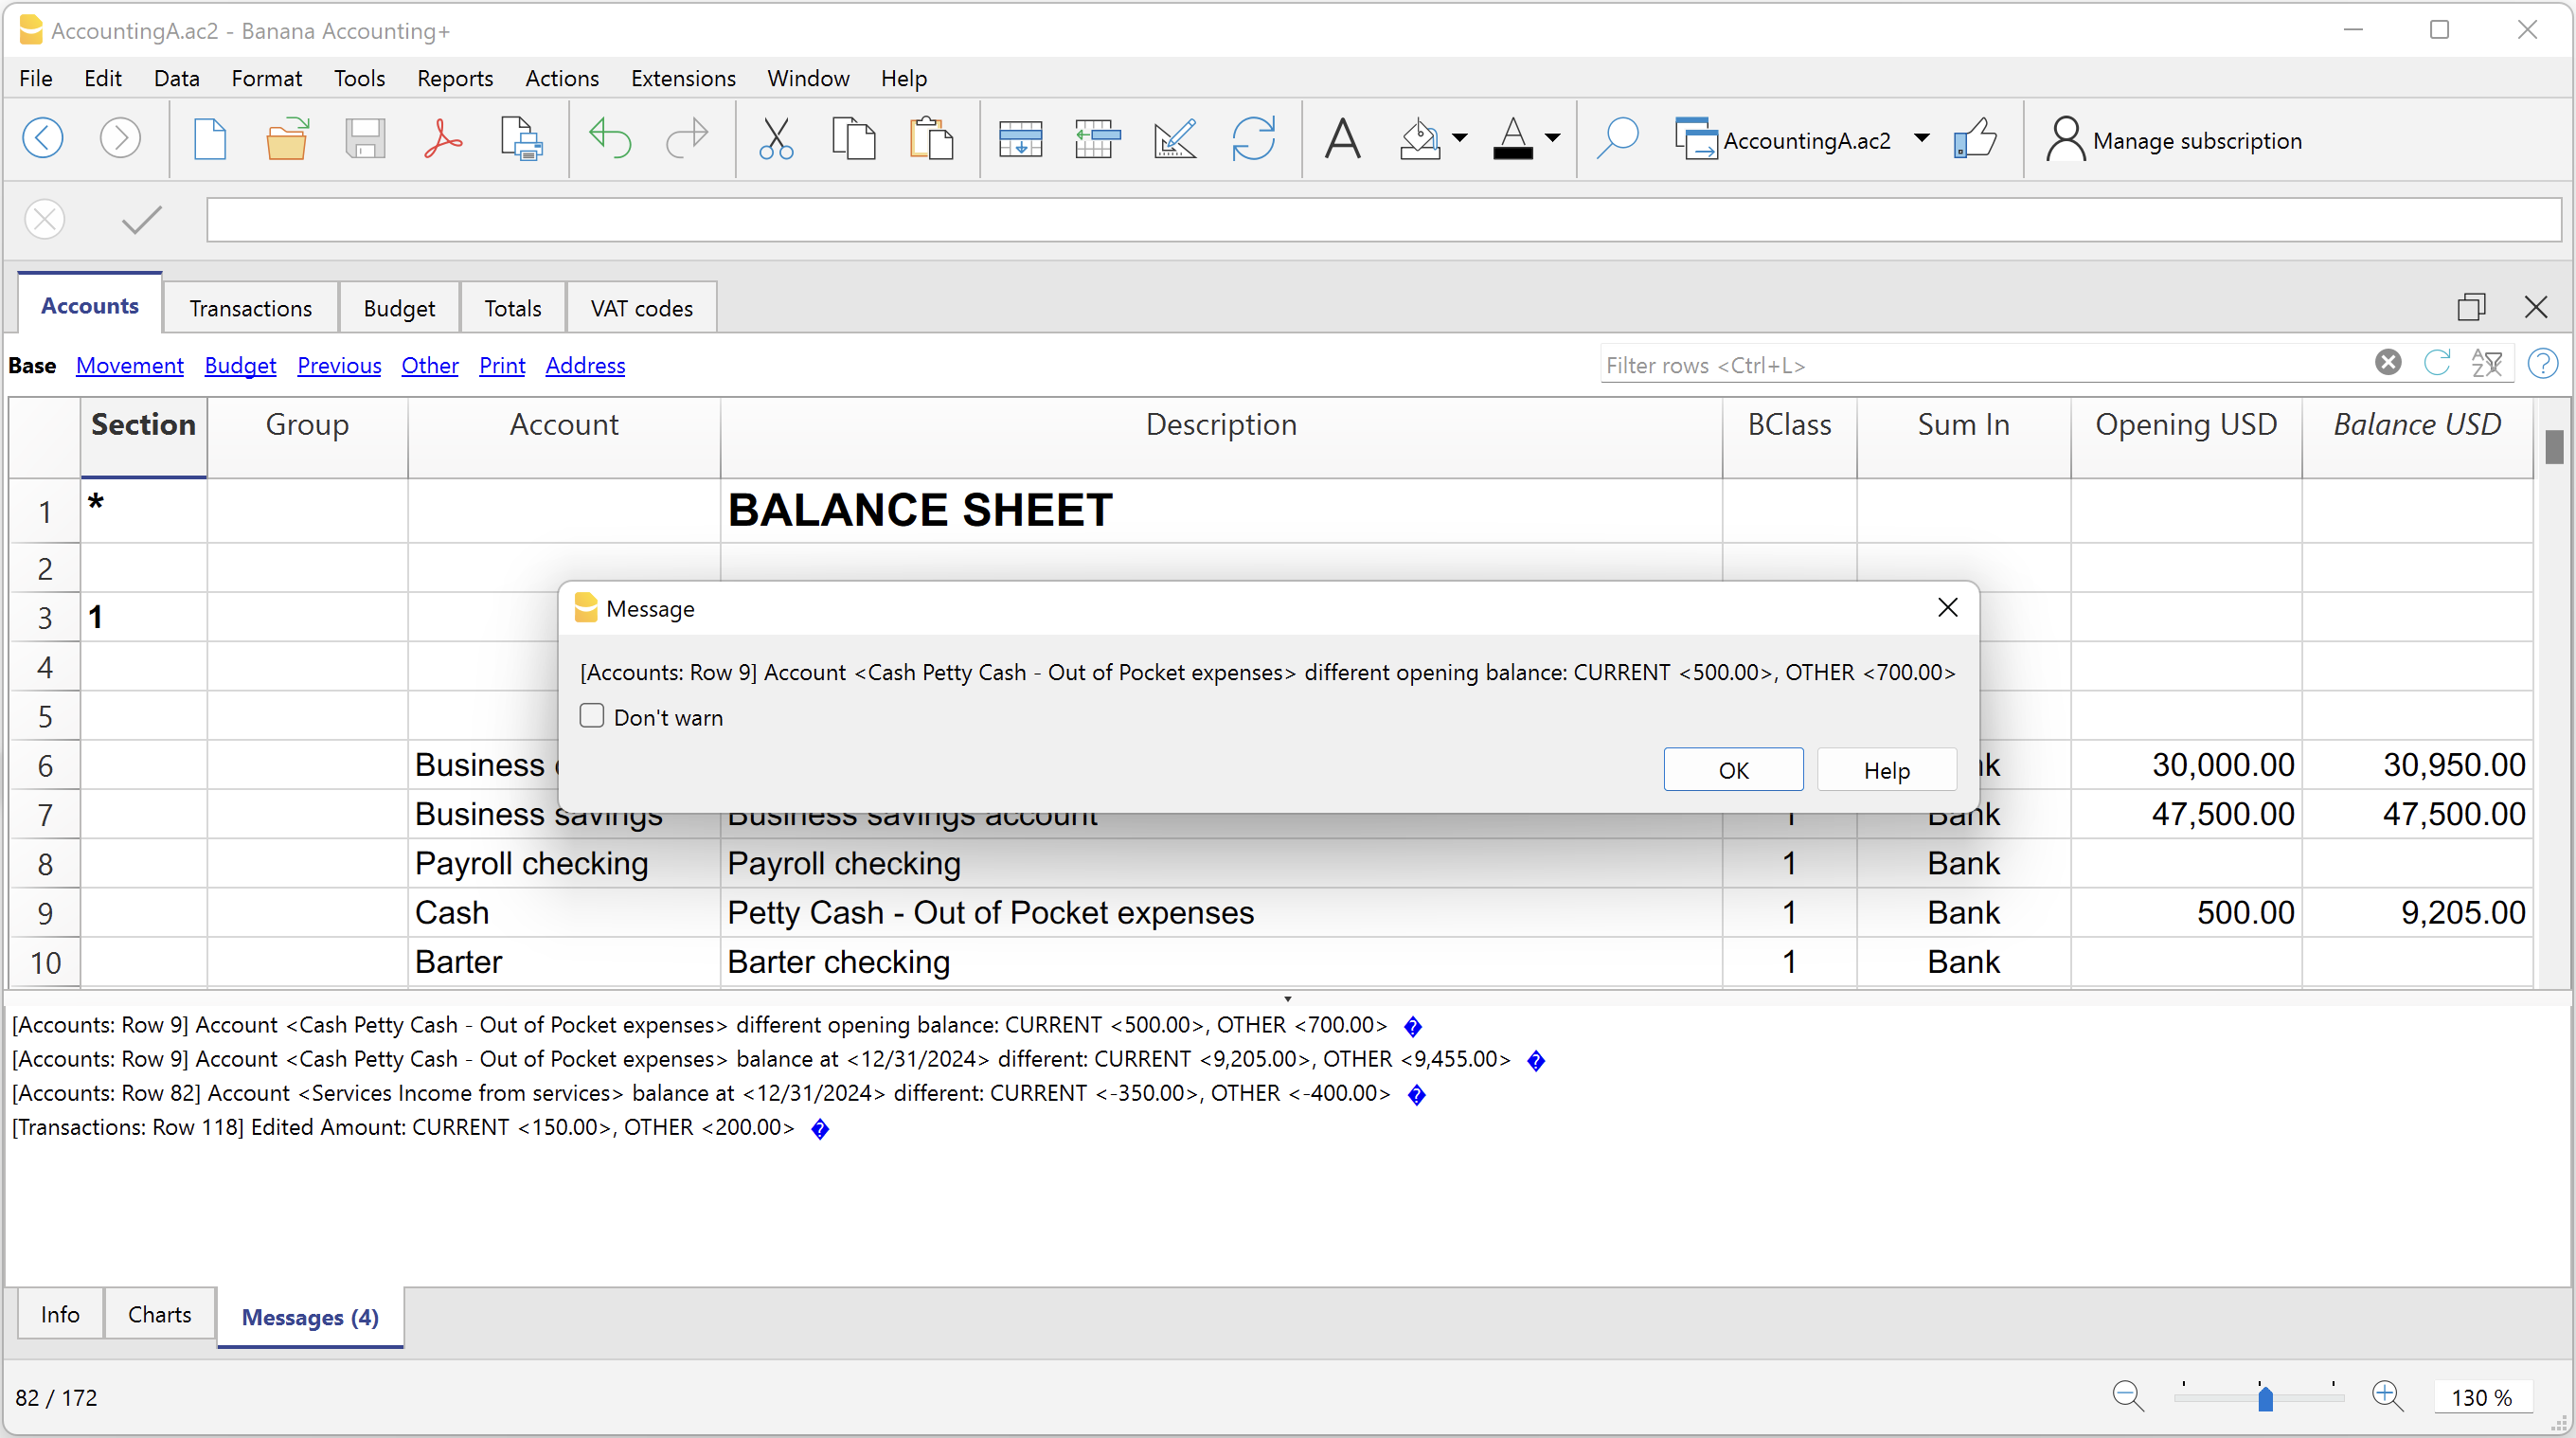
Create invoice transactions from member fee (Banana 9)
Create invoice transactions from member fee (Banana 9)Prerequisites
- Double-entry accounting file with normal accounts for members/customers is required.
Install the extension
To install the extension:
- Open Banana Accounting.
- Menu Extensions > Manage Extensions.
- In the search field enter Create invoice transactions from member fee (Banana 9).
- From the extensions list select Create invoice transactions from member fee (Banana 9).
- Select the extension and click Install.
- Click Close to close the window.
Add the MemberFee column
- Open the Accounts table (Address view).
- Activate the MemberFee column (the column already exists, it just needs to be activated).
- For each member/customer use the MemberFee column to enter the invoice amount.
Create invoice transactions
To creare the invoice transactions:
- Open an accounting file.
- From the menu Account1 select Import to accounting.
- As import option select Transactions.
- From the list select the Create invoice transactions from member fee extension.
- In the File name field, click Browse and select the current open accounting file.
- Click OK.
- Enter the invoice start number.
- Enter the revenue account.
- Enter the transaction description.
- The Import transactions opens, confirm with OK.
The program creates the invoice transactions for all the member/customer that has an amount in the MemberFee column of the table Accounts.
Create invoice transactions from member fee (Banana+)
Create invoice transactions from member fee (Banana+)Prerequisites
- Banana Accounting Plus.
- Double entry accounting file with Cost Centers accounts (Cc1, Cc2, Cc3) for members/customers is required.
Install the extension
To install the extension:
- Open Banana Accounting Plus.
- Menu Extensions > Manage Extensions.
- In the search field enter Create invoice transactions from member fee (Banana+).
- From the extensions list select Create invoice transactions from member fee (Banana+).
- Select the extension and click Install.
- Click Close to close the window.
Add the MemberFee column
- Open the Accounts table (Address view).
- Activate the MemberFee column (the column already exists, it just needs to be activated).
- For each member/customer use the MemberFee column to enter the invoice amount.
Create invoice transactions
To creare the invoice transactions:
- Open the accounting file.
- From the menu Extensions select Create invoice transactions from member fee (Banana+).
- In the Settings dialogue:
- Set the invoice description.
The text that is displayed on the invoice. This text is automatically followed by first and last name or company name. - Set the starting invoice number.
The first invoice starts whit this number, while all others invoices use progressive numbers.
- Set the invoice description.
- The program shows a dialog with all the invoice transactions that will be added.
- Confirm with OK.
The program creates the invoice transactions for all the members/customers that have an amount in the MemberFee column of the table Accounts.
- Date: the date of the current day.
- Description: text entered in the settings followed by first and last name or company name.
- Amount: the amount defined in the MemberFee column of the Accounts table.
- Cc1 / Cc2 / Cc3: the Cost Center account of the member/customer:
- Cc1 when using cost centers that starts with "."
- Cc2 when using cost centers that starts with ","
- Cc3 when using cost centers that starts with ";"
Duplicate transaction checking (auf Doppelbuchungen prüfen)
Duplicate transaction checking (auf Doppelbuchungen prüfen)Diese Applikation dient zur Prüfung auf Doppelbuchungen.
Es handelt sich um eine Doppelbuchung, wenn ein anderer Buchungssatz mit gleichem Betrag, sowie Haben-Konto und Soll-Konto in einem Zeitraum von 3 Tagen existiert.
Wird eine Doppelbuchung gefunden, wird dem Benutzer eine Meldung angezeigt.
Es ist möglich, die Prüfung einer Buchung zu überspringen, indem eine neue Spalte mit dem Namen 'SkipDuplicateCheck' hinzufügt und darin auf der Buchungszeile ein beliebiger Wert (z.B.:'x') eingegeben wird.
Siehe auch Installieren einer Banana-Erweiterungen.
Reconcile account with mt940/ISO20022 file
Reconcile account with mt940/ISO20022 fileThis extension takes as input an electronic bank statemant (MT940 or ISO20022) and compare day by day with the account statements and shows differences.
It is very usefull for finding transactions not recordered or incorrectly recorded.
Install the extension
To install the extension:
- Open Banana Accounting Plus.
- Menu Extensions > Manage Extensions.
- In the search field enter Reconcile account with mt940/ISO20022 file.
- From the extensions list select Reconcile account with mt940/ISO20022 file.
- Select the extension and click Install.
- Click Close to close the window.
Create the report
To creare the report:
- Open the accounting file.
- From the Extensions menu select the Reconcile account with mt940/ISO20022 file.
- Select the electronic bank statement (MT940 or ISO20022).
- Enter the account number.
A window with results is displayed. You can copy, save and print the results.
Update Dates in the accounting file
Update Dates in the accounting fileIn order to change the accounting data, the extension uses the Document Change API. For more information visit How-to update Accounting Dates using Document Change.
Install the extension
To install the extension:
- Open Banana Accounting Plus.
- Menu Extensions > Manage Extensions.
- In the search field enter Update Dates in the accounting file.
- From the extensions list select Update Dates in the accounting file.
- Select the extension and click Install.
- Click Close to close the window.
Change accounting dates
To change accounting dates using the extension:
- Open an accounting file.
- From the Extensions menu select the Update Dates in the accounting file.
- A confirmation window dialogue shows all the sections and tables of the accounting where dates will be changed.
- Confirm with OK to apply the changes to the accounting file.
[UNI11] Layout 11 – Programmierbares Rechnungslayout (Banana+)
[UNI11] Layout 11 – Programmierbares Rechnungslayout (Banana+)Dieses Layout für den Rechnungsausdruck mit Banana Buchhaltung Plus ist sehr anpassbar und programmierbar. Sie können Ihre Rechnungen ganz nach Wunsch gestalten, selbst festlegen, welche Elemente gedruckt werden sollen, und die Textbeschreibungen individuell anpassen.
Das Layout UNI11 verfügt über denselben Funktionsumfang wie das Layout CH10, mit Ausnahme des Ausdrucks des Schweizer QR-Codes.
Die Dokumentation zu Layout UNI11 verweist auf diejenige des Layouts CH10, da die Funktionalität weitgehend identisch ist.
Die Bankverbindung für die Bezahlung der Rechnung wird über einen Schlusstext eingefügt. Bitte beachten Sie die entsprechende Anleitung zum Eingeben eines Schlusstextes, um die Zahlungsinformationen korrekt darzustellen.
Voraussetzungen
Personalisierung des Rechnungsausdrucks
Das Rechnungsdrucklayout enthält vordefinierte Einstellungen, die Sie an Ihre individuellen Bedürfnisse anpassen können. Der Rechnungsausdruck lässt sich auf einfache Weise personalisieren: Bestimmen Sie selbst, welche Rechnungselemente angezeigt oder ausgeblendet werden sollen. Passen Sie die vordefinierten Beschreibungstexte flexibel an, um sie Ihrer Sprache oder Ihrem Stil anzupassen.
- Dialogfenster zur Einstellung der Rechnungsparameter – Im Dialogfenster für das Rechnungsdrucklayout können Sie zahlreiche Einstellungen vornehmen, um Ihre Rechnung individuell zu gestalten:
- Auswahl der Rechnungselemente – Bestimmen Sie, welche Informationen auf der Rechnung enthalten sein sollen.
- Position der Rechnungsadresse – Wählen Sie, ob die Adresse rechts oder links auf der Rechnung erscheinen soll.
- Detailspalten definieren – Legen Sie fest, welche Spalten angezeigt werden (z.B. Menge, Einzelpreis, Gesamtbetrag) und in welcher Reihenfolge.
Es können Rechnungen mit vollständigen Detailangaben (Mengen und Preisen) oder nur mit Gesamtsummen erstellt werden. Auch benutzerdefinierte Spalten sind möglich. - Standardtexte bearbeiten – Ändern Sie vordefinierte Texte wie "Rechnung", "Fälligkeitsdatum" oder "Zahlbar bis" nach Ihren Bedürfnissen.
- Mehrsprachigkeit – Fügen Sie Übersetzungen in anderen Sprachen hinzu – ideal für internationale Kunden.
- Schriftart anpassen – Die Schriftart des Textes kann nach Wunsch geändert werden.
- Farbschema auswählen – Passen Sie die Farbgestaltung Ihrer Rechnung nach Ihren Wünschen an.
- JavaScript-Programmierung
- Erstellen Sie eigene Druckfunktionen für: Kopfzeile, Adressbereich, Positionsdetails, Schlusstext und Fusszeile.
Diese Funktionen ersetzen die standardmässig vordefinierten Ausgaben beim Rechnungsausdruck.
- Erstellen Sie eigene Druckfunktionen für: Kopfzeile, Adressbereich, Positionsdetails, Schlusstext und Fusszeile.
- CSS-Programmierung
- Passen Sie Ränder, Abstände und andere Formatierungsparameter an, indem Sie die entsprechenden CSS-Eigenschaften verändern.
- Benutzerdefiniertes Layout erstellen
- Dies erfordert Kenntnisse in der JavaScript-Programmierung.
- Alternativ können Sie ein bestehendes Layout als Vorlage verwenden und es nach Belieben anpassen.
Customizable Accounting Solution
Banana Accounting Plus is highly customizable professional accounting software that can be adapted to your organization, country and specific accounting needs.
Start from a ready-to-use template and customize the chart of accounts, reports, VAT settings, currencies and other elements to create the accounting solution that works best for you.
Customize your accounting
Banana Accounting gives you the flexibility to organize your accounting according to your own requirements.
- Create a chart of accounts with your preferred numbering and structure
- Choose your language, currency and local settings
- Define account groups, Cost Centers and Segments
- Add custom columns to accounts and transactions
- Define VAT or sales tax codes that automatically calculate VAT amounts
- Customize your Balance Sheet and Income Statement
- Manage multiple currencies and exchange rates
- Create your own extensions for printing, importing or exporting data with specific criteria
Start from a template and make it yours
The easiest way to create your customized accounting solution is to start from an existing template that is close to your needs and adapt it.
Once your accounting file is configured, you can save it and reuse it as the basis for other accounting files.
Although not recommended, you can also create a new accounting file from scratch and Creating a new template.
It is also possible to create an instance file in the XBRL format that is specific to a country.
Need help? We are here to help
Our accounting team has a broad international experience and is available to help you create the best solution for you.
- We have customers in more the 120 countries.
- We work in different languages.
- We have experience with many accounting and fiscal systems.
Adapt your accounting to different countries
Banana Accounting is designed to work with different languages, currencies and accounting systems. You can adapt the chart of accounts, VAT or sales tax settings and financial reports according to local requirements.
This flexibility makes Banana Accounting particularly useful for organizations working internationally or managing accounting in different countries.
Extend Banana Accounting with Extensions
Banana Extensions allow you to add specific functions and automate tasks according to your needs.
Extensions can be used to:
- Create customized accounting and financial reports
- Prepare reports according to specific tax or regulatory requirements
- Import data from banks or other systems
- Export accounting data in specific formats
- Check accounting data according to specific rules
- Create calculations, charts and other customized outputs
Build the solution that works for you
From a simple customized chart of accounts to advanced reporting, data import and automation, Banana Accounting can grow and adapt to your requirements.
You can start with a standard template and progressively customize your accounting as your needs evolve.
Start for free
Download Banana Accounting and start immediately with the Free plan. No personal information is required, and even your email address is optional.
Create your accounting file, explore the customization options and upgrade to a paid plan whenever you need additional features.
Case guide
Banana Accounting is a versatile accounting software. It can be used for different purposes.
When accounting is mandated by law
Business
- Required to do double entry accounting
Double entry accounting, with/without VAT or with/without multicurrency- Small companies (10 or more employees).
- Micro companies (1-9 employees).
- Companies or other organization with no employees.
Financial and Holding companies, Foundations, Asset management, Trusts.
- Required to report Revenue and Expenses.
- Small companies with revenue less then a specified amount
- Self employed individuals.
- VAT reporting
Certified public accountants (CPA)
Do accounting for other companies.
CPA doing accounting for small businesses usually prefer to use Double entry accounting.
Not for profit organizations
- Small non profit organization.
Income and expense accounting or double entry accounting. - Entities with institutional and commercial activities.
Double entry accounting. - International NGO
Double entry accounting with multi-currency.
Public sectors
- Small public entities.
Double entry accounting
Private and family accounting
- Private and Family accounting.
Income and Expense accounting. - Private and Family accounting with international investments.
Double entry accounting.
Auxiliary/ internal accounting
Not the main accounting
- Cash and liquidity management.
Income and Expense accounting.- Simple cash manager.
- Liquidity manager.
Companies that have a person that keep track of cash and banks.
- Project and Department accounting.
Income and Expense accounting.- Internal projects within larger organizations.
- Distributed accounting solutions
Keep local accounting, integrated in the ERP system. - Construction accounting.
Double entry or Income and Expense accounting.- Owners that build a property and keep track of the investment and progress.
- Contractors or architects that have responsibility of the construction’s project.
- Property management accounting.
Income and Expense accounting or Income and Expenses accounting.- Owner that mange a rented property.
- Condominiums.
- Professionals that manage properties for others.
Education
Banana Accounting is used as a tool to learn and exercise Double Entry Accounting.
- Basic accounting in low grade school.
- Introduction to accounting.
Show how the accounting works, with possibility. - Accounting training.
Students enter transactions (exercises on double entry accounting). - Accounting for a virtual company..
Budgeting and financial planning
Use the financial planning functionalities of Banana Accounting.
- Budgeting.
- Financial plan for a startup.
- Retirement planning.
Utilities products
Assets management
- Companies
Books catalog and loan management
- Small libraries
- Companies / legal practice
- Private
Address book
- Simple address management
- Google contacts editor
- Special adess management (Elenco patrizi)
Time sheet
- Employees for time tracking
- Companies for their employees
Future: project managment
Create a new template file
The first step is to create a new accounting file (File new) by choosing the more suitable type and language.
- It is suitable to start by choosing a predefined template that looks like the one you desire. You can then change everything you want.
- In the following examples we assume you use the double entry accounting system for a company.
- Once you have created a file you save it by giving it a name. This file can be used for your accounting or serve as a template for other companies.
Accounting in a language not available
You can create an accounting file that is in the desired language, even if your the software is not available in the local language.
- Create a new template, using a template in another language that is similar to you needs.
- Translate the accounting plan
Translate adapt the Description in the accounting plan as needed. - Translate the column headers.
- Menu Data -> Column settings.
- For each column change the header.
Create an accounting file with different settings
If the template setting are not suitable for you:
- Tools -> Convert to new file command, you will create a copy of the file
- Choose the file type
- Set the language, decimals rounding that is more suitable.
The Accounting properties
You insert the name of the company, the opening and closing date of the accounting year.
You can chose the accounting currency. If a currency is not on the list type the new currency code.
The accounting plan
Your country will probably have its own accounting numbering and grouping.
You will have to write or copy and paste the data in the Accounts table.
- Sections will define the main separations in the accounting.
- Balance sheet
- Income Statements
- Cost Centers
- Segments
- Account (Account number)
Is where you put the account number. - Group is where you insert the group number.
- Gr is where you insert the Group code where this Account or group should be totalized.
When creating a new accounting structure keep in mind:
- Add the accounts you will need. Don’t create a huge accounting plan in case you do not really need it.
Users can always add new accounts. - Keep the grouping simple, so that you have the groping required for your country.
The grouping usually also conforms to the country specific requirements. - For tax purposes you will probably need also a different grouping scheme that is different from the normal one that you use for Balance sheet or Income presentation:
- Use the column Gr1, Gr2, to assign to each account a different grouping scheme.
You will use then use the external report or create a BananaApps that will use the number to group different accounts together. - If you have a strict accounting numbering scheme, you can also create BananaApps that groups account based on specific number.
- Use the column Gr1, Gr2, to assign to each account a different grouping scheme.
- In case you need specific report for other need consider creating a BananaApps or an Excel sheet that takes the data from the accounting file.
Cost centers and segments
Consider using Cost Centers and Segments for more detailed reporting. If you do not have this specific need, you can add later.
In Banana you can define up to
- 3 types of cost centers, with an unlimited number of cost centers for each type.
- 10 levels of segments, with an unlimited number of segments for each type.
You can use the cost centers and segments while booking.
You specify the transaction code for the transaction. Cost centers are very flexible, and they are usually used for:
- Project income and expenses management
- Taking note of special transactions
- Have a parallel accounting scheme (for example large international NGO)
With the debit and credit account they have their internal accounting.
With the cost centers they have the transactions recorded by the donors accounting scheme. At any time they have reports for internal use or to presents to the donors.
You specify the segment in the transaction when you enter the account. You can have a segment that is different for account debit and credit. Consider using for managing:
- Branches, Organisations, Departments
- Different types of businesses
Vat Code
In the Accounts table you can setup all the VAT or sales tax percentage you will need. Basically there are two types of VAT Codes:
- VAT Due.
- VAT recoverable.
You can setup codes for all the percentages and purposes you will need.
Your country will have a specific reporting. With BananaApps you can create a printout that is a facsimile of the state form, with the amounts already grouped and summed as needed.
Use the column Gr1 or Gr2 to enter the number of the Tax form, were the VAT Code should be grouped. If a VAT code needs to be grouped in more than one place, separate the form number with a semicolon “;”.
The advantage of using Vat Code is that you can configure the accounting so that only useing the appropiate VAT code it is possible to extract the data necessary for the VAT reporting. You can have just one account where all the vat plus or minus is recorded. The accounting plan remain very simple and can focus on the company's need.
There are other approaches. For example in Germany the Datev accounting plan use the accounts as a base for the VAT reporting. For each specific VAT cases there must be a corresponding account. . The disadvantage of this approach is that there are accounts with special meaning (for example automatic accounts) with predefined VAT percentage and rules that are not visible for the users. This kind of accounting are more difficult to use unless you know exactly the purpose. With the VAT code the VAT complexity is resolved in the VAT table.
You will therefore have a choice to create an accounting plan, that is based on the need of a company and use the VAT code functionality for reporting, or mantain each VAT transaction separated for each case and have many VAT Accounts in the accounting plan.
Exchange rate table
If you have chosen the multi-currency option in the Exchange rate table you will setup the currency you will use.
Once you have declared a currency you can use it for an account.
Composition Balance sheet and Income statements
You can create predefined printouts of Balance Sheets and Income statements by creating a new composition.
It could be interesting to create predefined composition for:
- End of year report
- Trial balance
- Actual vs. Budget
- Columns with amount by Quarter
- Columns with amount by Segments
Create template documentation for the banana web site
Each template provided by Banana.ch has a page description under www.banana.ch/apps.
Required field
Title
Should be composed of the accounting type and the purpose of the template.
It is the text that will be displayed on google (think of Search Engine Optimisation).
- "Double entry accounting for small company in Switzerland, with VAT".
- "Double entry accounting for small company, with VAT and multi currency".
- "Double entry accounting for an international NGO".
File Url
The full url of the file.
- "https://github.com/BananaAccounting/Switzerland/raw/master/templates/english/double_entry_accounting/en_de_sme_company.ac2"
Short Description
It is displayed on the index, together with the Title.
A text that specify the purpose of the template. Be as expressive as possible.
Description
The Description is used to describe the template, show how to use it. The text should be also prepared for beeing indexed by the search engine.
It should contain reference to the possible user and other information that help make a good rank on google or bing (SEO).
- The first 2 lines of the text.
Are the one displayed in the google search. So they should summarize the use of the template well. - Following text .
Can be long as necessary with:- Use cases.
- Table description
- Content description
- Images
- Testimonials
- Reference to other documentation (Tax documents, business web site, ...)
Other field
- Language
The language of the page. - ac2 file type
Select the file type - ac2 category
Select the category.- Education means for educational purpose.
- ac2 country
Select the country.- If the country is not on the list select Other.
- If the template is for general use, not related to one country, select Universal.
- ac2 language
Select the language of the template.- If the language is not on the list select Other.
- ac2 publisher
Select the publisher. Banana.ch or other.
Setup the Accounts table
In the following we will explain what need to be considered when creating a new accounting tabble for a specific country.
- Creating the account structure and grouping specific country.
- Creating the country specific reports or export files, using the functionalities offered by the Banana API .
Documentation
- Accounts table documentation including table accounts columns.
Examples files
- The examples files are available on github/General/CaseStudies.
- File "scalar_income.ac2" is used in the following as an example of scalar accounting plan.
Using an existing accounting system
Usually countries have accounting system that include:
- Accounts numbering
- Accounts description
- Accounts grouping and totalisation
The country or sector specific accounting system is usually focused on helping prepare the Balance Sheet and Income & Exanses report.
Based on this accounting system it is also necessary to generate report that summirize the accounts for specific tax purposes, in case that the tax autorities require a report that is different from the Balance structure.
Accounts table
In Banana accounts and grouping are specified in the accounts table.
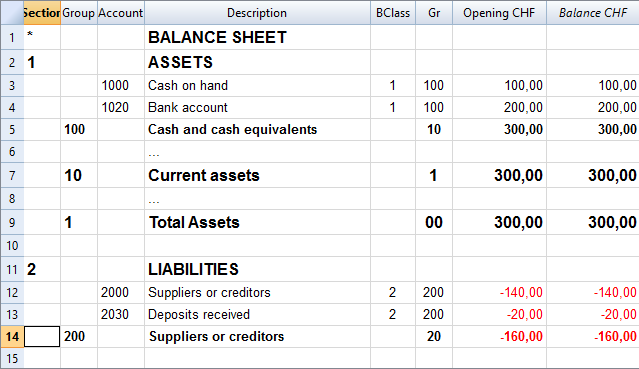
Banana allow to adapt to different county or sector specific requirement, but at the first moment the Banana grouping system look confusing, for the fact that there are different columns that contains similar information.
Accounts, groups and sections
There are three different type of line in the account table.
- Account.
Lines that have an account number in the column account.
Accounts can be normal account, cost center or segmente - Group
Lines that have a group number in the column group. - Section
Line the have a section number in the column section.
A line in the account table can is either an Account, Group or Section. It cannot be both, so if there are on the same line an account, group or section there is an error.
In the above example there are lines for Section, group and accounts.
Here is the meaning
- Accounts.
Are used for recording transactions. - Group
Are used to create sums. - Sections
Are used to separate different part of the report.
Summing and creating totals
In Banana you can create sum by using the combination of:
- Groups columns.
You enter the group number and the line become a group. - Gr
I where you enter the group on where this line should be totalized.
Accounts and Groups can have a Gr.
In the example above.
- The accounts 1000 and 1020 is totilized on the group 100.
- The group 100 is totilized on the group 10.
- The group 10 is totilized on the group 1
- The group 1 is totlized on the group 00.
By creating the group line and specifingin in the Gr whe the each line is grouped you create a wole totalisation.
Total debit = Total credit
Computer represent debit amount in positive and credit amounts in negative therefore we should totalize all accounts and groups in a final group that, if the accounting is correct, should have the amount to zero.
At the end of the grouping we will have a group named "Difference should be zero (null)" that in the above accountng example has the number 00.
Basically in the double entry accountiong system the totalisations is done in this way.
- Group Income and expenses (example group E7)
Is the sum of all Revenue and Costs accounts.
The Profit or Loss of the year that is further totalized in the Equity as the current year result. - Group Assets (example group 2)
Include all Assets accounts
Asset are totalized on the group Difference should zero. - Liabilities and Equity (example group 2).
Is the sum of all the Liabilities and Equity accouns, plus the Profit and loss of the current year from the total group of income and expenses.
Liabilities and Equity on the group Difference should zero. - Difference should be = 0 (example group 00)
Is the end sum of all accounts and the Balance should be null if the accounting is correnct.
The BClass column
In Banana each column has a (Banana class number) that indicate if the account belong to:
- 1 Total Assets
- 2 Total Liabilities
- 3 Total Expenses
- 4 Total Revenue
- 5 Total off balance sheet: Assets
- 6 Total off balance sheet: Liabilities
- 7 Total class 7
- 8 Total class 8
- 9 Total class 9
The BClass is somewhat a redundant information, but unfortunalty is also necessary in order to let Banana if the accounting is correct.
The BClass is also some time confusing for the fact that the country specific accounting system have normally class number that are not the same as the BClass in banana.
The Section column
Is also sometime redundant information, but unfortunatly is necessary in order to have the possibility to customize Balance sheet and other repors.
Grouping for the Balance
- Assets
You need to create a Total Assets group and intermediary groups (like fixed assets) so that up grouping the accounts specific to the Assets. - Liabilities (Third party capital and Equity)
Has subgroups for- Third party capital (Liabilities in anglo saxan terminology)
- Equity
Grouping for Income statemant
It groups all the accounts belonging to the Income statement. At the end there should be a group "Loss (+) por Profit (-).
There are two fundamentally different system to present the Income statement. One that sum separately the Revenue and the Costs and another one (scalar system) where the the Profit and Loss is calculated by starting from the revenues and obtainings intermediary results.
Revenue and Cost separated
There are two groups that are summed in the Loss and Profit
- Total Revenue
- Total Income
Scalar system
- (E1) Gross operating
Sum of all accounts for Revenue and Productions cost - (E2) Gross operating result after deducting personnel expenses
Sum of Gross operating group (E1) and the accounts Personel costs. - (E3) Operating result before depreciation and value adjustments, financial results and taxes (EBITDA)
Sum of E2 and the operating cost - (E4) Operating result before financial results and taxes (EBIT)
Sum of E3 and the depreciation - (E5) Operating result before taxes (EBT)
Sum of E4 and Financial costs - (E6) Profit or loss before taxes
Sum of E6 and extraordinary costs - (E7) Annual profit or loss
Sum of E6 and the tax - In this form it is necessary to create intermediary groups for.
Create a tutorial file with examples
When you create a new template file for beginners it is also suitable to create a tutorial file with example of opening balances, accounting and budget transactions.
The examples will depend on the specific purpose of the template, but it may be helpful to follow a similar approach and give an overview of the most used Transactions and Budget cases.
Opening Balances
Fill the column opening balances with amounts for the Assets, Liabilities and Equity.
Use simple rounded amounts.
Examples Of Accounting Transactions
Give examples of different Transactions type, without repeating too much the same case.
When it make sense, use the following sequence:
- Simple Transactions (direct Debit and Credit):
- Revenue Income going to the bank or the Cash.
- Equity capital going to the Bank.
- Loan going to the Bank.
- Expense payed with the Cash or Bank.
- Purchase of Material payed with Bank.
- Transfer from Bank to Cash.
- Transfer from Cash To Bank.
- Partial Repayment of a Loan.
- Transactions with multiple accounts:
- Bank income split on multiple Sales or Service account.
- Bank payment with multiple Costs.
- Transactions with VAT (When applicable):
- Sales.
- Purchase.
- Customers
- Issue of an invoice.
- Receive payment of an open invoice.
- Issue of Credit note.
- Suppliers
- Bill received.
- Bill payment.
- Receive a Credit note.
- End of year Transactions
- Depreciation of Material.
- Interest income.
- Interest on Loan.
- Active accruals.
- Passive accruals.
- Cost Centers
- Segments
Budget Transactions
- Not recurring revenues and expenses (no repetition code)
- Income as Equity advance.
- One time Sale.
- One time expense.
- One time payment with Bank with multiple costs.
- Buying of Assets (Material).
- Monthly recurring revenues and expenses (Repetition M)
The most part of Income and Expenses are made on a monthly base.- Revenues from sales
- All other Expenses.
- Quarter recurring revenues and expenses (Repetition 3M)
- Interest income.
- Interest on Loan.
- Semester recurring revenues and expenses (Repetition 6M)
- End of Year (Repetition Y)
- Depreciation.
- Loan repayment.
- Eventually an example of a Loan payment split on Interest and Repayment.
Setup the VAT table for a specific country
Use more languages
Banana Accounting software lets you setup the accounting file to use different languages.
- Create the accounting file with a main language.
- Add another language by adding the columns for the description in the other language.
You can add as many languages you need. - Customize the printout.
Program language
Every user can select and change the program language any time. Changing the program language will have no effect on the accounting data and accounting setup.
Adding columns for a different language
You can use the command Add column to create a supplementary column for the description in second language, in the table accounting, VAT table or Transaction's table. Use the language name (for example German, Chinese, etc.) as column name.
In the supplementary columns you will enter the description in the language.
You can add a new View for each language (German, Chinese, etc). You can customize the view to see only the description in one language or in more language at the same time.
People wiil be able to work on their language. .
Enhanced Balance sheet with in different languages
In the Enhanced Balance sheet you can choose witch column to use as description.
Under Columns select Add and choose the column you want to show.
You can create a Customization to save the setting for the printout. This way you can create printout for each language.
BananaApps
With BananaApps you can program a report to adapt to your necessity.
Local Extensions
Extensions for Accounting and VAT reporting
Following we list some developments, for the complete list goto to the Banana Apps search page.
- Austria
- China
- Template for SME companies
- China Small companies Balance Sheet and Profit and Loss reports
- Germany
- VAT Summary Reporting with XML file for uploading on the Elster portal.
- Italy
- Accounting plan and reporting for Non profit organisations
Accounting plan and reports required by the regional and national authorities.
Project developed together with the Centro Servizi Volontariato, Padova - VAT Italia
- Quarterly VAT reporting in XML format for upload.
- XML file with customers and suppliers invoice datafor uploading on the Autority web site.
- Accounting plan and reporting for Non profit organisations
- Netherland
- Audit file (accounting data is exported in XML as required by the NL tax autoryties)
- Switzerland - Ticino
- Curatele Accounting plan and required report
Project Istituti Sociali Città di Lugano - Patriziati
Project based on specificaction of the Sezioni Enti Locali Cantone Ticino.
- Curatele Accounting plan and required report
File Templates
See the Templates section.
Multi-Site Accounting
Distributed companies and organisations have operations in different places.
- In the same country.
- In different countries.
They need to setup an accounting organisation that allows to have:
- An acounting control for each entity (country or project)
- Have a consolidated accounting.
Data from the different accounting files need to be grouped together.
Multi-Site accounting
The Banana Accounting software is used by thousands of organisations and projects as a distributed accounting system.
Banana.ch has been a world pioneer in using blockchain technology, which faciltates the creation of a distributed accounting system.
Examples are:
- Entities that keep track of accounting transactions in different places and integrate the data in one central accounting.
- Projects accounting, with specific and detailed reporting, not available on the central system.
- A Non-profit organization that has projects worldwide, lets each project keep their accounting, and the data are integrated in the central accounting system (See Helvetas - Blockchain decentralized accounting).
- A large public organization that uses SAP, lets some organizations keep their accounting with Banana. (See Example of Kanton Basel City - German).
- Companies with different branches, that operate in different countries, with different currencies and accounting setup.
When multi-site, distributed accounting makes sense
Organizations tend to centralize their accounting system, so that all data reside in one system only.
Cloud computing makes it easier for organizations to share a centralized system. But distributed accounting still is the best choice:
- Connections are slow or costly.
- Using the central system is difficult:
- Require specifically trained personal
- Have high license costs.
- It is not flexible.
- Have a different workflow.
- Local accountings have specific needs, and customizing the central system would be too difficult and costly:
- different accounting plans and requirements
- different legal requirements
- different currencies.
- Accounting documents are kept at the branch level.
- Branches need a lot of flexibility but at the same time you do want to limit data access.
- The different branches have few interactions.
- There is no need to have all the detail-information in a central system.
In these cases it makes sense to have people in the branches use Banana Accounting.
Setting up the distributed accounting system
Organizations that use a distributed accounting system will then need to integrate the data in a central system, in order to have financial statements that include all branches and projects.
The data integration process must consider:
- With what frequency the data need to be integrated (monthly, quarterly, yearly, ...).
- The detail-transactions that need to be integrated in the central system.
- Whether only summary data are being integrated in the main system.
- How the data will be made available to the center.
Integrating all transactions into the central system
The requirements for working this way are:
- The distributed accounting and the central accounting use the same account numbers, same currency.
- In this case the integration process is done by importing the transactions from the branch into the central system.
- In Banana you have a central accounting system and use the import function.
- The distributed accounting and the central accounting have different account numbers or currencies
- The transactions must be converted to a format that is suitable for importing.
You can create a BananaApps that exports the data from the Banana Accounting file into the requested format's data. - Currency conversion.
You need to define at what rate the amounts from one currency are converted to the other currency. - If you use Banana for the central and distributed accounting see
- Import transactions
- Import file (this function also allows to convert account numbers).
- The transactions must be converted to a format that is suitable for importing.
Integrating only the summary data into the central system
This approach facilitates the integration process and is particularly adequate when:
- The central accounting system differs from the local one.
- Local accountings use different settings (currency, accounting plan), making the integration complex.
- There is no need to have detailed transactional information in the central system.
Detailed information can easily be accessed with the Banana accounting file. - There are large quantities of data and integrating it makes managing the central system more complex and costly.
Therefore, in the central system only the summary data are integrated:
- The period of the data that should be integrated (monthly, quarter, year) are defined
- Defined is whether the integration is done at the accounting level or at the group level (see below).
- Each branch accounting prints a summary of transactions (see BananaApps Trial Balance with blockchain) that includes:
- accounts or group number
- total debit and credit for the period.
- these amounts are registered unto the central accounting:
- Manually (directly from the report)
- With the import function. In this case the data should be exported from Banana Accounting.
Using blockchain lock function
If you use a distributed accounting system, it is important that, once you have integrated the data into the central system, the local data are not changed. In case the local data have been changed you will have difficulty in reconciling the different systems. The situation will get complicated if you have many accounting files.
The branch cannot be prevented to modify the file, for the fact that they have the file on their local system.
The only way to make sure that the data have not been changed, is to use a blockchain security mechanism embedded in Banana and named Lock transaction:
Each branch, at the end of each period, is required to:
- Check that the progressive lock of the previous period is the same as the one that has been printed.
- Lock the accounting for the period.
- Print the lock report, sign it and send it to the headquarters, together with the accounting file.
Once the accounting has been locked, the branch, should:
- Continue to work on the same file.
- Do not unlock or change the locked transactions.
The headquarter should:
- Keep note of the progrLock and number when they integrate the data.
- Keep a copy of the file that has been integrated previously.
The best is to put in a directory with the date or have a date in the file name. - When they receive the file, check that the lockProgressive of the last period is the same.
- If is not the same require the branch to fix the problem.
- do not proceed with the data integration.
- Use the BananaApps Compare two files to see the differences.
- In this case, it will be worth it to return the previous file, so that they can start from this and add the new transactions.
- If it is the same
- Proceed with the integration.
- Keep note of the last LockProgr and LockNumber.
- If is not the same require the branch to fix the problem.
Structuring the accounting plan to facilitate the data integration
Keep the same account numbers
If you need to use in the branch the same accounts number that you use in the central system, the best way is to use the same accounts number in the branch accounting file.
Using different account numbers
This is necessary in case local accounting should use a different accounting plan (local rules) or a more detailed accounting.
There are different options:
Add a column to the accounting plan for the central accounting number, so that each account will also have a corresponding central account number:
- The account column will use a local account number.
- In the columns Central account you enter for each account the number of the account used in the central system.
- Different accounts can have the same central account number.
Use a grouping schema where the groups in the accounting table corresponds to the account number of the central accounting (see Helvetas example)
- Each group in the accounting plan will correspond to an account number in the central accounting.
- In the accounts table you will have the groups totals corresponding to the accounts in the central accounting.
- You will end up having a lot of groups.
- This approach is useful if the local accounting needs to create many local accounts. For examples many bank accounts.
Multiple levels
If your organization is complex it may make sense to have different level of integration (see Helvetas example) with different approaches:
- Each country integrates the data of the local projects, by importing all transactions in one file.
- The summary data of each country is then integrated in the central accounting system.
Cash Manager
If the local project only has one account to manage, it make sense to set up a Cash Manager
- Create a Cash Manager file in which the branch keeps track of it's expenses.
- Use the import Cash Manager function to integrate the data in the main Banana Accounting file.
Banana Wertschriftenbuchhaltung
Banana Buchhaltung ist eine vollständige professionelle Buchhaltungssoftware, die auch eine integrierte Lösung für die Wertschriftenbuchhaltung enthält, wie sie normalerweise nur in hochwertigen oder spezialisierten Systemen zu finden ist. Die Lösung Banana Investment Accounting ermöglicht es jedem, Obligationen, Aktien, Fonds und andere Finanzinstrumente, auch in mehreren Währungen, direkt innerhalb der Buchhaltungsdatei einfach zu verwalten.
Sie hilft Finanzfachleuten und privaten Anlegern, ihre Anlagen zu überwachen, zu verwalten und zu berichten. Sie verfolgt Anlageaktivitäten über verschiedene Anlageklassen wie Aktien und Obligationen und liefert wertvolle Informationen für bessere Entscheidungen. Sie wird bereits von Unternehmen und Pensionskassen verwendet, die Wertschriften und Kryptowährungen im Wert von Hunderten von Millionen verwalten.
Banana Investment Accounting bietet eine zentrale Übersicht über alle Anlagen und ermöglicht es, verschiedene Anlagearten und Währungen zu verwalten und zu kontrollieren. Es ist nicht mehr nötig, komplizierte Tabellen zu benutzen, da alles an einem Ort mit derselben Genauigkeit, Flexibilität und Zuverlässigkeit verwaltet wird, wie man sie von professioneller Buchhaltungssoftware erwartet.
Banana Investment Accounting ergänzt die Online-Portfoliowerkzeuge, indem es eine vollständige, transparente und professionelle Aufzeichnung aller Anlageaktivitäten bietet. Es sorgt für Klarheit und volle Kontrolle über jedes finanzielle Detail, einschliesslich Kosten, Kommissionen, Gewinne und Verluste, in jeder Währung.
Vorteile der integrierten Wertschriftenverwaltung in der Buchhaltung
Banana Buchhaltung ist eine der wenigen Software, die es erlaubt, die Wertschriften direkt in der Buchhaltung zu verwalten.
- Sie haben eine komplette Buchhaltungsansicht in Bezug auf die Wertpapiere, ohne dass Sie externe Tabellen führen müssen.
- Sie sparen Zeit, weil Sie gleichzeitig mit der Verbuchung der Finanztransaktion (Kauf oder Verkauf von Wertpapieren) in der Buchhaltung auch die Mengen und Preise eingeben.
- Sie können den buchhalterischen Gewinn/Verlust und den Kursgewinn/-verlust des einzelnen Wertpapiers zum Zeitpunkt des Verkaufs oder des Abschlusses ermitteln.
Nachstehend finden Sie eine Buchungstabelle mit Transaktionen für den Verkauf und den Kauf von Wertpapieren in verschiedenen Währungen.

Käufe und Verkäufe von Wertpapieren erfassen
Die Tabelle Buchungen, das Herzstück der Buchhaltung, kann durch Hinzufügen der Spalten 'Menge und Stückpreis' individuell angepasst werden. So können Sie bei der Erfassung von Wertpapiergeschäften alle Informationen, die für die Wertpapierverwaltung erforderlich sind, direkt eingeben:
- Die gekaufte und verkaufte Menge und den entsprechenden Preis eingeben.
- Der Bankkostenanteil trennen.
- Der Gewinn oder Verlust zum Zeitpunkt des Verkaufs erfassen.
- Der Wechselkursgewinn oder -verlust zum Zeitpunkt des Verkaufs erfassen.
In der obigen Abbildung sehen Sie Beispiele für Kauf- und Verkaufsbuchungen, die Mengen und Preise angeben. Zum Zeitpunkt des Verkaufs wird auch der Gewinn verbucht, so dass der Buchwert der Wertpapiere dem Buchwert entspricht.
Liste der Wertpapiere
In der Buchhaltung können Sie die Tabelle Artikel hinzufügen, die wie ein integriertes Mini-Lager in der Buchhaltung funktioniert.
Sie wird für die integrierte Rechnungsstellung und Kostenkontrolle verwendet, eignet sich aber auch hervorragend für die Wertpapierverwaltung.
- Sie können alle von Ihnen erworbenen Wertpapiere auflisten und dabei alle erforderlichen Informationen eingeben.
- Sie können die Wertpapiere nach Wunsch gruppieren und Anleihen von Aktien trennen.
- Die Tabelle "Artikel" ist über den Positionscode mit der Tabelle "Buchungen" verknüpft. Wenn Sie eine Bewegung eingeben, aktualisiert das Programm die aktuelle Menge, so dass Sie immer wissen, welche Menge für jedes Wertpapier verfügbar ist.
Berechnung des Buchwerts
Das Ziel der Wertpapierverwaltung von Banana Buchhaltung ist es, den Buchwert jedes Wertpapiers zu kennen.
Der Buchwert eines Wertpapiers wird für die Erstellung der Bilanz verwendet und ist allgemein der Selbstkostenpreis oder der Durchschnittspreis.
- Der wird zur Berechnung des buchhalterischen Gewinns oder Verlusts verwendet, wenn die Wertpapiere verkauft werden.
- Der wird zur Berechnung des buchhalterischen Gewinns oder Verlusts verwendet, wenn die Wertpapiere zum Marktpreis neu bewertet werden.
Der ist daher sehr wichtig, da er zur Bestimmung des Buchwerts des gesamten Portfolios, des Unternehmensergebnisses und damit auch der Besteuerung beiträgt.
Die Instrumente zur Verwaltung von Wertpapieren, die von den Finanzinstituten zur Verfügung gestellt werden, sind sehr ausgeklügelt, aber sie verwalten nicht immer den Buchwert. Normale Buchhaltungsprogramme erfassen nicht die gekauften Mengen und Preise. Um den Buchwert der einzelnen Wertpapiere im Auge zu behalten, müssen die Buchhalter daher viel Zeit damit verbringen, Transaktionen zu rekonstruieren oder Excel-Tabellen zu führen.
Berechnung des Gewinns/Verlusts aus Wertpapieren
Wenn Sie eine Buchung für einen Wertpapierverkauf eingegeben haben, rekonstruiert die Erweiterung zur Gewinn-/Verlustberechnung den Buchwert und berechnet den Gewinn und Verlust.
Wenn Sie eine Buchhaltung mit Fremdwährungen verwenden, berechnet sie auch den realisierten Wechselkursgewinn/-verlust.
Diese Werte werden verwendet, um die Verkaufsbuchung abzuschliessen.
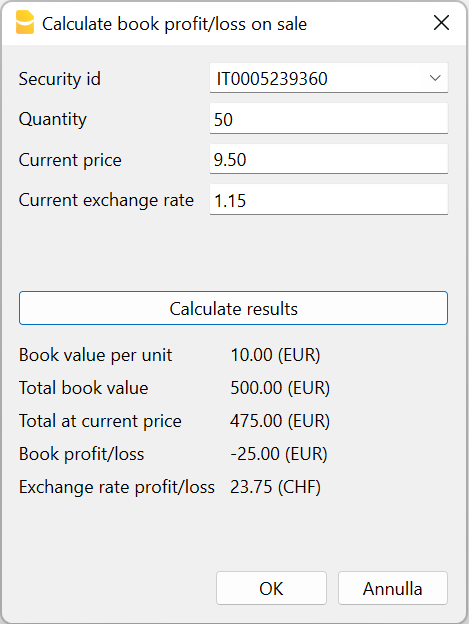
Bestandsaufnahme der Wertpapiere
Anhand der detaillierten Angaben in der Tabelle Buchungen und des Marktwerts der Wertpapiere in der Tabelle Positionen kann das Programm die aktuellen Werte der Wertpapiere sowie die nicht realisierten Gewinne und Verluste berechnen.
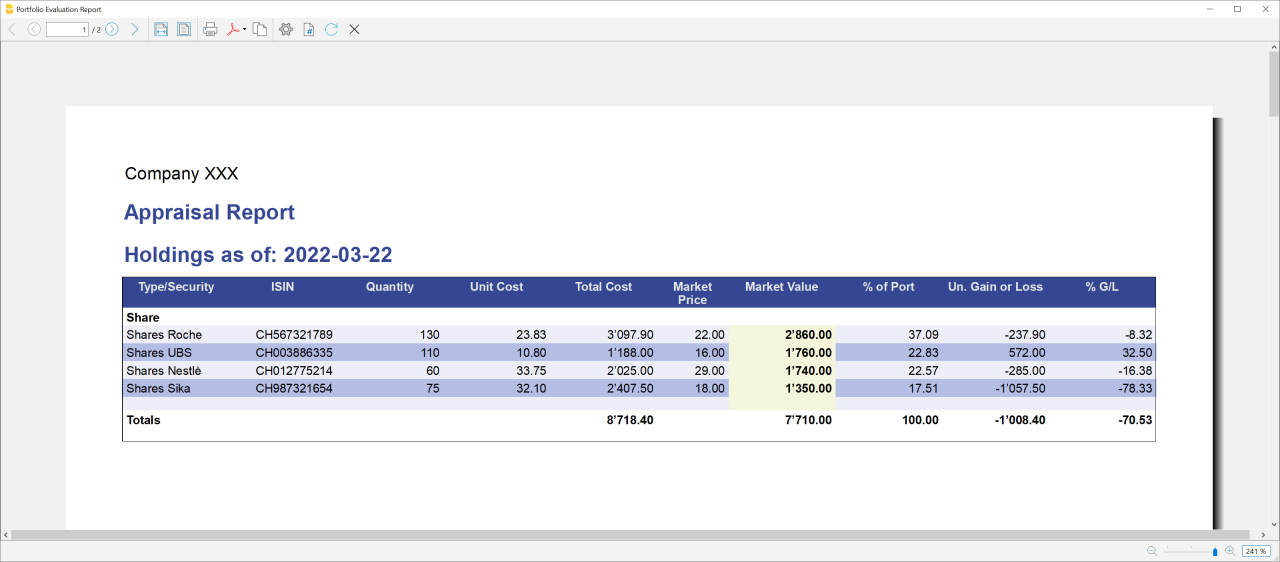
Erste Schritte
Sie können sich die Funktionsweise anhand einer unserer Vorlagen ansehen. Wenn Sie bereits über eine eigene Buchhaltung verfügen, können Sie Ihre aktuelle Buchhaltung in wenigen Schritten anpassen. Nutzen Sie die Erweiterungen, um den Gewinn oder Verlust aus dem Verkauf von Wertpapieren zu berechnen und verschiedene Berichte zu erhalten.
Dokumentation (auf Englisch)
- Investment Accounting
- How to Start
- Theoretical Introduction
- Accounts Table
- Items Table
- Transactions Table
- Opening and Closing
- Extensions
- Templates
Brauchen Sie mehr?
Die Erweiterungen für die Verwaltung der Wertpapierbuchhaltung befinden sich noch in der Beta-Version. Wenn Sie Vorschläge haben, wie der Inhalt der Vorlagen und Berichte verbessert werden können, oder wenn Sie denken, dass es nützlich/interessant wäre, neue Funktionen hinzuzufügen, senden Sie uns bitte Ihr Feedback über unseres Formular.
Wertpapiergeschäften erfassen
Für die Erfassung von Wertpapiergeschäften sehen Sie bitte unsere aktuell nur in Englisch verfügbare Webseite:
Immobilienbuchhaltung mit Banana Buchhaltung+
Banana Buchhaltung Plus macht die Immobilienbuchhaltung einfach, schnell und professionell – auch wenn Sie keine Buchhaltungserfahrung haben, sei es für eine Stockwerkeigentümergemeinschaft (StWE) oder eine Mietliegenschaft.
Vorlagen für die Immobilienbuchhaltung
Wählen Sie das für Ihre Liegenschaft und Ihre Buchhaltungsbedürfnisse am besten geeignete Modell von Banana Buchhaltung Plus.
Jedes Modell ist sofort einsatzbereit und darauf ausgelegt, die Immobilienverwaltung schnell, genau und transparent zu gestalten.
- Vorlagen für die Buchhaltung von Mietliegenschaften
- Vorlagen für die Buchhaltung von Stockwerkeigentum (StWE)
Immobilienbuchhaltung
Der Ausgangspunkt ist einfach: Jede Wohnung, jedes Geschäft oder Büro (Immobilieneinheit) hat einen Preis für die Nutzung und Kosten für den Betrieb.
Banana Buchhaltung Plus hilft Ihnen, alles klar im Griff zu behalten.
Um die Immobilienbuchhaltung zu verstehen, genügt es zu denken, dass jemand eine Immobilie – Wohnung, Geschäft oder Büro – nutzt, als wäre er immer der Eigentümer.
Daraus ergibt sich eine grundlegende Unterscheidung:
- der Preis des Hauses
- die Betriebskosten des Hauses
Diese Unterscheidung gilt in jeder Situation.
Mietliegenschaft
Wenn Sie eine Mietliegenschaft besitzen, sind Sie Eigentümer der Immobilie und führen eine vollständige Buchhaltung über Einnahmen und Ausgaben.
Die Miete, die Sie erhalten, ist der Preis, den der Mieter für die Nutzung der Immobilie bezahlt – als wäre sie seine eigene.
Dieser Betrag:
- ist ein Einnahmenposten für den Eigentümer
- stellt den Wert der Nutzung der Immobilie dar
Die Ausgaben betreffen alles, was für den ordnungsgemässen Betrieb der Liegenschaft erforderlich ist, zum Beispiel:
- Heizung
- gemeinsames Wasser und Strom
- Unterhalt
- Dienstleistungen und Lieferanten
Diese Ausgaben sind kein Gewinn, sondern reale Kosten, die jemand tragen muss.
In der Praxis übernimmt oder bevorschusst der Eigentümer die Betriebskosten, und der Mieter erstattet ihm den auf ihn entfallenden Anteil.
Das bedeutet, dass die Spesenrückerstattung kein echter Ertrag ist, sondern lediglich bereits entstandene Kosten deckt.
Anders gesagt: Die Miete ist der Preis des Hauses, die Spesen sind die Betriebskosten.
Diese Spesen dienen zur Deckung der Betriebskosten und gelten nicht als endgültige Ausgaben, solange die tatsächlichen Kosten nicht bekannt sind. Am Ende des Zeitraums kann man vergleichen:
- wie viel einbezahlt wurde
- wie viel tatsächlich ausgegeben wurde
und erhält so eine klare Übersicht für jeden Mieter.
Stockwerkeigentum
Auch im Stockwerkeigentum ändert sich das Prinzip nicht. Ein Stockwerkeigentum ist ein Gebäude mit mehreren Eigentümern, die einen Preis für ihre Wohnungen bezahlt haben und gemeinsame Teile und Kosten teilen.
Jeder Eigentümer nutzt das Gebäude anteilsmässig so, als wäre er Eigentümer des gesamten Gebäudes.
Die gemeinschaftlichen Ausgaben betreffen den Betrieb der gemeinsamen Teile, wie zum Beispiel:
- Treppenhaus und gemeinsam genutzte Räume
- Dach, Fassade und Anlagen
- Garten und Aussenbereiche
Diese Ausgaben sind die Betriebskosten des Gebäudes und werden von den Eigentümern gemäss ihren Anteilen getragen.
Im Stockwerkeigentum leisten die Eigentümer periodische Beiträge.
Diese Beiträge dienen der Deckung der Betriebskosten und gelten nicht als endgültige Ausgaben, solange die tatsächlichen Kosten nicht bekannt sind. Am Ende des Zeitraums kann man vergleichen:
- wie viel einbezahlt wurde
- wie viel tatsächlich ausgegeben wurde
und erhält so eine klare Übersicht für jeden Eigentümer.
Nachdem Sie die Art der Immobilienverwaltung definiert haben, können Sie das passende Buchhaltungsmodell auswählen.
Was Sie mit Banana Buchhaltung Plus tun können
Mit Banana Buchhaltung Plus können Sie:
- den Preis des Hauses und die Betriebskosten separat erfassen
- Mieten, Rückerstattungen und Ausgaben nachverfolgen
- sofort sehen, was eingenommen und was ausgegeben wurde
- einen klaren und verständlichen Jahresabschluss erhalten
Alles mit einer Logik, die auf Personen ausgerichtet ist, die ihre Immobilie selbst verwalten.
Eine klare Buchhaltung macht alles einfacher, wenn Sie trennen zwischen:
- dem, was Preis ist
- dem, was Kosten sind
und es wird sofort einfacher:
- die Rentabilität der Immobilie zu verstehen
- Verwirrung zu vermeiden
- bewusste Entscheidungen zu treffen
Gestione proprietà in affitto
Banana Contabilità Plus propone due modelli utili per tenere una contabilità immobiliare professionale per gli affitti:
- Modello per la contabilità affitti Entrate/Uscite: la versione semplice, ideale se non sei uno specialista e non conosci la contabilità in partita doppia.
- Modello per la contabilità affitti in partita doppia: la versione avanzata, ideale se conosci la contabilità classica in partita doppia.
Entrambi includono già il piano dei conti tipico della gestione immobiliare.
Piano dei conti per Affitti
La contabilità di una proprietà in affitto può essere vista come una normale contabilità, con una distinzione fondamentale:
- l’affitto rappresenta il prezzo della casa
- le spese rappresentano il costo del funzionamento della casa
L’inquilino paga entrambi, ma con significati completamente diversi.
Banana Contabilità Plus ti aiuta a tenerli sempre separati e sotto controllo.
Quando gestisci una proprietà in affitto:
- tu sei il proprietario dell’immobile
- tutte le entrate e le spese fanno capo a te
- una parte dei costi di funzionamento viene rimborsata dagli inquilini
La contabilità serve a distinguere chiaramente:
- ciò che è prezzo (affitto)
- ciò che è rimborso di costi (spese)
Il piano dei conti per gli affitti è organizzato per rispondere alla domanda su quanto si incassa come prezzo della casa e quanto si incassa solo per coprire i costi di funzionamento.
Per farlo la contabilità è suddivisa in alcune aree principali.
Conti degli inquilini
Per ogni inquilino viene creato un conto personale che serve a registrare:
- l’affitto richiesto
- gli anticipi per le spese
- i pagamenti ricevuti
- eventuali differenze da regolare a fine anno
Questi conti funzionano come conti clienti, mostrano sempre quanto è stato richiesto e quanto è stato pagato.
Conti per gli incassi degli affitti
I conti dei ricavi per affitti raccolgono esclusivamente il prezzo della casa, cioè:
- affitti di appartamenti
- affitti di uffici o spazi commerciali
- affitti di posteggi
Questi conti:
- contengono solo l’affitto
- non includono mai le spese
In questo modo il reddito dell’immobile è sempre chiaro.
Conti per il costo di funzionamento della casa
Per gestire correttamente le spese vengono utilizzati conti separati che servono a:
- registrare le spese effettivamente sostenute rimborsabili dagli inquilini
- raccogliere gli anticipi richiesti agli inquilini
- confrontare quanto incassato con quanto speso
L’obiettivo è che i soldi incassati per le spese devono corrispondere esattamente ai costi reali sostenuti.
Conti per i costi del proprietario
Per gestire correttamente le spese vengono utilizzati anche conti separati che servono a:
- registrare le spese effettivamente sostenute che non sono rimborsabili dagli inquilini
- confrontare quanto incassato come prezzo della casa dagli inquilini con quanto speso che non è rimborsabile dagli inquilini
L’obiettivo è calcolare esattamente quanto sta rendendo essere proprietari dell'immobile.
Registrazione delle richieste mensili
Per semplicità immagina che l’affitto viene richiesto ogni mese.
All’inizio del mese:
- viene registrato l’affitto richiesto all’inquilino
- viene registrato l’anticipo per le spese
Queste registrazioni avvengono anche se l’inquilino non ha ancora pagato.
Registrazione degli incassi
Quando l’inquilino paga:
- l’importo versato viene registrato nel suo conto
- la contropartita è il conto bancario o la cassa
In questo modo è sempre chiaro:
- cosa è stato richiesto
- cosa è stato effettivamente incassato
Conteggio di fine anno delle spese
Durante l’anno:
- gli inquilini versano anticipi per le spese
- il proprietario sostiene i costi di funzionamento
A fine anno si confrontano:
- gli anticipi richiesti
- le spese effettivamente sostenute
Per pareggiare i conti:
- a chi è stato richiesto meno paga la differenza
- a chi è stato richiesto di più riceve un rimborso
Questo conteggio serve esclusivamente a far coincidere incassi per spese e costi reali.
Controllo dei pagamenti degli inquilini
Il conto di ogni inquilino mostra sempre la sua situazione:
- saldo in Dare
significa che non ha ancora pagato tutto ciò che gli è stato richiesto - saldo in Avere
significa che ha versato più del necessario
Questo controllo è immediato e non richiede calcoli esterni.
Perché questo modello è efficace
Questo piano dei conti ti permette di:
- distinguere chiaramente il reddito dell’immobile dai rimborsi
- capire subito la redditività reale
- gestire le spese in modo trasparente
- evitare confusione tra affitto e spese
- dimostrare agli inquilini le spese effettivamente sostenute che sono tenuti a rimborsare
In questo modo la contabilità riflette la realtà, ossia che l’affitto è il prezzo della casa, le spese sono il costo del suo funzionamento.
La registrazione dell'affitto e dell'anticipo periodico richiesto può essere automatizzato grazie alle registrazioni ricorrenti automatiche.
Esiste inoltre un'estensione apposita per il controllo periodico del pagamento degli affitti.
Spese rimborsabili dagli inquilini
Nella gestione di una proprietà in affitto, una parte dei costi di funzionamento della casa può essere rimborsata dagli inquilini.
Questo significa che:
- il proprietario sostiene o anticipa questi costi
- gli inquilini rimborsano la quota che compete loro
Le spese rimborsabili devono essere registrate in modo ordinato, documentate, suddivise correttamente tra gli inquilini.
In questo modo gli inquilini possono, se necessario, verificare:
- quali costi sono stati sostenuti
- come sono stati ripartiti
La possibilità di farsi rimborsare alcune spese dipende dalle normative applicabili e dagli accordi presi con gli inquilini.
In alcuni casi si concorda un importo fisso senza calcolo delle differenze ossia l’affitto include tutte le spese, e in altri casi gli inquilini versano un anticipo fisso e a fine anno si confrontano anticipi e spese reali calcolando eventuali differenze. Banana Contabilità+ è pensato per supportare entrambe le situazioni.
Nel modello più frequente:
- l’inquilino versa regolarmente un anticipo
- il proprietario registra i costi reali
- a fine anno si calcola la differenza
Se gli anticipi sono:
- inferiori ai costi l’inquilino versa il saldo
- superiori ai costi l’inquilino riceve un rimborso
Questo importo di differenza viene definito come conteggio o conguaglio.
Questo meccanismo serve a far coincidere quanto è stato incassato per le spese con quanto è stato realmente speso.
Per gestire correttamente le spese rimborsabili è importante organizzarle in modo logico. Ad esempio, tutte le spese legate al riscaldamento possono essere raccolte in un unico gruppo, come:
- manutenzione della caldaia
- spazzacamino
- gas o gasolio
- elettricità utilizzata per il funzionamento della caldaia
Questo permette di calcolare il rimborso in modo coerente.
Se vuoi maggiore precisione, puoi creare conti separati per tipi specifici di costo e indicare chiaramente a cosa servono.
Ad esempio una parte dell’elettricità delle scale può essere attribuita al funzionamento della caldaia. Creando un conto dedicato, questa quota verrà suddivisa insieme ai costi di riscaldamento. In questo modo la suddivisione segue il criterio corretto.
Una buona pratica fondamentale è distinguere sempre le spese rimborsabili da quelle non rimborsabili.
Questo ti permette di:
- sapere subito cosa può essere ribaltato sugli inquilini
- evitare errori nei conteggi
- mantenere una contabilità chiara e trasparente
Gestire le spese rimborsabili significa, in pratica tenere sotto controllo il costo di funzionamento della casa, suddividerlo in modo equo, rimborsare o richiedere solo ciò che è effettivamente dovuto. Con Banana Contabilità+ questo processo rimane sempre chiaro, anche quando la gestione diventa più articolata.
Questi rimborsi non rappresentano mai un guadagno, ma servono solo a coprire spese reali.
Nel diagramma che segue puoi vedere la maggior parte delle spese immobiliari con un esempio di suddivisione tra quelle rimborsabili (a destra) e quelle non rimborsabili (a sinistra).

Conti contabili per spese rimborsabili
Le spese rimborsabili degli inquilini nei modelli sono posti nella parte attiva del bilancio (conti dal 1100) o nella tabella Conti per la contabilità Entrate-Uscite, proprio perché per il proprietario non sono vere e proprie spese.
Ecco le spese rimborsabili dagli inquilini in una contabilità in partita doppia:

Le spese in generale possono essere diverse in base all’immobile che si gestisce.
Puoi facilmente spostare, eliminare, inserire dei conti, cambiarne la descrizione.
Registrazioni delle spese rimborsabili dagli inquilini
- Per ogni spesa rimborsabile dagli inquilini:
- Si registra il corretto conto contabile delle spese (esempio conto 1100 in Dare).
- La contropartita è il conto bancario o la cassa se il pagamento è avvenuto a contanti.
Calcolo e suddivisione delle spese rimborsabili
Guarda la pagina dedicata al modello Excel per la suddivisione delle spese.
Spese non rimborsabili dagli inquilini
Come per la contabilità di una qualsiasi azienda, le spese che non possono essere rimborsate dagli inquilini sono elencate nel Conto economico o nella tabella Categoria come Costi.
Nel modello sono indicati nella parte Costi le spese non rimborsabili (per esempio conti 6100 e seguenti). Anche qui puoi facilmente eliminare, inserire dei conti, cambiarne la descrizione.

Calcolo e suddivisione delle spese rimborsabili dagli inquilini
Il calcolo e la suddivisione delle spese rimborsabili dagli inquilini tiene conto di:
- Il conto del Conteggio annuale che serve per registrare i conteggi calcolati per gli Inquilini.
- Si registra ogni singola spesa che deve essere rimborsata dall'inquilino (esempio conto 1100 in Avere).
- La contropartita è il conto di Conteggio annuale (conto Dare).
- L'importo delle spese è quello riferito a tutto il periodo di spese da suddividere.
- Gli anticipi sulle spese pagati dagli inquilini durante l'anno devono essere considerati nel calcolo del conteggio.
- Si registra in un unica registrazione il totale degli anticipi richiesti durante il periodo nel conto degli Anticipi dagli inquilini (conto Dare).
- La contropartita è il conto del Conteggio annuale (conto Avere).
- L'importo da girare è il totale degli anticipi richiesti a tutti gli inquilini durante il periodo.
- Differenze nel conto del Conteggio annuale.
- Dopo le due operazioni precedenti l'importo restante del conto Conteggio annuale è uguale al totale dei conteggi da suddividere agli inquilini.
- Questo importo deve essere suddiviso per ogni inquilino tramite un calcolo che fa uso di chiavi o coefficienti di suddivisione.
- Quando si registrano i conteggi calcolati per ogni singolo inquilino nel conto del Conteggio annuale questo conto dovrebbe azzerarsi o dovrebbero restare pochi centesimi non più suddivisibili a tutti gli inquilini.
Suddivisione delle spese per ogni appartamento
La suddivisione delle spese è riferita a ogni singolo appartamento e eventualmente anche al periodo di tempo in cui un inquilino è stato effettivamente inquilino.
Banana Contabilità Plus permette di tenere nota delle spese rimborsabili, ma non si occupa della suddivisione, perché il tema della suddivisione è diverso per ogni immobile e a volte può avere anche delle suddivisioni molto complesse.
Per la suddivisione si consiglia quindi di creare una tabella Excel per ogni immobile e per ogni anno (o periodo di suddivisione) dove sono riportati i totali di ogni singola spesa e poi gli importi sono calcolati e suddivisi tramite delle chiavi o coefficienti di suddivisione (m2, consumo, ecc).
Vedi l'esempio di seguito e scarica il modello Excel.
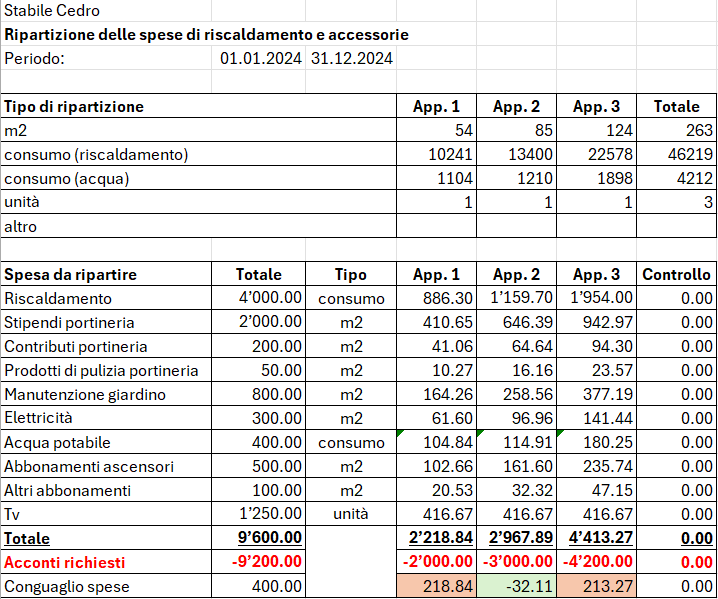
Conteggio agli inquilini
Il conteggio calcolato deve essere registrato in contabilità:
- Se l'inquilino ha versato meno rispetto alle spese a lui assegnate si chiede la differenza e si registra nel conto dell'inquilino in Dare.
La contropartita è il conto per il Conteggio annuale. - Se l'inquilino ha versato di più rispetto alle spese a lui assegnate si rimborsa la differenza e si registra nel conto dell'inquilino in Avere.
La contropartita è il conto per il Conteggio annuale. - Dopo avere registrato i conteggi ai rispettivi inquilini il conto Conteggio annuale dovrebbe azzerarsi o dovrebbe restare un importo di pochi centesimi che non può essere ulteriormente suddiviso su tutti gli inquilini.
- Se il conto Conteggio annuale si azzera o restano solo pochi centesimi la suddivisione delle spese è avvenuta correttamente.
- Se il conto Conteggio annuale non si azzera o restano importi superiori a pochi centesimi la suddivisione non è avvenuta correttamente. È quindi necessario ricontrollare i calcoli fatti per suddividere le spese agli inquilini.
Spese calcolate nel periodo successivo
- Le spese che non rientrano nel periodo di conteggio corrente, non vengono spostate nel conto per il Conteggio annuale. Queste spese verranno spostate e calcolate solo nel periodo o anno successivo.
- Con i conti delle spese rimborsabili dagli inquilini negli Attivi di una contabilità in partita doppia queste spese verranno riportate automaticamente nell'anno contabile successivo.
- Con i conti delle spese rimborsabili dagli inquilini nei Costi queste spese, a fine anno, devono essere spostate tra gli importi sospesi del Bilancio per riportarle nell'anno successivo.
Spese rimborsabili dagli inquilini pro-rata
Quando due inquilini si sono alternati come inquilini dell'appartamento durante l'anno, potrebbe essere necessario suddividere le spese pro-rata:
- Potrebbero esistere tuttavia anche altri metodi di suddivisione come quello per mesi o per periodo caldo e freddo dell'anno e così via.
- I metodi per la suddivisione delle spese pro-rata variano secondo le normative locali vigenti o secondo i contratti di affitto dell'appartamento.

Flusso di lavoro per la gestione degli affitti
Con Banana Contabilità+ puoi gestire una contabilità di una proprietà in affitto con il flusso di lavoro descritto in questa pagina e che comprende:
- la importazione degli estratti conto elettronici bancari.
- la registrazione automatica degli estratti attraverso la gestione delle regole di completamento delle registrazioni.
- la registrazione automatica dei salari versati al custode senza riscrivere o ricopiare le registrazioni più volte.
- l'addebito automatico degli affitti in contabilità alle scadenze prestabilite dai contratti.
- il facile controllo degli incassi e dei mancati pagamenti da parte degli inquilini.
- il salvataggio e l'invio della contabilità comprensiva dei giustificativi in un unico file PDF.
Guarda nel dettaglio ognuna di queste possibilità che hai a disposizione su Banana Contabilità+.
Importa gli estratti conto elettronici in contabilità
Puoi richiedere alla tua banca di fornirti l'estratto conto elettronico in formato XML (tipo di estratto Camt.053). Se necessario chiedi anche alla tua banca di continuare a ricevere l'estratto conto in formato PDF.
L'estratto conto elettronico in formato XML ti permette di ottenere la contabilità sempre aggiornata e di emettere richiami di pagamento in qualsiasi momento.
Quando il file XML è disponibile scaricalo dall'e-banking e salvalo sul computer. Potresti riceverlo giornalmente, settimanalmente o mensilmente in base a come lo hai richiesto.
Usa l’estensione Importazione estratto bancario SEPA/ISO 20022 per importare il file appena scaricato.
Quando importi un estratto conto elettronico puoi registrare automaticamente sia gli incassi ricevuti che i pagamenti effettuati grazie all'uso delle regole di completamento delle registrazioni contabili. A ogni importazione puoi creare tutte le regole necessarie. Con il tempo ti basterà importare gli estratti conto per registrare automaticamente tutta la contabilità.
Crea regole per la contabilizzazione automatica
Banana Contabilità Plus, con l'abbonamento al piano Advanced, permette di registrare automaticamente la contabilità secondo i criteri che desideri.
Per esempio puoi registrare tutte le fatture pagate a Azienda SA in un conto contabile specifico tramite il nome dell'azienda a cui paghi.
Quando nell'estratto conto elettronico appare quel nome di azienda e corrisponde a un'uscita, Banana Contabilità Plus lo registra nel conto contabile da te impostato.
Se paghi una fattura per un contratto stipulato con Azienda SA (per esempio per un'assicurazione, una fornitura di energia, ecc.) puoi aggiungere il segno + e il numero di contratto, come per esempio +Azienda SA 101.200.14, dove 101.200.14 è il numero di contratto stipulato.
Il segno + indica che è necessario trovare tutte le informazioni, in qualsiasi ordine, all'interno dell'estratto conto elettronico. In questo modo puoi registrare in maniera distinta più contratti diversi stipulati con la stessa azienda.
Allo stesso modo puoi registrare automaticamente gli incassi usando i nomi delle persone dalle quali incassi.
Con le regole registri automaticamente tutte le entrate e le uscite da tutti gli inquilini in maniera molto precisa.
Se desideri puoi anche indicare uno specifico importo alla regola. In questo modo distingui sempre di più le registrazioni, sia in entrata che in uscita.
Per usare le regole è necessario inserire nella colonna Doc della tabella Registrazioni ricorrenti il codice !Rule come negli esempi di regole seguenti.

In questa tabella è anche possibile usare il codice !RuleSplit per inserire regole che registrano automaticamente con registrazioni composte da più righe.
In questo modo riduci notevolmente il tempo di registrazione contabile e ottieni la contabilità sempre aggiornata.

Registra automaticamente i salari del custode
Dalla tabella Registrazioni ricorrenti registra i salari del custode su più righe inserendo per esempio nella colonna Doc il codice univoco salari su ogni riga.
Inserisci la descrizione di ogni riga inclusa nella registrazione, inserisci i rispettivi conti Dare e Avere e gli importi che si ripetono in modo ricorrente.

Quando imposti una registrazione ricorrente usala nella tabella Registrazioni:
- Compila la colonna Data inserendo la data.
- Inizia a scrivere nella colonna Doc la parola salari.
- Seleziona la registrazione ricorrente trovata da Banana Contabilità Plus.
La registrazione del salario composta da più righe apparirà già completata nella tabella Registrazioni in contabilità.
Se preferisci puoi automatizzare ulteriormente la registrazione composta da più righe con le regole per usarle quando importi l'estratto conto elettronico:
- Nella colonna Doc inserisci i codici !Rule e !RuleSplit al posto del nome salari riportato nell'esempio precedente.
- Inserisci il nome del custode a cui versi il salario nella colonna Descrizione della riga dove inserisci il codice !Rule.
- Questo nome verrà cercato nell'estratto conto elettronico durante l'importazione.
- Inserisci una parentesi quadrata aperta e una chiusa [] nel conto di contropartita della regola dove inserisci il codice !Rule. Queste parentesi indicano che si tratta di una regola per una registrazione con più righe.
Guarda l'esempio nella immagine seguente.

Addebita automaticamente gli affitti
Un’altra automazione che puoi aggiungere alla tua contabilità avviene con l’uso delle registrazioni automatiche per l'addebito periodico degli affitti:
- Crea una registrazione contabile come se stessi addebitando a un inquilino un affitto mensile e aggiungi nella colonna Doc la codifica !Auto.
- Completa la colonna Data con la data in cui iniziare ad addebitare.
- Completa la colonna Data Finale con la data quando l'inquilino termina il contratto di affitto.
- Completa la colonna Ripeti con il periodo di ripetizione della registrazione (per esempio M per mensile).

Banana Contabilità registra automaticamente le registrazioni impostate a ogni inizio di periodo. Se vuoi puoi decidere se essere avvisato prima di registrare automaticamente.
È possibile addebitare automaticamente l'affitto su più righe di registrazioni per ogni inquilino, per esempio suddividendo l'affitto dall'anticipo delle spese rimborsabili dall'inquilino.
Questa funzionalità è attualmente presente solo nella versione Banana Contabilità Plus Dev-Channel.
Controlla l'incasso degli affitti
Grazie all'estensione per il controllo degli affitti puoi tenere traccia e avere sempre disponibile un report con la panoramica su chi ha pagato regolarmente l'affitto, chi l'ha pagato solo parzialmente e chi non l'ha ancora pagato.
Puoi verificare facilmente anche se hai addebitato l'affitto correttamente a ogni inquilino e a ogni scadenza. Puoi anche ottenere una previsione di incasso per tutto l'anno corrente.
Crea report personalizzati in Excel
Con Banana Contabilità Plus è possibile collegare Microsoft Excel tramite l'Add-in di Banana Contabilità Plus per creare report completamente personalizzati.
Con l'Add-in puoi calcolare i conteggi di suddivisione delle spese tra gli inquilini.
Trovi l'Add-in da installare all'interno di Excel, cerca nei componenti aggiuntivi, installalo e inizia subito a generare i tuoi report personalizzati.
Per maggiori informazioni guarda anche le pagine di documentazione relative all'Add-in Excel di Banana Contabilità+.
Salva e invia la contabilità con i giustificativi in unico file PDF
Nella tabella Registrazioni è possibile abilitare e visualizzare la colonna Link. Usa questa colonna per allegare a ogni registrazione contabile il relativo giustificativo, come per esempio una fattura ricevuta o una fattura emessa.
Abilita la colonna Link in questo modo:
- Fai doppio clic sulla intestazione delle colonne nella tabella Registrazioni (per esempio sulla colonna Descrizione).
- Vista la casella DocLink nella colonna a sinistra della finestra che si apre, come da immagine seguente.
- Clicca sul bottone Ok in basso a destra nella finestra per confermare.
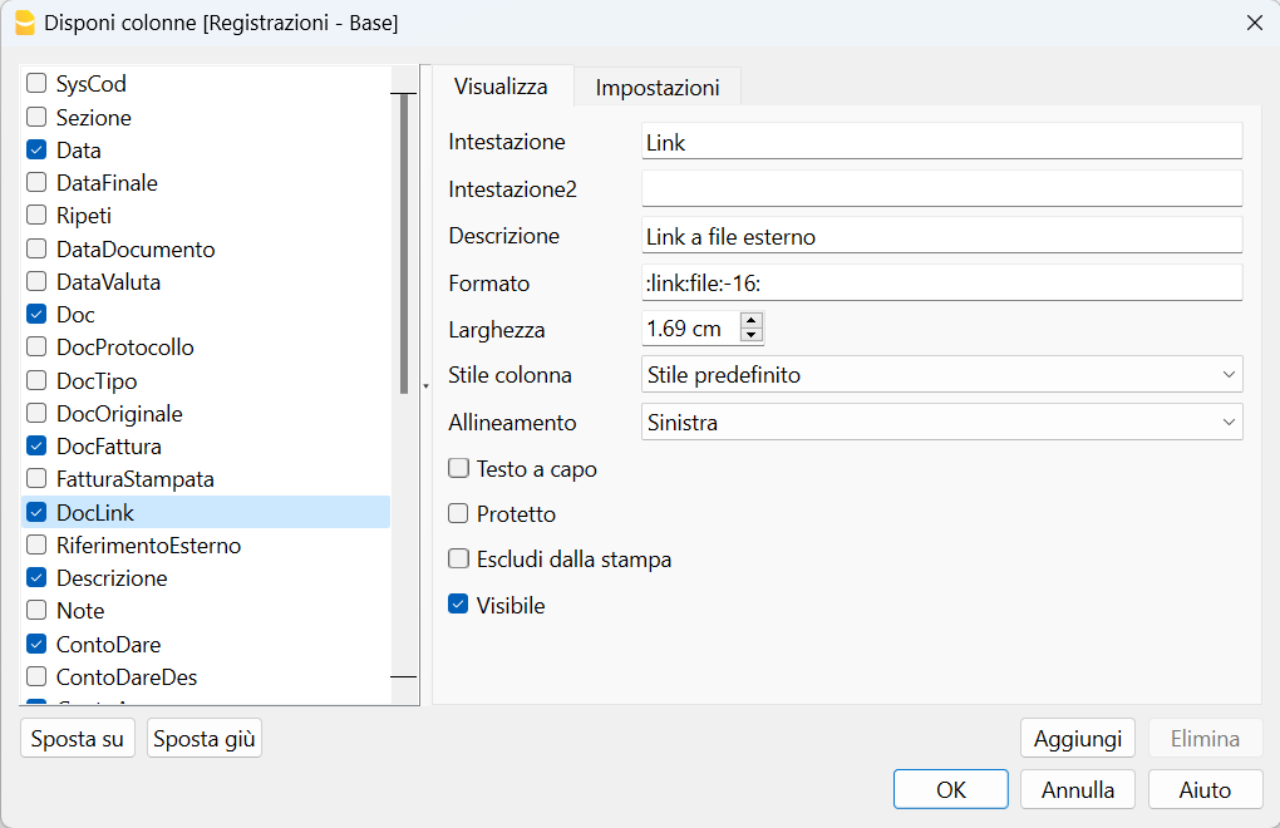
Ora allega i giustificativi dalla tabella Registrazioni. Fai doppio clic sulla cella della colonna Link e cerca e scegli il file da allegare che hai salvato sul tuo computer.
Quando desideri crea il dossier PDF in questo modo:
- Clicca dal menu File la voce Crea dossier PDF.
- Vista in basso a sinistra nella finestra che si apre la casella "Includi allegati", come da immagine seguente.
- Clicca il bottone Ok in basso a destra per confermare e salva il file PDF in una posizione del computer dove preferisci.
Il PDF salvato è un file con il bilancio, il conto economico, le schede conto e tutti i giustificativi allegati in unico file PDF.
Scarica e guarda un esempio di dossier PDF (alcuni browser non permettono la visualizzazione degli allegati, ti consigliamo di salvarlo e aprirlo con il programma Adobe Acrobat Reader che è gratuito).
Clicca sulle icone a forma di graffetta a sinistra delle registrazioni per aprire gli allegati, come nell'esempio seguente.
Con questa funzionalità puoi inviare il file PDF con la contabilità completa anche per e-mail o decidere di conservarlo secondo le norme vigenti.
Estensione per il controllo degli incassi degli affitti [BETA]
Estensione per il controllo degli incassi degli affitti [BETA]La gestione accurata degli incassi provenienti dai propri inquilini è fondamentale per garantire la redditività di un immobile.
Con l'obiettivo di agevolare questa necessità l'estensione per il controllo degli incassi degli affitti si rivela utile per i proprietari di immobili. Consente di tenere sempre sotto controllo l'incasso degli affitti, identificare i pagamenti mancanti o parziali e fornire una panoramica completa sul corretto addebito degli affitti in contabilità.
L'estensione offre sia un report semplice che uno dettagliato. Questi report consentono una visione immediata degli affitti ricevuti e delle somme mancanti.
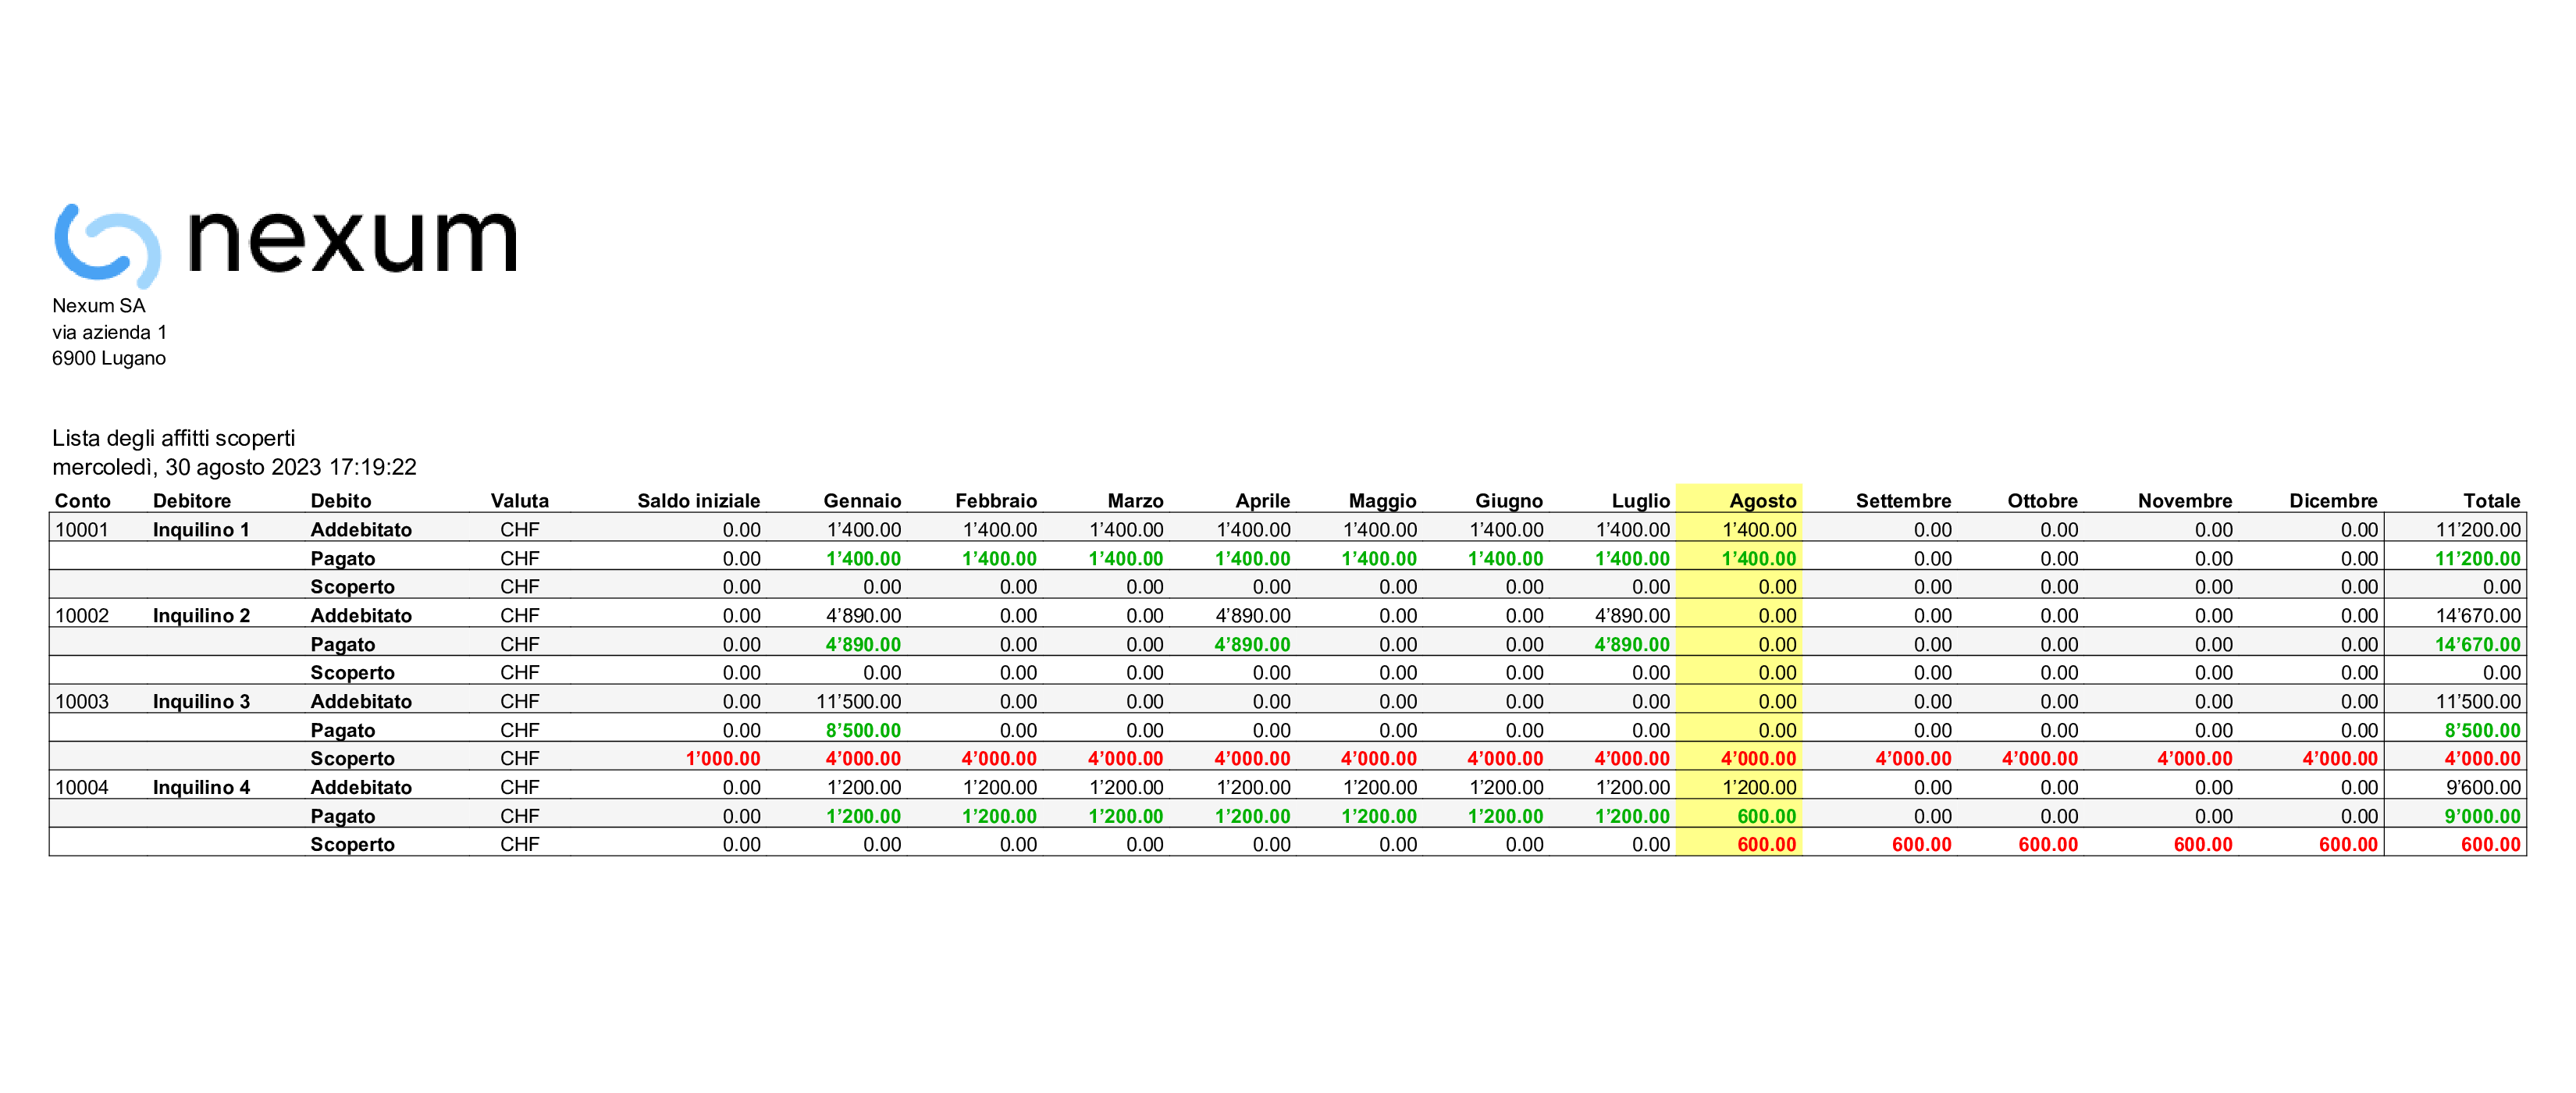
Il report dettagliato fornisce ulteriori informazioni sulle previsioni di incasso dell'anno corrente, suddiviso mensilmente e aggregato per l'intero anno. Questo report consente ai proprietari di pianificare meglio le proprie finanze e prendere decisioni informate.
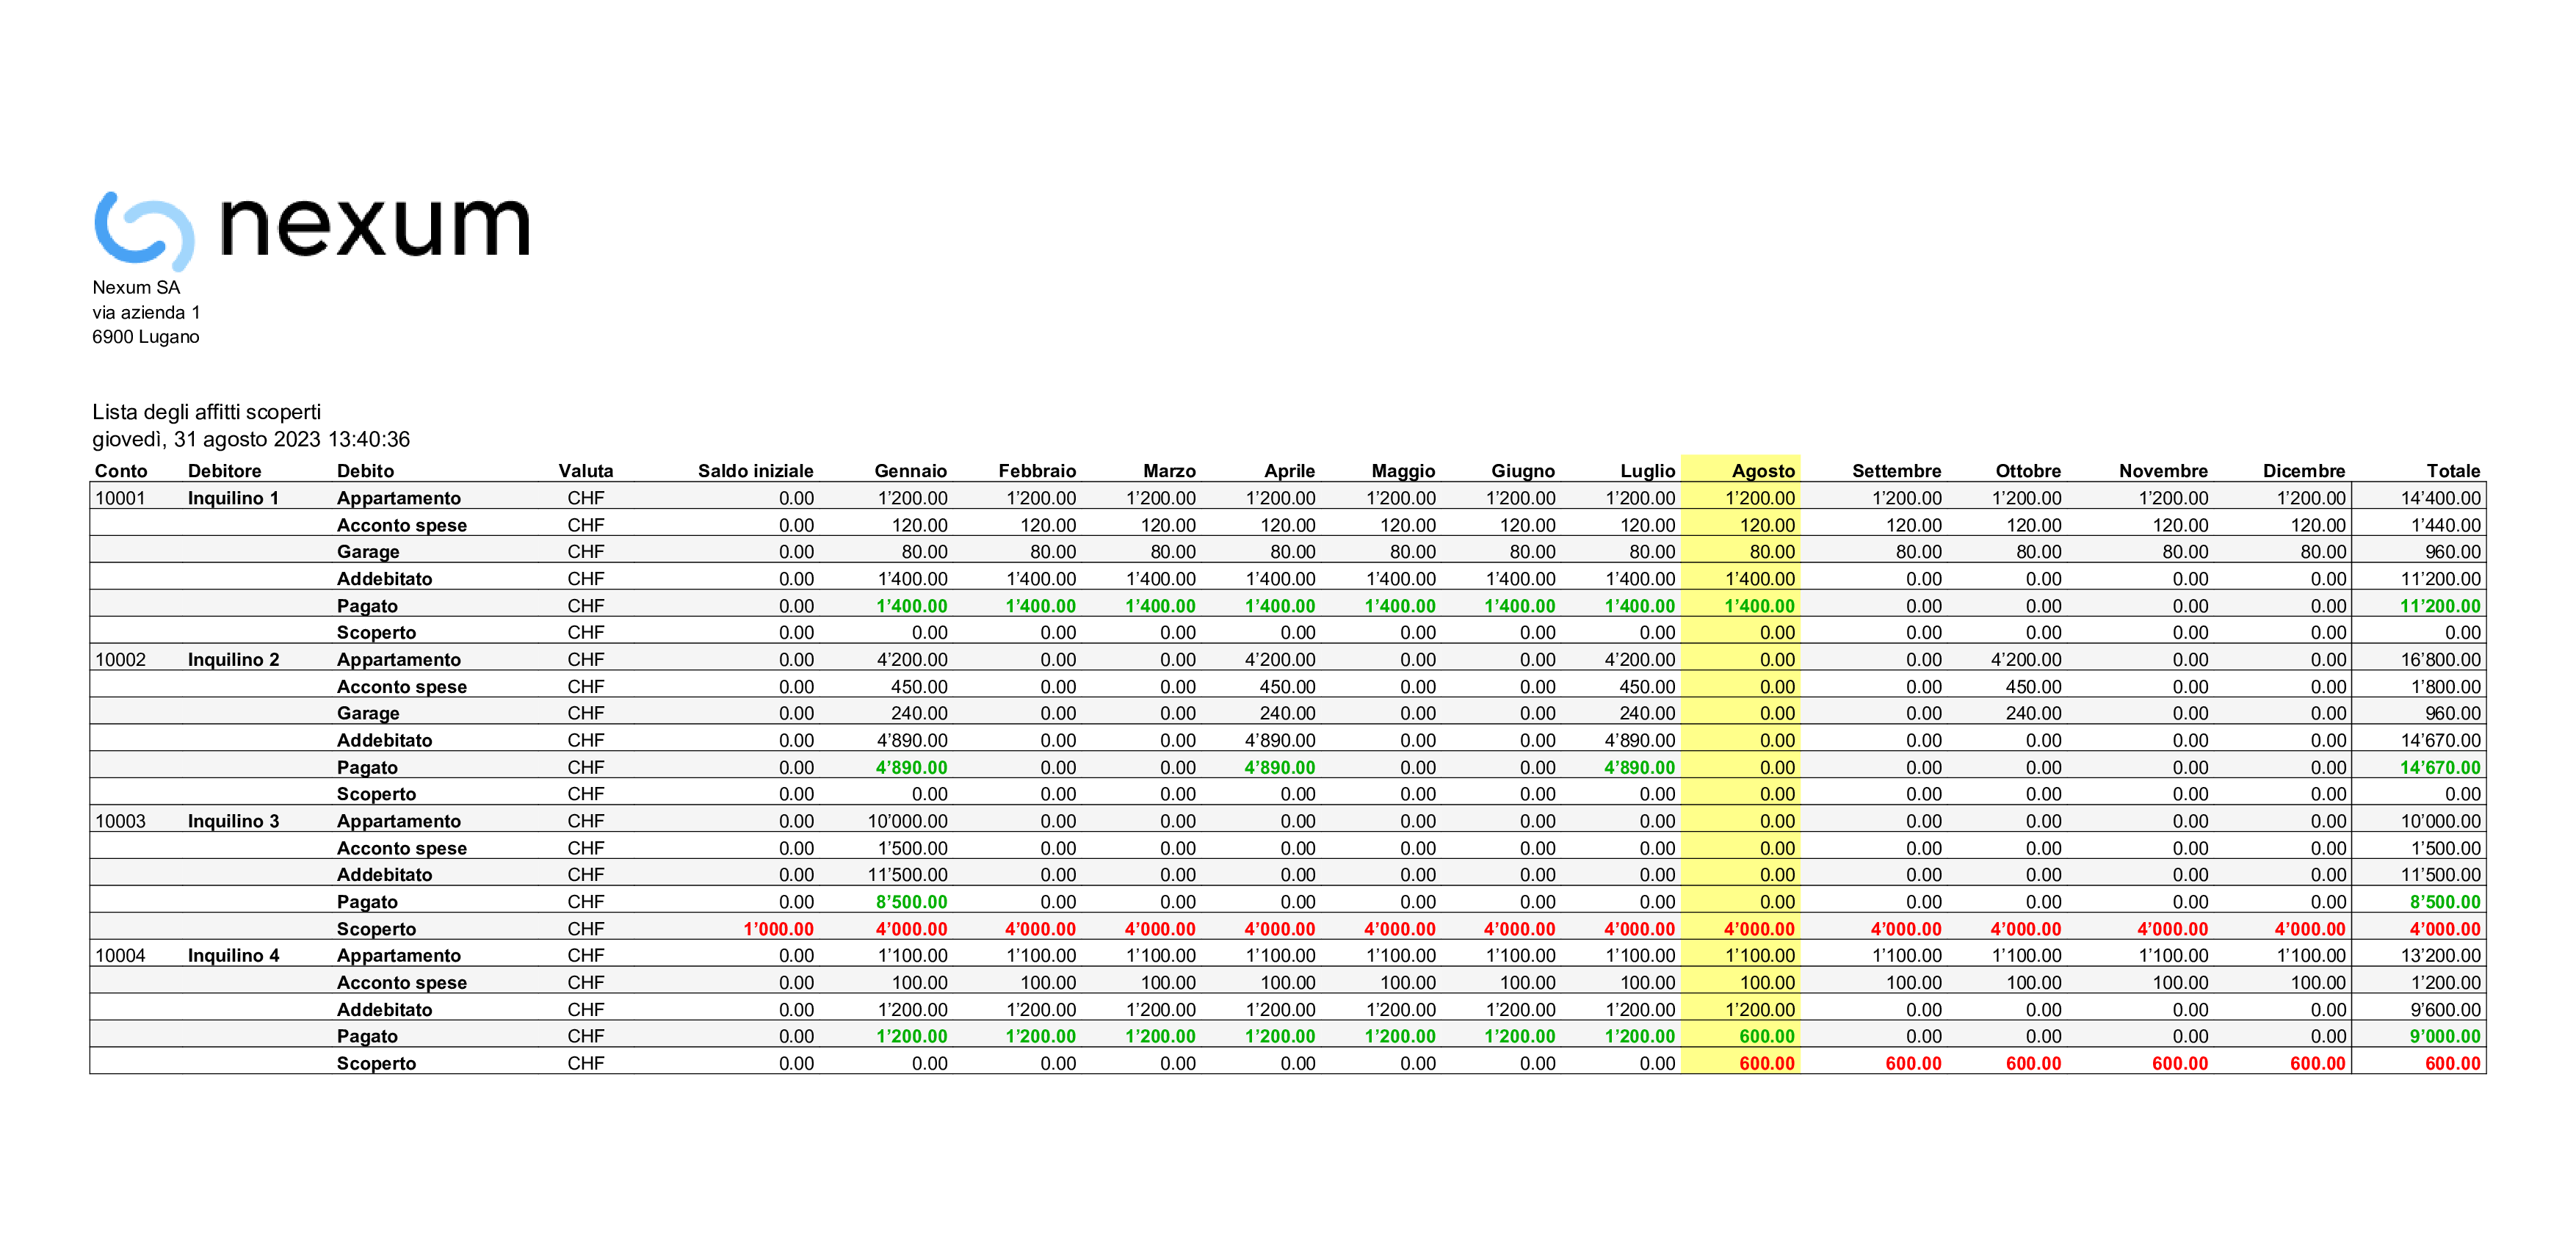
Con entrambe i report per il controllo degli incassi degli affitti l'estensione identifica chiaramente gli inquilini che non hanno effettuato il pagamento dell'affitto o che lo hanno pagato solo parzialmente. Questa funzionalità è utile per prendere azioni immediate e recuperare gli importi scoperti.
Evidenziano inoltre se l'affitto è stato già addebitato correttamente nella contabilità. Questo garantisce l'allineamento tra le entrate registrate e la situazione finanziaria reale.
L'estensione è flessibile e adatta a diversi modi di operare sulla contabilità. Infatti funziona sia con i modelli Entrate/Uscite per non specialisti della contabilità e sia con modelli per la contabilità in Partita doppia. Gli inquilini possono infine essere inseriti sia come conti contabili che come centri di costo (CC1, CC2 o CC3) adattandosi alle preferenze individuali sulla gestione contabile.
Prerequisiti
Per utilizzare questa estensione è necessario:
- Avere il piano Advanced di Banana Contabilità Plus.
- Attualmente questa estensione funziona solo con la versione Banana+ Dev Channel.
Come iniziare
Per iniziare a usarla è sufficiente configurare l'estensione per il controllo degli incassi degli affitti:
- Clicca Estensioni dal menu di Banana.
- Clicca Gestisci estensioni...
- Nella finestra che si apre seleziona la voce Online > Produttività presente nella colonna sinistra.
- Cerca nella colonna centrale della finestra l'estensione chiamata Estensione per il controllo degli incassi degli affitti [BETA].
- Nella colonna destra della finestra clicca sul bottone Installa.
- Una volta installata, per funzionare è necessario impostare il Gruppo o conto dei clienti dal menu Report > Clienti > Impostazioni.
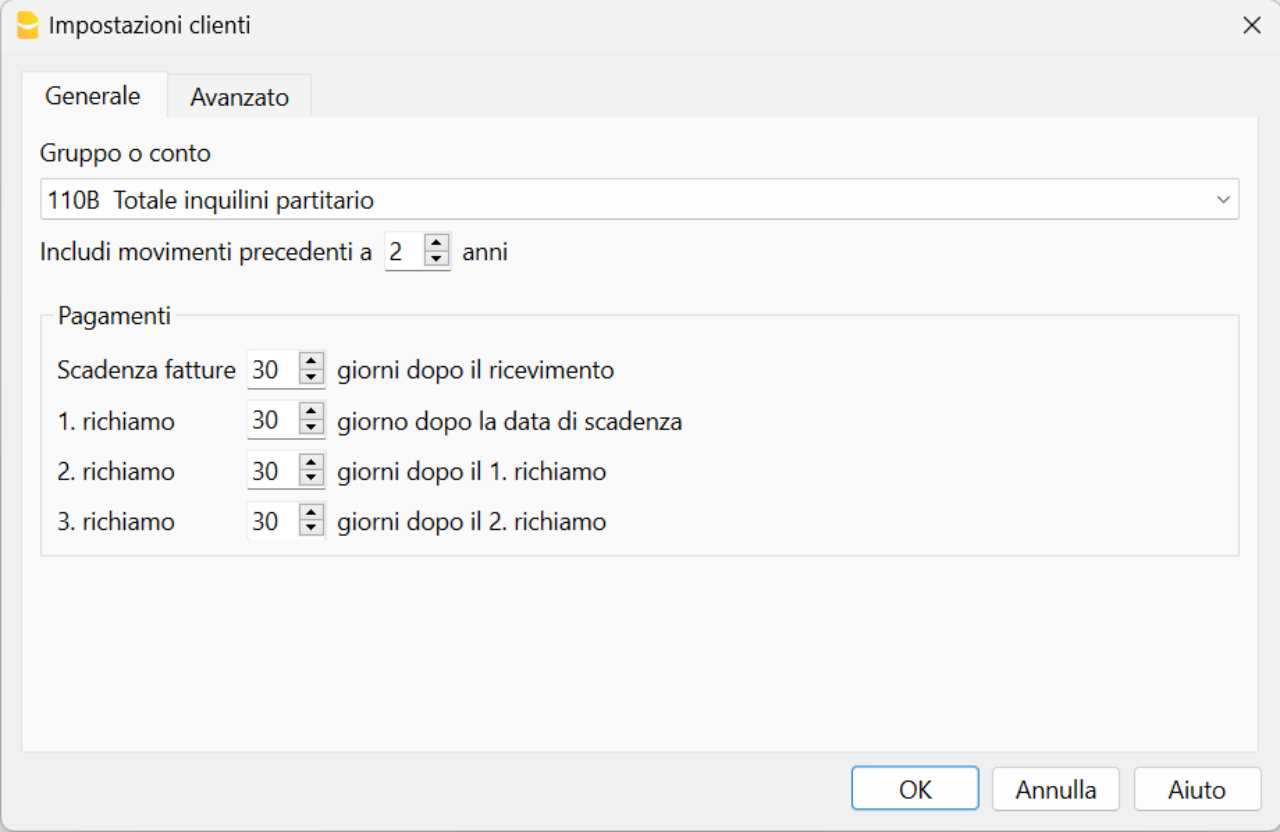
Imposta le registrazioni ricorrenti
Per utilizzare l'estensione tieni traccia degli affitti, degli anticipi per le spese e delle cadenze temporali degli affitti richiesti a ciascun inquilino nella tabella Registrazioni ricorrenti.
- Usa la colonna Data per indicare in che data iniziare ad addebitare automaticamente
- Usa la colonna Data Finale solo per indicare in che data l'inquilino terminerà il contratto di affitto dopo avere dato disdetta dal contratto
- Usa la colonna Ripeti per indicare la cadenza temporale di richiesta dell'affitto (Y anno, 6M semestrale, 4M quadrimestrale, 3M trimestrale, 2M bimestrale e M mensile).

Inserisci nella colonna Descrizione la descrizione per l'affitto e quella per l'anticipo sulle spese, come ad esempio "appartamento", "acconto spese", "garage".
Inserisci i conti contabili della registrazione degli addebiti come ad esempio il conto contabile dell'Inquilino 1 nella colonna Dare e il conto Ricavo da affitti nella colonna Avere.
Inserisci quindi l'importo corrispondente alla descrizione da addebitare.
Scopri il flusso di lavoro per la gestione degli affitti
Banana Contabilità Plus con il piano di abbonamento Advanced permette di facilitare e velocizzare molto la gestione di appartamenti in affitto attraverso un flusso di lavoro che sfrutta diverse funzionalità incluse nel programma.
Scopri il flusso di lavoro per la gestione degli affitti su Banana Contabilità+.
Centri di costo per inquilini
Per contabilità con un numero limitato di inquilini che si conoscono e pagano con regolarità potrebbe risultare troppo impegnativo addebitare mensilmente gli affitti da pagare.
È comunque sempre utile avere un controllo di quello che hanno pagato i singoli inquilini, per cui, invece di creare dei conti inquilini negli Attivi si possono creare dei conti inquilini come centri di costo CC3, preceduti dal punto e virgola ";".
Questa soluzione risulta utile nel caso che si vogliono registrare gli affitti secondo il metodo di cassa, per cui vengono considerati i ricavi solo al momento dell'incasso.
Questa soluzione è più semplice, ma permette comunque di avere un certo controllo e viene spiegata qui di seguito.
Conti inquilini come centri di costo
- Crea gli inquilini come centro di costo.
- Nella colonna Conto della Tabella Conti inserisci il numero dell'inquilino preceduto da un punto e virgola ";".
- Somma ogni inquilino (colonna Somma in "INQ") in un Gruppo "INQ" per ottenere il totale di tutti gli inquilini.
- Abilita la Vista Indirizzi per inserire i dati anagrafici di ogni inquilino.

Registrazione degli affitti sui centri di costo
- Nella Tabella Registrazioni.
- Guarda la Vista Centri di costo o abilita la colonna CC3 (Centro di Costo 3) nella Vista Base.
- Registra l'incasso dell'affitto come nell'immagine seguente, inserisci:
- l'incasso (conto della banca o cassa se l'affitto è stato pagato in contanti in Dare).
- la contropartita (conto Ricavi affitti in Avere).
- l'importo pagato dall'inquilino.
- nella colonna CC3 seleziona il nome dell'inquilino che ha pagato.

Registrazione del dovuto
Se si vuole tenere conto del dovuto sarebbe meglio registrare avendo dei conti di bilancio per ogni singolo inquilino.
Questa norma è consigliata soprattutto se si registra con il metodo sul fatturato.
Tuttavia puoi registrare anche con i centri di costo secondo il metodo di cassa:
- Tieni traccia del dovuto di un inquilino usando i centri di costo.
- Registra l'addebito usando i centri di costo, inserisci:
- la data.
- la descrizione.
- l'importo.
- il centro di costo dell'inquilino.
- Registra l'addebito usando i centri di costo, inserisci:
Non inserire il conto Dare e il conto Avere come nell'immagine seguente.
- Registra quindi il versamento dell'inquilino in contabilità, inserisci:
- l'incasso (conto della banca o cassa se l'affitto è stato pagato in contanti in Dare).
- la contropartita (conto Ricavi affitti in Avere).
- l'importo pagato dall'inquilino.
- il centro di costo scrivendo un segno meno davanti "-Inquilino 1".

Scheda conto inquilino
In ogni momento puoi visualizzare la scheda conto del centro di costo dell'inquilino desiderato.
Apri la scheda conto con un clic sul simbolo che esce nell'angolo in alto a sinistra quando passi il mouse sul centro di costo dell'inquilino, oppure usa il menu Report > Schede conto.
Se hai registrato anche l'addebito mensile dell'affitto la situazione dopo l'incasso è rappresentata nella immagine seguente.
La scheda conto permette di avere traccia del dettaglio degli affitti pagati per ogni singolo inquilino.

Modelli Universali Gestione Affitti
Contabilità Entrate/Uscite per Gestione appartamento o immobile in affitto (Universale)
Contabilità Entrate/Uscite per Gestione appartamento o immobile in affitto (Universale) michaelContabilità in partita doppia per Gestione appartamento o immobile in affitto (Universale)
Contabilità in partita doppia per Gestione appartamento o immobile in affitto (Universale) michaelVerwaltung von Stockwerkeigentum
Verwaltung von StockwerkeigentumEine Stockwerkeigentümergemeinschaft ist ein Gebäude mit mehreren Eigentümern, die sich die Ausgaben und die Gemeinschaftsbereiche teilen. Banana Buchhaltung Plus bietet eine hilfreiche Vorlage für eine professionelle Verwaltung, die bereits einen für die Immobilienverwaltung typischen Kontenplan enthält.
- Vorlage für Stockwerkeigentum | Doppelte Buchhaltung: fortgeschrittene Methode, wenn Sie mit der klassischen Buchhaltung vertraut sind.
Kontenplan für Stockwerkeigentum
Die Buchhaltung eines Stockwerkeigentums kann wie eine normale Buchhaltung betrachtet werden, mit einem wichtigen Unterschied: Die Ausgaben des Gebäudes werden von den Eigentümern vorausbezahlt und müssen genau den tatsächlichen Betriebskosten entsprechen.
Anders gesagt: Das Stockwerkeigentum soll weder Gewinn noch Verlust machen, und die Eigentümer zahlen nur das, was notwendig ist, um den Betrieb des Gebäudes sicherzustellen.
Diese Buchhaltungsvorlagen für Stockwerkeigentum dienen genau dazu:
- die tatsächlichen Kosten im Blick zu behalten
- zu überprüfen, ob jeder Eigentümer seinen korrekten Anteil bezahlt hat
Im Stockwerkeigentum stellen die Ausgaben die Betriebskosten des Gebäudes dar. Die Eigentümer leisten dafür Vorauszahlungen.
Am Jahresende müssen die einbezahlten Beträge den getätigten Ausgaben entsprechen. Die Buchhaltung hilft dabei, diesen Vergleich klar und nachvollziehbar zu machen.
Der Kontenplan des Stockwerkeigentums ist so aufgebaut, dass er die Frage beantwortet, ob die Eigentümer genau den Betrag eingezahlt haben, der für den Betrieb des Gebäudes ausgegeben wurde.
Dazu ist die Buchhaltung in mehrere Hauptbereiche unterteilt.
Konten der Eigentümer
Für jeden Eigentümer wird ein persönliches Konto erstellt, um folgendes zu erfassen:
- wie viel ihm als Vorauszahlung in Rechnung gestellt wurde
- wie viel er tatsächlich einbezahlt hat
- ob er noch bezahlen muss oder zu viel bezahlt hat
Diese Konten ermöglichen es, jederzeit die Situation jedes Eigentümers zu sehen.
Konto Einnahmen für Betriebskosten
Das Konto Einnahmen für Betriebskosten stellt die Gesamtheit der Beträge dar, die den Eigentümern zur Deckung der Betriebskosten des Gebäudes in Rechnung gestellt wurden.
Auf dieses Konto fliessen:
- die von den Eigentümern verlangten Akontozahlungen
- allfällige weitere Einnahmen im Zusammenhang mit dem Betrieb des Gebäudes
Der Gesamtsaldo dieses Kontos muss den getätigten Ausgaben entsprechen.
Weitere Einnahmen des Stockwerkeigentums
Das Stockwerkeigentum kann auch andere Einnahmen haben, zum Beispiel:
- Nutzung der gemeinschaftlichen Waschküche
- Vermietung von Parkplätzen oder Räumen an Dritte
Auch diese Einnahmen tragen zur Deckung der Betriebskosten des Gebäudes bei.
Die Summe der Einnahmen für Betriebskosten und der weiteren Einnahmen muss der Summe der im Jahr angefallenen Immobilienkosten entsprechen.
Konten der Immobilienkosten
Die Kostenkonten erfassen alle Ausgaben, die für den Betrieb des Gebäudes notwendig sind, wie zum Beispiel:
- Unterhalt
- Reinigung
- Energie
- Eingriffe an den Anlagen
- andere gemeinsame Kosten
Die Gesamtausgaben stellen die tatsächlichen Betriebskosten des Gebäudes dar.
Wie die Akontozahlungen der Eigentümer verbucht werden
Wenn einem Eigentümer eine Akontozahlung in Rechnung gestellt wird:
- wird der Betrag auf dem Konto des Eigentümers erfasst
- die Gegenbuchung erfolgt im Konto Einnahmen für Betriebskosten
Diese Buchung wird auch dann vorgenommen, wenn der Eigentümer noch nicht bezahlt hat.
Wenn der Eigentümer die Akontozahlung leistet:
- wird der Betrag als Zahlung auf dem Konto des Eigentümers verbucht
- die Gegenbuchung erfolgt im Bank- oder Kassenkonto
Auf diese Weise ist jederzeit klar ersichtlich:
- wie viel verlangt wurde
- wie viel tatsächlich bezahlt wurde
Kontrolle der geleisteten Akontozahlungen
Das Konto des Eigentümers zeigt jederzeit seine Situation:
- Sollsaldo
bedeutet, dass der Eigentümer noch nicht alle geforderten Akontozahlungen geleistet hat - Habensaldo
bedeutet, dass der Eigentümer mehr als nötig einbezahlt hat
Diese Kontrolle ist sofort verfügbar und erfordert keine externen Berechnungen.
Jahresabrechnung
Am Jahresende werden folgende Punkte verglichen:
- die insgesamt verlangten Beträge
- die tatsächlich angefallenen Ausgaben
Um die verlangten Akontozahlungen mit den Ausgaben auszugleichen:
- wird jenen, denen zu wenig verlangt wurde, der fehlende Betrag nachbelastet
- wird jenen, denen zu viel verlangt wurde, die Differenz zurückerstattet
In beiden Fällen erfolgt die Gegenbuchung im Konto Einnahmen für Betriebskosten.
Dieser Kontenplan ermöglicht es:
- sofort die Betriebskosten des Gebäudes zu verstehen
- die Richtigkeit der einbezahlten Beträge zu überprüfen
- eine transparente und verständliche Verwaltung zu gewährleisten
So widerspiegelt die Buchhaltung des Stockwerkeigentums genau die Realität – die Eigentümer tragen die Kosten des Gebäudes, nicht mehr und nicht weniger.
Banana Buchhaltung Plus verteilt die Ausgaben nicht automatisch auf die einzelnen Eigentümer, da jede Liegenschaft eine eigene, teils komplexe Aufteilung haben kann. Sie können jedoch die in Banana erfassten Daten exportieren und gezielt in Excel weiterverarbeiten. Sehen Sie sich dazu die Seite über die Excel-Vorlagen zur Aufteilung der Betriebskosten im Stockwerkeigentum an, um die Abrechnung an die Eigentümer zu erstellen oder die Spesen für eine eventuelle Steuererklärung aufzuteilen.
Verteilung und Abrechnung der Nebenkosten zulasten der Miteigentümer
Die Berechnung und Aufteilung der Immobilienkosten für die Eigentümer einer Stockwerkeigentümergemeinschaft berücksichtigt:
- Die Summe der angefallenen Kosten.
- Die Summe aller Einnahmen (Akontozahlungen der Eigentümer, Einnahmen aus der Waschküche und allfällige weitere Einnahmen), die einen Teil der Immobilienkosten decken.
- Die Differenz zwischen der Summe der Kosten und der Summe der Einnahmen ist der Saldo, also der Betrag, der am Jahresende von den Eigentümern eingefordert wird:
- Diese Differenz wird als Abrechnung oder Ausgleich bezeichnet.
- Wenn die Einnahmen höher sind als die Kosten, ergibt sich ein Überschuss, der den Eigentümern zurückerstattet wird.
- Wenn die Einnahmen geringer sind als die Kosten, ergibt sich ein Differenzbetrag, der von den Eigentümern eingefordert wird.
- Die Abrechnung ist individuell für jeden Eigentümer: Es ist daher möglich, dass ein Eigentümer Anspruch auf eine Rückerstattung hat, während ein anderer eine Nachzahlung leisten muss.
- Nach der Erfassung der Abrechnungen aller Eigentümer entspricht die Summe aller Kosten genau der Summe aller Einnahmen (kein Gewinn und kein Verlust).
Individuelle Aufteilung der Immobilienkosten
Die individuelle Aufteilung der Immobilienkosten bezieht sich auf jede einzelne Wohnung und auf den Zeitraum, in dem eine Person (natürliche oder juristische) effektiv Eigentümer war (bei Käufen und Verkäufen während des Jahres müssen Pro-rata-Abrechnungen erstellt werden).
Banana Buchhaltung Plus ermöglicht es, die Kosten zu erfassen, übernimmt jedoch nicht die Aufteilung, da diese für jede Liegenschaft unterschiedlich ist und teilweise sehr komplex sein kann.
Für die Aufteilung wird daher empfohlen, für jede Liegenschaft und für jedes Jahr (oder jeden Abrechnungszeitraum) eine Excel-Tabelle zu erstellen, in der die Totale jeder einzelnen Kostenart aufgeführt sind und die Beträge anschliessend mittels Verteilerschlüssel oder Koeffizienten (m2, Verbrauch, Wertquoten usw.) berechnet und aufgeteilt werden.
Siehe Beispiel unten sowie die beigelegte Excel-Vorlage.
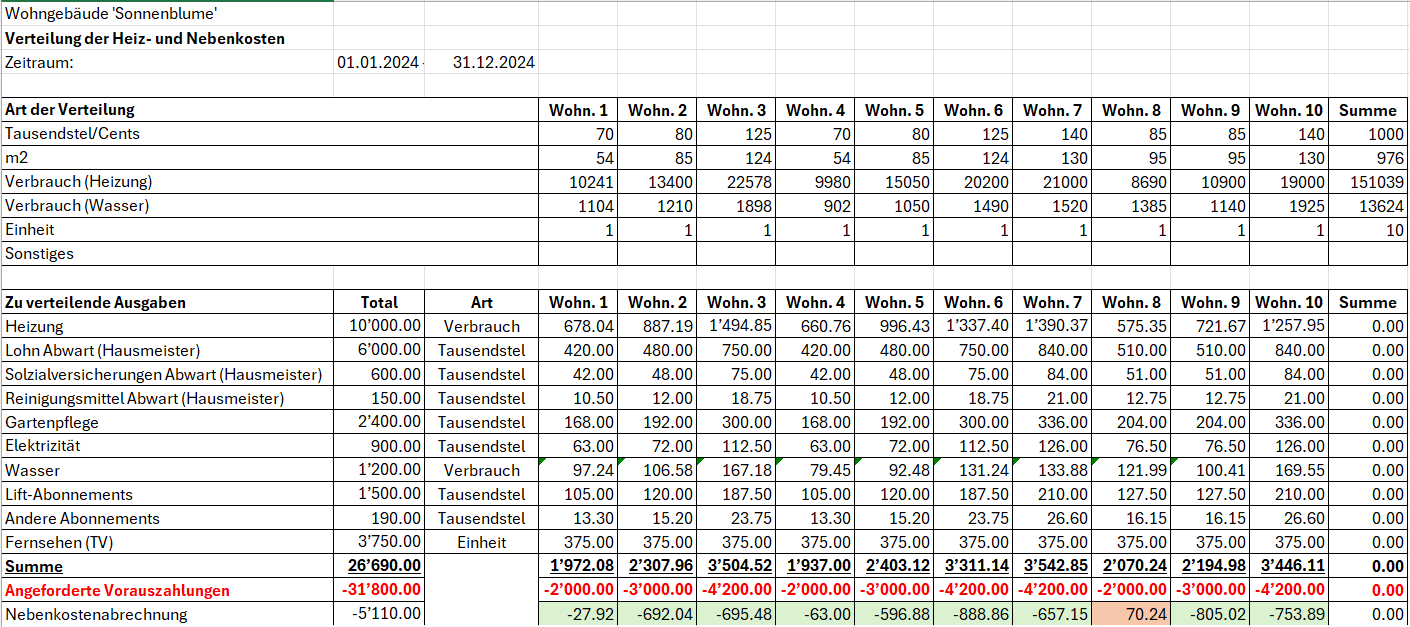
Abrechnung an die Eigentümer
Die berechnete Abrechnung muss in der Buchhaltung erfasst werden:
- Wenn der Eigentümer weniger bezahlt hat als die ihm zugewiesenen Kosten, wird die Differenz eingefordert und im Eigentümerkonto im Soll verbucht.
- Das Gegenkonto ist das Konto für Einnahmen aus Nebenkosten.
- Wenn der Eigentümer mehr bezahlt hat als die ihm zugewiesenen Kosten, wird die Differenz zurückerstattet und im Eigentümerkonto im Haben verbucht.
- Das Gegenkonto ist das Konto für Einnahmen aus Nebenkosten.
- Nachdem alle Abrechnungen den jeweiligen Eigentümern erfasst wurden, muss sich der Gewinn oder Verlust ausgleichen oder es darf ein Betrag von wenigen Rappen verbleiben, der nicht weiter auf alle Eigentümer aufgeteilt werden kann.
- Wenn sich Gewinn oder Verlust ausgleichen oder nur wenige Rappen verbleiben, ist die Aufteilung der Kosten korrekt erfolgt.
- Wenn sich Gewinn oder Verlust nicht ausgleichen oder Beträge von mehr als wenigen Rappen verbleiben, ist die Aufteilung nicht korrekt erfolgt. In diesem Fall müssen die Berechnungen zur Aufteilung der Kosten auf die Eigentümer überprüft werden.
Aufteilung der angefallenen Kosten für den Steuerabzug
Für einen allfälligen Steuerabzug der von jedem Eigentümer getragenen Kosten wird empfohlen, für jede Liegenschaft und für jedes Jahr (oder jeden Abrechnungszeitraum) eine spezifische Excel-Tabelle zu erstellen, in der die Totale der abzugsfähigen Kosten und die entsprechenden Beträge aufgeführt sind. Diese Beträge werden anschliessend für jede einzelne Wohnung mittels Berechnung und Verwendung von Verteilerschlüsseln oder Koeffizienten aufgeteilt.
Siehe das folgende Beispiel und laden Sie die Excel-Vorlage herunter.
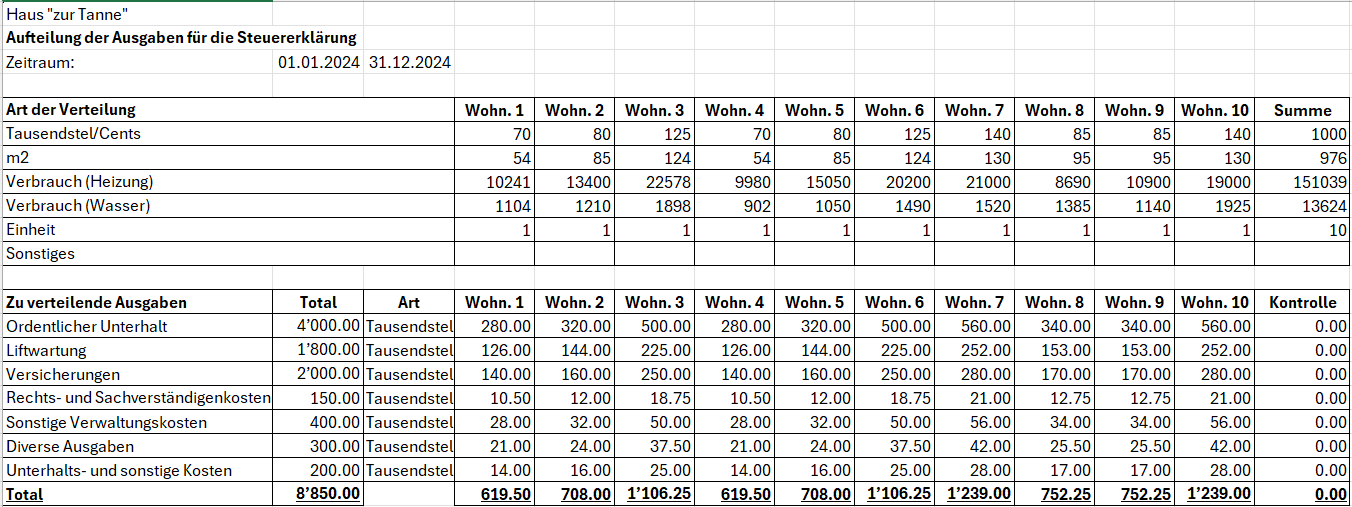
Kostenverteilung auf Miteigentümer nach dem Pro-rata-Prinzip
Wenn während des Jahres ein Verkauf einer Wohnung stattfindet, kann es notwendig sein, die Kosten pro-rata zwischen dem bisherigen und dem neuen Eigentümer aufzuteilen:
- Es können jedoch auch andere Aufteilungsmethoden bestehen, wie beispielsweise nach Monaten oder nach warmer und kalter Jahresperiode usw.
- Die Methoden zur Aufteilung der pro-rata Kosten variieren je nach geltenden lokalen Vorschriften oder gemäss den Kaufverträgen der Wohnung.

Flusso di lavoro per la gestione dei condomini
Con Banana Contabilità Plus puoi gestire una contabilità di condominio con il flusso di lavoro descritto in questa pagina e che comprende:
- l'importazione degli estratti conto elettronici bancari
- la registrazione automatica degli estratti attraverso delle regole di completamento delle registrazioni
- la registrazione automatica dei salari versati al custode senza riscrivere o copiare le registrazioni più volte
- la creazione di report completamente personalizzati in Excel
- il salvataggio e l'invio della contabilità completa dei giustificativi in un unico file PDF.
Importa gli estratti conto elettronici della banca
Puoi richiedere alla tua banca di fornirti l'estratto conto elettronico in formato XML (tipo di estratto Camt.053). Se necessario chiedi anche alla tua banca di continuare a ricevere l'estratto conto in formato PDF.
L'estratto conto elettronico in formato XML ti permette di ottenere la contabilità sempre aggiornata e di emettere richiami di pagamento in qualsiasi momento.
Quando il file XML è disponibile scaricalo dall'e-banking e salvalo sul computer. Potresti riceverlo giornalmente, settimanalmente o mensilmente in base a come lo hai richiesto.
Usa l’estensione Importazione estratto bancario SEPA/ISO 20022 per importare il file appena scaricato.
Quando importi un estratto conto elettronico puoi registrare automaticamente sia gli incassi ricevuti che i pagamenti effettuati grazie all'uso delle regole di completamento delle registrazioni contabili. A ogni importazione puoi creare tutte le regole necessarie. Con il tempo ti basterà importare gli estratti conto per registrare automaticamente tutta la contabilità.
Crea le regole per automatizzare la contabilità
Banana Contabilità Plus, con l'abbonamento al piano Advanced, permette di registrare automaticamente la contabilità secondo i criteri che desideri.
Per esempio puoi registrare tutte le fatture pagate a Azienda SA in un conto contabile specifico tramite il nome dell'azienda a cui paghi.
Quando nell'estratto conto elettronico appare quel nome di azienda e corrisponde a un'uscita, Banana Contabilità Plus lo registra nel conto contabile da te impostato.
Se paghi una fattura per un contratto stipulato con Azienda SA (per esempio per un'assicurazione, una fornitura di energia, ecc.) puoi aggiungere il segno + e il numero di contratto, come per esempio +Azienda SA 101.200.14, dove 101.200.14 è il numero di contratto stipulato.
Il segno + indica che è necessario trovare tutte le informazioni, in qualsiasi ordine, all'interno dell'estratto conto elettronico. In questo modo puoi registrare in maniera distinta più contratti diversi stipulati con la stessa azienda.
Allo stesso modo puoi registrare automaticamente gli incassi usando i nomi delle persone dalle quali incassi.
Con le regole registri automaticamente tutte le entrate e le uscite da tutti i proprietari in maniera molto precisa.
Se desideri puoi anche indicare uno specifico importo alla regola. In questo modo distingui sempre di più le registrazioni, sia in entrata che in uscita.
Per usare le regole è necessario inserire nella colonna Doc della tabella Registrazioni ricorrenti il codice !Rule come negli esempi di regole seguenti.

In questa tabella è anche possibile usare il codice !RuleSplit per inserire regole che registrano automaticamente con registrazioni composte da più righe.
In questo modo riduci notevolmente il tempo di registrazione contabile e ottieni la contabilità sempre aggiornata.
Registra automaticamente i salari del custode
Dalla tabella Registrazioni ricorrenti registra i salari del custode su più righe inserendo per esempio nella colonna Doc il codice univoco salari su ogni riga.
Inserisci la descrizione di ogni riga inclusa nella registrazione, inserisci i rispettivi conti Dare e Avere e gli importi che si ripetono in modo ricorrente.
Quando imposti una registrazione ricorrente usala nella tabella Registrazioni:
- Compila la colonna Data inserendo la data.
- Inizia a scrivere nella colonna Doc la parola salari.
- Seleziona la registrazione ricorrente trovata da Banana Contabilità Plus.
La registrazione del salario composta da più righe apparirà già completata nella tabella Registrazioni in contabilità.
Se preferisci puoi automatizzare ulteriormente la registrazione composta da più righe con l'uso delle regole per usarle quando importi l'estratto conto elettronico:
- Nella colonna Doc inserisci i codici !Rule e !RuleSplit al posto del nome salari riportato nell'esempio precedente.
- Inserisci il nome del custode a cui versi il salario nella colonna Descrizione della riga dove inserisci il codice !Rule.
- Questo nome verrà cercato nell'estratto conto elettronico durante l'importazione.
- Inserisci una parentesi quadrata aperta e una chiusa [] nel conto di contropartita della regola dove inserisci il codice !Rule. Queste parentesi indicano che si tratta di una regola per una registrazione con più righe.
Guarda l'esempio nella immagine seguente.
Crea report personalizzati in Excel
Con Banana Contabilità Plus è possibile collegare Microsoft Excel tramite l'Add-in di Banana Contabilità Plus per creare report completamente personalizzati.
Con l'Add-in puoi suddividere il budget o calcolare i conteggi di suddivisione delle spese tra i proprietari.
Trovi l'Add-in da installare all'interno di Excel, cerca nei componenti aggiuntivi, installalo e inizia subito a generare i tuoi report personalizzati.
Per maggiori informazioni guarda anche le pagine di documentazione relative all'Add-in Excel di Banana Contabilità Plus.
Salva e invia la contabilità per e-mail con i giustificativi in unico file PDF
Nella tabella Registrazioni è possibile abilitare e visualizzare la colonna Link. Usa questa colonna per allegare a ogni registrazione contabile il relativo giustificativo, come per esempio una fattura ricevuta o una fattura emessa.
Abilita la colonna Link in questo modo:
- Fai doppio clic sulla intestazione delle colonne nella tabella Registrazioni (per esempio sulla colonna Descrizione).
- Vista la casella DocLink nella colonna a sinistra della finestra che si apre, come da immagine seguente.
- Clicca sul bottone Ok in basso a destra nella finestra per confermare.
Ora allega i giustificativi dalla tabella Registrazioni. Fai doppio clic sulla cella della colonna Link e cerca e scegli il file da allegare che hai salvato sul tuo computer.
Quando desideri crea il dossier PDF in questo modo:
- Clicca dal menu File la voce Crea dossier PDF.
- Vista in basso a sinistra nella finestra che si apre la casella "Includi allegati", come da immagine seguente.
- Clicca il bottone Ok in basso a destra per confermare e salva il file PDF in una posizione del computer dove preferisci.
Il PDF salvato è un file con il bilancio, il conto economico, le schede conto e tutti i giustificativi allegati in unico file PDF.
Scarica e guarda un esempio di dossier PDF (alcuni browser non permettono la visualizzazione degli allegati, ti consigliamo di salvarlo e aprirlo con il programma Adobe Acrobat Reader che è gratuito).
Clicca sulle icone a forma di graffetta a sinistra delle registrazioni per aprire gli allegati, come nell'esempio seguente.
Con questa funzionalità puoi inviare il file PDF con la contabilità completa anche per e-mail o decidere di conservarlo secondo le norme vigenti.
Modelli Universali Gestione Condomini
Contabilità Entrate/Uscite per Gestione condominio (Universale)
Contabilità Entrate/Uscite per Gestione condominio (Universale) michaelContabilità in partita doppia per Gestione condominio (Universale)
Contabilità in partita doppia per Gestione condominio (Universale) michael记账凭证 (中文-柬埔寨文)
记账凭证 (中文-柬埔寨文)详细操作步骤,请参见页面记账凭证 (中文-英文)。
Produktivität (universelle Applikationen)
Banana Buchhaltung Plus bietet ergänzende Werkzeuge für eine noch umfassendere und effizientere Unternehmensverwaltung. Die integrierten Produktivitäts-Apps unterstützen Sie bei der Automatisierung zentraler Geschäftsprozesse – darunter Rechnungsstellung, Lagerverwaltung sowie die Überwachung und Kontrolle von Unternehmensgütern.
Offerten und Rechnungen
Mit dieser Erweiterung erstellen Sie schnell und professionell Offerten/Kostenvoranschläge, Rechnungen und Gutschriften.
Die Belege können entweder direkt aus Ihrer Buchhaltung generiert oder individuell angepasst werden – ganz nach Ihrem Bedarf.
- Schnelle Erstellung von Rechnungen und Offerten im PDF-Format
- Grafische Anpassung: Logo, Layout, Farben und Sprache flexibel gestalten
Schlüsselverwaltung
Ein praktisches Werkzeug zur Erfassung und Verwaltung von Schlüsseln und Zutrittsrechten – sowohl physisch (z.B. Tür- oder Gebäudeschlüssel) als auch digital (z.B. Zugangscodes, Karten uw.).
Verwalten Sie zentral, welche Schlüssel oder Zugänge Mitarbeitern, Partnern oder externen Personen zugewiesen wurden.
- Zentrale Zugangskontrolle für Gebäude, Räume oder Systeme
- Minimiertes Risiko durch dokumentierte Ausgabe – beugt Verlust oder Missbrauch vor
- Aktuelle Übersichten und Berichte für interne Verwaltung oder Audits
Lager
Ein Modul zur effizienten Verwaltung von Lagerbeständen und Warenbewegungen.
- Erfassung von Warenein- und -ausgängen
- Automatische Berechnung von Lagerbeständen und Lagerwerten
- Unterstützung von Artikelnummern, Kategorien und Bewertungsmethoden wie FIFO oder LIFO
Anlagegüterverzeichnis
Eine praktische Erweiterung zur Verwaltung von Anlagegütern sowie zur automatischen Berechnung jährlicher Abschreibungen – nach steuerlichen Vorgaben oder individuellen Kriterien.
- Lückenlose Nachverfolgung von Anschaffungen, Abwertungen und Ausbuchungen
- Automatische Berechnung der Abschreibungsbeträge
Dank dieser Werkzeuge wird Banana Buchhaltung Plus zur idealen Komplettlösung für kleine Unternehmen, Selbstständige und Vereine – effizient, integriert und ohne unnötige Komplexität.
Bibliotheken, Sammlungen und Ausleihungen
Bibliotheken, Sammlungen und AusleihungenSo verwenden Sie das Modell für Bibliotheken
- Installieren Sie das Programm Banana Buchhaltung+
- Laden Sie die oben erwähnte Vorlage "Download Vorlage: muster_bibliothek.ac2" herunter.
- Folgen Sie den ausführlichen Erläuterungen auf der Seite Bibliothek und Sammlungen.
Library Books Report
Library Books ReportInstall the extension
To install the extension:
- Open Banana Accounting Plus.
- Menu Extensions > Manage Extensions.
- In the search field enter Library Books Report.
- From the extensions list select Library Books Report.
- Select the extension and click Install.
- Click Close to close the window.
Create the report
To creare the report:
- Open an accounting file.
- From the Extensions menu select Library Books Report and then one of the following:
- Library Books Report.
- Library Contacts Report.
- Create vCard from address.
Library Books Report
This extension creates a list of all the books that are in the Banana Library file. For a clearer view the list is split and sorted by genre of books.
You can export the catalog in pdf format to easily publish it on your web site.
Example of books report:
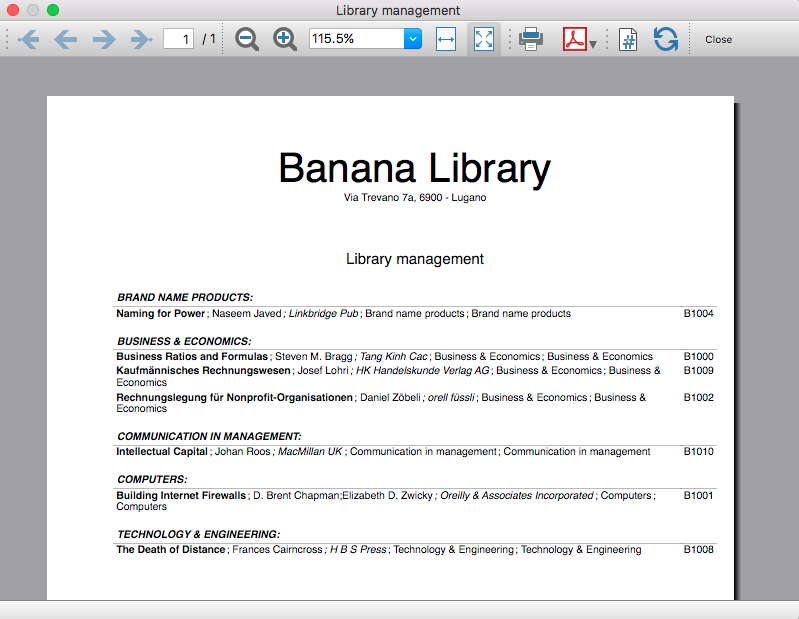
Library Contacts Report
Report Expired Outstanding books for each person.
This report creates a page card for each contact, with all information, including the outstanding books.
You can print:
- All contacts
- Selected contacts
- Conacts with outstanding books

Create vCard from address
This extension extract the addresses data in the vCard format.
For more information visit Export Address data in the VCard format.
Time Sheet Extensions
The Timesheet is a free and unlimited application because it is included in the Banana Accounting Plus Free Plan. It works like Excel but is optimized for calculation of hours. It is therefore much more reliable and you can easily manage all kind of working hours. You have a comprehensive view of the hours and can always correct.
Timesheet - Report with project and resource data [BETA]
Timesheet - Report with project and resource data [BETA]The following features provide tools to export and analyze timesheet data, helping you review recorded hours and gain insights by project and resource.
Time Sheet Export
The Time Sheet Export feature allows you to export recorded time data for further analysis, reporting, or integration with other systems.
It provides a structured way to extract time entries, making it easier to share data, create custom reports, or use the information in external accounting, payroll, or project management tools.
This function helps ensure consistency and accuracy when working with time-tracking data outside the application.
Timesheet – Report with Project and Resource Data [BETA]
The Timesheet – Report with Project and Resource Data [BETA] provides a detailed overview of recorded time, organized by projects and resources.
This report is designed to help users analyze how time is allocated across different activities and team members, offering better visibility into project progress and resource utilization.
As a Beta feature, it is intended for testing and feedback, and may be further refined based on user experience.
This extension works with a timesheet file and provide a report for the selected project and detail of the resource. You can install the extension from the menu Extensions->Manage Extensions.
This extension requires the Advanced plan of Banana Accounting Plus.
For more information see the documentation pages for tracking projects times.
You can install the Extension.
Setup timesheet file
Prior to use the extension you need to setup the timesheet file.
- Create a new Timesheet file or use an existing one.
- Add the Projects table:
- Tools → Add/Remove functionalities → Add Table Project.
- Add the projects codes.
- Add the Resources table
- Go to the Journal Table
- Tools → Add/Remove functionalities → Add simple table
- Enter the name "Resources" (Name XML must be "Resources")
- Go to the Journal Table
- Tools → Add/Remove functionalities → Add columns to join table
- Choose Resources
- Dialog "Insert column after" choose Description.
- Go to Resources table and enter the resource id and description (people name).
Enter Project data
In the Journal, when you enter the daily worked time, you can now specify the Project and Resource.
Print the report
You can print a report for a single project at a time.
Time sheet - systematic 2026
Time sheet - systematic 2026Work hours are recorded with start and end times; notes can be written down, reimbursements made, days of illness or additional work can be recorded. The program calculates the totals and any differences with the due hours.
Important: The festive days contained in the model are to be updated manually according to your country/region.
To use the Time Sheet application, download the available file and follow the instructions on our page How to start a Time Sheet.
Beispiel Offerten und Rechnungen
Beispiel Offerten und Rechnungen ivanVerwaltung und Erfassung von Tür- und Gebäudeschlüsseln
Verwaltung und Erfassung von Tür- und GebäudeschlüsselnEinfache und effektive Software zur Schlüsselverwaltung für Türen, Gebäude, Büros und Immobilien jeder Art.
Ideal für Hausverwaltungen, Wohnanlagen und gewerbliche Immobilienverwaltungen.
- Vollständige Schlüsselliste mit Anzahl, Seriennummern und individuell anpassbaren Zusatzinformationen – ganz nach Ihren Bedürfnissen.
- Standort- und Empfängerübersicht: Behalten Sie jederzeit den Überblick, wo sich welcher Schlüssel befindet – bei einer Person oder an einem bestimmten Ort.
- Lückenlose Dokumentation von Schlüsselübergaben und -rückgaben – klar nachvollziehbar und jederzeit abrufbar.
- Digitale Verknüpfungen: Verlinken Sie Dokumente, Quittungen und weitere Dateien direkt – für eine vollständig papierlose Verwaltung.
- Zentrale und skalierbare Lösung: Verwalten Sie beliebig viele Schlüssel und Liegenschaften in nur einer Anwendung.
Die Schlüsselverwaltung nutzt die Lagerverwaltungs-App als Grundlage und ist vielseitig einsetzbar.
Wenn Sie Anpassungen wünschen, die die Verwaltung noch einfacher und effizienter machen, lassen Sie es uns gerne über die untenstehende Feedback-Dokumentation wissen.
Lagerverwaltung
LagerverwaltungAnlagenbuchhaltung
AnlagenbuchhaltungCapitolati, Offerte Strutturate
Con Banana Contabilità Plus puoi creare e stampare un capitolato d’offerta in modo semplice e strutturato, organizzando lavori, materiali, quantità e prezzi.
La tabella QuickSum permette di inserire le diverse voci del capitolato e di calcolare automaticamente subtotali e totali. Puoi partire da un modello già predisposto e adattarlo alle esigenze del tuo progetto.
Per ottenere il documento finale è disponibile anche un’estensione per la stampa del capitolato d’offerta, che utilizza i dati della tabella QuickSum per generare un report ordinato e professionale.
Scopri le risorse disponibili per iniziare:
- Modello per capitolato d’offerta con tabella QuickSum
- Estensione QuickSum Stampa Capitolato d’offerta
QuickSum Stampa Capitolato d'offerta [BETA]
QuickSum Stampa Capitolato d'offerta [BETA]L'estensione presentata qui di seguito permette di creare una stampa del capitolato di offerta fatto con la tabella QuickSum.
Prerequisiti
Per utilizzare questa estensione:
- Scaricare e installare Banana Contabilità+ Dev Channel (versione 10.2.3 o successive).
Versione Beta
La tabella QuickSum è uno strumento ancora in fase di sviluppo e che viene messo a disposizione a un limitato numero di utenti.
Ci sono diverse funzionalità che sono per il momento provvisorie e che subiranno cambiamenti con il tempo.
L'estensione al momento è rilasciata in versione beta. Ciò significa che alcuni dettagli potrebbero cambiare senza preavviso.
Installazione e utilizzo dell'estensione
- Installa l'estensione QuickSum Capitolato d’offerta.
Visita la documentazione Gestione Estensioni per vedere come installare l'estensione. - Una volta installata, l'estensione sarà visibile nel menu Estensioni dove potrà essere eseguita.
Crea la stampa del capitolato d'offerta
- Dal menu Estensioni seleziona l'estensione QuickSum Capitolato d’offerta.
- Completa i campi del dialogo Impostazioni e clicca su OK.
- Viene automaticamente creato il report con la stampa del capitolato.
I testi delle impostazioni dell’estensione e i testi fissi sulla stampa, come le intestazioni delle colonne, il riporto e il titolo della pagina di riepilogo, vengono visualizzati nella lingua del file.
Da File > Proprietà file (Dati base) > sezione Varia > Lingua corrente è possibile cambiare la lingua del file.
Le lingue supportate sono italiano, francese, tedesco e inglese.
Dialogo Impostazioni
Esegui l'estensione dal menu QuickSum Capitolato d’offerta.
Si aprirà il dialogo delle Impostazioni dell'estensione, dove puoi definire alcune informazioni per creare la stampa del capitolato d'offerta.
Per l'inserimento dei dati fai un clic nel campo della colonna Valore.
Report
Impostazioni base del report.
- Nome report
- Opzionale.
- Serve per definire il nome del report, utilizzato nella visualizzazione dell'anteprima di stampa e per il nome del salvataggio del file.
- Moneta
- Indica la valuta del capitolato d’offerta (ad es. CHF, EUR).
- Mostra logo intestazione
- Opzionale.
- Serve per includere un logo nell'intestazione. Il logo è definito tramite il comando dal menu File > Imposta logo.
- Nome personalizzazione logo
- Opzionale.
- Serve per inserire il nome della personalizzazione logo da utilizzare.
- Mostra indirizzo intestazione
- Opzionale.
- Serve per includere l'indirizzo della ditta nell'intestazione.
L'indirizzo della ditta si deve prima definire nella scheda Indirizzo del file.
Possono essere utilizzate le seguenti informazioni dell'indirizzo: Società, Nome, Cognome, Indirizzo 1, Indirizzo 2, CAP, Località, Telefono, Email, Web.
Stampa capitolato d'offerta
Serve per includere il capitolato d'offerta nella stampa.
- Escludi ItemId (regex)
- Opzionale.
- Serve per definire una regola (regex) per non stampare alcuni valori nella colonna ItemId.
Ad esempio, per evitare la stampa, nella colonna ItemId, degli ItemId che terminano con una lettera, è possibile inserire l’espressione: /[a-zA-Z]$/
- Lunghezza massima descrizione per riga
- Consigliato 58 caratteri.
- Serve per indicare il numero massimo di caratteri per ogni riga di descrizione.
- Quando il testo della descrizione supera il numero indicato, il programma tronca il testo e lo suddivide su più righe. La suddivisione su più righe è necessaria per calcolare correttamente la posizione dei totali riporto a fine e inizio pagina.
- Decimali colonna Quantità
- Serve per definire il numero di decimali da visualizzare nella colonna Quantità.
- L'impostazione predefinita è 2.
- Mostra totale cumulativo sulle pagine
- Serve per includere il totale complessivo (colonna Cumulated) come riporto a fine pagina e inizio della successiva.
- Il riporto è sempre il totale complessivo cumulato indicato nella tabella.
- Utilizza gli stili delle righe
- Serve per applicare gli stili alle righe (grassetto, italico, colore testo, colore sfondo) così come sono nella tabella QuickSum.
Stampa riepilogo
Serve per includere alla fine della stampa del capitolato un foglio di riepilogo con tutti i totali.
- Altre posizioni da stampare
- Opzionale.
- Serve per indicare altre posizioni da includere nella stampa del riepilogo.
È utile, ad esempio, per stampare la riga dell’IVA. - Inserire l’ItemId (ad es. 9.1.2).
- È possibile inserire più ItemId, separati da un punto e virgola ; (ad es. 9.1.2;9.1.3).
- Le posizioni vengono stampate nell’ordine in cui sono inserite nella tabella QuickSum.
Stampa righe di verifica hash
Serve per aggiungere, al termine della stampa del capitolato, le righe contenenti i codici hash di verifica.
Confrontando gli hash stampati con quelli presenti nella tabella QuickSum, è possibile verificare che il documento non sia stato modificato.
Le righe di verifica vengono stampate solo se nella tabella QuickSum sono presenti i codici hash.
- #hash-base
Hash calcolato solo sugli elementi non modificabili del documento. Le modifiche ai campi modificabili in modalità blocco non cambiano l'hash. - #hash-all
Hash calcolato su tutto il documento. Qualsiasi modifica comporta il ricalcolo dell'hash.
Stampa capitolato
La stampa del capitolato riprende tutte le righe presenti nella tabella QuickSum, nello stesso ordine in cui compaiono, e consente di generare un’offerta completa che include tutti gli articoli (colonna Item) con le relative righe di dettaglio e di prezzo.
Nel report vengono stampate le colonne Articolo, Descrizione, Quantità, Unità, Prezzo unità e Importo totale.
Facoltativamente, alla fine di ogni pagina può essere incluso il riporto del totale complessivo calcolato fino a quel momento; lo stesso totale viene riportato anche all’inizio di ogni nuova pagina.
Il report termina con la stampa del subtotale, dell’IVA calcolata sul subtotale e del totale complessivo dell’offerta.
Esempio stampa capitolato:
Impostazioni della tabella QuickSum che influenzano la stampa
Alcune impostazioni e valori presenti nella tabella QuickSum modificano il comportamento e il contenuto della stampa del capitolato.
In particolare:
- ItemId
- Quando un articolo è commentato (ItemId inserito tra parentesi quadre), l’intera riga non viene stampata nel report.
- Stile
- #pagebreak
È possibile forzare un cambio pagina nel report inserendo il comando #pagebreak.
Inserire una riga vuota nella tabella immediatamente prima del punto in cui si desidera il cambio pagina e, nella colonna Style, inserire #pagebreak.
Se il comando viene inserito più volte in righe consecutive, il cambio pagina viene applicato una sola volta.
- #pagebreak
- Codice Modifica
- Utilizzare questa colonna per indicare quali valori devono essere completati dall’utente.
- In base alle informazioni inserite, vengono applicati eventuali tratteggi sotto i valori delle colonne Quantità e Prezzo unità.
- Se almeno uno di questi due valori risulta tratteggiato, anche il valore nella colonna Totale viene sottolineato con il tratteggio.
- Per maggiori informazioni sui codici da inserire e il loro funzionamento, consultare la documentazione della tabella QuickSum.
Stampa riepilogo
La stampa del riepilogo riprende tutte le righe di totale presenti nella tabella QuickSum, nello stesso ordine in cui compaiono.
Le righe di totale sono identificate da un valore nella colonna ItemId che inizia con "T:".
Lo scopo del report è fornire un riepilogo dei totali dei diversi articoli presenti nella tabella, con i relativi importi.
Nel report vengono stampate le colonne Articolo, Descrizione e Importo.
Esempio stampa riepilogo:
Capitolato d'offerta (tutorial)
Capitolato d'offerta (tutorial)Questo modello utilizza la tabella QuickSum per preparare preventivi e calcoli dettagliati dei costi, con un esempio dedicato a lavori di ristrutturazione di un'abitazione.
Le diverse lavorazioni possono essere organizzate in modo gerarchico, suddividendole in sezioni e sottosezioni. Per ogni voce è possibile indicare una descrizione, la quantità, l'unità di misura e il prezzo unitario; il programma calcola quindi automaticamente l'importo corrispondente e i totali progressivi.
Il modello mostra anche come gestire costi calcolati in percentuale rispetto ad altre voci o gruppi di voci. Nell'esempio, oltre ai lavori di tinteggiatura e alle piccole riparazioni delle superfici, viene calcolato automaticamente un costo percentuale per la protezione del cantiere.
Subtotali e totali permettono di ottenere una lettura chiara dei costi per ogni gruppo di lavori. È inoltre previsto il calcolo dell'IVA sul subtotale e del totale complessivo del preventivo.
Il modello è particolarmente indicato per artigiani, imprese di costruzione e ristrutturazione e professionisti che desiderano predisporre preventivi, offerte o stime dei costi con calcoli automatici, mantenendo una struttura ordinata e facilmente consultabile.
Technical Preview
La tabella QuickSum è uno strumento ancora in fase di sviluppo e che viene messo a disposizione a un limitato numero di utenti.
Ci sono diverse funzionalità che sono per il momento provvisorie e che subiranno cambiamenti con il tempo.
Prerequisiti
Per utilizzare questo modello:
- Scaricare e installare Banana Contabilità+ Dev Channel (versione 10.2.3 o successive).
Risorse utili