Modèles et Extensions Universels
Parallèlement aux options spécifiques à chaque pays, nous proposons également des modèles universels.
Il s'agit de modèles de fichiers Banana prêts à l'emploi, facilement adaptables à votre pays ou à vos préférences, avec des comptes descriptifs pour une meilleure compréhension.
Au lieu de comptes numériques, les modèles universels ont des comptes descriptifs. Au lieu d'un numéro ou d'un code, vous trouverez une brève description. Ce système rend la comptabilité plus simple et plus intuitive.
Voici un exemple de plan comptable pour un fichier de recettes et de dépenses :

Accounting Templates and Extensions | Universal
Accounting Templates and Extensions | UniversalAlongside country-specific options, Banana Accounting also offers Universal templates that can be easily adapted to your country and needs. They use descriptive account names instead of numerical codes, making accounting simpler and easier to understand.
Here is an example of a chart of accounts for an income and expenses accounting file:
Choose the template that best suits your needs from the drop-down menu on the left, or directly in Banana Accounting (File > New).
Business (Universale)
Modèles Universels Business
商店会计
商店会计 feiSimple Accounting for a Shop
Simple Accounting for a Shop michaelIncome & Expense Accounting for Property Management
Income & Expense Accounting for Property Management michaelIncome & Expense Accounting for a Corporation
Income & Expense Accounting for a Corporation michaelComptabilité multidevise pour PME
Comptabilité multidevise pour PMEModèle idéal pour la gestion de la comptabilité des sociétés anonymes. Le plan comptable est structuré selon le schéma PME et présente les registres clients/fournisseurs. Il y a des comptes en devises étrangères et des centres de coûts.
Comptabilité pour sociétés anonymes
Comptabilité pour sociétés anonymes caterinaComptabilité pour sociétés de personnes morales avec les registres clients/fournisseurs
Comptabilité pour sociétés de personnes morales avec les registres clients/fournisseursModèle idéal pour la gestion de la comptabilité des sociétés anonymes. Le plan comptable est structuré conformément au régime des PME. Il y a des centres de coûts.
Comptabilité pour sociétés de personnes morales avec les registres clients/fournisseurs
Comptabilité pour sociétés de personnes morales avec les registres clients/fournisseursModèle idéal pour la gestion de la comptabilité de personnes morales. Le plan comptable est structuré conformément au régime des PME. Il y a des centres de coûts et la gestion des clients et fournisseurs.
Comptabilité pour Entreprise jusqu'à 500'000 CHF chiffre d'affaires
Comptabilité pour Entreprise jusqu'à 500'000 CHF chiffre d'affairesPlan comptable structuré pour gérer une entreprise dont le chiffre d'affaires annuel n'excède pas 500'000 CHF. Avec TVA et des centres de coûts.
公司会计 (含中英文报表)
公司会计 (含中英文报表) feiComptabilité pour Entreprises Individuelles
Comptabilité pour Entreprises IndividuellesPour gérer les comptes d'une petite entreprise individuelle. Le plan comptable est structuré avec des groupes et sousgroupes et centres de coût.
Comptabilité pour Entreprises individuelles
Comptabilité pour Entreprises individuellesPour gérer les comptes d'une petite entreprise individuelle avec TVA et centres de coût.
Yacht, Boats, Cruises Income & Expense Accounting Log Book with Budget and Cash Plan
Yacht, Boats, Cruises Income & Expense Accounting Log Book with Budget and Cash PlanTrack yacht or sailboat expenses and revenues. No need of accounting experience.
Easy to use Accounting software for Yacht. Predefined account file with chart of account, with comprehensive list of expenses (Engine, Crew, Administrative, Guests) and Revenues, that can be easily adapted for your specific needs.
This accounting template provides.
- Predefined account chart with Expenses (Engine, Crew, Administrative, Guests) and Revenues that can be easily adapted for your specific needs.
- Cost and revenues subdivision also by cruise.
Double-Entry Accounting for a Corporation
Double-Entry Accounting for a Corporation michaelComptabilité/Budget Restaurant dépenses / recettes
Comptabilité/Budget Restaurant dépenses / recettesComment faire un budget pour un restaurant
Dans toutes les activités, il est essentiel de prendre des décisions sur la situation économique et financière tout au long de l'année avec confiance, en particulier avec la possibilité d'intervenir à l'avance avant qu'il ne soit trop tard. C'est pourquoi Banana Comptabilité a prévu dans ses modèles la fonction "Budget", dans laquelle vous pouvez créer le budget de votre restaurant.
Nous voulons vous aider pas à pas dans la rédaction du budget et, pour ce faire, il vous suffit de suivre les instructions ci-dessous. C'est simple et rapide, vous pouvez donc vous concentrer sur la gestion de votre entreprise et prendre soin de vos clients !
1. Entrer les recettes
Il faut se référer aux revenus certains, mais pour se faire une idée, vous pouvez vous baser sur les revenus de l'année précédente.
Les recettes se composent principalement des :
- Ventes d'aliments
- Ventes de boissons
Pour un restaurant, il est très utile de séparer, par mois, les ventes de nourriture et de boissons car elles peuvent varier beaucoup selon les vacances et la période de l'année. Evidemment, vous pouvez personnaliser, à votre gré, les articles de vente, par exemple les rendre plus détaillés pour les types d'aliments et de boissons.
En outre, il peut également y avoir des revenus non liés à l'activité principale :
- Loyers immobiliers
- Intérêts créditeurs sur les comptes bancaires et postaux
Pour plus d'informations sur l'insertion technique des données de l'estimation dans le programme Banana Comptabilité, veuillez consulter la page Tableau Budget.

2. Insérez les dépenses fixes et variables
Vous devez énumérer toutes les dépenses que vous prévoyez rencontrer au cours de l'année. Encore une fois, vous pouvez vous baser sur les dépenses de l'année précédente et réfléchir à tout changement et modifier les montants.
Les principales dépenses peuvent l'être :
- Achats de marchandises ou de matières premières (aliments et boissons)
- Salaires
- Équipement
- Cotisations de sécurité sociale
- Assurance du personnel
- Assurance machines et biens
- Loyer ou hypothèque et intérêts
- Impôts et taxes
- Lumière, eau et gaz
- Frais de téléphone et d'Internet
- Nettoyage
- Publicité
Il est également très utile de séparer les coûts des aliments et des boissons par mois.

3. Contrôle les dépenses et les recettes
Après avoir compilé toutes les entrées et sorties, il est temps de les comparer, pour savoir si vous pouvez atteindre l'objectif principal, qui est le profit.
Pour faire la comparaison, vous devez avoir le rapport du Budget : si vous utilisez notre modèle de Banana Comptabilité, allez dans Rapports → Rapport formaté par groupes, et choisissez le budget que vous voulez (généralement le plus utile dans ce cas est le budget annuel).
En cochant le budget, vous pouvez vérifier quels seront les liquidités, les dettes et l'actif total, en fonction des dépenses et des recettes prévues au budget.
En ayant une vue d'ensemble des dépenses et des revenus, vous pourrez voir si vous avez surestimé ou sous-estimé certaines dépenses ou certains revenus.
Si vous êtes susceptible de perdre, il est préférable de penser dès maintenant aux économies que vous pouvez réaliser en évaluant les diverses dépenses que vous avez énumérées et en modifiant les montants.

4. La vérification à la fin de l'année avec le bilan final
A la fin de l'année, lorsque vous aurez terminé d'enregistrer tous les mouvements, vous pourrez préparer un rapport qui vous montrera les montants de tous les comptes dans le bilan final et les comparera avec ceux budgétisés. Vous pourrez vérifier avec certitude si votre budget préparé au début de l'année était fiable et si vous avez pu gagner ce à quoi vous vous attendiez au début de l'année.
Pour comparer le solde final avec le budget, allez dans le menu Rapports, cliquez sur Rapport formaté par groupes et choisissez Comparer le solde final et le budget.
S'il change beaucoup, vous pouvez vérifier dans quelles recettes ou dépenses votre estimation était erronée et corriger les montants dans le budget du nouvel exercice.

Double-Entry Accounting for a Corporation with foreign currencies
Double-Entry Accounting for a Corporation with foreign currencies michaelPayPal Templates | Double-entry
PayPal Templates | Double-entryPayPal import transaction
Banana has an import filter that allows you to directly import the PayPal transactions data in your accounting file.
The attached files are predefined with the accounts so that you can start immediately using it.
There are two template example files you can download and open in Banana:
Files suitable for
These template files are especially suitable in case you have only one PayPal preferred currency.
The imported transactions will automatically be imported to the currency account, so that you can separately see all transactions.
If in PayPal you keep balances in different currencies, it will be more suitable to use a PayPal accounting in Multicurrency.
Even if you use another accounting software, you will find that is very efficient to keep a separate accounting in Banana and keep your PayPal accounting in it. Instead of recording all transactions in your accounting solution, you can keep a separated accounting in Banana and once a month or when needed, only record the summary movement for the period in your accounting solution .
Further adapting the file
The file can easily be adapted to suit your needs.
Adding new accounts and new currencies
-
In the Accounts table, add new accounts for other currencies or for different Income or Expense types.
Changing to another Basic currency
This file can easily be converted into one with another Basic currency.
- Change the Basic currency in the File properties.
Add VAT/Sales Tax, change language or convert into another type
Use Convert to new file to add more options or change the accounting file settings.
Contabilità Ristorante (Multi-Moneta)
Contabilità Ristorante (Multi-Moneta)Come fare il preventivo per un ristorante
Segui passo per passo la nostra guida alla pagina Come fare il preventivo per un ristorante che ti insegna come creare e gestire un budget familiare.
PayPal Templates | Multi-currency accounting
PayPal Templates | Multi-currency accountingPayPal import transactions
Banana has an import filter that allows you to directly import the PayPal transaction data into your accounting files.
The attached files are predefined with the accounts so that you can immediately start using it.
There are two template example files that you can download and open in Banana:
- Multi currency accounting with EUR as a Basic Currency
- Multi currency accounting with USD as a Basic Currency
Files suitable for
These example files are especially suitable in case you have PayPal transactions in different currencies and especially if you have set up your PayPal account to use and keep different currencies (see also PayPal template for Double-entry accounting) .
The imported transactions will automatically be imported to the currency account, so that you can see all transactions separately and have a balance in the currency.
Even if you use another accounting software, you will find that is very efficient to keep a separate accounting in Banana and keep your PayPal accounting in it. Instead of recording all transctions in your accounting solution, you can keep a separated accounting in Banana and once a month or when needed, only record the summary movement for the period in your accounting solution .
Further adapting the file
The file can easily be adapted to suit your needs.
Adding new accounts and new currencies
-
In the Accounts table, add new accounts for other currencies or for different Income or Expense types.
-
Add new currencies in the Exchange rates Table
Changing to another basic currency
This file can easily be converted into one with another Basic Currency
- Change the Basic currency in the Accounting properties.
- Adapt the Exchange Rates table with the appropriate currencies and exchange rates.
- In the Accounts table, change the currency for the accounts that need to be in Basic currency.
Add VAT/Sales Tax, change language or convert into another type
Use the Convert to new file command to add more options or change the accounting file settings.
Universal Accounting Templates VAT
商店会计
商店会计 feiDouble-Entry Accounting for a Corporation with VAT/Sales tax
Double-Entry Accounting for a Corporation with VAT/Sales tax michaelLibro de caja para un Comercio con IVA (con transacciones)
Libro de caja para un Comercio con IVA (con transacciones) barbaraDouble-Entry Accounting for a Corporation with foreign currencies and VAT/Sales tax
Double-Entry Accounting for a Corporation with foreign currencies and VAT/Sales tax michael公司 (含中英文报表)
公司 (含中英文报表)使用Banana财务会计软件,做专业的复式记账会计,一键生成资产负债表,损益表。多语言多汇率,使用中文做账一键点击生成外文报表。
创建您的文件
- 从该模板开始,创建一个新文件(模板编号+10680),使用在文中所解释的任何一种方式。
- 文件菜单→文件和账户属性命令,设置公司名称,会计期间及本位币。
- 文件菜单→另存为命令保存文件。以公司名称和年份作为文件名很有用。
例如“公司-2020.ac2”
文件和账户属性
- 账套
此标签可以编辑账套的信息,账套名称,开账日期和结账日期,以及记账本位币。 - 选项
此标签可以激活会计发生业务所需的功能。 - 地址
此标签中可以填入该会计账套的公司或个人信息,这些信息会做为本公司信息显示在给客户开具的发票中。 - 外汇
此标签中选择汇兑损益的会计科目代码。 - 增值税
此标签中选择应交增值税的会计科目代码。 - 其它
此标签中选择做账的语言和出报表的语言。 - 密码
此标签中设置账套密码。 - 文字
此标签中可以输入额外的信息,比如会计的名字。
编辑账户表
账户表格内显示有资产负债表及损益表的账户。
- 资产负债表显示所有资产账户的余额,即资产和负债。资产与负债之间的差额决定了个人资本。
- 损益表显示所有收入和费用的账户,它们的差额决定会计年度的损益状况。
所有的账户都可以根据您的需求进行客制化的编辑。例如,可以更改账号或摘要,可以在期初列内输入初始的余额,可以添加账户并且删除那些不需要的账户。
创建您的预算
在预算表格内,您可以输入指定年份的预估收入和费用。
- 列出每月费用和收入
例如,在办公室的租金中输入日期,重复,摘要,费用,借方账户,贷方账户和金额。
也可以会月收入执行相同的操作,并输入预估的收入。
输入会计发生业务
在会计发生业务表格中,输入实际的会计发生业务。
- 日期
- 摘要
- 借方账户
输入相对应的账户科目 - 贷方账户
输入相对应的账户科目 - 金额
对所有的会计发生业务执行同样的操作。
导入银行对账单
为了加快这些操作的进程,您可以导入银行对账单的数据并将其链接到数字收据。可以使用报表菜单→导入到账套命令。
报告和预算的比较
在输入会计发生业务后,程序将自动更新账户余额,您可以立即将其与预算余额进行比较。可随时查看并比较过去,现在和未来的会计数据。
外贸公司 (含中英文报表)
外贸公司 (含中英文报表) feiGlobal Accounting Chart - IFRS
The global accounting chart for SME is a IFRS compatible accounting chart specially conceived especially for SME (Small and Medium Enterprises).
- Easy to understand thank to the fact that accounts number follow the presentation.
- Groups numbering have the same sequence of the account numbers.
- Complete but not complex. It covers all the necessities SME, but don't have the complexity typical of accounting charts for large companies.
- Balance sheet and Income and Expenses.
- IFRS (International Financial Reporting Standard) SME compliant.
The Accounting chart structure and presentation is conform to the rule of the International Financial Reporting Standard for SME. - Easily adaptable.
- Fully tested.
This chart of account has been developed by the largest accounting association in Switzerland especially for SME. It has demonstrated to be easy to use and give all important results to companies owners and managers.
Global accounting templates for SME
The global accounting chart is the base for building the Banana Global accounting templates for Small and Medium Enterprise.
- Double entry accounting.
- Multi-currency accounting.
- The templates are available in many languages.
- It can be easily translated if necessary.
- There is a template with many languages together. So you can have the financial statements in different languages.
UndeeUse if Suitable for many countries
Use it in case your country authorities do not mandate a specific accounting chart. Many countries require accounting reporting to be conform to the IFRS rules, but they do not mandate a specific accounting plan or numbering.
A company that desire to keep their accounting in a modern way can adopt this accounting chart and adapt to their own needs.
More information
- Introduction IFRS for SME
- Structure of IFRS for SME
- Reclassification IFRS with Banana
- Excel file structure
- Free Excel model for the IFRS-SME
Balance Sheet - Statement of Financial Position
In SME the cash position is very important, so the presentation start with the account 1000 for Cash.
The group 100 is for Cash and cash equivalents and 10 for Current assets.
- 1. Assets
- 10. Current assets
- 100. Cash and cash equivalents
- 106. Short-term Assets listed in Stock Exchange
- 109. Transfer accounts
- 110. Accounts receivable
- 114. Other short-term receivables
- 120. Inventories
- 130. Prepaid Expenses
- 14. Fixed Assets
- 140. Financial assets
- 148. Investments
- 150 . Tangible assets
- 160. Tangible fixed asset management
- 170. Intangible fixed assets
- 180. Capital or non-paid Foundation capital
- 10. Current assets
- 2. Liabilities and Equities
- 20. Short-term third party capital
- 200. Suppliers or creditors
- 210. Short-term onorous debts
- 220. Other short-term debts
- 230. Accruals and deferred income
- 24. Long-term third party capital
- 240. Long-term onorous debts
- 250. Other long-term debts
- 260. Provisions and similar statutory posts
- 28. Equity
- 280. Capital or capital of the foundation
- 290. Legal reserves
- 295. Legal reserve from profit
- 296. Optional reserves from profit
- 297. Profit / Loss from Balance Sheet
- 298. Treasury stock, shares, rights of investment (negative)
- 20. Short-term third party capital
Statement of Comprehensive Income
The Income and Expense account start with 3000 for revenues and 3 for the Revenue Groups.
The structure is sufficient detailed to satisfy the need of a statement presentation. Depending on the situation other accounts and groups can be added, to provide a better look of the situation.
- 3. Revenues from supplies and services
- 30. Net revenues from supplies and services
- 39. Change in inventories and Non-invoiced services
- 4. Costs for material, goods, services and energy
- E1. Gross operating result after deducting costs for materials and goods
- 5. Personnel expenses
- E2. Gross operating result after deducting personnel expenses
- 6. Other operating expenses, depreciation, value adjustments and financial results
- 60. Rental
- 61. Maintenance, repairs and replacement of tangible assets
- 62. Vehicle and transportation expenses
- 63. Insurance for damage of items
- 64. Energy and disposal costs
- 65. Administrative and IT costs
- 66. Advertising
- 67. Various costs for the financial year
- 6. Other operating expenses, depreciation, value adjustments and financial results
- E3. Operating result before depreciation and value adjustments, financial results and taxes (EBITDA)
- 68.Depreciation and value adjustments of fixed assets
- E4. Operating result before financial results and taxes (EBIT)
- 69. Financial costs and revenue
- E5. Operating result before taxes (EBT)
- 7. Non-operating items
- 8. Results of extraneous, extraordinary or unique character, or for other accounting periods
- E6. Profit or loss before taxes
- 89. Direct taxes
- E7. Annual profit or loss
Full accounting Chart
| Section | Group | Account | Description |
| * | BALANCE SHEET | ||
| 1 | ASSETS | ||
| 1000 | Cash on hand | ||
| 1020 | Bank account | ||
| 100 | Cash and cash equivalents | ||
| 1060 | Bonds and stocks | ||
| 106 | Short-term Assets listed in Stock Exchange | ||
| 1090 | Internal transfers | ||
| 1091 | Transfer account for salaries | ||
| 1099 | Amounts to be clarified | ||
| 109 | Transfer accounts | ||
| 1100 | Due from Clients or Debtors | ||
| 1109 | Provision for Doubtful Debts | ||
| 110 | Accounts receivable | ||
| 1140 | Advances and loans | ||
| 1176 | Withholding tax | ||
| 1180 | Receivables from social insurances and social security institutions | ||
| 1188 | Source tax | ||
| 1190 | Various short-term receivables | ||
| 1199 | Securities | ||
| 114 | Other short-term receivables | ||
| 1200 | Goods for resale | ||
| 1210 | Raw materials | ||
| 1220 | Auxiliary material | ||
| 1230 | Consumables | ||
| 1260 | Finished products | ||
| 1270 | In-process products | ||
| 1280 | Non-invoiced services | ||
| 120 | Inventories | ||
| 1300 | Prepaid expenses | ||
| 1301 | Accrued income | ||
| 130 | Prepaid Expenses | ||
| 10 | Current assets | ||
| 1400 | Bonds and stocks | ||
| 1440 | Loans | ||
| 1460 | Loan to share-holder | ||
| 140 | Financial assets | ||
| 1480 | Investments | ||
| 148 | Investments | ||
| 1500 | Machinery | ||
| 1510 | Office furniture and equipment | ||
| 1520 | Office machinery, information and communication technology | ||
| 1530 | Motor vehicles | ||
| 1540 | Tools and equipment | ||
| 150 | Tangible assets | ||
| 1600 | Commercial buildings | ||
| 160 | Tangible fixed asset management | ||
| 1700 | Patents, know-how, licences, rights and development | ||
| 1710 | Brands | ||
| 1712 | Models | ||
| 1770 | Goodwill | ||
| 170 | Intangible fixed assets | ||
| 1850 | Share capital, rights not paid or non-paid Foundation capital | ||
| 180 | Capital or non-paid Foundation capital | ||
| 14 | Fixed Assets | ||
| 1 | Total Assets | ||
| 2 | LIABILITIES | ||
| 2000 | Suppliers or creditors | ||
| 2030 | Deposits received | ||
| 200 | Suppliers or creditors | ||
| 2100 | Due to banks short/term | ||
| 2120 | Financial leasing commitments | ||
| 2140 | Other onerous debts | ||
| 210 | Short-term onorous debts | ||
| 2206 | Withholding tax | ||
| 2208 | Direct taxes | ||
| 2210 | Other short-term debts | ||
| 2260 | Due to share-holders | ||
| 2261 | Dividends | ||
| 2270 | Social insurances and social security institutions | ||
| 2279 | Source tax | ||
| 220 | Other short-term debts | ||
| 2300 | Accrued expenses | ||
| 2301 | Next year's revenues collected | ||
| 2330 | Short-term provisions | ||
| 230 | Accruals and deferred income | ||
| 20 | Short-term third party capital | ||
| 2400 | Due to banks | ||
| 2420 | Financial leasing commitments | ||
| 2430 | Debenture loans | ||
| 2450 | Loans | ||
| 2451 | Mortgage | ||
| 240 | Long-term onorous debts | ||
| 2500 | Other long-term debts (non-onorous) | ||
| 250 | Other long-term debts | ||
| 2600 | Provisions | ||
| 260 | Provisions and similar statutory posts | ||
| 24 | Long-term third party capital | ||
| 2A | Third party capital | ||
| 2800 | Share capital, rights, foundation capital | ||
| 280 | Capital or capital of the foundation | ||
| 2900 | Legal reserves | ||
| 2940 | Revaluation reserves | ||
| 290 | Legal reserves | ||
| 2950 | Legal reserve from profit | ||
| 295 | Legal reserve from profit | ||
| 2960 | Optional reserves from profit | ||
| 296 | Optional reserves from profit | ||
| 2970 | Profit / Loss carried forward | ||
| 29A | Profit / Loss for the year | ||
| 297 | Profit / Loss from Balance Sheet | ||
| 2980 | Treasury stock, shares, rights of investment (negative) | ||
| 298 | Treasury stock, shares, rights of investment (negative) | ||
| 28 | Equity | ||
| 2 | Total liabilities | ||
| * | PROFIT & LOSS STATEMENT | ||
| 4 | |||
| 3000 | Earnings from own products | ||
| 3200 | Earnings from resale | ||
| 3400 | Earnings from services rendered | ||
| 3600 | Other revenues and services | ||
| 3710 | Own consumption | ||
| 3800 | Decrease in revenues | ||
| 3805 | Losses on accounts receivable, credit variation | ||
| 30 | Net revenues from supplies and services | ||
| 3900 | Change in inventories of in-process products | ||
| 3901 | Change in inventories of finished products | ||
| 3940 | Non-invoiced services variations | ||
| 39 | Change in inventories and Non-invoiced services | ||
| 3 | Revenues from supplies and services | ||
| 4000 | Raw materials | ||
| 4200 | Expenses for goods for resale | ||
| 4400 | Third party expenses | ||
| 4500 | Energy consumption for production | ||
| 4900 | Reduction of costs | ||
| 4 | Costs for material, goods, services and energy | ||
| E1 | Gross operating result after deducting costs for materials and goods | ||
| 5000 | Salaries | ||
| 5700 | Contribution to old age insurance and unemployment | ||
| 5710 | Family equalization fund | ||
| 5720 | Contribution to pension funds | ||
| 5730 | Contribution to accident insurance | ||
| 5740 | Contribution to voluntary daily benefits insurance | ||
| 5790 | Source tax | ||
| 5800 | Other personnel expenses | ||
| 5810 | Training of personnel | ||
| 5820 | Travel and entertainment expenses effective | ||
| 5830 | Travel and entertainment expense allowance | ||
| 5900 | Temporary staff | ||
| 5 | Personnel expenses | ||
| E2 | Gross operating result after deducting personnel expenses | ||
| 6000 | Rental | ||
| 6040 | Cleaning of facilities | ||
| 60 | Rental | ||
| 6100 | Maintenance, repairs and replacement of tangible assets | ||
| 6105 | Leasing costs tangible assets | ||
| 61 | Maintenance, repairs and replacement of tangible assets | ||
| 6200 | Repairs | ||
| 6210 | Fuel | ||
| 6220 | Car insurance | ||
| 6260 | Car leasing and rental | ||
| 6270 | Car costs - private part | ||
| 6282 | Transportation expenses | ||
| 62 | Vehicle and transportation expenses | ||
| 6300 | Insurance for damage of items | ||
| 63 | Insurance for damage of items | ||
| 6402 | Electricity | ||
| 6410 | Heating expenses | ||
| 6430 | Water | ||
| 6460 | Garbage | ||
| 64 | Energy and disposal costs | ||
| 6500 | Office supplies | ||
| 6503 | Technical magazines, newspapers, periodicals | ||
| 6510 | Telephone / internet | ||
| 6511 | Hosting at third-party | ||
| 6513 | Postal charges | ||
| 6570 | IT charges including leasing | ||
| 6580 | Licenses and updates | ||
| 6583 | Consumables | ||
| 65 | Administrative and IT costs | ||
| 6600 | Advertising | ||
| 6642 | Gifts to customers | ||
| 66 | Advertising | ||
| 6700 | Various costs for the financial year | ||
| 67 | Various costs for the financial year | ||
| 6 | Other operating expenses, depreciation, value adjustments and financial results | ||
| E3 | Operating result before depreciation and value adjustments, financial results and taxes (EBITDA) | ||
| 6800 | Depreciation and value adjustments of fixed assets | ||
| 68 | Depreciation and value adjustments of fixed assets | ||
| E4 | Operating result before financial results and taxes (EBIT) | ||
| 6900 | Costs for bank interest | ||
| 6940 | Bank costs | ||
| 6950 | Financial revenue | ||
| 69 | Financial costs and revenue | ||
| E5 | Operating result before taxes (EBT) | ||
| 7000 | Non-operating revenue | ||
| 7010 | Non-operating costs | ||
| 7500 | Corporate real estate revenues | ||
| 7510 | Corporate real estate costs | ||
| 7 | Non-operating items | ||
| 8000 | Extraneous costs | ||
| 8100 | Extraneous revenue | ||
| 8500 | Extraordinary, unique costs or costs relating to other accounting periods | ||
| 8510 | Extraordinary, unique revenue or revenue relating to other accounting periods | ||
| 8 | Results of extraneous, extraordinary or unique character, or for other accounting periods | ||
| E6 | Profit or loss before taxes | ||
| 8900 | Direct taxes | ||
| 89 | Direct taxes | ||
| E7 | Annual profit or loss |
Definition and principles of IFRS for SME
Definition of IFRS for SME
They are a set of accounting standards adopted globally for the financial statements of small to medium-sized companies with the goal of ensuring transparency, reliability, and comparability of the companies’ financial information.
They were issued by the International Accounting Standards Board (IASB), an independent organization based in London, composed of a group of experts with the function of defining accounting principles, preparing, reviewing, or using financial statements, and in accounting training.
When the IASB releases a new standard, there must be approval from the European Union, in the specific approval process, the responsibility lies with the European Commission with other consumptive entities.
IFRS Purposes
The main purpose is to create a common accounting framework for most companies operating within the European Community, offering the advantage of greater simplicity and transparency in relation to the balance sheets and financial information.
The objectives are characterized in various aspects as follows:
Transparency:
provide stakeholders with clear and detailed information on the company's financial status and performance.
Reliability:
financial reports that correspond to the business reality and are trustworthy.
Uniformity:
to report financial information that is comparable on a global scale.
Relevance:
to ensure that important information is provided to potential investors and other stakeholders.
Fundamental Principles IFRS SME
The characteristics of IFRS standards are based on principles as explained below:
Full Disclosure
All relevant information must be fully disclosed.
Substance over Form Principle
Transactions must be accounted for and presented based on their economic substance and reality, not just their legal form.
Principle of Prudence
Uncertainties and risks must be duly considered.
Fair Value Measurement
Numerous balance sheet items must be measured at their fair value, rather than at their historical cost.
Qualitative characteristics of financial information
Understandability
The presentation of financial statement information should be understandable in terms of the company’s commercial and economic activities. This principle does not allow for the omission of important information as it would become difficult to understand for some users.
Comparability
Information about an entity is useful if it can be compared with similar information from other entities. This characteristic allows stakeholders to identify and understand similarities and differences in business accounting realities.
Verifiability
Verifiability helps ensure a faithful representation of the company’s accounting and financial information. Quantified accounting information does not necessarily have to be an exact estimate to be verifiable.
Timeliness
Timeliness means having information available in time to make decisions. In this sense, the older the information, the less useful it is. There are exceptions, it is emphasized that for some information it can also be less timely since there is an evaluation over a longer period of time to study and identify trends.
References:
Composition of IFRS for SME
Introduction
According to Article 3.17 of the document "Exposure Draft IFRS for SMEs® Accounting Standard - Third edition of the IFRS for SMEs Accounting Standard - September 2022", it must include all of the following documents in order to have a complete set of financial statements:
- Financial statement.
- Income Statement.
- Statement of changes in equity.
- Cash flow.
- Notes.
References
Statement of financial position
It is a document that represents the balance sheet and financial situation of a company. The balance sheet is separated into current and non-current assets, and consists of assets, equity, liabilities.
Current assets comprise resources that are expected to be liquidated or used as part of usual business operations within one year from the date of the balance sheet. The distinction is particularly useful for investors who distinguish between net working capital and capital used for long-term operations in an operating cycle.
There is also another presentation, it is based on the degree of liquidity, but is suitable for banks and financial institutions that do not provide goods or services within an identifiable operating period.
Non-current assets are corporate resources that are expected to remain in use for an extended period beyond twelve months after the balance sheet date.
Short-term (current) liabilities are those due within the usual operating cycle or within twelve months after the balance sheet date. Trade payables must always be classified as short-term liabilities even if their settlement occurs beyond the normal operating cycle or more than twelve months after the balance sheet date.
Long-term (non-current) liabilities are those due beyond the normal operating cycle or more than twelve months after the balance sheet date.
Income statement
The income statement is the representation of the profit and loss account and is classified according to the by nature of expense method.
The classification by nature is one of the options available from the IFRS for SMEs, and since it is the simplest and most flexible for different business realities, it was decided to implement this approach.
The concept is that costs are aggregated according to their nature, such as depreciation, purchases of materials, transportation costs, etc.
There is also the classification by cost destination, where costs are distinguished between cost of goods sold and other costs, which provides more meaningful information but requires a considerable degree of discretion on the part of the financial statement preparer.
Statement of changes in equity
The statement of changes in the equity of a company between two financial years reflects the variations in the net equity due to the increase or decrease of its net assets for the period or the wealth generated, based on the specific valuation criteria implemented and indicated in the financial statements.
Cash flow
The IFRS for SMEs stipulates that entities must categorize their transactions into three distinct activities:
- Operating.
- Investing.
- Financing.
It further permits entities to present their operating cash flows using either the direct or indirect method. Ultimately, the framework’s goal is to furnish decision-useful information to users, aiding them in making informed economic choices.
Notes
The notes to the financial statements represent a fundamental part of financial reporting under IFRS for SMEs. They provide additional and detailed information that integrates and explains the data presented in the main financial statements.
Furthermore, they play a crucial role in ensuring the transparency and completeness of financial reporting, allowing users of the financial statements to fully understand the company's financial position, performance, and cash flows.
In conclusion, the notes to the financial statements are therefore an essential tool for improving the transparency and comparability of financial reporting at an international level.
Reclassification IFRS with Banana
Reclassification IFRS with BananaIntroduction
On this page, there is a brief explanation of the templates created with the Banana accounting software and how to use them to print the income statement and balance sheet report according to IFRS standards for SMEs.
At the bottom of the page are links to download the templates.
Template IFRS SME
The template file is set up with the IFRS SME chart of accounts in which the Statement of financial position, Income statement and Statement of changes in equity are present.
This file refers to the document "Reclassification IFRS SME" to print the report according to the IFRS SME setting, with the use of the financial statements embellished by groups.
For more information on financial statement enhanced balance sheet with groups:
- Video of how-to do enhanced balance sheet with groups.
- Documentation about enhanced balance sheet with groups.
- Documentation about reclassification of financial statement and Income statement.
Reclassification IFRS SME
The document contains the basic settings to print the page layout (document title, company master data), amounts, totals, subtotals of the Statement of Financial Position and Income Statement accounts.
The accounts will be printed even if the amount is zero. If you want to change the setting of this printout or the style you can do so within this file.
Report creation with Statement of financial position and Income statement
To create a report with the Statement of Financial Position and Income Statement documents, follow the next steps:
- Open the template file and record all case-specific accounting transactions.
- Click on Reports -> Enhaced balance sheet with groups
- Enter the important data relating to the reference company (e.g. document name, company master data) in the Page-Header and Footer section.
- You can make other settings by reading the details on Banana's site on the enhanced balance sheet.
- Click OK.
At the end of the process a new file will be opened with the Statement of Financial Position and Income Statement inside.
Download IFRS SME per Banana
We make the models available without any liability, as stipulated in our Terms and Conditions of Use.
Excel file structure
Introduction
On this page, there is a full explanation of how to use the file, what to find in it and its logic.
In addition, there are illustrations and sample figures to help explain how to use the Excel file. The amounts shown in these images are purely for illustrative purposes and do not necessarily reflect actual or significant values.
Documentary reference
For the creation of the accounting structure within the Excel file, the indications of the documentation related to the IFRS standards for SMEs were followed.
Specifically, the documentation is:
- Accounting principles, notes and other: "Exposure Draft IFRS for SMEs Accounting Standard" of September 2022".
- The presentation of the accounts and the explanatory notes: "IFRS Taxonomy Illustrated IFRS Accounting Taxonomy 2023".
Description structure file
The Excel template is divided into ten main parts:
- General information.
- Financial Statement.
- Income Statement.
- Financial Statement detailed.
- Income Statement detailed.
- Statement of changes in equity.
- Cash flow indirect.
- Notes of financial statements.
- Notes of income statement.
- Notes of cash flow statement.
In order to have a complete set of IFRS financial statements for SMEs, it is mandatory to complete the sheets on General information, Financial statement and Notes of financial statements, Income statement and Notes of income statement, Statement of changes in equity and Cash flow indirect and Notes of cash flow statement.
The Financial Statement detailed and Income Statement detailed sheets, are an alternative to the compilation procedure specified above, as they integrate the entire aspect of the Financial Statement and Income Statement, with all accounts detailed by the notes, having a direct view of the composition and structure of an account with the notes.
Organitation of the file
File content
The file contains seven fields:
- Main field.
- Main account.
- Sub-category of the main account.
- Code.
- Formula.
- Note.
- Account amount.
In the main field, you specify the name of the main account, the document reference and generic company information.
The main account is the name of the main account.
The sub-category of the main account can only be displayed if the Statement Financial detailed and Statement Income detailed sheet is used. It is an account taken from the notes and serves to detail the structure of an account, as required in the IFRS notes for SME.
The code is used for Banana's accounting model and serves to identify the account.
The formula is applied for account totals and subtotals.
The note is account-specific and is entered for some accounts as per the IFRS documentation for EMS.
The account amount is a number to two decimal places without currency indication.
Some fields are not editable as they are an essential part of the file structure. The only part to be changed are the amounts to be entered for the various accounts and the descriptions in the note sheet.
The legend below summarises what the fields correspond to and which are and are not editable.
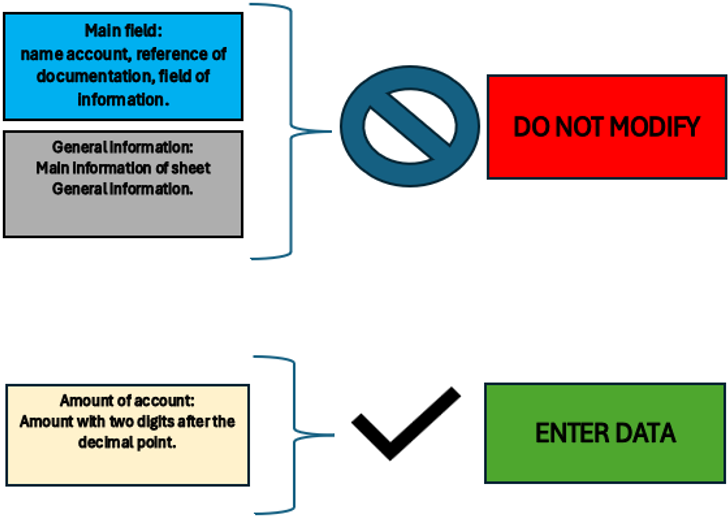
Figure of Excel in the sheet Legend
In the General information sheet, the essential information required by IFRS for SME is entered.
The essential information is useful to understand the biographical data of the company, the relevant accounting period, the currency used, the main activities and the content of this file, which is the complete structure of the financial statement.
Certain information such as company name, company name, domicile and accounting period is reported on all sheets specifically for the Identifying information of company.
General information
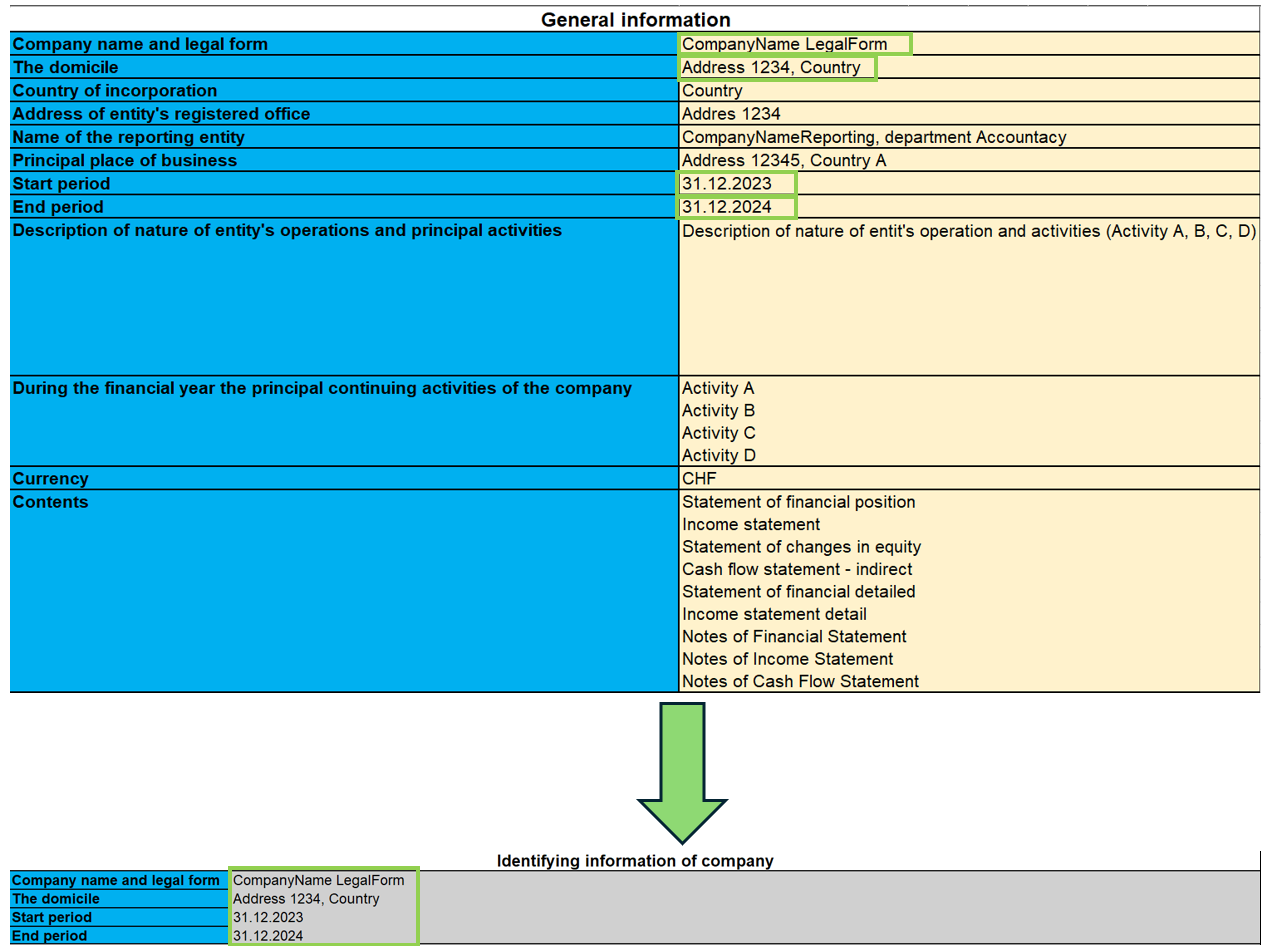
As shown in the image, the information entered on this sheet is carried over to all sheets, so that the company can be identified on each IFRS document, such as: the full name of the company, the address and registered office, and the beginning and end accounting year to be taken into account for accounting purposes.
Statement of financial position
The Financial Statement contains all account items relating to the current and non-current positions of the business for the years 2023 and 2024.
In this part you are required to enter the budget amounts in the specific accounts. Totals and subtotals are calculated automatically by the formulas.
It should also be noted that for some accounts it is mandatory to complete the Notes. This is done by entering the amounts and other descriptive notes in the ‘Notes of Finacial Statement’ sheet.
If an account has notes, its amount for the last year refers to the corresponding cell of the account total put in the notes, so it is necessary to fill in the amounts in the notes first.
For the notes, there is also the possibility of consulting the documentation indicated in the ‘Reference documentation’ field, specifying the page and section where the information on the notes can be found.
Finally, there is a final check part to see if the total assets and liabilities are equal.
Modalities of use
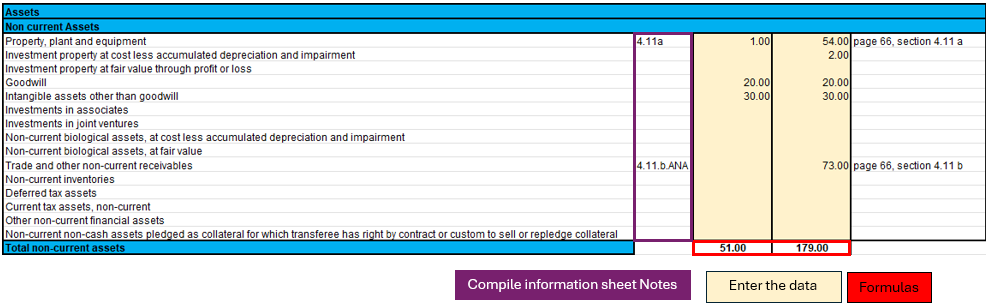
In the picture shown, a part of the Statement of Financial Position is selected as an illustrative example to guide the user. There are three highlighted parts in the image:
- Notes.
- The formulas.
- The data to be filled in.
Each part has its own specific function and in some cases the data are directly linked to each other.
Specifically, if an account has notes, it means that in the ending balance (31.12.xx) there will be the total of the amount calculated in the ‘Notes of financial statement’ sheet. This implies that in order to change that amount, one must fill in the account data on the "Notes of financial statement" sheet.
In this sheet one must therefore:
- Verify that the account is not linked to notes and enter the amount in the account.
- If there are notes, then only the ‘Notes of financial statement’ part of the sheet must be filled in.
The formulas integrated in this sheet will make the totals and subtotals of the accounts in the Statement of financial position.
Income Statement
The income statement is presented according to the classification ‘by nature of expense’.
This classification is an aggregation of costs according to their nature (e.g. depreciation, purchase of materials, transport costs, salaries, advertising costs, etc.) and are not allocated according to their purpose within the company.
The implementation of this classification was decided upon because it is simple and widely applicable for SMEs. The other classification was according to costs by function, where a distinction was made between costs of sales versus other costs (e.g. distribution costs or administrative costs) and this representation requires a considerable degree of discretion on the part of the end user.
As previously done for the Financial Statement, there are the amounts to be entered while the totals are already calculated by means of the formulas applied in the sheets.
In addition, a further breakdown has been made for EBIT (earnings before interest and tax) and EBT (earnings before interest).
Modalities of use
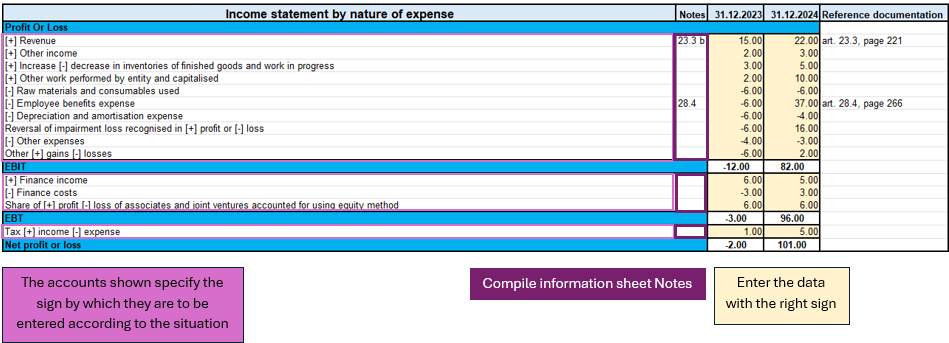
This figure highlights the important parts of the income statement.
Looking at the accounts, there are indications of the signs (+/-) to be used in the various circumstances, which implies that for accounts that have both positive and negative signs, there is an assessment of the positive or negative impact of that amount on the result of the income statement.
As previously seen in the ‘Statement of financial position’, there are also notes to be entered in the relevant sheet ‘Notes of income statement’ in order to be able to correctly define the amount, as the latter depends on the total in the notes.
In summary, what you need to do on this sheet are the following steps:
- Evaluate the circumstances of the account with both positive and negative sign and understand whether you are in a situation where it has a positive or negative impact on the result.
- Verify that the account is not linked to notes and enter the corresponding amount with the correct sign.
- If the account is correspondent with the notes, then only the ‘Notes of income statement’ sheet must be completed.
Statement Financial detailed
This document differs from the Statement of financial position in that there is more detail on the accounts. The official presentation of the accounts can be found in the ‘Statement of financial position’ sheet in terms of how the accounts are summarised; in this sheet, however, we have more detail, with the aim of avoiding filling in the notes directly in the specific sheet. The use of this sheet excludes the use of the ‘Statement of financial position’ sheet because they refer to the same notes.
The main difference is that not only the main accounts required as a presentation by IFRS for EMS are shown, but they are detailed in sub-categories of accounts that are the same as those found in the notes, so that using this document one can avoid filling in the notes, using only the sub-categories of accounts, except in some cases where the account requires descriptive textual type details, without using calculation formulas or amounts. For this reason, not all parts of notes are integrated, as some accounts require a textual type description.
To distinguish the main accounts from the sub-categories of accounts, the main categories are coloured dark, while the light categories are the accounts related to the notes.
If there are no subcategories of accounts (coloured light), then it is sufficient to go to the specific Notes of Statement or financial position sheet.
Modalities of use
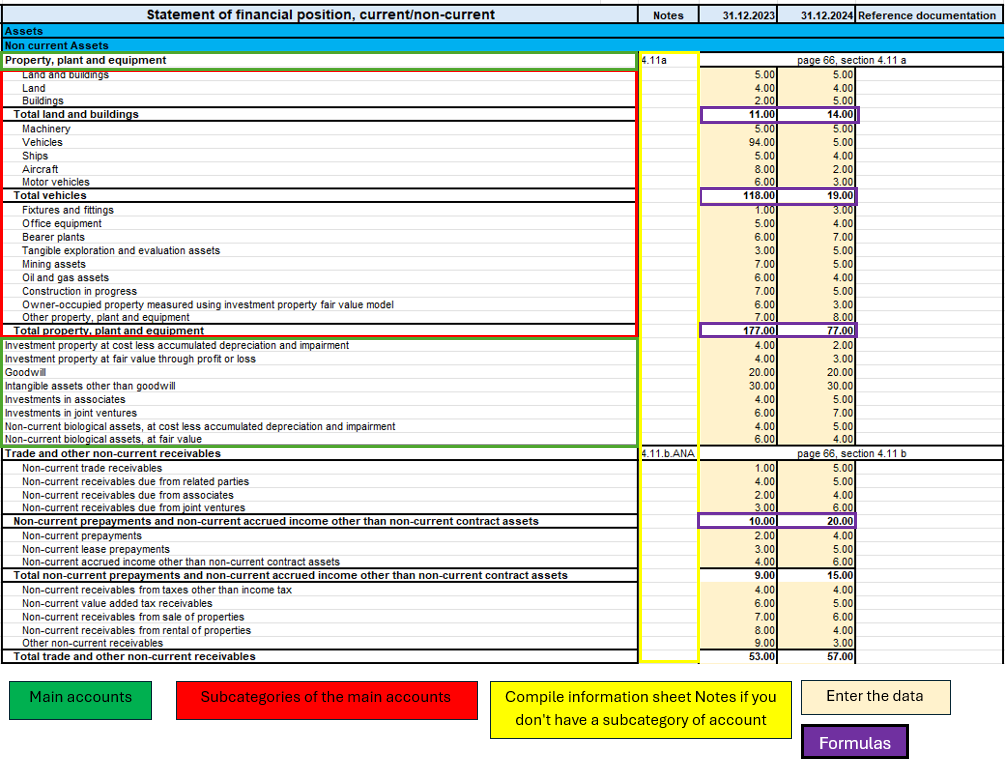
In this image, you can see four essential parts of the document:
- Main accounts.
- Subcategories of the main accounts.
- Notes.
- The amounts to be entered.
- The formulas.
This part, there is more detail only if an account has notes, otherwise it is the same as the Statement of Financial Position. What requires attention is the verification of an account if it is an account with notes and has no sub-categories of accounts, if you find yourself in this situation then it means that the account requires an additional textual description to define some peculiarities in the ‘Notes of financial statement’ sheet.
On the other hand, for accounts that have notes but also account sub-categories, only the amounts of the sub-categories of the specific account need to be filled in. In this way, having filled in all the amounts of the sub-categories of the account, the formulas applied to the sub-categories will calculate the subtotals and the total of the main account.
So to summarise, the procedure for filling in this sheet is:
- I enter the amounts in the main accounts if there are no notes to refer to.
- If the main account has notes, I check that it has sub-accounts, if it does not, then I go to the ‘Notes of financial statement’ sheet and fill in the text description.
- If, on the other hand, the main account has notes and has the subcategories of accounts, then I only fill in the amounts of the subcategories.
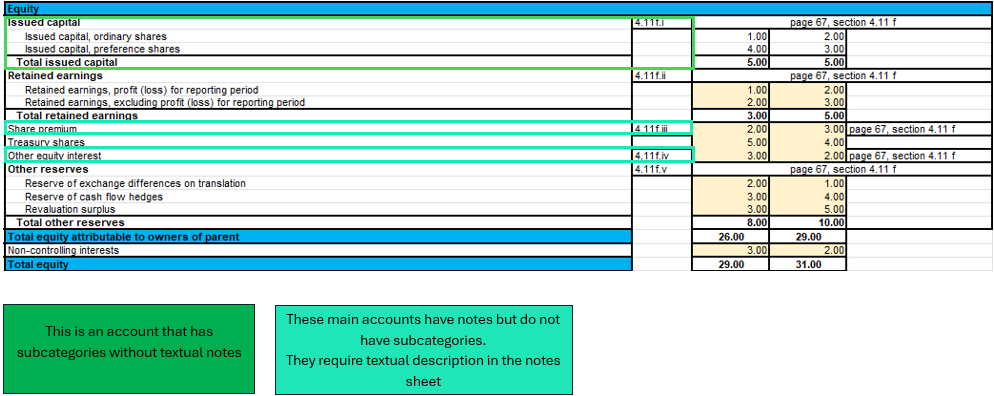
In this example image in the Equity part, a case is illustrated where an account has notes but no account subcategories, which requires a textual description in the ‘Notes of financial statement’ sheet, and a normal case where there are notes with account subcategories.
Income statement detailed
Income statement detail is based on the same logic as the Statement of financial detailed, with the aim of providing a single document for its function, detailed by the accounts of the notes, without having to fill in the Notes of income statement.
There are the main accounts and when there are notes, they are detailed by the sub-categories of accounts that are part of them.
Modalities of use
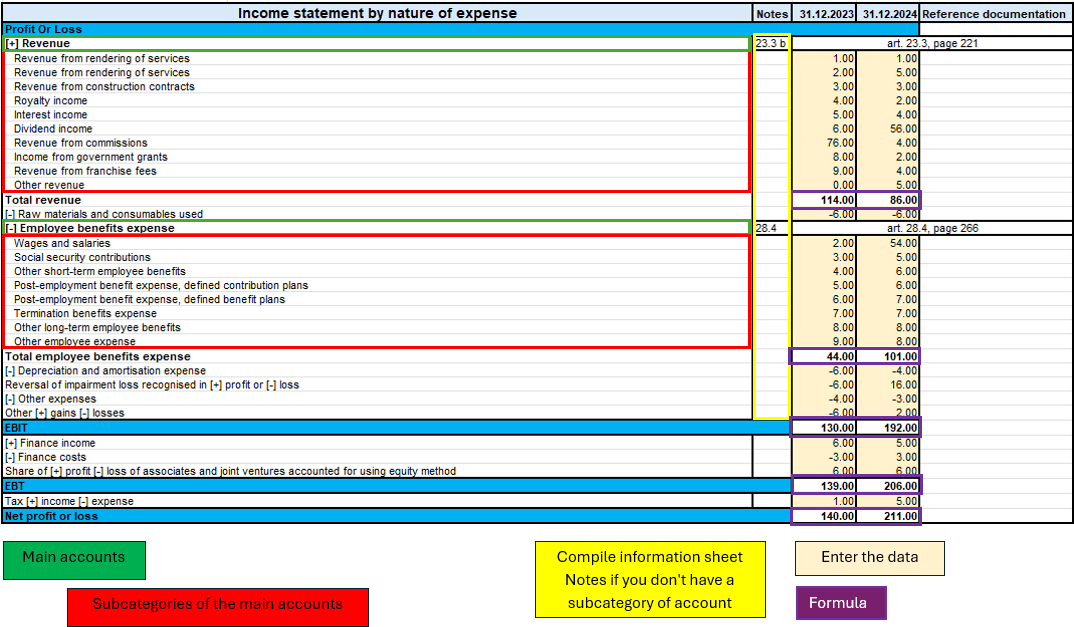
As illustrated in the figure above, there are four equal parts to the ‘Statement of financial detailed’ sheet with the same logic.
The only difference is that there are no descriptive notes, so all accounts with notes are already with their sub-categories without requiring additional compilation on the ‘Notes of income statement’ sheet.
Therefore, to summarise, it is essential to follow these steps:
- Enter the amounts of the main accounts if they have no notes.
- If the main account has notes, enter the amounts only in the subcategories of the account.
The Statement of Changes in Equity
The Statement of Changes in Equity reflects changes in equity.
This part provides insight and transparency into decisions and their effect on the value of equity. It is also a useful tool for investors and other stakeholders to understand how the company has generated and utilised equity capital.
Modalities of use
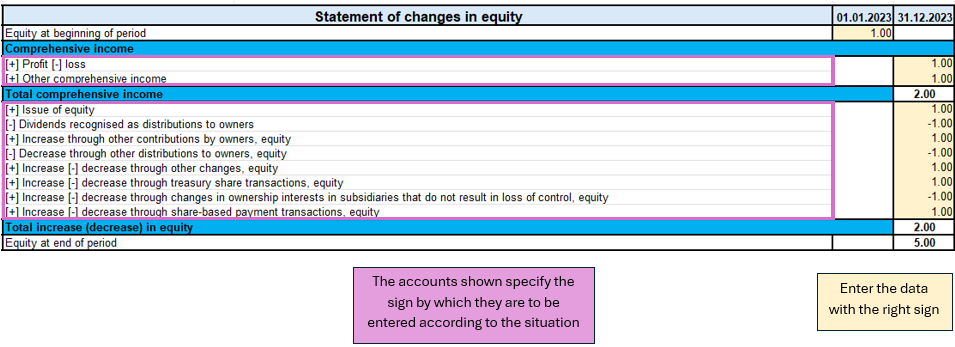
In the sheet ‘Statement of changes equity’ as shown in the image, there is one part to pay attention to.
The first is the evaluation of the change in the account item, whether it increases or decreases, and then according to the sign (+/-) the amount must be written with the correct sign.
Unlike other documents, this one does not require notes.
So the process of completing the document is:
- Evaluate the account change and follow the indications on the sheet on the sign to be taken in the various circumstances (increase or decrease in the account).
- Enter the amount with the correct sign.
Cash flow indirect
This document draws up the entity in four parts:
1. Cash flow from operating activities;
2. Cash flow from investing activities;
3. Cash flow from financing activities;
4. Net cash flow.
The document is independent of the other sheets, so you have to do your own calculations to deduct the various amounts to be included in the cash flow items.
The accounts are taken from the IFRS for SME taxonomy, first there are the profit or loss adjustments and then the operating activities are calculated.
Investing activities are characterised by the purchase or sale of fixed assets such as equipment, real estate, joint venture participations and others.
Cash flows from financing activities are related to the company's sources of financing, such as leasing, share issues, debt repayments or financing income. There is also the payment of dividends to shareholders.
In the last part of cash flow there are some clarifications to be made. The net change in cash is assessed in two steps, the first is calculated before the effect of the exchange rate change and the second after this change. In addition, as a form of control, the change in liquidity is also calculated, showing the changes in the period of activity, by calculating the difference between the initial and final liquidity balance.
Modalities of use
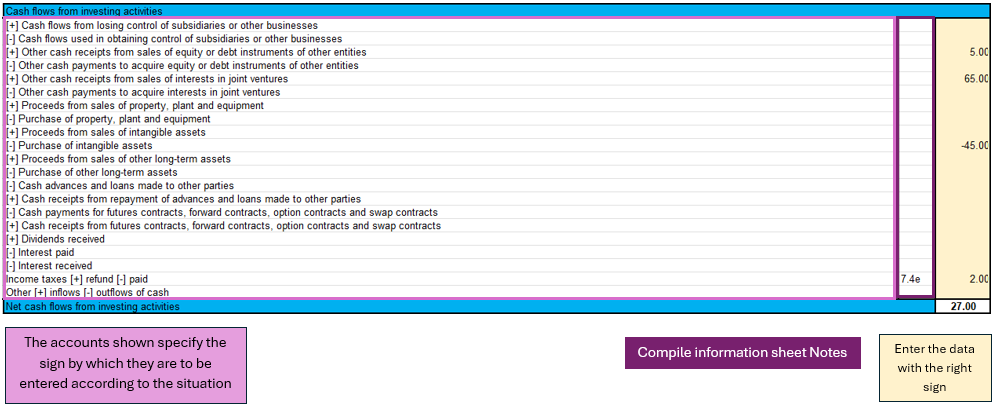
As shown in the figure of the cash flow for investing activities, three main components can be identified:
- The main accounts show the sign depending on the situation.
- For some accounts, the notes of cash flow statement are required.
- Entering the amounts requires attention with respect to the sign.
In the cash flow statement, reasoning on the implications of the balance sheet and profit and loss accounts is required in order to conclude which amount to enter in the specific item of the cash flow statement, so the conclusion depending on which cash flow statement has been analysed, could be an increase or decrease of an asset, a payment for property purchase, payment of dividends to shareholders,...
There is no sheet for this purpose, the user must reason with the amounts available, entered in the balance sheet and profit and loss account, and come to his own conclusions.
Next, having an amount, one must distinguish the situation as indicated in the sheet, in order to enter the amount with the correct sign.
Finally, in the event that it is required, fill in the notes of cash flow statement with the specific amounts in the case.
Notes
The notes are divided by the three IFRS documents:
- Notes to the Financial Statement.
- Notes of the Income Statement.
- Notes to the Cash Flow Statement.
As mentioned in the introductory section, the notes serve to supplement the information taken from the financial documents.
The note sheet contains four essential parts: the note code, reference account, amount and notes (text).
The note code is the reference for each part of the documents that serves to understand in which account the notes are to be completed.
The account represents the account taken from the document (Financial Statement, Income Statement, Cash Flow) to be detailed in the notes.
The amount is singular for the detailed account and is not always required because in some cases only a textual description is needed.
Notes as text are necessary if there are cases where only a description or more detailed customisation is required to explain an account.
Modalities of use
Case for the Financial Statement
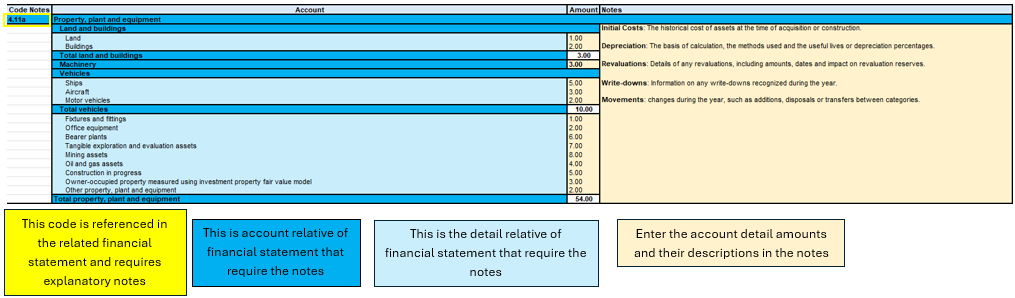
Figure of Excel in the sheet Notes of financial statement
In this image, four main components can be seen, the account reference code, the account, the detail grouping the sub-categories of accounts, the amounts to be entered with any textual notes.
The starting point for completing this sheet is then the financial statement, where we list which accounts need more detail, and then move on to complete the information in the notes sheet.
The data entry part concerns the amount of the detail account and any descriptive text.
The account totals and subtotals are calculated from the formulas, the account total is shown on the main sheet of the financial statement, so it is essential that if an account needs notes, it is only on the notes sheet.
Case for the Income Statement
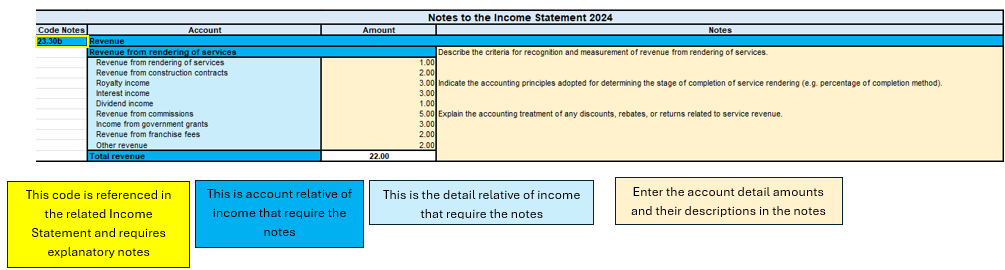
Figure of Excel in the sheet Notes of income statement
As seen above, the structure does not change for the Income statement notes. The main parts are always the same, as also for the cash flow notes.
To summarise therefore in this process one must:
- Depending on which sheet you are compiling, you must check that the analysed account of the financial statement, income statement or cash flow note is there.
- All the necessary data and information must be filled in.
- If there is a sub-account in the notes that is not needed or not used, you can simply leave it blank or enter a zero amount.
Objectives of the file
The process of creating the IFRS structure for SMEs took the official documentation and reconstructed a structure in the Excel template, with the aim of allowing the user to follow the IFRS reporting logic by entering the main information in the parts of the file.
The basic characteristics of such a file is the completeness of the document by having all the main parts required for IFRS, the usefulness of preferring the most widely used models that are more suitable for several companies, and excluding other more specialised models only in certain contexts.
The end result is to have a financial and economic view of the company's situation in the specific period, in compliance with the IFRS standards for SMEs.
In addition, the aim of IFRS for SMEs is to improve the comparability of financial data between different companies, to facilitate the analysis and interpretation of financial results by stakeholders outside the company, and to promote the adoption of IFRS for SMEs by providing a practical and accessible tool.
Free Excel model for the IFRS-SME
We make the model available without liability as per our Terms and Conditions of Use.
Cash Flow Statements and Financial Ratios [BETA]
Cash Flow Statements and Financial Ratios [BETA]L'extension est disponible en italien, mais la documentation est écrite en anglais. Voir la documentation en anglais
Introduction
What is exactly the financial statement analysis?
Financial statement analysis is an accounting tool that provides an assessment of a company's economic, financial and asset condition. It is based on the financial statements and reports the data. It contains the profits and losses of a company and therefore serves to derive the general performance of the company.
Why is this activity very important for your SME ?
Until recently there were few SMEs that often used a financial statement analysis as larger companies could use it.
Today, times have changed. Reading the numbers well can make a difference within the strategy and management of an enterprise. Understanding which products it is worth investing in and which jobs can be neglected determines the difference between the growth or decline of a company.
This activity can be a source of interest for various subjects, external or internal to the company. Entities or external individuals can analyse their solvency profile (current or potential lenders), capacity to provide an adequate return on capital (for those who want to buy shares for example) or even just obtain information on the company's situation with respect to competition in the sector.
Through the comparative balance sheet analysis of the various elements available, it is possible to arrive at the following formulation of a "judgement" on the health of the company in all its dimensions:
- Economic
- Asset
- Financial
How it works
The financial statement analysis is based on two fundamental documents for a company:
- The Balance sheet
- The Profit and loss statement
In order to perform a correct analysis, it is always necessary to start from the reclassification of the accounts, which includes 3 phases in particular.
- Group the account items into groups
- Order such groups
- Bringing out intermediate results
The reclassification allows for a slightly cleaner first view of the company's situation and is already useful information can be obtained from it.
Analysis by Indexes
Once the intermediate results have been obtained, it is possible to proceed with the calculation of the indices useful for the analysis. The financial statements analysis by means of indexes is a very powerful tool that allows you to use indicators capable of providing a very concise assessment of one's own situation.
How should the data be interpreted?
Better results in terms of interpretation and evaluation are therefore achieved by analysing a series of balance sheets and studying the trend over time of the significant balance sheet ratios, so as to understand in which management is moving the company (dynamic financial statements analysis).
How do I evaluate them?
- Temporal evolution
- Comparison with average values of the sector
- Comparison with "normal" values i.e. with the benchmark
- Comparison with objectives
Response to results
This is the last activity of the analysis cycle, where the "relay" passes into the hands of those who deal with the Management of the Company, with data that speak clearly, the Manager will have to plan how to proceed using the right Project Management techniques.
The report contain errors?
If you notice incorrect data within the report or find that for some reason the calculated amounts do not match, please follow the steps below:
- Check that the data in your accounts are correct.
- Check that you have set up the groups correctly in the settings dialog.
If the errors persist, contact us via our feedback form and send us an example accounting file (*.ac2), even with little data, but allowing us to reproduce the possible problem and correct it.
Multi-language
The extension is available in the following languages:
- English
- Italian
- French (translation currently not complete)
- German (translation currently not complete)
And will adapt according to the language in which the application is set up. For all other languages, the standard version in English will be displayed.
Save your analysis
You can save the report in the following formats:
- Html
- Excel
- Latex
Settings Dialog
Dialog is accesible:
- By going to the Extensions menu→Cash Flow Statements and financial Ratios →Financial Reports.
- By going to the Extensions menu→Cash Flow Statements and financial Ratios →Settings.
Set up the groups
The first and most important step is to enter the groups or accounts number you are using in your account table.
Once you enter the groups the report and calculations are all done automatically, except for some specific transactions for the Cash Flow Statement.
- Groups must be entered manually
- Groups must be separated by a semi-colon ';'
- Both groups and accounts can be entered
- It is important to make sure that you include elements that exist in your chart of accounts, if are entered groups or accounts that do not exist in your chart of accounts, a message will be displayed on the row of the grouping concerned, returning those elements for which a match was not found in the chart of accounts. Once corrected, you only need to run the dialogue again and the message will disappear.
- By default, the groups within the dialogue refer to the Swiss SME chart of accounts, and it is possible to return to the base scenario by clicking the Restore Defaults button. Beware, however, that in this way the customisations made will be lost, and will be replaced with the default values.
.png?raw=true)
All the necessary elements must be inserted within the different groupings defined in the dialogue (Liquidity, Fixed Asset,Owned base capital,...).
Assets
They show the total employment of a company, so the investments to which the company has allocated
the means found in carrying out its activity.
- Liquidity: Must include groups or accounts that define liquidity in the company, such as cash or bank
- Credits: Must include groups or accounts within which are recorded all the operations
concerning money due to buyers who didn’t paid yet for their purchases - Stocks: Must include groups or accounts with all goods for resale in the ordinary course of business.
- Fixed assets: Must include groups or accounts containing fixed assets elements, as:
- Buildings
- Computer equipment
- Computer software
- Furniture and fixtures
- Intangible assets
- Land
- Leasehold improvements
- Machinery
- Vehicles
Liabilities and Equity
Shows where company's resources come from. In general, the funds at the company's disposal are
classified in a way to distinguish between own funds (which flow into equity) and those from third parties.
- Short-term debt capital: Must include groups or accounts representing the company commitments that must be fulfilled, without any particular cancellation, in the current year.
- Long term debt capital: Must include groups or accounts containing that kind of capital that the company can have at its disposal for several years, on a fixed basis, and that can usually only be withdrawn within a set time limit.
- Own Base capital: Must include groups or accounts those group referring to the company's own capital.
- Reserves and Profits: Must include groups or accounts within which are recorded the amounts to be paid to reserves or designated as profits.
Revenues
Indicates what is produced by the company during a financial year. Whether it is an increase in the value of products or semi-finished products in the course of production or services in progress, revenue from the sale of products or services or the increase in the value of fixed assets thanks to own resources, all these heterogeneous factors add up.
- Sales turnover: Must include groups or accounts within which is recorded what is produced by the company during a financial year. Whether it is an increase in the value of products or semi-finished products in the course of production or services in progress.
Costs
- Costs of Merchandise and services: Must include those groups or accounts in which all costs relating to goods and services consumed during the annual financial year are recorded.
- Personnel Costs: Must include all those accounts referring to a cost due to personnel, such as:
- Salaries
- Social charges
- Severance Pay
- Pension and similar treatment
- Other costs
- Different Costs: Must include all other groups or accounts relating to costs during the operating period.
- Interests: Must include groups or accounts containing the costs of financing sources, such as bank interest payable or interest on loans.
- Depreciation and Adjustments: Must include groups or accounts where are registered possible revaluations and write-downs of equity investments, as well as of financial fixed assets and securities included in current assets that are not equity investments.
- Final Result: The group containing the difference between the costs and the revenues at the end of the year.
Average Number of employees
This information is useful for calculating efficiency ratios, enter the average number of employees in the company and find out information such as the average company revenue per employee.
Printing Preferences
To make the Analysis as close as possible to your needs you can set some preferences, and choose about the details of printing and analysis
.png?raw=true)
Printing Details
- Page header: Include the header in the report, the header is composed with the information retrieved from the properties of the file.
- Logo: Choose whether to include your company logo in the report. for information on how to set up a logo visit this Logo set up page.
- Background color of headers: Choose the colors for the table headings
- Text color of headers: Choose the color for the texts in the table headings
- Report Without colors: Check the box for no colours in the report.
Analysis Details
- Number of previous years: Set the number of previous accounts (years) to be included in the analysis, which will be added to the current year and the Budget (if present and included).If you don't know how to set the previous year to a file, go to “File→File and Accounting Properties→Options Tab.
- Number of decimals: Choose how many numbers after the decimal point you want for the digits in the report, if you don't want to have decimals you only need to insert a zero 0.
- Include Budget: If you are using the Budget table for your financial planning, you have the possibility to include it in the analysis.
- Include Budget to date column: Include the columns showing the values of the budget up to that day, compare the values with those of the year-to-date.
- Include Current year projection column: You can include the projection for the current year. The programme uses the values in the budget table to return what could be the values at the end of the year.
- Current Date: Insert the current date. If no date is entered, the date of the day is taken automatically
- Include DuPont Analysis: Choose whether to include the Dupont Analysis
- Include Control Sums: Choose whether to include the table with the control sums, useful to inform in case of errors on the totals (assets/liabilities, operating result).
- Show the formulas column: Choose whether to show the column with the calculation formulas.
- Show the acronym column: Decide whether or not to show the acronym column, which is useful for identifying the elements used for formulas.
The columns of acronyms and formulas are complementary, that's beacuse the acronym column is useful to uderstand how the formulas are composed. if you dont need these columns, just uncheck the checkbox.
Set the benchmarks
Benchmarking is a method of assessing an organisation's competences based on comparison with the "best
in class", whatever sector it belongs to. So the Benchmark is a key performance indicator on the basis of
which a company assesses its performance with regarding to products, services and business processes.
You can customise these values depending on your company:
- Sector
- Size
- Targets
These values are only representative, which means that the figures you enter are not used in the analysis but are shown as they are. In the report, they are displayed in the Benchmark column, in the indexes tables, so that you can quickly assess the situation.
.png?raw=true)
It's also possible to call the dialog from the opened report and change the parameters. The values of the
analysis will be updated automatically.
Cash Flow Statement
Cash Flow is an analytical tool that helps to visualise the positive and negative changes in liquidity as a result of management, with reference to a given period of time: it is in fact the reconstruction of monetary flows, then the difference between all the monetary income and expenditure of a company.
Cash Flow analysis is not subject to accounting rules and many investors use the data to assess the strength of the company.
Essentially, if the Cash Flow is positive, it shows the financial availability for the company within the reporting period, whereas if the cash flow is negative, it means that more resources have been absorbed than have been received.
Special Cash Flow transactions
The first step to obtain the Cash flow Statement i its to setup the account groups in the settings dialog, Most value needed for preparing the Cash Flow Statement can be calculated based on the changes of the standard account classification. Identifying Disinvestments, Revaluations, transactions and other specific movements effecting the cash flow, would require a restructuring of the account plan. We have therefore opted to identify these values, by adding a special code to the description of a transaction.
It is important that these transactions are made using the recommended account type or group, because the program searches for cashflow amounts in certain groups, so if an entry is made using another account type, there could be an error as the amount may not be found.
If we talk about entering a fixed asset account, the account must belong to one of the groups entered in the fixed assets section of the dialogue. For example, if I disinvest by selling a vehicle and I use the standard chart of accounts for SMEs, I can use the account Vehicles '1530', which is part of the group 150, which in the dialogue is entered under the section 'Tangible Assets' in the fixed assets.
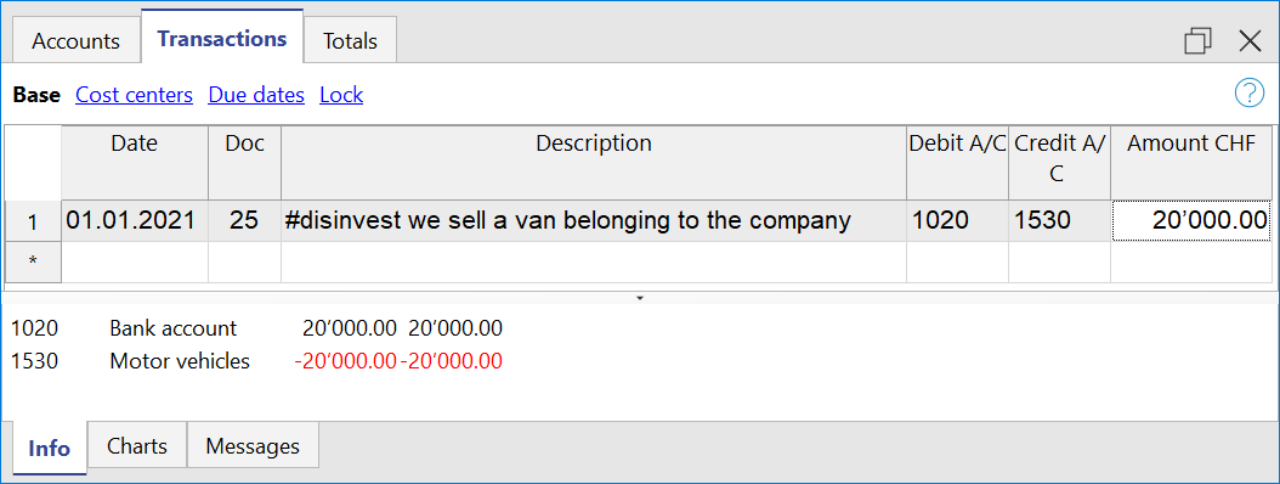
- Disinvestments (#disinvest)
- A disinvestment simply represents the sale of a fixed asset such as a vehicle or machinery. When recording a disinvestment.
- Debit Column: Insert the account where you will collect the money from the sale, such as the post or the bank.
- Credit Column: Insert a fixed asset account that relates to the item sold.
- Knowing the amount of disinvestments, the program is able to calculate in detail the real amount of investments that have been made during the year. For an SME, the number of disinvestments during the accounting period usually remains quite small, whereas investment activities are much more frequent operations, which is why it is very important to find the real amount net of all other movements.
- A disinvestment simply represents the sale of a fixed asset such as a vehicle or machinery. When recording a disinvestment.
- Revaluations of fixed assets (#revaluations)
- Revaluation of a fixed asset is the accounting process of increasing the carrying value of a company's fixed asset or group of fixed assets to account for any major changes in their fair market value.
- Debit Column: Enter the account of the fixed asset item you are revaluing to increase its value.
- Credit Colum: Enter an income account, if you don't have a particular one you can enter it as extraordinary income.
- Revaluation of a fixed asset is the accounting process of increasing the carrying value of a company's fixed asset or group of fixed assets to account for any major changes in their fair market value.
- Devaluations of fixed assets (#devaluations)
- It works in the same way as a revaluation, but instead of increasing the value of the fixed asset it decreases it, which means that the accounting entry is also reversed, i.e. the income becomes a cost.
- Debit Column: Enter a cost account, if you don't have a particular one you can enter it as extraordinary cost.
- Credit Colum: Enter the account of the fixed asset item you are revaluing to increase its value.
- It works in the same way as a revaluation, but instead of increasing the value of the fixed asset it decreases it, which means that the accounting entry is also reversed, i.e. the income becomes a cost.
- Dividends (#dividends)
- Dividends are fees paid to shareholders and usually depend on the profit made. The payment of a dividend must be recorded in a specific liability account, and should appear under short-term liabilities.
- Debit Column: Enter the reported balance sheet Profit / Loss carried forward account.
- Credit Colum: Enter the specific account for dividends.
- Dividends are fees paid to shareholders and usually depend on the profit made. The payment of a dividend must be recorded in a specific liability account, and should appear under short-term liabilities.
Cashflow Statement
Cash flow is divided into three main components:
- Operating cash flow which originates from the core business operations of a company.
- Cash flow for the company, which is the cash flow available to all investors in the company.
- Cash flow available to shareholders, which only considers the cash flows that are due to the shareholders, resulting from the net of all payments made and received, including from debt holders.
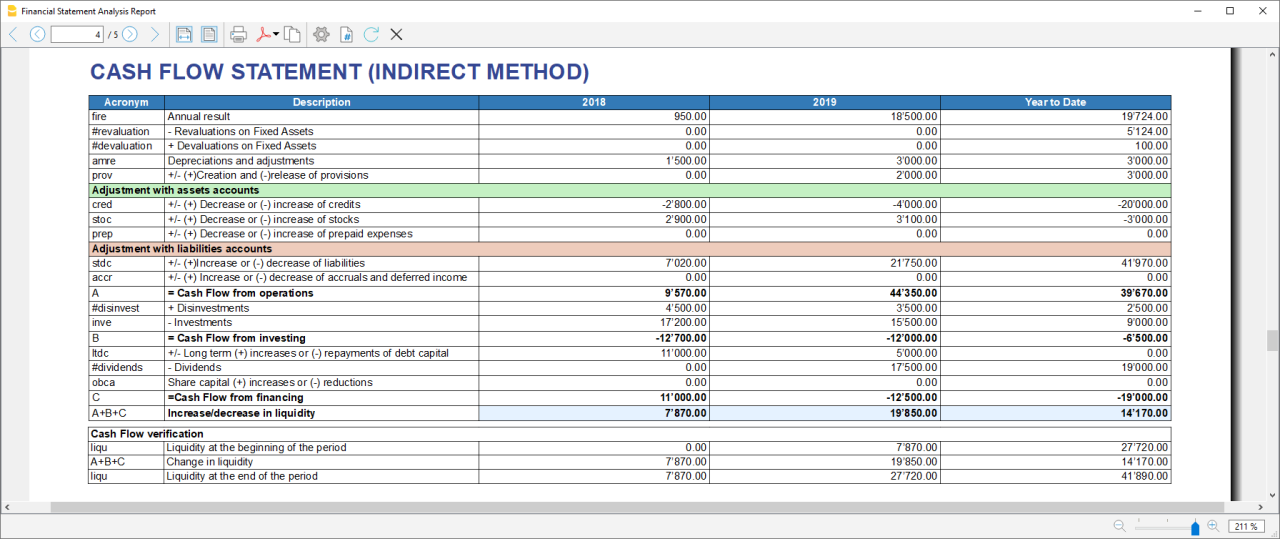
Adding up all the totals you find the amount that corresponds to the change in liquidity for the period, which in turn when added to the value of the liquidity at the opening of the period should give you the current liquidity balance.
If the results do not match, an error message is displayed.
Acronym column
In the acronym column of the cashflow, the reference to the account taken into account in the calculation is entered, or in the case of special entries, the prefix of the entry, so that it is easy to see which item of the balance sheet or income statement a certain movement relates to.
Cash Flow verification
This table shows any differences between the change in cash flow calculated in the cashflow and the actual cash flow in the accounts, which in an optimal situation should match. If there is a difference in one of the years of analysis the amount in question is printed in red on a line below.
Usually, when an error occurs, the first thing to do is to check whether the amounts in the balance sheet and profit and loss statement are correct or whether there are differences between the assets and liabilities, for checking them, control sums are very useful because they immediately show whether there is a difference.
if you realise there is some error but you dont know exactly where, you can check the amounts by comparing the ones in the report with those in the chart of accounts.
The differences are generally due to an error when entering groups in the settings dialog, which can occur in two ways:
- One or more groups were not included
- One or more groups were entered under the wrong heading
In case the balance and profit and loss amounts are correct but the cashflow displays an error, is probably due to the fact that a group has been inserted in the wrong place.
Retained Earnings Statement
This table shows the movements made with the annual profit achieved. Starting from the reported annual profit it adds the profit for the period and adjusts the value by taking into account the payment of dividends and the creation or dissolution of reserves. The last two rows show the total undistributed profit, and the undistributed profit realised in the current year.

This information is somewhat supportive of Cash Flow but since earnings management does not directly affect cash, it is presented in a separate statement.
Record Transactions
It is useful to first record the transfer of the profit for the year from the profit and loss account to the profit shown in the balance sheet as shown in the example image.
In order to record the payment/discharge of reserves and the payment of dividends, it is sufficient to use the specific account of one of the above items and to decrease or increase the profit account shown in the balance sheet. The remaining amount (not allocated to reserves or dividends) then increases the retained earnings.

Cash Flow Ratios
In addition to the ratios already present, those ratios are added just below the Cashflow table and in the Charts
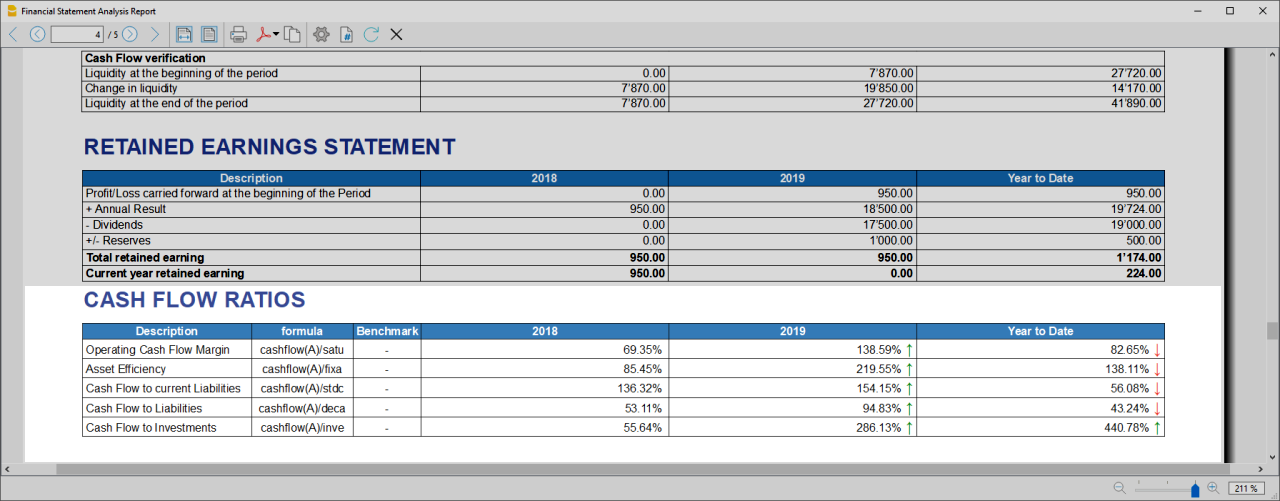
- Cashflow margin: Measures the amount of revenue a firm can convert into operating cash flow. When a firm is thriving, operating cash flow should grow alongside revenue. While profit margins measure a firm's pricing power; a declining cash flow margin also measures the health of customer and supplier relationships.
- Asset Efficiency Ratio: This is a basic ratio to show you how well the company uses its assets to generate cash flow. It’s best used to view the historical trend as well as to compare with competitors.
- Cashflow to current Liabilties: This ratio gives you an idea about the company’s debt management practices.It’s also a better indicator of the company’s ability to pay current liabilities than the current ratio or quick ratio
- Cashflow to Liabilities: Measures the amount of operating cash flow a firm generates on each dollar of total liabilities. Businesses that can't produce operating cash flow to pay off all their liabilities cannot continue to operate indefinitely, making this ratio an important indicator of liquidity as well as solvency
- Cashflow to Investments: Measures the amount a company outlays for capital assets for each dollar of cash dollar it generates from those investments.
Why Is Cash Flow Analysis Important?
Performing cash flow calculations in combination with constant monitoring of the company's cash flows is the winning formula for effective treasury management, and is useful for making the best use of available cash.
Thanks to the ability to generate cash flow and the financial solvency of the company, you gain confidence from banks and suppliers, as it symbolises a certain control over your business: the calculation of cash flow is in fact a way to detect the actual availability of the company, giving the possibility to face unexpected events or to plan consistently the future of projects.
For more information on Cashflow Analysis, please refer to the following page.
Balance Sheet and Profit and Loss Reclassification
Generate the Report by going to the Extensions menu→Cash Flow Statements and financial Ratios →Financial Reports.
The Report contains all the analysis data processed by the extension:
- Reclassified balance sheet
- Reclassified Profit and Loss Statement
- Control Sums table
Reclassified Balance Sheet
The reclassification of accounts allows for the display of a series of values, results and intermediate margins that contain more information than the traditional structure.
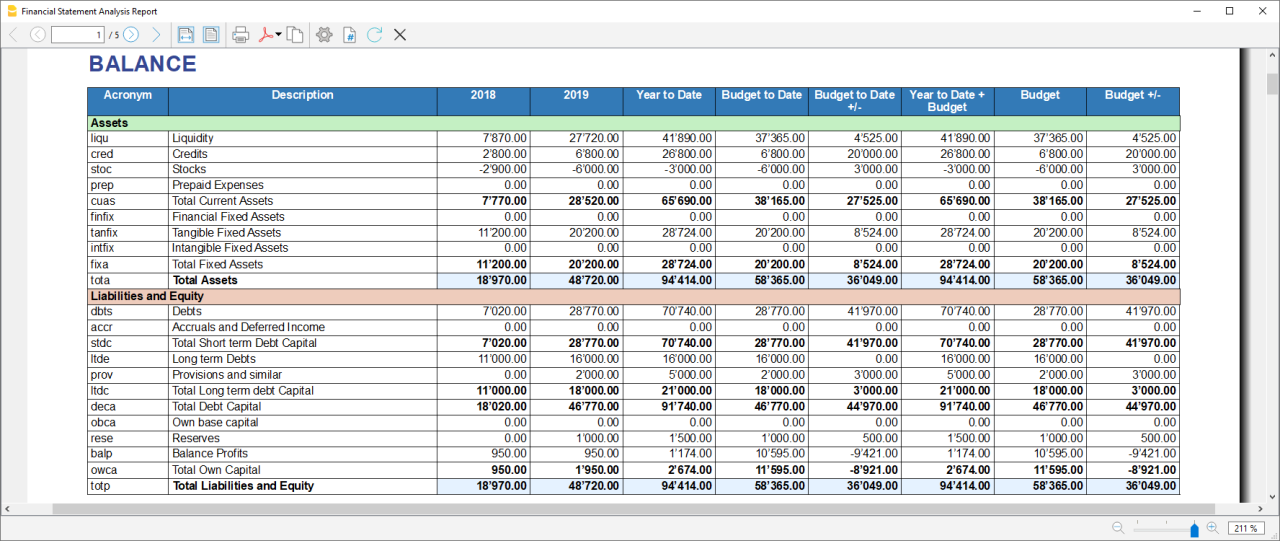
- Current Assets: All the assets of a company that are expected to be sold or used as a result of standard business operations over the next year.
- Fixed Assets: Items, such as property or equipment, a company plans to use over the long-term to help generate income.
- Total Assets: The sum of current assets and fixed assets.
- Debt Capital: Is the capital that a business raises by taking out a loan. It is a loan made to a company, typically as growth capital, and is normally repaid at some future date.
- Own Capital: It is the capital owned by the company.
- Total Liabilites and equity: The sum of Debt Capital and Own Capital.
Reclassified Profit and Loss Statement
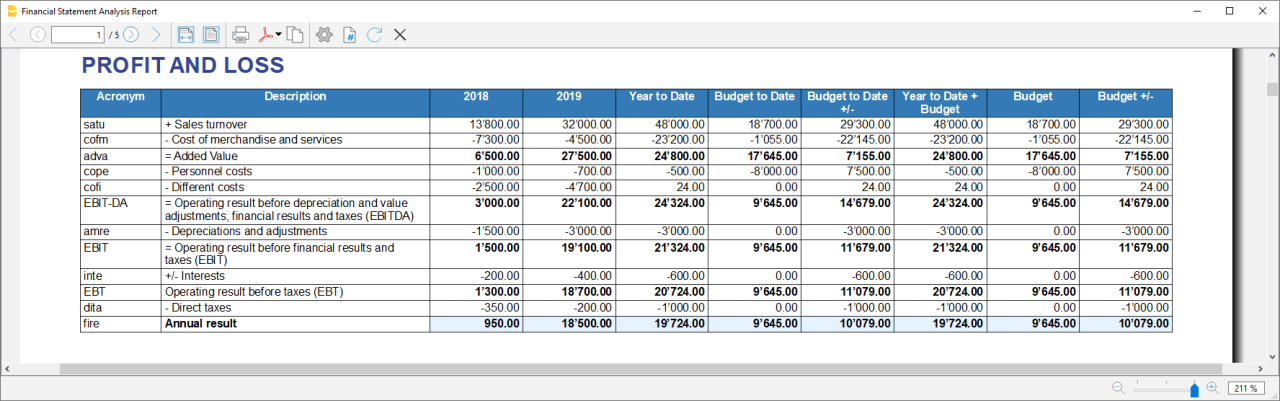
- Added value: The difference between operating costs and operating revenues incurred for resources outside the company, expresses the company's ability to create wealth and then remunerate the various production factors and stakeholders.
- MOL /EBITDA: "Earning Before Interests, Taxes, Depreciation and amortization" is obtained by subtracting from production revenues the costs of production (including internal costs such as personnel costs), without considering provisions and depreciation. As it does not contain economic items without monetary movement, its value assumes very important information for financial investors.
- EBIT :"Earning Before interests and Taxes", helps to understand whether the company is also able to cover the financial charges arising from its financial commitments.
Control Sums
Resumes the totals of the reclassified accounts (Assets, Liabilities and Equity , Annual Result). Checks that the sums calculated in the analysis match the totals in the accounting sheets and that Assets and Labilities and equity match.
- Accounting Total column: Represents the actual total in the accounts.
- Calculated Total column: Represents the total calculated by the program based on the groups entered.
- Difference column: Represents the difference found between the total in the accounts and the calculated total for each year. The value equal to 0, otherwise will be displayed an error message, which means that there may have been an error in entering the accounts/groups .In this case it is useful to check in the dialogue that you have entered the groups correctly.
Financial Ratios
Generate the Report by going to the Extensions menu→Cash Flow Statements and financial Ratios →Financial Reports.
The balance sheet ratios are formulas calculated on financial, economic and asset values. These ratios are derived from the income statement and balance sheet data. Balance sheet indices are important analysis tools that provide essential indications for the entrepreneur's activity.
It is widely used by all professionals who are interested in assessing the soundness of a company for their work.
In fact, banks use the balance sheet indexes to evaluate company loan applications.
the indexes are divided into four main types
- Liquidity ratios:
- Financing ratios
- Profitability ratios
- Efficiency ratios
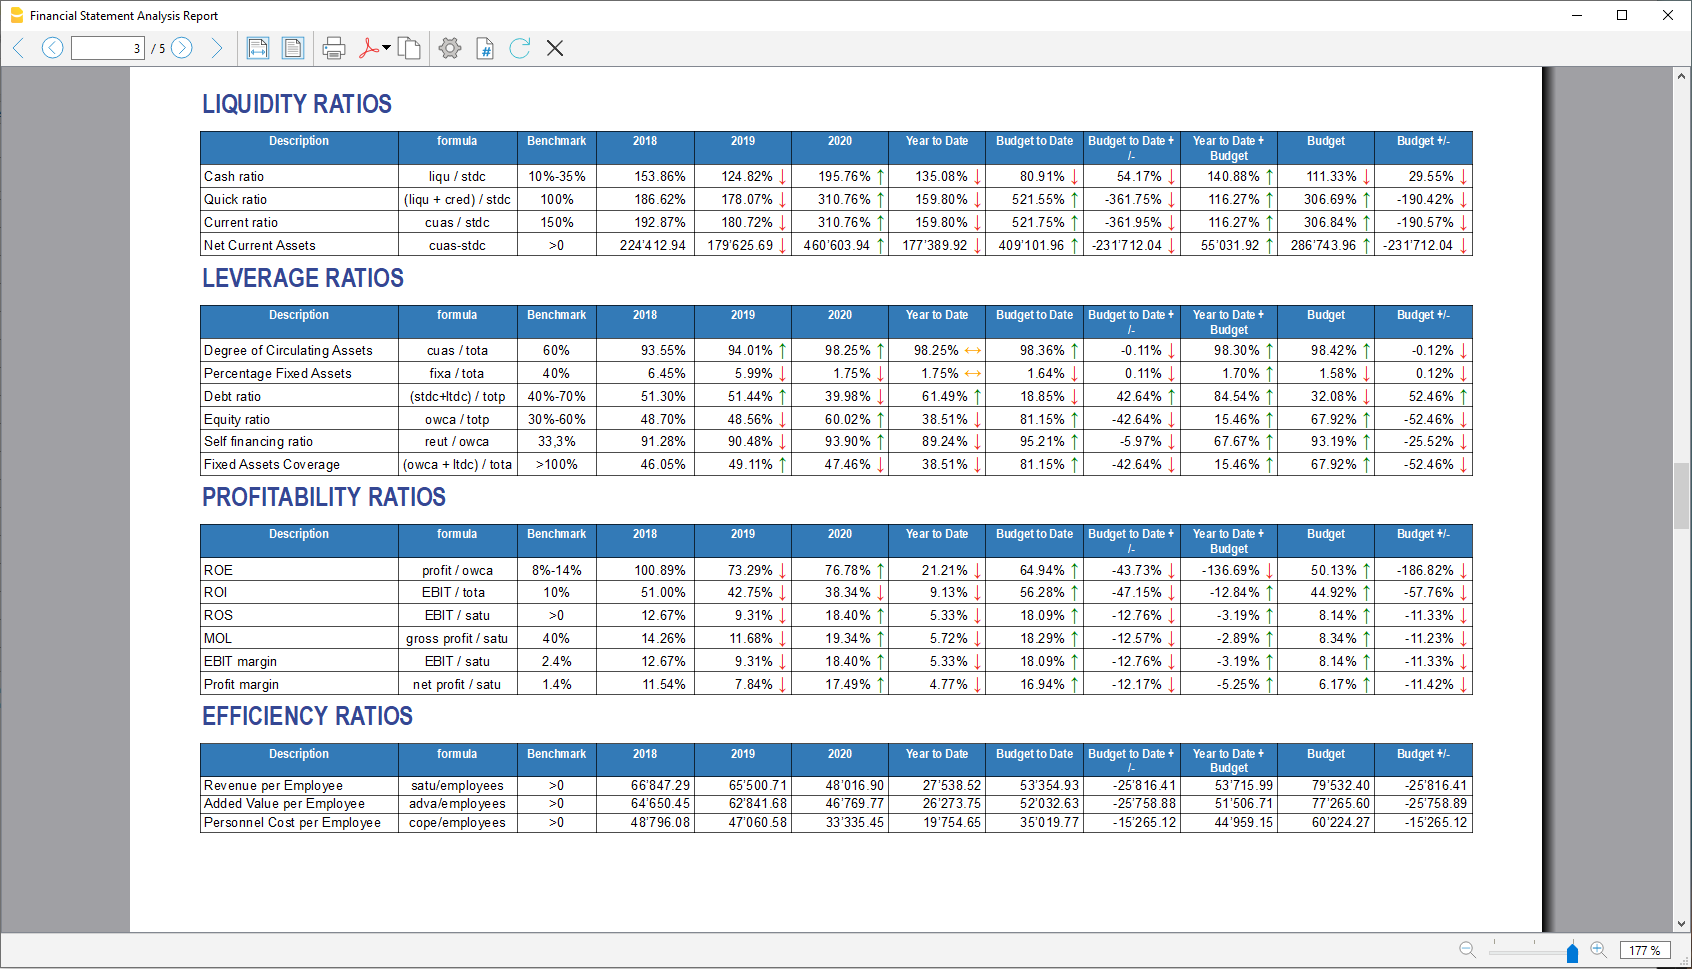
Liquidity ratios
An important class of financial metrics used to determine a debtor's ability to pay off current debt obligations without raising external capital. Liquidity ratios measure a company's ability to pay debt obligations and its margin of safety through the calculation of metrics.
- Cash ratio: Indicates the extent to which the company is able to repay its debts at the end of the term.
- Quick ratio: Indicates the extent to which the company is able to pay its debts when due.
- Current ratio: Indicates the extent to which the company is able to pay its short-term debts without touching fixed assets.
- Net Current Asset: Indicates the part of the current assets free of short-term commitments, which can therefore be used in the activity.
Financing ratios
They look at how much capital comes in the form of debt (loans) or assesses the ability of a company to meet its financial obligations.
- Degree of Circulating Assets: It allows us to understand whether there is a balance within the company's assets, a judgement can only be made if we have the average data for the same line of business.
- Percentage Fixed Assets: It is complementary to the previous one.
- Debt ratio: Indicates the extent to which the company has had to resort to external financing, the judgement depends very much on the branch of activity.
- Equity ratio: Is complementary to the previous one, equity ratio has the advantage of being less expensive.
- Self-Financing ratio: Indicates the extent to which the company has been able to accumulate undistributed profits.
- Fixed Asset coverage: The fixed assets must absolutely be financed from equity or possibly from long term capital, otherwise major repayment problems could occur.
Profitability ratios
Are useful to assess a business's ability to generate earnings relative to its revenue, operating costs, balance sheet assets, or shareholders' equity over time, using data from a specific point in time.
- Return on equity (ROE): By comparing the percentage obtained with the rates commonly applied for other investments, it is possible to understand whether the equity invested by the company gives a sufficient return or not.
- Return on investment (ROI): Identifies the return on invested capital. Basically it serves to understand how much the invested capital returns in terms of income.
- Gross Operating Margin (MOL) :Is a value that measures the profitability of a company. In other words, it measures the ability to make profit margins: Indicates the company's return on sales made.
- EBIT margin: Is the ratio of EBIT to turnover of a company. This ratio provides information on its profitability and helps to compare different companies and sectors.
- Profit margin: It represents what percentage of sales has turned into profits.
Efficiency ratios
Express the degree of efficiency of the company's factors of production, those chosen by us give us an indication of the relationship between the number of employees and the various margins of the profit and loss account. Efficiency indicators are related to profitability indicators, as higher productivity generates an improvement in profitability indicators.
- Revenue per Employee: An increase indicates greater efficiency of the company and a lowering of the break even point. Its increase is certainly an indicator of the good health of the company itself.
- Added Value per Employee: Gives evidence of efficiency in terms of cost reduction (e.g. economies of scale). If the revenue per capita index remains stable and the value added per capita index increases, this is evidence of cost efficiency.
- Personnel Cost per Employee: Highlights the trend in average personnel costs.
Within the tables and also visible the calculation formula of each index.
Dupont Analysis and Altman index Z-Score
Dupont Analysis
The Dupont model is a technique that can be used to analyse the profitability of a company using
traditional performance management tools. To enable this, the model integrates the elements of the Profit
and Loss Account and Balance Sheet.
Altman index Z-Score
The Z-Score is an index of the discriminating analysis used to determine the probability of bankruptcy of a
company within 2 years using statistical techniques.
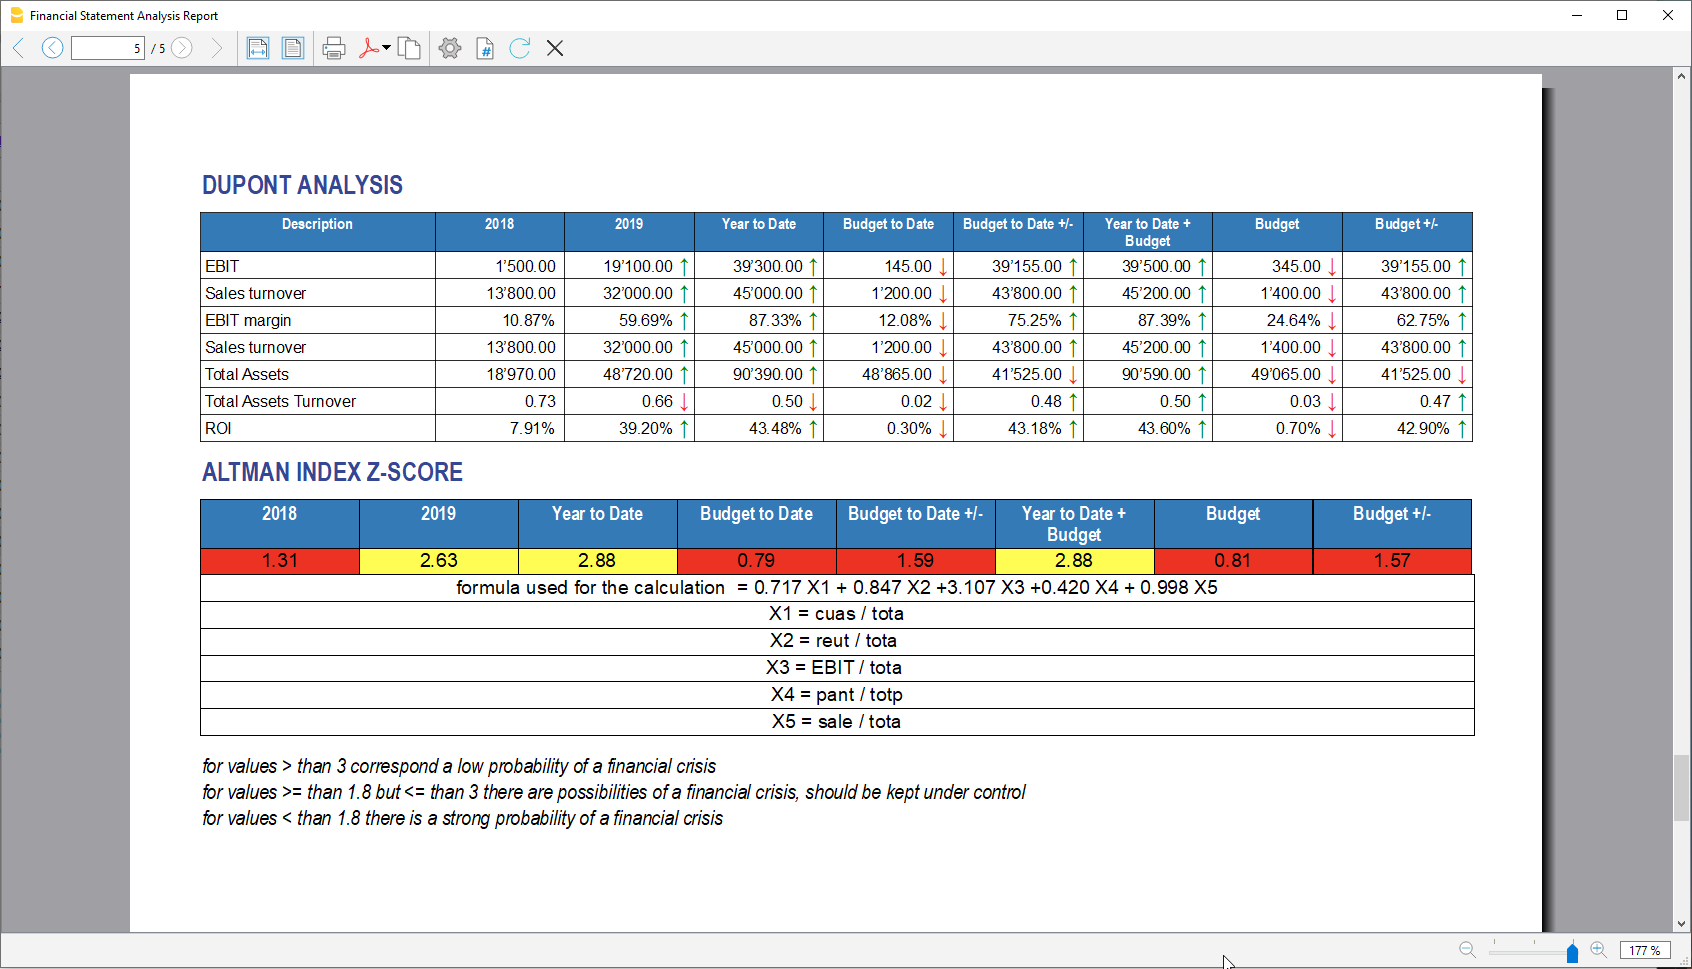
Financial Charts
It’s possible to access to the charts by going to the Extensions menu→Cash Flow Statements and financial Ratios →Financial Charts.
Charts allow you to read the same information as you can find in the report but in a clearer and more
intuitive way. Once the dialogue is open, you can move between the various elements thanks to a drop-down menu.
Ratios charts
- Financing ratios evolution
- Liquidity ratios evolution
- Profitability ratios evolution
- Efficiency ratios evolution
- Cashflow ratios evolution
These charts represent the evolution of the indexes over time. For each type of index there is a bar chart,
within which there is a section that represents the evolution over time of each index for each year included
in the analysis.
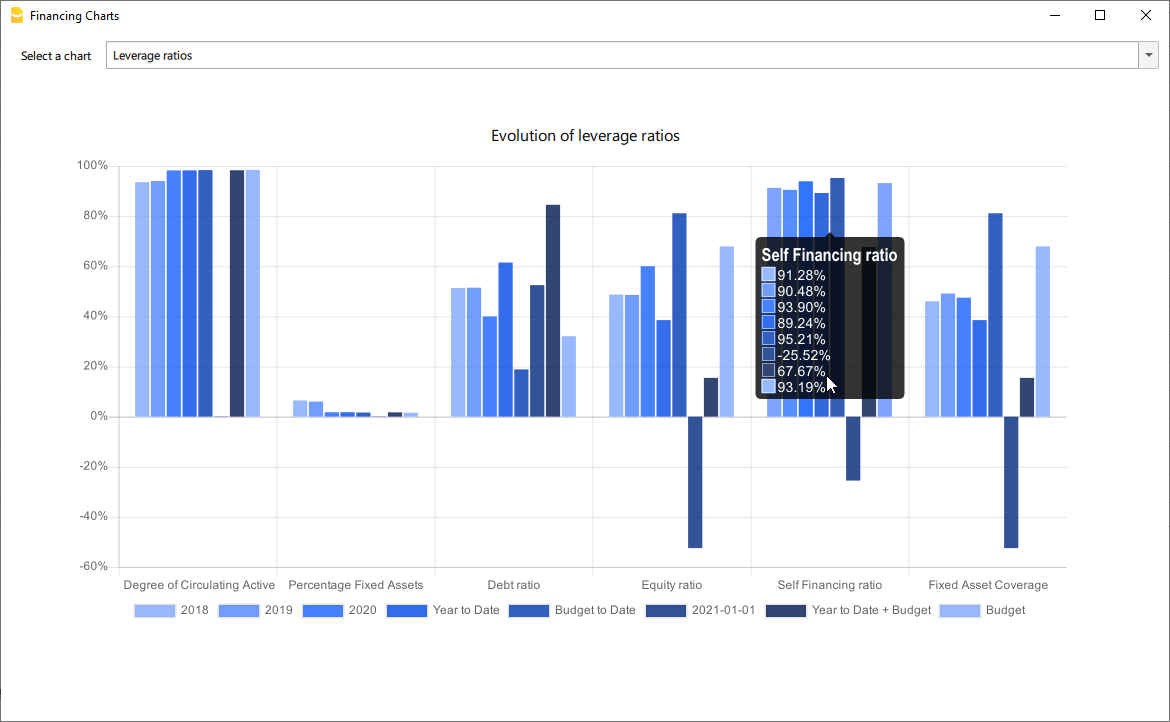
Reclassified Elements charts
- Reclassified asset variation
- Reclassified liabilities and equity variation
These charts show the time evolution of the reclassified assets, and reclassified liabilities, using stacked
chart. It is possible to see how and in what quantity the groups make up the total of assets and liabilities (in
percentage %)
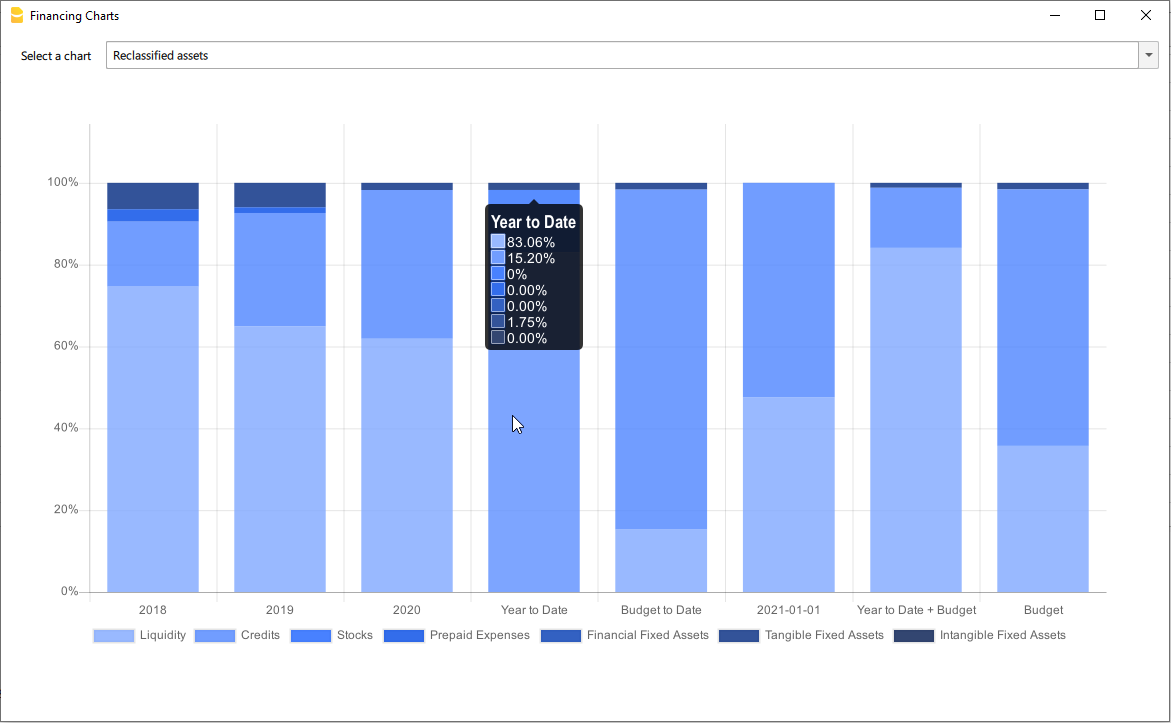
Reclassified profit and loss variation
Shows by using histogram the value of the intermediate totals (EBIT,EBIT-DA,..) of the reclassified profit and loss account ,and their evolution over the time.
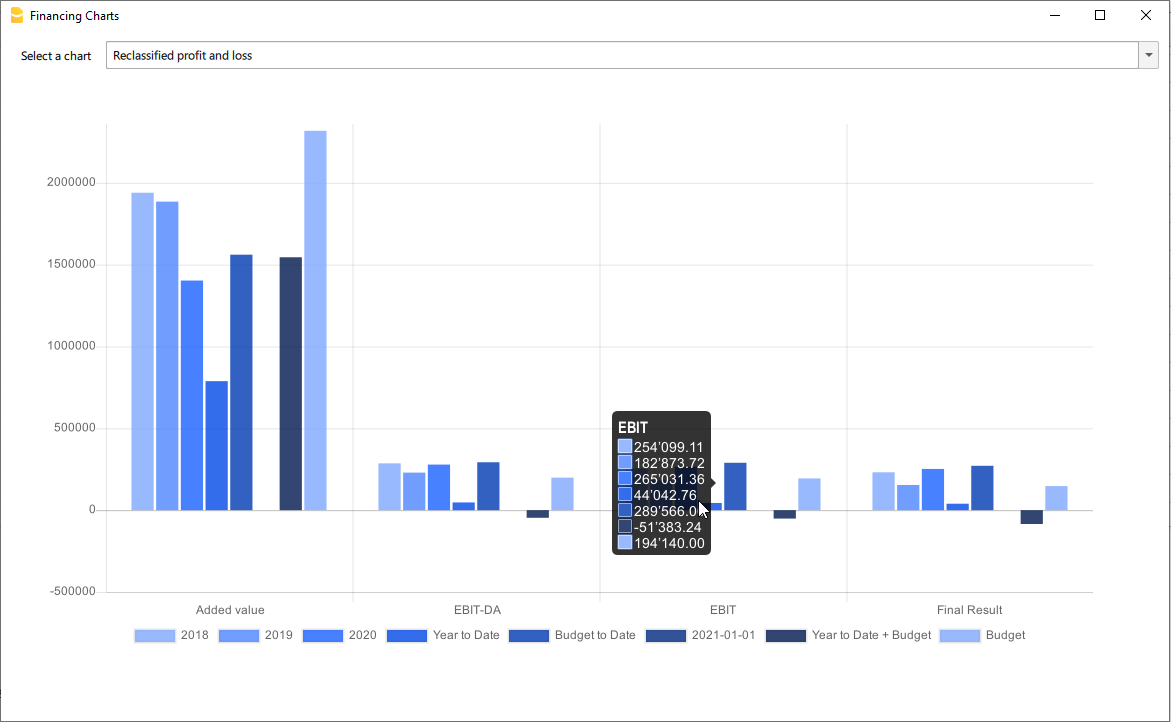
Airbnb, Booking.com, Vrbo and similiar hosting platform templates
Those who have an Airbnb rental business and are looking for a simple and efficient way to manage their finances will find the ideal solution in Banana Accounting Plus templates for several reasons.
With the templates, you can manage and track all expenses and income for all the rooms, apartments or houses you rent without any limits.
Moreover, you can manage the budget for your business in a flexible and personalized way. Whether you have multiple rooms, apartments or houses, you can keep track of specific income and expenses either collectively or divided for each individual rental unit. Additionally, you can set the budget according to irregular or regular deadlines such as monthly, quarterly, semi-annually or annually. This way, you can adapt the budget to your financial and business planning needs.
Through the budget feature in the templates, you can also make financial forecasts for your short-term rental business. You can gain a clear and detailed overview of your future income and plan ahead for all your activities.
Inventory management is another useful and powerful functionality offered by Banana Accounting Plus. You can keep track of all the items relevant to your business, categorizing them by room, apartment or rented house. This way, you will always be aware of what you own and easily manage the purchase or replacement of any necessary assets. With Banana Accounting Plus, you can create all the accounting files you need without limitations.
Regarding the management of income from hosting platforms such as Airbnb, Booking.com, Vrbo and others, the templates provide you with the option to record both the actual income deposited into your bank account and all other rental-related income, especially the commissions paid to the platforms. This information is crucial for tax purposes as it allows you to comply with the rules of the country where you operate your business.
For those who have an Airbnb business and are looking for a simple and efficient way to manage their finances, Banana Accounting Plus templates provide the ideal solution for other several reasons too.
Available templates
There are two templates available for short-term rental hosts on Airbnb, Booking.com, Vrbo or similar platforms.
The completely free template is suitable for those without accounting knowledge who want to manage the finances of their business. The second template is designed for those with double-entry accounting knowledge and who manage a business using multiple assets and possibly different currencies:
- Free template based on Banana Accounting Plus Cash Manager.
- Double-entry and multi-currency template.
All the functionalities and features described in the free template are also included in the double-entry multi-currency template.
In each template, you can easily view some sample accounting entries.
Manage Airbnb reservations
With Banana Accounting Plus templates, you have complete control over your reservations even before they are paid. This allows you to keep track of all bookings in your file, ensuring you are always up to date on availability and key dates. You can input reservations into the system and monitor them, making planning and management of your rental properties easier.
In addition to managing reservations, the templates also allow you to record payment receipts and income. This is particularly useful for monitoring and ensuring compliance with maximum nights allowed regulations in your country. You will have an accurate record of guest stays and corresponding income, providing clear and transparent documentation for regulatory compliance purposes.
Manage Airbnb Experiences
Banana Accounting Plus templates also enables you to manage and track Airbnb experience reservations. If you offer unique experiences such as sailing trips, mountain bike tours, tastings or others, you can record these specific bookings and efficiently monitor them. You will have a comprehensive overview of your Airbnb experience activities, including booking details and corresponding income.
With Banana Accounting Plus templates you simplify the financial management of your Airbnb rental business. You can take advantage of all the features offered and gain a clear and organized view of your finances.
Manage Airbnb business budget and financial forecasts
The Budget table in all Banana Accounting Plus files provides a comprehensive tool for creating your business budget and forecasting future financials.
This feature, always accessible through the Tools > Add/Remove functionalities menu, allows you to generate cash flow statements, liquidity plans and investment plans.
For more advanced needs, you can create budgets using formulas and automatic calculations. Additionally, you can obtain monthly, quarterly and annual financial forecasts as well as projections for multiple years.
Explore the full documentation on budget management and financial forecasting with Banana Accounting Plus.
Manage inventory along with their corresponding receipts
On all files, Banana Accounting Plus allows the display of the Link column in the Transactions table, enabling you to attach supporting documents to each accounting entry.
If needed, there are other predefined columns that you can easily show in your accounting file.
Additionally, with Banana, you can add your custom columns, additional tables, and link them to existing ones. Refer to the documentation on enabling the display of predefined columns and adding columns and new tables to your file.
The ability to add new tables and create custom columns also allows you to integrate the inventory of items in the rooms and apartments you rent into your file and attach relevant documentation, which can be useful, for example, for warranty or insurance purposes.
If you prefer you can create a dedicated new file to create and manage the inventory of your rooms and rented apartments. With all Banana Accounting Plus subscription plans, there are no limits on the number of files you can create and manage.
Handle the accounting recording of the fees you pay to platforms
Using a spreadsheet like Excel or Google Sheets doesn't always allow for proper management of income received from platforms such as Airbnb, Booking.com, Vrbo or similar ones. Often, the income received in your bank account does not include the commissions you need to pay to the platforms.
These platforms deduct the commissions before making payments, but there are countries where you are required to declare the gross income for tax purposes, including the deducted commissions.
With Banana Accounting Plus you can record the gross income you receive, ensuring that everything is accurately accounted for and that your bank balance always matches the actual balance in your account.
Check the example entries in the provided templates pages to see how this accounting record is done.
Free Airbnb template for income and expenses management: ideal also for Booking.com and Vrbo
Free Airbnb template for income and expenses management: ideal also for Booking.com and VrboManage your accommodation on Airbnb, Booking.com, Vrbo or the platforms you use with this free template and keep track of your finances easily and efficiently.
The Banana Accounting Plus template is superior to an Excel spreadsheet or a Google Sheet but avoids potential errors and time loss due to formula management. This way, you have a completely free accounting management template specifically designed for hosts.
With Banana Accounting Plus, unlike Excel or Google spreadsheets, there are no limits on the number of rooms, apartments or houses you can manage, and it allows you to easily track income and expenses for each individual rental property and your entire short-term rental business.

With this template, you can record and monitor all your income and expenses quickly and easily, providing you with a clear and detailed snapshot of your finances and how to optimize expenses. The accounting management template on Banana Accounting Plus offers a simple and effective way to organize and analyze all the financial data that is important for hosts.
Here are some of the key features and benefits of the free accounting management template:
- Easy to use: the template is designed to be intuitive and user-friendly, even for those who are not accounting experts. No technical skills or in-depth knowledge of Excel spreadsheets are required to use it. Banana Accounting also has extensive online documentation in multiple languages readily available.
- Startup budget: create, manage and update the budget of your startup to generate detailed and useful reports and forecasts for the success of the business.
- Income tracking: record all income generated from bookings, including payments from platforms, booking fees and reimbursement of cleaning expenses for rooms, apartments or houses, with all the necessary tracking details.
- Expense management: keep track of all expenses associated with your properties, such as utilities, cleaning, maintenance and supplies. Choose the level of detail you prefer for each expense associated with your rental properties. Add, edit, group and customize expenses you want to monitor without limitations.
- Track rental property information: easily track guest names, rented room, apartment or house, check-in and check-out dates, total nights stayed, number of guests per booking, the source of guests' bookings and payment dates from platforms.
- Automatic calculations: the template performs calculations automatically for you, without the potential errors of Excel or Google Sheet formulas, providing a clear overview of your cash flow, profits and expenses for your entire business or for a single room, apartment or house you manage.
- Detailed reports: generate comprehensive and professional financial reports, including profit and expense statements, balance sheets and more. These reports will help you make informed decisions and have detailed control over your finances.
- Manage hosting platform Experiences: easily and quickly manage the Experiences you offer on Airbnb, Vrbo or other similar platform.
- Customizable: the template can be easily customized to fit your specific needs. You can add custom categories, modify, group and personalize all the details you want to monitor according to your preferences.
- Privacy: it's important to note that the data entered into Banana Accounting is not used for commercial purposes. Your information remains confidential, offline and is not repurposed in any way.
This free template for income and expense accounting management for hosts managing their short-term rental properties simplifies the management of your finances, saves you valuable time, and provides you with a clear and comprehensive overview of your income and expenses professionally.
Banana Accounting is a highly versatile and customizable accounting software that can be used for broader accounting purposes beyond managing hosts on Airbnb, Booking.com, Vrbo and other hosting platforms.
Totally free
This template is based on the Cash Manager feature of Banana Accounting Plus, which can be used for free and without limitations with the free subscription plan.
Create and save the file
You can open and save your new file to start either through Banana Accounting Plus Web or by downloading and installing the software on your computer:
- Download and install Banana Accounting Plus.
- Click on File > New.
- Select Cash Manager.
- Search for the Category Business.
- Select the template "Income and expenses management template for Airbnb or similar platforms".
- Click on Create.
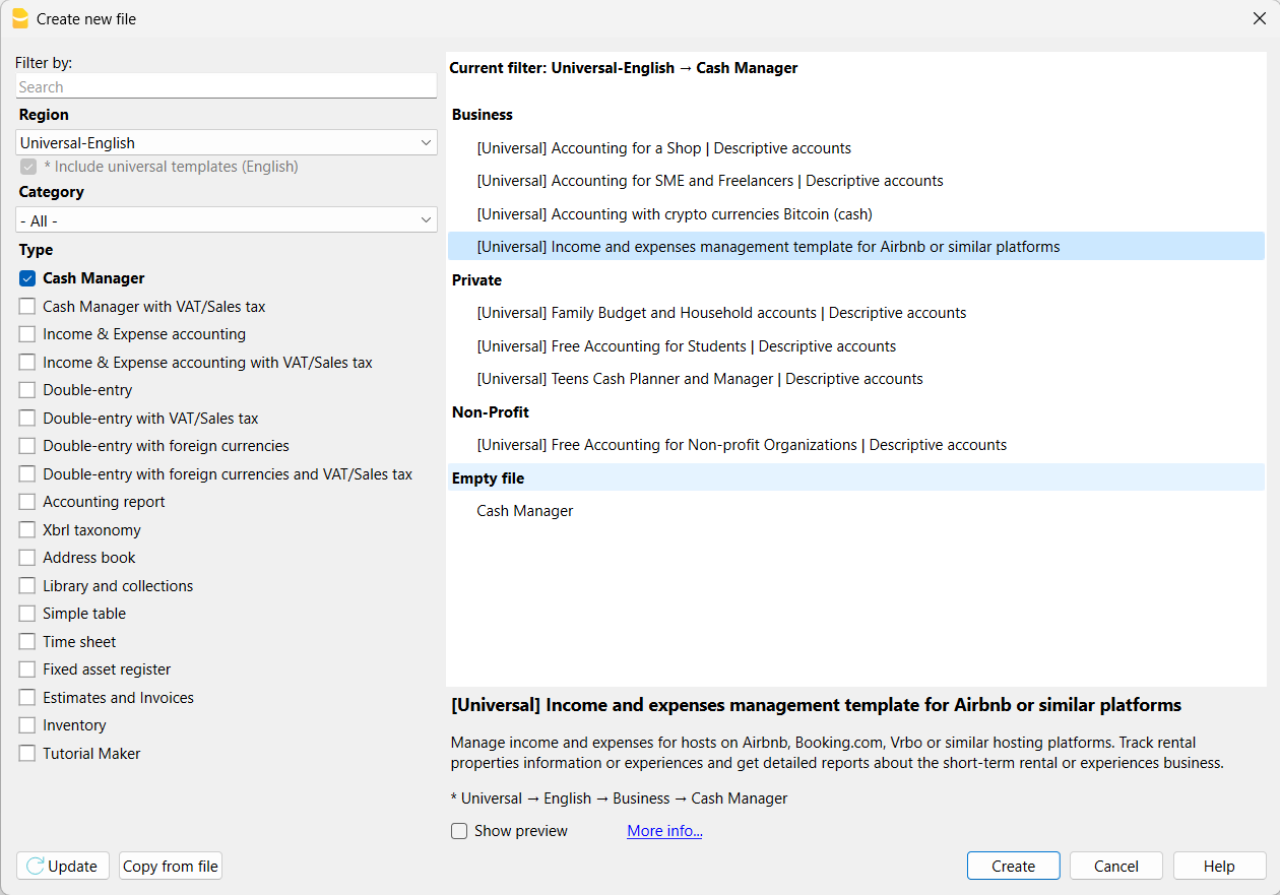
If you click on the text "More info...", you will be directed to this specific documentation page for the template. On this page, you can always find the tutorial file including sample records.
Using the command File > File Properties, set your references, the accounting period with opening, closing dates and the base currency. In the Address section, fill in the fields for the entity managing the rental properties. If necessary, change the base currency of the accounting file in the Accounting section.
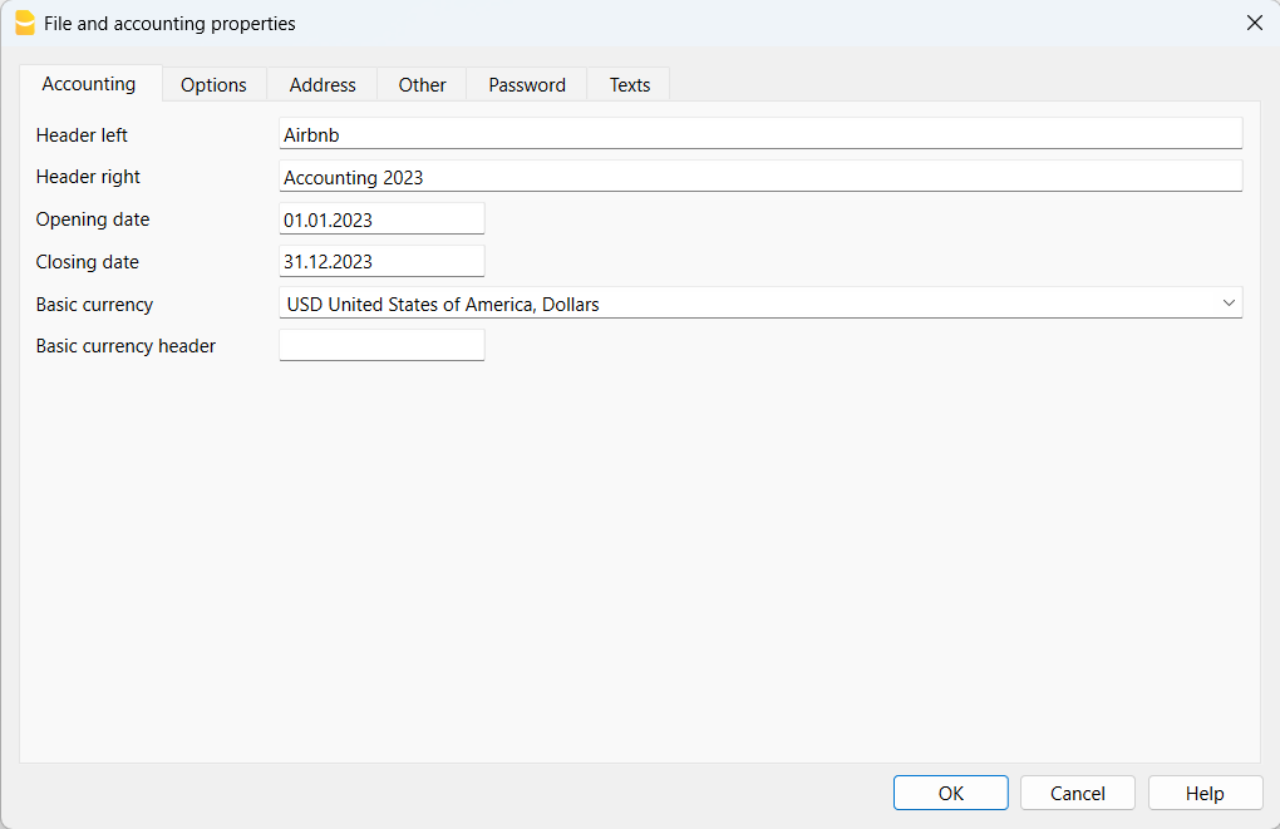
With the command File > Save As, save the file. It is useful to include the name of your business and the year in the file name. For example, "BusinessName-2023.ac2".
Also, refer to the article on organizing accounting files locally, on a network, and in the cloud.
Banana Accounting Plus Web Access
When you have downloaded and saved your new accounting file to open and use it from the web, you can bookmark the following link to access Banana Accounting Plus Web. However, it is recommended to download and install Banana Accounting Plus on the computers where it is needed, because Banana Accounting Plus Web does not yet have all the features available.
Create the budget
With Banana Accounting Plus, you can easily create a startup budget for your new short-term rental business on Airbnb, Booking.com, Vrbo and other platforms, and forecast all the costs you'll need to deal with. Consult all the relevant documentation on how to create a budget with Banana Accounting for detailed information.
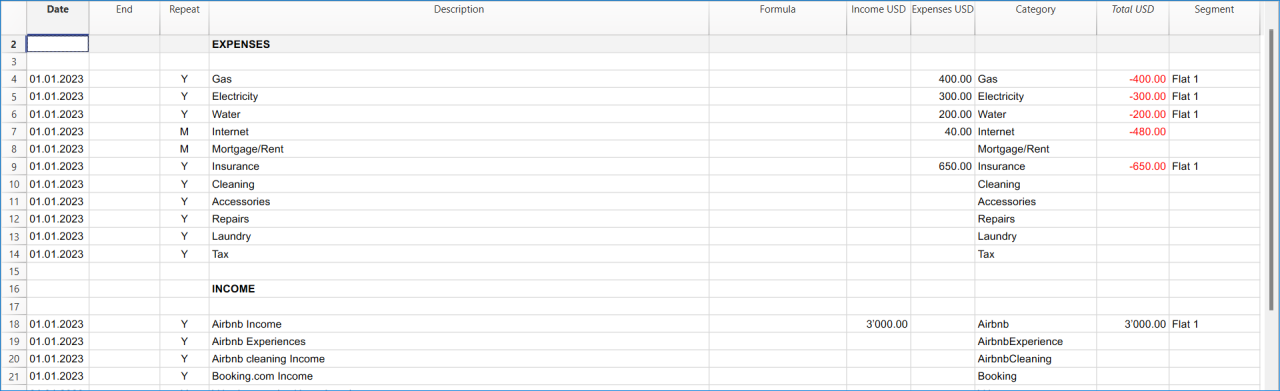
Customize and categorize expenses
If you prefer, you can group similar costs into categories and maintain the detail for each type of expense:
- Properties costs: mortgage payments, repairs and insurance coverage.
- Initial setup expenses: spending on furniture and household utensils.
- Bills: electricity, gas and water expenses.
- Supplies: expenses for items like linens, toiletries and cleaning products.
- Business expenses: costs related to accounting, software and taxes.
- Other costs: payments for cleaners, laundry services and ads.
See how you can easily create accounts groups.
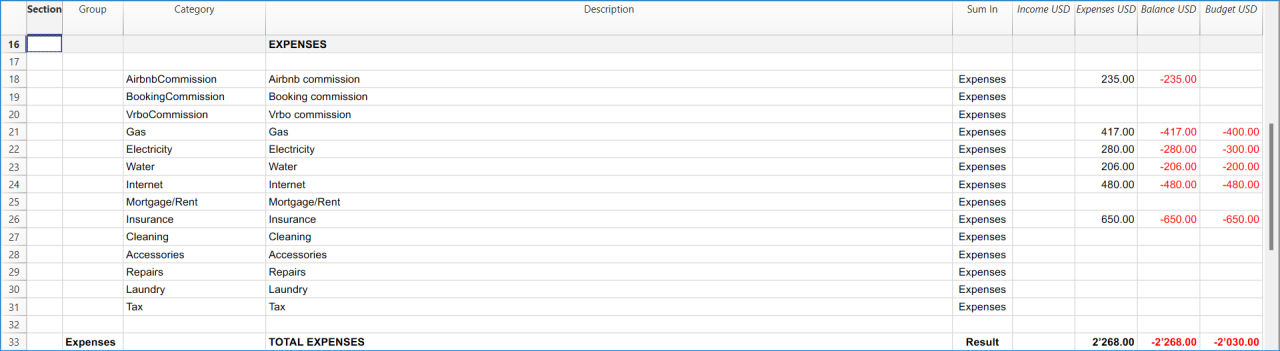
Recording transactions
In the Transactions table, record all transactions in chronological order, including debtor payments and invoice payments, as well as other types of transactions. The recordings can always be sorted and viewed instantly. You can highlight rows, correct any mistakes and copy and paste previously entered transactions.
To expedite data entry, we suggest using the various features of Banana:
- The auto-completion data entry feature automatically retrieves previously entered data.
- The recurring transactions feature (in the Actions menu) allows you to store frequently recurring transactions in a dedicated table.
- You can import data from bank statements, automatically capturing all bank transactions.
- You can link each recording to its corresponding digital document, and with a simple click, you can view the document. Refer to accounting files and digital documents for better document organization.
- Use the sort recordings command to arrange rows in chronological order.
- Use the print/preview command to print or export the journal in PDF format.
Bank transactions import
You can import bank statements, eliminating the need for manual entry.
Additionally, with the Advanced plan, it also allows for easy management of rules to automate accounting according to your specified criteria. This significantly reduces the effort required for accounting management, resulting in unmatched time savings.
Print financial statements or accounting reports
To view and print the financial statements at any time, click on the Report menu > Enhanced financial statements with groups. You can customize them or have an accounting report for a specific period.
Obtain detailed and customizable reports on all expenses and revenues of your business with Airbnb. You can compare them with the budget to always keep track of the performance of your startup.
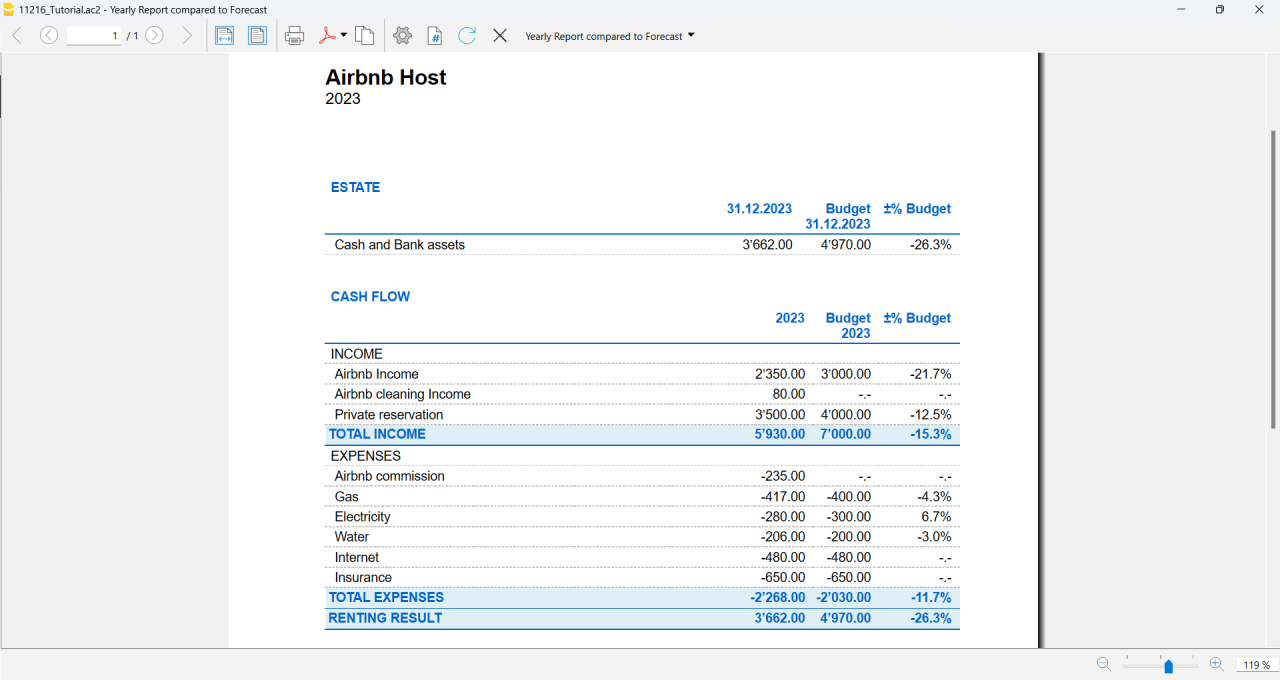
If you manage multiple rooms, apartments or rental properties, you can keep track of expenses and revenues allocated to each individual property you rent. You can also create room-specific budgets and compare the results with the actual expenses and earnings whenever you want.
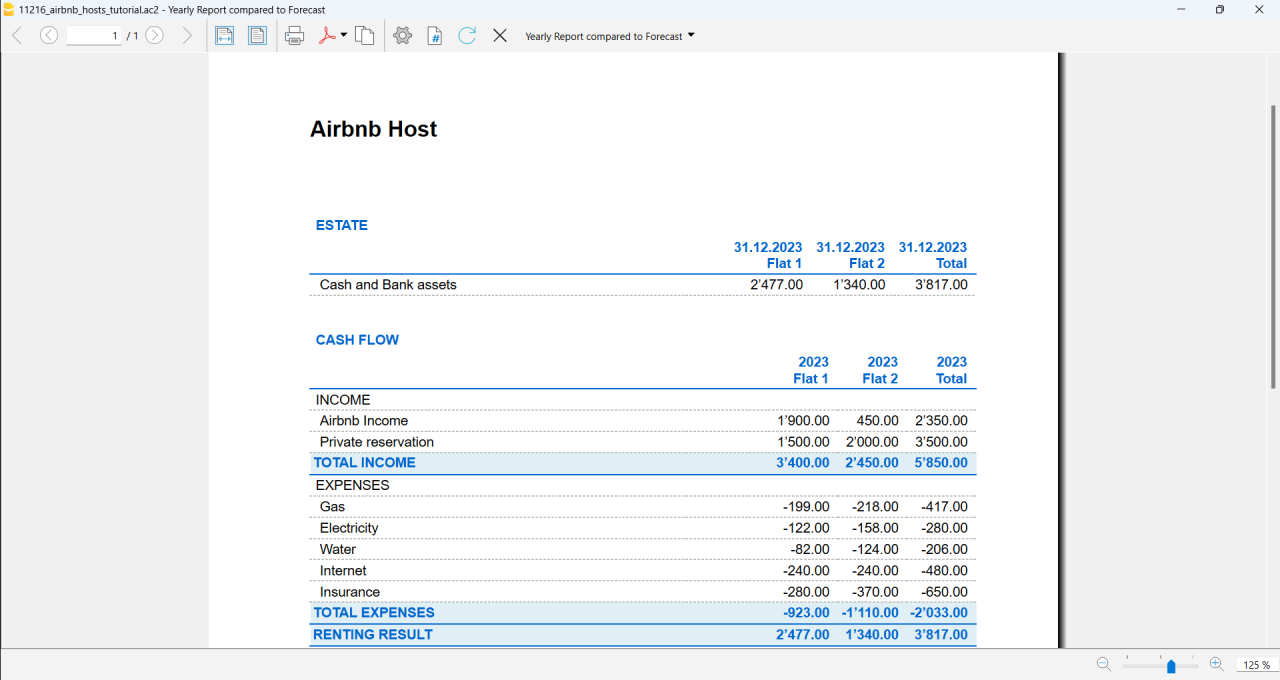
Advanced management
If you want, you can manage your Airbnb business in an advanced and optimized way through the rental management view called Manage Rentals. This allows you to keep track of all the necessary information about the reservations you receive. For those who offer Airbnb Experiences, there is the experiences management view, called Manage Experiences, available to track guest bookings related to experiences.
Navigate between the various available views to keep all the relevant data under control.
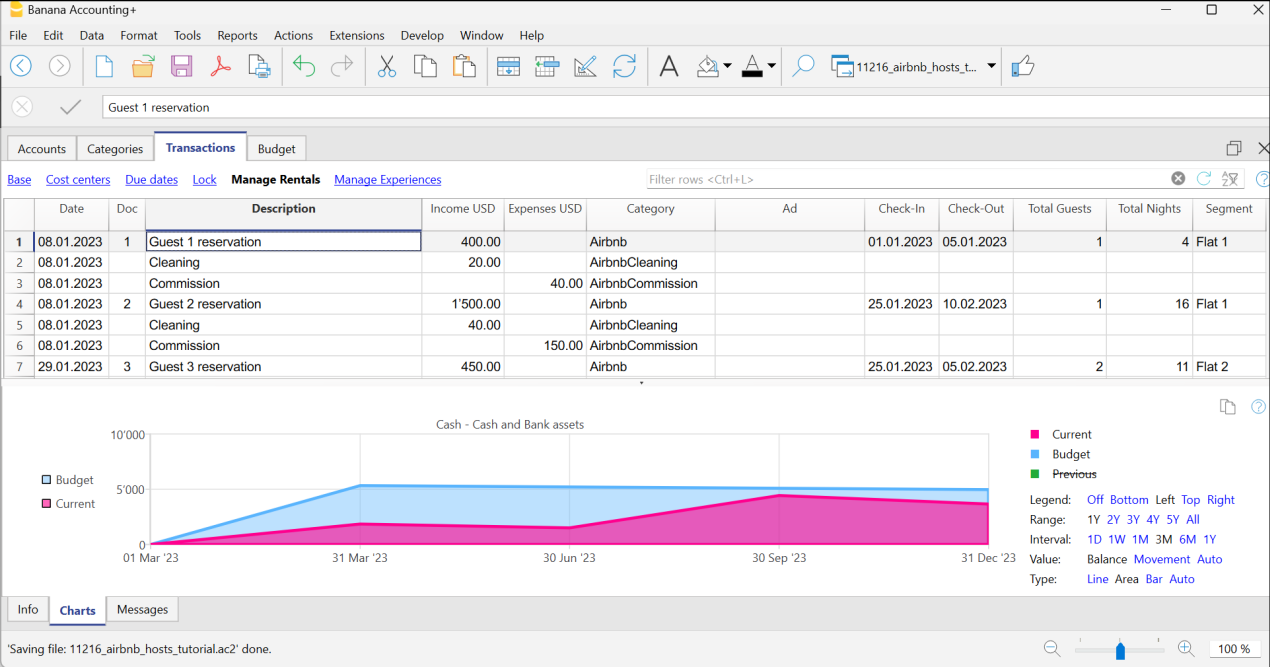
Questions or specific requests
Do you have any questions or specific requests regarding this template for Airbnb hosts or other short-term rental platforms? Please e-mail us.
Sample records for managing income and expenses for Airbnb hosts or other hosting platforms
Here are the sample accounting records for this template.
Recording an Airbnb or other platform revenue transaction
Record revenue from online platforms such as Airbnb, where you receive booking fees, with the preferred breakdown of the collected amounts and platform commissions. If you want, keep track of the ad from which the guest made the reservation, the check-in and check-out dates, the number of guests for the booking, the booked nights, the room or flat rented and the date of payment from the online platform.
To print the receipt to be given to the guest upon arrival, enter the receipt number in the Doc column and use the designated printer extension. You can also attach the receipt to the corresponding revenue record using the Link column.

Recording an expense for your short-term rental business
Record the expenses you incur for your Airbnb business by indicating the date of the expense, a description of the purchase, the amount incurred, the expense category, and the room or flat associated with your monetary outflow. You can always attach your receipts using the Link column.

Airbnb template for multi-currency accounting management
Airbnb template for multi-currency accounting managementThis template is useful for comprehensive and efficient accounting management for Airbnb hosts who need a system that supports double-entry bookkeeping and handles multiple currencies. Banana Accounting Plus provides a wide range of features to track the income and expenses of your short-term rental business.
Banana Accounting Plus is an advanced accounting software that is superior to Excel, yet it is simpler and more cutting-edge, catering to the common needs of Airbnb hosts. The accounting template has been specifically designed to offer a comprehensive and customizable solution for the financial management of your Airbnb properties. It allows you to track expenses, record income, monitor cash flow and much more.
The key features of this accounting template for Airbnb include:
- Asset Management: this template encompasses all the features of the free template for Airbnb, Booking.com, Vrbo and similar hosting platforms and provides an advanced solution for those with greater needs. It allows you to manage unlimited assets compared to the free template.
- Double-Entry Bookkeeping: the template adheres to the fundamental accounting principle of double-entry bookkeeping, ensuring the accuracy and correctness of your financial records.
- Multi-Currency Management: if you manage Airbnb properties using different currencies, Banana Accounting enables you to record and track income and expenses in different currencies, simplifying international financial management.
- Advanced Reporting: the software offers the ability to generate detailed reports on your finances, including profit and loss statements, account statements, balance sheets and detailed budgets. These reports provide you with a comprehensive overview of the performance of your Airbnb properties.
- User-Friendly: the software is designed to be user-friendly, even for those new to double-entry bookkeeping or without extensive accounting experience. The accounting template is intuitive, and the extensive available online documentation guides you step-by-step in managing your finances.
Banana Accounting Plus is intuitive, easy to use and simplifies your accounting management for Airbnb.
Example of a multi-currency income transaction for hosts
Here's how to use the multi-currency feature of Banana Accounting Plus:
- Set the desired currency exchange rate through the Exchange Rates table.
- Perform the accounting entry by entering date, description, bank of the currency received, income account, amount in the currency received and specify the currency received. Banana Accounting Plus will automatically calculate the amount in the main currency used for managing your Airbnb accounting.

Image of the Exchange Rates table

Image of the Transactions table where to record the income received from Airbnb or similar platform.
Accounting templates with crypto currencies
Accounting with crypto currencies Bitcoin (cash)
Accounting with crypto currencies Bitcoin (cash) tizianaIncome & Expense Accounting with crypto currencies Bitcoin
Income & Expense Accounting with crypto currencies Bitcoin tizianaDouble-Entry Accounting with crypto currencies Bitcoin
Double-Entry Accounting with crypto currencies Bitcoin tizianaDouble-Entry Accounting for digital currencies Bitcoin and Ethereum (Base Currency ETH)
Double-Entry Accounting for digital currencies Bitcoin and Ethereum (Base Currency ETH) tizianaDouble-Entry Accounting for digital currencies Bitcoin and Ethereum (Base currency USD)
Double-Entry Accounting for digital currencies Bitcoin and Ethereum (Base currency USD) tizianaEssential Expense Manager PDF report with embedded receipts
Essential Expense Manager PDF report with embedded receiptsImproving how employee expenses are managed is crucial for all businesses.
Whether employees are traveling for work or working from home, keeping track of their expenses and making sure they get reimbursed correctly has become a complex task.
Banana Accounting expense manager functionality to create a PDF dossier is essential and cost-effective for the majority of small and medium-sized businesses. It helps track expenses, improves transparency and makes it smoother for employees to interact with the company's accounting department.
All in one PDF report with embedded receipts
Banana Accounting create a PDF report with embedded receipts. The PDF file includes everything is necessary for reporting, approval and reimbursement.
- The list of expenses with all information necessary and the link to receipt.
- The report of the categorized expenses, for accounting purposes.
- The scanned receipt's files.
PDF file can embed other files. If you don't know just open this example PDF file and click on the link (look the link icons on the left in the image below), so that the receipt document will directly open (some browser don't show the files, better use Adobe Acrobat Reader that is free to use).
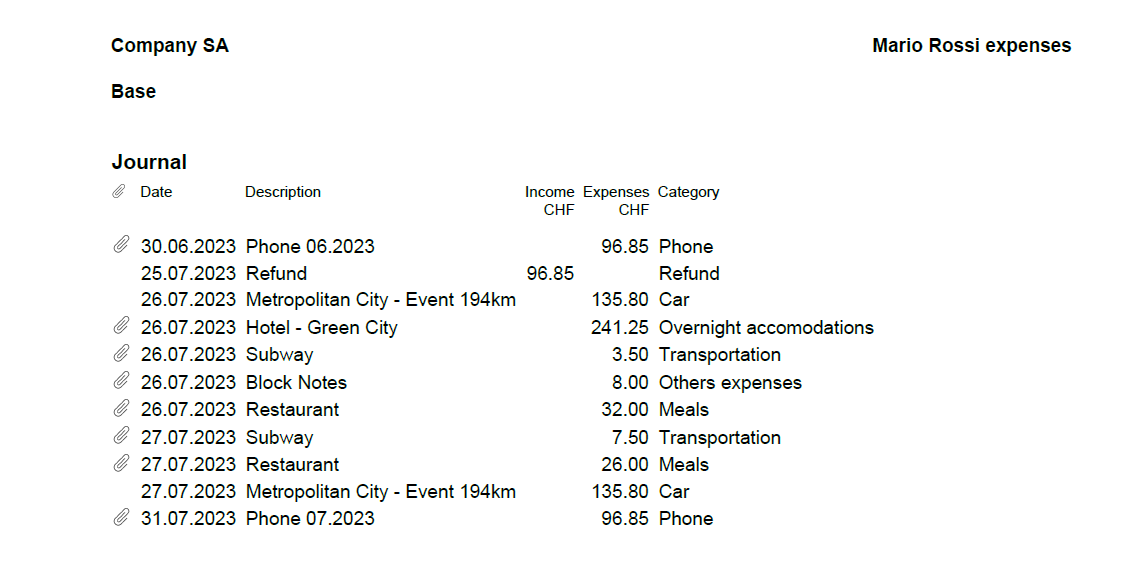
Totally free for up to 70 expense entries
The Banana Accounting template is designed to benefit companies of all sizes. The expense manager template is a software entirely free for up to 70 expense entries, making it a very accessible solution.
How to start
Using this Banana Accounting functionality allows you to obtain your PDF dossier with expenses categorized and embedded in a simple and immediate way:
- Install Banana Accounting
- Open the template file and save to a directory, where you also scan your documents.
- Scan your receipts or invoices (Banana Accounting does not perform the scanning).
- Enter the incurred expenses in the Transaction table and add a Link to the scanned receipt file.
- With File menu > Create Pdf Dossier create the PDF report (check the Include attachments).
- Transmit the file for reimbursement.
Now you'll be ready to send your PDF dossier by email to the accounting department, for approval and reimbursement.
This workflow is essential and cost-effective for the majority of small and medium-sized businesses.
Add the payment methods used by employees
If you wish, you can manage the payment methods used for expenses through the CC3 column.
To enable it, double-click on the column headers in the Transactions table. In the window that opens, on the left, enable the display of the Cc3 column and confirm with the Ok button.
Manage the different payment methods from the Categories table by adding the accounting accounts with a semicolon in front. You can add as many payment methods as you prefer.
Add the quantity columns to manage travel kilometers
To manage travel expenses based on the distance traveled, it could be useful to enable the display of columns related to quantities.
To enable them, double-click on the column headers in the Transactions table. In the window that opens, on the left, enable the display of the columns Quantity, ReferenceUnit, UnitPrice, and confirm with the Ok button.
Remember to enter Unit Price in the Transactions table with a negative sign.
Additional features of the Essential Expense Manager
Easy Expense Logging: the core of this tool is a user-friendly interface. Employees can quickly record their expenses by entering the date, category, amount and payment method. This reduces mistakes and ensures accurate data entry.
Digital Receipts: instead of using paper receipts, the software lets employees attach digital copies of receipts. This prevents losing receipts and keeps expense records secure.
Detailed PDF Reports: the software is great at creating comprehensive expense reports. These reports include all embedded receipts in a single PDF file, which can be easily shared with accountants through email. The reports break down expenses, categories and receipts, promoting transparency.
Customizable Categories: the software lets administrators customize expense categories to fit the company's needs. This ensures that expenses are organized in a way that matches the company's reporting and analysis requirements.
Easy Access: the expense manager can be shared through email, which is helpful for remote employees or those who often travel for work.
Data Privacy: it's important to note that the data entered into Banana Accounting is not used for commercial purposes. Your information remains confidential, offline and is not repurposed in any way.
WooCommerce Products Export-Import [BETA]
WooCommerce Products Export-Import [BETA]WooCommerce extension description
This extension for importing and exporting products sold on WooCommerce online shop simplifies and optimizes the integration between your online store and Banana Accounting software.
The extension either allows the export of products already listed in your inventory from Banana Accounting to your WooCommerce online store, or may become an intuitive and efficient solution to easily allow you to import products directly from your online store into Banana Accounting.
Banana Accounting is superior to Excel, allowing you to swiftly edit product details at any time and it guarantees that the information remains aligned to your online store on WooCommerce.
The Banana Accounting extension offers you the opportunity to export product data already present in your Banana Accounting inventory in a format already prepared for import into WooCommerce. This streamlines the input and/or management of products in your online store, enabling you to maintain coherence and consistency between the two platforms and to begin selling online more seamlessly.
As it is crucial to manage product information accurately and effortlessly in your online store and inventory, this extension allows you to do so in a simple and secure manner. With the export file obtained from the WooCommerce platform, you can easily create your inventory in Banana Accounting or update existing products directly in Banana Accounting to align them with those present on your online store.
Both functions eliminate the need for lengthy and complex manual procedures and reduce the risk of transcription errors, ensuring data accuracy and efficiency.
This solution is suitable for those who want to manage the inventory in a simple way, exporting or importing to WooCommerce whenever they desire. It is not suitable for those looking for a cloud solution that automatically synchronizes warehouse management with WooCommerce.
Banana Accounting key features
Easy: the Banana Accounting software is easy to use and every file can be shared through email, which is helpful for a easy support too.
Privacy: it's important to note that the data entered into Banana Accounting is not used for commercial purposes. Your information remains confidential, offline and is not repurposed in any way.
Beta version
This extension is published in BETA version. We recommend creating a backup copy of the inventory file. Having regular file backups is always useful in any context. This WooCommerce extension require a subscription to Banana Accounting Plus Advanced version.
Primary Key Used
The Id column from Banana's Items table will be exported and used as the primary key for import and it must contain the product's SKU reference of WooCommerce online shop.
Those who already have a warehouse in Banana Accounting can replace the codes in the Id column using the Rename function from Banana's Data menu. This function will automatically replace the Id value even in the Transactions table.
Create/Update products from WooCommerce
The Create/Update products from WooCommerce function will create the products exported from WooCommerce (CSV file format) in the Items table of the inventory in Banana Accounting if they do not exist. If products with the same Id value already exist, it will update the values in the Description, Quantity begin and Unit Price columns in the Items table with the information present in the exported file from WooCommerce.
Export products for WooCommerce
The Export products for WooCommerce function will export data from the Id, Description, Quantity balance and Unit Price columns in the Items table into a CSV file format, ready to be imported into WooCommerce.
Associations à but non lucratif et ONG (universel)
Modèles universels Noprofit
Free Excel Standard INPAS Template
[This page is currently being updated]
INPAS key accounting documents
This page is dedicated to the chart of accounts template that conforms to the INPAS standard. The INPAS standard is designed to improve the transparency and accuracy of nonprofit associations' financial statements. It is also possible to download a complete Excel template that facilitates the compilation of all the documents required to comply with the standard.
The chart of accounts has been designed and interpreted based on the INPAS drafts and may require adjustments once the final guidance is published in 2025.
The compliance of the accounting with the INPAS standard always depends on the accountant and the auditor working on the accounts.
Updates may be possible following the final publication of INPAS in 2025.
Statement of Financial Position
The balance sheet is an essential document that provides a detailed view of your organization's financial health, clearly showing assets, liabilities and net worth. Because of the flexibility of the INPAS standard, you can present the financial statements either vertically or horizontally, tailoring them to the specific needs of your nonprofit.
This document can be generated easily using Banana Accounting+ template.
Statement of Income and Expenses
This document shows your organization's income and expenses during a period. Proper management of the income statement is crucial to demonstrate how resources were used to achieve missionary goals.
This document can be generated easily using Banana Accounting+ template.
Statement of Changes in Net Assets
This document is critical to understanding the changes that have occurred in net assets during the fiscal year. The INPAS standard provides a sequence of elements that transparently reflects the changes, making clear the impact of financial activities on the organization's assets.
Statement of Cash Flows
The cash flow statement, which shows cash flows, is essential for monitoring your organization's liquidity and ability to fund its activities. With our INPAS template, you can present this information in a clear and accessible way, improving transparency to donors and board members.
Explanatory notes
Explanatory notes offer crucial details to fully understand the numbers presented in other accounting documents. They provide a clear description of adopted accounting policies and significant changes, contributing to a deeper and more accurate analysis of the institution's financial position.
Excel template to download
To facilitate the accounting management of associations, a complete Excel template can be downloaded to provide all the necessary documents according to the INPAS standard. In fact, this versatile and easy-to-use tool also allows you to create the Statement of Changes in Net Assets, Statement of Cash flows and Explanatory notes, completing the documentation with the Balance Sheet and Statement of Income and Expenses you can easily obtaine through Banana Accounting+.
Download the INPAS Excel Template
Statement of Financial Position
This document can be generated easily using Banana Accounting+ template. Here is what the statement of financial position must contain.
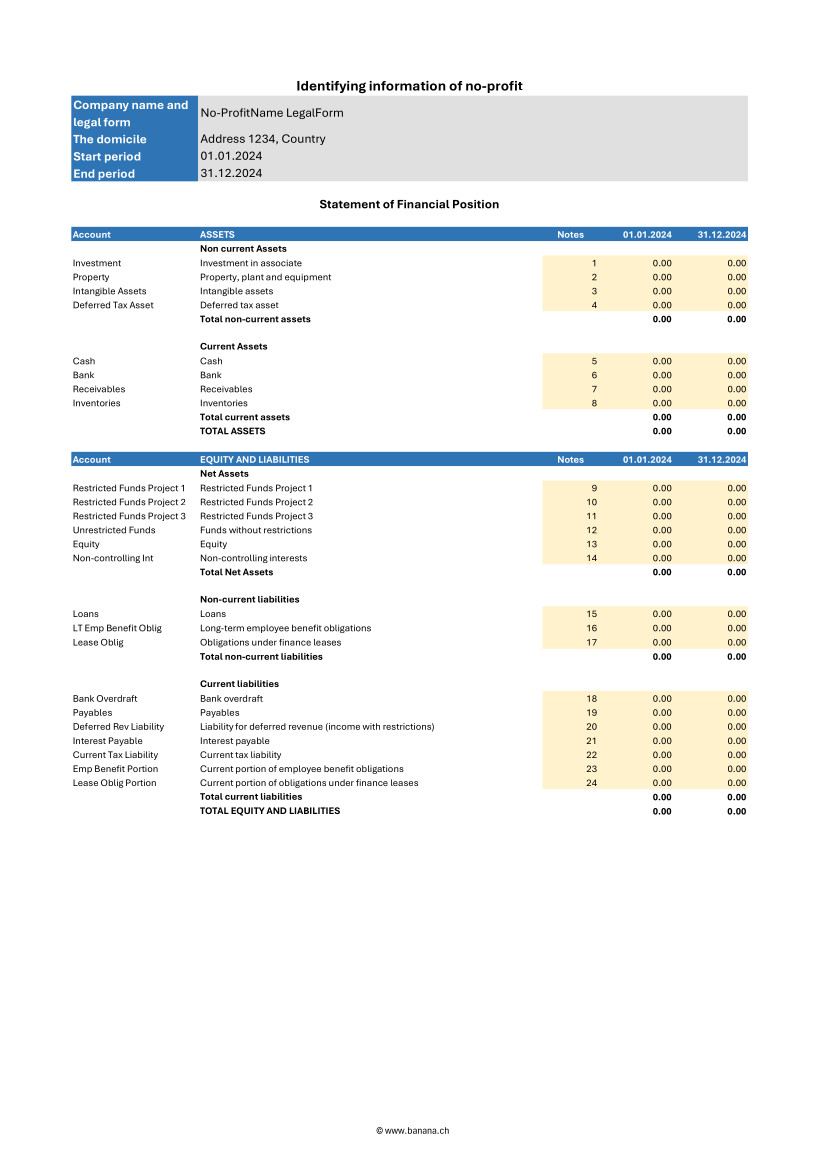
Current and non-current assets
Assets should be distinguished into current and non-current. Current assets are those that are expected to be converted to cash or used within one year. They include accounts such as cash and cash equivalents, short-term receivables, and inventories. Non-current assets, on the other hand, are those that are expected to be held for periods longer than one year and may include tangible assets, intangible assets, and long-term investments.
Current and non-current liabilities
Liabilities must also be classified into current and noncurrent. Current liabilities are payables and obligations that are expected to be settled within one year, such as accounts payable, accrued expenses, and other short-term liabilities. Non-current liabilities represent long-term commitments that the organization does not expect to settle within the next year, such as long-term debts and mortgages.
Shareholders' Net Assets
Net Assets represents the difference between the organization's total assets and total liabilities. In financial statements according to the INPAS standard, net assets should be divided into three main categories:
- Unrestricted funds: resources available for general use and not subject to specific restrictions. These funds may be used at the discretion of the organization to fund any activity or operational need.
- Restricted funds:
- Temporarily restricted funds: resources subject to restrictions imposed by donors or temporary conditions. These funds may be used only for specific purposes and for a specified period, after which, if conditions are met, they may be reclassified as unrestricted funds.
- Permanently restricted funds: resources that must be kept intact indefinitely, often to ensure a continuous source of income for the organization. These funds are typically associated with permanently restricted donations.
Statement of Income and Expenses
This document can be generated easily using Banana Accounting+ template. Here is what the statement of activities must contain.
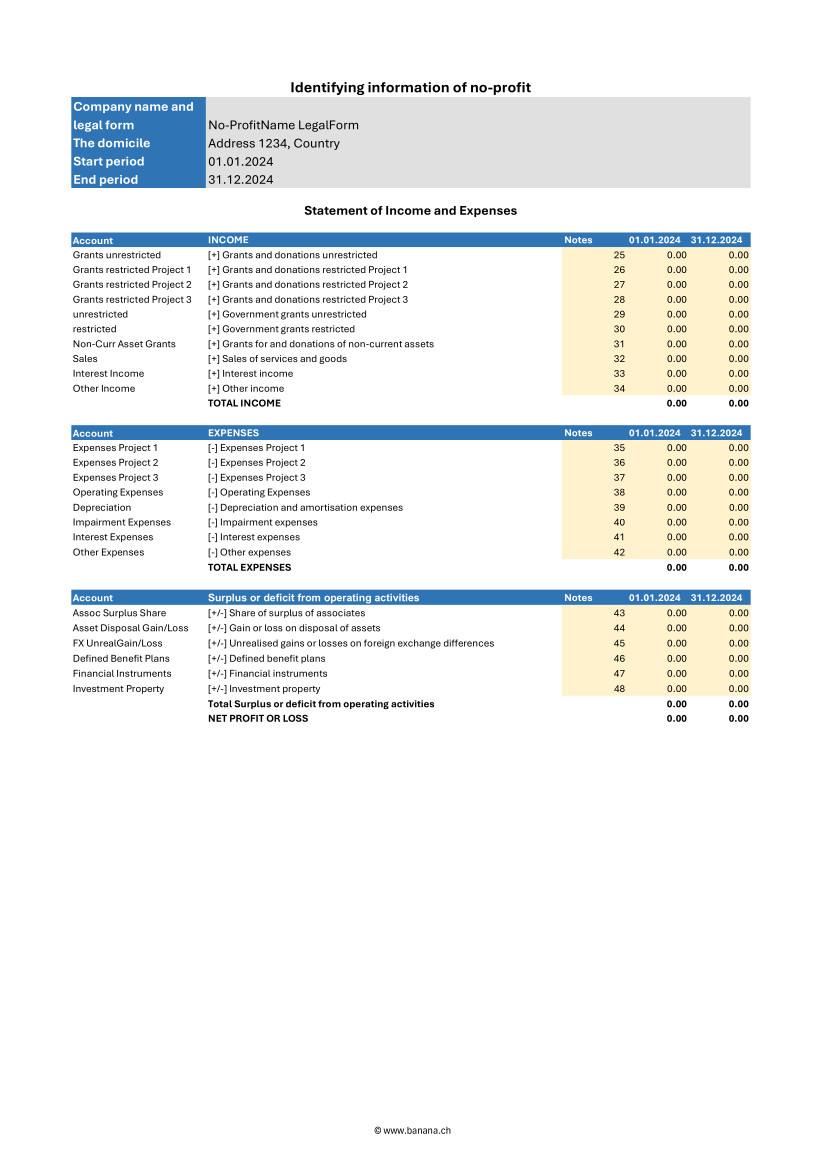
Revenue
Income should be divided between restricted and unrestricted to reflect donor or regulatory restrictions. This distinction is crucial to understanding the organization's flexibility in the use of funds received.
- Restricted income: funds earmarked for specific purposes, such as particular projects or specific periods. These funds may come from donations, grants, or funding with donor-imposed conditions limiting their use.
- Unrestricted income: funds that can be used at the discretion of the organization for any operational need. These include general donations, proceeds from nonspecific fundraising events, and other income that has no special restrictions.
Expenses
Expenses should be broken down into major categories to give a clear view of how resources are allocated. This breakdown helps to better understand the organization's priorities and efficiency in managing funds.
- Programmatic expenses: costs directly associated with the implementation of the organization's core programs and activities. These include salaries of operational staff, costs of materials and equipment used in projects, and other expenses directly related to the organization's missions.
- Fundraising expenses: costs incurred for fundraising activities, including events, marketing campaigns, and salaries of dedicated fundraising staff. This category highlights the investment made to secure future financial resources.
- Administrative expenses: general costs of running and administering the organization. These include administrative staff salaries, office rent, consulting fees, and other overhead costs necessary for the day-to-day operation of the organization.
Changes in shareholders' Net Assets
The income and expenses statement should report changes in net worth during the reporting period, broken down by fund category:
- Unrestricted funds: changes resulting from the use or appropriation of unrestricted revenues and non-programmatic expenditures.
- Restricted funds:
- Temporarily restricted funds: changes due to the use of restricted funds according to donor-imposed conditions and their eventual transfer to unrestricted funds once conditions are met.
- Permanently restricted funds: changes related to new permanently restricted gifts or changes in the investment policies of permanent assets.
Statement of Changes in Net Assets
Here is what the statement of changes in net assets must contain.
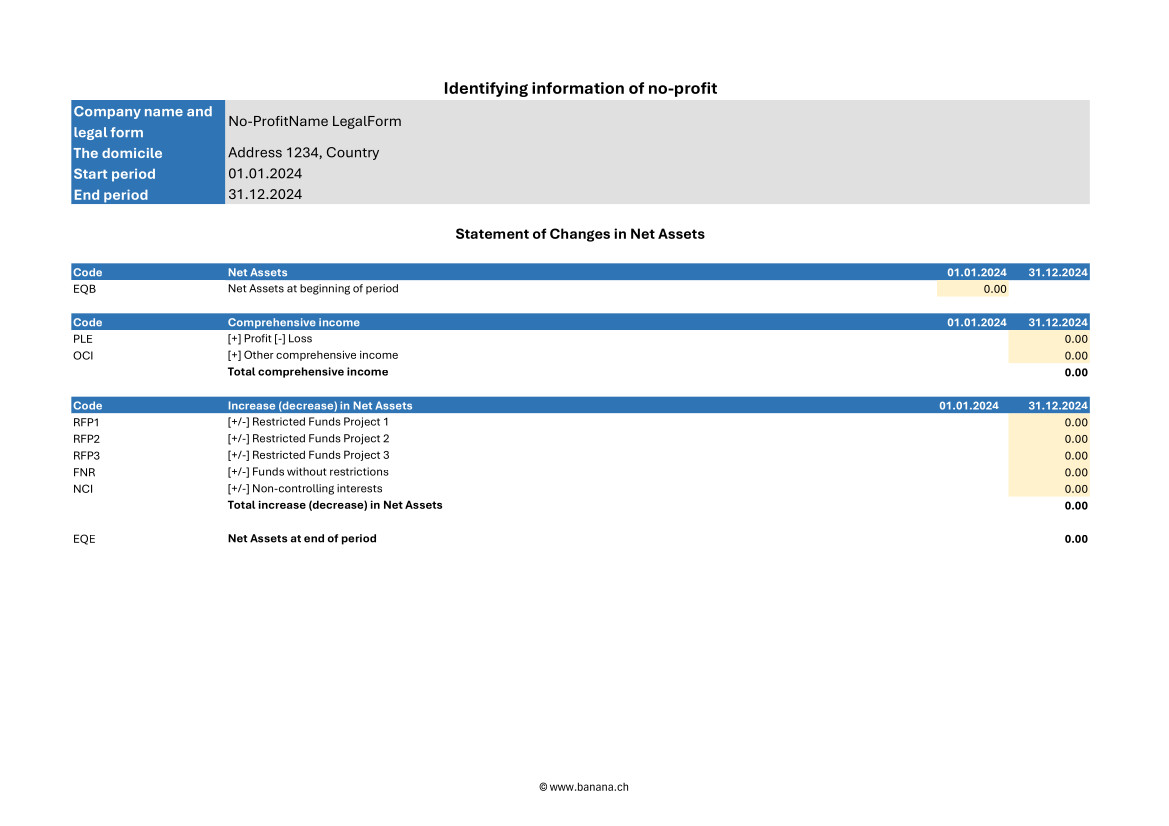
Changes in shareholders' Net Assets by period
The statement should report all changes in net assets broken down by period, clearly showing increases and decreases in the various funds.
- Increases in net assets: these may result from new donations, contributions, grants received, or other sources of income. Each increase should be specified in terms of restricted and unrestricted funds to highlight restrictions on the use of funds.
- Decreases in net assets: decreases may result from the use of funds to cover programmatic, fundraising, and administrative expenses. Again, it is important to specify whether the decreases involve restricted or unrestricted funds.
Details on contributions, donations and other sources of funding
The statement should include a detailed description of all funding sources received during the period, broken down by type and restriction.
- Contributions and donations: specify donations received, indicating whether they are restricted or unrestricted, and describe any conditions or restrictions imposed by donors.
- Grants and funding: detail grants obtained, including conditions of use and periods of application.
- Other income: include any other sources of funding, such as income from fundraising activities, investment income, or income from ancillary activities, detailing any applicable restrictions.
Use of funds under restrictions
The statement should clearly show how funds have been used according to donor or regulatory restrictions, ensuring transparency and compliance.
- Restricted funds:
- Temporarily restricted funds: describe how these funds were used for specific projects or programs, and whether any restrictions were met, allowing the funds to be reclassified as unrestricted.
- Permanently restricted funds: highlight the use of income generated by these funds to support the organization's activities, keeping the principal capital intact according to the conditions set by the donors.
- Unrestricted funds: indicate how these funds have been allocated for general operating expenses and other needs without specific restrictions.
Mandatory elements of the statement of changes in Net Assets
- Beginning balances
- The beginning balances of each component of net assets at the beginning of the accounting period must be reported.
- Example: share capital, reserves, retained earnings.
- Changes for each component
- Detail all changes for each component of net assets during the accounting period.
- These changes may include:
- Profits or losses for the year.
- Increases in capital stock.
- Reductions in capital stock.
- Dividend distributions (if applicable).
- Contributions and distributions from owners
- If applicable, indicate contributions made by owners and distributions made to owners.
- Reserves
- Any changes in reserves, such as legal reserves, extraordinary reserves, revaluation reserves, etc.
- Ending balance
- Report the ending balances of each component of net assets at the end of the accounting period.
Steps to implement the statement of changes in Net Assets
- Identification of the components of shareholders' Net Assets
- Determine all components of net assets that should be reported in the statement, such as share capital, reserves, and retained earnings.
- Collection of initial data
- Collect the beginning balances of all components of net assets from the last closed financial statements.
- Recording of changes
- Record all changes that have occurred during the accounting period, such as capital increases, recorded gains or losses, dividend distributions, and other changes in reserves.
- Calculating ending balances
- Calculate the ending balances of each component of net assets taking into account the changes recorded.
- Preparation of schedule
- Compile the statement of changes in net worth with all the information collected, making sure that the totals are correct and that all changes are adequately explained.
Statement of changes in funds
The Statement of Changes in Funds is a crucial accounting document that illustrates the changes in an organization's funds during an accounting period. According to the INPAG standard, the Statement of Changes in Funds must include a detailed set of information to ensure transparency and accuracy in reporting.
Here are the required elements of the statement of changes in funds.
- Initial balances of funds
- The initial balances of each fund at the beginning of the accounting period must be reported.
- Revenue by fund
- Detail the income received for each fund during the accounting period.
- Expenditures by fund
- Detail the expenditures made for each fund during the accounting period.
- Transfers between funds
- Information on any transfers of resources between different funds.
- Ending fund balances
- Indication of the ending balance of each fund at the end of the accounting period.
- Variations in funds with restrictions
- Specific details on changes in time-restricted or donor-restricted funds.
Statement of Cash Flows
Here is what the cash flow statement must contain.
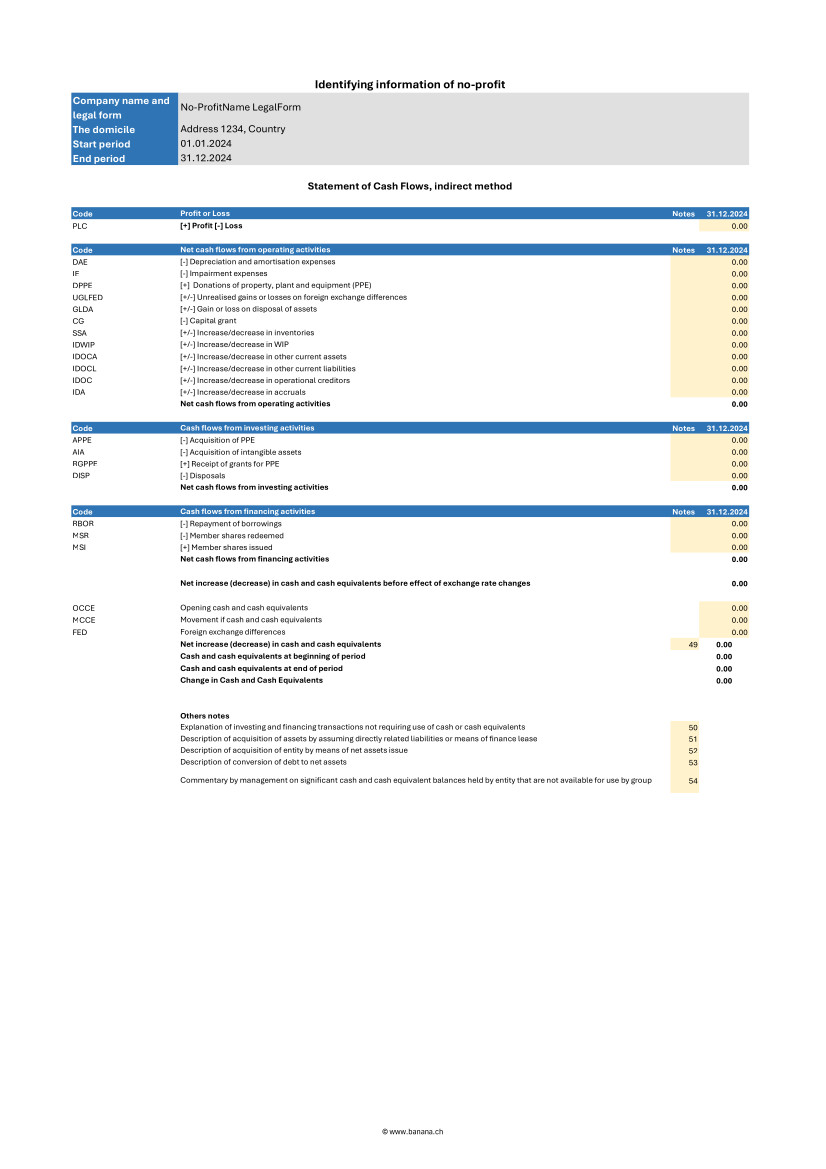
Cash flows from operating activities
This section reports cash flows generated or used by the daily operations of the organization. It must include:
- Income from donations and grants: cash flows from donations, grants, and other funding sources not specifically tied to investments or financing.
- Payments for operating expenses: cash flows used to cover programmatic, fundraising, and administrative expenses, including salaries, supplies, and other operating costs.
- Receivables collections and payables payments: cash flows associated with the management of short-term receivables and payables.
Cash flows from investing activities
This section covers cash flows related to the purchase and sale of long-term assets and other investments. It must include:
- Purchases of fixed assets: cash flows used to purchase tangible fixed assets, such as buildings, equipment, and intangible fixed assets.
- Income from sales of fixed assets: cash flows generated from the sale of long-term assets.
- Financial investments: cash flows related to acquisitions or disposals of financial investments, such as securities and other investment instruments.
Cash flows from financing activities
This section reports cash flows associated with the organization's financing activities, including changes in restricted and unrestricted funds. It must include:
- Receipts from long-term restricted loans and donations: cash flows from donations and loans restricted specifically for long-term purposes.
- Repayment of long-term debts: cash flows used to repay long-term debts and obligations.
- Interest payments and other financing costs: cash flows related to interest payments and other financing-related costs.
Reconciliation of net income to net cash flow from operating activities
This section is critical to linking net income with actual cash flows from operations. It must include:
- Net income: the net economic result of the organization for the period.
- Adjustments for nonmonetary items: for example, depreciation and amortization.
- Changes in financial statement balances: changes in accounts receivable, accounts payable, inventories and other operating items.
- Extraordinary items: any extraordinary non-recurring cash inflows or outflows.
Explanatory notes
Explanatory notes should include detailed information regarding the accounting policies adopted, explanations of major items in the financial statements, and details of material subsequent events that could affect the understanding of the financial statements.
Here is what the explanatory notes must contain.
Information on accounting policies adopted
The notes to the financial statements should provide a detailed description of the accounting policies followed by the organization. This information helps users of financial statements understand the principles on which the figures reported are based.
- Principles of recognition and measurement: description of the criteria used to recognize and measure assets, liabilities, income, and expenses.
- Depreciation methods: explanation of the methods used to depreciate tangible and intangible assets.
- Valuation policies: information on valuation policies for inventories, receivables, and liabilities.
- Revenue recognition: criteria adopted for revenue recognition, including restricted and unrestricted donations.
Additional details on items in the balance sheet and income statement
Explanatory notes should provide additional details that help to better understand the items presented in the balance sheet and income statement.
- Analysis of principal items: detailed explanation of major items of assets, liabilities, income, and expenses. For example, a breakdown of fixed assets, long-term debt, and major revenue categories.
- Significant transactions: description of significant transactions that occurred during the period, such as acquisitions, sales of fixed assets, or extraordinary events.
- Significant changes: explanation of significant changes from previous periods, providing a context for understanding changes in financial data.
Information on possible risks and uncertainties
Explanatory notes should include information on any risks and uncertainties that could affect the organization. This information helps assess the financial strength and risk management of the institution.
- Financial risks: description of key financial risks, such as credit risk, liquidity risk, and market risk, and the policies adopted to manage them.
- Contingencies and contingent liabilities: information on legal contingencies, contingent liabilities, or other uncertain events that could have a significant financial impact.
- Risk management: details of the risk management strategies and policies implemented by the organization to mitigate the effects of such risks.
Segment reporting if applicable
If the organization operates in different industries or geographic areas, the explanatory notes should include segment reporting information to provide a more detailed view of financial and operational performance.
- Information by segment: details on revenues, expenses, assets, and liabilities for each operating or geographic segment.
- Aggregation criteria: explanation of the criteria used to aggregate data for different segments.
- Performance by segment: analysis of the financial and operational performance of each segment, highlighting differences and relative contributions to the overall performance of the organization.
Accrual accounting requirement
The INPAG standard requires that all transactions be recorded on an accrual basis. This means that transactions must be recognized in the period in which they occur, regardless of actual cash flows. Adopting accrual accounting provides a more accurate and realistic view of an organization's financial position and performance, improving the transparency and reliability of financial information.
Examples for Income from donations
When a donation is promised but has not yet been received insert:
- in Debtor Account column the account Debtors from donations.
- in Creditor Account column the account Income from donations.
- in the Amount column the promised amount.
This record recognizes the income as a debt, reflecting the promise of the donation, even though the money has not yet been received.
When the donation is actually received insert:
- in the Debtor Account column the account Bank.
- in the Creditor Account column the account Donation debtor.
- in the Amount column the received amount.
This recording adjusts the accounts once the money is actually received, eliminating the previously recorded debt.
Examples for project expenses
When an invoice for project services is received but not yet paid insert:
- in the Debtor Account column the account Project expenses.
- in the Creditor Account column the account Creditors.
- in the Amount column the invoice total amount.
This entry recognizes the expense when the invoice is received, regardless of whether it has been paid or not.
When the invoice is actually paid insert:
- in the Debtor Account column the account Creditors.
- in the Creditor Account column the account Bank.
- in the Amount column the paid invoice total amount.
This entry reduces creditors once the invoice has been paid, reflecting actual cash flow.
Benefits of accrual accounting
Adopting accrual accounting, as required by the INPAG standard, ensures that revenues and expenses are recorded in the correct period. This approach provides a more accurate view of the organization's financial activities, facilitating better resource management and more accurate planning. Nonprofit organizations that follow these accounting practices can demonstrate greater transparency and accountability, increasing the trust of donors, board members and other stakeholders.
Accounting for restricted grants and donations
INPAG requires that funds be distinguished between restricted and unrestricted funds. This distinction should be visible in the financial statements or notes.
Accounting for grant and donation income according to the INPAG standard requires a specific structure to ensure proper recording and recognition. The accounting process includes the following steps:
- Identify whether there is an enforceable agreement that confers rights and obligations.
- Identify the enforceable obligations in the agreement.
- Determine the amount of the transaction.
- Allocate the transaction amount to the enforceable obligations.
- Recognize the revenue when (or while) the enforceable obligation is satisfied.
- These steps ensure that revenue is recognized appropriately, accurately reflecting the economic activity of the organization.
Example of accounting transactions for restricted donations
Receipt of a grant for a specific project with implementing obligations.
When you receive the amount insert:
- in the Debtor Account column the account Cash/Bank or Donation debtor if the donation was promised.
- in the Creditor Account column the account Liabilities for grants.
- in the Amount column the amount received.
At this stage the amount received is recorded as a liability because the organization has an obligation to meet the conditions of the grant.
When you fulfill the executive obligation insert:
- in the Debtor Account column the account Expense1.
- in the Creditor Account column the account Bank.
- in the Amount column the paid amount.
The second transaction must be insert:
- in the Debtor Account column the account Liabilities from grants.
- in the Creditor Account column the account Income from grants.
- in the Amount column the paid amount.
Once the enforceable obligation is fulfilled, the liability is reduced and the amount is recognized as revenue, reflecting the completion of the project or condition fulfilled.
Accounting for unrestricted donations
Unrestricted donations, which do not impose specific obligations on the organization, follow a simpler accounting process than donations with enforceable obligations. These receipts can be recognized immediately upon receipt.
Example of an unrestricted donation
When you receive the amount insert:
- in the Debtor Account column the account Cash/Bank or Donation debtor if the donation was promised.
- in the Creditor Account column the account Income from donations.
- in the Amount column the received amount.
In this case the amount is immediately recognized as income since there are no specific obligations to be met.
Foreign currency conversion
Managing foreign currency transactions is an essential part of accounting, especially for nonprofit organizations that receive international grants and donations. The INPAS standard establishes precise rules for managing these transactions, including disclosure of foreign exchange gains and losses and retranslation of foreign currency monetary assets and liabilities related to grant agreements.
Foreign currency transactions must be translated into the functional currency using the exchange rate in effect on the date of the transaction. Monetary items, such as debtors and creditors, must be retranslated at the balance sheet date to reflect current exchange rates.
Example of transactions for foreign currency conversion
Receipt of 10'000$ grant when the exchange rate is 1$ = 0.90€.
Initial acknowledgement:
- in the Debtor Account column the account Cash/Bank.
- in the Creditor Account column the account Liabilities for grants.
- in the Amount column the amount 9'000€ (10'000$ * 0.90€ = 9'000€).
In this case the grant is recorded in euros at the exchange rate in effect at the time of the transaction.
Retranslation on the balance sheet date with the exchange rate 1$ = 0.85€.
- in the Debtor Account column the account Loss on exchange.
- in the Creditor Account column the account Cash/Bank.
- in the Amount column the lost amount 500€.
At the balance sheet date the grant must be retranslated at the new exchange rate. The difference between the initial value and the retranslated value is recorded as an exchange loss.
Treatment of exchange rate changes on grants
Exchange rate differences on monetary items related to grants should be treated in a manner consistent with the nature of the transaction. For example, if a grant received is to be spent on a specific project and the exchange rate varies, the amount to be reimbursed could differ due to exchange rate fluctuations.
For example a grant received of 10'000$ must be spent on a specific project. If the exchange rate varies and the grant must be partially repaid due to exchange rate differences.
No INPAS adoption for certain transactions
When an organization chooses not to apply INPAS standard for certain transactions, it is essential to provide a clear explanation and details of the accounting management adopted. The INPAS standard requires disclosure of the following information to maintain transparency and understandability in financial statements.
Mandatory disclosures in the case of no INPAS adoption
- Disclosure of transactions not compliant with INPAS
- The organization must specify which transactions do not follow INPAS standards.
- Example: “Donations in kind were not accounted for in accordance with INPAS standards.”
- Accounting treatment adopted
- The alternative accounting treatment used for these transactions must be described.
- Example: “In-kind donations were recorded at appraised value rather than market value according to INPAS guidelines.”
- Rationale for non adoption of INPAS
- It is necessary to explain the reasons why INPAS standards were not applied.
- Example: “Valuation of in-kind donations according to INPAS standards required specialized skills that the organization does not currently possess.”
- Impact on budgets
- It must be indicated how the financial statements would differ if INPAS requirements had been applied.
- Example: “If in-kind donations had been valued according to INPAS, the total value of income would have increased by €10,000.”
- Quantification of differences
- Where possible differences between the accounting treatment adopted and that provided by INPAS should be quantified, without excessive costs.
- Example: “Donations in kind were recorded at €5,000, while according to INPAS the correct value would have been €15,000, resulting in a difference of €10,000.”
References
- International Financial Reporting For Non Profit Organisations: www.ifr4npo.org
International Non-Profit Accounting Guidance - INPAS Standard Template
International Non-Profit Accounting Guidance - INPAS Standard Template[This page is currently being updated]
The INPAS International template for associations provides a comprehensive framework for organizing financial transactions and reporting for associations adhering to international standards.
This chart of accounts template is designed to streamline accounting processes, ensure consistency in financial reporting and facilitate compliance with regulatory requirements. With a user-friendly format and customizable accounts name, associations can efficiently track income, expenses, assets and liabilities, enabling clear and transparent financial management. Whether managing donations, membership dues or program expenditures, this template offers flexibility and adaptability to suit the unique needs of diverse associations while promoting transparency and accountability in financial operations.
The chart of accounts has been designed and interpreted based on the INPAS drafts and may require adjustments once the final guidance is published in 2025.
The compliance of the accounting with the INPAS standard always depends on the accountant and the auditor working on the accounts.
Updates may be possible following the final publication of INPAS in 2025.
Using Banana Accounting Plus you can manage the balance sheet and the income statement. All other documents are easily obtained thanks to the Excel template.
Create your file
- Create a new file, starting from this template (Template ID +11255), using one of the methods explained.
- With the command File → File properties, set the period, the association name and the basic currency.
- With the command File → Save as, save the file. Enter the association name and year in the file name.
For example "no-profit-2024.ac2".
See also Organize accounting files locally, online or in the cloud
Customize the Accounts table
Once you have entered the transactions, you can check the Accounts table. You will have an overview of your assets, liabilities, income and expenses, which allows you to keep your balance under control.
Customize the Accounts table to suit your needs: you can add, delete and edit accounts, groups or descriptions.
Enter Opening Balances
In the Opening column enter the opening balances of the Accounts. Negative asset account amounts are entered with a minus sign in front.
Enter the balances of the previous year
If you are creating a new accounting and you want the amounts of the previous year to appear in the statements to be printed, you must insert the values in the appropriate column. Go to the Previous view and in the Previous Year column enter the values.
Enter the Transactions
Register the accounting transactions in the journal. Enter the date, the document number and the description. Enter the destination account into the Debit account column, and the account of origin in the Credit account. Then add the amount.
You can modify the journal at any time.
Manage funds, grants and donations, project and operating expenses
Manage funds in the Balance Sheet divided by project.

Manage grants and donations in the Income Statement.
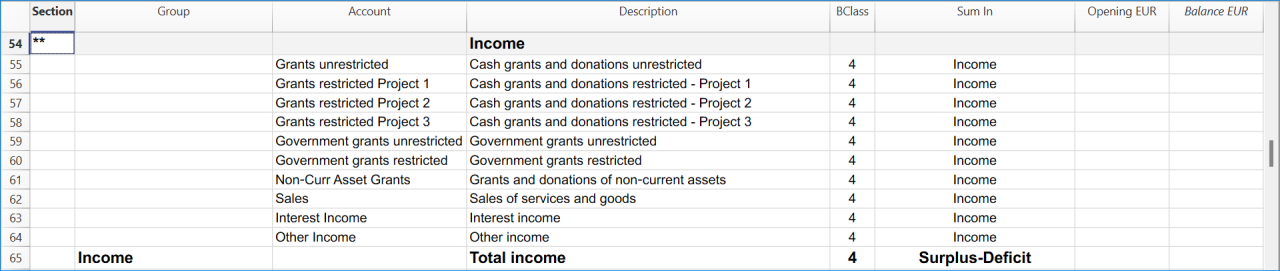
Manage projects expenses and operating expenses in the Income Statement.

Get the Statement of Financial Position and the Income Statement
At any time of the year you can create your Balance sheet, which is a financial report of your assets, liabilities and equity and the Profit and Loss statement, which includes income and expenses. You will achieve optimal reports because you can always modify the data until they are perfect. You have the possibility to print out your statements or save them in PDF format.
Complete the documentation using the Excel Template
When you get the balance sheet and the income statement, complete the Excel template to get all the documents needed to comply with the INPAG standard.
Income & Expenses: INPAS Standard Template
Income & Expenses: INPAS Standard Template[This page is currently being updated]
The chart of accounts has been designed and interpreted based on the INPAS drafts and may require adjustments once the final guidance is published in 2025.
The compliance of the accounting with the INPAS standard always depends on the accountant and the auditor working on the accounts.
Updates may be possible following the final publication of INPAS in 2025.
Free Excel Standard INPAS Template
Free Excel Standard INPAS Template timoComptabilité Cash Manager pour Associations
Comptabilité Cash Manager pour AssociationsCe modèle fournit un plan comptable simplifié avec des comptes descriptifs qui facilitent la saisie des données. Obtenez rapidement le Compte de Résultat, gérez les membres et les projets.
Pour des informations plus détaillées sur les solutions destinées aux associations, consultez la page Comptabilité pour les Associations.
Créer un nouveau fichier
- Créez un nouveau fichier à partir de ce modèle (Template ID +11138) en utilisant l'une des méthodes expliquées.
- Avec la commande Fichier → Propriétés fichier (Données de base), définissez la période, le nom de l'association et la devise de base (vous pouvez faire le budget et la comptabilité dans la devise de votre choix).
- Avec la commande Fichier → Enregistrer sous..., enregistrez le fichier. Il est utile d'indiquer dans le nom du fichier, le nom de famille et l'année. Par exemple "Association-xx-2022.ac2".
Voir aussi Organiser les fichiers et le cloud.
Enregistrer les écritures
Enregistrez les écritures de liquidité dans le journal. Saisissez la date, le numéro du document et la description. Indiquez ensuite le compte de destination, la catégorie et le montant.
Vous pouvez modifier le journal à tout moment.
Cliquez ici pour en savoir plus sur les écritures.

Vérifier et personnaliser le Tableau Comptes
Après avoir saisi les écritures, vous pouvez vérifier le Tableau Comptes. Vous aurez un aperçu de votre actif, de votre passif, de vos recettes et de vos dépenses; cela vous permettra de contrôler votre solde.

Compte de Résultat
À tout moment de l'année, vous pouvez créer compte de résultat, qui comprend les recettes et les dépenses. Vous pourrez obtenir des rapports optimaux grâce à la possibilité de modifier les données jusqu'à ce qu'elles soient parfaites. Vous avez la possibilité d'imprimer vos bilans ou de les enregistrer au format PDF

Comptabilité Dépenses et Recettes pour Associations
Comptabilité Dépenses et Recettes pour AssociationsCe modèle fournit un plan comptable simplifié avec des comptes descriptifs qui facilitent la saisie des données. Obtenez rapidement le Compte de Résultat, gérez les membres et les projets.
Pour des informations plus détaillées sur les solutions destinées aux associations, consultez la page Comptabilité pour les Associations.
Créer un nouveau fichier
- Créez un nouveau fichier à partir de ce modèle (Template ID +11137) en utilisant l'une des méthodes expliquées.
- Avec la commande Fichier → Propriétés fichier (Données de base), définissez la période, le nom de l'association et la devise de base (vous pouvez faire le budget et la comptabilité dans la devise de votre choix).
- Avec la commande Fichier → Enregistrer sous..., enregistrez le fichier. Il est utile d'indiquer dans le nom du fichier, le nom de famille et l'année. Par exemple "Association-xx-2022.ac2".
Voir aussi Organiser les fichiers et le cloud.
Enregistrer les écritures
Enregistrez les écritures de liquidité dans le journal. Saisissez la date, le numéro du document et la description. Indiquez ensuite le compte de destination, la catégorie et le montant.
Vous pouvez modifier le journal à tout moment.
Cliquez ici pour en savoir plus sur les écritures.

Vérifier et personnaliser le Tableau Comptes
Après avoir saisi les écritures, vous pouvez vérifier le Tableau Comptes. Vous aurez un aperçu de votre actif, de votre passif, de vos recettes et de vos dépenses; cela vous permettra de contrôler votre solde.

Compte de Résultat
À tout moment de l'année, vous pouvez créer compte de résultat, qui comprend les recettes et les dépenses. Vous pourrez obtenir des rapports optimaux grâce à la possibilité de modifier les données jusqu'à ce qu'elles soient parfaites. Vous avez la possibilité d'imprimer vos bilans ou de les enregistrer au format PDF.

Comptabilité en partie double pour Associations
Comptabilité en partie double pour AssociationsCe modèle fournit un plan comptable simplifié avec des comptes descriptifs qui facilitent la saisie des données. Obtenez rapidement le Compte de Résultat et le Bilan, gérez les membres et les projets.
Pour des informations plus détaillées sur les solutions destinées aux associations, consultez la page Comptabilité pour les Associations.
Créer un nouveau fichier
- Créez un nouveau fichier à partir de ce modèle (Template ID +11135) en utilisant l'une des méthodes expliquées.
- Avec la commande Fichier → Propriétés fichier (Données de base), définissez la période, le nom de l'association et la devise de base (vous pouvez faire le budget et la comptabilité dans la devise de votre choix).
- Avec la commande Fichier → Enregistrer sous..., enregistrez le fichier. Il est utile d'indiquer dans le nom du fichier, le nom de famille et l'année. Par exemple "Association-xx-2022.ac2".
Voir aussi Organiser les fichiers et le cloud.
Enregistrer les écritures
Enregistrez les écritures de liquidité dans le journal. Saisissez la date, le numéro du document et la description. Indiquez le compte de destination dans la colonne Compte de Débit, et le compte d'originedans la colonne Compte de Crédit. Ajoutez ensuite le montant.
Vous pouvez modifier le journal à tout moment.
Cliquez ici pour en savoir plus sur les écritures.

Vérifier et personnaliser le Tableau Comptes
Après avoir saisi les écritures, vous pouvez vérifier le Tableau Comptes. Vous aurez un aperçu de votre actif, de votre passif, de vos recettes et de vos dépenses; cela vous permettra de contrôler votre solde.

Saisir les soldes d'ouverture
Dans la colonne Ouverture, entrez les soldes d'ouverture des comptes. Les montants négatifs des comptes d'actifs sont saisis avec un signe moins devant.
Insérer les soldes de l'année précédente
Si vous commencez une nouvelle comptabilité, en reprenant une comptabilité existante, et que vous désiriez que sur les rapports imprimés figurent aussi les valeurs de l'année précédente, il faut insérer dans le tableau Comptes, Vue précédente, colonne Année précédente, les soldes finaux de l'année précédente.
Bilan et Compte de Résultat
À tout moment de l'année, vous pouvez créer votre bilan, qui est un rapport financier de vos actifs, passifs et capitaux propres, et le compte de résultat, qui comprend les recettes et les dépenses. Vous pourrez obtenir des rapports optimaux grâce à la possibilité de modifier les données jusqu'à ce qu'elles soient parfaites. Vous avez la possibilité d'imprimer vos bilans ou de les enregistrer au format PDF.


Comptabilité multidevises pour Associations
Comptabilité multidevises pour AssociationsCe modèle fournit un plan comptable simplifié avec des comptes descriptifs qui facilitent la saisie des données. Obtenez rapidement le Compte de Résultat et le Bilan, gérez les membres et les projets.
Pour des informations plus détaillées sur les solutions destinées aux associations, consultez la page Comptabilité pour les Associations.
Créer un nouveau fichier
- Créez un nouveau fichier à partir de ce modèle (Template ID +11136) en utilisant l'une des méthodes expliquées.
- Avec la commande Fichier → Propriétés fichier (Données de base), définissez la période, le nom de l'association et la devise de base (vous pouvez faire le budget et la comptabilité dans la devise de votre choix).
- Avec la commande Fichier → Enregistrer sous..., enregistrez le fichier. Il est utile d'indiquer dans le nom du fichier, le nom de famille et l'année. Par exemple "Association-xx-2022.ac2".
Voir aussi Organiser les fichiers et le cloud.
Enregistrer les écritures
Enregistrez les écritures de liquidité dans le journal. Saisissez la date, le numéro du document et la description. Indiquez le compte de destination dans la colonne Compte de Débit, et le compte d'origine dans la colonne Compte de Crédit. Ajoutez ensuite le montant et spécifiez la devise.
Vous pouvez modifier le journal à tout moment.
Cliquez ici pour en savoir plus sur les écritures.

Vérifier et personnaliser le Tableau Comptes
Après avoir saisi les écritures, vous pouvez vérifier le Tableau Comptes. Vous aurez un aperçu de votre actif, de votre passif, de vos recettes et de vos dépenses; cela vous permettra de contrôler votre solde.
Bilan et Compte de Résultat
À tout moment de l'année, vous pouvez créer votre Bilan, qui est un rapport financier de vos actifs, passifs et capitaux propres, et le Compte de Résultat, qui comprend les recettes et les dépenses. Vous pouvez également comparer votre situation actuelle avec le budget pour comprendre si et où vous dépensez excessivement d'argent.


非营利组织
非营利组织 fei非营利组织会计
非营利组织会计 feiModèles universels Organisations religieuses
Comptabilité Dépenses et Recettes pour Organisation religieuse
Comptabilité Dépenses et Recettes pour Organisation religieuse anneliesParoisses
ParoissesCe modèle se base sur la comptabilité Dépenses / Recettes et présente les comptes types pour gérer les dépenses et les recettes d'une Paroisse.
Dans le Tableau des Comptes se trouvent les comptes patrimoniaux, alors que dans le Tableau Catégories se trouvent les coûts et les gains
Les coûts et les gains sont sous-divisés en plusieurs sous-groupes et dans le Tableau Catégories il y a deux types de centres de coûts qui permettent de gérer séparément le dépenses de la paroisse et celle de l'Oratoire.
Les comptes et les catégories peuvent être personnalisés selon les propres exigences.
Comptabilité en partie double pour Organisation religieuse
Comptabilité en partie double pour Organisation religieuse anneliesComptabilité multidevise pour Organisation religieuse
Comptabilité multidevise pour Organisation religieuse annelies非营利协会或组织会计
非营利协会或组织会计 feiCertificat de don pour les Associations (Banana+)
Certificat de don pour les Associations (Banana+)Un certificat de don atteste d'un donation volontaire à une association. Normalement, toutes les associations impriment des attestations de dons pour leurs membres et bénévoles, car ceux-ci sont souvent déductibles des impôts.
L'extension présentée ci-dessous permet de créer un certificat de don pour les donateurs enregistrés dans Banana Comptabilité (tableau Comptes).
Il est indispensable que les membres/donateurs soient configurés avec des centres de coût, en utilisant le centre de coût CC3.
Conditions préalables
Pour utiliser cette extension, il faut
- Télécharger et installer Banana Comptabilité+ (version 10.1.7 ou suivante).
- Avoir le Plan Professionnel ou le Plan Advanced de Banana Comptabilité Plus.
Version bêta
L'extension est actuellement disponible en version bêta. Cela signifie que certains détails peuvent être modifiés sans préavis.
Installation et utilisation de l'extension
- Installez le Banana Comptabilité+.
- Installez l'extension Certificat de don pour Associations (Banana Plus). Visitez la documentation Gérer Extensions.
- Une fois installée, l'extension sera visible dans le menu Extensions où elle peut être exécutée.
Créer une attestation de don
- Saissisez les données de l'Association dans la section Adresse du fichier comptable.
- Dans le menu Extensions, sélectionnez l'extension Certificat de don pour Associations (Banana Plus).
- Introduisez la période dans la boîte de dialogue.
- Complétez les champs de la boîte de dialogue et cliquez sur OK.
Dialogue de configuration
Lancez l'extension à partir du menu Extensions > Certificat de don pour Associations (Banana Plus).
Après avoir sélectionné la période, le dialogue Paramètres de l'extension s'ouvre. A partir de là, vous pouvez définir les informations nécessaires pour créer l'impression de l'attestation de don.
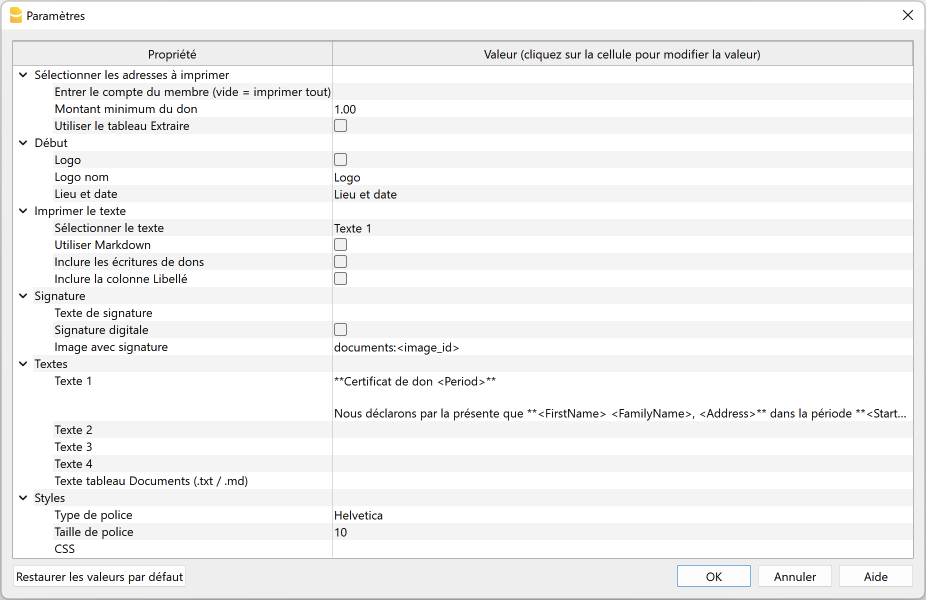
Pour la saisie des données, cliquez dans le champ de la colonne Valeur.
Les paramètres sont répartis dans les groupes suivants :
- Sélectionner les adresses à imprimer
- Définissez les comptes des membres pour lesquels l'attestation de don doit être créée.
- Début
- Définissez le logo pour l'en-tête, l'emplacement et la date.
- Imprimer le texte
- Définissez le texte à utiliser et décidez d'inclure ou non les écritures de dons.
- Signature
- Définissez le texte et l'image de la signature.
- Textes
- Définissez jusqu'à quatre textes différents ou prenez un texte dans le tableau Documents.
- Styles
- Définissez le type et la taille de la police pour les textes des lettres.
Les données saisies sont utilisées pour générer le rapport, que vous pouvez ensuite enregistrer et imprimer.
Sélectionner les adresses à imprimer
Ici, vous pouvez décider pour quels membres, définis avec les centres de coûts CC3, créer l'attestation de don.
- Saisir le compte du membre (vide = imprimer tout)
- Saisir un seul compte (par exemple "10001").
- Saisissez plusieurs comptes divisés par un "," (par exemple "10001,10002,10005").
- Si vous n'entrez rien, les certificats seront imprimés pour tous les membres inscrits.
- Montant minimum du don
- Les comptes dont le solde est inférieur au montant indiqué ne sont pas pris en compte. La valeur par défaut est '1.00' (par exemple, les comptes avec un solde nul sont exclus).
- Saisissez '0.00' pour inclure les comptes dont le solde est nul.
- Utiliser le tableau Extraire
- Utiliser les comptes extraits dans la table d'extraction.
- Vous devez d'abord utiliser la commande Données > Extraire et trier lignes pour extraire les lignes contenant les comptes que vous souhaitez utiliser.
Début
Vous définissez ici le logo pour l'en-tête, le lieu et la date.
- Logo
- Inclure un logo dans l'en-tête. Le logo est défini via la commande Fichier → Configuration logo
- Logo nom
- Entrez le nom de la personnalisation du logo à utiliser.
- Lieu et date
- Saisissez le lieu et la date.
Imprimer le texte
Vous pouvez ici choisir le texte à utiliser parmi ceux que vous avez saisis et décider d'inclure ou non les écritures de dons.
- Sélectionner le texte
- Sélectionnez le texte que vous souhaitez utiliser dans la liste.
- Pour la saisie du texte, voir ci-dessous.
- Utiliser Markdown
- Le texte sélectionné est interprété comme un texte Markdown (nécessite le plan Banana Comptabilité Plus Advanced).
- Inclure les écritures de dons
- En cochant la case, vous pouvez inclure un tableau récapitulatif avec les détails des dons tirés du tableau des Ecritures.
- Inclure la colonne Libellé
- Si vous avez préalablement activé l'option "Inclure les écritures de dons", il sera alors possible, en cochant cette option, d'inclure également la colonne de la description de l'écriture dans le certificat.
Signature
Vous définissez ici le texte et l'image pour la signature de l'attestation de don.
- Texte de signature
- Saissisez le nom et le prénom de la personne qui délivre l'attestation
- Signature digitale
- Utilisez une image comme signature.
- Image avec signature
- Entrez l'image à utiliser. Vous avez deux possibilités :
- documents:<nom_id>: pour utiliser une image enregistrée dans le Tableau Documents, où <nom_id> représente le nom saisi dans la colonne ID du tableau (par exemple "documents:signature").
- file:document/<image> : pour utiliser une image enregistrée en dehors de Banana, mais dans le même dossier que le fichier .ac2. Indiquer aussi l'extension de l'image .png ou .jpg (par exemple "file:document/signature.png").
- Entrez l'image à utiliser. Vous avez deux possibilités :
Textes
Vous définissez ici les textes de l'attestation de don. Vous pouvez saisir jusqu'à quatre textes différents ou prendre un texte dans le tableau Documents.
- Texte 1, Texte 2, Texte 3, Texte 4
- Saisissez le texte que vous souhaitez afficher dans l'impression. Le texte peut également figurer sur plusieurs lignes.
- Les textes peuvent être de type texte ou de type Markdown.
- Vous pouvez saisir jusqu'à quatre textes différents, puis choisir celui que vous souhaitez utiliser.
- Le champ Texte 1 contient le texte par défaut. Vous pouvez le modifier.
- Texte tableau Documents (.txt /.md)
- Pour utiliser les textes saisis dans le Tableau Documents.
- Saisissez l'identifiant (Id) du document (par exemple, "Letter.txt", "Letter", "Letter.md", etc.)
- Les textes peuvent être de type texte ou de type Markdown.
- Pour les textes de type Markdown, l' Id identifiant dans le tableau Documents doit se terminer par ".md" et le nom complet, y compris le ".md" final (par exemple "Lettre.md"), doit être saisi ici.
Styles
Vous définissez ici le type et la taille de la police pour les textes des lettres.
- Type de police
- Définissez le type de police.
- La police par défaut est "Helvetica".
- Taille de police :
- Définissez la taille de la police.
- La taille de police par défaut est '10'.
- CSS
- Facultatif.
- Vous pouvez modifier l'apparence de l'impression (formatage du texte, positionnement de l'adresse, etc.) en entrant du code CSS pour personnaliser le style.
CSS prédéfinis
/* Donation Statement (Banana+) predefined CSS */

@page {
   margin-top: 0.0cm;
   margin-bottom: 0.0cm;
   margin-left: 0.0cm;
   margin-right: 0.0cm;
}

body {
   font-family: $font_family;
   font-size: $font_size;
}

.bold {
   font-weight: bold;
}

.right {
   text-align: right;
}

.center {
   text-align: center;
}

.header_address_row_1 {
   font-family: $font_family;
   font-size: $font_size_header;
}

.header_address_row_2_to_5 {
   font-family: $font_family;
   font-size: $font_size;
}

.header_text {
  margin-top: 1.2cm;
  margin-left: 1.2cm;
  margin-right: 1.2cm;
  text-align: right;
  position: absolute;
}

.logo {
  margin-top: 1.2cm;
  margin-left: 1.34cm;
  margin-right: 1.2cm;
  position: absolute;
}

.address {
  top: 4.5cm;
  left: 12.3cm;
  width: 7.5cm;
  position: absolute;
}

.date {
   margin-top: 4.6cm;
   margin-left: 1.5cm;
   position: absolute;
}

.text {
   margin-top: 8.5cm;
   margin-left: 1.5cm;
   margin-right: 1.0cm;
}

.transactions_details {
   margin-top: 0.5cm;
   margin-left: 1.65cm;
}

.transactions_rows {
   border-bottom:thin solid black;
}

.transactions_total {
   font-weight: bold;
   border-top:thin solid black;
   border-bottom:thin solid black;
}

.signature {
   margin-top: 1.5cm;
   margin-left: 12.3cm;
}

.image-signature {
   height: 15mm;
   margin-left: 12.3cm;
}
Tableau Extraire (commande Extraire lignes)
La fonctionnalité Extraire et trier lignes peut être utilisée pour sélectionner les comptes des membres pour lesquels l' attestation doit être créé. Ceci est utile lorsque, par exemple, vous ne souhaitez imprimer le relevé de dons que pour certains membres, sans devoir introduire la liste des comptes directement dans les paramètres de l'extension.
Si, par exemple, vous regroupez les membres en différents groupes (tableau Comptes), vous pouvez ensuite utiliser la commande Données > Extraire et trier lignes pour extraire les lignes des membres appartenant uniquement à certains groupes (dans l'exemple, les membres appartenant aux groupes S1 et S3).
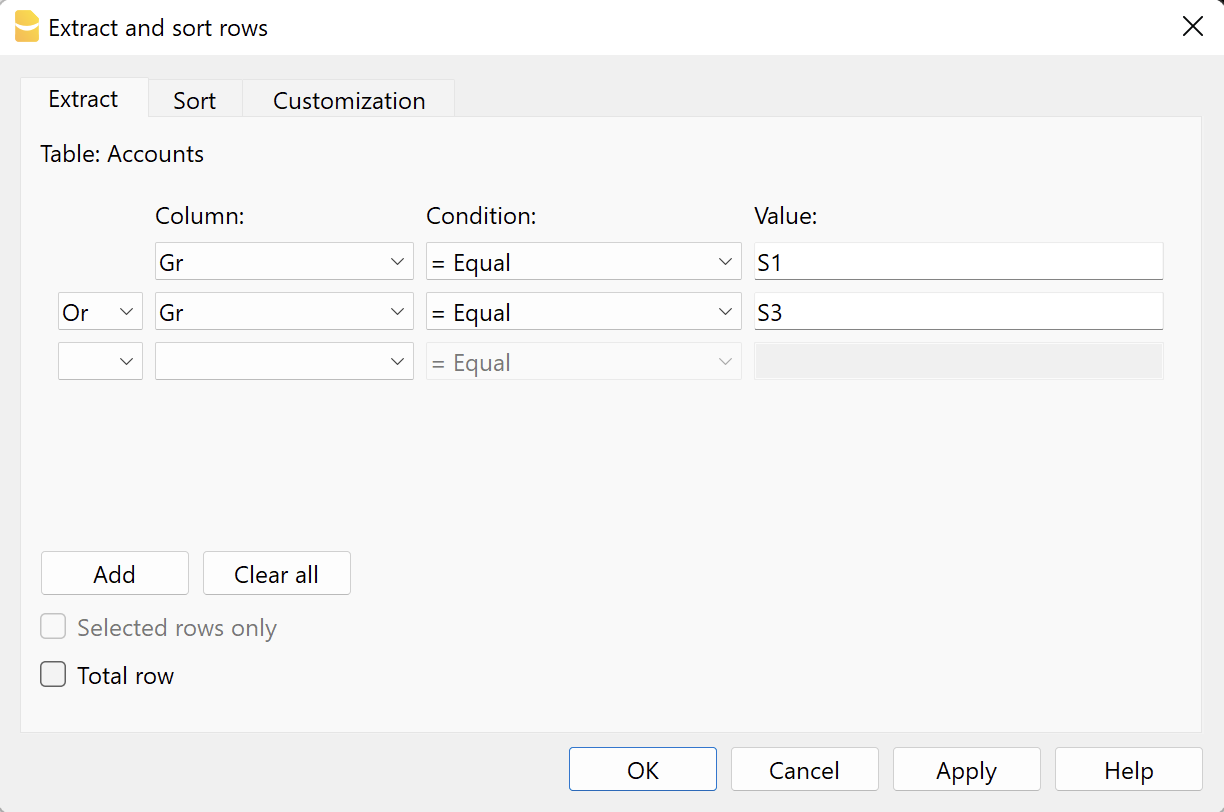
Pour utiliser les lignes extraites
- Extraire les lignes avec la commande Données > Extraire et trier les lignes.
- Lancez l'extension et dans la boîte de dialogue des paramètres, section Sélectionnez les adresses à imprimer, cochez la case Utiliser tableau Extraire
- Si les lignes n'ont pas été extraites avant le début de l'impression, un message d'avertissement s'affiche et tous les comptes membres enregistrés sont utilisés.
Texte de l'attestation de don (texte normal)
Il existe deux possibilités pour saisir et utiliser du texte normal :
- Saisir le texte dans la boîte de dialogue des paramètres.
- Saisir le texte dans les champs Texte 1, Texte 2, Texte 3 ou Texte 4.
Il est possible d'ajouter jusqu'à quatre textes. - Sous Imprimer texte > Sélectionner texte, sélectionnez le texte à utiliser.
- Sous Imprimer texte, ne sélectionnez PAS l'option Utilisez Markdown.
- Saisir le texte dans les champs Texte 1, Texte 2, Texte 3 ou Texte 4.
- Saisissez le texte dans le tableau Documents.
- Ajoutez un document en sélectionnant le type Texte normal (text/plain).
Il n'y a pas de limite, vous pouvez ajouter autant de texte que vous le souhaitez.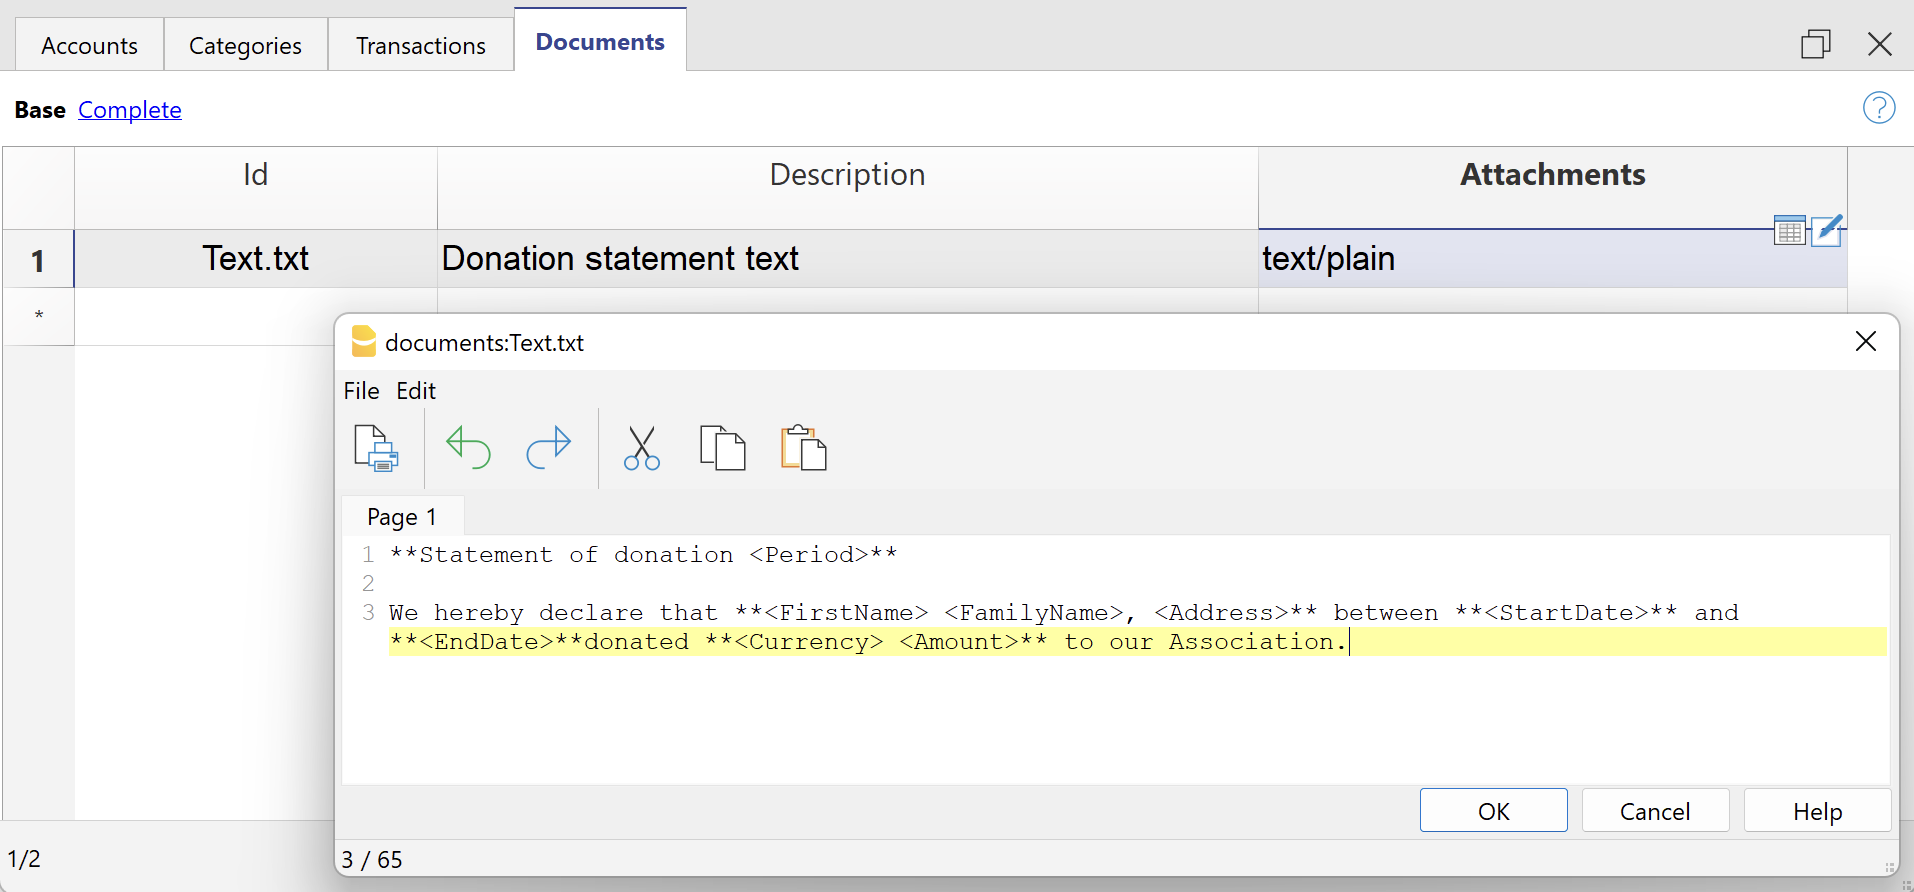
- Dans le dialogue Paramètres :
- Sous Imprimer le texte > Sélectionner le texte, sélectionnez l'option Texte tableau Documents (.txt / .md).
- Sous Textes > Texte Tableau Documents (.txt / .md), entrez l' ld identifiant du texte saisi dans le tableau Documents (par exemple 'text.txt').
- Ajoutez un document en sélectionnant le type Texte normal (text/plain).
Pour tous les textes :
- Avec une annotation spécifique, vous pouvez appliquer le style gras aux textes. Pour ce faire, insérez les textes souhaités entre les doubles astérisques ** .
Exemples :- **texte** = texte
- **texteA texteB** texteC = texteA texteB texteC
- Si les valeurs suivantes (en anglais) sont saisies dans les lignes de texte, elles seront remplacées par les valeurs correspondantes :
- <Period>: période sélectionnée
- <Account>: compte du membre
- <NamePrefix> : préfixe du membre
- <FirstName>: prénom du membre
- <FamilyName>: nom du membre
- <OrganisationName> : organizzazione del socio
- <Address>: adresse du membre
- <AddressExtra> : adresse supplémentaire
- <Region> : région/état ou province
- <Country> : nation
- <StartDate>: date de début de la période sélectionnée
- <EndDate>: date de fin de la période sélectionnée
- <Currency>: devise
- <Amount>: montant des dons
Texte certificat de don (texte Markdown)
Markdown est un langage qui permet de créer du texte formaté à l'aide d'un éditeur de texte standard et d'une syntaxe facile à écrire et à lire.
Pour utiliser Markdown, le Plan Advanced de Banana Comptabilité Plus est nécessaire.
Il existe deux façons de saisir et d'utiliser du texte Markdown.
- Saisir le texte dans les dialogue paramètres
- Saisissez le texte dans les champs Texte 1, Texte 2, Texte 3 ou Texte 4.
Il est possible d'ajouter jusqu'à quatre textes. - Sous Imprimer texte > Sélectionner texte, sélectionnez le texte à utiliser.
- Sous Imprimer texte, affichez l'option Utiliser Markdown.
- Saisissez le texte dans les champs Texte 1, Texte 2, Texte 3 ou Texte 4.
- Saisissez le texte dans le tableau Documents.
- Utilisez l'éditeur Markdown pour ajouter un document, en sélectionnant le type Texte formaté Markdown (text/markdown)..
Il n'y a pas de limites, vous pouvez ajouter autant de texte que vous le souhaitez. - Le nom du fichier dans la colonne Id doit se terminer par ".md" (par exemple "texte.md").
- Utilisez l'éditeur Markdown pour ajouter un document, en sélectionnant le type Texte formaté Markdown (text/markdown)..
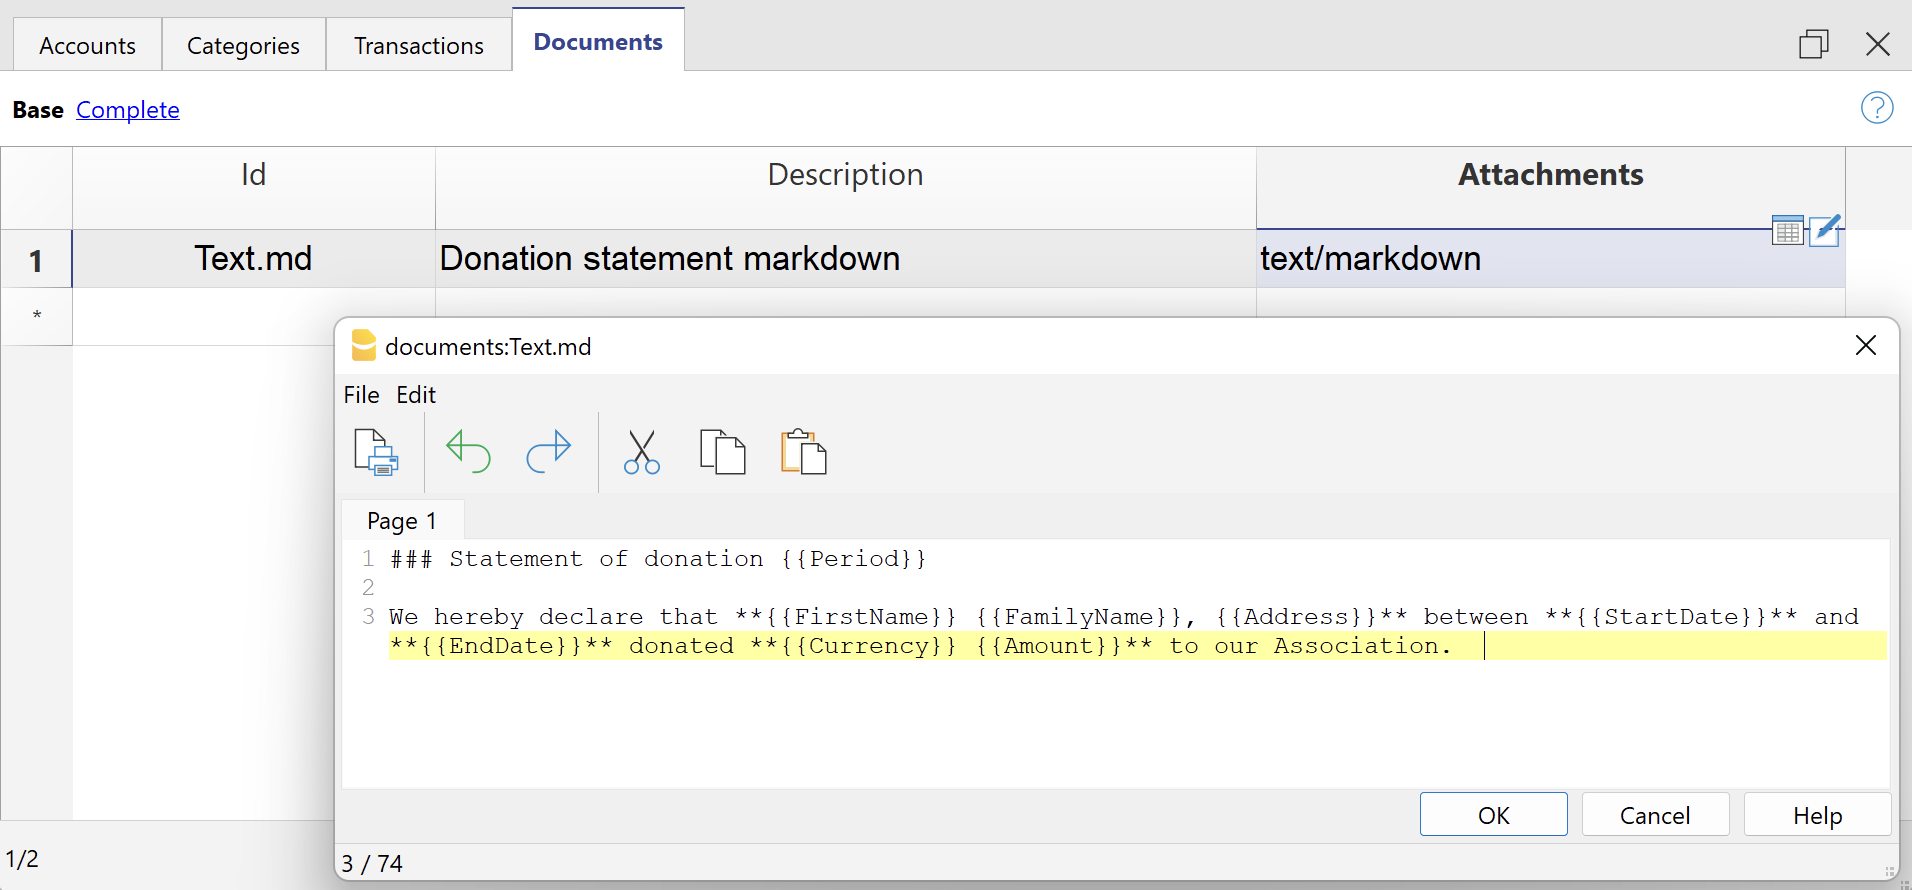
-
- Dans le dialogue Paramètres :
- Sous Imprimer texte > Sélectionner texte, sélectionnez l'option Texte tableau Documents (.txt / .md).
- Sous Textes > Tableau de texte Documents (.txt / .md), entrez l Id 'identifiant du texte markdown saisi dans le tableau Documents (par exemple, "texte.md").
- Dans le dialogue Paramètres :
Pour tous les textes :
- Si les valeurs suivantes (en anglais) sont saisies dans les lignes de texte, elles seront remplacées par les valeurs correspondantes :
- {{Period}} : période sélectionnée
- {{Account}} : compte du membre
- {{NamePrefix}} : préfixe du membre
- {{FirstName}} : prénom du membre
- {{FamilyName}} : nom de famille du membre
- {{OrganisationName}} : organisation du membre
- {{Address}} : adresse du membre
- {{AddressExtra}} : adresse supplémentaire
- {{Region}} : région/état/province
- {{Country}} : nation
- {{StartDate}} : date de début de la période sélectionnée
- {{EndDate}} : date de fin de la période sélectionnée
- {{Currency}} : devise
- {{Amount}} : montant total des dons
Exemples d'impression
Attestation de don avec détails écritures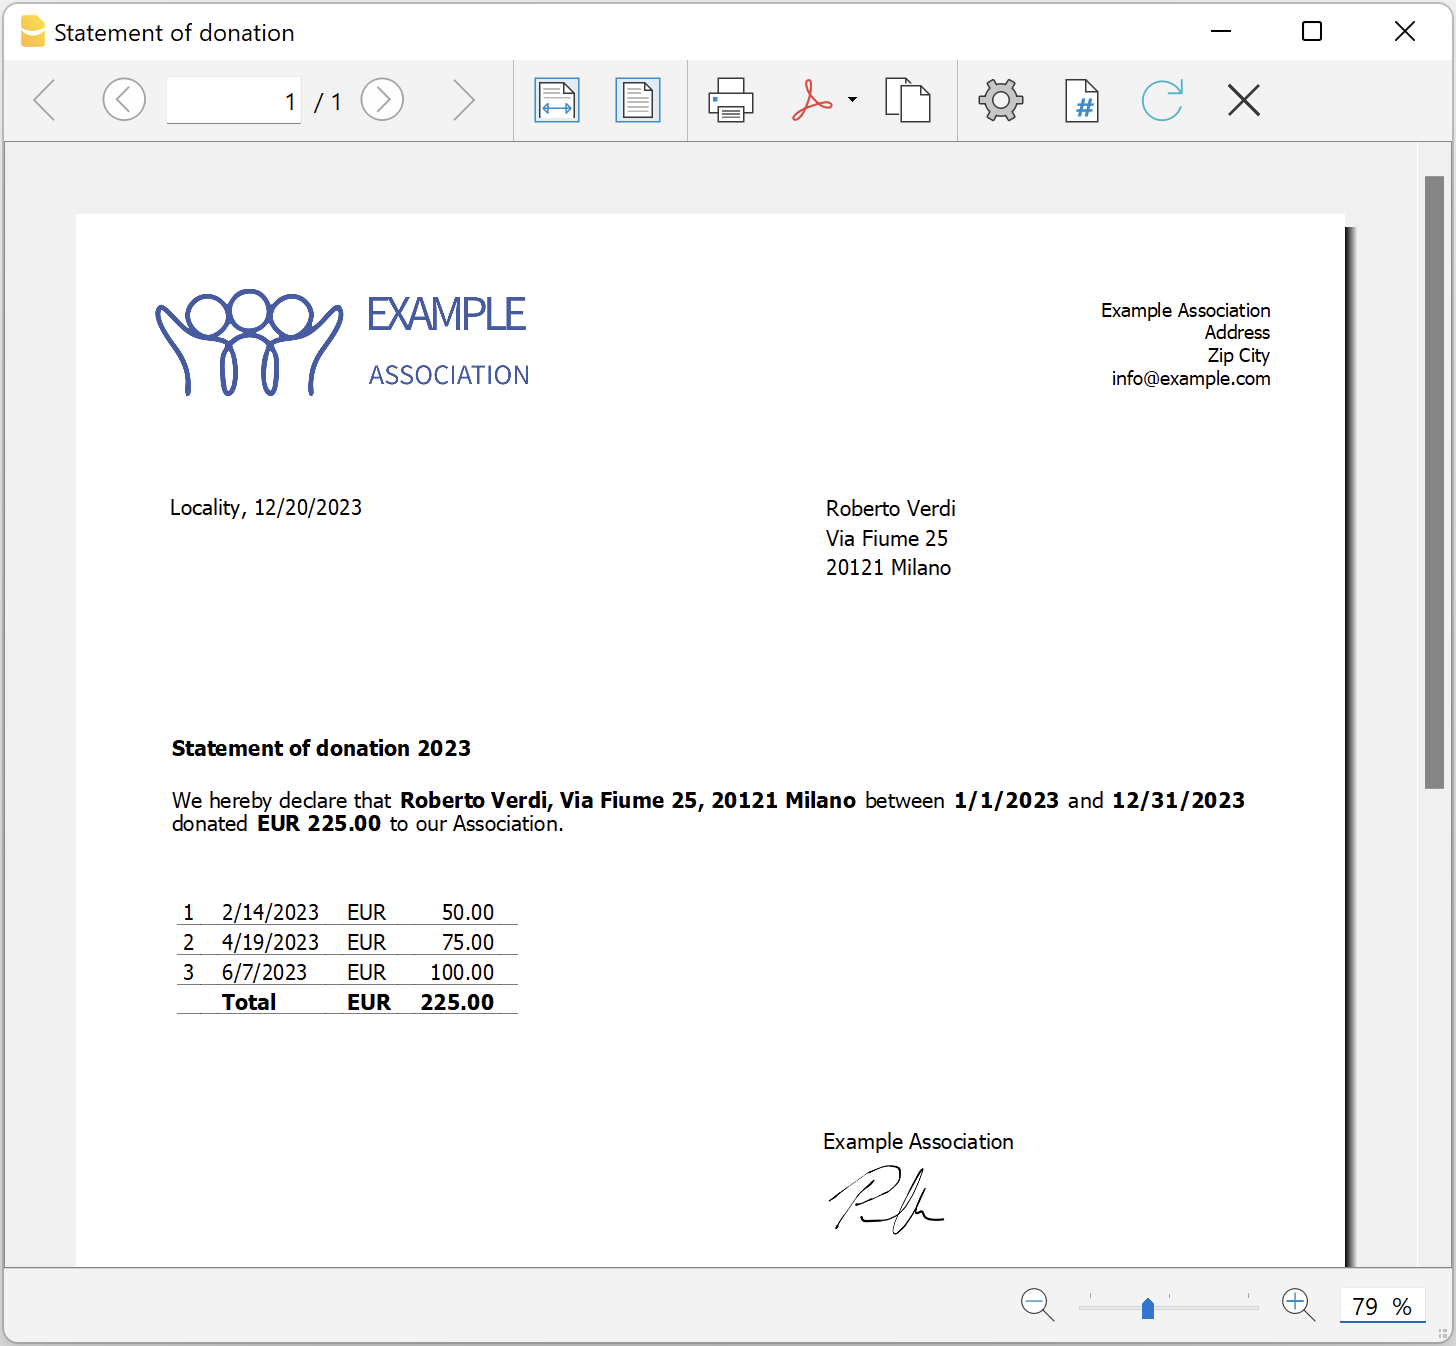
Attestation de don pour les Associations (Banana 9)
Attestation de don pour les Associations (Banana 9)Une attestation de don certifie un don volontaire à une association. En général, toutes les associations impriment des certificats de dons pour leurs membres et leurs bénévoles, car ceux-ci sont souvent déductibles des impôts.
L'extension présentée ci-dessous vous permet de créer un certificat de don pour les donateurs enregistrés dans Banana Comptabilité (tableau Comptes).
Il est essentiel que les membres/donateurs soient configurés avec des centres de coûts, en utilisant le centre de coûts CC3.
Installation et utilisation de l'extension
- Installez Banana Comptabilité (version 9.0.5 ou supérieure).
- Installez l'extension pour l'Attestation de don pour les associations (voir la documentation Menu Extensions).
- Une fois installée, l'application sera visible dans le menu Extensions où elle peut être exécutée.
Créer un certificat de don
- Inscrivez les données de l'Association dans la fiche d'adresse du fichier comptable.
- Dans le menu Extensions, sélectionnez l'App Attestation de dons aux Associations.
- Saisissez la période dans la boîte de dialogue
- Remplissez les champs de dialogue et cliquez sur Ok
Dialogue Paramètres
Pour saisir les données, faites un double clique dans le champ 'Valeur'.
- Entrer le compte du membre (vide = imprimer tout)
- Insérer un compte individuel (e.g. "10001").
- Insérer plusieurs comptes séparés par une virgule "," (e.g. "10001,10002,10005").
- Laisser vide pour imprimer un certificat de don pour tous les membres inscrits.
- Montant minimum du don: les comptes avec un solde inférieur à ce montant ne sont pas inclus. La valeur par défaut est "1.00" (par ex. les comptes avec solde zéro sont exclus). Insérer "0.00" pour inclure les comptes avec solde zéro.
- Textes
- Utiliser des textes standard: cochez la case pour utiliser les textes par défaut (tout texte personnel sera écrasé).
- Titre (optionnel): insérer l'objet de la lettre.
- Texte 1 (optionnel): insérer le texte du premier paragraph
- Texte 2 (optionnel): insérer le texte du deuxième paragraph
- Texte 3 (optionnel): insérer le texte du troisième paragraph
- Texte 4 (optionnel): insérer le texte du quatrième paragraph
- Inclure les détails du don: cochez la case pour inclure un tableau récapitulatif des dons.
Pour tous les textes :
Vous pouvez marquer un ou plusieurs mots ou même le texte complet en gras.
Pour obtenir le mot désiré en gras, saisissez-le en double astérisque (par ex. **mot**).
Pour obtenir le texte complet en gras, insérez deux astérisques au début du texte (par ex. **texte....).
Si les valeurs suivantes (en anglais) sont insérées dans les lignes de texte, elles seront remplacées par les valeurs correspondantes (ex. <Account> est remplacé par 10001) :
<Period>: période sélectionnée
<Account>: compte du membre
<FirstName>: prénom du membre
<FamilyName>: nom du membre
<Address>: adresse du membre
<StartDate>: date de début de la période sélectionnée
<EndDate>: date de fin de la période sélectionnée
<Currency>: devise
<Amount>: montant des dons
- Signature: insérer le nom et le prénom de la personne qui délivre la déclaration.
- Lieu et date : insérer le lieu et la date d'émission du certificat
- Signature avec image: cochez la case pour utiliser une image comme signature.
- Image: insérer l'image à utiliser. Il y a deux façons possibles de le faire :
- documents:<id_name>: utiliser une image enregistrée dans le tableau Documents, où <id_name> représente le nom entré dans la colonne ID du tableau (ex. : "documents:signature") ; ou
- fichier:document/<image_name>: utiliser une image enregistrée en dehors de Banana, mais dans le même dossier que le fichier *.ac2. Indiquez également l'extension de l'image .png ou.jpg (e.g. "fichier:document/signature.png").
- Hauteur de l'image (mm): modifier la hauteur de l'image pour la redimensionner. La hauteur est en millimètres.
- Styles
- Logo: inclure le logo dans l'en-tête. Le logo est défini avec la commande File → Configuration Logo.
- Nom du logo: entrez le nom de la personnalisation du logo.
- Type de police: définis le type de police. Le type par défaut est "Helvetica".
- Taille de police: définis la taille de la police. La taille par défaut est "10".
Les données saisies sont utilisées pour générer le rapport, que vous pouvez ensuite sauvegarder et imprimer.
Exemple de dialogue:
Exemple d'attestation:
Exemple d'attestation avec détails:
非营利协会或组织会计
非营利协会或组织会计 feiComment la méthode Agile peut aider les projets des ONG
[Cette page a été traduite automatiquement.]
Découvrez ce qu’est la méthodologie Agile et comment elle peut conduire à une mise en œuvre efficace et dynamique de projets liés aux ONG et à la coopération internationale.
De nos jours, au sein d’une ONG, il est courant de voir une gestion de projet qui suit des modèles très définis et rigides. Mais quels sont les effets de l’Agile appliqué dans le domaine de la coopération ? Banana Comptabilité offre un exemple complet de la façon dont Agile, lentement intégré dans un projet à but non lucratif, peut simplifier sa gestion. En conséquence, vous pouvez également obtenir plus de flexibilité, d’adaptabilité et d’efficacité.
Découvrez les nombreux avantages de l’intégration Agile avec nous. Notre expérience dans le but d’offrir une formation en comptabilité à tous les jeunes étudiants au Congo, montre comment Agile peut être efficace aussi pour les projets d’ONG.
Introduction
Très certainement, vous avez déjà entendu parler de la méthodologie Agile, souvent opposée aux modèles de gestion de projet rigides. En particulier, les entreprises principalement axées sur la réalisation de profits préfèrent appliquer ce modèle. Mais la plupart du temps, les start-ups et les sociétés de développement de logiciels ne peuvent pas renoncer à Agile pour ses nombreux avantages.
Et que pensent les organisations non gouvernementales d’une gestion de projet agile ? Malheureusement, pour le moment, ils semblent manquer de confiance dans cette méthode innovante. En outre, les institutions qui soutiennent financièrement les projets continuent d’adopter la méthodologie traditionnelle. En conséquence, il devient difficile d’obtenir de l’argent qui est utilisé, comme c’est le cas dans les start-ups, pour expérimenter des procédures de méthode à petite et grande échelle.
Pourtant, la méthodologie Agile pourrait être une solution pour simplifier les projets de coopération internationale, qui ont généralement une gestion compliquée. En fait, ils opèrent souvent dans des contextes très difficiles, avec des situations logistiques précaires, des ressources financières limitées et dans des cultures et des environnements très différents. Le manque de prévisibilité est similaire à celui que l’on retrouve dans les domaines dynamiques et innovants, tels que le développement de logiciels et les start-ups. Mais Agile pourrait être intégré aux modèles actuels des ONG pour conduire à une gestion fluide et à une plus grande flexibilité.
La méthodologie agile est appliquée depuis les années 1990, mais différentes organisations à but non lucratif sont réticentes ou peu familières avec cette option qui pourrait être combinée avec des modèles traditionnels sans perturber le système de gestion actuel, conduisant ainsi à de meilleures réalisations de projets.
Avec ce dossier Agile, nous souhaitons vous présenter un projet dans lequel Banana.ch joue un rôle pertinent. Étant une entreprise qui développe des logiciels, nous appliquons toujours la méthode Agile dans nos projets. Grâce à elle, nous avons obtenu un succès continu. Mais à un moment donné, nous nous sommes demandés :
« Et si on appliquait le même modèle, petit à petit, dans une industrie où les modèles rigides sont la norme ? ».
En 2017, nous avons commencé une collaboration en tant que partenaires technologiques avec le ministère de l’Éducation de la République démocratique du Congo, dans le but d’améliorer l’enseignement de la comptabilité. Cet objectif était clairement très différent de ceux que nous nous étions habituellement fixés. Mais, même dans ce cas, nous avons décidé d’utiliser la méthodologie Agile, avec l’approbation du client qui, bien que peu familier, était ouvert à la possibilité d’une gestion dynamique. Avec la méthodologie Agile, nous avons progressé, surmonté plusieurs difficultés et obtenu des résultats importants, malgré les difficultés en termes de logistique et de ressources disponibles. En général, nous avons atteint plusieurs objectifs sur le projet de formation des comptables, géré par le ministère de l’Enseignement primaire, secondaire et professionnel du Congo.
La méthode s’est avérée très adaptée à ce projet de coopération, qui opère dans des situations complexes nécessitant une grande flexibilité et adaptabilité. Le projet éducatif n’a pas été stoppé par les différences culturelles, la distance entre les différentes parties prenantes, des ressources très limitées, des événements imprévus et un financement limité. Et cela est dû, en grande partie, à l’adoption d’une méthodologie peu connue dans le domaine à but non lucratif. Agile n’a pas été imposé et l’application a été progressive afin que le commissaire puisse se familiariser sans se méfier de ce modèle de gestion alternatif. Après avoir surmonté la méfiance initiale, en partie grâce à l’enthousiasme du ministère de l’Éducation, nous travaillions avec la direction presque sur la base d’Agile.
Notre parcours dans la méthodologie Agile pour les ONG et les organisations à but non lucratif commencera par expliquer les principes et l’histoire. Ensuite, nous passerons au projet de formation en comptabilité au Congo. Vous découvrirez avec nous comment Agile peut être la solution pour une gestion efficace, flexible et optimale des projets dans le secteur à but non lucratif, ceci au profit de toutes les parties prenantes impliquées, mais surtout à toutes les personnes qui verront une amélioration dans leur vie.
Il est bon de souligner qu’Agile n’a pas besoin d’être largement appliqué au secteur des ONG. Il peut être utilisé pour gérer certains projets, ou à côté de modèles traditionnels et il n’a certainement pas à perturber les cadres de coopération actuels. Cependant, en utilisant la méthode Agile ici et là, vous découvrirez lentement les avantages et les fonctionnalités également pour le secteur à but non lucratif.
Comme vous le verrez dans notre exemple, l’ouverture progressive à de nouvelles possibilités de gestion peut vous aider à atteindre certains objectifs sans changements majeurs.
Nous commencerons notre voyage dans la méthodologie Agile pour les ONG et les organisations à but non lucratif en expliquant les principes et l’histoire. Ensuite, nous passerons au projet de formation comptable au Congo. Vous découvrirez avec nous comment Agile peut être la solution pour une gestion de projet efficace, flexible et optimale dans le secteur à but non lucratif, au bénéfice de toutes les parties prenantes impliquées, et surtout pour les personnes qui en bénéficieront.
La méthodologie agile : naissance et caractéristiques
Un manifeste anarchique d’informaticiens
Vous pouvez gérer des projets au sein d’entreprises à but lucratif et à but non lucratif en suivant différentes méthodologies.
Le modèle que nous allons explorer en profondeur provient de l’industrie du développement de logiciels. La méthodologie Agile a été développée depuis les années 90 grâce au mouvement Agile initié par un groupe d’informaticiens.
La méthode Agile contraste avec la méthode Waterfall, l’un des modèles classiques de gestion de projet. Jetons un coup d’œil à un exemple réel de cascade: une construction de maison. Dans un premier temps, l’architecte prépare les dessins détaillés. Ensuite, l’entreprise obtiendra un devis, planifiera toutes les phases de travail et livrera la maison, comme prévu. La planification suit une série d’étapes claires: elle commencera par la préparation du site, se poursuivra avec l’excavation et la création du sous-sol et de la toiture. Les intérieurs seront construits et les systèmes techniques, les luminaires et les accessoires seront installés dans un ordre bien défini et avec un état de progression qui est prédit avec précision. Ce modèle, cependant, a de grandes limites, par exemple un changement majeur dans les progrès est problématique et conduit à une forte augmentation des coûts. De plus, la maison restera la même pendant des années.
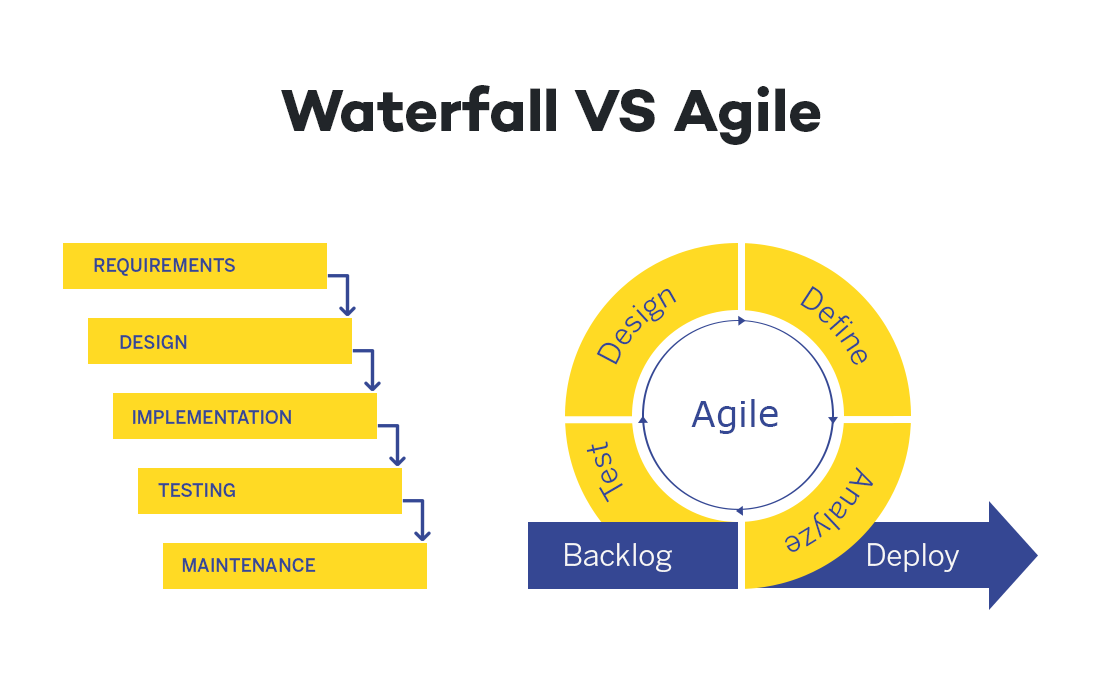
Ce modèle en cascade était la norme dans le domaine du développement de logiciels. Jusqu’à ce que, en 2001, certains développeurs « anarchistes » décident de faire un grand changement dans l’industrie du logiciel en publiant le Manifeste Agile. Leur but est de créer des modèles organisationnels « basés sur les personnes, la collaboration et la construction de communautés dans lesquelles nous aimerions travailler ».
Les fondements de l’Agile
Actuellement, les quatre principes de la méthodologie Agile sont appliqués en dehors du monde de l’informatique. Jetons un coup d’œil à ces valeurs:
- Individus et interactions sur les processus et les outils
La méthode Agile encourage la communication directe entre les personnes, afin de réduire les éventuels malentendus. Il doit y avoir une réduction des étapes et des obstacles entre les différents membres travaillant sur le projet. - Un produit satisfaisant sur une documentation détaillée
Le principal indicateur de réussite du projet est lorsque le produit répond aux besoins du client. La documentation de la procédure et des étapes est pertinente, mais le produit est plus important. - Collaboration avec les clients sur la négociation de contrats
Les clients connaissent généralement leurs besoins mieux que le développeur de logiciels ou tout autre produit. Par conséquent, la collaboration est essentielle pour déterminer les prochaines étapes du développement de produits. Ce point est au cœur de la méthodologie Agile. - Répondre au changement plutôt que de suivre un plan
Les mises à jour et les changements sont inévitables et encouragés. À chaque série de commentaires, le produit sera plus réactif aux besoins des clients. Vous devez d’abord être flexible et réactif, le plan est secondaire.
Dans la méthode Agile , vous définissez un objectif, mais les exigences sont énoncées et mises en œuvre étape par étape. Le développement se déroule en plusieurs cycles appelés « sprints », dans lesquels les changements de produits se produisent rapidement. Cela contraste évidemment avec un projet qui montre la solution complète tout de suite.
Habituellement, les projets liés au monde numérique n’ont pas de séquence prédéfinie et le produit n’est souvent pas physique, donc Agile est une méthode idéale. Au départ, ce qui compte, c’est un produit minimum viable, qui est une première version du produit avec des exigences minimales. Le client interagit ensuite avec les développeurs, fournit des commentaires, signale les problèmes et établit des priorités. Le résultat final provient de toutes les interactions et changements qui se produisent dans les différents cycles.
Un exemple concret : la conception de sites web
Évidemment, Agile nécessite une organisation minutieuse du projet. Vous devez le diviser en différentes phases et trouver un ordre logique pour les mettre en œuvre. De cette façon, vous pouvez passer du produit de travail minimum au produit final.
Pour mieux comprendre le fonctionnement de la méthodologie, prenons comme exemple une entreprise qui veut son propre site web.
- Pour créer une présence en ligne, l’entreprise décide de ne pas demander à l’entreprise de conception de site Web de livrer le produit final. Au lieu de cela, en suivant le modèle Agile, l’entreprise commencera par définir ses besoins et ressources clés. Le choix se portera probablement sur la création de pages de présentation d’entreprise avec un contenu minimal.
- Dans très peu de temps, l’entreprise disposera d’un produit fonctionnel (c’est-à-dire un site Web) et commencera à collecter des données sur les utilisateurs.
- Ces statistiques seront ensuite utilisées pour déterminer, en étroite collaboration avec le client, le développement ultérieur. En évaluant les besoins, les capacités et les ressources, il sera possible de définir ce qu’il faut réaliser dans le prochain « sprint ». Par exemple, la priorité est donnée à la création de contenu technique, ou à la présentation vidéo, ou à une boutique en ligne ou à l’intégration avec le système de gestion.
- Le résultat peut sembler complètement différent de ce que vous aviez initialement imaginé, et les prochaines améliorations du site Web se poursuivront ensuite en utilisant Agile.
Une méthodologie qui aide toutes les start-up
La méthodologie Agile est également très appropriée pour aborder des problèmes complexes, où il n’y a pas encore de solution finale claire. Après avoir été appliqué dans l’industrie du logiciel, Agile est devenu la méthode de gestion de projet préférée des start-ups et a également été adopté par les grandes entreprises pour gérer des projets dans des domaines très innovants.
Les start-ups doivent être très flexibles, de sorte qu’elles ne mettent généralement jamais en œuvre leurs projets en réparant tout de manière rigide dès le début. En fait, ces jeunes entreprises procèdent étape par étape, en mettant en place un prototype de produit pour voir si la technologie fonctionne. Ensuite, ils passent à la création du MVP pour comprendre s’il peut répondre aux besoins des clients. Plus tard, la start-up améliorera le produit, le mettra sur le marché à un moment donné, etc.
En règle générale, les start-ups travaillent avec peu de ressources, vous vérifiez donc constamment si vous suivez le bon chemin et investissez aux bons endroits. Grâce à la méthode Agile, si vous n’atteignez pas les résultats escomptés ou si vous faites face à des problèmes inattendus, il sera assez facile de s’adapter à une approche différente. L’expérience et les résultats des différents cycles de projet aideront à fixer de nouveaux objectifs, à planifier les prochaines étapes et à décider des investissements à faire.
Financement progressif
Parmi ses nombreux avantages, Agile utilise les financements d’une manière qui s’adapte bien au monde des start-up, souvent confronté à une grande variabilité et imprévisibilité, en maintenant toujours les risques au minimum. Une entreprise innovante comme une start-up ne reçoit pas de financement pour mener à bien le projet en une seule fois, mais en une série de tours.
- Cela commence par le financement d’un prototype. Si le prototype répond aux attentes, un MVP (Minimum Viable Product) est financé. La solution peut désormais être sur le marché et la start-up vérifie l’intérêt et la réponse des premiers clients.
- Vous passez au tour suivant, où vous améliorez le produit et, grâce à une stratégie marketing, augmentez le nombre de clients. Les montants initiaux sont limités et sont généralement disponibles sans procédures spéciales. L’idée, son potentiel et les capacités de l’équipe de start-up sont maintenant évalués. Il arrive souvent que la start-up décide d’explorer des produits ou des marchés différents de ceux initialement imaginés.
- Dans les cycles suivants, il y a une augmentation des financements, mais seulement si les tours précédents ont été couronnés de succès. Si la start-up ne réalise pas le prototype ou si le produit trouve peu d’intérêts de la part des clients, les investissements sont suspendus.
Utilisation de la méthodologie Agile dans les organisations à but non lucratif
Nous avons vu que la méthodologie Agile est efficace non seulement pour les entreprises de développement de logiciels, mais aussi pour le monde des start-ups et dans les grandes entreprises. Deux décennies après la publication du Manifeste Agile, ce modèle a conduit au succès de nombreuses entreprises et a été largement utilisé par toutes sortes d’organisations à but lucratif.
Malheureusement, à l’heure actuelle, Agile n’est pas bien connu des organisations à but non lucratif. Dans ce contexte, la méthodologie Agile et d’autres méthodologies qui utilisent des concepts similaires tels que le Design Thinking peuvent être facilement adoptées et apporter des avantages importants.
Dans le contexte de la coopération internationale , la question est plus compliquée, car il y a des acteurs publics, des lois, des références et d’autres qui sont difficiles à adapter. Il y a une forte nature statique et en outre, contrairement à l’environnement des affaires, la communication entre les différents niveaux: ONG, bailleurs de fonds, partenaires locaux et bénéficiaires de projets, est beaucoup plus compliquée et ne peut pas être facilement simplifiée et accélérée. Cependant, il y a aussi des tentatives d’introduire de nouvelles méthodologies dans ce domaine, dont l’une est l’adaptation du développement. Normalement, les normes de travail établies telles que la méthodologie du cadre logique et la théorie du changement sont utilisées dans le contexte de la coopération. Afin d’assurer un résultat positif, il est important de définir les phases avec autant de détails que possible et de mettre en place des systèmes de surveillance et de contrôle à l’avance. Cependant, cela conduit à des projets de plus en plus complexes, plus coûteux et moins capables de s’adapter aux circonstances réelles,
Dans le domaine de la coopération internationale, il est peu probable qu’Agile puisse supplanter les méthodes existantes. Cependant, la méthodologie Agile peut certainement être très utile en complément, pour gérer certaines phases de projets. La méthode Agile pourrait aider à :
- Aller de l’avant de manière progressive
- Recueillez constamment des commentaires
- Planifier les objectifs et les approches de manière plus éclairée
- Faites face aux problèmes et aux événements inattendus de manière rapide et flexible.
Introduire plus de dynamisme à certaines étapes des projets contribuerait également à améliorer la transparence, la communication et la confiance entre les différentes parties concernées.
Nous voulons maintenant vous présenter un cas détaillé d’un projet Banana créé et mis en œuvre en collaboration avec une ONG.
Des « projets à but lucratif » aux ONG : l’affaire Banana
Heureusement, au cours des dernières années, la volonté de gérer des projets « agiles » est également apparue au sein de certaines organisations à but non lucratif. Ils prennent l’expérience des entreprises qui utilisent la méthodologie Agile comme exemple, et ils ont remarqué que de petits changements peuvent apporter des avantages. Même une application partielle du modèle Agile donne la capacité de réagir efficacement à l’incertitude des situations d’urgence.
La méthodologie agile pourrait apporter de nombreux avantages aux ONG et, plus généralement, elle permet une grande flexibilité opérationnelle.
- Vous obtenez des commentaires importants sur chaque cycle pour ajuster l’intégrité du programme
- Identifier de nouveaux modes opératoires qui permettent de mieux atteindre les objectifs humanitaires
- Comprendre quels pourraient être les développements futurs et réagir rapidement
- Capacité à faire des erreurs sans regret et à en tirer des leçons pour améliorer la stratégie
- Une administration et une comptabilité qui s’adaptent rapidement au changement
- Entretenir la confiance entre les différentes parties prenantes impliquées dans le projet grâce à une transparence et une communication accrues
Parmi les nombreux projets Banana.ch, nous avons également un exemple fort sur la façon dont le modèle Agile s’applique presque parfaitement à un projet lié à des organisations à but non lucratif.
En 2017, Babana.ch a participé à un projet en tant que partenaire technologique en République démocratique du Congo.
Avant d’expliquer les détails et les développements, nous allons commencer par vous donner un contexte dans lequel Banana.ch deviez l’adapter.
Le Congo et l’éducation des étudiants dans le monde numérique
La République démocratique du Congo (RDC) est une nation avec un vaste territoire situé au centre de l’Afrique et elle compte plus de 100 millions d’habitants. Comme d’autres pays d’Afrique subsaharienne, la RDC est confrontée à un grand nombre de difficultés, notamment des problèmes logistiques, financiers et sanitaires. La population est très jeune et l’un des principaux défis est de renforcer le système éducatif et de l’adapter à la transformation numérique, afin de réduire le fossé technologique existant.
Au Congo, les écoles sont gérées et financées par les comtés. D’autre part, le Ministère de l’enseignement primaire, secondaire et professionnel (MEPST), basé dans la capitale Kinshasa, est responsable de la coordination de l’éducation dans tout le pays et est chargé de définir les programmes et le matériel pédagogique.
Après avoir rejoint l’Organisation pour l’harmonisation du droit africain des affaires (OHADA) en 2012, le CDR a adopté les règles comptables communes et le ministère de l’Éducation a modifié les programmes de formation conformément aux nouvelles modalités. Compte tenu du fait que la plupart des entreprises congolaises tiennent ou conserveront leurs comptes numériquement, le MEPST a décidé de revoir la formation comptable dans les écoles professionnelles. Pour cette raison, ils ont introduit l’utilisation d’ordinateurs, de logiciels de productivité (feuilles de calcul telles qu’Excel, traitements de texte) et de programmes de comptabilité.
Malheureusement, avec le système actuel, il n’est pas possible de résoudre la fracture numérique. Actuellement, les étudiants n’apprennent que des concepts théoriques. Cela signifie qu’une fois qu’ils commencent à travailler, ils doivent être formés à l’utilisation d’ordinateurs et de logiciels. Au lieu de cela, les étudiants devraient recevoir une formation complète sur certains outils informatiques. Cela faciliterait non seulement l’accès dans la vie professionnelle, mais les étudiants eux-mêmes pourraient devenir les promoteurs de la modernisation numérique dans les entreprises et les organismes publics congolais.
Le plan des Cellules face à une limitation majeure
Afin de combler la fracture numérique, le ministère de l’Éducation a confié en 2015 aux Cellules des Branches Commerciales de la Direction des Programmes Scolaires et Matériel Didactique (aussi appelées Cellules) la mise en œuvre d’un plan d’amélioration des compétences numériques dans plus de 4 000 écoles. Ce projet s’inscrit dans le cadre de la stratégie plus large du Ministère visant à promouvoir la numérisation, qui concerne également les secteurs primaire, secondaire et professionnel.

Malheureusement, il y avait une limite majeure : un grand nombre d’écoles n’avaient pas de salles de classe d’informatique. En outre, le gouvernement de la RDC, ainsi que ses provinces, disposent de ressources financières limitées, et la gratuité de l’éducation pour les élèves est déjà un grand défi. Cependant, il reste essentiel que les écoles soient équipées d’ordinateurs, surtout si les élèves veulent se familiariser avec certains logiciels.
Comptabilité au Congo : le système OHADA
Parmi les différentes étapes du projet éducatif, les Cellules ont dû sélectionner un logiciel de comptabilité, conforme à la réglementation OHADA et également adapté à l’enseignement. Ainsi, en 2017, ils ont contacté notre société Banana Comptabilité.
Notre logiciel a attiré leur attention car il convient aux petites entreprises, il est utilisé dans plusieurs pays et a obtenu des références très importantes dans le domaine de la comptabilité. En plus de cela, le logiciel Banana est également disponible en Français, la langue officielle du Congo, et offre une licence gratuite à des fins éducatives. Les Cellules se sont rendu compte que le logiciel Banana Comptabilité était bien adapté à l’enseignement dans les écoles congolaises.
Un autre aspect essentiel de la sélection était la compatibilité avec le système comptable, de sorte que le programme doit être aligné sur le plan comptable et les rapports utilisés par l’OHADA. Ce système est utilisé par les grandes entreprises, a une numérotation spécifique et comprend également des schémas fixes pour la présentation du bilan, le compte de profits et pertes et le compte de flux de capitaux. Au cours des phases préliminaires, les Cellules ont sollicité la collaboration du Conseil Permanent de Comptabilité au Congo (CPCC). Dès lors, le projet de la Banane de former les étudiants sur notre logiciel de comptabilité a commencé.
Le début du projet et les premières difficultés rencontrées avec Agile
Dans des situations normales, nous organisons des rencontres entre les différentes parties prenantes et les développeurs. De cette façon, nous pouvons définir clairement les fonctionnalités du projet
Mais le projet avec la Cellule n’a pas démarré en douceur. Domenico Zucchetti, PDG et fondateur de Banana.ch s’est rendu à Nairobi (Kenya) pour une brève session de formation, mais après il n’était plus possible de se rencontrer en personne. Les autres moyens de communication étant très limités, il n’était pas facile de collaborer et de mener à bien efficacement le projet. Par conséquent, nous avons proposé l’intégration d’une solution alternative.
Dans Banana.ch nous avons toujours appliqué la méthodologie Agile pour n’importe quel projet, il est normal pour nous de suivre un processus progressif, en abordant un problème à la fois. Nous sommes conscients qu’il est essentiel d’aller pas à pas, avec une interaction étroite entre les parties prenantes pour travailler à distance et avec des contextes culturels et opérationnels très différents. C’est pourquoi nous avons décidé de proposer une nouvelle méthode pour le projet au Congo, et nous avons convaincu les Cellules d’appliquer Agile.
Grâce à la modélisation Agile, Banana.ch et les Cellules du ministre de l’Éducation ont pu faire face à la voie difficile du projet. Lentement, cette méthodologie a été appliquée à chaque phase du projet.
En ce qui concerne la première phase, c’est-à-dire le développement d’un logiciel conforme aux règles comptables d’OHADA, nous avons résolu les différents problèmes grâce à Agile.
- COMMUNICATION
Comme contact principal, Zucchetti s’est tourné vers Didier Kinano, le directeur des cellules. Les directives étaient généralement signalées par courriel et par téléphone. À son tour, le PDG de Banana Comptabilité a expliqué les fonctionnalités de Banana pour obtenir certains résultats, puis il a donné des instructions à son équipe de développement logiciel. - LES PREMIÈRES ÉTAPES CRITIQUES
Même s’il y avait une bonne collaboration, la répartition des tâches était trop complexe et les possibilités de communication n’étaient pas pleinement exploitées. De plus, nous avons dû faire face à des progressions de travail limitées. Après de nombreuses itérations, le plan comptable a finalement été complété avec les impressions de bilan et le compte de résultat correspondants. - LA PHASE COMPLEXE
Banana.ch s’est ensuite attaqué à la partie la plus complexe, à savoir la création du compte des flux de capitaux, avec la révision connexe du plan comptable. M. Kinano a donné des instructions et a ensuite vérifié l’exactitude des résultats. - UN SYSTÈME DE VÉRIFICATION FLEXIBLE
Avoir un test fiable est un élément important de la méthodologie Agile. Dans le cas du projet avec les Cellules, nos développeurs ont eu des difficultés car ils ne connaissaient pas le système OHADA et ne savaient pas comment tester les fonctionnalités. Par conséquent, Kinano a dû préparer des comptes qui ont été utilisés comme tests. Cela a facilité une progression rapide car les développeurs ont pu éviter les régressions, sans être en contact tout le temps. - UN NOUVEAU DÉVELOPPEUR
Banana.ch a également pu faire des progrès au niveau de la communication des flux de capitaux. Plus tard, nous avons commencé une collaboration avec un développeur basé à Kinshasa, qui a reçu des instructions directement de Kinano et s’est tourné vers Banana.ch pour la partie programmation. - LES DERNIÈRES ÉTAPES
Enfin, Banana.ch a pu réaliser d’autres rapports et mettre en œuvre la partie gestion et impression du relevé de TVA selon les modèles requis par les autorités fiscales locales.
Agile : gagner la collaboration pour le projet de comptabilité au Congo
L’utilisation de la méthode Agile pour mettre en œuvre le projet comptable au Congo s’est avérée être un choix gagnant.
Notre rôle s’est limité à l’assistance technique pour l’installation et l’utilisation de Banana Comptabilité, ainsi qu’à l’adaptation au système OHADA. De plus, n’étant pas sur place, nous avions une vision très limitée de ce qui se passait et nous n’étions pas particulièrement familiers avec le système éducatif du Congo. Bien que nous n’ayons pas eu une vision claire de la gestion (le ministère était en charge), la méthode Agile nous a permis d’atteindre nos objectifs.
Didier Kinano était devenu notre personne de référence. Les discussions étaient axées sur les aspects techniques, mais parfois nous avons discuté du projet d’une manière plus large. Petit à petit, Domenico Zucchetti a eu une meilleure vision des différentes parties prenantes, du contexte dans lequel elles opéraient et de leurs ressources disponibles. À un moment donné, nous pourrions commencer par la mise en œuvre du nouveau système de comptabilité numérique au Congo.
La mise en place du système de comptabilité numérique au Congo
Dans un premier temps, le plan du Ministère était de fournir aux écoles des ordinateurs, puis d’installer le logiciel et de former les enseignants et les élèves. Cependant, la plupart des écoles n’avaient pas de salles informatiques, et certaines n’avaient même pas d’électricité!
Les ressources disponibles étaient très limitées et il n’était pas possible d’en demander plus au Gouvernement congolais, car il était déjà occupé à assurer la gratuité de l’éducation de base. Le soutien de tiers était également peu probable, de sorte que la perspective d’avoir plus d’ordinateurs semblait à distance. Il y avait beaucoup d’inquiétude sur la réalisation du projet. Mais avec la suggestion de Zucchetti, quelque chose a commencé à changer:
« La situation ne me semblait pas si mauvaise. En fait, le Ministère était dans la même situation que de nombreuses start-ups, où l’on trouve des idées très ambitieuses et transformatrices, unies par une grande motivation et capacité, mais avec de nombreux obstacles et des ressources financières très limitées. J’ai dit qu’il serait probablement très bénéfique que le ministère adopte des modes de fonctionnement de type start-up, qui visent à tirer le meilleur parti des ressources existantes. »
De façon inattendue, cette remarque a suscité beaucoup d’intérêt, ce qui est assez rare dans les ministères qui ont des modes de fonctionnement très différents de ceux des start-ups. Au lieu de cela, lors des réunions suivantes, le Ministère s’est ouvert à aborder les problèmes d’une manière différente.
L’une des raisons de cette acceptation de l’Agile réside peut-être dans le niveau différent de prévisibilité entre l’Europe et l’Afrique. En Europe, le degré d’imprévisibilité est très faible et, surtout, il y a peu de flexibilité dans l’administration publique. Au contraire, en Afrique, la population et les fonctionnaires sont confrontés à une grande imprévisibilité. Des difficultés imprévues les obligent à trouver de nouvelles solutions. En substance, Banana.ch vu qu’au Congo, les gens sont plus disposés à adopter et à utiliser la méthodologie Agile.
Exploiter les ressources disponibles pour obtenir d’excellents résultats
L’étape suivante du projet consistait à définir le chemin de mise en œuvre à l’aide des ressources existantes.
La République démocratique du Congo dispose d’un vaste territoire, même si la plupart des écoles ne disposaient pas d’infrastructures appropriées, quelques-unes d’entre elles disposaient de salles de classe informatiques. Comme on pouvait s’y attendre, il n’y avait pas la prochaine génération d’ordinateurs, mais ils étaient parfaitement adaptés à l’installation et à l’utilisation de Banana Comptabilité.
Nous avons ensuite fourni le logiciel dans certaines écoles de la capitale Kinshasa. Les professeurs de comptabilité ont montré un grand intérêt et ont demandé une formation afin de se familiariser avec Banana Comptabilité. Les Cellules ont préparé le matériel d’information, étant très compétentes dans leur rôle. Ainsi, en peu de temps, ils ont mis en place une formation de 13 jours, tant pour le logiciel que pour le système OHADA. Les enseignants qui ont assisté au cours étaient très satisfaits, de sorte que le Ministère a établi un plan pour former davantage d’enseignants avec les ressources existantes.
Grâce au changement progressif de méthodologie vers Agile, le projet a progressé sans hoquet majeur. Nous n’avons pas eu à attendre que toutes les écoles soient équipées d’ordinateurs. Avec le temps, Banana Comptabilité a été installé dans plusieurs ordinateurs et le nombre d’enseignants formés augmentait également. Nous sommes ensuite passés à la phase d’enseignement aux étudiants, avec un succès considérable. La formation à l’installation et aux logiciels s’est étendue à d’autres provinces, toujours avec beaucoup d’intérêt.
De nouveaux problèmes sont apparus régulièrement, mais en appliquant la méthodologie Agile, le Ministère a pu les résoudre rapidement. Nous avons développé des solutions à petite échelle, en effectuant des ajustements rapidement, puis en les mettant en œuvre dans d’autres écoles. Par exemple, le programme du Congo impliquait l’utilisation de l’écriture manuscrite pour les examens. Le Ministère a ensuite introduit la possibilité d’avoir des examens avec ordinateur dans les écoles avec des salles de classe appropriées. Cette expérience a ensuite servi de base à la résolution de problèmes nouveaux ou similaires, à l’amélioration du système et à son introduction dans d’autres écoles. La stratégie a été constamment améliorée sprint après sprint, réduisant les problèmes imprévus et faisant le meilleur usage des ressources disponibles.
Des petits objectifs à une vision à long terme
Habituellement, Agile aide à obtenir des résultats à court terme, mais il est également extrêmement efficace pour une vision à long terme.
En gardant à l’esprit que le développement technologique évolue rapidement, nous sommes conscients que certaines solutions peuvent devenir obsolètes en un rien de temps. Par conséquent, il est très important de mettre à jour la vision du projet à long terme et de vérifier si nous allons dans la bonne direction.
Dans les projets d’envergure comme la comptabilité au Congo, l’une des tâches les plus importantes du partenaire technologique (Banana.ch) est de trouver des solutions durables pour intégrer les nouvelles technologies. Dans ce cas, comme on l’a vu plus haut, le principal problème était la difficulté d’équiper toutes les écoles congolaises de salles d’informatique.
Comment résoudre le problème des salles de classe informatiques
Banana.ch fournit ses logiciels aux écoles suisses depuis de nombreuses années. Cependant, en Suisse, la pénurie de salles informatiques n’est pas du tout un problème; de plus, tous les étudiants des écoles professionnelles ont déjà un ordinateur portable. Ainsi, en Suisse, les écoles adoptent le modèle BYOD (Bring Your Own Device) et n’investissent plus dans les salles de classe informatiques. D’autre part, au Congo, la situation est différente car le pouvoir d’achat est plus faible et les enseignants et les étudiants ne peuvent pas se permettre un ordinateur portable.

En travaillant en étroite collaboration avec les représentants du ministère, nous avons élaboré un scénario alternatif. En RDC, tous les enseignants et étudiants des écoles professionnelles ont un téléphone portable. Grâce aux progrès technologiques, nous avons prédit que les étudiants auront bientôt des smartphones. Nous nous sommes donc adaptés à leur situation actuelle et nous nous sommes concentrés sur :
- Améliorations de Banana Comptabilité sur les systèmes d’exploitation mobiles (Android et iOS) jusqu’à ce qu’il soit presque conforme à la version de bureau.
- Possibilité, également sur mobile, de tenir la comptabilité sans se connecter à Internet, car au Congo les connexions ne sont pas toujours rapides et ont des coûts importants.
Garder des comptes sur un téléphone portable n’est certainement pas la solution idéale. Mais sachant que les apprenants auront un smartphone, nous sommes sûrs qu’ils tiendront leurs comptes en utilisant les fonctions ERP (logiciel de planification des ressources d’entreprise), même sans se connecter à Internet. Par conséquent, au moment où les étudiants trouveront un emploi, ils seront déjà prêts à utiliser un logiciel de comptabilité.
Nous avons remarqué une augmentation de l’utilisation de la version mobile de Banana.ch au Congo, signe que la stratégie fonctionne.
Adaptation aux nouvelles technologies : le modèle BYOD dans les écoles congolaises
À l’heure actuelle, nous constatons une convergence entre l’utilisation de logiciels mobiles et de bureau. Le ministère de l’Education nationale du Congo a présenté une nouvelle technologie disponible, pour l’instant, sur les smartphones haut de gamme. Les enseignants peuvent activer le mode bureau Android en connectant un moniteur et un clavier au smartphone de dernière génération. Le petit appareil se transforme ainsi en un véritable ordinateur.
Dans les années à venir, grâce aux progrès technologiques, cette fonctionnalité sera certainement disponible également pour les smartphones moins chers. Même les étudiants congolais auront la chance d’utiliser un téléphone qui devient un ordinateur. De cette façon, le modèle BYOD peut être adopté et nous éliminerons le problème des salles de classe informatiques.
Ce scénario semble de plus en plus réaliste, et le Ministère est à la recherche d’un nouveau plan pour former les enseignants avec les nouvelles modalités. À l’avenir, lorsque le mode bureau sera possible sur les téléphones intelligents, les fonctionnaires du ministère devraient être prêts à offrir une formation adaptée à cette nouvelle technologie.
L’eurodéputé a déjà mis en place un plan de formation de plusieurs personnes dans les différentes provinces, qui à leur tour formeront les enseignants au système comptable OHADA et à l’utilisation de Banana Accounting.
Avec le temps, la méthodologie Agile est devenue partie intégrante de la collaboration avec les différentes parties prenantes, mais nous l’avons également utilisée pour expérimenter de nouvelles technologies et de nouvelles solutions intéressantes. Vous n’avez pas besoin de changer le système de gestion de projet actuel des ONG pour voir des résultats avec Agile, mais dans notre cas, une large application a rendu la réalisation de nombreux objectifs beaucoup plus facile.
Financement du projet au Congo
Dans le cas du financement du projet éducatif au Congo, le ministère n’avait pas beaucoup d’argent. Ensuite, il y a eu la pandémie de COVID en 2020, qui a mis à genoux les finances de nombreux États, y compris la RDC. Nous devions trouver d’autres moyens, nous avons donc décidé de présenter le projet à d’éventuelles entités de financement. Suivant la méthode Agile, nous développons une structure de documentation et de collecte de fonds en commençant par un financement très limité, nécessaire pour offrir la formation et trouver de nouvelles solutions. Ensuite, dans les étapes ultérieures, ces solutions peuvent éventuellement être appliquées à plus grande échelle. Nous avons divisé le projet d’extension de la formation dans de nouvelles provinces en blocs, ce qui a rendu les chiffres abordables pour de nombreuses fondations et organisations.
| Budget indicatif pour le séminaire dans les provinces |
| Coût | des activités |
|---|---|
| Hébergement pour 2 éducateurs (13 nuits) | 800 $ |
| Restauration pour 2 éducateurs | 400 $ |
| Pause déjeuner pour 52 participants (12 jours) | 6 000 $ |
| Rémunération 2 éducateurs (14 jours) | $ 4.000 |
| Aller-retour 2 éducateurs | 1.500 $ |
| Investissement total pour 1 séminaire | 12.700 $ |
| Investissement total pour les 37 provinces | 427.000 $ |
| Collecte de fonds (50 % des coûts) * |
223 500 $ |
Cependant, nous avons rencontré une limitation majeure : la méthodologie Agile n’est pas bien connue dans le secteur de la coopération internationale, et le financement est généralement accordé pour des projets complets, avec des processus décisionnels plutôt complexes et bureaucratiques.
Dans notre cas, toutes les parties prenantes ont pu voir que le projet géré avec Agile était valide et adapté. En effet, les différentes phases ont permis la consolidation du système scolaire existant. L’impact positif du projet est évident parce que les bénéficiaires, ou les nouvelles générations d’étudiants, seront mieux préparés à leur travail et auront plus de chances de trouver un emploi.
Malgré les résultats, pour le moment, nous n’avons pas encore trouvé de soutien auprès de financements étrangers. Les montants requis sont faibles, mais malheureusement, dans le monde de la coopération, il est encore compliqué et coûteux de développer des stratégies de financement, car la planification ne se fait qu’avec la méthode en cascade. Contrairement au monde des start-up, il n’y a pas encore de prédisposition à accorder un soutien de manière progressive, ouverte au développement de nouvelles solutions.
Une perspective vers une utilisation généralisée de l’agilité dans les ONG
La gestion de projet réussie de la comptabilité numérique au Congo n’est qu’un des exemples qui montrent l’efficacité et la pertinence d’Agile dans le domaine à but non lucratif. Nous n’en sommes pas encore là, mais jusqu’à présent, nous avons considérablement progressé dans un contexte difficile. Ce modèle a permis de tirer le meilleur parti des ressources, des compétences et des organisations disponibles qui sont déjà bien structurées et largement présentes dans la région.
L’agilité appliquée aux ONG ouvre des perspectives impensables il y a quelques années. Certes, l’intégration de cette méthode sera très utile aux projets de coopération internationale, tous caractérisés, plus ou moins, par un degré élevé de difficulté, de variabilité et d’imprévisibilité. Agile peut devenir une option de gestion de projet, sans affecter les méthodologies à but non lucratif actuellement utilisées.
Nous espérons que ce projet dans lequel nous sommes impliqués vous a démontré le fort potentiel de la méthodologie Agile. Les ONG pourraient envisager de l’appliquer pour améliorer l’efficacité des interventions et faciliter l’octroi de petits montants pour des projets humanitaires.
Dans l’espoir qu’Agile sera intégré dans de nombreux projets à but non lucratif, nous vous invitons à nous contacter si vous avez des questions sur le projet de comptabilité éducative au Congo ou sur l’utilisation d’Agile dans le secteur de la coopération.
Références
Helms, B. (2019, 10 settembre). La communauté de développement peut-elle adopter Agile ?. DAI. https://dai-global-developments.com/articles/can-the-development-community-adopt-agile.
Manifeste pour le développement logiciel agile. (2001). Manifeste Agile. https://agilemanifesto.org/
Modernisation de la formation en comptabilité au Congo RDC. (2020, gennaio). Banana.ch. https://www.banana.ch/fr/formation/comptabilite-rdc.
Terbeche, M., Carrier, M. (2019, 26 marzo). Un « Manifeste Agile » pour les projets humanitaires et de développement. Groupe URD. https://www.urd.org/en/review-hem/an-agile-manifesto-for-humanitarian-and-development-projects/.
(2018, 2-4 ottobre). Aide humanitaire en mouvement n° 20. [Relazione a convegno]. Groupe URD. École d’automne sur l’aide humanitaire. https://www.urd.org/fr/review-hem/humanitarian-aid-on-the-move-n20/.
Shafiq, M., & Soratana, K. (2019). Paradigmes Lean et Agile dans la logistique et la gestion de la chaîne d’approvisionnement des organisations humanitaires. LogForum, 15 (1).
Trish. ( s.d.). Agile pour les organisations à but non lucratif: une méthode de gestion de projet. Printemps. https://www.springly.org/en-us/blog/agile-method-project-management-method-nonprofit/.
Modèles pour la gestion familiale dans Banana Comptabilité (Universel)
Banana Comptabilité propose une série de modèles prêts à l'emploi pour aider les familles, les étudiants et les jeunes à gérer leurs finances personnelles. Qu'il s'agisse d'un foyer, d'un jeune faisant ses premiers pas dans l'épargne ou d'un étudiant universitaire, les modèles répondent à tous les besoins avec des outils simples mais efficaces.
Cash Manager : Famille / Jeunes / Étudiants
Modèles basés exclusivement sur la gestion de la liquidité (espèces, compte bancaire, cartes), idéaux pour garder le contrôle des dépenses quotidiennes de manière simple.
- Aucune connaissance comptable requise
- Enregistrement facile des recettes et des dépenses
- Graphiques et résumés automatiques pour analyser les coûts
- Versions adaptées au public cible (familles, jeunes, étudiants).
Recettes/Dépenses : Famille
Modèle conçu pour ceux qui souhaitent un suivi plus détaillé des finances domestiques, avec la possibilité de générer des rapports de bilan tout en gardant une configuration simplifiée.
- Contrôle des catégories de dépenses (alimentation, transports, logement...)
- Résumés périodiques
- Aide à la planification du budget familial.
Partie Double : Famille
Pour les familles souhaitant une gestion comptable plus rigoureuse, le modèle en partie double permet une vue complète du patrimoine, des dettes, des créances et des mouvements.
- Plus de précision et de traçabilité
- Bilans complets et personnalisables
- Convient à ceux qui gèrent également des biens, des prêts ou des activités secondaires.
Multi-devises : Famille
Parfait pour les familles qui voyagent fréquemment ou gèrent des comptes dans différentes devises.
- Gestion intégrée de plusieurs devises (ex. EUR, USD, CHF)
- Conversion automatique vers la devise de base
- Pratique pour les dépenses à l’étranger ou les comptes multidevises.
Chaque modèle peut être adapté aux besoins spécifiques et constitue une excellente base pour améliorer la conscience et le contrôle financiers au quotidien.
Budget familial et comptes du ménage | Cash Manager (Gratuit)
Budget familial et comptes du ménage | Cash Manager (Gratuit)Créer un budget familial avec Banana Comptabilité, c'est comme le faire avec Excel, mais plus rapide, plus sécurisé et complètement gratuit. Grâce au modèle de comptes tout prêts, vous commencez tout de suite, il suffit de saisir les données.
Créer rapidement des prévisions et voir où vous pouvez économiser de l'argent et quels paiements vous pouvez différer. Enregistrez rapidement vos recettes, vos dépenses et sachez si vous respectez votre budget et si vous pouvez payer vos factures à la fin du mois. Ne vous inquiétez pas, vous n'avez pas besoin de connaissances en comptabilité pour commencer à gérer vos comptes avec Banana Comptabilité, et une fois que vous aurez le contrôle de vos finances, vous penserez à la fin du mois avec plus de tranquillité d'esprit et moins de tensions.
Le modèle est préparé avec tous les recettes et dépenses du budget typique d'une famille, il suffit donc d'entrer les montants et d'obtenir immédiatement les prévisions. Nous avons également préparé ce guide pour vous aider à établir le budget familial et à résoudre vos problèmes financiers. Si vous le suivez en détail, vous y arriverez, car vous pouvez toujours le modifier et le corriger. Il est donc facile d'actualiser vos prévisions et de tirer le meilleur parti de votre argent et d'en mettre le plus possible de côté.
Voici comment vous pouvez améliorer votre situation financière en quelques étapes :
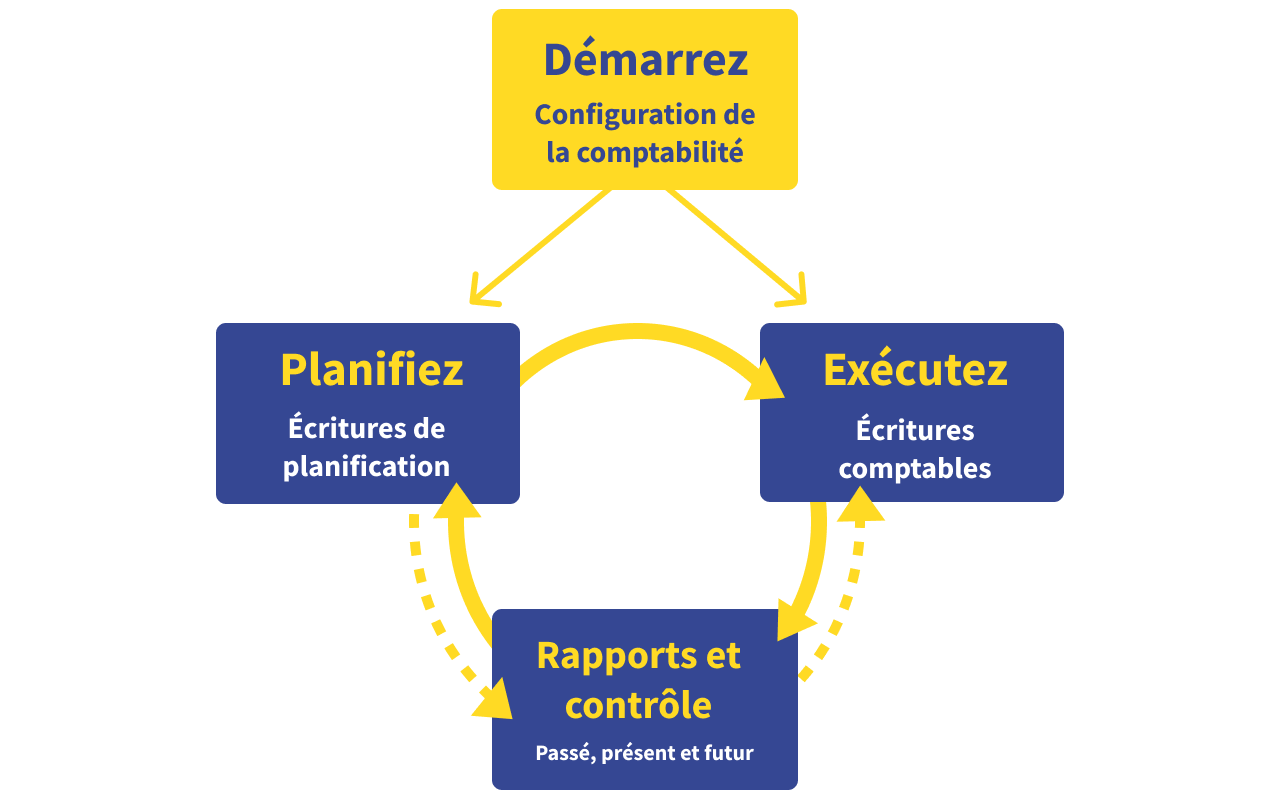
La seule façon d'apprendre à gérer vos finances de la meilleure manière possible et d'obtenir un maximum de succès est de suivre ces trois étapes. Cela demandera un peu d'effort au début, mais une fois que vous aurez compris le mécanisme, vous irez vraiment bien !
Êtes-vous prêt ? Commencez par ici !
Créer un nouveau fichier
- Créez un nouveau fichier à partir de ce modèle (Template ID +11040) en utilisant l'une des méthodes expliquées.
- Avec la commande Fichier > Propriétés fichier (Données de base), définissez la période, le nom de famille et la devise de base (vous pouvez faire le budget et la comptabilité dans la devise de votre choix).
- Avec la commande Fichier > Enregistrer sous..., enregistrez le fichier. Il est utile d'indiquer dans le nom du fichier, le nom de famille et l'année. Par exemple "Famille-Martin-2022.ac2".
Adaptez les tableaux des comptes et des catégories
Avant de créer votre budget, vous devez rapidement adapter le compte et les catégories à vos propres besoins.
Tableau des comptes
Dans le tableau Comptes, il n'y a que le compte de liquidités, c'est-à-dire la disponibilité en votre possession. Vous pouvez le personnaliser en modifiant le numéro de compte, la description et le solde d'ouverture.

Tableau Catégories
Le tableau Catégories contient les catégories de recettes et de dépenses, dont vous pouvez consulter les soldes actualisés à tout moment. Il existe également les Centres de coût qui permettent de connaître en détail le montant des dépenses et des revenus de chaque membre de la famille.
Les catégories sont divisées selon la même structure expliquée en détail dans la section Planification :
- Recettes
- Dépenses fixes
- Dépenses variables
Vous pouvez également modifier les catégories et les centres de coûts en ajoutant d'autres postes, en changeant le numéro ou la description de la catégorie, en modifiant l'ordre et en supprimant les lignes dont vous n'avez pas besoin.

Créer votre budget
Veuillez saisir vos prévisions de dépenses et de recettes.
C'est maintenant le moment de la phase de planification, vous devez entrer les dépenses et les recettes prévues : allez au tableau Budget. La création du budget est très facile, il suffit de saisir les montants des recettes et des dépenses que vous prévoyez d'avoir au cours de l'année, en leur attribuant une catégorie de dépenses.
- Dans le modèle, vous trouverez déjà des lignes pour les différentes dépenses, que vous complétez avec votre montant
- Les opérations de répétition sont saisies une fois, en indiquant le code Répéter.
Si vous faites une erreur, vous pouvez toujours la corriger, vous êtes donc sûr de faire une prévision parfaite !
Pour créer votre citation correctement, suivez trois étapes simples :
- Indiquez vos recettes
- Indiques les dépenses fixes
- Indiquez les dépenses variables ou extras
Pour plus d'informations techniques, veuillez vous référer à la page de documentation du tableau Budget.
Entrez vos recettes
Commencez par réfléchir à tous les revenus fixes dont vous disposez et à leur montant.Le salaire est le revenu principal, mais il peut y en avoir d'autres en fonction de votre travail et de vos ressources.
Le revenu peut comprendre :
- Salaire
- Vente de biens immobiliers
- Pensions alimentaires
- Intérêts bancaires et postaux
Conseil : ne comptez que sur certains revenus.

Entrer les sorties fixes
Il est temps de réfléchir à toutes les dépenses fixes. Ce type de dépenses comprend les dépenses annuelles et mensuelles et vous pouvez utiliser les dépenses de l'année précédente pour les estimer. Pour les dépenses qui varient légèrement d'une période à l'autre, vous pouvez faire une estimation moyenne, en arrondissant le montant au chiffre supérieur pour être plus prudent. Il vaut mieux faire une prévision inexacte au début de l'année, puis l'ajuster, que de se retrouver avec des surprises de dépenses plus élevées.
Par exemple, pour saisir la dépense de loyer mensuel, vous devez saisir la date de début (généralement le début de l'année), la répétition (la fréquence de répétition de cette dépense), la description, le montant dans la colonne des dépenses et la catégorie de la dépense.
Dans le modèle, vous trouverez déjà des exemples de dépenses fixes que vous pouvez facilement modifier et supprimer selon vos besoins. Vous pourrez toujours insérer de nouveaux postes.
Les dépenses fixes peuvent inclure :
- Loyer ou hypothèque pour la maison
- Taxes et redevances
- Assurance
- Frais médicaux (assurance maladie)
- Taxe de télévision
- l'électricité, l'eau et le gaz
- Denrées alimentaires
- Transport (carburant, abonnement aux transports publics)
- Dépenses de soins personnels (hygiène personnelle, hygiène domestique)
- Dépenses d'éducation (frais de scolarité, livres scolaires, abonnement quotidien)

Saisir les sorties variables ou extras
Maintenant, faites la même chose, mais pensez à toutes ces dépenses non essentielles (que nous pouvons aussi appeler dépenses extra), qui sont généralement variables tout au long de l'année.
Les dépenses variables peuvent inclure :
- Vacances
- Repas et boissons dans les restaurants et les bars
- Cinéma, théâtre et spectacles
- Shopping
- Cadeaux
- Pannes à la maison
- Réparation de voitures
- Hobby
- Cigarettes
Dans ce cas aussi, vous devez faire une estimation de toutes les dépenses supplémentaires, en pensant au nombre de fois que vous engagez chaque dépense et bien sûr à son montant.
Conseil :
- Pour chaque dépense supplémentaire, fixez un plafond mensuel, c'est-à-dire un montant maximum que vous ne devez pas dépasser chaque mois. Le respecter vous permettra de maîtriser vos dépenses.
- Les dépenses imprévues, telles que les réparations automobiles et les pannes à domicile, sont estimées chaque année, divisées par 12 et déclarées chaque mois.

Voir la prévision pour chaque mois
Une action souvent sous-estimée est celle qui consiste à contrôler vos dépenses et vos recettes budgétaires, afin de déterminer dès le départ comment vous gérez votre argent.
Pour ce faire, il est très facile de se rendre sur le site Rapports > Rapport formaté par groupes, et dans la liste qui apparaît, choisissez le rapport Prévisions mensuelles (c'est le rapport le plus important à consulter dans cette situation). Appuyez sur OK pour visualiser le rapport. Le programme vous montrera pour tous les mois et pour l'année :
- Le statut de la liquidité
- Total des recettes et des dépenses
- L'excédent ou le déficit du mois

Outre les prévisions mensuelles, toujours dans le Rapports > Rapport formaté par groupes, vous pouvez consulter librement les rapports annuels, trimestriels et sur 4 ans, ou créer votre propre rapport.
Comment améliorer votre situation financière
L'objectif que vous voulez atteindre est certainement d'économiser le plus possible. Vérifiez donc le poste "Variation des liquidités" (surligné en rouge dans l'image ci-dessus) et assurez-vous d'avoir une valeur positive, surtout à la fin de l'année. Dans ce cas, cela signifie que vous générez des économies, et c'est bien !
À l'inverse, si vos dépenses sont supérieures à vos revenus, cela signifie que vous gérez mal votre argent pour le moment. Analysez la situation et apportez des modifications aux prévisions. En cliquant sur le bouton "Controller Comptabilité", le programme recalculera la prévision en tenant compte des changements apportés.
- Vérifiez si vous avez des mois de déficit
- Vérifiez s'il y a des mois où les liquidités diminuent (ce qui signifie que vous avez un problème)
- Vérifier quelles dépenses affectent ce déficit
- Vous pouvez apporter des améliorations :
- Éliminer les dépenses qui ne sont pas essentielles
- Réduire les dépenses
- Déplacer les dépenses plus tard dans le temps
- Vérifier si vous avez la possibilité d'augmenter vos recettes
Saisir les écritures
Avec le budget devant vous, incluant l'"objectif d'économie", vous pouvez commencer la phase d'exécution, c'est-à-dire enregistrer les différents mouvements quotidiens d'argent et les comparer de temps en temps avec les valeurs attendues.
Les mouvements quotidiens doivent être saisis dans le tableau Ecritures. Pour effectuer un enregistrement, vous devez saisir la date, la description, le montant des recettes ou des dépenses et la catégorie correspondante, comme vous l'avez fait pour la prévision précédente. Facile, n'est-ce pas ?
Pour chaque dépense, vous pouvez également inscrire le centre de coût (membre de la famille) dans la colonne CC1, de sorte que le montant de la dépense pour chaque membre de la famille soit mis à jour.

Visualiser les transactions avec les fiches de compte
Lorsque vous enregistrez vos mouvements, vous pouvez trouver utile de vérifier comment une catégorie de dépenses ou un compte de liquidité particulier a évolué au fil du temps. Pour cela, veuillez vous référer à la fiche de compte concerné.
Par exemple, en sélectionnant la fiche Compte de liquidité, vous aurez un résumé de tous ses mouvements. En cliquant également sur l'option en bas du graphique, vous obtenez une vue encore plus immédiate de la performance du compte.
Conseil : vérifiez votre compte de liquidité au moins une fois par mois pour voir comment il se comporte instantanément et comparez-le avec les mois qui passent.

Vérifiez la différence entre le solde et le budget prévisionnel
Pour un meilleur contrôle de vos dépenses, vous pouvez vous rendre dans le tableau Catégories et consulter la colonne Diff.Budget, qui vous indique, pour chaque catégorie, la différence entre les soldes réels et les valeurs que vous aviez prévues. Vous disposez ainsi d'un indicateur supplémentaire pour comprendre si vous suivez bien le budget et pour prendre de meilleures décisions.

Comparer la prévision avec le bilan
Au cours de l'année, vous pouvez à tout moment comparer votre situation actuelle avec celle de la prévision pour voir si et où vous dépensez le plus, afin d'adapter vos habitudes d'achat pour économiser plus d'argent ! À la fin de l'année, vous pouvez faire la comparaison finale entre le rapport réel et la prévision du début de l'année pour voir si vous avez réussi à réaliser les économies souhaitées.
Voir le rapport de comparaison Menu Rapports > Rapport formaté par groupes > Rapport annuel comparé au budget.

Dans ce cas aussi, si vous souhaitez avoir une vue plus précise et plus spécifique, vous pouvez créer des rapports avec la subdivision mensuelle, qui comprennent également la différence entre le solde et la prévision de chaque mois. Cela vous permet d'avoir une vue d'ensemble des mois au cours desquels vous avez eu le plus de difficultés financières et de ceux où vous avez économisé le plus d'argent.
À la fin de l'année, vous devrez maintenant replanifier l'année suivante en créant une nouvelle prévision, exactement de la même manière qu'auparavant. Un nouvel objectif d'épargne vous attend !
Essayez la méthode Recettes/Dépenses
Vous êtes à l'aise avec le système du Livre de caisse, mais vous devez gérer plusieurs comptes, comme un compte bancaire ou postal, ou vous voulez gérer un plan d'investissement ? Vous pouvez ensuite passer au type de comptabilité Recettes / Dépenses : elle est plus complète et fonctionne de la même manière que celle de la Caisse ! En outre, votre fichier de livre de caisse peut être facilement converti en type de déclaration de revenus, ce qui vous permet de reprendre là où vous vous êtes arrêté.
Page modèle des Recettes/Dépenses pour le budget familial
Pour le système de Recettes/ Dépenses, vous aurez la limite de 70 entrées et 20 lignes pour le devis, mais si vous souhaitez dépasser cette limite et utiliser Banana Comptabilité de façon illimitée, vous pouvez acheter une licence et explorer tous les types de comptabilité.
Comptabilité Gratuite pour les Jeunes - Réalisez vos projets en apprenant à gérer votre argent
Comptabilité Gratuite pour les Jeunes - Réalisez vos projets en apprenant à gérer votre argentUne bonne gestion de votre argent est la base d'un investissement durable pour votre bien-être financier. C'est pourquoi il est important d'acquérir cette expertise dès le plus jeune âge. Afin d'économiser de l'argent et de bénéficier de plus de ressources à l'avenir, vous pouvez apprendre à planifier la manière dont vous allez dépenser votre argent, en essayant de corriger les mauvaises habitudes et d'éviter les dépenses inutiles.
Banana vous guidera dans ce nouvel apprentissage en quelques étapes.
Les destinataires de ce modèle et les bénéfices
Parents et enseignants : la gestion de l'argent est une compétence qui n'est souvent pas enseignée à l'école, mais qui peut être très utile dans la vie des enfants. Banana Comptabilité devient une excellente alliée pour les parents et les enseignants qui veulent guider les nouvelles générations dans la gestion de leur argent de poche ou de leurs premiers revenus. L'objectif est de sensibiliser les jeunes à l'argent et de les rendre conscients et responsables de leurs dépenses. Les jeunes pourront ainsi s'autodiscipliner et devenir indépendants dans la gestion des petits revenus, l’argent de poche, l'argent reçu en cadeau ou des salaires des premiers jobs d'été.
Les jeunes sont les principaux destinataires de ce modèle. Ils peuvent facilement suivre les recettes et les dépenses de leurs économies, sans avoir à demander constamment à leurs parents de leur donner plus d'argent. Apprendre l'art d'épargner n'a jamais été aussi facile avec Banana Comptabilité : grâce à la fonction Budget, vous pouvez planifier vos dépenses, comme des vacances entre amis, et vous assurer à l'avance que votre épargne est suffisante pour atteindre vos buts.
Augmenter les compétences digitales
Les compétences digitales permettent d'utiliser les nouvelles technologies de façon familière et consciente.
En plus d'apprendre les bases de la comptabilité et donc de la gestion de votre argent, Banana Comptabilité vous permettra de développer vos compétences digitales. Vous apprendrez à utiliser de nouveaux softwares, à travailler avec des documents et des liens digitaux, ce qui vous permettra d'économiser du papier et du temps. Vous serez en mesure de mettre à profit ces compétences dans différents domaines de votre vie, par exemple dans le travail et la vie privée.
Comment utiliser Banana
- Ouvrez le modèle avec la WebApp de Banana Comptabilité
- Avec la commande Fichier > Propriétés fichier, définissez la période, le nom de famille et la devise de base (vous pouvez gérer le budget et la comptabilité dans la devise de votre choix).
- Avec la commande Fichier > Enregistrer sous, enregistrez le fichier. Il est utile d'indiquer dans le nom du fichier le nom de famille et l'année. Par exemple "Leo-Martin-20xx.ac2".
ATTENTION : Si vous fermez le navigateur sans enregistrer, vous perdrez votre fichier. Enregistrez toujours le fichier sur votre ordinateur.
Pour rouvrir le fichier enregistré, cliquez sur Fichier > Ouvrir.
Fonctions de base : Banana Comptabilité en quelques étapes
Caisse
La caisse indique votre solde actuel, c'est-à-dire la quantité d'argent dont vous disposez en ce moment. Cela vous permettra de surveiller toujours vos disponibilités financières.
Pour commencer à gérer votre argent, la première chose à faire est d'entrer le solde de votre compte. Cliquez ensuite sur le tableau Comptes et vous verrez la section "Caisse". Dans la colonne Libellé, vous pouvez ajouter vos notes personnelles. Cliquez ensuite sur Ouverture et entrez votre solde.

Catégories
À droite du tableau Comptes, vous trouverez le tableau Catégories. Dans cette section, il y a les recettes et les dépenses, c'est-à-dire l'argent que vous recevez ou gagnez et l'argent que vous dépensez. Les catégories sont présentes pour les revenus et les dépenses, et sont utiles pour reconnaître la nature de vos mouvements en un coup d'œil. Sur le modèle que vous pouvez télécharger sur cette page en cliquant sur télécharger modèle, nous avons inséré quelques entrées qui vous guideront. Par exemple, pour les revenus, nous avons : argent de poche, famille/cadeaux, les revenus du travail et autres entrées, tandis que pour les dépenses, certains exemples sont : nourriture, vêtements, sorties avec les amis, etc... Bien sûr, vous pouvez changer les catégories et leurs descriptions comme vous le souhaitez ou en ajouter d'autres simplement en insérant des lignes.

Écritures
Les écritures ne sont rien d'autre que des notes de vos revenus et dépenses. Il est important d'être discipliné dans l'inscription de toutes les dépenses et de tous les revenus, autrement le solde réel ne correspondra pas à celui du fichier.

Pour effectuer des inscriptions, cliquez sur le tableau Écritures. Entrez ensuite la date, la description, par exemple "Pizza avec des amis", et indiquez combien d'argent vous avez dépensé dans la colonne Dépenses. Faites la même opération avec les entrées, mais mettez le montant dans la colonne des Recettes. Entrez ensuite la catégorie et, en tapant seulement les premières lettres, le programme affichera une liste de suggestions (auto-remplissage) avec les mots que vous aviez entrés précédemment.
À ce moment, le programme fera tout pour vous. Vous pouvez retourner à la section Comptes pour vérifier automatiquement votre solde actualisé, ou aller dans le tableau des Catégories et vérifier vos revenus et dépenses dans les différentes catégories.

Vérifier et contrôler
Enfin, si vous voulez être sûr de ne pas avoir fait d'erreurs, Banana Comptabilité vous aide avec une fonction de contrôle très utile. Il signale les erreurs et vous indique les lignes où elles se trouvent exactement (par exemple si vous avez oublié d'inscrire une catégorie ou un montant).
Pour effectuer le contrôle, allez dans le menu Action > Contrôler comptabilité.
En bref : pourquoi utiliser Banana ?
Application gratuite sans installation
Rapide et facile
Atteindre les objectifs financiers
Apprendre l'art d'épargner et devenir entrepreneur
Références
Profamilia Vaud. Argent de poche ? La grande question ! (Profamiliavaud.ch 2017).
Comptabilité Gratuite pour les étudiants - Gérez votre argent et réalisez vos objectifs
Comptabilité Gratuite pour les étudiants - Gérez votre argent et réalisez vos objectifsLa vie d'étudiant n'est pas toujours rose. Après le lycée, vous vous retrouvez dans une nouvelle vie pleine de responsabilités. Entre celles-ci, la gestion de l'argent. Pour les étudiants loin de leur domicile ou ceux qui doivent payer leurs études en travaillant, il peut être difficile de faire face aux factures, au loyer, aux frais de scolarité, etc.
Banana Comptabilité est un programme simple et intuitif qui vous accompagnera et vous aidera à réaliser vos projets futurs.
Pourquoi télécharger Banana Comptabilité ?
- Contrôle constant de votre solde : l'une des principales caractéristiques de Banana Comptabilité est que vous pouvez suivre vos revenus et vos dépenses dans le temps. Cela vous permettra de ne pas trop dépenser et d'éviter d'arriver à la fin du mois sans argent. Il est essentiel qu'un étudiant comprenne comment il dépense son argent, surtout lorsqu'il doit payer un prêt d'études ou qu'il doit payer ses études avec peu de moyens.
- Planifiez et économisez : grâce à la fonction Budget, vous pouvez enfin planifier vos dépenses d'études, l'achat d'une voiture ou le remboursement d'un prêt. En fait, cette fonction vous permettra de savoir combien d'argent vous aurez dans une certaine période.
- Rapide et facile : si vous voulez commencer votre comptabilité, il vous suffit de télécharger le modèle de cette page, qui contient déjà tous les éléments dont vous avez besoin. Il suffit d'ajouter les montants et le programme fera tout pour vous.
Augmenter les compétences digitales : Les compétences digitales permettent d'utiliser les nouvelles technologies de façon familière et consciente. En plus d'apprendre les bases de la comptabilité et donc de la gestion de votre argent, Banana Comptabilité vous permettra de développer vos compétences digitales. Vous apprendrez à utiliser de nouveaux softwares, à travailler avec des documents et des liens digitaux, ce qui vous permettra d'économiser du papier et du temps. Vous serez en mesure de mettre à profit ces compétences dans différents domaines de votre vie, par exemple dans le travail et la vie privée.
Qu'est-ce que Banana Comptabilité offre en plus ?
Par rapport à la comptabilité enregistrée dans Excel ou d'autres programmes, Banana vous permet de traiter votre budget en étapes simples et de disposer du plan de liquidité, un outil qui vous permettra de suivre l'évolution des liquidités dans le temps et de signaler quand il y aura une diminution ou un manque d'argent.
Comment utiliser Banana
- Ouvrez le modèle avec la WebApp de Banana Comptabilité
- Avec la commande Fichier > Propriétés fichier, définissez la période, le nom de famille et la devise de base (vous pouvez gérer le budget et la comptabilité dans la devise de votre choix).
- Avec la commande Fichier > Enregistrer sous, enregistrez le fichier. Il est utile d'indiquer dans le nom du fichier le nom de famille et l'année. Par exemple "Leo-Martin-20xx.ac2".
ATTENTION : Si vous fermez le navigateur sans enregistrer, vous perdrez votre fichier. Enregistrez toujours le fichier sur votre ordinateur.
Pour rouvrir le fichier enregistré, cliquez sur Fichier > Ouvrir.
Enregistrer des dépenses et des recettes réelles
Nous allons maintenant passer directement aux écritures. Vous devez indiquer la date, la description, le montant et la catégorie. Pour simplifier l'entrée des catégories, le programme proposera la liste des catégories en entrant simplement l'initiale du mot.
Veillez à inscrire les montants dans la colonne correspondante : s'il s'agit d'argent que vous recevez, inscrivez le montant dans la colonne Revenus, et s'il s'agit d'argent que vous dépensez, dans la colonne Dépenses.

Prêts et bourses d’études
Si vous avez des prêts ou des bourses d'étude, vous devrez les enregistrer séparément dans les catégories afin de faire la distinction entre vos revenus et ceux qui ne sont pas les vôtres. S'il s'agit d'un prêt, vous pouvez également enregistrer le remboursement et garder une trace de la somme qu'il vous reste à rembourser.

Ajouter des factures, des reçus, des fiches de paie
Dans le tableau Écritures, Banana Comptabilité vous permet de joindre des fichiers PDF de reçus, factures, fiches de paie, etc. Il vous suffit de vous déplacer sous la colonne Lien et de choisir le fichier que vous souhaitez. De cette façon, vous aurez également une preuve détaillée de vos dépenses et de vos revenus.
Pour entrer dans la colonne Lien, allez dans le menu Données → Organiser colonnes → activez Lien.

Vérifier et contrôler
Enfin, si vous voulez être sûr de ne pas avoir fait d'erreurs, Banana Comptabilité vous aide avec une fonction de contrôle très utile. Il signale les erreurs et vous indique les lignes où elles se trouvent exactement (par exemple si vous avez oublié d'inscrire une catégorie ou un montant).
Pour effectuer le contrôle, allez dans le menu Actions → Contrôler comptabilité...
Mieux comprendre la comptabilité : Qu'est-ce que la comptabilité et à quoi sert-elle ?
Le mot "comptabilité" peut nous donner l'idée d'être un concept complexe et obscur. C'est en fait moins compliqué que nous le pensons. En termes simples, il s'agit de l'enregistrement et du contrôle de notre argent ou de celui de quelqu'un d'autre ou d'une entreprise. Par "registres", nous entendons les recettes et les dépenses, c'est-à-dire l'argent qui entre et ce qui est dépensé.
Le contrôle des recettes et des dépenses est fondamental pour la gestion d'une entreprise, qui vise à maximiser les recettes tout en réduisant les coûts. Grâce à la comptabilité, vous disposez d'informations immédiates sur les performances économiques, ce qui vous permet d'élaborer des stratégies opportunes pour corriger ou améliorer la gestion de l'entreprise en vue d'objectifs futurs.
La comptabilité facilite également la rédaction de la déclaration d'impôts, car vous avez une vue immédiate de vos revenus et de vos dépenses, de la provenance de vos revenus, de la manière dont vous avez dépensé l'argent et de l'état de votre compte.
Parallèlement aux grandes entreprises et aux petites sociétés, la comptabilité aide également les individus dans leur vie quotidienne, par exemple pour suivre les dépenses familiales ou pour des projets petits ou importants, comme l'achat d'une maison.
En bref, la comptabilité permettra à chacun d'entre nous de devenir un vrai entrepreneur.
Les concepts de base de la comptabilité
Budget
Le budget est une prévision de vos recettes et dépenses avec indication de la catégorie. Le budget vous permettra de vérifier que vos dépenses n'excèdent pas vos revenus et, le cas échéant, d'éviter des dépenses.
Pour établir un bon budget, vous devrez noter au début de l'année tous les types de revenus que vous pensez avoir et toutes les dépenses fixes et supplémentaires. En prévoyant vos dépenses et vos revenus, vous aurez une vision très claire et un meilleur contrôle de votre argent, ce qui vous permettra de planifier et d'optimiser votre épargne afin de ne pas dépenser plus que ce que vous avez. En plus, grâce au budget, vous pouvez comparer vos prévisions avec l'évolution réelle de votre argent afin de corriger vos dépenses au cas où vous dépenseriez de façon erronée.
Plan de caisse
Le plan de caisse est l'évolution réelle des recettes et des dépenses dans le temps. Grâce aux catégories, Banana vous permet de contrôler la provenance de votre argent (par exemple, de votre emploi à temps partiel), le type de dépenses que vous faites (sorties en boîte avec des amis) et le moment où ces transactions ont lieu.
Prévisions de cash-flow
Grâce au budget, vous pouvez voir la disponibilité future (évolution prévue du solde de liquidité). En fait, Banana vous permettra également d'entrer la date de vos inscriptions, ce qui vous permettra non seulement de planifier et d'optimiser vos dépenses, mais surtout de connaître à l'avance un éventuel manque d'argent et d'éviter des dépenses inutiles. En cas d’une dépense plus importante, comme un nouveau téléphone, vous pourrez prévoir quand et combien d'argent vous devrez consacrer à cette dépense.
En conclusion, le plan de caisse et le budget sont deux moyens complémentaires extrêmement utiles pour apprendre à gérer votre argent, à optimiser vos dépenses ou à les évaluer dans le temps pour les modifier afin de réaliser un certain but. Cela vous permettra de faire vos dépenses en toute conscience et d'éviter de manquer d'argent.
En bref : pourquoi utiliser Banana ?
Application gratuite téléchargeable sur votre téléphone mobile ou votre PC
Rapide et facile grâce au modèle prêt-à-utiliser
Atteindre vos objectifs futurs
Apprendre l'art d'épargner et devenir entrepreneur
Références
Burek, Owen. How to Budget at University. Save The Student (2019).
Segal, Troy. Money Management for College Students. Investopedia (2020).
Budget familial et comptes du ménage | Dépenses et Recettes
Budget familial et comptes du ménage | Dépenses et RecettesCe modèle est basé sur la gestion des comptes du noyeau familial. Dans le tableau Budget, vous pouvez entrer tous les revenus et dépenses fixes et variables que vous prévoyez pour le cours de l'année. Des rapports automatiques, possibles à tout moment, vous permettent d'avoir une vue immédiate des comptes à l'état actuel et budgétisés.
Créer un nouveau fichier
- Créez un nouveau fichier à partir de ce modèle (Template ID +11107) en utilisant l'une des méthodes expliquées.
- Avec la commande Fichier → Propriétés fichier (Données de base), définissez la période, le nom de famille et la devise de base (vous pouvez faire le budget et la comptabilité dans la devise de votre choix).
- Avec la commande Fichier → Enregistrer sous..., enregistrez le fichier. Il est utile d'indiquer dans le nom du fichier, le nom de famille et l'année. Par exemple "Famille-Martin-2022.ac2".
Adaptez les tableaux des comptes et des catégories
Avant de créer votre budget, vous devez rapidement adapter le compte et les catégories à vos propres besoins.
Tableau des comptes
Le tableau Comptes présente les comptes permettant de gérer les banques, le compte courant postal, la caisse, les créances et les dettes.
Vous pouvez les personnaliser en modifiant la description (et/ou le numéro de compte), en ajoutant ceux dont vous avez besoin ou en supprimant ceux dont vous n'avez pas besoin. Ensuite, pour chaque compte, indiquez votre disponibilité actuelle dans la colonne Ouverture.

Tableau Catégories
Le tableau Catégories contient les catégories de recettes et de dépenses, dont vous pouvez consulter les soldes actualisés à tout moment. Il existe également les Centres de coût qui permettent de connaître en détail le montant des dépenses et des revenus de chaque membre de la famille.
Les catégories sont divisées selon la même structure expliquée en détail dans la section Planification :
- Recettes
- Dépenses fixes
- Dépenses variables
Vous pouvez également modifier les catégories et les centres de coûts en ajoutant d'autres postes, en changeant le numéro ou la description de la catégorie, en modifiant l'ordre et en supprimant les lignes dont vous n'avez pas besoin.
Créer votre budget
C'est maintenant le moment de la phase de planification, vous devez entrer les dépenses et les recettes prévues : allez au tableau Budget. Dans ce tableau, vous indiquerez tous les recettes et les dépenses que vous engagerez au cours de l'année.
Pour créer votre citation correctement, suivez trois étapes simples :
- Indiquez vos recettes
- Indiques les dépenses fixes
- Indiquez les dépenses variables ou extras
Pour plus d'informations techniques, veuillez vous référer à la page de documentation du tableau Budget.
Entrez vos recettes
Commencez par réfléchir à tous les revenus fixes dont vous disposez et à leur montant.Le salaire est le revenu principal, mais il peut y en avoir d'autres en fonction de votre travail et de vos ressources.
Le revenu peut comprendre :
- Salaire
- Vente de biens immobiliers
- Pensions alimentaires
- Intérêts bancaires et postaux
Conseil : ne comptez que sur certains revenus.

Entrer les sorties fixes
Il est temps de réfléchir à toutes les dépenses fixes. Ce type de dépenses comprend les dépenses annuelles et mensuelles et vous pouvez utiliser les dépenses de l'année précédente pour les estimer. Pour les dépenses qui varient légèrement d'une période à l'autre, vous pouvez faire une estimation moyenne, en arrondissant le montant au chiffre supérieur pour être plus prudent. Il vaut mieux faire une prévision inexacte au début de l'année, puis l'ajuster, que de se retrouver avec des surprises de dépenses plus élevées.
Par exemple, pour saisir la dépense de loyer mensuel, vous devez saisir la date de début (généralement le début de l'année), la répétition (la fréquence de répétition de cette dépense), la description, le montant dans la colonne des dépenses et la catégorie de la dépense.
Dans le modèle, vous trouverez déjà des exemples de dépenses fixes que vous pouvez facilement modifier et supprimer selon vos besoins. Vous pourrez toujours insérer de nouveaux postes.
Les dépenses fixes peuvent inclure :
- Loyer ou hypothèque pour la maison
- Taxes et redevances
- Assurance
- Frais médicaux (assurance maladie)
- Taxe de télévision
- l'électricité, l'eau et le gaz
- Denrées alimentaires
- Transport (carburant, abonnement aux transports publics)
- Dépenses de soins personnels (hygiène personnelle, hygiène domestique)
- Dépenses d'éducation (frais de scolarité, livres scolaires, abonnement quotidien)

Saisir les sorties variables ou extras
Maintenant, faites la même chose, mais pensez à toutes ces dépenses non essentielles (que nous pouvons aussi appeler dépenses extra), qui sont généralement variables tout au long de l'année.
Les dépenses variables peuvent inclure :
- Vacances
- Repas et boissons dans les restaurants et les bars
- Cinéma, théâtre et spectacles
- Shopping
- Cadeaux
- Pannes à la maison
- Réparation de voitures
- Hobby
- Cigarettes
Dans ce cas aussi, vous devez faire une estimation de toutes les dépenses supplémentaires, en pensant au nombre de fois que vous engagez chaque dépense et bien sûr à son montant.
Conseil :
- Pour chaque dépense supplémentaire, fixez un plafond mensuel, c'est-à-dire un montant maximum que vous ne devez pas dépasser chaque mois. Le respecter vous permettra de maîtriser vos dépenses.
- Les dépenses imprévues, telles que les réparations automobiles et les pannes à domicile, sont estimées chaque année, divisées par 12 et déclarées chaque mois.

Contrôle des dépenses et des recettes budgétisées
Pour compléter votre budget, il ne vous reste qu'une dernière étape à franchir, très importante pour commencer à prendre en compte les dépenses et les recettes réelles : vous devez comparer les recettes et les dépenses estimées.
Pour faire la vérification il suffit d'aller sur Rapports → Rapport formaté par groupes, et dans la liste qui s'affiche, choisissez le rapport que vous souhaitez (généralement, le plus utile dans ce cas est le Budget annuel). Appuyez sur OK pour visualiser le rapport.
L'objectif que vous voulez atteindre est certainement d'économiser le plus possible. Vérifiez donc le poste "Variation des liquidités" (surligné en rouge dans l'image ci-dessus) et assurez-vous d'avoir une valeur positive, surtout à la fin de l'année. Dans ce cas, cela signifie que vous générez des économies, et c'est bien !
À l'inverse, si vos dépenses sont supérieures à vos revenus, cela signifie que vous gérez mal votre argent pour le moment. Analysez la situation et apportez des modifications aux prévisions. En cliquant sur le bouton "Controller Comptabilité", le programme recalculera la prévision en tenant compte des changements apportés.

Saisir les écritures
Avec le budget devant vous, incluant l'"objectif d'économie", vous pouvez commencer la phase d'exécution, c'est-à-dire enregistrer les différents mouvements quotidiens d'argent et les comparer de temps en temps avec les valeurs attendues.
Les mouvements quotidiens doivent être saisis dans le Tableau Ecritures. Pour effectuer un enregistrement, vous devez saisir la date, la description, le montant des recettes ou des dépenses et la catégorie correspondante, comme vous l'avez fait pour la prévision précédente. Facile, n'est-ce pas ?
Pour chaque dépense, vous pouvez également inscrire le centre de coût (membre de la famille) dans la colonne CC1, de sorte que le montant de la dépense pour chaque membre de la famille soit mis à jour.

Comparer la prévision avec le bilan
Au cours de l'année, vous pouvez à tout moment comparer votre situation actuelle avec celle de la prévision pour voir si et où vous dépensez le plus, afin d'adapter vos habitudes d'achat pour économiser plus d'argent ! À la fin de l'année, vous pouvez faire la comparaison finale entre le rapport réel et la prévision du début de l'année pour voir si vous avez réussi à réaliser les économies souhaitées.
Voir le rapport de comparaison → Menu Rapports → Rapport formaté par groupes → Rapport annuel comparé au budget.

À la fin de l'année, vous devrez maintenant replanifier l'année suivante en créant une nouvelle prévision, exactement de la même manière qu'auparavant. Un nouvel objectif d'épargne vous attend !
Privé avec activité accessoire
Privé avec activité accessoire caterinaBudget familial et comptes du ménage | Partie Double
Budget familial et comptes du ménage | Partie Double michaelBudget familial et comptes du ménage | Multidevise
Budget familial et comptes du ménage | Multidevise michaelDie Organisation persönlicher Finanzen
Banana hat ein Haushaltsbuch entwickelt, das das Verwalten der Konten zu Hause erleichtert. In Kürze:
- Sofortiger und vollständiger Überblick über die finanzielle Situation
- Detailansicht der zukünftigen Entwicklung der Finanzen
Im Gegensatz zu anderer Buchhaltungssoftware ermöglicht Ihnen unsere Methode, in die Vergangenheit, die Gegenwart und die Zukunft zu blicken.
Vorteile unserer Vorlagen für die Verwaltung der Finanzen zu Hause
In Banana Buchhaltung wird die Kakebo-Methode mit einer eigenen Technologie kombiniert, damit Sie auch die Finanzen im Haushalt besser verwalten können.
Die Methode Banana hat folgende Vorteile:
- Ordnungsgemässe und genaue Klassifizierung der Ausgaben je nach Bedürfnis
- Prognose der Ausgaben und Einnahmen
- Täglicher Überblick über die Ausgaben für ein besseres Konsumverhalten
- Hilft sparen zu lernen
- Fördert die Selbstdisziplin
- Sie sind entspannt, weil Sie nie mehr ausgeben, als zur Verfügung steht.
Klassifizierung der Einnahmen und Ausgaben
Banana übernimmt von der Kakebo-Methode die Struktur der Kategorien (Ausgaben), mit Hinzufügen einer Business-Kategorie, um die mit einer Nebentätigkeit verbundenen Kosten unter Kontrolle zu halten.
Die Struktur der Ausgabeposten ist nur ein Ausgangspunkt; sie kann zu Beginn oder während des Jahres angepasst werden, um besser auf Ihre Bedürfnisse und deren Entwicklung einzugehen (wenn Sie z.B. Immobilien besitzen und diese vermieten, ist es sinnvoll, eine Gruppe zu bilden, in der alle Einnahmen und Ausgaben im Zusammenhang mit der Immobilie zusammengefasst sind).
- Einnahmen
Alle Einnahmen jeglicher Art - Ausgaben
Die Ausgaben werden so klassifiziert:- Fixe Ausgaben
Sind die Ausgaben, die regelmässig anfallen und die nicht umgangen werden können (wie Miete, Hypothek, Versicherung, Telefonabonnements, öffentliche Verkehrsmittel, Fitnessstudio, Sozialversicherungsbeiträge) - Veränderliche Ausgaben
Ausgaben, die mehr oder weniger nötig sind, wobei die Möglichkeit besteht, selber Produkte aufgrund des Preises auszuwählen- Alltag
Die üblichen, unvermeidbaren Ausgaben für Lebensmittel, Gesundheit, Verkehr oder andere Zwecke - Fakultativ
Ausgaben für Freizeit und Vergnügen - Kultur
Ausgaben, die Geist und Körper bereichern - Extra
Alle Ausgaben, die nicht in andere Kategorien fallen oder die langzeitig sind.
Bei der Einnahmen/Ausgaben-Rechnung sowie der doppelten Buchführung werden langzeitige Ausgaben wie Investitionen behandelt und als Aktiva gebucht - Business.
Ausgaben im Zusammenhang mit Nebentätigkeiten
- Alltag
- Fixe Ausgaben
Effektive Ausgaben und Einnahmen buchen
In der Tabelle Buchungen werden alle Ausgaben angegeben. Neben Datum, Beschreibung und Betrag definiert man die Kategorie einer Ausgabe
- Bewegungen können aus dem Kontoauszug der Bank importiert werden.
- Belege erhalten eine fortlaufende Nummer in der Spalte Beleg
So ist es einfach, Dokumente wieder zu finden - Buchung können an ein digitales Dokument gebunden sein, das gescannt und auf Ihrem Computer gespeichert ist
In der Tabelle Kategorien haben Sie einen sofortigen Überblick über Ihre finanzielle Situation.
Finanzplanung
In der Tabelle Budget können Sie Bewegungen eingeben, die Sie voraussehen.
Die Daten werden zu Beginn des Jahres eingegeben, aufgrund von dem, was Sie erwarten zu verdienen und auszugeben; periodisch können Sie alle Ausgaben und Einnahmen überprüfen und mit dem Budget vergleichen. So können Sie eine detaillierte Finanzplanung erstellen und wissen, wie sich Ihre Finanzen im laufenden und in den folgenden Jahren entwickeln werden.
- Sich wiederholende Bewegungen, geben Sie sie nur einmal ein
- Alle festen Ein- und Ausgaben, die sich nie ändern
- Sie müssen die variablen festen Ausgänge schätzen.
- Die anderen Ausgaben können Sie auch schätzen und als wiederkehrende Ausgaben eingeben
- Wichtige Ausgaben, wie z.B. der Kauf eines Autos, müssen Sie vorhersagen und auch das voraussichtliche Datum angeben
Sie werden augenblicklich wissen, wie sich Ihre Finanzen entwickeln werden
- Sie sehen sofort, ob Sie genug Geld für Ihre Ausgaben haben
- Sie sind in der Lage, Liquiditätskrisen frühzeitig zu erkennen
- Bei grösseren Ausgaben können Sie simulieren, wie sie sich auf Ihre Finanzen auswirken würden
Die Art der Buchhaltung, die Ihren Bedürfnissen am besten entspricht
Sie können die Art der Buchhaltung wählen, die Ihren Bedürfnissen am besten entspricht. Es stehen gebrauchsfertige Vorlagen mit Konten und Kategorien zur Verfügung:
- Kassenbuch
Für eine einfache und effiziente Kontrolle der Ausgaben und der Finanzplanung
Alle Einnahmen und Ausgaben werden so betrachtet, als ob sie von einem einzigen Konto stammen - Einnahmen-und Ausgabenrechnung
Neben dem Ausgabeposten wird auch das Herkunfts- oder Bestimmungskonto angegeben. Ausserdem haben Sie einen klaren Überblick über Ihr Vermögen, Ihre Bankkonten und Kreditkarten. Sie können auch andere Aktiva wie Investitionen, Autos, Möbel, Wohnungen und sogar kurz- oder langfristige Darlehen im Auge behalten. - Doppelte Buchführung
Das ist die professionelle Art und beruht auf internationalen Standards. Buchungen werden eingegeben, indem man das Konto Soll und Haben angibt. - Doppelte Buchführung mit Fremdwährungen.
Wird verwendet, wenn Sie Konten und Ausgaben in verschiedenen Währungen verwalten möchten.
Wenn sich Ihre Bedürfnisse ändern, können Sie Ihre Buchhaltung auch während des Jahres in eine andere umwandeln. (Z.B. von der Einnahmen-Ausgabenrechnung auf die Doppelte Buchhaltung übergehen).
Geschichte und Struktur unserer Methode für Hauskonten
Die Banana Methode für Haushaltskonten basiert auf der Kakebo-Methode, einem innovativen japanischen System, das Anfang des 19. Jahrhunderts entwickelt worden ist. Die Kakebo-Methode kombiniert die Planung von Ausgaben für den Haushalt mit dem Erfassen von Ausgaben. Zu Beginn des Monats werden Einnahmen, fixe Ausgaben, die variablen Ausgaben und Sparziele definiert. Während des Monats werden die tatsächlichen Ausgaben erfasst, so dass am Ende des Monats Ihre finanzielle Situation und erreichten Ziele leicht zu erkennen sind. Diese ständige Arbeit von Voraussehen und Kontrolle ermöglicht es Ihnen, eine ganze Reihe von Wissen zu erwerben, das es Ihnen ermöglicht, Ihre finanzielle Situation besser zu managen.
Die Methode Banana verfolgt das gleiche Konzept, indem sie die Planung mit der tatsächlichen Datenerfassung kombiniert, aber im Gegensatz zur Kakebo-Methode bietet sie neben dm Anzeigen der monatlichen festen Einnahmen und Ausgaben auch eine vollständige Planung mit allen Einnahmen und Ausgaben für das nächste Jahr oder die nächsten Jahre. Diese Zukunftsvision ermöglicht es Ihnen, Ihre Ressourcen besser zu kontrollieren und wichtige Entscheidungen mit grösserer Sicherheit zu treffen. Während Sie Ihre tatsächlichen Ausgaben buchen, sind Sie immer auf dem neuesten Stand Ihrer finanziellen Situation und können sehen, wie weit Sie gekommen sind.
Die Finanzplanung von Banana basiert auf der Buchführung. Prognosen werden mit den gleichen Ausgabepositionen und durch Erfassen von Budgetbuchungen erstellt. Es besteht eine totale Symbiose zwischen Prognose- und effektiven Daten, die eine effiziente Kontrolle der Ausgaben und eine Verbesserung der Prognosen ermöglicht.
Offensichtlich ist die Methode Banana optimiert, um die Konten mit dem Computer zu verwalten. Alle Rechnungen und Projektionen werden von der Software Banana Buchhaltung durchgeführt. Das ist einfacher und Sie verfügen immer über aktuelle Informationen. Die für Banana typischen Funktionen erleichtern die Buchführung und erlauben, einfach und schnell machen.
Education comptable
Modèles pour l'éducation de base
Comptabilité en partie double pour l'Enseignement de la Comptabilité
Comptabilité en partie double pour l'Enseignement de la ComptabilitéCe modèle présente un plan comptable très simple, idéal pour enseigner les bases de la comptabilité en partie double, avec les Actifs, les Passifs, les Charges et les Produits, sans sous-groupes.
Pour plus d'informations sur la Formation :
Pour apprendre à utiliser Banana Comptabilité :
Plan comptable
Dans le tableau Comptes, le plan comptable est visible, avec le bilan et le compte de résultat en un coup d'oeil.
Il peut être adapté en modifiant, ajoutant et supprimant des comptes, en fonction des besoins. Plus de détails sur la façon de configurer le plan comptable sont disponibles dans la leçon en ligne Le plan comptable.
Un aspect important est que du point de vue informatique, les logiciels comptables sont généralement tous basés sur l'équation "Débit = Crédit", qui se réécrit "Débit - Crédit = 0". Les programmeurs ont choisi de maintenir cette forme, de sorte que les montants en Débit sont associés par le système au signe plus "+", tandis que les montants en Crédit sont associés au signe moins "-".

Soldes d'ouverture
Dans la colonne Ouverture, les soldes initiaux des Actifs et des Passifs sont insérés. Les soldes passifs sont insérés avec un signe moins devant.
Journal et écritures
Le tableau Écritures est le coeur de Banana Comptabilité et est utilisé pour saisir les écritures en partie double. Les étudiants effectuent toutes les opérations ici : ils s'exercent en entrant les données, les vérifient et peuvent les corriger à tout moment s'ils commettent des erreurs.
Pour saisir les mouvements au journal, les colonnes suivantes doivent être remplies :
- Date, éventuel numéro de document
- Description
- Compte en Débit
- Compte en Crédit
- Montant
Les écritures individuelles peuvent prendre la forme de simples, c'est-à-dire occupant une seule ligne, ou composées, c'est-à-dire occupant plusieurs lignes (si plus de deux comptes sont impliqués). C'est exactement identique à ce qui se passe sous forme traditionnelle papier, mais plus rapide grâce à l'utilisation de l'ordinateur.
Après chaque écriture, les soldes des comptes (dans le tableau Comptes) sont automatiquement mis à jour. Ainsi, les étudiants peuvent immédiatement se rendre compte de l'impact de chaque opération et la comptabilité est toujours en ordre.

Colonne Solde
Grâce à la Colonne Solde, les étudiants peuvent voir instantanément s'il y a des erreurs comptables ou des anomalies et peuvent corriger immédiatement les données saisies.

Fiches de compte
Les Fiches de compte correspondent aux livres auxiliaires et montrent donc les mouvements de chaque compte individuel. Elles indiquent le solde initial, les variations dues aux écritures entrées au Journal et le solde final résultant.
Bilan et Compte de Résultat
Une fois que les écritures comptables ont été saisies, on peut obtenir le Bilan et le Compte de Résultat. Le Plan de Comptes, déjà automatiquement et instantanément complété avec les Soldes finaux, montre déjà le Bilan et le Compte de Résultat finaux.
Grâce à la commande Rapports > Bilan formaté par groupes, on peut obtenir une présentation ordonnée et soignée du Bilan et du Compte de Résultat à sauvegarder en PDF ou à imprimer. Ils sont ainsi "embellis" et reproduits dans un style traditionnel pour la présentation.
Les rapports peuvent être personnalisés en choisissant les sections à imprimer, la période, la subdivision de la période et d'autres options.

Analyse du bilan
Grâce à une extension spécifique, dans le menu Extensions > Comptes de flux et indices de bilan (Cash Flow Statements and Financial Ratios), vous pouvez obtenir automatiquement un rapport au format PDF contenant :
- Ratios de liquidité (Cash ratio, Quick ratio, Current ratio)
- Ratios de rentabilité (ROE, ROI, ROS, ...)
- Ratios d'efficacité
- Cash Flow
- Analyse DuPont et Altman Index Z-Score
Fichier Enseignant pour la correction automatique des exercices et examens
Fichier Enseignant pour la correction automatique des exercices et examens patrickFichier Étudiant pour la correction automatique des exercices et des examens de comptabilité
Fichier Étudiant pour la correction automatique des exercices et des examens de comptabilité patrickExercices avec le logiciel de comptabilité
Les étudiants sont dirigés vers l'utilisation du logiciel de comptabilité et l'adoptent pour effectuer des exercices comptables pratiques. Les enseignants ont la possibilité de partager facilement les exercices de comptabilité et de les corriger automatiquement de manière aisée.
Introduction à l'utilisation du logiciel
Les feuilles de calculs de Banana Comptabilité sont similaires à celle d'Excel et sont généralement faciles à comprendre. Les étudiants peuvent facilement être dirigés à l'usage du logiciel en l'utilisant simplement pendant la leçon.
Par exemple, l'enseignant peut présenter le plan comptable pendant le cours en expliquant sa structure. Il en va de même pour l'insertion des enregistrements comptables.
Les élèves, seuls ou en groupe, ont la possibilité d'utiliser le programme et d'effectuer les exercices assignés par l'enseignant. Cette phase est précédée d'une présentation de l'utilisation du logiciel.
Préparation de la leçon et des modèles comtables pour les exercices
L'enseignant établit des fichiers comptables qui servent à la fois à expliquer les questions théoriques et à permettre aux étudiants de suivre la leçon et de s'exercer. La durée de cette phase dépend de la durée du programme d'études.
L'enseignant :
- Prépare des fichiers comptables pour chaque phase de l'apprentissage.
- Fournit des explications théoriques et montre en même temps comment elles sont traduites dans la pratique.
- Prépare des exercices à faire pour les élèves.
Installer le programme sur l'ordinateur de l'étudiant
L'enseignant donne des instructions sur la façon dont chaque élève peut installer le programme sur son ordinateur.
- Il est préférable de fournir ces informations à l'avance afin que chaque étudiant ait le temps d'installer le programme de manière indépendante.
Le fait que tous les élèves installent le programme en même temps en classe est toujours problématique car cela ralentit les connexions. - Vous devez fournir les informations d'installation pour les différents systèmes d'exploitation :
- Ordinateurs Windows, Mac et Linux. Il est utile de signaler la page de téléchargement et la page des configuration minimal.
- L'installation est entièrement automatique, mais les étudiants doivent être informés qu'ils doivent fonctionner en mode administrateur de l'ordinateur pour installer le logiciel.
- Si les élèves ne disposent que de connexions lentes, l'école peut télécharger les fichiers d'installation sur son réseau.
Dans ce cas, il faut veiller à mettre à jour les fichiers afin que les étudiants installent toujours la dernière version. - Encouragez les élèves à démarrer le programme afin qu'ils puissent vérifier que l'installation a été réussie.
- Play Store pour Android. Recherchez Banana Comptabilité Mobile et installez-le.
- IOS App Store. Recherchez Banana Comptabilité Mobile et installez-le.
- Ordinateurs Windows, Mac et Linux. Il est utile de signaler la page de téléchargement et la page des configuration minimal.
- Au cours de la leçon suivante, l'enseignant vérifie que tous les élèves ont installé le programme.
Fournir des fichiers d'exercices de comptabilité aux étudiants
En règle générale, pour chaque exercice, l'enseignant met à disposition des fichiers de comptabilité que les élèves téléchargent sur leur ordinateur. Pendant cette phase, les étudiants ont besoin d'une connexion Internet.
- La manière de mettre les fichiers d'exercices à la disposition des élèves dépend de la structure informatique de l'école.
- Il est utile que les étudiants aient le temps et les connexions nécessaires pour télécharger ces fichiers.
- Grâce à la nouvelle Communauté de Banana Comptabilité Plus, les écoles et les enseignants peuvent télécharger leurs modèles de plan comptable utiles à des fins pédagogiques directement dans le programme Banana Comptabilité Plus. De cette manière, chaque étudiant dispose des fichiers nécessaires pour suivre les cours ou réaliser les exercices comptables.
Flux de travail pour les exercices comptables des étudiants
Une fois que les élèves ont installé Banana Comptabilité et téléchargé le fichier d'exercice fourni par l'enseignant, il n'est plus nécessaire de disposer d'une connexion Internet.
Il existe plusieurs possibilités pour faire travailler les étudiants :
- Effectuer les exercices sur leur propre ordinateur pendant que le professeur explique.
- Effectuez les exercices en classe, dans le temps imparti par l'enseignant.
- Faites les exercices en dehors des heures de cours.
Voici le mode de travail de l'étudiant et celui de la correction ultérieure des exercices comptables par l'enseignant.
Mode de travail de l'étudiant
Chaque élève travaille sur son propre fichier de comptabilité et effectue les tâches qui lui sont assignées par l'enseignant.
Une fois l'exercice de comptabilité terminé, chaque étudiant transmet le fichier à l'enseignant, également par e-mail. Les modalités de transmission dépendent de l'infrastructure de gestion de l'école et de la préférence de l'enseignant. Généralement, les fichiers peuvent être téléchargés sur la plateforme d'apprentissage en ligne ou sur le système réseau de l'école, ou sur leur propre Cloud désigné (par exemple Google Drive, Dropbox, iCloud, OneDrive).
Correction des exercices de comptabilité
L'enseignant ouvre le dossier de l'élève et vérifie si l'exercice a été fait correctement. Pour faciliter ce travail, il est également possible d'utiliser l'extension automatique pour la correction des exercices.
Pendant la correction, l'enseignant peut mettre en évidence des lignes en utilisant des couleurs et ajouter des notes et des commentaires pour signaler d'éventuelles erreurs.
Par la suite, l'étudiant peut télécharger le fichier corrigé par l'enseignant sur son propre ordinateur et visualiser le résultat obtenu ainsi que les corrections apportées par l'enseignant.
Insegnare Contabilità
Libro “Funzionamento e logiche dei programmi di contabilità”
Scopri il libro che svela le logiche alla base dei software di contabilità, pensato per chiunque voglia comprendere a fondo il funzionamento dei programmi contabili. Questo testo offre una guida completa e accessibile, partendo dalla storia della contabilità fino alle tecnologie digitali più recenti, per mostrare come i software moderni automatizzano operazioni complesse di bilancio, calcolo e reporting.
A chi è indirizzato?
Il libro è rivolto a una vasta gamma di lettori: professionisti, sviluppatori di software, docenti, studenti e chiunque si avvicini alla contabilità per la prima volta. È ideale per chi utilizza software di contabilità senza una formazione specifica, fornendo una comprensione più profonda delle logiche e dei meccanismi che facilitano la gestione contabile e permettono di sfruttare al meglio questi strumenti.
Perché leggere questo libro?
L'automazione dei software contabili ha semplificato notevolmente il lavoro di contabilità, ma spesso ha anche nascosto i meccanismi fondamentali della contabilità a partita doppia. Questo libro è stato scritto per colmare questa lacuna, offrendo una guida chiara che permette ai lettori di comprendere come i software gestiscono automaticamente diverse operazioni contabili. La comprensione delle logiche di base dietro questi strumenti consente di usare i software in modo più consapevole e di sfruttarne al massimo il potenziale.

Domenico Zucchetti, contabile, giurista e programmatore, è un pioniere nello sviluppo di soluzioni per la contabilità digitale. Con oltre 40 anni di esperienza nel settore, ha fondato Banana.ch SA e creato Banana Contabilità, uno dei software più accessibili per la gestione contabile. Zucchetti ha dedicato la sua carriera a rendere la contabilità intuitiva e automatizzata, focalizzandosi sulle esigenze delle piccole imprese e sull’efficacia didattica dei suoi strumenti. La sua profonda conoscenza dei principi contabili e delle tecnologie emergenti lo rende una figura di riferimento per chiunque voglia migliorare la gestione finanziaria aziendale.
Condividi la tua opinione
Siamo sempre interessati a conoscere le opinioni dei nostri lettori. Dopo aver letto “Funzionamento e logiche dei programmi di contabilità” ti invitiamo a condividere i tuoi feedback e suggerimenti. Facci anche sapere se dovessi trovare che alcuni argomenti vadano spiegati in maniera più semplicistica. Le tua opinione è preziosa e ci aiuta a migliorare continuamente la qualità del nostro lavoro.
Puoi inviare il tuo feedback tramite questo modulo. Grazie per il tuo contributo!
Automatic Corrections for Accounting Exams: Extension pour la préparation et la correction des exercices [BETA]
Automatic Corrections for Accounting Exams: Extension pour la préparation et la correction des exercices [BETA][Cette extension et cette documentation sont en cours de développement et ne sont pas encore définitives]
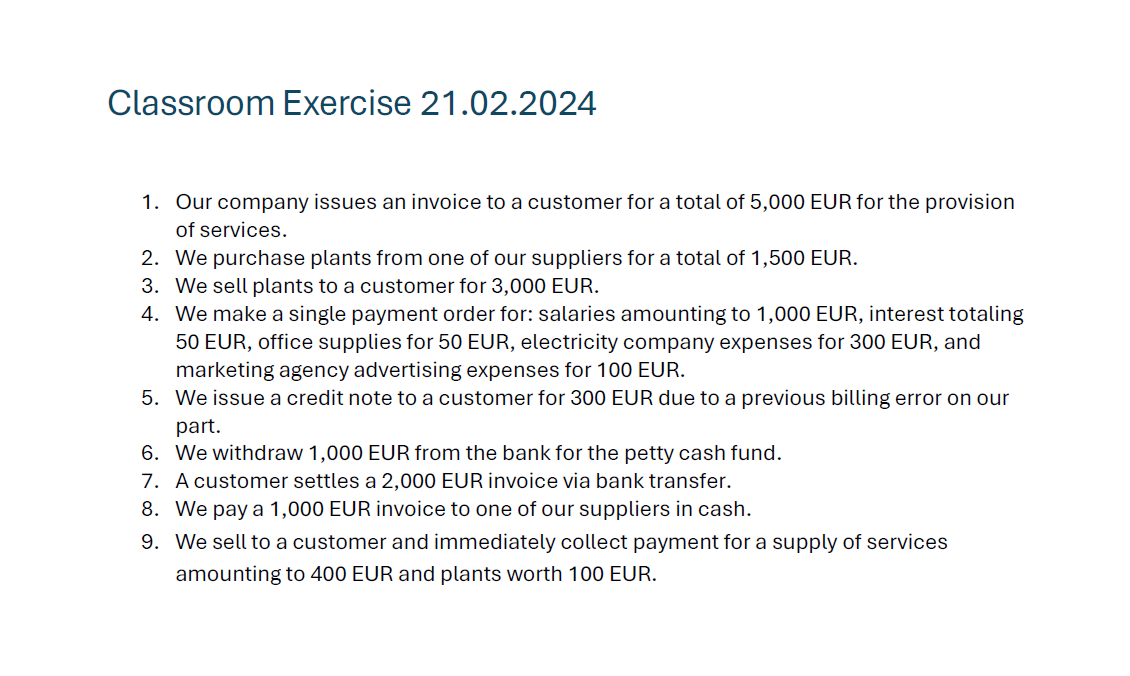
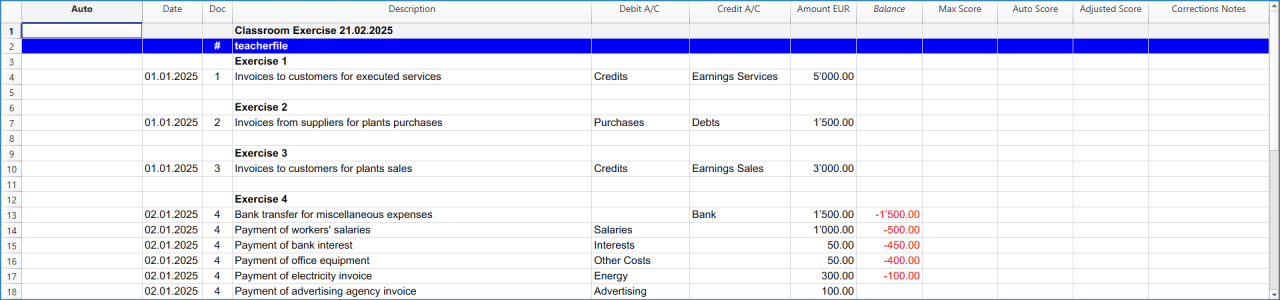
Adapter un modèle existant pour les corrections automatiques des exercices
[Cette extension et cette documentation sont en cours de développement et ne sont pas encore dans leur forme finale]
L’extension Corrections automatiques pour les examens de comptabilité peut adapter des fichiers existants ou utiliser les modèles de plans comptables disponibles directement dans Banana Accounting+. Cela les rend adaptés aussi bien à des fins de formation qu’à des exercices et examens de comptabilité en partie double.
- Créez ou ouvrez un fichier de comptabilité en partie double.
- Dans le menu Banana, cliquez sur Extensions.
- Cliquez sur Corrections automatiques pour les examens de comptabilité.
- Cliquez sur Préparation du fichier.
- L’extension vous demande de préparer soit un fichier enseignant, soit un fichier étudiant.
- Choisissez le type de fichier que vous souhaitez préparer et cliquez sur le bouton OK.

- Cliquez sur le bouton OK dans la fenêtre qui s’affiche. Les modifications montrées dans l’image ci-dessous seront alors appliquées au fichier.
L’extension ajoute automatiquement au fichier les colonnes nécessaires, tout en conservant les écritures existantes.
Si les colonnes requises sont déjà présentes, elles ne seront pas ajoutées à nouveau. Si le fichier est déjà préparé, cette fonction n’apportera aucune modification.
Si votre fichier est déjà prêt à l’emploi, cette fonction n’effectuera aucune modification.
Les colonnes suivantes sont ajoutées :
- Auto (première colonne à gauche).
- Max Score.
- Auto Score.
- Adjusted Score.
- Corrections Notes.
Cette fonctionnalité est disponible uniquement pour les modèles de comptabilité en partie double.
Instructions ajoutées pour le fichier de l’enseignant
Un symbole dièse (#) est inséré dans la colonne Doc de la table Écritures.
La clé teacherfile est ajoutée dans la colonne Description (sans guillemets et entièrement en minuscules).
Instructions ajoutées pour le fichier de l’étudiant
Le mot Student est ajouté dans la colonne Doc (sans guillemets et avec la première lettre en majuscule).
Corriger les exercices
[Cette extension et cette documentation sont en cours de développement et ne sont pas encore dans leur forme finale]
La correction automatique peut être exécutée uniquement sur le fichier de l’étudiant :
- Elle n’est pas disponible lorsqu’elle est exécutée sur le fichier de l’enseignant.
- Elle ne peut être effectuée que si aucune correction automatique n’a déjà été appliquée au fichier de l’étudiant.
- Si une seconde correction est nécessaire, les corrections automatiques existantes doivent d’abord être supprimées à l’aide de la fonction Supprimer les corrections.
Vérifier la solution
Voici le flux de travail pour exécuter une correction automatique avec l’extension :
- Dans le menu, sélectionnez Actions > Recalculer la comptabilité. Le programme vous avertira s’il existe des problèmes dans le fichier.
- Exécutez la commande Extensions > Corrections automatiques pour les examens de comptabilité > Corriger les exercices.
- Cette commande effectue des contrôles spécifiques, tels que la vérification des numéros de compte et d’autres données.
- Si une écriture contient une erreur, un message apparaîtra dans la colonne Corrections Notes.
- La colonne Auto Score sera mise à jour avec le score calculé.
- Cette commande effectue des contrôles spécifiques, tels que la vérification des numéros de compte et d’autres données.
Recalculer le total
[Cette extension et cette documentation sont en cours de développement et ne sont pas encore dans leur forme finale]
Cette fonctionnalité fonctionne uniquement si des corrections automatiques ont déjà été exécutées à l’aide de la commande Corriger les exercices.
La colonne Adjusted Score permet à l’enseignant de modifier manuellement le score calculé automatiquement lorsque cela est nécessaire. Après avoir effectué les ajustements, l’enseignant peut recalculer le score total de l’ensemble de l’exercice via le menu de l’extension.
La dernière ligne, qui affiche le score total, sera alors mise à jour avec le score ajusté final défini par l’enseignant.
Supprimer les corrections
[Cette extension et cette documentation sont en cours de développement et ne sont pas encore dans leur forme finale]
Cette fonction supprime les lignes qui ont été ajoutées automatiquement par l’extension pendant le processus de correction.
Les lignes originales de l’étudiant restent dans le fichier, mais toutes les mises en évidence par couleur, les scores et les messages d’erreur sont supprimés.
De cette manière, le fichier de l’étudiant est rétabli dans son état d’origine.
La fonction ne peut être exécutée que si une correction automatique a déjà été effectuée et elle s’applique exclusivement au fichier de l’étudiant.
Paramètres
[Cette extension et cette documentation sont en cours de développement et ne sont pas encore dans leur forme finale]
Les paramètres permettent de décider s’il faut attribuer un score automatique et de définir les points pour chaque condition vérifiée.
Tous les paramètres doivent être configurés dans le fichier de l’enseignant et seront appliqués automatiquement lors de l’évaluation des fichiers des étudiants.
Paramètres disponibles dans le fichier de l’enseignant
Les paramètres actuellement disponibles et leurs descriptions sont les suivants :
- Évaluation basée sur des points : active ou désactive l’attribution automatique de points pour les écritures des étudiants.
- Points pour la date correcte : attribue des points si la date saisie par l’étudiant correspond à celle de l’enseignant.
Mettre à zéro si vous ne souhaitez pas évaluer ce champ. - Points pour le compte débit correct : attribue un score si le compte débit saisi est correct.
Mettre à zéro si vous ne souhaitez pas évaluer ce champ. - Points pour le compte crédit correct : attribue un score si le compte crédit saisi est correct.
Mettre à zéro si vous ne souhaitez pas évaluer ce champ. - Séparer les comptes débit et crédit : permet une attribution de points séparée pour le compte débit et le compte crédit.
- Si la case est cochée, le score est attribué séparément même si l’un des deux comptes (débit ou crédit) est incorrect.
- Si la case n’est pas cochée, le score est égal à zéro lorsque les deux comptes débit et crédit sont incorrects ou lorsque l’un des deux est incorrect.
- Si la case n’est pas cochée, des points sont attribués uniquement lorsque les comptes débit et crédit sont tous deux corrects.
- Dans ce cas, les points du compte débit et du compte crédit sont additionnés pour former le score final attribué à l’étudiant.
- Points pour le montant correct : attribue un score si le montant saisi est correct.
Mettre à zéro si vous ne souhaitez pas évaluer ce champ. - Points pour le code TVA : attribue un score si le code TVA saisi est correct.
Mettre à zéro si vous ne souhaitez pas évaluer ce champ.
Les points pour le code TVA sont pris en compte uniquement pour les modèles avec fonctionnalités TVA activées. - Points pour le montant en devise : attribue un score si le montant en devise saisi est correct.
Mettre à zéro si vous ne souhaitez pas évaluer ce champ.
Les points pour le montant en devise sont pris en compte uniquement pour les modèles multidevises. - Points pour la devise : attribue un score si la devise saisie est correcte.
Mettre à zéro si vous ne souhaitez pas évaluer ce champ.
Les points pour la devise sont pris en compte uniquement pour les modèles multidevises. - Points pour le taux de change : attribue un score si le taux de change saisi est correct.
Mettre à zéro si vous ne souhaitez pas évaluer ce champ.
Les points pour le taux de change sont pris en compte uniquement pour les modèles multidevises. - Pénaliser le montant uniquement si Débit et Crédit sont corrects : attribue des points au montant uniquement si les comptes débit et crédit saisis sont corrects.
En bas, une image de la fenêtre des paramètres dans le fichier de l’enseignant illustre la manière dont ces options sont configurées.
Banana Investment Accounting
Banana Investment Accounting allows you to manage shares, bonds, funds, and other investments in multiple currencies directly within your accounting file. It combines double-entry Financial Accounting with the detailed tracking of individual investments, including quantities, prices, book values, and market values.
Investment transactions update both the accounting records and the related investment data, providing an integrated view of your investments and their impact on the Balance Sheet and Income Statement.
The Investment Accounting Extension adds specialized commands and reports for tasks such as calculating realized gains or losses, creating valuation adjustments, checking balances, and preparing investment reports.
Templates
We provide two predefined accounting templates to help you get started:
Both templates are preconfigured with sample Investment Balance Sheet Accounts and account groups, providing a ready-to-use starting point for managing investments with Banana Investment Accounting. The chart of accounts can be customized to suit your specific requirements.
The Double-Entry Accounting template is suitable for managing investments in the base currency only.
The Multi-Currency Accounting template allows you to manage investments denominated in foreign currencies. The Exchange Rates table is used to define the currencies and exchange rates, while the Accounts table includes the accounts required to record exchange rate gains and losses.
Double-Entry Accounting Example For Integrated Investment Accounting
Double-Entry Accounting Example For Integrated Investment Accounting michaelDouble-Entry Multi-Currency Accounting Example With Investment Accounting
Double-Entry Multi-Currency Accounting Example With Investment Accounting
For more information see:
Use for your accounting
This template is conceived to experiment with the Portfolio extension and it contains example of investments and transactions.
The accounts list is very limited, but if you want to use as a base of your accounting simply:
- Delete all transactions
- Delete the opening amount in the Accounts table
- Delete the opening values in the Items table.
Extensions de la comptabilité des titres [BETA]
Extensions de la comptabilité des titres [BETA]Documentation disponible en anglais:
- Accounts settings
- Update market prices
- Calculate unit price
- Calculate sales data
- Create adjustment transactions
- Check balances report
- Reconciliation report
- Security card report
- Evaluation of investments report
Comment commencer
- Ouvrir Banana Comptabilité Plus
- Ouvrez votre comptabilité Banana avec votre comptabilité de portefeuille, ou créez une nouvelle comptabilité de portefeuille à partir de nos modèles.
- Allez dans le menu Extensions > commande Gérer les extensions et installez l'extension Comptabilité Titres.
Exigences :
Accounts settings
The Accounts Settings dialog allows you to specify the accounts used for different investment transactions, such as sales, valuation adjustments, and other investment-related entries.
These accounts are used by the Investment Accounting extension when it automatically calculates or creates accounting transactions, ensuring that the appropriate accounts are used for each type of operation.
You do not need to specify every account, only those required for your accounting setup. The accounts entered in the dialog must exist in the Accounts table. If an account does not exist, the program displays an error message when you try to confirm the settings.
Sections in the Dialog and Account Usage

The dialog is divided into three main sections.
Balance Accounts
This section contains the Balance Sheet accounts associated with investments and other investment-related balances.
- Assets
Contains the accounts used to record investment assets.
The first time you open the dialog, the program automatically fills this field with the Investment Balance Sheet Accounts specified in the Asset Account column of the Items table. - Liabilities
Contains the accounts used for investment-related liabilities, such as margin loans or other financial obligations.
Value Changing Accounts
This section contains the accounts used to record realized and unrealized gains and losses, exchange rate differences, and other adjustments affecting the value of investments.
- Realized Gain: Account for recording realized gains from investment sales.
- Realized Loss: Account for recording realized losses from investment sales.
- Unrealized Gain: Account for recording unrealized gains due to an increase in the market value of investments.
Used by the Create adjustment transactions command. - Unrealized Loss: Account for recording unrealized losses due to a decrease in the market value of investments.
Used by the Create adjustment transactions command. - Realized Exchange Rate Gain: Account for recording realized exchange rate gains arising from the sale of investments denominated in a foreign currency.
- Realized Exchange Rate Loss: Account for recording realized exchange rate losses arising from the sale of investments denominated in a foreign currency.
- Unrealized Exchange Rate Gain: Account for recording unrealized currency gains due to favorable exchange rate movements.
- Unrealized Exchange Rate Loss: Account for recording unrealized currency losses due to unfavorable exchange rate movements.
- Depreciations: Account for recording investment depreciation adjustments, if applicable.
- Other Value Changing Costs: Account for miscellaneous expenses affecting the value of investments.
- Other Value Changing Income: Account for miscellaneous income affecting the value of investments.
- Rounding Differences: Account for small discrepancies due to rounding or decimal precision differences.
Profit and Loss Accounts
This section contains the accounts used to record income and expenses related to investment activities.
- Charges: Account for general investment-related charges and fees.
- Commissions: Account for broker or bank commissions on investment transactions.
- Interest Earned: Account for interest income from bonds or other financial instruments.
- Interest Paid: Account for interest expenses related to investment loans or margin trading.
- Dividends Income: Account for dividend income received from investments.
- Other Income: Account for any additional investment-related income not classified elsewhere.
- Other Costs: Account for any additional investment-related costs not classified elsewhere.
Error Messages
- Account XXX not found in the Accounts table: The account entered does not exist in the Accounts table.
- Add the account to your Accounts table.
- Select the “Ignore warnings/errors” checkbox at the bottom of the dialog to ignore the error.
Update market prices
This command updates the current market prices of investments in the Items table. Market price data can be imported from a CSV file or from the clipboard.
Before applying the changes, Banana Accounting displays a preview in the Commit changes dialog. Once the changes are confirmed, the imported prices are entered in the Price Current column of the Items table.
Price Current Column
The Price Current column in the Items table contains the current market price used to calculate the current value of the investment.
You can update Price Current manually, by copying and pasting values into the Items table, or by using the Update market prices command to import prices for multiple investments.
When market prices are imported and the changes are confirmed, the command updates the Price Current column of the corresponding Items.
Prepare Current Market Price Data
Current market prices can be obtained from financial information providers and prepared in an Excel or CSV file for import.
For each investment, provide:
- the ISIN or other identifier used to identify the investment
- the corresponding current market price.
Make sure that the identifier used in the import data corresponds exactly to the identifier entered for the investment in the Items table.
File Format
The extension expects the data to be in the following two-column format, with ISIN and current market price separated by a semicolon (;):
US123456789;11.04873
IT000792468;10.98732
...
- First column: The ISIN or other investment identifier.
- Second column: The current market price, without thousands separators and using a period (".") as the decimal separator.
Import Procedure
You can import the data in two different ways.
Import *.csv File
- Choose Extensions > Investment accounting > Update market prices.
- Select the *.csv file.
- Review the changes in the Commit changes dialog and confirm them.
Import from Clipboard
- Choose Actions > Import to accounting and select the Import File option.
- Select the extension to be used, in this case 2. Update market prices.
- Open the Excel file, select the data, and copy it to the clipboard.
- In the import dialog, select Import data from clipboard.
- Click OK.
- Review the changes in the Commit changes dialog and confirm them.

Error Messages
- Unrecognised *.csv file format: The format of the *.csv file you are trying to import does not match the required format.
- Make sure that you selected the correct file.
- Check that the data follows the format described in the File Format section above.
- Items table not found: The Items table is not present in the accounting file.
- Add the Items table to the accounting file.
- Asset: XXX not found in the Items table: The identifier contained in the imported data does not correspond to an investment in the Items table.
- Check that the identifier is correct and corresponds to the one entered in the Items table.
- If the investment has not yet been defined, add it to the Items table before importing its market price.
Calculate sales data
The Calculate sales data dialog allows you to calculate the realized gain or loss resulting from the sale of an investment and, when required, create the related accounting transactions.
The dialog provides two main functions:
- Calculate the Sale Result – Click Calculate profit or loss to preview the realized gain or loss based on the data entered in the dialog or automatically retrieved from the accounting file. No accounting transactions are created. This function can also be used without starting from the sale transaction row in the Transactions table.
- Create the Sales Record – Click Create sales record to create the accounting transactions required to complete the sale recording. To use this function, start from the sale transaction row in the Transactions table that records the net proceeds from the investment sale.
Start from the Sale Transaction Row
When creating the sales record, the program needs to identify the transaction to be completed with the additional entries required to record the sale, such as charges, realized gains or losses, and exchange rate differences. Therefore, you must start from the transaction row that records the net proceeds from the investment sale.
If this row already includes:
- Item (security ID)
- Quantity
- Unit Price (Market Price)
- Exchange Rate (for multi-currency accounting)

The dialog retrieves this information automatically. Otherwise, you need to enter the missing information in the dialog.
The sale transaction row is the only row that must be entered manually. Once this row is available, the program can automatically create the additional entries required to complete the sale recording.
How to use the dialog
When you execute this command, a dialog titled Calculate book profit/loss on sale opens.

Enter or review the information required for the sale:
- Security Data:
- Id (ISIN): Select the security from the dropdown.
- Type: Displays whether the security is a Stock or a Bond.
- Quantity/Nominal Value: Enter the quantity or nominal value of the investment being sold.
- Current Price: Enter the price per unit at which the investment is being sold.
- Current Exchange Rate: For investments denominated in a foreign currency, enter the exchange rate applicable to the transaction.
- Bank Charges: Enter any bank charges related to the sale. If no amount is entered, the corresponding transaction is not created.
- Other Charges: Enter any additional costs related to the sale. If no amount is entered, the corresponding transaction is not created.
- Accrued Interests: For bonds, enter any accrued interest related to the sale. This field is enabled only for bonds.
- Results Preview: Once the required data is entered, click Calculate profit or loss to generate a preview showing:
- Actual Quantity: The quantity held before the sale.
- Book Value per Unit: The current book value per unit of the investment.
- Total Book Value: The book value of the investment quantity being sold.
- Total at Current Price: The value of the investment quantity being sold at the entered Current Price.
- Book Profit/Loss: The difference between the book value and the sale value.
- Exchange Rate Profit/Loss: For investments denominated in a foreign currency, the gain or loss resulting from exchange rate differences.
Amounts are displayed using the number of decimal places defined for the corresponding columns in the Transactions table.
When you enter an amount in the dialog, make sure to use the local number format (for example, “1'234.56” in Switzerland), as this is the format expected by the program.
Recording the Sale
Once you are satisfied with the preview, click Create sales record to create the accounting entries required to complete the sale recording. The program displays a confirmation dialog showing the entries to be added or modified, allowing you to review them before applying the changes.

- Upon confirmation, the program updates the accounting records with the new or modified entries.
- If the quantity is zero or the calculated profit/loss is zero, no transaction is created.
- The program adds a transaction identifier to the ExternalReference column of both the original sale row and any newly created rows. This prevents duplicate entries if the command is run multiple times on the same sale row.
- If the program detects an existing record for this sale, it will ask whether you want to overwrite it.
This procedure helps ensure that investment sales are correctly recorded while allowing you to review the accounting entries before they are applied.

In the example shown in the image, placeholder accounts are used. These are used when the corresponding accounts have not been defined in the Accounts Settings dialog.
The extension uses a neutral number (±123.00) in the Quantity column when recording the realized gain or loss. A neutral quantity does not change the quantity held but allows the amount of the realized gain or loss to be associated with the investment and its corresponding unit value to be shown in the Unit Price column. This is especially useful for investment funds and ETFs.
Error Messages
- Items table not found: The Items table is not present in the accounting file.
- Add the Items table to your file.
- Asset: XXX not foun: The selected Asset does not exist in the Items table.
- Asset: XXX without assigned Asset Account: No Asset Account has been assigned to this Asset in the Items table.
- Define an account in the Asset Account column for the Asset in the Items table.
- Asset: XXX without assigned type: No Asset Type has been defined for this Asset.
- The selected row does not contain the Asset ID: The selected row does not contain a valid Asset ID. To create the sales record, the selected row must contain the ID of an Asset defined in the Items table.
- The selected row does not contain a valid sale Quantity: The selected row does not contain a valid quantity for an investment sale. The sale quantity must be negative. Check that the quantity is preceded by a minus sign (-) and that you have selected a sale row rather than a purchase row.
- The selected row in the Transactions table is not correct: The selected row does not correspond to the investment sale row required to create the sales record.
- The selected row in the Transactions table is not valid: The selected row in the Transactions table is not a valid transaction row.
Create adjustment transactions
This command automatically creates adjustment transactions to align the book value of investments with their current market value and, for investments denominated in a foreign currency, with current exchange rates. Adjustment transactions can be created multiple times during the year. For year-end adjustments, see Investment Accounting Opening and Closing the Year.
Define Current Market Values
Set Up the Current Prices
In the Items table, enter the current market price for each investment in the Price Current column.
You can:
- Enter the current prices manually, including only for the investments for which you want to create adjustment transactions.
- Use the Update Market Prices command to import and update current prices for multiple investments.
Current Exchange Rates
For investments denominated in a foreign currency, the current value in base currency is automatically calculated using the current exchange rate defined for the corresponding currency in the Exchange rates table.
The current exchange rate is the exchange rate entered without a specific date. For more information, see Items Table with Investments List.
Adjustment Transactions Dialog
When you run the Create adjustment transactions command, a dialog asks you to enter the date to be used for the adjustment transactions. By default, the current date is suggested.
All adjustment transactions created by the command are recorded with the specified date.

Commit Changes Dialog
Before the adjustment transactions are recorded, the Commit changes dialog displays a preview of all the transactions that will be created, allowing you to review them before confirming the changes.

Adjustement Transactions
Adjustment transactions are generated and grouped by investment. If both a market price adjustment and an exchange rate adjustment are required for the same investment, the corresponding transactions are kept together.
Adjustment transactions are recorded using the Asset Account defined for the investment in the Items table, increasing or decreasing its book value. The offsetting entry is recorded in the corresponding gain or loss account.
If the following accounts are defined in the Accounts Settings dialog, the program uses them to record the adjustments:
- Unrealized Gain / Unrealized Loss for market price adjustments.
- Unrealized Exchange Rate Gain / Unrealized Exchange Rate Loss for exchange rate adjustments.
If the required accounts are not defined in the Accounts Settings dialog, the program inserts descriptive placeholder accounts in the generated transactions.

Once the adjustment transactions have been recorded, verify that the balances of the Asset Accounts match the current values of the corresponding investments in the Items table. For more information, see Create Adjustment Transactions.
In the following cases, no adjustment transactions are created:
- The book value already corresponds to the current market value and, for investments denominated in a foreign currency, the book exchange rate corresponds to the current exchange rate.
- The investment has a current quantity of zero.
- No current market price is defined for the investment.
Error Messages
- Items table not found: The Items table is not present in the accounting file.
- Add the Items table to your file.
- No Asset found in the Items table: The Items table does not contain any valid Assets.
- Add Assets to the Items table.
- A valid Asset must have an ID and an Asset Account.
- No Asset with current price found in the Items table: No Asset with a valid current price was found in the Items table.
- The carrying amounts are already aligned with the current market prices. No unrealized gains or losses have been generated: The book values of the investments are already aligned with their current market values and, where applicable, current exchange rates. No adjustment transactions are required.
Check balances report
The Check Balances report verifies that the values of individual investments are consistent with the balances of the Asset Accounts to which they are assigned.

This check is particularly useful at the beginning of a new accounting year to verify that:
- Opening and closing balances have been recorded correctly.
- The values of individual investments are consistent with the balances of their corresponding Asset Accounts.
Currently, the check is performed only for the current accounting year.
Why Use This Report?
The report helps you:
- Identify discrepancies between investment values and the balances of the corresponding Asset Accounts.
- Verify that investments and their assigned Asset Accounts remain consistent.
- Check the consistency of balances after year-end closing.
The report can be exported and saved at any time. For more information, see Printouts/preview.
Error Messages
- Items table not found: The Items table is not present in the accounting file.
- Add the Items table to your file.
- No Asset found in the Items table: The Items table does not contain any Asset.
- Add Assets to the Items table.
- A valid Asset must have an ID and an Asset Account.
- No Asset accounts found in the Items table: No Asset Accounts have been assigned to the Assets in the Items table.
- Define an Asset Account for each Asset using the Asset Account column. in the Items table.
Reconciliation report
The Reconciliation Report provides a detailed overview of the transactions recorded for investments and verifies that the balance of each Asset Account in the accounting records is consistent with the balance calculated from the transactions of the investments assigned to that account.
At the end of the report, a reconciliation summary shows the opening balance, the net change during the period, and the closing balance, allowing you to verify that the Asset Account balance matches the balance calculated from the corresponding investment transactions. Any differences are shown in the Differences fields, with the corresponding amounts highlighted in red.
Selection Dialog
Select the Asset Account(s) for which you want to generate the reconciliation report.

Report Structure
The structure of this report is similar to the Security Card report, as it lists the transactions for each investment assigned to the selected Asset Account.
For each selected Asset Account, a separate table is generated on a new page of the report.

Saving and Exporting the Report
The report can be exported and saved at any time. For more information, see Printouts/preview.
Error Messages
- Items table not found: The Items table is not present in the accounting file.
- Add the Items table to your file.
- No Asset found in the Items table: The Items table does not contain any Asset.
- Add Assets to the Items table.
- A valid Asset must have an ID and an Asset Account.
- No Asset accounts found in the Items table: No Asset Accounts have been assigned to the Assets in the Items table.
- Define an Asset account for each Asset in the Items table using the Asset Account column.
Security card report
The Security Card report provides a detailed overview of all transactions recorded for a specific investment. Its structure is similar to the Account Card, but the report is filtered by investment and also shows how the quantity held and the book value change after each transaction.
Selection Dialog
Select the investment for which you want to generate the Security Card report. By default, the dialog displays the list of investments defined in the Items table.
If the selected investment is not found in the Items table, an error message is displayed. Make sure that the investment is correctly defined in the table.

When you reopen the dialog, the investment selected the last time is displayed again.
Report structure
- Date: Transaction date.
- Doc: Transaction number.
- Description: Transaction description.
- Debit (item Currency): Debit amount in the item currency.
- Credit (item Currency): Credit amount in the item currency.
- Quantity:
- Purchased: No sign.
- Sold: With minus '-' sign.
- Neutral: With neutral number symbol: '±'.
- Unit Price (item Currency): purchase or sale (unit) price of the investment.
- Balance (item Currency): Balance amount in the item currency.
- Quantity Balance: Current quantity of securities.
- Book value per unit (item Currency): Current book value per unit of the investment.
- Debit (Base Currency): Debit amount in base currency.
- Credit (Base Currency): Credit amount in base currency.
- Balance (Base Currency): Balance amount in base currency.

Saving and Exporting the Report
The report can be exported and saved at any time. For more information, see Printouts/preview.
Error Messages
- Items table not found: The Items table is not present in the accounting file.
- Add the Items table to your file.
- Asset: XXX not found: The selected Asset has not been found in the Items table.
- No Asset found in the Items table: The Items table does not contain any Asset.
- Add Assets to the Items table.
- A valid Asset must have an ID and an Asset Account.
Evaluation of investments report
The report provides a comprehensive overview of your current investments. It is divided into two main sections:
- Appraisal Report: Offers a snapshot of your investments, comparing the book value of each investment with its current market value.
- Investment Accounting Transactions: Displays a detailed list of all transactions carried out for each investment.
Appraisal Report
The Appraisal Report helps you quickly assess the situation of your investments. It displays key information such as book value, current market value, and any unrealized gains or losses for each investment.
To obtain an up-to-date appraisal, enter the current market price for each investment in the Price Current column of the Items table.
- Type/Security: Name of the group or investment.
- ISIN: ISIN or other identification number of the investment.
- Currency: Currency in which the investment is denominated.
- Current quantity: Current quantity of the investment held.
- Book value per unit: Current book value per unit of the investment.
- Book value: Total book value of the investment.
- Market value per unit: Current market price per unit of the investment, as defined in the Price Current column of the Items table.
- Market value: Current market value of the investment.
- % of Port: Percentage of the total portfolio represented by the investment.
- Un.Gain or Loss: Unrealized gain or loss on the investment.
- % G/L: Ratio of the unrealized gain or loss to the market value.
Investment Accounting Transactions Report
The report summarises the accounting transactions recorded for each investment.

Saving and Exporting the Report
The report can be exported and saved at any time. For more information, see Printouts/preview.
Error Messages
- Items table not found: The Items table is not present in the accounting file.
- Add the Items table to your file.
- No Asset found in the Items table: The Items table does not contain any Asset.
- Add Assets to the Items table.
- A valid Asset must have an ID and an Asset Account.
Management accounting and Cash Management
Banana Accounting is a sophisticated a flexible accounting solution designed to complement existing accounting systems with powerful tools for Cash and Management Accounting.
It enhances and does not replace statutory or tax accounting typically structured around fiscal deadlines and compliance requirements.
Management Accounting
Banana Accounting supports a management-driven approach to accounting, starting with one of the most critical aspects of business control: liquidity management.
Effective financial management requires up-to-date information on cash availability, expected inflows, and planned payments. Liquidity control cannot rely solely on accounting prepared for tax deadlines or year-end reporting. It requires regular and systematic updates so that management always has a clear and reliable view of the company’s financial position. Banana Accounting enables continuous cash monitoring and forward-looking planning, helping organizations anticipate cash shortages and make timely decisions.
Beyond liquidity, Banana Accounting supports full Management Accounting functions. Companies can analyze costs and revenues by project or cost center, compare budget and actual figures, and generate customized management reports for any period. This makes it possible to monitor performance throughout the year and adjust strategies based on current data.
The objective is not only compliance, but control. Instead of focusing exclusively on statutory and tax-driven accounting, Banana Accounting complements existing solutions by providing timely financial insight that strengthens internal management and supports informed, proactive decision-making.
Trust Accounting
Double-Entry Accounting for Trust
Double-Entry Accounting for Trust jessica.mattiMulti-Currency Accounting for Trust
Multi-Currency Accounting for Trust jessica.mattiForensic Accounting, Reconstruction, Auditing and Cleanup of Financial Records
Banana Accounting Software helps accounting professionals quickly rebuild, verify, reconcile, and reorganize financial records in a clear, reliable, and professionally structured environment. It combines the flexibility of a spreadsheet with the control of double-entry accounting, making complex cleanup, reconstruction, and audit work faster and more effective.
With its table-based structure, Banana Accounting greatly reduces the time needed to rebuild accounting records and makes it much easier to view the data. The powerful filtering tools let you quickly find information and categorize movements. It generates professional financial reports, including balance sheets, income statements, account cards, and detailed transaction listings. It also includes advanced features such as investment accounting, which are not available in standard ERP systems.
Use in Investigative Units
Banana Accounting is used with satisfaction by several Swiss investigative units for accounting reconstruction in the context of financial investigations.
A Precious Tool for Accounting Professionals
For many accounting professionals, Banana Accounting has become a very valuable tool that complements accounting systems and Excel. It allows them to take on complex and interesting assignments and make them economically worthwhile while ensuring full client satisfaction. The professionalism and efficiency demonstrated often become the starting point for consulting activities and other value added services that are highly appreciated and well paid.
This documentation introduces the principles of forensic accounting and the cleanup and reconstruction of financial records, and explains how Banana Accounting can be used to support these activities effectively.
Accounting Cleanup
Accounting cleanup refers to the systematic correction and reorganization of financial records that have become inaccurate, inconsistent, or incomplete during normal business operations. It is commonly required when a CPA takes over a new client, prepares year-end financial statements, or discovers discrepancies during routine review work.
Typical cleanup tasks include reconciling bank and credit card accounts, resolving unexplained balances, correcting misclassified transactions, rebuilding opening balances, clearing suspense or temporary accounts, and ensuring that receivables, payables, and tax liabilities are properly stated. In some cases, it may also involve partially reconstructing prior periods to restore continuity and accuracy.
The objective of accounting cleanup is to re-establish a coherent and internally consistent accounting structure that produces reliable financial statements. Unlike daily bookkeeping, cleanup work focuses on identifying accumulated errors and restoring confidence in the underlying data before further reporting, advisory, or tax activities can proceed.
Auditing of Accounting
The auditing process often requires checking the accounting data managed with the company’s accounting software. In many cases, the accounting software does not provide the tools needed for this work. As a result, auditors often export the data and rebuild the accounting situation in Excel.
A useful alternative is to import the chart of accounts and the transactions into Banana Accounting. The program is based on double entry accounting logic and rebuilds the accounting situation from the start. This makes it possible to verify that the results match correctly.
Once the data is in Banana Accounting, it becomes easier to perform additional checks, filter the information, and export the data to other formats.
Accounting Reconstruction
Accounting Reconstruction is the rapid and systematic restoration and analysis of financial information in cases of fraud, legal disputes, insolvency, data loss, or abrupt management changes, when reliable accounting records are missing, incomplete, or inconsistent. It may also be necessary to obtain more detailed information when the current system does not allow it, for example during an M&A due diligence process.
The primary objective is to swiftly rebuild a structured and verifiable accounting system from available source documents, including bank statements, invoices, contracts, and tax filings. By organizing transactions through the double-entry bookkeeping method, Backlog Accounting Reconstruction ensures internal data consistency, highlights discrepancies, and restores full operational control over financial records.
The final output is a clear, accurate, and legally defensible representation of the organization’s financial position—including the Balance Sheet, Income Statement, and detailed transaction ledgers—enabling informed decision-making in legal, financial, or operational contexts.
Emergency accounting is the rapid reconstruction and analysis of financial information in crisis situations, such as fraud, disputes, insolvency, data loss, or sudden management changes, when reliable accounting records are missing, incomplete, or inconsistent.
Forensic accounting
Forensic Accounting is the application of accounting and auditing techniques to legal, judicial, and investigative matters. The goal is to reconstruct the financial truth when data is missing, incomplete, manipulated, or suspicious. Financial investigations often analyze existing accounting records and require a solid understanding of accounting practices. They are usually conducted by experienced accountants, often with specific training.
The popularity of crime investigation series like CSI has led to associating the term "forensic" mainly with crimes such as fraud or money laundering. In reality, it also includes the collection of evidence and investigations in civil matters, such as shareholder or inheritance disputes, or in tax cases like overdue taxes.
Forensic accounting includes all investigative activities related to reconstructing financial situations, such as:
- Legal audits, assessments, financial consulting, damage quantification, and analysis.
- Bankruptcies, company liquidations, and financial restructurings.
- Disputes between partners, inheritance transfers, or checks during due diligence.
- M&A due diligence.
- Legal and tax compliance failures.
- Fraud, bankruptcy, or money laundering.
- Monitoring the use of funds, illegal expenses, and corruption.
- Lack of access to or problems with the original IT system.
Shortcomings of Pre-Existing Tools
Professional accountants and CPAs already rely on established tools such as ERP systems, accounting platforms, and spreadsheets. These solutions are highly effective for routine bookkeeping, compliance, payroll processing, and periodic reporting.
However, situations involving reconstruction, cleanup, data verification, due diligence, or other non-recurring operations present different requirements. These tasks are exploratory, corrective, and often temporary in nature. They require flexibility, transparency, and the ability to reorganize data without disrupting operational systems.
In these contexts, traditional tools may reveal structural limitations.
Shortcomings of ERP and Standard Accounting Systems
Enterprise accounting software and ERP systems are designed primarily for structured, ongoing operations. They are optimized for efficiency, internal control, and compliance within a stable workflow.
In reconstruction or cleanup scenarios, these characteristics can become constraints:
- Rigid process flows and approval structures.
- Complexity caused by the need to cover all requirements.
- Multiple integrated modules that do not communicate well with each other.
- Reduced transparency and control due to increased automation.
- Standardized charts of accounts and predefined reporting formats.
- Emphasis on periodic tax and regulatory reporting.
- Many constrains importing and reorganizing raw transactional data.
- Risk associated with modifying historical records in live systems.
- Difficulty testing alternative classifications or adjustments without affecting official books.
- Vendor lock-in, with the need to move to a more expensive version to access certain features.
Such systems are excellent for daily operations but are not specifically designed for investigative, corrective, or one-time analytical work.
Shortcomings of Excel
When faced with reconstruction or cleanup tasks, many professionals turn to Excel because it allows rapid data collection, filtering, and analysis. Spreadsheets are flexible and familiar, and they support quick experimentation.
However, Excel lacks the structural safeguards of accounting software:
- It requires careful management of formulas and links.
- It does not enforce double-entry accounting logic.
- It does not automatically ensure that debits and credits balance.
- Categorization is manual and not inherently based on accounting rules.
- Standard financial statements must be built manually.
- Errors can remain undetected in complex models.
Excel is a powerful analytical tool, but it was not designed to function as a controlled accounting system.
Banana Accounting for Reconstruction and Cleanup
Reconstruction, cleanup, and other non-recurring accounting tasks require a working environment that combines flexibility with accounting control. Banana Accounting provides a structured and independent space where financial data can be reorganized, verified, and recalculated without affecting the operational system.
Unlike ERP systems, it is not constrained by rigid workflows. Unlike spreadsheets, it enforces double-entry consistency automatically.
Banana Accounting allows professionals to:
- Work in a separate accounting file without modifying the client’s live system.
- Import and reorganize raw transactional data quickly.
- Use a fully customizable chart of accounts.
- Automatically ensure debit/credit balance and internal consistency.
- Detect discrepancies through built-in double-entry controls.
- Test reclassifications and adjustments safely.
- Instantly generate balance sheets, income statements, and detailed account cards.
- Present results in a clear and professionally recognized accounting format.
By combining spreadsheet flexibility with accounting discipline, Banana Accounting bridges the gap between rigid ERP systems and unstructured Excel files, making it particularly suited for reconstruction and cleanup work.

Similar to Excel
Banana Accounting is similar to Excel, does not require specific training, and offers great flexibility. It is therefore a very useful tool for reconstructing financial situations and managing accounting for forensic analysis.
- The accounting is a file that contains multiple tables.
- The tables are similar to Excel sheets: you can move freely, insert and select cells, copy and paste.
- You can create as many files as you want, each with its own settings.
- The file can be saved and moved wherever you want.
Local data management
Unlike other accounting software that operates only in the cloud, Banana Accounting allows you to choose where to save and store your accounting file. This way, you can keep your data locally without uploading it to cloud systems, avoiding the need for specific authorizations. Accounting records can be easily linked to digital supporting documents stored on your computer, allowing you to quickly and thoroughly check the reason for specific expenses during data analysis.
This feature can be especially useful in the preliminary analysis phase, not only for privacy reasons but also because it makes it easier to share information and reuse data in later stages.
Importing data
Banana Accounting is based on tables, so it is quite easy to import existing data, whether it concerns the chart of accounts, customers or suppliers, product or investment lists, VAT codes, or other information. For more information, please refer to the page:
- Importing data from other programs.
- Once you have imported the data you can complete it and modify.
- You can filter, select multiple cells, copy and paste, search and replace, and fix multiple rows almost instantly.
- You can undo and redo operations.
Ideal for various fields
Banana Accounting is not a specialized forensic analysis software, but it can be extremely helpful for professionals such as:
- Accountants and auditors.
- Family offices.
- Fiduciary, financial, and real estate management firms.
- Lawyers and law firms.
- Restructuring specialists.
- Court-appointed or party-appointed technical consultants.
- Inspectors or experts working within legal teams.
- Departments of large organizations.
Try Banana Accounting with the WebApp
If you want to see how easy it is to collect and categorize accounting data:
- See how to get started with double-entry accounting, including a short explanatory video.
- Try the Banana Accounting WebApp, which runs directly in your browser (no registration required):
it’s the fastest way to test, set up an accounting file, and start entering data.
These links launch the WebApp and open one of the universal templates, not tied to any specific country:
To manage accounting regularly and completely, we recommend using the desktop version of Banana Accounting (to download and install on your computer). The Free plan of Banana Accounting lets you create accounting files and use most features, with a saving limit of 70 transactions. It's the ideal way to get started and see if the tool fits your needs.
Our customer service is available for more information. Our specialists can also advise you on how to proceed with data recovery or other specific needs.
Use Banana Accounting for Reconstructing the Financial Situation
Below you’ll find an explanation of how to use Banana Accounting to reconstruct accounting records for forensic accounting activities.
Keep in mind that reconstruction can be done in two phases:
- Preliminary data collection and analysis to assess the situation.
- Data collection and analysis with more specific goals.
The financial reconstruction, whether preliminary or final, is generally structured as follows:
- Defining the objectives of the investigation.
- Collecting documents, bank statements, and other financial information.
- Re-entering transactions into an accounting system, completing and categorizing them.
- Verifying, evaluating, and analyzing the data.
- Presenting the financial information.
- Economic and legal evaluations, with preparation of reports.
Create accounting starting from a template
What makes Banana Accounting particularly suitable for forensic accounting is that it is a professional international accounting tool, not designed solely for corporate accounting. It is modular, so you can have double-entry accounting setups for foundations, associations, individuals, in different currencies and languages. For simpler situations, you can also use the income & expense method, which can still manage the balance sheet.
To start a new accounting file, use a predefined template for a specific purpose:
- Menu File > New.
A dialog will appear where you can choose a template by region and type of accounting. - Templates for specific regions.
These are set up according to national accounting standards.
The chart of accounts usually has numerical account IDs. - Universal templates.
These are for more general use. The account IDs are usually descriptive text.
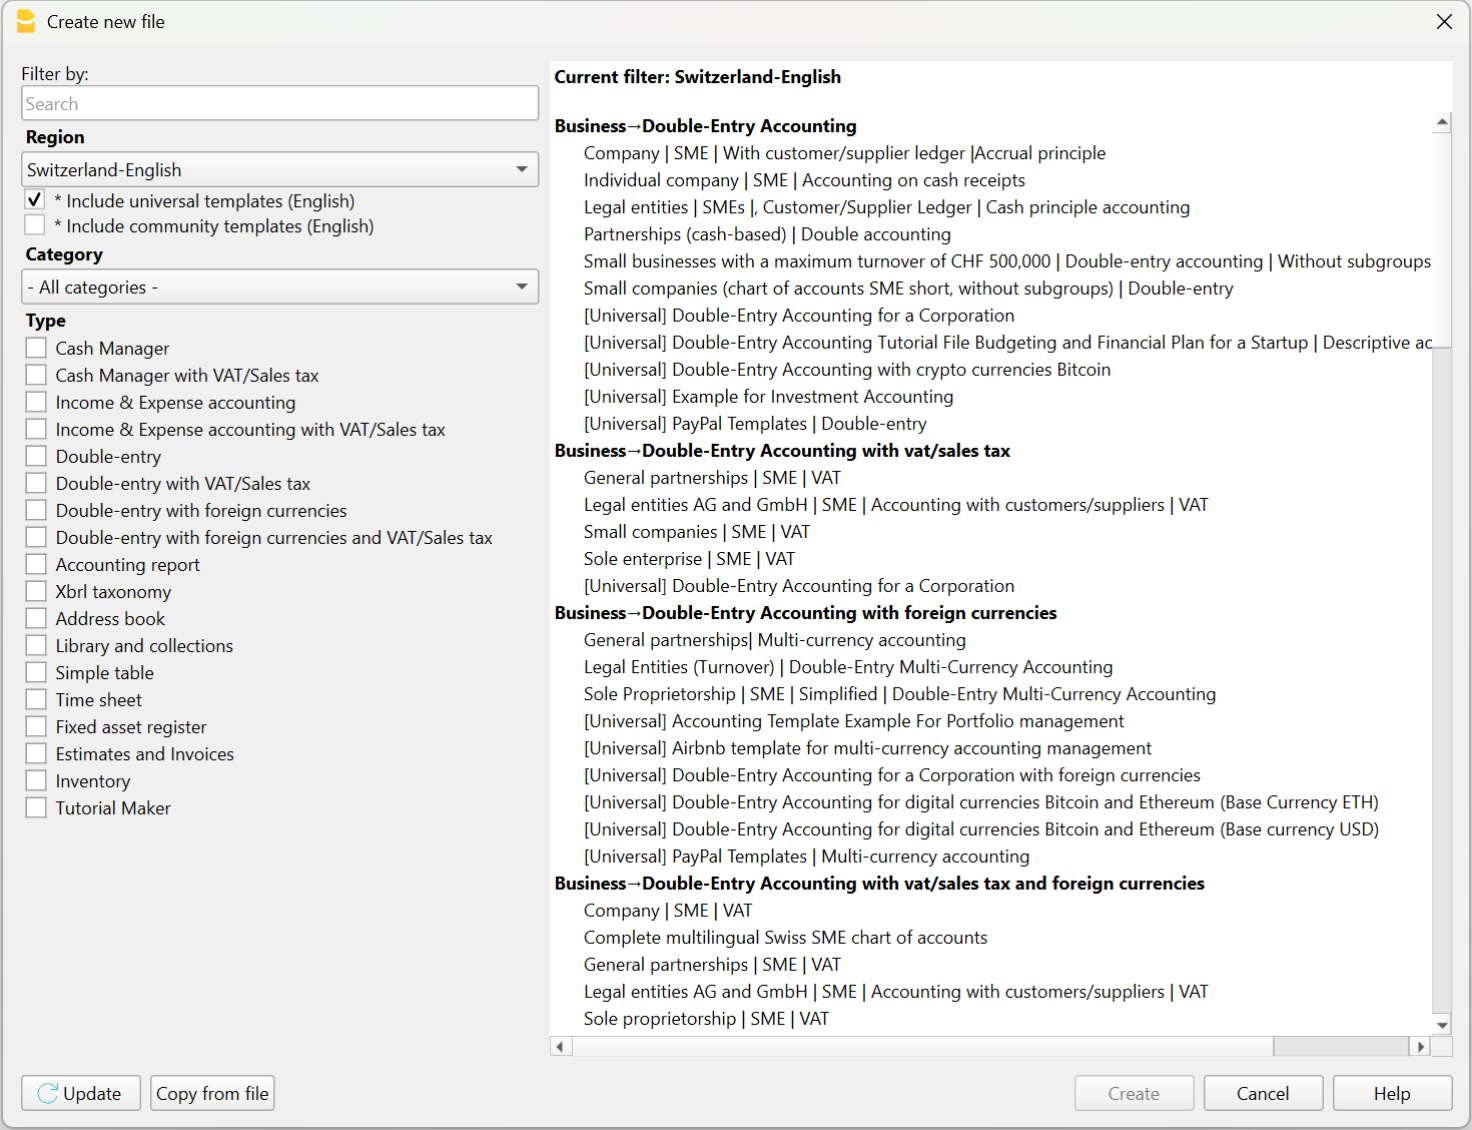
Chart of accounts and opening balances
After choosing the template that best suits your needs, you will need to customize the Accounts table by modifying, adding, or removing accounts. You can adjust the chart of accounts and grouping structure at any time.
You can create account plans with grouping structures that reflect those used in existing accounting systems managed with other software.
If you're reconstructing an accounting file, you will likely need to enter opening balances using the “Opening” column in the Accounts table.
Note that in Banana Accounting’s double-entry system, amounts are displayed according to the logic of accounting programs, so Debit amounts are positive and Credit amounts are negative. Opening balances in Credit must therefore be entered as negative values.
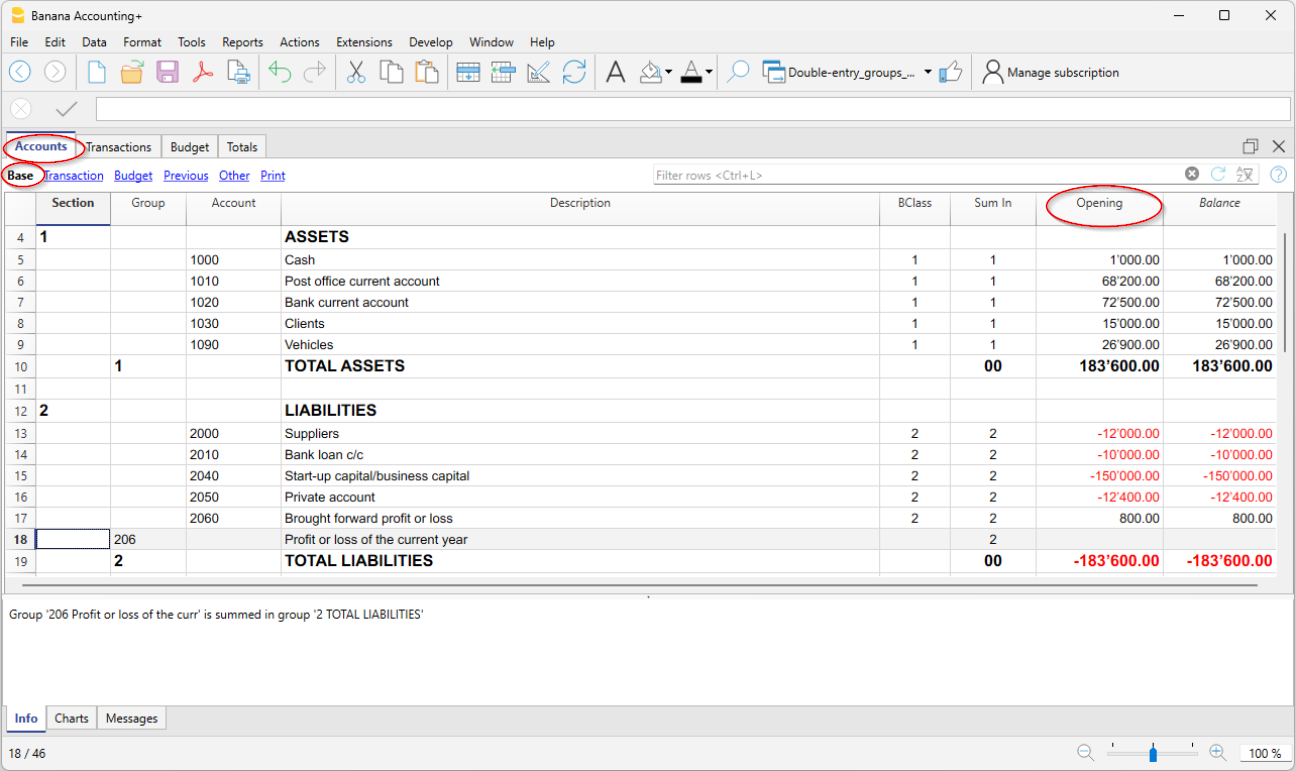
Entering and importing transactions
In the Transactions table you enter accounting transactions:
- You can enter and edit them manually.
- Entering and modifying data within the tables is very easy.
- You can copy and paste from Excel or other programs.
- In the Recurring Transactions table you can set up repeating entries.
- You can import data:
- You can import from CSV or other file formats.
- You can import digital bank statements.
- Several import extensions are available.
- You can create Import Rules that automatically complete the offset account and other elements.
- Modify and complete the transactions:
- When you enter or import transactions, the software will alert you to any errors or differences.
- You can apply rules for automatic completion.
- You can modify the transactions.
Banana Accounting was designed for small businesses, but in theory, there are no limits to the number of transactions or accounts you can manage. The software keeps all data in memory, so performance depends on your computer’s RAM and processor. Some clients successfully manage very large accounting files, with tens of thousands of accounts and hundreds of thousands of entries.
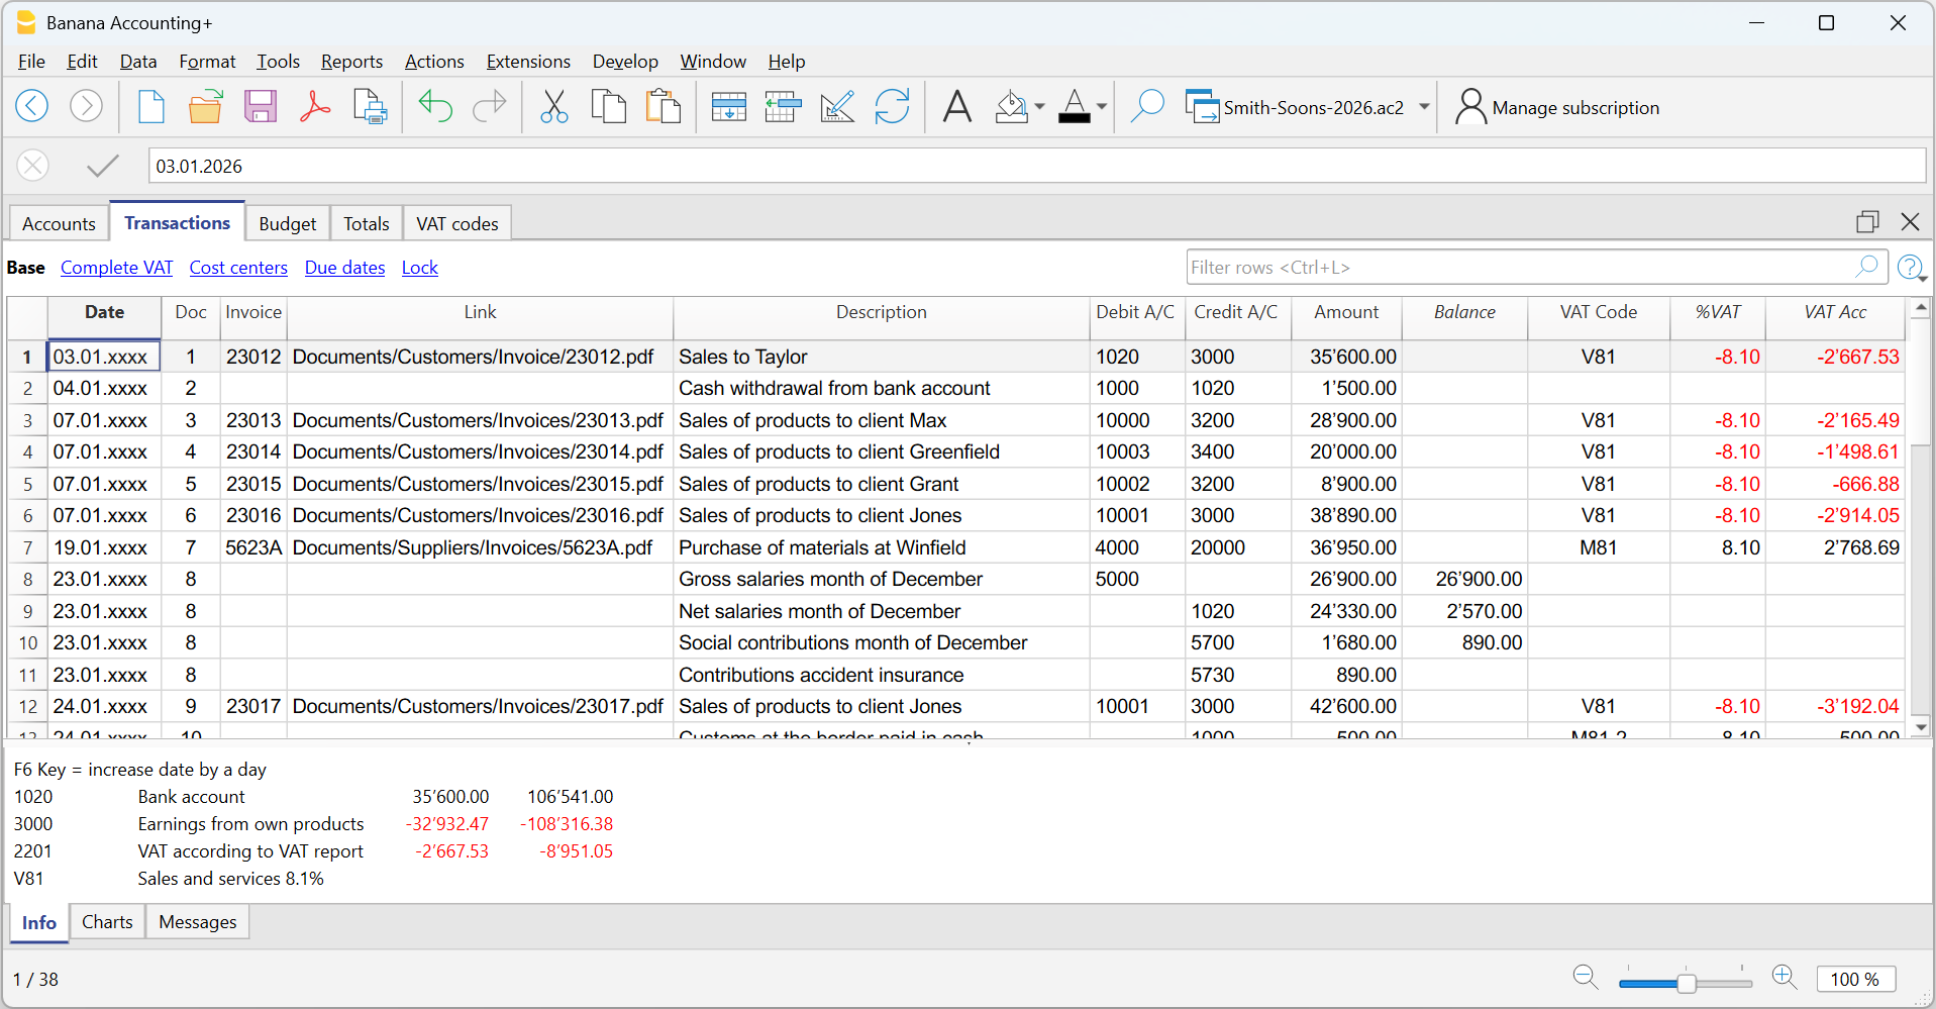
Automatic transaction categorization
Banana Accounting provides a deterministic rule system, configured by the accountant, to automatically categorize and complete transactions imported from bank statements. Thanks to these rules, you can quickly process large volumes of data. The applied rules are always visible in the Recurring Transactions table, where they can be printed and reviewed by auditors. Still, it is good practice to always check individual account statements.
There are many tools that digitize paper documents and, through artificial intelligence, extract information, analyze, and categorize content based on probabilistic logic. These tools can be very helpful and save time. However, it's important to note that categorization based on probabilistic logic is not a reliable source and always requires thorough verification.
AI-based tools often allow data export in CSV or Excel format, so you can easily import the data into Banana Accounting for manual review, corrections, and completion.

Review and add additional information
Once transactions are imported, you can review, edit, and complete them manually with the information you need:
- You can highlight and color rows, bold them, or change font size.
- Using the Data > Arrange Columns menu:
- You can show pre-configured columns (e.g. Notes, Links),
- You can add new types of columns.
- You can add links to supporting digital documents.
- You can use:
- Cost and profit centers – to categorize transactions in different ways.
- Segments – to divide activity by areas, branches, or other categories.

Error detection, reconciliation, and closing procedures
Banana Accounting provides built-in tools for identifying errors, performing reconciliations, and preparing adjusting entries and period-end closings. Thanks to the double-entry structure, inconsistencies are immediately visible, and the accounting check function systematically verifies the chart of accounts and all recorded transactions.
Bank and account reconciliations are simplified through clear account cards, transaction filtering, balance controls, and automatic calculation of differences. This makes it easier to detect missing entries, duplicated postings, or incorrect classifications.
The structured framework also supports the preparation of accruals, deferrals, provisions, and other adjusting entries required for accurate financial reporting. As a result, period-end closings can be completed efficiently and with a high level of reliability, even in complex reconstruction or investigative contexts.
Filtering and other useful features
There are many useful features that allow you to analyze and complete data quickly, including:
- The Balance column in the Transactions table indicates if there is an imbalance between Debit and Credit, due to account coding errors or unbalanced multi-account entries.
- The Temporary row filter function shows only the rows containing a specific text. There is also advanced syntax available for more powerful searches.
When the filter is active, you can edit transaction content, select, copy, and paste cells just like in Excel. - With Temporary row sorting, you can view rows in ascending or descending order based on a column. You can remove the temporary sort to return to the original order.
- Find and replace.
- The Copy rows command copies the selection with column headers. When you paste into Excel, the headers are already included so you can easily apply filters or create pivot tables.
- The Check accounting tool rechecks the chart of accounts and all entries and alerts you if there are errors or discrepancies.

Balance sheet and Account cards
The main advantage of Banana Accounting compared to Excel is that, once transactions are entered, you automatically get the Balance Sheet, the Income Statement, and the account cards for each account.
In the Accounts table, you have an immediate view of all accounts and groups, with updated movements and balances. This way you instantly see the current situation of your Balance Sheet and Income Statement. Of course, it’s essential to verify that bank balances match those in your accounting.

Additional accounting features
At any time, you can adapt your accounting setup and add or remove features. See:
Extensions
Banana Accounting, like Excel, provides a programming language that allows you to perform all kinds of processing.
It is commonly used to create custom reports, but it can also be used, for example, to create import extensions or modify existing data:
- Create extensions for Banana Accounting
- Information on importing data into Banana Accounting
- Information on exporting data from Banana Accounting
We have also created ChatGPT assistants to help you create extensions for generating reports. The extensions run locally in Banana, so you don’t need to send your data to the cloud AI assistant.
Analisi e revisione dei dati contabili
Banana Contabilità permette di analizzare e revisionare facilmente i dati contabili. L’impostazione a tabelle, simile a Excel, consente di visualizzare e ricercare con immediatezza tutte le informazioni. Inoltre, i dati sono strutturati secondo le regole della contabilità in partita doppia, quindi il programma esegue automaticamente una serie di controlli, segnala eventuali errori e mette a disposizione tutti gli strumenti e i report necessari per l’analisi contabile.
Comando Controlla contabilità
Quando si ricostruisce una contabilità capita spesso che non tutte le operazioni possano essere completate, vengano lasciate in sospeso e che magari si cambi anche in modo importante la struttura del piano dei conti.
Banana Contabilità mette però a disposizione il comando che permette di lavorare con la massima libertà e tranquillitaà.
Che azzera tutti i valori e ricalcola e ricontrolla il piano dei conti e tutte le operazioni come se si stessero inserendo manualmente. Se ci sono operazioni in sospeso, errori o differenze queste vengono nuovamente segnalate.
Filtra righe
È certamente una delle funzioni più utili nella ricostruzione contabile, poiché consente di ricercare e modificare rapidamente le operazioni di interesse.
Offre inoltre comandi di filtro avanzati, per esempio per visualizzare solo le righe colorate o le celle che contengono un testo specifico.
Un aspetto molto importante è che, anche quando si applica un filtro o un ordinamento temporaneo, è possibile continuare a utilizzare le funzioni di selezione e copia-incolla. Si possono, per esempio, cercare tutte le righe che contengono un determinato nome e sostituire il conto di tutte le righe in un’unica operazione.
Scheda conto
Il vantaggio principale di Banana Contabilità rispetto a Excel è che, una volta inserite le registrazioni, ottieni in automatico il Bilancio, il Conto Economico, le schede con i movimenti di ogni conto, principale o centro di costo o profitto.
L'estratto conto è ovviamente uno strumento insostituibile in contabilità, perché puoi vedere l'elenco di movimenti specifici che sono stati categorizzati in un preciso conto e quindi avere tutti i dettagli.
Bilanci e Conto economico
Nella tabella Conti hai una visione immediata di tutti i conti e i gruppi, con i movimenti e i saldi aggiornati. Così vedi a colpo d'occhio la situazione aggiornata del Bilancio e del Conto economico. Rimane naturalmente fondamentale verificare che i saldi bancari corrispondano a quelli registrati in contabilità.
Estensioni
Banana Contabilità, come Excel, mette a disposizione un linguaggio di programmazione che consente di effettuare elaborazioni di ogni genere.
Viene generalmente usato per creare dei report personalizzati, ma può anche essere usato ad esempio per creare estensioni di importazione o che modificano i dati esistenti:
- Creare estensioni per Banana Contabilità (in inglese)
- Informazioni per importare dati in Banana Contabilità (in inglese)
- Informazioni per esportare dati da Banana Cobtabilità (in inglese)
Abbiamo anche creato degli assistenti in ChatGPT che ti permettono di creare delle estensioni per generare report. Le estensioni vengono poi eseguite localmente da Banana, pertanto non si devono inviare i dati all’Assistente AI cloud.
Ricostruzione della situazione contabile e finanziaria
Questa pagina introduce alle particolarità dell'attività di ricostruzione contabile finanziaria, dette anche di Forensic Accounting, che pur avendo molte similirità con la tenuta contabile abituale, presenta molte diversità,.
Spiega i come usare al meglio Banana Contabilità in questo ambito e ottere velocemente i risultati desiderati.
Particolarità della ricostruzione contabile
L'attività di ricostruzione contabile è un progetto a se stante, che, da un punto di vista operativo, si differenzia dalla normale tenuta contabile:
- Ha degli obiettivi più specifici (non necessariamente strumento di controllo di gestione).
- Il lavoro viene svolto da un numero limitato di specialisti che ha generalmente accesso illimitato ai dati (situazione diversa rispetto a un ERP).
- Gli specialisti possono non avere o avere poche conoscenze circa l'attività da investigare.
- L'attività viene svolta in un periodo di tempo definito e non ha carattere ricorrente.
- Si ha la possibilità e necessità di elaborare tutti i dati in blocco.
- I dati da trattare non sono stati necessariamente predisposti per servire allo scopo e devono quindi essere rielaborati.
Queste particolarità aiutano a comprendere perché non tutti i software di contabilità, e in particolare gli ERP, siano adatti.
Banana Contabilità, invece, grazie alla sua flessibilità e modularità, è un software ideale per le ricostruzioni contabili e finanziarie di qualsiasi genere.
Fasi per la ricostruzione della situazione finanziaria
La ricostruzione finanziari e generalmente strutturata in più fasi:
- Definizione degli obiettivi dell’indagine.
- Raccolta documenti, estratti conti bancari e altre informazioni finanziarie.
- Ripresa dei movimenti in un sistema contabile, completamento e categorizzazione.
- Verifica, valutazione e analisi dei dati.
- Presentazione delle informazioni economico finanziarie.
- Valutazioni economico e legali, con preparazione dei rapporti.
Durante la fase di verifica e valutazione dei dati, può rilevarsi un'insufficienza di elementi e la necessità di raccogliere ulteriori dati e informazioni.
Organizzare i dati del progetto
La ricostruzione contabile consiste principalmente nel categorizzare i movimenti finanziari relativi a una determinata attività, con l’obiettivo di accertare la provenienza dei fondi o il modo in cui sono stati utilizzati. Si tratta quindi di esaminare documenti che testimoniano i movimenti finanziari, individuare gli elementi più rilevanti e inserirli in un sistema contabile, affinché possano essere classificati ed elaborati per ottenere le analisi e i report necessari.
La ricostruzione contabile parte dunque da un insieme di informazioni digitali o cartacee, che potranno eventualmente essere digitalizzate. Nel corso di un’indagine ci si troverà a gestire una quantità significativa di informazioni digitali, e quindi di file. Idealmente, è opportuno creare una cartella di progetto nel proprio sistema informatico, all’interno della quale salvare tutti i documenti, organizzandoli in sotto-cartelle. Si presume che la gestione degli accessi avvenga tramite le funzioni del sistema operativo, e che gli utenti con accesso ai file siano anche autorizzati a prenderne visione. Se così non fosse, sarà necessario creare cartelle separate, in modo da suddividere i dati e regolare l’accesso in base alle autorizzazioni.
Banana Contabilità è un software che lavora localmente e presuppone che i file contabili su cui opera siano accessibili localmente, direttamente o tramite collegamenti di rete o sistemi di sincronizzazione:
Ovviamente la situazione di un’indagine è generalmente diversa, ma è utile tenerne conto per comprendere la logica di funzionamento del programma e il collegamento con i giustificativi.
Raccolta e digitalizzazione dei documenti
Ogni contabilità si basa su dei giustificativi contabili e quindi il primo passo per avviare un'indagine finanziaria è quello di raccogliere tutti i dati necessari, come
- Giustificativi contabili, come ricevute, fatture, note spese e tutte le informazioni che certificano un cambiamento nella situazione finanziaria.
- Estratti conto bancari, dei clienti o dei fornitori.
- Contratti di diverso genere.
È inutile evidenziare che i risultati di un indagine dipendono in larga misura dalla possibilità di avere informazioni il più possibile precise e dettagliate. Queste devono poi essere valutate e categorizzate, generalmente facendo uso di software atti alla ricostruzione contabile.
Se le informazioni non sono disponibili in formato digitale, sarà necessario riprenderli, tramite degli scanner e software in grado di trasformare delle immagini in dati che possono essere più facilmente trattati. Se il volume di dati è limitato, come può essere il caso di una situazione di un'anziano, i datti possono anche essere ripresi manualmente. Se invece si l'indagine richiede di valutare una grande quantità di informazioni ecco che saranno indispensabili degli strumenti che possano ridurre i tempi e contenere i costi.
Ci sono molti software che si concentrano sulla digitalizzazione e l'estrazione di dati da documenti esistenti, per poi mettere a disposizioni le informazioni in un formato leggibile da Excel, programmi di analisi o software di contabilità.
Creazione del file di contabilità
Il primo passo consiste nel creare un file di contabilità che conterrà il piano dei conti e nel quale saranno registrati e categorizzati i movimenti finanziari. Ciò che rende Banana Contabilità particolarmente adatto all’ambito del forensic accounting è il fatto di essere uno strumento contabile professionale di livello internazionale, modulare e altamente flessibile, che consente di creare contabilità perfettamente adattate alle esigenze specifiche delle indagini, rendendo il lavoro più semplice, rapido e accurato.
È possibile creare un numero illimitato di contabilità, ognuna in lingue e valute diverse, utilizzando sia il metodo delle Entrate e Uscite sia quello della Partita Doppia. Si tratta di una soluzione molto efficace, poiché permette di utilizzare lo stesso strumento per ricostruire qualsiasi tipo di situazione finanziaria: di imprese, fondazioni, associazioni o privati, oppure per analizzare in modo mirato attività specifiche, come la gestione dei fondi di un singolo progetto.
Banana Contabilità è stato concepito per contabilità di piccole imprese, ma teoricamente non esistono limiti al numero di registrazioni o conti che si possono gestire. Il programma tiene tutti i dati in memoria, quindi le prestazioni sono dipendenti dalla quantitià di memoria (RAM) del computer e dalla potenza del processore. Alcuni nostri clienti gestiscono con successo contabilità molto estese, con anche decine di migliaia di conti e centinaia di migliaia di movimenti.
Creare una contabilità partendo da un modello
Il modo più veloce per creare una contabilità è quello di scegliere un fra i tanti modelli disponibili nel Template store:
- Menu File > Nuovo.
Ti appare un dialogo dove scegliere il modello in base alla regione e tipo di contabilità. - Modelli per specifiche Regioni.
- Sono impostati secondo degli schemi contabili nazionali.
- Il piano dei conti ha l’identificativo dei conti generalmente numerico, usato nella nazione.
- Modelli Universali.
- Sono per un uso più generale.
- L’identificativo dei conti è generalmente testuale (conti descrittivi).
Il periodo contabile e numero di file
Generalmente con Banana Contabilità si crea un file di contabilità per ogni anno contabile, pertanto nei dati base della contabilità, la data inizio e fine corrisponderà all'anno civile o fiscale.
Per una ricostruzione contabile che riguarda più anni, può comunque risultare più facile tenere un file unico con tutte le registrazioni. In questo modo si potranno vedere e modificare direttamente tutte i movimenti. Ai fini della reportistica si sceglierà poi il periodo di reporting.
Tenere dei file separati per più anni può risultare utile, specialmente se vi è una gran mole di dati. Con più file separati più persone possono dividersi il lavoro e ciascuno può lavorare così indipendentmente dagli altri. In questi casi è comunque utile tenere un piano dei conti che è identico, così che si può anche creare un file riassuntivo nel quale sono integrati tutti gli anni contabili.
Impostazione del Piano dei conti
Dopo aver scelto il modello più adatto alle tue esigenze, dovrai personalizzare la tabella Conti, modificando, aggiungendo o rimuovendo conti. L’adattamento del piano dei conti e la modifica dei raggruppamenti possono essere eseguiti in qualsiasi momento.
Puoi creare dei piani dei conti con strutture di raggruppamento che riprendono quella di una contabilità esistente gestita con altri programmi.
Inserimento dei saldi d'apertura
Se stai ricostruendo una contabilità dovrai probabilmente inserire i saldi iniziali utilizzando la colonna “Apertura” nella tabella Conti.
Considera che Banana Contabilità, nella contabilità in partita doppia, visualizza gli importi esattamente seguendo la logica interna dei programmi di contabilità, quindi gli importi in Dare sono in positivo e gli importi in Avere sono in negativo. I saldi di apertura in Avere devono quindi essere inseriti in negativo.
Multi-moneta, Criptocurrency, Gestione titoli e altro
Come accennato in precedenza, Banana Contabilità è uno strumento estremamente modulare. Si possono creare contabilità molto semplici, con solo gli elementi essenziali, ma, quando necessario, è possibile aggiungere un’ampia gamma di funzionalità aggiuntive, tra cui la gestione:
- Gestione Clienti e fornitori.
- Gestione IVA.
- Gestione quantitativi e magazzino integrata in contabilità.
- Contabilità Titoli.
Questa funzionalità è generalmente disponibili sono il software contabili specializzati e con costi molto alti. - Tabelle note.
Puoi integrare direttamente in contabilità informazioni che hai raccolto.
Inserire e importare registrazioni
Una volta impostato il file di contabilità, ti rimane la parte principale del lavoro di ricostruzione finanziaria, ovvero importare o inserire nella tabella Registrazioni i movimenti contabili, competandoli e categorizzandoli:
- Puoi inserirli e modificarli manualmente.
- Nella tabella Registrazioni ricorrenti puoi impostare movimenti che si ripetono.
- Puoi copiare e incollare da Excel o altri programmi.
Vedi Riprendere dati da altri programmi. - Puoi importarli da file CSV o di altro genere.
- Puoi importarli da estratti bancari digitali.
- Ci sono diverse estensioni di importazioni.
- Puoi creare delle Regole di importazione che completano in automatico la contropartita e altri elementi.
In poco tempo la contabilità è fatta! Quando inserisci o importi i movimenti, il programma ti segnala eventuali errori o differenze.
Categorizzazione dei movimenti
Elemento centrale di un'indagine forense è la categorizzazione dei movimenti. Se si sospetta una frode i movimenti leciti verranno registrati sui conti considerati leciti, mentre quelli sospetti su altri conti specifici. Se invece se dovrà ricostruire la contabilità per delle indagini tributarie, si dovrà categorizzare i movimenti in base alle specifiche necessità di rendicontazione.
Il primo livello di categorizzazione offerto da Banana Contabilità è quello relativo ai conti impostati nel piano dei conti. I movimenti bancari verranno quindi registrati sul conto apposito e poi si sceglierà il conto di contropartita. Se un'importo deve essere assegnato a più conti di spesa o entrata, la registrazione dovrà usare più righe, ciascuno con il proprio conto e importo.
Con questa categorizzazione tipica di tutti software contabili si avranno già importanti informazioni relativamente alla situazione patrimoniale (Bilancio) e all'evoluzione finanziaria (Conto Perdite e Profitti). Ovviamente si avrà poi l'estratto conto che mostra tutti i movimenti del conto. Se si necessitano di categorizzare con un maggiore livello di dettaglio si possono creare più conti, per esempio, creare un conto "Benzina", in aggiunto a quello "Spese auto" e modificare le registrazioni di conseguenza.
Banana Contabilità consente però anche di categorizzare contemporaneamente gli importi anche usando altre logiche. Ci sono diversi possibilità.
- Puoi evidenziare e colorare le righe, oppure metterle in grassetto o cambiare la dimensione del carattere.
- Centri di costo e profitto,
Permettono di categorizzare i movimenti logiche diverse da quelle contabili.
Sono certamente quelli più adatti per una ricostruzione contabile, perché sono facilmente utilizzabili e danno una visione immediata di certe situazioni. - Segmenti
Permettono di suddividere l’attività per ambiti, succursali o altro. - Colonne Note e altre predefinite.
Con il comando Menu Dati > Disponi colonne puoi rendere visibili diverse colonne predisposte per inserire altre informazioni, come la data valuta, note, ecc. - Sempre con Menu Dati > Disponi colonne puoi aggiungere nuovi tipi di colonne.
Collegamento ai documenti digitali
Ogni riga di qualsiasi tabella ha una colonna già predisposta dove inserire il collegamento a un documento digitale.
- Collegamenti ai documenti (giustificativi) digitali.
- Con un semplice click puoi visualizzare la fatura o la ricevuta collegata a un movimento.
Se vuoi collegare più documenti, puoi aggiungere altre colonne per collegamenti.
Completamento e categorizzazione automatica
Banana Contabilità mette a disposizione un sistema di regole deterministiche, impostate dal contabile, per categorizzare e completare in automatico i movimenti importati dagli estratti conto bancari. Grazie a queste regole, è possibile processare velocemente un grande volume di operazioni. Le Regole applicate sono sempre visibili nella tabella Registrazioni ricorrenti, dove possono essere stampate e verificate da periti. Rimane comunque una buona prassi controllare sempre le singole schede.
Esistono numerosi programmi che digitalizzano documenti cartacei e che, grazie all’uso dell’intelligenza artificiale, estraggono informazioni, analizzano e categorizzano i contenuti basandosi su logiche probabilistiche. Questi strumenti possono essere molto utili e permettere un notevole risparmio di tempo. Bisogna però considerare che la categorizzazione fondata su logiche probabilistiche non rappresenta una fonte sicura e richiede sempre una verifica puntuale.
Gli strumenti basati sull’AI danno la possibilità di esportare i dati in formato CSV o Excel, così da poterli facilmente importare in Banana Contabilità per poi essere controllati, modificati e completati manualmente.
Verifica e modifiche a mano
Gli strumenti di automazione sono molto utili, ma non possono di certo sostituire il controllo e la verifica dei dati da parte dello specialista. Il fatto di essere simile a Excel, di potere vedere tutti i conti, i movimenti e gli estratti conti e molti report disposti in tabella rende le verifiche molto più facile.
Si possono infatti scorrere i dati Banana Contabilità, selezionare celle e completare o apportare modifiche molto velocemente, grazie anche a delle funzionalità che pochi software di contabilità hanno:
- La funzione Filtro righe temporaneo ti mostra solo le righe che contengono un determinato testo. C’è però anche una sintassi avanzata, che permette ricerche molto più potenti.
Quando il Filtro è attivo, puoi modificare il contenuto dei movimenti, selezionando e copiando e incollando celle esattamente come fai con Excel. - Con l'Ordine temporaneo delle righe
Visualizzi le righe nell’ordine ascendente o discendente di una colonna. Diversamente da Excel, dove il sort è definitivo, con Banana Contabilità puoi togliere l'ordine temporaneo per ritornare alla sequenza originale delle righe. - Cerca e sostituisci.
- Il comando Copia e Incolla.
- Il comando Copia righe che è un anche un copia incolla potenziato, in quanto include anche le intestazioni colonne. Così quando incolli i dati in Excel, hai già le intestazioni per applicare facilmente filtri o creare tabelle pivot.
- La colonna Saldo nella tabella Registrazioni indica se vi è uno sbilancio fra Dare e Avere, dovuto ad errori nella codifica dei conti oppure a registrazioni su più conti che non si compensano.
- I grafici nella finestrra Info che mostrano l'evoluzione di un conto o gruppi nel tempo.
Filtra righe
È certamente una delle funzioni più utili nella ricostruzione contabile, poiché consente di ricercare e modificare rapidamente le operazioni di interesse.
Offre inoltre comandi di filtro avanzati, per esempio per visualizzare solo le righe colorate o le celle che contengono un testo specifico.
Un aspetto molto importante è che, anche quando si applica un filtro o un ordinamento temporaneo, è possibile continuare a utilizzare le funzioni di selezione e copia-incolla. Si possono, per esempio, cercare tutte le righe che contengono un determinato nome e sostituire il conto di tutte le righe in un’unica operazione.
Comando Controlla contabilità
Quando si ricostruisce una contabilità capita spesso che non tutte le operazioni possano essere completate, vengano lasciate in sospeso e che magari si cambi anche in modo importante la struttura del piano dei conti.
Banana Contabilità mette però a disposizione il comando che permette di lavorare con la massima libertà e tranquillitaà.
Che azzera tutti i valori e ricalcola e ricontrolla il piano dei conti e tutte le operazioni come se si stessero inserendo manualmente. Se ci sono operazioni in sospeso, errori o differenze queste vengono nuovamente segnalate.
Revisione e analisi dati
Banana Contabilità permette di analizzare e revisionare facilmente i dati contabili grazie all’impostazione a tabelle, simile a Excel, che consente di visualizzare con immediatezza tutte le informazioni. Inoltre, i dati sono strutturati secondo le regole della contabilità in partita doppia, quindi il programma esegue automaticamente una serie di controlli, segnala eventuali errori e mette a disposizione tutti gli strumenti e i report necessari per l’analisi contabile.
Crea una contabilità con i dati di una contabilità preesistente
Banana Contabilità è un software molto flessibile e modulare, che consente di creare facilmente una nuova contabilità partendo dai dati di una contabilità esistente gestita con un altro programma. Avere tutti i dati della contabilità disponibili in Banana Contabilità può essere molto utile in divesti ambiti e specialmente per indagini nell'ambito del forensic accounting.
Di seguito viene illustrata la tematica e come procedere in modo efficace, fornendo anche rimandi alle informazioni utili per ogni fase.
Perché riprendere i dati in Banana Contabilità
Banana Contabilità visualizza tutti i dati contabili in forma tabellare, permettendo di scorrerli, ricercarli rapidamente e ottenere immediatamente i report contabili. Consente inoltre di modificarli, aggiungendo informazioni o categorizzando i movimenti secondo criteri personalizzati. In molti casi riprendere una contabilità esistente in Banana Contabilità può essere molto utile:
- Si dispongono dei dati contabili, ma il software originale con cui era stata tenuta la contabilità non è più disponibile, oppure riattivarlo risulterebbe troppo complesso o costoso.
- La ricostruzione contabile ha uno scopo limitato e non giustifica la riattivazione dell’intera applicazione.
- Le persone che svolgono l’indagine non possono accedere all’applicativo contabile oppure dispongono di un accesso molto limitato, che restringe le possibilità di analisi.
- L’accesso ai dati contabili in modo strutturato facilita attività di controllo, audit, analisi e permette di estrarre nuovamente informazioni o stampare rendiconti.
- Il software originario è ancora operativo, ma non offre sufficiente flessibilità nelle indagini, né consente di aggiungere facilmente nuove informazioni o riclassificare i dati.
- L’impresa desidera un metodo più flessibile per accedere ai propri dati contabili.
- È necessario conformarsi a un obbligo legale che prevede la disponibilità continua dei dati contabili.
- Si vuole abbandonare l’altro software e utilizzare Banana Contabilità, proseguendo il lavoro già iniziato.
La ripresa dei dati contabili risulta utile anche per indagini finanziarie di forensic accounting, per attività ispettive o di revisione dei conti, oltre che per facilitare analisi e ricerche.
I dati preesistenti
Gli elementi principali di una contabilità sono:
- Informazioni circa la società, periodo contabile e altro.
- Il piano dei conti, con la relativa classificazione.
- I movimenti contabili.
- I giustificativi contabili.
In Banana Contabilità ci si limita a mettere un link che collega la registrazione al documento. - Informazioni supplementari circa gestione IVA, clienti e fornitori, fatture.
Queste informazioni possono essere già disponibili in un formato che può essere trasformato o importato in Banana Contabilità. Se non è il caso si dovrà procedere alla trasfromazione.
Probabimlente non si andrà a riprendere tutti i dati, ma solo quelli che sono necessari per lo scopo che ci si prefissa.
I passi per creare una contabilità e riprendere i dati
Per potere arrivare ad trasferire tutti i dati in Banana Contabilità ci sono dei passi da seguire:
- Creare un nuovo file di contabilità.
Generalmente è utile partire da un modello esistente, configurato in modo simile a quello che sono le proprie necessità. - Impostare i dati base.
Nome della ditta, moneta base, periodo contabile e altro necessario. - Impostare o importare il piano dei conti sulla base di quello esistente.
Si stratta di riprendere nella Tabella Conti il piano dei conti. - Impostare altre informazioni, come per esempio la tabella dei codici IVA.
- Importare i movimenti contabili nella Tabella Registrazioni.
È utile ovviamente automatizzare il più possibile questa operazione.
I dati importati potranno comunque anche essere aggiustati manualmente. - Controllo e verifica.
Si deve controllare che i saldi della contabilità corrispondano a quella originale.
Creazione contabilità e ripresa dati in un passo unico
Se i dati della contabilità sono disponibili in un formato che contiene tutte le informazioni necessarie è possibile creare un'estensione che crea, in base alla struttura dati esistenti, la nuova contabilità e vi traferisce tutti i dati in modo automatico.
Il presupposto è che l'applicativo originale salvi o esporti i dati in un file unico e che vi sia un'estensione di Banana Contabilità predisposto per questo scopo, tipo:
- Audit file for Taxation
- È un formato file XML concepito appositamente per archiviare i dati di una contabilità in modo standard, così che possano essere resi facilmente accessibili alle autorità tributarie, per dei controlli e verifiche
- In certe nazioni, è pure obbligatorio salvare i dati in questo formato per scopi di archiviazione.
- Banana Contabilità ha delle estensioni in grado di leggere in automatico taluni di questi file e ricreare in automatico la contabilità.
- Formati file proprietari
- Ci sono applicativi contabili in grado di salvare tutti i dati della contabilità in un formato proprietario.
Per creare un nuovo file si usa:
- Comando: Menu Strumenti > Crea File da dati esterni
- La programmazione dell'estensione avviene tramite le funzionalità File Creator Extensions.
Ripresa dati in blocco
Il processo di ripresa dei dati viene fatto in due tempi:
- Creazione e impostazione del file di contabilità in modo manuale.
- Importazione dei dati in blocco usando il comando
- Menu Azioni > Importa in Contabilità > Importa file
Questo approccio viene usato per esempio per:
- Italia: Estensione importazione delle fatture scaricate dal cassetto fiscale dell'Agenzia delle entrate.
L'estensione in automatico crea i conti dei clienti e dei fornitori e aggiunge i movimenti contabili.
Le estensioni che usano questo approccio usano la Document Change API di Banana Contabilità che permette di apportare modifiche a più tabelle.
Ripresa dati in più fasi
Il processo di ripresa dei dati viene fatto in diversi tempi:
- Creazione e impostazione del file di contabilità in modo manuale.
- Importazione o impostazione del piano dei conti.
- Importazione o ripressa dei dei movimenti.
L'automazione del processo si concentra sull'importazione die movimenti.
Questo approccio è quello più comunemente usato, anche perché
- Vi sono diverse estensioni già predisposte per l'importazione dei movimenti.
- L'importazione dei dati può essere fatta in modo semi automatico trasferendo prima i dati in Excel e poi copiandoli in Banana Contabilità.
Vedi: Riprendere dati da altri programmi.
The Standard Audit File for Taxation (SAF-T)
The Standard Audit File - for Taxation (SAF-T) is a file format that specify how to package all the most important accounting data in a standard format. The SAF-T is a recommendation of the OECD’s Committee on Fiscal Affairs (CFA). The file format makes it easier for taxpayers to provide their electronic records to tax auditors in support of their tax return and for auditors to review accounting records.
Import SAF-T Files
Banana Accounting allows you to export and import accounting data in various national SAF-T formats. See:
Main SAF-T Uses
There are different uses for the SAF-T files:
- Auditing purpose.
Every Auditor or VAT inspector has the discretion to demand the file at the occasion of an audit. Accounting software should be able to generate the SAF-T file when auditors require it.SAF-T allows auditors ready-access to data to perform compliance and substantive testing. - Archival purpose.
The SAF-T format is used to store the accounting data for archival purpose. Accounting data is therefore available over the times in a standard format. This use case is especially important for cloud service solution, that makes the data available only until they pay the subscription.
Using the SAF-T file for archival purpose is a very intelligent way to have always access to the accounting data.
SAF-T is the standard archival format in Norwegian for companies with a minimun revenues. - Analytics purpose.
You can use the accounting data for analytics and reporting that your current accounting solutions does not offer. - Moving data to other solutions.
The SAF-T file allows companies that switch solution to more easily move their accounting data to other solutions.
The structure of the SAF-T
The SAF-T file is an XML file that has been conceived to structure all the accounting data in a standard format. The SAF-T format has been conceived in a way that allows countries to create localized version that best support the local
The forma include the most important accounting data:
- Header information.
Company information - Master Files
- General ledger Accounts (GeneralLedgerAccounts)
All the accounts used within the accounting solutions, with- AccountId and Description
- Account grouping, account type and account standard id for country specific categorisation.
- Opening and closing balance.
- Accounting Taxonomy (Taxonomies)
Information for grouping the accounts for reporting. - Customers (Customers)
List of all the customers:- Address and company information.
- AccountId and grouping.
- Opening and closing balance.
- Suppliers (Suppliers)
List of all the suppliers:- Address and company information’s.
- AccountId and grouping.
- Opening and closing balance.
- TAX table (TaxTable)
Information regarding the VAT or Sales Tax.- Tax Code
- Percentages and applicability date.
- Inventory (PhysicalStock)
- Products list
- Quantities, opening and closing values.
- Fixed Assets
- Id and descriptions
- Acquisition information
- Valuation
- General ledger Accounts (GeneralLedgerAccounts)
- General Ledger Entries
Journal Entries- Transactions date, type
- Source documents
- Account id, customer or supplier info
- Debit and credit amount
- Tax information
- Analysis (Cost, projects, amounts)
- Source Documents (SourceDocuments)
- Sales Invoice
- Purchase invoice
- Payments
- Movements of goods
- Assets transactions
Currently Products, Source documents and other data is not imported.
Standard Audit File for Payroll (SAF-P)
The SAF-P (AuditFilePayroll) is aimed at saving data relative the payroll. The SAF-P is structured in this way.
- Header
With company information. - MasterFiles
With data for Employees, Branches. - TransactionsFiles.
For more information see the OECD Guidance document for SAF-P version 1.0 (2010).
Banana Accounting currently does not provide a reader for SAF-P files.
References
- SAF-T Wikipedia page
- OECD (FTA - Forum on Tax Administration)
- Guidance for accounting software developers concerning auditing requirements.
- FTA Guidance Notes on E-Auditing Standards
- SAF-T Version 2.0 (2010)
- SAF-T Version 1.0 (2005)
- SAF-T and SAF-P overview and governing bodies.
- TJC Group - SAF -T
- Czechia: VAT Control Statement
Standard Audit File Reader
How to view the content of a SAF-T file
Follows this simple steps.
- First use
- Install and run the Banana Accounting Insider Preview.
- Menu->Extensions->Manage Extensions install the Import extension for your audit file.
See the list of country specific import extensions.
- View the audit file
- Menu->Tools->Create file from external data.
- Select the audit file you want to import.
- You should have an audit file created with a country specific accounting software.
- Select the correct extension (*.xml or *.*) to show the file on disk.
Banana will create a in memory new accounting file and import all the data. Depending on the size of the audit file, after some time, you will see all the data in the Transactions and Accounting table.
Once the data is converted you can save the file and access the data later at any time without the need to convert.
In order to import all the data you need the Advanced Plan. With the free plan or professional plan only 70 transactions will be imported.
See how the SAF-T Reader work
If you don't have any audit file and you want to see how the SAF-T Reader work, we make available some test file you can experiment with.
- Download a test file
- Install the audit file country specific import extension.
- Proceed as explained above.
Country specific SAF-T file
Each country has their own specification that is usually a derivation of the OECD SAF-T 2.0 standard.
Currently Banana Accounting has import extensions for this SAF-T format:
Other file import
There are also extensions that import data from other country specific file types.
- German DATEV
- Import accounts
- Import transactions
- Electronic invoices Italy
It allows to import customer's invoice from a XML files (Cassetto fiscale).
In order to import the content of this kind of file you should proceed as explained before under import in existing files.
Structure of the accounting data in Banana
In Banana is a flexible accounting software based on the double entry accounting method. The SAF-T reader recreate a complete accounting file. In Banana Accounting the data is contained in tables that are like Excel sheets.
- Accounts table.
It contains the account plan, including:- The general ledger accounts
- The customers and suppliers accounts with address.
- The groups and grouping structure that form the Balance sheet and Profit & Loss statements.
- The opening balance and current balance calculated based on the transactions.
- Transactions table
It contains all the journal movements including the VAT information.
View and analyze the accounting data
Once the SAF-T data is loaded in Banana, you can view the content and use the accounting specific commands. Here are some suggestion on the use the converted accounting data. Kindly let us know if you have any feedback or suggestion on getting the max out of your accounting data.
View the content
- Scroll the Transactions and Accounts tables.
- The Data->Find command let you search for any text.
- The Data->Extract command to filter and sort content.
See graphic trend
- Select the Charts window.
- Select the account or group you are interested in seeing the graphical performance of.

Copy and paste to Excel
- Select the cell of the table you want to copy and paste in Excel.
- Select the rows and use the command Edit->Copy rows and when pasting in Excel you will also have the column header, for simple filtering.
Print or export
- Preview and print the content of the table or any reports.
- Export to pdf, html or any other format.
Accounting reports
The conversion process recreates a complete accounting file. So, you can use all the double entry reporting functionalities, like:
- The Actions->Account card give you the reconstructed card with all the transactions of any account or group.
- Within the Accounts table you have the recalculate balance of each accounts and groups that form the Balance Sheet, Profit & Loss Statement.
- With Reports->Advanced Balance Sheet with groups, you can print and customize the balance sheet and profit and loss statement. You can also have reporting by periods.
- With Reports->Accounting report you get the data in table format, for period or other parameters.
Adding comments or other information
Once you have the SAF-T data in the accounting file you can add other information.
- Make the column Notes visible.
- Use Cost centers columns to group transactions.
- Add any other column you need.
- Add a linked table for further categorisation.
- Mark the lines with colors to quickly retrieve some transactions.
Javascript extraction and reporting
The integrated Javascript interpreter let you create script:
- Select and extract data.
- Use the Banana Accounting API for
- Create any type of reports.
Organizing files of more years
If you have to do analysis on more than one account years it make sense to save the data in the Banana Accounting and connect the file of the previous year. Later you quickly open the files and create reports with data of multiple years.
- Convert the SAF-T to Banana Accounting and save the file.
- Set the file of the previous year.
File->File Properties->Options.
Importing SAF-T In an Existing Banana Accounting File
You can also import the SAF-T in an existing accounting file.
- Open your accounting file.
- Menu->Action->Import
- Import file
- Install and select the import extension for the specific country.
Feedback and contacts
The SAF-T Reader is a new product. We welcome any feedback on how to improve it or to provide extensions that could make auditing and analytics more easy.
Kindly contact our costumer service specifying "audit file" and the country extension you are using. Also briefly indicate your question or suggestion.
Modèles Universels Business Plan
Comment créer une prévision Cash Flow | Cash Manager (Gratuit)
Comment créer une prévision Cash Flow | Cash Manager (Gratuit)Créer une prévision de liquidité avec Banana Comptabilité, c'est comme la créer avec Excel, mais plus rapide, plus sûr et complètement gratuit. Grâce au modèle de comptes prêts à l'emploi, vous commencez immédiatement, il vous suffit de saisir les données.
Vous savez à l'avance combien de liquidités vous avez et combien de temps elles vont durer, quand et quelles dépenses vous devrez faire face et sur quels revenus vous pourrez compter. Vous pouvez simuler la réduction des dépenses et voir l'effet qu'elle a sur la liquidité et la rentabilité, comprendre les volumes de vente futurs et savoir si le capital sera suffisant.
Nous avons élaboré ce guide pour vous aider à prévoir vos liquidités et à résoudre vos problèmes financiers. Si vous le suivez en détail, vous y arriverez, car vous pouvez toujours le modifier et le corriger, il est donc facile de mettre à jour votre prévision.
Créer un nouveau fichier
- Créez un nouveau fichier à partir de ce modèle (Template ID +10204) en utilisant l'une des méthodes expliquées.
- Avec la commande Fichier → Propriétés fichier (Données de base), définissez la période, le nom de famille et la devise de base (vous pouvez faire le budget et la comptabilité dans la devise de votre choix).
- Avec la commande Fichier → Enregistrer sous..., enregistrez le fichier. Il est utile d'indiquer dans le nom du fichier, le nom de famille et l'année. Par exemple "entreprise-2022.ac2".
Voir aussi Organiser les fichiers et le cloud.
Adapter les tableaux Comptes et Catégories
Avant de créer votre propre prévision Cash Flow, vous devez rapidement adapter votre compte et vos catégories à vos besoins spécifiques.
Tableau Comptes
Le tableau Comptes ne présente que le compte Caisse, ou plutôt les liquidités en votre possession. Vous pouvez le personnaliser en modifiant le nom du compte, son libellé et son solde d'ouverture.

Tableau Catégories
Ce tableau contient les catégories de revenus et de dépenses ainsi que l'évolution du capital. Vous pouvez modifier ces catégories en ajoutant de nouveaux éléments, en changeant le nom de la catégorie, en modifiant l'ordre et en supprimant les catégories dont vous n'avez pas besoin. À tout moment, vous pouvez voir les soldes actualisés de chaque catégorie.

Les sections utiles Capital Entrant & Capital Sortant vous permettent d'inscrire :
- Injections et remboursements de prêts
- Injections et versements de fonds par les propriétaires
- Ventes et achats d'actifs immobilisés
Pour savoir à tout moment à combien s'élèvera le Cash Flow actuel (quand vous commencerez à saisir les transactions quotidiennes), il vous suffit de regarder la valeur dans la ligne "Variation nette du Cash Flow". De cette façon, vous saurez en un coup d'œil si vous avez une Encaissement ou un Décaissement et le montant exact.

Créez vos prévisions Cash flow
L'innovation intéressante de Banana Comptabilité est la possibilité de créer des prévisions de Cash Flow pour contrôler les liquidités et prendre des décisions opportunes pour votre entreprise.
C'est pourquoi nous vous recommandons maintenant de créer vos propres prévisions de Cash Flow. Allez dans le tableau Budget : ce tableau contient toutes les entrées et sorties de liquidité que vous aurez au cours de l'année.
Pour créer correctement la prévision, suivez ces étapes simples :
- Insérez les revenus de l'opération
- Insérez les dépenses de l'opération
- Insérez le Capital Entrant
- Insérez le Capital Sortant
Pour plus d'informations techniques, veuillez consulter la page de documentation du tableau Budget.
Insérez les revenus de l'opération
Commencez par énumérer tous les revenus de l'opération dont vous disposez et leur montant. Les ventes au comptant constituent le principal revenu, mais il en existe d'autres en fonction de votre activité.
Le revenu de l'opération peut inclure :
- Ventes au comptant
- Recettes diverses en espèces
- Recouvrement des comptes de crédit des clients
- Revenus d'intérêts
Pour insérer une opération dans le budget, vous devez saisir la date (quand vous pensez avoir ce revenu), la date de fin (si nécessaire), la répétition (combien de fois ce revenu est répété, s'il est hebdomadaire, mensuel ou annuel), le libellé, le montant dans la colonne des revenus et la catégorie de revenu.
Dans le modèle, vous pouvez déjà trouver des exemples d'écritures budgétaires que vous pouvez facilement modifier et éliminer, selon vos besoins. Vous pouvez encore en insérer de nouveaux.
Pour être aussi précis que possible avec cette estimation, regardez les valeurs de l'année dernière, en arrondissant le montant vers le bas lorsque vous voulez être plus prudent.
Conseils :
- Ne compter que sur un revenu assuré
- Regroupez les revenus en fonction de leur répétition (hebdomadaire, mensuelle, annuelle, ...)

Insérez les dépenses de l'opération
Il est maintenant temps de dresser la liste de tous les dépenses de l'opération. Comme pour les recettes, vous devez ici estimer les dépenses en vous basant sur les valeurs de l'année dernière, mais en en arrondissant les montants vers le haut lorsque vous voulez être plus prudent. Il est toujours préférable de faire une prévision inexacte en début d'année, plutôt que d'avoir des surprises de dépenses plus élevées.
Les dépenses de l'opération peuvent inclure
- Salaires
- Traitement des salaires
- Loyer
- Assurances
- Publicité et promotion
- Services publiques
- Déplacements
- Téléphone
- Frais bancaires
- Intérêts
- …
Conseils :
- Regroupez les dépenses en fonction de leur répétition (hebdomadaire, mensuelle, annuelle, ...)

Insérez le Capital entrant et le Capital sortant
Cette section est très utile pour avoir une prévision de Cash Flow net et pas seulement une prévision opérationnelle. Vous devez ensuite saisir les entrées et sorties de capitaux prévues, les investissements et les désinvestissements en immobilisations.
Le Capital Entrant peut inclure :
- Injections de prêts
- Injections de fonds par les propriétaires
- Ventes d'actifs immobilisés
Le Capital Sortant peut inclure :
- Remboursements de prêts
- Versements en espèces aux propriétaires
- Achats d'actifs immobilisés

Contrôlez vos prévisions Cash Flow
Il est important de savoir immédiatement si votre entreprise, grâce à vos estimations, génère un Cash Flow positif ou non. Vous êtes curieux, n'est-ce pas ? La génération du rapport de prévision vous donnera la réponse !
Pour ce faire, il est très simple : rendez-vous au menu Rapports → Rapport formaté par groupes, et dans la liste qui apparaît, choisissez le Rapport annuel comparé aux Prévision. Appuyez sur OK pour afficher le rapport de prévision.
L'objectif de toute activité est certainement d'avoir un Cash Flow positif, car c'est la seule façon de survivre, ou plutôt de payer les fournisseurs, de rembourser les dettes, ... Vérifiez le poste Variation nette du Cash Flow (en bas du rapport) et assurez-vous que vous avez un résultat positif (Entrées). Si c'est le cas, vous pouvez être content, car vous gérez bien votre entreprise !
En revanche, si vous avez un Cah flow négatif (Outflow), cela signifie que votre entreprise a malheureusement des difficultés à gérer ses liquidités. Ce que vous devez faire dans ce cas, c'est tout d'abord bien vérifier vos estimations de recettes et de dépenses, s'il y a des ajustements à faire ou des erreurs à corriger, qui améliorent le Cash Flow. Si vous avez toujours un Cash Flow négatif, vous devez réfléchir aux mesures à prendre pour améliorer la gestion des liquidités à partir de l'année prochaine ou lorsque la période de prévision commence. Vous devrez très probablement essayer de réduire vos dépenses de gestion-

En plus des prévisions annuelles, toujours dans le menu Rapports → Rapport formaté par groupes, pour avoir un contrôle encore plus détaillé de l'évolution des liquidités (par exemple comment elles se comportent pendant l'année), vous pouvez choisir des rapports trimestriels et quadriennaux, ou créer votre propre rapport.


Enregistrer les écritures
Une fois les prévisions de Cash Flow sous contrôle, vous pouvez commencer à enregistrer les différentes écritures de liquidité réelles et les comparer de temps en temps avec les valeurs attendues.
Enregistrer les écritures de liquidité
Les écritures quotidiennes doivent être insérées dans le tableau Écritures. La saisie se fait de la même manière que pour la prévision dans le tableau Budget (la seule différence est que vous n'avez pas la colonne de répétition). Le tableau contient également quelques exemples que vous pouvez supprimer et modifier.

Vérifier les mouvements avec les fiches de compte
Lorsque vous saisissez progressivement vos écritures, il peut être utile de vérifier comment le compte de caisse ou une catégorie de dépenses particulière a évolué au fil du temps. Pour ce faire, vous pouvez consulter la fiche de compte/catégorie correspondante.
Par exemple, en sélectionnant la fiche du compte de caisse, vous aurez un résumé de tous ses mouvements. En cliquant également sur l'option Graphiques en bas, vous avez une vue encore plus immédiate de l'évolution du compte.
Conseil : Vérifiez votre compte Caisse au moins une fois par mois pour voir immédiatement sa progression et le comparer avec les mois précédents.

Vérifier la différence entre le solde et le budget
Pour plus de contrôle sur vos performances, vous pouvez aller dans le tableau Compte ou Catégories, en sélectionnant la vue Budget et regarder la colonne Diff.Budget, qui vous montre la différence entre les soldes réels et les valeurs que vous aviez prévues au budget. Vous disposez ainsi d'un indicateur supplémentaire pour comprendre si vous suivez bien le budget et pour prendre de meilleures décisions.

Comparer et créer une nouvelle prévision
Au cours de l'année, vous pouvez comparer à tout moment votre situation actuelle avec les prévisions, pour comprendre si et où vous dépensez plus, afin de prendre des décisions à l'avance. À la fin de l'année, vous pouvez effectuer la comparaison finale entre le rapport réel et les prévisions pour voir si vous avez atteint le Cash Flow net prévu.
Créez le rapport de contrôle à partir du menu Rapports → Rapport formaté par groupes → Rapport annuel comparé aux Prévisions.

Si vous souhaitez avoir une vue plus précise et plus ciblée, vous pouvez créer des rapports avec une subdivision trimestrielle, qui comprennent également la différence entre le solde et la valeur du budget de chaque mois. Cela vous donne une vue d'ensemble des mois où vous avez eu le plus de difficultés de liquidité et de ceux où vous avez gagné le plus.

Vous êtes arrivés à la fin de l'année, vous devez donc maintenant planifier la suivante en créant une nouvelle prévision de Cash Flow, exactement comme vous l'avez fait jusqu'à présent. Ne vous arrêtez pas, ce n'est que de cette manière que vous verrez votre Cash Flow s'améliorer de plus en plus !
Plan financier et business plan d'un Startup (Méthode récettes/dépenses)
Plan financier et business plan d'un Startup (Méthode récettes/dépenses)Plan financier et des liquidités du Bar de Luc
Ici dessous, on explique comment configurer un plan financier, relatif à une nouvelle activité entrepreneuriale, selon le modèle de la comptabilité dépenses et recettes.
Voir aussi la présentation de la fonction de la planification financière.
Note : Veuillez considérer que pour ce tutoriel, l'année 2017 fait référence à l'avenir.
Luc a l'intention d'ouvrir en 2017 un bar-restaurant et prépare donc un plan financier, avec tous les détails nécessaires.
- Le financement viendra de fonds propres et aussi d' un prêt de tiers.
- Le mois de janvier 2017, il prend en location les locaux, meuble le bar et commence son activité.
- La période de planification couverte est de janvier 2017 à décembre 2020.
En insérant les détails des différentes dépenses et recettes tu pourra obtenir l'impression du Bilan (liquidité et autre) et des Produits et Coûts, avec l'évolution financière de l'année, subdivisée par trimestre, ou autres subdivisions par période.
En particulier, de l'évolution du compte bancaire on peut voir si la liquidité sera suffisante.
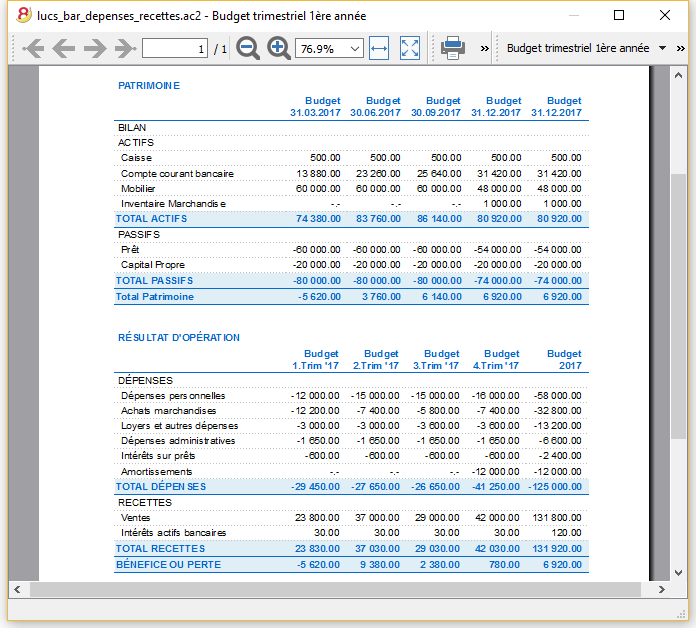
Ouvre le fichier d'exemple
Télécharge ce modèle et ouvre-le dans le programme Banana Comptabilité (pour de plus amples information consulter la page Essai Gratuit).
Une fois le fichier ouvert, insère dans le Tableau Budget les indications concernant les dépenses et recettes que tu prévois pour tes activités, et tu auras immédiatement le plan financier et de la liquidité.
Propriétés Fichier
Dans Menu Fichier->Propriété fichier (base de données) configurer les données générales.
La date d'ouverture est le 1 janvier 2017 et celle de la clôture, le 31 décembre 2017.
C'est aussi la période de calcul utilisée pour la colonne Total dans le budget.
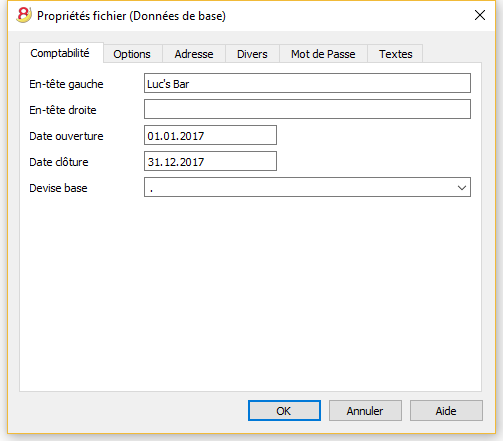
Le plan comptable
-
C'est un exemple destiné à expliquer le fonctionnement des prévisions budgétaires
- Le plan comptable est simplifié au maximum
- Des noms de comptes ont été utilisés pour rendre l'explication plus facile encore.
- Ouverture. L'activité débute à zéro et donc, il n'y a aucun solde de début
- Budget - c'est le budget global à la fin de la période comptable
Comme on peut le voir, il y a le Bilan et le Compte Résultat de la fin de l'année budgétisée.
Si l'activité n'est pas trop complexe, on peut modifier ce plan comptable.
Pour un plan comptable plus structuré, il est préférable d'utiliser un des nombreux modèles mis à disposition et ajouter le tableau Budget.
Le tableau des Comptes
Dans le tableau des comptes, on insère les comptes patrimoniaux (Actifs et Passifs)
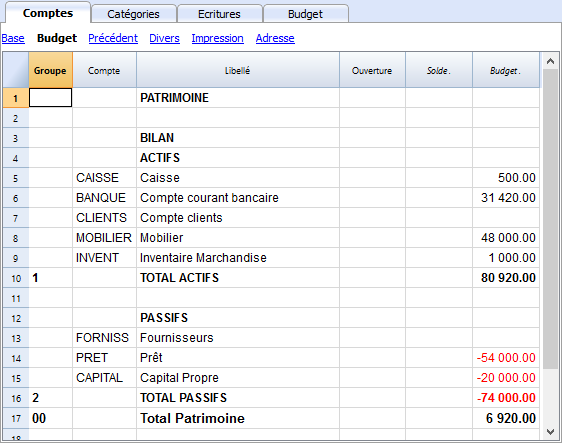
Tableau Catégories
Dans le tableau Catégories, on configure les voix des recettes et dépenses.
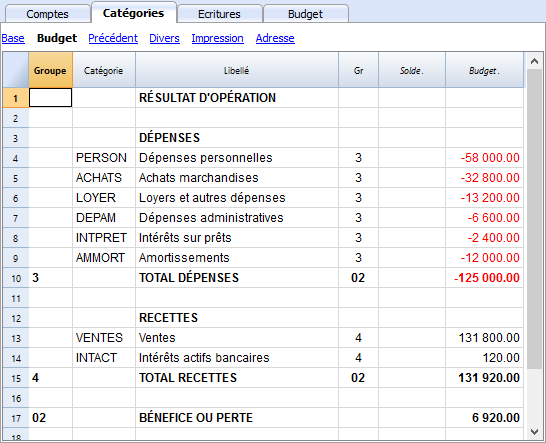
Le Tableau Budget
Le tableau Budget (voir aussi les explications correspondantes aux colonnes) est l'endroit où l'on insère les écritures correspondantes à la planification.
Le plan financier se produit en insérant des écritures de budget dans le tableau Budget. Le tableau Budget offre des colonnes supplémentaires qui facilitent énormément la préparation du plan financier.
- Répéter
Par exemple, si l'on indique "M" = Mensuel, c'est comme si l'on insère l'écriture pour tous les mois suivants. - Si aucune répétition n'est indiquée, l'opération sera exécutée une seule fois.
- Fin (Date)
Utilisée en combinaison avec la répétition et indique la dernière date à laquelle l'opération sera répétée. - Total
Le montant global écrit pour l'année courante.
Ecritures du mois de janvier
Il s'agit d'écritures tout à fait identiques à celles du tableau écritures, parce qu'elles ne contiennent aucune répétition.
C'est le premier mois d'activité du Bar et on y trouve des versements de capital, le paiement du mobilier et l'ouverture d'un prêt.
Les écritures et le loyer du premier mois ont été insérés ici et non comme écritures répétitives, simplement pour montrer des écritures simples, sans aucune répétition.
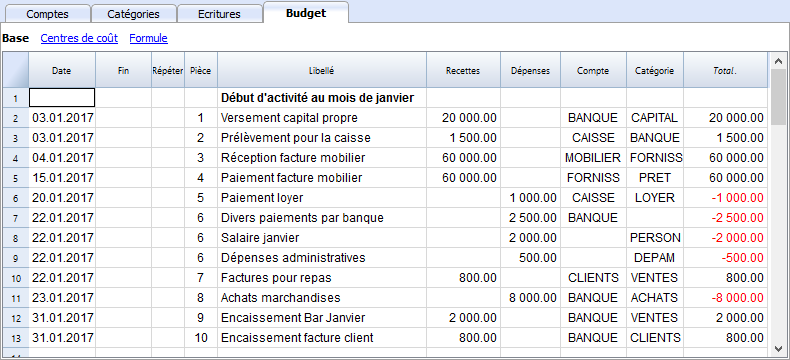
Ecritures répétées pour le mois de février
Pour le mois de février, nous insérons les écritures qui se répéteront mensuellement.
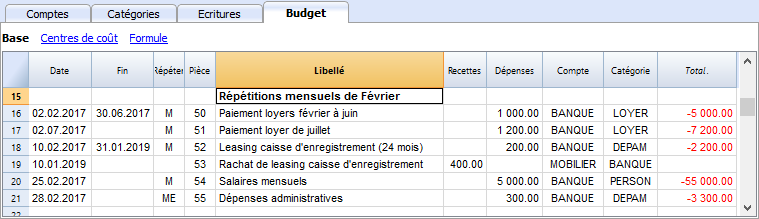
- Le loyer de janvier à juin est de 1'000, à partir de juillet il sera de 1'200 par mois.
- Pièce 5:
Le premier loyer a été versé par la caisse. Il y aura probablement aussi eu un versement pour la garantie. - Pièce 50:
Le loyer de 1'000 pour les mois de février à juin est budgété- Le 2 février, le loyer est payé par la banque
Dans les mois suivants, le 2 de chaque mois, le paiement du loyer figurera dans le tableau. - La Date Fin est le 30 juin.
Le dernier loyer à 1'000 sera le 2 juin. - Répéter est M=Mensuel
- Total 5'000 (5x1'000) calcule automatiquement le montant global pour cette écriture durant la période.
- Le 2 février, le loyer est payé par la banque
- Pièce 51:
Les loyers à partir de juillet sont budgétés - Date: 2 juillet
Dans les mois suivants, le 2 de chaque mois, le paiement du loyer figurera pour le montant de 1'200. - Fin:
Aucune date finale n'est indiquée, donc cette dépense se répétera pour tous les mois et ans successifs. - Répéter: M=Mensuellement.
- Total: 7'200 (6x1'200) est calculé automatiquement.
Les six mois de loyer de juillet à décembre.
- Pièce 5:
- Pièce 52.
La location de la caisse enregistreuse- Date: 10 février
- Fin: 31 janvier 2019. Fin du dernier versement du leasing.
- Répéter; M = chaque mois
L'opération sera répétée chaque mois suivant et jusqu'à la dernière fois, en janvier 2019. - CtDébit: dépenses administratives
- CtCrédit: banque
- Montant: 200.00 - tranche mensuelle du leasing.
- Total: 5'500 (500 x 11 mois)
- Pièce 53:
Versement pour le rachat du leasing.
Opération de 2019, mais nous l'insérons ici parce qu'elle est étroitement liée au leasing mensuel- Date: 10 février 2019
- CtDébit: dépenses administratives.
- CtCrédit: la banque
- Montant: 400.00, le montant du rachat.
- Total: vide, parce que pendant l'année courante il n'y aucune dépense.
- Pièce 54
Salaires mensuels- Date: 25 février
- Répéter: M=Mensuel
L'opération sera répétée tous les 25 des mois à venir. - Total : 55'000 (5'000 x 11 mois).
- Pièce 55:
Dépenses administratives
Elles sont approximatives car, pour que le budget soit plus correct, il faudrait des écritures pour toutes sortes de dépenses.- Date: 28 février
- Répéter: ME=Fin de mois (Month End).
L'opération sera répétée chaque mois successif, le dernier jour du mois.
Ainsi, en mars, ce sera le 31, en avril, le 30 et ainsi de suite. - Montant: 300.00
- Total: 3'300 (300 x 11 mois)
Prévisions recettes et achat de marchandise
Selon le type d'activité il faudra choisir le mode plus adéquat pour spécifier les recettes.
Les recettes et les achats de marchandise sont insérées, ci de suite, comme des montants mensuels, tout en considérant qu'il y aura des variations mensuelles importantes.
Il serait probablement plus opportun de créer des détails pour le chiffre d'affaires pour les boissons ou pour la cuisine.
Pour le mois de février, nous n'avons indiqué aucune répétition parce que nous prévoyons un plus grand chiffre d'affaires pour l'année suivante, et donc, nous l'indiquerons plus loin.
Pour les mois à partir de mars, nous pensons que le chiffre d'affaires sera encore significatif pour les années à venir.
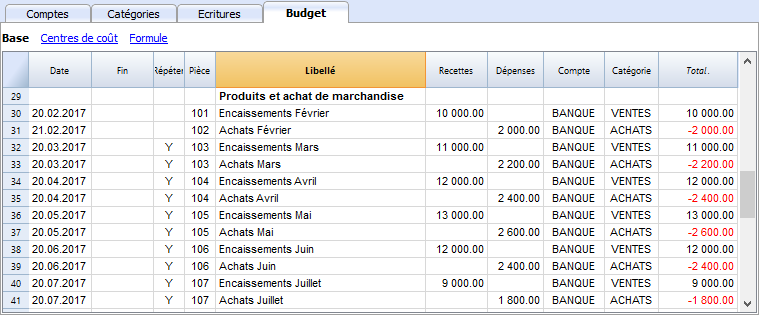
La prévision des recettes et des frais de marchandise est calculée mensuellement
- Pièce 101:
Nous indiquons l'encaissement de février- Date: 20 février
En raison des liquidités nous l'insérons ni au début ni à la fin du mois. - Répéter: vide (aucune répétition)
L'année suivante, nous prévoyons un chiffre d'affaires plus élevé, c'est à ce moment-là que nous ferons l'écriture. - CtDébit: BANQUE - nous faisons figurer l'encaissement directement dans la banque.
- CtCrédit: VENTE - provient du compte Vente
- Montant: 10'000.00.
- Total: 10'000.00 - la prochaine opération se tiendra l'année suivante, donc pour cette année-ci, le montant n'est considéré qu'une seule fois.
- Date: 20 février
- Pièce 102:
Nous indiquons les frais de marchandise mensuels, comme les 20% de la vente mensuelle- Date: 21 février. Le jour qui suit l'écriture des ventes.
- Répéter: vide (aucune répétition)
L'opération sera répétée le 21 de chaque mois successif.
Ainsi, pour chaque mois, le calcul des achats sera calculé en fonction de pourcentage du mouvement du compte Vente. - CtDébit: ACHATS - le frais de marchandise sont écrits dans le compte Achats.
- CtCrédit: BANQUE - le paiement des frais de marchandise se fait au travers de la banque.
- Pièce 103:
Deux lignes similaires aux pièces 101 et 102, mais pour le mois de mars.- Répéter: Y - chaque année. Le chiffre d'affaires et les frais du mois de mars ainsi que pour les années à venir.
- Pièces 104 à 112
Toujours pour le 20 du mois, les ventes prévues pour les différents mois de l'année sont indiquées.
Recettes année successive
Ici, nous désirons faire voir qu'il est aussi possible d'indiquer des opérations pour les années successives.
Ces données seront utilisées pour établir le budget des années à venir.
La colonne Total reste vide, parce qu'il s'agit de valeurs hors de la période comptable. C'est pour cela qu'elles ne sont pas indiquées dans la colonne Total, qui ici, se réfère à la période courante.
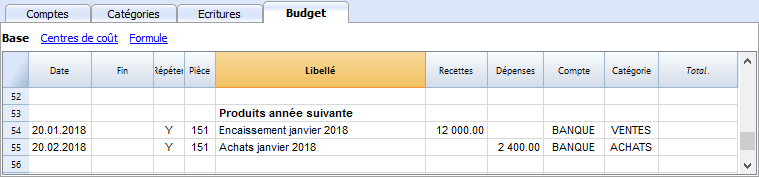
- Pièce 151:
Ecritures semblables à l'année précédente.- Date: 20 janvier
- Répéter: Y=annuel
Cette répétition figurera pour toutes les années suivantes - Total: vide (calculé automatiquement)
Cette opération sort de l'année comptable, ainsi, pour cette année-ci, il n'y a pas de montant
Fin de trimestre
Ici, nous indiquons certaines écritures typiques qui se répéteront à la fin du trimestre
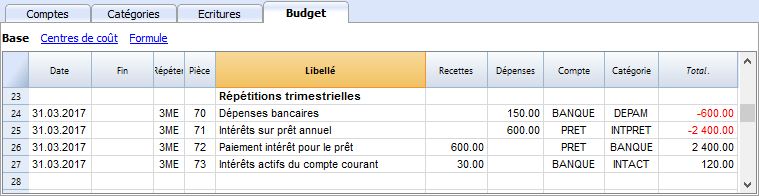
- Pièce 70:
Donnons un exemple qui utilise les colonnes Quantité et Prix- Date: 31 mars
- Répéter: 3ME = trois mois à la fin du mois (3 Month End).
- CtDébit: DEPAM - dépenses administratives.
- Montant: 150 (Calculé automatiquement), multipliant la quantité par le prix unitaire
- Pièce 71
Intérêts sur le prêt, à verser trimestriellement.- Date: 31 mars
- Répéter: 3ME - trois mois à la fin du mois (3 Month End)
- CtDébit: INTPRET - le compte des intérrêts passifs
- CtCrédit: PRET - les intérêts augment le prêt
- Montant: les intérêts pour ce trimestre
- Total: les intérêts pour l'année courante. .
- Pièce 72:
Les intérrêts maturés sur le compte prêts sont versés avec la Banque.- Date: 31 mars
- Répéter: 3ME - trois mois à la fin du mois (3 Month End)
- CtDébit: PRET- le compte des intérêts passifs
- CtCrédit: BANQUE - le compte utilisé pour verser les intérêts.
- Montant: le résultat de la formule, c'est-à-dire les intérêts pour ce trimestre.
- Total: les intérêts pour l'année courante.
- Pièce 73:
Intérêts maturés sur le compte bancaire courant- Date: 31 mars
- Répéter: 3ME, trois mois à la fin du mois (3 Month End)
- Ctdébit: BANQUE - le compte bancaire
- Ctcrédit: INTACT - les intérêts actifs
- Montant: ce sont les intérêts actifs pour ce trimestre
- Total: ce sont les intérêts actifs pour l'année en vigueur
Fin d'Année
A la fin de l'année il y a des opérations à faire. Ici, nous utilisons la fonction Répéter "Y" de façon à ce que ces opérations soient aussi exécutées même pour les années suivantes.
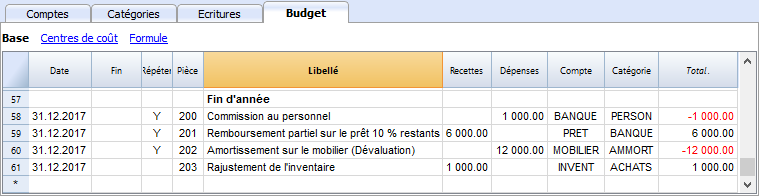
- Pièce 200.
Nous attribuons au personnel une commission d'1% sur les ventes annuelles.- Date: 31 décembre
- Répéter: Y - sera répété chaque année.
- Ctdébit: PERSON - le compte des charges de personnel
- Ctcrédit: BANQUE
- Montant: - commission que nous versons au personnel de vente
- Total: égal au montant
- Pièce 201
Nous remboursons 10% du prêt existant encore- Date: 31 décembre
- Répéter: Y - sera répété chaque année
- Ctdébit: PRET - le compte prêt (remboursement du prêt)
- Ctcrédit: BANQUE - les fonds servant à rembourser le prêt proviennent de la banque
- Montant: 6'000 correspondant à 10% du prêt actuel
- Total: égal au montant
- Pièce 202:
Avec cette opération nous amortissons le mobilier - Pièce 203
Avec cette opération nous ajustons l'inventaire
Ce n'est pas une opération répétitive car l'ajustement devrait être effectué sur la base des valeurs de l'inventaire
Personnalisation
Nous avons utilisé la commande créer de nouvelles personnalisations pour obtenir des impressions avec paramètre d'impression déjà préfigurées du Bilan formaté par groupes. Mais on peut aussi préfigurer les options d'impressions selon les choix personnels.
Si l'on comprend comment les personnalisations fonctionnent, on pourra utiliser d'autres commandes et créer des impressions ou d'autres, adaptées aux besoins propres.
Rapport dans le tableau Comptes
Dans le tableau Comptes, vue Budget, on trouve les montants ajournés du budget.
Plan financier et des liquidités de la première année
Avec la commande:
- Subdivision par période->Trimestre.
- Compta1->Budget trimestriel 1. année, nous voyons l'évolution pour la première année.
On voit la personnalisation préfigurée par
- Subdivision par Période -> Trimestre
Ces deux impressions permette de voir:
- Le budget économique (Coûts et Recettes) et financier de l'année courante.
- L'évolution de la liquidité. On y voit en détail l'évolution du Compte Bancaire Courant.
En modifiant ou en créant une nouvelle personnalisation on peut obtenir la subdivision par mois.
Par mois
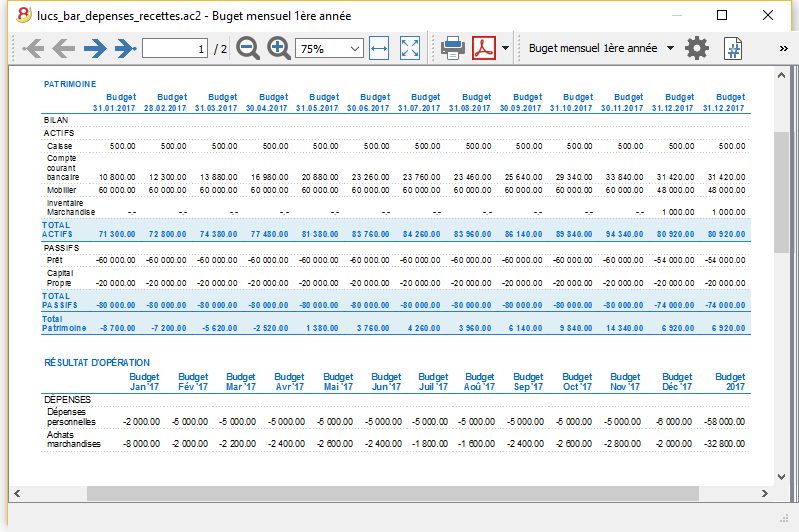
Prévision financière et de la liquidité sur 4 ans
Avec la commande
- Rapports→ Budget 4 ans
On peut voir la personnalisation prédéfinie avec:
- Période du 1.1.2017 au 31.12.2020
Dans le rapport il est possible d'indiquer une période différente de celle de la comptabilité
Le programme projette ainsi les données pour la période indiquée. - Subdivision par Année
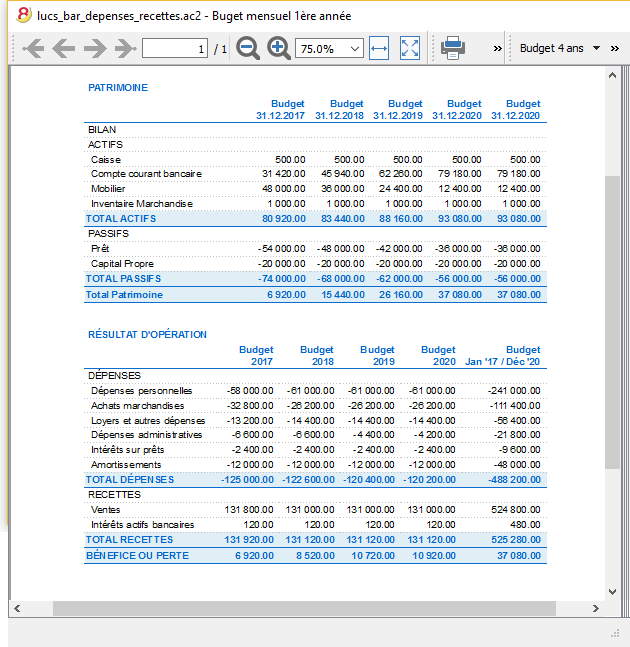
Fiche Compte
Dans le tableau Budget, en allant sur le compte "BANQUE" et cliquant sur "voir fiche", on obtient la fiche du compte budget de la banque, avec tous les mouvements budgétisés.
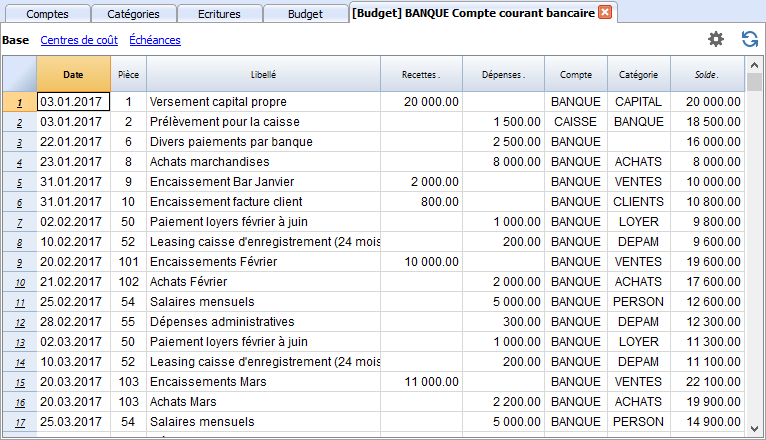
Plan financier Start-up
Plan financier Start-upLa solution simple pour établir des plans professionnels de liquidité
Si tu penses lancer une nouvelle activité, ou si tu es déjà entrain de compiler un business plan, il est important de faire un plan de la liquidité. Surtout au début de l'activité, il est facile de se retrouver avec des difficultés financières.
Le programme Banana Comptabilité offre la possibilité d'établir et tenir à jour, facilement, des plans financiers et de liquidité de façon très soignée.
Le logiciel Banana Comptabilité te permet de préparer une comptabilité du futur, insérer des mouvements comptables relatifs aux années à venir. En insérant les prévisions de dépenses, on obtient tous les rapports typiques de la comptabilité tels que Bilan, Compte de Résultat, Détails des mouvements, mais se référant à l'avenir.
L'image qui suit te donne un exemple de plan mensuel que tu peux facilement obtenir avec le programme Banana Comptabilité.
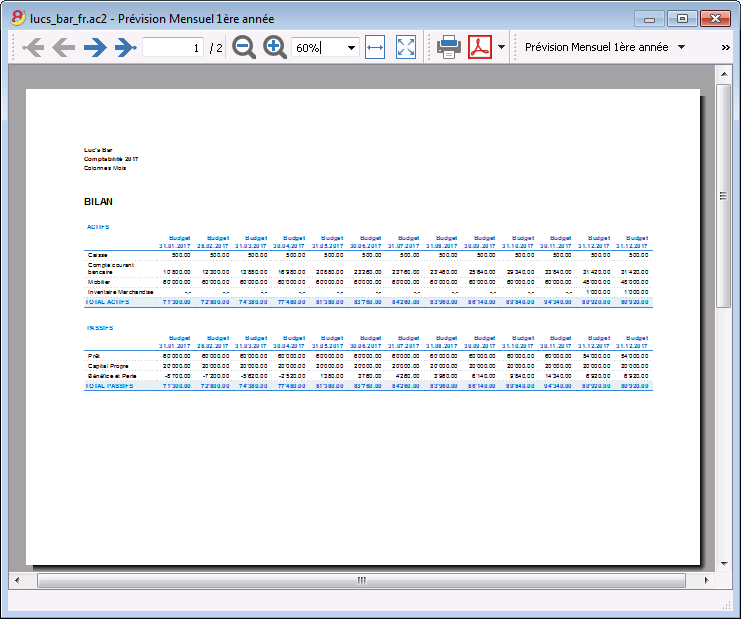
Plan financier et de liquidité du Luca's Bar
Ci-dessous, on trouve des explications sur comment créer un plan financier en s'inspirant, par exemple, de l'ouverture d'un Bar.
Le but est de faire comprendre le fonctionnement du système et les fonctionnalités que le logiciel Banana Comptabilité met à disposition.
Luca a l'intention d'ouvrir en 2017 un bar-restaurant et prépare donc un plan financier, avec tous les détails nécessaires.
- Le financement est puisé dans les fonds propres et aussi un prêt de tiers.
- Le mois de janvier 2017, il prend en location les locaux, meuble le bar et commence son activité.
- La période de planification couverte est de janvier 2017 à décembre 2020.
Prévisions économiques et de la liquidité
Ce modèle sert à apprendre les diverses fonctionnalités du programme dans le domaine de la planification financière.
Quelques fonctions, comme par exemple, les formules, s'utiliseront dans des cas plus avancés. La possibilité de saisir des formules n'est disponible dans Banana Comptabilité Plus qu'avec le plan Advanced. Mettez à jour maintenant!
- Utilisation des écritures de budget
- Opérations répétées
- Utilisation de quantité et prix
- Utilisation de formules
- Variables
- Calculs des intérêts actifs et passifs
- Reprise du solde de compte
- Reprise des mouvements de compte
- Budget pour une année divisé en trimestre, avec résultats ainsi que l'évolution de la liquidité
- Budget pour plusieurs années, avec résultats ainsi que l'évolution de la liquidité
Propriétés fichier
La date d'ouverture est le 1 janvier 2017 et celle de la clôture, le 31 décembre 2017.
C'est aussi la période de calcul utilisée pour la colonne Total dans le budget.
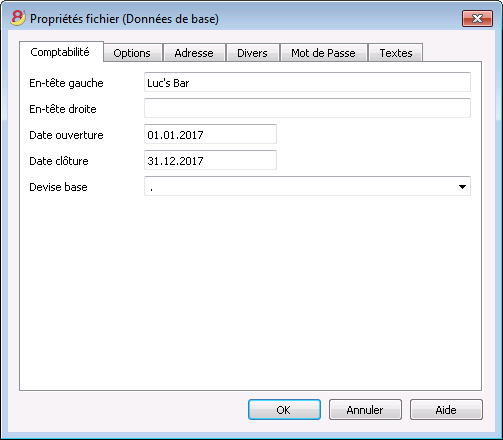
Le plan comptable
C'est un exemple destiné à expliquer le fonctionnement des prévisions budgétaires.
- Le plan comptable est simplifié au maximum
- Des noms de comptes ont été utilisés pour rendre l'explication plus facile encore.
- Ouverture. L'activité débute à zéro et donc, il n'y a aucun solde de début
- Budget - c'est le budget global à la fin de la période comptable
Comme on peut le voir, il y a le Bilan et le Compte Résultat de la fin de l'année budgétisée.
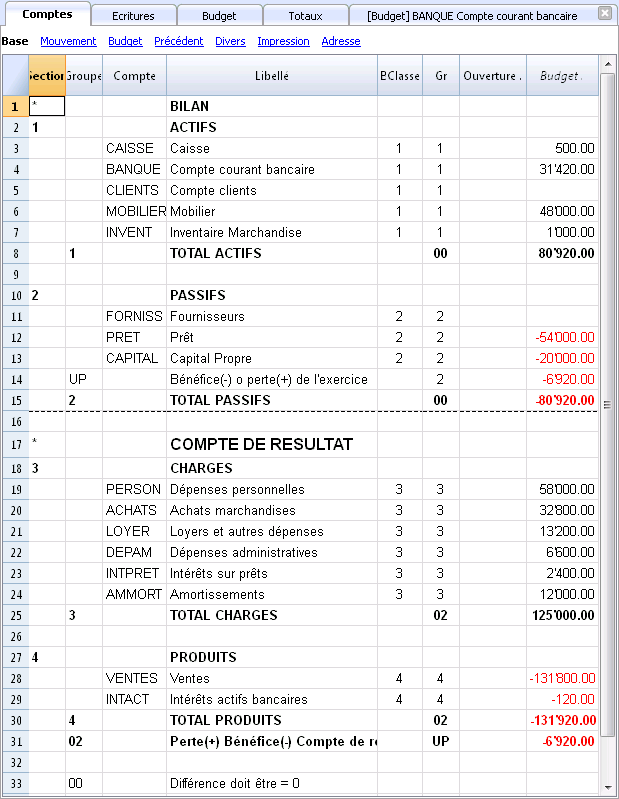
Créer son propre plan comptable
Le plan comptable définit les éléments des dépenses, recettes et investissements. Si l'on désire obtenir de plus amples subdivisions il sera nécessaire d'ajouter d'autres comptes. En revanche, au lieu de commencer par un plan comptable trop simple et devoir ajouter chaque fois des comptes ou groupes, il est préférable de commencer dès le départ avec un plan comptable plus structuré. Le logiciel Banana Comptabilité offre différents plans comptables déjà préfigurés et il est conseillé de choisir celui qui correspond le mieux à ses exigences, et ainsi de l'adapter selon les nécessités et ajouter le tableau budget.
Le tableau budget
Le tableau Budget (voir aussi les explications correspondantes aux colonnes) est l'endroit où l'on insère les écritures correspondantes à la planification.
Le plan financier se produit en insérant des écritures normales dans la comptabilité en partie double dans le tableau Budget. Le tableau Budget offre des colonnes supplémentaires qui facilitent énormément la préparation du plan financier.
- Répéter
Par exemple, si l'on indique "M" = Mensuel, c'est comme si l'on insère l'écriture pour tous les mois suivants. - Si aucune répétition n'est indiquée, l'opération sera exécutée une seule fois.
- Fin (Date)
Utilisée en combinaison avec la répétition et indique la dernière date à laquelle l'opération sera répétée. - Total
Le montant global écrit pour l'année courante. - Qt, Prix
Permet d'indiquer une combinaison de valeurs sur la base de laquelle sera calculé le montant. - Formule
Permet d'indiquer la formule pour le calcul du montant.
La formule a la priorité pour le calcul du montant.
Enregistrements mois de janvier
Il s'agit d'enregistrements tout à fait identiques à ceux du tableau écritures, parce qu'ils n'ont pas de répétition.
C'est le premier mois d'activité du Bar et il y a on y trouve des versements de capital, le paiement du mobilier et l'ouverture d'un prêt.
Les écritures, le loyer du premier mois ont été insérée ici et non comme écritures répétitives, simplement pour montrer des écritures simples, sans aucune répétition.
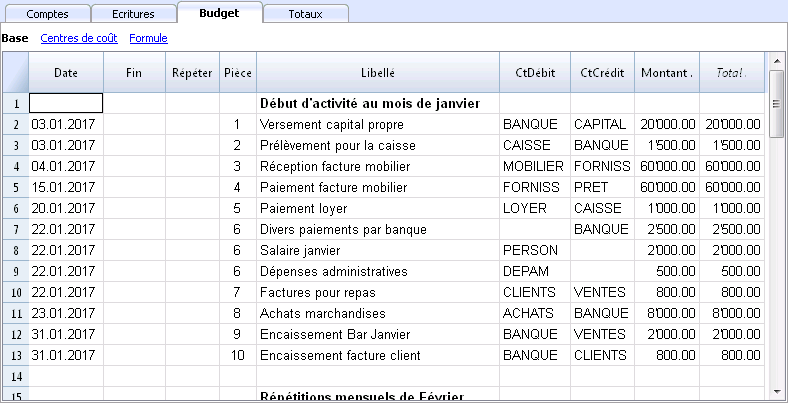
Écritures répétées pour le mois de février
Pour le mois de février, nous insérons les écritures qui se répéteront mensuellement.
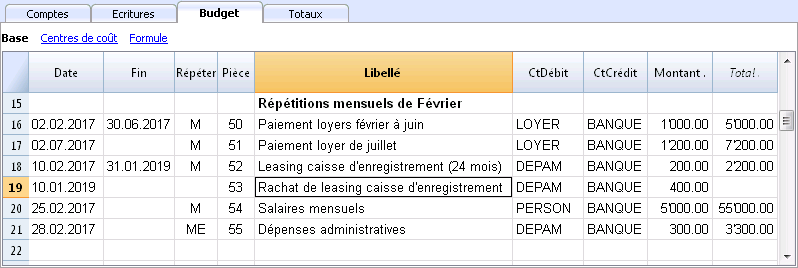
- Le loyer de janvier à juin est de 1'000; et à partir de juillet il sera 1'200 par mois
- Pièce 5:
Le premier loyer a été versé par la caisse. Il y aura probablement aussi eu un versement pour la garantie. - Pièce 50:
Le loyer de 1'000 pour les mois de février à juin est budgété- Le 2 février, le loyer est payé par la banque
Dans les mois suivants, le 2 de chaque mois, le paiement du loyer figurera dans le tableau. - La Date Fin est le 30 juin.
Le dernier loyer à 1'000 sera le 2 juin. - Répéter est M=Mensuel
- Total 5'000 (5x1'000) calcule automatiquement le montant global pour cette écriture durant la période.
- Le 2 février, le loyer est payé par la banque
- Pièce 5:
- Pièce 51:
Les loyers à parti de juillet sont budgétés- Date: 2 juillet
Dans les mois suivants, le 2 de chaque mois, le paiement du loyer figurera pour le montant de 1'200. - Fin:
Aucune date finale n'est indiquée, donc cette dépense se répétera pour tous les mois et ans successifs. - Répéter: M=Mensuellement.
- Total: 7'200 (6x1'200) est calculé automatiquement.
Les six mois de loyer de juillet à décembre.
- Date: 2 juillet
- Pièce 52.
La location de la caisse enregistreuse- Date: 10 février
- Fin: 31 janvier 2019. Fin du dernier versement du leasing.
- Répéter; M = chaque mois
L'opération sera répétée chaque mois suivant et jusqu'à la dernière fois, en janvier 2019. - CtDébit: dépenses administratives
- CtCrédit: banque
- Montant: 200.00 - tranche mensuelle du leasing.
- Total: 5'500 (500 x 11 mois)
- Pièce 53:
Versement pour le rachat du leasing.
Opération de 2019, mais nous l'insérons ici parce qu'elle est étroitement liée au leasing mensuel- Date: 10 février 2019
- CtDébit: dépenses administratives.
- CtCrédit: la banque
- Montant: 400.00, le montant du rachat.
- Total: vide, parce que pendant l'année courante il n'y aucune dépense.
- Pièce 54
Salaires mensuels- Date: 25 février
- Répéter: M=Mensuel
L'opération sera répétée tous les 25 des mois à venir. - Total : 55'000 (5'000 x 11 mois).
- Pièce 55:
Dépenses administratives
Elles sont approximatives, car il faudrait pour que le budget soit plus correct, des écritures pour toutes sortes de dépenses.- Date: 28 février
- Répéter: ME=Fin de mois (Month End).
L'opération sera répétée chaque mois successif, le dernier jour du mois.
Ainsi, en mars, ce sera le 31, en avril, le 30 et ainsi de suite. - Montant: 300.00
- Total: 3'300 (300 x 11 mois)
Prévisions recettes et achat de marchandise
Selon le type d'activité il faudra choisir le mode plus adéquat pour spécifier les recettes.
Les recettes et les achats de marchandise sont insérées, ci de suite, comme des montants mensuels, tout en considérant qu'il y aura des variations mensuelles importantes.
Il serait probablement plus opportun de créer des détails pour le chiffre d'affaires pour les boissons ou pour la cuisine.
Pour le mois de février, nous n'avons indiqué aucune répétition parce que nous prévoyons un plus grand chiffre d'affaires pour l'année suivante, et donc, nous l'indiquerons plus loin.
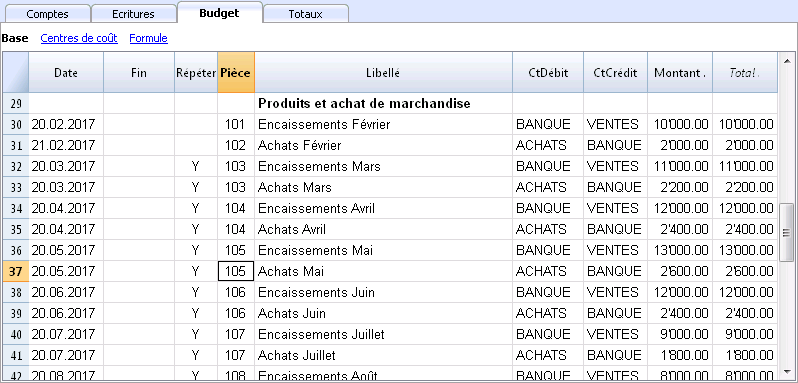
A partir du mois de mars, nous prévoyons que le chiffre d'affaire soit assez représentatif des années à venir.
La prévision des recettes et des frais de marchandise est calculée mensuellement
- Pièce 101:
Nous indiquons l'encaissement de février- Date: 20 février
En raison des liquidités nous l'insérons ni au début ni à la fin du mois. - Répéter: vide (aucune répétition)
L'année suivante, nous prévoyons un chiffre d'affaires plus élevé, c'est à ce moment-là que nous ferons l'écriture. - CtDébit: BANQUE - nous faisons figurer l'encaissement directement dans la banque.
- CtCrédit: VENTE - provient du compte Vente
- Montant: 10'000.00.
- Total: 10'000.00 - la prochaine opération se tiendra l'année suivante, donc pour cette année-ci, le montant n'est considéré qu'une seule fois.
- Date: 20 février
- Pièce 102:
Nous indiquons les frais de marchandise mensuels, comme les 20% de la vente mensuelle- Date: 21 février. Le jour qui suit l'écriture des ventes.
- Répéter: vide (aucune répétition)
L'opération sera répétée le 21 de chaque mois successif.
Ainsi, pour chaque mois, le calcul des achats sera calculé en fonction de pourcentage du mouvement du compte Vente. - CtDébit: ACHATS - le frais de marchandise sont écrits dans le compte Achats.
- CtCrédit: BANQUE - le paiement des frais de marchandise se fait au travers de la banque.
- Pièce 103:
Deux lignes similaires aux 101 et 102, mais pour le mois de mars.- Répéter: Y - chaque année. Le chiffre d'affaires et les frais du mois de mars ainsi que pour les années à venir.
- Pièces 104 à 112
Toujours pour le 20 du mois, les ventes prévues pour les différents mois de l'année sont indiquées.
Recettes année successive
Ici, nous désirons faire voir qu'il est aussi possible d'indiquer des opérations pour les années successives.
Ces données seront utilisées pour établir le budget des années à venir.
La colonne Total reste vide, parce qu'il s'agit de valeurs hors de la période comptable. C'est pour cela qu'elles ne sont pas indiquées dans la colonne Total, qui ici, se réfère à la période courante.
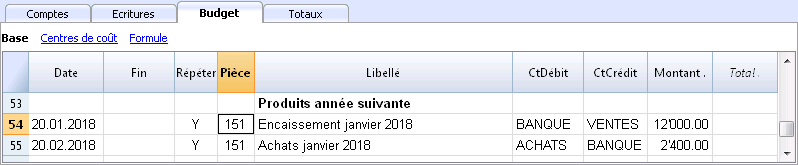
- Pièce 151:
Écritures semblables à l'année précédente.- Date: 20 janvier
- Répéter: Y=annuel
Cette répétition figurera pour toutes les années suivantes - Total: vide (calculé automatiquement)
Cette opération sort de l'année comptable, ainsi, pour cette année-ci, il n'y a pas de montant
Fin de trimestre
Ici, nous indiquons certaines écritures typiques qui se répéteront à la fin du trimestre
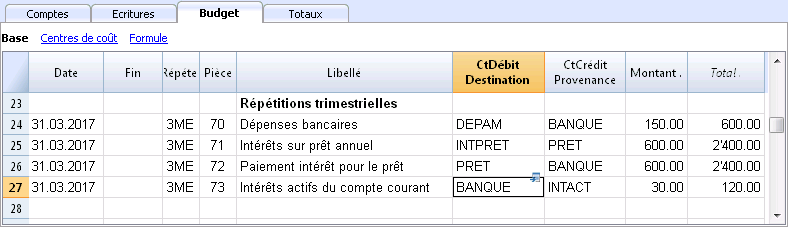
- Pièce 70:
Donnons un exemple qui utilise les colonnes Quantité et Prix- Date: 31 mars
- Répéter: 3ME = trois mois à la fin du mois (3 Month End).
- CtDébit: DEPAM - dépenses administratives.
- Montant: 150 (Calculé automatiquement), multipliant la quantité par le prix unitaire
- Pièce 71
Intérêts sur le prêt, à verser trimestriellement.- Date: 31 mars
- Répéter: 3ME - trois mois à la fin du mois (3 Month End)
- CtDébit: INTPRET - le compte des intérêts passifs
- CtCrédit: PRET - les intérêts augment le prêt
- Montant: les intérêts pour ce trimestre
- Total: les intérêts pour l'année courante. .
- Pièce 72:
Les intérrêts maturés sur le compte prêts sont versés avec la Banque.- Date: 31 mars
- Répéter: 3ME - trois mois à la fin du mois (3 Month End)
- CtDébit: PRÊT- le compte des intérêts passifs
- CtCrédit: BANQUE - le compte utilisé pour verser les intérêts.
- Montant: le résultat de la formule, c'est-à-dire les intérêts pour ce trimestre.
- Total: les intérêts pour l'année courante.
- Pièce 73:
Intérêts maturés sur le compte bancaire courant- Date: 31 mars
- Répéter: 3ME, trois mois à la fin du mois (3 Month End)
- Ctdébit: BANQUE - le compte bancaire
- Ctcrédit: INTACT - les intérêts actifs
- Montant: ce sont les intérêts actifs pour ce trimestre
- Total: ce sont les intérêts actifs pour l'année en vigueur
Fin d'Année
A la fin de l'année il y a des opérations à faire. Ici, nous utilisons la fonction Répéter "Y" de façon à ce que ces opérations soient exécutées même pour les années suivantes.
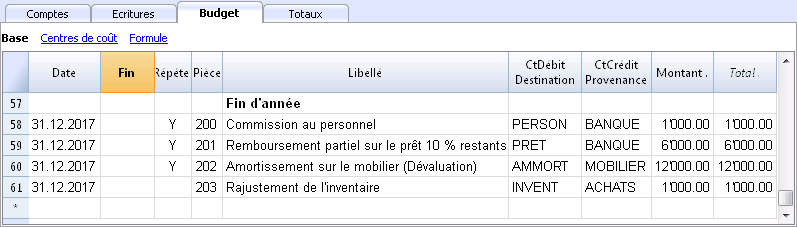
- Pièce 200.
Nous attribuons au personnel une commission d'1% sur les ventes annuelles.- Date: 31 décembre
- Répéter: Y - sera répété chaque année.
- Ctdébit: PERSONNEL - le compte des charges de personnel
- Ctcrédit: BANQUE
- Montant: - commission que nous versions au personnel de vente
- Total: égal au montant
- Pièce 201
Nous remboursons 10% du prêt existant encore- Date: 31 décembre
- Répéter: Y - sera répété chaque année
- Ctdébit: PRÊT - le compte prêt (remboursement du prêt)
- Ctcrédit: BANQUE - les fonds servant à rembourser le prêt proviennent de la banque
- Montant: 6'000 correspondant à 10% du prêt actuel
- Total: égal au montant
- Pièce 202:
Avec cette opération nous amortissons le mobilier - Pièce 203
Avec cette opération nous ajustons l'inventaire
N'est pas une opération répétitive car l'ajustement devrait être effectué sur la base des valeurs de l'inventaire
Personnalisations
Nous avons utilisé la commande créer de nouvelles personnalisations pour obtenir des impressions avec paramètre d'impression déjà préfigurées du Bilan formaté par groupes. Mais on peut aussi préfigurer les options d'impressions selon les choix personnels.
Si l'on comprend comment personnalisations fonctionnent, on pourra utilise d'autres commandes e créer des impressions ou d'autres, adaptées aux fins propres.
Rapport dans le tableau Comptes
Dans le tableau Comptes, vue Budget, se trouvent les montants ajournés du budget.
Plan financier et des liquidités de la première année
Avec la commande:
- Subdivision par période->Trimestre.
- Rapports→ Budget trimestriel 1. année, nous voyons l'évolution pour la première année.
On voit la personnalisation préfigurée par
Ces deux impressions permettent de voir:
- Le budget économique (Coûts et Recettes) et financier de l'année courante.
- L'évolution de la liquidité. On y voit en détail l'évolution du Compte Bancaire Courant.
En modifiant ou en créant une nouvelle personnalisation on peut obtenir la subdivision par mois.
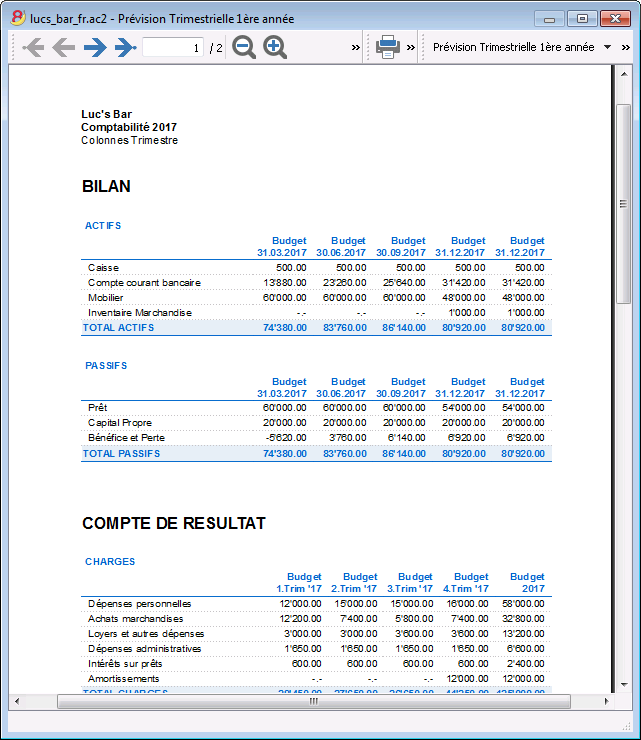
Par mois.
Prévision financière et de la liquidité sur 4 ans
Avec la commande
- Rapports → Budget 4 ans
On peut voir la personnalisation prédéfinie avec:
- Période du 1.1.2017 au 31.12.2020
Dans le rapport il est possible d'indiquer une période différente de celle de la comptabilité
Le programme projette ainsi les données pour la période indiquée. - Subdivision par Année
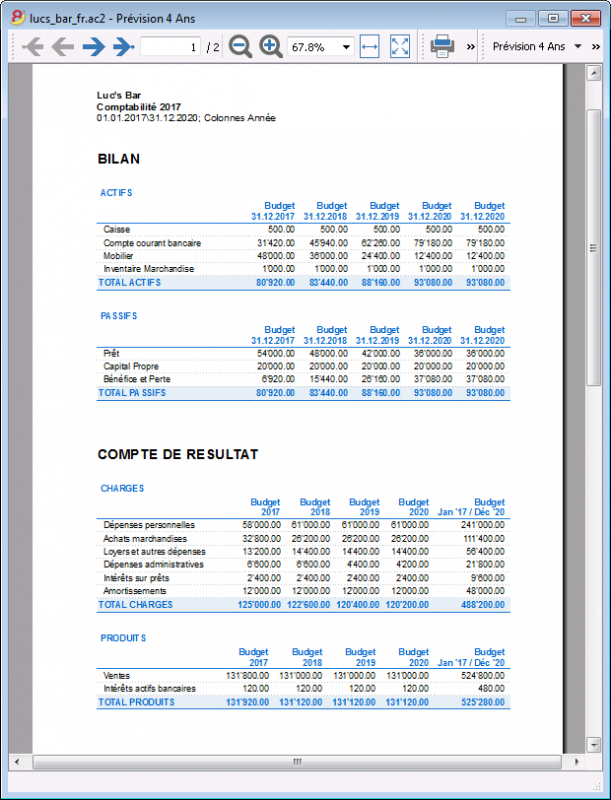
Fiche Compte
Dans le tableau Budget, en allant sur le compte "BANQUE" et cliquant sur "voir fiche", on obtient la fiche du compte budget de la banque, avec tous les mouvements budgétisés.
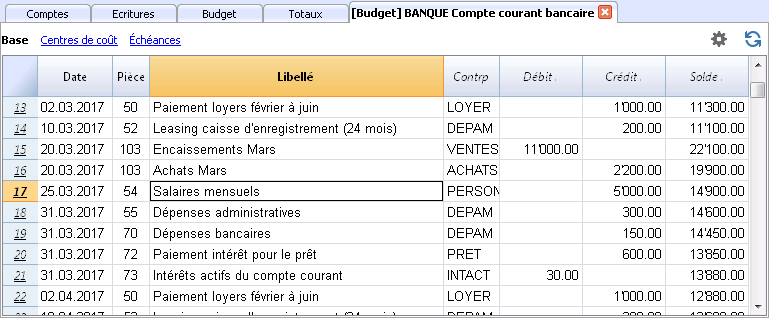
Tutorial file for amortisation and interest calculation with budget's formulas
Tutorial file for amortisation and interest calculation with budget's formulasThe possibility to enter formulas is available in Banana Accounting Plus only with the Advanced plan. Update now!
Planification financière avec formules
Planification financière avec formulesLa possibilité de saisir des formules n'est disponible dans Banana Comptabilité Plus qu'avec le plan Advanced. Mettez à jour maintenant!
Ce fichier contient des exemples d'écritures dans le tableau Budget, qui font usage de la colonne Formule et aussi des colonnes Quantité et Prix unitaire.
Pour les explications relatives au tableau Budget et aux colonnes veuillez consulter la page tableau Budget.
Rappellez-vous particulierèment, que les calculs sont effectués par ordre de date et non selon la séquence dans laquelle les mouvements budget ont été insérés.
Colonne quantité et prix unitaire
Dans la vue Formule vous verrez les colonnes Qt. (quantité) et Prix/Unité
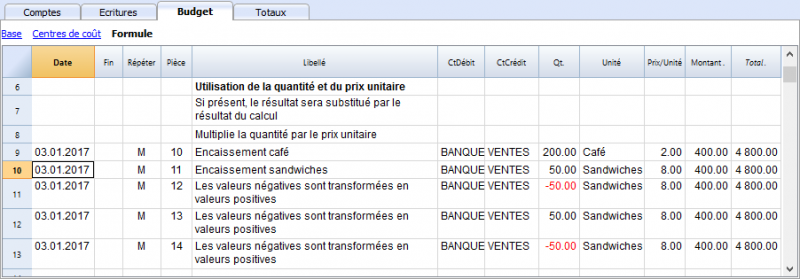
- Pièce 10. Dans la colonne Qt. se trouve le nombre de cafés vendus en un mois et dans la colonne Prix/Unité le profit pour chaque café.
Le programme calcule le Montant. - Les valeurs de la colonne Qt et Prix peuvent être insérées avec des chiffres négatifs, mais le Montant est converti en positif.
Formule dans le langage Javascript
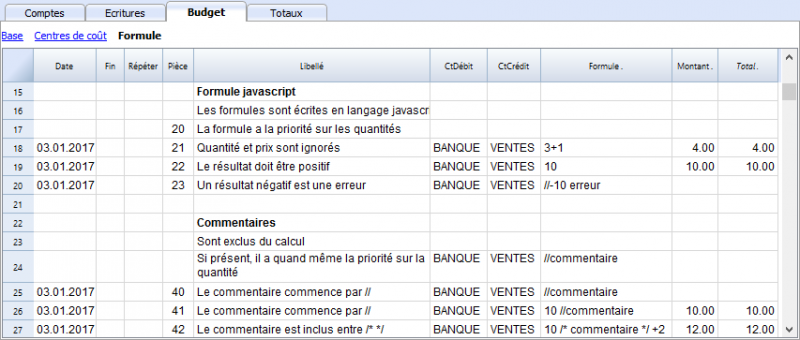
La colonne Formule permet d'insérer des expressions de calculs dans le langage Javascript.
- Si le résultat de la formule est un numéro, il sera repris comme Montant.
- Pièce 11. On peut indiquer des numéros ou des expressions mathématiques.
- Pièce 40 et 41. Le "//" indique que le texte est un commentaire.
- Pièce 42. Le texte compris entre /* et */ est traîté comme un commentaire non pas comme faisant partie de la formule.
Erreurs dans les formules
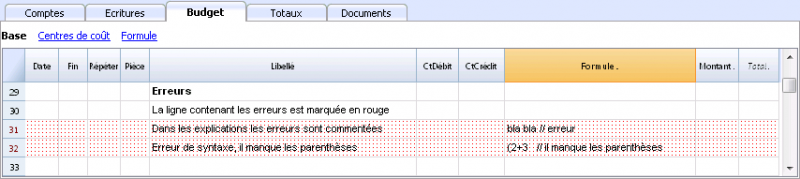
Si il y a des erreurs:
- La ligne avec l'erreur est indiquée en rouge.
- Le texte de l'erreur parraît dans la fenêtre "messages".
Pour éviter des signalisations d'erreur en continue, les erreurs sont commentées dans le fichier d'exemple (commencent avec "//").
Séparateur point virgule ";"
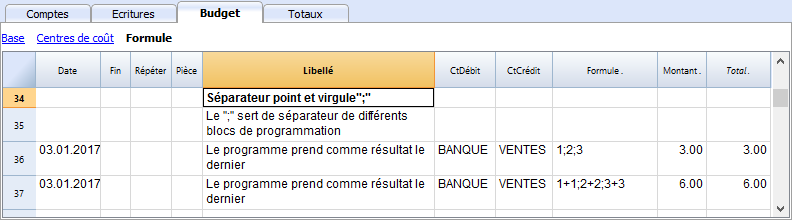
En javascript, chaque ligne de commande se termine par un ";". On peut ainsi enchaîner les expressions sur une ligne. La valeur de retour est le résultat de la dernière expression.
Séparateur virgule ","
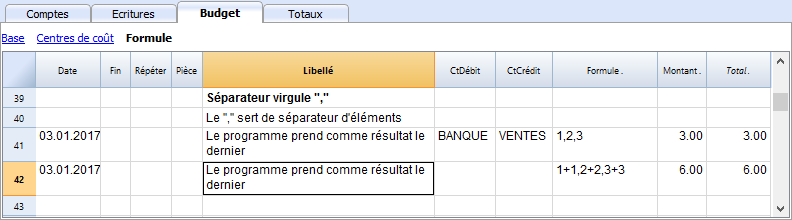
En javascript, la virgule est utilsée pour séparer les différentes expressions comprises dans une fonction. Le séparateur de virgules, dans ce cas, sépare les différentes expressions et le résultat est celui de la dernière expression.
N'utilisez pas la virgule comme séparateur de décimales, parce que dans la formule, la virgule est considérée comme un séparateur d'expressions seulement, et donc la valeur numérique sera tronquée.
Séparateur de décimales - le point "."
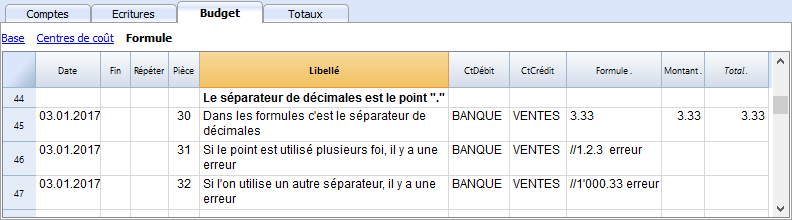
Javascript utilise le point "." comme séparateur de décimales. Indépendament de la configuration des décimales dans le système d'exploitation de votre ordinateur, javascript utilisera toujours le point pour séparer les décimales.
Simples calculs mathématiques
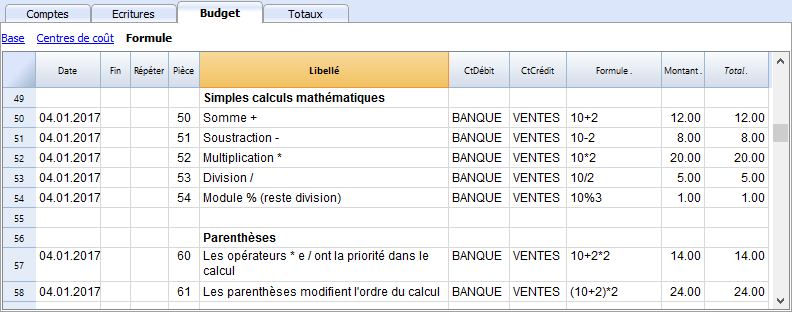
Dans la colonne formule vous pouvez insérer des calculs mathématiques composés avec de simples chiffres.
Textes et variables
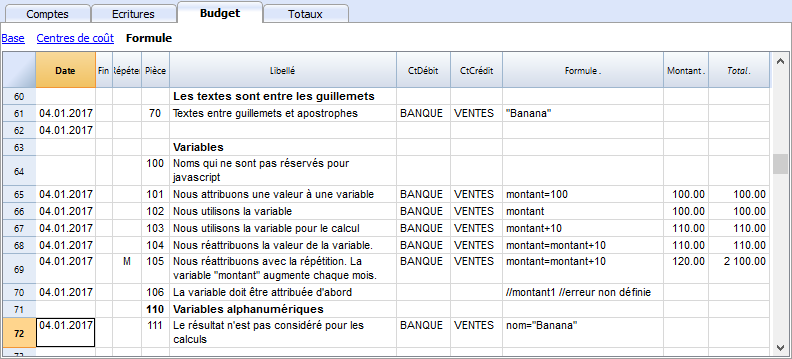
- Les textes sont des valeurs comprises entre des guillemets et des apostrophes.
- Les variables sont des éléments qui rappellent la valeur qui leur ont été attribuées.
- Le nom de la variable doit commencer par une lettre ou le signe souligné "_"
- Les variables doivent d'abord être définies à travers l'affectation "nomevariabile = 100"
- Exemples:
- Pièce 70. "Banana" entre les guillemets est un texte.
- Pièce 101
Une valeur de 100 est affectée à la variable Montant. - Pièce 102.
Le contenu de la variable Montant est repris. -
Pièce 103
Le contenu de la variable Montant est repris, incrémenté de 10 -
Pièce 104.
Le contenu de la variable montant est affecté à la variable montant incrémenté de 10.
La variable montant sera égale à 110. - Pièce 105
Cette formule sera appliquée mensuellement "Répéter = M".- La première fois 110+10=120
- La seconde fois 120+10=130 et ainsi de suite.
- Pièce 106
Si on enlève le commentaire cela indiquera que la variable montant1 n'a pas été définie. - Pièce 110
Affectons à la variable le nom/texte "Banana".
Controle du flux if ... then ... else
Vous pouvez utiliser toutes les expressions conditionnelles de javascript. Le sujet est très vaste et nous vous conseillons fortement de consulter la documentation sur le langage Javascript.
Nous signalerons uniquement, à ce propos, que dans Javascript:
- Le signe égal "=" est utilisé pour affecter une valeur à une variable "a=10"
- Pour la comparaison, on utilise, par contre, deux foix le signe égal l'un après l'autre "==". If (10==10) {1};
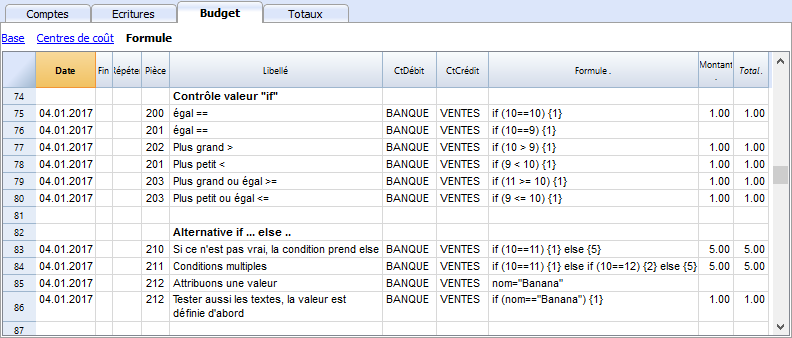
- Pièce 200-203
Si la condition indiquée entre des parenthèses rondes après le mot "if" est vraie "(10==10), alors le résultat de l'expression suivante, contenue dans les accolades "{1}", sera indiqué dans le montant.
Si elle n'est pas vraie "(10==9)", la valeur du montant sera zéro.
Propritétés et Fonctions
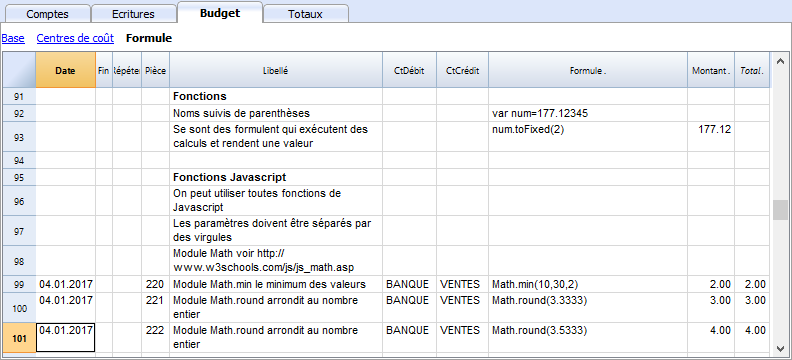
Les fonctions prédéfinies de javascript, comme, par exemple, celle du Module Math peuvent être utilisées.
Pour appeler une fonction, indiquez le nom suivi de la parenthèse à l'intérieur des quelles se trouvent les paramètres de la fonction.
Le nombre des paramètres dépend de la fonction.
- Pièce 220.
Math.min(10, 30, 2) retourne la valeur minimum des valeurs spécifiées et séparées par la virgule.
Object "row" ligne courante
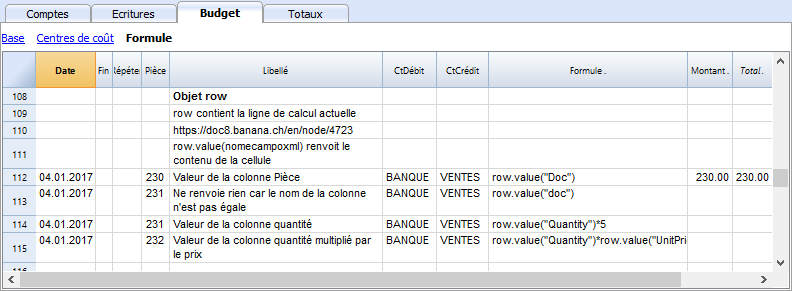
L'objet row du type Banana.Document.Row se réfère à la ligne courante.
Spécifier le nom de la colonne xml via la fonction value fait retourner le contenu de cette colonne-là.
Fonction prédéfine débit et crédit
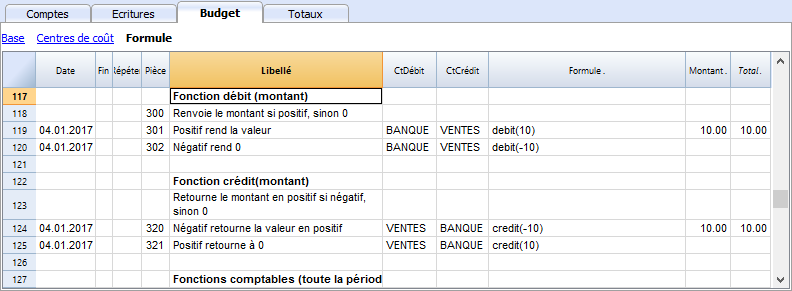
La formule n'accèpte, comme résultats, que des valeurs positives.
- La fonction débit retourne la valeur entrée comme paramètre si elle est positive.
- La fonction crédit retourne la valeur entrée comme paramètre avec le signe inverti si la valeur entrée est négative.
Fonctions comptables pour toute la période
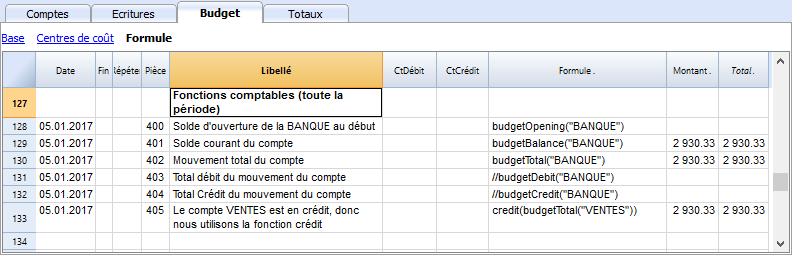
Si l'on utilise des fonctions spécifiques du budget sans période, la valeur relative retournera à la situation actuelle.
Rappelez-vous que les lignes sont élaborées par dates consécutives et donc, il ne peut y avoir de valeurs suivant la date de la ligne en élaboration.
Fonctions comptables limitée à une période
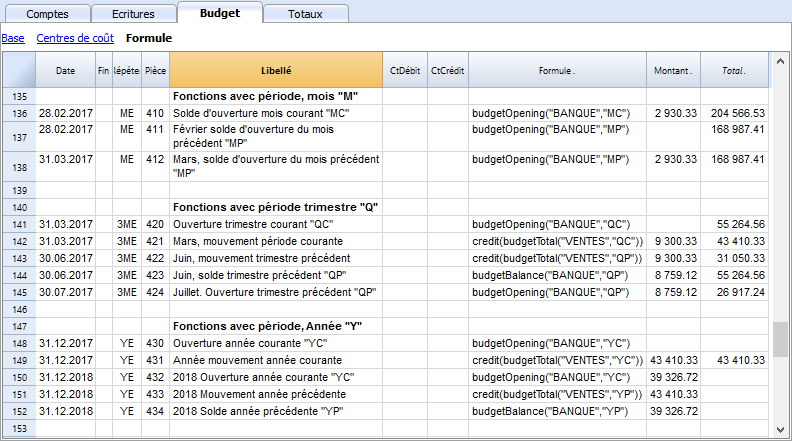
Ici, les fonctions sont utilisées avec la période.
La fonction BudgetBalance pour la période courante sera toujours égale à la fonction sans période, parce que la fonction BudgetBalance retourne le solde à la fin de la période et, de toutes façons, la ligne en élaboration est la dernière de cette période.
Par contre, en ce qui concerne les fonctions BudgetOpening et BudgetTotal, on considère aussi les dates de début, c'est pourquoi la période est importante.
Fonctions pour le calcul d'intérêts.
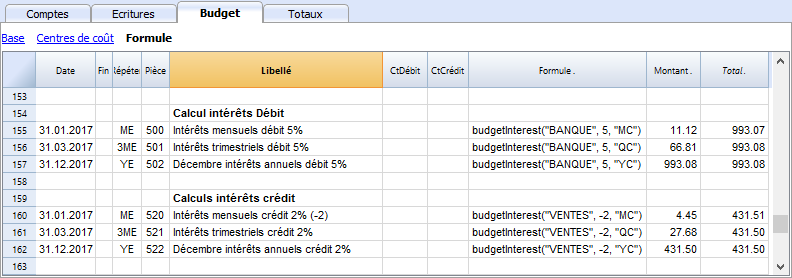
La fonction BudgetInterest calcule l'intérêt sur le compte indiqué en considérant les jours effectifs (365/365) à la date indiquée pour les écritures.
En calculant l'intérêt du mois courant, vous devez indiquer la date de fin du mois comme date.
- Pièce 500.
Le second paramètre représente le taux d'intérêt. Le 5 signifie 5%. Quand il est positif, il calcule l'intérêt pour les jours pour lesquels le solde se trouvait en débit. - Pièce 520.
Ici le taux d'intérêt est négatif, donc, il calcule les intérêts pour les jours où le solde se trouvait en crédit.
Fonctions de calcul de l'impôt sur le revenu

- Pièce 600.
L'impôt sur le bénéfice est calculée sur le mouvement dans la période "budgetTotal" du groupe final du Compte de résultat (dans ce cas, le 02).
credit(budgetTotal ("GR = 02", "YC")) * 0.10- Tu obtiens le mouvement du groupe dans l'année en cours
budgetTotal ("GR = 02", "YC") - La fonction credit () renvoie la valeur uniquement si elle est négative et la convertit en positif.
credit(budgetTotal ("GR = 02", "YC")) - Le résultat est multiplié par 0.10 (pourcentage 10%)
- Dans le compte Débit, il faut indiquer le compte Impôts du Compte de Résultat.
- Dans le compte Crédit, il faut indiquer le compte bancaire ou le compte de crédit du Trésor.
- Tu obtiens le mouvement du groupe dans l'année en cours
Fonctions définies par l'utilisateur
Calcul de l'impôt sur le bénéfice avec taux progressif
- Pièce 610
Le bénéfice est d'abord calculé et attribué à la variable - Pièce 611
Le bénéfice est passé à la fonction calculeImpot() qui applique le pourcentage d'impôt en fonction du montant et renvoie l'impôt à payer.
Autres fonctions définies par l'utilisateur
- Pièce 620
La fonction test () est appelée, qui est également définiee dans le document _budget .js, qui retourne simplement une valeur.
Utilisation des variables pour les calculs suivants
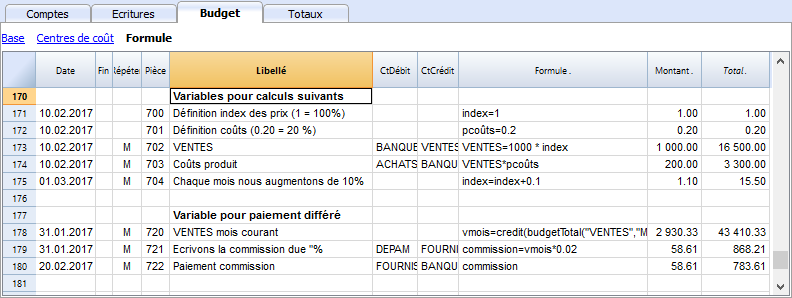
Les variables sont très utiles pour mémoriser des valeurs qui servent pour les calculs suivants.
- Doc 700-704
Le ventes sont indexées.- Pièce 700.
Nous fixons l'index à 1 (100%)-
Nous n'utilisons ni le compte débit (CtDébit) ni le compte crédit (CtCrédit) parce que la ligne sert seulement à mémoriser l'index. - Pièce 702.
Les ventes sont 1000 multiplié par la valeur de l'index.
Nous utilisons aussi la variable ventes pour calculer les coûts d'achat en la multipliant par 0.2 (20%) - Pièce 704
A partir du 1er mars, l'index s'incrémente de 0.1 chaque mois.
A partir de cette date, la valeur des ventes augmentera progressivement.
- Pièce 700.
- Pièces 720-722
Nous affectons à la variable vmois (ventes mois) la valeur des ventes du mois.
Nous calculons ensuite la commission.
Colonne JRepeatNumber
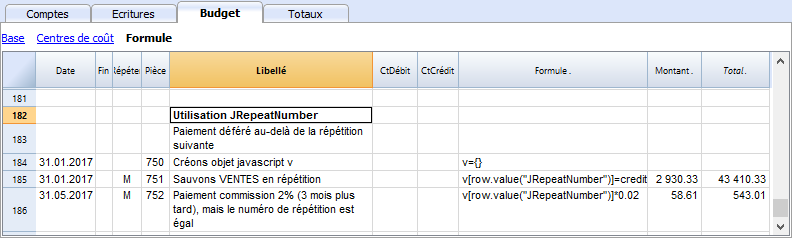
Dans l'objet "row" ligne courante " dans le champ JRepeatNumber le numéro de la répétition est sauvé lorsque des lignes ont la fonction "répéter".
- La première répétition est 0.
- La seconde répétition est 1 et ainsi de suite.
La valeur de JRepeatNumber est utilsée s'il n'est pas possible d'utilser une variable normale parce que la répétition a déjà souscrit une valeur.
En utilisant, par contre, JRepeatNumber comme propriété pour votre objet, vous pouvez sauver toutes les séquences et les reprendre par la suite.
Planification financière formule multidevise
Planification financière formule multideviseLa possibilité de saisir des formules n'est disponible dans Banana Comptabilité Plus qu'avec le plan Advanced. Mettez à jour maintenant!
Cet exemple explique comment utiliser les formules pour les fonctions spécifiques à la comptabilité en partie double avec multidevise.
Pour de plus amples informations, nous vous renvoyons vers les pages suivantes:
Calcul du montant en devise de base
D'abord, c'est la formule de la valeur en devise du compte qui est résolue, ensuite, celle pour le calcul en devise de base.
Taux de Changes et taux de changes historiques
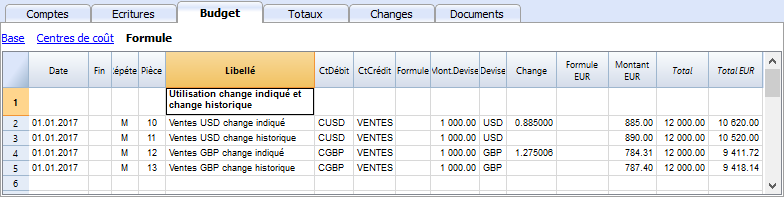
- Pièces 10 e 12.
Si un taux de change est indiqué dans la colonne Change, pour calculer le montant en devise de base (dans ce cas-ci en Euro), le programme utilise le taux de change indiqué sur la ligne. - Pièces 11. et 13
Si aucun taux de change n'est indiqué, le programme utilisera le taux de change dans le Tableau Changes, même pour les lignes avec des dates ultérieures, au cas où la répétition est en vigueur. - Si des taux de changes historiques sont définis dans le tableau changes, en ajoutant une date, le programme utilise le taux de changes relatif à la date ou aux taux de change précédent le plus récent.
Utilisation des formules pour la devise de base
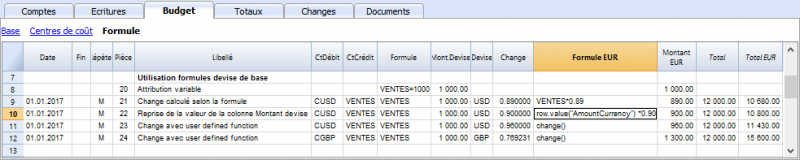
Dans la colonne Formule des devises de base, vous pouvez utiliser toutes les formules disponibles dans le tableau Budget.
Dans ces exemples, on peut voir que la valeur de la devise de base (EUR) est calculée selon une formule.
- Pièce 21.
La valeur de la variable VENTE est multipliée par le taux de change. Le taux de changes indiqué dans la colonne est donc ignoré. - Pièce 22.
Idem à la pièce précédente, mais pour la valeur de la colonne "AmountCurrency" qui est le résultat de la formule. - Pièce 23.
Dans le document "_budget.js", nous avons défini la fonction Changes () qui calcule la valeur selon le contenu de la ligne.
Avec ces fonctions on peut créer des simulations de changes.
Exemples de fonctions de Changes
Cette fonction calcule le taux de change en fonction des lignes de la devise et de la date
Si ils sont en USD le taux de change est établi mensuellement.
En revanche, pour les GBP, on utilise toujours le même taux de change.
La fonction retourne le montant contenu dans AmountCurrency, multiplié par le taux de change.
  function change() {
    var montant = row.value("AmountCurrency");
    var change = 1;
    var devise = row.value("ExchangeCurrency");
    var date = Banana.Converter.toDate(row.value("JDate"));
    var mois = date.getMonth() + 1;
    if (devise == "USD") {
      change = 0.95;
      if (mois == 1)
        change = 0.96;
      else if (mois == 2)
        change = 0.97;
    }
    if (devise == "GBP") {
      change = 1.30;
    }
    return montant * change;
  }
Formule pour le calcul des différences de taux de change
Pour obtenir des informations concernant le calcul des différences de taux de change, nous vous renvoyons aux informations sur les écritures multidevise et à la page de la commande Créer Différence de Changes
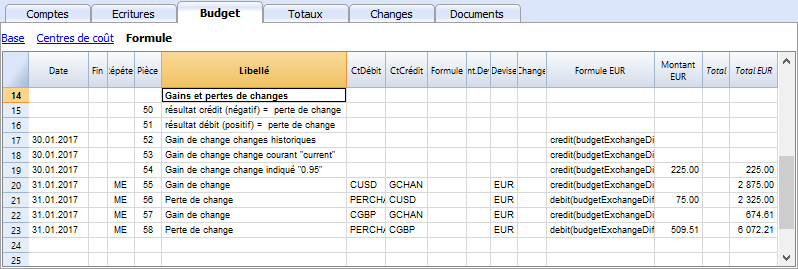
- La devise est toujours la devise de base.
- Il ne faut pas indiquer de montant dans la devise de base
- Le change doit être vide et même di une valeur aurait été insérée, elle ne serait pas considérée.
- La fonction budgeExchangeDifference calcule la différence de change sur un compte. Il s'agit du bénéfice ou de la perte du change non réalisé-
- La fonction rendra une valeur positive s'il s'agit d'une perte de change et négative (crédit) s'il s'agit d'un bénéfice du change.
Il faut donc créer deux écritures, une pour le bénéfice dû au change et une pour la perte due au change. - Le montant retourné est la réévaluation nécessaire en devise de base pour faire en sorte que le sole du compte en devise de base soit égal au solde du compte en devise convertie au change utilisé pour le calcul de la différence du change.
- La fonction rendra une valeur positive s'il s'agit d'une perte de change et négative (crédit) s'il s'agit d'un bénéfice du change.
- Le premier paramètre "CUSD" de la fonction budgetExchangeDifferences est le compte en devise étrangère pour lequel on veut calculer la différence du change.
- Le deuxième paramètre est le taux de change à appliquer.
- S'il n'y a pas de taux de change, alors c'est le taux de change historique relatif à la date de l'écriture qui sera appliqué.
- Si "current" est utilisé, alors c'est le taux de change du tableau de Change sans date qui sera appliqué.
- On peut éventuellement indiquer un taux de change, il faut utiliser alors le point ".". comme séparateur de décimales.
  credit(budgetExchangeDifference("CUSD"))
  credit(budgetExchangeDifference("CUSD", "current"))
  credit(budgetExchangeDifference("CUSD", "0.95"))
Tutoriel Planification financière experts-comptables
Tutoriel Planification financière experts-comptablesLa planification financière de précision est une méthode permettant de construire l’avenir financier de l’entreprise avec la même rigueur que la comptabilité réelle.
Dans Banana Comptabilité, la prévision n’est pas séparée, mais intégrée dans le même fichier comptable.
Dans ce tutoriel, vous verrez comment créer une prévision complète en saisissant des écritures futures et en obtenant automatiquement le bilan, le compte de résultat et la trésorerie prévisionnels. Vous pouvez également simuler différents scénarios.
Vidéo d’introduction
Pour voir le système en action, consultez notre vidéo ci-dessous :
À qui s’adresse ce tutoriel
Ce tutoriel est destiné aux :
- Experts-comptables
- Fiduciaires
- Conseillers et comptables
L’objectif est de vous montrer comment créer rapidement une planification financière complète dans le même fichier comptable, en incluant :
- Compte de résultat prévisionnel
- Bilan prévisionnel
- Évolution de la liquidité
- Comparaison entre budget et résultats réels.
Vous pouvez préparer la planification financière aussi bien pour votre entreprise que pour vos clients, en offrant une valeur ajoutée à vos conseils allant au-delà de la gestion comptable.
Structure de la planification
Avec Banana Comptabilité, vous n’avez rien à créer de plus que ce que vous utilisez déjà. Cela signifie que vous travaillez avec :
- le même plan comptable
- la même logique Débit/Crédit
- les mêmes outils d’analyse
Pour saisir les écritures budgétaires, vous utilisez :
- le tableau Budget dans lequel vous saisissez les mouvements prévus pendant l’année :
- saisissez l’écriture une seule fois
- définissez la fréquence
- vous pouvez déterminer qu’un mouvement apparaisse pendant une période définie par une date de début et de fin.
Plan comptable
Les comptes utilisés sont ceux déjà disponibles dans le plan comptable. Dans le tableau Comptes, vous pouvez afficher la colonne Budget afin d’avoir toujours à disposition les soldes prévisionnels :
- menu Données > Organiser Colonnes > activer la colonne Budget
Actifs et Passifs (Bilan)
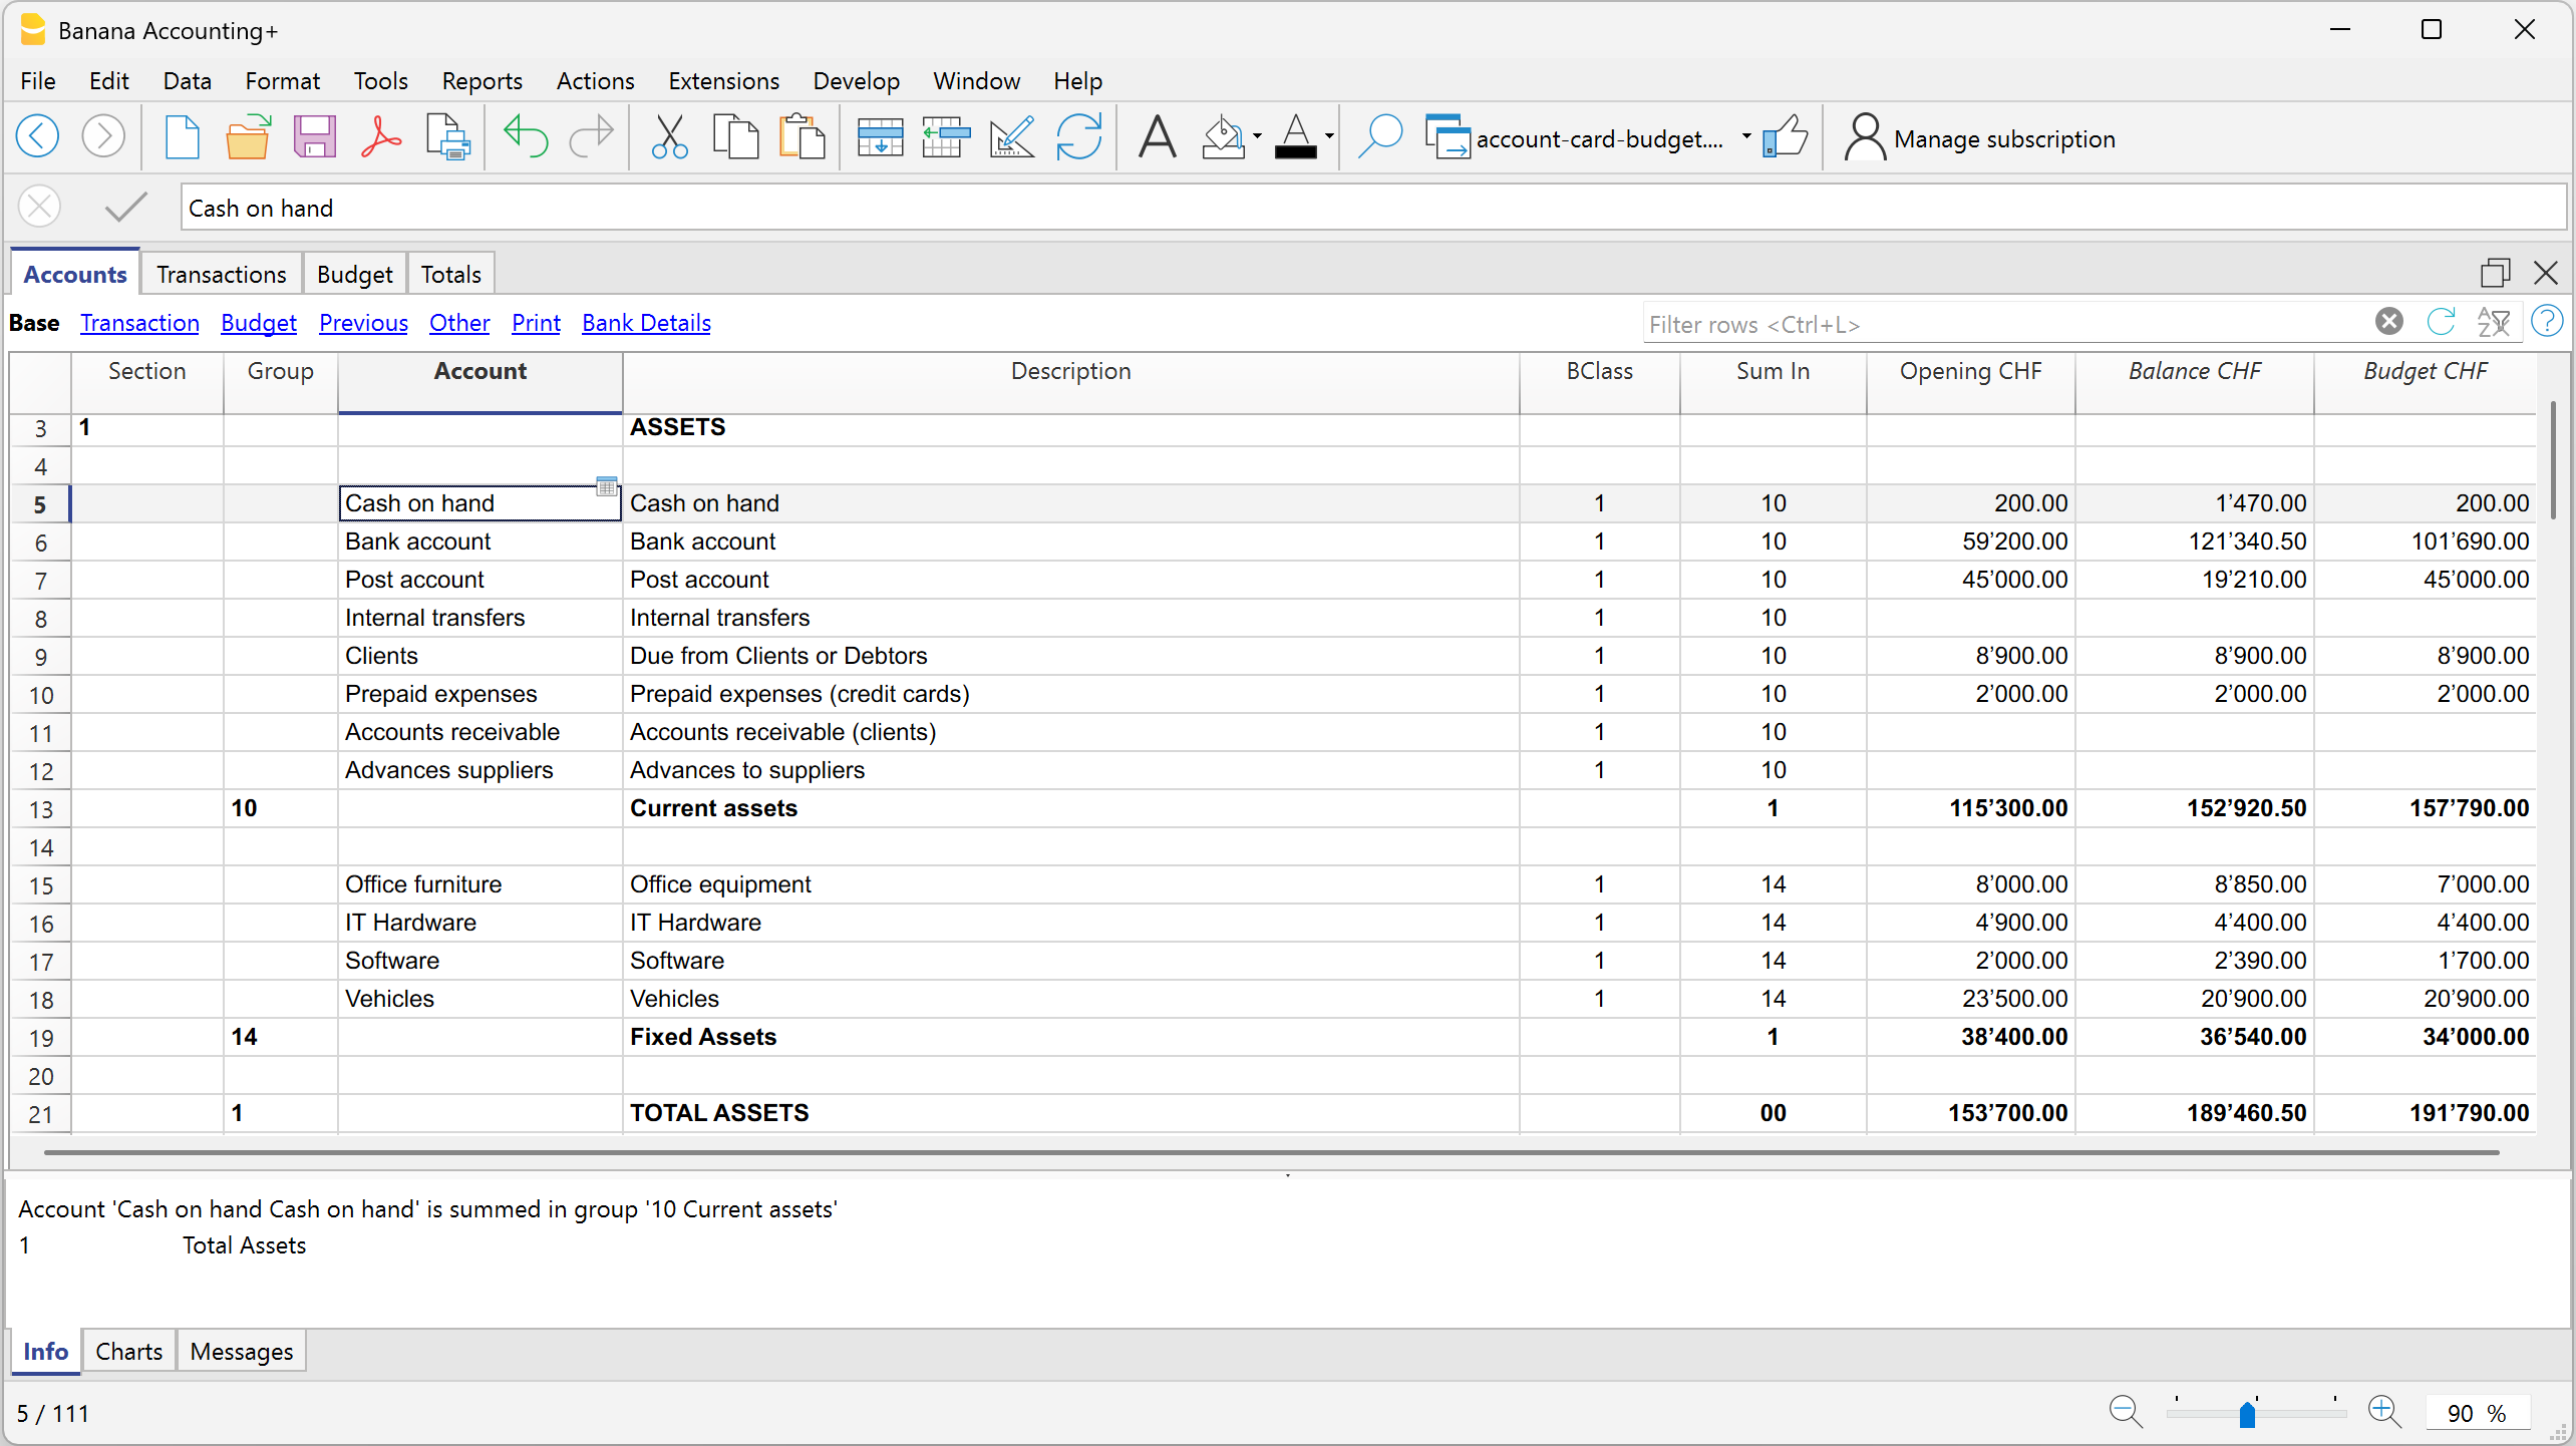
- Charges et Produits (Compte de résultat)
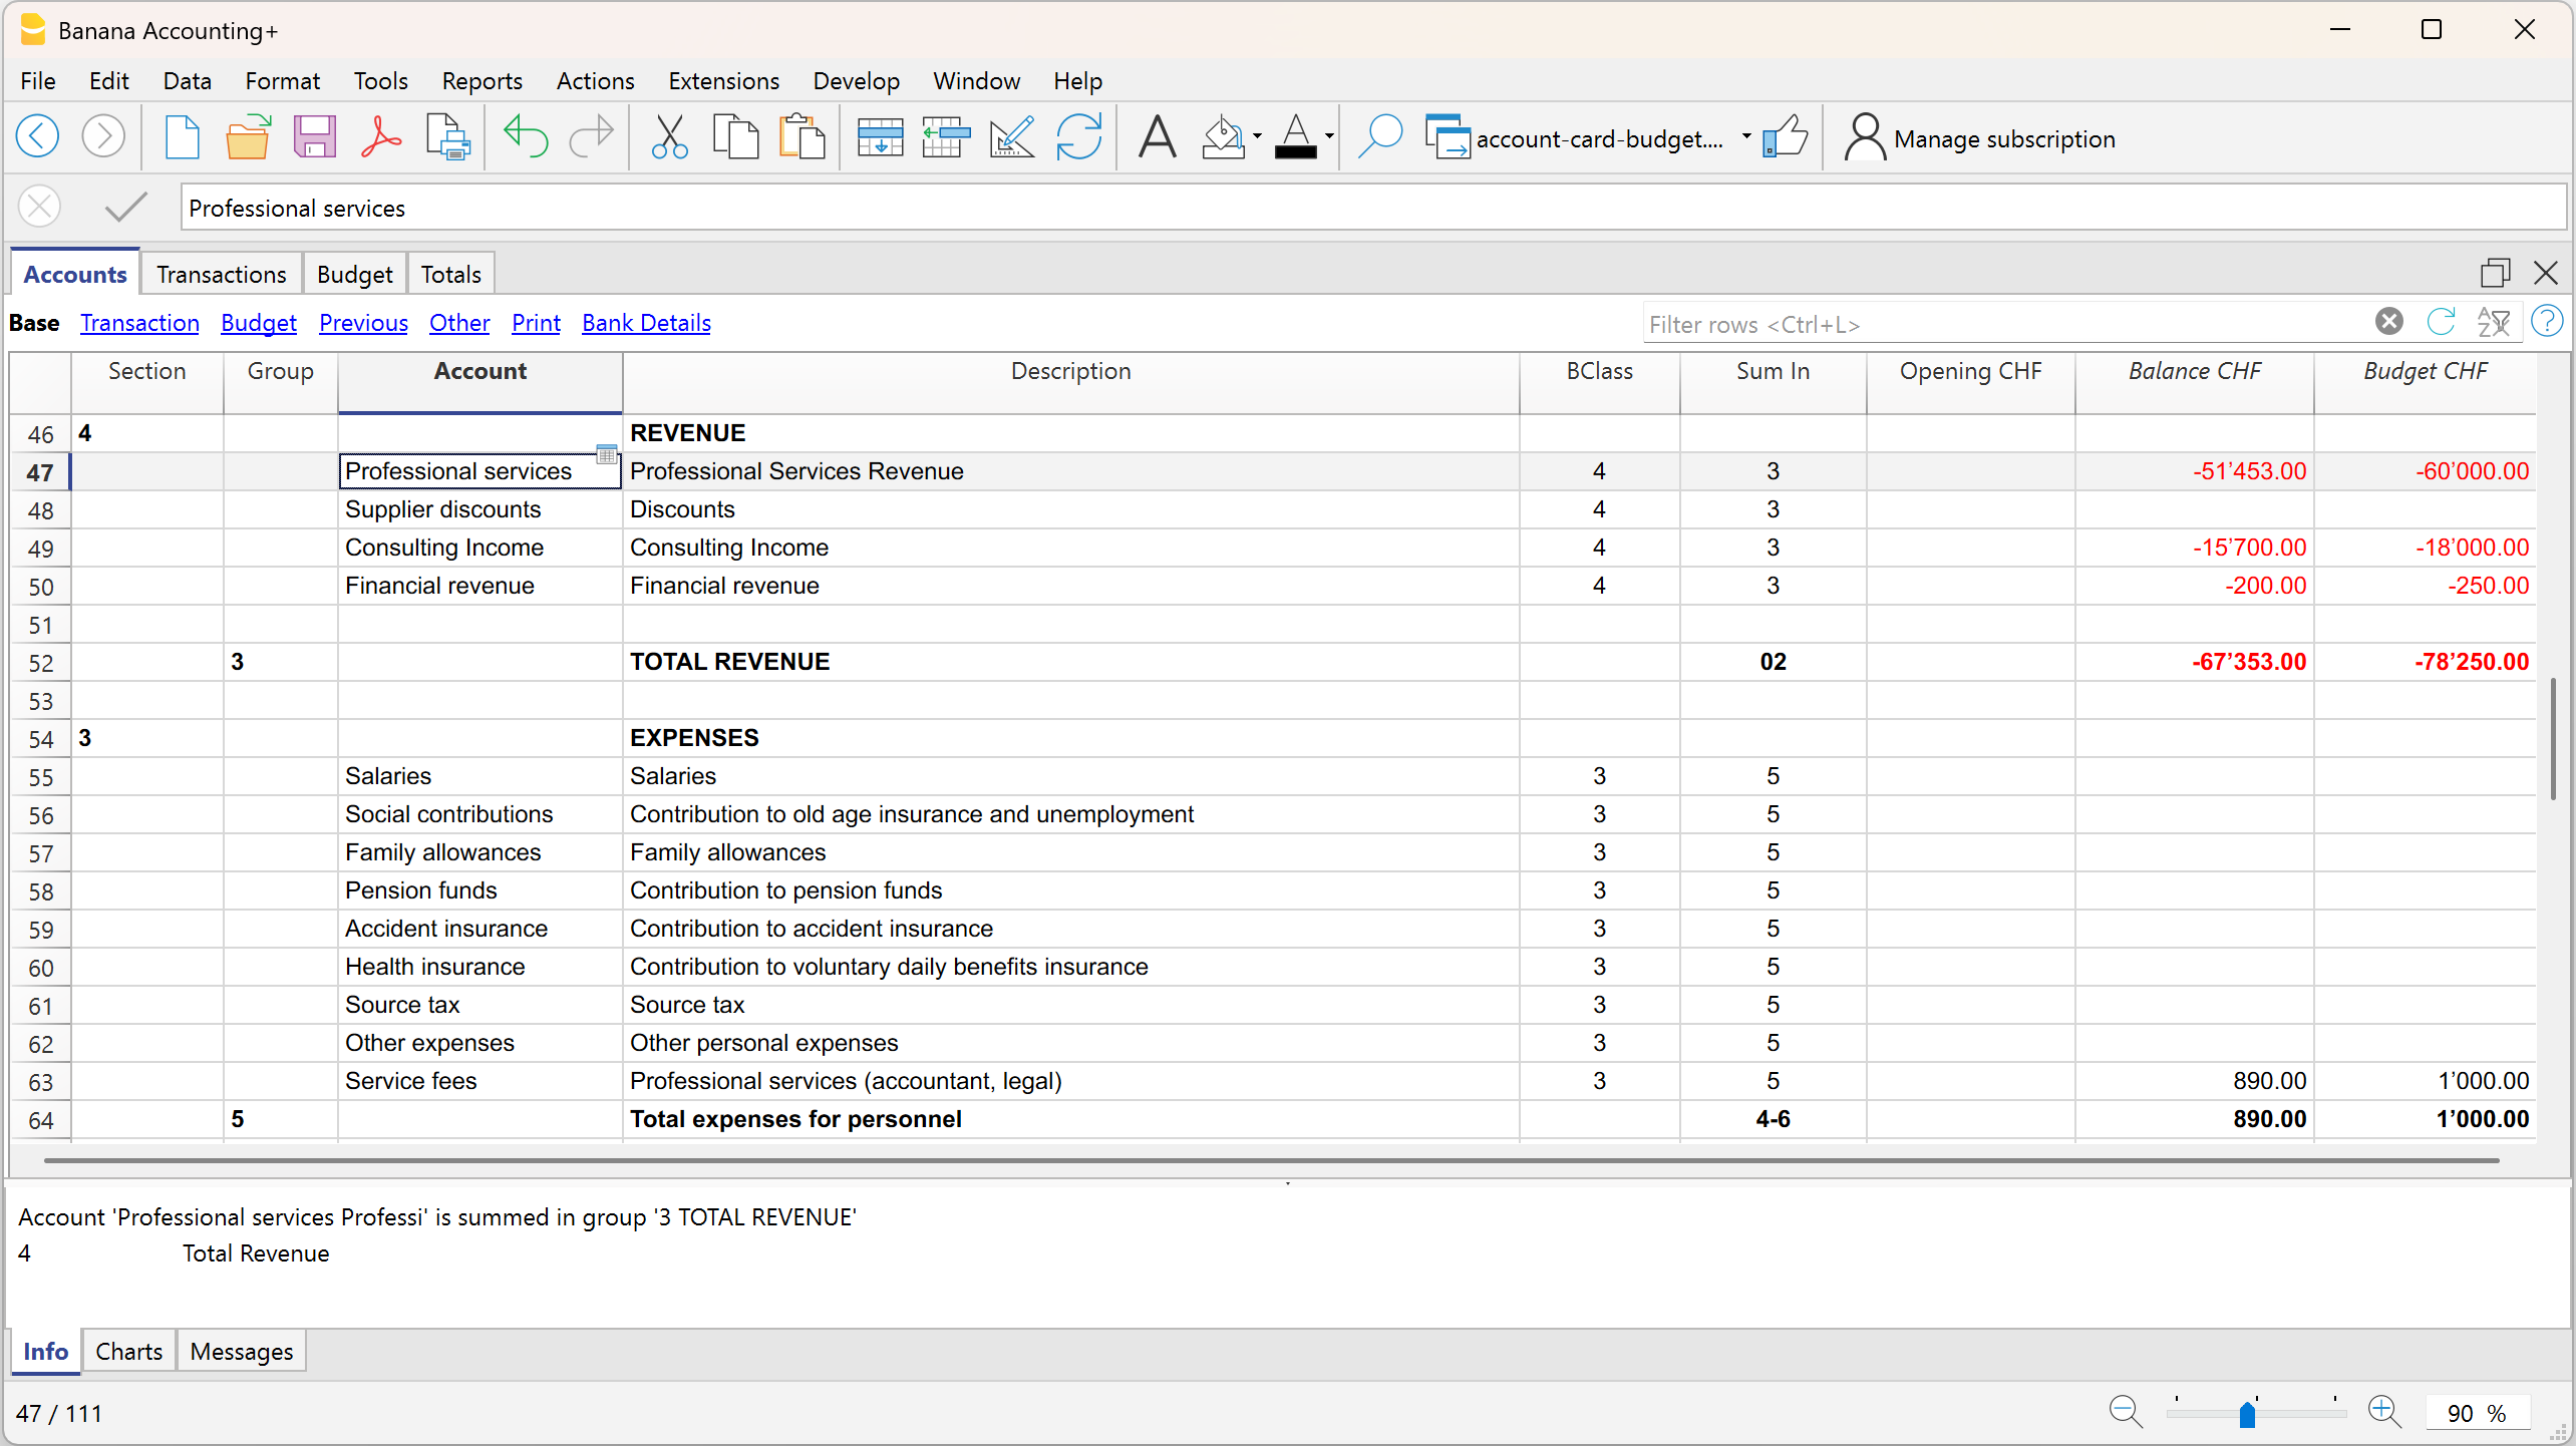
Pour une prévision plus détaillée, si ce n’est pas déjà le cas, nous vous conseillons de configurer et d’utiliser :
Tableau Budget
Le tableau Budget est le cœur du système de prévision, où vous saisissez les mouvements prévus pendant l’année ou sur une période définie.
Pour chaque événement futur, saisissez les données dans les colonnes suivantes :
- Date de début : la date de début du mouvement
- Date de fin : la dernière date à laquelle le mouvement prend fin (il est possible d’indiquer la date d’une ou plusieurs années suivantes).
S’il s’agit d’un mouvement qui se répétera toujours au fil des années, vous ne devez saisir aucune date. - Répéter : la fréquence de répétition (jour, mois, trimestre, semestre, année)
- Description : la description du mouvement
- Compte Débit / Crédit : comptes disponibles et repris du plan comptable
- Montant : montant du mouvement
Si nécessaire, vous pouvez également saisir un code TVA, des segments ou des centres de coûts.
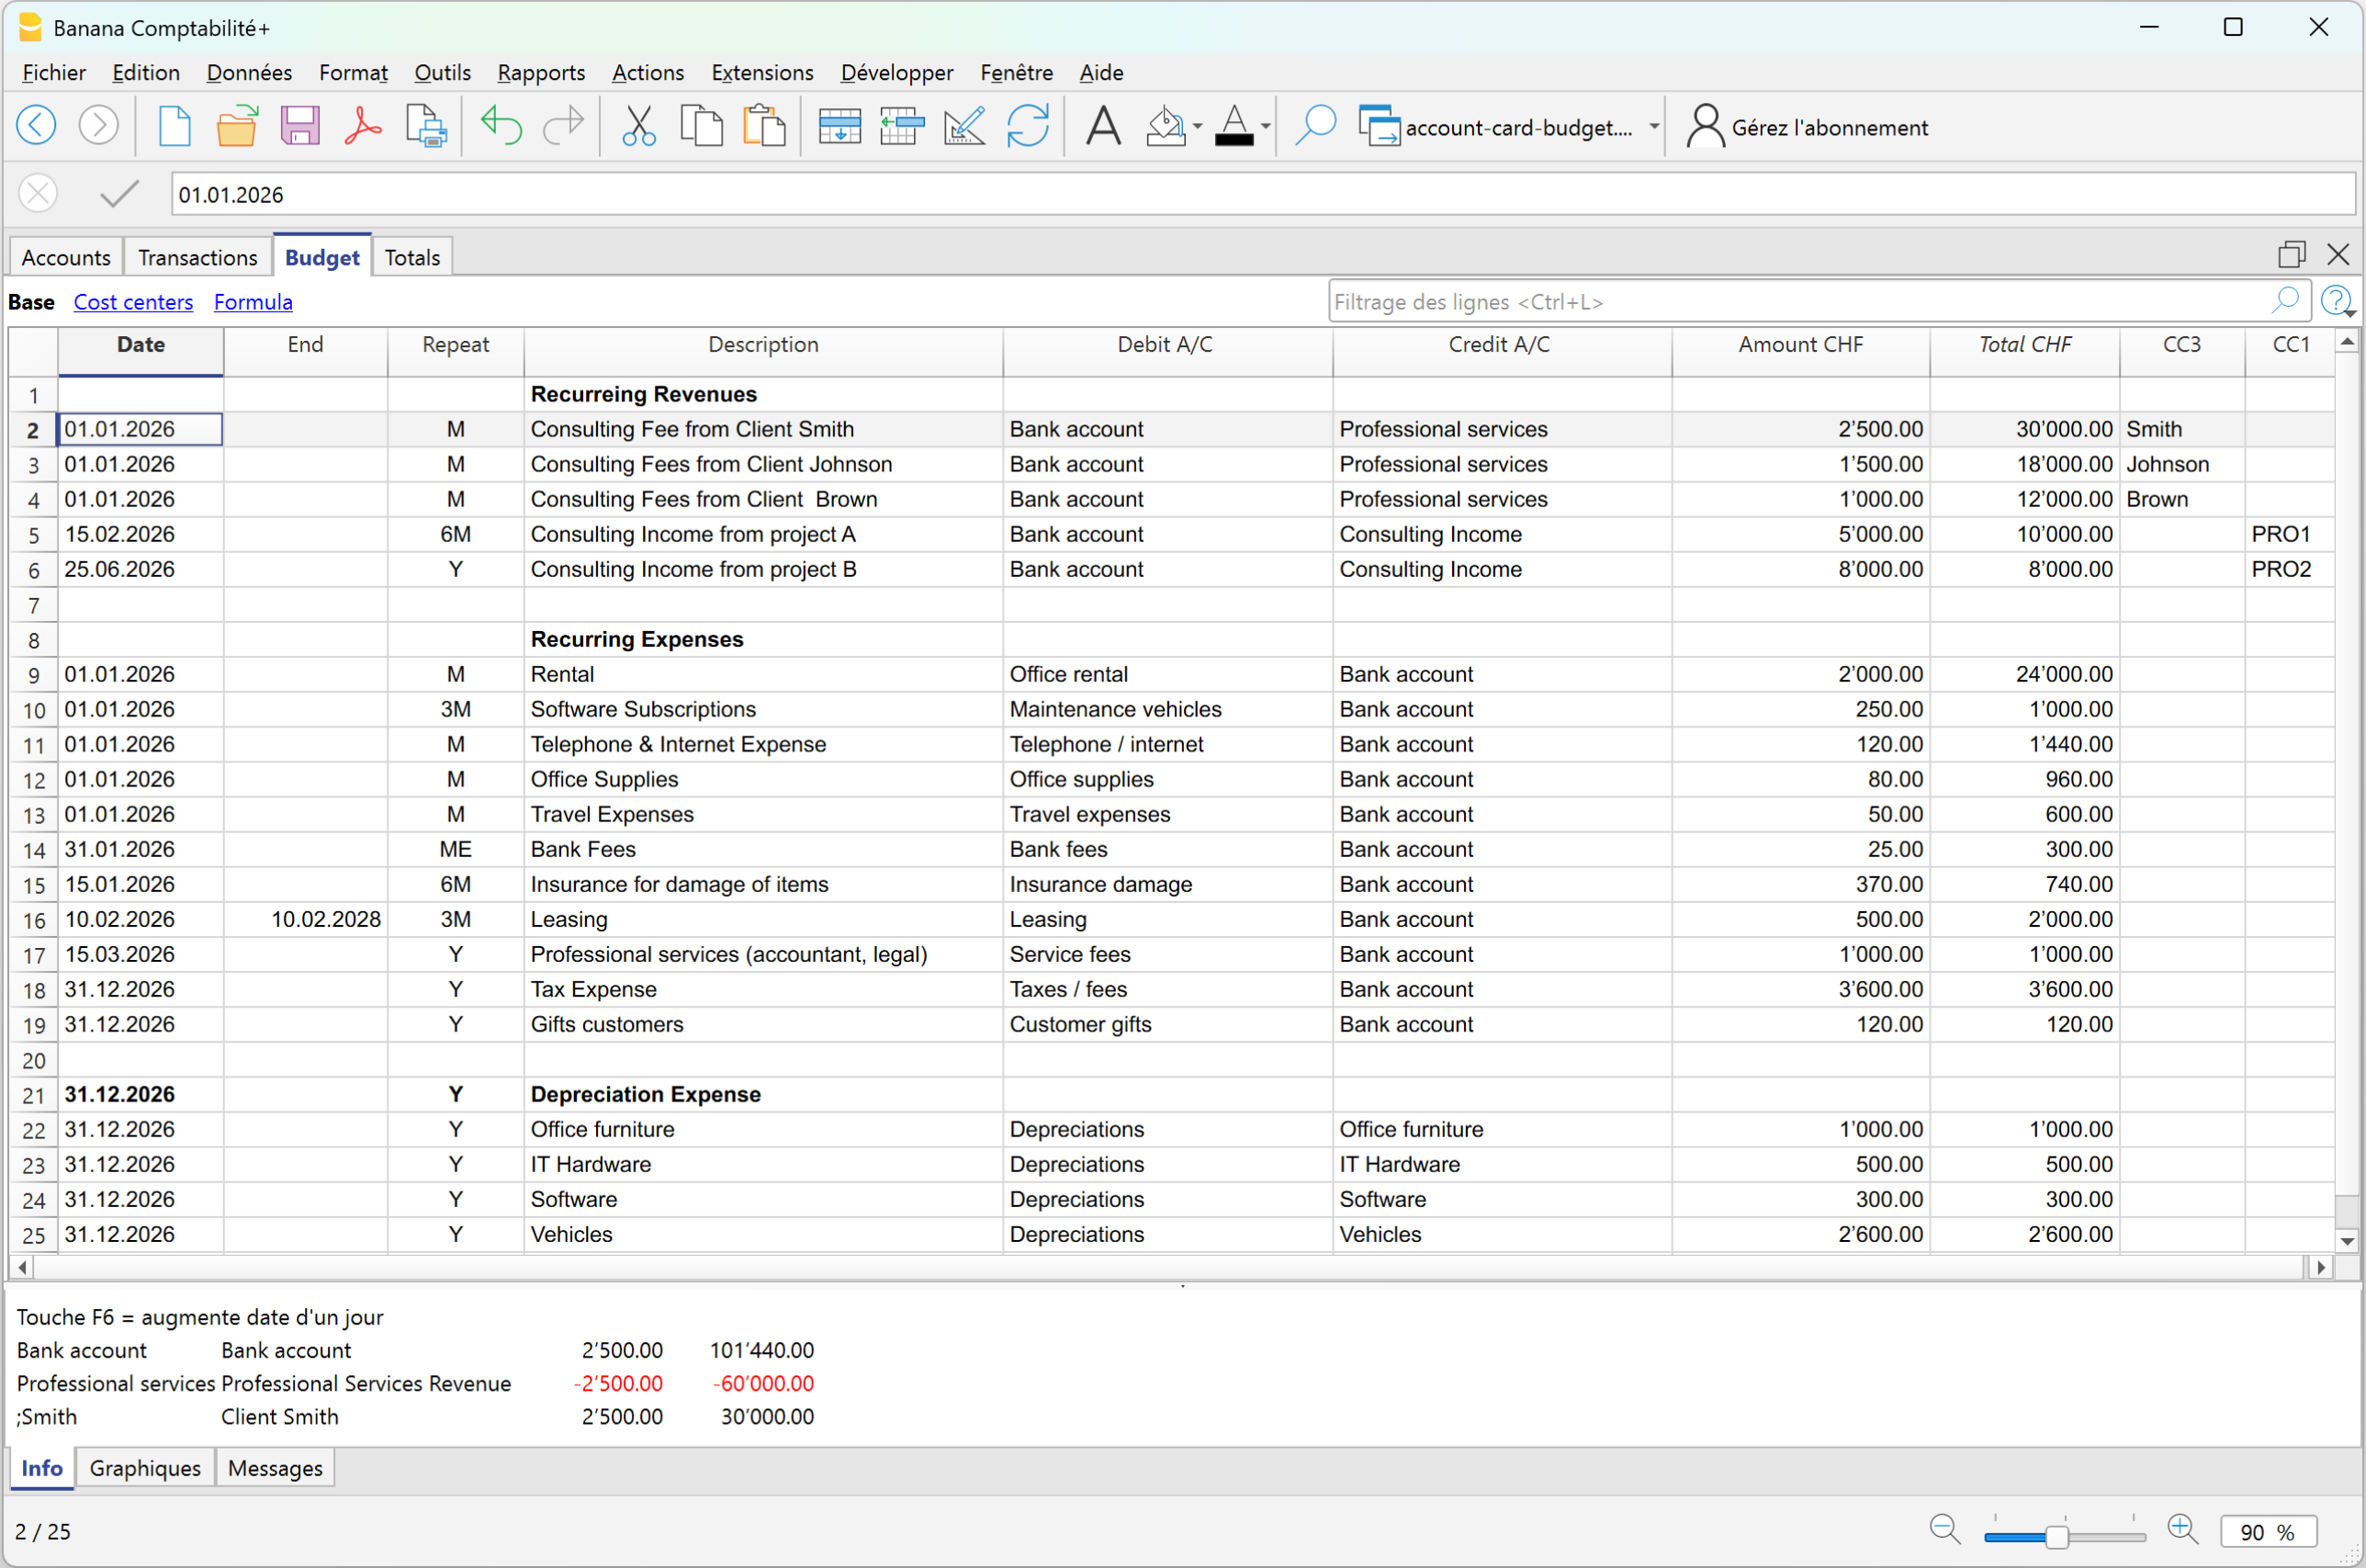
Sur la base des mouvements saisis, le programme crée automatiquement tous les rapports, avec la même rapidité et les mêmes options que dans le Bilan Formaté par groupes, et reporte les soldes dans la colonne Comptes, dans la vue Budget.
Rapports prévisionnels complets et comparaison avec les données réelles
Avec les rapports prévisionnels, vous n’obtenez pas seulement des projections annuelles agrégées. Vous pouvez également analyser les données par périodes spécifiques : si une charge ou un produit ne se produit que certains mois, le système le représente exactement dans les périodes correctes.
Par exemple : si une charge survient uniquement pendant les mois de juin, juillet et août, dans le tableau Budget, en définissant les dates de compétence, dans le rapport prévisionnel le montant sera imputé exactement à la période spécifique, sans aucune répartition sur les autres mois.
Pour obtenir le bilan et le compte de résultat prévisionnels :
- Depuis le menu Rapports > Bilan Formaté par groupes > dans la section Plan comptable > Colonnes, activer Budget
Dans le Bilan Formaté par groupes, si vous affichez les colonnes des résultats réels, du budget et la colonne des différences du Budget, vous obtenez immédiatement une vue d’ensemble :
Bilan avec soldes réels, budgétaires et différences
La prévision dans Banana Comptabilité n’est pas un document séparé, mais s’intègre aux données comptables et évolue avec la comptabilité réelle.
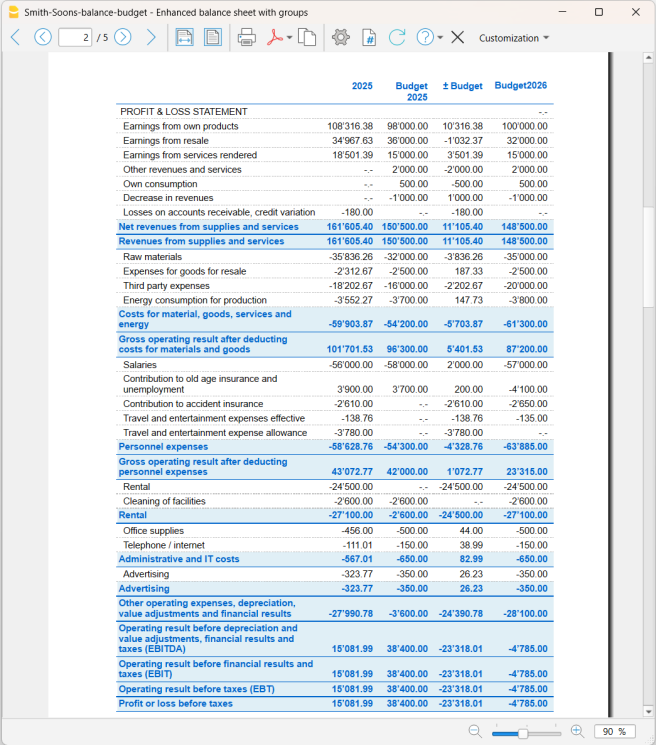
Compte de résultat avec soldes réels, budgétaires et différences
Avec cette présentation des rapports, vous pouvez évaluer si l’entreprise sera rentable et identifier d’éventuels problèmes à l’avance.
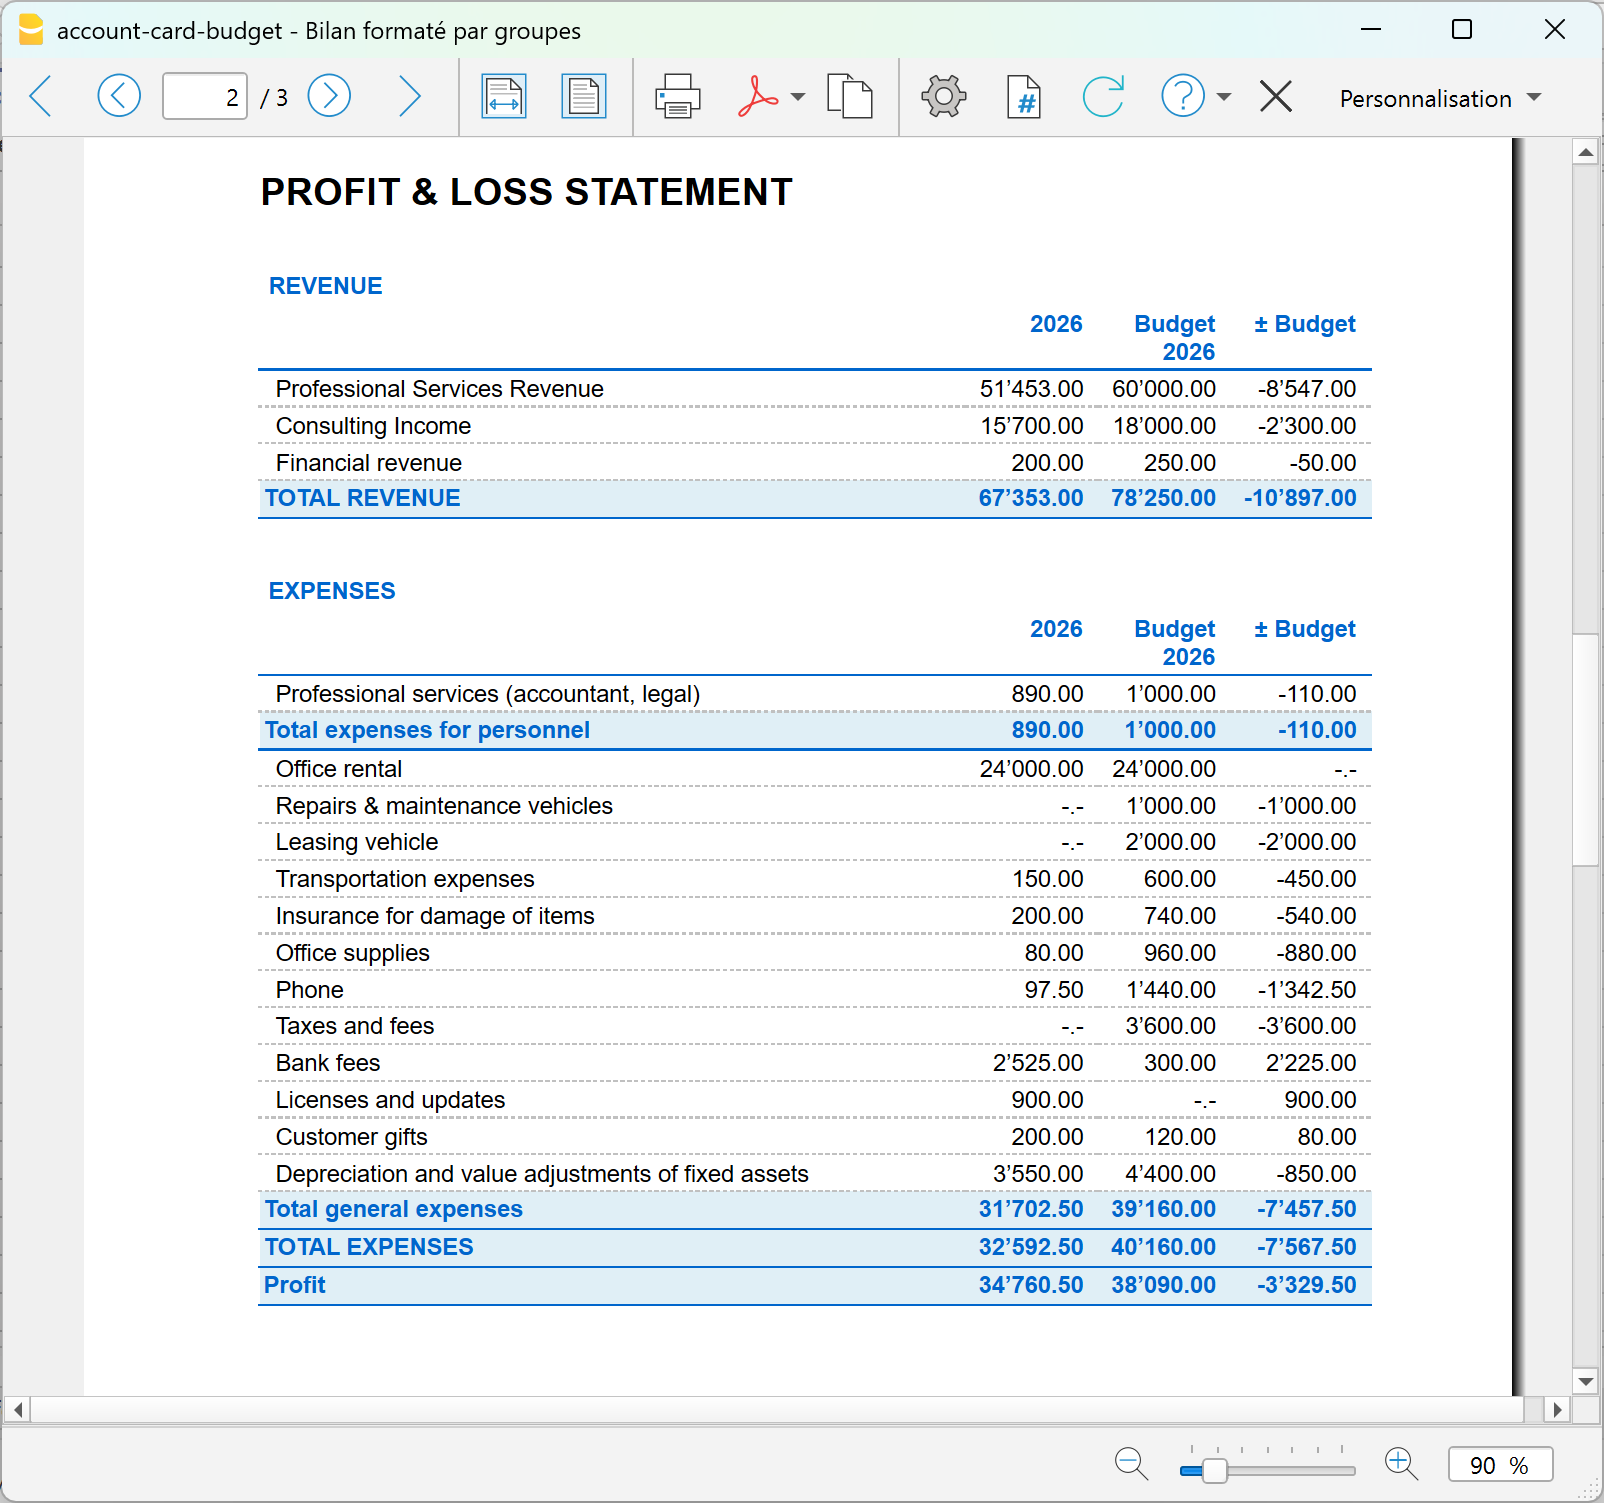
Comparaison fiche de compte réel vs budget
Avec la planification financière de Banana Comptabilité, vous pouvez aller au-delà des prévisions habituelles. Grâce à la nouvelle extension Account card: Current vs/Budget (version Beta), vous pouvez comparer la fiche d’un compte avec les mouvements des résultats réels et les mouvements budgétaires.
Il s’agit d’une nouveauté absolue qui vous permet de :
- évaluer en détail les mouvements réels par rapport à ceux budgétés
- identifier facilement les écarts visibles dans la colonne Différences.
- améliorer progressivement votre capacité de planification.
Avantage : fiche compte client avec résultats réels et budget
Avec Banana Comptabilité, pour chaque client vous disposez d’une fiche complète qui intègre :
- données réelles → factures émises et encaissements réels
- données prévisionnelles → factures futures et encaissements attendus
Avec Banana, la fiche client ne montre pas seulement ce qui s’est passé, mais aussi ce qui se passera, avec tous les détails de gestion déjà intégrés. Dans une seule vue, vous voyez le passé, le présent et le futur.
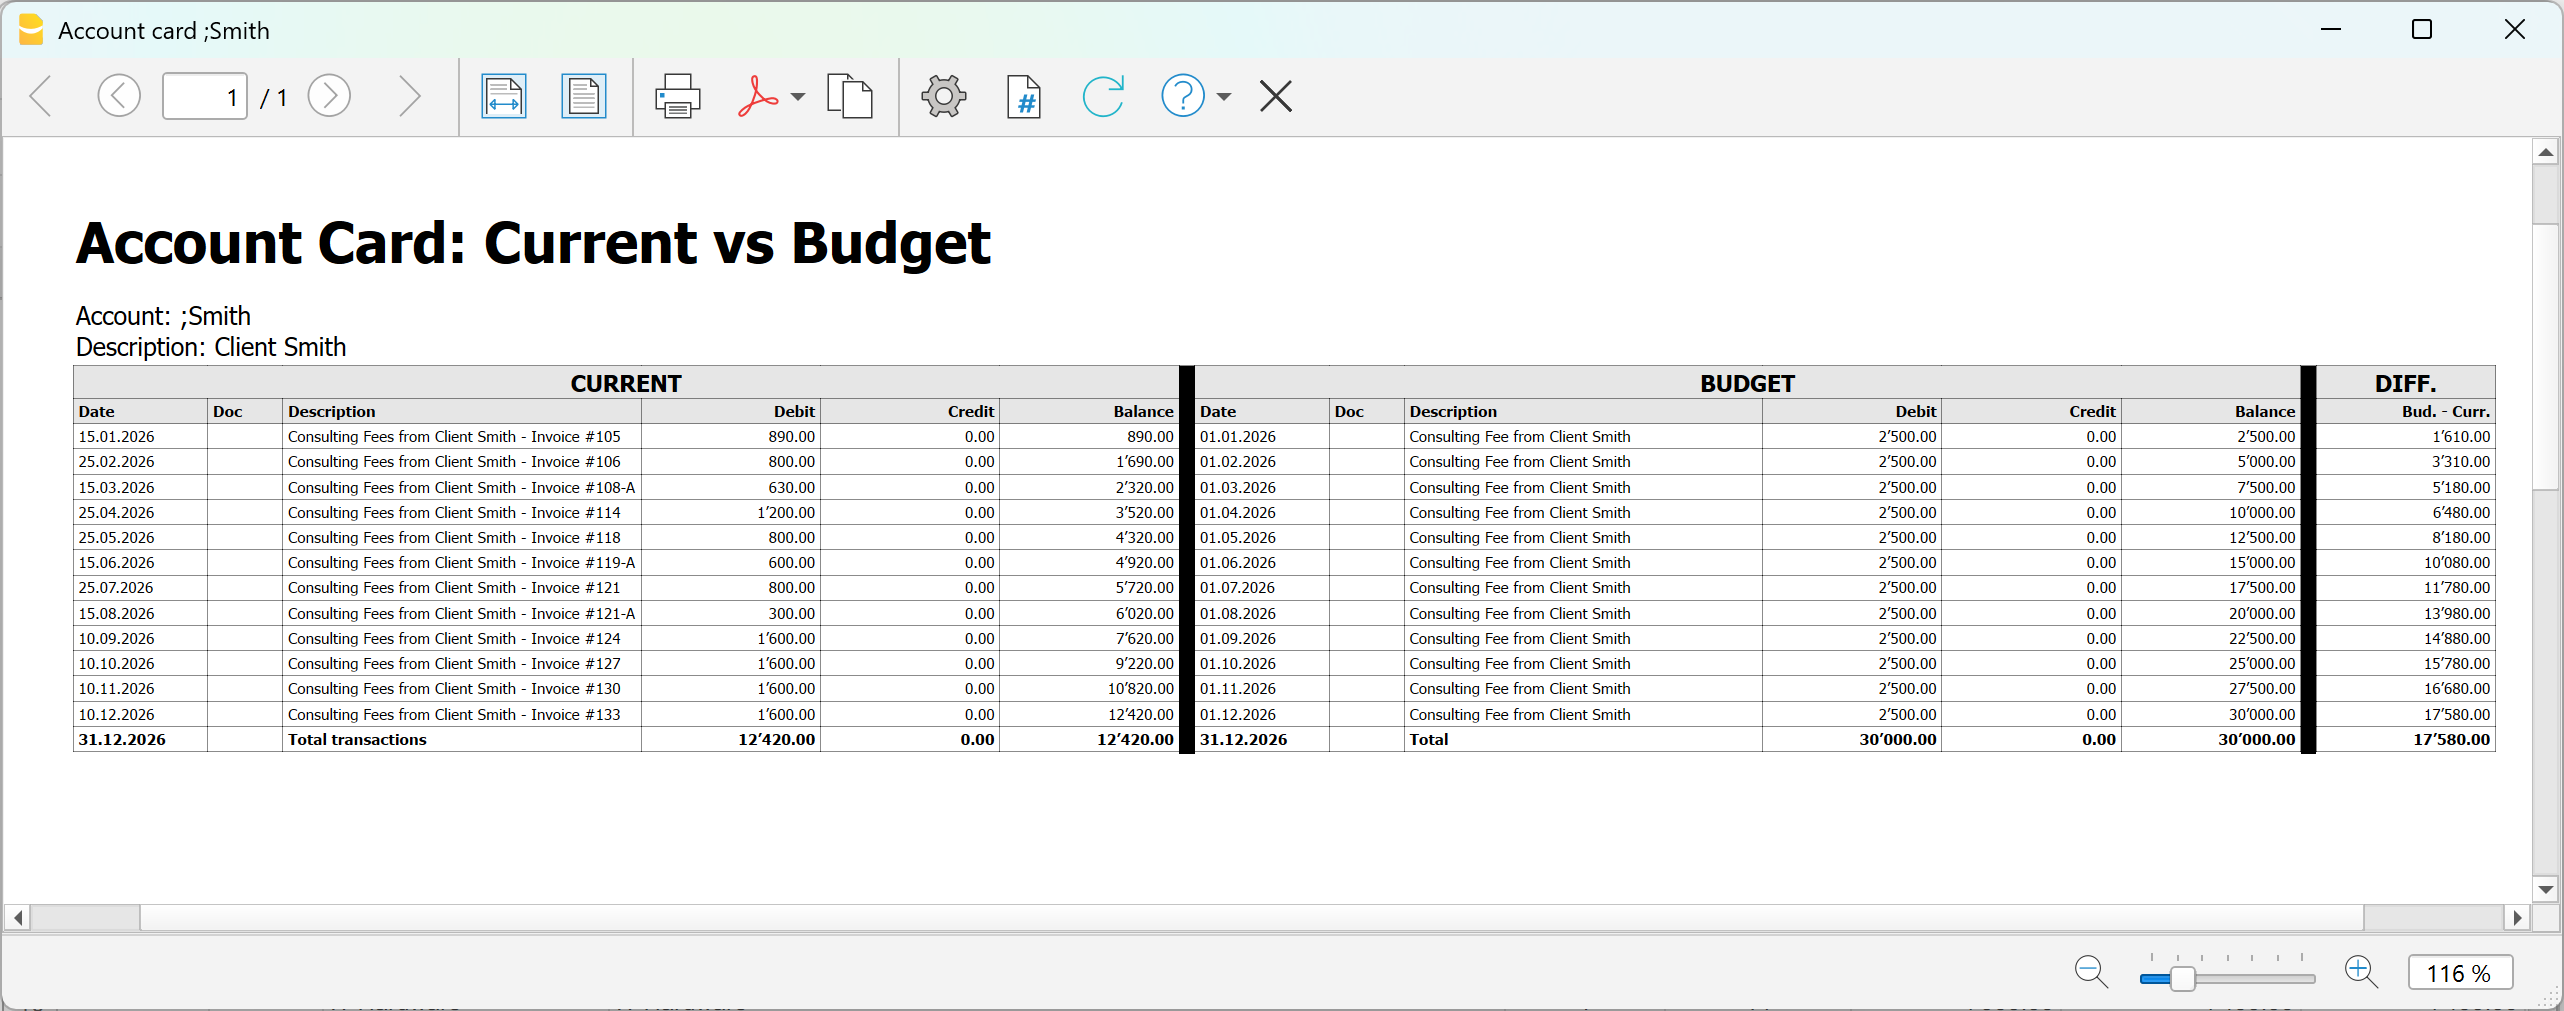
En utilisant la nouvelle extension dédiée à la fiche d’un compte, qui compare les mouvements réels et budgétaires, vous pouvez analyser en détail :
- Client
- Projet
- Centre de coûts
- Segment
Pour obtenir l’affichage de la comparaison entre les résultats réels et le budget d’un compte, vous devez :
- Installer l’extension Account card current vs budget (version Beta)
- Depuis le menu Extensions > Gérer les extensions > Accout card: current vs budget (version Beta)
- Dans la fenêtre de dialogue qui s’ouvre :
Double-cliquer sur Compte et sélectionner dans la liste des comptes le compte (ou la catégorie), centre de coûts- Deux fiches de compte côte à côte concernant le même compte sont affichées
- Dans la dernière colonne de la fiche budgétaire, la colonne Différence est affichée, mettant en évidence ligne par ligne la différence de montants entre les résultats réels et le budget.
En résumé
Avec la planification financière de précision, vous pouvez :
- saisir des prévisions détaillées mouvement par mouvement
- obtenir automatiquement tous les rapports
- contrôler la liquidité et la rentabilité
- comparer prévisions et réalité
- améliorer progressivement les décisions
Il ne s’agit pas seulement de créer un budget, mais d’utiliser un système intégré pour planifier et gérer l’avenir financier avec des outils comptables professionnels.
Account Card: Current vs Budget (BETA)
Account Card: Current vs Budget (BETA)The report provides:
- detailed transaction data
- progressive balances
- differences between actual and planned values
Prerequisites
To use this extension you must download and install Banana Accounting Plus.
Create the report
Run the extension from the menu Extensions > Account Card: Current vs Budget.
The extension Settings dialogue will open. From here you can choose some options to create the report.
- Account
Select the account to analyze (populated automatically from the Accounts table). - Subdivision by period
Select the period subdivision (none, by month, by quarter).- None: shows all transactions in chronological order.
- By month: groups transactions by month; each month is visually separated.
- By Quarter: groups transactions by quarter (Q1, Q2, Q3, Q4); each quarter is visually separated.
- Print in landscape
Prints the report in landscape orientation.
The report will be generated and shown in preview.
Report content
The report is structured into three main sections:
- Current account card
Displays current account card transactions with the columns Date, Document, Description, Debit, Credit, Balance. - Budget account card
Displays budget account card transactions with the columns Date, Document, Description, Debit, Credit, Balance. - Difference (between budget balances and current balances).
For each row, the difference is calculated as: Budget balance – Current balance.
This column highlights deviations between planned and actual values.
Each row or the report includes:
- current transaction (if available)
- budget transaction (if available)
- updated balance
- difference between balances
When one side has no data, the last available balance is carried forward. This ensures continuous and consistent comparison.
Report example:
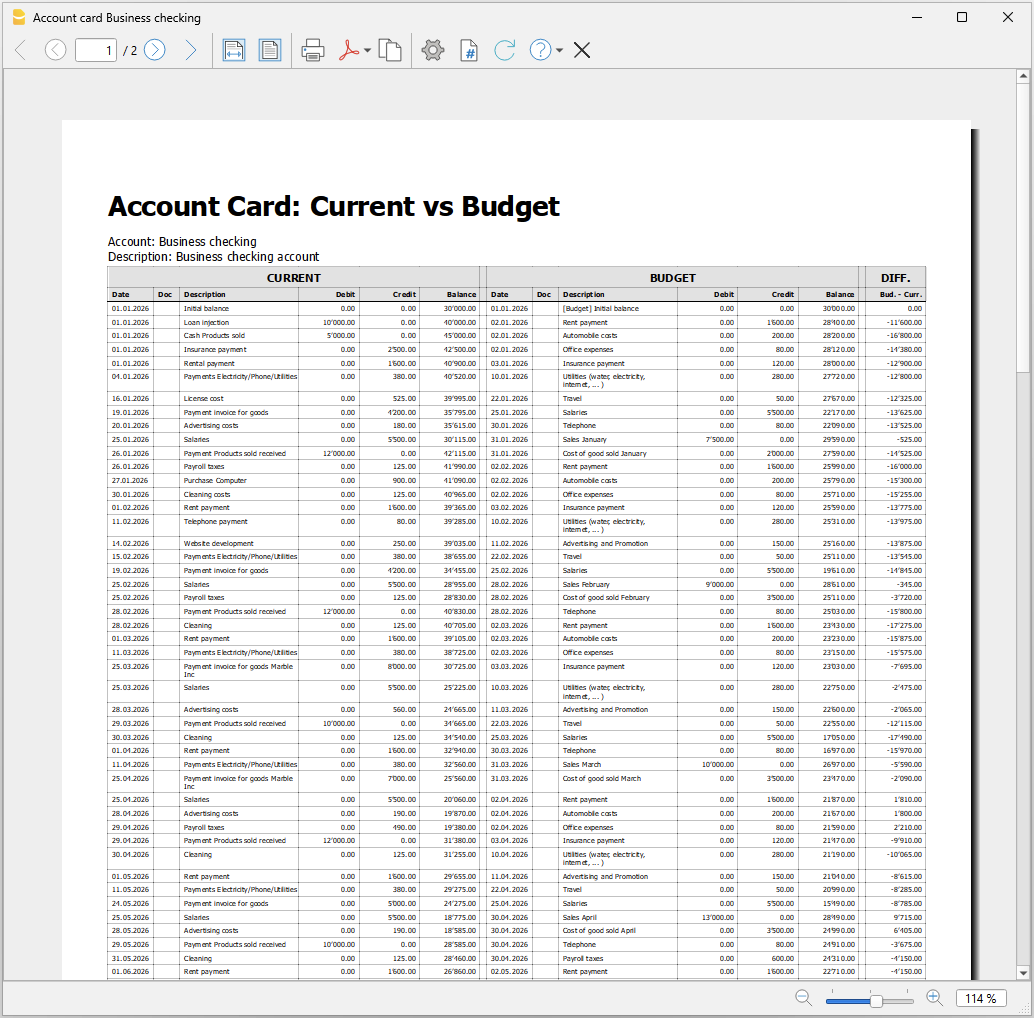
Accounting software for Accountants, Fiduciaries and Auditors
Banana Accounting complements the accounting software you already use, giving you the flexibility to handle special cases and offer services that go beyond traditional bookkeeping.
From investment portfolio accounting and financial forecasting to forensic accounting, trusts and international mandates, Banana helps you turn your accounting expertise into new opportunities for your practice.
The modern accountant: turning change into opportunity
The role of the accountant has evolved. Accounting and tax compliance remain essential, but digitalisation, cloud solutions and AI are making many operational tasks faster and increasingly accessible to clients themselves.
As clients take care of more of their day-to-day bookkeeping, the accountant's expertise becomes valuable in new ways: reviewing their work, interpreting financial data, anticipating problems and helping them make better decisions.
This shift creates new opportunities. By spending less time on repetitive tasks, accountants can manage more clients while focusing their expertise on higher-value advisory and specialised services — from financial analysis and planning to more sophisticated mandates for businesses and private clients with complex needs.
This is what we call the "poliedrico" accountant: a versatile professional who combines accounting expertise, technology, analysis and advisory skills, adapting them to very different clients and situations.
Banana Accounting is designed for precisely this kind of flexibility.
Add flexibility to the software you already use
You don't need to replace your existing accounting or management system. Banana Accounting works alongside it whenever you need more flexibility, customisation or specialised functionality.
Its table-based approach combines the freedom of a spreadsheet with the controls and logic of professional accounting software. You can adapt the chart of accounts, settings and structure to each mandate, start from ready-to-use templates and customise them to the specific needs of each client.
With a single Banana Accounting subscription, you can also create and manage an unlimited number of accounting files, with no additional cost for each new client, company or mandate.
This gives you the freedom to take on very different types of work and develop specialised services that strengthen your expertise and your relationship with your clients.
Here are some of the high-value services you can add to your practice with Banana Accounting:
Accounting reviews and controls
Let your clients manage their day-to-day bookkeeping while you provide the professional oversight.
Banana's accounting checks and verification tools help you review accounts efficiently, identify problems and prepare reports or VAT statements. Clients gain greater independence while you remain their professional point of reference.
Investment portfolio accounting
Help private clients, foundations and organisations gain a clear overview of their financial investments. With Banana Investment Accounting, you can manage shares, bonds, funds and other securities directly within the accounting system, including multi-currency portfolios.
- You always know the quantity and book value of your investments.
- The program automatically calculates gains and losses on sales transactions.
"I oversee several foundations and had to manage investment portfolios with Excel. Every update required time, manual checks, and continuous verification. With Banana Accounting I integrated investment portfolio management and now work faster, with a clear overview of investments." - anonymous user

Precision financial forecasting
Banana's financial forecasting is based on double-entry accounting logic. Create detailed forecasts for liquidity, balance sheet and profit and loss, develop different scenarios and continuously compare forecasts with actual figures. Give entrepreneurs and organisations a clearer basis for decisions about investments, financing and future cash requirements.
Liquidity management and cash flow analysis
Give your clients an up-to-date view of their liquidity and cash flows, helping them understand where their money comes from, where it goes and how their financial position is evolving.
With Banana's Rules for the automatic completion of imported transactions, you can quickly update the accounts with the latest bank transactions and provide cash flow analysis based on data that is current up to the previous day — turning liquidity monitoring into a valuable ongoing advisory service.
Forensic accounting and accounting reconstruction
Special situations require the freedom to work directly with the data. Banana's transparent table-based approach makes it particularly suitable for reconstructing incomplete accounts, analysing transactions, identifying inconsistencies and cleaning up accounting data. It provides accountants and auditors with a professional alternative to complex Excel spreadsheets for unusual or investigative cases.
Trusts, foundations and special mandates
Not every client fits into a standard company structure. Adapt charts of accounts, currencies, reports and accounting structures to trusts, foundations, associations, real estate, entities in other jurisdictions, parallel accounts and other non-standard situations.
Ready-to-use templates provide a starting point and can be customised to each client's requirements with relatively little effort.
Explore all Banana Accounting features for accounting experts...
Why Banana instead of Excel?
When traditional accounting software cannot handle a particular case, Excel is often the natural fallback. It offers flexibility, but formulas must be created and maintained, accounting consistency is not guaranteed and errors can be difficult to detect.
Banana retains the freedom of working in tables while adding accounting intelligence:
- automatic accounting controls
- reliable calculations without complex formulas
- transparent and traceable data
- easy filtering, copying and editing
- professional reports
- files that can be understood and worked on by others
You remain free to work with the data without giving up the safeguards of professional accounting software.
Your clients' data remains under your control
Confidentiality is fundamental when dealing with financial information.
Banana Accounting works locally and does not require you to upload your clients' accounting data to Banana servers. You decide where files are stored: on your computer, your firm's infrastructure or the cloud storage solution of your choice. Your clients' sensitive financial information remains under your control.
Try Banana Accounting
Discover how Banana Accounting can work alongside the tools you already use and help you expand the services you offer your clients.
The advanced features designed for accounting professionals are included in the Banana Accounting Advanced plan, at CHF 179/year.
Would you like to see how they could fit into your practice? We’ll be happy to provide you, upon request, with a free trial period of the advanced features, so you can explore them with your own accounting needs and workflows.
Useful links
Auditing companies using Banana Accounting
Auditing companies that use Banana Accounting take usually less time then when using other accounting software.
- The auditor can install the Banana Accounting software on his computer.
It is free, as with the Free Version that you download and install, you can open any accounting file and you can navigate through the accounting data. - With the full version, you can save changes (colored rows, added cost centers, selections to copy data in Excel).
- Ask your client to give you their accounting file.
You can copy it on your computer and you have access to all accounting data.
If possible, you might even ask for the files of the previous years, so you can have access to historic data. - If your client uses digital documents, ask them also for these data, so you don't need them to bring you all the paper folders.
When you are on a specific transaction or in the account card, a simple click lets you open the document relative to the transaction. - Use the command "Check accounting" and the software will inform you if there are any imbalances or differences.
- You can check if the digital seal of the blockchain is the same same as the one archived.
If it is, you can be sure that the content of file has not been altered. - In the Accounts table, you see all accounts and you drill down and see all transactions.
- You can extract the transactions for a specified period of your choice.
- You can color transactions that need further inquiry.
- You can add other information (columns auditors note) or Cost centers for reconciliation.
- You can select and extract data.
Banana Accounting will do the sums for you, without worries about possible errors. You do not have to do reconciliations with Excel. - You can copy the data from Banana and paste in Excel.
- When you select an account or a group, you can see the chart with the evolution of the balance at the bottom of the window.
You immediately can have an overview of the evolution. If the Cash account gets negative, you will notice immediately.
Using Banana Accounting for auditing purposes
Using Banana for auditing companies that use other accounting software
When you are auditing companies that use other software, you usually do not have full access to the accounting data on their computers. The auditors usually receive pdf files and in some cases a limited access to the accounting solution.
Excel is a very important tool for auditors. They use it to do reconciliations and create specific reports.
This requires a lot of attention from the auditors. Errors in formulas can be difficult to discover.
Where there is quite a lot of data to reconcile, auditors can create a new accounting file in Banana and import the data from the original accounting file.
With Excel you can read CSV files, adjust and copy and paste into Banana Accounting.
You will immediately know if there are any imbalances and you can have access to all account cards and print the Profit & Loss statement and Balance sheet. You have full access to the data and in most cases, you don't need to setup reconciliations in Excel.
Importing data in Banana Accounting
See the documentation available:
Financial management statements for construction projects extension [BETA]
Financial management statements for construction projects extension [BETA]Start by downloading the Financial management for construction projects template, build your accounting and use the extension to control and compare the costs of your project. Generate the report by choosing in the dialog the columns to show, in this way you will have only the data that really interest you.
▶ Video: Construction projects management.
How it works
Easily manage all financial aspects of a construction project. Everything is already set up, you can easily adapt it to the individual project and enter the data.
- For each construction project you shall create an accounting file.
- Start with the preset template in the software, with accounts and categories already set up.
- You can also open the tutorial template, with examples.
-
You can manage as many projects as you like.
- Estimate Budget.
The development phase of the project where it is important to have an overall view of the costs.- In the Categories table enter the Estimate Budget. You can edit, add expense items and also groupings.
-
You have an overview of the overall costs of the project.
- If you want you can add more columns to manage more variants.
- Assingments.
You have chosen the project and now it's time to start with the request for offers and assignments to companies.- In the Accounts table, enter a row with the relative cost center for each company.
- In the Budget table enter the approved amounts, indicating the category of expenditure and the company.
- You have the report with the total of the budgeted values, the approved values and the deviations from the budget. You know in advance if you will be able to avoid overruns on the budget.
- Actual expenses.
Companies send requests of advance payment and invoices.-
In the Transactions table, enter the amounts have been paid.
- You have the report with the total amount paid by category and by company. See the deviations from the approved and budgeted amounts. You immediately notice if there are overruns, for a type of work or company.
-
The main advantages
- It is used like Excel.
- Easy to use, it is based on income and expense accounting, which everyone knows.
- Financial situation of the construction project always up-to-date.
- Covers all phases of the project, from budgeting to assignments and payments.
- It manages both the expenses and the income (inputs of own funds, contributions, and other).
- You notice immediately, at each stage, if there are any overruns.
- Complete reports.
-
By expense/income category
- By company
- Estimate budget.
- Assignments Amounts
- Amounts actually paid (advance payments and invoices).
- Deviation, indicating in color whether there are increases or savings.
-
- Collect documents.
When you enter an assignment or a payment you can also link the transactions to the digital document. Easy to make verifications because you can open attachments with a simple click. -
Bank account movements. Payment account statement.
- Data reuse for further reporting.
Requirements for using the extension
To use it, it is necessary to download and install Banana Accounting Plus with the Advanced plan.
Classification of data by cost category and by companies. It is used like Excel, making it ideal for architects, engineers, surveyors and contractors. Complete with key financial statements offering very sophisticated project management programs.
File setup of project accounting
Create new file
To create a new File, go to the File menu and click the New command.
This command opens the window for creating a new file. From this window you can search for the template you are interested in, in this case choose the Construction Project Accounting template.
Basic properties
The main parameters of the accounting file are defined in the file and accounting properties, such as the header, the opening and closing date of the project. You can change the properties from the File menu → File and accounting properties.
This data is included in the report and can be printed.
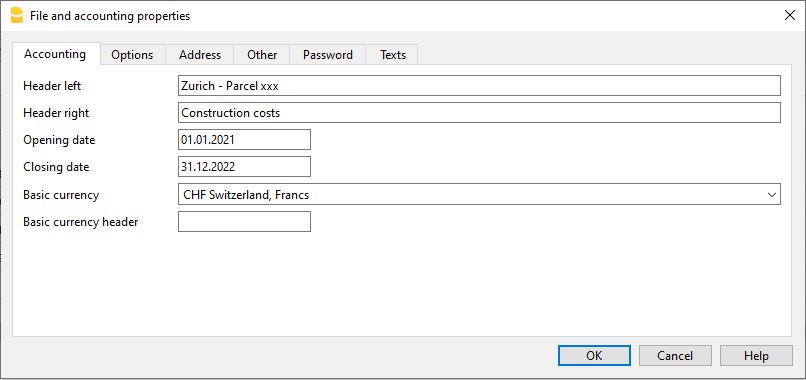
Create a project folder
You can manage your documents and receipts in digital format by linking them to transactions so you have everything well organized and can view them with one click.
It is therefore useful that you create a folder to save the accounting file you have created.
Then create subfolders for documents of deliberations, receipts, and others. See how to organize digital documents.
Categories and Estimate Budget
Categories Table
The Categories table is where you set the elements of the work to be performed. Cost categories can be changed or personalized in any moment, if you have particular requirements you can decide to change the structure of grouping of the elements, or use the one proposed by the template.
Estimate Budget Column
In this column you define the amount of the estimate for each Cost category. You can change the amount whenever you want.
Variants of Budget
You can add additional columns to enter the amounts relating to any variants of the estimate. Use the Data menu → Columns setup command, and add a column of Amount type to make sure that the values are totalized.
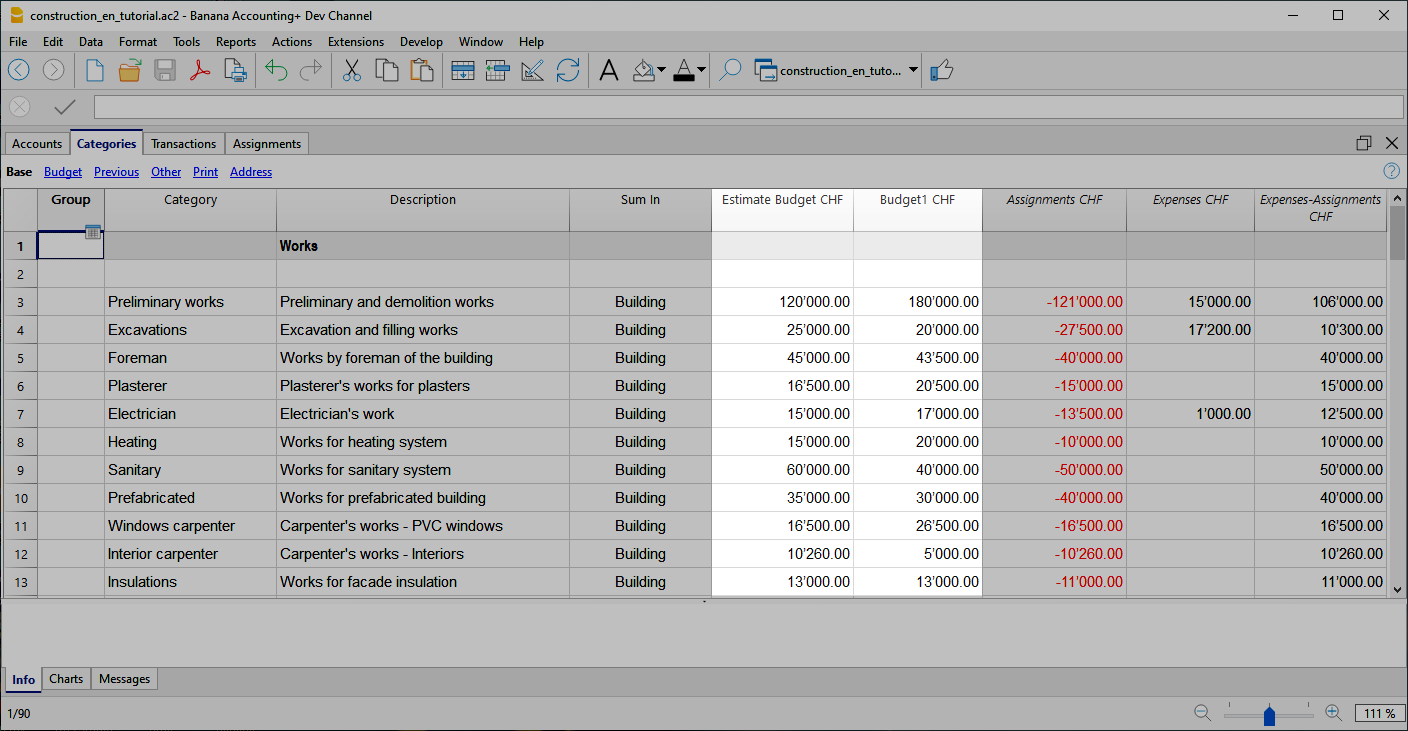
Additional columns
In Banana Accounting terminology, the Budget column is the one that contains the values calculated on the basis of the movements contained in the Budget table.
In project management, the Budget table has been renamed to "Assignments " and is used to insert assignments . This can create a moment of confusion.
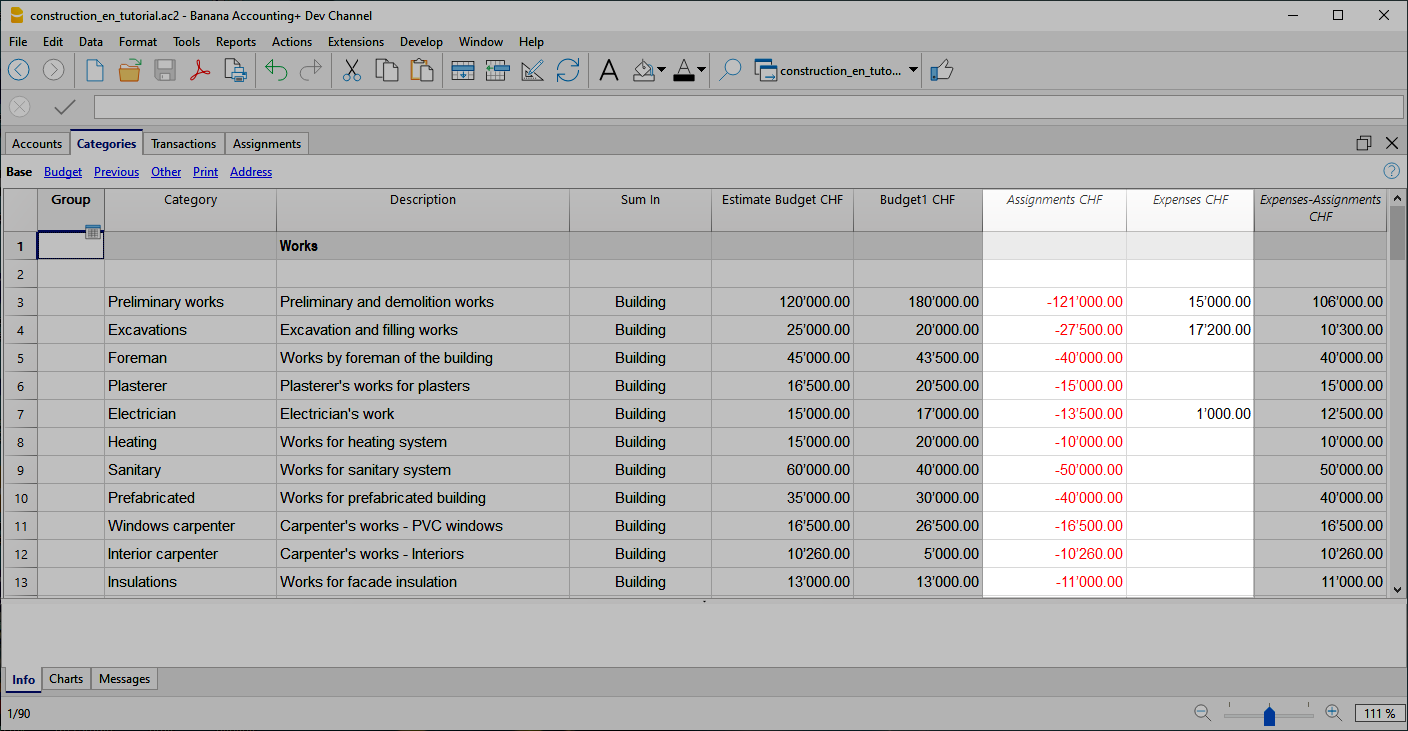
Assignments column
Contains the values shown in the Assignments table.
Expenses column
It contains the values calculated on the basis of the movements in the Transactions table.
Expenses-Assignments column
Calculates the difference between the values obtained with the movements in the Transactions table and the amounts in the Assignments .
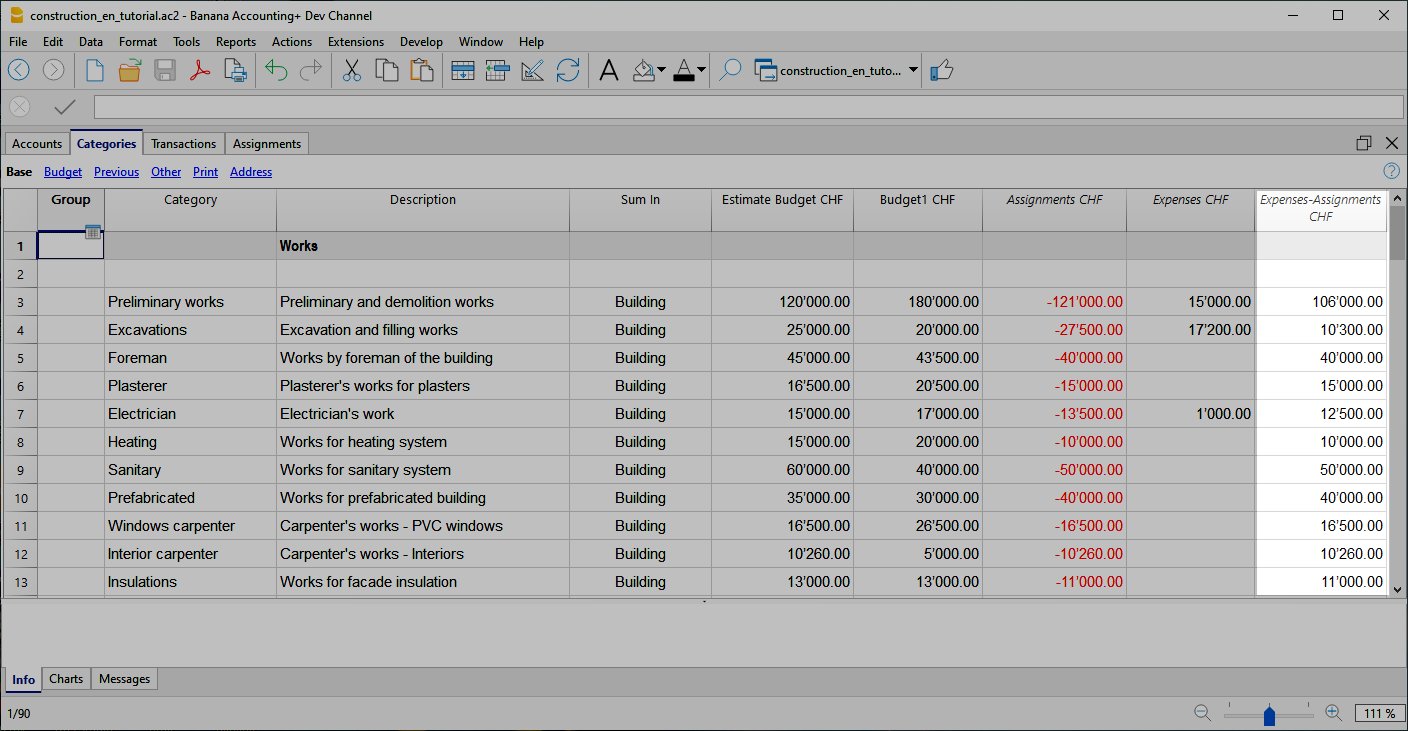
Use your own structure
You can freely create a structure of Categories as you wish, also taking up standard structures.
- Create categories.
You can use numbers or descriptors. - Create the groupings.
You can use as many levels as you like.
Additional groupings
For tax authorities or other needs you may find it useful to group the Categories entries by other criteria. You can use the Gr1 column for this purpose or add additional columns as needed.
Assignments
Movements relating to the assignment of work are entered in the Assignments table.
When entering a assignment, the Company account and the category to which it refers must also be entered.
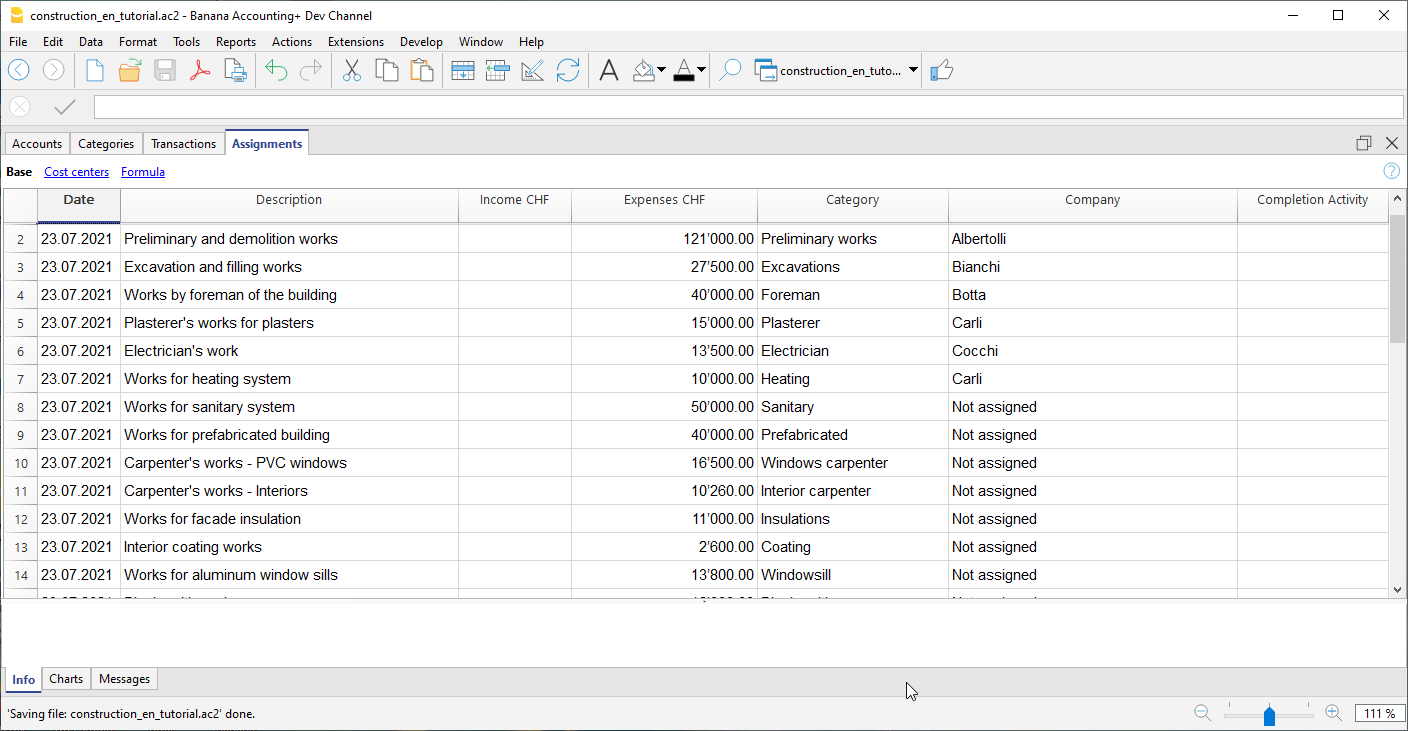
Once you have entered the data, you can use the report to see the overall situation and deviations from the estimate budget. You can also see the assignment amounts in the Categories table, they are listed in the 'Assignments ' column so that you can have a quick comparison with the other values.
Create assignments movements
You can create Assignments transactions in an easy and fast way. From the Extensions menu choose Construction Project Statement→Create transactions for assignments . The extension takes the data from the Categories table and for each cost category you have defined creates a transaction with the following fields:
- Date: Current Date.
- Description: Description present in the column of the same name in the Categories table.
- Expenses: Amount of the estimate budget. At the time you define the exact amount of the assignment, you can change the amount.
- Category: Name of the category.
- Company: Initially, each assignment is assigned a default "Unassigned" company, as soon as the assignment is assigned to a company, enter the correct name, referring to the companies you have defined in your chart of accounts.
When you start the extension, a dialog is shown with a summary of the changes that will be made, by pressing OK, the changes will be confirmed and executed. On the contrary, if you press Cancel the operation will be cancelled. You can execute this command every time when you add new categories to which you assign an estimate budget, starting the extension again will create the movements of the assignment only for the new elements.
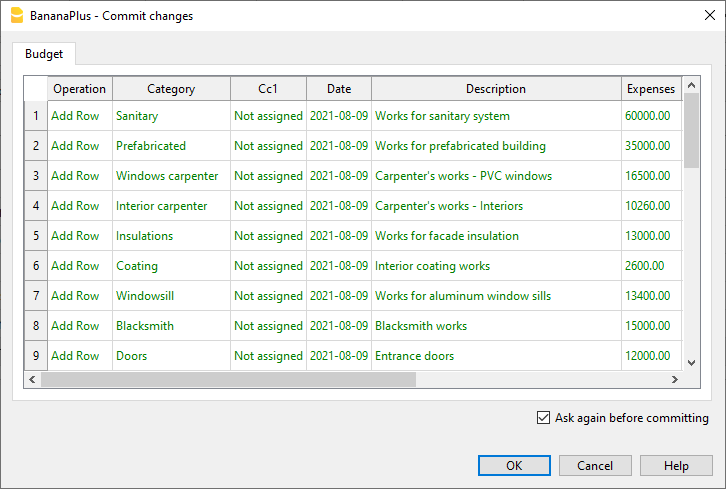
Alternatively, you can always choose to record the assignment manually.
Companies and Accounts
Accounts Table
The program allows you to manage the origin of the funds that are used to make payments. It indicates the accounts with which you are going to pay the artisans and other accounts of origin of the funds (own contributions).
Typically in a construction project there will be the construction bank account.
There are also preset accounts for:
- Disputed Invoices.
- Record the part of the invoice amount, which is not considered due.
- Invoices awaiting payment. Invoices received that have not yet been paid.
- Work in Progress. To record work that has been done, but for which you have not yet received the invoice.
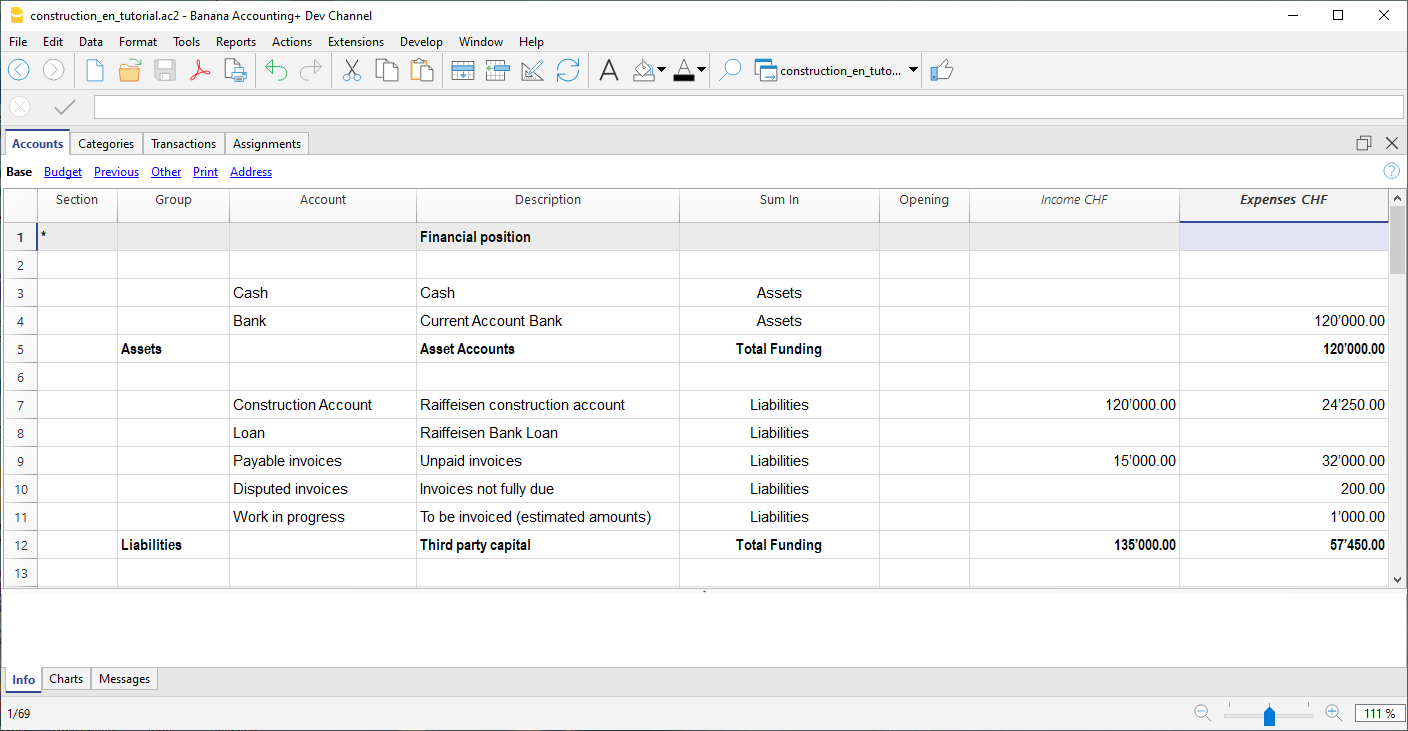
However, you can also create other accounts used to make payments or those of mortgages, used for the consolidation of the project.
Company accounts
For each company to which a job is assigned, you must first create an account of type cost center 1 (preceded by ".").
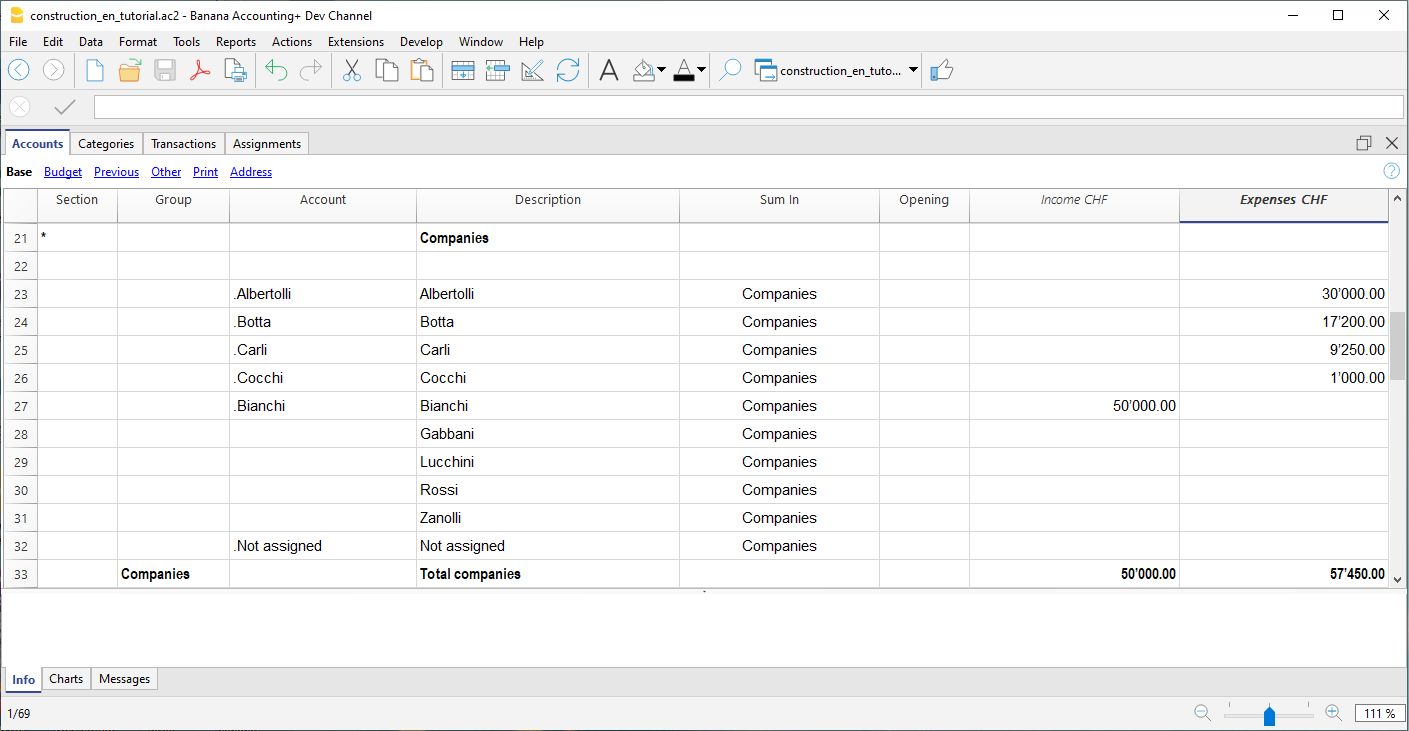
With the address view you can also enter the personal data, contacts and other information relating to the company.
Segments
Payments and Transactions table
Transactions table
In the transactions table, record the payments that are made for the project. For each transaction, in addition to the account, it also indicates the company and the category to which it refers. In the Expenses column indicates the amount of the payment, this value is also included in the Categories table.
Advance payment and invoices
The advance payment or invoice payment is recorded, indicating the date, the amount, the account used for the payment, expense category and the company's account.
You can also link the transaction row to the digital slip, so that you can view it with one click.
Receipt of invoice
The accounting management is carried out on the amounts actually been paid. To have an updated situation, it is possible to insert also the receipt of the invoice. In the account column you will have to insert the invoice account to be paid.
When you subsequently make the payment, the invoice receipt transaction must be overwritten with the payment information. If the payment is partial, you will need to create another transaction and split the amounts manually.
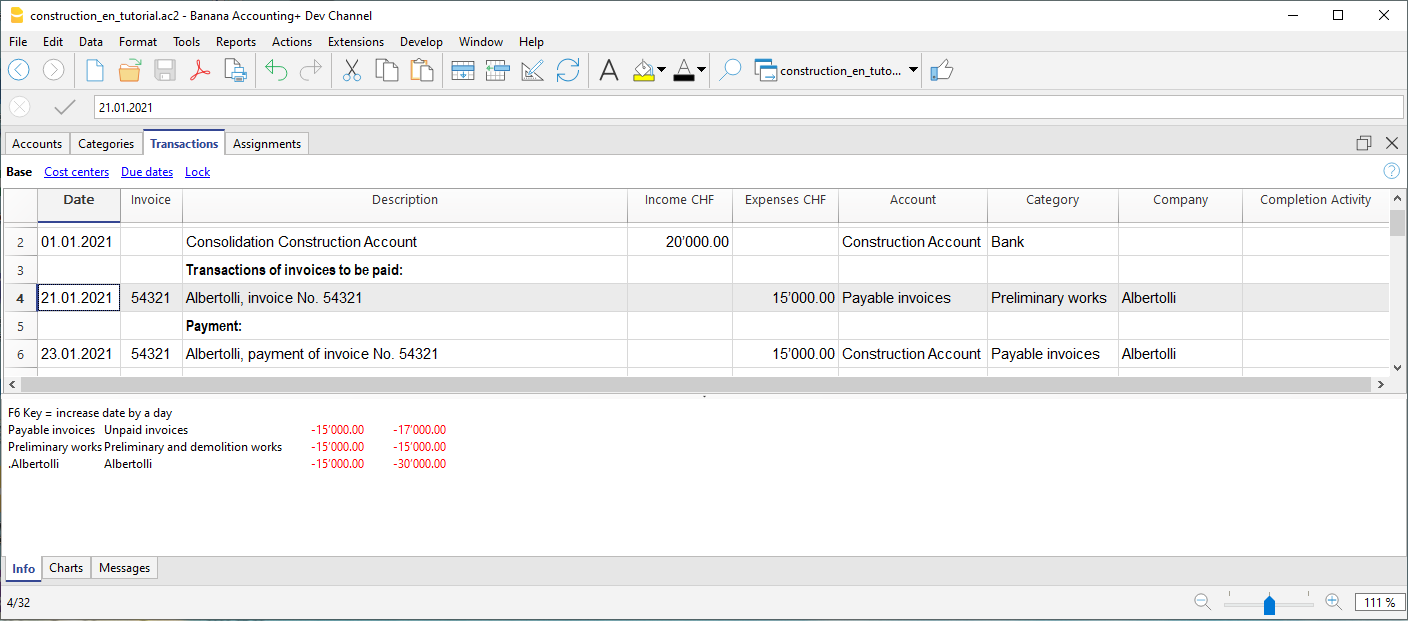
Disputed works
Records as if it were a payment, but using the account, disputed invoices.
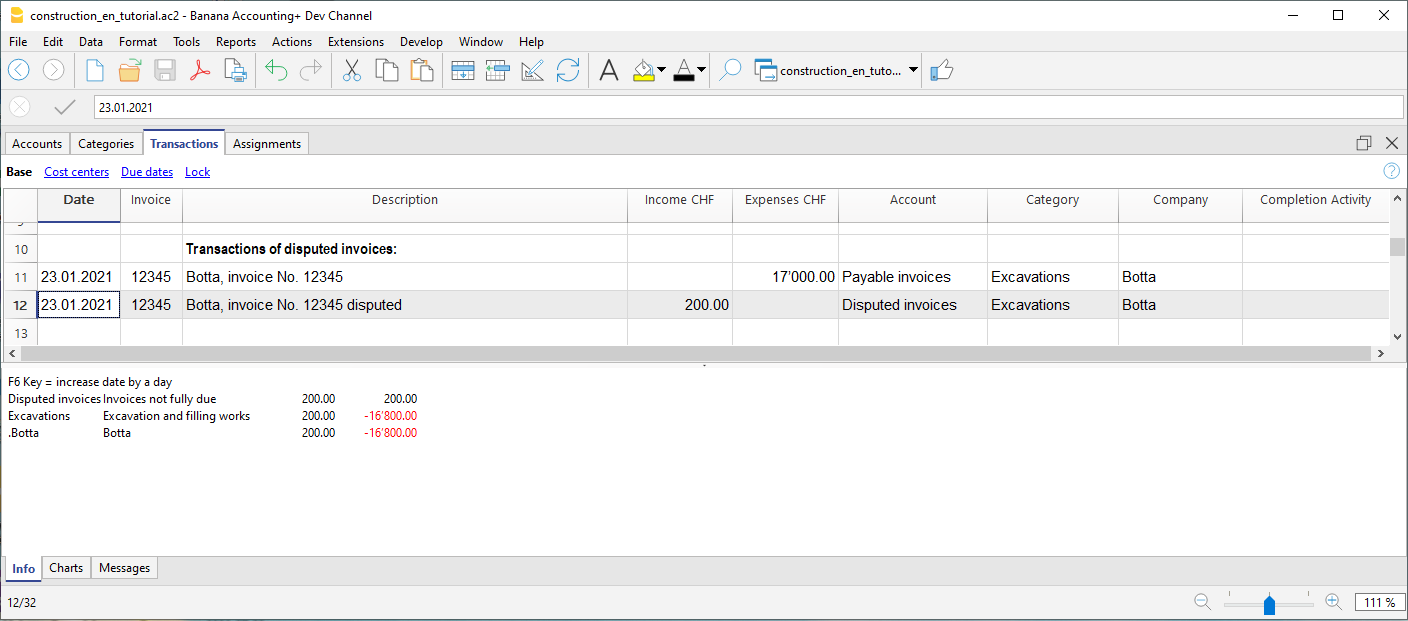
Work in progress
You can enter registrations, similar to payments, but indicating the work in progress account. The amount will be estimated by the construction management. In this way, you can have a progression of the works. You can also color these rows with a particular color, so that you can easily distinguish them from the others.
When the invoices arrive, you will need to replace the invoice.
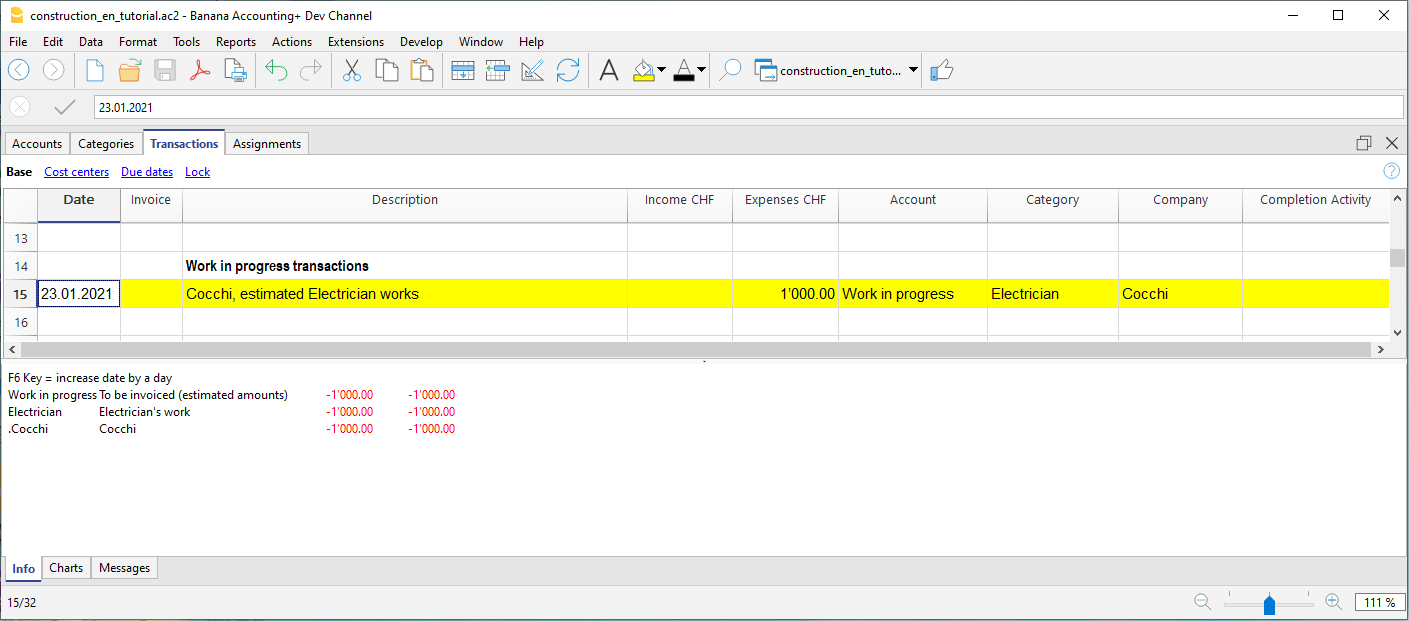
Income and financial transactions
In the transactions table you can also enter income such as subsidies or other financial transactions, capital payment or construction account consolidation.
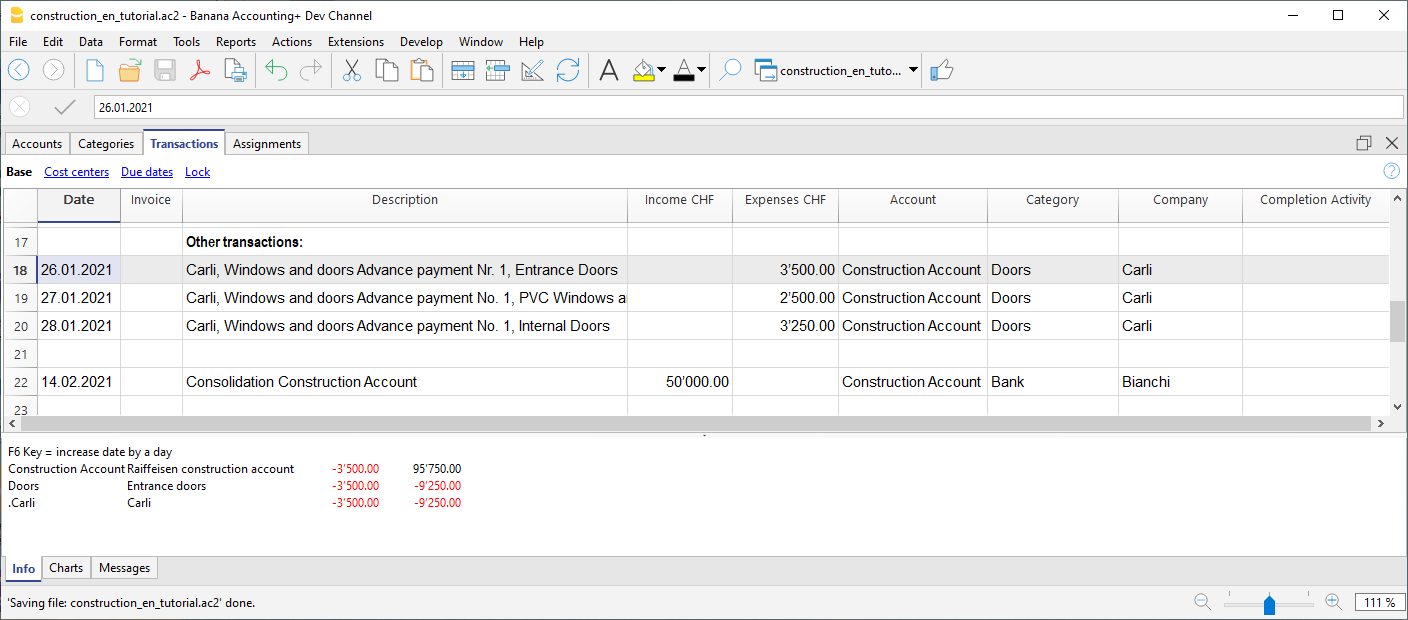
Percentage of work progress
Use the transactions table also to record manually the percentage of work progress. Define if the transaction is related to a company or a category, and the percentage. In the report you can evaluate the progress with the costs incurred.
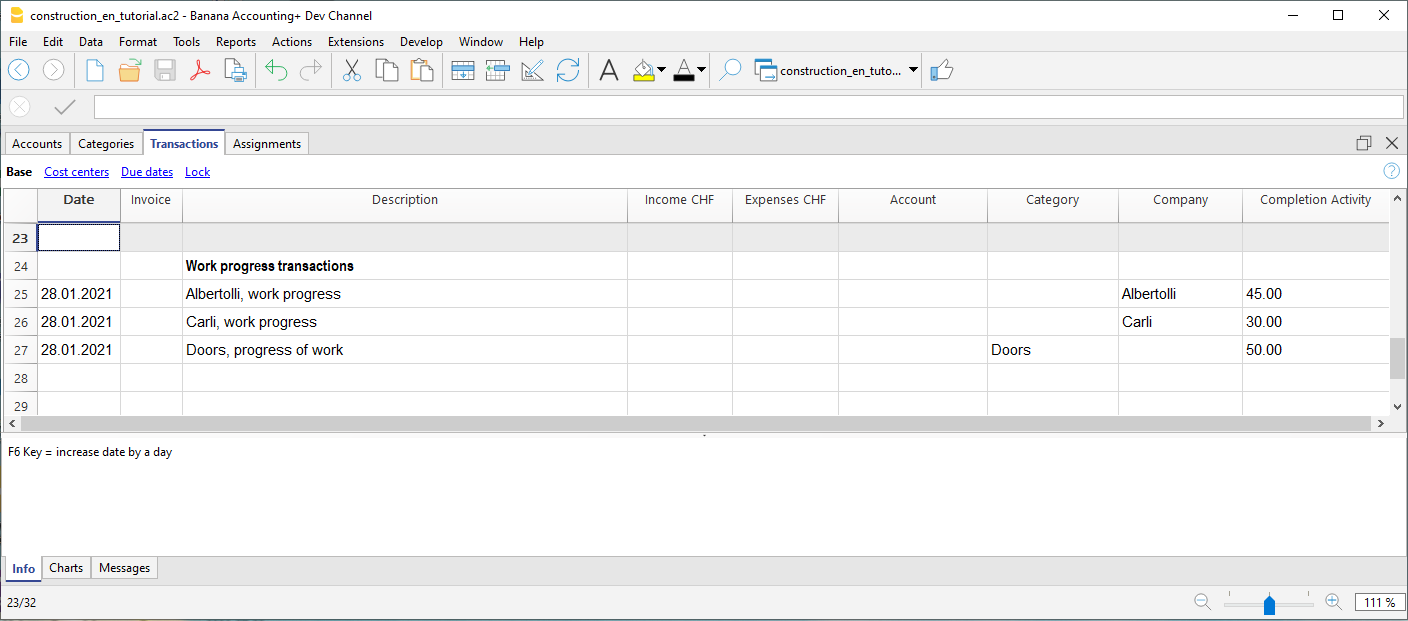
Reports by Categories and Companies
Heading
The extension takes the following information that you have defined in the file properties:
- Header left: Indicates for example the area, or the city with the mapping where the work will be performed.
- Header right: Indicates the project title.
- Opening/Closing Date: Indicates when the project started or when it will be concluded.
Dialog
When the extension is launched, a dialog window appears in which you can define the columns you want to display. For example, you can initially decide to show in the report only the columns of the estimate budget and the assignments , and then add the columns of the expenses later.
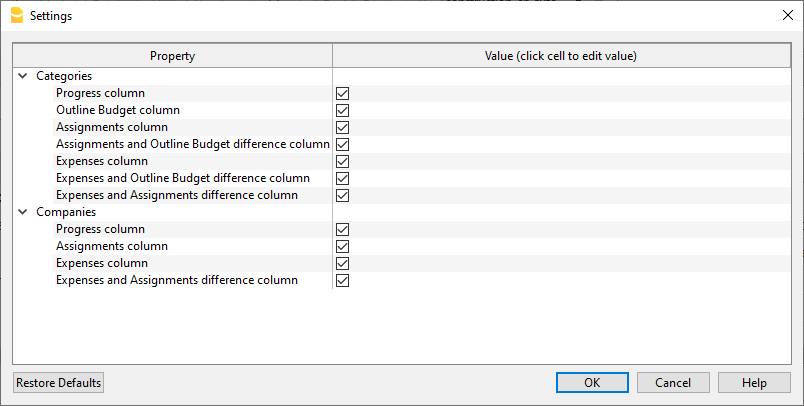
Report by Category
Inside the first table, the report shows the expenses divided by cost category, all the categories you have defined in the Categories table are included.
The columns you can view are as follows:
- Category: Name of the category, taken directly from the Categories table.
- Progress %: Resumes the last recorded work completion percentage, attributed to a specific category.
- Estimate Budget: This is the amount defined in the Estimate Budget column in the categories table.
- Assignments : Assignments are defined in the "Budget" table.
- Diff. Assign./Budg.: It is the difference between the assigned amounts and the budget, if the assigned amounts are less than the budget, it means that the costs will be lower than initially estimated budget, in this case a green icon is shown, if the assign is greater than the budget instead, then the icon appears red, if the amount is equal it remains yellow.
- Expenses: They are the actual expenses recorded in the transactions table.
- Diff. Exp./Budg.: This is the difference between the actual expenses and the estimate budget; if the estimate budget is greater than the expenses, then a green icon is shown because the actual expenses were less than the budgeted amount for that work. If the amounts are equal, then the icon remains yellow.
- Diff. Exp./Assign.: This is the difference between the actual expenses and the assigned amounts, if the assignments are greater than the expenses, then a green icon is shown as the actual expenses were less than the assigned amount for that work. If the amounts are equal, then the icon remains yellow.
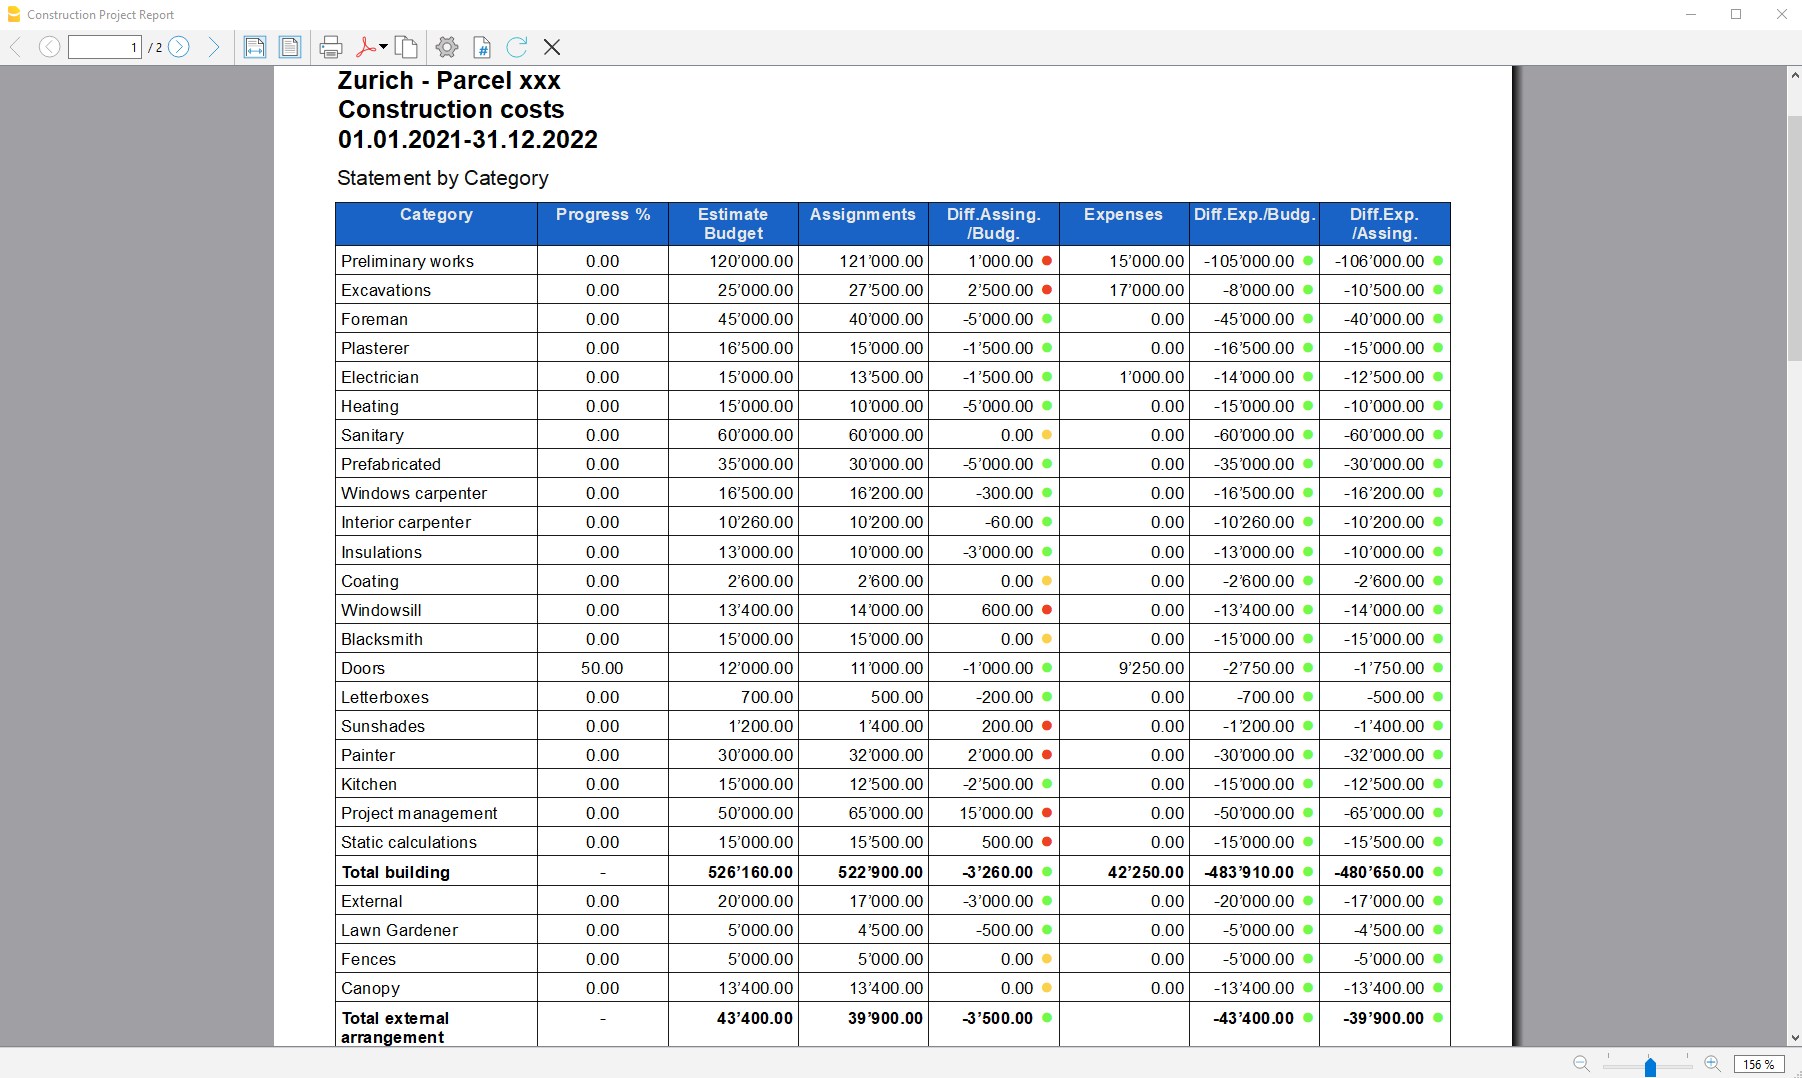
Report by Company
The second table shows the expenses divided by company, the companies are defined in the Accounts table.
The columns you can view are as follows:
- Company: Company name, taken from the account table.
- Progress %: Resumes the last recorded work completion percentage, attributed to a specific company.
- Assignments : The assignments are defined in the "Budget" table, make sure you have assigned a company to the assignments , otherwise no amount will be displayed (see template).
- Expenses: These are the actual expenses recorded in the transactions table.
- Diff. Exp./Del.: This is the difference between the actual expenses and the assigned amounts for each company, if the assignments are greater than the expenses, then a green icon is shown as the actual expenses were less than the assigned amount for that work. If the amounts are equal, then the icon remains yellow.
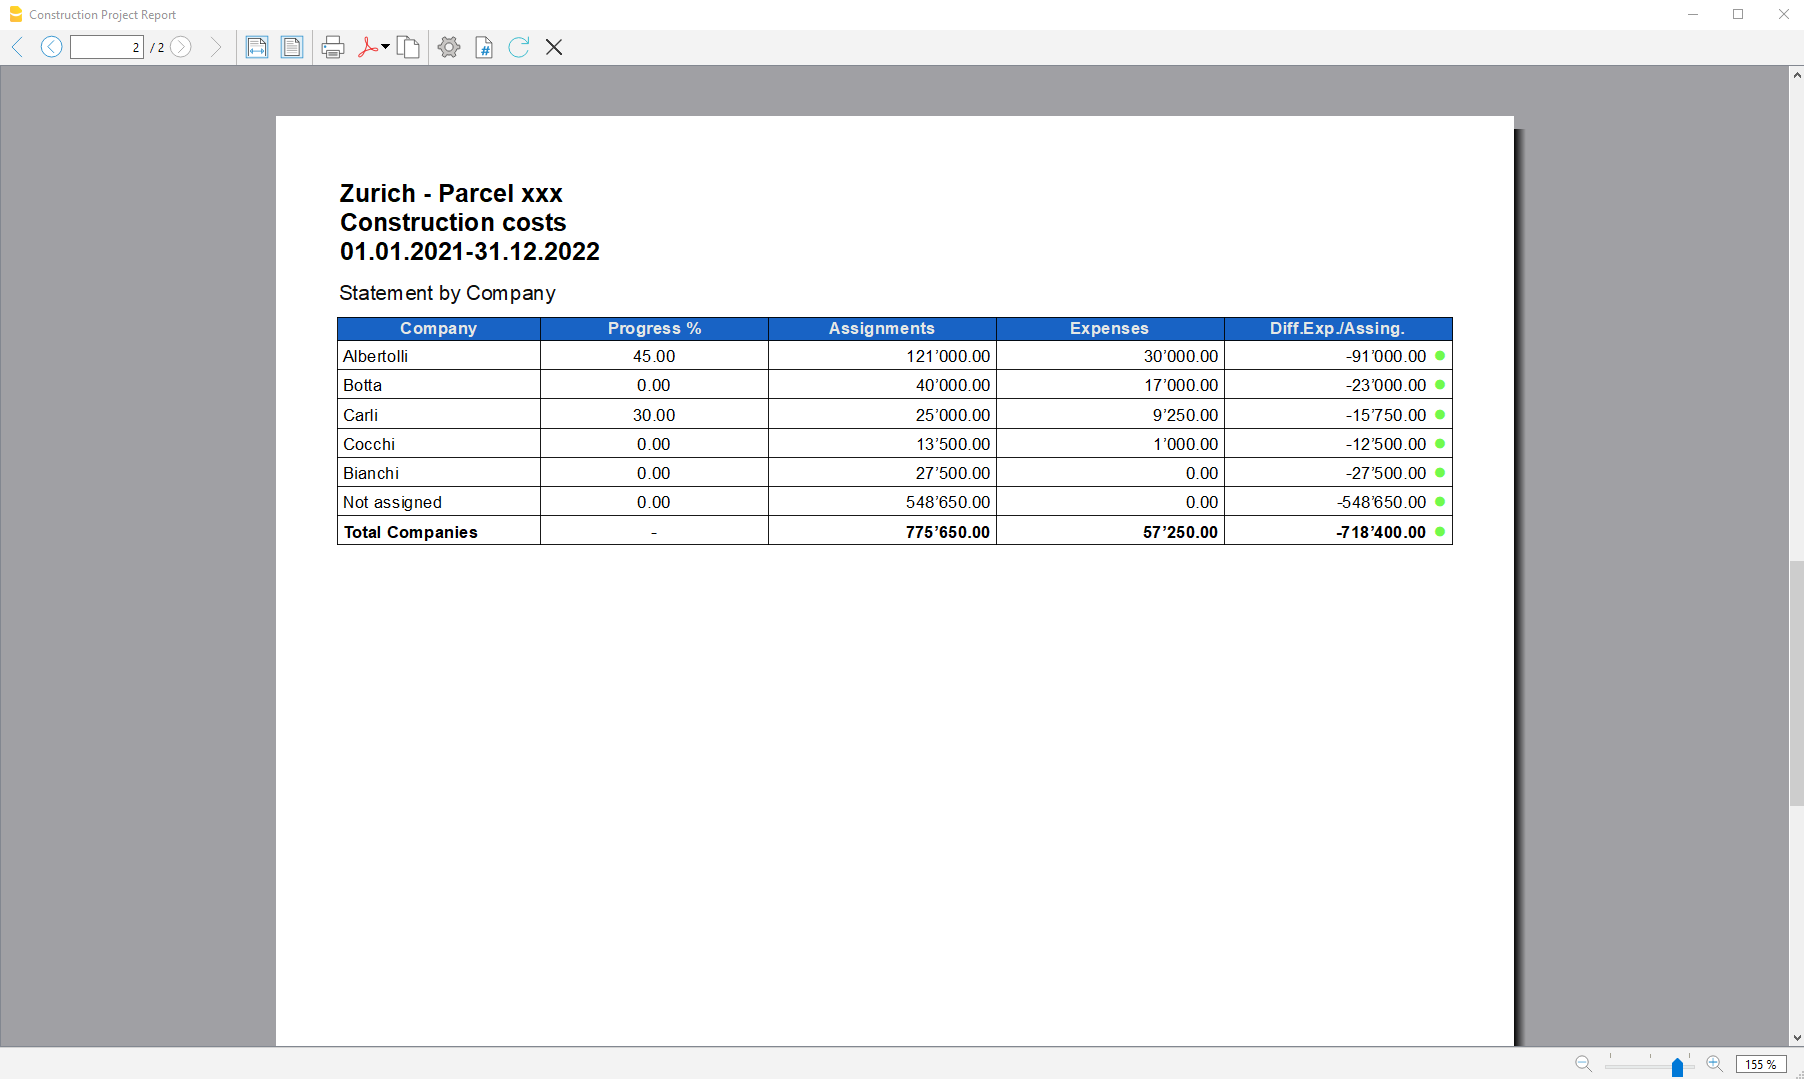
Accounting Extensions
Extensions Universelles d'importation
Avec Banana Comptabilité Plus, vous pouvez importer des données de différents formats.
Relevé bancaire SEPA/ISO 20022
Le Camt/ISO 20022 est le format d'extrait de compte mis à disposition par la plupart des banques.
Voir :
Extension SEPA/ISO 20022 pour l'importation des données des extraits bancaires
Importation à partir de PayPal
Cette extension permet d'importer des transactions PayPal dans Banana Comptabilité Plus :
Importer Extrait de compte SEPA/ISO 20022
Importer Extrait de compte SEPA/ISO 20022Importer des données dans la comptabilité courante
Cette fonction est incluse dans le programme. Procédez comme indiqué pour la commande Importer en comptabilité.
Avec cette fonction, vous pourrez aussi ouvrir un fichier compressé. Dans ce cas, le programme invitera l'utilisateur à sélectionner le fichier à partir duquel il faut importer les données dans le fichier compressé.
Afficher le contenu
Si avant d'importer le fichier vous désiriez voir son contenu, utilisez la fonction Ouvrir fichier ISO20022
Le standard ISO20022 pour les extraits de compte.
Avec le SEPA (Single Euro Payment Area) le standard ISO 20022 est devenu obligatoire depuis le 1.1. 2014, et supplante le format Swift MT940.
Banana Comptabilité supporte les formats ISO 20022 camt.052, camt.053 (y compris les versions 4 et 8) et camt.054
Notes techniques sur la conversion ISO 20022
Le standard ISO 20022 encode les données comptables de l'extrait bancaire de manière très précise. Cependant, une certaine liberté est conservée pour insérer des informations supplémentaires du compte et des mouvements.
En lisant le fichier, le logiciel Banana, essaye de s'adapter à la façon avec laquelle le fichier ISO 20022 a été préparé.
- Le programme Banana lit comme solde d'ouverture les codages similaires
- Le programme Banana lit comme solde de clôture les codages similaires
- Tous les mouvements contenus sont lus et transformés en mouvements
- Date d'opération (Date)
- Date devise
- Montant du mouvement (positif ou négatif)
- Libellé (pour l'instant, Banana assemble les diverses descriptions en un seul texte)
Dans l'avenir, nous prévoyons la possibilité d'extraire cette information avec plus de précision et d'indiquer d'autres colonnes où elle pourra être insérée.
SumUp - Importer mouvements .csv (Banana+ Advanced)
SumUp - Importer mouvements .csv (Banana+ Advanced)Cette extension d'importation vous permet d'importer les transactions de la plateforme SumUp dans Banana.
Consultez la documentation en anglais: SumUp - Import movements .csv (Banana+ Advanced)
Chase - Import movements .csv (Banana+ Advanced)
Chase - Import movements .csv (Banana+ Advanced)Cette extension d'importation vous permet d'importer les transactions de la plateforme Chase dans Banana.
Consultez la documentation en anglais : Chase - Import movements .csv
PayPal Import *.csv (Banana+) [BETA]
PayPal Import *.csv (Banana+) [BETA]This extension lets you import in Banana Accounting your PayPal transactions. Only for Banana+ version.
Separate accounting for PayPal transactions
PayPal transactions are usually composed of small amounts and have many particularities (refund, fees, etc.).
It can be expensive and time consuming to handle all this work within the main company accounting.
We have prepared different template that you can immediately use:
In many cases, it is more appropriate to manage the PayPal transactions within a separated accounting file and once a month integrate the summary data (movements for the month) into the main accounting.
This solution also allows a third person to take responsibility for the PayPal accounting.
If you use Banana for a PayPal Accounting solution, you can:
- Create an accounting file for a specific PayPal account
- Have a Chart of accounts with
- A different account for each currency used
- Different accounts for Income and Expenses
- Import the PayPal transactions and have all accounts, expenses, income and PayPal fees automatically allocated, and currency converted into basic currency.
- Record the transactions on the appropriate accounts for
- Bank transfers
- Revenue with different Sale tax codes
- Different expense types
- Refunds and charge backs
- Adding other information for special reporting (Cost Centers, Segments, Customers, etc.)
- Regularly (week, month, quarter) integrate the data into the main accounting, either by
- Printing a summary and recording manually
- Or exporting the data for the period and import them into the main system
- At any time, print the journal and necessary reports for auditing or control.
- Eventually, in case you have a lot of transactions, you can customize the import filter (Javascript) so that certain transactions are registered onto specific accounts numbers.
Within the Banana PayPal accounting you can easily keep the whole history, have instant access to all the data necessary to give a good customer service.
Activate the import PayPal transaction
First you need to update the import filters in Banana Accounting. See also Manage extensions.
- Start Banana Accounting+
- Open your accounting file
- Menu "Actions→ Import to accounting"
- Select "Import transactions"
- Button Manage extensions
- Button Update extensions
- Check the "PayPal Import (*.csv)" and deselect the other filters you do not need
- Close the dialog
Download PayPal transactions
PayPal customize fields to download
Be careful that the PayPal standard download file does not contain all the fields necessary for the import into Banana.
You need to change the settings in PayPal so that you can have a correct download
Business Account
- Login into PayPal
- Go to Activity.
- Click All Reports
- Click Activity download under Reports.
- Select the transaction type, date range, and choose the CSV file format.
- Click Customize report fields and make sure that all field are checked or check all fields available.
- Click Create Report.
- When the report is ready, click Download.
Personal Account
- Login into PayPal
- Go to Activity.
- Click the download button icon.
- Click on Custom.
- Click Activity download under Reports.
- Select the transaction type, date range, and choose the CSV file format.
- Click Customize report fields and make sure that all field are checked or check all fields available.
- Click Create Report.
- When the report is ready, click Download.
PayPal language encoding setting (only for Business Account)
If you use a local encoding, make sure that the encoding reflects your local computer encoding.
Banana import works better if you set your file encoding in UTF-8.
To change your language encoding settings in PayPal:
- Login into PayPal
- My Account → Account Settings → Website payments
- PayPal button Language encoding (click on Update)
- Eventually More Options is where you can set the UTF-8 in the list box
Import PayPal transactions
See also import transactions
- Open your accounting file
- Menu "Actions→ Import to accounting"
- Select "Import transactions"
- Select "PayPal"
- In File Name, enter the path and file name of the PayPal download (or Browse)
- Click OK.
- In the settings dialog enter:
- Choose the date format for the PayPal date format.
If you get the error "Date Format not valid" open the file you have downloaded from PayPal with notepad and check how the dates are written and then choose the appropriate format. - Enter the Account number for the PayPal Account (PayPal Account)
- Enter the Account number where Income should be registered (PayPal In)
- Enter the Account number where Expenses should be registered (PayPal Out)
- Enter the Account number where PayPal Fees should be registered (PayPal Fee)
- If it is multi-currency accounting also sets the exchange rates
- Choose the date format for the PayPal date format.

Once you have imported the transactions, you can undo the operation or change the imported data.
This will be the case if you want some income or some expenses to be registered on a different account..
Adapt your accounting file for import
Instead of specifying the PayPal account when the script starts, you can indicate in the Chart of accounts of Banana which accounts it should use. This method is also necessary if you want to have different accounts for each currency.
- The Basic currency in File properties should be set to a valid currency.
- Prior to import, the program will look for and use accounts with the following description:
- "PayPal Account": the account for PayPal
- "PayPal In": the account for income
- "PayPal Out": the account for expenses
- "PayPal Fee": the account for the PayPal fees.
- Set the opening balance of the PayPal accounts.
For each currency, you can specify an account. All transactions for this currency will be recorded on the specified account. You also will have the currency conversion transactions between the various currencies.
- For an accounting file NOT in multi/foreign currency, insert the currency code into the account description:
- PayPal Account EUR
- PayPal Account USD
- PayPal Account CHF
- PayPal Account GBP
- For an accounting file with multi/foreign currency, the program will look for the account where the description begins with "PayPal Account" and will then use the currency symbol of the Currency column.
If no account has been specified for the currency, the amount will go to the basic currency account.
PayPal currency settings and accounting settings
It is suitable that your PayPal currency settings (My Account → Profile → My Money→ PayPal Balance → Currencies) are the same as the ones of the accounting file:
- PayPal "Primary currency" is the same as your Basic Currency.
- If you have set up PayPal to use more currencies (Add Currency) you should use the Double-entry accounting with Multi-currency.
You will be able to keep a separate account for each currency in the original value.
You can convert an existing accounting file into a multi-currency file with the Convert to new file command. - For multi-currency accounting, the accounts "PayPal In", "PayPal Out", "PayPal Fee" should preferably be in basic currency.
Transaction split and selection
Each PayPal transaction includes the Gross amount, the Fee amount and the Net amount. If the Net is different from the Gross, the program will generate 3 lines:
- Line with the Gross amount registered on the PayPal Account
- Line with the Net amount registered on the Income or Expense account
- Line with the Fee amount registered on the Fee account.
Transactions already imported
The columns "ExternalReference" of the Transactions table will be filled with the unique PayPal transactionsID.
The next time you import, transactions with the same ID will be excluded from the import. The information from the older transactions will be used for currency conversion and grouping.
Last balance
The import will also add a line with information regarding the last PayPal Balance for each currency used. If you do not want this information, delete the imported lines.
Modifying the imported transactions
Once the transactions are imported, you will be able to change the transactions, as you like.
- Record the transfers to and from the bank account on a "Internal transfers account (Giro bank account)".
Do the same when you import your Bank account transactions.
The balance of the "Internal transfers account (Giro bank account)" should compensate and go to zero. - Income from sales can be registered on specific accounts based on the sales tax applied or based on the type of sales.
You must adapt your accounting plan accordingly. - You can add segments or cost centers.
Adapt the View of the Transaction table so that you have all columns visible and in the best sequence for modifying the data.
Exchange rate profit and loss
The balances of the PayPal accounts in currency will match the balance of the PayPal account.
The balances in basic currency may be different due to:
- The exchange rates for the transactions vary over the time.
- PayPal has different exchange rates for selling or buying a specific currency.
You should from time to time adjust the basic currency with the command Recording exchange rate differences.
Multi currency conversion
If there are different transactions in different currencies in the file, the amounts will be converted into basic currency following this rule and order:
- Basic currency
- PayPal currency conversion
Transactions that belong to the same block will use the same conversion, so that the amount in basic currency for the same amount and transaction will always be the same. - Exchange rate from currency conversion of the same date
- Exchange rates taken from the Accounting file (Exchange rates table)
- Exchange rate collected from the PayPal currency conversion.
The conversion will give an indication when it could not find a valid exchange rate for a currency and ask for a currency exchange rate.
Import other PayPal fields
You can import other information, included in the PayPal file, into Banana Accounting.
- Add a new column to the Transactions table with the name "PayPal" + the column name of the PayPal file.
For example "PayPalTimeZone", "PayPalSalesTax", "PayPalTip".- Specify the column type (Text, Number, Amount, Date, Time).
- For Amount and Number also indicate the decimal place.
- In the Account Card, the columns of the Amount type will also have an end total.
- In the PayPal download history with "Customize Download Fields", you can specify the column to download.
- The available columns (names in English, without space and in CamelCase) are:
Time, TimeZone, Type, Name, Status, Subject, Currency, Gross, Fee, Net, Note, FromEmailAddress, ToEmailAddress, TransactionId, PaymentType, CounterpartyStatus, ShippingAddress, AddressStatus. ItemTitle, ItemId, ShippingAndHandlingAmount, InsuranceAmount, SalesTax, Tip, Discount, SellerId, Option1Name, Option1Value, Option2Name, Option2Value, AuctionSite, BuyerId, ItemUrl, ClosingDate, ReferenceTxnId, InvoiceNumber,SubscriptionNumber, CustomNumber, ReceiptId, Balance, ContactPhoneNumber, BalanceImpact, AddressLine1, AddressLine2, State, Town, Zip, Country.
When you import the transactions, the PayPal* column cells will be filled with the contents of the PayPal file.
Banana PayPal import extension
The conversion from the PayPal format to the accounting format is a Javascript program.
The program is "open source software" and can be modified to suit the user's needs at best.
To modify the extension, first change the following values so that it does not conflict with the Banana PayPal filter:
- Use a different file name
- Use a different @id
- Use a different description.
License terms
The PayPal documentation does not cover all possible transactions. The import script has been developed based on use cases, and it is possible that not all possibilities have been covered and that the script need improvements.
PayPal may also change the data format and the script results may not be the same.
Take care using the import and always check that the Account Balance corresponds to the PayPal balance.
The use of the import script is governed by the Apache 2.0 license, the file can be freely modified.
By using the script you accept the license and the disclaimer terms.
Troubleshooting
If you experience any problem first update the import filter to the latest version in Manage apps.
- Rounding problem.
It can happen that the PayPal file use a decimal format that is different from the one of your computer. Amount are therefore truncated (12.34 become 12 or it become 1234).
PayPal assign you a specific format for the language encoding based on you country (see PayPal language encoding explanations).- Make sure that the PayPal download are the same as your computer settings
- Or login in you PayPal account and change the PayPal language encode setting (https://www.paypal.com/cgi-bin/customerprofileweb?cmd=_profile-language-encoding).
With the button More Option you can eventually select the UTF-8 that is the best suited to exchange data.
- The error message "Impossible to translate file header: .."
- Try using the Banana Accounting 9 version.
- Change your download settings as specified above in the "PayPal language encoding setting"
- Assure you are using the original CSV file downloaded from PayPal and not one opened and saved with Excel.
- The error message "Currency non converted" indicates that there has been no available exchange rate for the conversion.
- It is possible you have not set up your basic currency
- You have set up the PayPal to keep more than one currency. The PayPal file does not convert currency and you should therefore use a multi-currency accounting.
- If the last balance is different from the account
- Check whether you have a correct opening amount (the balance prior to the first imported transaction)
- Your account is not in the same currency.
If your PayPal account is set up to use different currencies or in a currency different from basic currency, it would be suitable to use a multi currency account.
- If you get a message field "BalanceImpact not found in headers" or the same message with another field name, is due to the fact that the PayPal History file does not contains a field that is needed for import.
- Login in PayPal and go to download history
- Before downloading the PayPal history file click on "Customize My History Download"
- You will see a list of available field and check the one that is missing
The "Balance Impact" is near the end of the list.
PayPal will save the setting. Next time you download again the field will be included. - Download again the history file.
- If you have an error message "AccountDebit" and "AccountCredit" not found, you have a file with old columns name.
use the command Tools->Create New File to create a copy of the file with the correct columns.
Reference
PayPal Documentation
Changes
- 2021-03-24 New version for Banana+
- Complete history
Feedback
Let us know what you think of the import script or how we could eventually improve the script.
Revolut - Import movements .csv (Banana+ Advanced)
Revolut - Import movements .csv (Banana+ Advanced)Cette extension d'importation vous permet d'importer les transactions de la plateforme Revolut (Personal & Business) dans Banana.
Consultez la documentation en anglais : Revolut - Import movements .csv
Stripe - Import movements .csv (Banana+ Advanced) [BETA]
Stripe - Import movements .csv (Banana+ Advanced) [BETA]Cette extension d'importation vous permet d'importer les transactions de la plateforme Stripe dans Banana.
Consultez la documentation en anglais : Stripe - Import movements .csv
Wise - Import transactions (*.csv)
Wise - Import transactions (*.csv)Cette extension d'importation vous permet d'importer les transactions de la plateforme Wise (Personal & Business) dans Banana.
Consultez la documentation en anglais : Wise - Import transactions (*.csv)
Yokoy - Import movements .csv (Banana+ Advanced) [BETA]
Yokoy - Import movements .csv (Banana+ Advanced) [BETA]Cette extension d'importation vous permet d'importer les transactions de la plateforme Yokoy dans Banana.
Consultez la documentation en anglais : Yokoy - Import movements .csv
CiviCRM Contributions - Import movements .csv (Banana+ Advanced) [BETA]
CiviCRM Contributions - Import movements .csv (Banana+ Advanced) [BETA]You can install the extension from the menu Extensions > Manage Extensions.
Requirements for Use
Banana Accounting Plus with the Advanced Plan.
Send us a feedback
This extension is a BETA version, we welcome suggestions for improvement.
It may happen that the format of the csv file is updated and as a result the filter no longer functions correctly. Send us feedback and attach an example file (.csv) with the new format and we will proceed to update the filter.
OFX - Open financial exchange transactions import filter (*.ofx *.ofc *.xml)
OFX - Open financial exchange transactions import filter (*.ofx *.ofc *.xml)Import extension (*.ofx *.ofc *.xml). Install this filter via the menu command Extensions → Manage Extensions.
The file is an import extension for Banana Accounting 8 and following.
It allows the software to:
Read OFX (Open Financial Exchange) files
Extract financial transactions
Convert them into Banana’s Transactions table
What Is OFX?
OFX (Open Financial Exchange) is a structured financial data format used by banks and software such as:
Quicken
Microsoft Money
It is more reliable than QIF because it includes:
Unique transaction IDs (FITID)
Structured account information
Statement balances
Currency data
What the Script Does
The OFX import extension:
Parses the OFX file structure
Extracts transaction blocks (<STMTTRN>)
Reads key fields:
Date (<DTPOSTED>)
Amount (<TRNAMT>)
Description (<NAME>)
Memo (<MEMO>)
Transaction ID (<FITID>)
Converts them into Banana transaction rows
Prevents duplicate imports using FITID
Typical OFX Transaction Structure
<STMTTRN>
  <TRNTYPE>DEBIT
  <DTPOSTED>20260301
  <TRNAMT>-125.50
  <FITID>20260301001
  <NAME>Vendor Payment
  <MEMO>Invoice 4587
</STMTTRN>
Export from Online Banking (Recommended)
Many banks in USA allow transaction export.
Steps:
Log into your online banking portal
Go to transaction history
Select Download / Export
Choose format:
OFX
or QFX
Select date range
Download the file
Export from Financial Software
Software like Quicken allows exporting to OFX:
Open your account
Choose Export transactions
Select OFX format
Save the file
Quicken Interchange Format import filter (*.qif)
Quicken Interchange Format import filter (*.qif)It allows Banana Accounting to read and convert data from QIF (Quicken Interchange Format) files into Banana’s internal accounting structure (Transactions table, Accounts, Categories).
The script:
- Parses QIF records (such as date, amount, payee, memo, category)
- Transforms them into Banana-compatible transaction rows
- Handles different QIF types (Bank, Cash, Credit Card, etc.)
- Ensures correct formatting for dates and amounts
In short, it enables importing bank or financial transaction data exported in QIF format into Banana Accounting.
How to Export Data in QIF Format
QIF is an older financial exchange format originally used by Quicken.
Exporting from Financial Software
If your software supports QIF export:
Open your accounting or banking software
Go to Export or Data Export
Select:
Format: QIF (Quicken Interchange Format)
Account type: Bank / Cash / Credit Card
Choose date range
Save the
.qiffile
Exporting from Online Banking
Some banks still allow QIF export:
Log in to your online banking portal
Open the transaction history
Choose Download / Export
Select format:
QIF (if available)
Otherwise: CSV (you would need conversion)
Many banks today provide CSV or OFX instead of QIF.
Basic QIF Structure Example
A QIF file looks like this:
!Type:Bank
D03/01/2026
T-125.50
PPayment to Vendor
MInvoice 4587
LExpenses:Office
^Export Extensions
Export Address data in the VCard format
Export Address data in the VCard formatUsing the extension to export vCards
This extension is compatible only with the following file types:
- Address book
- Library and collections
- Estimates and Invoices
To generate and export vCards, the extension uses data from the Contacts table in the file. Specifically, it reads the following columns:
- First Name
- Family Name
- Street
- Zip
- Locality
- Country Code
- Country
- Mobile Phone
- Home Phone
- Email Home
Ensure that your file is of a supported type and that the required columns are filled in correctly to guarantee a successful export.
Install the extension
To install the extension:
- Open Banana Accounting Plus.
- Menu Extensions > Manage Extensions.
- In the search field enter Export Address data in the VCard format.
- From the extensions list select Export Address data in the VCard format.
- Select the extension and click Install.
- Click Close to close the window.
Export address data in vCard format
To export the vCard with the addresses data:
- Open the Banana file.
- From the Extensions menu select Export Address data in the VCard format.
- Enter the contact ID. You can export a vCard containing all contacts or just specific ones.
- Save the vCard.
The generated .vcf file contains a structure like the following one:
BEGIN:VCARD
VERSION:3.0
N:Pallino;Pinco
FN:Pinco Pallino
TEL;type=CELL:1234567890
TEL;type=HOME:1234567890
ADR;TYPE=HOME:;;Via Trevano 7a;Lugano;;6900;
LABEL;TYPE=HOME:Via Trevano 7a Lugano,6900
REV:2017-02-07T14:07:54.694Z
END:VCARD
Export vCard for unsupported file types
If you're using a file type that is not supported by this extension (e.g., a double-entry accounting file, an income/expense accounting file, etc.), you can still export the data for members, customers and suppliers by following these steps:
- Copy the contact information from your current accounting file.
- Create a new file of type Address book and paste the copied data into the appropriate columns.
- Run the extension to export the vCards in the new file.
Journal Export (Banana 9)
Journal Export (Banana 9)How to use it
In order to use this app you have to:
- Install the app
- Menu Apps → Manage Apps...
- Select Universal as country.
- Select english as language.
- Select Online → Productivity.
- From the apps list select Journal Export.
- Click Install to install the app.
- Click Close to close the window.
- Run the app
- Menu Apps → Journal Export.
- Export the content
- From the top bar select Copy to Clipboard.
- Copy into Excel
- Open Excel and paste the copied content.
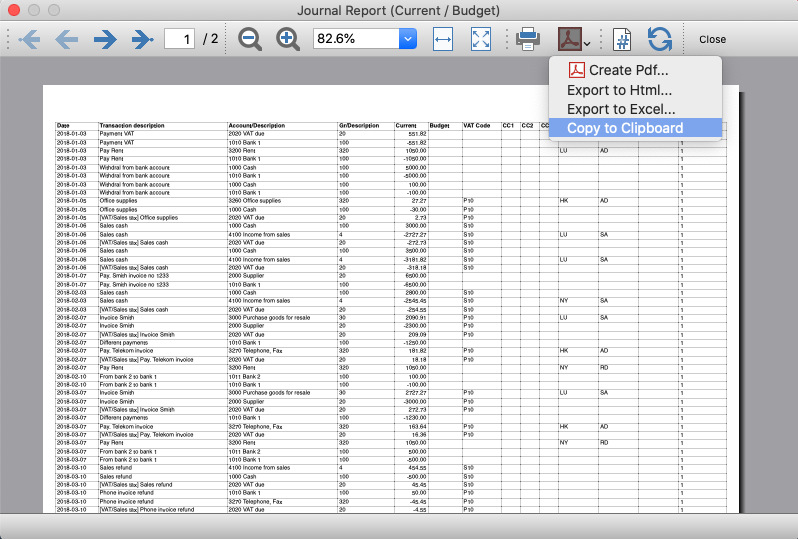
Journal Export (Banana+)
Journal Export (Banana+)Prerequisites
To use this extension you must download and install Banana Accounting Plus.
Install the extension
To install the extension:
- Open Banana Accounting Plus.
- Menu Extensions > Manage Extensions
- Select Universal as country.
- Select english as language.
- Select Online > Productivity.
- From the extensions list select Journal Export (Banana+).
- Click Install to install the extension.
- Click Close to close the window.
Create the journal report
To creare and export the journal:
- Open an accounting file.
- From the Extensions menu select the Journal Export (Banana+).
- In Settings dialogue choose the journal columns you want to display, then click OK.
- From the Print Preview of the report select the Copy to Clipboard command in the top bar.
- Open Excel and paste the copied content. Columns headers and data will be copied in Excel. From there you can use it to create your own reports.
Settings dialogue
Run the extension from the menu Extensions > Journal Export (Banana+).
The extension Settings dialogue will open. From here you can choose the journal columns you want to include in the report.
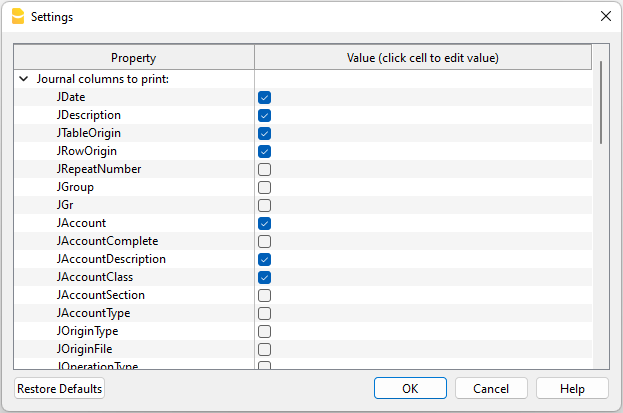
You can find more information about the journal columns in the Journal’s API documentation.
Print example
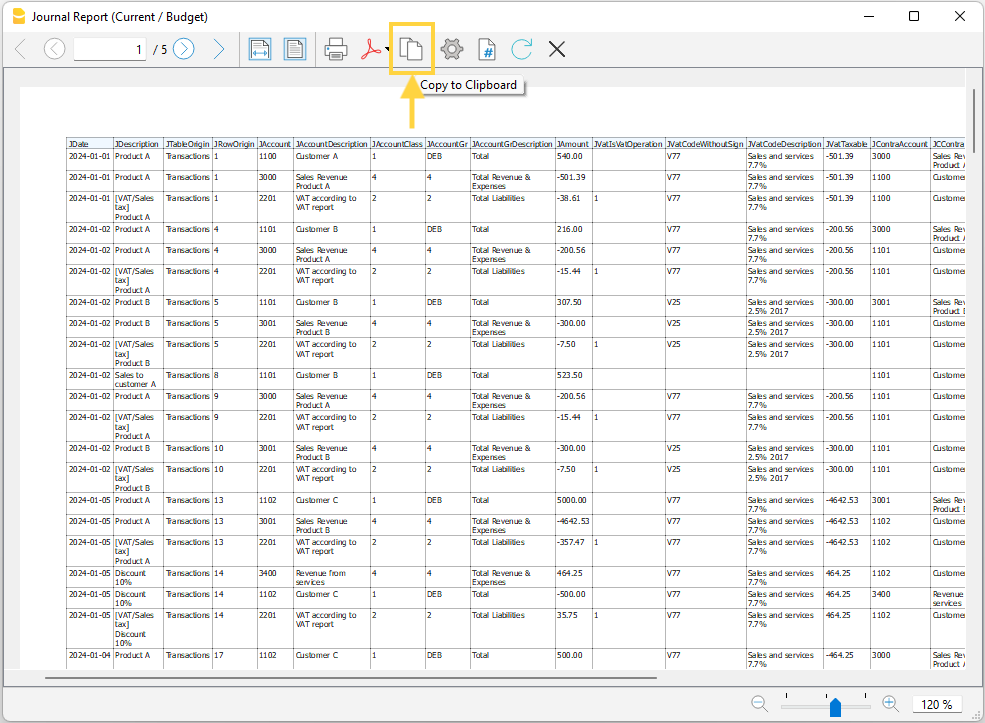
Time Sheet Export
Time Sheet ExportPrerequisites
- Download and install Banana Accounting Plus (or Banana Accounting 9, version 9.0.5).
Install the extension
To install the extension:
- Open Banana Accounting Plus.
- MenuExtensions > Manage Extensions.
- Select Universal as country.
- Select english as language.
- Select Online > Productivity.
- From the extensions list select Time Sheet Export.
- Click Install.
- Click Close to close the window.
Export the time sheet columns
To export the columns of the time sheet table:
- Open a time sheet file type.
- From the Extensions menu select the Time Sheet Export.
- In Settings dialogue choose the time sheet columns you want to export, then click OK.
- From the Print Preview of the generated report select the Copy to Clipboard command in the top bar.
- Open Excel and paste the copied content. Columns headers and data will be copied in Excel. From there you can use it to create your own reports.
Report Extensions
Account Statement Letter
Account Statement LetterInstall the extension
To install the extension:
- Open Banana Accounting Plus.
- Menu Extensions > Manage Extensions.
- In the search field enter Account Statement Letter.
- From the extensions list select Account Statement Letter.
- Select the extension and click Install.
- Click Close to close the window.
Create the report
To creare the report:
- Open an accounting file.
- From the menu File > File and accounting properties > Address, enter the sender address.
- In the Accounts table (Address view) enter the receiver address for the account.
- From the Extensions menu select the Account Statement Letter.
- Enter the account number.
Example of account statement report:
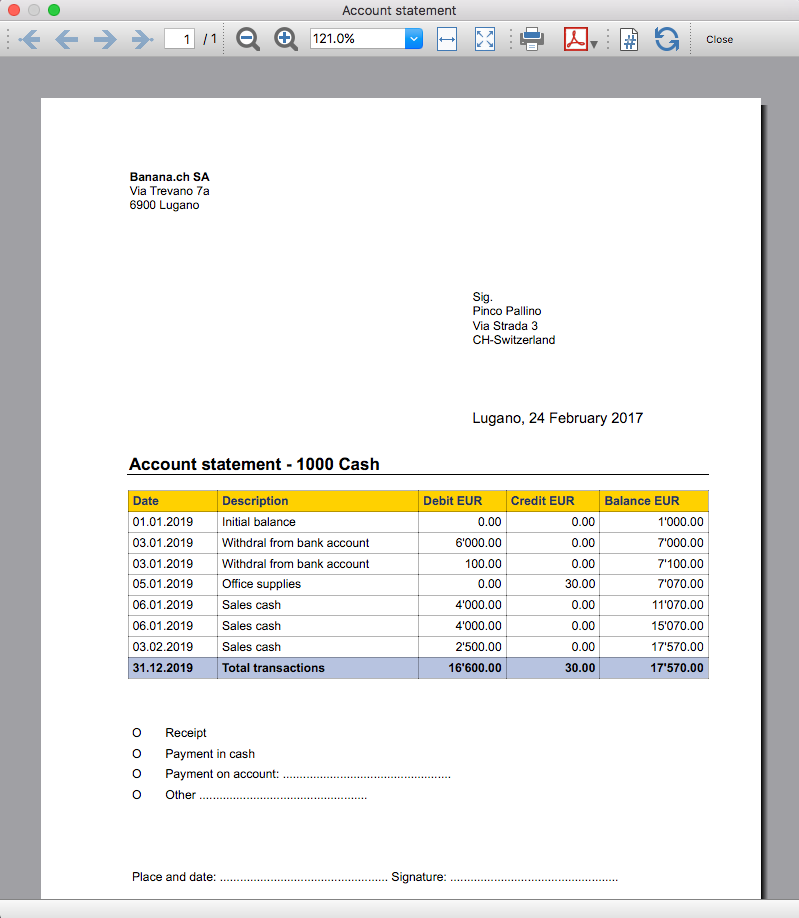
Account balance by day within a period
Account balance by day within a periodInstall the extension
To install the extension:
- Open Banana Accounting Plus.
- Menu Extensions > Manage Extensions.
- In the search field enter Account balance by day within a period.
- From the extensions list select Account balance by day within a period.
- Select the extension and click Install.
- Click Close to close the window.
Create the report
To creare the report:
- Open an accounting file.
- From the Extensions menu select the Account balance by day within a period.
- Enter the account number.
- Select the period.
A window with results is displayed. You can copy, save and print the results.
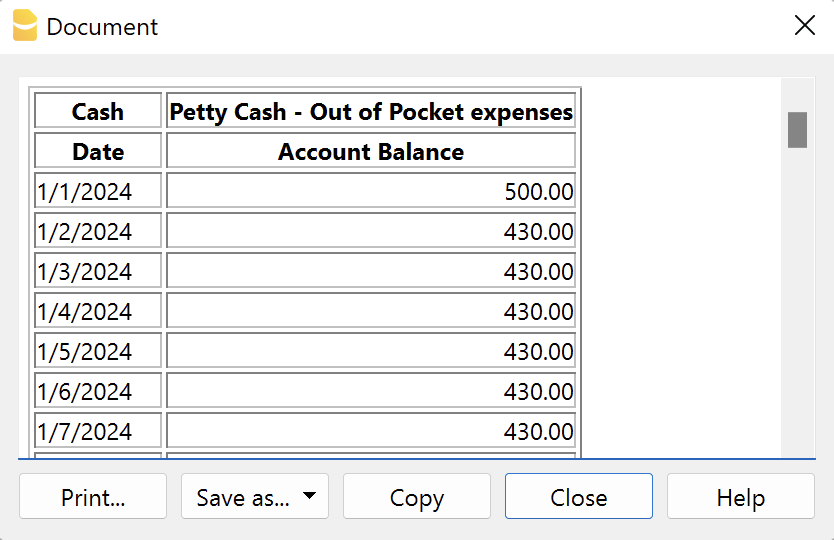
Account balance for all days in a month
Account balance for all days in a monthInstall the extension
To install the extension:
- Open Banana Accounting Plus.
- Menu Extensions > Manage Extensions.
- In the search field enter Account balance for all days in a month.
- From the extensions list select Account balance for all days in a month.
- Select the extension and click Install.
- Click Close to close the window.
Create the report
To creare the report:
- Open an accounting file.
- From the Extensions menu select Account balance for all days in a month.
- Enter the month number.
- Enter the account number.
A window with results is displayed. You can copy, save and print the results.
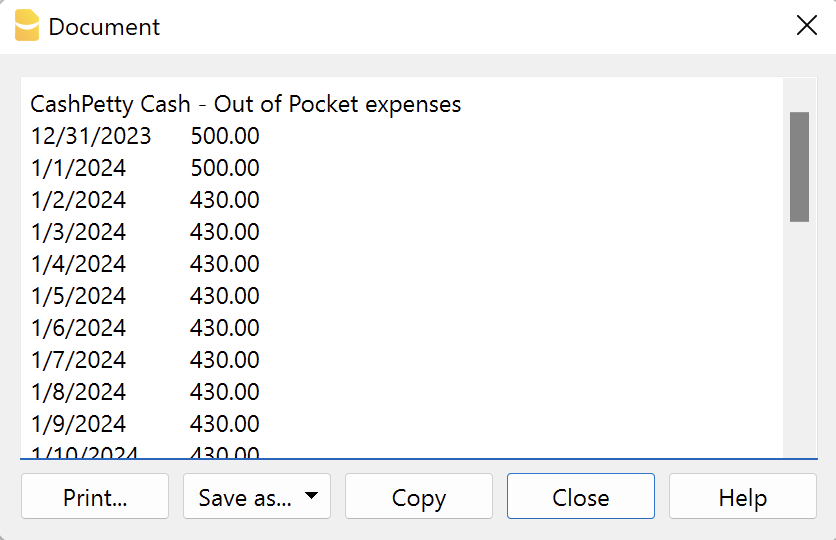
Audit Reports [BETA]
Audit Reports [BETA]The main purpose of this extension is to provide reports that can be easily copied into excel, summarising and showing the main accounting data that are normally taken as a basis by auditors when preparing their analysis.
Useful reports for Banana users who need to send their auditor accounting data, but also for auditors who use Banana themselves, as these reports are based on the functionalities already offered by Banana and therefore facilitate and speed up the collection of accounting data.
Reports
The following reports can be generated:
- General Ledger: Shows the transactions for each account, like in the account card.
- Journal: Shows the details of each transaction.
- VAT Journal: Shows the details of each VAT transaction.
- Trial Balance: Shows the balance of all accounting items in two columns (debit and credit).
- Customers And Suppliers: Shows list of customers and suppliers and information about them.
Through a dialogue it is possible to decide the time of year to be taken into account in the reports.
Adding extra columns
Through the command "Columns Settings" additional columns can be inserted in each report, except for the trial balance, which remains as it is. To add a column to the report, simply enter its xml name in the dialogue. To add several columns, separate them with a semicolon ";" as shown in the example.

The columns you can add are the same present in the Transactions table, except for the Customers and Suppliers report, for which you find the data in the Accounts table.
If you accidentally add a column that is not contained in the tables mentioned, no error is currently raised, the column will be added but no value will be present.
Copy to Excel
Reports are easily copied to Excel, when the report preview is generated, just click on the "copy" icon and paste the copied table into an Excel sheet.

Once the whole table has been copied, you can arrange the file as you want and customise your report with Excel tools.

Messages
- Total debit and total credit are different: The total Debit and total Credit do not match, check if the same error is present in your Accounting file, if it is only present in the report send us a feedback
Lettre en texte libre (Banana+) [BETA]
Lettre en texte libre (Banana+) [BETA]L'extension présentée ci-dessous permet de créer une lettre en texte libre pour les membres enregistrés dans Banana Comptabilité Plus (tableau Comptes).
Il est indispensable que les membres soient configurés avec des centres de coût, en utilisant le centre de coût CC3.
Pour utiliser cette extension, il faut
- Télécharger et installer Banana Comptabilité+ (version 10.1.7 ou suivante).
- Avoir le Plan Advanced de Banana Comptabilité Plus.
Version Beta
L'extension est actuellement disponible en version bêta. Cela signifie que certains détails peuvent être modifiés sans préavis.
Installation et utilisation de l'extension
- Installez Banana Comptabilité Plus Dev-Channel
- Installez l'extension Lettre (Banana+) . Visitez la documentation Gérer Extensions.
- Une fois installée, l'extension sera visible dans le menu Extensions où elle pourra être exécutée.
Créer une lettre
- Introduire les données de l'association dans la section Adresse du fichier comptable.
- Dans le Menu Extensions, sélectionnez l'extension Lettre (Banana+) .
- Complétez les champs du dialogue de paramétrage et cliquez sur OK.
Dialogue paramètres
Lancez l'extension à partir du menu Extensions > Lettre (Banana Plus).
Le dialogue Paramètres de l'extension s'ouvre, où vous pouvez définir les informations nécessaires pour créer l'impression de la lettre.
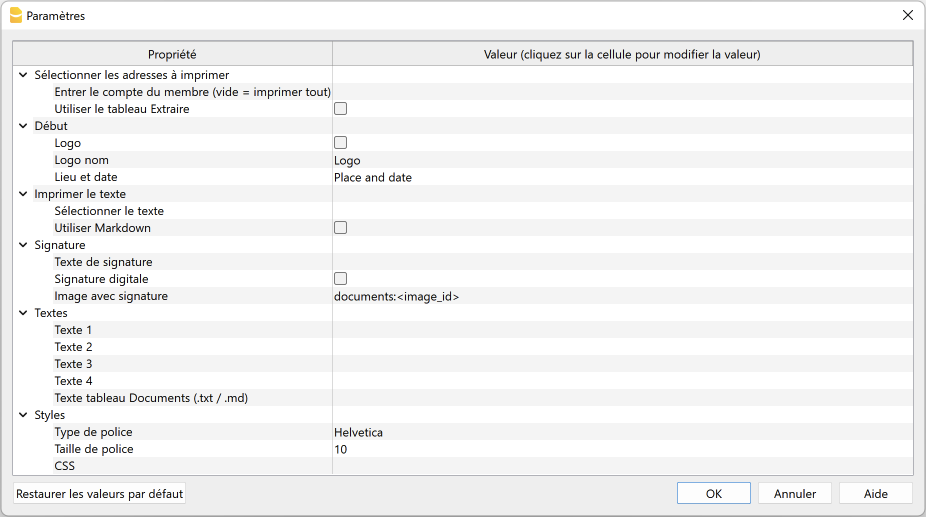
Pour la saisie des données, cliquez dans le champ de la colonne Valeur.
Les paramètres sont répartis dans les groupes suivants :
- Sélectionnez les adresses à imprimer
- Définissez les comptes membres pour lesquels créer la lettre.
- Début
- Définissez le logo pour l'en-tête, l'emplacement et la date.
- Imprimez le texte
- Définissez le texte à utiliser.
- Signature
- Définissez le texte et l'image de la signature.
- Textes
- Définissez jusqu'à quatre textes différents ou prendre un texte dans le tableau Documents.
- Styles
- Définissez le type et la taille de la police pour les textes des lettres.
Les données saisies sont utilisées pour générer le rapport, que vous pouvez ensuite enregistrer et imprimer.
Sélectionner les adresses à imprimer
Ici, vous pouvez décider pour quels membres, définis avec les centres de coûts CC3, créer la lettre.
- Saisir le compte du membre (vide = imprimer tout)
- Saisir un seul compte (par exemple "10001").
- Introduisez plusieurs comptes divisés par un "," (par exemple "10001,10002,10005").
- Si vous n'introduisez rien, une lettre sera imprimée pour tous les membres inscrits.
- Utiliser le tableau Extraire
- Utilisez les comptes extraits dans le tableau Extraire
- Il faut d'abord utiliser la commande Données > Extraire et trier lignes pour extraire les lignes contenant les comptes que l'on veut utiliser.
Début
Vous définissez ici le logo pour l'en-tête, l'emplacement et la date.
- Logo
- Inclure un logo dans l'en-tête. Le logo est défini via la commande Fichier → Configuration logo.
- Nom logo
- Saissisez le nom de la personnalisation du logo à utiliser.
- Lieu et date
- Saisissez le lieu et la date.
Imprimer texte
Vous pouvez ici choisir le texte à utiliser parmi ceux que vous avez saisis.
- Selectionnez texte
- Sélectionnez le texte que vous souhaitez utiliser dans la liste.
- Voir ci-dessous pour la saisie de texte.
- Utilisez Markdown
- Le texte sélectionné est interprété comme un texte Markdown (nécessite le plan avancé de Banana Comptabilité Plus).
Signature
Vous définissez ici le texte et l'image de la signature de la lettre.
- Texte de la signature
- Saisissez le nom et le prénom de la personne qui émet la lettre.
- Signature digitale
- Utilisez une image comme signature.
- Image avec signature
- Entrez un image à utiliser. Vous avez deux possibilités :
- documents:<nom_id> : pour utiliser une image enregistrée dans le tableau Documents, où <nom_id> représente le nom saisi dans la colonne ID du tableau (par exemple "documents:signature").
- file:document/<image> : pour utiliser une image enregistrée en dehors de Banana, mais dans le même dossier que le fichier .ac2. Il indique aussi l'extension de l'image .png ou .jpg (par exemple "file:document/signature.png").
- Entrez un image à utiliser. Vous avez deux possibilités :
Textes
Vous définissez ici les textes de la lettre. Vous pouvez saisir jusqu'à quatre textes différents ou prendre un texte dans le tableau Documents.
- Texte 1, Texte 2, Texte 3, Texte 4
- Saisissez le texte que vous souhaitez afficher dans l'impression. Le texte peut également être disposé sur plusieurs lignes.
- Les textes peuvent être de type texte ou de type Markdown.
-
Vous pouvez saisir jusqu'à quatre textes différents, puis choisir celui que vous souhaitez utiliser.
- Texte tableau Document (.txt / .md)
- Pour utiliser les textes saisis dans le Tableau documents
- Saisissez l' Id 'identifiant du document (par exemple, "Letter.txt", "Letter", "Letter.md", etc.)
- Les textes peuvent être de type texte ou de type Markdown.
- Pour les textes de type Markdown, l'Id identifiant dans le tableau Documents doit se terminer par ".md" et le nom complet, y compris le ".md" final (par exemple "Lettre.md"), doit être saisi ici.
Styles
Vous définissez ici le type et la taille de la police pour les textes des lettres.
- Type de police
- Définissez le type de police.
- La police par défaut est "Helvetica".
- Taille de la police :
- Définissez la taille de la police.
- La taille de police par défaut est '10'.
- CSS
- Facultatif.
- Vous pouvez modifier l'apparence de l'impression (formatage du texte, positionnement de l'adresse, etc.) en entrant du code CSS pour personnaliser le style.
- Voir la documentation sur la création de styles CSS (en anglais)
Tableau Extraire (commande Extraire lignes)
La fonctionnalité Extraire et trier lignes peut être utilisée pour sélectionner les comptes des membres pour lesquels l' attestation doit être créé. Ceci est utile lorsque, par exemple, vous ne souhaitez imprimer le relevé de dons que pour certains membres, sans devoir introduire la liste des comptes directement dans les paramètres de l'extension.
Si, par exemple, vous regroupez les membres en différents groupes (tableau Comptes), vous pouvez ensuite utiliser la commande Données > Extraire et trier lignes pour extraire les lignes des membres appartenant uniquement à certains groupes (dans l'exemple, les membres appartenant aux groupes S1 et S3).
Pour utiliser les lignes extraites
- Extraire les lignes avec la commande Données > Extraire et trier les lignes.
- Lancez l'extension et dans la boîte de dialogue Paramètres, section Sélectionnez les adresses à imprimer, cochez la case Utiliser tableau Extraire
- Si les lignes n'ont pas été extraites avant le début de l'impression, un message d'avertissement s'affiche et tous les comptes membres enregistrés sont utilisés.
Texte de la lettre (texte normal)
Per inserire e utilizzare un normale testo ci sono due possibilità:
- Saisir le texte dans la boîte de dialogue Paramètres.
- Saisir le texte dans les champs Texte 1, Texte 2, Texte 3 ou Texte 4.
Il est possible d'ajouter jusqu'à quatre textes. - Sous Imprimer texte > Sélectionner texte, sélectionnez le texte à utiliser.
- Sous Imprimer texte, ne sélectionnez PAS l'option Utilisez Markdown.
- Saisir le texte dans les champs Texte 1, Texte 2, Texte 3 ou Texte 4.
- Inserire il testo nella tabella Documenti.
- Saisissez le texte dans le tableau Documents.
- Ajoutez un document en sélectionnant le type Texte normal (text/plain).
Il n'y a pas de limite, vous pouvez ajouter autant de texte que vous le souhaitez. - Dans le dialogue paramètres :
- Sous Imprimer le texte > Sélectionner le texte, sélectionnez l'option Texte tableau Documents (.txt / .md).
- Sous Textes > Texte Tableau Documents (.txt / .md), entrez l' ld identifiant du texte saisi dans le tableau Documents (par exemple 'text.txt').
Pour tous les textes :
- Avec une annotation spécifique, vous pouvez appliquer le style gras aux textes. Pour ce faire, insérez les textes souhaités entre les doubles astérisques ** .
Exemples :- **texte** = texte
- **texteA texteB** texteC = texteA texteB texteC
- Si les valeurs suivantes (en anglais) sont saisies dans les lignes de texte, elles seront remplacées par les valeurs correspondantes :
- <Account>: compte du membre
- <NamePrefix> : préfixe du membre
- <FirstName>: prénom du membre
- <FamilyName>: nom du membre
- <OrganisationName> : organizzazione del socio
- <Address>: adresse du membre
- <AddressExtra> : adresse supplémentaire
- <Region> : région/état ou province
- <Country> : nation
- <Amount>: montant des dons
Texte de la lettre ( texte Markdown)
Markdown est un langage qui permet de créer du texte formaté à l'aide d'un éditeur de texte standard et d'une syntaxe facile à écrire et à lire.
Pour utiliser Markdown, le Plan Advanced de Banana Comptabilité Plus est nécessaire.
Il existe deux façons de saisir et d'utiliser du texte Markdown.
- Saisir le texte dans les dialogue paramètres
- Saisissez le texte dans les champs Texte 1, Texte 2, Texte 3 ou Texte 4.
Il est possible d'ajouter jusqu'à quatre textes. - Sous Imprimer texte > Sélectionner texte, sélectionnez le texte à utiliser.
- Sous Imprimer texte, affichez l'option Utiliser Markdown.
- Saisissez le texte dans les champs Texte 1, Texte 2, Texte 3 ou Texte 4.
- Saisissez le texte dans le tableau Documents.
- Utilisez l'Editeur Markdown pour ajouter un document, en sélectionnant le type Texte formaté Markdown (text/markdown)..
Il n'y a pas de limites, vous pouvez ajouter autant de texte que vous le souhaitez. - Le nom du fichier dans la colonne Id doit se terminer par ".md" (par exemple "texte.md").
- Dans le dialogue paramètres :
- Sous Imprimer texte > Sélectionner texte, sélectionnez l'option Texte tableau Documents (.txt / .md).
- Sous Textes > Tableau de texte Documents (.txt / .md), entrez l Id 'identifiant du texte markdown saisi dans le tableau Documents (par exemple, "texte.md").
- Utilisez l'Editeur Markdown pour ajouter un document, en sélectionnant le type Texte formaté Markdown (text/markdown)..
Pour tous les textes :
- Si les valeurs suivantes (en anglais) sont saisies dans les lignes de texte, elles seront remplacées par les valeurs correspondantes :
- {{Account}} : compte du membre
- {{NamePrefix}} : préfixe du membre
- {{FirstName}} : prénom du membre
- {{FamilyName}} : nom de famille du membre
- {{OrganisationName}} : organisation du membre
- {{Address}} : adresse du membre
- {{AddressExtra}} : adresse supplémentaire
- {{Region}} : région/état/province
- {{Country}} : nation
- {{Currency}} : devise
- {{Amount}} : montant total des dons
Exemples d'impression
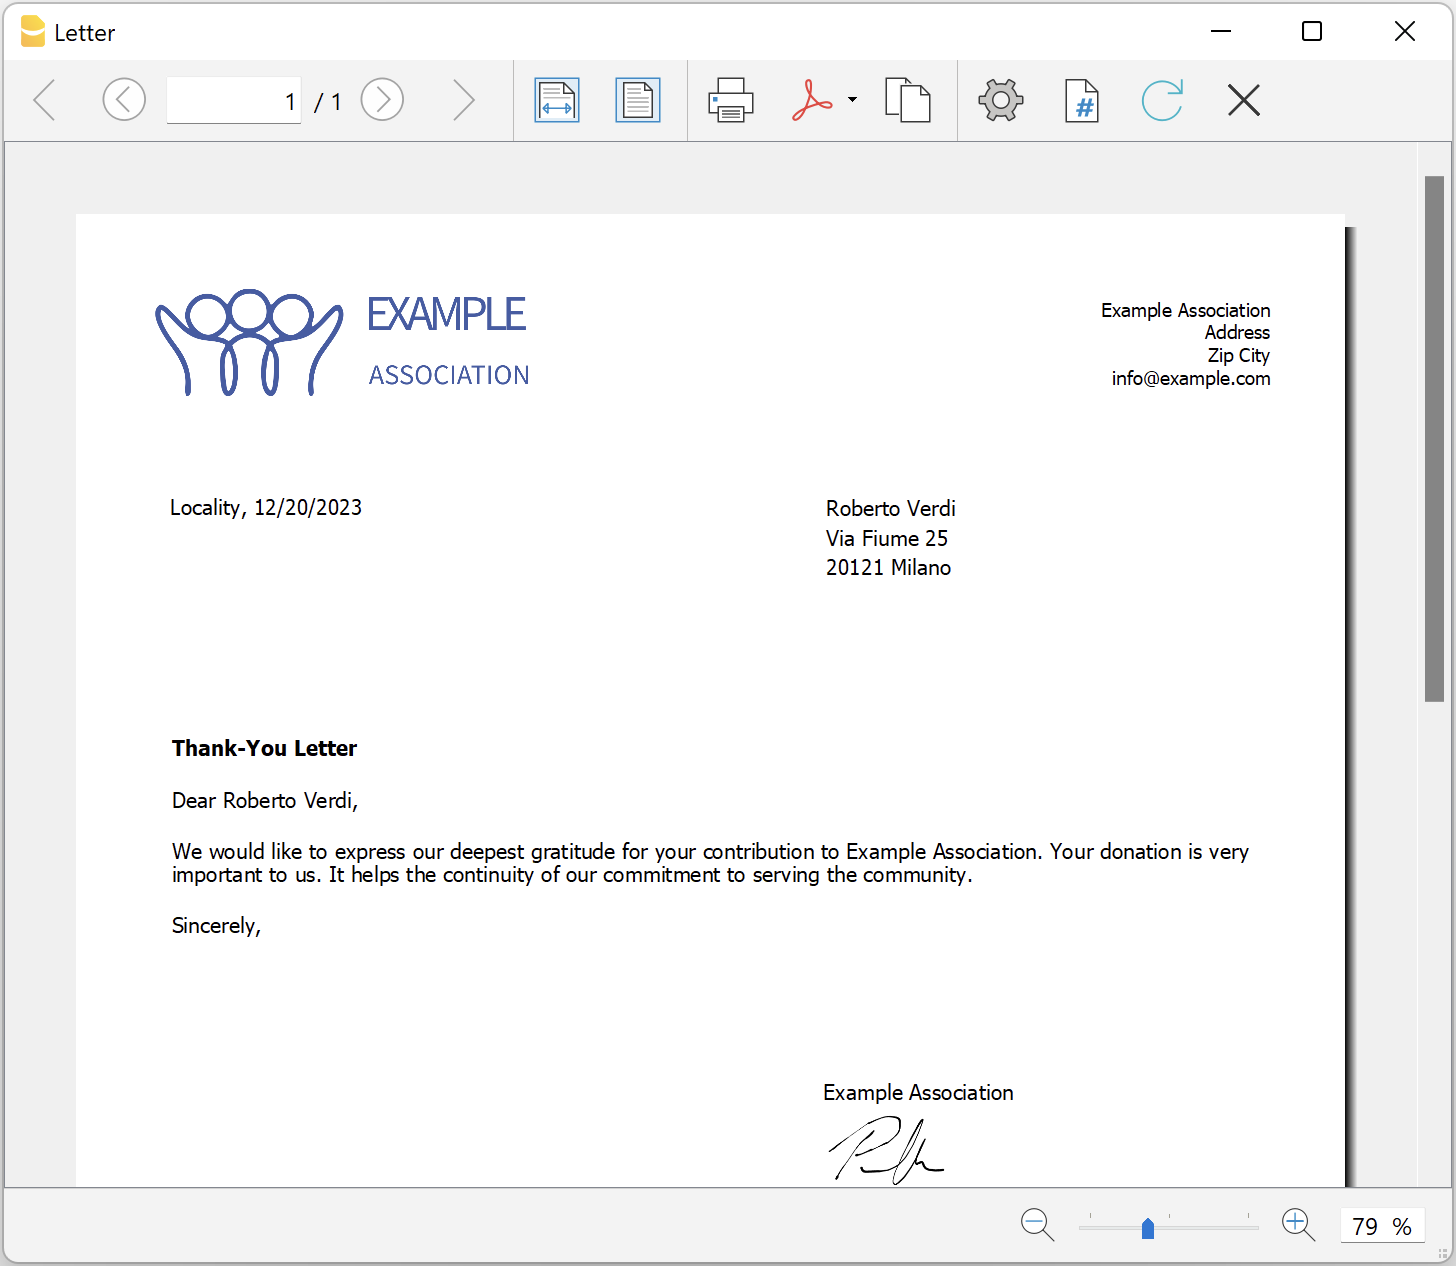
Printing receipts from cash book transactions
Printing receipts from cash book transactionsThis extension prints payment receipts based on transactions from cash book accounting file.
Example of a payment receipt:
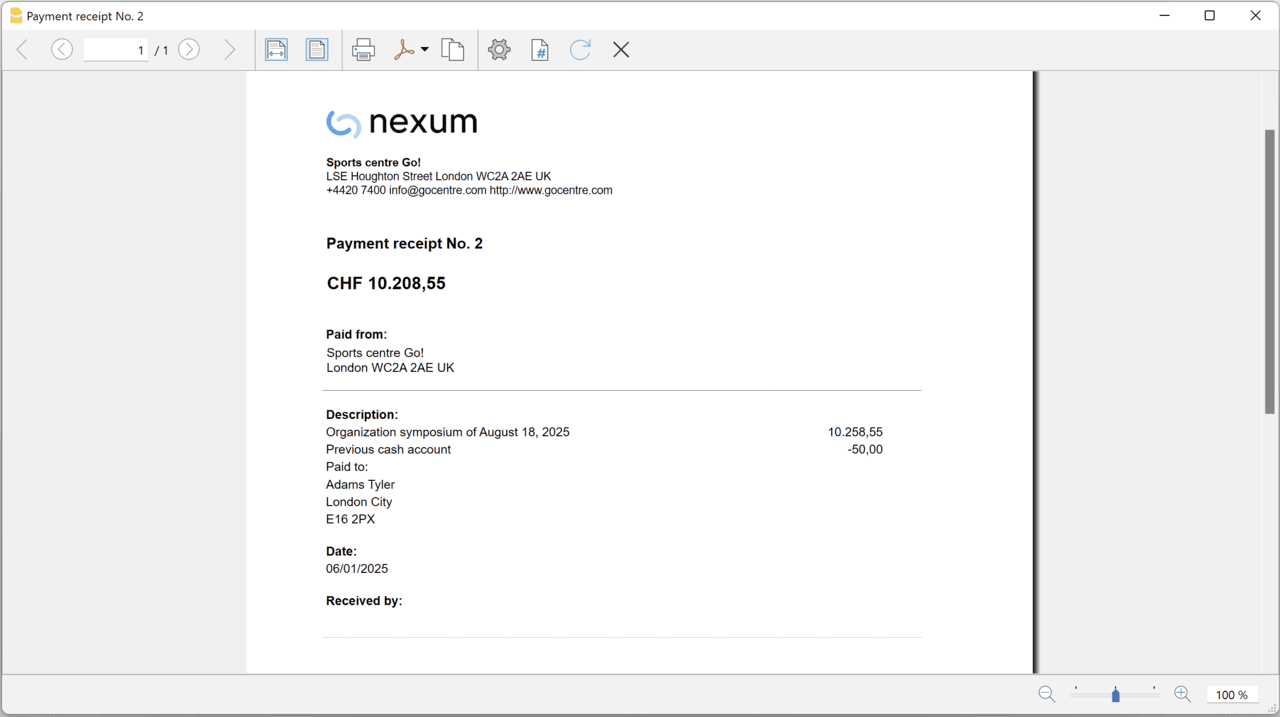
The program prints the receipt using the following logic:
- It takes all the lines with the same Doc Number, of the lines where the cursor is positioned.
- It prints the document number in the "Payment receipt No: "
- It prints the amount by summing all the amounts.
- It prints the Descriptions in different lines.
with the text of the Description column of all the transactions that have the same doc number.
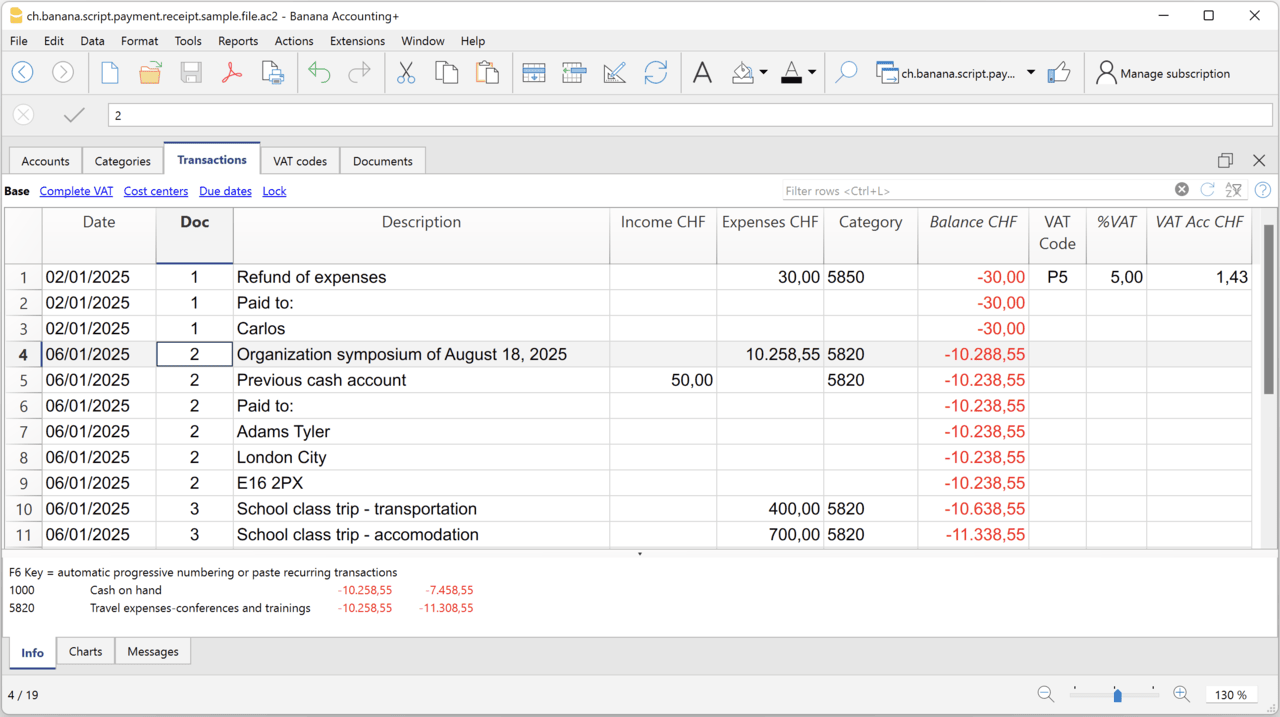
Example file
To created the receipts:
- Open a Cash Book file:
- Or download the example ch.banana.script.payment.receipt.sample.file.ac2 and open it.
- Positions on the line of the transaction group you wish to print.
- From the Extensions menu select the Printing receipts from cash book transactions.
Settings and properties
Prior to printing the receipt you can set the
Extension properties
You can set the following parameters from the menu Extensions > Manage Extensions, select the Printing receipts from cash book transactions extension and click on Settings.
- Include page header (1=yes, 0=no)
The logo and the address information can be included as header of the page. - Automatic date (1=yes, 0=no)
The date of the transaction is used. - Font type
The font type of the texts (Arial, Helvetica, Times New Roman, ...)
Address
Set your address from the menu File > File and accounting properties > Address.
Header logo
A logo for the header can be added as attachment in the Documents table.
- Add the Documents table to the Banana Accounting file.
If it is not already present you need to add the Documents table in the Banana document with the menu command Tools > Add new features > Add document table. - Add a row in the Documents table.
- In the ID column, enter "logo".
- In the Attachments column, double click on the cell and select Image, then choose the logo image you want to use.
Entering transactions
Cash book transactions are entered as usual in the Transactions table.
- Transactions are considered to belong to the same group when they have the same doc number.
- Paid to
- You can enter the text you want to display on the printout (e.g. "Paid to:").
- You can also enter text in bold by enclosing it in double asterisks ** (e.g. **Paid to:**)
- You can enter the text "#paidto" (without quotes) to let the program insert a blank line followed by the text in bold and in the language of the accounting file (it, fr, de, en, nl).
Report Balance and Profit & Loss with transactions details
Report Balance and Profit & Loss with transactions detailsThis extension creates a Balance Sheet and Profit & Loss report with transactions details for each account.
Install the extension
To install the extension:
- Open Banana Accounting Plus.
- Menu Extensions > Manage Extensions.
- In the search field enter Report Balance and Profit & Loss with transactions details.
- From the extensions list select Report Balance and Profit & Loss with transactions details.
- Select the extension and click Install.
- Click Close to close the window.
Create the report
To creare the report:
- Open an accounting file.
- From the Extensions menu select the Report Balance and Profit & Loss with transactions details.
- Select the financial report you want to print:
- Assets / Liabilities
- Income / Expenses
- All
Example of assets details: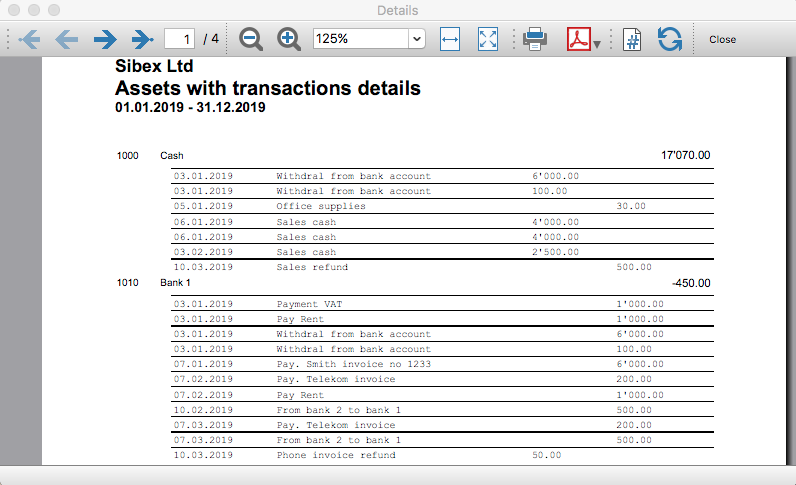
Example of liabilities details: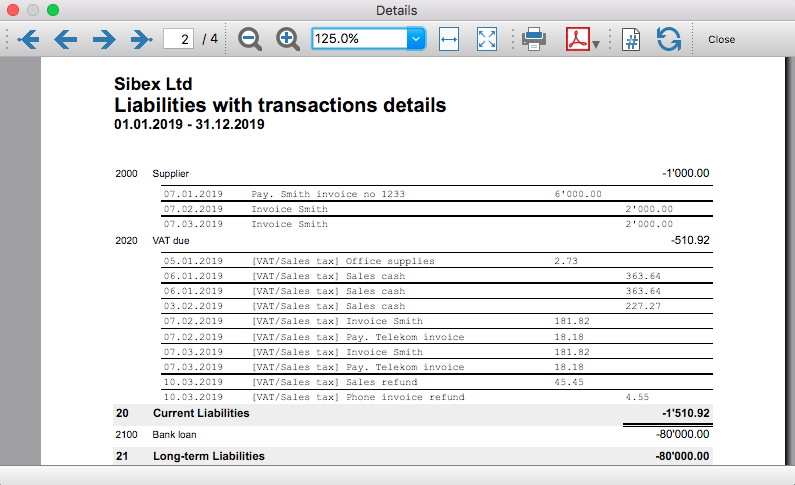
Example of income details: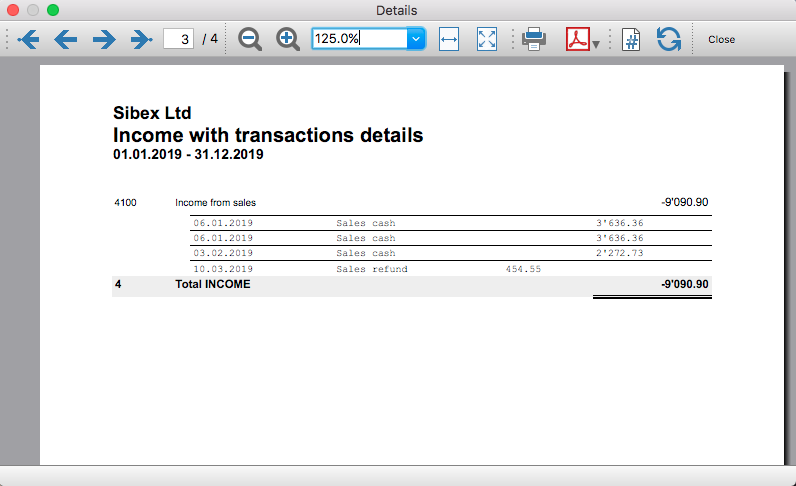
Example of expenses details: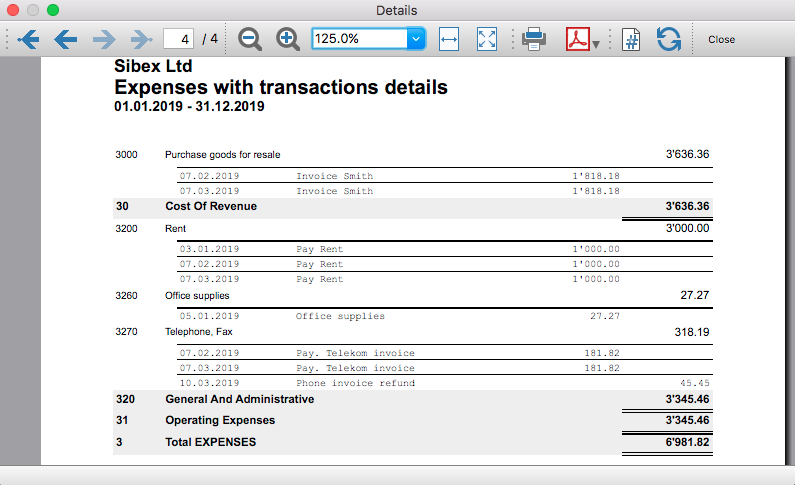
Transaction Voucher (Banana+)
Transaction Voucher (Banana+)Accounting settings
From menu File > File and accounting properties > Accounting Tab, enter the project number/name in the Header Left field.
How it works
- For each transaction of the Transactions table enter the voucher number in the Doc column.
- From the Transactions table of the accounting file select a row with the desired voucher number you want to create the report.
The voucher number is taken from the selected row where the cursor is positioned, but you can also change it manually into settings dialog. - Launch the extension from the menu Extensions > Transaction Voucher (Banana+).
- In the settings dialog window enter the required information.
- Logo
Check to include the logo in the header.
The logo is defined with the command File > Logo setup where you can also set the size, choose how to align it (left, centre, right). - Logo-Name
Enter the name of the logo customisation defined in the menu File > Logo setup, respecting upper and lower case. - Title
- Voucher number
- Paid to
- Paid in
- Cheque No.
- Payment Received by
- Paid by
- Prepared by
- Verified by
- Recommended by
- Approved by
- Logo
- All the values entered are saved and proposed the next time.
- The extension will print the information entered in the dialog plus the data of the transaction with the specified Voucher / Doc number.
Transaction Voucher (Helvetas model)
Transaction Voucher (Helvetas model)How it works
- From the Transactions table of the accounting file select a row with the desired Doc number.
- Launch the extension from the menu Extensions > Transaction Voucher (Helvetas model).
- A dialog window requesting some information will appear.
The voucher number is taken from the row selected where the cursor is positioned, but you can change it manually.
Complete all the remaining fields by entering your data and click Ok.
The values entered are saved and proposed the next time. - The extension will print the information entered in the dialog plus the data of the transactions with the specified Voucher / Doc number.
Example of Voucher report:
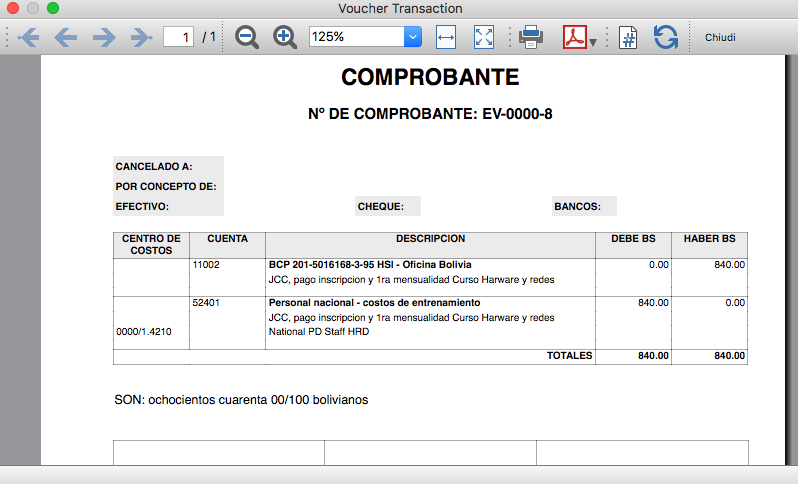
Transaction Voucher (Swiss Red Cross model)
Transaction Voucher (Swiss Red Cross model)Accounting settings
Two settings are required:
- the Header Left
- click menu File > File and accounting properties > Header Left.
The Header Left field must contain the project number and the project name divided by the "-" character (example: "1234 - Abc")
- click menu File > File and accounting properties > Header Left.
- add a small image/logo
- Add the Documents table to the Banana Accounting file.
If it is not already present you need to add the Documents table in the Banana document with the menu command Tools > Add new features > Add document table. - In the Id column, of the documents table insert transaction_voucher_image.
- In the Attachments column, double click on the cell, select Image and add the desired image.
- Add the Documents table to the Banana Accounting file.
How it works
- From the Transactions table of the accounting file select a row with the desired Doc number.
For example: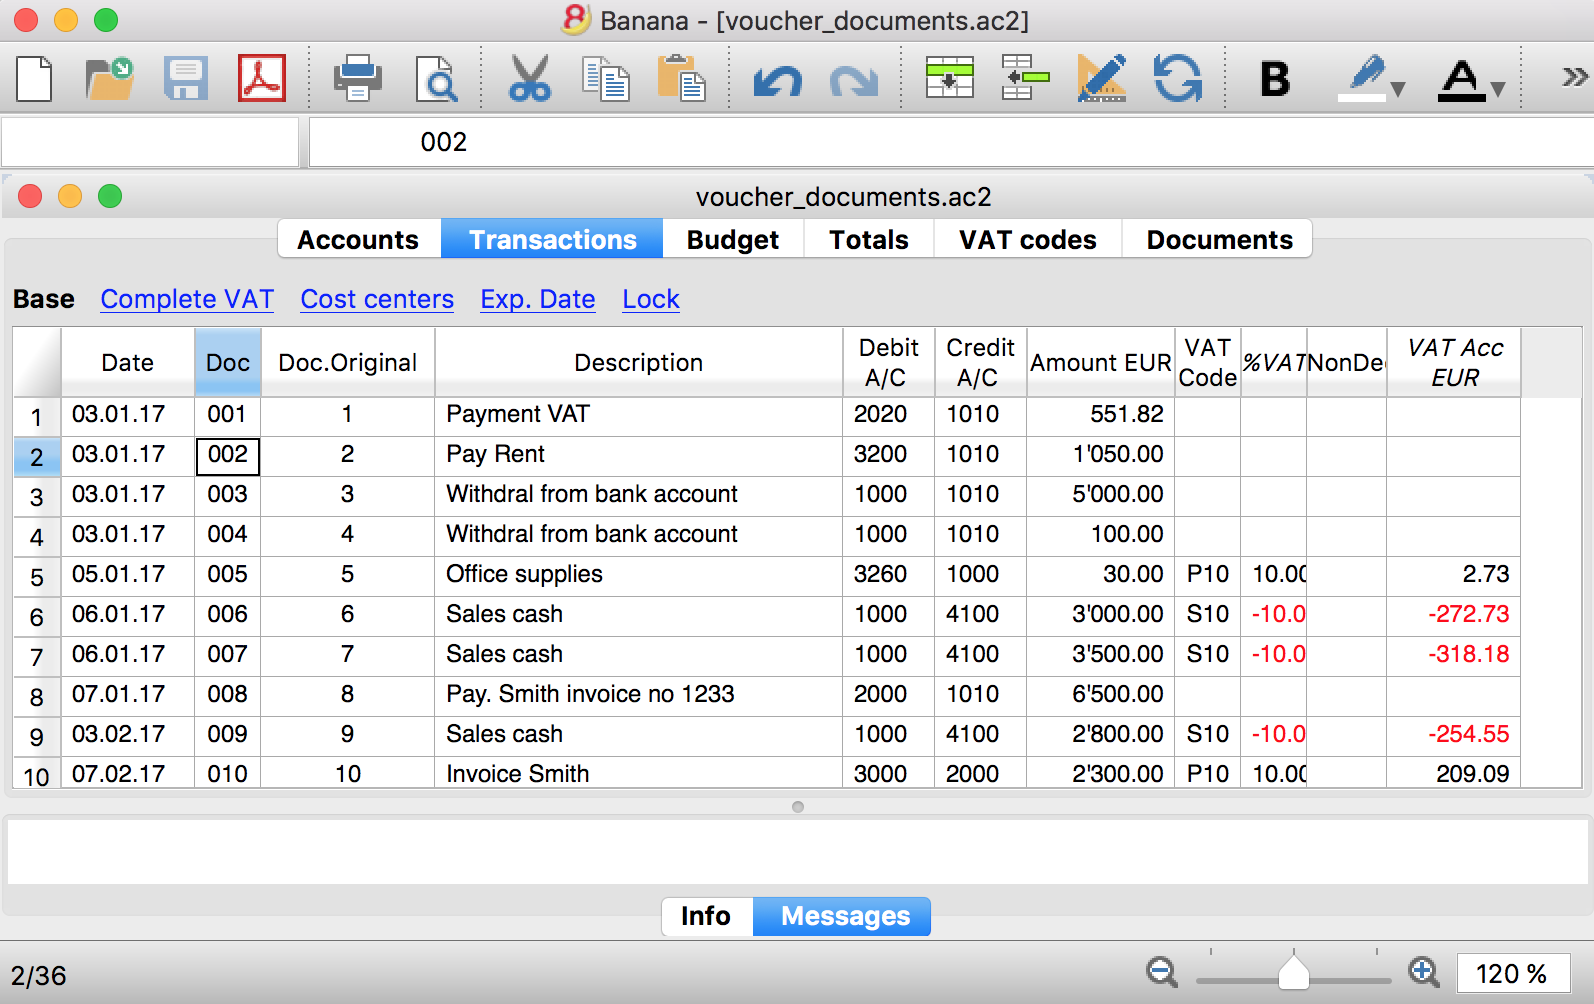
- Launch the extensions from the menu Extension > Transaction Voucher. A dialog window requesting some information will appear.
- The voucher number is taken from the row selected where the cursor is positioned, but you can change it manually.
- Complete all the remaining fields by entering your data and click Ok.
The values entered are proposed the next time.
Dialog example:
- The extension will print the information enterd in the dialog plus the data of the transactions with the specified Voucher / Doc number.
For example:
Trial Balance
Trial BalanceInstall the extension
To install the extension:
- Open Banana Accounting Plus.
- Menu Extensions > Manage Extensions.
- In the search field enter Trial Balance.
- From the extensions list select Trial Balance.
- Select the extension and click Install.
- Click Close to close the window.
Create the report
To creare the report:
- Open an accounting file.
- From the Extensions menu select the Trial Balance.
- Select the period.
For the given period, display a Trial Balance report containing:
- Balance sheet
- Profit & Loss
The details displayed are the following:
- Account
- Account description
- Debit amounts
- Credit amounts
Example of Trial Balance report: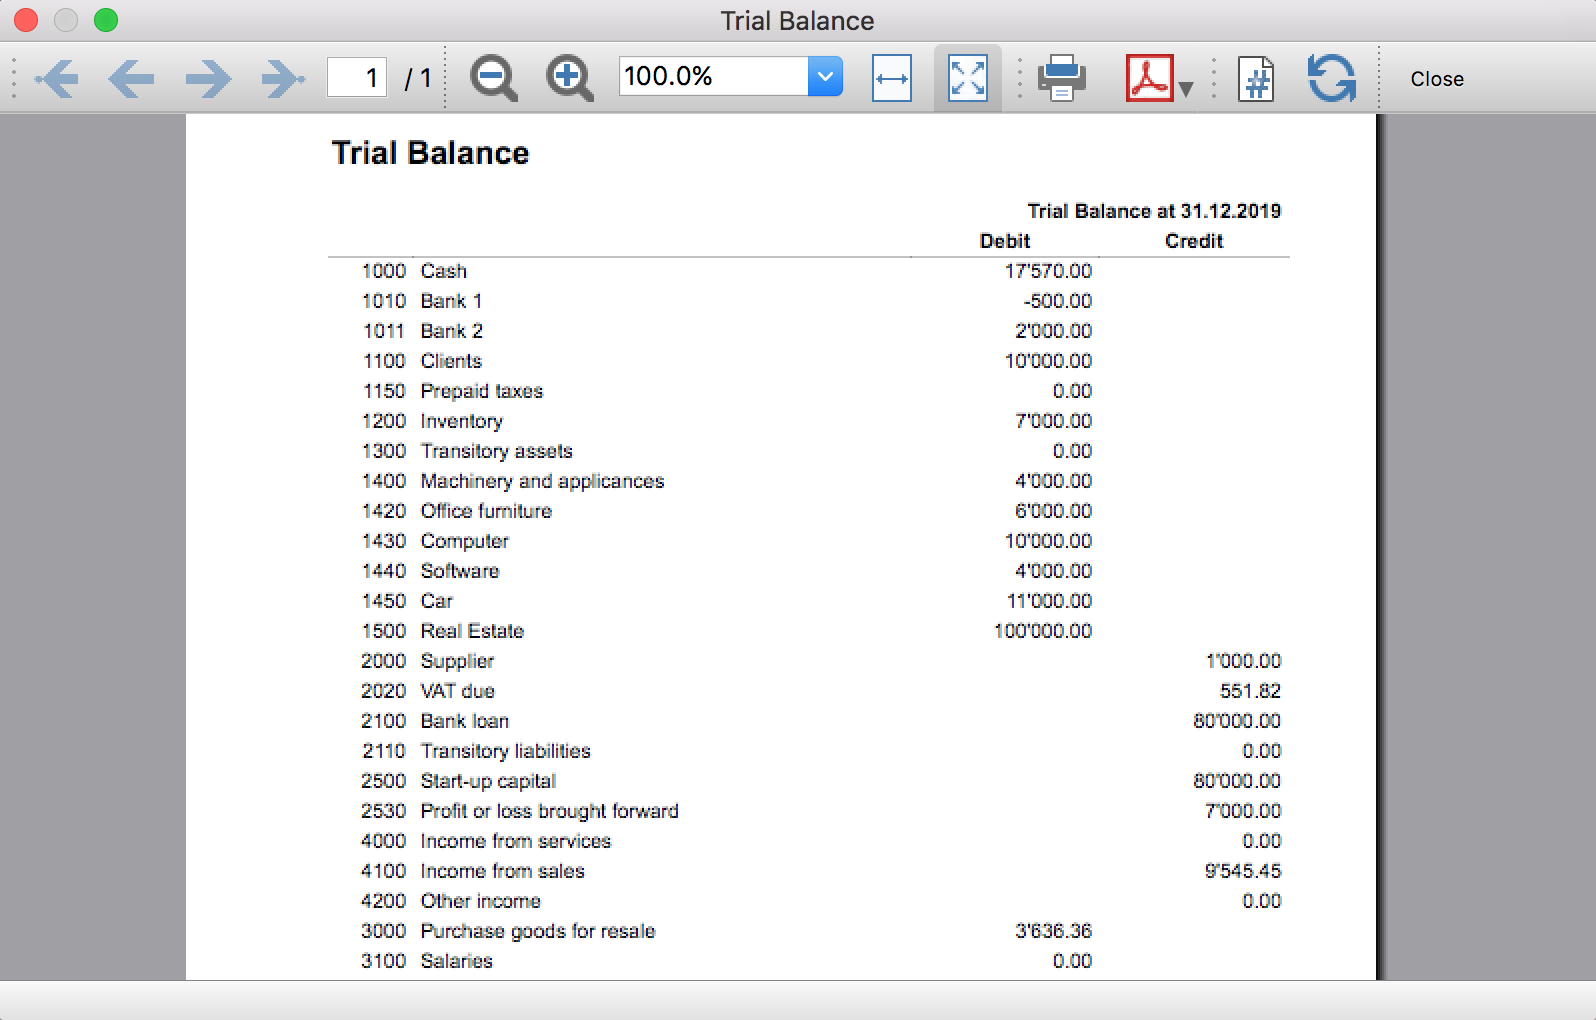
Trial Balance and Blockchain (Quarter periods)
Trial Balance and Blockchain (Quarter periods)This extension creates a report containing the table Accounts and at the end the blockchain for the selected quarter period.
Prerequisites
To use this extension you must download and install Banana Accounting Plus.
Install the extension
To install the extension:
- Open Banana Accounting Plus.
- Menu Extensions > Manage Extensions
- Select Universal as country.
- Select Online > Productivity.
- From the extensions list select Trial Balance and Blockchain (Quarter periods).
- Click Install to install the extension.
- Click Close to close the window.
Create the report
To creare the report:
- Open an accounting file.
- From the menu File > File and accounting properties, in the Header left and Header right fields enter the texts to be printed on the left and right in the page header.
- From the Extensions menu select Trial Balance and Blockchain (Quarter periods).
- In Settings dialogue select the period, set the header texts, the title and font, then click OK to create the report.
The texts of the settings dialog and column headers in the printout are fixed and are in the same language as the Banana file (defined from the menu File > File and accounting properties > Other > Current language). The languages that can be used are Italian, French, German and English.
Settings dialogue
Run the extension from the menu Extensions > Trial Balance and Blockchain (Quarter periods).
The extension Settings dialogue will open. From here you can choose some parameters to print the report.
- Period.
Select a period from the list. The periods are divided into three quarters. - Header left text.
Insert another text to be printed on the left side of the page header. - Header right text.
Insert another text to be printed on the right side of the page header. - Title.
Insert text to be printed as title of the page. - Font family.
Insert the font type. - Font size.
Insert the font size for all the page texts. - Title font size.
Insert the font size for the title.
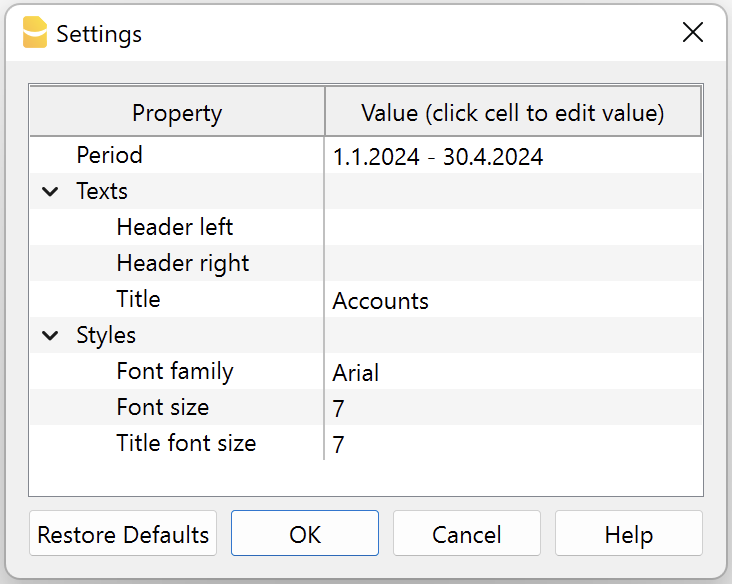
Print example
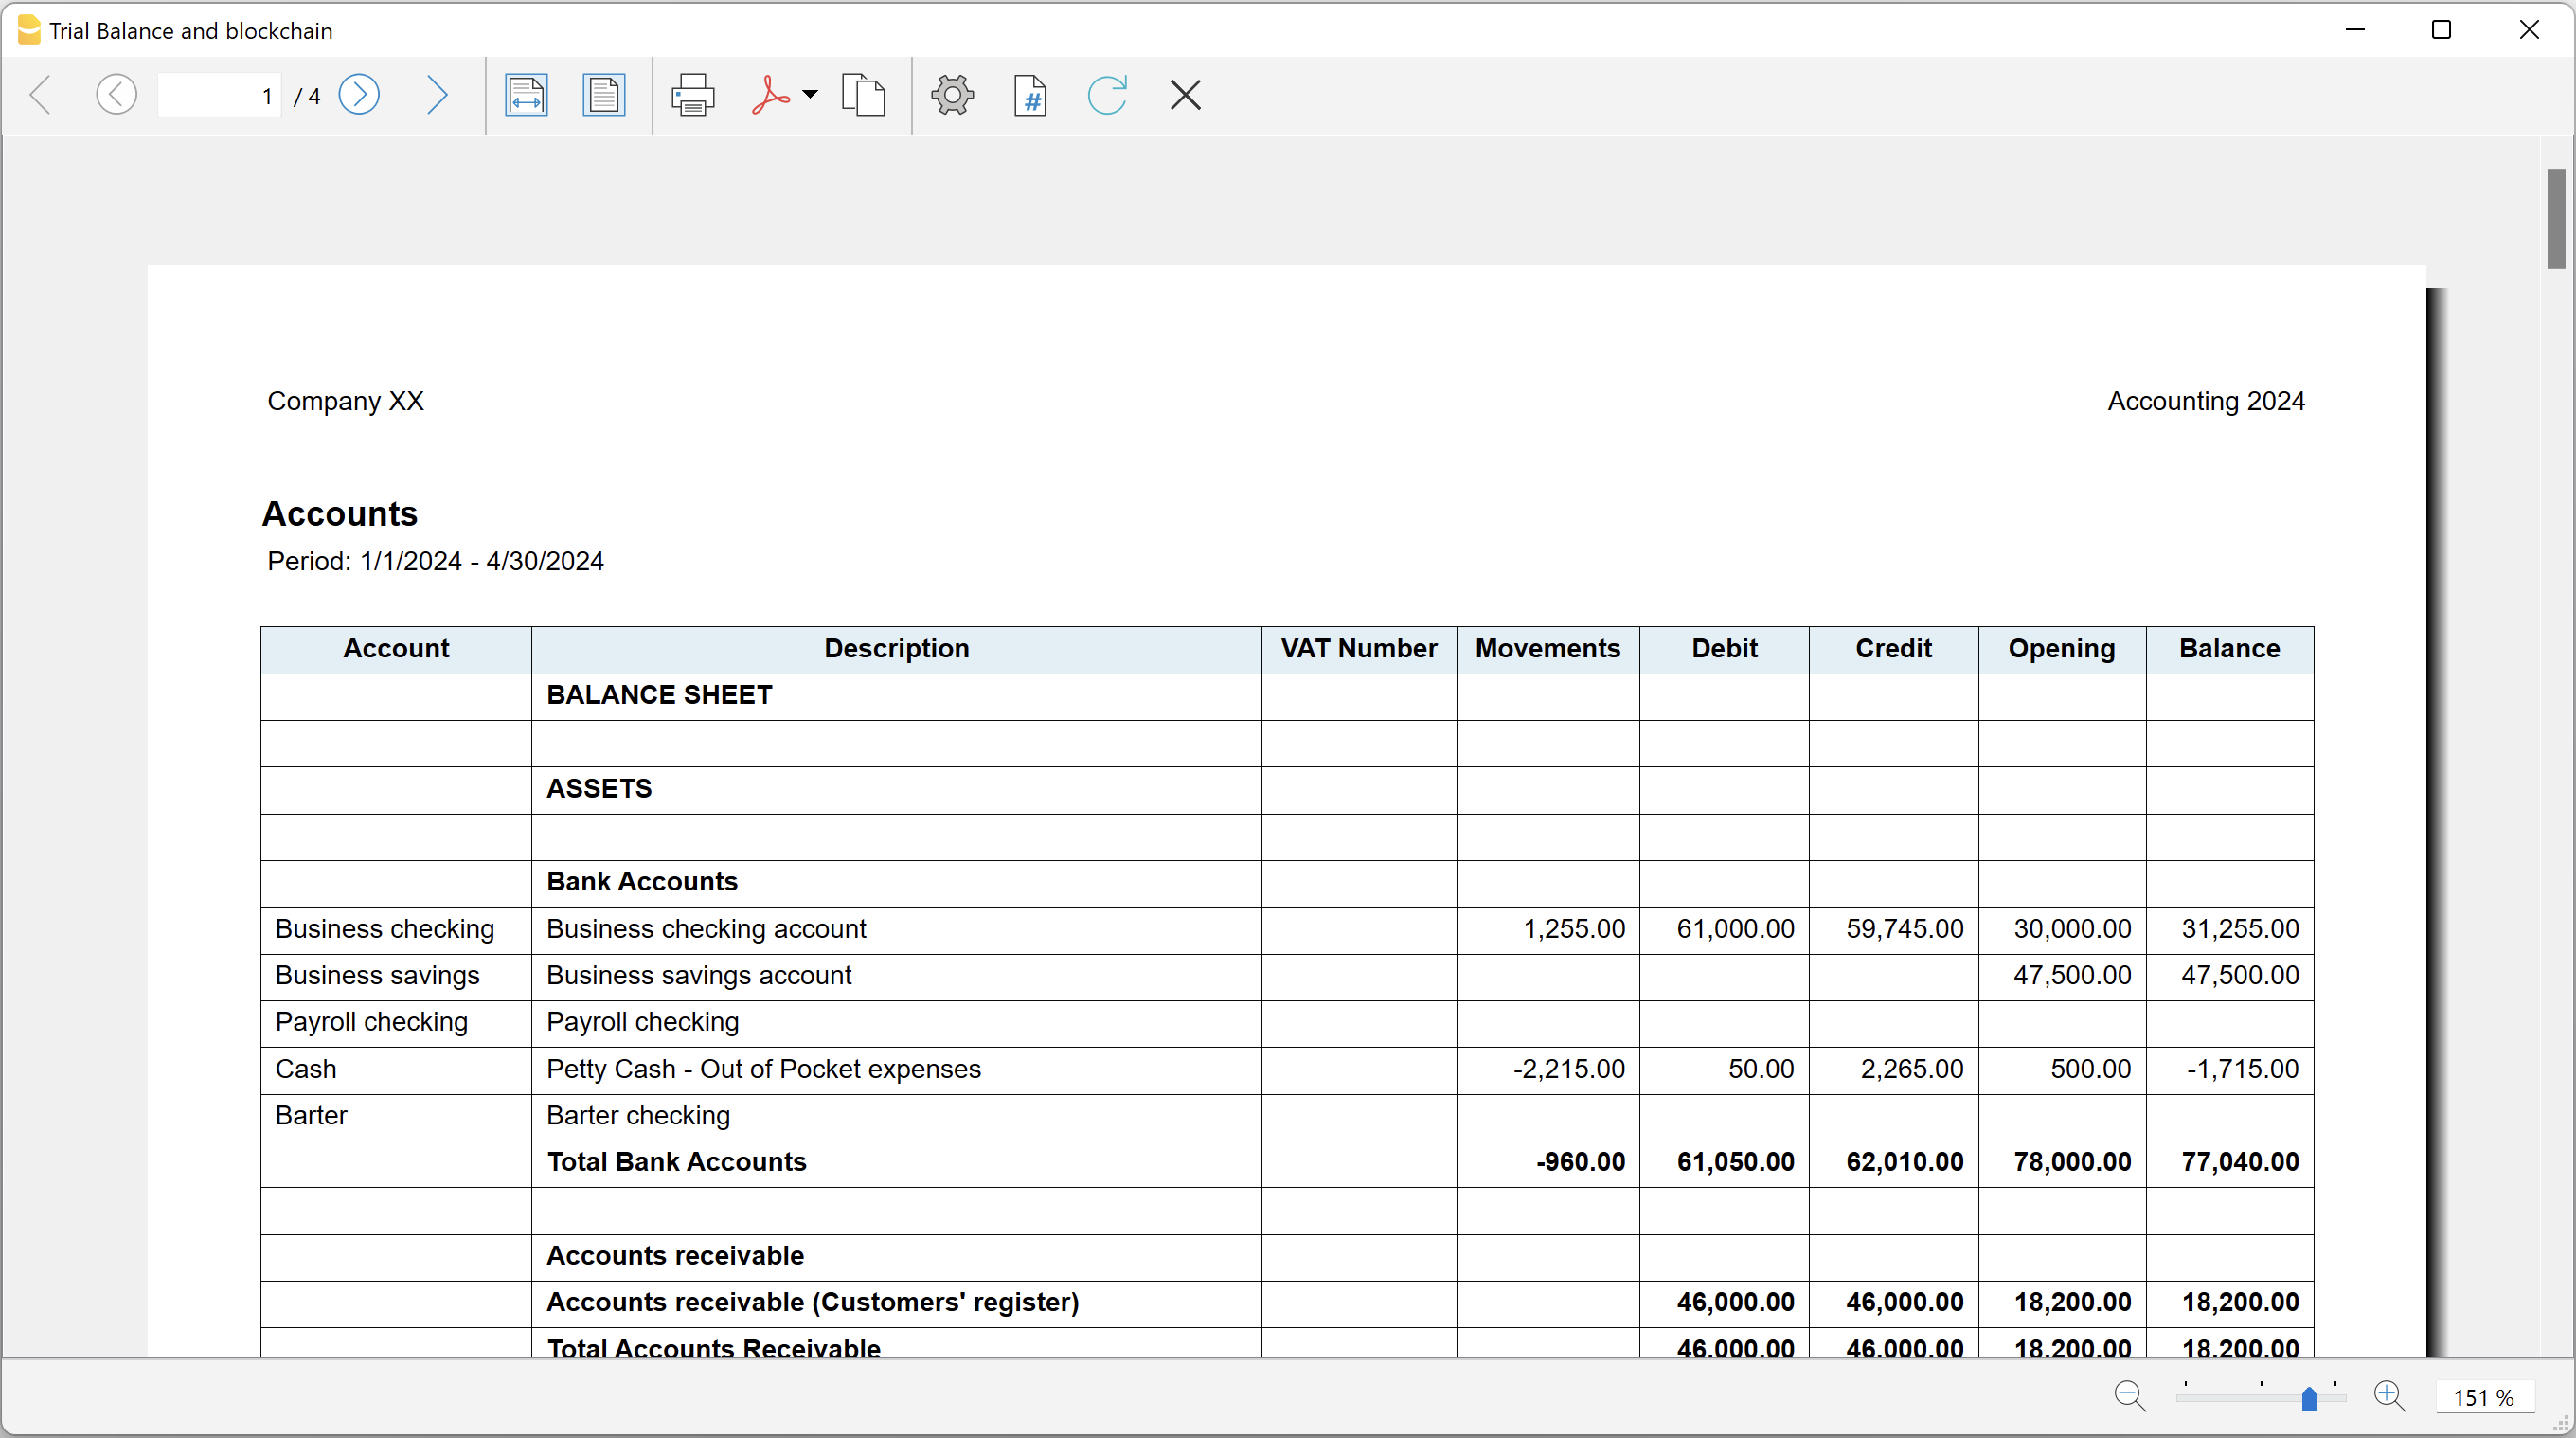
Trial Balance with transaction's lock blockchain information
Trial Balance with transaction's lock blockchain informationThe extension creates a report containing the table Accounts and the blockchain information regarding the transaction lock of the previous period and of the current period.
This printout has been conceived for a customer that has central SAP accounting and use Banana Accounting locally, to keep accounting for at more than 40 schools. Each school keep their own accounting and every 4 months the data is integrated in the main accounting system.
In order to assure that the information is perfectly synchronized:
- The school lock the transactions so that each movement is marked with a blockchain.
- The school print the report using this extension, with the data and the blockchain info of the current and last period.
- Prior to entering the data in the main system, the responsable verify that the blockchain of the last period already entered is the same as the one printed on the current report.
Personal at the schools can easily manage their finance locally and have more details and better control over the spending. Data is only entered in the main system periodically. The organisation have a better accounting system and save a lot of money in training and SAP licenses.
Install the extension
To install the extension:
- Open Banana Accounting Plus.
- Menu Extensions > Manage Extensions
- Select Universal as country.
- Select Online > Productivity.
- From the extensions list select Trial Balance with transaction's lock blockchain information.
- Click Install to install the extension.
- Click Close to close the window.
Create the report
To creare the report:
- Open an accounting file.
- From the menu File > File and accounting properties, in the Header left and Header right fields enter the texts to be printed on the left and right in the page header.
- From the Extensions menu select Trial Balance with transaction's lock blockchain information.
- In Settings dialogue set header texts, title and font as you want, then click OK.
- In Period dialogue select a period and confirm with OK to create the report.
The texts of the settings dialog and column headers in the printout are fixed and are in the same language as the Banana file (defined from the menu File > File and accounting properties > Other > Current language). The languages that can be used are Italian, French, German and English.
Settings dialogue
Run the extension from the menu Extensions > Trial Balance with transaction's lock blockchain information.
The extension Settings dialogue will open. From here you can choose some parameters to print the report.
- Header left text.
Insert another text to be printed on the left side of the page header. - Header right text.
Insert another text to be printed on the right side of the page header. - Title.
Insert text to be printed as title of the page. - Font family.
Insert the font type. - Font size.
Insert the font size for all the page texts. - Title font size.
Insert the font size for the title.
Print example
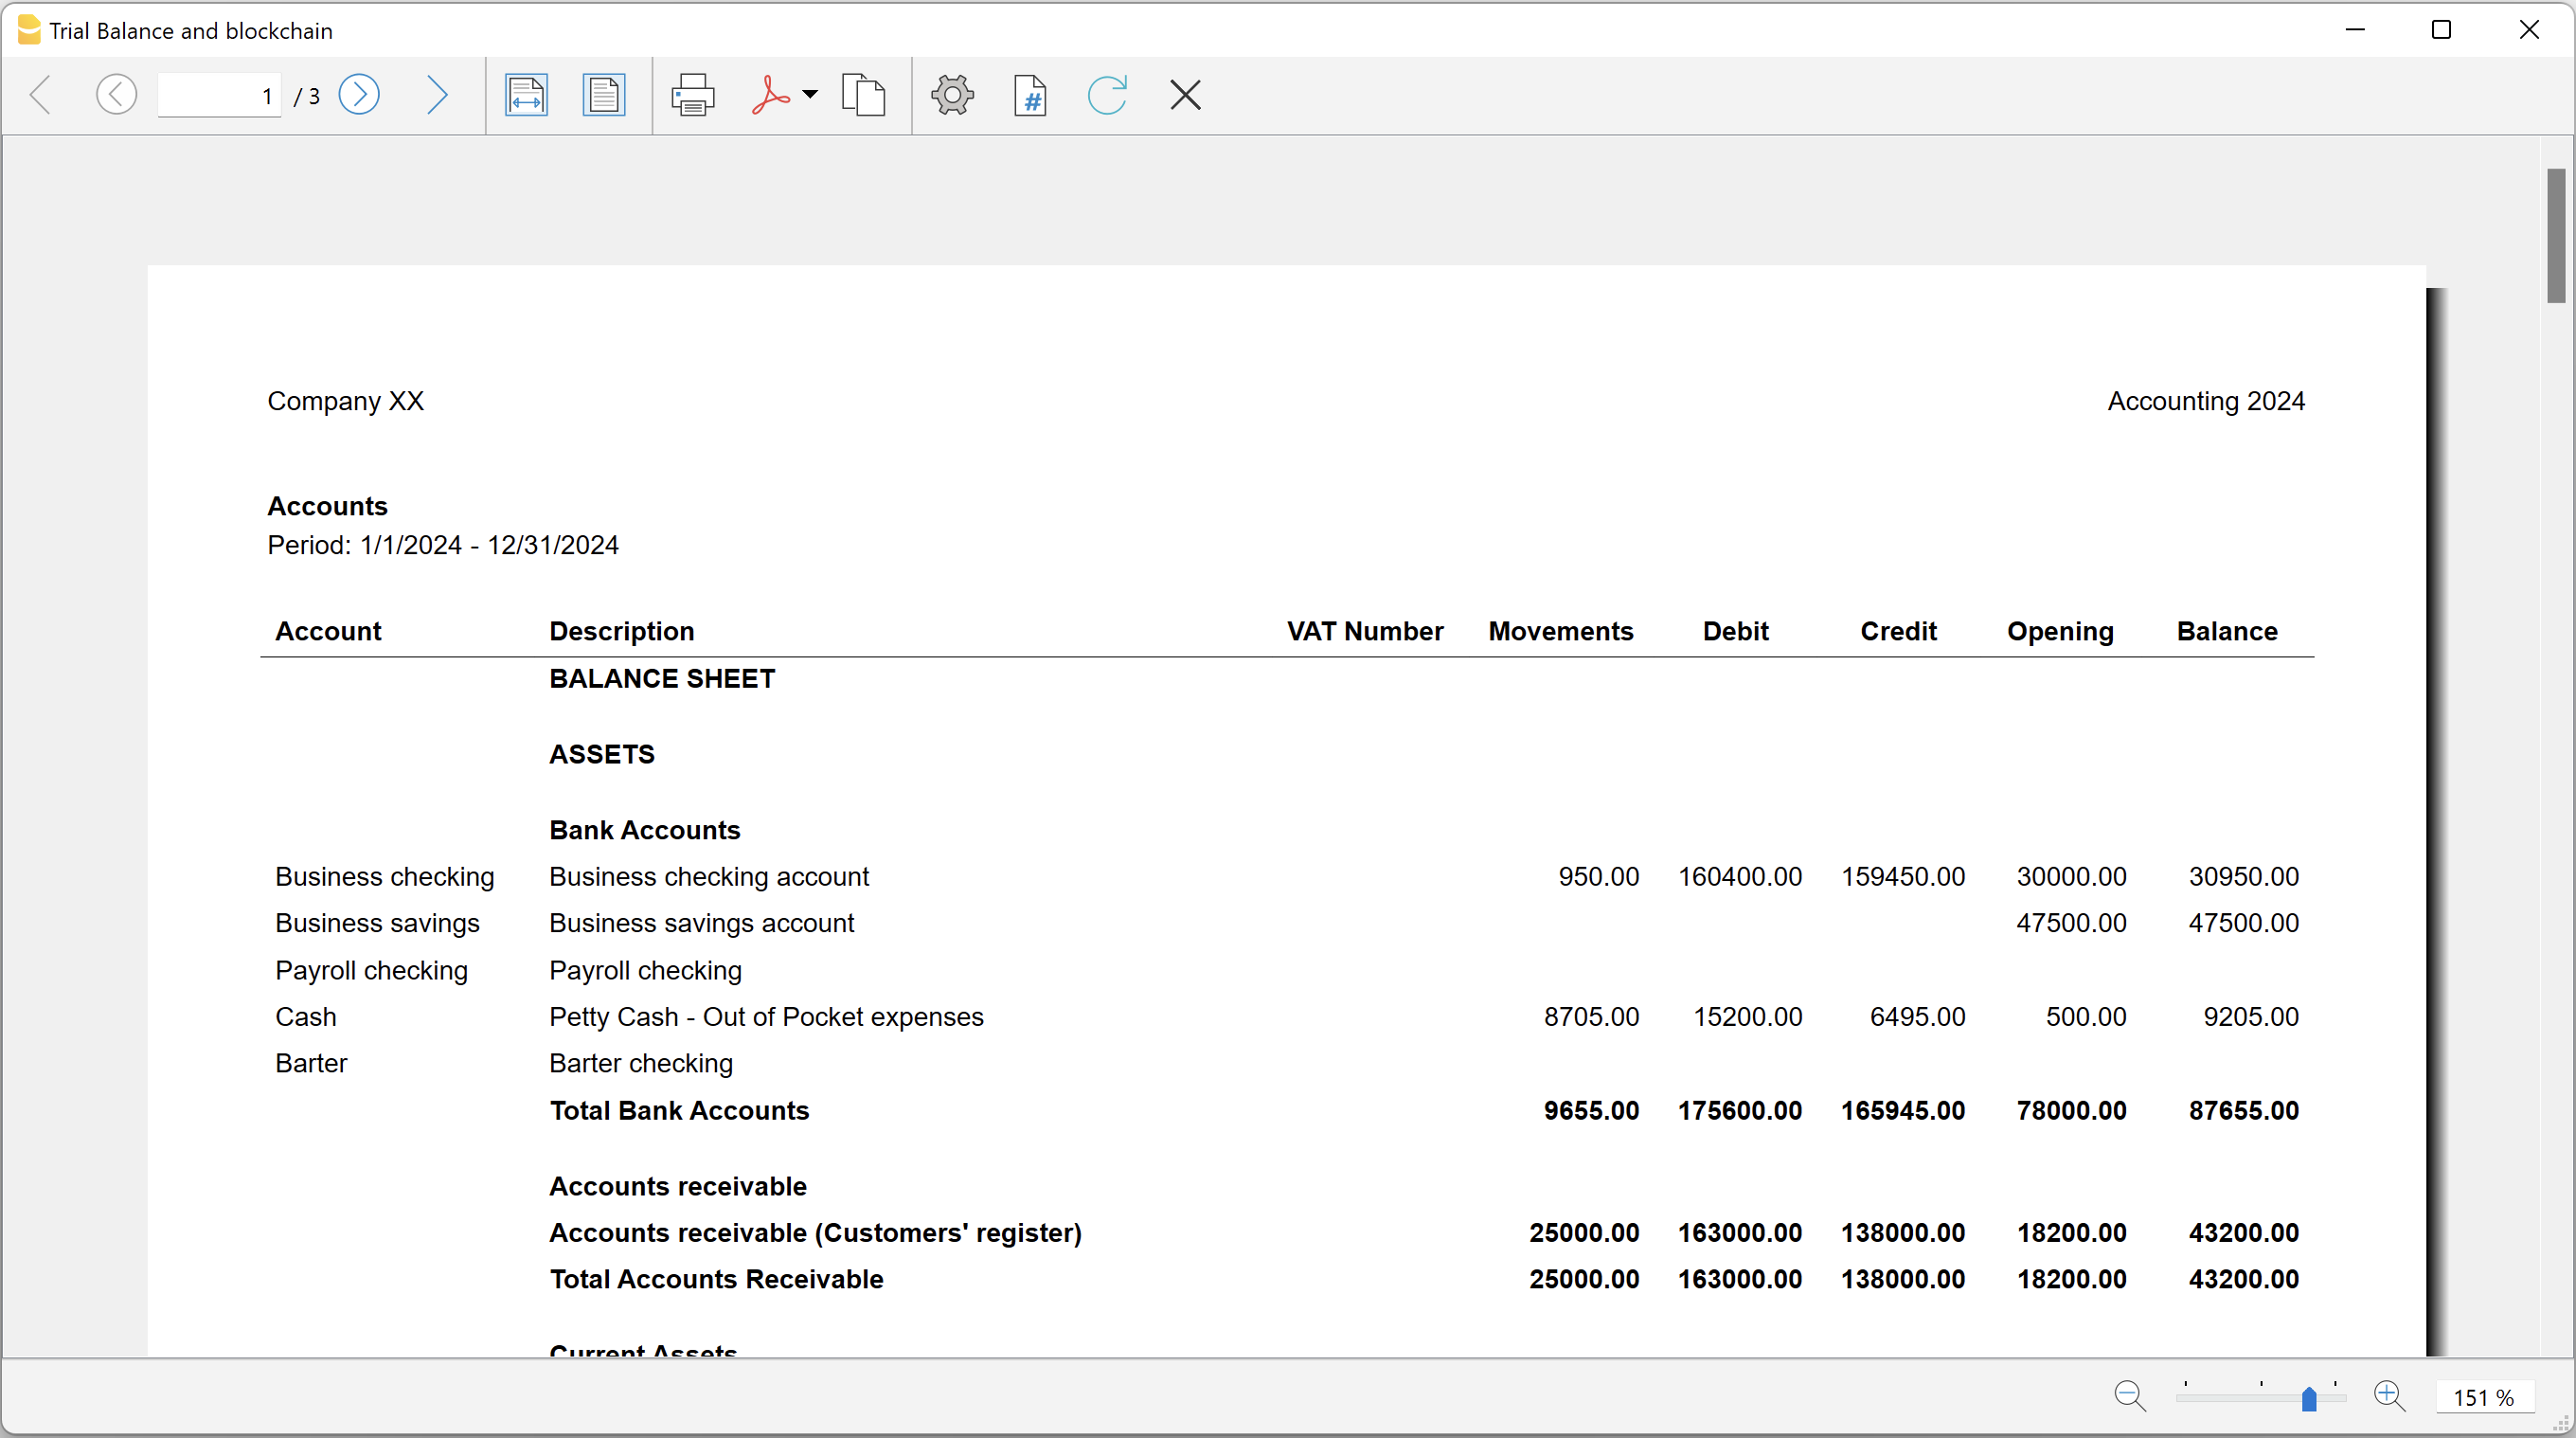
Blockchain row explanation:
- Date until which transactions are locked.
- Date of the last transaction.
- Number of locked transactions.
- Progressive hash of last locked transaction.
Utilities Extensions for accounting
This section covers general utility extensions for accounting.
Table of contents
- Compare current with other accounting file
- Calculate interest on account (exact days 365/365)
- Update Dates in the accounting file
- Invoice from member fee (Banana 9)
- Invoice from member fee (Banana+)
- Printing receipts from cash book transactions
- Reconcile account with mt940/ISO20022 file
- Duplicate transaction checking
Calculate interest on account (exact days 365/365)
Calculate interest on account (exact days 365/365)Install the extension
To install the extension:
- Open Banana Accounting Plus.
- Menu Extensions > Manage Extensions.
- In the search field enter Calculate interest on account (exact days 365/365).
- From the extensions list select Calculate interest on account (exact days 365/365).
- Select the extension and click Install.
- Click Close to close the window.
Create the report
To creare the report:
- Open an accounting file.
- From the Extensions menu select Calculate interest on account (exact days 365/365).
- Enter the account number.
- Select the period.
- Enter the interest rate on debit balance.
- Enter the interest rate on credit balance.
A window with results is displayed. You can copy, save and print the results. The transactions list can be paste into the table Transactions.
Compare current with other accounting file
Compare current with other accounting fileInstall the extension
To install the extension:
- Open Banana Accounting Plus.
- Menu Extensions > Manage Extensions.
- In the search field enter Compare current with other accounting file.
- From the extensions list select Compare current with other accounting file.
- Select the extension and click Install.
- Click Close to close the window.
Compare two accounting files
To compare two accounting files:
- Open an accounting file.
- From the Extensions menu select Compare current with other accounting file.
- Select a second accounting file to compare.
The differences are reported as messages, when you click on it you go to the row.
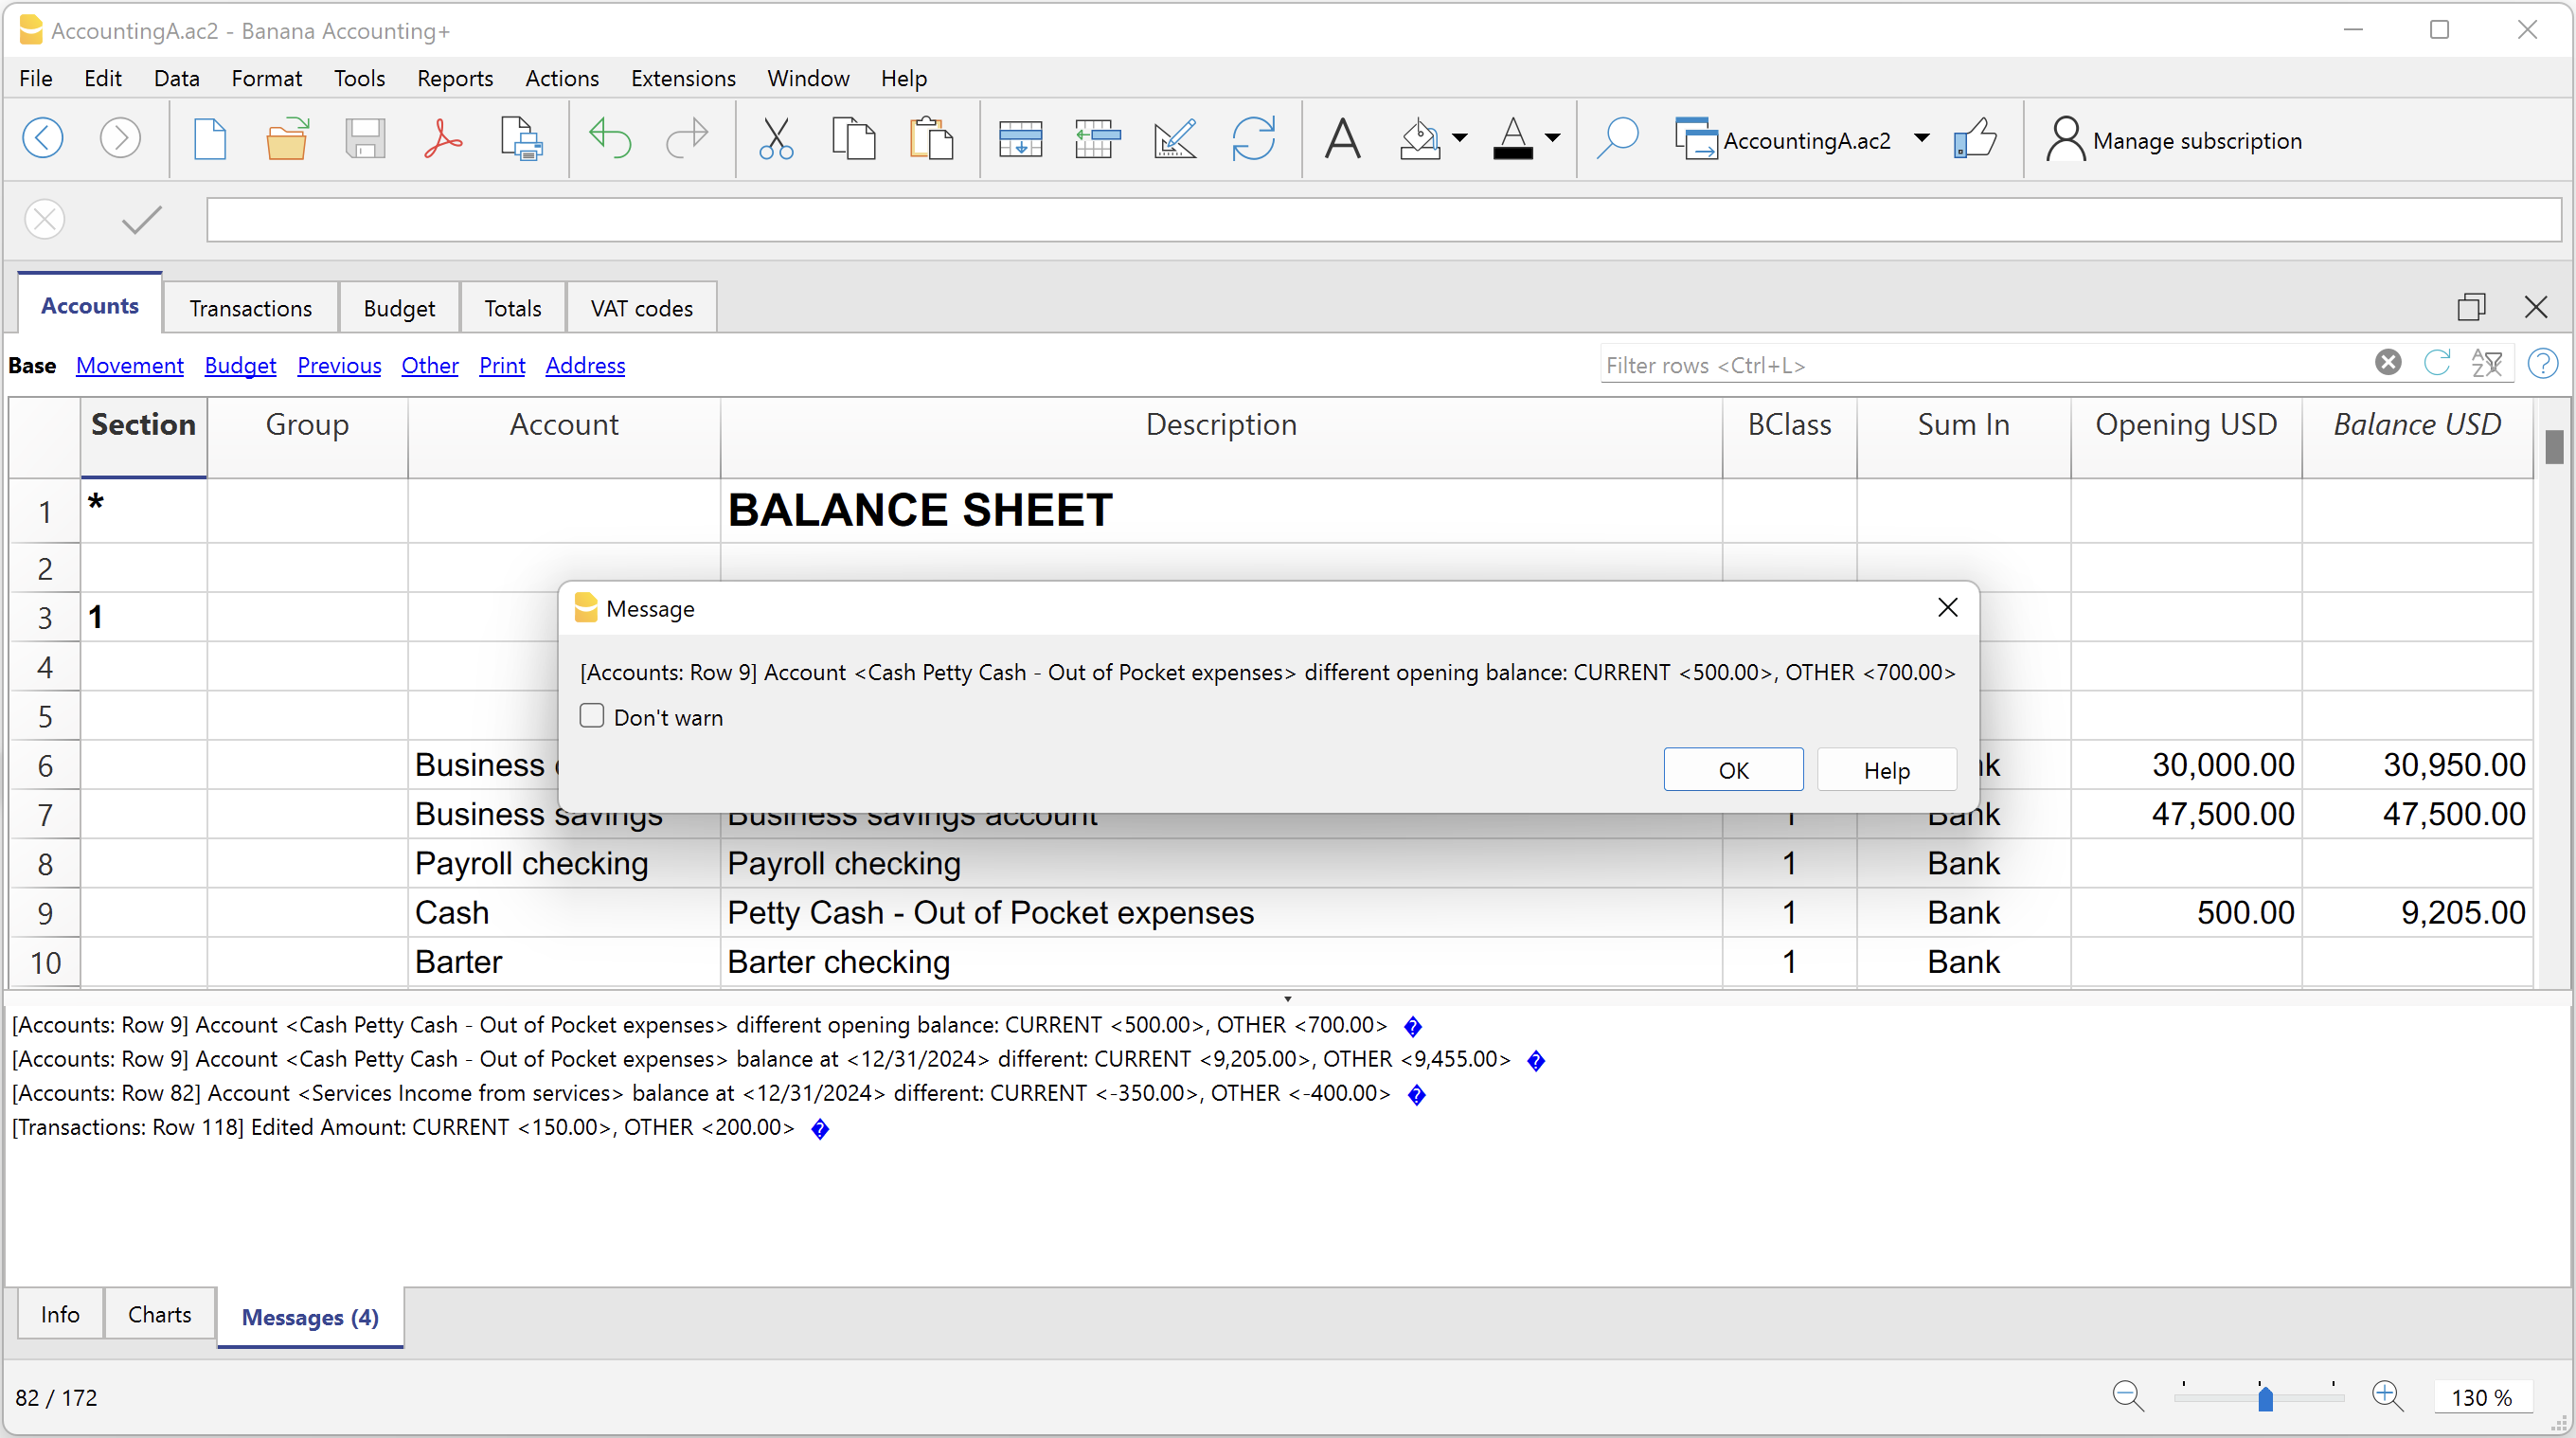
Create invoice transactions from member fee (Banana 9)
Create invoice transactions from member fee (Banana 9)Prerequisites
- Double-entry accounting file with normal accounts for members/customers is required.
Install the extension
To install the extension:
- Open Banana Accounting.
- Menu Extensions > Manage Extensions.
- In the search field enter Create invoice transactions from member fee (Banana 9).
- From the extensions list select Create invoice transactions from member fee (Banana 9).
- Select the extension and click Install.
- Click Close to close the window.
Add the MemberFee column
- Open the Accounts table (Address view).
- Activate the MemberFee column (the column already exists, it just needs to be activated).
- For each member/customer use the MemberFee column to enter the invoice amount.
Create invoice transactions
To creare the invoice transactions:
- Open an accounting file.
- From the menu Account1 select Import to accounting.
- As import option select Transactions.
- From the list select the Create invoice transactions from member fee extension.
- In the File name field, click Browse and select the current open accounting file.
- Click OK.
- Enter the invoice start number.
- Enter the revenue account.
- Enter the transaction description.
- The Import transactions opens, confirm with OK.
The program creates the invoice transactions for all the member/customer that has an amount in the MemberFee column of the table Accounts.
Create invoice transactions from member fee (Banana+)
Create invoice transactions from member fee (Banana+)Prerequisites
- Banana Accounting Plus.
- Double entry accounting file with Cost Centers accounts (Cc1, Cc2, Cc3) for members/customers is required.
Install the extension
To install the extension:
- Open Banana Accounting Plus.
- Menu Extensions > Manage Extensions.
- In the search field enter Create invoice transactions from member fee (Banana+).
- From the extensions list select Create invoice transactions from member fee (Banana+).
- Select the extension and click Install.
- Click Close to close the window.
Add the MemberFee column
- Open the Accounts table (Address view).
- Activate the MemberFee column (the column already exists, it just needs to be activated).
- For each member/customer use the MemberFee column to enter the invoice amount.
Create invoice transactions
To creare the invoice transactions:
- Open the accounting file.
- From the menu Extensions select Create invoice transactions from member fee (Banana+).
- In the Settings dialogue:
- Set the invoice description.
The text that is displayed on the invoice. This text is automatically followed by first and last name or company name. - Set the starting invoice number.
The first invoice starts whit this number, while all others invoices use progressive numbers.
- Set the invoice description.
- The program shows a dialog with all the invoice transactions that will be added.
- Confirm with OK.
The program creates the invoice transactions for all the members/customers that have an amount in the MemberFee column of the table Accounts.
- Date: the date of the current day.
- Description: text entered in the settings followed by first and last name or company name.
- Amount: the amount defined in the MemberFee column of the Accounts table.
- Cc1 / Cc2 / Cc3: the Cost Center account of the member/customer:
- Cc1 when using cost centers that starts with "."
- Cc2 when using cost centers that starts with ","
- Cc3 when using cost centers that starts with ";"
Duplicate transaction checking
Duplicate transaction checkingInstall the extension
To install the extension:
- Open Banana Accounting Plus.
- Menu Extensions > Manage Extensions.
- In the search field enter Duplicate transaction checking.
- From the extensions list select Duplicate transaction checking.
- Select the extension and click Install.
- Click Close to close the window.
Check for duplicate transactions
To check for duplicate transactions:
- Open an accounting file.
- From the Extensions menu select Duplicate transaction checking.
A transaction is duplicate if another transaction exists with the same amount, the same credit account and the same debit account in a time laps of 3 days.
If a duplicate transaction is found, a message is displayed to the user.
It is possible to skip the check for a transaction: just add a column with the name 'SkipDuplicateCheck' and insert any value (ie.: 'x') to the transaction to skip.
Reconcile account with mt940/ISO20022 file
Reconcile account with mt940/ISO20022 fileThis extension takes as input an electronic bank statemant (MT940 or ISO20022) and compare day by day with the account statements and shows differences.
It is very usefull for finding transactions not recordered or incorrectly recorded.
Install the extension
To install the extension:
- Open Banana Accounting Plus.
- Menu Extensions > Manage Extensions.
- In the search field enter Reconcile account with mt940/ISO20022 file.
- From the extensions list select Reconcile account with mt940/ISO20022 file.
- Select the extension and click Install.
- Click Close to close the window.
Create the report
To creare the report:
- Open the accounting file.
- From the Extensions menu select the Reconcile account with mt940/ISO20022 file.
- Select the electronic bank statement (MT940 or ISO20022).
- Enter the account number.
A window with results is displayed. You can copy, save and print the results.
Update Dates in the accounting file
Update Dates in the accounting fileIn order to change the accounting data, the extension uses the Document Change API. For more information visit How-to update Accounting Dates using Document Change.
Install the extension
To install the extension:
- Open Banana Accounting Plus.
- Menu Extensions > Manage Extensions.
- In the search field enter Update Dates in the accounting file.
- From the extensions list select Update Dates in the accounting file.
- Select the extension and click Install.
- Click Close to close the window.
Change accounting dates
To change accounting dates using the extension:
- Open an accounting file.
- From the Extensions menu select the Update Dates in the accounting file.
- A confirmation window dialogue shows all the sections and tables of the accounting where dates will be changed.
- Confirm with OK to apply the changes to the accounting file.
[UNI11] Layout 11 Facture programmable (Banana+)
[UNI11] Layout 11 Facture programmable (Banana+)Mise en page pour l'impression de la facture de Banana Comptabilité hautement personnalisable et programmable.
Vous pouvez facilement adapter l'impression des factures à vos souhaits, décider des éléments à imprimer, modifier la description des textes.
Conditions préalables
Personnalisation des impressions de factures
La mise en page de l'impression des factures est déjà définie et prêt à l'emploi . Toutefois, vous pouvez le personnaliser si vous le souhaitez.
La mise en page UNI11 a les mêmes fonctionnalité que la mise en page CH10, sauf pour l'impression du QR-Code suisse.
La documentation fait référence à la disposition CH10.
Les coordonnées bancaires pour le paiement doivent être saisies en tant que texte final. Voir comment saisir un texte final.
- Personnalisation via le dialogue de paramétrage
- Choisir les éléments de la facture que vous voulez inclure dans l'impression.
- Imprimer l'adresse à droite ou à gauche.
- Indiquer les colonnes de détail à inclure et définir la séquence. Vous pouvez avoir une facture avec les quantités et les prix, ou seulement les montants totaux ou même les colonnes que vous avez ajoutées dans le tableau Écritures.
- Modifier les textes par défaut à utiliser pour l'impression.
- Ajouter des traductions dans d'autres langues.
- Changer la police et le caractère d'impression.
- Choisir la combinaison de couleurs que vous souhaitez.
Personnalisation par programmation
- Personnalisation par programmation Javascript.
- Créer des fonctions d'impression qui remplacent celles par défaut, pour imprimer l'en-tête, les adresses, les détails, le texte final et le pied de page.
- Personnalisation par programmation CSS.
- Vous pouvez adapter l'impression en créant des styles personnalisés afin de pouvoir modifier l'apparence de la facture (formatage du texte, positionnement des éléments, etc.).
Banana Comptabilité Titres
Banana Comptabilité est un logiciel de comptabilité professionnel complet qui comprend également une solution intégrée pour la comptabilité des titres, généralement disponible uniquement dans des systèmes haut de gamme ou spécialisés. La solution Banana Investment Accounting permet à chacun de gérer facilement les obligations, actions, fonds et autres instruments financiers, même dans plusieurs devises, directement dans le fichier comptable.
Elle aide les professionnels de la finance et les investisseurs privés à suivre, gérer et présenter leurs investissements financiers. Elle enregistre les activités d’investissement sur différentes catégories d’actifs, comme les actions et les obligations, et fournit des informations utiles pour prendre de meilleures décisions. Elle est déjà utilisée par des entreprises et des caisses de pension qui gèrent des titres et des cryptomonnaies pour des montants de plusieurs centaines de millions.
Banana Investment Accounting offre une vue centralisée de tous les investissements et permet de gérer et de contrôler différents types d’actifs et de devises. Il n’est plus nécessaire d’utiliser des feuilles de calcul complexes, car tout est géré en un seul endroit avec la même précision, flexibilité et fiabilité qu’un logiciel de comptabilité professionnel.
Banana Investment Accounting complète les outils de portefeuille en ligne en offrant un enregistrement complet, transparent et professionnel de toutes les activités d’investissement. Il garantit la clarté et un contrôle total sur chaque détail financier, y compris les coûts, commissions, bénéfices et pertes, dans n’importe quelle devise.
Avantages de l'intégration de la gestion des titres dans la comptabilité
Banana Comptabilité est un des rares logiciels qui permet de gérer les titres directement dans la comptabilité.
- Vous disposez d'une vue comptable complète des titres, sans devoir gérer des tableaux externes.
- Vous gagnez du temps parce qu'en même temps que vous enregistrez l'opération financière (achat ou vente de titres) dans la comptabilité, vous introduisez aussi les quantités et les prix.
- Vous pouvez connaître le bénéfice/la perte comptable et le bénéfice/la perte de change sur le titre individuel au moment de la vente ou de la clôture.
Voici un tableau d'écritures avec des opérations de vente et d'achat de titres en différentes devises.

Enregistrement des achats et des ventes de titres
Le tableau Ecritures, cœur de la comptabilité, peut être personnalisé en ajoutant les colonnes Quantité et Prix unitaire. Lors de l'enregistrement des opérations sur titres, vous pouvez ainsi saisir directement toutes les informations nécessaires à la gestion des titres :
- Saisir la quantité achetée et vendue et le prix correspondant.
- Séparer la partie coût bancaire.
- Enregistrer le bénéfice ou la perte au moment de la vente.
- Enregistrer le gain ou la perte de change au moment de la vente.
Dans l'image ci-dessus, vous voyez des exemples d'écritures d'achat et de vente, avec les quantités et les prix. Au moment de la transaction de vente, le bénéfice est également enregistré, de sorte que la valeur comptable des titres corresponde à la valeur comptable.
Liste des articles
Dans la comptabilité, vous pouvez ajouter le tableau Articles, qui fonctionne comme un mini-entrepôt intégré dans la comptabilité.
Il est utilisé pour la facturation intégrée dans la comptabilité, mais convient parfaitement à la gestion des titres.
- Vous pouvez dresser la liste de tous les titres que vous avez achetés, en saisissant toutes les informations nécessaires.
- Vous pouvez regrouper les titres comme vous le souhaitez, séparer les obligations des actions.
- Le tableau des postes est lié au tableau des transactions par le biais du code du poste. Ainsi, lorsque vous saisissez un mouvement, le programme met à jour la quantité actuelle et vous connaissez donc toujours la quantité disponible pour chaque titre.
Calcul de la valeur comptable
L'objectif de la gestion des titres de Banana Comptabilité est de connaître la valeur comptable de chaque titre.
La valeur comptable d'un titre est celle qui est utilisée pour la préparation du bilan et correspond généralement au prix de revient ou au coût moyen.
- Elle est utilisée pour calculer le bénéfice ou la perte comptable lors de la vente des titres.
- Elle est utilisée pour calculer le bénéfice ou la perte comptable lorsque les titres sont réévalués au prix du marché.
Elle est donc très importante car elle contribue à déterminer la valeur comptable de l'ensemble du portefeuille, les résultats de l'entreprise et donc aussi la fiscalité.
Les outils de gestion des titres mis à disposition par les institutions financières sont très sophistiqués, mais ne gèrent pas toujours la valeur comptable. Les programmes comptables habituels ne permettent pas de suivre les quantités et les prix d'achat. Pour suivre la valeur comptable des titres individuels, les comptables doivent donc passer beaucoup de temps à reconstituer les transactions ou à tenir des tableaux Excel.
Calcul du résultat sur titres
Lorsque vous avez passé une écriture de vente de titres, l'extension de calcul des profits et pertes reconstitue la valeur comptable et calcule les profits et pertes.
Si vous utilisez un compte multidevise, elle calcule également le gain/la perte de change réalisé(e).
Ces valeurs sont utilisées pour compléter l'écriture de vente.
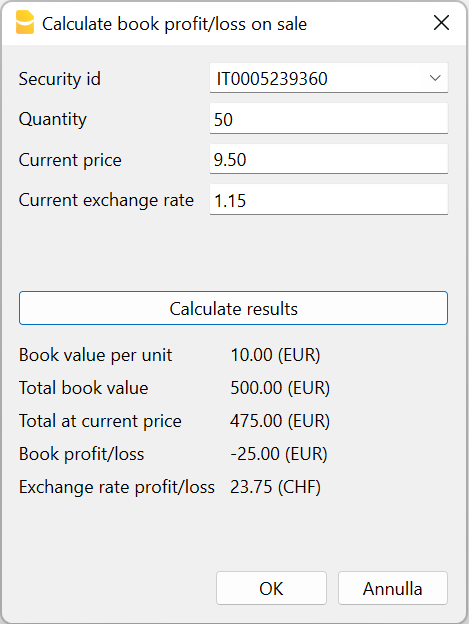
Inventaire des titres
Grâce aux informations détaillées saisies dans le tableau Ecritures et à la valeur de marché des titres saisie dans le tableau Articles, le programme est en mesure de calculer les valeurs actuelles des titres ainsi que les plus-values et moins-values latentes.
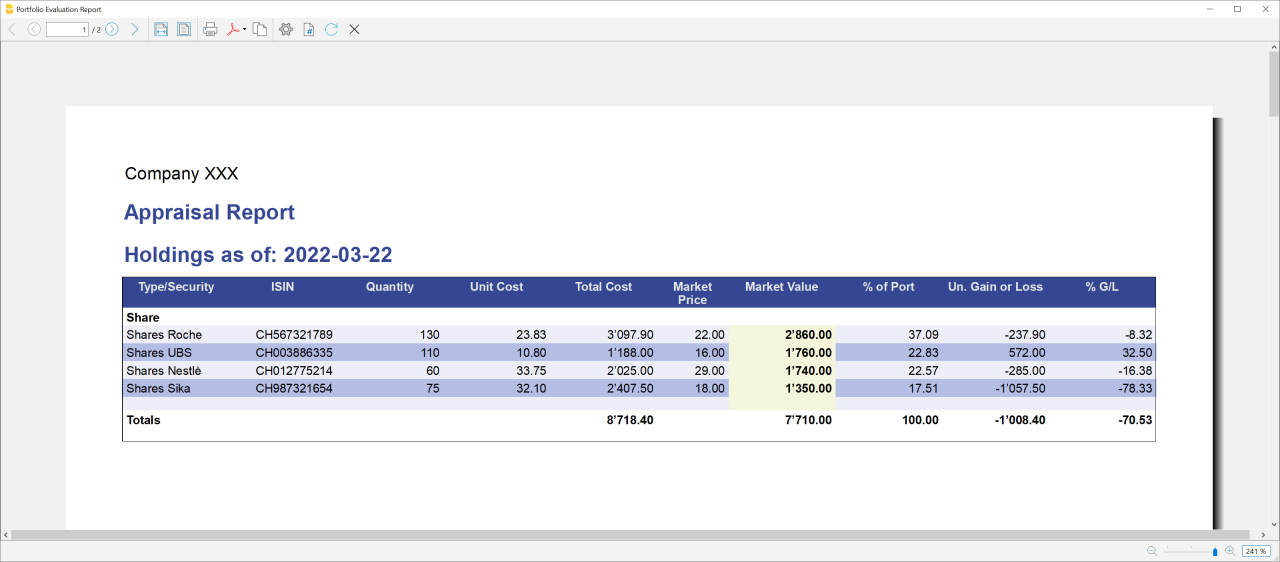
Pour commencer
Vous pouvez voir comment cela fonctionne en utilisant l'un de nos modèles ou Si vous avez déjà votre propre comptabilité, vous pouvez adapter votre comptabilité actuelle en quelques étapes seulement. Utilisez les extensions pour calculer le bénéfice ou la perte sur la vente de titres et obtenir divers rapports.
Documentation (en anglais)
- Investment Accounting
- How to Start
- Theoretical Introduction
- Accounts Table
- Items Table
- Transactions Table
- Opening and Closing
- Extensions
- Templates
Avez-vous besoin d'autre chose ?
La gestion de portefeuille est une fonction bêta, elle est donc encore en cours de développement. Si vous avez des suggestions pour améliorer le contenu des modèles et des rapports ou si vous pensez qu'il serait utile/intéressant d'ajouter de nouvelles fonctionnalités, n'hésitez pas à nous faire part de vos commentaires en utilisant notre formulaire.
Wertpapiergeschäften erfassen
Für die Erfassung von Wertpapiergeschäften sehen Sie bitte unsere aktuell nur in Englisch verfügbare Webseite:
Customizable Accounting Solution
Banana Accounting Plus is highly customizable professional accounting software that can be adapted to your organization, country and specific accounting needs.
Start from a ready-to-use template and customize the chart of accounts, reports, VAT settings, currencies and other elements to create the accounting solution that works best for you.
Customize your accounting
Banana Accounting gives you the flexibility to organize your accounting according to your own requirements.
- Create a chart of accounts with your preferred numbering and structure
- Choose your language, currency and local settings
- Define account groups, Cost Centers and Segments
- Add custom columns to accounts and transactions
- Define VAT or sales tax codes that automatically calculate VAT amounts
- Customize your Balance Sheet and Income Statement
- Manage multiple currencies and exchange rates
- Create your own extensions for printing, importing or exporting data with specific criteria
Start from a template and make it yours
The easiest way to create your customized accounting solution is to start from an existing template that is close to your needs and adapt it.
Once your accounting file is configured, you can save it and reuse it as the basis for other accounting files.
Although not recommended, you can also create a new accounting file from scratch and Creating a new template.
It is also possible to create an instance file in the XBRL format that is specific to a country.
Need help? We are here to help
Our accounting team has a broad international experience and is available to help you create the best solution for you.
- We have customers in more the 120 countries.
- We work in different languages.
- We have experience with many accounting and fiscal systems.
Adapt your accounting to different countries
Banana Accounting is designed to work with different languages, currencies and accounting systems. You can adapt the chart of accounts, VAT or sales tax settings and financial reports according to local requirements.
This flexibility makes Banana Accounting particularly useful for organizations working internationally or managing accounting in different countries.
Extend Banana Accounting with Extensions
Banana Extensions allow you to add specific functions and automate tasks according to your needs.
Extensions can be used to:
- Create customized accounting and financial reports
- Prepare reports according to specific tax or regulatory requirements
- Import data from banks or other systems
- Export accounting data in specific formats
- Check accounting data according to specific rules
- Create calculations, charts and other customized outputs
Build the solution that works for you
From a simple customized chart of accounts to advanced reporting, data import and automation, Banana Accounting can grow and adapt to your requirements.
You can start with a standard template and progressively customize your accounting as your needs evolve.
Start for free
Download Banana Accounting and start immediately with the Free plan. No personal information is required, and even your email address is optional.
Create your accounting file, explore the customization options and upgrade to a paid plan whenever you need additional features.
Case guide
Banana Accounting is a versatile accounting software. It can be used for different purposes.
When accounting is mandated by law
Business
- Required to do double entry accounting
Double entry accounting, with/without VAT or with/without multicurrency- Small companies (10 or more employees).
- Micro companies (1-9 employees).
- Companies or other organization with no employees.
Financial and Holding companies, Foundations, Asset management, Trusts.
- Required to report Revenue and Expenses.
- Small companies with revenue less then a specified amount
- Self employed individuals.
- VAT reporting
Certified public accountants (CPA)
Do accounting for other companies.
CPA doing accounting for small businesses usually prefer to use Double entry accounting.
Not for profit organizations
- Small non profit organization.
Income and expense accounting or double entry accounting. - Entities with institutional and commercial activities.
Double entry accounting. - International NGO
Double entry accounting with multi-currency.
Public sectors
- Small public entities.
Double entry accounting
Private and family accounting
- Private and Family accounting.
Income and Expense accounting. - Private and Family accounting with international investments.
Double entry accounting.
Auxiliary/ internal accounting
Not the main accounting
- Cash and liquidity management.
Income and Expense accounting.- Simple cash manager.
- Liquidity manager.
Companies that have a person that keep track of cash and banks.
- Project and Department accounting.
Income and Expense accounting.- Internal projects within larger organizations.
- Distributed accounting solutions
Keep local accounting, integrated in the ERP system. - Construction accounting.
Double entry or Income and Expense accounting.- Owners that build a property and keep track of the investment and progress.
- Contractors or architects that have responsibility of the construction’s project.
- Property management accounting.
Income and Expense accounting or Income and Expenses accounting.- Owner that mange a rented property.
- Condominiums.
- Professionals that manage properties for others.
Education
Banana Accounting is used as a tool to learn and exercise Double Entry Accounting.
- Basic accounting in low grade school.
- Introduction to accounting.
Show how the accounting works, with possibility. - Accounting training.
Students enter transactions (exercises on double entry accounting). - Accounting for a virtual company..
Budgeting and financial planning
Use the financial planning functionalities of Banana Accounting.
- Budgeting.
- Financial plan for a startup.
- Retirement planning.
Utilities products
Assets management
- Companies
Books catalog and loan management
- Small libraries
- Companies / legal practice
- Private
Address book
- Simple address management
- Google contacts editor
- Special adess management (Elenco patrizi)
Time sheet
- Employees for time tracking
- Companies for their employees
Future: project managment
Create a new template file
The first step is to create a new accounting file (File new) by choosing the more suitable type and language.
- It is suitable to start by choosing a predefined template that looks like the one you desire. You can then change everything you want.
- In the following examples we assume you use the double entry accounting system for a company.
- Once you have created a file you save it by giving it a name. This file can be used for your accounting or serve as a template for other companies.
Accounting in a language not available
You can create an accounting file that is in the desired language, even if your the software is not available in the local language.
- Create a new template, using a template in another language that is similar to you needs.
- Translate the accounting plan
Translate adapt the Description in the accounting plan as needed. - Translate the column headers.
- Menu Data -> Column settings.
- For each column change the header.
Create an accounting file with different settings
If the template setting are not suitable for you:
- Tools -> Convert to new file command, you will create a copy of the file
- Choose the file type
- Set the language, decimals rounding that is more suitable.
The Accounting properties
You insert the name of the company, the opening and closing date of the accounting year.
You can chose the accounting currency. If a currency is not on the list type the new currency code.
The accounting plan
Your country will probably have its own accounting numbering and grouping.
You will have to write or copy and paste the data in the Accounts table.
- Sections will define the main separations in the accounting.
- Balance sheet
- Income Statements
- Cost Centers
- Segments
- Account (Account number)
Is where you put the account number. - Group is where you insert the group number.
- Gr is where you insert the Group code where this Account or group should be totalized.
When creating a new accounting structure keep in mind:
- Add the accounts you will need. Don’t create a huge accounting plan in case you do not really need it.
Users can always add new accounts. - Keep the grouping simple, so that you have the groping required for your country.
The grouping usually also conforms to the country specific requirements. - For tax purposes you will probably need also a different grouping scheme that is different from the normal one that you use for Balance sheet or Income presentation:
- Use the column Gr1, Gr2, to assign to each account a different grouping scheme.
You will use then use the external report or create a BananaApps that will use the number to group different accounts together. - If you have a strict accounting numbering scheme, you can also create BananaApps that groups account based on specific number.
- Use the column Gr1, Gr2, to assign to each account a different grouping scheme.
- In case you need specific report for other need consider creating a BananaApps or an Excel sheet that takes the data from the accounting file.
Cost centers and segments
Consider using Cost Centers and Segments for more detailed reporting. If you do not have this specific need, you can add later.
In Banana you can define up to
- 3 types of cost centers, with an unlimited number of cost centers for each type.
- 10 levels of segments, with an unlimited number of segments for each type.
You can use the cost centers and segments while booking.
You specify the transaction code for the transaction. Cost centers are very flexible, and they are usually used for:
- Project income and expenses management
- Taking note of special transactions
- Have a parallel accounting scheme (for example large international NGO)
With the debit and credit account they have their internal accounting.
With the cost centers they have the transactions recorded by the donors accounting scheme. At any time they have reports for internal use or to presents to the donors.
You specify the segment in the transaction when you enter the account. You can have a segment that is different for account debit and credit. Consider using for managing:
- Branches, Organisations, Departments
- Different types of businesses
Vat Code
In the Accounts table you can setup all the VAT or sales tax percentage you will need. Basically there are two types of VAT Codes:
- VAT Due.
- VAT recoverable.
You can setup codes for all the percentages and purposes you will need.
Your country will have a specific reporting. With BananaApps you can create a printout that is a facsimile of the state form, with the amounts already grouped and summed as needed.
Use the column Gr1 or Gr2 to enter the number of the Tax form, were the VAT Code should be grouped. If a VAT code needs to be grouped in more than one place, separate the form number with a semicolon “;”.
The advantage of using Vat Code is that you can configure the accounting so that only useing the appropiate VAT code it is possible to extract the data necessary for the VAT reporting. You can have just one account where all the vat plus or minus is recorded. The accounting plan remain very simple and can focus on the company's need.
There are other approaches. For example in Germany the Datev accounting plan use the accounts as a base for the VAT reporting. For each specific VAT cases there must be a corresponding account. . The disadvantage of this approach is that there are accounts with special meaning (for example automatic accounts) with predefined VAT percentage and rules that are not visible for the users. This kind of accounting are more difficult to use unless you know exactly the purpose. With the VAT code the VAT complexity is resolved in the VAT table.
You will therefore have a choice to create an accounting plan, that is based on the need of a company and use the VAT code functionality for reporting, or mantain each VAT transaction separated for each case and have many VAT Accounts in the accounting plan.
Exchange rate table
If you have chosen the multi-currency option in the Exchange rate table you will setup the currency you will use.
Once you have declared a currency you can use it for an account.
Composition Balance sheet and Income statements
You can create predefined printouts of Balance Sheets and Income statements by creating a new composition.
It could be interesting to create predefined composition for:
- End of year report
- Trial balance
- Actual vs. Budget
- Columns with amount by Quarter
- Columns with amount by Segments
Create template documentation for the banana web site
Each template provided by Banana.ch has a page description under www.banana.ch/apps.
Required field
Title
Should be composed of the accounting type and the purpose of the template.
It is the text that will be displayed on google (think of Search Engine Optimisation).
- "Double entry accounting for small company in Switzerland, with VAT".
- "Double entry accounting for small company, with VAT and multi currency".
- "Double entry accounting for an international NGO".
File Url
The full url of the file.
- "https://github.com/BananaAccounting/Switzerland/raw/master/templates/english/double_entry_accounting/en_de_sme_company.ac2"
Short Description
It is displayed on the index, together with the Title.
A text that specify the purpose of the template. Be as expressive as possible.
Description
The Description is used to describe the template, show how to use it. The text should be also prepared for beeing indexed by the search engine.
It should contain reference to the possible user and other information that help make a good rank on google or bing (SEO).
- The first 2 lines of the text.
Are the one displayed in the google search. So they should summarize the use of the template well. - Following text .
Can be long as necessary with:- Use cases.
- Table description
- Content description
- Images
- Testimonials
- Reference to other documentation (Tax documents, business web site, ...)
Other field
- Language
The language of the page. - ac2 file type
Select the file type - ac2 category
Select the category.- Education means for educational purpose.
- ac2 country
Select the country.- If the country is not on the list select Other.
- If the template is for general use, not related to one country, select Universal.
- ac2 language
Select the language of the template.- If the language is not on the list select Other.
- ac2 publisher
Select the publisher. Banana.ch or other.
Setup the Accounts table
In the following we will explain what need to be considered when creating a new accounting tabble for a specific country.
- Creating the account structure and grouping specific country.
- Creating the country specific reports or export files, using the functionalities offered by the Banana API .
Documentation
- Accounts table documentation including table accounts columns.
Examples files
- The examples files are available on github/General/CaseStudies.
- File "scalar_income.ac2" is used in the following as an example of scalar accounting plan.
Using an existing accounting system
Usually countries have accounting system that include:
- Accounts numbering
- Accounts description
- Accounts grouping and totalisation
The country or sector specific accounting system is usually focused on helping prepare the Balance Sheet and Income & Exanses report.
Based on this accounting system it is also necessary to generate report that summirize the accounts for specific tax purposes, in case that the tax autorities require a report that is different from the Balance structure.
Accounts table
In Banana accounts and grouping are specified in the accounts table.
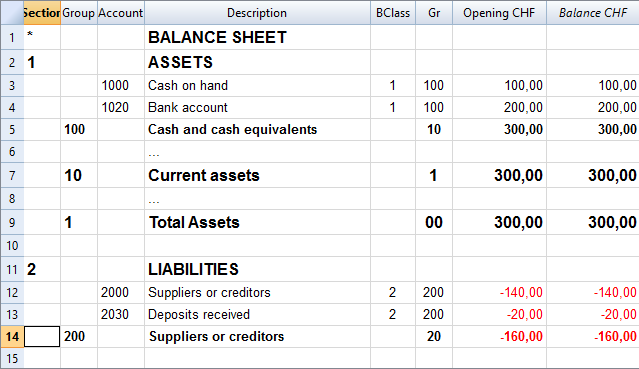
Banana allow to adapt to different county or sector specific requirement, but at the first moment the Banana grouping system look confusing, for the fact that there are different columns that contains similar information.
Accounts, groups and sections
There are three different type of line in the account table.
- Account.
Lines that have an account number in the column account.
Accounts can be normal account, cost center or segmente - Group
Lines that have a group number in the column group. - Section
Line the have a section number in the column section.
A line in the account table can is either an Account, Group or Section. It cannot be both, so if there are on the same line an account, group or section there is an error.
In the above example there are lines for Section, group and accounts.
Here is the meaning
- Accounts.
Are used for recording transactions. - Group
Are used to create sums. - Sections
Are used to separate different part of the report.
Summing and creating totals
In Banana you can create sum by using the combination of:
- Groups columns.
You enter the group number and the line become a group. - Gr
I where you enter the group on where this line should be totalized.
Accounts and Groups can have a Gr.
In the example above.
- The accounts 1000 and 1020 is totilized on the group 100.
- The group 100 is totilized on the group 10.
- The group 10 is totilized on the group 1
- The group 1 is totlized on the group 00.
By creating the group line and specifingin in the Gr whe the each line is grouped you create a wole totalisation.
Total debit = Total credit
Computer represent debit amount in positive and credit amounts in negative therefore we should totalize all accounts and groups in a final group that, if the accounting is correct, should have the amount to zero.
At the end of the grouping we will have a group named "Difference should be zero (null)" that in the above accountng example has the number 00.
Basically in the double entry accountiong system the totalisations is done in this way.
- Group Income and expenses (example group E7)
Is the sum of all Revenue and Costs accounts.
The Profit or Loss of the year that is further totalized in the Equity as the current year result. - Group Assets (example group 2)
Include all Assets accounts
Asset are totalized on the group Difference should zero. - Liabilities and Equity (example group 2).
Is the sum of all the Liabilities and Equity accouns, plus the Profit and loss of the current year from the total group of income and expenses.
Liabilities and Equity on the group Difference should zero. - Difference should be = 0 (example group 00)
Is the end sum of all accounts and the Balance should be null if the accounting is correnct.
The BClass column
In Banana each column has a (Banana class number) that indicate if the account belong to:
- 1 Total Assets
- 2 Total Liabilities
- 3 Total Expenses
- 4 Total Revenue
- 5 Total off balance sheet: Assets
- 6 Total off balance sheet: Liabilities
- 7 Total class 7
- 8 Total class 8
- 9 Total class 9
The BClass is somewhat a redundant information, but unfortunalty is also necessary in order to let Banana if the accounting is correct.
The BClass is also some time confusing for the fact that the country specific accounting system have normally class number that are not the same as the BClass in banana.
The Section column
Is also sometime redundant information, but unfortunatly is necessary in order to have the possibility to customize Balance sheet and other repors.
Grouping for the Balance
- Assets
You need to create a Total Assets group and intermediary groups (like fixed assets) so that up grouping the accounts specific to the Assets. - Liabilities (Third party capital and Equity)
Has subgroups for- Third party capital (Liabilities in anglo saxan terminology)
- Equity
Grouping for Income statemant
It groups all the accounts belonging to the Income statement. At the end there should be a group "Loss (+) por Profit (-).
There are two fundamentally different system to present the Income statement. One that sum separately the Revenue and the Costs and another one (scalar system) where the the Profit and Loss is calculated by starting from the revenues and obtainings intermediary results.
Revenue and Cost separated
There are two groups that are summed in the Loss and Profit
- Total Revenue
- Total Income
Scalar system
- (E1) Gross operating
Sum of all accounts for Revenue and Productions cost - (E2) Gross operating result after deducting personnel expenses
Sum of Gross operating group (E1) and the accounts Personel costs. - (E3) Operating result before depreciation and value adjustments, financial results and taxes (EBITDA)
Sum of E2 and the operating cost - (E4) Operating result before financial results and taxes (EBIT)
Sum of E3 and the depreciation - (E5) Operating result before taxes (EBT)
Sum of E4 and Financial costs - (E6) Profit or loss before taxes
Sum of E6 and extraordinary costs - (E7) Annual profit or loss
Sum of E6 and the tax - In this form it is necessary to create intermediary groups for.
Create a tutorial file with examples
When you create a new template file for beginners it is also suitable to create a tutorial file with example of opening balances, accounting and budget transactions.
The examples will depend on the specific purpose of the template, but it may be helpful to follow a similar approach and give an overview of the most used Transactions and Budget cases.
Opening Balances
Fill the column opening balances with amounts for the Assets, Liabilities and Equity.
Use simple rounded amounts.
Examples Of Accounting Transactions
Give examples of different Transactions type, without repeating too much the same case.
When it make sense, use the following sequence:
- Simple Transactions (direct Debit and Credit):
- Revenue Income going to the bank or the Cash.
- Equity capital going to the Bank.
- Loan going to the Bank.
- Expense payed with the Cash or Bank.
- Purchase of Material payed with Bank.
- Transfer from Bank to Cash.
- Transfer from Cash To Bank.
- Partial Repayment of a Loan.
- Transactions with multiple accounts:
- Bank income split on multiple Sales or Service account.
- Bank payment with multiple Costs.
- Transactions with VAT (When applicable):
- Sales.
- Purchase.
- Customers
- Issue of an invoice.
- Receive payment of an open invoice.
- Issue of Credit note.
- Suppliers
- Bill received.
- Bill payment.
- Receive a Credit note.
- End of year Transactions
- Depreciation of Material.
- Interest income.
- Interest on Loan.
- Active accruals.
- Passive accruals.
- Cost Centers
- Segments
Budget Transactions
- Not recurring revenues and expenses (no repetition code)
- Income as Equity advance.
- One time Sale.
- One time expense.
- One time payment with Bank with multiple costs.
- Buying of Assets (Material).
- Monthly recurring revenues and expenses (Repetition M)
The most part of Income and Expenses are made on a monthly base.- Revenues from sales
- All other Expenses.
- Quarter recurring revenues and expenses (Repetition 3M)
- Interest income.
- Interest on Loan.
- Semester recurring revenues and expenses (Repetition 6M)
- End of Year (Repetition Y)
- Depreciation.
- Loan repayment.
- Eventually an example of a Loan payment split on Interest and Repayment.
Setup the VAT table for a specific country
Use more languages
Banana Accounting software lets you setup the accounting file to use different languages.
- Create the accounting file with a main language.
- Add another language by adding the columns for the description in the other language.
You can add as many languages you need. - Customize the printout.
Program language
Every user can select and change the program language any time. Changing the program language will have no effect on the accounting data and accounting setup.
Adding columns for a different language
You can use the command Add column to create a supplementary column for the description in second language, in the table accounting, VAT table or Transaction's table. Use the language name (for example German, Chinese, etc.) as column name.
In the supplementary columns you will enter the description in the language.
You can add a new View for each language (German, Chinese, etc). You can customize the view to see only the description in one language or in more language at the same time.
People wiil be able to work on their language. .
Enhanced Balance sheet with in different languages
In the Enhanced Balance sheet you can choose witch column to use as description.
Under Columns select Add and choose the column you want to show.
You can create a Customization to save the setting for the printout. This way you can create printout for each language.
BananaApps
With BananaApps you can program a report to adapt to your necessity.
Local Extensions
Extensions for Accounting and VAT reporting
Following we list some developments, for the complete list goto to the Banana Apps search page.
- Austria
- China
- Template for SME companies
- China Small companies Balance Sheet and Profit and Loss reports
- Germany
- VAT Summary Reporting with XML file for uploading on the Elster portal.
- Italy
- Accounting plan and reporting for Non profit organisations
Accounting plan and reports required by the regional and national authorities.
Project developed together with the Centro Servizi Volontariato, Padova - VAT Italia
- Quarterly VAT reporting in XML format for upload.
- XML file with customers and suppliers invoice datafor uploading on the Autority web site.
- Accounting plan and reporting for Non profit organisations
- Netherland
- Audit file (accounting data is exported in XML as required by the NL tax autoryties)
- Switzerland - Ticino
- Curatele Accounting plan and required report
Project Istituti Sociali Città di Lugano - Patriziati
Project based on specificaction of the Sezioni Enti Locali Cantone Ticino.
- Curatele Accounting plan and required report
File Templates
See the Templates section.
Multi-Site Accounting
Distributed companies and organisations have operations in different places.
- In the same country.
- In different countries.
They need to setup an accounting organisation that allows to have:
- An acounting control for each entity (country or project)
- Have a consolidated accounting.
Data from the different accounting files need to be grouped together.
Multi-Site accounting
The Banana Accounting software is used by thousands of organisations and projects as a distributed accounting system.
Banana.ch has been a world pioneer in using blockchain technology, which faciltates the creation of a distributed accounting system.
Examples are:
- Entities that keep track of accounting transactions in different places and integrate the data in one central accounting.
- Projects accounting, with specific and detailed reporting, not available on the central system.
- A Non-profit organization that has projects worldwide, lets each project keep their accounting, and the data are integrated in the central accounting system (See Helvetas - Blockchain decentralized accounting).
- A large public organization that uses SAP, lets some organizations keep their accounting with Banana. (See Example of Kanton Basel City - German).
- Companies with different branches, that operate in different countries, with different currencies and accounting setup.
When multi-site, distributed accounting makes sense
Organizations tend to centralize their accounting system, so that all data reside in one system only.
Cloud computing makes it easier for organizations to share a centralized system. But distributed accounting still is the best choice:
- Connections are slow or costly.
- Using the central system is difficult:
- Require specifically trained personal
- Have high license costs.
- It is not flexible.
- Have a different workflow.
- Local accountings have specific needs, and customizing the central system would be too difficult and costly:
- different accounting plans and requirements
- different legal requirements
- different currencies.
- Accounting documents are kept at the branch level.
- Branches need a lot of flexibility but at the same time you do want to limit data access.
- The different branches have few interactions.
- There is no need to have all the detail-information in a central system.
In these cases it makes sense to have people in the branches use Banana Accounting.
Setting up the distributed accounting system
Organizations that use a distributed accounting system will then need to integrate the data in a central system, in order to have financial statements that include all branches and projects.
The data integration process must consider:
- With what frequency the data need to be integrated (monthly, quarterly, yearly, ...).
- The detail-transactions that need to be integrated in the central system.
- Whether only summary data are being integrated in the main system.
- How the data will be made available to the center.
Integrating all transactions into the central system
The requirements for working this way are:
- The distributed accounting and the central accounting use the same account numbers, same currency.
- In this case the integration process is done by importing the transactions from the branch into the central system.
- In Banana you have a central accounting system and use the import function.
- The distributed accounting and the central accounting have different account numbers or currencies
- The transactions must be converted to a format that is suitable for importing.
You can create a BananaApps that exports the data from the Banana Accounting file into the requested format's data. - Currency conversion.
You need to define at what rate the amounts from one currency are converted to the other currency. - If you use Banana for the central and distributed accounting see
- Import transactions
- Import file (this function also allows to convert account numbers).
- The transactions must be converted to a format that is suitable for importing.
Integrating only the summary data into the central system
This approach facilitates the integration process and is particularly adequate when:
- The central accounting system differs from the local one.
- Local accountings use different settings (currency, accounting plan), making the integration complex.
- There is no need to have detailed transactional information in the central system.
Detailed information can easily be accessed with the Banana accounting file. - There are large quantities of data and integrating it makes managing the central system more complex and costly.
Therefore, in the central system only the summary data are integrated:
- The period of the data that should be integrated (monthly, quarter, year) are defined
- Defined is whether the integration is done at the accounting level or at the group level (see below).
- Each branch accounting prints a summary of transactions (see BananaApps Trial Balance with blockchain) that includes:
- accounts or group number
- total debit and credit for the period.
- these amounts are registered unto the central accounting:
- Manually (directly from the report)
- With the import function. In this case the data should be exported from Banana Accounting.
Using blockchain lock function
If you use a distributed accounting system, it is important that, once you have integrated the data into the central system, the local data are not changed. In case the local data have been changed you will have difficulty in reconciling the different systems. The situation will get complicated if you have many accounting files.
The branch cannot be prevented to modify the file, for the fact that they have the file on their local system.
The only way to make sure that the data have not been changed, is to use a blockchain security mechanism embedded in Banana and named Lock transaction:
Each branch, at the end of each period, is required to:
- Check that the progressive lock of the previous period is the same as the one that has been printed.
- Lock the accounting for the period.
- Print the lock report, sign it and send it to the headquarters, together with the accounting file.
Once the accounting has been locked, the branch, should:
- Continue to work on the same file.
- Do not unlock or change the locked transactions.
The headquarter should:
- Keep note of the progrLock and number when they integrate the data.
- Keep a copy of the file that has been integrated previously.
The best is to put in a directory with the date or have a date in the file name. - When they receive the file, check that the lockProgressive of the last period is the same.
- If is not the same require the branch to fix the problem.
- do not proceed with the data integration.
- Use the BananaApps Compare two files to see the differences.
- In this case, it will be worth it to return the previous file, so that they can start from this and add the new transactions.
- If it is the same
- Proceed with the integration.
- Keep note of the last LockProgr and LockNumber.
- If is not the same require the branch to fix the problem.
Structuring the accounting plan to facilitate the data integration
Keep the same account numbers
If you need to use in the branch the same accounts number that you use in the central system, the best way is to use the same accounts number in the branch accounting file.
Using different account numbers
This is necessary in case local accounting should use a different accounting plan (local rules) or a more detailed accounting.
There are different options:
Add a column to the accounting plan for the central accounting number, so that each account will also have a corresponding central account number:
- The account column will use a local account number.
- In the columns Central account you enter for each account the number of the account used in the central system.
- Different accounts can have the same central account number.
Use a grouping schema where the groups in the accounting table corresponds to the account number of the central accounting (see Helvetas example)
- Each group in the accounting plan will correspond to an account number in the central accounting.
- In the accounts table you will have the groups totals corresponding to the accounts in the central accounting.
- You will end up having a lot of groups.
- This approach is useful if the local accounting needs to create many local accounts. For examples many bank accounts.
Multiple levels
If your organization is complex it may make sense to have different level of integration (see Helvetas example) with different approaches:
- Each country integrates the data of the local projects, by importing all transactions in one file.
- The summary data of each country is then integrated in the central accounting system.
Cash Manager
If the local project only has one account to manage, it make sense to set up a Cash Manager
- Create a Cash Manager file in which the branch keeps track of it's expenses.
- Use the import Cash Manager function to integrate the data in the main Banana Accounting file.
Immobilienbuchhaltung mit Banana Buchhaltung+
Banana Buchhaltung Plus macht die Immobilienbuchhaltung einfach, schnell und professionell – auch wenn Sie keine Buchhaltungserfahrung haben, sei es für eine Stockwerkeigentümergemeinschaft (StWE) oder eine Mietliegenschaft.
Vorlagen für die Immobilienbuchhaltung
Wählen Sie das für Ihre Liegenschaft und Ihre Buchhaltungsbedürfnisse am besten geeignete Modell von Banana Buchhaltung Plus.
Jedes Modell ist sofort einsatzbereit und darauf ausgelegt, die Immobilienverwaltung schnell, genau und transparent zu gestalten.
- Vorlagen für die Buchhaltung von Mietliegenschaften
- Vorlagen für die Buchhaltung von Stockwerkeigentum (StWE)
Immobilienbuchhaltung
Der Ausgangspunkt ist einfach: Jede Wohnung, jedes Geschäft oder Büro (Immobilieneinheit) hat einen Preis für die Nutzung und Kosten für den Betrieb.
Banana Buchhaltung Plus hilft Ihnen, alles klar im Griff zu behalten.
Um die Immobilienbuchhaltung zu verstehen, genügt es zu denken, dass jemand eine Immobilie – Wohnung, Geschäft oder Büro – nutzt, als wäre er immer der Eigentümer.
Daraus ergibt sich eine grundlegende Unterscheidung:
- der Preis des Hauses
- die Betriebskosten des Hauses
Diese Unterscheidung gilt in jeder Situation.
Mietliegenschaft
Wenn Sie eine Mietliegenschaft besitzen, sind Sie Eigentümer der Immobilie und führen eine vollständige Buchhaltung über Einnahmen und Ausgaben.
Die Miete, die Sie erhalten, ist der Preis, den der Mieter für die Nutzung der Immobilie bezahlt – als wäre sie seine eigene.
Dieser Betrag:
- ist ein Einnahmenposten für den Eigentümer
- stellt den Wert der Nutzung der Immobilie dar
Die Ausgaben betreffen alles, was für den ordnungsgemässen Betrieb der Liegenschaft erforderlich ist, zum Beispiel:
- Heizung
- gemeinsames Wasser und Strom
- Unterhalt
- Dienstleistungen und Lieferanten
Diese Ausgaben sind kein Gewinn, sondern reale Kosten, die jemand tragen muss.
In der Praxis übernimmt oder bevorschusst der Eigentümer die Betriebskosten, und der Mieter erstattet ihm den auf ihn entfallenden Anteil.
Das bedeutet, dass die Spesenrückerstattung kein echter Ertrag ist, sondern lediglich bereits entstandene Kosten deckt.
Anders gesagt: Die Miete ist der Preis des Hauses, die Spesen sind die Betriebskosten.
Diese Spesen dienen zur Deckung der Betriebskosten und gelten nicht als endgültige Ausgaben, solange die tatsächlichen Kosten nicht bekannt sind. Am Ende des Zeitraums kann man vergleichen:
- wie viel einbezahlt wurde
- wie viel tatsächlich ausgegeben wurde
und erhält so eine klare Übersicht für jeden Mieter.
Stockwerkeigentum
Auch im Stockwerkeigentum ändert sich das Prinzip nicht. Ein Stockwerkeigentum ist ein Gebäude mit mehreren Eigentümern, die einen Preis für ihre Wohnungen bezahlt haben und gemeinsame Teile und Kosten teilen.
Jeder Eigentümer nutzt das Gebäude anteilsmässig so, als wäre er Eigentümer des gesamten Gebäudes.
Die gemeinschaftlichen Ausgaben betreffen den Betrieb der gemeinsamen Teile, wie zum Beispiel:
- Treppenhaus und gemeinsam genutzte Räume
- Dach, Fassade und Anlagen
- Garten und Aussenbereiche
Diese Ausgaben sind die Betriebskosten des Gebäudes und werden von den Eigentümern gemäss ihren Anteilen getragen.
Im Stockwerkeigentum leisten die Eigentümer periodische Beiträge.
Diese Beiträge dienen der Deckung der Betriebskosten und gelten nicht als endgültige Ausgaben, solange die tatsächlichen Kosten nicht bekannt sind. Am Ende des Zeitraums kann man vergleichen:
- wie viel einbezahlt wurde
- wie viel tatsächlich ausgegeben wurde
und erhält so eine klare Übersicht für jeden Eigentümer.
Nachdem Sie die Art der Immobilienverwaltung definiert haben, können Sie das passende Buchhaltungsmodell auswählen.
Was Sie mit Banana Buchhaltung Plus tun können
Mit Banana Buchhaltung Plus können Sie:
- den Preis des Hauses und die Betriebskosten separat erfassen
- Mieten, Rückerstattungen und Ausgaben nachverfolgen
- sofort sehen, was eingenommen und was ausgegeben wurde
- einen klaren und verständlichen Jahresabschluss erhalten
Alles mit einer Logik, die auf Personen ausgerichtet ist, die ihre Immobilie selbst verwalten.
Eine klare Buchhaltung macht alles einfacher, wenn Sie trennen zwischen:
- dem, was Preis ist
- dem, was Kosten sind
und es wird sofort einfacher:
- die Rentabilität der Immobilie zu verstehen
- Verwirrung zu vermeiden
- bewusste Entscheidungen zu treffen
Gestione proprietà in affitto
Banana Contabilità Plus propone due modelli utili per tenere una contabilità immobiliare professionale per gli affitti:
- Modello per la contabilità affitti Entrate/Uscite: la versione semplice, ideale se non sei uno specialista e non conosci la contabilità in partita doppia.
- Modello per la contabilità affitti in partita doppia: la versione avanzata, ideale se conosci la contabilità classica in partita doppia.
Entrambi includono già il piano dei conti tipico della gestione immobiliare.
Piano dei conti per Affitti
La contabilità di una proprietà in affitto può essere vista come una normale contabilità, con una distinzione fondamentale:
- l’affitto rappresenta il prezzo della casa
- le spese rappresentano il costo del funzionamento della casa
L’inquilino paga entrambi, ma con significati completamente diversi.
Banana Contabilità Plus ti aiuta a tenerli sempre separati e sotto controllo.
Quando gestisci una proprietà in affitto:
- tu sei il proprietario dell’immobile
- tutte le entrate e le spese fanno capo a te
- una parte dei costi di funzionamento viene rimborsata dagli inquilini
La contabilità serve a distinguere chiaramente:
- ciò che è prezzo (affitto)
- ciò che è rimborso di costi (spese)
Il piano dei conti per gli affitti è organizzato per rispondere alla domanda su quanto si incassa come prezzo della casa e quanto si incassa solo per coprire i costi di funzionamento.
Per farlo la contabilità è suddivisa in alcune aree principali.
Conti degli inquilini
Per ogni inquilino viene creato un conto personale che serve a registrare:
- l’affitto richiesto
- gli anticipi per le spese
- i pagamenti ricevuti
- eventuali differenze da regolare a fine anno
Questi conti funzionano come conti clienti, mostrano sempre quanto è stato richiesto e quanto è stato pagato.
Conti per gli incassi degli affitti
I conti dei ricavi per affitti raccolgono esclusivamente il prezzo della casa, cioè:
- affitti di appartamenti
- affitti di uffici o spazi commerciali
- affitti di posteggi
Questi conti:
- contengono solo l’affitto
- non includono mai le spese
In questo modo il reddito dell’immobile è sempre chiaro.
Conti per il costo di funzionamento della casa
Per gestire correttamente le spese vengono utilizzati conti separati che servono a:
- registrare le spese effettivamente sostenute rimborsabili dagli inquilini
- raccogliere gli anticipi richiesti agli inquilini
- confrontare quanto incassato con quanto speso
L’obiettivo è che i soldi incassati per le spese devono corrispondere esattamente ai costi reali sostenuti.
Conti per i costi del proprietario
Per gestire correttamente le spese vengono utilizzati anche conti separati che servono a:
- registrare le spese effettivamente sostenute che non sono rimborsabili dagli inquilini
- confrontare quanto incassato come prezzo della casa dagli inquilini con quanto speso che non è rimborsabile dagli inquilini
L’obiettivo è calcolare esattamente quanto sta rendendo essere proprietari dell'immobile.
Registrazione delle richieste mensili
Per semplicità immagina che l’affitto viene richiesto ogni mese.
All’inizio del mese:
- viene registrato l’affitto richiesto all’inquilino
- viene registrato l’anticipo per le spese
Queste registrazioni avvengono anche se l’inquilino non ha ancora pagato.
Registrazione degli incassi
Quando l’inquilino paga:
- l’importo versato viene registrato nel suo conto
- la contropartita è il conto bancario o la cassa
In questo modo è sempre chiaro:
- cosa è stato richiesto
- cosa è stato effettivamente incassato
Conteggio di fine anno delle spese
Durante l’anno:
- gli inquilini versano anticipi per le spese
- il proprietario sostiene i costi di funzionamento
A fine anno si confrontano:
- gli anticipi richiesti
- le spese effettivamente sostenute
Per pareggiare i conti:
- a chi è stato richiesto meno paga la differenza
- a chi è stato richiesto di più riceve un rimborso
Questo conteggio serve esclusivamente a far coincidere incassi per spese e costi reali.
Controllo dei pagamenti degli inquilini
Il conto di ogni inquilino mostra sempre la sua situazione:
- saldo in Dare
significa che non ha ancora pagato tutto ciò che gli è stato richiesto - saldo in Avere
significa che ha versato più del necessario
Questo controllo è immediato e non richiede calcoli esterni.
Perché questo modello è efficace
Questo piano dei conti ti permette di:
- distinguere chiaramente il reddito dell’immobile dai rimborsi
- capire subito la redditività reale
- gestire le spese in modo trasparente
- evitare confusione tra affitto e spese
- dimostrare agli inquilini le spese effettivamente sostenute che sono tenuti a rimborsare
In questo modo la contabilità riflette la realtà, ossia che l’affitto è il prezzo della casa, le spese sono il costo del suo funzionamento.
La registrazione dell'affitto e dell'anticipo periodico richiesto può essere automatizzato grazie alle registrazioni ricorrenti automatiche.
Esiste inoltre un'estensione apposita per il controllo periodico del pagamento degli affitti.
Spese rimborsabili dagli inquilini
Nella gestione di una proprietà in affitto, una parte dei costi di funzionamento della casa può essere rimborsata dagli inquilini.
Questo significa che:
- il proprietario sostiene o anticipa questi costi
- gli inquilini rimborsano la quota che compete loro
Le spese rimborsabili devono essere registrate in modo ordinato, documentate, suddivise correttamente tra gli inquilini.
In questo modo gli inquilini possono, se necessario, verificare:
- quali costi sono stati sostenuti
- come sono stati ripartiti
La possibilità di farsi rimborsare alcune spese dipende dalle normative applicabili e dagli accordi presi con gli inquilini.
In alcuni casi si concorda un importo fisso senza calcolo delle differenze ossia l’affitto include tutte le spese, e in altri casi gli inquilini versano un anticipo fisso e a fine anno si confrontano anticipi e spese reali calcolando eventuali differenze. Banana Contabilità+ è pensato per supportare entrambe le situazioni.
Nel modello più frequente:
- l’inquilino versa regolarmente un anticipo
- il proprietario registra i costi reali
- a fine anno si calcola la differenza
Se gli anticipi sono:
- inferiori ai costi l’inquilino versa il saldo
- superiori ai costi l’inquilino riceve un rimborso
Questo importo di differenza viene definito come conteggio o conguaglio.
Questo meccanismo serve a far coincidere quanto è stato incassato per le spese con quanto è stato realmente speso.
Per gestire correttamente le spese rimborsabili è importante organizzarle in modo logico. Ad esempio, tutte le spese legate al riscaldamento possono essere raccolte in un unico gruppo, come:
- manutenzione della caldaia
- spazzacamino
- gas o gasolio
- elettricità utilizzata per il funzionamento della caldaia
Questo permette di calcolare il rimborso in modo coerente.
Se vuoi maggiore precisione, puoi creare conti separati per tipi specifici di costo e indicare chiaramente a cosa servono.
Ad esempio una parte dell’elettricità delle scale può essere attribuita al funzionamento della caldaia. Creando un conto dedicato, questa quota verrà suddivisa insieme ai costi di riscaldamento. In questo modo la suddivisione segue il criterio corretto.
Una buona pratica fondamentale è distinguere sempre le spese rimborsabili da quelle non rimborsabili.
Questo ti permette di:
- sapere subito cosa può essere ribaltato sugli inquilini
- evitare errori nei conteggi
- mantenere una contabilità chiara e trasparente
Gestire le spese rimborsabili significa, in pratica tenere sotto controllo il costo di funzionamento della casa, suddividerlo in modo equo, rimborsare o richiedere solo ciò che è effettivamente dovuto. Con Banana Contabilità+ questo processo rimane sempre chiaro, anche quando la gestione diventa più articolata.
Questi rimborsi non rappresentano mai un guadagno, ma servono solo a coprire spese reali.
Nel diagramma che segue puoi vedere la maggior parte delle spese immobiliari con un esempio di suddivisione tra quelle rimborsabili (a destra) e quelle non rimborsabili (a sinistra).

Conti contabili per spese rimborsabili
Le spese rimborsabili degli inquilini nei modelli sono posti nella parte attiva del bilancio (conti dal 1100) o nella tabella Conti per la contabilità Entrate-Uscite, proprio perché per il proprietario non sono vere e proprie spese.
Ecco le spese rimborsabili dagli inquilini in una contabilità in partita doppia:

Le spese in generale possono essere diverse in base all’immobile che si gestisce.
Puoi facilmente spostare, eliminare, inserire dei conti, cambiarne la descrizione.
Registrazioni delle spese rimborsabili dagli inquilini
- Per ogni spesa rimborsabile dagli inquilini:
- Si registra il corretto conto contabile delle spese (esempio conto 1100 in Dare).
- La contropartita è il conto bancario o la cassa se il pagamento è avvenuto a contanti.
Calcolo e suddivisione delle spese rimborsabili
Guarda la pagina dedicata al modello Excel per la suddivisione delle spese.
Spese non rimborsabili dagli inquilini
Come per la contabilità di una qualsiasi azienda, le spese che non possono essere rimborsate dagli inquilini sono elencate nel Conto economico o nella tabella Categoria come Costi.
Nel modello sono indicati nella parte Costi le spese non rimborsabili (per esempio conti 6100 e seguenti). Anche qui puoi facilmente eliminare, inserire dei conti, cambiarne la descrizione.

Calcolo e suddivisione delle spese rimborsabili dagli inquilini
Il calcolo e la suddivisione delle spese rimborsabili dagli inquilini tiene conto di:
- Il conto del Conteggio annuale che serve per registrare i conteggi calcolati per gli Inquilini.
- Si registra ogni singola spesa che deve essere rimborsata dall'inquilino (esempio conto 1100 in Avere).
- La contropartita è il conto di Conteggio annuale (conto Dare).
- L'importo delle spese è quello riferito a tutto il periodo di spese da suddividere.
- Gli anticipi sulle spese pagati dagli inquilini durante l'anno devono essere considerati nel calcolo del conteggio.
- Si registra in un unica registrazione il totale degli anticipi richiesti durante il periodo nel conto degli Anticipi dagli inquilini (conto Dare).
- La contropartita è il conto del Conteggio annuale (conto Avere).
- L'importo da girare è il totale degli anticipi richiesti a tutti gli inquilini durante il periodo.
- Differenze nel conto del Conteggio annuale.
- Dopo le due operazioni precedenti l'importo restante del conto Conteggio annuale è uguale al totale dei conteggi da suddividere agli inquilini.
- Questo importo deve essere suddiviso per ogni inquilino tramite un calcolo che fa uso di chiavi o coefficienti di suddivisione.
- Quando si registrano i conteggi calcolati per ogni singolo inquilino nel conto del Conteggio annuale questo conto dovrebbe azzerarsi o dovrebbero restare pochi centesimi non più suddivisibili a tutti gli inquilini.
Suddivisione delle spese per ogni appartamento
La suddivisione delle spese è riferita a ogni singolo appartamento e eventualmente anche al periodo di tempo in cui un inquilino è stato effettivamente inquilino.
Banana Contabilità Plus permette di tenere nota delle spese rimborsabili, ma non si occupa della suddivisione, perché il tema della suddivisione è diverso per ogni immobile e a volte può avere anche delle suddivisioni molto complesse.
Per la suddivisione si consiglia quindi di creare una tabella Excel per ogni immobile e per ogni anno (o periodo di suddivisione) dove sono riportati i totali di ogni singola spesa e poi gli importi sono calcolati e suddivisi tramite delle chiavi o coefficienti di suddivisione (m2, consumo, ecc).
Vedi l'esempio di seguito e scarica il modello Excel.
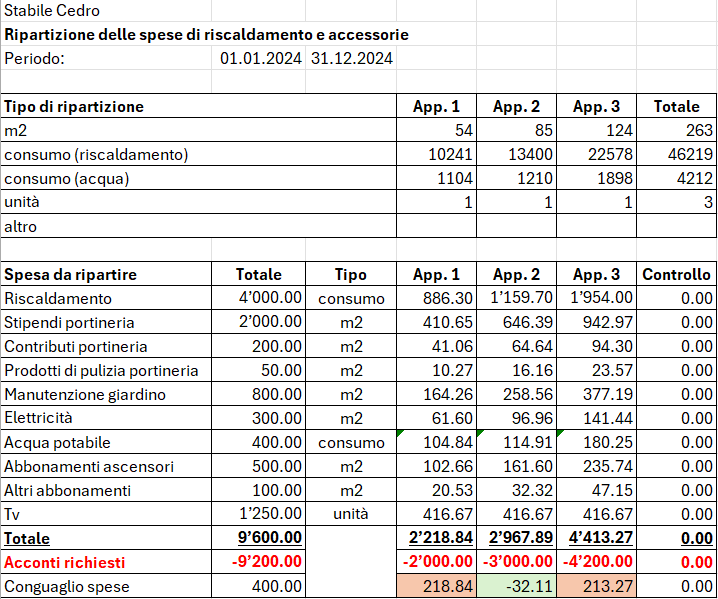
Conteggio agli inquilini
Il conteggio calcolato deve essere registrato in contabilità:
- Se l'inquilino ha versato meno rispetto alle spese a lui assegnate si chiede la differenza e si registra nel conto dell'inquilino in Dare.
La contropartita è il conto per il Conteggio annuale. - Se l'inquilino ha versato di più rispetto alle spese a lui assegnate si rimborsa la differenza e si registra nel conto dell'inquilino in Avere.
La contropartita è il conto per il Conteggio annuale. - Dopo avere registrato i conteggi ai rispettivi inquilini il conto Conteggio annuale dovrebbe azzerarsi o dovrebbe restare un importo di pochi centesimi che non può essere ulteriormente suddiviso su tutti gli inquilini.
- Se il conto Conteggio annuale si azzera o restano solo pochi centesimi la suddivisione delle spese è avvenuta correttamente.
- Se il conto Conteggio annuale non si azzera o restano importi superiori a pochi centesimi la suddivisione non è avvenuta correttamente. È quindi necessario ricontrollare i calcoli fatti per suddividere le spese agli inquilini.
Spese calcolate nel periodo successivo
- Le spese che non rientrano nel periodo di conteggio corrente, non vengono spostate nel conto per il Conteggio annuale. Queste spese verranno spostate e calcolate solo nel periodo o anno successivo.
- Con i conti delle spese rimborsabili dagli inquilini negli Attivi di una contabilità in partita doppia queste spese verranno riportate automaticamente nell'anno contabile successivo.
- Con i conti delle spese rimborsabili dagli inquilini nei Costi queste spese, a fine anno, devono essere spostate tra gli importi sospesi del Bilancio per riportarle nell'anno successivo.
Spese rimborsabili dagli inquilini pro-rata
Quando due inquilini si sono alternati come inquilini dell'appartamento durante l'anno, potrebbe essere necessario suddividere le spese pro-rata:
- Potrebbero esistere tuttavia anche altri metodi di suddivisione come quello per mesi o per periodo caldo e freddo dell'anno e così via.
- I metodi per la suddivisione delle spese pro-rata variano secondo le normative locali vigenti o secondo i contratti di affitto dell'appartamento.

Flusso di lavoro per la gestione degli affitti
Con Banana Contabilità+ puoi gestire una contabilità di una proprietà in affitto con il flusso di lavoro descritto in questa pagina e che comprende:
- la importazione degli estratti conto elettronici bancari.
- la registrazione automatica degli estratti attraverso la gestione delle regole di completamento delle registrazioni.
- la registrazione automatica dei salari versati al custode senza riscrivere o ricopiare le registrazioni più volte.
- l'addebito automatico degli affitti in contabilità alle scadenze prestabilite dai contratti.
- il facile controllo degli incassi e dei mancati pagamenti da parte degli inquilini.
- il salvataggio e l'invio della contabilità comprensiva dei giustificativi in un unico file PDF.
Guarda nel dettaglio ognuna di queste possibilità che hai a disposizione su Banana Contabilità+.
Importa gli estratti conto elettronici in contabilità
Puoi richiedere alla tua banca di fornirti l'estratto conto elettronico in formato XML (tipo di estratto Camt.053). Se necessario chiedi anche alla tua banca di continuare a ricevere l'estratto conto in formato PDF.
L'estratto conto elettronico in formato XML ti permette di ottenere la contabilità sempre aggiornata e di emettere richiami di pagamento in qualsiasi momento.
Quando il file XML è disponibile scaricalo dall'e-banking e salvalo sul computer. Potresti riceverlo giornalmente, settimanalmente o mensilmente in base a come lo hai richiesto.
Usa l’estensione Importazione estratto bancario SEPA/ISO 20022 per importare il file appena scaricato.
Quando importi un estratto conto elettronico puoi registrare automaticamente sia gli incassi ricevuti che i pagamenti effettuati grazie all'uso delle regole di completamento delle registrazioni contabili. A ogni importazione puoi creare tutte le regole necessarie. Con il tempo ti basterà importare gli estratti conto per registrare automaticamente tutta la contabilità.
Crea regole per la contabilizzazione automatica
Banana Contabilità Plus, con l'abbonamento al piano Advanced, permette di registrare automaticamente la contabilità secondo i criteri che desideri.
Per esempio puoi registrare tutte le fatture pagate a Azienda SA in un conto contabile specifico tramite il nome dell'azienda a cui paghi.
Quando nell'estratto conto elettronico appare quel nome di azienda e corrisponde a un'uscita, Banana Contabilità Plus lo registra nel conto contabile da te impostato.
Se paghi una fattura per un contratto stipulato con Azienda SA (per esempio per un'assicurazione, una fornitura di energia, ecc.) puoi aggiungere il segno + e il numero di contratto, come per esempio +Azienda SA 101.200.14, dove 101.200.14 è il numero di contratto stipulato.
Il segno + indica che è necessario trovare tutte le informazioni, in qualsiasi ordine, all'interno dell'estratto conto elettronico. In questo modo puoi registrare in maniera distinta più contratti diversi stipulati con la stessa azienda.
Allo stesso modo puoi registrare automaticamente gli incassi usando i nomi delle persone dalle quali incassi.
Con le regole registri automaticamente tutte le entrate e le uscite da tutti gli inquilini in maniera molto precisa.
Se desideri puoi anche indicare uno specifico importo alla regola. In questo modo distingui sempre di più le registrazioni, sia in entrata che in uscita.
Per usare le regole è necessario inserire nella colonna Doc della tabella Registrazioni ricorrenti il codice !Rule come negli esempi di regole seguenti.

In questa tabella è anche possibile usare il codice !RuleSplit per inserire regole che registrano automaticamente con registrazioni composte da più righe.
In questo modo riduci notevolmente il tempo di registrazione contabile e ottieni la contabilità sempre aggiornata.

Registra automaticamente i salari del custode
Dalla tabella Registrazioni ricorrenti registra i salari del custode su più righe inserendo per esempio nella colonna Doc il codice univoco salari su ogni riga.
Inserisci la descrizione di ogni riga inclusa nella registrazione, inserisci i rispettivi conti Dare e Avere e gli importi che si ripetono in modo ricorrente.

Quando imposti una registrazione ricorrente usala nella tabella Registrazioni:
- Compila la colonna Data inserendo la data.
- Inizia a scrivere nella colonna Doc la parola salari.
- Seleziona la registrazione ricorrente trovata da Banana Contabilità Plus.
La registrazione del salario composta da più righe apparirà già completata nella tabella Registrazioni in contabilità.
Se preferisci puoi automatizzare ulteriormente la registrazione composta da più righe con le regole per usarle quando importi l'estratto conto elettronico:
- Nella colonna Doc inserisci i codici !Rule e !RuleSplit al posto del nome salari riportato nell'esempio precedente.
- Inserisci il nome del custode a cui versi il salario nella colonna Descrizione della riga dove inserisci il codice !Rule.
- Questo nome verrà cercato nell'estratto conto elettronico durante l'importazione.
- Inserisci una parentesi quadrata aperta e una chiusa [] nel conto di contropartita della regola dove inserisci il codice !Rule. Queste parentesi indicano che si tratta di una regola per una registrazione con più righe.
Guarda l'esempio nella immagine seguente.

Addebita automaticamente gli affitti
Un’altra automazione che puoi aggiungere alla tua contabilità avviene con l’uso delle registrazioni automatiche per l'addebito periodico degli affitti:
- Crea una registrazione contabile come se stessi addebitando a un inquilino un affitto mensile e aggiungi nella colonna Doc la codifica !Auto.
- Completa la colonna Data con la data in cui iniziare ad addebitare.
- Completa la colonna Data Finale con la data quando l'inquilino termina il contratto di affitto.
- Completa la colonna Ripeti con il periodo di ripetizione della registrazione (per esempio M per mensile).

Banana Contabilità registra automaticamente le registrazioni impostate a ogni inizio di periodo. Se vuoi puoi decidere se essere avvisato prima di registrare automaticamente.
È possibile addebitare automaticamente l'affitto su più righe di registrazioni per ogni inquilino, per esempio suddividendo l'affitto dall'anticipo delle spese rimborsabili dall'inquilino.
Questa funzionalità è attualmente presente solo nella versione Banana Contabilità Plus Dev-Channel.
Controlla l'incasso degli affitti
Grazie all'estensione per il controllo degli affitti puoi tenere traccia e avere sempre disponibile un report con la panoramica su chi ha pagato regolarmente l'affitto, chi l'ha pagato solo parzialmente e chi non l'ha ancora pagato.
Puoi verificare facilmente anche se hai addebitato l'affitto correttamente a ogni inquilino e a ogni scadenza. Puoi anche ottenere una previsione di incasso per tutto l'anno corrente.
Crea report personalizzati in Excel
Con Banana Contabilità Plus è possibile collegare Microsoft Excel tramite l'Add-in di Banana Contabilità Plus per creare report completamente personalizzati.
Con l'Add-in puoi calcolare i conteggi di suddivisione delle spese tra gli inquilini.
Trovi l'Add-in da installare all'interno di Excel, cerca nei componenti aggiuntivi, installalo e inizia subito a generare i tuoi report personalizzati.
Per maggiori informazioni guarda anche le pagine di documentazione relative all'Add-in Excel di Banana Contabilità+.
Salva e invia la contabilità con i giustificativi in unico file PDF
Nella tabella Registrazioni è possibile abilitare e visualizzare la colonna Link. Usa questa colonna per allegare a ogni registrazione contabile il relativo giustificativo, come per esempio una fattura ricevuta o una fattura emessa.
Abilita la colonna Link in questo modo:
- Fai doppio clic sulla intestazione delle colonne nella tabella Registrazioni (per esempio sulla colonna Descrizione).
- Vista la casella DocLink nella colonna a sinistra della finestra che si apre, come da immagine seguente.
- Clicca sul bottone Ok in basso a destra nella finestra per confermare.
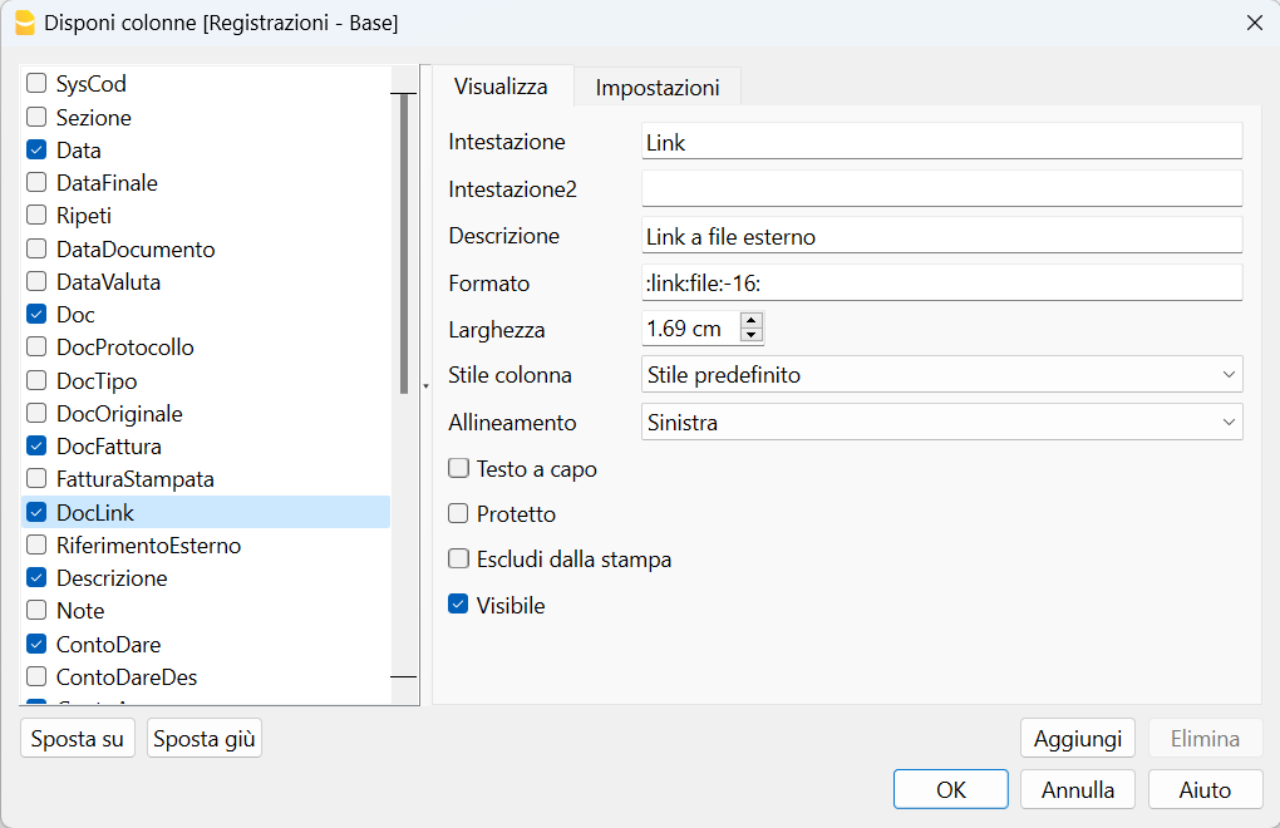
Ora allega i giustificativi dalla tabella Registrazioni. Fai doppio clic sulla cella della colonna Link e cerca e scegli il file da allegare che hai salvato sul tuo computer.
Quando desideri crea il dossier PDF in questo modo:
- Clicca dal menu File la voce Crea dossier PDF.
- Vista in basso a sinistra nella finestra che si apre la casella "Includi allegati", come da immagine seguente.
- Clicca il bottone Ok in basso a destra per confermare e salva il file PDF in una posizione del computer dove preferisci.
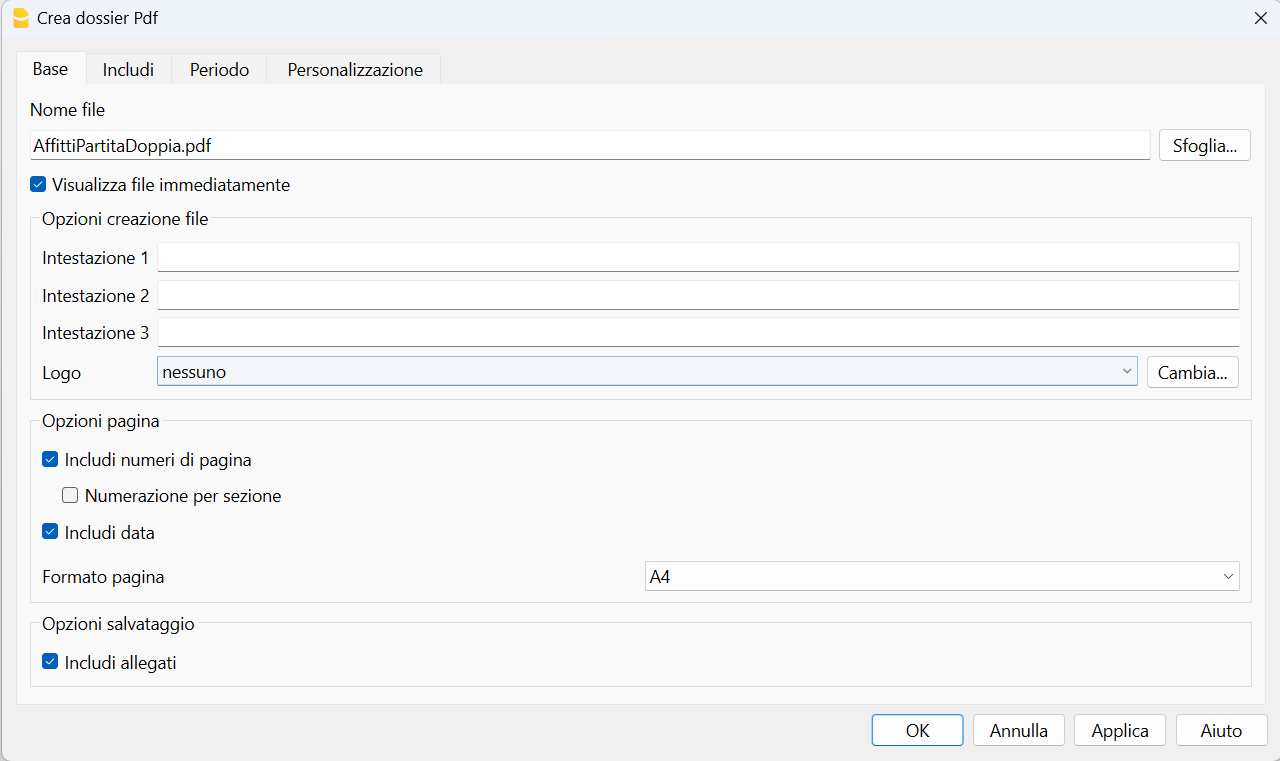
Il PDF salvato è un file con il bilancio, il conto economico, le schede conto e tutti i giustificativi allegati in unico file PDF.
Scarica e guarda un esempio di dossier PDF (alcuni browser non permettono la visualizzazione degli allegati, ti consigliamo di salvarlo e aprirlo con il programma Adobe Acrobat Reader che è gratuito).
Clicca sulle icone a forma di graffetta a sinistra delle registrazioni per aprire gli allegati, come nell'esempio seguente.
Con questa funzionalità puoi inviare il file PDF con la contabilità completa anche per e-mail o decidere di conservarlo secondo le norme vigenti.
Estensione per il controllo degli incassi degli affitti [BETA]
Estensione per il controllo degli incassi degli affitti [BETA]La gestione accurata degli incassi provenienti dai propri inquilini è fondamentale per garantire la redditività di un immobile.
Con l'obiettivo di agevolare questa necessità l'estensione per il controllo degli incassi degli affitti si rivela utile per i proprietari di immobili. Consente di tenere sempre sotto controllo l'incasso degli affitti, identificare i pagamenti mancanti o parziali e fornire una panoramica completa sul corretto addebito degli affitti in contabilità.
L'estensione offre sia un report semplice che uno dettagliato. Questi report consentono una visione immediata degli affitti ricevuti e delle somme mancanti.
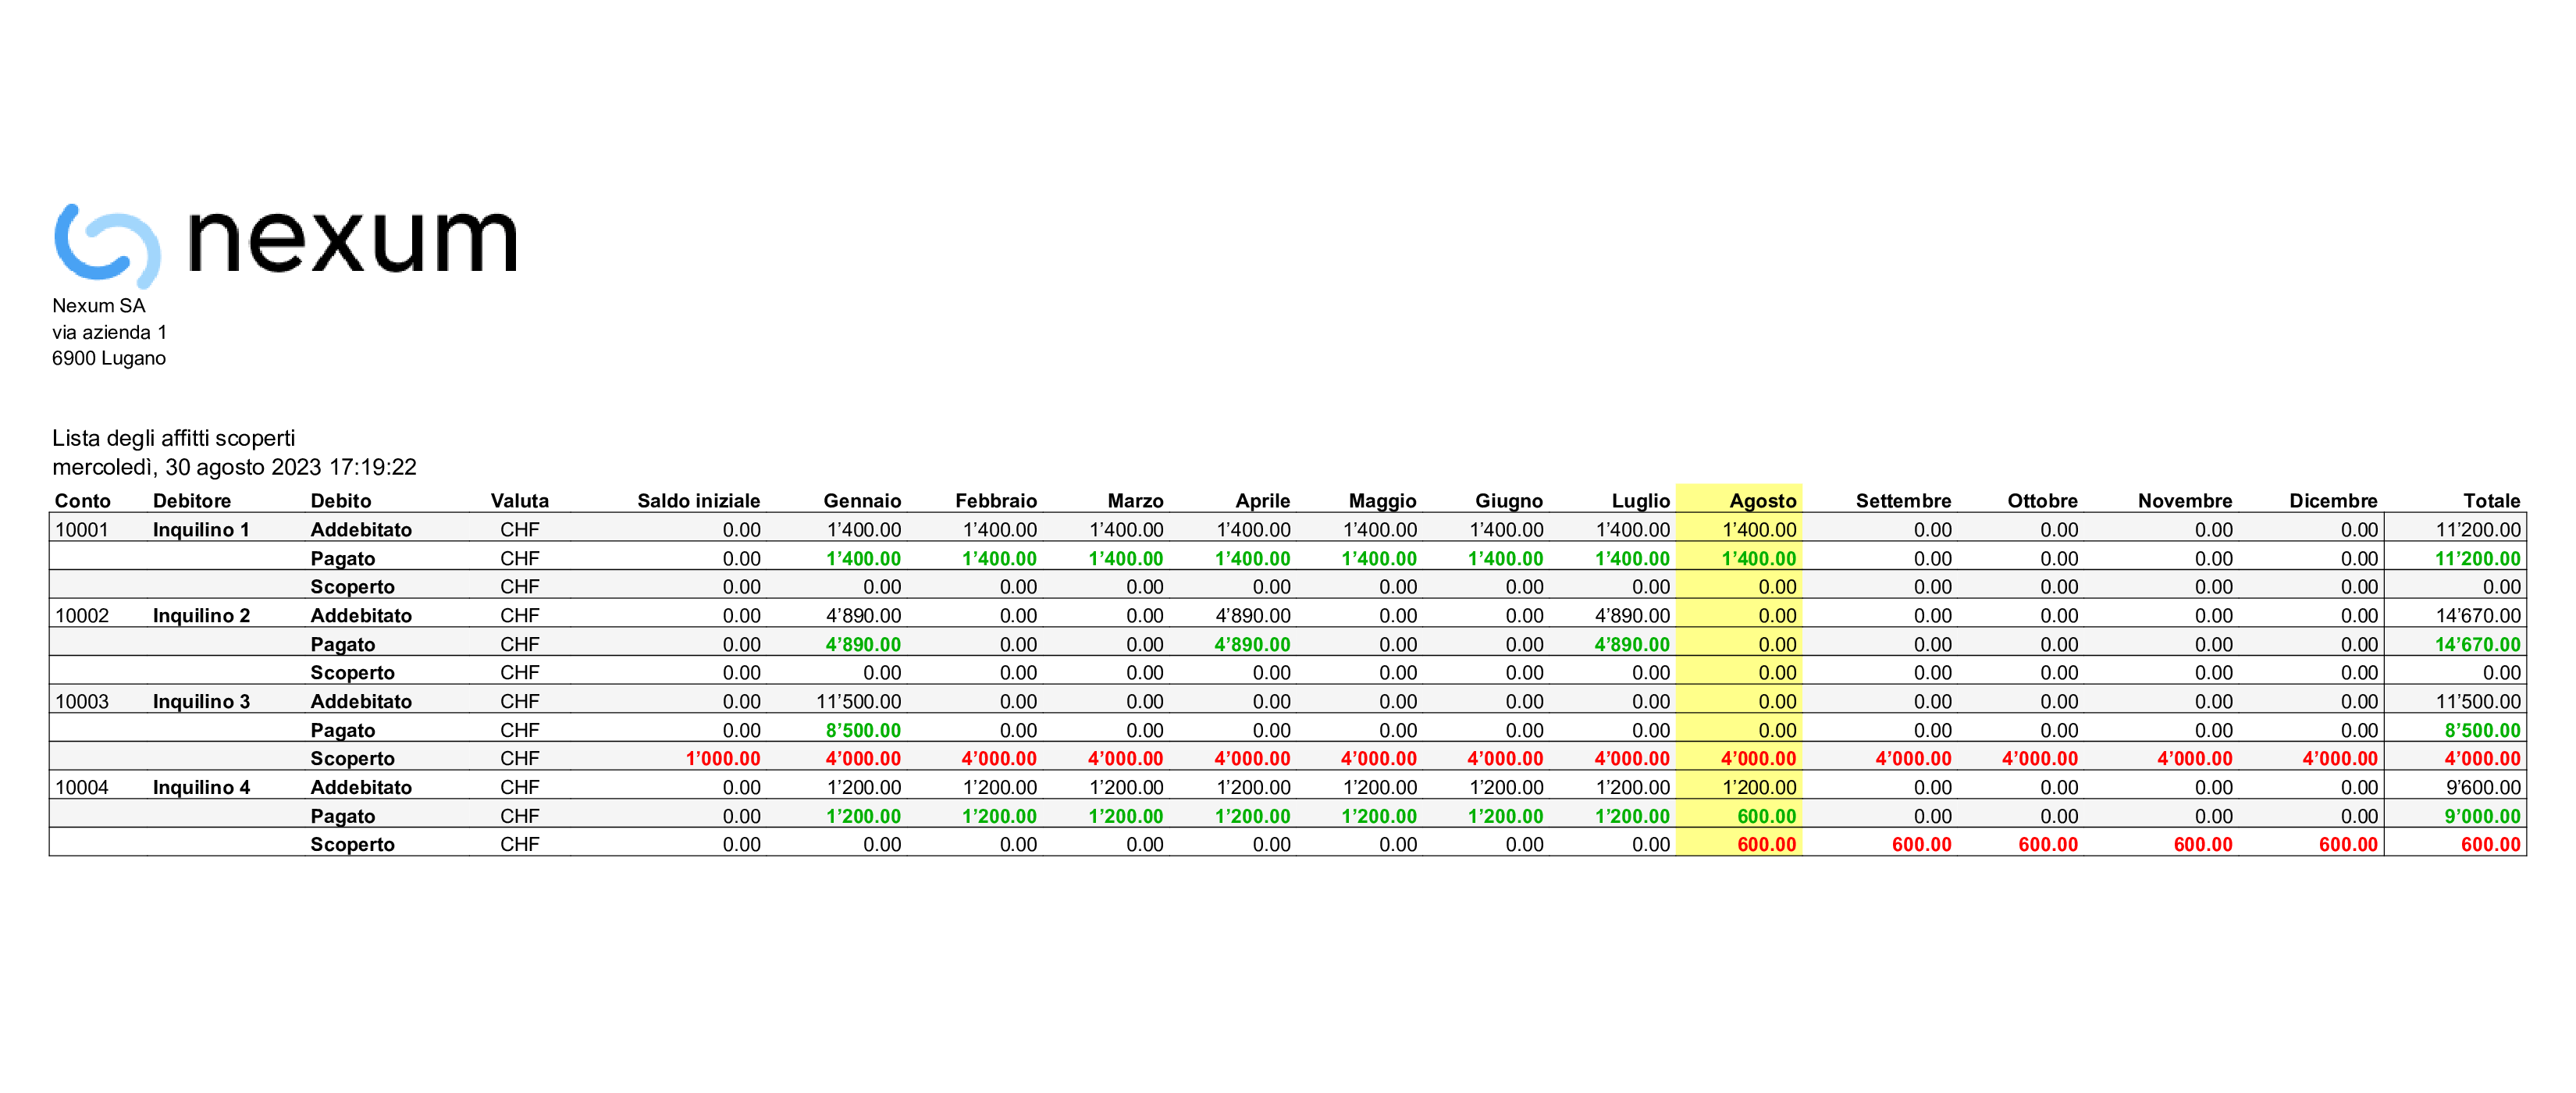
Il report dettagliato fornisce ulteriori informazioni sulle previsioni di incasso dell'anno corrente, suddiviso mensilmente e aggregato per l'intero anno. Questo report consente ai proprietari di pianificare meglio le proprie finanze e prendere decisioni informate.
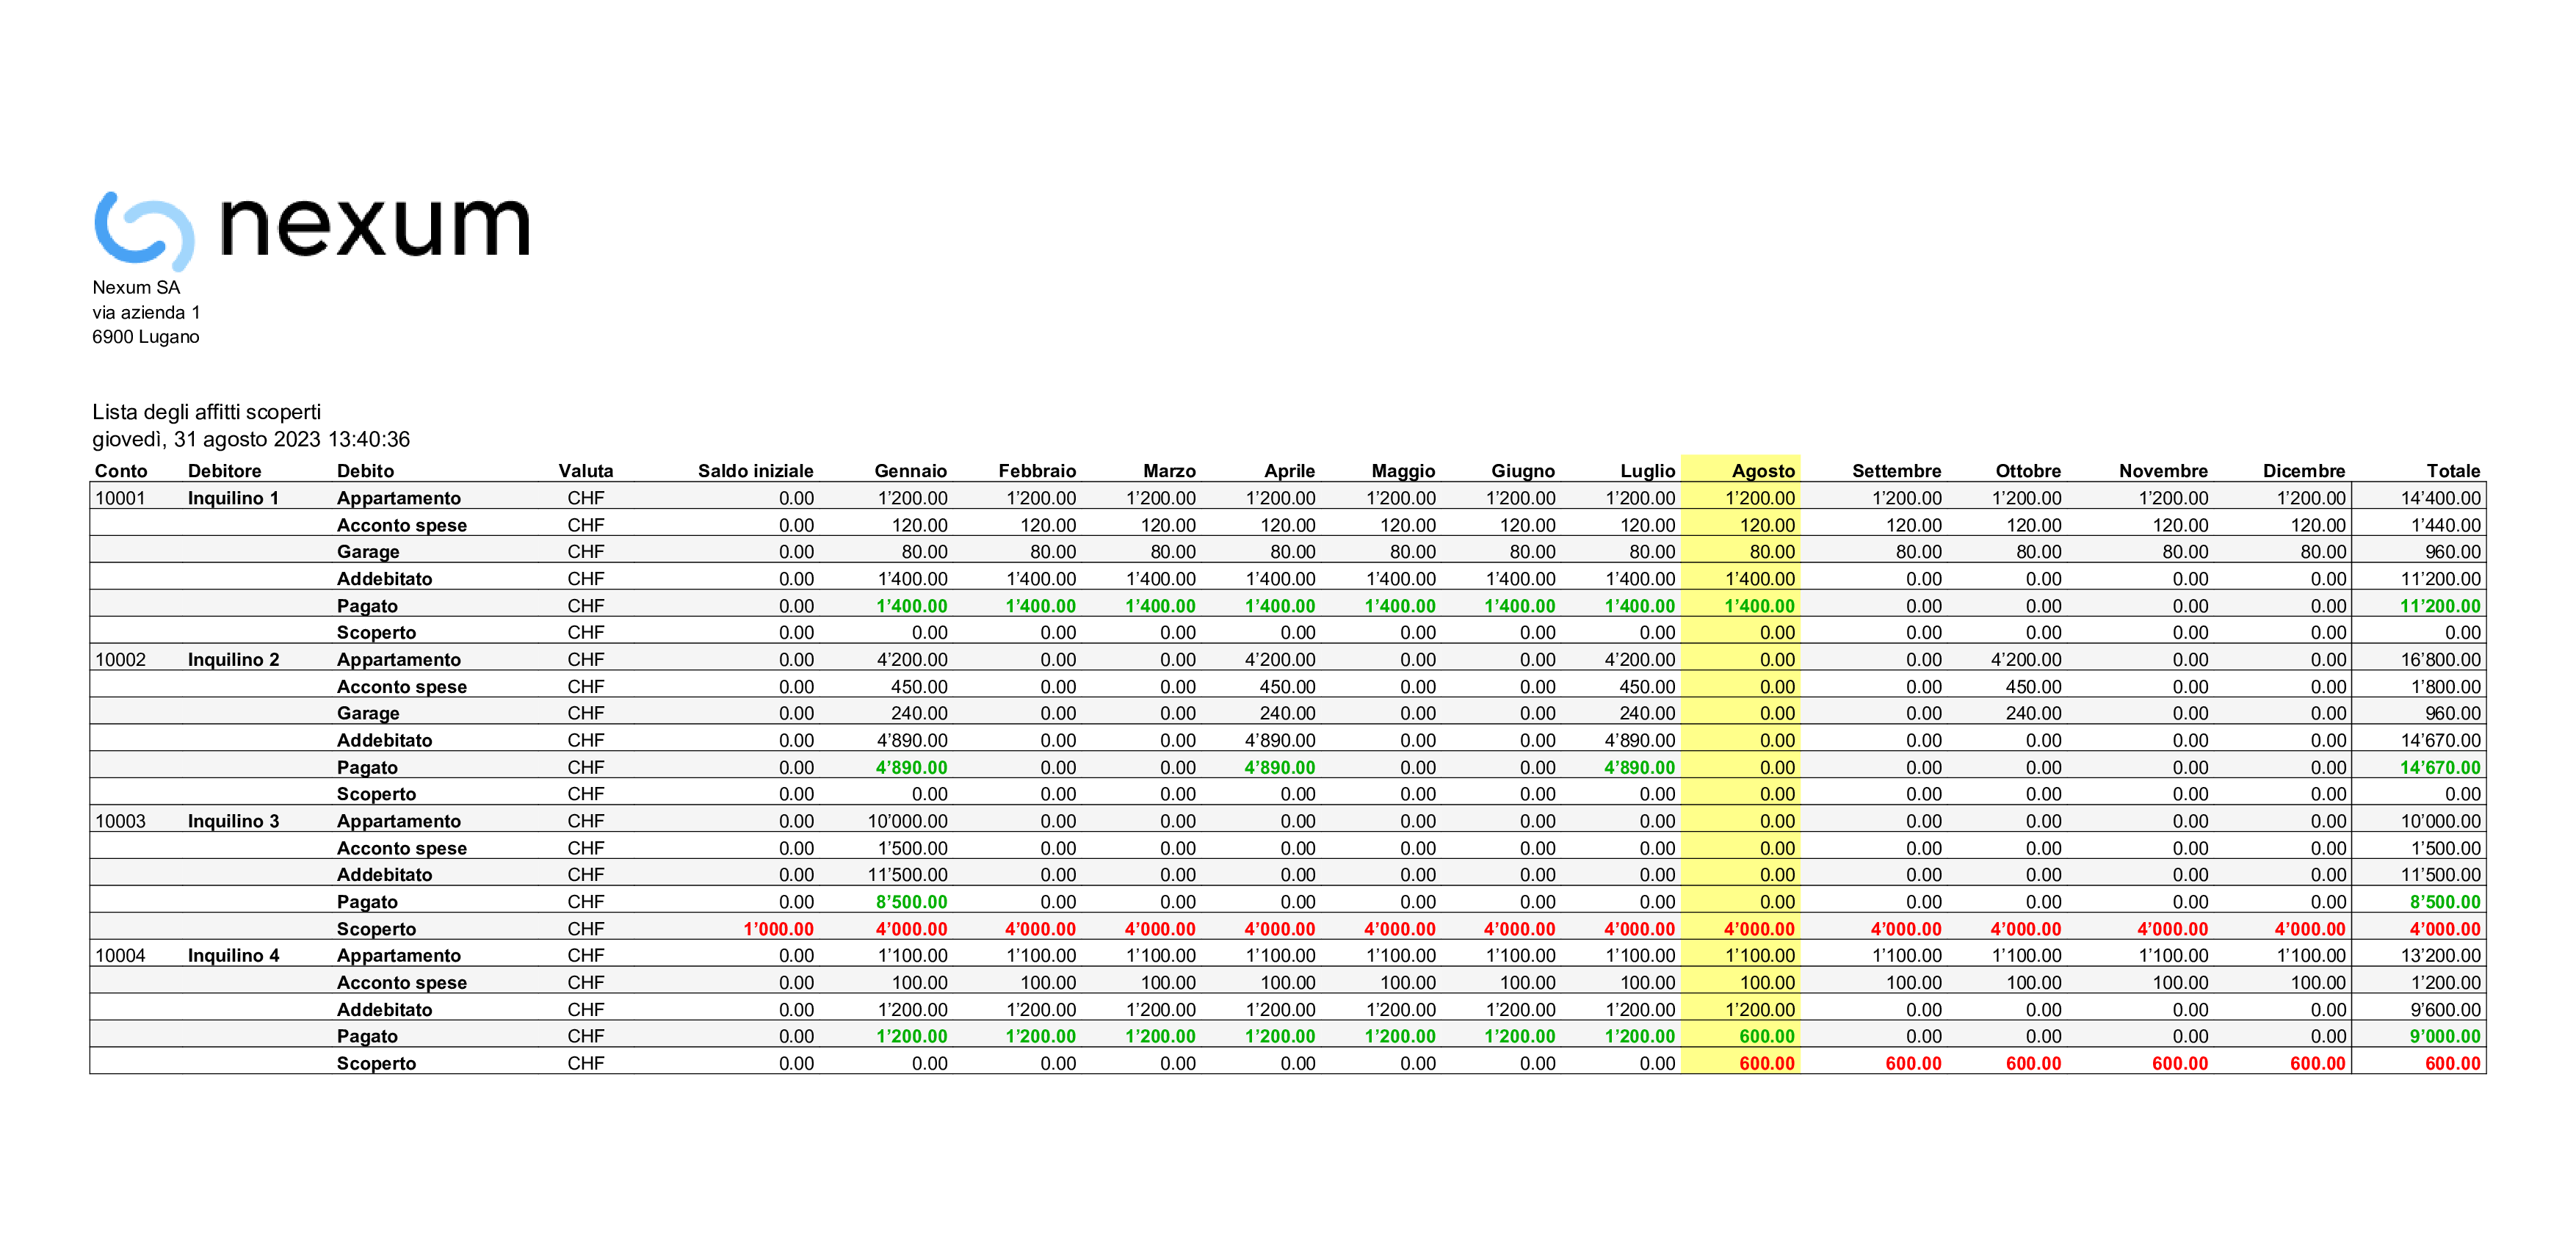
Con entrambe i report per il controllo degli incassi degli affitti l'estensione identifica chiaramente gli inquilini che non hanno effettuato il pagamento dell'affitto o che lo hanno pagato solo parzialmente. Questa funzionalità è utile per prendere azioni immediate e recuperare gli importi scoperti.
Evidenziano inoltre se l'affitto è stato già addebitato correttamente nella contabilità. Questo garantisce l'allineamento tra le entrate registrate e la situazione finanziaria reale.
L'estensione è flessibile e adatta a diversi modi di operare sulla contabilità. Infatti funziona sia con i modelli Entrate/Uscite per non specialisti della contabilità e sia con modelli per la contabilità in Partita doppia. Gli inquilini possono infine essere inseriti sia come conti contabili che come centri di costo (CC1, CC2 o CC3) adattandosi alle preferenze individuali sulla gestione contabile.
Prerequisiti
Per utilizzare questa estensione è necessario:
- Avere il piano Advanced di Banana Contabilità Plus.
- Attualmente questa estensione funziona solo con la versione Banana+ Dev Channel.
Come iniziare
Per iniziare a usarla è sufficiente configurare l'estensione per il controllo degli incassi degli affitti:
- Clicca Estensioni dal menu di Banana.
- Clicca Gestisci estensioni...
- Nella finestra che si apre seleziona la voce Online > Produttività presente nella colonna sinistra.
- Cerca nella colonna centrale della finestra l'estensione chiamata Estensione per il controllo degli incassi degli affitti [BETA].
- Nella colonna destra della finestra clicca sul bottone Installa.
- Una volta installata, per funzionare è necessario impostare il Gruppo o conto dei clienti dal menu Report > Clienti > Impostazioni.
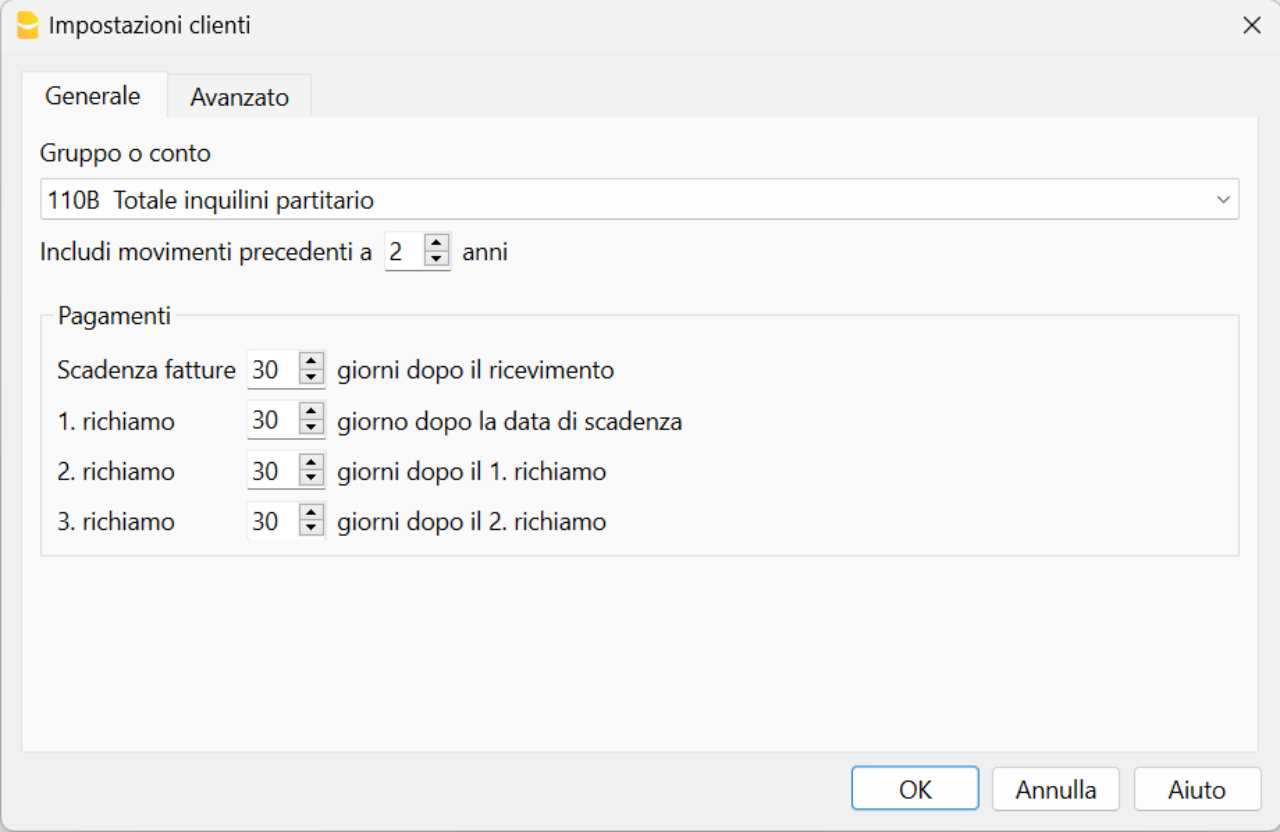
Imposta le registrazioni ricorrenti
Per utilizzare l'estensione tieni traccia degli affitti, degli anticipi per le spese e delle cadenze temporali degli affitti richiesti a ciascun inquilino nella tabella Registrazioni ricorrenti.
- Usa la colonna Data per indicare in che data iniziare ad addebitare automaticamente
- Usa la colonna Data Finale solo per indicare in che data l'inquilino terminerà il contratto di affitto dopo avere dato disdetta dal contratto
- Usa la colonna Ripeti per indicare la cadenza temporale di richiesta dell'affitto (Y anno, 6M semestrale, 4M quadrimestrale, 3M trimestrale, 2M bimestrale e M mensile).

Inserisci nella colonna Descrizione la descrizione per l'affitto e quella per l'anticipo sulle spese, come ad esempio "appartamento", "acconto spese", "garage".
Inserisci i conti contabili della registrazione degli addebiti come ad esempio il conto contabile dell'Inquilino 1 nella colonna Dare e il conto Ricavo da affitti nella colonna Avere.
Inserisci quindi l'importo corrispondente alla descrizione da addebitare.
Scopri il flusso di lavoro per la gestione degli affitti
Banana Contabilità Plus con il piano di abbonamento Advanced permette di facilitare e velocizzare molto la gestione di appartamenti in affitto attraverso un flusso di lavoro che sfrutta diverse funzionalità incluse nel programma.
Scopri il flusso di lavoro per la gestione degli affitti su Banana Contabilità+.
Centri di costo per inquilini
Per contabilità con un numero limitato di inquilini che si conoscono e pagano con regolarità potrebbe risultare troppo impegnativo addebitare mensilmente gli affitti da pagare.
È comunque sempre utile avere un controllo di quello che hanno pagato i singoli inquilini, per cui, invece di creare dei conti inquilini negli Attivi si possono creare dei conti inquilini come centri di costo CC3, preceduti dal punto e virgola ";".
Questa soluzione risulta utile nel caso che si vogliono registrare gli affitti secondo il metodo di cassa, per cui vengono considerati i ricavi solo al momento dell'incasso.
Questa soluzione è più semplice, ma permette comunque di avere un certo controllo e viene spiegata qui di seguito.
Conti inquilini come centri di costo
- Crea gli inquilini come centro di costo.
- Nella colonna Conto della Tabella Conti inserisci il numero dell'inquilino preceduto da un punto e virgola ";".
- Somma ogni inquilino (colonna Somma in "INQ") in un Gruppo "INQ" per ottenere il totale di tutti gli inquilini.
- Abilita la Vista Indirizzi per inserire i dati anagrafici di ogni inquilino.

Registrazione degli affitti sui centri di costo
- Nella Tabella Registrazioni.
- Guarda la Vista Centri di costo o abilita la colonna CC3 (Centro di Costo 3) nella Vista Base.
- Registra l'incasso dell'affitto come nell'immagine seguente, inserisci:
- l'incasso (conto della banca o cassa se l'affitto è stato pagato in contanti in Dare).
- la contropartita (conto Ricavi affitti in Avere).
- l'importo pagato dall'inquilino.
- nella colonna CC3 seleziona il nome dell'inquilino che ha pagato.

Registrazione del dovuto
Se si vuole tenere conto del dovuto sarebbe meglio registrare avendo dei conti di bilancio per ogni singolo inquilino.
Questa norma è consigliata soprattutto se si registra con il metodo sul fatturato.
Tuttavia puoi registrare anche con i centri di costo secondo il metodo di cassa:
- Tieni traccia del dovuto di un inquilino usando i centri di costo.
- Registra l'addebito usando i centri di costo, inserisci:
- la data.
- la descrizione.
- l'importo.
- il centro di costo dell'inquilino.
- Registra l'addebito usando i centri di costo, inserisci:
Non inserire il conto Dare e il conto Avere come nell'immagine seguente.
- Registra quindi il versamento dell'inquilino in contabilità, inserisci:
- l'incasso (conto della banca o cassa se l'affitto è stato pagato in contanti in Dare).
- la contropartita (conto Ricavi affitti in Avere).
- l'importo pagato dall'inquilino.
- il centro di costo scrivendo un segno meno davanti "-Inquilino 1".

Scheda conto inquilino
In ogni momento puoi visualizzare la scheda conto del centro di costo dell'inquilino desiderato.
Apri la scheda conto con un clic sul simbolo che esce nell'angolo in alto a sinistra quando passi il mouse sul centro di costo dell'inquilino, oppure usa il menu Report > Schede conto.
Se hai registrato anche l'addebito mensile dell'affitto la situazione dopo l'incasso è rappresentata nella immagine seguente.
La scheda conto permette di avere traccia del dettaglio degli affitti pagati per ogni singolo inquilino.

Modelli Universali Gestione Affitti
Contabilità Entrate/Uscite per Gestione appartamento o immobile in affitto (Universale)
Contabilità Entrate/Uscite per Gestione appartamento o immobile in affitto (Universale) michaelContabilità in partita doppia per Gestione appartamento o immobile in affitto (Universale)
Contabilità in partita doppia per Gestione appartamento o immobile in affitto (Universale) michaelVerwaltung von Stockwerkeigentum
Verwaltung von StockwerkeigentumEine Stockwerkeigentümergemeinschaft ist ein Gebäude mit mehreren Eigentümern, die sich die Ausgaben und die Gemeinschaftsbereiche teilen. Banana Buchhaltung Plus bietet eine hilfreiche Vorlage für eine professionelle Verwaltung, die bereits einen für die Immobilienverwaltung typischen Kontenplan enthält.
- Vorlage für Stockwerkeigentum | Doppelte Buchhaltung: fortgeschrittene Methode, wenn Sie mit der klassischen Buchhaltung vertraut sind.
Kontenplan für Stockwerkeigentum
Die Buchhaltung eines Stockwerkeigentums kann wie eine normale Buchhaltung betrachtet werden, mit einem wichtigen Unterschied: Die Ausgaben des Gebäudes werden von den Eigentümern vorausbezahlt und müssen genau den tatsächlichen Betriebskosten entsprechen.
Anders gesagt: Das Stockwerkeigentum soll weder Gewinn noch Verlust machen, und die Eigentümer zahlen nur das, was notwendig ist, um den Betrieb des Gebäudes sicherzustellen.
Diese Buchhaltungsvorlagen für Stockwerkeigentum dienen genau dazu:
- die tatsächlichen Kosten im Blick zu behalten
- zu überprüfen, ob jeder Eigentümer seinen korrekten Anteil bezahlt hat
Im Stockwerkeigentum stellen die Ausgaben die Betriebskosten des Gebäudes dar. Die Eigentümer leisten dafür Vorauszahlungen.
Am Jahresende müssen die einbezahlten Beträge den getätigten Ausgaben entsprechen. Die Buchhaltung hilft dabei, diesen Vergleich klar und nachvollziehbar zu machen.
Der Kontenplan des Stockwerkeigentums ist so aufgebaut, dass er die Frage beantwortet, ob die Eigentümer genau den Betrag eingezahlt haben, der für den Betrieb des Gebäudes ausgegeben wurde.
Dazu ist die Buchhaltung in mehrere Hauptbereiche unterteilt.
Konten der Eigentümer
Für jeden Eigentümer wird ein persönliches Konto erstellt, um folgendes zu erfassen:
- wie viel ihm als Vorauszahlung in Rechnung gestellt wurde
- wie viel er tatsächlich einbezahlt hat
- ob er noch bezahlen muss oder zu viel bezahlt hat
Diese Konten ermöglichen es, jederzeit die Situation jedes Eigentümers zu sehen.
Konto Einnahmen für Betriebskosten
Das Konto Einnahmen für Betriebskosten stellt die Gesamtheit der Beträge dar, die den Eigentümern zur Deckung der Betriebskosten des Gebäudes in Rechnung gestellt wurden.
Auf dieses Konto fliessen:
- die von den Eigentümern verlangten Akontozahlungen
- allfällige weitere Einnahmen im Zusammenhang mit dem Betrieb des Gebäudes
Der Gesamtsaldo dieses Kontos muss den getätigten Ausgaben entsprechen.
Weitere Einnahmen des Stockwerkeigentums
Das Stockwerkeigentum kann auch andere Einnahmen haben, zum Beispiel:
- Nutzung der gemeinschaftlichen Waschküche
- Vermietung von Parkplätzen oder Räumen an Dritte
Auch diese Einnahmen tragen zur Deckung der Betriebskosten des Gebäudes bei.
Die Summe der Einnahmen für Betriebskosten und der weiteren Einnahmen muss der Summe der im Jahr angefallenen Immobilienkosten entsprechen.
Konten der Immobilienkosten
Die Kostenkonten erfassen alle Ausgaben, die für den Betrieb des Gebäudes notwendig sind, wie zum Beispiel:
- Unterhalt
- Reinigung
- Energie
- Eingriffe an den Anlagen
- andere gemeinsame Kosten
Die Gesamtausgaben stellen die tatsächlichen Betriebskosten des Gebäudes dar.
Wie die Akontozahlungen der Eigentümer verbucht werden
Wenn einem Eigentümer eine Akontozahlung in Rechnung gestellt wird:
- wird der Betrag auf dem Konto des Eigentümers erfasst
- die Gegenbuchung erfolgt im Konto Einnahmen für Betriebskosten
Diese Buchung wird auch dann vorgenommen, wenn der Eigentümer noch nicht bezahlt hat.
Wenn der Eigentümer die Akontozahlung leistet:
- wird der Betrag als Zahlung auf dem Konto des Eigentümers verbucht
- die Gegenbuchung erfolgt im Bank- oder Kassenkonto
Auf diese Weise ist jederzeit klar ersichtlich:
- wie viel verlangt wurde
- wie viel tatsächlich bezahlt wurde
Kontrolle der geleisteten Akontozahlungen
Das Konto des Eigentümers zeigt jederzeit seine Situation:
- Sollsaldo
bedeutet, dass der Eigentümer noch nicht alle geforderten Akontozahlungen geleistet hat - Habensaldo
bedeutet, dass der Eigentümer mehr als nötig einbezahlt hat
Diese Kontrolle ist sofort verfügbar und erfordert keine externen Berechnungen.
Jahresabrechnung
Am Jahresende werden folgende Punkte verglichen:
- die insgesamt verlangten Beträge
- die tatsächlich angefallenen Ausgaben
Um die verlangten Akontozahlungen mit den Ausgaben auszugleichen:
- wird jenen, denen zu wenig verlangt wurde, der fehlende Betrag nachbelastet
- wird jenen, denen zu viel verlangt wurde, die Differenz zurückerstattet
In beiden Fällen erfolgt die Gegenbuchung im Konto Einnahmen für Betriebskosten.
Dieser Kontenplan ermöglicht es:
- sofort die Betriebskosten des Gebäudes zu verstehen
- die Richtigkeit der einbezahlten Beträge zu überprüfen
- eine transparente und verständliche Verwaltung zu gewährleisten
So widerspiegelt die Buchhaltung des Stockwerkeigentums genau die Realität – die Eigentümer tragen die Kosten des Gebäudes, nicht mehr und nicht weniger.
Banana Buchhaltung Plus verteilt die Ausgaben nicht automatisch auf die einzelnen Eigentümer, da jede Liegenschaft eine eigene, teils komplexe Aufteilung haben kann. Sie können jedoch die in Banana erfassten Daten exportieren und gezielt in Excel weiterverarbeiten. Sehen Sie sich dazu die Seite über die Excel-Vorlagen zur Aufteilung der Betriebskosten im Stockwerkeigentum an, um die Abrechnung an die Eigentümer zu erstellen oder die Spesen für eine eventuelle Steuererklärung aufzuteilen.
Verteilung und Abrechnung der Nebenkosten zulasten der Miteigentümer
Die Berechnung und Aufteilung der Immobilienkosten für die Eigentümer einer Stockwerkeigentümergemeinschaft berücksichtigt:
- Die Summe der angefallenen Kosten.
- Die Summe aller Einnahmen (Akontozahlungen der Eigentümer, Einnahmen aus der Waschküche und allfällige weitere Einnahmen), die einen Teil der Immobilienkosten decken.
- Die Differenz zwischen der Summe der Kosten und der Summe der Einnahmen ist der Saldo, also der Betrag, der am Jahresende von den Eigentümern eingefordert wird:
- Diese Differenz wird als Abrechnung oder Ausgleich bezeichnet.
- Wenn die Einnahmen höher sind als die Kosten, ergibt sich ein Überschuss, der den Eigentümern zurückerstattet wird.
- Wenn die Einnahmen geringer sind als die Kosten, ergibt sich ein Differenzbetrag, der von den Eigentümern eingefordert wird.
- Die Abrechnung ist individuell für jeden Eigentümer: Es ist daher möglich, dass ein Eigentümer Anspruch auf eine Rückerstattung hat, während ein anderer eine Nachzahlung leisten muss.
- Nach der Erfassung der Abrechnungen aller Eigentümer entspricht die Summe aller Kosten genau der Summe aller Einnahmen (kein Gewinn und kein Verlust).
Individuelle Aufteilung der Immobilienkosten
Die individuelle Aufteilung der Immobilienkosten bezieht sich auf jede einzelne Wohnung und auf den Zeitraum, in dem eine Person (natürliche oder juristische) effektiv Eigentümer war (bei Käufen und Verkäufen während des Jahres müssen Pro-rata-Abrechnungen erstellt werden).
Banana Buchhaltung Plus ermöglicht es, die Kosten zu erfassen, übernimmt jedoch nicht die Aufteilung, da diese für jede Liegenschaft unterschiedlich ist und teilweise sehr komplex sein kann.
Für die Aufteilung wird daher empfohlen, für jede Liegenschaft und für jedes Jahr (oder jeden Abrechnungszeitraum) eine Excel-Tabelle zu erstellen, in der die Totale jeder einzelnen Kostenart aufgeführt sind und die Beträge anschliessend mittels Verteilerschlüssel oder Koeffizienten (m2, Verbrauch, Wertquoten usw.) berechnet und aufgeteilt werden.
Siehe Beispiel unten sowie die beigelegte Excel-Vorlage.
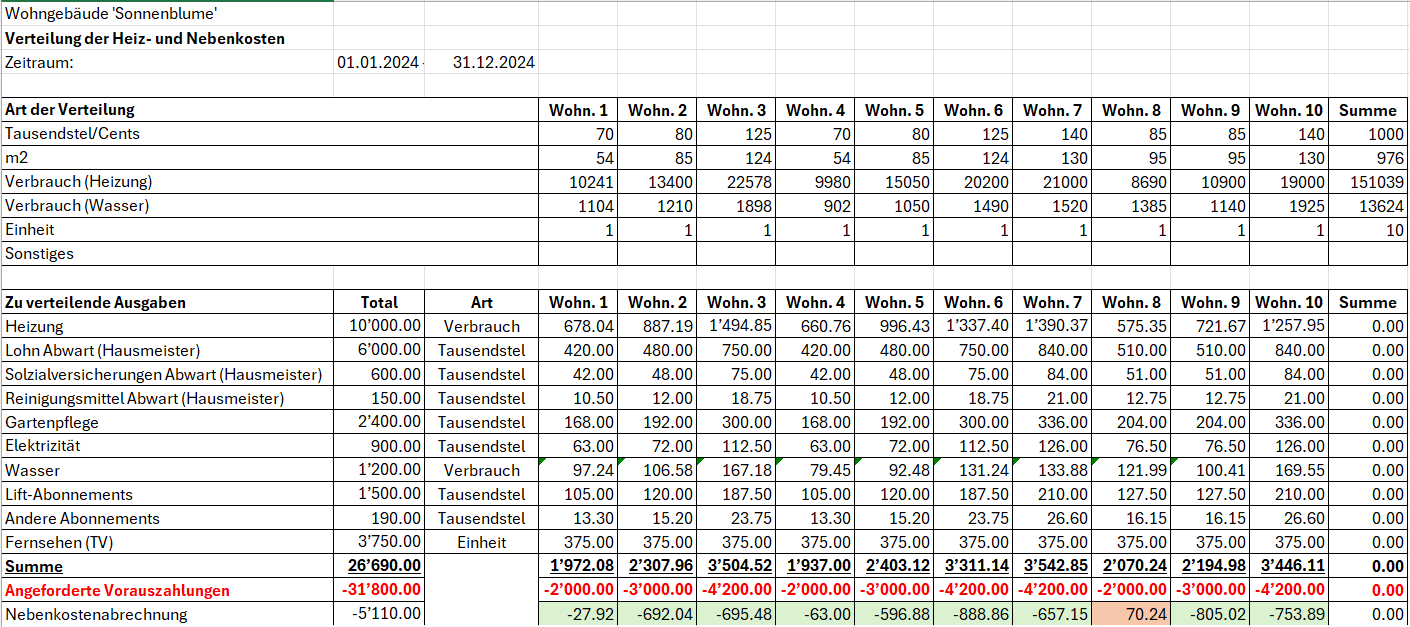
Abrechnung an die Eigentümer
Die berechnete Abrechnung muss in der Buchhaltung erfasst werden:
- Wenn der Eigentümer weniger bezahlt hat als die ihm zugewiesenen Kosten, wird die Differenz eingefordert und im Eigentümerkonto im Soll verbucht.
- Das Gegenkonto ist das Konto für Einnahmen aus Nebenkosten.
- Wenn der Eigentümer mehr bezahlt hat als die ihm zugewiesenen Kosten, wird die Differenz zurückerstattet und im Eigentümerkonto im Haben verbucht.
- Das Gegenkonto ist das Konto für Einnahmen aus Nebenkosten.
- Nachdem alle Abrechnungen den jeweiligen Eigentümern erfasst wurden, muss sich der Gewinn oder Verlust ausgleichen oder es darf ein Betrag von wenigen Rappen verbleiben, der nicht weiter auf alle Eigentümer aufgeteilt werden kann.
- Wenn sich Gewinn oder Verlust ausgleichen oder nur wenige Rappen verbleiben, ist die Aufteilung der Kosten korrekt erfolgt.
- Wenn sich Gewinn oder Verlust nicht ausgleichen oder Beträge von mehr als wenigen Rappen verbleiben, ist die Aufteilung nicht korrekt erfolgt. In diesem Fall müssen die Berechnungen zur Aufteilung der Kosten auf die Eigentümer überprüft werden.
Aufteilung der angefallenen Kosten für den Steuerabzug
Für einen allfälligen Steuerabzug der von jedem Eigentümer getragenen Kosten wird empfohlen, für jede Liegenschaft und für jedes Jahr (oder jeden Abrechnungszeitraum) eine spezifische Excel-Tabelle zu erstellen, in der die Totale der abzugsfähigen Kosten und die entsprechenden Beträge aufgeführt sind. Diese Beträge werden anschliessend für jede einzelne Wohnung mittels Berechnung und Verwendung von Verteilerschlüsseln oder Koeffizienten aufgeteilt.
Siehe das folgende Beispiel und laden Sie die Excel-Vorlage herunter.
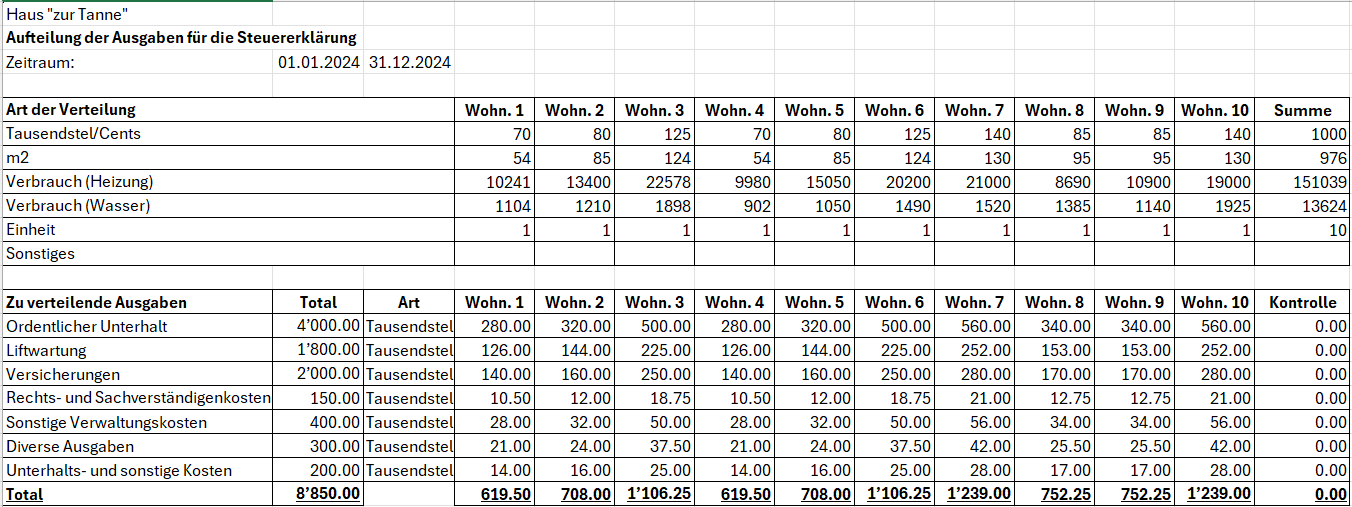
Kostenverteilung auf Miteigentümer nach dem Pro-rata-Prinzip
Wenn während des Jahres ein Verkauf einer Wohnung stattfindet, kann es notwendig sein, die Kosten pro-rata zwischen dem bisherigen und dem neuen Eigentümer aufzuteilen:
- Es können jedoch auch andere Aufteilungsmethoden bestehen, wie beispielsweise nach Monaten oder nach warmer und kalter Jahresperiode usw.
- Die Methoden zur Aufteilung der pro-rata Kosten variieren je nach geltenden lokalen Vorschriften oder gemäss den Kaufverträgen der Wohnung.

Flusso di lavoro per la gestione dei condomini
Con Banana Contabilità Plus puoi gestire una contabilità di condominio con il flusso di lavoro descritto in questa pagina e che comprende:
- l'importazione degli estratti conto elettronici bancari
- la registrazione automatica degli estratti attraverso delle regole di completamento delle registrazioni
- la registrazione automatica dei salari versati al custode senza riscrivere o copiare le registrazioni più volte
- la creazione di report completamente personalizzati in Excel
- il salvataggio e l'invio della contabilità completa dei giustificativi in un unico file PDF.
Importa gli estratti conto elettronici della banca
Puoi richiedere alla tua banca di fornirti l'estratto conto elettronico in formato XML (tipo di estratto Camt.053). Se necessario chiedi anche alla tua banca di continuare a ricevere l'estratto conto in formato PDF.
L'estratto conto elettronico in formato XML ti permette di ottenere la contabilità sempre aggiornata e di emettere richiami di pagamento in qualsiasi momento.
Quando il file XML è disponibile scaricalo dall'e-banking e salvalo sul computer. Potresti riceverlo giornalmente, settimanalmente o mensilmente in base a come lo hai richiesto.
Usa l’estensione Importazione estratto bancario SEPA/ISO 20022 per importare il file appena scaricato.
Quando importi un estratto conto elettronico puoi registrare automaticamente sia gli incassi ricevuti che i pagamenti effettuati grazie all'uso delle regole di completamento delle registrazioni contabili. A ogni importazione puoi creare tutte le regole necessarie. Con il tempo ti basterà importare gli estratti conto per registrare automaticamente tutta la contabilità.
Crea le regole per automatizzare la contabilità
Banana Contabilità Plus, con l'abbonamento al piano Advanced, permette di registrare automaticamente la contabilità secondo i criteri che desideri.
Per esempio puoi registrare tutte le fatture pagate a Azienda SA in un conto contabile specifico tramite il nome dell'azienda a cui paghi.
Quando nell'estratto conto elettronico appare quel nome di azienda e corrisponde a un'uscita, Banana Contabilità Plus lo registra nel conto contabile da te impostato.
Se paghi una fattura per un contratto stipulato con Azienda SA (per esempio per un'assicurazione, una fornitura di energia, ecc.) puoi aggiungere il segno + e il numero di contratto, come per esempio +Azienda SA 101.200.14, dove 101.200.14 è il numero di contratto stipulato.
Il segno + indica che è necessario trovare tutte le informazioni, in qualsiasi ordine, all'interno dell'estratto conto elettronico. In questo modo puoi registrare in maniera distinta più contratti diversi stipulati con la stessa azienda.
Allo stesso modo puoi registrare automaticamente gli incassi usando i nomi delle persone dalle quali incassi.
Con le regole registri automaticamente tutte le entrate e le uscite da tutti i proprietari in maniera molto precisa.
Se desideri puoi anche indicare uno specifico importo alla regola. In questo modo distingui sempre di più le registrazioni, sia in entrata che in uscita.
Per usare le regole è necessario inserire nella colonna Doc della tabella Registrazioni ricorrenti il codice !Rule come negli esempi di regole seguenti.

In questa tabella è anche possibile usare il codice !RuleSplit per inserire regole che registrano automaticamente con registrazioni composte da più righe.
In questo modo riduci notevolmente il tempo di registrazione contabile e ottieni la contabilità sempre aggiornata.
Registra automaticamente i salari del custode
Dalla tabella Registrazioni ricorrenti registra i salari del custode su più righe inserendo per esempio nella colonna Doc il codice univoco salari su ogni riga.
Inserisci la descrizione di ogni riga inclusa nella registrazione, inserisci i rispettivi conti Dare e Avere e gli importi che si ripetono in modo ricorrente.
Quando imposti una registrazione ricorrente usala nella tabella Registrazioni:
- Compila la colonna Data inserendo la data.
- Inizia a scrivere nella colonna Doc la parola salari.
- Seleziona la registrazione ricorrente trovata da Banana Contabilità Plus.
La registrazione del salario composta da più righe apparirà già completata nella tabella Registrazioni in contabilità.
Se preferisci puoi automatizzare ulteriormente la registrazione composta da più righe con l'uso delle regole per usarle quando importi l'estratto conto elettronico:
- Nella colonna Doc inserisci i codici !Rule e !RuleSplit al posto del nome salari riportato nell'esempio precedente.
- Inserisci il nome del custode a cui versi il salario nella colonna Descrizione della riga dove inserisci il codice !Rule.
- Questo nome verrà cercato nell'estratto conto elettronico durante l'importazione.
- Inserisci una parentesi quadrata aperta e una chiusa [] nel conto di contropartita della regola dove inserisci il codice !Rule. Queste parentesi indicano che si tratta di una regola per una registrazione con più righe.
Guarda l'esempio nella immagine seguente.
Crea report personalizzati in Excel
Con Banana Contabilità Plus è possibile collegare Microsoft Excel tramite l'Add-in di Banana Contabilità Plus per creare report completamente personalizzati.
Con l'Add-in puoi suddividere il budget o calcolare i conteggi di suddivisione delle spese tra i proprietari.
Trovi l'Add-in da installare all'interno di Excel, cerca nei componenti aggiuntivi, installalo e inizia subito a generare i tuoi report personalizzati.
Per maggiori informazioni guarda anche le pagine di documentazione relative all'Add-in Excel di Banana Contabilità Plus.
Salva e invia la contabilità per e-mail con i giustificativi in unico file PDF
Nella tabella Registrazioni è possibile abilitare e visualizzare la colonna Link. Usa questa colonna per allegare a ogni registrazione contabile il relativo giustificativo, come per esempio una fattura ricevuta o una fattura emessa.
Abilita la colonna Link in questo modo:
- Fai doppio clic sulla intestazione delle colonne nella tabella Registrazioni (per esempio sulla colonna Descrizione).
- Vista la casella DocLink nella colonna a sinistra della finestra che si apre, come da immagine seguente.
- Clicca sul bottone Ok in basso a destra nella finestra per confermare.
Ora allega i giustificativi dalla tabella Registrazioni. Fai doppio clic sulla cella della colonna Link e cerca e scegli il file da allegare che hai salvato sul tuo computer.
Quando desideri crea il dossier PDF in questo modo:
- Clicca dal menu File la voce Crea dossier PDF.
- Vista in basso a sinistra nella finestra che si apre la casella "Includi allegati", come da immagine seguente.
- Clicca il bottone Ok in basso a destra per confermare e salva il file PDF in una posizione del computer dove preferisci.
Il PDF salvato è un file con il bilancio, il conto economico, le schede conto e tutti i giustificativi allegati in unico file PDF.
Scarica e guarda un esempio di dossier PDF (alcuni browser non permettono la visualizzazione degli allegati, ti consigliamo di salvarlo e aprirlo con il programma Adobe Acrobat Reader che è gratuito).
Clicca sulle icone a forma di graffetta a sinistra delle registrazioni per aprire gli allegati, come nell'esempio seguente.
Con questa funzionalità puoi inviare il file PDF con la contabilità completa anche per e-mail o decidere di conservarlo secondo le norme vigenti.
Modelli Universali Gestione Condomini
Contabilità Entrate/Uscite per Gestione condominio (Universale)
Contabilità Entrate/Uscite per Gestione condominio (Universale) michaelContabilità in partita doppia per Gestione condominio (Universale)
Contabilità in partita doppia per Gestione condominio (Universale) michael记账凭证 (中文-柬埔寨文)
记账凭证 (中文-柬埔寨文)详细操作步骤,请参见页面记账凭证 (中文-英文)。
Productivité (Universel)
Banana Comptabilité Plus met à disposition des outils complémentaires pour une gestion d’entreprise plus complète et efficace. Les applications de productivité permettent d’automatiser des processus clés tels que la facturation, la gestion des stocks et le contrôle des biens d’entreprise.
Exemple : Offres et Factures
L’extension permet de créer des offres, devis, factures et notes de crédit de manière simple et professionnelle, à partir de données comptables ou en les personnalisant manuellement.
- Génération rapide de factures et d’offres en PDF
- Personnalisation graphique (logo, mise en page, langues)
Gestion des Clés
Outil utile pour enregistrer et suivre les clés et les accès (physiques ou numériques) accordés aux employés, collaborateurs ou tiers.
- Contrôle centralisé des accès
- Réduction des risques de perte ou d’utilisation abusive
- Rapports mis à jour pour les audits ou la gestion interne
Stock
Module conçu pour la gestion des stocks et des mouvements de marchandises.
- Enregistrement des entrées/sorties de marchandises
- Calcul automatique des stocks et de la valeur d’inventaire
- Prise en charge des codes articles, catégories et valorisation (FIFO, LIFO)
Registre des Biens Amortissables
Extension utile pour suivre les biens d’entreprise et calculer les amortissements annuels selon des critères fiscaux ou personnalisés.
- Suivi complet des achats, dépréciations et cessions
- Calcul automatique des montants d’amortissement
Ces outils font de Banana Comptabilité Plus une solution plus puissante et polyvalente, adaptée aux petites entreprises, indépendants et associations à la recherche d’efficacité et d’intégration sans complexité.
Bibliothèque, collections de livres et gestion des prêts
Bibliothèque, collections de livres et gestion des prêtsMode d'emploi du modèle pour les bibliothèques
- Téléchargez le programme Banana Comptabilité 8
- Téléchargez le modèle indiqué au-dessus "Modele_Bibliotheque_et_collections_fr.ac2"
- Suivre les explications détaillées é la page d'information Bibliothèques et Collections
Insérer et gérer les données des utilisateurs
Les données des utilisateurs sont insérées dans le tableau Contacts et peuvent être sous-divisés en groupe dans le tableau Groupes.
Pour des explications sur les colonnes présentes dans les tableaux Groupes et Contacts, veuillez consulter l'explication du Carnet d'adresses
Tableau Groupes
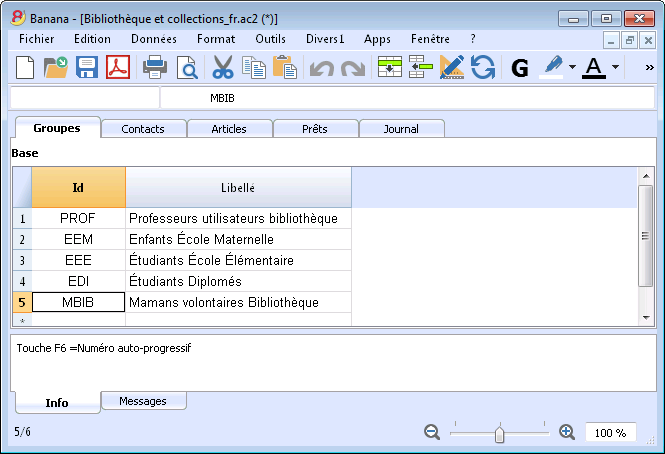
Tableau Contacts
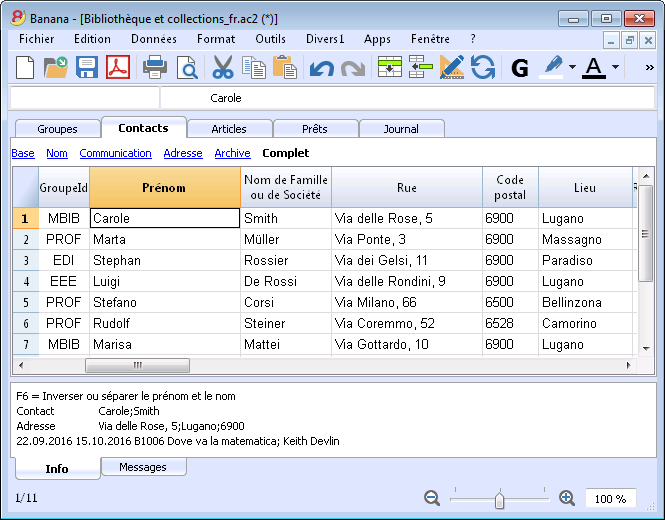
Insérer les données des livres
Les données des livres d'insèrent dans le tableau Articles.
Pour des explications détaillées des colonnes dans le tableau Articles, veuillez consulter la page Bibliothèques et Collections - Colonnes
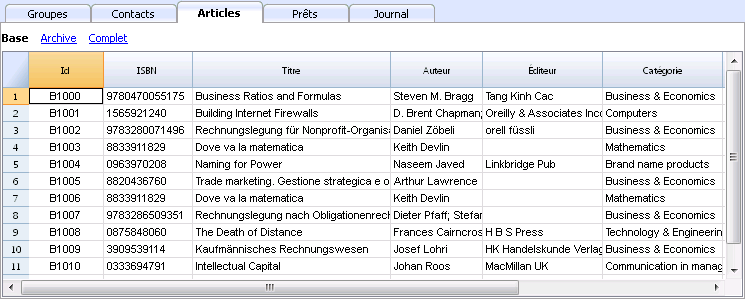
Façons d'insérer les données des livres:
- Insertion manuelle
- Récolte des données d'Excel
- Récolte des données des livres depuis l'internet
Pour des explications détaillées des colonnes, veuillez consulter la page Bibliothèques et collections - Insertion des livres
Gérer les prêts
Dans le tableau Prêts, on gère les prêts des livres et les échéanches auxquelles les livres devront être restitués. Pour les explications détaillées des colonnes, veuillez consulter la pages Bibliothèques et collections - Gérer les prêts
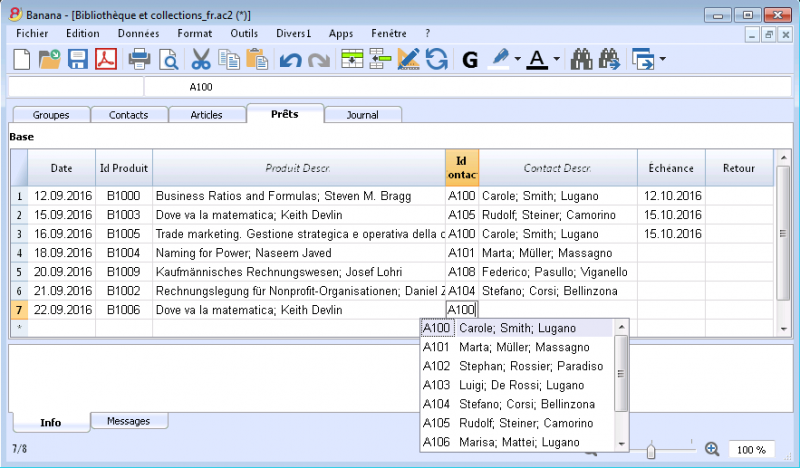
Restitution d'un livre
Pour chercher un libre et encoder sa restitution il suffit de choisir la commande Retourner articles... du menu Divers1.
Pour des explications détaillées des colonnes, veuillez consulter la pages Bibliothèques et collections - Restitution d'un livre
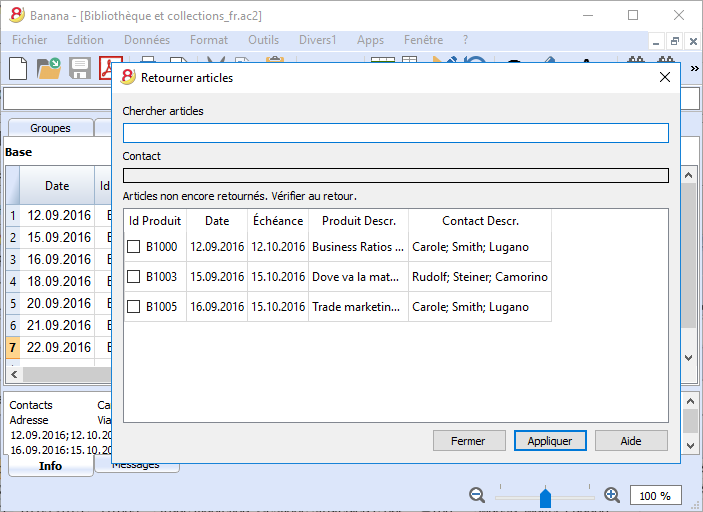
Archiver les données
Avec la commande Archiver Données (du menu Divers1), et ensuite Archiver Prêts, le programme élimine du tableau Prêts tous les prêts des livres restitués et les inscrit dans le tableau Archives.
Pour des explications détaillées des colonnes, veuillez consulter la pages Bibliothèques et collections - Archives.
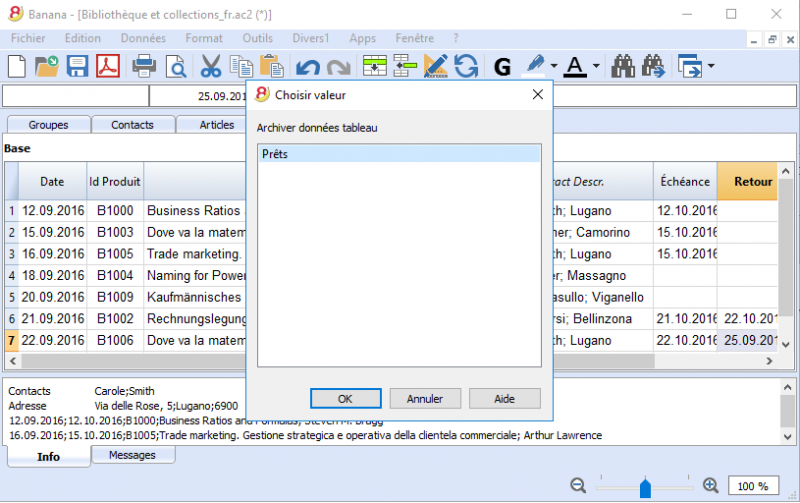
Journal de Bord - organisation et note interne
Le tableau Journal est très utile pour inscrire les jours de service des bibliothécaires, ainsi que pour y inscrire des remarques, ou des faits pertinents, des listes de choses à faire, etc.
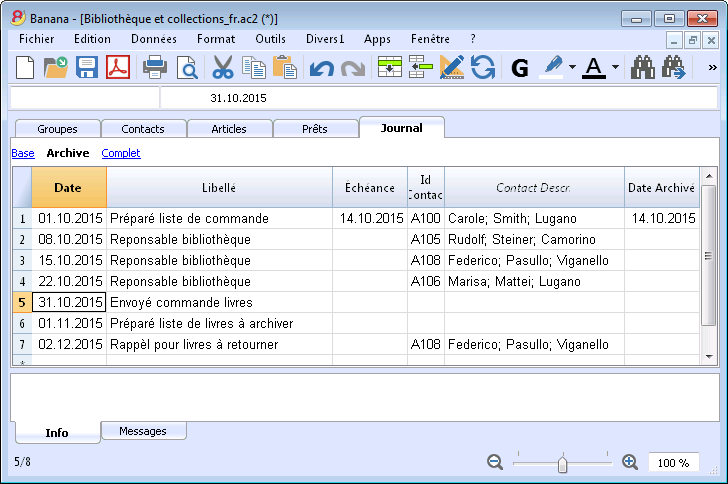
Impression
Tout ce qui s'affiche peut être imprimé ou sauvegarder dans un fichier pdf.
Dans la section BananaApps (cherchez Library) vous trouverez les extensions pour l'impression:
- Impression du catalogue complet des livres en pdf, a publier sur le site internet.
- Impression des fiches des contacts avec le livres encore prêtés (à envoyé en annexe lors des rappels)
Imprimer les étiquettes
Il est possible d'imprimer deux types d'étiquettes:
- des petites étiquettes à placer au dos du livre (avec le code du livre), de façon à ce qu'elles soient visibles sur les étagères
Les étiquettes peuvent être imprimées soit à partir du fichier Banana où se trouvent toutes les données des livres de la bibliothèque, soit à partir d'un fichier vide, au cas où vous désirez d'abord imprimer les codes et ensuite les attribuer aux livres. - des grandes étiquettes à placer dans la page interne du livre, dans lesquelles, par exemple, apparait le nom de la bibliothèque ainsi que la date de restitution. Les textes sont personnalisables.
Impression codes des livres
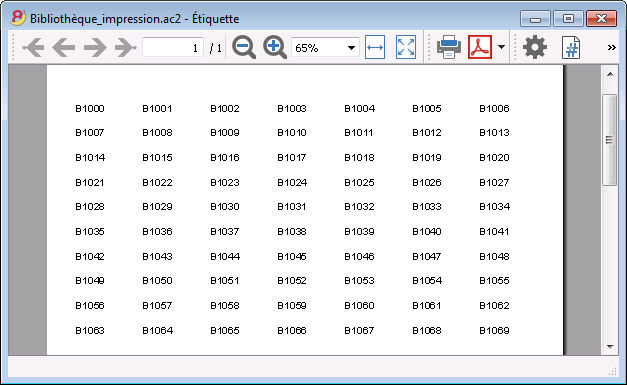
Impression d'étiquettes pour l'intérieur des livres
Gestion des cotisations annuelles
Pour les bibliothèques avec membres inscrits, vous pouvez, par exemple, créer un nouveau fichier de comptabilité en partie double pour gérer les cotisations de vos membres. Pour cela, nous vous prions de consulter la Section Modèles pour obtenir celui qui convient le mieux à vos besoins.
|
|
Library Books Report
Library Books ReportInstall the extension
To install the extension:
- Open Banana Accounting Plus.
- Menu Extensions > Manage Extensions.
- In the search field enter Library Books Report.
- From the extensions list select Library Books Report.
- Select the extension and click Install.
- Click Close to close the window.
Create the report
To creare the report:
- Open an accounting file.
- From the Extensions menu select Library Books Report and then one of the following:
- Library Books Report.
- Library Contacts Report.
- Create vCard from address.
Library Books Report
This extension creates a list of all the books that are in the Banana Library file. For a clearer view the list is split and sorted by genre of books.
You can export the catalog in pdf format to easily publish it on your web site.
Example of books report:
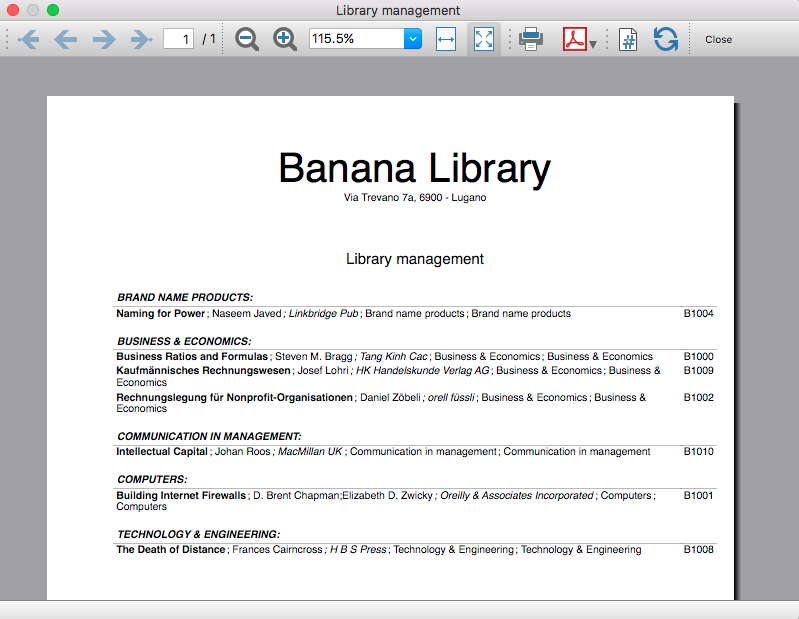
Library Contacts Report
Report Expired Outstanding books for each person.
This report creates a page card for each contact, with all information, including the outstanding books.
You can print:
- All contacts
- Selected contacts
- Conacts with outstanding books

Create vCard from address
This extension extract the addresses data in the vCard format.
For more information visit Export Address data in the VCard format.
Time Sheet Extensions
The Timesheet is a free and unlimited application because it is included in the Banana Accounting Plus Free Plan. It works like Excel but is optimized for calculation of hours. It is therefore much more reliable and you can easily manage all kind of working hours. You have a comprehensive view of the hours and can always correct.
Timesheet - Report with project and resource data [BETA]
Timesheet - Report with project and resource data [BETA]The following features provide tools to export and analyze timesheet data, helping you review recorded hours and gain insights by project and resource.
Time Sheet Export
The Time Sheet Export feature allows you to export recorded time data for further analysis, reporting, or integration with other systems.
It provides a structured way to extract time entries, making it easier to share data, create custom reports, or use the information in external accounting, payroll, or project management tools.
This function helps ensure consistency and accuracy when working with time-tracking data outside the application.
Timesheet – Report with Project and Resource Data [BETA]
The Timesheet – Report with Project and Resource Data [BETA] provides a detailed overview of recorded time, organized by projects and resources.
This report is designed to help users analyze how time is allocated across different activities and team members, offering better visibility into project progress and resource utilization.
As a Beta feature, it is intended for testing and feedback, and may be further refined based on user experience.
This extension works with a timesheet file and provide a report for the selected project and detail of the resource. You can install the extension from the menu Extensions->Manage Extensions.
This extension requires the Advanced plan of Banana Accounting Plus.
For more information see the documentation pages for tracking projects times.
You can install the Extension.
Setup timesheet file
Prior to use the extension you need to setup the timesheet file.
- Create a new Timesheet file or use an existing one.
- Add the Projects table:
- Tools → Add/Remove functionalities → Add Table Project.
- Add the projects codes.
- Add the Resources table
- Go to the Journal Table
- Tools → Add/Remove functionalities → Add simple table
- Enter the name "Resources" (Name XML must be "Resources")
- Go to the Journal Table
- Tools → Add/Remove functionalities → Add columns to join table
- Choose Resources
- Dialog "Insert column after" choose Description.
- Go to Resources table and enter the resource id and description (people name).
Enter Project data
In the Journal, when you enter the daily worked time, you can now specify the Project and Resource.
Print the report
You can print a report for a single project at a time.
Time sheet - systematic 2026
Time sheet - systematic 2026Work hours are recorded with start and end times; notes can be written down, reimbursements made, days of illness or additional work can be recorded. The program calculates the totals and any differences with the due hours.
Important: The festive days contained in the model are to be updated manually according to your country/region.
To use the Time Sheet application, download the available file and follow the instructions on our page How to start a Time Sheet.
Exemple Offres et Factures
Exemple Offres et Factures ivanGestion et inventaire des clés de portes et de bâtiments
Gestion et inventaire des clés de portes et de bâtimentsLogiciel simple et efficace pour la gestion des clés de portes, immeubles, bureaux et bâtiments de tout type.
Pour les administrateurs d’immeubles et de copropriétés.
- Liste de toutes les clés, avec quantités, numéros de série et toute autre information que vous souhaitez ajouter.
- Liste des personnes ou des lieux où se trouvent les clés.
- Registre de remise et de retour des clés.
- Ajoutez des liens vers des fichiers de documents et de reçus numériques, pour une gestion sans papier.
- Gérez un nombre illimité d’immeubles.
La gestion des clés est basée sur l'application de stock et offre de nombreuses possibilités. Faites-le-nous savoir via le retour d'information sur la documentation ci-dessous si vous avez besoin de personnalisations qui pourraient rendre la gestion encore plus simple et rapide.
Stock
Stock
Veuillez consulter les pages suivantes pour plus de détails :
- Caractéristiques
- Comment démarrer
- Propriétés fichier
- Tableau Articles
- Tableau Écritures
- Tableau Lieux
- Rapports du Stock
Registre des Actifs
Registre des ActifsCapitolati, Offerte Strutturate
Con Banana Contabilità Plus puoi creare e stampare un capitolato d’offerta in modo semplice e strutturato, organizzando lavori, materiali, quantità e prezzi.
La tabella QuickSum permette di inserire le diverse voci del capitolato e di calcolare automaticamente subtotali e totali. Puoi partire da un modello già predisposto e adattarlo alle esigenze del tuo progetto.
Per ottenere il documento finale è disponibile anche un’estensione per la stampa del capitolato d’offerta, che utilizza i dati della tabella QuickSum per generare un report ordinato e professionale.
Scopri le risorse disponibili per iniziare:
- Modello per capitolato d’offerta con tabella QuickSum
- Estensione QuickSum Stampa Capitolato d’offerta
QuickSum Stampa Capitolato d'offerta [BETA]
QuickSum Stampa Capitolato d'offerta [BETA]L'estensione presentata qui di seguito permette di creare una stampa del capitolato di offerta fatto con la tabella QuickSum.
Prerequisiti
Per utilizzare questa estensione:
- Scaricare e installare Banana Contabilità+ Dev Channel (versione 10.2.3 o successive).
Versione Beta
La tabella QuickSum è uno strumento ancora in fase di sviluppo e che viene messo a disposizione a un limitato numero di utenti.
Ci sono diverse funzionalità che sono per il momento provvisorie e che subiranno cambiamenti con il tempo.
L'estensione al momento è rilasciata in versione beta. Ciò significa che alcuni dettagli potrebbero cambiare senza preavviso.
Installazione e utilizzo dell'estensione
- Installa l'estensione QuickSum Capitolato d’offerta.
Visita la documentazione Gestione Estensioni per vedere come installare l'estensione. - Una volta installata, l'estensione sarà visibile nel menu Estensioni dove potrà essere eseguita.
Crea la stampa del capitolato d'offerta
- Dal menu Estensioni seleziona l'estensione QuickSum Capitolato d’offerta.
- Completa i campi del dialogo Impostazioni e clicca su OK.
- Viene automaticamente creato il report con la stampa del capitolato.
I testi delle impostazioni dell’estensione e i testi fissi sulla stampa, come le intestazioni delle colonne, il riporto e il titolo della pagina di riepilogo, vengono visualizzati nella lingua del file.
Da File > Proprietà file (Dati base) > sezione Varia > Lingua corrente è possibile cambiare la lingua del file.
Le lingue supportate sono italiano, francese, tedesco e inglese.
Dialogo Impostazioni
Esegui l'estensione dal menu QuickSum Capitolato d’offerta.
Si aprirà il dialogo delle Impostazioni dell'estensione, dove puoi definire alcune informazioni per creare la stampa del capitolato d'offerta.
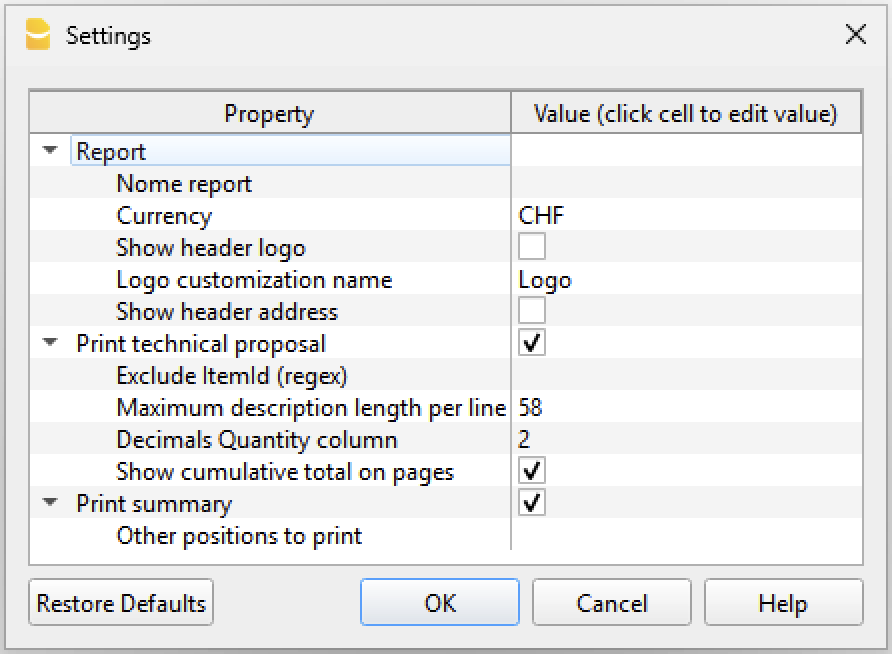
Per l'inserimento dei dati fai un clic nel campo della colonna Valore.
Report
Impostazioni base del report.
- Nome report
- Opzionale.
- Serve per definire il nome del report, utilizzato nella visualizzazione dell'anteprima di stampa e per il nome del salvataggio del file.
- Moneta
- Indica la valuta del capitolato d’offerta (ad es. CHF, EUR).
- Mostra logo intestazione
- Opzionale.
- Serve per includere un logo nell'intestazione. Il logo è definito tramite il comando dal menu File > Imposta logo.
- Nome personalizzazione logo
- Opzionale.
- Serve per inserire il nome della personalizzazione logo da utilizzare.
- Mostra indirizzo intestazione
- Opzionale.
- Serve per includere l'indirizzo della ditta nell'intestazione.
L'indirizzo della ditta si deve prima definire nella scheda Indirizzo del file.
Possono essere utilizzate le seguenti informazioni dell'indirizzo: Società, Nome, Cognome, Indirizzo 1, Indirizzo 2, CAP, Località, Telefono, Email, Web.
Stampa capitolato d'offerta
Serve per includere il capitolato d'offerta nella stampa.
- Escludi ItemId (regex)
- Opzionale.
- Serve per definire una regola (regex) per non stampare alcuni valori nella colonna ItemId.
Ad esempio, per evitare la stampa, nella colonna ItemId, degli ItemId che terminano con una lettera, è possibile inserire l’espressione: /[a-zA-Z]$/
- Lunghezza massima descrizione per riga
- Consigliato 58 caratteri.
- Serve per indicare il numero massimo di caratteri per ogni riga di descrizione.
- Quando il testo della descrizione supera il numero indicato, il programma tronca il testo e lo suddivide su più righe. La suddivisione su più righe è necessaria per calcolare correttamente la posizione dei totali riporto a fine e inizio pagina.
- Decimali colonna Quantità
- Serve per definire il numero di decimali da visualizzare nella colonna Quantità.
- L'impostazione predefinita è 2.
- Mostra totale cumulativo sulle pagine
- Serve per includere il totale complessivo (colonna Cumulated) come riporto a fine pagina e inizio della successiva.
- Il riporto è sempre il totale complessivo cumulato indicato nella tabella.
- Utilizza gli stili delle righe
- Serve per applicare gli stili alle righe (grassetto, italico, colore testo, colore sfondo) così come sono nella tabella QuickSum.
Stampa riepilogo
Serve per includere alla fine della stampa del capitolato un foglio di riepilogo con tutti i totali.
- Altre posizioni da stampare
- Opzionale.
- Serve per indicare altre posizioni da includere nella stampa del riepilogo.
È utile, ad esempio, per stampare la riga dell’IVA. - Inserire l’ItemId (ad es. 9.1.2).
- È possibile inserire più ItemId, separati da un punto e virgola ; (ad es. 9.1.2;9.1.3).
- Le posizioni vengono stampate nell’ordine in cui sono inserite nella tabella QuickSum.
Stampa righe di verifica hash
Serve per aggiungere, al termine della stampa del capitolato, le righe contenenti i codici hash di verifica.
Confrontando gli hash stampati con quelli presenti nella tabella QuickSum, è possibile verificare che il documento non sia stato modificato.
Le righe di verifica vengono stampate solo se nella tabella QuickSum sono presenti i codici hash.
- #hash-base
Hash calcolato solo sugli elementi non modificabili del documento. Le modifiche ai campi modificabili in modalità blocco non cambiano l'hash. - #hash-all
Hash calcolato su tutto il documento. Qualsiasi modifica comporta il ricalcolo dell'hash.
Stampa capitolato
La stampa del capitolato riprende tutte le righe presenti nella tabella QuickSum, nello stesso ordine in cui compaiono, e consente di generare un’offerta completa che include tutti gli articoli (colonna Item) con le relative righe di dettaglio e di prezzo.
Nel report vengono stampate le colonne Articolo, Descrizione, Quantità, Unità, Prezzo unità e Importo totale.
Facoltativamente, alla fine di ogni pagina può essere incluso il riporto del totale complessivo calcolato fino a quel momento; lo stesso totale viene riportato anche all’inizio di ogni nuova pagina.
Il report termina con la stampa del subtotale, dell’IVA calcolata sul subtotale e del totale complessivo dell’offerta.
Esempio stampa capitolato:
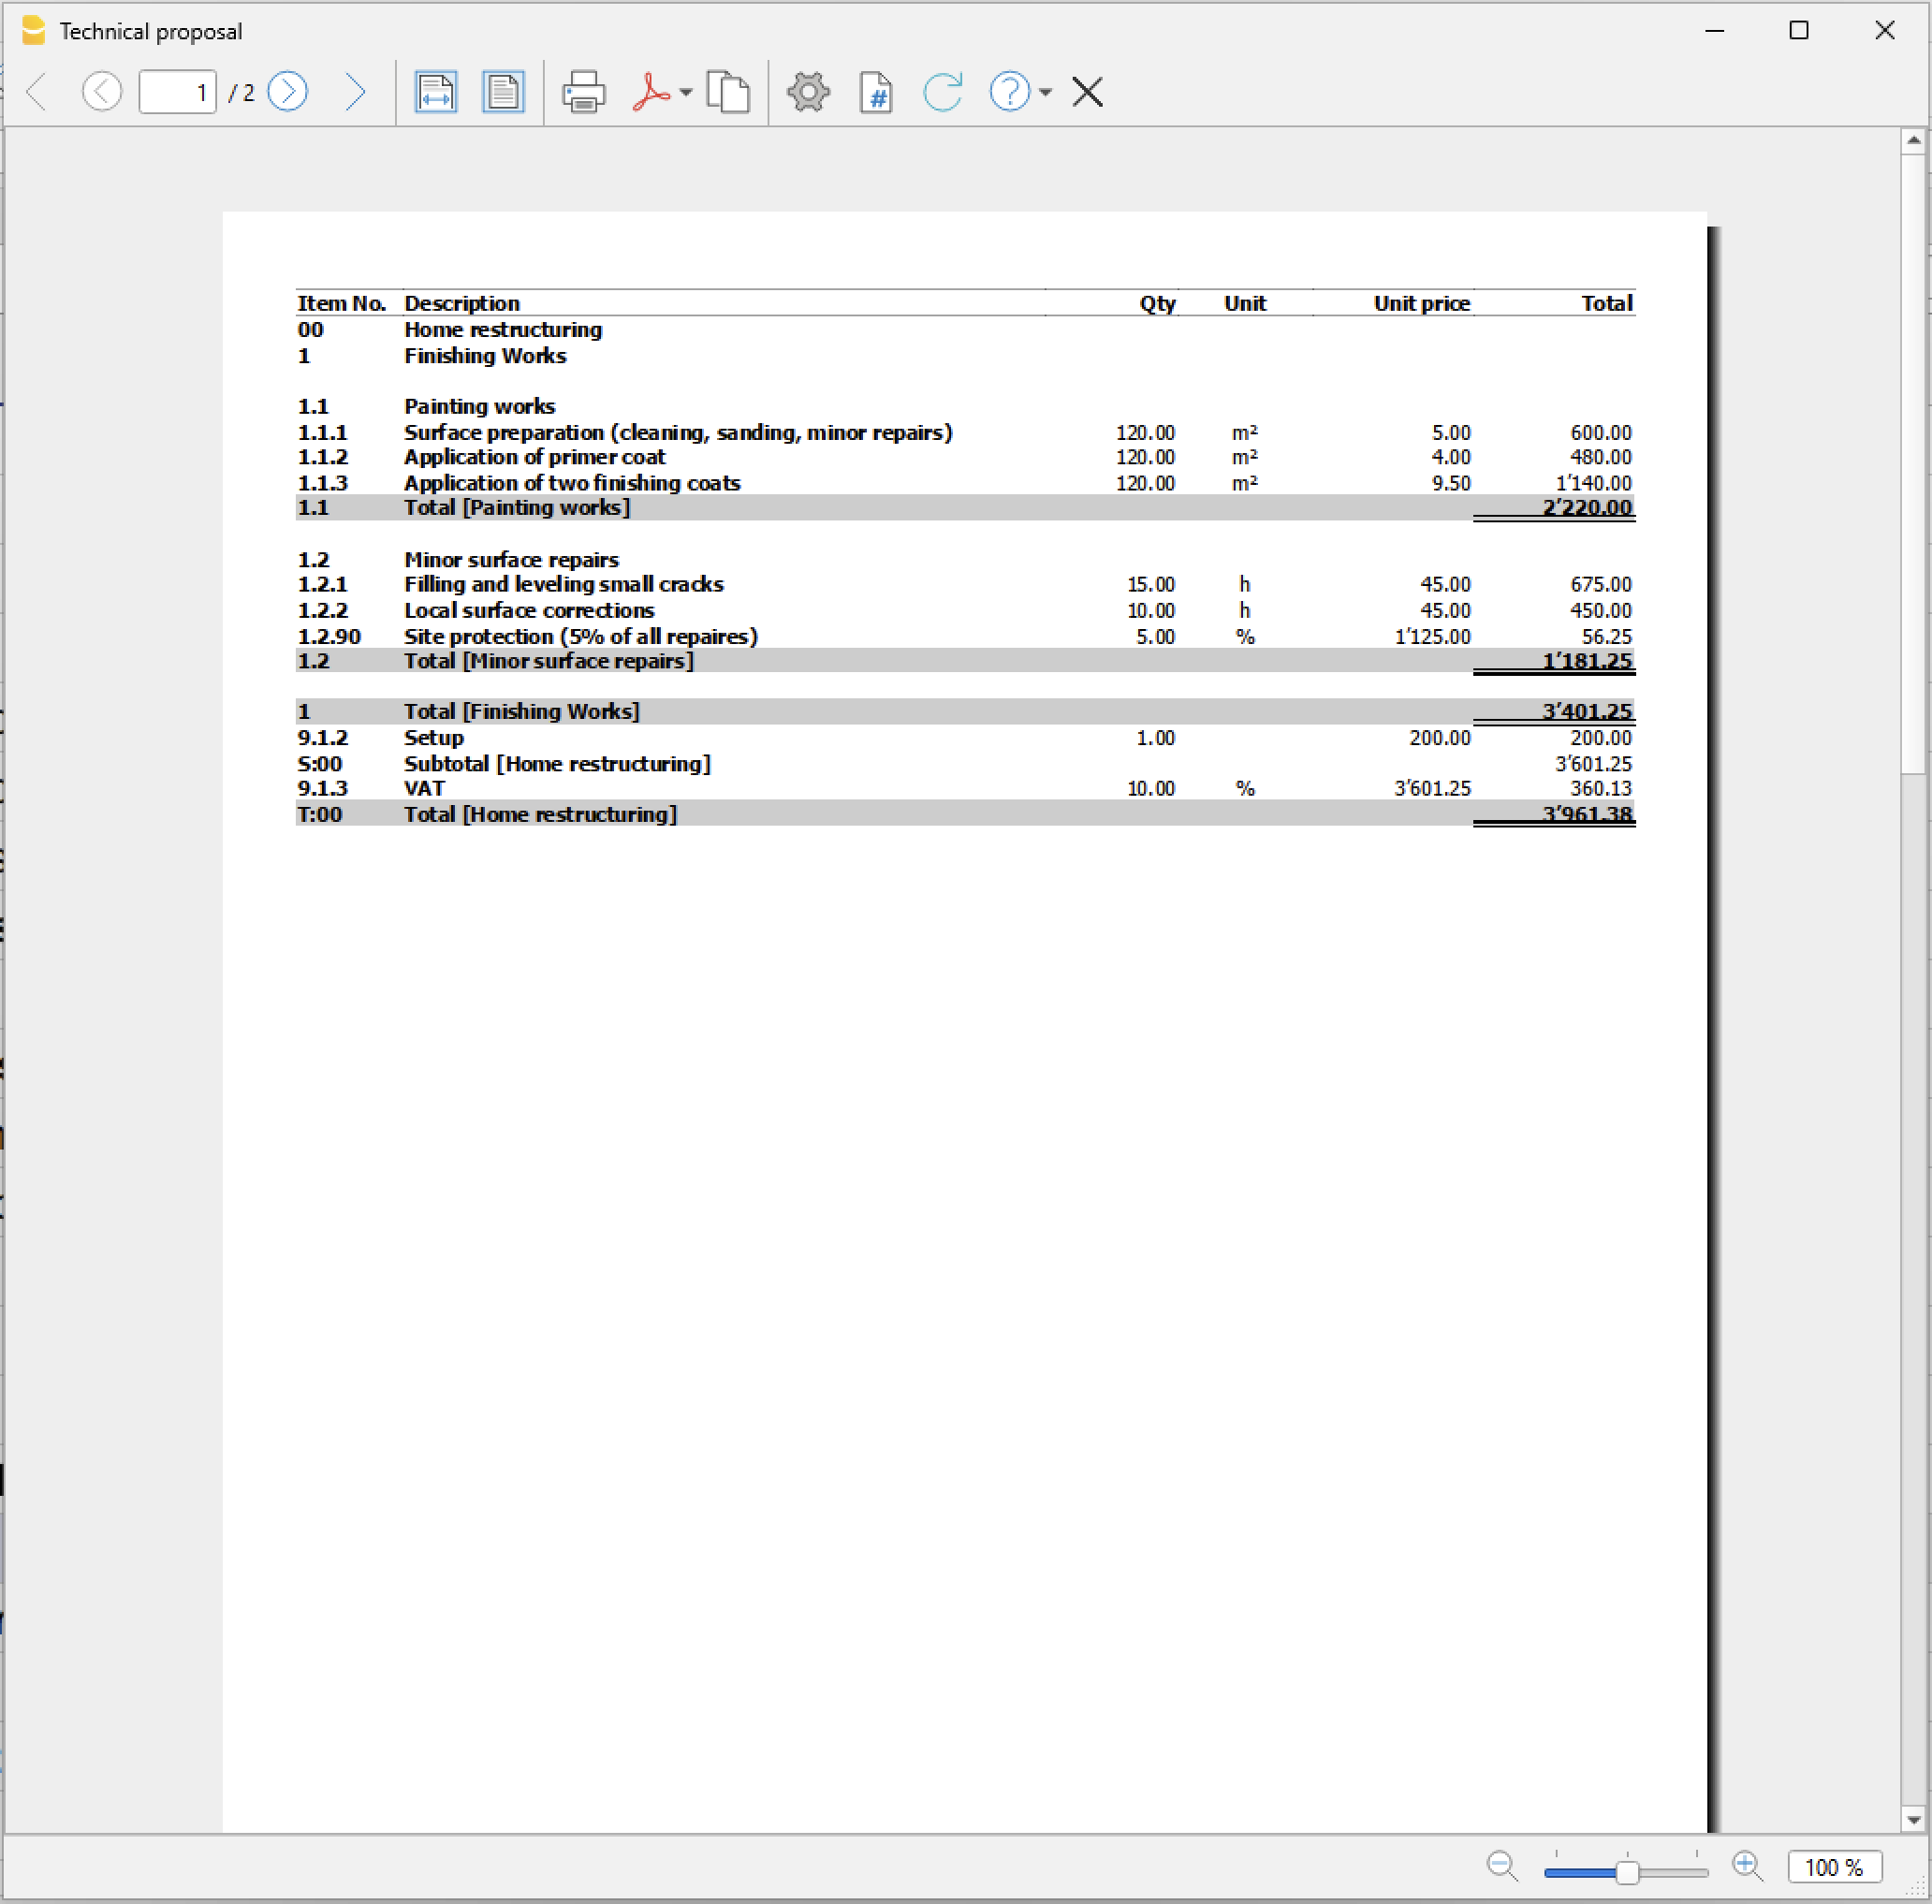
Impostazioni della tabella QuickSum che influenzano la stampa
Alcune impostazioni e valori presenti nella tabella QuickSum modificano il comportamento e il contenuto della stampa del capitolato.
In particolare:
- ItemId
- Quando un articolo è commentato (ItemId inserito tra parentesi quadre), l’intera riga non viene stampata nel report.
- Stile
- #pagebreak
È possibile forzare un cambio pagina nel report inserendo il comando #pagebreak.
Inserire una riga vuota nella tabella immediatamente prima del punto in cui si desidera il cambio pagina e, nella colonna Style, inserire #pagebreak.
Se il comando viene inserito più volte in righe consecutive, il cambio pagina viene applicato una sola volta.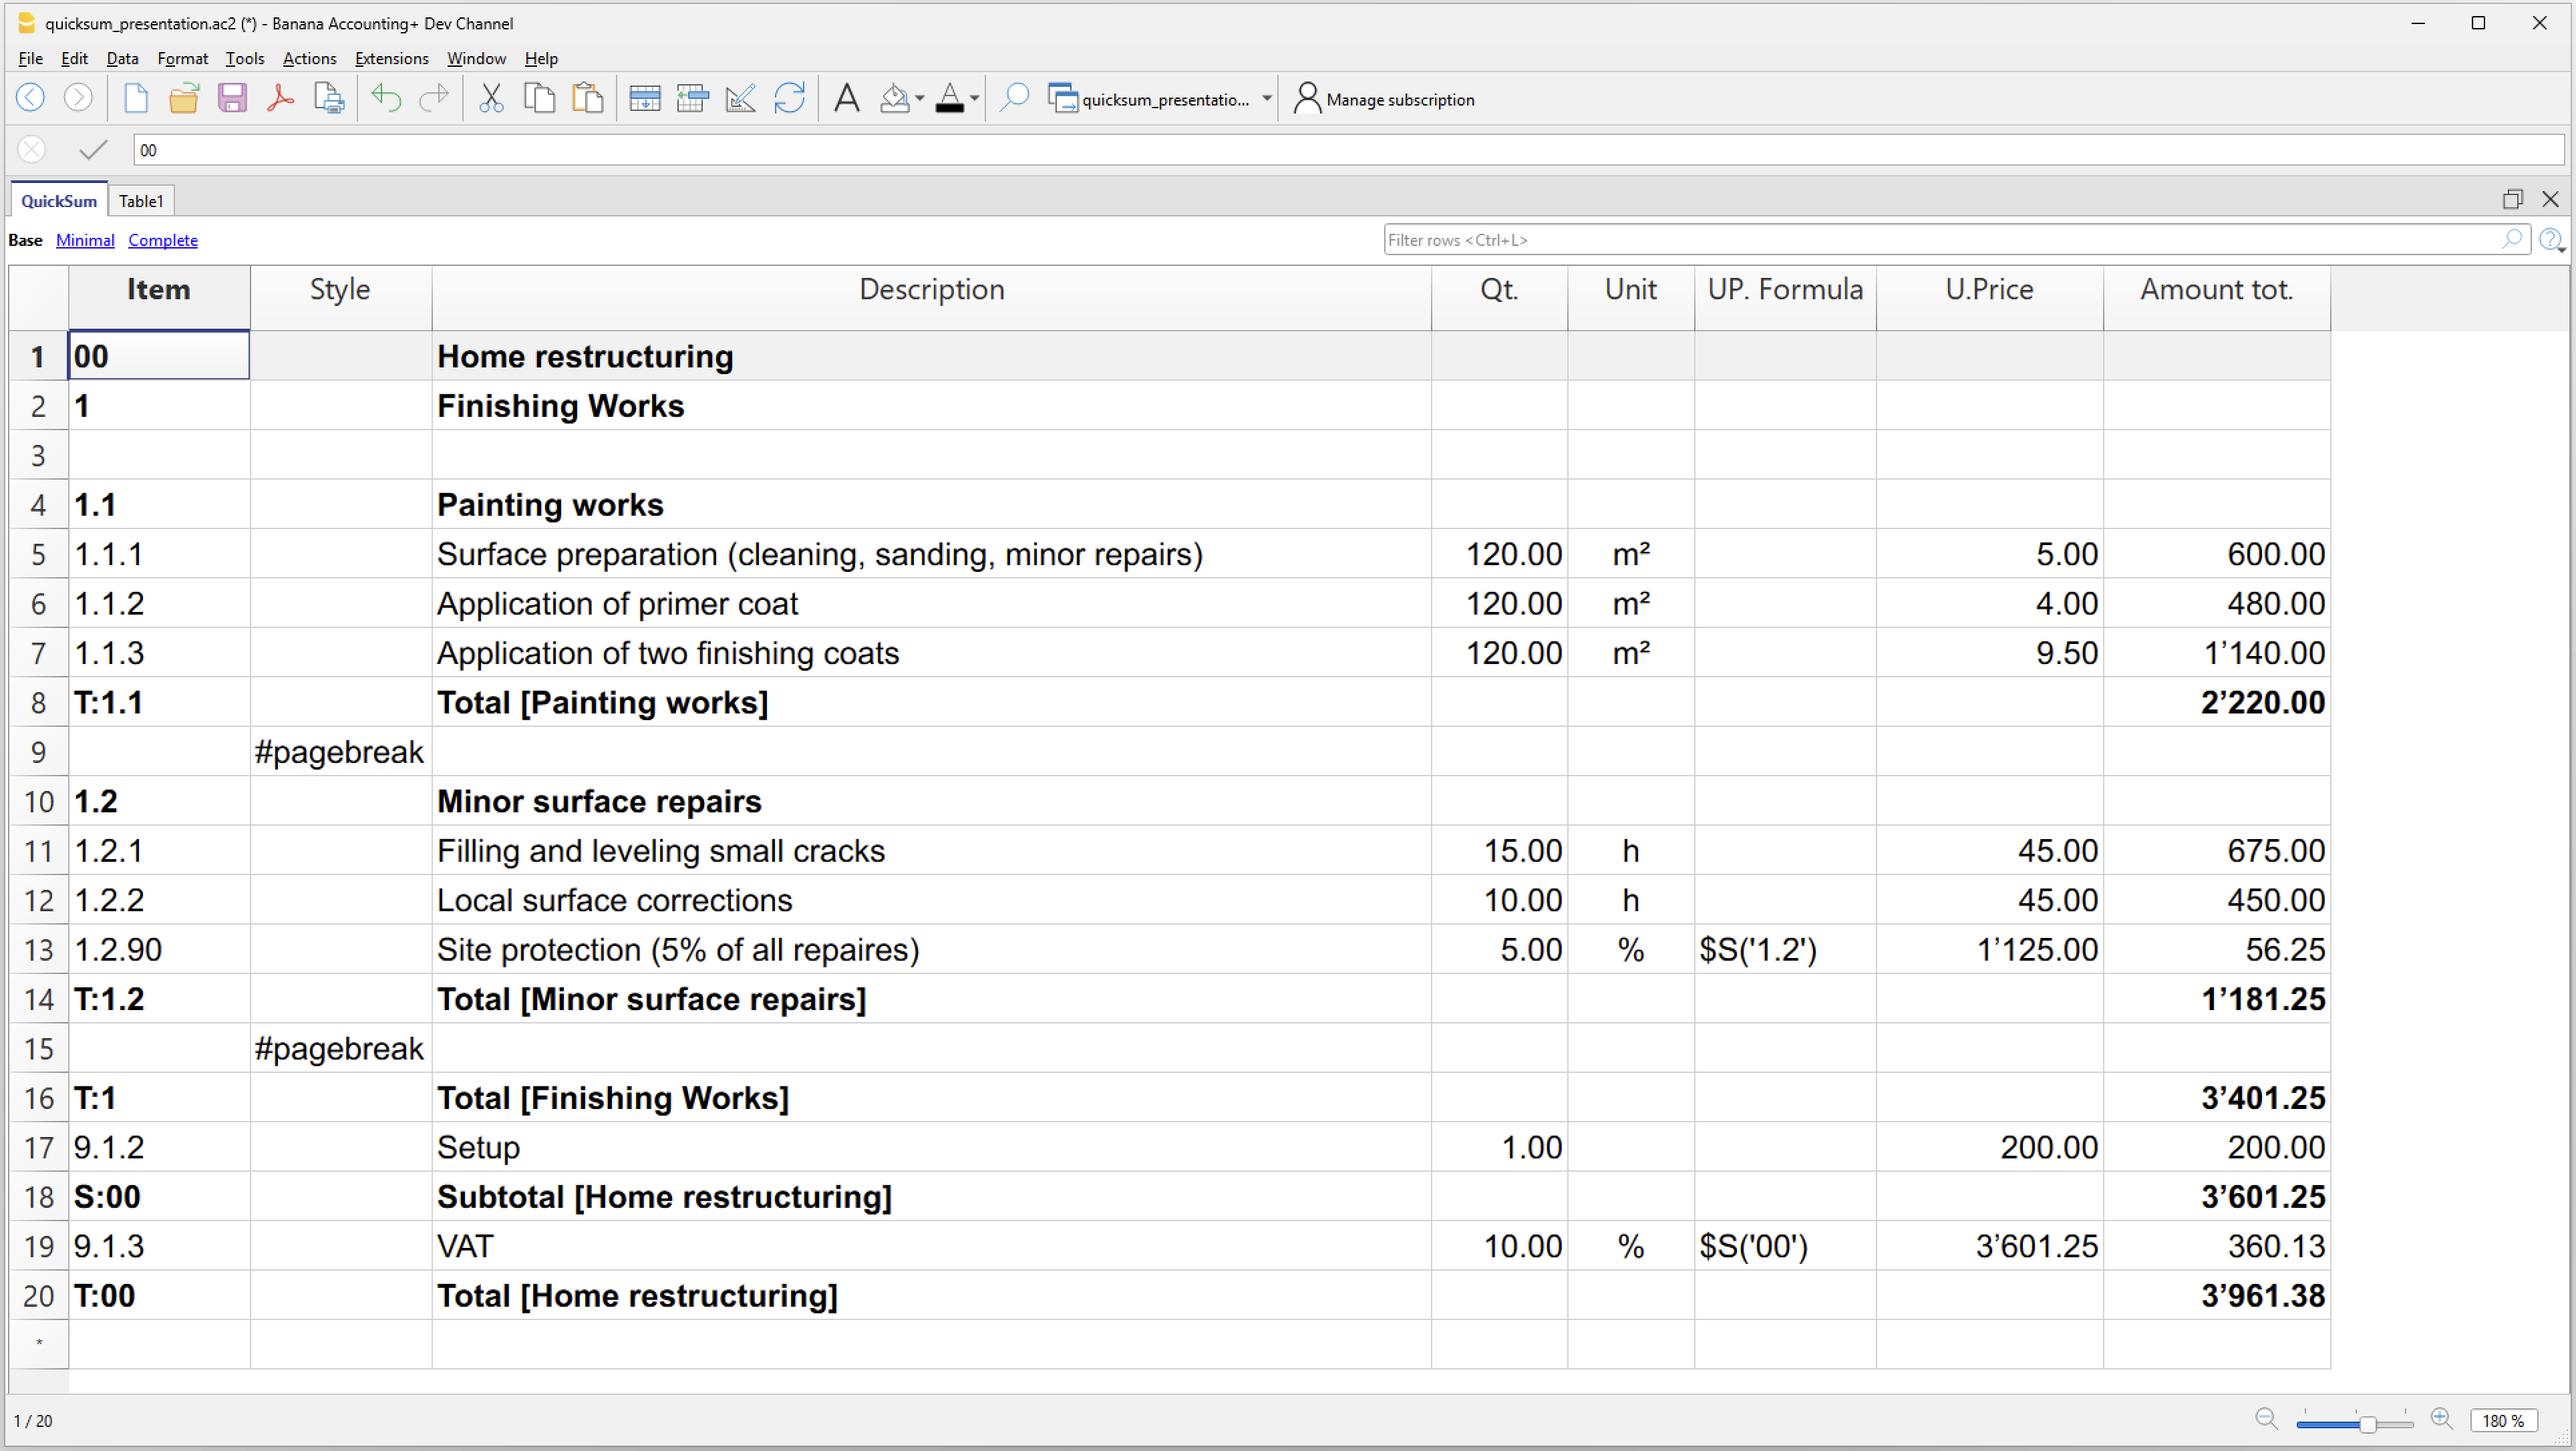
- #pagebreak
- Codice Modifica
- Utilizzare questa colonna per indicare quali valori devono essere completati dall’utente.
- In base alle informazioni inserite, vengono applicati eventuali tratteggi sotto i valori delle colonne Quantità e Prezzo unità.
- Se almeno uno di questi due valori risulta tratteggiato, anche il valore nella colonna Totale viene sottolineato con il tratteggio.
- Per maggiori informazioni sui codici da inserire e il loro funzionamento, consultare la documentazione della tabella QuickSum.
Stampa riepilogo
La stampa del riepilogo riprende tutte le righe di totale presenti nella tabella QuickSum, nello stesso ordine in cui compaiono.
Le righe di totale sono identificate da un valore nella colonna ItemId che inizia con "T:".
Lo scopo del report è fornire un riepilogo dei totali dei diversi articoli presenti nella tabella, con i relativi importi.
Nel report vengono stampate le colonne Articolo, Descrizione e Importo.
Esempio stampa riepilogo:
Capitolato d'offerta (tutorial)
Capitolato d'offerta (tutorial)Questo modello utilizza la tabella QuickSum per preparare preventivi e calcoli dettagliati dei costi, con un esempio dedicato a lavori di ristrutturazione di un'abitazione.
Le diverse lavorazioni possono essere organizzate in modo gerarchico, suddividendole in sezioni e sottosezioni. Per ogni voce è possibile indicare una descrizione, la quantità, l'unità di misura e il prezzo unitario; il programma calcola quindi automaticamente l'importo corrispondente e i totali progressivi.
Il modello mostra anche come gestire costi calcolati in percentuale rispetto ad altre voci o gruppi di voci. Nell'esempio, oltre ai lavori di tinteggiatura e alle piccole riparazioni delle superfici, viene calcolato automaticamente un costo percentuale per la protezione del cantiere.
Subtotali e totali permettono di ottenere una lettura chiara dei costi per ogni gruppo di lavori. È inoltre previsto il calcolo dell'IVA sul subtotale e del totale complessivo del preventivo.
Il modello è particolarmente indicato per artigiani, imprese di costruzione e ristrutturazione e professionisti che desiderano predisporre preventivi, offerte o stime dei costi con calcoli automatici, mantenendo una struttura ordinata e facilmente consultabile.
Technical Preview
La tabella QuickSum è uno strumento ancora in fase di sviluppo e che viene messo a disposizione a un limitato numero di utenti.
Ci sono diverse funzionalità che sono per il momento provvisorie e che subiranno cambiamenti con il tempo.
Prerequisiti
Per utilizzare questo modello:
- Scaricare e installare Banana Contabilità+ Dev Channel (versione 10.2.3 o successive).
Risorse utili