Funciones contables adicionales
La documentación en español está en constante progreso. Algunos enlaces pueden dirigir a páginas que aún están en inglés. ¡Gracias por tu paciencia y vuelve a visitar esta página en el futuro!
Todas las funciones que necesitas
El programa incluye una serie de funciones para gestionar tu actividad de manera sencilla y profesional. Nuestros usuarios están muy satisfechos al ahorrar tiempo en tareas contables que de otro modo serían complejas. También ahorrarás dinero porque reducirás el trabajo y los costos de tu asesor financiero.
Balances e informes inmediatos
Imprime rápida y fácilmente todos los informes que necesites en cualquier momento:
- Tarjetas de cuenta
- Balance & Estado de Resultados
- Diario de movimientos
- Presupuesto y mucho más!

Gestión de clientes y proveedores
Gracias a los modelos predefinidos con el subdiario de clientes y proveedores, puedes gestionar todo de manera óptima: simplemente introduce en el registro la cuenta de tu cliente o proveedor.
Obtén el registro completo de clientes y proveedores y mantén un control de los pagos y cobros.

Gestión del IVA
Máxima simplicidad: introduce en los movimientos el código de la tasa de IVA y el programa hará el resto.
Centros de costo y Segmentos
Destaca sectores específicos de tu actividad de manera sencilla y eficiente obteniendo un nivel de detalle superior.
Los Centros de Costo y Segmentos de Banana Contabilidad Plus permiten ver detalles de proyectos, eventos, obras, socios y otras actividades específicas, o resaltar costos e ingresos por unidad, departamento o sucursal.

Presupuesto y Plan de Liquidez
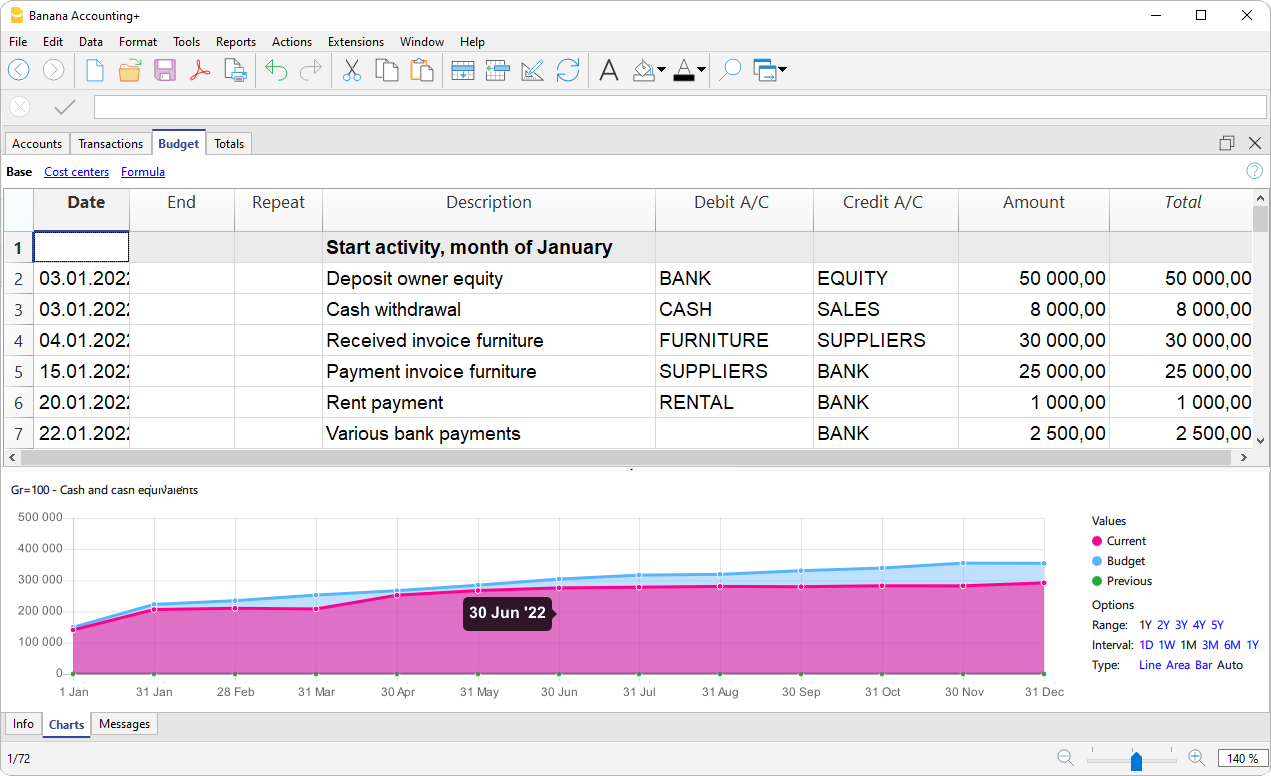
Crea fácilmente tu presupuesto para un control eficaz de los costos y una visión a futuro.
En la tabla de Presupuesto, introduce registros con fechas futuras e indica su periodicidad. El programa proyectará tus previsiones por mes, trimestre, semestre, año y en varios años.
Una excelente herramienta para anticiparse a los acontecimientos y tomar medidas oportunas para alcanzar mejor tus objetivos.
Importación y automatización
Gracias a las innovadoras funciones de importación de datos desde extractos bancarios y la automatización de registros con las Reglas, hacer la contabilidad se vuelve fácil, inmediato y sin errores.
Al importar, para cada movimiento que se repita en el futuro, se crea una regla, asignando la cuenta de contrapartida, el código de IVA, el centro de costo o de beneficio. En las importaciones siguientes, todos los movimientos que coincidan con las reglas se completarán automáticamente, reduciendo significativamente el tiempo de ingreso de datos.

Impresiones avanzadas gracias a las Extensiones
Las Extensiones son programas adicionales que amplían las funcionalidades de Banana Contabilidad Plus. Gracias a ellas, también puedes obtener:
- Certificado de donación para asociaciones
- Lista de libros para bibliotecas
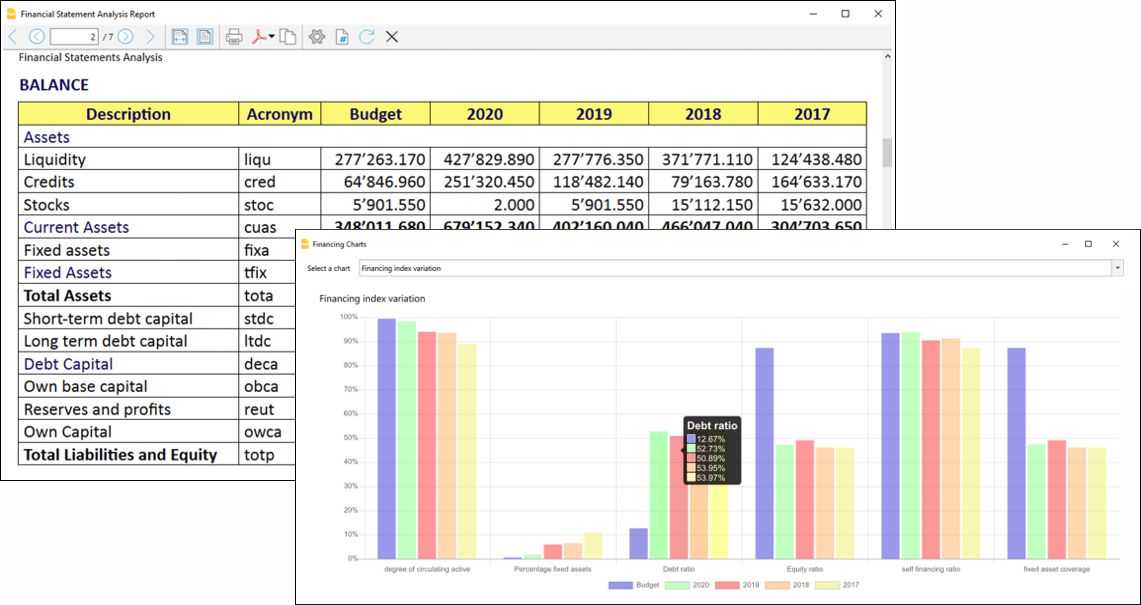
- Análisis de balances y flujos de efectivo
- Gestión de cartera de valores
- Gestión de construcciones y renovaciones
Muchas de estas extensiones requieren el plan Advanced.
Customers and Suppliers
The features dedicated to customers, suppliers, and invoicing in Banana Accounting allow you to fully manage your business activities directly within your accounting.
You can monitor balances, due dates, transactions, and documents, keeping everything synchronized with the accounting records.
Thanks to these features, you can:
- Manage customers and suppliers integrated with accounting;
- Create and record invoices without duplicate work or risk of errors;
- Monitor due dates, receivables, and payables in real time;
- Speed up invoice entry using the Items table;
- Get clear and updated reports for full control over business relationships;
- Work more efficiently and save time in administrative tasks.
Customers
Customer management allows you to keep track of receivables, due dates, and transactions for each customer.
You can record issued invoices, received payments, and automatically generate customer statements and reports.
This way, you always have an up-to-date view of incoming payments, can easily monitor who has paid and who hasn't, and keep customer accounting perfectly aligned with the general ledger.
Suppliers
With the Suppliers function, you can manage payables to those who provide you with goods or services.
Each recorded payment is automatically linked to the corresponding invoice, so you always know how much you owe, to whom, and by when.
You can also generate payment lists and detailed reports for a complete overview of your supplier situation.
Customer Management
Customer management in Banana Accounting Plus allows you to record, organise, and manage customer information and allows you to keep track of customer transactions and payments, payment due dates, and contact information. You can track customer payments, update the payment status of issued invoices as well as enter and print invoices.
Customer management is a feature available in all accounting applications of Banana Accounting Plus, but it is especially used in double-entry accounting.
Please also visit Supplier management
Recording customer transactions
The Transactions table is the heart of Banana Accounting and is used to record all transactions, including customer transactions, simply by entering the customer's account. You work quickly because you can select, copy and paste customer transactions that have already been entered previously. If you make mistakes you can correct them so it is easy to record:

There are columns for entering various information, as:
- The date of the transaction, due date, expectation date and payment date.
- The Invoice Number.
- The Debit and Credit Account where to indicate the customer account and the counterpart.
- The amount.
- The VAT codes for the automatic calculation of VAT.
- Links to digital documents (e.g. the invoice issued to the customer, or notes in pdf).
Customer accounts
Customer accounts are used to record all transactions relating to the customers of a company.
The main functions of customer accounts are as follows:
- Create an account for each customer and keep track of all transactions made.
- Record the invoices issued for each customer.
- Record customer payments and associate them with the invoices issued.
In Banana Accounting:
- Customer accounts and addresses (first name, surname, company name, address, customer language, VAT number, etc.) are set up in the Accounts table.
- Account movements on the accounts are entered in the Transactions table.
- After each entry, all customer account balances (Accounts table) are automatically updated and you immediately have an overview of the outstanding balances.

Recording issued invoices
The invoice is used for accounting and tax purposes, as it allows you to accurately record the company's revenues and expenses, and to calculate sales or purchase tax.
If you issue invoices in Word, Excel or other programs, you can record the issuance in accounting so that you know what the customer owes and, if necessary, send reminders.
In Banana Accounting, the invoices are recorded in the Transactions table:
- By entering the date and description
- By entering an invoice number
- By recording in the Debit account the customer's account and in the Credit account the revenue
- By entering the VAT code for sales or services. The calculations and VAT amounts are entered automatically.
When the invoice is posted, the programme automatically creates the invoice and prints it out.
Creating and printing invoices
Directly in the Transactions table, you can also enter transactions to create invoices as simple entries in the Transactions table.
By entering the Debit and Credit account, in addition to printing the invoice, you have the accounting of the invoice in the accounting file at the same time.

From the menu, Reports > Customers > Print Invoices, you can:
- Preview and print the invoice.
- Choose the Print Layout and set other information to customise the printout, such as the QR Code.
More customisation is possible with the Advanced plan.

Recording collections
In Banana Accounting, collections are recorded in the Transactions Table in one of the following ways:
- Manually:
- The date and description are recorded
- In the Invoice column, by entering the customer's account, a drop-down menu displays the invoices still open, simply select the invoice collected and press the Enter key, the program automatically enters the customer's account in Credit, and the amount of the invoice. Then simply enter the cash account in Debit to complete the transaction.
- Importing Data from Account Statements with Rules
- The programme imports data from ISO 20022 account statements and with the use of Rules the programme enters the complete entry, entering all data, without manual intervention.
Open invoices
Open invoices per customer are issued invoices that remain open or outstanding because the customer has yet to make full payment.
Open invoices per customer can be managed via an accounting ledger that keeps track of invoices issued, payment due dates and payments received. In this way, the seller can monitor the financial situation of each customer and send payment reminders if invoices remain open for too long.
It is important to note that open invoices per customer can affect the liquidity of the seller's company, as the money tied up in these invoices has not yet been collected.
Banana Accounting automatically generates an open invoice report where you can immediately see which invoices are still outstanding and from which customer, as well as the total amount of outstanding invoices.
There are two types of reports:
- Open invoices by customer, where all open invoices for each customer are listed.
- Open invoices by due date, where open invoices are listed in order of due date.

The due date of an invoice can be set in different ways. More information can be found on the following page Due dates and payment terms

Account card
Account cards are documents used in accounting that record the financial transactions of a company. Each card represents a specific account in the company's general ledger and contains detailed information on the transactions involving that account, such as the date of the financial transaction, the type of transaction, the amount and the description of the transaction.
In Banana accounting, on the basis of the data entered in the Transactions table, the programme automatically prepares the Account card for each customer, where the opening balance, all transactions and relative closing balance are shown. You can also have the account card by period.

Reminders
Payment reminders are used to request customers to pay overdue or outstanding invoices.
Through the function of payment reminders you speed up the payment process from customers, reducing delays, and at the same time effectively manage cash flow.
Banana Accounting provides functions to:
- Identify overdue or outstanding invoices.
- Generate payment reminders.
- Customise payment reminders.
In Banana Accounting Plus you can print recalls in two different ways:
- With Reminder layouts
- Print reminder summary (list of overdue invoices).
- Print without QR payment slip.
- Limited customisations.
- Function available in Banana Accounting Plus - any plan (excluding Free plan limitations).
- With Invoice layout
- Print with QR payment slip.
- Layout customisations.
- Requires Banana Accounting Plus Dev-Channel version and Advanced plan.

Credit notes
A credit note is an accounting document used to correct or cancel an invoice already issued. It may be issued for a number of reasons:
- Reimbursement of an overpayment
- Reduction in the price of a product or service
- Product return
- Correction of an invoicing error
In Banana Accounting you account for credit notes in the Transactions table, entering the revenue account in the Debit account and the customer account in the Credit account; the VAT code must be entered with a minus sign in front, so that the VAT amount is reversed at the same time.
The programme uses the accounting entry of the credit note to automatically create a printout of the credit note.

Setting up and using the customers and invoices features
- Setting up accounting on actual bills issued (accrual principal) or
- Setting up accounting on a collected cash basis.
- Setting up Customers settings.
- Setting up the Transactions table and entering the invoices.
- Reports for open, overdue and issued invoices.
- Generating invoices.
Notes
- Multi-currency accounts: reports are based on the customer's account currency balances; possible exchange rate differences will not be taken into account.
In the Issued invoices table, the recordings of exchange rate differences are also listed, whereas only the customer's currency amount is used in other printouts.
Example file
Customers' register and checking of open invoices
Directly in the accounting you can:
- Prepare customers' accounts, with the related addresses and other customers' data.
- Add to the transactions:
- the data related to the issued invoices (invoice number, customer, amount, due date).
- the data related to the payment for the invoices and the issuing of credit notes, if any.
- Retrieve the list of your Payments schedule
Other features available:
Addresses | Customers / Suppliers register | Members
In the Addresses view of the Accounts table, there are columns to manage the addresses of customers, suppliers or members.
Address data are essential in order to manage billing, reminders and to control receipts and payments.
If columns for managing address data are missing in the Accounts table, you can add them:
If IBAN column is missing, your accounting file has an old configuration and you need to convert it with the command Tools > Convert to new file...

In the Accounts table the command will add:
- The Address view which displays columns for entering address data.
To change the display or arrangement of the columns use the Setup columns command.
The columns of the Address view
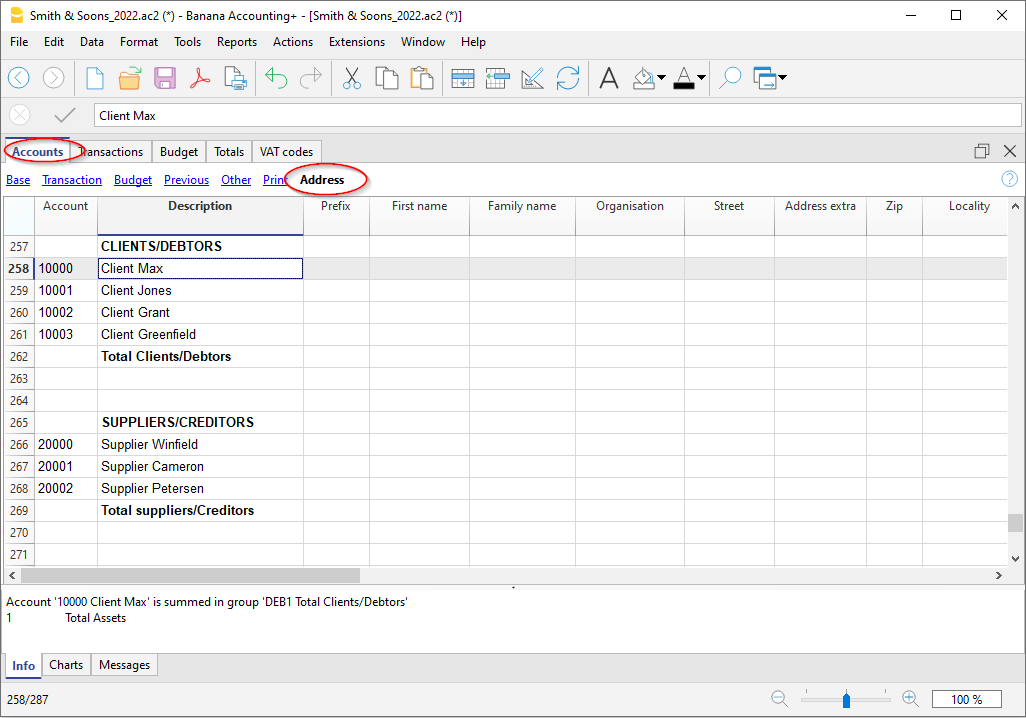
Prefix
Insert courtesy code (Mr., Mrs., Doctor or other).
First name
The name of the customer, supplier or member.
Family name
The name of the customer, supplier or member.
Organization
Enter the name of the company, of the association.
Street
The street where the customer, supplier or member resides.
Building Number
The building number of the address.
Address extra
Column to enter other address data, such as the post office box, or to enter a very large address.
Postal Code /ZIP
The postal/ZIP code.
Locality
The name of the city of the customer, supplier or member.
Country
The nation inherent in the city.
Country Code
The country code.
Language
You can define the language for each customer, supplier or member account. This allows you to view and print the documents (eg invoice) in their language.
Indicate:
- de - for German
- fr - for French
- it - for Italian
- en - for English
- es - for Spanish
- nl - for Dutch
- zh - for Chinese
- pt - for Portuguese
- ru - for Russian
Main phone
Landline phone number
Mobile
Mobile phone number
Fax
Fax number
Email work
email address.
www
website address of the customer, supplier, association.
Birth
The date of birth of the customer, supplier, association.
Days
Enter a number of days within which the collection and payment must take place
Limit
If a credit is made, the credit limit is indicated, or the debit limit if it is a supplier.
Bank name
The name of the customer's, supplier's or member's bank.
IBAN
IBAN number of the customer's, supplier's or member's bank.
Bank clearing
The identification code of the customer bank, supplier or member.
The accrual method management
Introduction
Banana Accounting allows you to manage the customers both on an accrual or cash method. A detailed explanation is available at the page Accounting with accrual or cash method.
The following explains how to set up separate accounts for each customer and a group for customers, so that you can have a list of separate invoices per customer available.
In case you only have few invoices and don't want to keep a detail per customer, you may also keep one single account only to record all customer invoices. The list of invoices will thus apply for all customers and not for any single customer.
Setting up the Customers' register
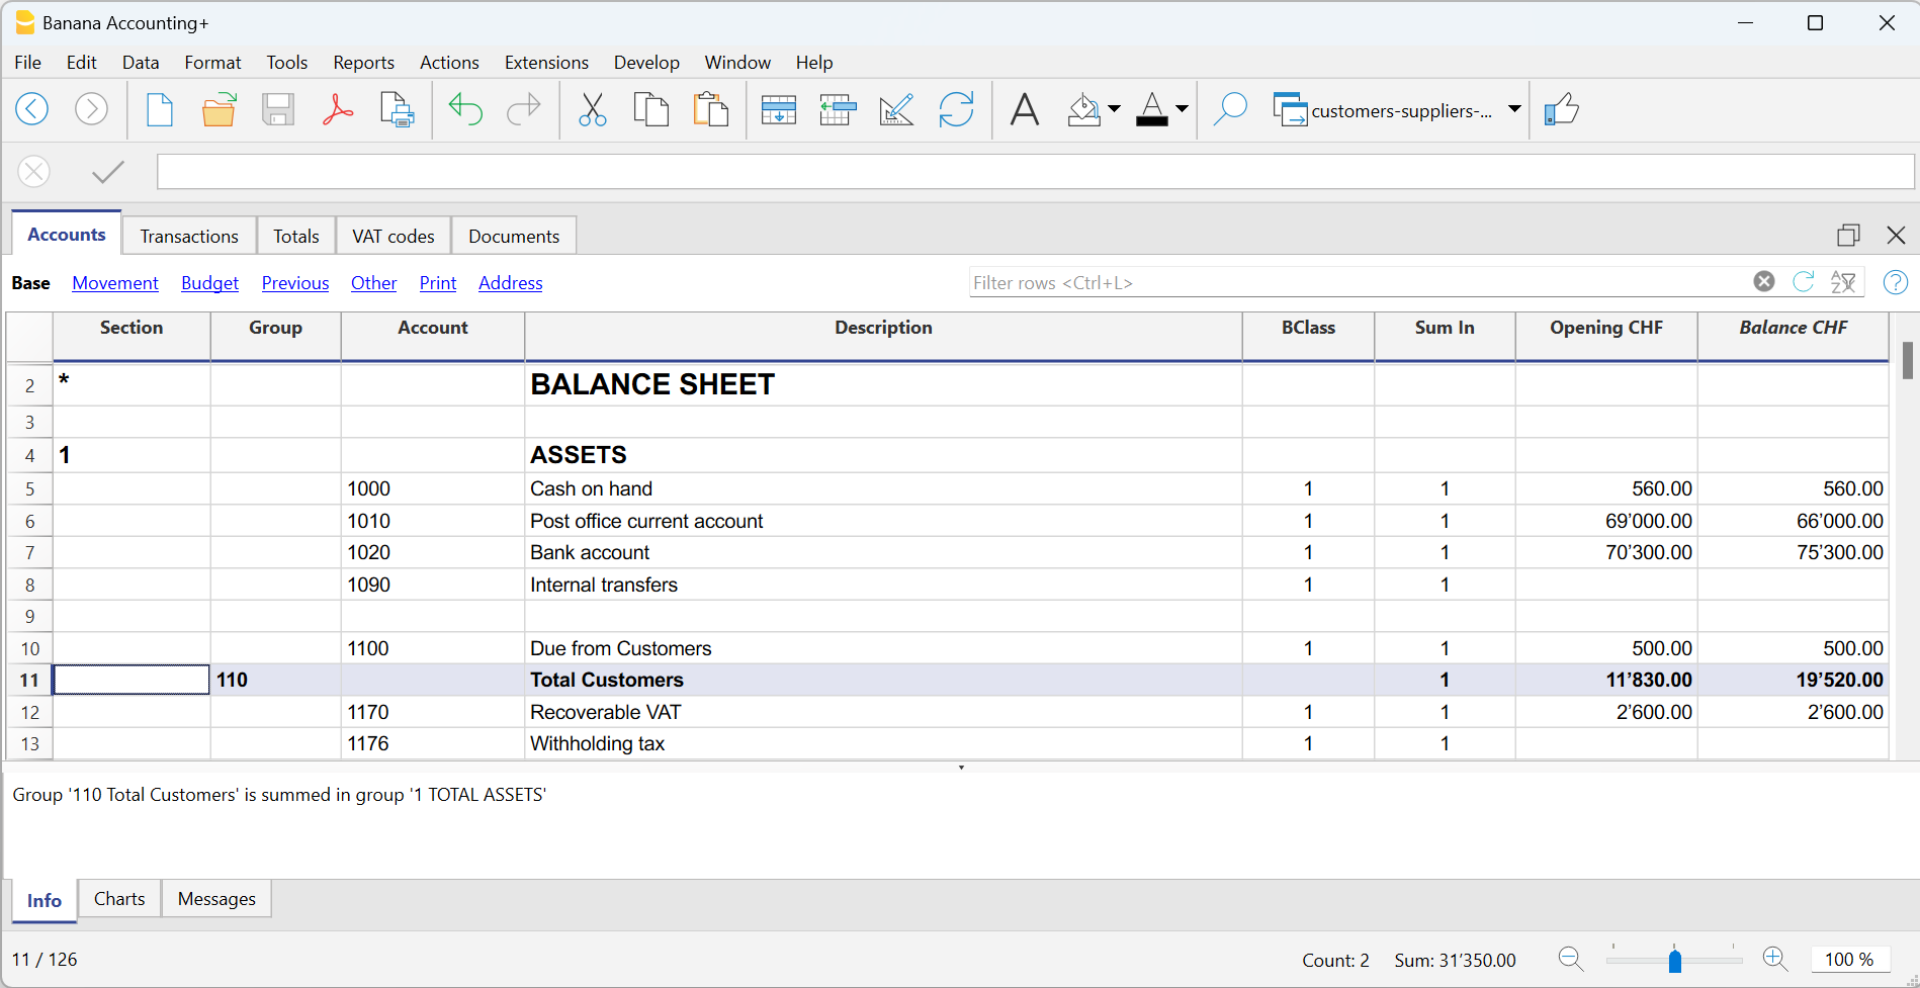
The customer ledger with its accounts and/or groups is inserted at the end of the chart of accounts with a separate section.
The following settings must be added to create the ledger:
- A * section (header) (see Sections)
- A 01 section for the Customers (see Sections)
- The Customers accounts that are required (see Adding a new account). Each customer will be allocated one row in the Chart of Accounts and a his/her single account number. Account numbers is at your discretion (see Accounts) it is however advisable to use numbers only, especially for the management of payments.
- A group where all customer accounts are totaled.
- This group, in turn, is totaled into a group present in the Assets.
Alternatively, customer accounts and/or groups can be entered directly in the assets section.
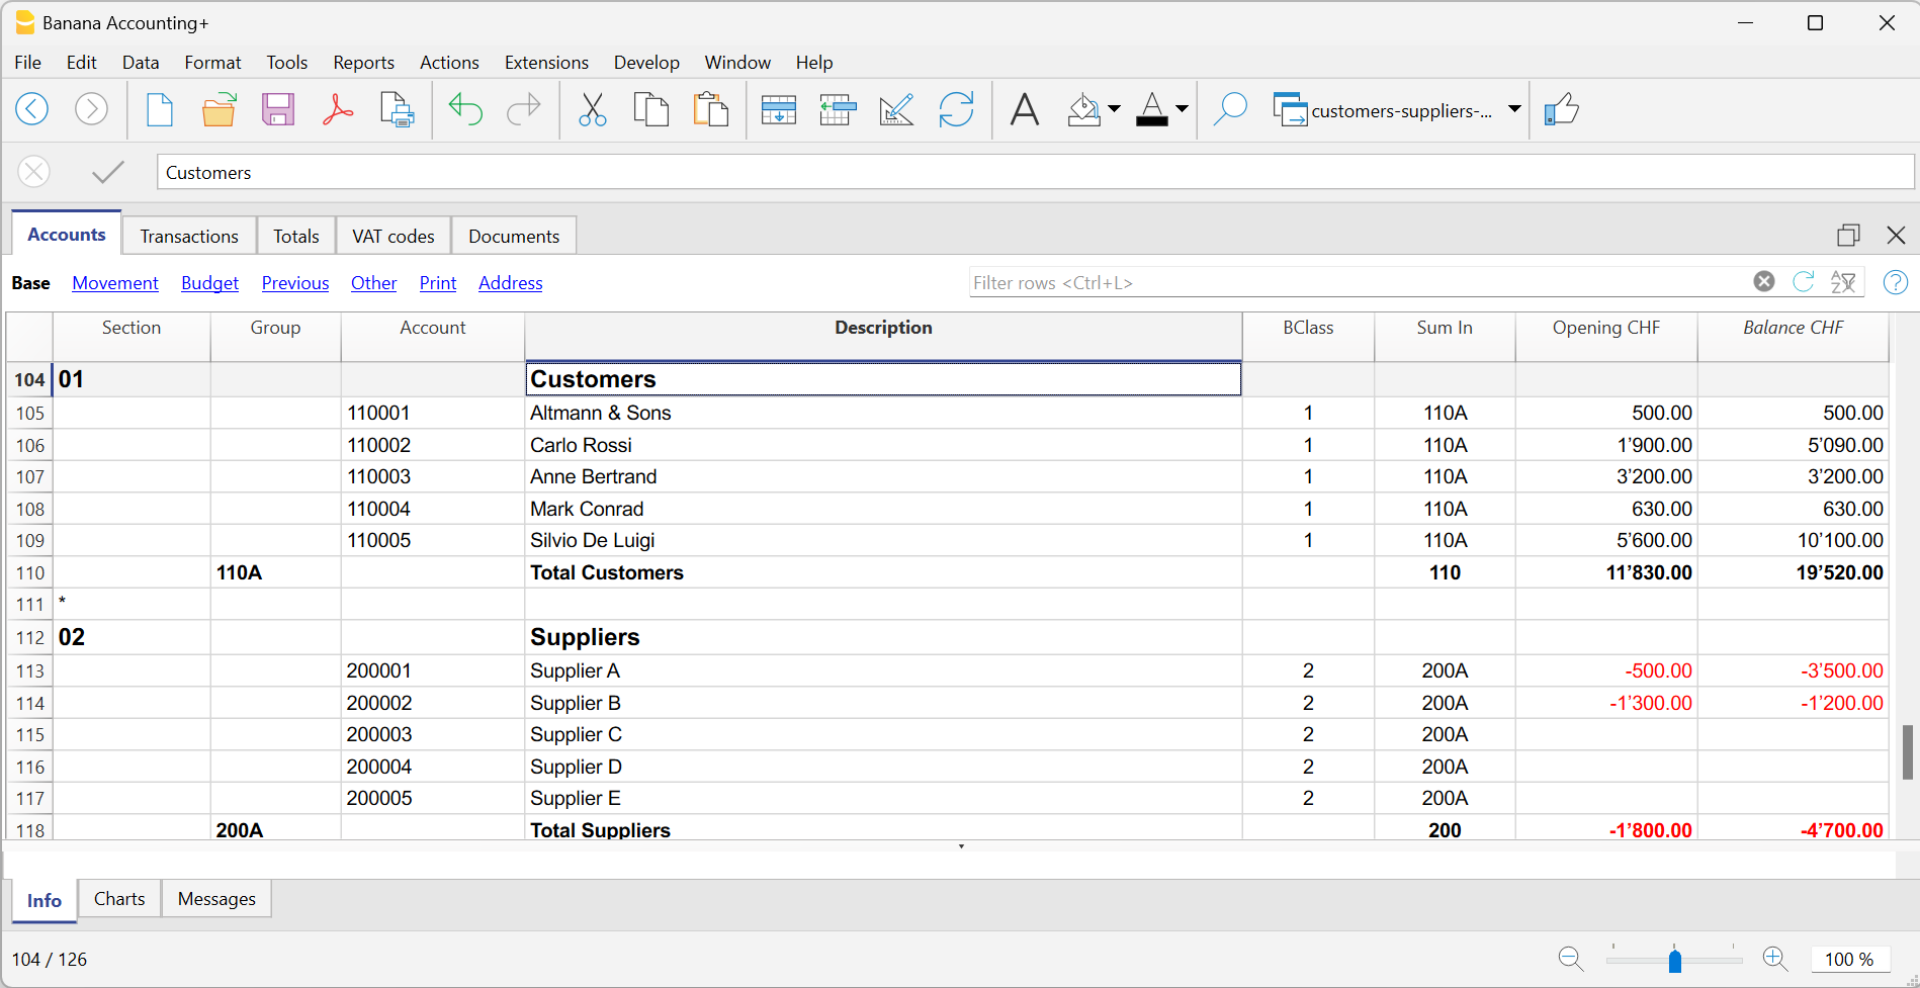
- The total for Customers will be totaled in the summary group 110A of the Sum in column.
- The same code or number used in the Sum in column (110A), must be used in the Assets Group column, in the row corresponding to the Total Customers of the Balance Sheet.
- The groups' numbering can be freely chosen (see Groups).
Recording an issued invoice
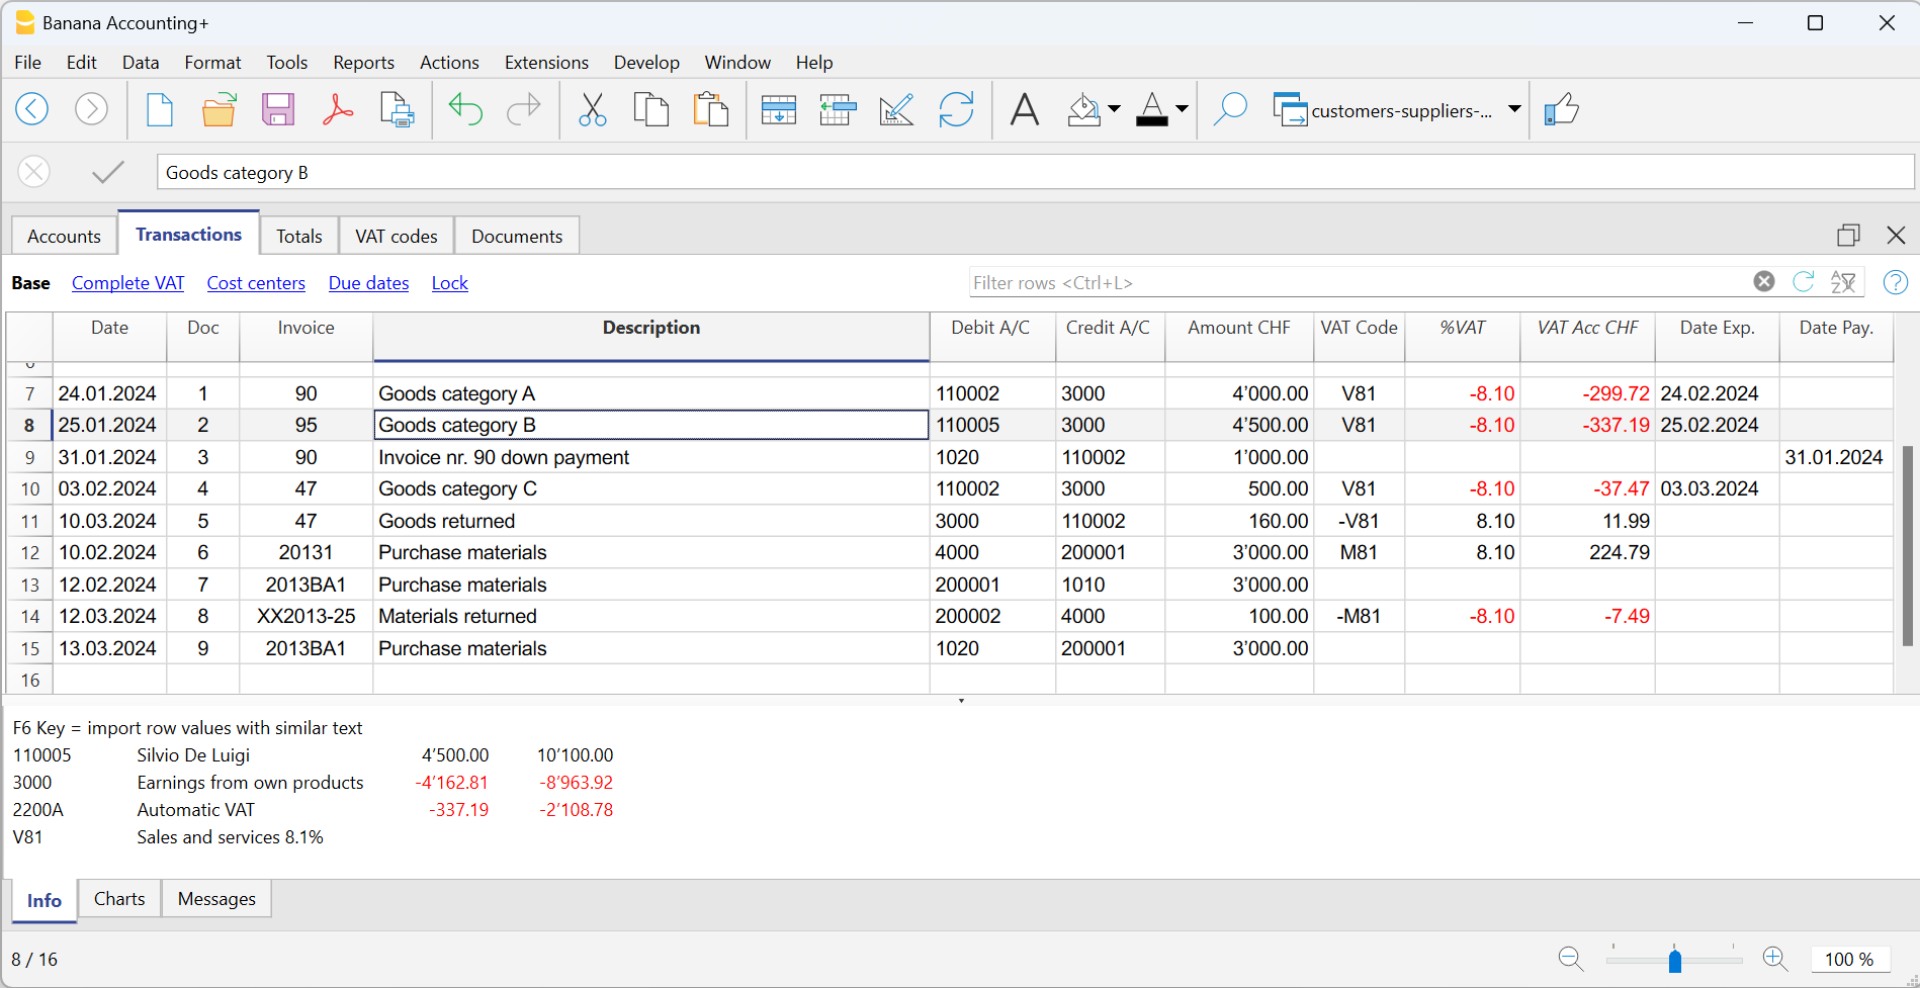
The issued invoice is registered by entering the following data in the respective columns:
- Date of the invoice and any document number
- Invoice number - It is very important to enter the invoice number in the Invoice column, because it is used to automate the various customer reports and to automatically close the customer's open invoice when recording the payment.
- Customer account in Debit and Revenue account in Credit
- The VAT code corresponding to the sale.
Recording a payment
There are two ways to record the collection of a customer invoice:
- Manual recording of customer invoice collection.
- Automatic recording with data import from account statement in ISO 20022 format.
The collection of a customer invoice is recorded by entering the following data in the respective columns:
- In the Date column enter the transaction date
- In the Type column enter 11 (customer payment)
Note: If an advance payment is to be recorded by the customer and is to appear on the invoice, the cell in the Type column must remain empty. - In the Invoice column enter the paid invoice number.
- With a double-click on the cell, the program will show a list of all open invoices.
Alternatively, you may also press the F2 button. If the F2 button doesn't work, you need to activate your customers/suppliers settings, by entering your customers register group, via the Reports menu → Customers → Settings. - Select the number of the paid invoice. The program will automatically enter:
- In the Description column, the payment description
- In the the Credit account column, the customer account number
- In the Amount column, the invoice amount.
If the entered amount does not include VAT and the customers are set up as cost centers, you must configure the cost centers correctly to use the amount with VAT in File and accounting properties (basic data), VAT/Sales tax tab. See also VAT amount with cost and profit centers.
- With a double-click on the cell, the program will show a list of all open invoices.
- In the Debit column, you must manually enter the conra account (the bank account where the amount has been credited).

Recording a credit note
In order for the amount to be deducted from the initial invoice, the same invoice number must be used.
- If the adjustment document (for example a credit note) has a different numbering that you still need to keep available, write this reference in another column, for example Doc Original.
- Enter data for the columns Date, Doc., Original Doc, Description
- The VAT Code must be preceded by the minus sign "-" so that the VAT operation is reversed, or use a specific VAT Code for debit notes (set in the VAT Codes table).
Note: to print the credit note to be sent to the customer, it is necessary to indicate in the DocType: 12 column, see Entering a credit note.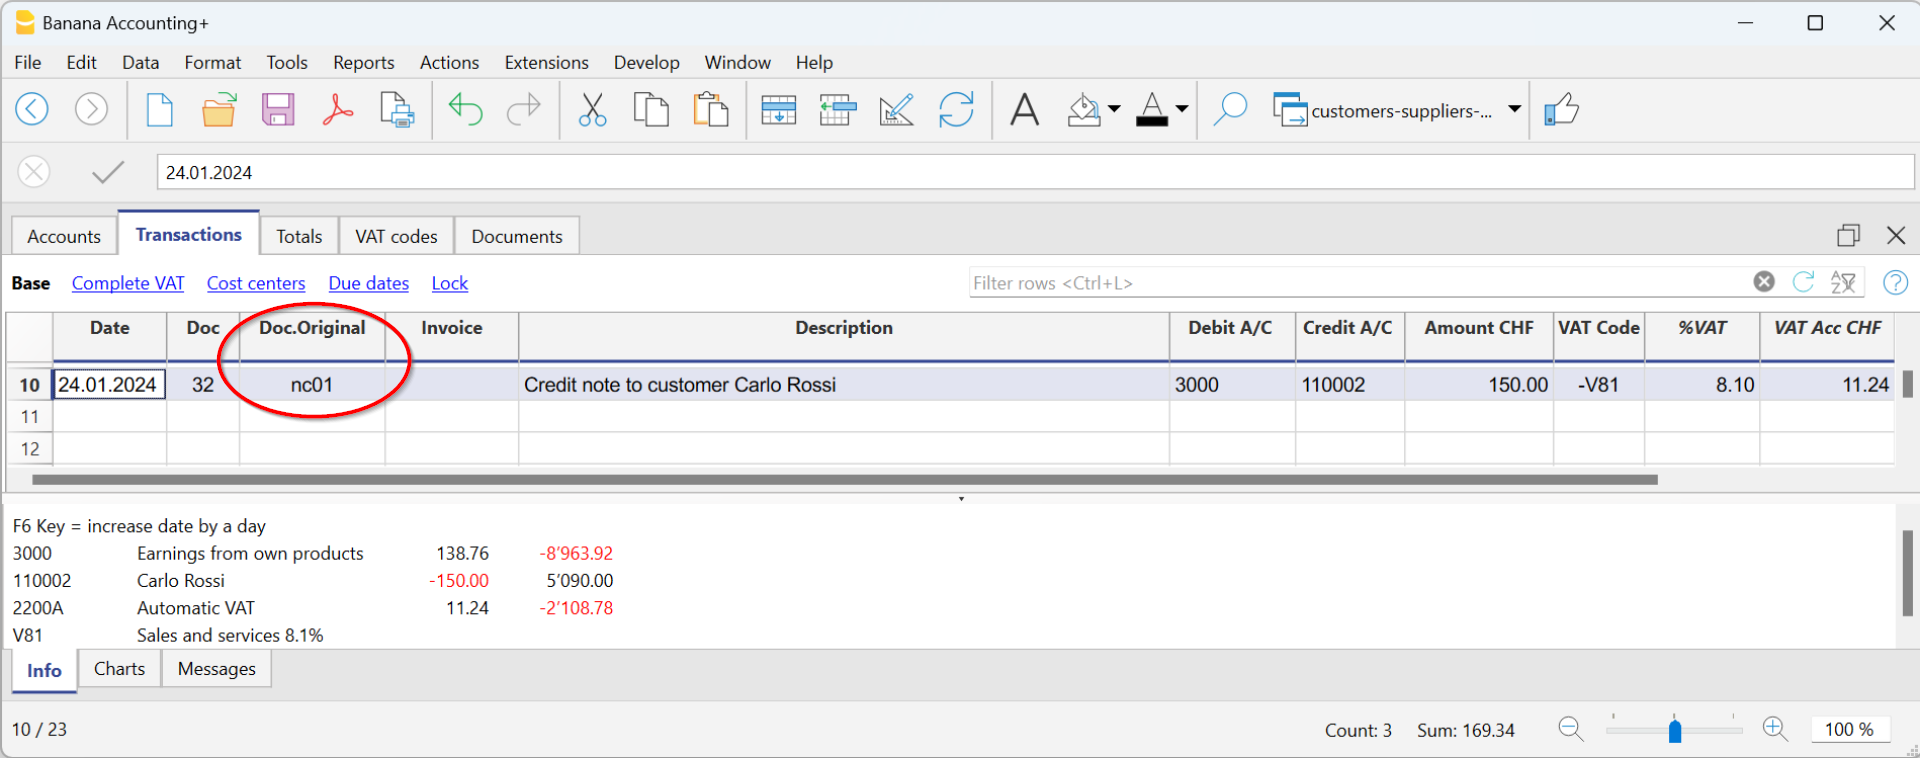
The cash method management
It is possible to manage the customers/suppliers register, even when using the cash method, as with the Cost and Profit Centers.
- We advise you to use the CC3 cost center (where the accounts are preceded by a semi-colon ";") to set up the customer and supplier register
- Set up the customers group via Reports → Customers → Settings.
For all Swiss users who manage the VAT on cash received, this setup is the best to manage the VAT. This setting allows to manage VAT optimally and to know the details for customers and suppliers.
By using this setup, the cost center balances for customers and suppliers will not appear in the Balance Sheet, but you will have all data and reports for internal purposes.

How to record when issuing an invoice
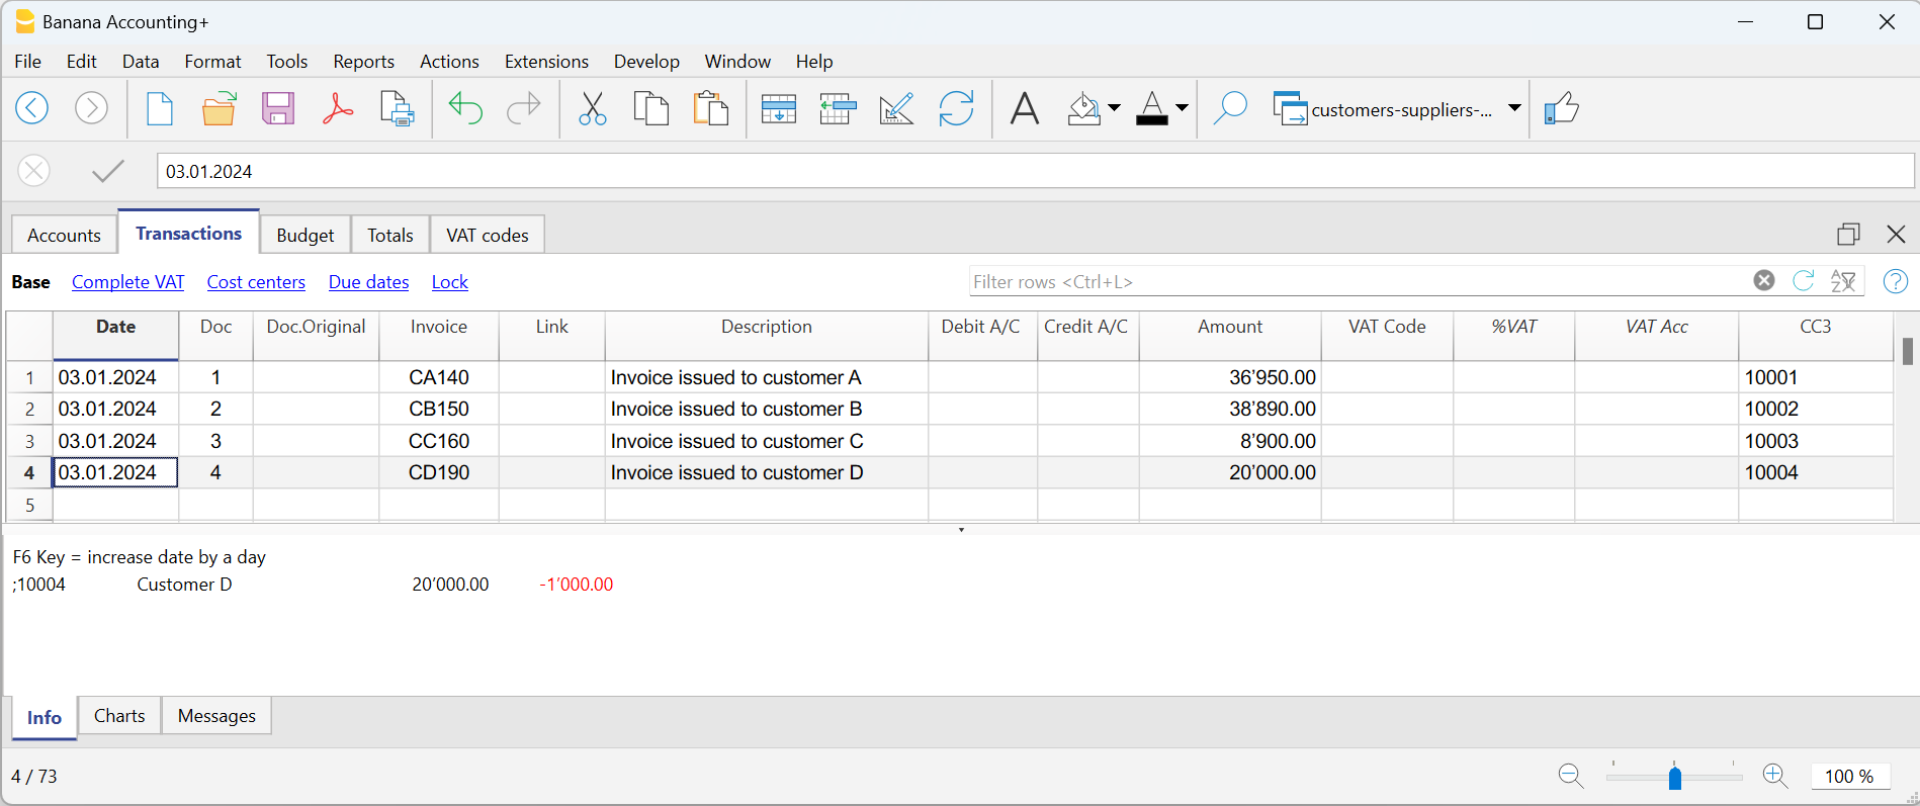
When you issue an invoice, record it as follows:
- In the Date column, enter the date of the invoice.
- In the Doc column, enter the document number if available.
- In the Invoice column, enter the invoice number.
- In the Description column, enter a description.
- In the Debit, Credit and VAT Code columns, do not enter any data.
- In the Amount column, insert the gross amount without any VAT code.
The VAT code in the case of cash management is recorded when the invoice is collected. - In the CC3 column, insert the CC3 account of the client without the ";" (ex. 10004).
How to record when an invoice is paid
When you collect an invoice, record it as follows:
- In the Date column, enter the date the invoice was collected.
- In the Doc column, enter the document number if available.
- In the Invoice column, enter the invoice number collected.
- In the Description column, enter a description.
- In the Debit column, enter the bank account (or other cash account).
- In the Credit column, enter the revenue account corresponding to the invoice.
- In the Amount column, enter the gross amount.
- In the VAT Code column, enter the VAT code of the invoiced sales or service.
- In the CC3 column, enter the customer's CC3 account without the ";", with the minus sign "-" in front of the account (e.g. -10004).
In Integrated invoicing with Income/Expense accounting, with a customer ledger configured with profit centres, the option Record (+/-) cost centres as category should not be activated, as the account and category are not indicated when the invoice is issued.
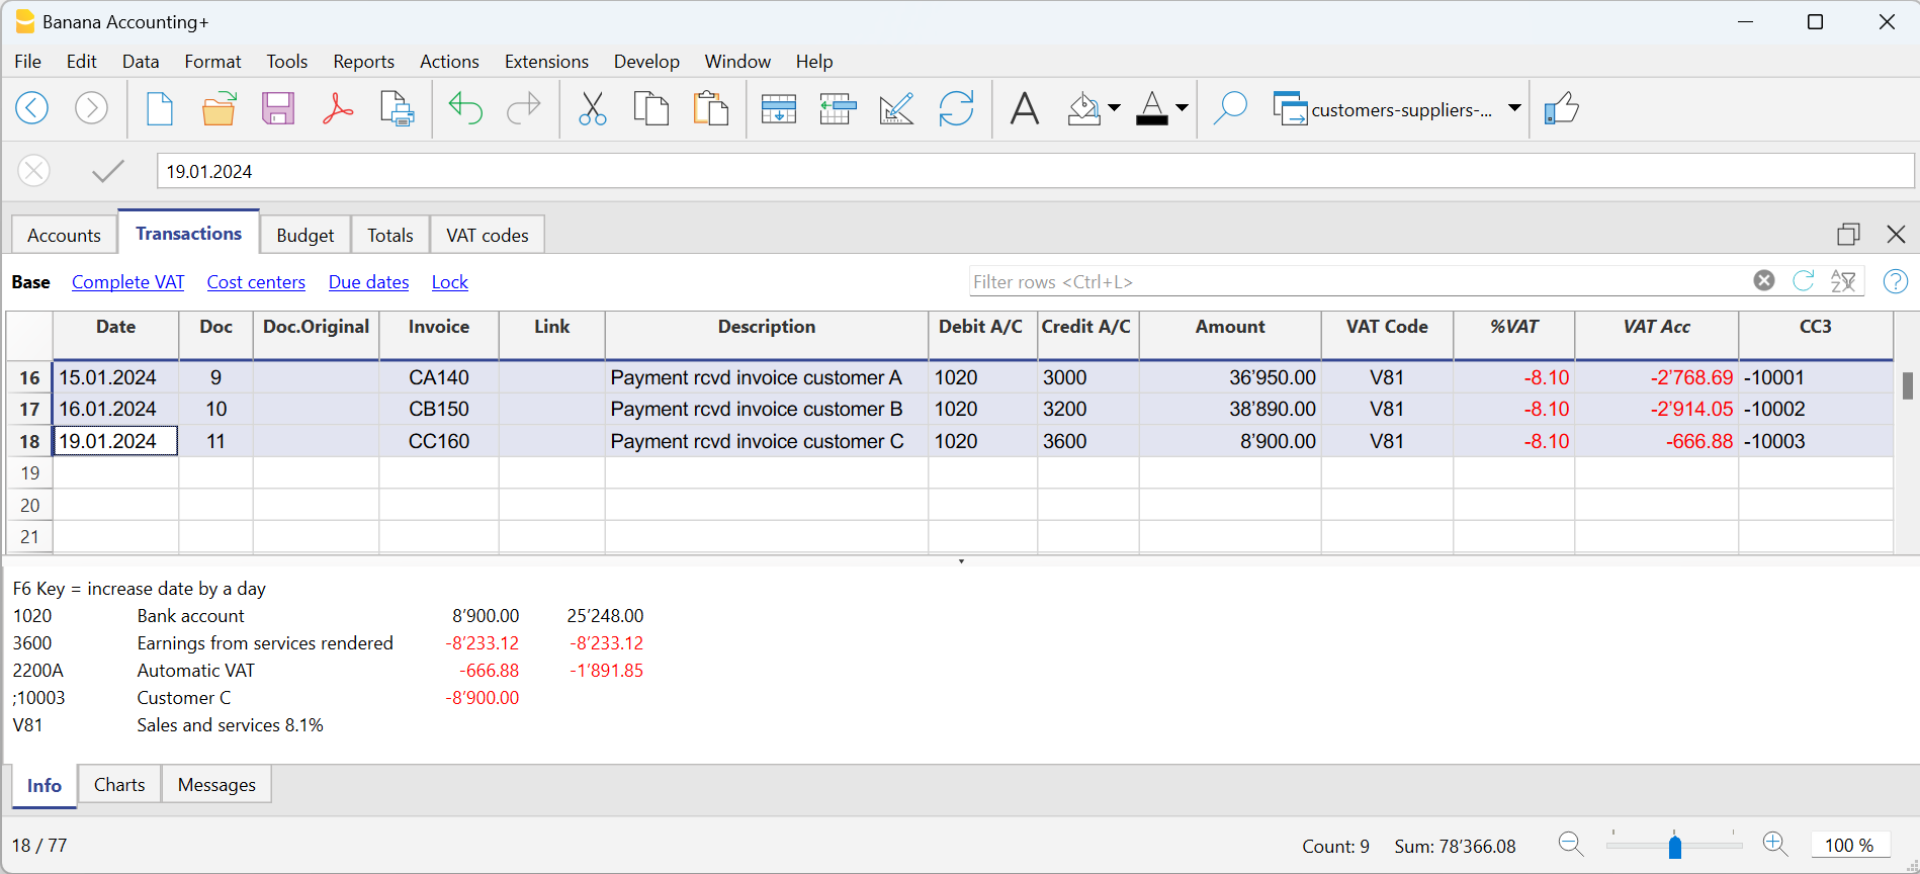
More information can be found on page Clients and suppliers with VAT, using the Cash method.
How to record a credit note with cash method
For the amount to be deducted from the initial invoice, the same invoice number must be used.
- If the adjusting document (e.g. a credit note) has a different number, which you must still keep, write this reference in another column, e.g. Doc. Original
- Enter the data for the Date, Original Document, Description columns
- Leave the Debit and Credit columns blank
- Enter the amount and in column CC3, enter the customer's cost centre with a - sign.
N.B: In order to print the credit note to be sent to the customer, you must indicate in the column TypeDoc: 12, see Credit notes.
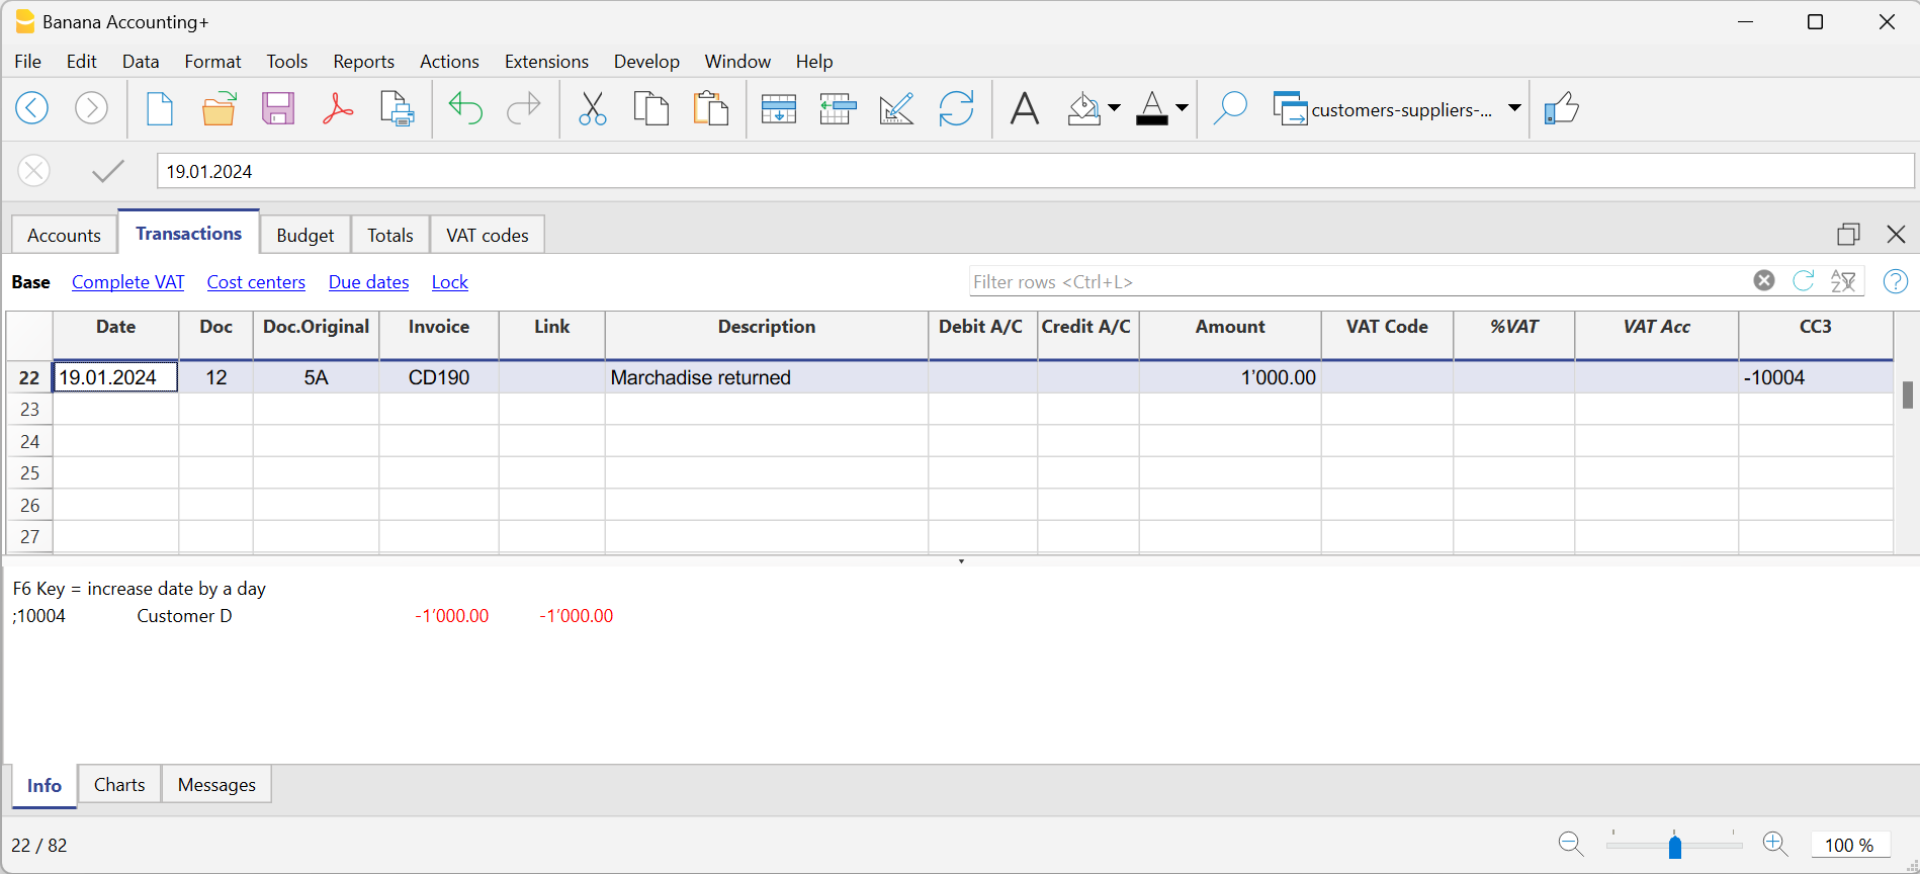
Customers' settings
To activate the options in the Customers menu, you need to set the customer group via the menu Reports → Customers → Settings menu.
The functions related to customers are explained below, but also apply to those of suppliers (Reports → Suppliers → Settings). the dialogues that follow are identical for both customer and supplier functionalities.
Without the indication of the group in the settings of the Customers menu, all functions are disabled.

General
Group or account
Select the generic group or account that contains the Customers or Suppliers list. The group or the account needs to be already present in the Accounts table.
For further details on customers or suppliers settings see:
- Setting up the Customers' register and Setting up the Suppliers' register (accrual method).
- Setting up the Customers' register and Setting up the Suppliers' register (cash method).
Due date invoices (in days)
The program uses the following order of priority to calculate the invoice deadline:
- The due date if you entered it in the transaction row.
If there are several dates for the same invoice number, the program takes into consideration the most recent one. - If the number of days is indicated in the PaymentTermInDays column of the Accounts table, the transaction date is incremented by the number of days set.
- The date of the transaction is incremented by the days indicated in the settings dialog box.
Include transactions from previous (years)
- If 0, the program will not display invoices from the previous year, but only the opening balances of the customer account.
- If 1, the program will also include the invoices of the previous year in the customer card.
- If 2 or more, the program will also include invoices from years before in the customer card.
Advanced

Link to the invoice document
You can save invoices (pdf, doc or other) and insert the link in the Link to invoice document cell. In the Transactions table, Invoice column, the program will open the document if the invoice number is indicated, allowing access to the content.
The link may contain:
- The XML name <DocInvoice> or the name of another column contained between <>.
If you use the "<DocInvoice>.pdf" command and you are on the row with invoice number 100, the program will try to open the "100.pdf" file. You can also prefix the filename with the name of a directory. - Any file name extension can be used. This extension must, however, be included in the list of file extensions considered safe (Tools- Program options-Advanced).
- It is also possible to indicate a path preceding the field name, that contains the name of the document to be opened.
- With the "c:\temp\<DocInvoice>.pdf" link and the invoice number 100, the program proceeds to open the file c:\temp\100.pdf.
- The name of the directory is relative to the directory where the file is located.
Alternative text for payment auto-completion (Payment %1)
The entry of a payment for an invoice can be facilitated by the auto-completion of the payment, which can be activated via the F2 key in the Invoice field of the Entries table.
The auto-completion completes the entry columns such as invoice number, description, amount, accounts. In the Description column, it is possible to edit the text 'Payment' followed by the description of the first line of the invoice (%1), indicating the desired text.
Invoice rounding (base currency)
Indicate the minimum amount for rounding the invoice total. For example:
0.01 rounds the invoice total to the nearest cent, 0.10 rounds to the nearest 10 cents.
If the field is empty, the invoice total in CHF is rounded to the nearest 5 cents, for other currencies rounding is to the nearest cent.
Disable auto-completion of invoice data
This option is usually deactivated when there are many entries in the accounts and the data entry is slowed down by the display of the list of open invoices in the Invoice field of the Entries table.
Disable automatic compensation of open invoices with opening balances
Automatic compensation (or settlement) refers to the process where the opening balance of the account is used to offset open invoices. When the opening balance can fully cover the amounts in the transaction table, the invoices are considered paid, and their status will be marked as "paidOpening." If the opening balance is insufficient to cover the invoices, they will remain open.
Disabling this function means that the system will no longer use the opening balance to offset open invoices. As a result, the opening balance will be displayed separately from the invoices in the invoice list.
If you wish to offset an invoice with the opening balance, regardless of the 'Disable automatic compensation' option, simply enter 'openBalance' in the invoice number field.
Opening an invoice document
- Position yourself in the Invoice column of the transaction row related to the invoice you wish to open
- Open the context menu with the right mouse button
- Select the Open Invoice Link command.
Miscellaneous operations
Below we will explain some very important features and settings to best manage your customers, to speed up the work and get the reports correctly.
- Displaying the Invoice column in the Transactions table
- Auto-complete of invoice data
- Extract invoice rows and Open invoice link commands
- Activating the Address columns (optional)
- Setting up the expiration date for invoices
- Setting up the Customers' parameters
Displaying the Invoice column in the Transactions table
If the Invoice column is not displayed in the Transactions table, it can be activated via the Data Menu → Columns setup → Invoice Doc column.
It is very important to enter the invoice number for various program automatism that concern the processing of the various reports and the closing of the amount in the customer card when the invoice is collected.

Access the invoice saved in pdf format by clicking on the cell in the Invoice column.

Auto-complete of invoice data
When a payment is being recorded or an issued invoice is being corrected, the program offers suggestions to complete the transaction automatically. Proceed as follows:
- Create a new transaction row and add the date and the eventual document number.
- Press the F2 key in the Invoice column :
- The list of still open invoices will appear. If you type an invoice number or a customer number, the list will be filtered according to the entered text.
- Select the invoice you want from the list and press Enter. The program will automatically complete the registration with the description, the debit or credit account and the amount. The data can of course also be changed manually.
- In addition to the date, it is also possible to indicate the customer account before pressing F2 to display the list of open invoices, in this case the list will be filtered with the customer account present in the transaction row.
Note
The list displayed in the Invoice column includes both the Customers' and Suppliers' invoices. A supplier's invoice may have the same number as the invoice of another supplier, because the criterion for display takes into consideration the invoice number besides the Supplier's account number.
Extract invoice rows and Open invoice link commands

The Extract invoice rows command displays the transactions for the selected invoice.
The command is available by clicking on the small blue icon at the upper right corner of the cell or with the right mouse button.
The Open Invoice link command provides the text, as defined in the Customers' settings (Reports - Customers - Settings - Advanced - Link to the Invoice document).
On the command line, you can also indicate other columns in the table using their XML name.
If the message 'File with extension considered unsafe' appears, add the extension (for example .doc) using the Tools - Program options, Advanced, File extension command.
Activating the Address columns (optional)
It is possible to add some specific columns in the Chart of Accounts, to insert the address and other customers data:
- Choose the Tools → Add new functionalities command from the menu
- Choose the Add addresses columns in the Accounts table command
(If you don't see this option in the list, it means that this function has already been activated).
In the Accounts table, the program will add :
- An Address view, where the added columns are made visible.
- The columns that allow the insertion of the address data and other information.
- To display one or more of these columns, use the Columns setup command from the Data menu.
- To create other views with only selected columns, use the Tables setup command (Data menu).
Select Accounts table, Address view and add the required information to the customers' accounts.

Setting up the expiry date for invoices
To set / modify invoice expiration dates, you may act on three levels, where higher priority is given to the first one. Expiration data will be displayed in the payments schedule and printed out on the invoice document.
1. level - setting the expiry date on an individual invoice
In the row of the Transactions table, where your invoice is entered, you will find an Date Exp. column when using the Due Date view. If a date is set up, it will have priority over dates set up on the 2nd or 3rd level.
2. level - setting the expiry date on an individual customer/supplier account
In order to set up an expiration date on a customer level, for example +20 days after issuance of the invoice, select the account in the Accounts table, using the Address view, go to the Days Column (PaymentTermInDays) to set up the number of days to be used.
3. level - general setup
Expiration dates applying to all Customers/Suppliers can be set up via menu Reports → Customers → Settings.
Setting up the Customers' parameters
- Select the Reports → Customers → Settings command
- Please indicate the group of the Chart of Accounts in which the different customers' accounts are grouped in "Group or account".
- For an explanation of the different options, go to Customers and Suppliers settings.
List of customer invoices
Displaying invoices issued to customers
Reports menu → Customers → Invoices issued to customers...

This dialog box is identical for both Customers and Suppliers functionalities.
The following explains the functions related to customers, but they also apply to suppliers.
All customers
Displays the account statement of all customers belonging to the group, as defined in the Customers and Suppliers settings.
Select a single customer
Displays the account statement for the customer selected belonging to the group defined in the Customers and Suppliers settings.
Displaying open invoices
Command: Reports → Customers → Open invoices by customer
Invoices showing an open balance are being listed in this table.
For multi-currency accounting, if there are unposted exchange rate differences for a particular customer, an 'Adjustment exchange rate differences' line will be displayed that balances the balance in the open invoice list with the balance on the account card.

Displaying overdue invoices
Command: Reports → Customers → Open invoices by due date
In this table, invoices showing an open balance are being listed, filtered by due date.

The due date of an invoice can be set in different ways. More information can be found on the following page: Due dates and payment terms.
Print statements
To view this window, it is necessary to configure customer settings.
Access the printing of the statements via the menu Reports > Customers > Print statements.
It is essential to install the Customer Statement layout for printing the statement. There are two ways:
- From the Extensions menu > Manage extensions select the Customer Statement layout from the list of the extensions and click onto button Install.
- From the menu Reports > Customers > Print statements > More layouts select the Customer statement layout.

Statement date
This is the date printed on the statement. It is not possible to set up a date prior to the date of the last existing transaction.
Layout
The styles allow you to change the print layout.
Export PDF
The programme displays a preview of the extracts, with the Export PDF command you can then create the file containing all extracts or PDFs for each extract.
Print payment reminders
Feature available with Banana Accounting Plus - any plan (excluding Free plan limitations)
The printing of Payment reminders is accessed from the Reports menu > Customers > Print reminders.

The program automatically creates payment reminders from past due invoices.
- In addition to the printouts, the program directly creates the transactions in the Transactions table, which are used to recreate the issued reminders history.
- These transactions show the document date and the document Type: 16-1 first reminder, 16-2 second reminder and 16-3 third reminder.
Use last payment reminders
If in the Transactions table there are reminder transactions with the indicated date, the program will suggest to print these reminders.
Create new payment reminders
For all invoices that have expired, automatic reminder transactions are created in the Transactions table, which allow the printing of reminders.

Payment reminders
The program will show the expired invoices, which you can deactivate if you do not wish to send the reminder.

Template
Two reminder templates are available, one with a logo and one without (see Logo setup) . It is not possible to include the payment slip, insert notes and free texts.If you need the payment slip, use the Print Reminders Invoices dialogue.
Manage extensions
To update the templates with the latest ones or to add your own custom templates go to the Extensions menu.
It allows you to set the parameters of the selected style.
Show expiry dates
Customers & Suppliers Management
In order to automatically manage the invoices issued or received, we advise you to use the Customers Menu and the Suppliers Menu.
Associate an expiry date to a transaction
As an alternative to the customers and suppliers management, or for simpler checking purposes, you can also enter the payment date manually in the transaction row, in the Date Payment column.
This is an operating mode that consents simplified checkup.
With the Data menu → Columns Setup command, you should display the Date Exp. and Date Pay columns.
You should then enter the invoice expiration date in the Date Exp. column, and the invoice payment date in the Date Pay. column, when the payment is being recorded.
The due date of an invoice can be set in different ways. More information can be found on the following page: Due dates and payment terms.
Show expiry dates
With the Show expiry dates command of the Actions menu, the program displays in the Expiry dates table the transaction rows that have a due date and no payment date.
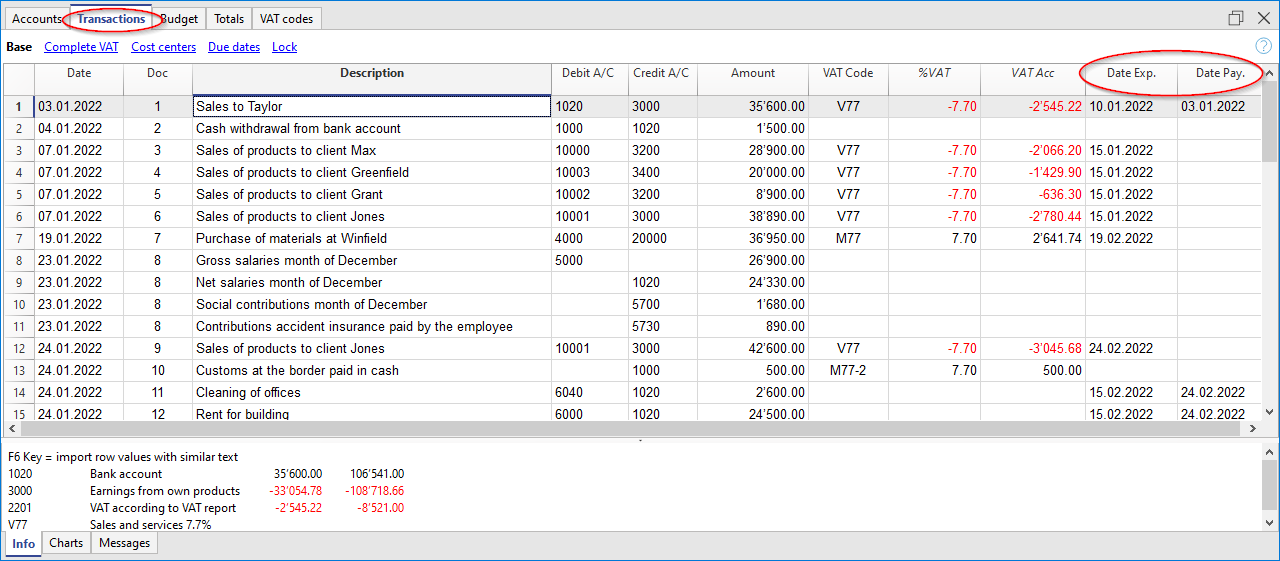
To obtain an automatic expiration schedule (Customer and Supplier open positions), see the List of customer invoices page.
Supplier Management
The supplier management allows you to record, organize, and manage supplier information, enabling you to keep track of supplier transactions and payments, payment deadlines, and contact information. You can monitor due invoices, paid invoices, and the account balance for each supplier, as well as the total open balance.
Supplier management is one of the features of Banana Accounting Plus available in all accounting applications.
Supplier master data settings include both revenue and cash management. Foreign currency supplier accounts can also be managed.
The function of making supplier invoice payments via e-banking is only available in the Advanced plan.
Recording Supplier Transactions
The Transactions table is the heart of Banana Accounting and is used to record all operations, including supplier transactions, simply by specifying the supplier's account. You can work quickly because you can select, copy, and paste supplier transactions that have been entered previously. If you make any mistakes, you can always correct them.
The supplier transactions recorded in the Transactions table include the following:
- Receiving invoices
- Making invoice payments
- Receiving credit notes or refunds
- Managing payments via e-banking
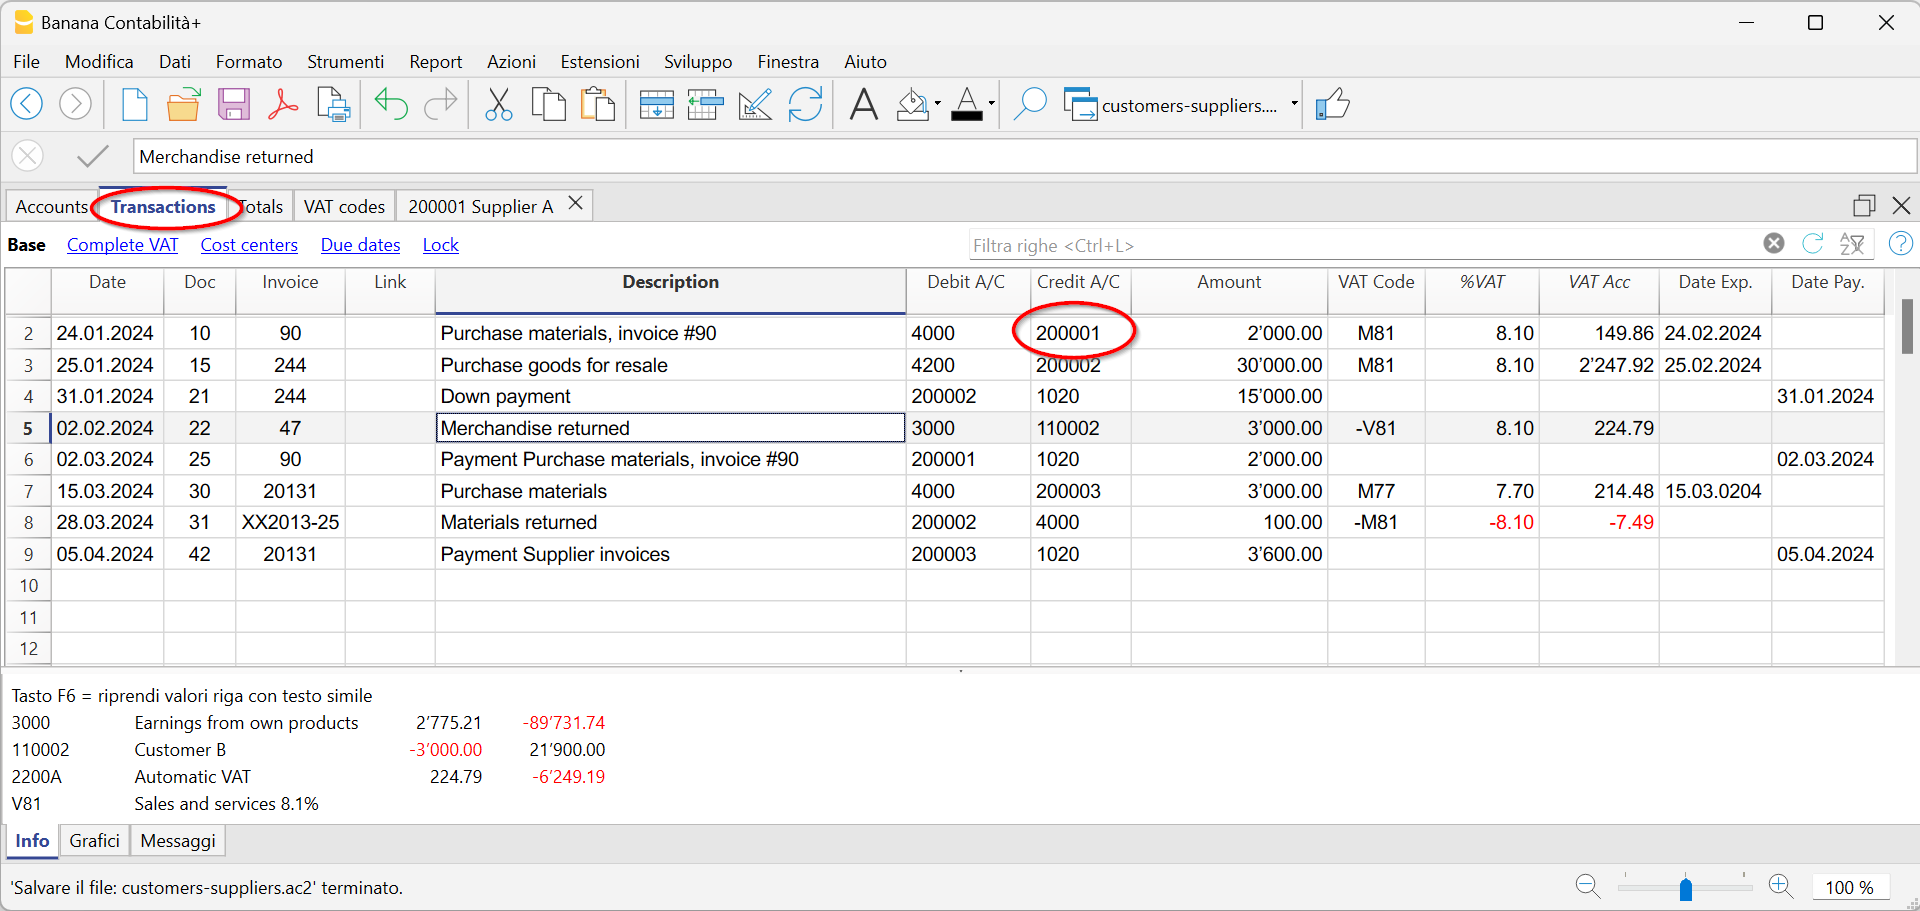
There are columns where you can enter various pieces of information, including:
- Date of the Transaction, Due Date, and Payment Date.
- Invoice number.
- Debit and Credit Accounts where you specify the supplier's account (Credit) and the counterpart account (Debit).
- Amount.
- VAT codes for the automatic calculation of VAT
- Links to Digital Documents (such as the invoice received from the supplier or PDF annotations).
Supplier Accounts
Supplier accounts are used to record all transactions related to a company's suppliers.
The main functions of supplier accounts are as follows:
- Create an Account for Each Supplier and Track All Transactions.
- Record Received Invoices for Each Supplier.
- Create an E-banking Payment Order Directly from the Supplier Invoice.
- Record Payments to Suppliers and Associate Them with Received Invoices.
- Generate Lists for Payment Verification.
In Banana Accounting Plus:
- Supplier accounts and their Addresses (name, surname, company name, address, VAT number, etc.) are set up in the Accounts table.
- Accounting transactions related to these accounts are entered in the Transactions table.
- After each entry, all supplier account balances (Accounts table) are automatically updated, providing an immediate overview of outstanding balances yet to be paid.
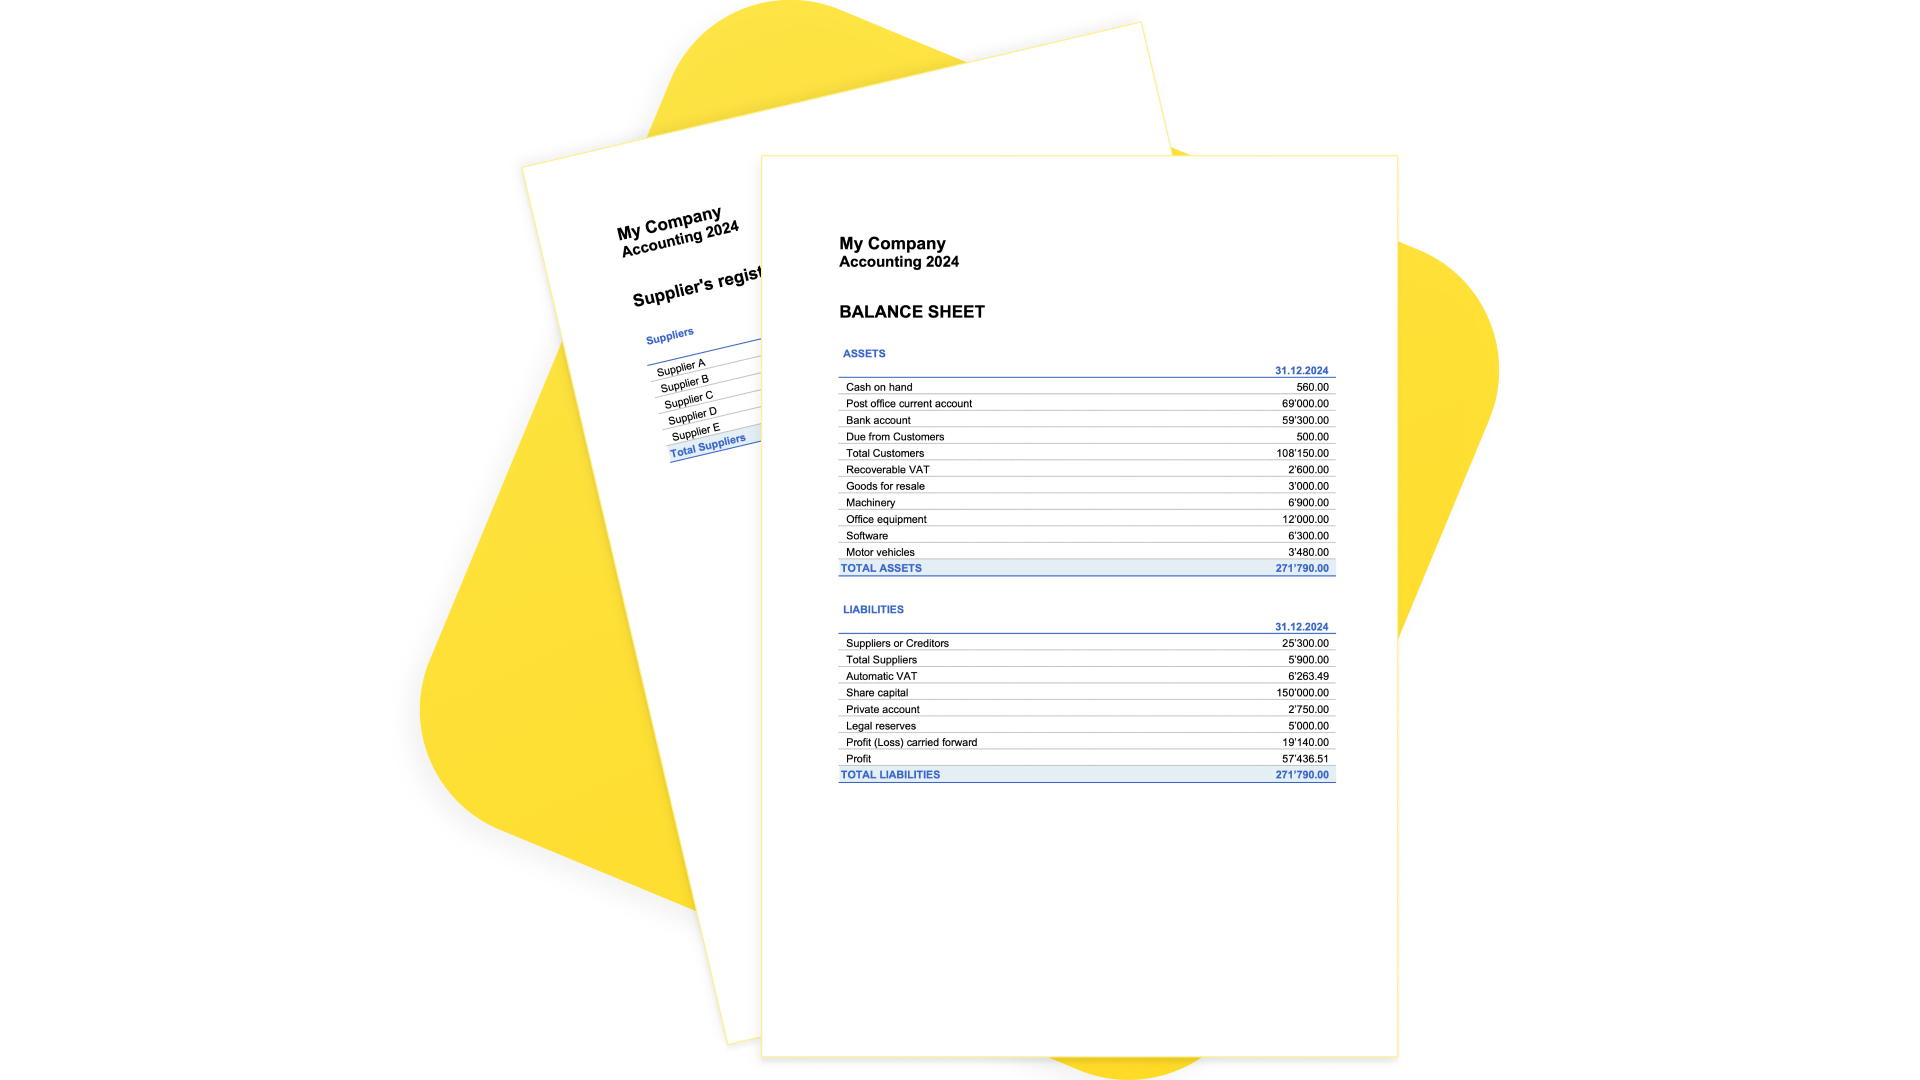
Recording Received Invoices
The invoice received from the supplier is used for accounting and tax purposes as it allows for the accurate recording of a company's costs and expenses, as well as the calculation of VAT.
In Banana Accounting, invoices are recorded in the Transactions table by:
- Entering the date and description.
- Adding an invoice number.
- Recording the cost account in the Debit column and the supplier account in the Credit column.
- Specifying the VAT code for goods or services purchased. Calculations and VAT amounts are automatically inserted.
Recording Payments
In Banana Accounting, payments are recorded in the Transactions table using one of the following methods:
- Manual Recording:
- Enter the date and description.
- In the Invoice column, specify the supplier's account. A dropdown menu will display the open invoices. Simply select the invoice received from the supplier, press Enter, and the program will automatically fill in the supplier's account in the Debit column, along with the invoice amount. Basta poi Then, enter the cash account in the Credit column to complete the recording.
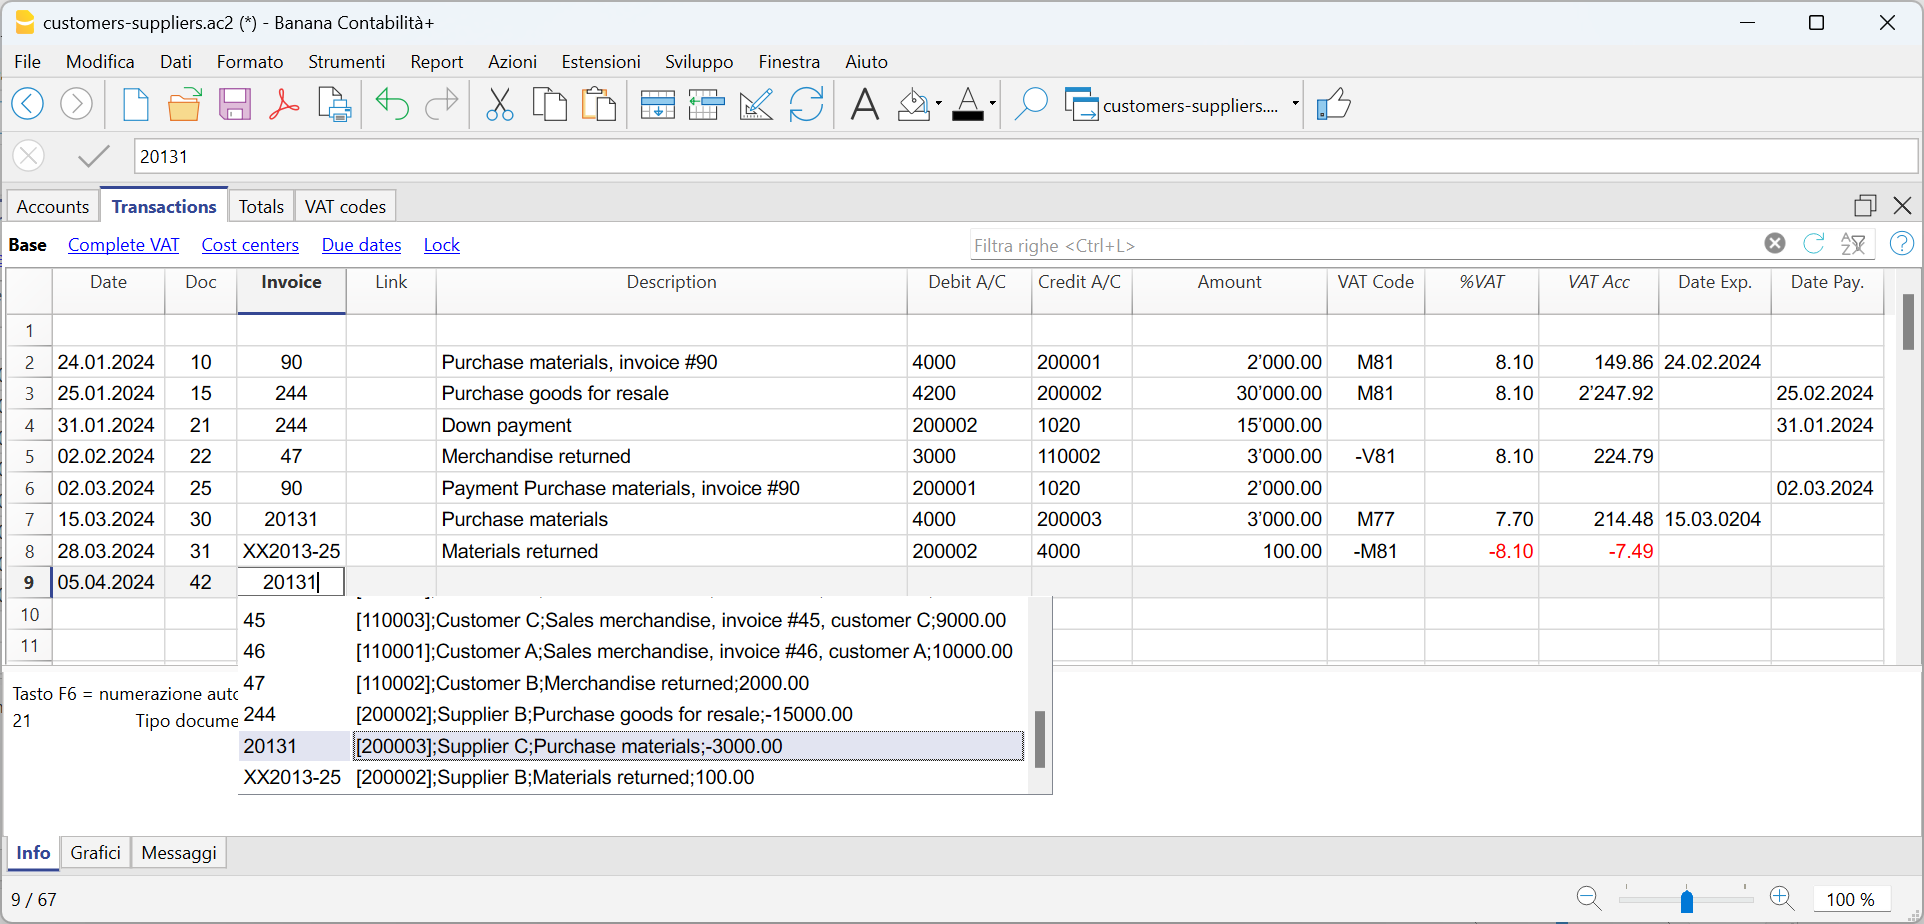
- Data Import from Bank Statements Using Rules
- The program imports data from ISO 20022 bank statements, and with the use of Rules, it automatically enters complete transactions, including all necessary details, without the need for manual intervention.
Outstanding Invoices
Outstanding invoices from suppliers are those invoices that have been received but are still pending payment.
Supplier's outstanding invoices can be managed through an accounting register that tracks issued invoices, payment due dates, and received payments. This allows the seller to monitor the financial status of each supplier and send payment reminders if invoices remain unpaid for an extended period.
It's important to note that outstanding supplier invoices have an impact on a company's liquidity, as they represent funds that need to be allocated for payment.
Banana Accounting automatically generates a report of outstanding invoices, where you can quickly verify which invoices are still pending payment, from which supplier, and the total amount of outstanding invoices.
There are two types of reports:
- Open Invoices by Supplier, where all open invoices for each supplier are listed.
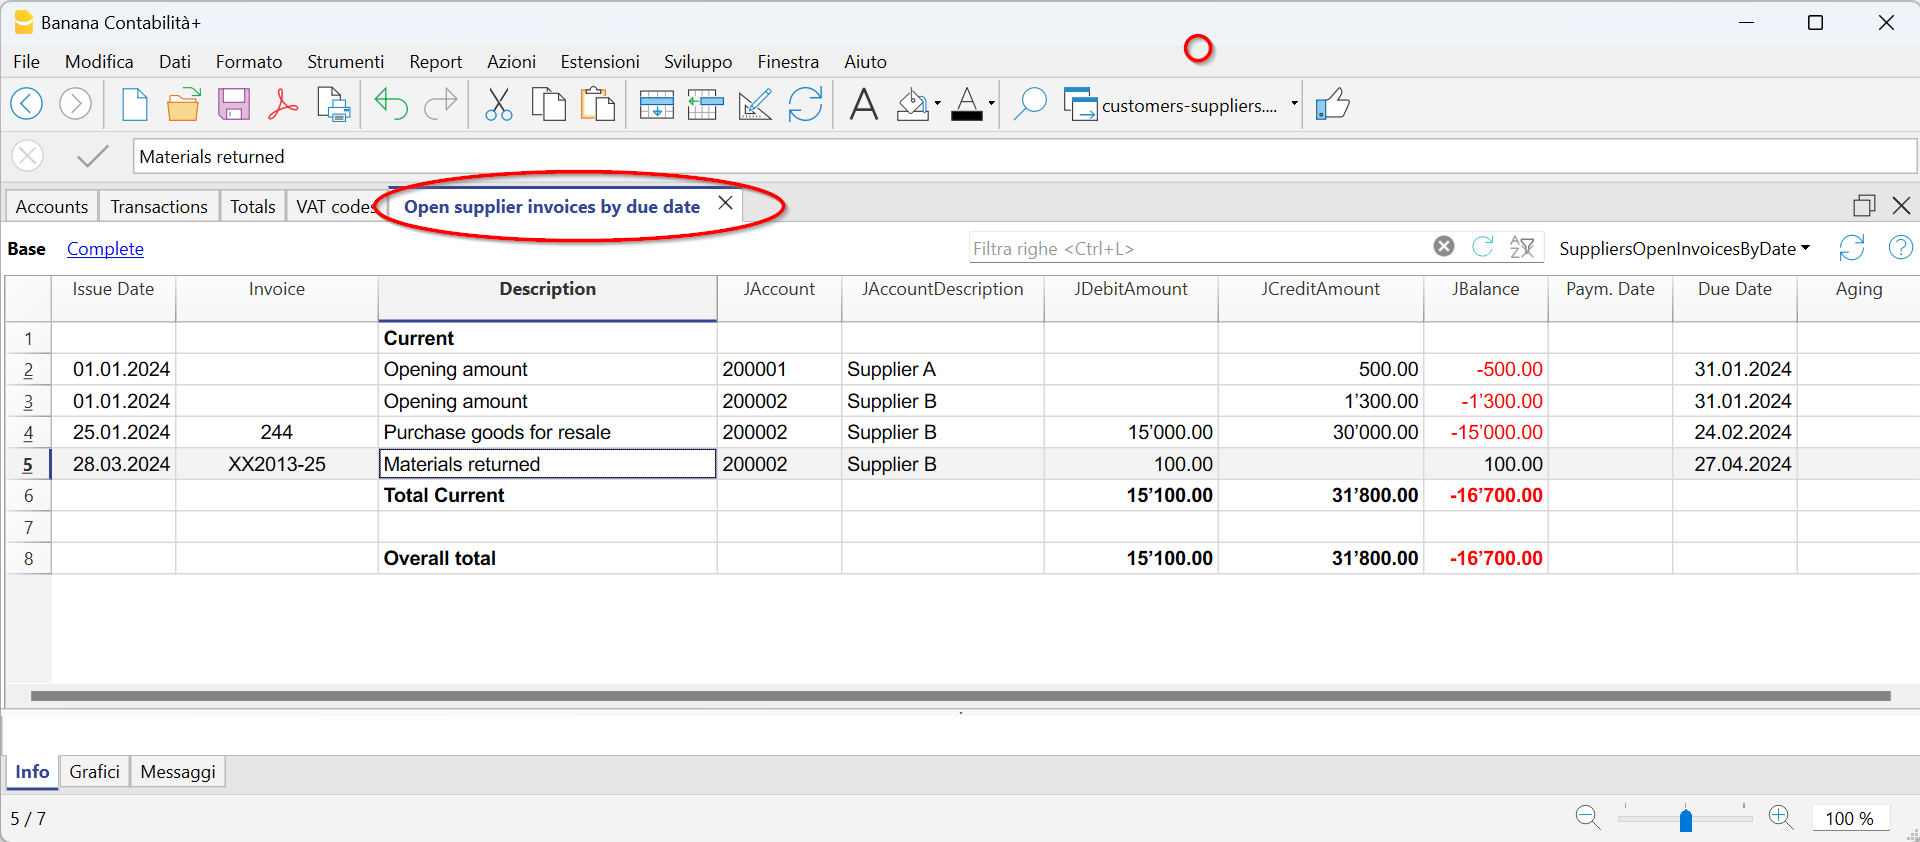
2. Open Invoices by Due Date, where open invoices are listed in order of their due dates.
The due date for an invoice can be set in various ways. Further information is available on the following page: "Expiry Dates and Payment Terms."
Accounts Cards
Accounts cards are accounting documents that record the financial transactions of a company. Each card represents a specific account in the company's general ledger and contains detailed information about the transactions related to that account, such as the date of the financial transaction, the type of transaction, the amount, and the description of the transaction.
In Banana Accounting, based on the data entered in the Transactions table, the program automatically generates an Accounts Card for each supplier. These cards display the opening balance, all transactions, and the final balance. You can also generate account cards for specific time periods.

Set up and use supplier features
- Set up accounts for turnover accounting (accrual principle).
- Set up accounts for collection accounting (cash principle).
- Configure supplier settings (explanation as for customers).
- Set up the transactions table and post supplier invoices.
- Open, overdue or received supplier invoice reports.
Notes
- In multi-currency accounting, the reports are based on the balances in the currency of the supplier's account, so any exchange rate differences are not taken into consideration.
- In the Invoices received table, the exchange rate differences transactions are also listed, while in the other printouts only the supplier's currency amount is valid.
- The Description column of the reports includes the first transaction row for each invoice.
- For the accounting on the collected, it is possible to set up a suppliers register with cost centers.
Example file
Managing with the accrual method
Introduction
In Banana Accounting it is possible to manage suppliers both with the accrual and cash method. A detailed explanation is available on the accounting with the accrual or cash principle page.
Below we explain how to set up the group and supplier accounts, so that you can have a separate invoice list for each supplier.
If you have few invoices and do not want to keep a detail by supplier, it is also possible to have only one account where all the invoices of the suppliers are recorded. In this case, the list of invoices will be grouped by all suppliers and not by a single supplier.
Setting up the Suppliers' register
To create the Suppliers' register, add at the end of the Chart of accounts:
- A* section (header) (see Sections)
- A 02 section for suppliers (see Sections)
- The Suppliers' accounts that are needed (see Adding a new account). Each supplier is entered on a row of the Chart of Accounts and has its own account number. The account numbering can be freely chosen (see Accounts), however it is recommended to use only numbers, in particular for the management of payments.
- A group where all the accounts payable are totaled.
- This group is in turn totaled into a group present in the liabilities.

- The total Suppliers will be totaled in the 200A summary group of the Sum in column.
- The same code or number used for the Gr (200A), must be used in the Liabilities Group column, in the row corresponding to the Total Suppliers. The groups numbering can be freely chosen (see Groups).

Record a received invoice

Record a payment
- Enter the transaction date
- Position yourself on the Invoice field and press the F2 key or double click on the cell.
The list of open invoices will be displayed. - Select the paid supplier invoice and press Enter.
The program will complete the transaction with the Description, Debit Account and Amount fields. As long as the contra account is not entered, the program will report the difference in the transactions.

Record a credit note
The same invoice number must be used for the amount to be deducted from the initial invoice. If the adjustment document (for example a credit note) has a different numbering that you still need to keep available, write this reference in another column, for example DocOriginal.

Collection management (cash principle)
Set up the suppliers register with the cost centers
For Swiss users who have VAT on their receipts, this setting allows you to manage VAT in an optimal way.
It is possible to manage the customers and suppliers register as cost centers (see also the Cost and Profit Centers page). A detailed explanation is available on the Accounting page on accrual or cash method.
- It is advisable to use the cost center CC3 (accounts preceded by a semicolon ";")
- The balances of the cost centers will therefore not appear in the balance sheet.

Transactions
The information is available on the Customers and suppliers page with VAT using the cash principle.

Miscellaneous operations
The various functions listed use the same methods as those used for clients. For further information, please refer to the relevant client pages.
View the Invoice column in the Transactions table
See Clients - Display Invoice columns.
Auto-complete
Extract invoice rows and open invoice link commands
Vedi Clients - Extract invoice rows commands.
Activating the Address columns (optional)
See Clients - Address column setup.

Configure supplier settings
- Select the Reports → Suppliers → Settings command.
- It is important to indicate in the "Group or account", the group of the chart of accounts where the various accounts of the suppliers are grouped.
- For explications of the different options see Customers/Suppliers settings.
List of supplier invoices
Displaying invoices received
Command: Reports → Suppliers → Open invoices by supplier.
All invoices that belong to the supplier register or to an individual supplier are displayed in this table.

Displaying the open invoices
Command: Reports → Suppliers → Open supplier invoices
In this table, only invoices that have an open balance are being listed.
For multi-currency accounting, if there are unrecorded exchange rate differences for a particular supplier, an 'Adjustment exchange rate differences' line will be displayed that balances the balance in the open invoice list with the balance on the account card.

Displaying invoices by due date
Command: Reports → Suppliers → Open supplier invoices by due date
Only invoices that have an open balance, are displayed in this table, grouped by due period.

Payment files for invoices from suppliers
The new Payments function allows you to create payment orders (pain.001) either from a list of transactions or by scanning the QR codes on received invoices.
The pain.001 files are XML messages that contains details of the payments to be made and that can be uploaded to the portal of the major financial institutions. Banana currently supports the Swiss payment standards (SPS).
More info Payment orders PAIN.001.
Migration to structured addresses
Prerequisites and important notes
Currently the payment functionality
- Is available in the Dev-Channel version, so please install the latest version of Banana Accounting+ Dev Channel.
- This extension works only with the Advanced Plan, you can request a 1 month promo code from our support service.
- The extension is currently in Beta Test, please check everything and report any problem.
How to create the payment file (pain.001)
- Open your accounting file (double entry accounting or income-expense accounting ) or download our example file Payments_2024_en.ac2
- In the Accounts table, verify the presence of the Address view.
You can add it using the menu command Tools > Add/Remove functionalities... > Add Address columns in Accounts table.
If your Address columns are different (e.g. missing IBAN, see the documentation Address view.
- The first time, install the Payment functionalities with the command Tools > Add/Remove functionalities... > Add payment functionalities
- Set up the debit bank account, which will be used when creating the payment order. In the Accounts table, select the debit account and complete the following data (Address view):
- Name, surname or company name (bank account holder)
- IBAN (IBAN account of the bank or postal account to be debited)
- Bank clearing (BIC code of the financial institution to be debited)
- Check and update the address and payment information of your suppliers in the Accounts table (Address view).
If you don't have a list of suppliers, please define it according to our explanation in the Suppliers section.
If you make payments by scanning QR-Codes you don't need to setup the addresses because all information for the payment is included in the QR-Code
- In the Transactions table enter the invoices of your suppliers or scan your QR-Codes

- Enter and complete the payment details by clicking directly on the Payment Data column. Ensure that all transactions to be paid are completed with the payment information.
If the supplier list (Account ID) is empty, it is necessary to configure the Payments extension by setting up the Suppliers group.
See the Payment orders extension (Payment Data dialog) for guidance.
- Select the command Reports > Suppliers > Create payment file

- Please fill in with the name of the account holder to be debited, their corresponding IBAN, and BIC code. If you have previously entered this information in the Accounts table, it will be automatically suggested.
If you want to display each payment separately on the bank statement, you must enable the "Individual booking" option when creating the payment order; otherwise, only the total amount will be shown on the bank statement.
Press the "Next" button.
- A summary of the payment file is displayed and you can specify where to save it. Click on Finish, you will be asked to save the payment file, which you can upload to your bank. Note: In Banana it's not possible to connect to your bank and transmit the file, you need to upload the file from your computer into the bank app or website.

- After saving the payment file, a row containing the payment/file object will be inserted into the Transactions table.
You can view the content of the XML file again by double-clicking on the Payment Data cell or by clicking on the edit icon located at the top right of the cell.
This is a receipt, and it is no longer possible to modify the payment file or send it again.
Warning! The payment/file objects are used to determine whether a payment has been transmitted to the bank.
Therefore, it is recommended not to delete the rows containing these objects; otherwise, payments that have already been transmitted will continue to appear among the pending ones.

- When creating a payment order in Banana, the related payment entries are not generated immediately, as the file must first be transmitted to the bank and the payment is only executed after bank confirmation.
Once the payments have been made, it is recommended to import into Banana the ISO 20022 file provided by the bank, which contains the details of the completed payments.
After importing the invoice payments, you can complete them by pressing F2 in the Invoice column, so that they are marked as paid in the Supplier Invoices table (menu Reports > Suppliers).
Opening a new year
The payment file (XML file) can only be created in the accounting file that contains the necessary payment data for its generation. When opening the new year, only customer and supplier invoices are carried forward, without their related payment data; therefore, it is not possible to create a payment file for invoices recorded in the accounting file of the previous year.
However, through the menu Report > Suppliers > List of payment files, you can also view the payment files from previous years, based on the Suppliers settings, by enabling the Include transactions from previous years option in the Report > Suppliers > Settings command.
Create payment file
The command Reports > Suppliers > Create payment file creates an XML message collecting information from payment data objects.
See How to create the payment file (pain.001)
Scanning QR-Codes
The Reports→ Suppliers→ Scan QR-code command displays the Scan code dialog,which allows you to enter one or more QR codes and create the accounting entries and related payment files from these data.
We tested the functionality with the Datalogic QuickScan reader (more on scanner configuration).
It is also possible to scan the QR-Codes with a mobile app, copy the data to the clipboard and paste them into the Banana Scan code dialog. You can search for an app that scans QR codes and saves them to the clipboard in the Apple or Android store. Our company does not provide or publish any software of this type.
If you have multiple QR codes to scan, use the Next Scan button after each scan.
If you are picking up a list of QR codes from the clipboard, they must be separated by semicolons, without adding spaces or line breaks (...EDP;SPC...).
To automatically retrieve the supplier's account number, you must correctly specify the supplier's name in the Organization column of the Accounts table, Address view. The text in the Organization column must exactly match the name indicated in the QR code.

Configure and Use QR Code Scanner
- Configure and connect the scanner.
- In Banana, select the command Reports > Suppliers > Scan QRCode (Ctrl+8) and place the cursor in the input field.
- Press the button on the scanner.
- The scan dialog will be automatically filled in.
- Complete the process.
Configure and Use Mobile App
- Install the mobile app, scan QR codes with the app, and save the data to the clipboard.
- Transfer the saved text to your computer with Banana (e.g., via email or AirDrop).
- In Banana, select the command Reports > Suppliers > Scan QRCode (Ctrl+8) and place the cursor in the input field.
- Paste the copied text into the scan dialog.
- Complete the process.
List of payments
The command Reports > Suppliers > List of payment files display all payments included in payment files present in the Transaction table (Payment file).

Payment List

Invoicing with Banana Accounting
In Banana Accounting Plus, you can create your invoices directly within the accounting file or manage them completely separately using the Estimates and Invoices application.
- Integrated invoicing in accounting
Additional functionality included in all accounting applications (double-entry, income/expense, multi-currency, cash manager). - Estimates and Invoices application
A separate application from all other accounting applications, used only to create offers and invoices without any connection to the accounting file. There is no link to the accounting file.
Below is a summary table for the two methods, detailing what they allow you to do and the customisations available.
Legend: ✅ with Professional or Advanced plan, 🔒 only with Advanced plan, ❌ not available
Features | Integrated Invoicing | Offers and Invoices Application |
| Common Features | ||
| Invoice Creation | ✅Yes, directly in the Transactions table. | ✅Yes, in the dedicated dialog. |
| Proforma Invoice Creation | 🔒 Yes, create the invoice in the Transactions table and print it as a Proforma Invoice (Advanced plan only). | 🔒 Yes, create the invoice in the dialog and print it as a Proforma Invoice (Advanced plan only). |
| Estimates Management | 🔒 No, but an invoice can be created with the "Estimate" label and print it as Estimate (Advanced plan only). | ✅Yes, in the dedicated dialog. |
| Payment Reminders Management | ✅Yes, automated management with the Print Reminders command. | 🔒 No, create the invoice with the "Reminder" label. and print it as a Reminder. (Advanced plan only). |
| Delivery Notes Creation | 🔒 No, only invoice with "Delivery Note" label. From the Invoice Printing dialog > Print as > Delivery Note. (Advanced plan only). | 🔒 No, only invoice with "Delivery Note" label. From the Invoice Printing dialog > Print as > Delivery Note. (Advanced plan only). |
| Order Confirmation Creation | 🔒 No, only invoice with "Order Confirmation" label. From the Invoice Printing dialog > Print as > Order Confirmation. (Advanced plan only). | 🔒 No, only invoice with "Order Confirmation" label and print as Order Confirmation. (Advanced plan only). |
| Header Logo | ✅Yes, with the Logo setup command | ✅Yes, with the Logo setup command |
| Sender Address in Header | ✅Yes, with File and Accounting Properties command. | ✅Yes, with File and Accounting Properties command. |
| Invoice Information | ✅Data of the invoice (invoice number and date, customer number, due date, etc.). | ✅Data of the invoice (invoice number and date, customer number, due date, etc.). Customizable with additional fields. |
| Invoice Address (Customer) | ✅Customer ledger management in the Accounts table, Address view. | ✅Customer address management in the Contacts table. |
| Title / Subject | ✅Yes, customizable via the DocType column in the Transactions table, or in Invoice Settings. | ✅Yes, customizable in the Dialog, or in Invoice Settings. |
| Free Initial Text | ✅Yes, through the DocType column in the Transactions table, or in Invoice Settings. | ✅Yes, in the Dialog, or in Invoice Settings. |
| Default Columns and Column Layout | ✅Columns in the Transactions table and Items ( Items, Description, Quantity, Unit, Unit Price, Amount, VAT Code). Display columns in the printout from Invoice Settings. | ✅Columns in the Dialog (Date, Item, Description, Quantity, Unit, Unit Price, Discount, Amount, VAT Code). Display columns in the printout from Invoice Settings. |
| Custom Columns (Transactions / Items Table) | 🔒 Uses custom columns in the Transactions and Items tables (Advanced plan only). | 🔒 Uses custom columns in the Items table (Advanced plan only). |
| Discounts and Reductions | ✅Yes, add a line to the invoice via accounting transaction | ✅Yes, item discount column and overall discount via Invoice Dialog. |
| Advance Payments | ✅Yes, add a line to the invoice via accounting transaction. | ✅Yes, via Dialog. |
| Notes and Final Text | ✅Yes, from the Dialog Options or Invoice Settings or DocType column | ✅Yes, via Invoice Dialog > Final Text or from Dialog options or from Invoice Settings |
| QR Bill with IBAN Account | ✅Yes, invoices with Swiss QR bill with IBAN account. | ✅Yes, invoices with Swiss QR bill with IBAN account. |
| QR Bill with Special QR-IBAN Account | ✅Yes, invoices with Swiss QR bill with special QR-IBAN account. | ✅Yes, invoices with Swiss QR bill with special QR-IBAN account. |
| Style and Color Customization | ✅Yes, from dialog Invoice Settings > Font type and Colors. | ✅Yes, from dialog Invoice Settings > Font and Colors. |
| CSS Customization | 🔒 Yes, customize invoice styles and appearance via CSS customization (Advanced plan only). | 🔒 Yes, customize invoice styles and appearance via CSS customization (Advanced plan only). |
| JavaScript Customization | 🔒 Yes, set invoice printing via JavaScript customization (Advanced plan only). | 🔒 Yes, set invoice printing via JavaScript customization (Advanced plan only). |
| Product Images | 🔒 Yes, add product or service images to invoices. See Invoice with Product Images (Advanced plan only) | 🔒 Yes, add product or service images to both offers and invoices See Invoice with Product Images. (Advanced plan only). |
| VAT management | ✅ Yes, print invoices with VAT and manage in accounting. ⚠️ Limitation: Net VAT management | ✅ Yes, only print invoices with VAT |
| Multi currency invoices | ✅ Yes | ✅ Yes |
| Exclusive Features of Integrated Invoicing | ||
| Integrated Data in the Accounting File | ✅Yes, in the Transactions table. | ❌No |
| Revenue Management | ✅Yes, create invoices on revenue with customer subledger in the Balance sheet. | ❌No |
| Cash Basis Accounting Management | ✅Yes, create invoices upon cash method with Customer subledger via profit centers (CC3). | ❌No |
| Reporting | ✅Yes, account card per customer, history, and open invoice reports per customer and due date. | ❌No |
| Payment Reminders Management | ✅Yes, overdue invoice management and reminder printing with the Print Reminders command. | 🔒No, manual management of overdue invoices and reminder printing. (Advanced plan only). |
| Invoice Payment Management | ✅Yes, registration of invoice collection. | ✅No, it is possible to manually track paid invoices using the Payment column in the Invoices table. |
| Exclusive Features of the Estimates and Invoices Application | ||
| Offers Management | 🔒No, create the invoice with the label "Estimate" and print it as an Estimate (Advanced plan only) | ✅Yes, manage Estimates separately from invoices. |
| Offer Conversion | 🔒No, create the invoice with the label "Estimate" and print it as an Estimate (Advanced plan only). | ✅Yes, convert estimates into invoices with a simple command. |
Invoicing integrated in the accounting file
The integrated invoicing feature of Banana Accounting Plus uses the customer invoice recording system directly in the Transactions table. It allows you to create prints, including customizable ones, based on customer transaction records.
You can print both invoices for Switzerland with a QR payment slip and international invoices for other countries, even in foreign currency without a QR payment slip.
Creating invoices
The Transactions table is the heart of Banana Accounting and is also used to issue invoices. Nothing could be simpler: To create an invoice, enter a normal transaction that charges the customer.
Banana Accounting also allows you to create invoices in foreign currency.
The main columns for invoicing:
- Date - Invoice date
- Invoice - The invoice number.
- Description - Description of the item to be invoiced.
If there is more than one item to be invoiced, use another row that has the same customer number. - Debit - Customer account.
- Credit - Profit account.
- Amount - Invoice amount
You can also indicate the quantity, the unit price and the programme calculates the amount. - VAT code- VAT code of the profit
Advantages
With Banana Accounting's integrated invoicing you simplify your administrative work, reducing the time needed to manage invoices, customers and accounting transactions:
- Invoice transactions are always the same for both invoicing and accounting, reducing the possibility of errors and omissions.
- Banana Accounting automatically generates the related accounting documents, such as VAT registers, customer accounts, receipts registers.
- You have a more accurate and real-time view of your customers with constantly updated balances.
- Lots of automation to make your work easy and with immediate professional results:
- Automatic retrieval of addresses from contacts so that the data do not have to be re-entered on the invoice.
- No manual calculations. All calculations are automatic, always accurate and up-to-date.
- Setting of the language, currency, number of decimals and rounding for each individual invoice.
- Deadline display.
- Invoice archiving for a tidy history that is always available for tax audits.
Differences with the Estimates and Invoices application
Integrated invoicing is an additional feature included in all accounting applications: double-entry, Income / Expense, Multicurrency, Cash Manager.
Integrated invoicing is ideal for billing services or sales without the need for many structured details on the invoice.
- The elements and details for invoices (such as quantities, prices, units, etc.) are recorded solely in the Transactions table. In the Estimates and Invoices application, there is a Invoices table with an Invoice Dialog where various columns and options are available to detail the various items and data to be inserted. In this aspect, the Estimates and Invoices application is much more flexible and comprehensive because it allows for greater customization.
- In the Transactions table, in addition to the data for invoicing, by entering the Debit and Credit account, the registration remains accounted for in the accounting file without the need to register the invoice subsequently. This is ideal for managing revenue accounting.
In Estimates and Invoices, the data is not accounted for, so it is necessary to register the invoice in the accounting file. - In integrated invoicing, it's not possible to create offers. However, it is possible to create and print an invoice with the title "Estimate" (instead of "Invoice.")
The Estimates and Invoices application is specific for creating also Estimates.
Items Table
The Items Table allows you to manage the article catalogue, keep track of available quantities, sales and purchase prices.
Data for managing articles or services to be invoiced are entered in this table. Each article is assigned an ID, and groupings of articles and services in the same category can be created.
Various columns are available for complete and detailed information:
- Article (IdArticle): the code of the article.
- Description: the description of the article.
- Group membership
- Account (for accounting)
- VAT code of the sale
- Unit: an abbreviation to define the type to which the quantity refers (pieces, hours...)
- Sale: the unit sales price.
- Purchase cost.
The Items table is linked to the Items columns of the Transactions table.
The use of the Articles table speeds up the entry of invoice data into the Transactions table. By entering the ID (article code), the programme automatically takes over the description, unit and unit price. By entering the Quantity, the total price to be invoiced is calculated and entered.

Print invoice with Swiss QR Bulletin
After entering the invoice data in the Transactions table, you can create and print invoices with the Print Layouts.
From the Menu, Reports > Customers > Print Invoices:
- Choose CH10 Invoice layout with Swiss QR Code for Switzerland
- Customise your printing. More customisation is possible with the Advanced plan.
- Preview the invoice. You can save it as a PDF and send it electronically or print it.
If you use this layout, the bulletin with Swiss QR will be printed on the invoice and the reference data will appear on the statements. You can import customer payment data from the bank with the Bank statement extension Camt ISO 20022 Switzerland (Banana+). You have invoice receipts under control.
It is possible to print the invoice with a QR bulletin even without an amount and without an address, leaving an empty box to manually insert the data. More information is available on the QR-Code Customization page, section Include/Exclude from printing.
With the same registration, from the Print Invoices dialogue box, under Preferences Layout > Print as you can also choose to print Delivery Notes, Offers and Reminders.
Print International Invoices
After entering the invoice data in the Transactions table, you can create and print invoices with the Print Layouts.
From the Menu, Reports > Customers > Print Invoices:
- Choose the Layout 11 programmable Invoice
- Customise your printing. More customisation is possible with the Advanced plan.
- Preview the invoice. You can save it as a PDF and send it electronically or print it.
With the same registration, from the Print Invoices dialogue box, under Preferences Layout > Print as you can also choose to print Delivery Notes, Offers and Reminders.
Invoice Structure
In this image you can see how the invoice is structured:
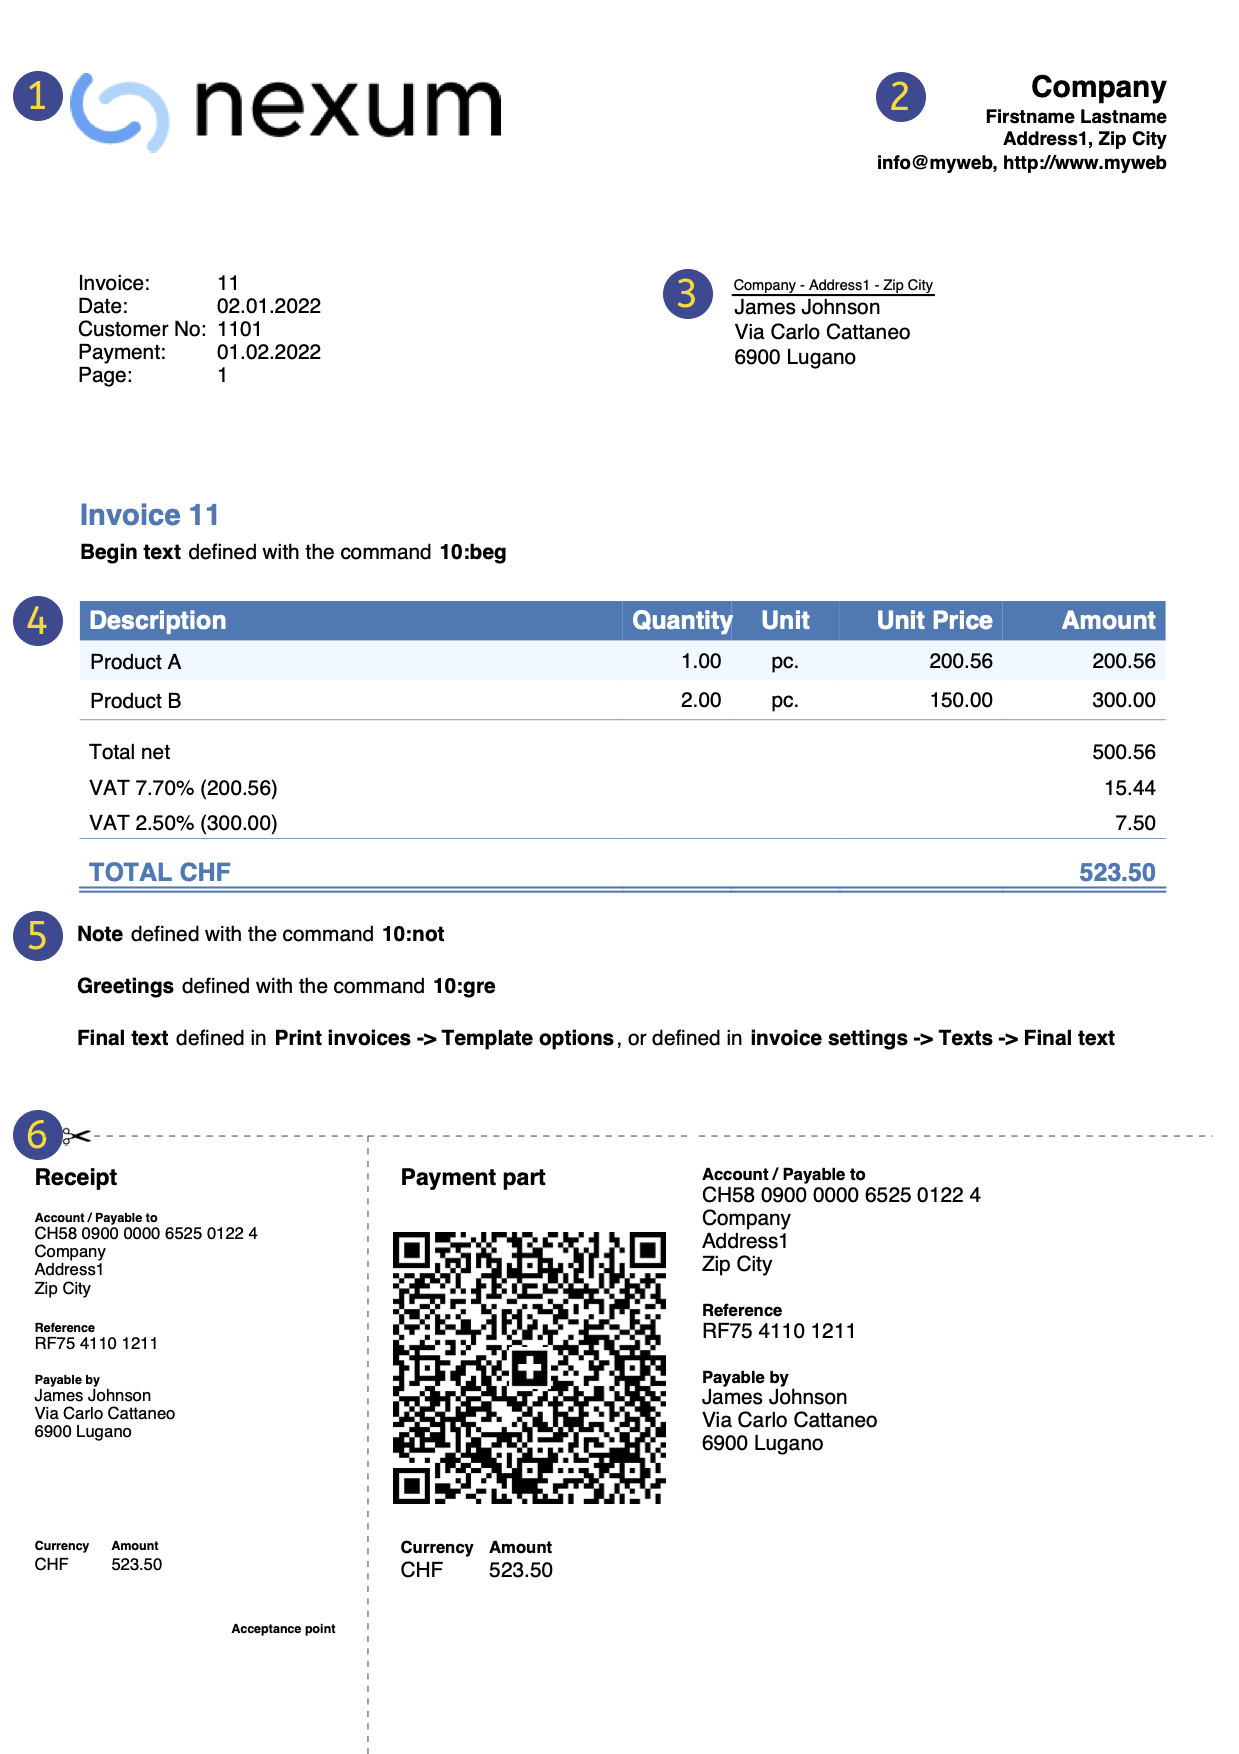 | LogoInsert a personalized logo from menu file → Logo setup | |||
HeadingThe heading of the invoice will be identical to the one entered | ||||
Customer AddressThe customer's address will be retrieved from Accounts table, see Setting up customer accounts. | ||||
Invoice dataThe contents of the invoice must be entered in the Transactions table, learn how to enter invoices. | ||||
Free textsInsert begin text, notes and greetings using the Column Type, and ending texts from menu Reports→ Clients → Print Invoices → Option layout. | ||||
Settings Swiss QR-CodeSettings can only be defined for Switzerland and with the [CH10] Swiss QR Code layout . |


Customer Management
Customer Management allows you to record, organise and manage customer information, keeping track of customer transactions and payments, payment due dates and contact information. You can track customer payments, update the payment status of issued invoices as well as enter and print invoices.
In Banana Accounting the customer data is set up in the Accounts table.
In order to create invoices, it is necessary to:
- Define the Customer Register
- Create invoices, entering the transactions in the Transactions table, debiting the customer's account.
With a range of functions you can manage the:
- Invoice collections by entering them in the Transactions table:
Creating an invoice from a profit centre
When the customer ledger is set up with profit centres (cash method management), the profit centre column CC3 is used in the invoice transactions.
In the appropriate columns of the Transactions table indicate:
- The date.
- The invoice number.
- The description of the invoice item, which you want to appear on the invoice.
If there is more than one item to be invoiced, use another row with the same customer number. - In the Debit account do not record any account
- In the Credit account do not record any account
- The amount. You can also enter the quantity and the unit price and the programme will calculate the amount.
- In column CC3 enter the customer's profit centre account (Accounts table).

Features currently not available
These features, although requested by some users, are not available at the moment:
- Automated invoice sending by email.
- Creation of estimates.
The programme allows you to print an invoice with the indication 'Estimate'. - Creation of delivery notes.
The programme allows an invoice to be printed with the indication 'Delivery Note'. - Link with Inventory application.
- Link with Timesheet.
- Creation of invoices in foreign currency with VAT in base currency (e.g. invoices in EUR with VAT in CHF).
- Automatically add reminder fees to the invoice.
Alternatively, you can insert a line in the invoice indicating the invoice date and number, and specify in the description the text related to the reminder fees along with the desired amount.
If you want to issue invoices separately from accounting (useful for cash accounting) and also prepare estimates, you may use:
This also allows you to add additional information more easily.
Full list of features currently not available in Banana+
Insights
- Invoice printing and VAT (based on turnover and cash received)
- Set customer language in invoices
- Due dates and payment terms
- All extensions with QR invoicing
Related topics:
- Example file in Income/Expense accounting
- Example file invoices in Double-entry accounting
- Example file invoices using Cost centers
Useful for registering invoice with VAT on the cash-in basis (with customer and supplier accounts as cost centres CC3) or if you want to exclude invoice details from the balance sheet accounts.
Setting up the file
There are two ways to set up your accounting file for your invoicing
- Create a new accounting file, using an existing template.
- Adapt your existing accounting file.
New Accounting File
Several templates are available, containing a preset ledger of clients. Creating Invoicing is possible in the following accounting types:
- Double-entry accounting with or without vat.
- Multi-currency accounting with or without vat.
- Income & Expense accounting with or without vat.
A new accounting file is created as follows:
- File Menu > New.
- Select the Region and the language.
- Type Invoice in the Filter by field.
- Select a template in the right hand section.
- Save your file with a name.
Please follow the instructions contained in the Invoicing documentation.
In the accounting types with VAT, in order to correctly set up the file, we advise you to consult the explanations on the page Invoice printing and VAT.
Adapt your existing Accounting File
If you wish to adapt your existing accounting file for creating your invoices, you will have to add certain functions and settings in order to be able to print them:
Insert the data for your company
- In the File menu > File and accounting properties... > Address, you can setup your company's address and data, which will be used as the header of the invoice.
- To use your personal logo, check instructions here.
Set the list of customers in the Accounts table
- In the Accounts table, you can setup your customers register
- Add and display customer address columns.
- In the Accounts table, you can select the Address view and enter your customer's data.
- If the Address view is not visible, you can add it using the Tools menu > Add new functionalities... command > Add Address columns in the Accounts table.
- Manage your customer settings via the Reports menu > Customers > Settings.
Add the columns you wish to use in the Transactions table
- Display the columns for Invoicing in the Transactions table:
- Data menu > Columns setup and check the DocType and DocInvoice boxes.
- Add the columns for Quantity and Unit Price (optional).
Tools Menu > Add new functionalities > Add Items Columns in Transactions table. - Add Items table (optional).
This will assist you keep track of your Items and micro-manage your inventory.
Tools Menu > Add new functionalities > Add Items table.
In the accounting types with VAT, in order to correctly set up the file, we advise you to consult the explanations on the page Invoice printing and VAT.
Invoicing managed in a file dedicated to Invoicing only,
If you wish to manage your invoicing separately from your main accounting, you will have to create a new file. You will insert the accounts for the clients you need for the Invoicing only, in your Plan of Accounts. Invoices are entered via the Transactions table.
This approach is suitable for when:
- Accounting on a cash-in basis. Only the the payed amount is entered in the accounting file.
- Wishing to keep the management of your invoices completely separate from your main accounting ledger, for example for an Association that needs to send membership fees to their members.
How to create a separate accounting file for invoices:
- Download the template, open it and adjust it to your requirements.
Alternatively, you may start out with any template and adapt it - as previously indicated - for use with invoicing. - Make sure al setups and and columns are present, as explained above.
Issuing invoices in the transaction rows.
With integrated invoicing, invoices are created and simultaneously recorded in the accounting. You can create invoices with or without VAT.
Before creating and recording invoices, you must define the accounting method. The available methods are:
- Invoicing on turnover (revenue-based accounting).
- Issued invoices are immediately recorded and accounted for.
- Revenue is recognized when the invoice is issued.
- Customer ledger through balance sheet accounts.
- Cash-based accounting.
- Issued invoices are only recorded when payment is received.
- Revenue is recognized only when the invoice is actually paid, by recording the transactions at the time of payment.
- Customer ledger through profit centers CC3.
VAT Management
- Accounting with the effective method
- Invoices are issued with rates according to the effective method (e.g. 8.1%, 3.8%, 2.6%).
- Revenue is recorded when the invoice is issued.
- The amount to be recorded is usually gross of VAT.
- The VAT code is entered on the revenue line when the invoice is issued.
- With cash-basis accounting, if the amounts are net, the invoices must be managed in a separate file (Quotations and Invoices application or accounting file).
- Accounting with flat rate VAT.
- Invoices are issued with a VAT rate different from the one used for accounting.
- Revenue is recognized only when the invoice is actually paid, by recording the transactions at the time of payment.
- If the amounts are gross, accounting can be done on issuance or on payment, entering the VAT code in square brackets.
- With both accounting methods (turnover or cash-based), if the amounts are net, the invoices must be managed in a separate file (Quotations and Invoices application or accounting file).
Invoice with net VAT and VAT management on payment:
- When creating invoices with VAT, there are limitations if in the accounting the amounts are recorded net and the cash method is used. In this case, it is not possible to enter net VAT amounts, because at the time of issuing the invoice the VAT codes must be enclosed in square brackets. VAT is not calculated automatically, but shown only as an indication for printing purposes.
The columns to create invoices
To enter the standard invoice data, there are basic columns. If more details are needed, such as quantity, unit price, etc., additional columns can be added by adding the Items table.
The columns can also be customized in terms of display order.

Basic columns
Date
The invoice will show the date indicated in this column. All rows belonging to the document must show the same date.
Invoice
To manage invoices, it is mandatory to indicate an invoice number in the Invoice column.
Description
A description of the goods or services to be invoiced. These texts appear on the invoice.
Debit
Use this column only to record the payment of the invoice, entering the liquidity account (bank, postal account,...).
Credit
Use this column only to record the payment of the invoice, entering the revenue account.
Amount
An amount. If VAT is managed, enter the gross amount (including VAT).
VAT Code
The VAT code corresponding to the revenue account (sales or services):
- When issuing the invoice, the VAT code must be entered in square brackets (e.g. "[V81]").
- When recording the payment of the invoice, the VAT code must be entered without square brackets.
CC3
A customer account present in the Accounts table, in the Profit Center CC3 group.
Optional columns
Type
In the Type column you can define detail rows, such as subtotal rows or specific payment terms for an invoice.
This column is not visible by default but must be displayed through the Data menu > Columns setup command and by selecting the DocType column.
Quantity
The quantity of goods or services to be invoiced.
To add the quantity column, use the menu Tools > Add new features > Add Item columns in the Transactions table.
Unit
A type of unit (e.g. 'pcs', 'h', 'm', 'kg').
Unit Price
The unit price for the goods or services.
The program automatically calculates the total amount based on the quantities entered in the Quantity column.
Other columns
When printing the invoice, you can add other columns from the Transactions table, including those that were manually added to the table. See example Use columns from the Transactions table.
Invoice with multiple rows
When the invoice includes multiple items to be charged (products, services or both), you must enter each item on a separate row.
- Enter a new transaction row for each item you want to include in the invoice.
- On each additional row, repeat the invoice date and number, identical to those in the first row.
Customer account management
- Composed transactions (on several rows)
If the customer account is not indicated in the detail rows, but only the account opposite, you must specify the customer account in the first row.
Otherwise, the accounts of the following rows will not be correctly displayed in the invoice printout. - Simple transactions (on one row)
Alternatively, you can enter both the customer account and the income account on each detail row, ensuring a correct data association.
How to define Customer Number and Invoice Number
This page explains how to correctly define the length and format of the Customer number and the Invoice number when invoicing with Banana Accounting Plus.
Important: Correctly setting the Customer number and the Invoice number is essential, especially if you issue Swiss QR invoices and want to automatically record payments. Both numbers are included in the reference number on the QR slip and are used to automatically link imported payments to the related invoices.
This setting applies to:
- Invoicing integrated in the accounting file (with or without Swiss QR)
- Invoicing with the Estimates and Invoices application (with or without Swiss QR).
Customer number
The Customer number is the identifier of the customer in accounting (subaccount or cost center). In QR invoices, it is also used to automatically record payments of the invoices.
Customer number format for QR invoices
In QR invoices, the customer number is included in the reference number. For this reason, it must follow specific rules, which vary depending on the type of account used (IBAN or QR-IBAN) and the type of reference number chosen.
- QR Invoice with IBAN account:
- Only numbers or letters are allowed (A‑Z, 0‑9).
- Spaces, separators, or other characters (-, /, #, etc.) are not allowed.
If you insert separators or other characters, they will be removed from the invoice printout and may cause problems in automatically recording payments. - Customer number + Invoice number ≤ 19 characters.
The two numbers together must not exceed 19 characters. It is recommended to keep the Customer number to a maximum of 7 characters.
- QR Invoice with QR-IBAN:
- Only digits (0–9) are allowed.
- No spaces, letters, separators or other characters (-, /, #, etc.). If you insert separators or other characters, they will be removed from the invoice printout and may cause problems in automatically recording payments.
- Maximum length 7 digits.
- Customer number + Invoice number: together must not exceed 14 digits.
Customer number format for invoices without QR
For invoices without QR, there are no constraints regarding the format of the customer number. Best practices apply.
Best practices for customer numbers
- Uniqueness: each customer must have a unique number.
- Consistency: use a fixed scheme (e.g. 1000001, 1000002, etc.).
- Compatibility: if you plan to issue QR invoices with both standard IBAN accounts and special QR-IBAN accounts, or switch from IBAN to QR-IBAN, use only numbers.
Invoice number
The Invoice number uniquely identifies the invoice (mandatory). In QR invoices, it is also used to automatically record payments.
Invoice number format for QR invoices
In QR invoices, the invoice number is included in the reference number. For this reason, it must follow specific rules, which vary depending on the type of account used (IBAN or QR-IBAN) and the type of reference number chosen.
- QR Invoice with IBAN account:
- Only numbers or letters are allowed (A‑Z, 0‑9).
- Spaces, separators, or other characters (-, /, #, etc.) are not allowed. If you insert separators or other characters, they will be removed from the invoice printout and may cause problems in automatically recording payments.
- Customer number + Invoice number: ≤ 19 characters.
The two numbers together must not exceed 19 characters. It is recommended to keep the Customer number to a maximum of 7 characters.
- QR Invoice with QR-IBAN:
- Only digits (0–9) are allowed.
- No spaces, letters, separators, or other characters (-, /, #, etc.). If you insert separators or other characters, they will be removed from the invoice printout and may cause problems in automatically recording payments.
- Maximum length 7 digits.
- Customer number + Invoice number: together must not exceed 14 digits.
Invoice number format for invoices without QR
For invoices without QR, there are no constraints regarding the invoice number. Best practices apply.
Best practices for invoice numbers
- Uniqueness: each invoice must have a unique number.
- Consistency: use a fixed scheme (e.g. year+progressive: 2500001, 2500002, etc.).
- Compatibility: if you plan to issue QR invoices with both standard IBAN accounts and special QR-IBAN accounts, or switch from IBAN to QR-IBAN, use only numbers.
Issuing invoices with VAT with the Cash method
In integrated invoicing, invoices are created and recorded in the same file. As for cash-based accounting, invoices must be recorded at the time of payment.
In managing cash-based invoicing, it is necessary to set up the customer subaccount in the Accounts table using the Profit Center CC3.
- All customer accounts must have complete information (first name, last name or company name, address), because when creating the invoice, the program uses this data for the invoice header.
It is possible to create and record invoices with or without VAT.
Cash-based Invoice
In the cash-based system, the invoice is created to be sent to the customer, but the accounting entry is made later when payment is received.
Therefore, to create the invoice, the items to be invoiced are recorded using the customer’s CC3 profit center:
- In the Date and Doc. columns, enter the date and any document number.
- In the Invoice column, enter the invoice number.
It is important that the invoice number complies with certain requirements: see how to correctly create the invoice number. - In the Description column, enter the items to be invoiced that should appear on the customer’s invoice.
- The Debit and Credit columns must remain empty because the accounting entry is made when the customer's payment is received.
- In the Amount column, enter the gross amount.
- In the CC3 column, enter the customer's CC3 profit center account.
It is important that the customer number complies with certain requirements: see how to correctly create the customer number.
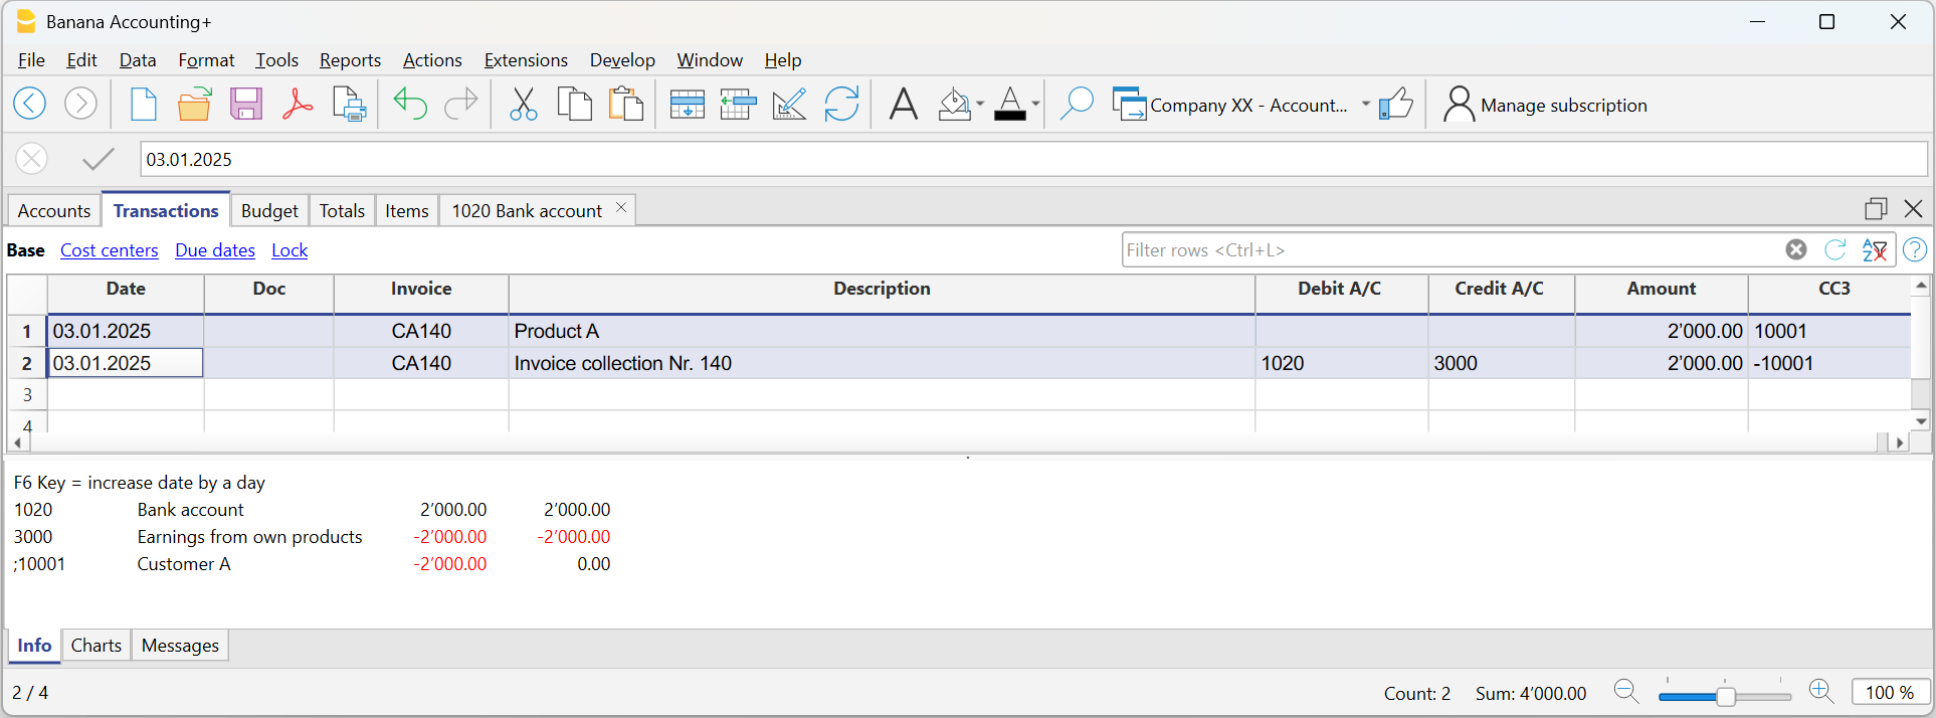
Cash-based Invoice and Effective VAT Method
The Banana Accounting VAT management procedure requires that the VAT code is always entered on the line where the income is recorded.
Income is recorded only when the invoice is actually paid. Therefore, in cash-based VAT management, the VAT code is entered only when the invoice is paid.
Invoice data is entered in the Transactions table. Enter a new transaction row for each new invoice.
- Enter the transaction date
- The invoice number
It is important that the invoice number complies with certain requirements: see how to correctly create the invoice number. - The description text (products, services, consulting...) that will appear on the customer’s invoice
- The Debit account must remain empty
- The Credit account must remain empty
- Enter the gross amount
- In cases subject to VAT, enter the sales VAT code in square brackets (e.g. "[V81]").
The VAT code entered in square brackets allows the VAT amount to be displayed on the invoice, without its accounting entry, which will occur when the payment is recorded. - In the CC3 column, enter the customer’s profit center account (CC3). It is important that the customer number complies with certain requirements: see how to correctly create the customer number.
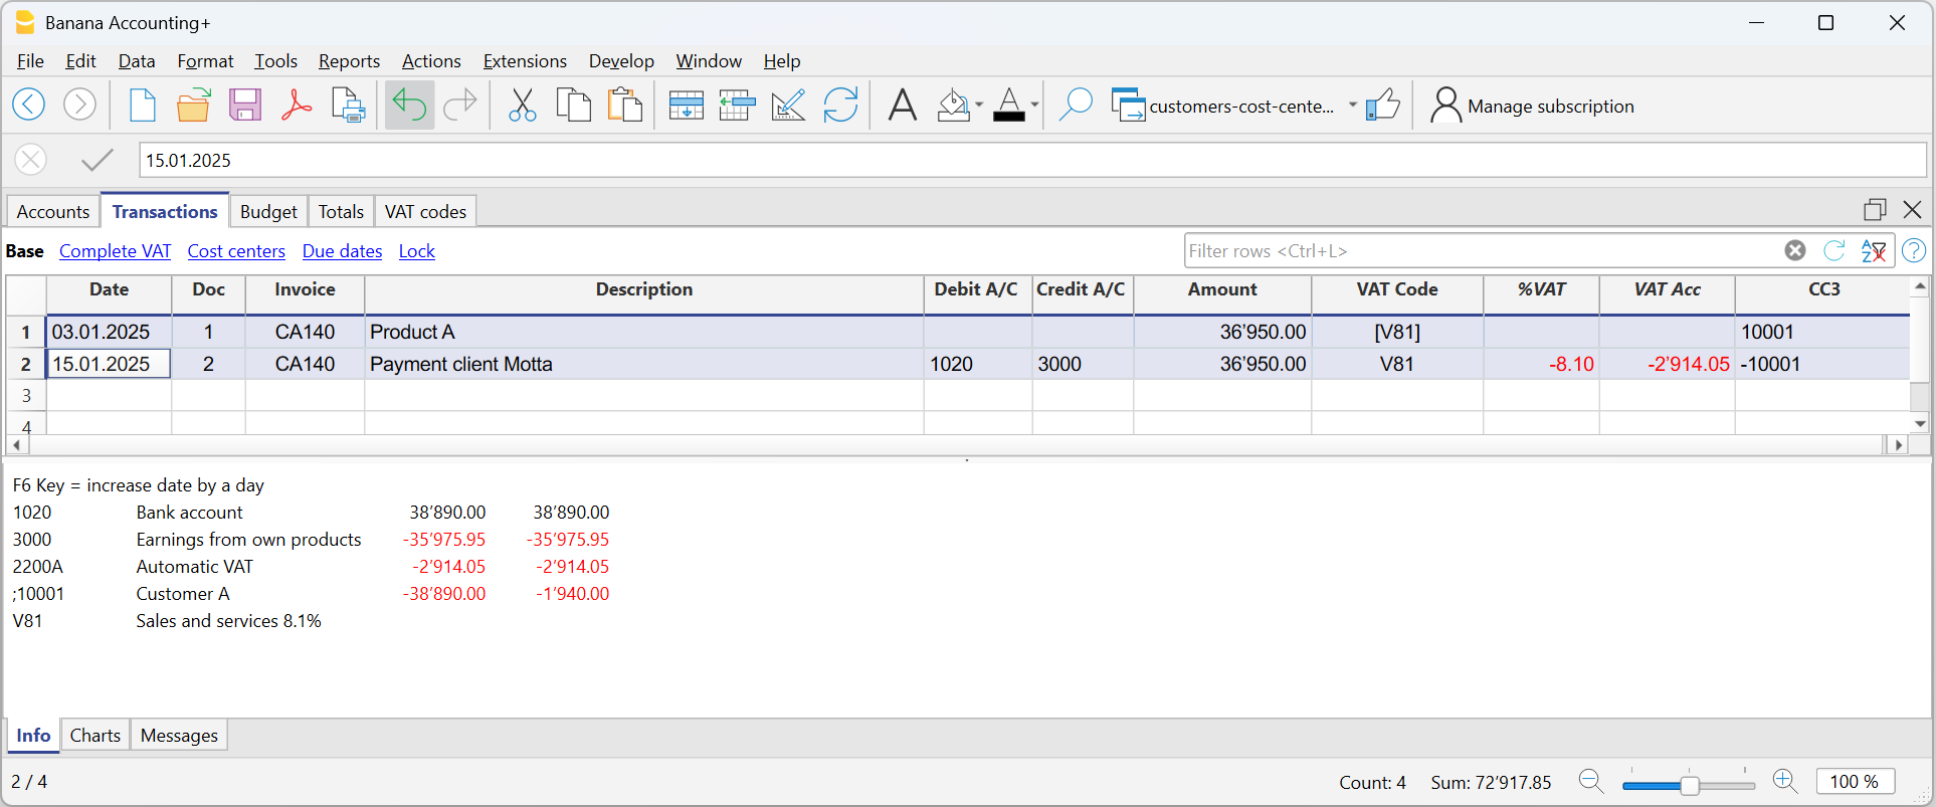
Invoicing on turnover
In integrated invoicing, invoices are created and recorded in the same file. Regarding accrual-based accounting, invoices must be recorded at the time of issuance.
In accrual-based invoicing management, it is necessary to set up the customer subaccount in the Accounts table as shown in the balance sheet.
- All customer accounts must have complete data (first name, last name or company name, address), because when creating the invoice, the program uses this data for the invoice header.
It is possible to create and record invoices with or without VAT.
Accrual-based Invoice
In the accrual-based system, the invoice is created to be sent to the customer, and it is recorded at the same time.
Therefore, with a single transaction, both the invoice is created and recorded:
- In the Date and Doc. column, enter the date and any document number.
- In the Invoice column, enter the invoice number.
It is important that the invoice number complies with certain requirements: see how to correctly create the invoice number. - In the Description column, enter the items to be invoiced that should appear on the invoice.
- In the Debit column, enter the customer's account from the subaccount.
It is important that the customer number complies with certain requirements: see how to correctly create the customer number. - In the Credit column, enter the revenue account.
- In the Amount column, enter the gross amount.
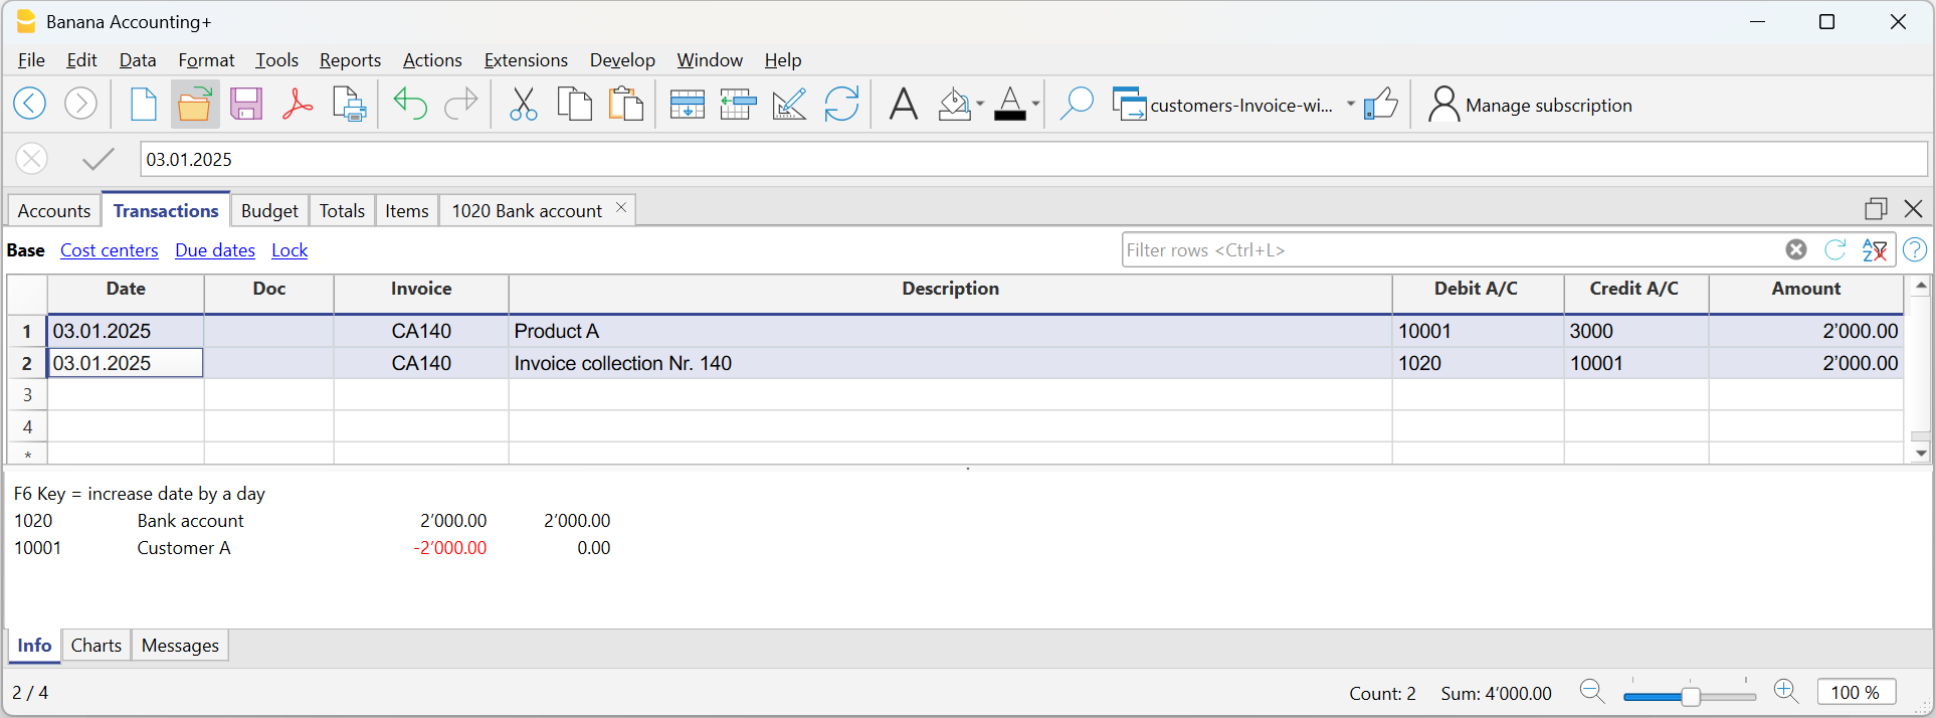
Accrual-based Invoice and VAT – Effective Method
The standard procedure in Banana Accounting for VAT management requires entering the VAT code on the same row where the income is recorded.
Issued invoices are immediately recorded and posted. Income is recognized at the time the invoice is issued.
Therefore, in accrual-based VAT management, the VAT code is added when the invoice is created.
The invoice data is entered in the Transactions table. For each new invoice, enter a new transaction row.
- Enter the date of the transaction
- The invoice number
It is important that the invoice number complies with certain requirements: see how to correctly create the invoice number. - The description text (products, services, consulting...) that will appear on the customer invoice
- In the Debit account, enter the customer account number
It is important that the customer number complies with certain requirements: see how to correctly create the customer number. - In the Credit account, enter the counterpart (Sales account, Consulting or other)
- Enter the amount
- In cases subject to VAT, enter the VAT Code with the applicable VAT rate. See Print invoices and VAT management.
Invoicing and VAT net tax rate method
If you are subject to VAT under the balance rate or flat-rate regime with the cash-based system, you must record the invoice issuance to the customer and its accounting registration separately, for the following reasons:
- Invoice to be sent to the customer:
It must show a normal commercial VAT rate (e.g., 8.1%), as required by tax regulations. - Accounting of the invoice:
It must instead be recorded in accounting with the effective balance rate (e.g., 6.2%), using the corresponding VAT code (e.g., F1).
This approach is essential to ensure that the VAT paid corresponds to the applicable reduced regime, while still maintaining a formally correct invoice for the customer.
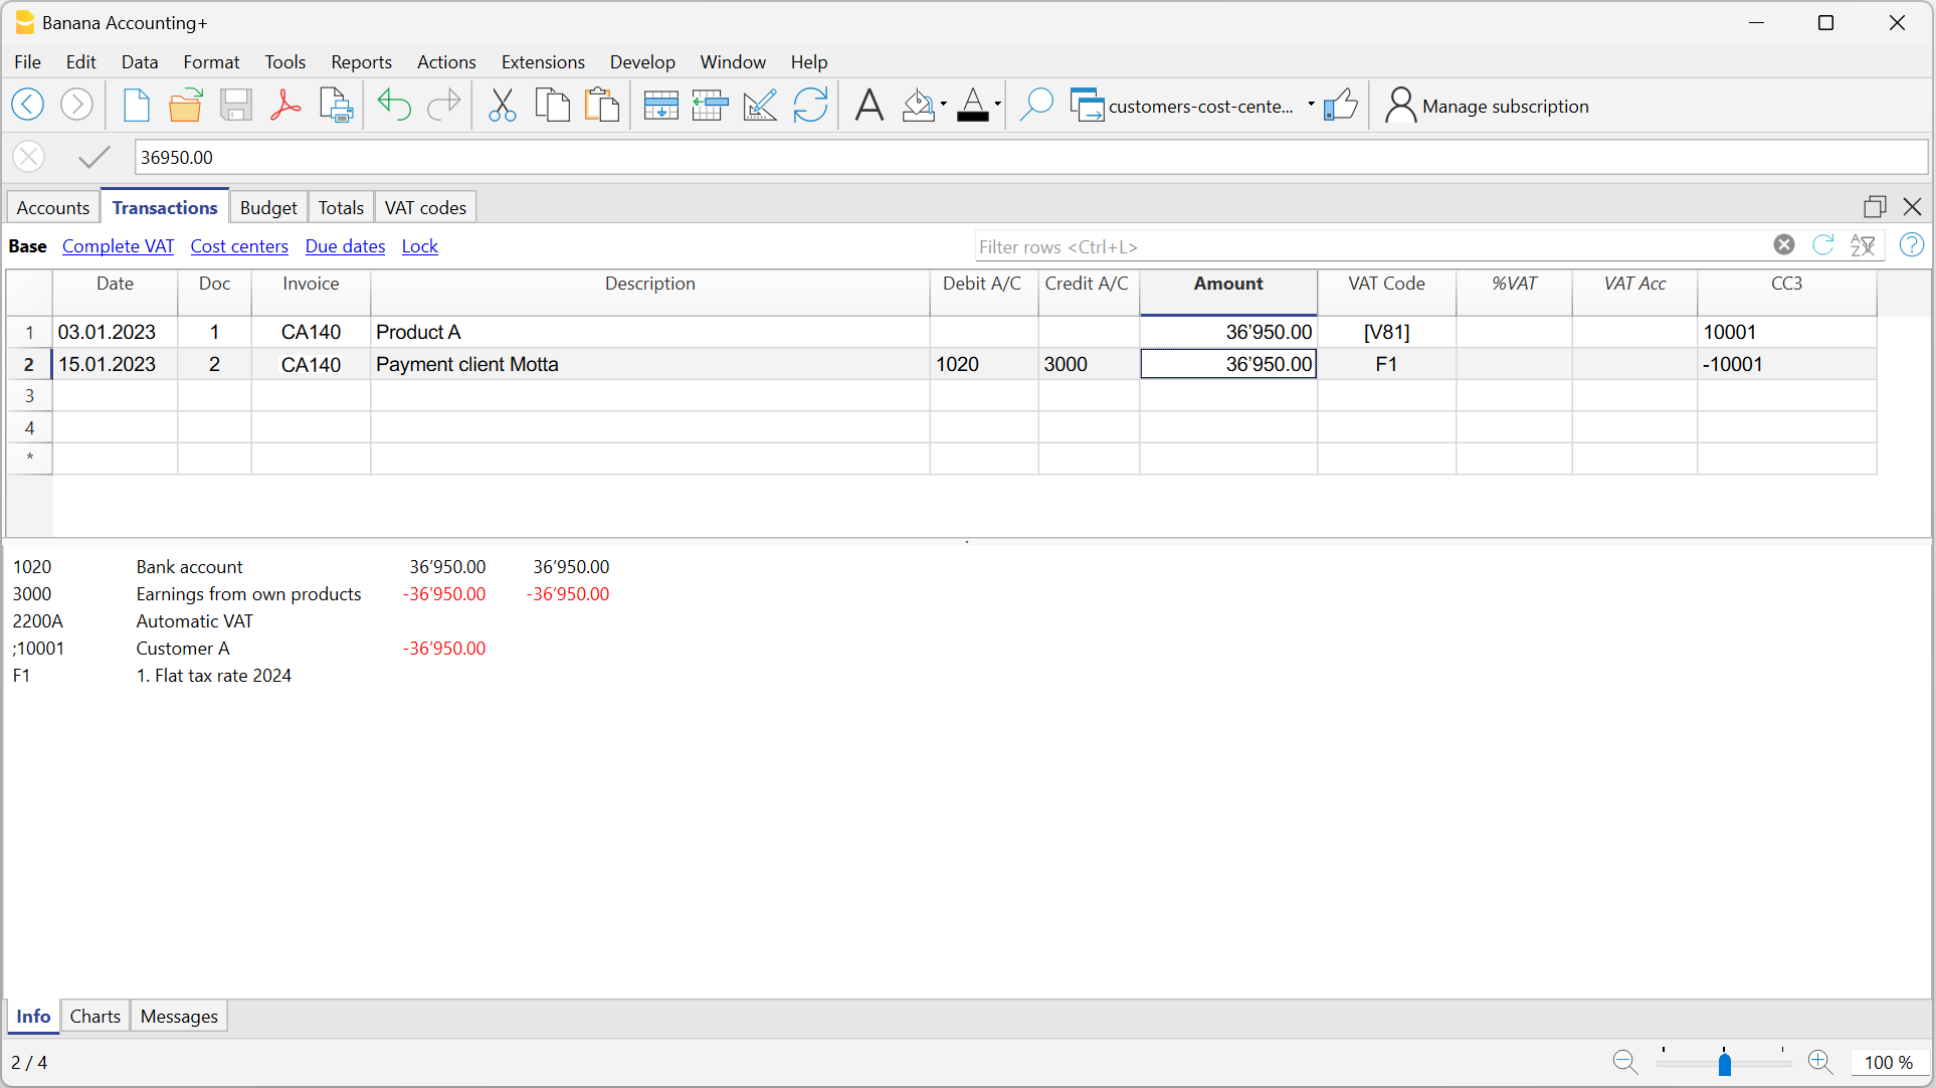
Issuing the invoice to the customer
To issue the invoice to the customer, proceed as follows:
In the Accounts Table:
- Create a customer sub-account with the profit center CC3 (example: ;10001 for customer XX)
- In the Address view, enter all customer data.
In the Transactions table:
- In the Date column, enter the invoice issue date.
- In the Invoice column, enter the invoice number.
It is important that the invoice number complies with certain requirements: see how to correctly create the invoice number. - In the Description column, enter the description that should appear in the invoice details.
- In the Amount column, enter the amount
- The Debit and Credit columns must remain empty.
- In the VAT Code column, type the code V81 in square brackets [V81].
VAT codes in square brackets do not generate any VAT entry. - In the CC3 column, indicate the profit center number without semicolon (e.g., 10001).
It is important that the customer number complies with certain requirements: see how to correctly create the customer number.
Since there are no accounts in the Debit and Credit columns, the invoice creation entry will not be recorded in accounting.
Recording the invoice with VAT balance rate
When recording an invoice subject to VAT with a balance rate in accounting, it is sufficient to proceed as with a normal entry, indicating the accounts in the Debit and Credit columns and entering the VAT code corresponding to the balance rate (e.g., F1).
Two recording systems can be used to register the invoice with the balance rate:
- Recording with split
In the VAT codes table, VAT percentages have been assigned to balance rate VAT codes. In the transactions table, by entering the balance rate VAT code (e.g., F1), the program automatically enters the corresponding VAT percentage (e.g., 6.2) and the VAT amount. - Recording without split, by entering the balance rate VAT code (e.g., F1), percentage and amount are not entered. At the end of the period, the specific extension for calculating balance VAT is used.
Based on the rate defined in the extension dialog, the program:- Identifies all entries with balance rate VAT code.
- Automatically calculates the VAT due for the reporting period.
- Totals the amounts on a periodic basis (e.g., monthly, quarterly, yearly).
Discounts and reductions
To enter a discount or reduction in an invoice, add a new row and enter:
- Invoice date
- Invoice number
- Description of the discount or reduction
- Accounts in the Debit and Credit columns. It is important to invert the accounts compared to the sales transaction.
When the customers / suppliers register is set up with cost centers and there are registrations with discounts and reductions, in order for the amount to be reversed, the sign of the cost centers must be inverted. - In case of VAT, indicate the VAT code with the minus sign, so that the VAT is deducted, or, if present use the VAT code for discount and reductions.

Invoicing and VAT with balance rate using the invoicing method
The Banana Accounting procedure for VAT management requires entering the VAT code always on the line where the income is recorded. When accounting is managed based on turnover, the income is recorded when the invoice is issued.
When subject to VAT using the balance rates or flat-rate method, customer invoices must be issued using the normal rates (e.g., 8.1%). However, the accounting of invoices under the balance rates or flat-rate method involves reduced rates (e.g., 6.2%).
- If the amounts are gross, you can record them based on turnover or on cash received, by entering the VAT code in square brackets.
- If the amounts are net, it is not possible to create and post the invoices at the same time. In this case, it is necessary to manage:
- The creation of invoices in an accounting file, using the integrated invoicing or with the Offers and Invoices Application
- The posting of invoices in the accounting file.
In this case, the creation of the invoices must be handled in an accounting file or with the Offers and Invoices Application, and the posting in a separate accounting file.
Issuing an invoice with balance tax rate and gross amounts
To issue an invoice to customers with the standard VAT rate (e.g. 8.1%), you need to create a customer subaccount with profit centers CC3 (example: ;10001), completing all customer information in the columns of the Address view.
In the Transactions table:
- In the Date column, enter the invoice issue date.
- In the Invoice column, enter the invoice number:
It is important that the invoice number follows certain rules: see how to correctly create the invoice number. - In the Description column, enter the invoice details.
- The Debit and Credit columns must remain empty.
Since there are no accounts in the Debit and Credit columns, the invoice creation entry will not be recorded. - In the Amount column, enter the amount.
- In the VAT Code column, type the V81 code in square brackets [V81].
VAT codes in square brackets do not trigger VAT accounting. - In the CC3 column, enter the customer account, without semicolon (e.g. 10001).
It is important that the customer number follows certain rules: see how to correctly create the customer number.
Posting an Invoice with Balance Rate and Gross Amounts
When recording the invoice in the accounting, to post it using the VAT balance rate, you must enter the transaction as usual, also entering the accounts in the Debit and Credit columns and the VAT code of the balance rate:
- If the VAT breakdown method is used, enter the VAT code for the balance rate (e.g., F1). In this case, the VAT Codes table includes the VAT rates for the balance. In example F1 corresponds to 6.2%.
- If the non-VAT breakdown method is used, enter the VAT code without rate (e.g., F1). In the VAT code table, the balance rate codes do not have rates.
To post the invoice using the balance rate, it is necessary to create in the Accounts table:
- A customer sub-account using balance sheet accounts.
- Enter the date and description in the corresponding columns.
- In the Debit column, enter the customer account (e.g., 10001).
- In the Credit column, enter the income account.
- In the Amount column, enter the amount.
- In the VAT Code column, type the VAT code for the balance rate (e.g., F1)
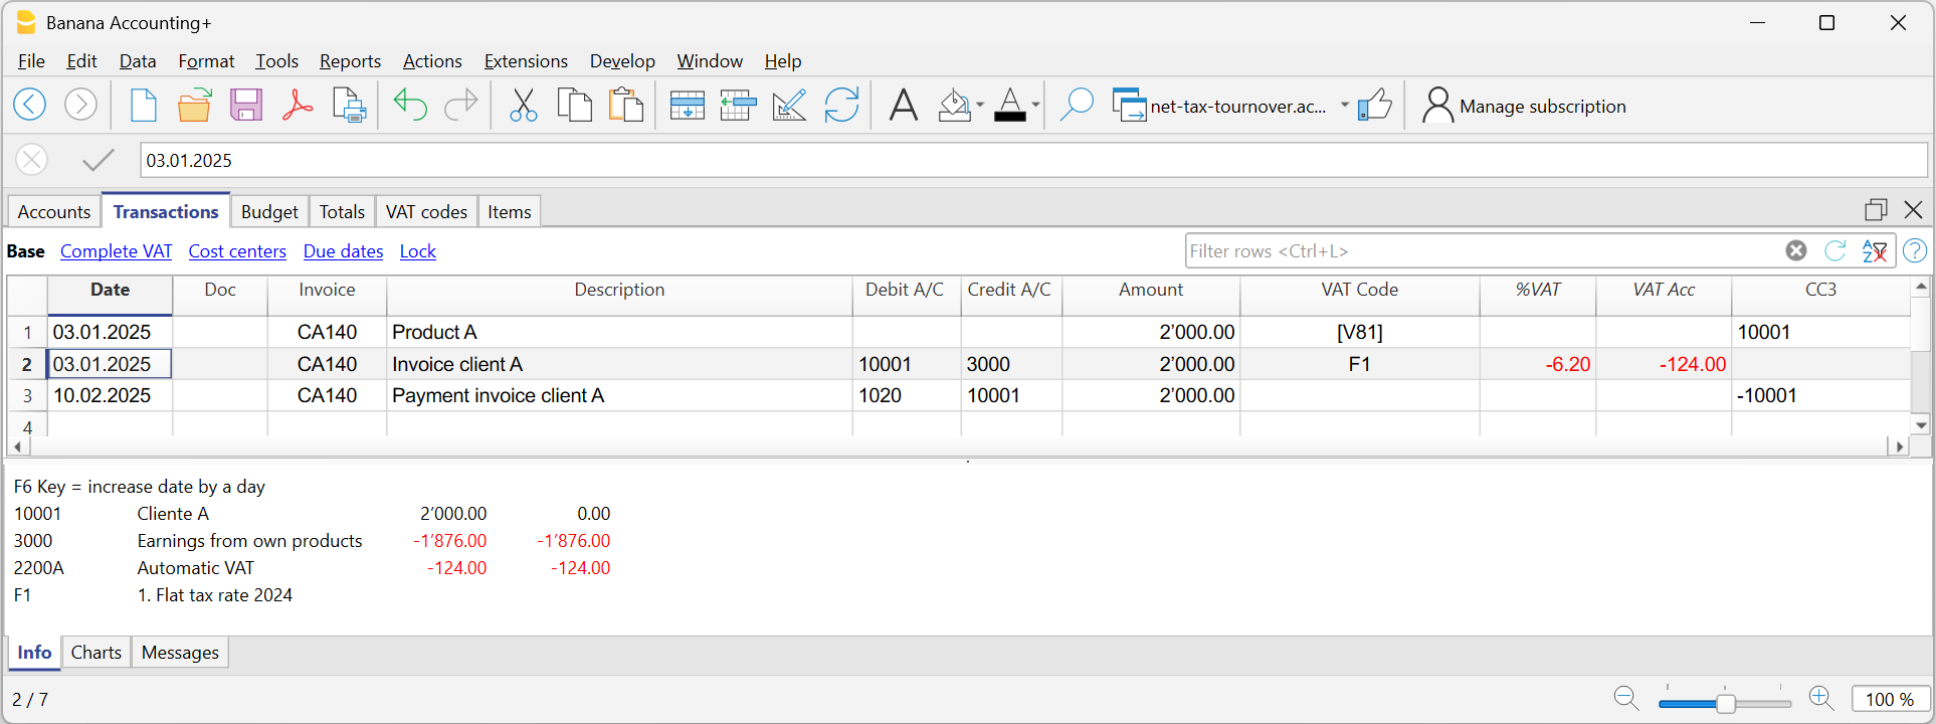
Rounding in invoice printout
In the printout of invoices integrated in accounting, the total VAT amount corresponds to the sum of the individual VAT transactions that make up the invoice. Since the individual VAT transactions are rounded to the nearest cent, there may be a difference compared to the VAT calculated on the total invoice amount.
To better understand, let's consider the following example:
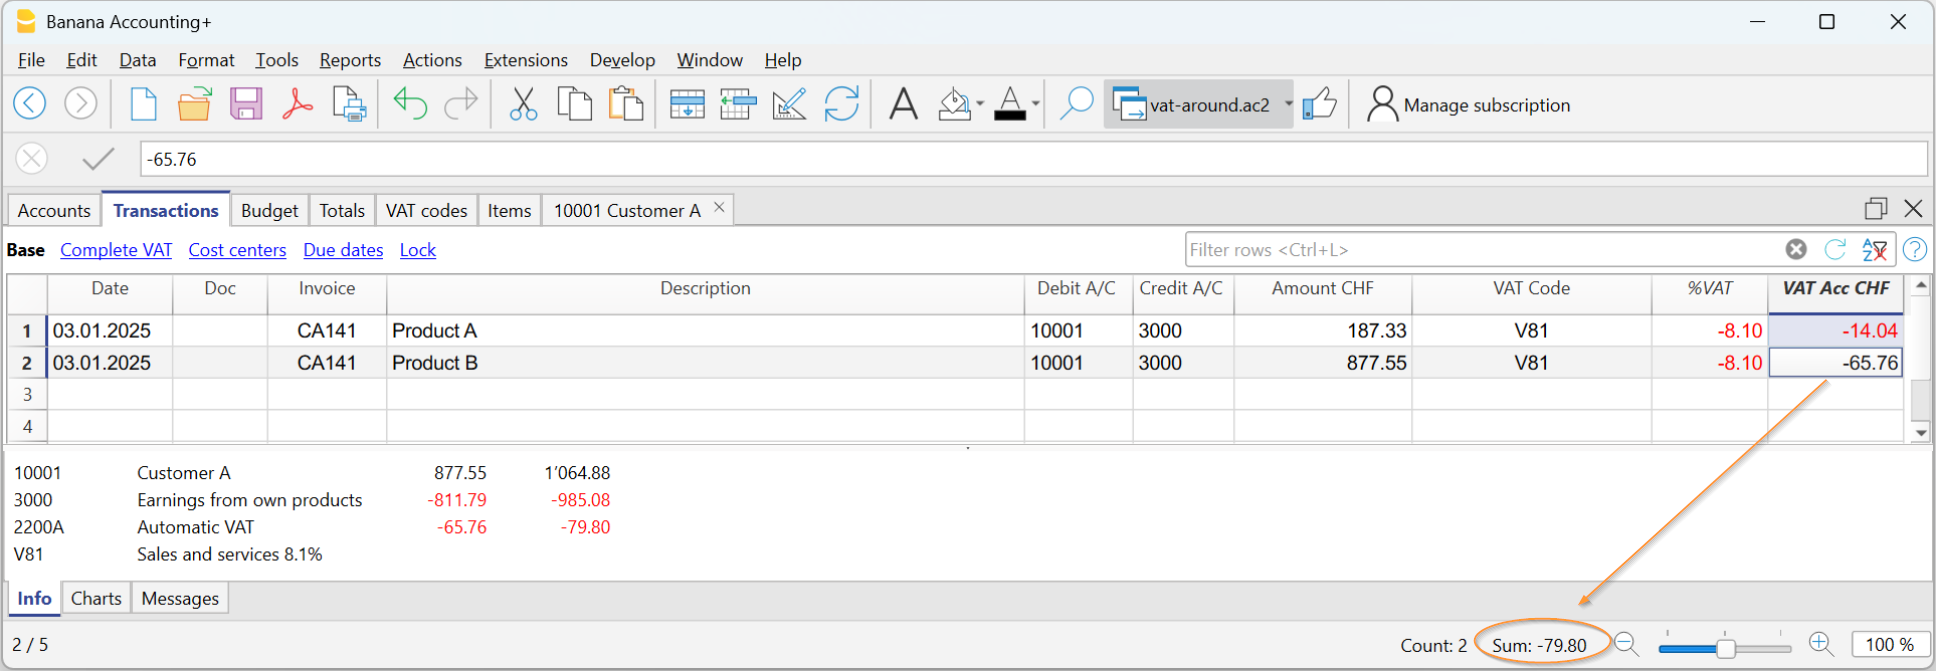
- Row 1: 8.1% of CHF 187.33 = Rounded: CHF 14.04
- Row 2: 8.1% of CHF 875.00 = Rounded: CHF 65.76
- Total: 8.1% of CHF 1064.88 = Rounded: CHF 79.80
The invoice shows a VAT amount of CHF 79.80 instead of CHF 79.79 (amount calculated directly on the total of 1064.88). In fact, the amount of CHF 79.80 corresponds to the sum of VAT individually calculated for each item (CHF 14.04 + CHF 65.76).
This logic is adopted to avoid discrepancies between the VAT amounts recorded in accounting and those shown on the invoice. In this way, the total VAT in accounting matches the one printed on the invoice.
Set customer language
The default layouts include the following languages: Italian, German, English, French, Dutch.
Invoice texts are printed in the customer's language, provided that this is set in the Language column (Accounts table, Address view).
The language is an ISO code, generally of 2 lowercase letters (it=italian, de=german, en=english, fr=french, nl=dutch).
When no language has been indicated for the customer account, the language of the accounting is used, defined in the File menu→ File and accounting properties (basic data) → Other.

Due dates and payment terms
The due date of an invoice can be set up in different ways:
- Generalized due date - identical due date for all invoices
Select menu Reports→ Customers → Settings → General → Invoices are due, indicate the period (in days) after which the invoice is considered due. As an example, if the date of your document is the 10th of May and you enter a value of 10 days, the due date will be the 20th of May. - Due dates per customer - specific for each customer
In the Accounts table, a DateExpiration column is available (if not on display set up via Data → Columns setup ...). The period (in days) after which the invoice is considered to be due can be set up in this column. - Specific dates per invoice
In the Transactions table, Due dates view, the Date Exp. column is visble; you can indicate the expiration date directly in this column. -
Alternative text for the expiration date
It is possible to define a text of your choice as a payment term for each invoice. This will replace the text of the expiration date. Revert to Advanced input -Type column for detailed information.
Print invoices in other currencies
With Banana Accounting Plus, you can also print invoices in foreign currency.
Invoices in foreign currency
Required settings:
- Open one of our multi-currency accounting templates.
- Set up in the Accounts table, in the customer ledger, the customer with the foreign currency. Invoices are printed in the currency of the customer's account.
- If you want to send invoices in different currencies to the same customer, you must create accounts in different currencies for the same customer (Accounts table).
- Use the UNI11 layout for printing invoices to be sent abroad.
Invoices in foreign currency with VAT in base currency
It is not normally possible to enter a foreign currency invoice with VAT in base currency. This can be overcome with the following procedures:
Invoices in foreign currencies with VAT using Cash principle
- Open one of our multi-currency accounting templates with VAT with cost centres CC3.
- Set up in the Accounts table, customers in foreign currencies as CC3 cost centres (;).
If you wish to send invoices in different currencies to the same customer, you must create accounts in different currencies for the same customer (Accounts table). - From the menu, Reports > Customers > Settings, set the Customer group/account to use the CC3 cost center.
- In the Transactions table, you must enter the invoice data on several rows:
- In the first row:
- In the Amount Currency column (Currency Amount) enter the amount net of VAT (without entering any debit or credit account).
- In the column CC3 enter the customer's cost centre account in foreign currency.
- In the second line:
- In the Amount Currency column (Currency Amount) enter the VAT amount in foreign currency (without entering any debit or credit account), manually calculating the VAT amount in foreign currency.
- In column CC3 enter the customer's cost centre account in foreign currency.
- In the first row:
- For printing invoices with Swiss QR code use layout CH10.
To register the receipt:
- In the Debit column enter the liquidity account.
- In the Debit column enter the revenue account.
- In the VAT Code column enter the VAT code of the sale.
- In the column CC3 enter the customer's cost centre account in foreign currency with a negative sign.
Example: Invoice entry in foreign currency (EUR) with VAT on receipts in base currency (CHF):
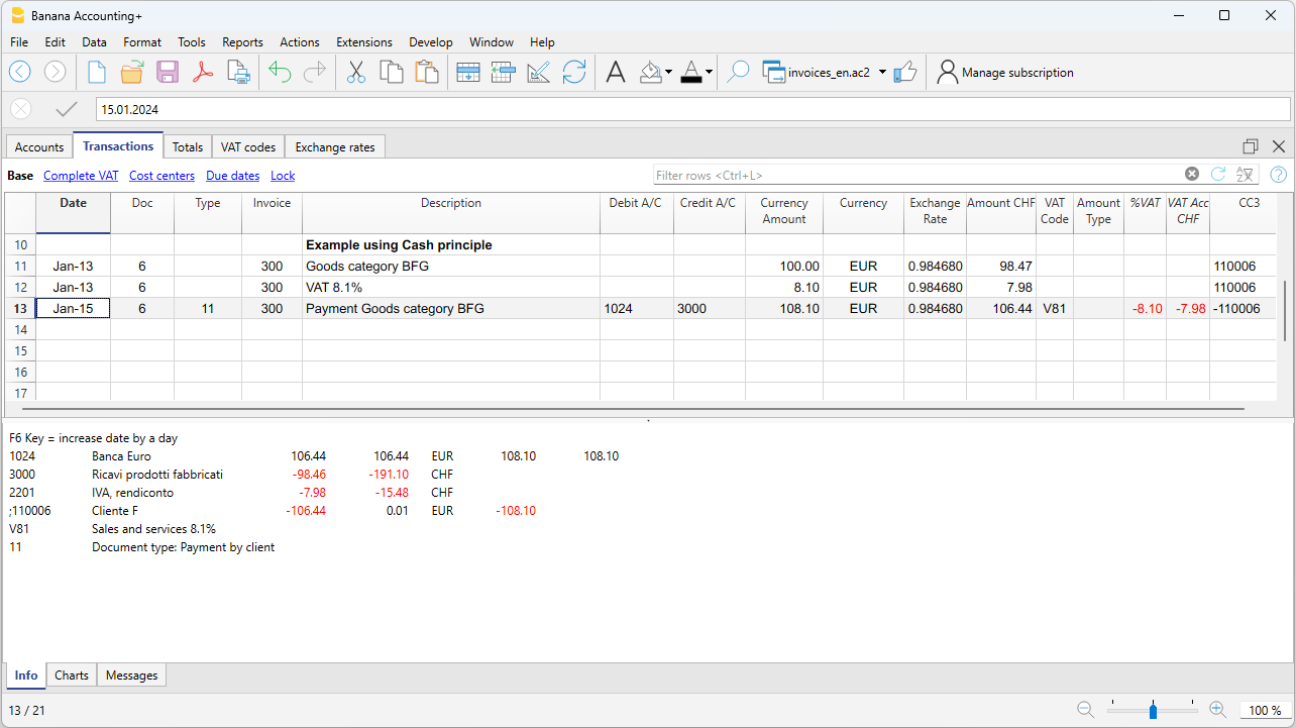
Invoices in foreign currencies with VAT on turnover
- Open one of our multi-currency accounting templates with VAT and a customer ledger.
- In the Accounts table, set the customers in foreign currencies both as a ledger (Accounts) and as CC3 cost centres (;).
From the Reports > Customers > Settings menu, set the Customer group/account to use the CC3 cost centre.
Note: If you set this option to CC3, invoices issued to a normal account will no longer be created. Therefore, we recommend also setting up your customers as CC3 cost centres.- In the Transactions table, you must enter the invoice data on several rows:
- In the first line enter the invoice issue normally:
- The date, the description, in the Debit account the customer account in foreign currency and in the Debit account the revenue, the amount before VAT and the VAT code of the sale.
- The invoice number does not have to be entered.
- In the second line:
- In the Amount Currency column (Currency Amount) enter the invoice amount net of VAT (without entering any debit or credit account).
- In column CC3 enter the customer's cost centre account in foreign currency.
- Where the columns Quantity, Unit and Unit Price are used, the unit price must be net of VAT.
- In the third line:
- In the Amount Currency column (Currency Amount) enter the VAT amount in foreign currency (without entering any debit or credit account), manually calculating the VAT amount in foreign currency.
- In column CC3 enter the customer's cost centre account in foreign currency.
- In the first line enter the invoice issue normally:
Rows with cost centres are simply used to search invoices in foreign currency with VAT.
To register the receipt:
- In the Debit column enter the liquidity account.
- In the Debit column enter the customer's foreign currency account.
- In the column CC3 enter the customer's cost centre account in foreign currency with a negative sign.
Example: Invoice entry in foreign currency (EUR) with VAT on turnover in base currency (CHF):
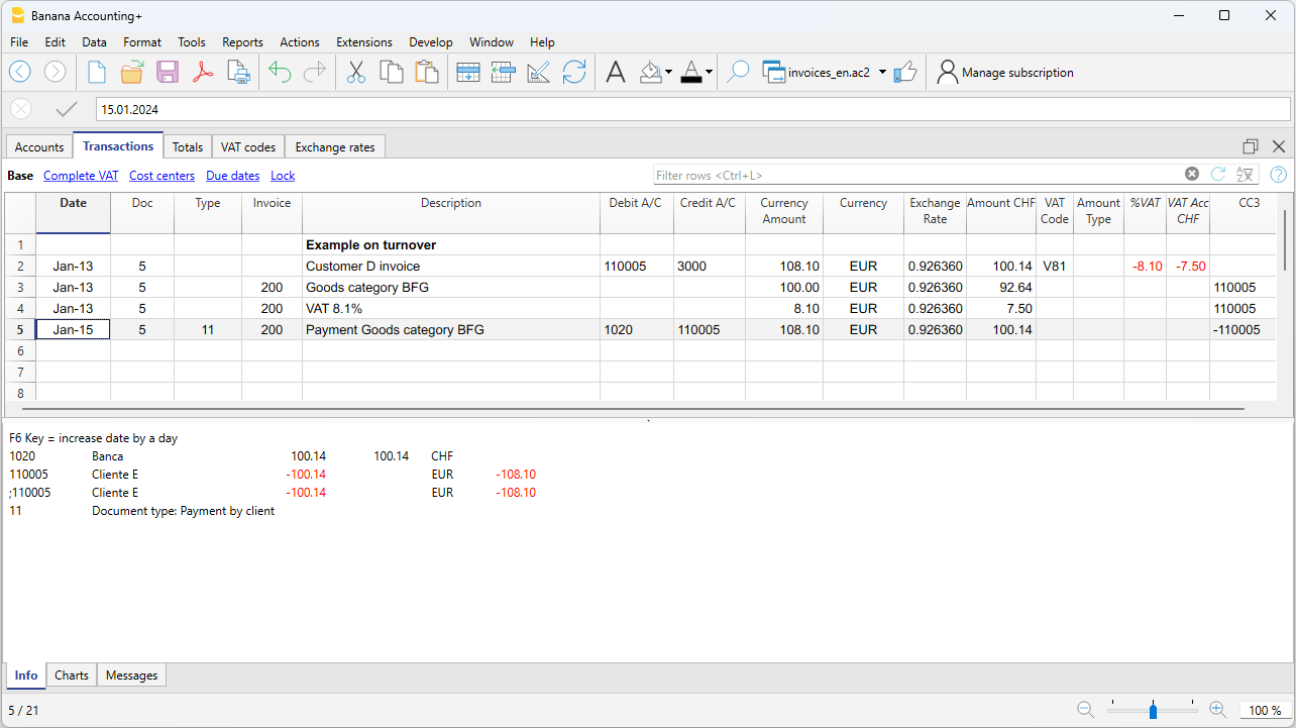
Advanced input Type column
The Type column in the Transactions table can be used to define the commands that are relevant to the display for printing data specific to your Invoice.
Check the DocType column via menu Data → Columns setup ..., to display the column and use it.
Entering data
Once the column is displayed, you may proceed by entering your data. You will need to:
- Add an empty row after the Date of the Invoice.
- Enter the date of the Invoice in the Date column.
- Enter the required command in the Type column (refer to table below)
- Enter the Invoice number in the Invoice column.
- Enter the data relevant to appear on the Invoice in the Description column.
Invoice to the customer
Typing 10: the Type column will list all possible options available to customize the data of your invoice.
These command lines should, except for the total lines, be placed at the end of the invoice, after all detail lines related to items or services.
| Invoice data | Column Type | Description column |
|---|---|---|
Client address If you want the address to look differently from the one defined in the Accounts table (Address view), you can change it using using the appropriate options. On each row a different element of the address is indicated (name, surname, address...). | 10:adr:fna 10:adr:lna 10:adr:bna 10:adr:str1 10:adr:str2 10:adr:str3 10:adr:cod 10:adr:cit 10:adr:sta 10:adr:cou | Enter name Enter surname Enter name of company/organization Enter line 1 of address Enter line 2 of address Enter line 3 of address Enter postal code Enter the location Enter the state /province Enter the country |
| Shipping address | 10:sadr:pna 10:sadr:fna 10:sadr:lna 10:sadr:str1 10:sadr:cod 10:sadr:cit | Enter prefix Enter name Enter surname Enter line 1 of address Enter postal code Enter the country |
Greetings After the invoice details, you may add a line of text for your final greetings (also see Examples invoices). | 10:gre | Enter your greetings |
Final notes One or several rows of notes can be inserted after the details of the invoice and before the greetings (also see Examples invoices). | 10:not | Enter your notes |
| Order date | 10:ordd | Enter the order date |
| Order number | 10:ordn | Enter the order number |
Parameters (advanced) When wanting to print personalized data on the invoice, you can use the appropriate command. This option is aimed at users with JavaScript programming knowledge, and allows you to change the invoice layout, so as to use the parameters indicated via this command. For further information please revert to Printing custom data. | 10:par | Enter your customized parameters |
Payment term Should you want to indicate an alternative text as a payment term, enter the desired text. This will be displayed on the invoice. | 10:ter | Enter the alternative text for the payment term |
| Text begin | 10:beg | Enter the text printed before the invoice title |
Title If you do not wish to use the default invoice title, you can choose a different title. | 10:tit | Enter your text to appear as the invoice title |
Items subtotals It is possible to enter intermediate totals for your invoice in the table with the details of the invoice (also see Examples invoices). | 10:tot 10:tot:0 10:tot:1 10:tot:2 | Enter level 0 subtotal (tot and tot: 0 is always level 0) Enter level 1 subtotal Enter level 2 subtotal |
Header line text In the invoice details table you can add headers to group items (also see Examples invoices). | 10:hdr | Enter the text you want to add to the invoice details. Leave empty to add an empty line. |
Intermediate Totals
In order to insert intermediate totals, you will need to add additional rows in the Transactions table:
- Enter 10 in the Type column: select :tot from the drop down menu, 10:tot will display. Enter again : and enter :1
- Enter the appropriate description in the Description column (ex. Total goods)
- Enter the Invoice number (in the absence of number, the total will not be printed).

Example of Invoice with intermediate totals.

Alternative text for payment terms
It is possible to define your own wording as a payment term for each invoice and this will replace the existing text for the expiry date.
- Enter an additional line with the same invoice number in the Transactions table.
- You will need to enter 10: in the Type column and select :ter from the drop-down menu, therefore the wording 10:ter will appear
- In the Description column, enter your text (ex 30 days net, 60 days etc ..).
When the invoice is printed, the value assigned as a payment term will be displayed.
Additional customisations
Other customisation options, such as the definition of bank details or final greetings, are available in the Print invoices dialog.
Customise invoice printing
Invoice printing can be customised and adapted to specific needs.
Set your company address (sender)
In the File menu > File and accounting properties (Basic data) > Address , set the address of your company.
Set the customer number and invoice number
It is important that the customer number and invoice number comply with certain constraints: see how to correctly create the customer number and invoice number.
Set up the list of customers in the Accounts table
- In the Accounts table, set up the customer's register.
- Display the address columns from the Address view and enter the customer addresses.
If the Address view is not visible, add it via the menu Tools > Add new functionalities > Add address columns in the Accounts table. - Configure the customer settings in the menu Reports > Customers > Settings.
Retrieving customer addresses from Excel
When customer data is on an Excel file, it can easily be taken back to the Accounts table, Address view.
It is assumed that in the Accounts table, at the end of the Chart of Accounts, there is the customer or shareholder register set up. Make sure you have enough empty rows to insert the data copied from Excel.
Proceed as follows:
- Select from Excel the column with the data to be copied and use the Copy (Ctrl+C) command.
- Go to Banana, Accounts table (Address view), position yourself in the corresponding column and issue the Paste (Ctrl+V or Paste) command from the Edit menu.
- Repeat this operation for all address columns (Account, First Name, Last Name, Organisation, Street, Zip, Country Code, Language).
The data corresponding to the mentioned columns are required for printing the invoice. - If you do not have all the columns mentioned in the Excel file, you must add the missing information manually.
Set customer language
You can print invoices in the customers' language. To do this you must first set the customer's language.
Logo setup position and sender address
To set the logo, you must:
- Upload the logo image in the menu File > Logo setup.
- To use the logo in the invoice, in the Invoice Settings you must activate the Logo box and enter the name of the customisation you used, respecting upper and lower case, in the Logo Name field.
For example, you can place the logo on the left and the address on the right and change the size of the logo.
The sender's address, if the default settings are not changed, is entered on the right, regardless of the presence of the logo.
If you want to set the sender address on the left without any logo, please see the following page:
Customise address in invoice header
The style of the sender's address in the invoice header (colour, size, font..) is set by default by the program.
The Advanced Plan of Banana Accounting Plus allows you to customize the style of the address. For more information see the Examples page.
Set invoice information
Invoice information is information about the date, customer number, due date, etc., which is usually located just below the header and next to the customer address.
The CH10 and UNI11 layouts allow you to define which invoice information to include and which to exclude from printing. You can find instructions on the Invoice Settings page.
For the other print layouts (CH01-CH09 / UNI01-UNI08), the information cannot be modified.
Set the payment term
The payment term for invoices by default is 30 days from the invoice date.
To change the payment term proceed as follows:
- In the Transactions table, ad a row to the invoice
- In the Date column enter the invoice date
- In the DocType column enter 10:ter (:ter Term of payment)
- In the Invoice column enter the invoice number
- In the Description column enter the desired payment term (for example "10 days")
Your text will be shown in the invoice Information.
Set customer address position
The CH10 and UNI11 layouts allow you to define the position of the customer address and the elements of the address. Please visit the Invoice Settings page for more information.
For other print layouts (CH01-CH09 / UNI01-UNI08), the location and composition of the customer address cannot be changed.
Set shipping address
To enter a shipping address in addition to the customer address, proceed as follows:
- Use the Type column of the Transactions table , command 10:sadr.
- Add a line to the invoice in the Transactions table .
- In the Date column, enter the date of the invoice
- In the Type column, enter::
- 10:sadr:fna for the name.
- 10:sadr:lna for the surname.
- 10:sadr:str1 for the address (street and number).
- 10:sadr:cod for the postcode.
- 10:sadr:cit for the location.
- In the Invoice column, enter the invoice number.
- In the Description column, enter the text to be displayed.
- With the CH10 and UNI11 layouts, go to Invoice settings > Customer address section and tick the Shipping address entry.
The data entered via the Type column of the Invoice table are taken over and inserted on the printout of the invoice.
Set title/object
To enter the title/object of the invoice, you have two options:
- Use the DocType column from the Transactions table, entering the text 10:it
- For each invoice you can define a title.
- If you leave the field empty, the default text is used.
- A text entered in the DocType column always has priority over entering the title in the layout settings (see next point).
- With the CH10 and UNI11 layouts, you can enter the text in the invoice Settings > Texts section > Invoice title.
- The title applies to all invoices printed with this layout.
- The title applies only if no title has been defined as per the first point.
If no text is entered, the program will use the default text.
Set initial text
To enter the title/object of the invoice, you have two options:
- Use the DocType column from the Transactions table, entering the text 10:beg
- For each invoice you can define a title.
- If you leave the field empty, the default text is used.
- A text entered in the DocType column always has priority over entering the title in the layout settings (see next point).
- With the CH10 and UNI11 layouts, you can enter the text in the invoice Settings > Texts section > Begin text.
- The title applies to all invoices printed with this layout.
- The title applies only if no title has been defined as per the first point.
Setting up the invoice details
Use the Transactions table to enter invoice data.
See also Discounts and rebates.
With the CH10 and UNI11 layouts, you decide which columns to display in the printout. See how to do this on the page Invoice Settings > Invoice Details.
For the other print layouts (CH01-CH09 / UNI01-UNI08), the columns are not editable.
Set final texts
To enter the final text of the invoice proceed as follows:
- From the Invoice Print Dialog > Options section
- Select the desired language
- Enter the text in the Final text field
- This text is applied to any print layout.
The CH10 and UNI11 layouts also allow you to define a final text from the Invoice Settings
- Go to Invoice Settings > Texts section > End text field and enter your text for each language.
- This text is applied to all invoices in the same .ac2 file created with that layout.
- This text has priority to whatever text has been entered in the has priority over the text entered from the Invoice Print Dialog.
To set different final texts for each invoice, you must use the DocType column of the Transactions table:
- In the DocType column, enter 10:not (Notes).
- In the Description column, enter the desired end text. The text you enter will appear on a single line.
- To add additional rows of notes, you must repeat the entry in the DocType and Description columns on multiple rows.
Set bank account number
If you don't use the QR-Code, you need to enter the bank account number as a reference for the invoice payment.
See the chapter above Set final texts to enter the bank account number.
Set IBAN for Swiss QR-Code printing
If you want to create QR invoices with IBAN account, you need to:
- Use the Layout CH10 for Banana Accounting Plus
- Set up IBAN account
- Set up the printing of the Swiss QR-Code
On the QR-Invoice with IBAN account page you will find more information for setting up QR-invoices with IBAN account.
Set up QR-IBAN for Swiss QR-Code printing
If you want to create QR-invoices with QR-IBAN account, you have to:
- Use the Layout CH10 for Banana Accounting Plus
- Set up QR-IBAN account
- Set up Swiss QR-Code printing
On the QR-Invoice with QR-IBAN page you can find more information about the settings of QR-invoices with QR-IBAN account.
Print QR form without amount and address
If you want to print only the QR-bill without amount and customer address, you have to:
- Use the QR-Invoice extension without amount and address.
- Set the currency, address and IBAN account.
- Create the bulletin with QR code.
See also how to print an Invoice without amount.
Set styles and colors
Invoice print layouts also have a setting where you can define:
- The font
- Enter the name of the font (e.g. Arial, Helvetica, etc).
- The colors
- You can use the English designation (black, yellow, white, blue, red, etc.).
- Or the hexadecimal value (HEX) preceded by the # sign (e.g. #000000, #009FE3, #FF00EA).
- Color codes are easily found on the internet. For example, you can consult the table at https://www.w3schools.com/cssref/css_colors.asp.
The CH10 and UNI11 layouts also have an Invoice Settings to define font size.
Set Bold texts
In the Invoice settings page you will find information on how to apply bold style to invoice texts.
Adding images to invoices
The Advanced Plan of Banana Accounting Plus allows you to add images to the offers and invoices to be sent to customers.
This functionality makes the invoice even more customizable and the client who receives it has a more complete and direct vision of the invoicing of the items.
See our information pages on how to add images:
Close cashed invoices
There are two ways to close open invoices:
Other resources
Print invoices | Integrated Invoicing
- You can choose the Print layout.
- You can customise invoice printing by changing the settings.
- Several layouts are available for invoice printing, here are the recommended ones:
- The CH10 layout for all users in Switzerland (with Swiss QR-Code).
- The UNI11 layout for all users in other countries. (Same as CH10, but without the QR-Code).
For more information on customisation, see:
With the Advanced plan of Banana Accounting Plus it is also possible to print several invoices at the same time and obtain single PDFs for each of them! For more information visit the page Print invoices or customer statements as separate PDFs.
Print invoice dialog Estimates and Invoices

From here you can:
- Select the invoice or invoices you wish to print.
- Set the layout to be used for printing the invoice.
- Access the layout settings to customise the printout.
Once the print options have been chosen, the OK button displays the invoice in the print preview window.
From the invoice preview you can:
- Print the invoice.
- Save it in PDF so that you can easily send it by e-mail
- Save the invoice in other formats.
- Access the Print Invoices dialogue.
Print tab
Invoice numbers
You can print single or multiple invoices:
- For single prints, indicate the number of the invoice.
- For multiple prints, indicate the numbers of the invoices between commas "1,3,6".
- To print a range ( from..to..) indicate the numbers separated by hyphen "1-3" .
If the invoice itself contains a '-', for example if you have an invoice number '2016-1', this must be enclosed in brackets {}, to distinguish the numbering of a range of documents {2016-1}-{2016-3}.
Invoices from
This option allows you to print all invoices included in the selected period. You need to enter an initial and final date.
Unprinted invoices
Invoices where the InvoicePrinted column of the Transactions table is empty are printed. All unprinted invoices are therefore printed.
Layout
The styles allow you to change the invoice layout.
Layout Preferences
Requirements to be able to use the layout preferences:
- Banana Accounting Plus (version 10.1.7 or more recent).
- Advanced plan
This option allows you to set the preferences offered by the selected layout.
If a layout with no preferences is selected, this section is not displayed in the dialogue box.
- Print as
You can select the type of document you wish to print, the choices are:- Automatic: prints the document in invoice format.
- Delivery note with amounts: prints the document as a delivery note.
- Delivery note without amounts: prints the document as a delivery note, without showing the amounts and the total.
- Estimate: prints document as estimate.
- Order confirmation: prints the document as order confirmation.
- Proforma Invoice: prints document as proforma invoice.
- Invoice: prints the document in invoice format.
- QR Slip: prints only the QR slip (for layout CH10 only).
- 1st reminder: prints the document as first reminder.
- 2nd reminder: prints the document as second reminder.
- 3rd reminder: prints document as third reminder.
The chosen document type is not saved for the next time, instead it is set to "automatic" again.
Layout preferences are offered by the following layouts:
Other layouts
This button takes you to the Manage extensions dialog window, where you can install new layouts, update existing ones with the latest versions, or add your own customised layouts.
Settings
Allows you to access the settings dialogue of the selected layout, where you can customise the printing of the invoice. Each layout has its own customisable settings.
Update the InvoicePrinted column after printing
You can make this column visible by using the Data menu → Columns setup command.
The program will update the content of the column Printed after the print preview, adding the text 1. This will allow the Select unprinted invoices command to only print the invoices with no content in this column.
Options tab
In this section, language-specific texts can be added, for example, to indicate final greetings or bank details for payment. Depending on the customer's language, the programme will display at the end of the invoice the texts saved for the language indicated.
Only one type of text can be entered, one for each language.
The texts entered here are taken over when printing all invoices, whichever print layout is used.
To enter a final text:
Menu Reports > Customers > Print invoices.
In the Options section, enter the desired text.
Confirm with OK.
The text entered will appear in the print preview of the invoice.

Adding different types of end texts
In order to add different types of notes in invoices, please refer to the following paragraph in page:
Export to PDF
The program displays a preview of invoices or customer statements. From the print preview, using the Export PDF command, you can create:
- A single file that contains all invoices or customer statements.
- Separate files for each individual invoice or customer statement.
Print Delivery notes | Integrated Invoicing
With Integrated invoicing, when you create an invoice, it is automatically recorded in the accounting system and the customer's account. It is possible to print an invoice with the wording "Delivery Note" containing the same invoice data, using layouts CH10 and UNI11.
However, it is not possible to create a standalone record for the delivery note without any accounting impact, one that doesn't debit the customer's account or credit other accounts.
Mandatory requirements to use the layout preferences:
- Banana Accounting Plus (Release 10.1.7 or later).
- The Advanced plan
How to print a delivery note
In the Transactions table select the row where the delivery note to be printed is located and proceed as follows:
- Menu Report > Customers > Print invoices
- Select Layout CH10 or UNI11
- Under Print as, select:
- Delivery note with amounts
In this case, amounts in details and total amount are included in the delivery note. - Delivery note without amounts
Only the details of the dispatched goods are displayed in the delivery note, without any amounts.
- Delivery note with amounts
- Conferm with OK.
Delivery address
When printing the delivery note with an address other than the billing address, the delivery address must be entered in the Transactions table, using the Type column.
In this case, the delivery note will print the address entered in the Transactions table and not that of the respective customer, which is instead found in the Accounts table, Address view.
Printing customization
All settings that characterise Layout CH10 and UNI11 are also retained when printing the delivery note.
To change the settings, go to Print Layout Settings.
Under Texts > Delivery Note you can define the initial and final texts in the delivery note.
Print example:
Print Estimates | Integrated Invoicing
With Integrated invoicing, when you create an invoice, it is automatically recorded in the accounting system and the customer's account. It is possible to print an invoice with the wording "Estimate" containing the same invoice data, using layouts CH10 and UNI11.
However, it is not possible to create a standalone transaction for the Estimate without any accounting impact, one that doesn't debit the customer's account or credit other accounts.
Requirements in order to use layout preferences to select the label "Estimate" are
- Banana Accounting+ (version 10.1.7 or later).
- Advanced plan
How to print an estimate
In theTransactions table, select the row that corresponds to the estimate and proceed as follows:
- Menu Reports > Customers > Print invoices
- Select Layout CH10 or UNI11
- Select the option Print as, and choose Estimate
- Confirm with OK.
The offer is always printed without the Swiss QR bulletin.
Printing customization
All the settings that characterize the CH10 and UNI11 Layout are also retained in the printing of the estimate.
To modify the settings, go to the Print Layout Settings.
In the Texts > Estimate section, you can define the initial and final texts of the quote.
Print Reminders | Integrated Invoicing
In Banana Accounting Plus you can print reminders in two different ways:
Print Reminders from the Print Invoice dialogue | Integrated Invoicing
Banana Accounting Plus, with the CH10 and UNI11 layouts, also allows you to print reminders.
Requirements for using layout preferences:
On the basis of the invoice data entered in the Transactions table, reminders can be printed.
How to print a reminder
In the Transactions table select the row where the invoice for which you need to print the reminder is located and proceed as follows:
- From the Menu Reports > Customers > Print Invoices
- Select Layout CH10 or UNI11
- Under Print as, select one of the following options:
- 1. reminder
- 2. reminder
- 3. reminder
- Confirm with OK
Print customization
All settings that characterise the CH10 and UNI11 layouts are also retained in the reminder printout.
To change the settings, go to Print Layout Settings.
Under Texts → Reminder you can define the start and end texts in the reminder.
Print example: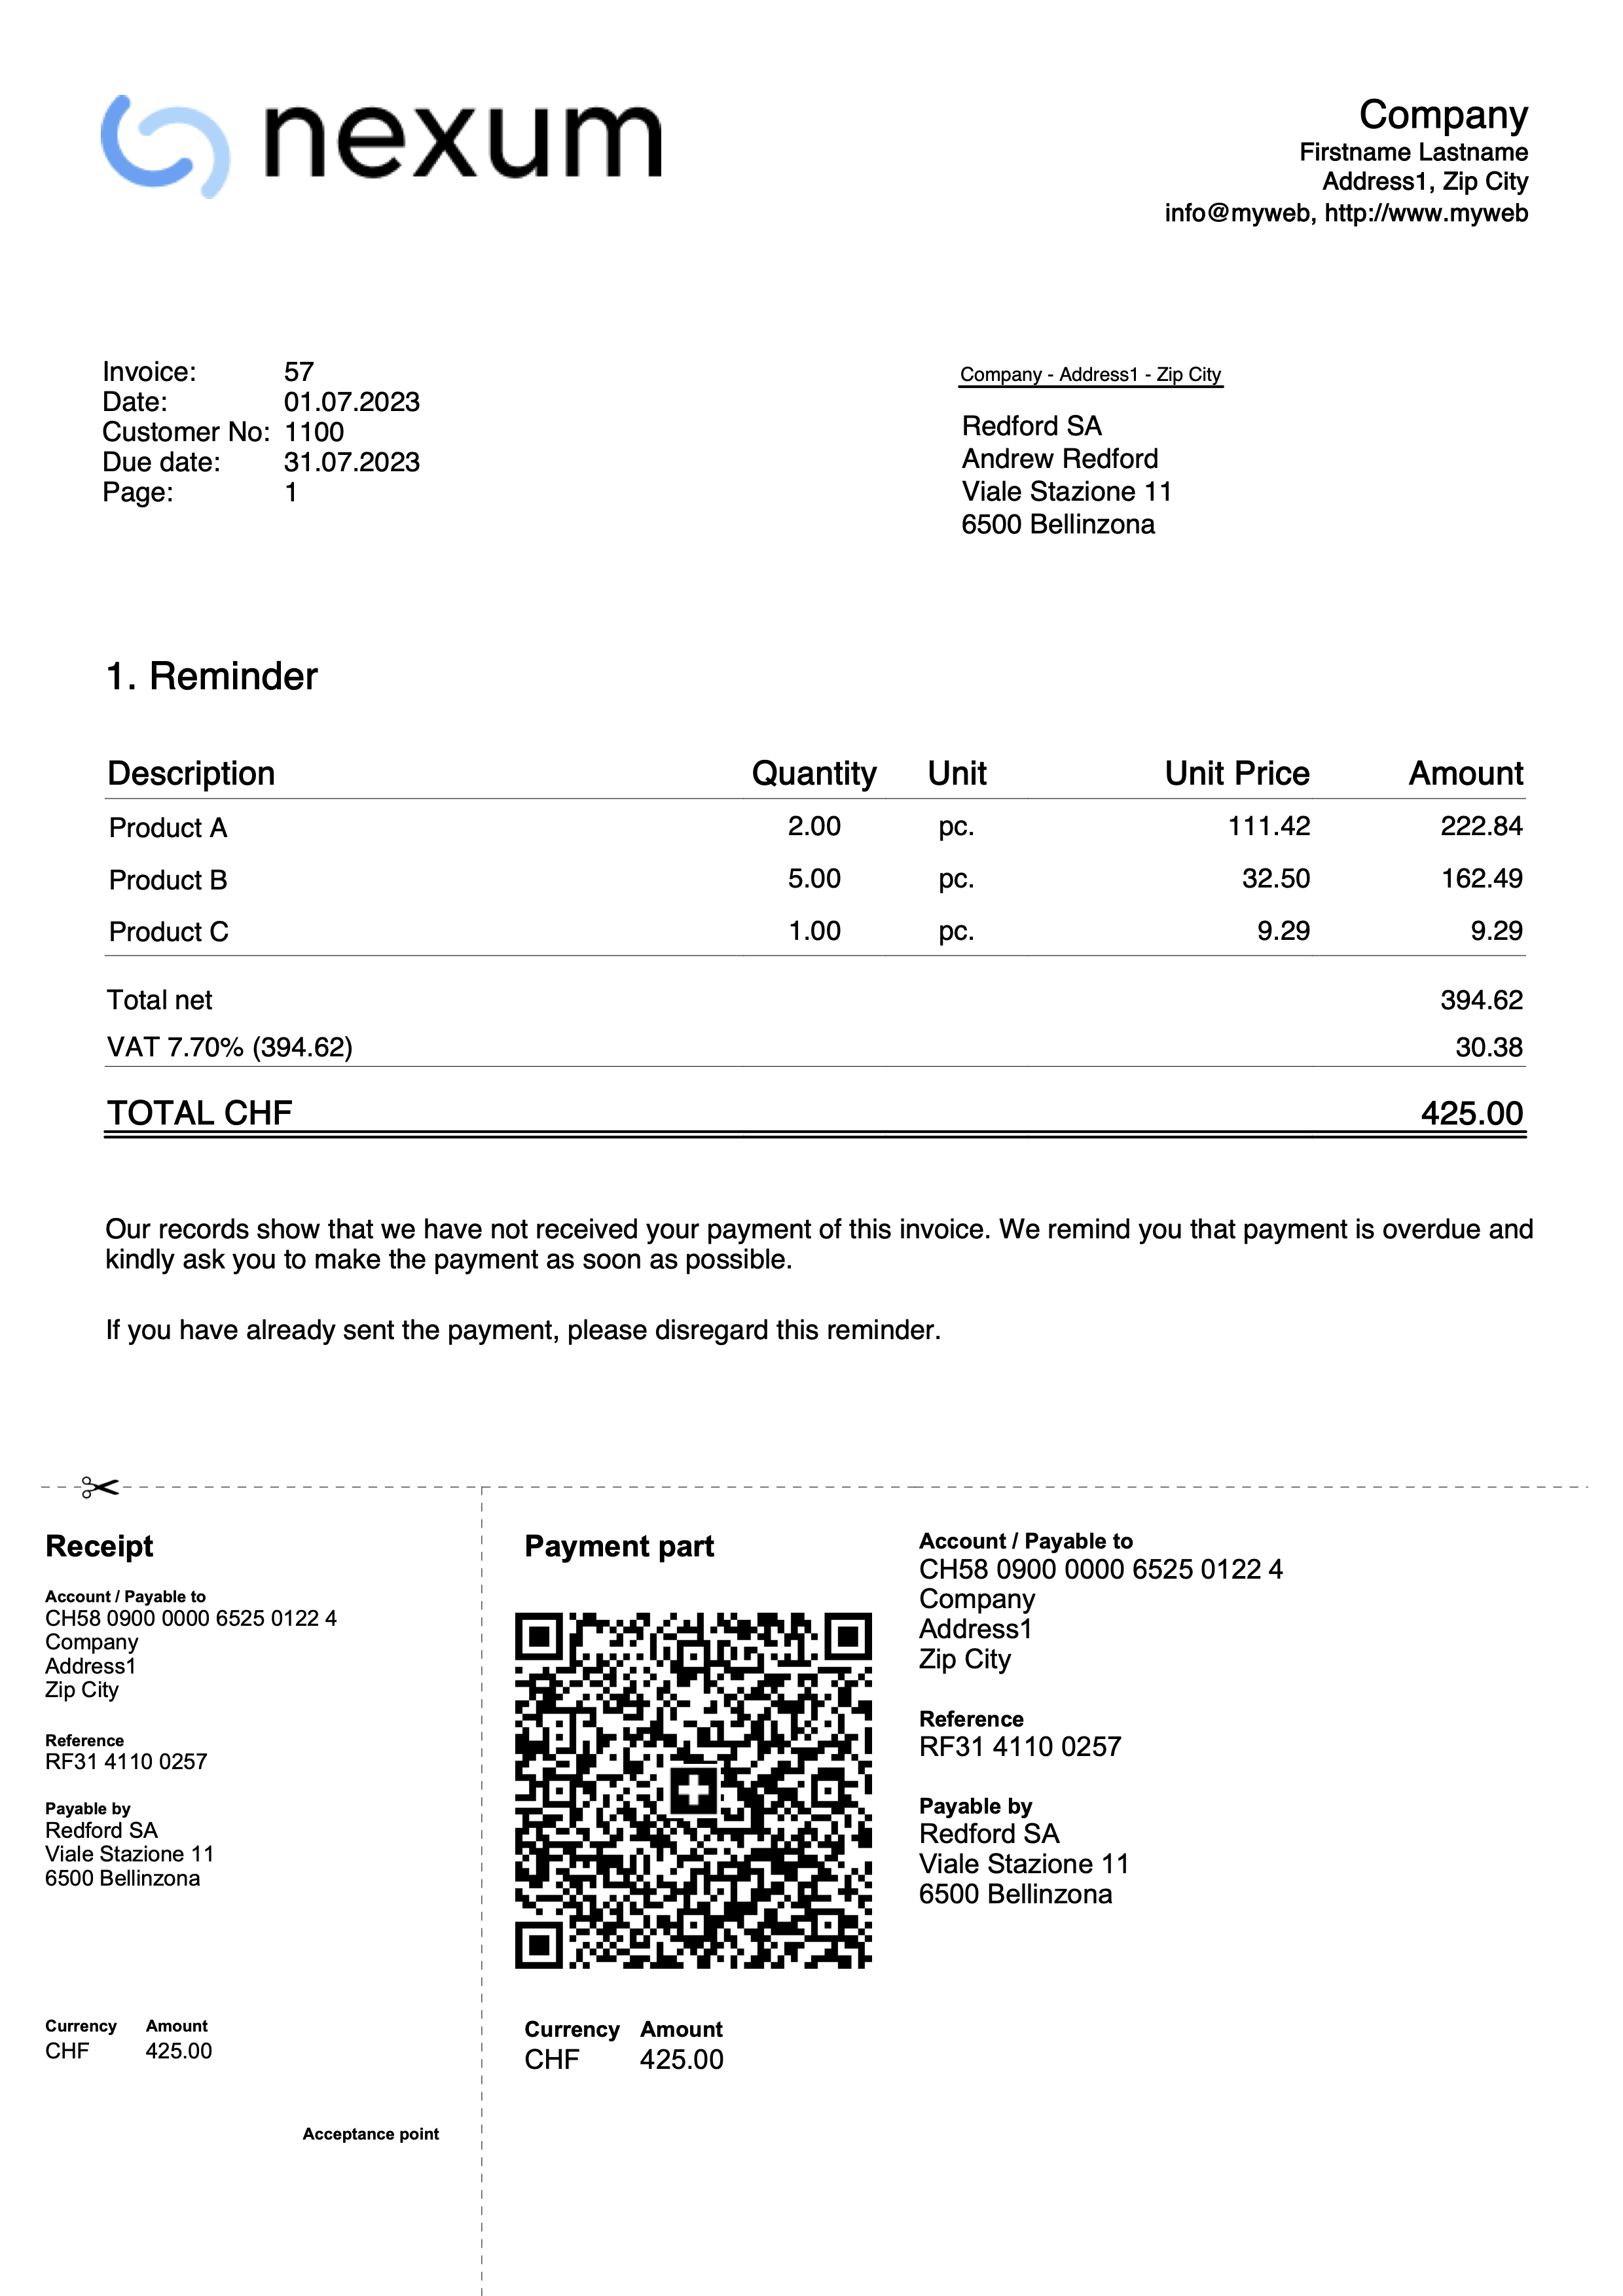
Export invoices in PDF
This dialog window appears from the print preview when you need to export invoices and customer statements to PDF.
To export invoices to PDF:
- From the menu Reports > Customers > Print invoices
- Specify the invoices to print (e.g. 1-10)
- Confirm with OK.
- From the print preview, click the PDF icon.
Export single invoices or customer statements to PDF
This function allows you to export an invoice or a customer statement into a PDF file.
The option is visible when only one invoice or one customer statement has been selected for PDF export.
To export a single invoice or customer statement to PDF, you must:
- From the print preview, click Export > Create PDF.
- Click Browse and select or create the folder where to save the file.
- Enter the PDF file name. The name is automatically filled in the File name field.
- Enable the Open file immediately option to view the created PDF.
- Confirm with OK.
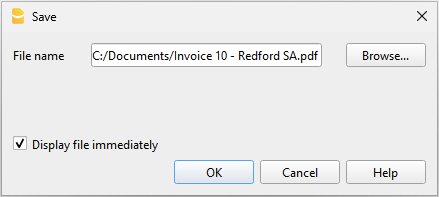
Export multiple invoices or customer statements into a single PDF
This function allows you to export several invoices or customer statements into one single PDF.
The option is only visible when multiple invoices or customer statements have been selected for PDF export.
To export invoices or customer statements into a single PDF, you must:
- From the print preview, click Export > Create PDF.
- Enable the Save as single file option.
- Click Browse and select or create the folder where to save the file.
- Enter the PDF file name. The name is automatically filled in the File name field.
- Enable the Open file immediately option to view the created PDF.
- Confirm with OK.
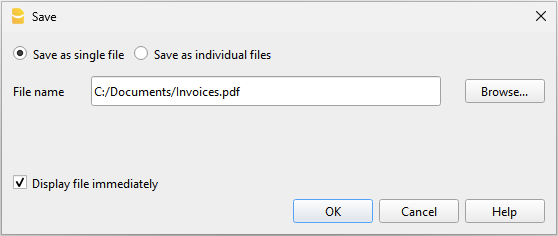
Export multiple invoices or customer statements as separate PDFs
This function allows you to export several invoices or customer statements in a single operation, generating separate PDF files.
This option is only available:
- With the Advanced plan of Banana Accounting Plus.
- When multiple invoices or customer statements have been selected for PDF export.
To export invoices or customer statements as separate PDFs, you must:
- From the print preview, click Export > Create PDF.
- Enable the Save as individual files option.
- Click Browse and select or create the folder where to save the files.
- In the File names field, you can customize the file name using variables available in the dialog window.
- Click Variables to view the full list of variables.
- Double-click the variables you want to use and compose the file name. While composing, the resulting file name preview is updated automatically.
Example: <doc_date> for the document date, <customer_name> for the customer name, and <doc_number> for the document number.
- Enable the Open file immediately option to view the created PDF.
- Confirm with OK.
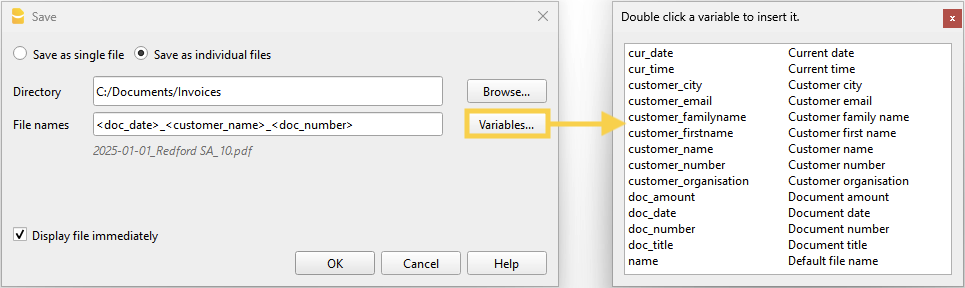
If a file with the same name already exists in the selected folder, the program will ask for confirmation during saving.
List of available variables
To customize the file names, use the following variables:
- cur_date: the current date when the PDF documents are created.
- cur_time: the current time when the PDF documents are created.
- customer_city: the customer's city.
- customer_email: the customer's email address.
- customer_familyname: the customer's last name.
- customer_firstname: the customer's first name.
- customer_name: the full name of the customer or the company name.
- customer_number: the customer number.
- customer_organisation: the company name.
- doc_amount: the amount of the document.
- doc_date: the date of the document.
- doc_number: the document number.
- doc_title: the invoice title with number, customer name or company name.
- name: the default file name (invoice title with number, customer name or company name).
Export other types of documents
From the print preview, you can export any document to PDF using the Create PDF command.
For more information, visit:
Invoice collection registration
There are two ways to close open invoices:
- Manually register the collection of customer's invoice
- Automatically register by importing the data in the bank statement in ISO 20022 format.
Closure with manual recording
To manually record the receipts of the invoices, see the following pages
- Closing with transaction on the turnover principle method
- Closing with transaction on the cash method
Closing with ISO 20022 data import (Switzerland)
To automatically close open invoices by importing statement data, you must:
- Download and save on your computer the data in ISO 20022 format directly from the bank's website.
Files in ISO 20022 formats camt052, camt053 and camt054 are supported for Swiss specifications. - Install the ISO 20022 Camt Bank Statement (Switzerland) extension.
- Set some parameters of the extension.
- Import the transactions by selecting the Camt Bank Statement ISO 20022 (Switzerland) extension.
With the import, the program automatically creates records in the Transactions table and enters the data in the corresponding columns:
- In the Date column, the date of the invoice collection.
- In the Invoice column, the invoice number extracted from the QR reference number (see parameters).
- In the Description column, the QR reference number.
- In the A/C Credit column, the customer account extracted from the QR reference number (see parameters);
- The extracted customer account will be saved as an account/category or cost center based on the parameters.
- In the Amount column, the invoice amount.
- In the A/C Debit column, the counterpart account (the bank account where the amount has been collected) if this has been enabled during the import.
For more information, see the Camt ISO 20022 (Switzerland) Bank Statement page.
QR References
The codes of the QR references are explained on the following pages:
- With the IBAN account, the Structured Creditor Reference (SCOR) type is used.
- With QR-IBAN account the QRR Reference type is used.
Kundenkonto und Rechnungsnummer bearbeiten
Wenn Sie die Kundennummer sowohl im Postenbuch als auch in den Kosten- und Profitstellen ändern oder die Rechnungsnummer anpassen, stellen Sie sicher, dass keine offenen Rechnungen aus den Vorjahren vorhanden sind.
Kundenkonto bearbeiten ohne Anfangssaldi
Das Kundenkonto kann mit dem Befehl Umbenennen geändert werden.
Wenn bereits Buchungen mit dem alten Konto existieren, werden diese automatisch auf das neue Kundenkonto aktualisiert.
Es wird empfohlen, ein Kundenkonto zu Beginn des Jahres umzubenennen, sofern keine offenen Rechnungen vorhanden sind.
Kundenkontos bearbeiten mit Anfangssaldi
Wenn ein Kundenkonto mit Eröffnungssalden (offenen Rechnungen) umbenannt werden soll, kann das Konto nicht einfach geändert werden. Stattdessen muss ein neues Konto mit der neuen Nummerierung angelegt werden. Der Eröffnungssaldo wird anschliessend durch eine Buchung vom alten Konto auf das neue Konto übertragen.
- Fügen Sie in der Tabelle Konten das neue Konto mit der neuen Nummerierung hinzu.

- Erstellen Sie in der Tabelle Buchungen eine Buchung, um den Eröffnungssaldo vom alten Konto auf das neue Konto umzubuchen.
- Falls im neuen Jahr noch Rechnungen existieren, die sich auf das alte Konto beziehen, können diese dem neuen Konto zugeordnet werden. Dazu muss die Kontonummer in allen zugehörigen Buchungen geändert werden.
Wichtige Hinweise:
- Seien Sie besonders vorsichtig, wenn Rechnungen bereits an den Kunden gesendet oder bezahlt wurden.
- Falls die Belegnummer auch die Kundennummer enthält, prüfen Sie, ob eine Änderung erforderlich oder möglich ist.

- Im Menü Aktionen > Kundenbericht > Offene Rechnungen pro Kunde wird ein Bericht angezeigt, der die Schliessung des alten Kontos sowie die Übertragung des Saldos auf das neue Konto dokumentiert.
- Ein Konto mit der alten Nummerierung und einem Nullsaldo kann im folgenden Jahr gelöscht werden, sofern der Anfangssaldo Null beträgt.

Ändern einer bereits gebuchten oder ausgestellten Rechnungsnummer
Wenn Sie die Nummer einer noch nicht bezahlten Rechnung ändern möchten, stehen Ihnen zwei Möglichkeiten zur Verfügung:
- Ersetzen Sie die Rechnungsnummer direkt in der ursprünglichen Buchung der Rechnung.
Diese Vorgehensweise wird nicht empfohlen, wenn die Rechnung mit der alten Nummer bereits in der Vorjahresdatei erfasst wurde.
- Stornierung und erneute Buchung
- Stornieren Sie die ursprüngliche Buchung der Rechnungsausstellung.
- Erfassen Sie eine neue Buchung mit folgenden Angaben:
- Spalte Rechnung – Geben Sie die neue Rechnungsnummer ein.
- Spalte Typ – Tragen Sie den Wert 15 ein (schliesst den Kundenbeleg).
- Spalte Soll – Geben Sie ein Transferkonto an.
- In der Spalte Haben – Geben Sie das Kundenkonto an.
- Spalte Betrag – Erfassen Sie den Rechnungsbetrag.
Diese Vorgehensweise wird empfohlen, wenn die Rechnung mit der alten Nummer in der Vorjahresdatei erfasst wurde, da sie sicherstellt, dass die Änderung korrekt nachvollzogen werden kann.

How to create a credit note – Invoiced and collected
With Banana Accounting you can create a credit note both when recording on an accrual basis (Accrual principle) and on a cash basis (Cash principle).
Below are the two separate procedures:
Credit note on an accrual basis (Accrual principle)
Credit notes have their own DocType, different from invoices.
Entering the transaction
- Enter the transaction as if it were an invoice.
- In the Invoice column, indicate the credit note number.
- In the DocType column, enter 12.
- In the Description column, enter the text that will appear in the credit note details.
- In the Debit column, enter the sales account and in the Credit column, enter the customer account.
The accounts will follow the posting logic of a credit note. As a result, the amount in the document will be negative.
VAT reversal (if necessary)
If you also need to reverse VAT in the credit note:
- In the VAT Code column, enter the sales VAT code with a minus sign in front (Example -V81).

Printing the credit note
To print the credit note, use the same command as for invoices:
Credit note on a cash basis (Cash principle)
Also in this case, credit notes have a specific DocType.
Entering the transaction
Enter the transaction as if it were an invoice, without entering any account in the Debit and Credit columns.
- In the DocType column, enter 12.
- In the Invoice column, indicate the credit note number.
If the credit note must be shown as a reduction of the invoice amount:- The credit note number must be the same as the invoice number.
- In the Description column, enter the text that will appear in the credit note details.
- In the Amount column, enter the amount.
- In the CC3 column, enter the customer’s CC3 account with a minus sign in front.
VAT reversal (if necessary)
If you also need to reverse VAT in the credit note:
- In the VAT Code column, enter the sales VAT code in square brackets with a minus sign in front (Example [-V81]).
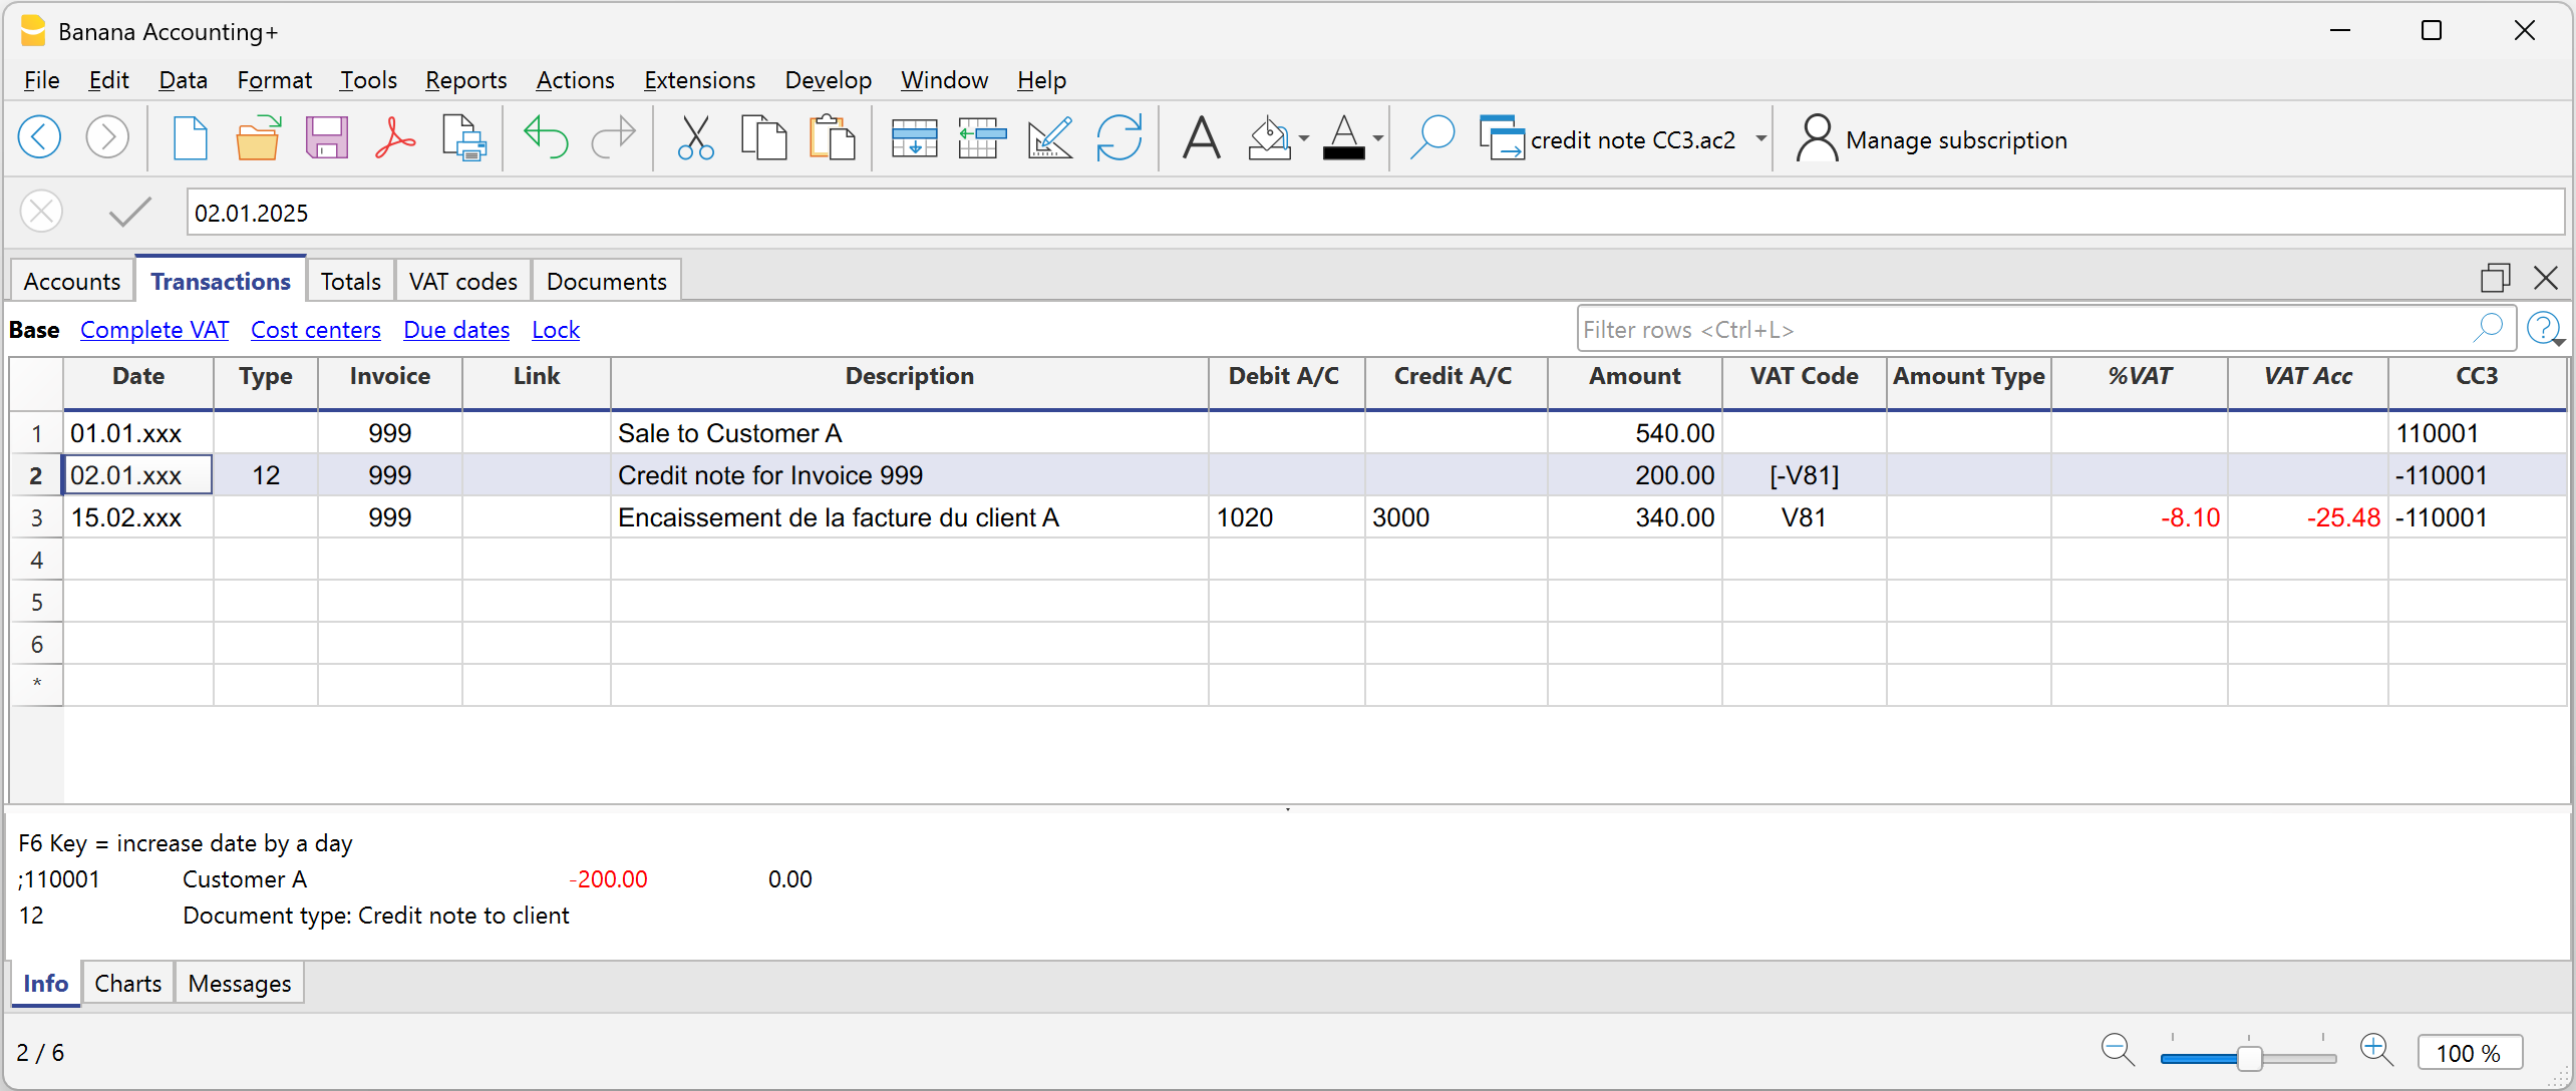
Printing the credit note
Also in this case, printing is done using the same command as for invoices:
Roundings in invoices
If there is a rounding in the invoice printout, the rounding must be reported into the accounting, otherwise the programme will report an error, indicating the difference to be recorded.
From the menu Reports > Customers > Settings > Advanced it is possible to set the roundings of the invoice to the desired cents, but only in base currency.
If you do not wish to round the invoice amount, you must set the rounding in the field Invoice rounding (basic currency) to 0.01; the invoice total will correspond to the amount of the transactions.
In the Exchange Rates table, the Reference Currency column typically contains the base currency, while the Currency column contains the foreign currency.
When the reference currency is not the base currency, it is not possible to set rounding from the customer settings (menu Report > Customers > Settings > Advanced). In this case, to set rounding, you need to use the Rounding column in the Exchange Rates table (menu Data > Columns setup > display the Rounding column). If you do not wish to round the invoice amount, set the rounding to 0.01 in this column.
Record positive roundings in customer chart of accounts
When there is a positive rounding, enter the following in the Transactions table:
- Enter the date of the invoice in the Date column.
- Enter the invoice number in the Invoice column.
- Enter a description in the Description column.
- Enter the customer's account in the Debit column.
- Enter the counterpart (Sales, Consulting or other account) in the Credit column.
- Enter the hundredths of the rounding in the Amount column.

Record negative roundings in customer chart of accounts
When there is a negative rounding, enter the following in the Transactions table:
- Enter the date of the invoice in the Date column.
- Enter the invoice number in the Invoice column.
- Enter a description in the Description column.
- Enter the counterpart (Sales, Consulting or other account) in the Debit column.
- Enter the customer account in the Credit column.
- Enter hundredths of the rounding in the Amount column.
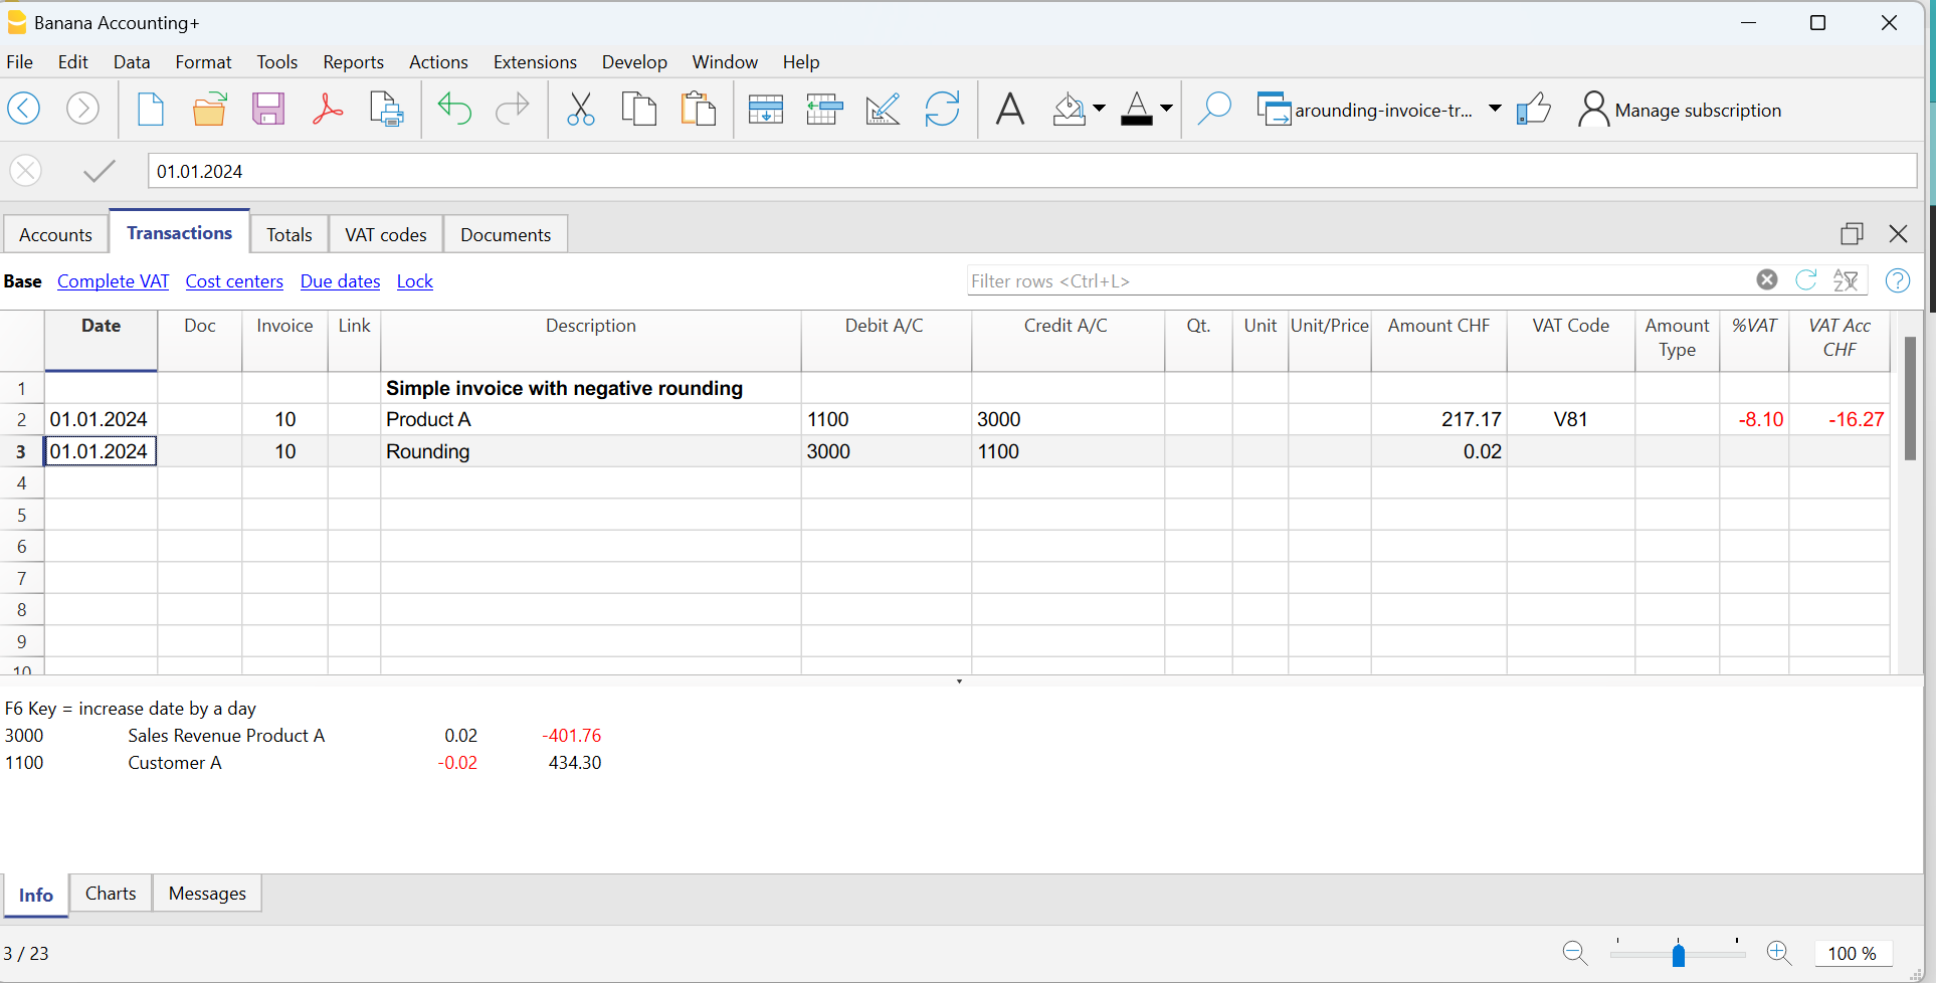
Record positive roundings in the cost centre (CC3)
When there is a positive rounding, enter the following in the Transactions table:
- Enter the date of the invoice in the Date column.
- Enter the invoice number in the Invoice column.
- Enter a description in the Description column.
- Leave the Debit column blank.
- Leave the Credit column blank.
- Enter hundredths of a rounding in the Amount column.
- In the CC3 column, enter the customer's cost centre.
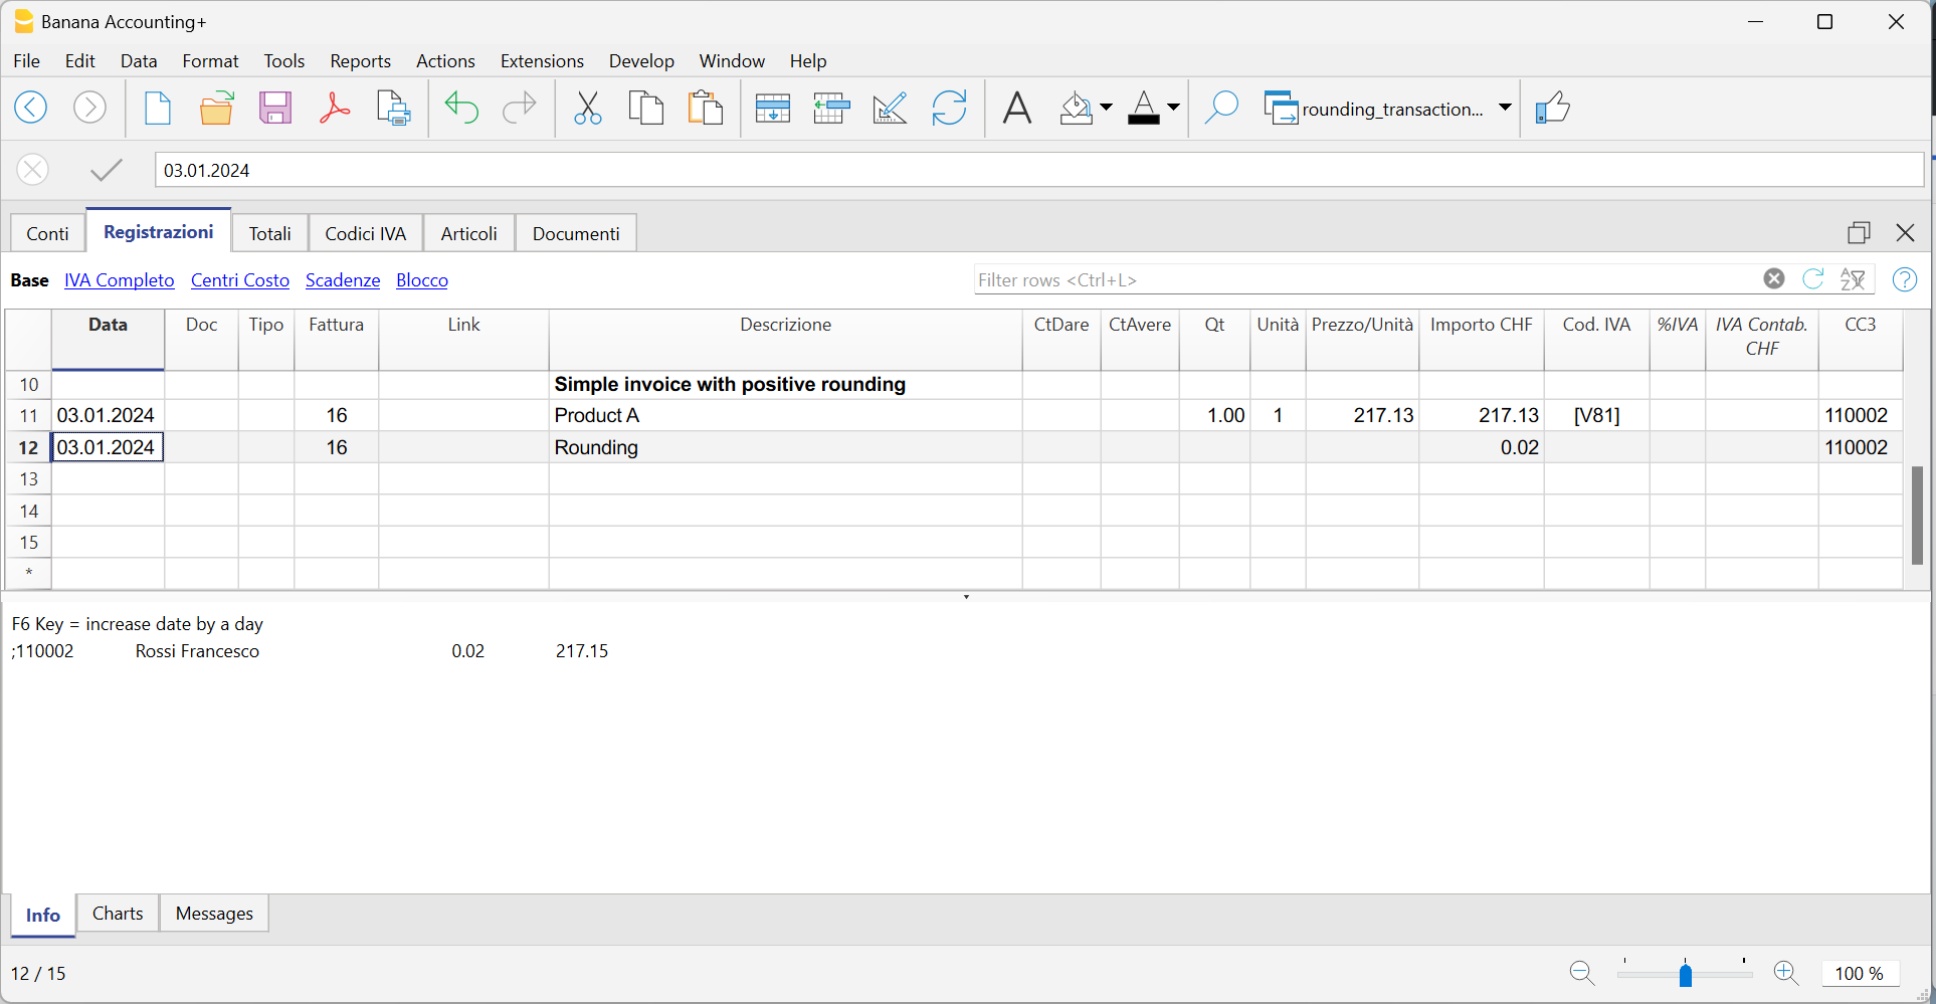
Record negative roundings in cost centre (CC3)
When there is a negative rounding, record in the Transactions table as follows:
- Enter the date of the invoice in the Date column.
- Enter the invoice number in the Invoice column.
- Enter a description in the Description column.
- Leave the Debit column blank.
- Leave the Credit column blank.
- Enter hundredths of the rounding in the Amount column.
- Enter the customer's cost centre with a minus sign in front in the CC3 column.
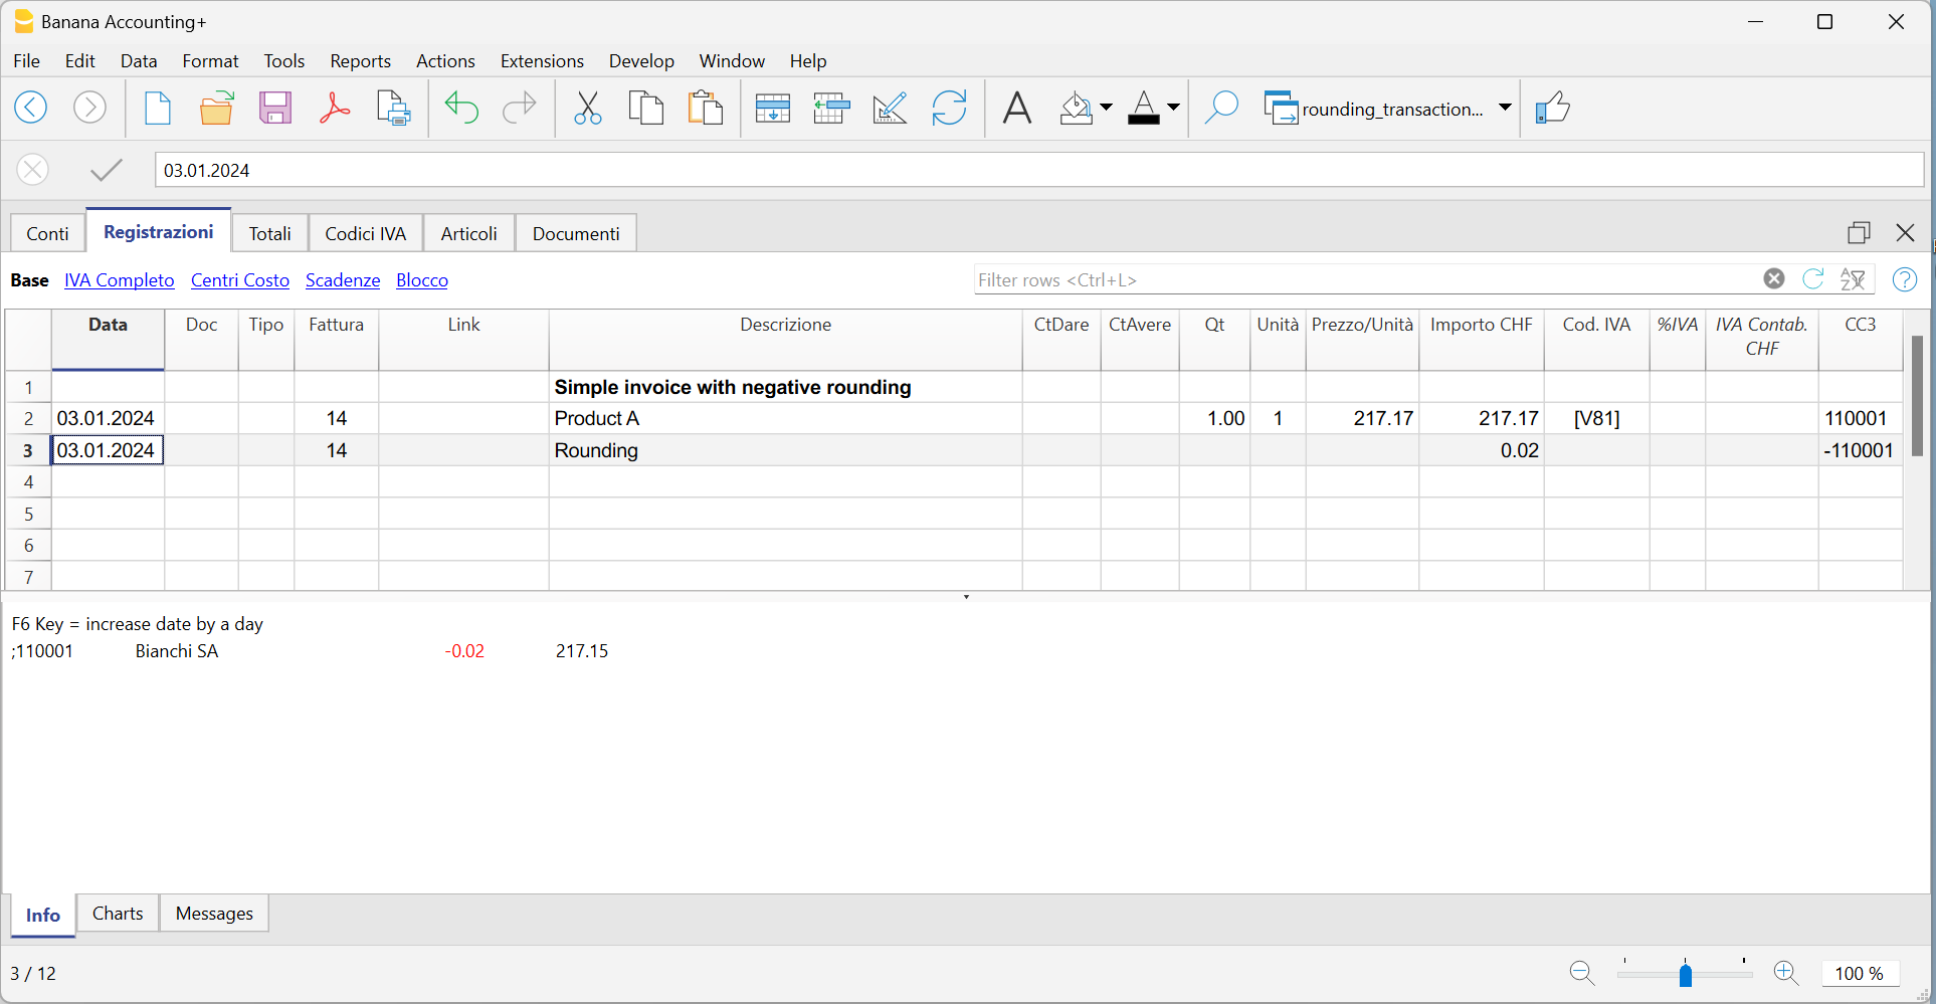
Item management integrated into accounting
In the accounting file, a table can be added to manage items and link them to individual transactions via the Item Id (item identifier) that is entered in the Item column.
This feature is very powerful and useful because it allows the following automations:
- To integrate a list of products or an inventory with descriptions, quantities, prices and groupings into the accounting.
- In the Transations table, by entering invoices and simply indicating the Item Id (Item identifier) in the Item column, the description, price and account are taken over.
- In the transaction row, by entering the quantity (positive or negative), the programme automatically updates the existing quantity balance. It thus functions as a small warehouse.
Some extensions, such as those for securities management, make use of this functionality, to manage the list of securities, have an inventory and calculate the accounting profit or loss at the time of sale.
Activate the functionality
The functionality is enabled from the menu Tools menu > Add/remove functionalites.
The options are as follows:
- Add Items table
Adds the Items table in the accounting file. - Add Items table and Items Columns in the Transactions table.
Adds the Items table and Items columns to the Transactions table at the same time.
Items table in the accounting file
The Items table is a kind of mini-warehouse integrated in accounting.
It is used to:
- Manage the list of products, with their prices.
- You can group products into groups.
- In the Transactions table, you enter the item and the programme takes up the description and price.
- If you enter the quantity in the Transactions table, the programme updates the current quantity in the Items table.
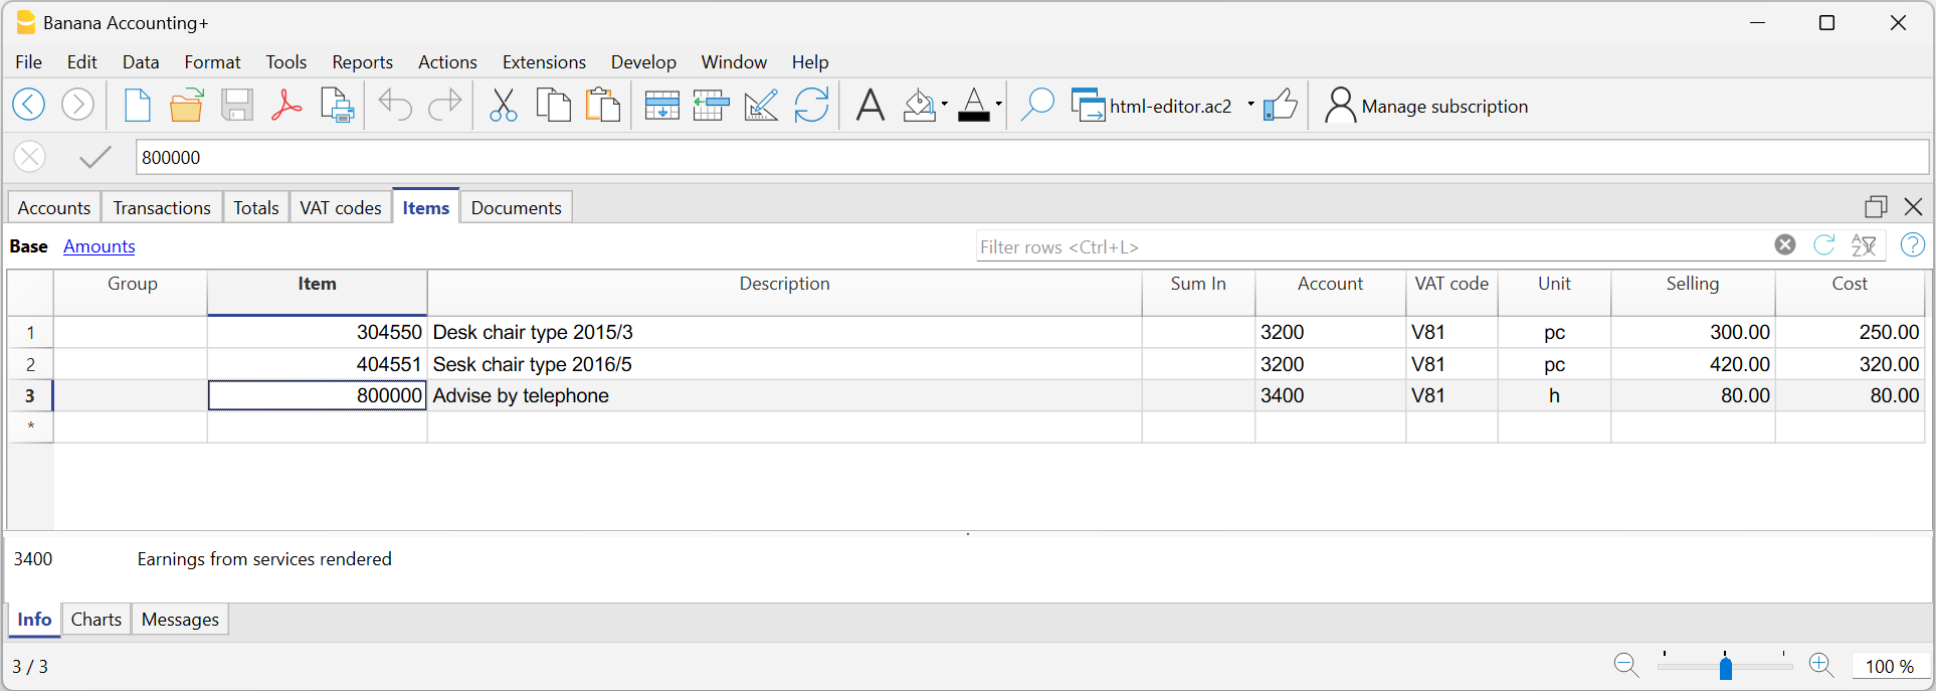
In order to use the Items table, you need to:
- Add the Items table.
- Add the Items columns in the Transactions table.
- Display the Item column in the Transactions table via the Data menu > Columns setup.
The content of the ItemId column must be an item defined in the Items table.
Adding the Items table
The Items table can be added from the Tools menu > Add new functionalities > Add Items table
In the Items table, you can enter items, products, or other items, and it can also be used as a small inventory control tool.
Items table columns
The predefined columns are the following:
- Group: Generates the totals rows.
- Item: Item code.
- Description: Item description.
- Sum in: the group in which to total a set of items.
- Account: account used in the transactions.
- AssetAccount: is the Balance Sheet account indicating where this item is recorded.
It is used to link the double-entry accounting with the inventory accounting of the items.
If the AssetAccount is specified:- The currency of the AssetAccount must be the same as that of the Item.
- The opening balance of the AssetAccount should correspond to the total of the initial values of all items having the same AssetAccount.
- The balance of the AssetAccount should be equal to the total book value of all items having the same AssetAccount.
- AssetType: Defines the type of the Asset. This is an internal program classification used by the investment accounting extension to calculate values; it is not a standard classification and has no reporting purpose. The currently supported values are:
- 1: Stocks, ETFs, funds,...
Investments Measured by Quantity. - 2: Bonds, debt securities,...
Investments Measured by Nominal Value.
- 1: Stocks, ETFs, funds,...
- Currency: Currency to be used (for multi-currency accounting only).
- VATCode: VAT code to be used (for VAT accounting only).
- Unit: an abbreviation to define the type to which the quantity refers.
- Selling: Unit sale price. It is retrieved in the Transactions table when the Item Identifier is entered.
- Cost: Unit cost price, It is a value used for reference only and not used by the program.
- Begin Qt.: initial quantity amount of the item
- Price Begin: the initial unit price of the item. In multi-currency accounting, it is expressed in the item's currency.
- Value Begin Currency: In multi-currency accounting, the initial quantity multiplied by the initial unit price in the item's currency.
- Value Begin: In the base currency.
In multi-currency accounting, it represents the initial value in currency converted at the opening exchange rate specified in the Exchange Rates table. - Current Qt.: current quantity, calculated by program, taking into account Begin Qt. and transactions of Item in Transactions table. The Quantity column of the Transactions table is being used.
- Movement Qt.: the total of the quantity movements. This value is automatically calculated by the program based on the movements entered in the Quantity column of the Transactions table.
- Price current: The current price of the item.
- In multi-currency accounting, it is expressed in the item's currency.
- It must be entered manually by the user or imported from other programs.
- It is also used as the closing value of the accounting, and in securities accounting, it is the value used to calculate any unrealized gain or loss compared to the book value.
- Currency value: Calculated by the program. The current quantity multiplied by the current price in currency.
- Current value: The current value at the current exchange rate indicated in the Exchange Rates table.
The table does not contain columns indicating the average book value or the value calculated based on the LIFO or FIFO methods.
These values are, if needed, calculated by specific extensions, such as the Securities Accounting extension, which calculates the book value based on the transactions.
Items columns in the Transactions table
The Items columns of the Transactions table are used to enter the quantity and price.
- They can be added to the Transactions table from the menu Tools → Add/Remove functionalities → Add Items columns.
- The transaction amount is calculated based on the values entered in the quantity and unit price columns.
- If the Items table is present, the quantity is used as in inventory management, increasing or decreasing the current quantity.
For more information, see:
Columns added in the Transactions table
- ItemId
- It is the item contained in the Items table.
- By default, in the Transactions table the ItemId column is not visible.
Using the command Data → Columns setup, it is possible to make the column visible so that it can be used. - If the Items table is not present, it serves only as a reference.
- Quantity
- A positive value (+) is added to the item's quantity.
- A negative value (–) is subtracted from the item's quantity.
- A neutral value (±) is considered for calculating the transaction amount, but does not affect the quantity in the Items table.
- Together with the Unit price, it is used to calculate the transaction amount.
- If an ItemId is present, the quantity increases (positive values) or decreases (negative values) the quantity in the Items table.
- Neutral values (±123) are used to calculate the transaction amount, but do not modify the quantity in the Items table.
- Unit
An abbreviation indicating what the piece refers to (for example pcs, m, h). - Unit Price
Can be a positive, negative or neutral value.

VAT Management in Banana Accounting+
Banana Accounting Plus simplifies VAT management by automating the calculation, recording, and submission of VAT returns to tax authorities. Cutting-edge features reduce manual errors, ensuring tax compliance. Banana Accounting Plus simplifies VAT management by automating the calculation, recording, and submission of declarations to tax authorities. Cutting-edge features reduce manual errors, ensuring tax compliance. Pre-set templates with VAT options and pre-configured codes are available for all accounting applications,
For Switzerland, the new 2024 VAT rates are already available. The new VAT extension for submitting returns digitally is available.
- Swiss VAT management
- ▶ Video: Swiss VAT return (in French, German, Italian)
Recording transactions with VAT
With Banana Accounting, VAT management is very simple because it is completely automated. Transactions with VAT are recorded in the Transactions table, the main hub of all accounting, by entering for each VAT transaction the corresponding VAT code, referring to the sale or purchase, according to the rates in force.
Several pre-set columns are available, the display of which can be customised.
In addition, the programme offers:
- Accounting with different VAT rates in the same transaction
- Add the invoice in PDF in the link column.

In the Transactions table there are specific VAT Columns for various VAT-related information.
To record a transaction with VAT, enter the following data:
- The date of the transaction.
- The invoice number.
- In the Link column, you can enter the digital link to the Pdf accounting document.
- The Debit and Credit Account where you can indicate the account and the contra-account
- The amount.
- The VAT code relating to the purchase or sale (codes found in the VAT Codes table).
For each transaction, the programme performs the following automatisms:
- Accurately records the VAT paid on purchases and the VAT received on sales.
- Automatically calculates the VAT amount.
- Breaks down the VAT amount from the cost or revenue.
- Retreives the VAT amount, taxable amount and VAT amount on the VAT accounts.
Predefined VAT accounts and settings
In the Banana Accounting Plus VAT models, the VAT accounts are already set up in the Accounts table. In the passive accounts, there are the automatic VAT split account and the VAT due account (or VAT receivable account).
To speed up VAT transactions, it is possible to set the VAT code to each account that has VAT transactions in the Accounts table. This setting allows you to automate the entry of the VAT code when you enter the account in the Accounts table.
More details can be found on the page Match the VAT code to account.

VAT Codes Table
The VAT Codes table defines the VAT codes for the rates in force and other parameters for calculating VAT.
- There are columns in which to set VAT codes for calculating VAT gross, net or by VAT amount only.
- There are both VAT codes for the effective method and for the flat rate method
- Swiss templates have the VAT Codes table already set up:
- with the VAT codes relating to the rates in force
- for each VAT code, in the GR1 column, the reference figure is set, which will allow the VAT data to be reported in the VAT reporting template and also in the Xml file to be transmitted to the Federal Tax Administration (FTA).
- For each country, there are files with the VAT codes already set according to the national reporting requirements.
Automated VAT reports and returns
The programme automatically generates various reports with very detailed summaries by VAT code, account, percentages, records and period. VAT summaries can be customised by displaying columns specific to the data you wish to obtain. VAT summaries are useful for understanding the movement of VAT (VAT due, recoverable and payable) and allow effective control and in the event of audits by tax authorities, targeted details are available to facilitate audit work.
More information is available on the VAT Report page.

The VAT functionalities of Banana Accounting Plus offer several advantages:
- Efficiency
You avoid preparing calculations and statements manually, saving time and effort - Accurate calculations and statements
Errors are avoided because calculations are performed automatically and accurately by the programme on the basis of the data recorded by the system. - Compliance with current regulations
The programme is updated according to current rates. Simply update the VAT Codes table and the calculations and statements are performed correctly and in a manner consistent with the regulations. - National VAT Reports Extensions
These are additional modules, different per country, that print or export VAT data in the format required by the tax authorities. Please refer to the national VAT documentation - Archiving of VAT printouts
All printouts with VAT data can be saved in pdf or other formats and archived. Archiving allows the data to be available at all times in case of tax audits.
Calculation methods
Banana Accounting is a powerful calculation tool and in VAT management, too, you can take advantage of its potential to always have accurate and correct VAT calculations and reports.
There are two calculation methods:
- Effective Method - calculations and accounting of VAT using the cash principle and on turnover
- Flat tax rate Method - Calculations and accounting of VAT upon the VAT rates granted by fiscal authorities
Accounting methods
- Turnover
Demands the for the keeping of a customer and supplier ledger.
Costs and revenues, with the corresponding VAT code, are recorded when the invoice is issued and received.
More information can be found on the page How to manage VAT on turnover.
- Cash principle/ Collection
It is not compulsory to keep a customer and supplier ledger, but if you still wish to have one, it is important to set it up with cost centres.
Costs and revenues, with the corresponding VAT code, are recorded when collected or paid.
More information can be found on the page Clients and Suppliers with VAT using the Cash principle
Features currently unavailable
These features are not available at the moment:
- In multi-currency accounting, the account to which VAT is recorded net (usually Revenue and Expense accounts) must be in base currency.
It is not possible to deduct VAT from accounts that are not in base currency. - The VAT amount is calculated by the programme and recalculated when the Recalculate accounting is done. This gives the auditor or others who check the accounts the certainty that the calculations are always made with the same logic.
For VAT rounding, it is not possible to enter a different VAT amount than the one calculated by the programme. Generally, these are VAT amounts that have been rounded on the invoice, even by a few cents.
Insights
VAT documentation specific to Switzerland, Italy and other countries.
In the section of each country you will find the most specific documentation on VAT.
English not being an official language, you will be redirected to the relevant pages in official languages for Switzerland.
- VAT management for Swizerland
Information pages specific to Switzerland:- Swiss VAT codes table.
- How to register VAT.
- Prepare the VAT return.
- Use the Swiss VAT Extension.
- VAT management for Italy
- Information pages specific to Italy:
- Italian VAT codes table.
- How to register VAT.
- Prepare the VAT return.
- Use the Italian VAT Extension.
Extensions for national VAT reports
For some countries there are Extensions that can be easily installed and allow you to print or export the VAT report in the format required by the authorities.
Each country's VAT extensions work in conjunction with the country's VAT Codes table.
Theory
VAT (Value-added Tax) is a tax that weighs on the final consumer. Every VAT subject must calculate and periodically deposit the tax to the Revenues Authority.
Every country has its own VAT rates that are established in different percentages depending on the type of merchandise or service. Certain merchandise and services are exempt or excluded.
The percentages vary according to the financial necessity of the country; therefore, there can be changes over the years.
VAT rate
In this document, to make calculations easier, we will use the following rates:
- 10 % normal rate
- 5% reduced rate
- 0% excluded operations or exempt operations
VAT calculation
Net Price x VAT Percentage / 100 = VAT Amount
Example:
Net price 300
Tax rate 10%
VAT amount = 300 x 10 / 100 = 30
Gross price calculation
Net price + VAT Amount = Gross Price
Example:
300 + 30 = 330
Sometimes the gross amount is known and it is necessary to find the net and VAT amounts.
Net price calculation
Gross Price / (100 + VAT rate) x 100 = Net Price
Example:
330 / (100 + 10) x 100 = 300
The net price represents the cost (purchase) or the revenue (sale) of the company
VAT amount calculation
Gross Price - Net Price = VAT Amount
Example:
330 - 300 = 30
or
330 - [330 / (100 + 10) x 100] = 30
The VAT amount represents the debit (sales) or the credit (purchases) towards the Revenues Authority.
VAT rate calculation
VAT Amount / Net Amount x 100 = VAT Rate
Example:
30 / 300 x 100 = 10%
or
[330 - 330 / (100 + 10) x 100]/100 = 10%
Another example:
20 / 400 x 100 = 5%
This way of calculating is used when the rate is not known.
File properties (VAT/Sales tax tab)
This tab will only appear if an accounting template with VAT/Sales tax management is selected.
The VAT section for setting up VAT accounts is accessed via the File menu > File properties (basic data) > VAT/Sales tax tab.

VAT Account
The automatic breakdown VAT account, present in the chart of accounts, is set by default. For Swiss users it corresponds to the VAT according to VAT report. In this case it is not necessary to enter the VAT account in the VAT Code Table.
With the setting of the automatic breakdown VAT account only, all the VAT amounts, both of the sales and of the purchases, flow respectively into the credit and debit of this account and it is not necessary to set up the recoverable VAT account. At the end of the quarter, the balance of the automatic breakdown VAT account is turned over to the VAT payable account (or Inland Revenue VAT account).
Recoverable VAT Account
If the automatic breakdown VAT account is not set up as the only VAT account, the recoverable VAT account is set up. In this case it is not necessary to enter the account in the VAT Codes table.
VAT rounding
It is defined how the VAT amounts must be rounded; for example, if you enter 0.05, the VAT amounts are rounded to multiples of 0.05.
Cost centers 1 (CC1), 2 (CC2), 3 (CC3)
For each type of Cost Center it is possible to choose which amount to use for registration in the cost center:
- Use the transaction amount.
- Use the amount with VAT included
(In the case of cost centers used for customer or supplier accounts) - use the amount without VAT
Setting whether the cost center is used for costs or revenues.
Note
if one of these parameters is changed, the accounting will have to be recalculated.
Related documents:
VAT Codes Table
The settings in the VAT Codes table allow you to define all the parameters necessary to manage the procedures for registering with VAT. The settings concern:
- VAT due or recoverable.
- Transaction amount recorded as net, gross, or VAT amount at 100% (Customs VAT).
- Percentage of applicable VAT rates.
- The account in which VAT is be recorded.
- Special rounding off for each code.
- Grouping and totaling method.
The VAT Codes table has a Base view and a Complete view. The difference between the two is the fact that the Complete view presents several columns that are not available in the Base view.
Calculation method
The parameters indicated in the VAT Codes table are being used to calculate the VAT of the individual transactions.
The parameters established in the VAT Codes table cannot be changed in the transactions. This modality guarantees that the VAT calculations are correct and consistent.
Please note: if the values of a VAT Code, which has already been used in the transactions, are being modified, the changes are not active immediately; in this case it is necessary to use the Actions > Check accounting command.
When modifying the VAT table, the program, as a precaution, displays a message in the Info window inviting for a complete recalculation.
The following Table refers to the codes being used according to the Swiss legislation:
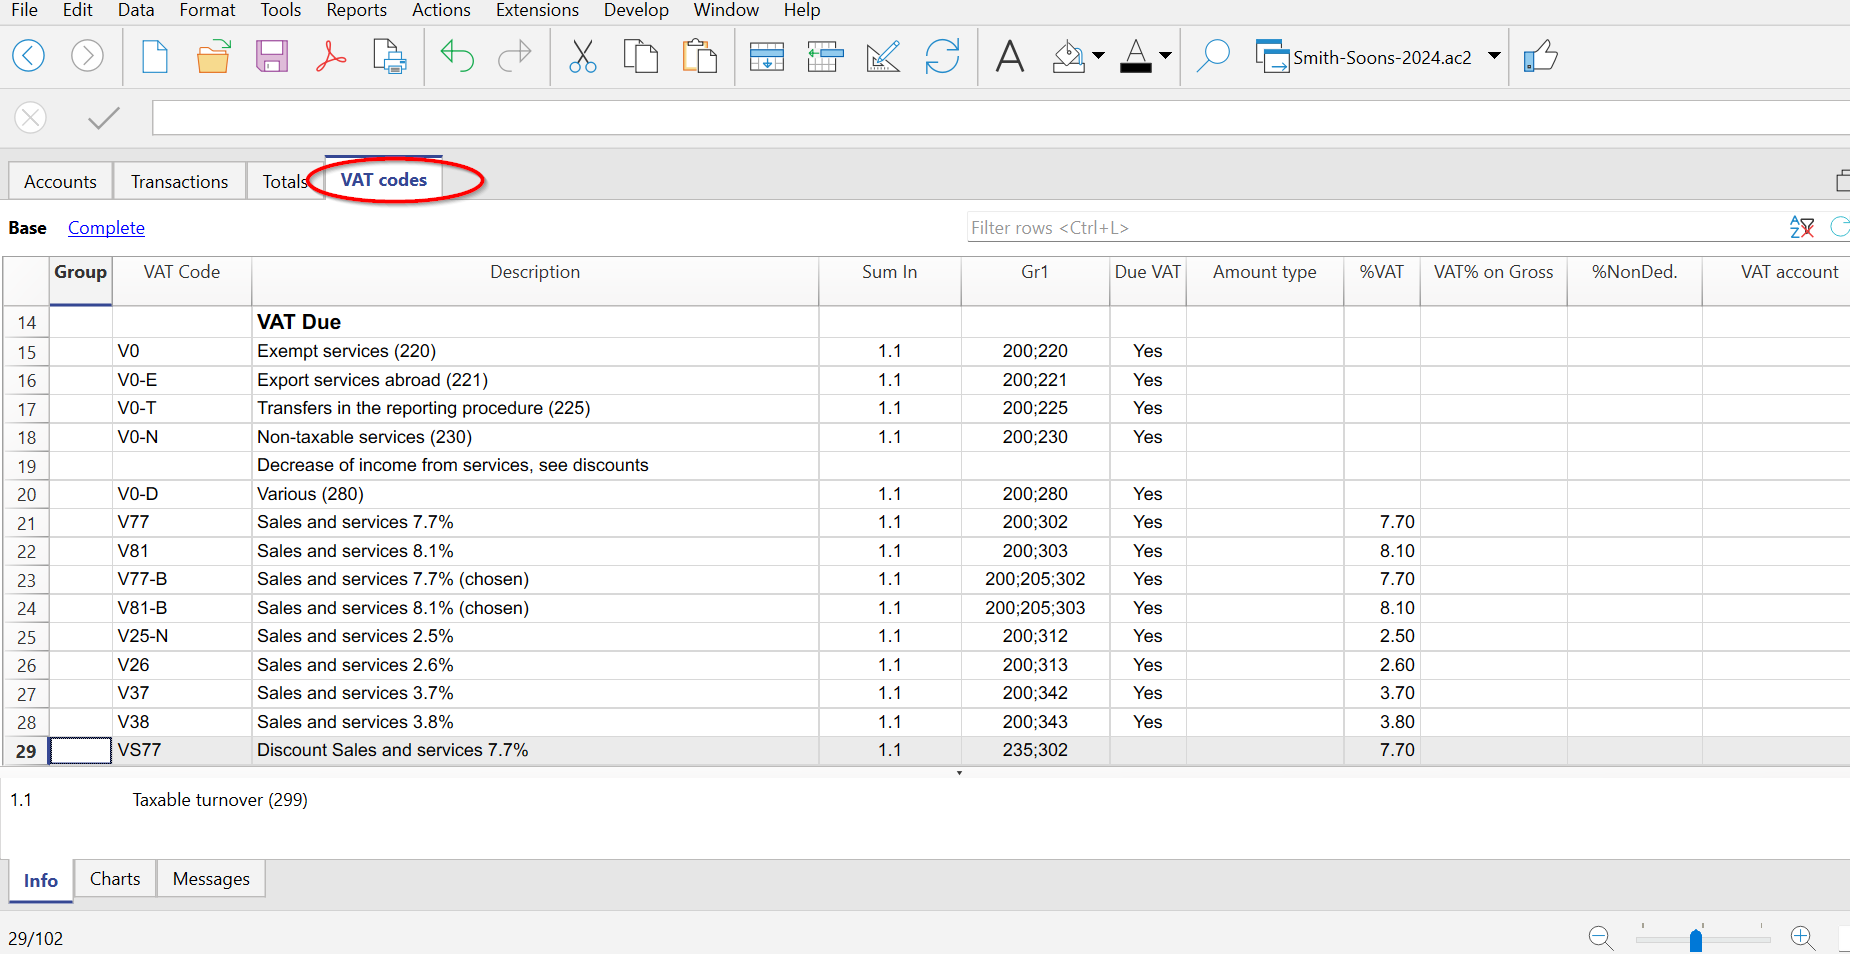
Detailed description of the columns
In the following columns, insert the following data:
- Group: an abbreviation or a number that indicates the group to which the codes belong.
For more information on the grouping system, please refer to the Grouping System page. - VAT Code:
The program provides for three types of codes- Normal VAT codes
The abbreviation used to identify and apply the VAT code in the transactions
Used in the Transactions table, VAT Code column (e.g. V81)
Note: they cannot contain the character ":" - Special codes prefixed by the character ":"
These are not VAT codes but are used to specify VAT cases in more detail
Used in the Transactions table, Extra VAT column (e.g. :ESCL) - Reverse charge VAT codes
In reverse charge transactions, two VAT codes separated by a colon are entered; the program calculates both the VAT payable and receivable
Used in the Transactions table, VAT Code column (e.g. B81:M81)
Note: in the VAT Codes table only the two individual codes are defined; the combination is entered in the Transactions table.
- Normal VAT codes
- Description: a text for the description of the VAT Code or the group.
- Disable:
Allows you to disable VAT codes that are not used. Facilitates data entry in the Transactions table.- 1 - the VAT code is not visible in the auto-completion list (Transactions table), but it can still be used;
- 2 - the VAT code is not visible in the auto-complete list and must not be used.
- Sum in: abbreviation or number of the Group in which the row of a code must be totaled.
- Gr1: this column is used for specific groupings.
The screen capture shows the groupings for the encoding of the figures of the Swiss VAT return. - Gr2: code for additional groupings.
- Due VAT:
If the word Yes is being inserted, this means that the VAT is at debit (due to the State)
If the cell is empty, this means that the VAT is at credit (recoverable) - Amount type:
The code indicates how the VAT amount of the transaction is to be understood.- 0 (or empty cell) - with VAT/sales tax (the transaction amount is considered VAT included)
- 1 = without VAT/Sales tax (the transaction amount is considered VAT excluded)
- 2 = VAT amount (the transaction amount is considered the VAT amount, 100%)
The amount type 2 is used in particular to account for customs VAT paid or charged on the shipper's invoice. More details on the recording are available on the page: Entering VAT at customs for import
- % VAT: VAT code percentage.
- % NonDed.: if, for a VAT code, it is not possible to deduct the full 100%, enter the non deductible percentage here (example 100%)
- VAT% on gross: is usually left empty. The word "Yes" has to be inserted only if the VAT percentage has to be applied on the gross amount (VAT included) and not on the taxable amount (e.g. for flat rates).
- VAT account: The account to which the broken down VAT automatically is posted.
In the File and Accounting properties (File menu), a general account, that will be used as the VAT account, can be defined. - Round Min: minimum rounding value.
If left empty, the rounding indicated in the basic accounting data is used. - Don't warn: there are particular entries that the program might interpret as wrong, but which are in fact correct. To prevent the program from reporting error warnings, enter Yes to the code of interest.
Rechecking the accounting file
When the accounting is recalculated and the transactions are not blocked, the program resumes the VAT parameters assigned to each code in the transactions. Therefore, if a setting of a VAT code has been changed, the change is resumed in the respective columns of the transactions which are not editable by the user.
For this reason, when editing the VAT codes table, the program suggests to operate a full accounting recheck.
Adding a new percentage
When a new percentage is added, a new row has to be added; in the new row, insert the data of the new VAT code with the new percentage, while paying attention to insert the correct grouping. Don't change a code that has already been used in the transactions.
VAT codes for services provided abroad
In the VAT Codes table, it is possible to set up, in separate groups, VAT codes for the provision of services provided abroad, with specific rates for the country in which one operates and for which VAT is also due to foreign countries.
The corresponding VAT code is set for each country, which can be totaled in its own group or in a totalization group that refers to the VAT to be paid to foreign countries.
To view the amounts to be paid, go via the Reports > VAT /Sales tax report menu and select the specific code for the country or the totalization group for the VAT to be paid to foreign countries.
For the VAT to be paid in foreign countries, it is not possible to send it electronically.
Own Groupings
By creating groups with multiple totaling levels, the user can obtain the totals that are necessary for the VAT declaration.
In the VAT report, by activating the option Use own grouping scheme, the software calculates the totals exactly as indicated in the sequence of the indicated groupings in the VAT Codes table.
The groupings are being used to obtain totals for groups of transactions, for example, the totals for all exportations or importations.
Match the VAT Code to an Account
All the codes listed in the VAT Codes table can be linked to the VAT-related accounts in the Accounts table. This way, when entering transactions in the Transactions table, the program automatically inserts the corresponding VAT code.
The procedure for linking a VAT code is described on the page:
Related document:
- Import VAT codes
- National VAT documentation
Link to specific VAT documentation for Switzerland, Italy and other countries.
Match the VAT code to the account
In accounting with VAT, in the Accounts table, you can automate the entry of the VAT code by associating each account with its corresponding VAT code. In this way, in the Transactions table, when you enter the account, the program automatically inserts the VAT code and completes the columns with the corresponding data.
Link a VAT code to an account (effective method)
To link a VAT code to an account:
- The VAT Code column is visible by default in the Advanced view.
If you want to display the VAT Code column in the Basic view, go to the menu Data > Columns setup > VAT Code. - Once the column is visible, enter the VAT codes related to the accounts.
If the VAT code is entered in square brackets, such as [V81], VAT will appear only on issued invoices and will not be posted.
Link a VAT code to an account (flat rate method)
The procedure is the same as described in the previous paragraph:
- In the Accounts table, in the VAT Code column, enter the VAT code on the rows of the accounts related to sales.
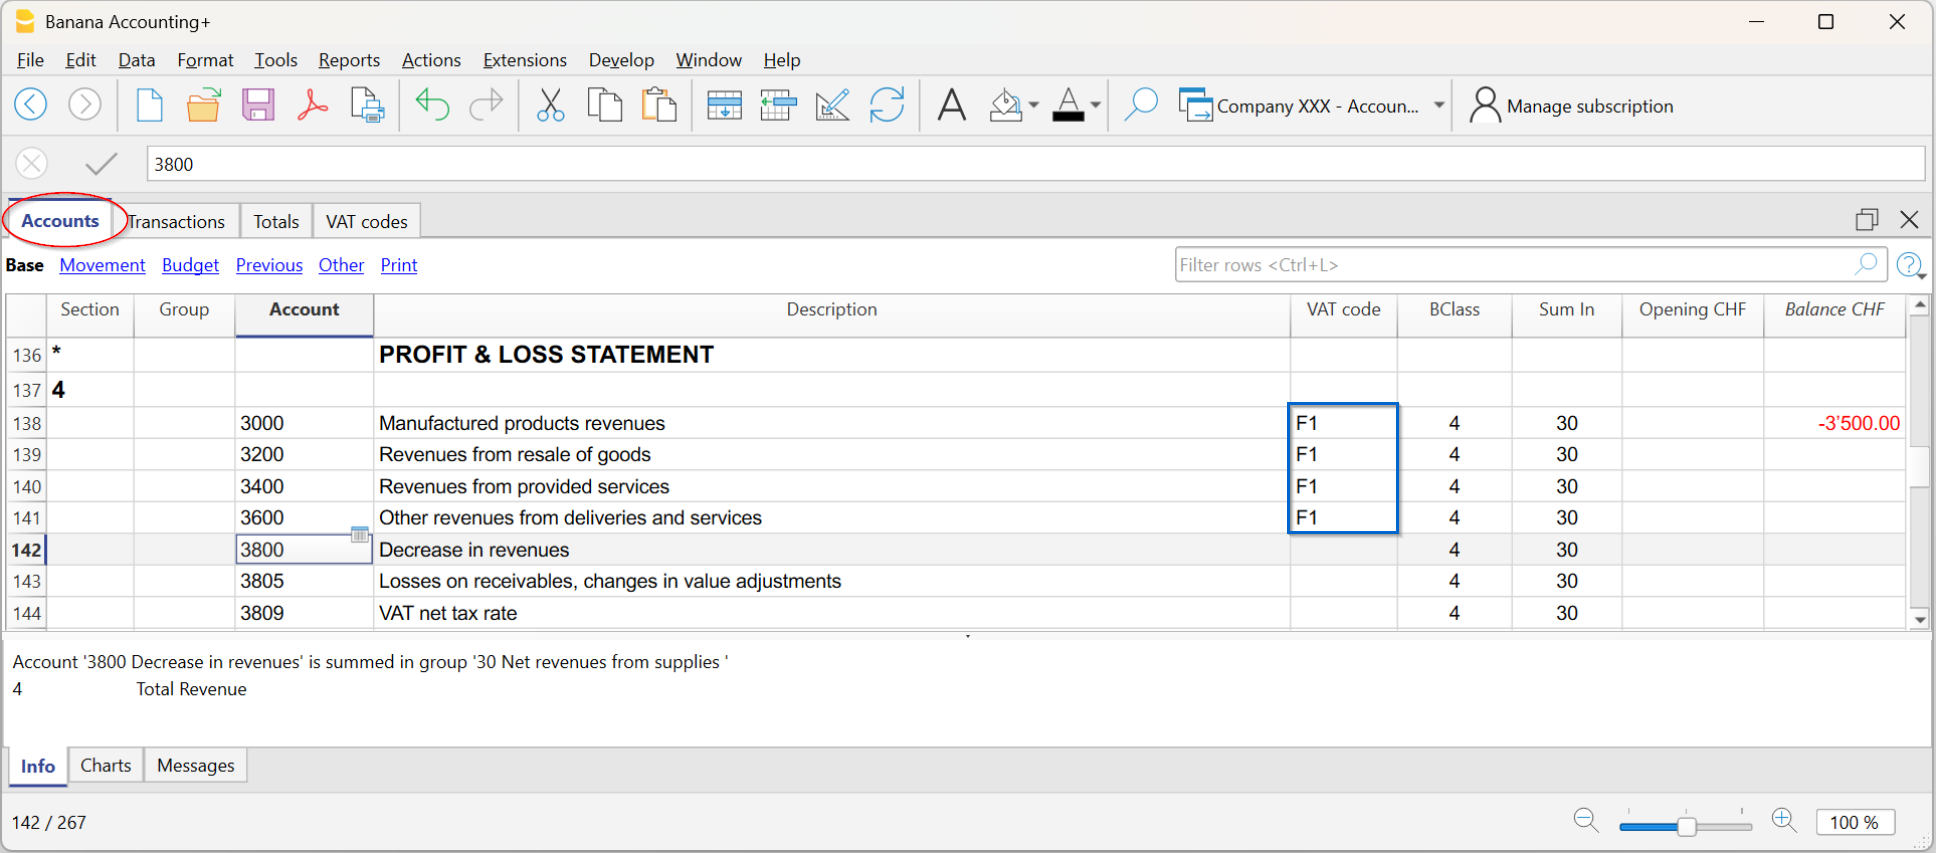
Depending on the type of transaction, there are two cases:
Case 1 – Transaction with VAT breakdown
If you want to record with VAT breakdown:
- In the VAT Codes table, enter the flat rate VAT rate(s).
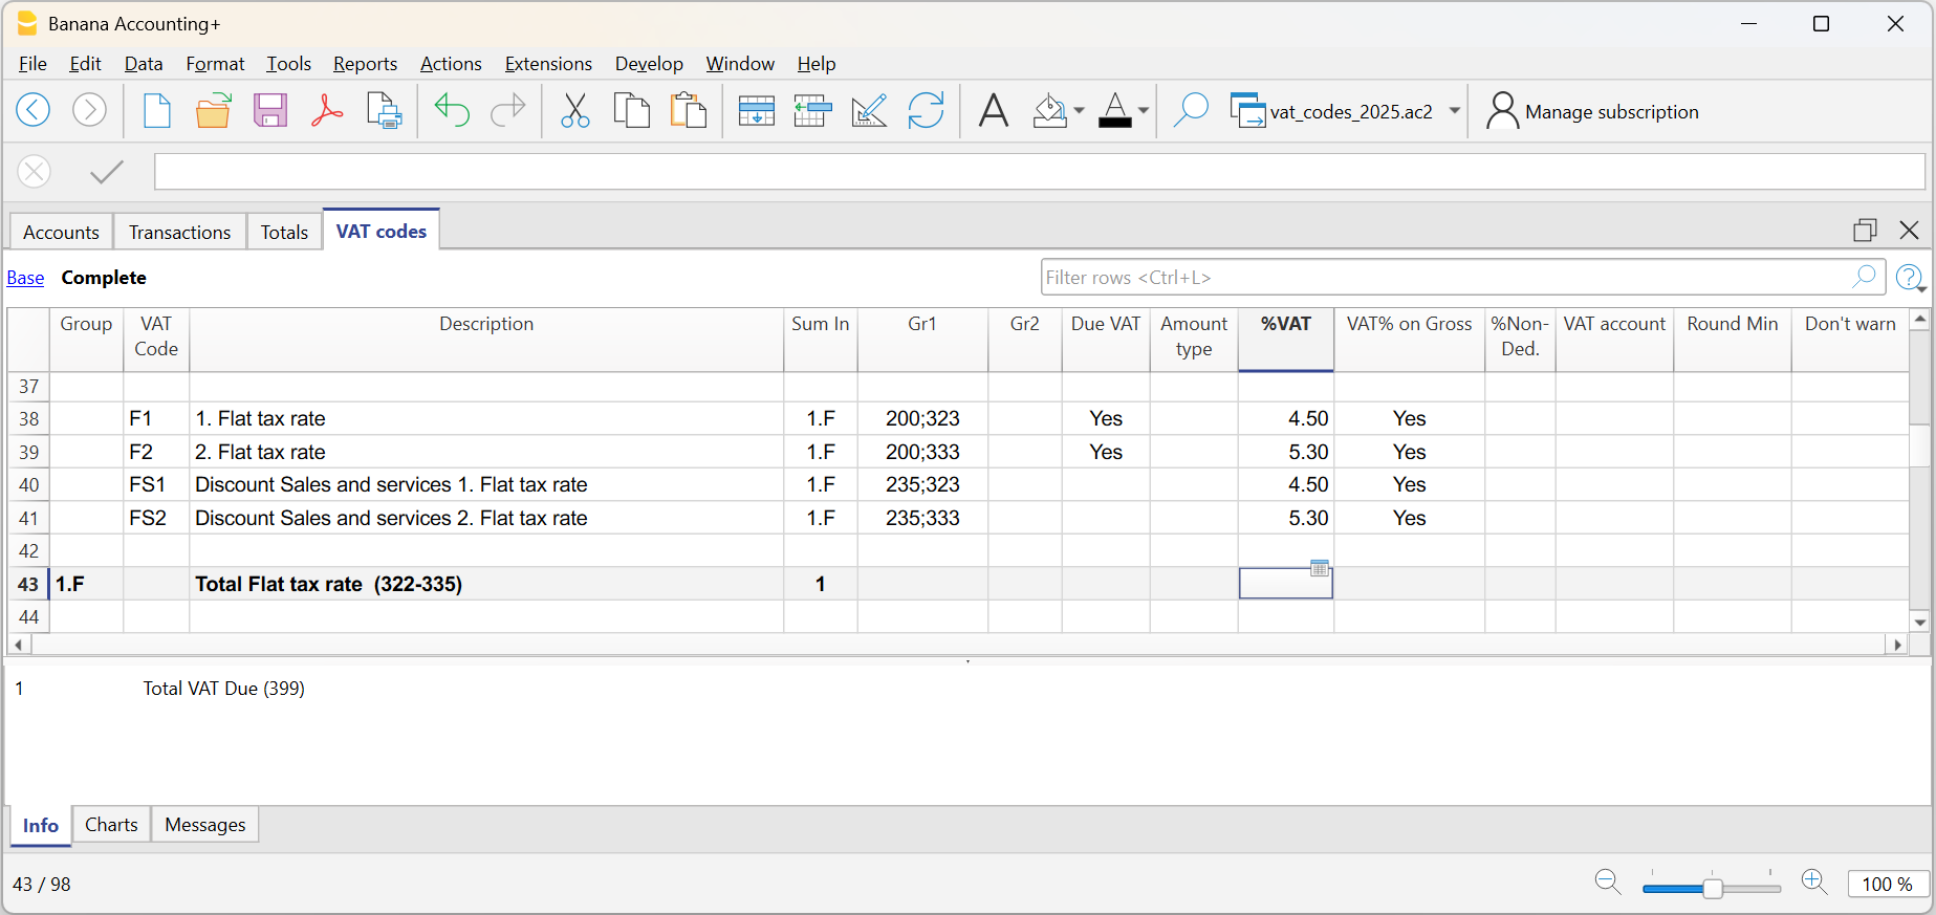
- The program will show for each transaction:
- the gross sales amount
- and the corresponding VAT breakdown.
In this way, you get a complete detail of the taxable amount and the tax.
Case 2 – Transaction without VAT breakdown
If you want to record without VAT breakdown:
- In the VAT Codes table, the flat rate VAT rates must not be entered.
- In the Accounts table, in the VAT Code column, simply enter the corresponding code.
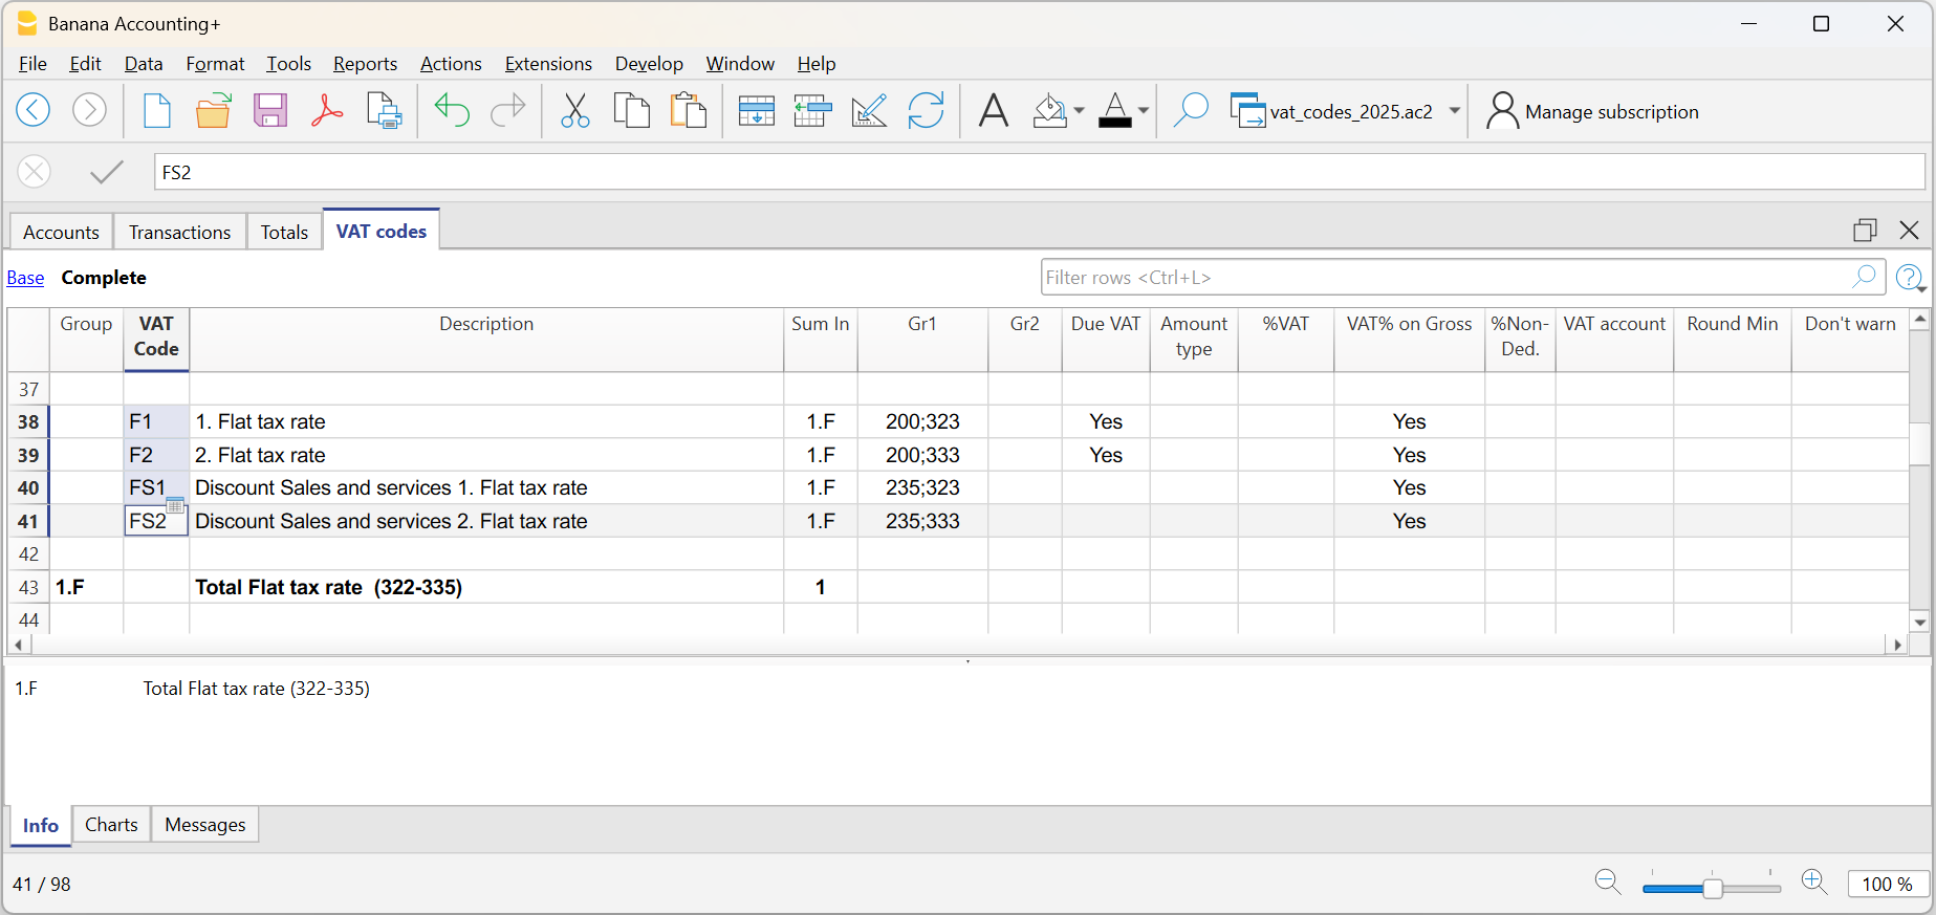
At the end of the semester (or the defined period), the program automatically calculates the VAT due based on the gross turnover amount determined from the sales transactions marked with the flat rate VAT code.
Note: if the VAT rates have changed (see New VAT Rates), the values entered in the VAT Code column must be updated manually. The same applies to transactions already present in the Transactions table (VAT Code column), which must be manually edited row by row or all at once using the Replace command.
VAT rounding
The Swiss system for VAT calculation, provides for calculated to the cent, without rounding.
For those who need to have VAT amounts rounded up to cents, the following procedure is followed:
- In the Transactions table, post normally by applying the appropriate VAT code
- On the next row, post the expense or revenue account used in the previous line in debit and credit
- In the amount column, enter the cents to be rounded
- In the VAT Code column, enter a VAT code with amount type 2 (100% VAT amount), for example M81-2
- When the cents are to be decreased, enter the code with the minus sign in front of "-M81-2".

Setting up VAT accounts
VAT accounts are ledger accounts used to automatically record VAT amounts calculated by the program when a VAT code is used.
They are used to record and monitor VAT due on sales and input VAT (recoverable) on purchases. Thanks to the automation of VAT codes, it is not necessary to manually calculate or record VAT amounts: Banana Accounting performs the calculations and postings automatically.
How VAT accounts work
When a VAT code is used, Banana Accounting automatically calculates:
- the taxable amount
- the VAT amount
- the amounts to be recorded in the Debit and Credit accounts
- the VAT amount to be recorded in the VAT account.
Based on the VAT account settings defined in the menu File > File and accounting properties > VAT/Sales tax or in the VAT Codes table, the program automatically records the VAT amounts in the appropriate accounts.
To check the calculation details, simply place the cursor on the transaction. In the information window at the bottom, the amounts recorded in the different accounts are displayed.
Use one automatic VAT account or specific VAT accounts?
In most cases, it is sufficient to use one automatic VAT account, a simpler solution to manage and control.
From a tax perspective, it is necessary to distinguish VAT due on sales from input VAT on purchases. In Banana Accounting, this distinction can be achieved either through separate VAT accounts or through VAT codes and the related reports.
In programs that do not use VAT codes, it is often necessary to record each type of transaction in separate VAT accounts in order to obtain the details required for checks and the VAT return.
With Banana Accounting, however, thanks to VAT Codes and the VAT Report, it is possible to obtain detailed information even when using a single VAT account.
In fact, it is possible to view:
- transactions and totals by individual VAT code
- transactions and totals by VAT rate
- transactions and totals by VAT account
- transactions and totals of VAT due and input VAT
- taxable amounts and recorded VAT amounts.
For this reason, in the standard Swiss templates of Banana Accounting, account 2201 - VAT settlement is normally used.
Using a single VAT account (2201 - VAT settlement)
If in the menu File > File and accounting properties > VAT /Sales tax the account 2201 - VAT settlement (automatic VAT account) is set as the default VAT account, it will be automatically used for all transactions containing a VAT code, both for VAT due and for input VAT.
In this case, in the VAT Codes table, column VAT account, it is not necessary to specify any VAT account.
All VAT amounts are recorded in the account 2201 - VAT settlement
- in Debit, input VAT amounts on purchases are recorded;
- in Credit, VAT amounts due on sales are recorded.
The account balance therefore represents the VAT amount to be paid to the tax authority or the VAT credit to be recovered.
Using specific VAT accounts
If you wish to use specific VAT accounts, you can associate a different VAT account with each VAT code.
For example, in Swiss charts of accounts it is common to use:
- accounts 1170 and 1171 for input VAT
- account 2200 for VAT due
- additional accounts for particular categories of VAT transactions.
To use specific VAT accounts, you must:
- add the desired VAT accounts to the chart of accounts (for example accounts 1170 and 1171 for input VAT);
- leave the Automatic VAT account field empty in the File and accounting properties > VAT/Sales tax (File menu)
- specify in the VAT Codes table, VAT account column, the VAT account to be used for each code.
In this way, VAT amounts will be automatically recorded in the accounts specified for each VAT code, instead of in a single automatic VAT account.
Advantages of using the automatic VAT account
After years of experience and user support, we have found that using a single VAT account is often the most intuitive solution.
Unlike many traditional accounting programs, Banana Accounting allows you to obtain all this information directly from VAT Codes and the VAT Report, while at the same time maintaining a simpler and more orderly chart of accounts.
The main advantages are:
- a simpler and more orderly chart of accounts;
- an easier-to-read balance sheet;
- simplified management of transactions with different VAT rates;
- immediate view of the overall VAT balance;
- the possibility to check all VAT transactions in a single account card.
In the VAT account card, all VAT transactions are visible, both in Debit and in Credit.

When to use specific VAT accounts
In Banana Accounting, thanks to VAT Codes and the VAT Report, in most cases it is not necessary to use separate VAT accounts, as all the information required for VAT control and analysis is already available through the program reports.
In some countries or in certain organisations, however, it is common practice to use separate VAT accounts for each type of transaction. For example, in Germany it is common to use separate accounts for:
- VAT on sales
- VAT on purchases
- intra-community transactions
- other specific types of VAT transactions.
In these cases, the VAT return can be prepared directly using the balances of the individual VAT account cards.
To ensure compatibility with these operational requirements and different accounting practices, Banana Accounting allows you to associate a specific VAT account with each VAT code.
Closing VAT accounts at the end of the period
At the end of each VAT period, it is advisable to close the VAT accounts and transfer the balance to a single summary account.
This operation allows you to:
- To accurately determine the VAT amount to be paid or reclaimed
- keep the different VAT periods separate
- facilitate checks and the identification of any errors
- start the new period with a VAT balance of zero.
In templates that use account 2201 - VAT Report, the periodic closing allows the VAT situation to remain clear and easily verifiable at all times.
For more details, see the Periodic VAT Closing and VAT Payment page.
Transactions with VAT
In Banana Accounting, in the Charts of Accounts prepared for Switzerland, the VAT accounts and the VAT rates currently in force are already set. In particular, the 2201 "VAT according to VAT report" account (VAT account with automatic splitting) is set both in the Chart of accounts and in the File properties (basic data) → VAT section. In this case no VAT account needs to be inserted in the VAT Codes Table.
In case you are not using the Charts of accounts already available in Banana, make sure that the necessary VAT accounts are present in your own Chart of accounts. Our advice is to use the 2201 "VAT according to VAT report" account (VAT account with automatic splitting) and to enter it into the File properties (basic data) → VAT section.
In the VAT codes table, there are codes for the sales, the purchases and for services rendered. When entering the transactions, use the appropriate VAT code.
The software automatically splits the VAT amounts and records them in the "VAT according to VAT report" account or in the VAT account that has been indicated by the user in the File and Accounting properties.
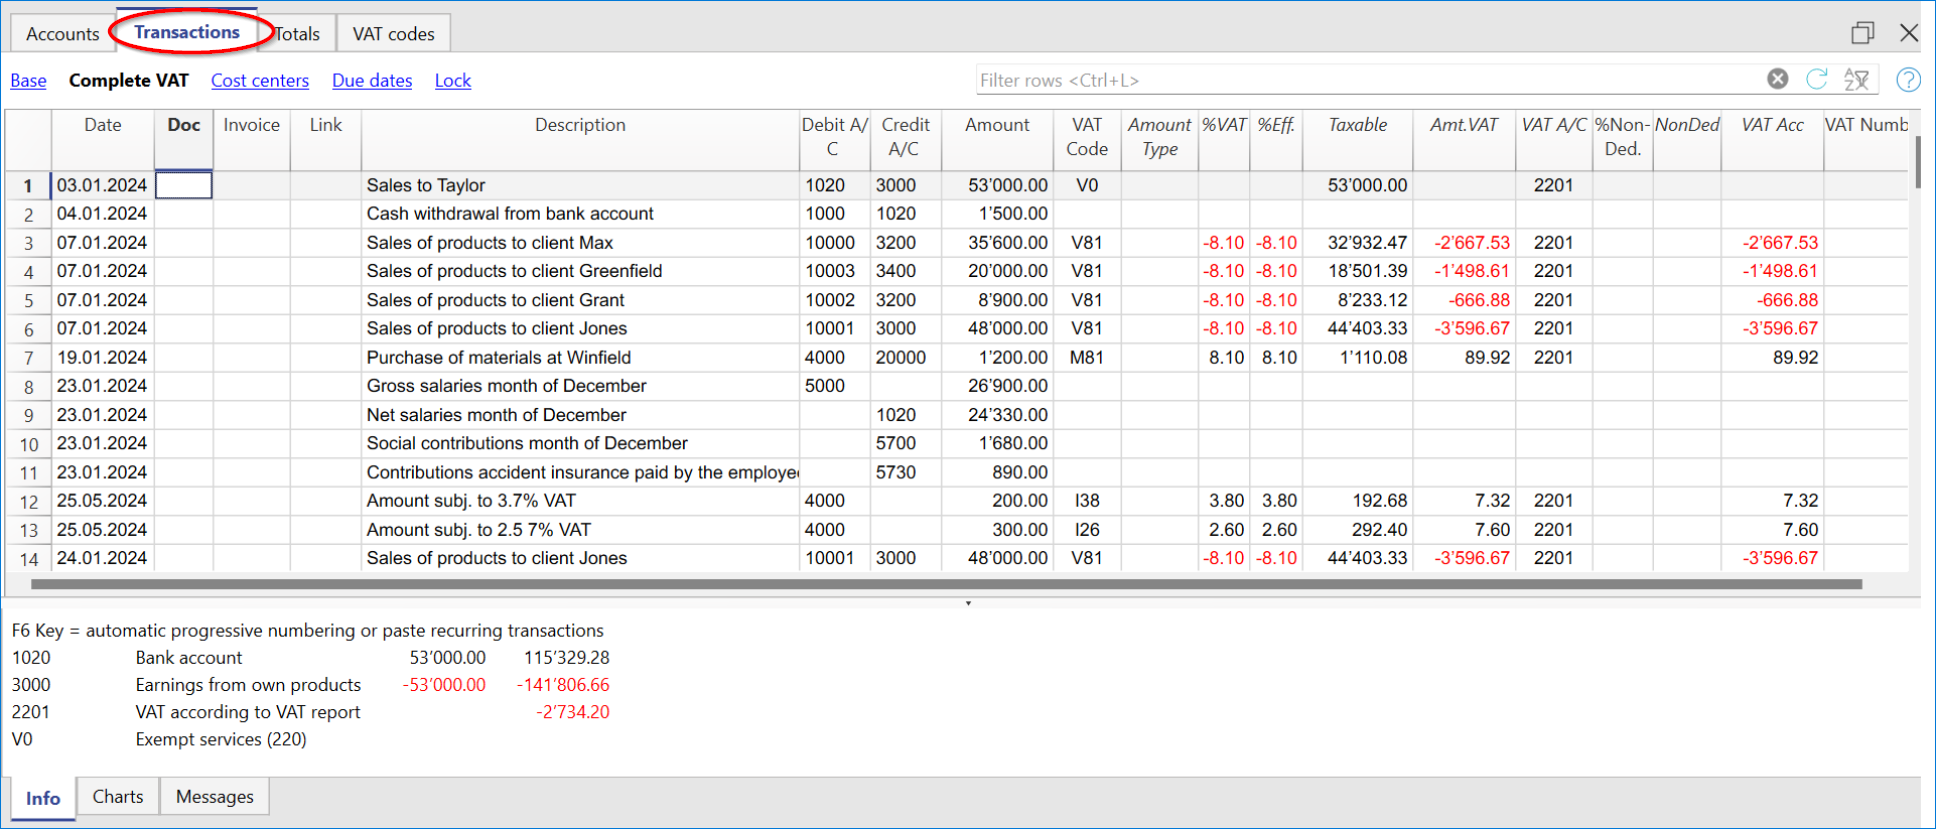
VAT columns in the Transactions table (Complete VAT view)
You can find the full explanation of the main Transactions table columns in the Columns and Views page.
In the Double-entry accounting with VAT or in the Income & Expense accounting with VAT, you will find the following VAT columns:
- VAT Code: for each transaction with VAT you need to enter one of the VAT codes from the VAT codes table. In Reverse Charge operations, two VAT codes can be used, separated by the symbol ":".
- VAT %: the program automatically enters the VAT percentage associated with the VAT code you entered. If the amount is preceded by a "+/-" sign, it is a Reverse Charge operation.
- VATExtraInfo: A code related to extra info about the VAT, to be used only in very exceptional cases.
It is possible to enter a symbol to identify specific VAT cases. The program suggests options, corresponding to the VAT Codes that start with a colon ":". - %Eff.: the program automatically enters the VAT percentage referred to the net amount (taxable amount). It is different from the percentage applied when the latter is calculated on the gross amount (balance rate).
- Taxable: once you enter the VAT code, the software automatically indicates the taxable amount (without VAT).
- VAT amount: the program automatically indicates the VAT amount.
- VAT A/C: the account where the VAT is registered is automatically indicated (for Switzerland, this is normally the 2201 "VAT according to VAT report" account) previously entered in the File Properties (basic data), VAT tab (from the File menu).
- Amount type: this is a code that indicates how the software considers the transaction amount:
- 0 (or empty cell) with VAT/sales tax, the transaction amount is VAT included.
- 1 = without VAT/Sales tax, the transaction amount is VAT excluded.
- 2 = VAT amount, the transaction amount is considered the VAT amount at 100%.
- Amount type not editable: Default mode.
- The column is protected.
- The program uses the associated value of the VAT Codes table.
- When you edit the value in the VAT Codes table and you recalculate the accounting, the program uses the new value associated with this VAT Code.
- Amount type editable: this option can be activated with the Add new functionalities command. The activation of the option cannot be undone.
- When you edit the VAT Code, the program uses the Amount type associated with this code.
- The value can be edited manually.
- When the accounting is being recalculated, the value indicated in the Transactions table is being maintained.
- Non. Ded. %: this indicates the non deductible %.
- The program uses the Non. Ded. % associated to a VAT Code that is present in the VAT Codes table.
- You can manually edit the value.
- VAT Acc.: this is the VAT amount registered in the VAT account.
It is calculated by the program according to the transaction amount, the Amount type and the non deductible percentage. - VAT number: this is the code or VAT number of your client/supplier.
When you enter a transaction with VAT, it is possible to enter the VAT number of your counterparty. If in the Accounts table, Address view, in your clients/suppliers register accounts, you enter their VAT number, this is automatically loaded in the Transactions table, in the VAT number column.
Transactions with VAT
Before entering transactions with VAT, you must keep in mind all the information on the Transactions page.
Entering a VAT transaction is very easy:
- Enter the date, document number and invoice number in the respective columns
- Enter the description, the Debit account and the Credit account
- Enter the gross amount (including VAT)
- Enter the VAT code provided for the type of transaction (purchases, sales, investments...) and present in the VAT Codes Table.
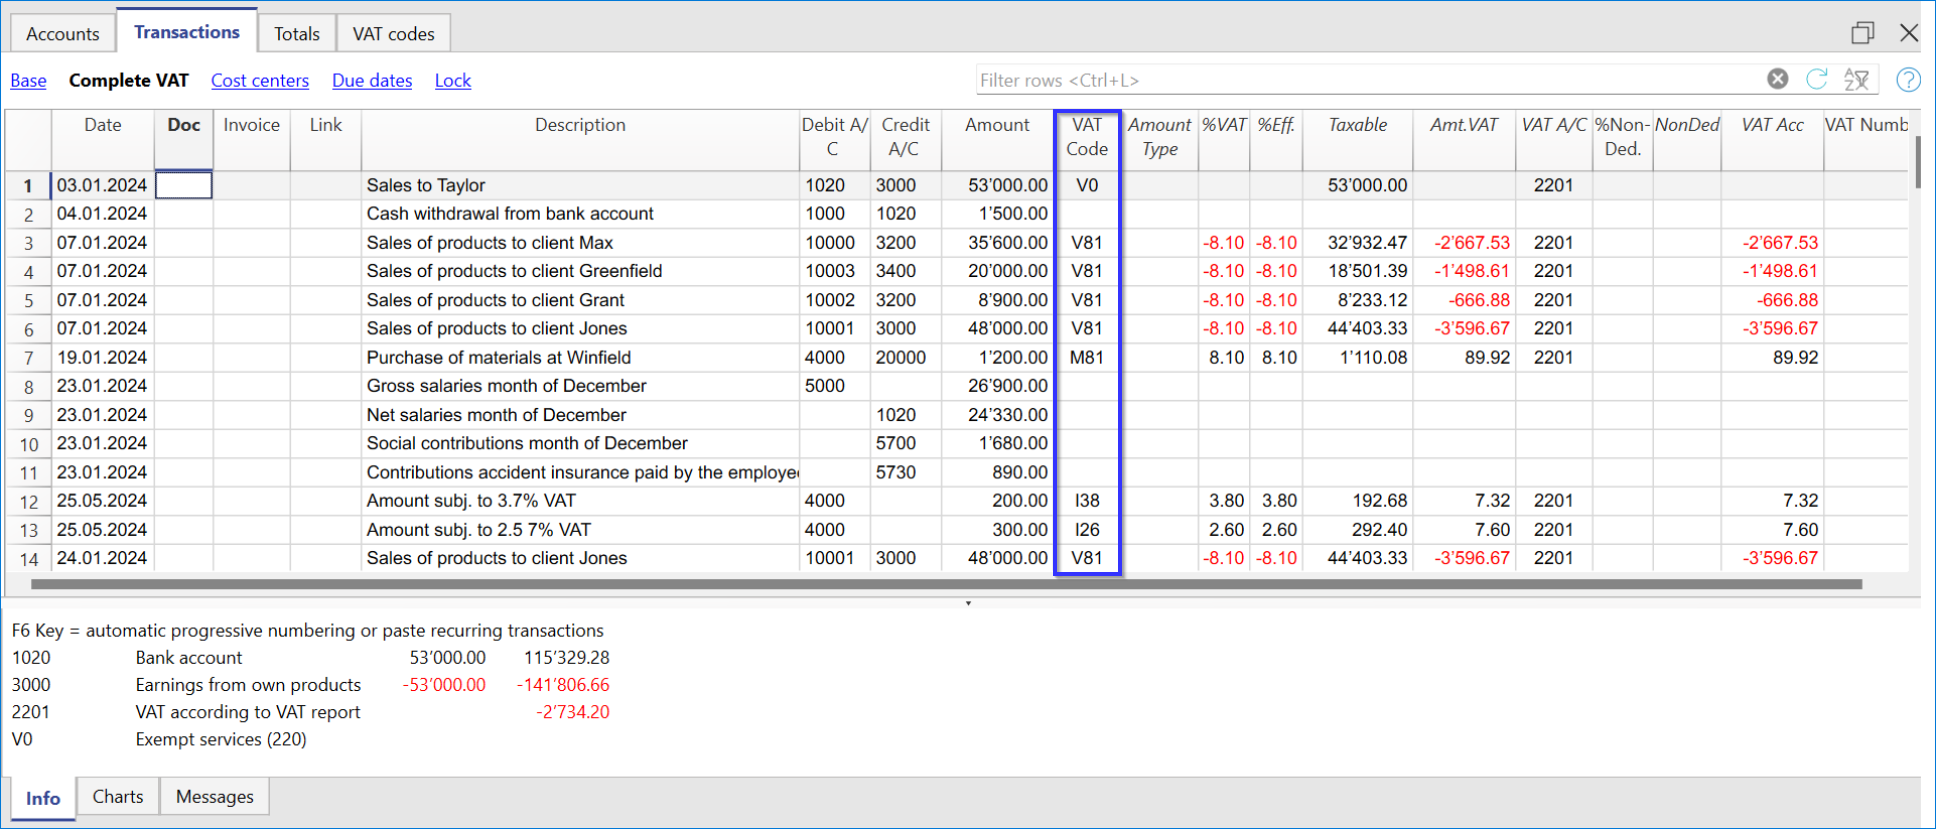
How to correct VAT transactions
In case of an error in a transaction with VAT, it is possible to correct it directly on the transaction row, provided that no VAT declaration has been submitted or no accounting lock has been executed.
If however your accounting file is locked or if you have already sent your VAT declaration, you cannot simply delete the wrong transaction, but you need to operate some cancellation-transaction and then re-enter the correct transaction.
In order to rectify VAT operation(s), you need to:
- Make a new transaction by inverting the Debit and Credit accounts used in the wrong transaction.
- Enter the same amount.
- Enter the same VAT code but preceded by the minus sign (ex.: -V81).
- Enter a new transaction with the correct accounts, amount and VAT code.
Depending on the entity of the mistake, you should consider informing your local VAT office; usually they ask you to download a specific form for correcting mistakes in the previous VAT period that you already declared.
How to only enter the VAT amount
There are cases where only the VAT amount needs to be recorded, such as when you receive compensation from the car insurance.
In these cases, you can proceed as follows:
- Enter the date, document number and description in the appropriate columns.
- In the Credit A/C column enter the account used to pay the VAT amount (the Debit A/C column remains empty).
- In the Amount column enter the VAT amount to be paid.
- In the VAT code column enter the VAT code I81-2 (the code that refers to 100% amount VAT).
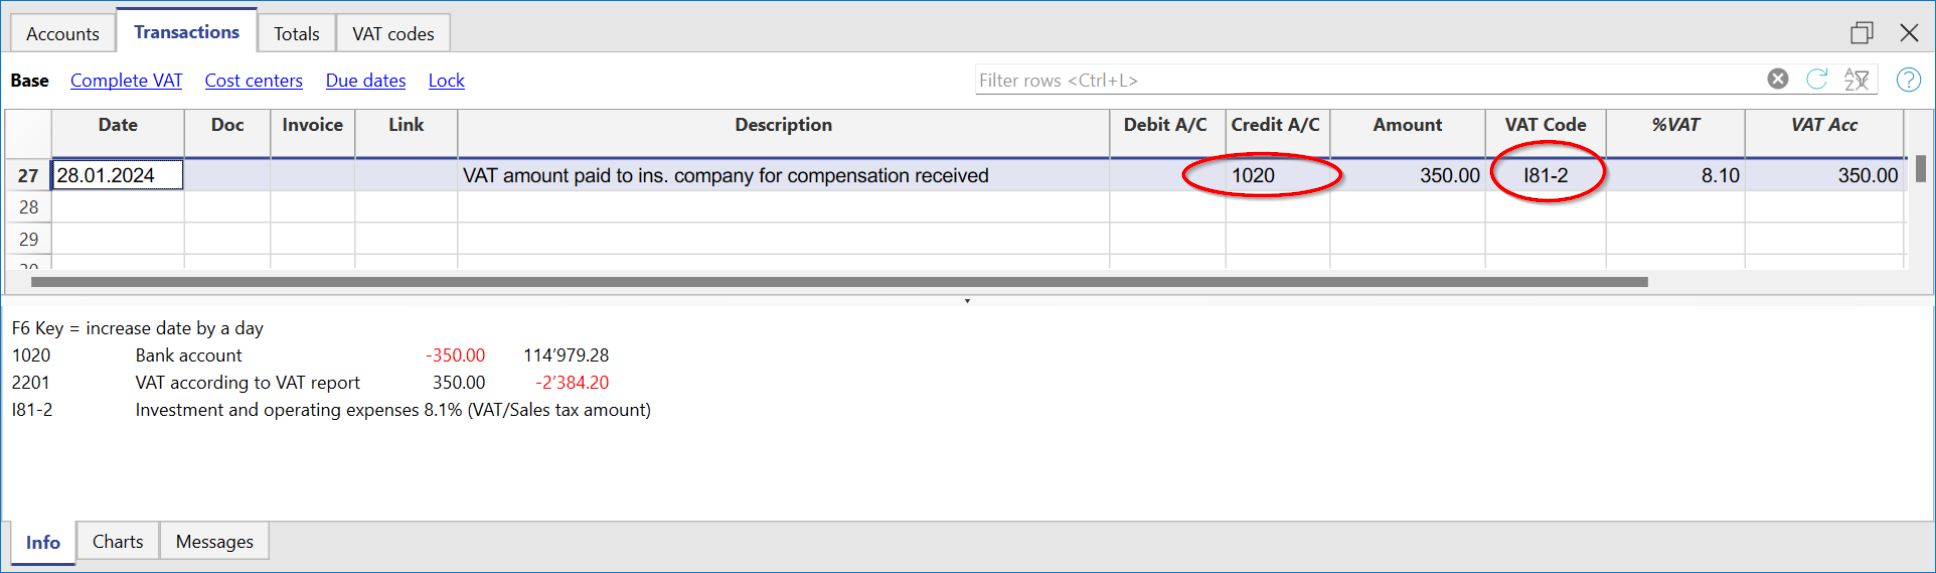
Transactions with different VAT rates
There may be cases in which the total amount is composed of several taxable amounts with different VAT rates. In this case the transaction is recorded on several rows.
For the transaction, it is necessary to:
- Subdivide the overall amount into the various amounts, each of which is subject to a specific VAT rate.
- On each row, enter the amount (amount with VAT) and insert the VAT code with the specific rate.
- Once the transaction is completed, check that the sum of the single gross amounts and the VAT amounts correspond to the invoice total.
Example
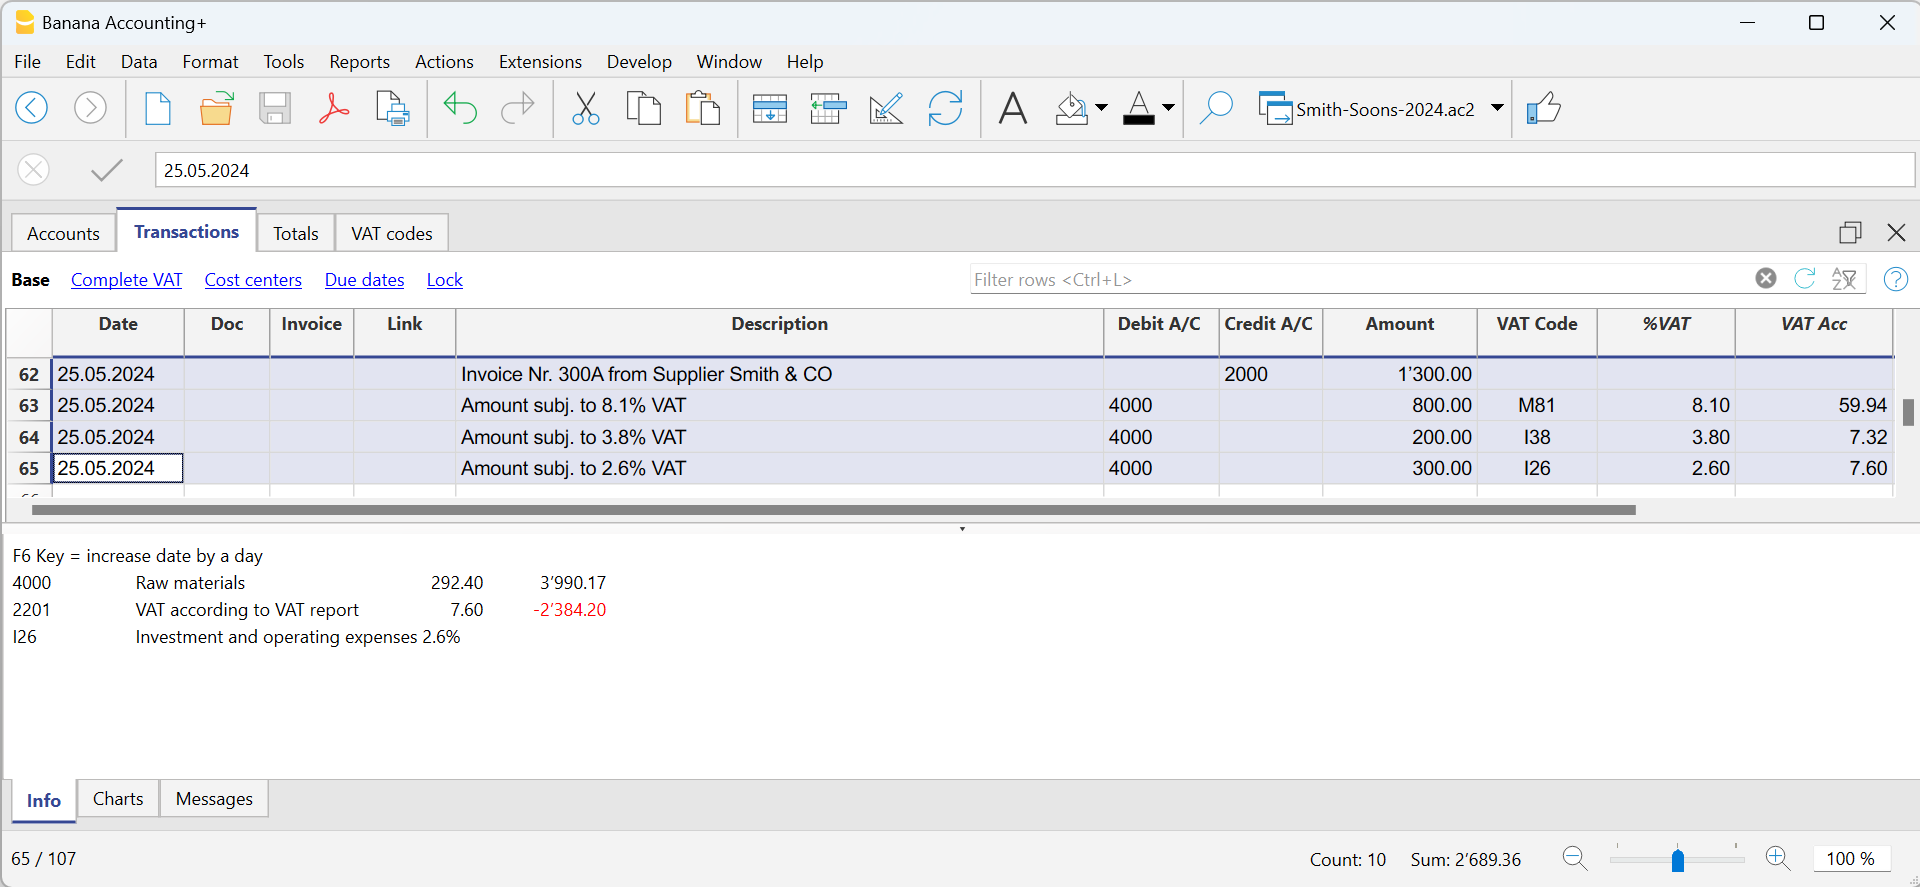
VAT EXEMPTION
When in the invoice the total amount subject to VAT is made up of a taxable part and a VAT-exempt part, it is necessary to register on more than one row as in the previous case, applying the exempt VAT code, present in the VAT Codes table.
Reversals/Credit note
When there are reversal operations for credit or debit notes, or simply to rectify previously recorded transactions whose amounts are subject to VAT, the VAT must also be reversed in the reversal transaction.
For the transaction:
- Reverse in the Debit and in the Credit column the accounts that were used in the previous transaction, to which the credit note refers.
To reverse the VAT there are two possibilities:
- Put the minus sign in front of the VAT code (e.g. -V81).
- Use one of the codes that refer to discounts, already set in the VAT Codes table.
With these procedures the VAT amount will be adjusted.
Example of a credit note on a sale
When a client finds a defect on a sold product, usually a credit note on his behalf is being issued. The credit note implies a decrease of the income and as a result a recovery of the VAT (Sales tax).
For example, we enter a sale amount of 12'000 including a 8.1% VAT. We then issue on the client's behalf a credit note of CHF 200.- for a product defect.
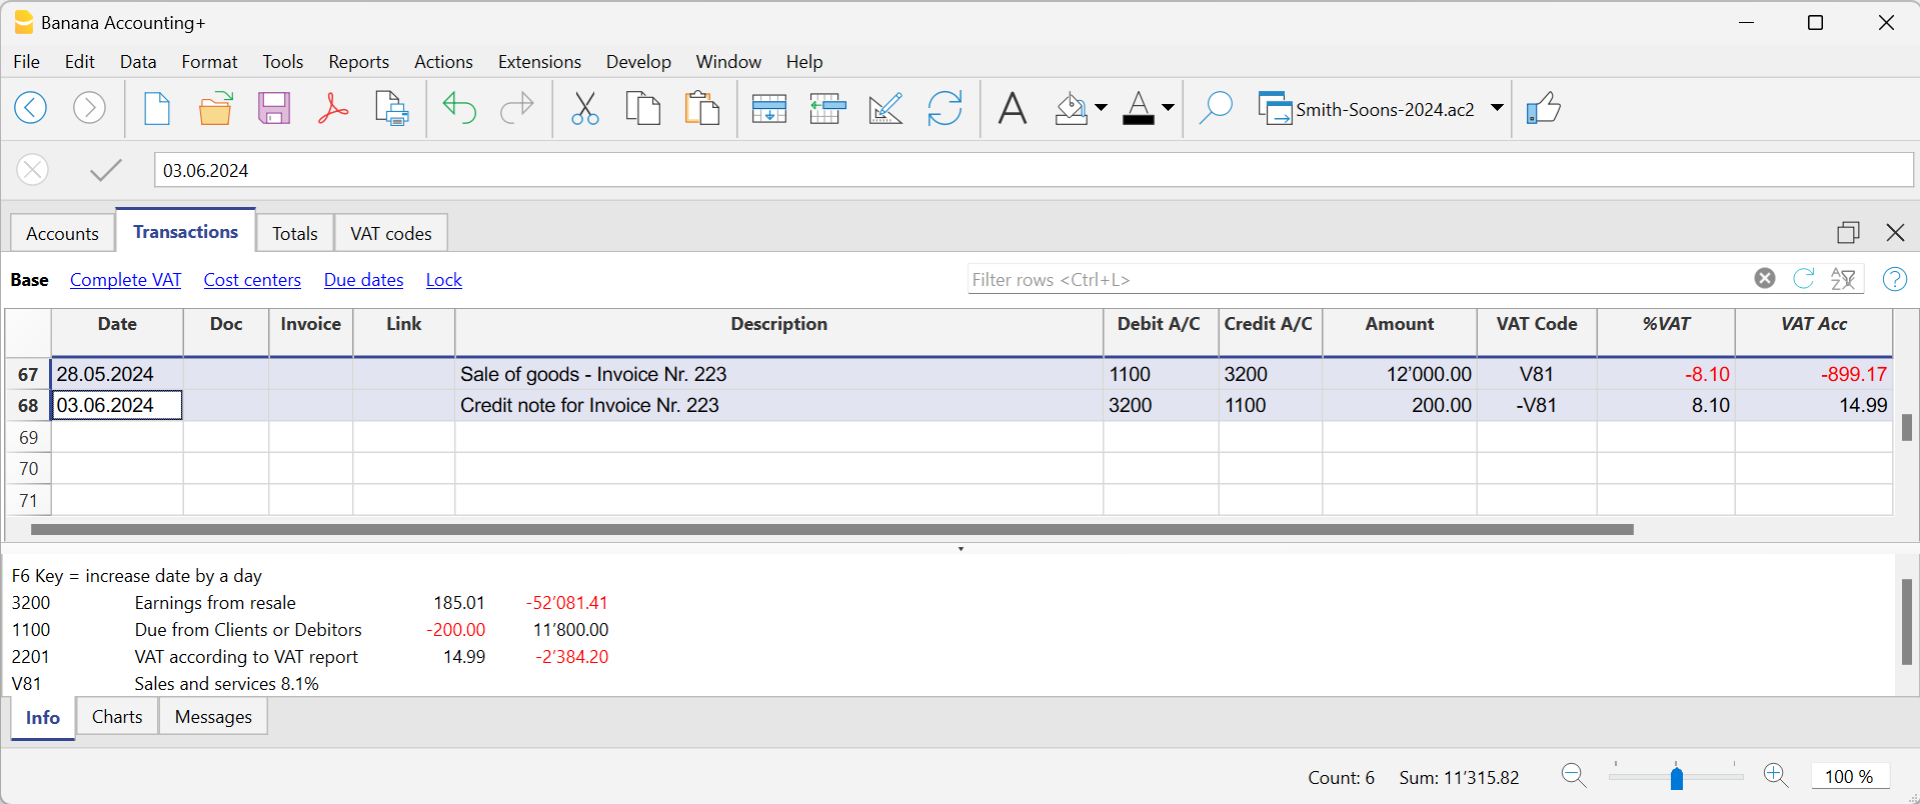
In the transaction of the credit note issued to the customer:
- The accounts of the sale, to which the credit note refers, have been reversed
- For VAT recovery on the credit note, the VAT code of the sales is recorded, preceded by the minus sign.
Example of a credit note on a purchase
When we receive a credit note from a supplier, the procedure for the transaction is similar:
- The accounts used for the purchase are reversed.
- Enter the same VAT code used for the purchase, preceded by the minus sign.
For example, we record an invoice for the purchase of goods for CHF 3'000 including a 8.1% VAT. We then receive a credit note of CHF 300.- from our supplier for a product defect.
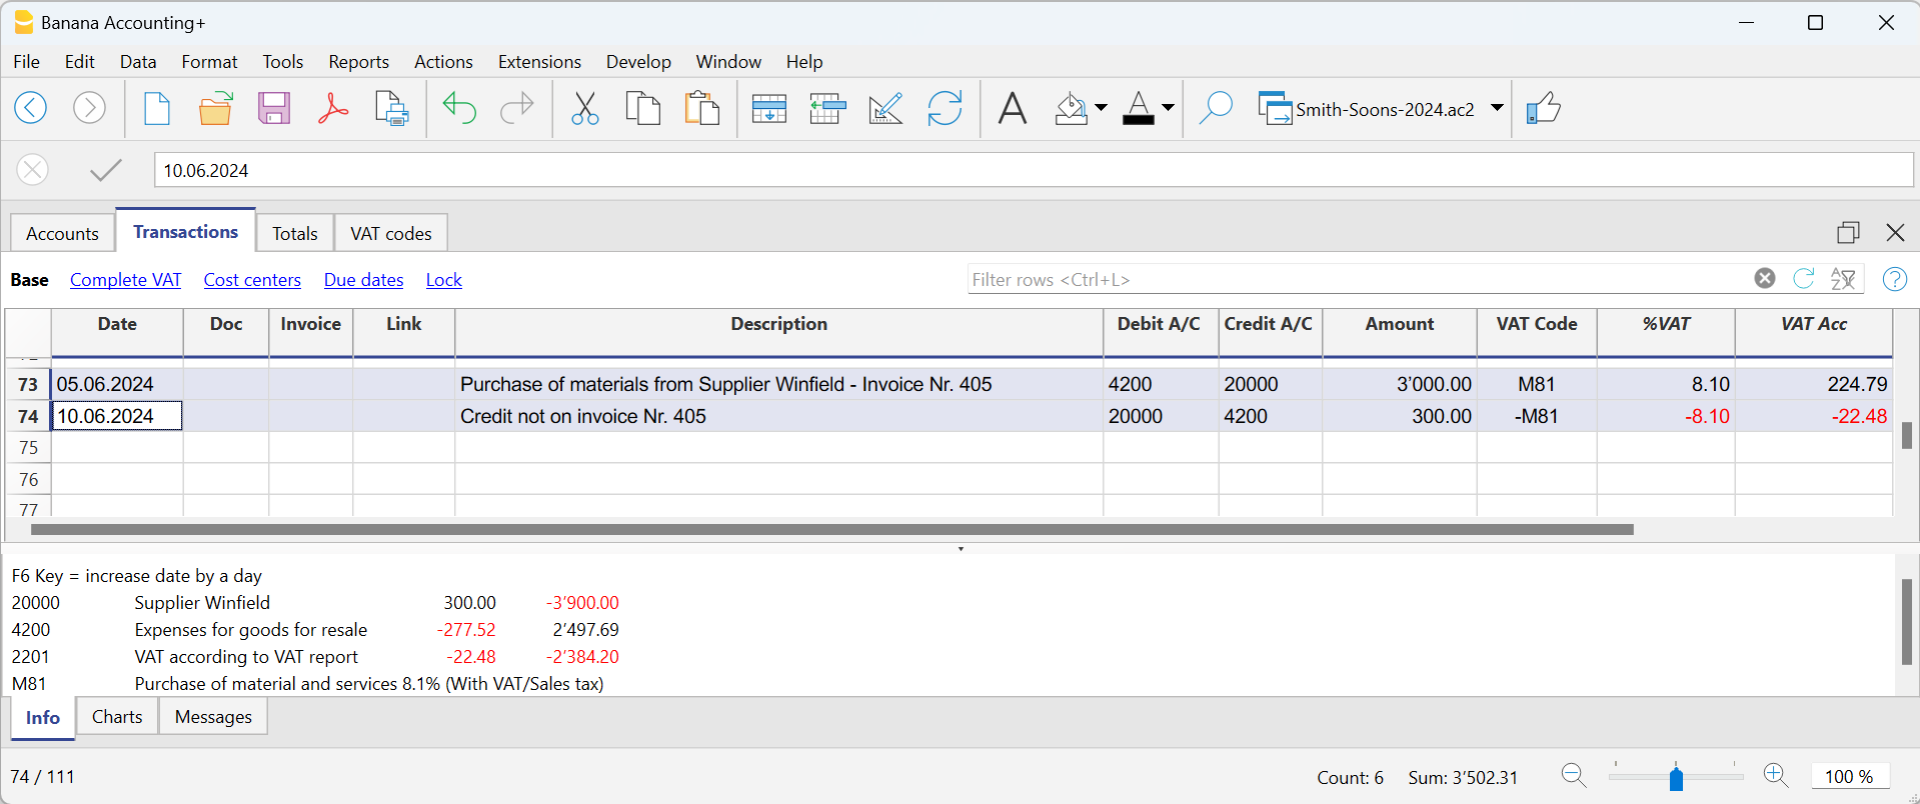
In the transaction of the credit note received from the supplier:
- The accounts of the purchase, to which the credit note refers, have been reversed.
- For VAT recovery on the credit note, the VAT code of the purchases is recorded, preceded by the minus sign.
Reverse charge: cos’è e quando si applica
Normalmente l’IVA è a carico del venditore, che la addebita in fattura e la versa all’autorità fiscale.
Con il reverse charge (o inversione contabile), questo meccanismo viene invertito: l’IVA è posta a carico dell’acquirente.
Il reverse charge non modifica l’importo dell’operazione, ma cambia il modo in cui l’IVA viene dichiarata e registrata.
Si tratta di una gestione particolare dell’IVA che richiede attenzione sia dal punto di vista fiscale sia nella registrazione contabile.
Nel reverse charge:
- il fornitore emette una fattura senza IVA
- il cliente calcola e dichiara l’IVA
- l’IVA risulta, nella maggior parte dei casi, sia a debito sia a credito
Dal punto di vista fiscale, l’IVA risulta quindi:
- dovuta
- e, se previsto dalla normativa, recuperabile
Nella maggior parte dei casi, l’effetto finale sull’IVA è neutro, ma l’operazione deve essere comunque registrata correttamente.
Quando si applica
Il reverse charge si applica principalmente quando:
- si acquistano beni o servizi all’estero
- l’operazione non è stata assoggettata all’IVA in dogana
- il fornitore è esonerato dall’applicazione dell’IVA
Oltre agli acquisti all’estero, ogni Paese prevede altri casi specifici di applicazione del reverse charge, definiti dalla propria legislazione fiscale.
Non tutte le fatture senza IVA rientrano nel reverse charge. È quindi necessario verificare, caso per caso, se l’operazione è soggetta a inversione contabile.
Logica generale di registrazione dell’IVA
Quando un’operazione è soggetta a reverse charge:
- l’IVA deve risultare come IVA dovuta
- se deducibile, deve risultare anche come IVA recuperabile
Questa logica è comune a tutti i tipi di contabilità, ma le modalità di registrazione cambiano a seconda del sistema contabile utilizzato.
Reverse charge in Banana Contabilità
In Banana, la gestione del reverse charge è facilitata dall’uso dei codici IVA già impostati nella tabella Codice IVA, che permettono di calcolare correttamente l’IVA dovuta e l’IVA recuperabile.
Nel caso in cui l'IVA può essere recuperata, nella registrazione Banana Contabilità permette di inserire un doppio codice che va a contabilizzare sia l'IVA dovuta sia l'IVA recuperabile.
Questa modalità semplifica la registrazione e riduce il rischio di errori, mantenendo al tempo stesso la correttezza fiscale.
La possibilità di registrare l'operazione soggetta al Reverse Charge, assoggettamento e recupero IVA, su di un'unica riga, è disponibile nella versione Banana Contabilità Plus.
A seconda del caso, l’operazione può essere registrata:
- con un solo codice IVA, quando l’IVA è solo dovuta
- oppure con due codici IVA, quando l’IVA è sia dovuta sia recuperabile
I dettagli operativi dipendono dal tipo di contabilità utilizzato e sono spiegati nelle sezioni dedicate.
In Banana, il reverse charge utilizza la stessa logica IVA sia nella contabilità in partita doppia sia nella contabilità Entrate/Uscite.
La differenza riguarda la rappresentazione contabile: nella partita doppia i movimenti sono registrati su conti in dare e avere, mentre nella contabilità Entrate/Uscite gli importi sono registrati nelle colonne Entrata e Uscita.
In entrambi i casi, l’effetto IVA è determinato dai codici IVA utilizzati.
Applicazione del reverse charge per nazione
L’applicazione del reverse charge dipende dalla normativa fiscale nazionale. Le regole descritte in questa pagina illustrano il principio generale; i casi concreti variano in base al Paese.
VAT registration with the Reverse Charge
VAT with the Reverse Charge
Normally VAT is applied to the seller of the goods. Reverse Charge is the term used to indicate that the VAT tax is applied to the buyer.
The Reverse Charge is used mainly when buying goods or services abroad and that have not been taxed at customs. In these cases, the exporting seller is exempted from VAT, while the importing buyer is taxed at the local rate and can possibly deduct it. In addition, there are other cases of purchases abroad subject to the Reverse Charge and each country, in its tax legislation, provides for different situations. When registering VAT with the Reverse Charge:
- The transaction must be included so that it will result as VAT due.
- If the VAT is also deductible, the deductible part of VAT must also be recorded.
Software prerequisites
The possibility of recording the transaction subject to the Reverse Charge, tax liability and VAT recovery on one single row, is available for the Banana Accounting Plus.
Reverse Charge with tax liability only
If you have to include the purchase of goods or services, but do not have the possibility to deduct VAT:
- Indicate the VAT code due to the appropriate case in the transaction.
The liability with the Reverse Charge without deduction is generally used in the case one is benefiting from a flat-rate scheme or when the type of expense is not considered deductible.
Reverse Charge with tax liability and VAT deduction
If the amount of VAT due is equal to that of the deductible VAT, the Reverse Charge can be registered on a single row, by simultaneously entering both the code for the VAT due and the code for the recoverable VAT.
- The pre-defined VAT codes are used and there is no need to change the VAT table.
- In the row of the entry with VAT Reverse Charge, enter the two predefined VAT codes in the VAT Code column, separated by a colon ":".
- The two VAT codes must be complementary in order for the result to offset one other.
- One of the two codes must be set up with VAT due and the other with recoverable VAT.
- The VAT rate and all other calculation parameters must also be identical.
- If the VAT codes do not have the same parameters, an error message will be displayed.
- The sequence of codes is not relevant, you can put one or the other first.
- When reversing an operation, the first VAT code must be preceded by the minus sign "-".
Reversal is used to cancel an incorrectly posted transaction. In this case, the same elements are kept, but the original transaction is reversed:- The VAT payable code is recorded as recoverable.
- The recoverable VAT code is posted as due.
- In the VAT columns, the amounts are preceded by the sign "+/-", which signals that the amounts offset each other for VAT purposes.
- In the account card and in the VAT summary there are separate entries for the debit and credit entries.
Example of transaction with Reverse Charge
Below are some examples of the Reverse Charge transaction inclusive of VAT due and recoverable:
- VAT included and excluding operations.
- Cancellation transactions, with VAT codes preceded by the "-" sign.
Notes: The examples in the image below are purely indicative. These codes must be adapted according to the rates in your country. Further information:
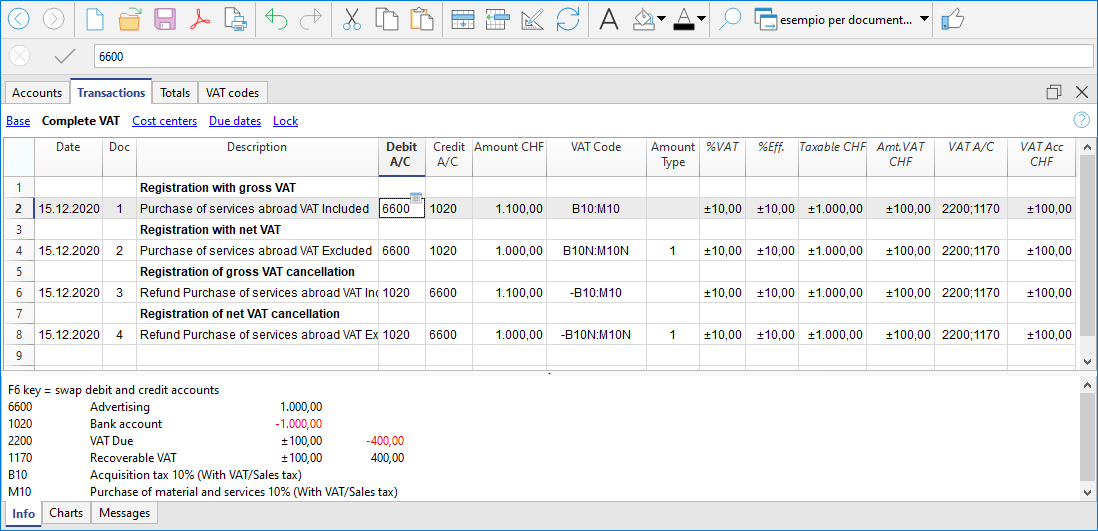
Reverse Charge with account in foreign currency
When the invoice is presented in a currency other than the accounting currency, the posting must be carried out on two lines:
- the invoice in foreign currency is entered on the first row
- the second line records the taxation and deduction of VAT, taking up the amount calculated in the accounting currency.
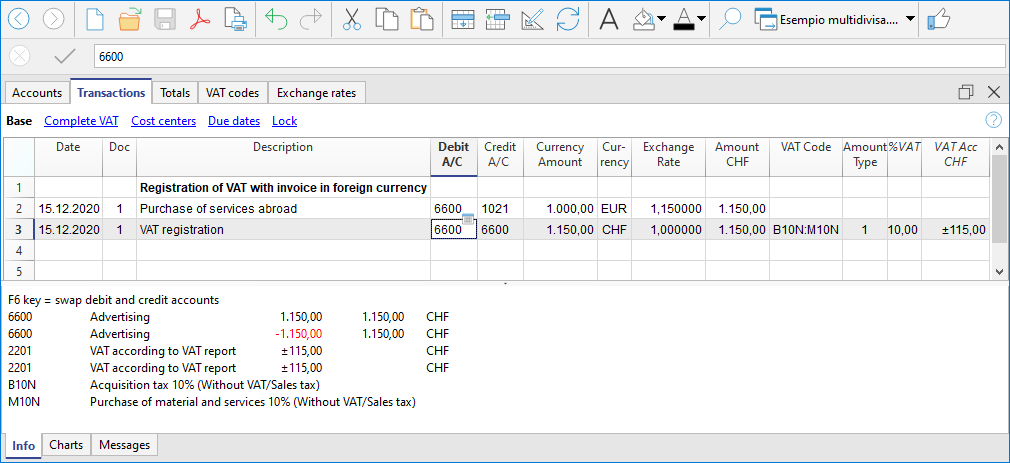
Reverse Charge at different rates
When different rates are to be considered in the taxation of the due and recoverable VAT or the VAT is partially deductible, the transaction must be made on several rows:
- On one row, enter the VAT due code (tax liability).
- On another row, the recoverable VAT code is entered.
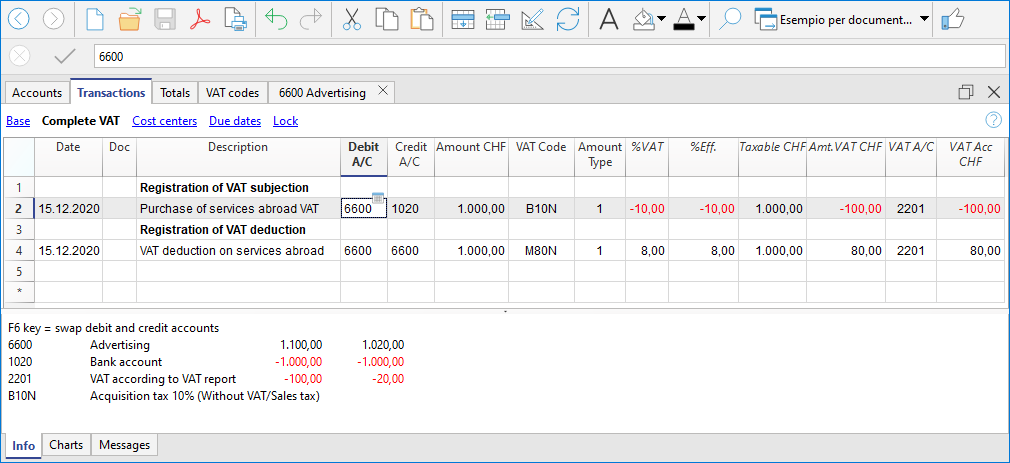
Reverse charge with the net / flat rate method (CH)
In this case, it is not possible to post the VAT deduction, as it is not possible to recover the VAT on purchases. In any case, the tax liability must be registered.
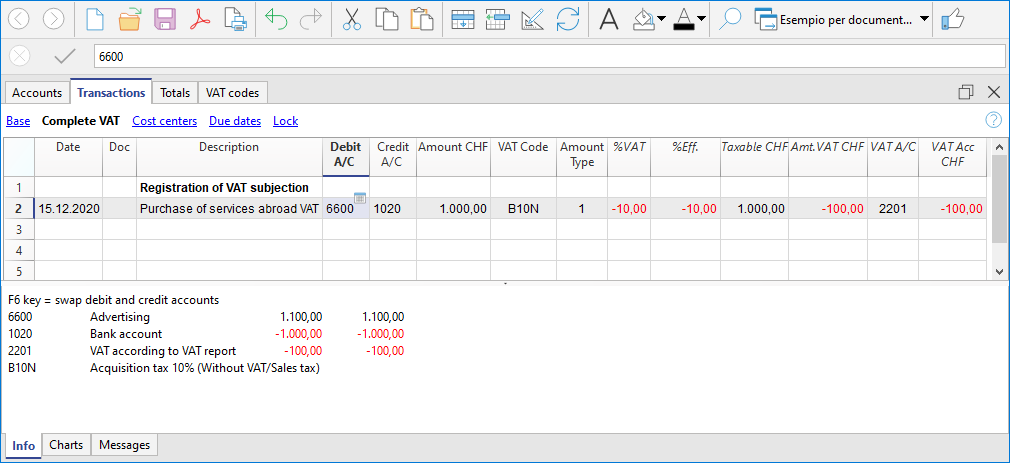
Registrazioni Reverse charge nella contabilità Entrate/Uscite
Nella contabilità Entrate/Uscite, il reverse charge viene gestito registrando correttamente l’IVA dovuta e, se prevista, l’IVA recuperabile, in modo che l’imposta risulti conforme alla normativa fiscale e correttamente esposta nei report IVA.
Anche nella contabilità Entrate/Uscite, Banana facilita la gestione del reverse charge tramite l’uso del doppio codice IVA nella stessa registrazione.
Principio contabile
Con il reverse charge:
- il fornitore non addebita l’IVA in fattura
- l’acquirente deve assoggettare l’operazione all’IVA
- se ne ha diritto, può dedurre la stessa IVA
Dal punto di vista fiscale, l’IVA deve quindi risultare:
- come IVA dovuta
- e, se deducibile, come IVA recuperabile
Quando l’IVA dovuta e l’IVA recuperabile hanno lo stesso importo, l’effetto finale sull’IVA è neutro, anche nella contabilità Entrate/Uscite.
Modalità di registrazione
Le modalità di registrazione del reverse charge dipendono dal diritto alla deduzione dell’IVA:
- reverse charge con solo assoggettamento IVA
- reverse charge con assoggettamento e deduzione IVA
Reverse charge con solo assoggettamento IVA
Se l’IVA è dovuta ma non deducibile:
- si utilizza un solo codice IVA, impostato come IVA dovuta
- l’IVA risulta come IVA da versare
- non viene registrata alcuna IVA recuperabile
Questo caso si presenta, ad esempio, quando:
- si applica un regime forfettario
- il tipo di spesa non consente la deduzione dell’IVA
Reverse charge con assoggettamento e deduzione IVA
Se l’IVA dovuta è interamente deducibile, il reverse charge può essere registrato su un’unica riga, anche nella contabilità Entrate/Uscite.
In questo caso:
- nella colonna Codice IVA si inseriscono due codici IVA
- i codici sono separati dal segno ":" (due punti)
- un codice è impostato come IVA dovuta
- l’altro come IVA recuperabile.
I due codici IVA devono essere:
- complementari
- con stessa aliquota
- con stessi parametri di calcolo
Se i parametri non coincidono, Banana visualizza un messaggio di errore.
La sequenza dei codici non è rilevante.
Effetti sulla contabilità e sui report IVA
Con questa modalità di registrazione:
- l’IVA dovuta e l’IVA recuperabile si compensano
- l’operazione risulta neutra ai fini IVA
- nei report IVA Banana evidenzia correttamente:
- l’IVA dovuta
- l’IVA recuperabile.
Questo garantisce:
- correttezza fiscale
- trasparenza nei controlli
- tracciabilità delle operazioni.
Operazioni di storno
Per annullare una registrazione di reverse charge effettuata in modo non corretto:
- si utilizza lo storno
- il primo codice IVA viene preceduto dal segno “-”
- i ruoli dei codici IVA vengono invertiti:
- l’IVA dovuta diventa recuperabile
- l’IVA recuperabile diventa dovuta
Lo storno mantiene gli stessi elementi della registrazione originale, ma ne annulla gli effetti.
Esempi e casi particolari con reverse charge
Gli esempi che seguono illustrano alcuni casi tipici di reverse charge nella contabilità Entrate/Uscite:
- operazioni con assoggettamento e deduzione IVA inclusa
- operazioni con assoggettamento e deduzione IVA esclusa
- operazioni di storno.
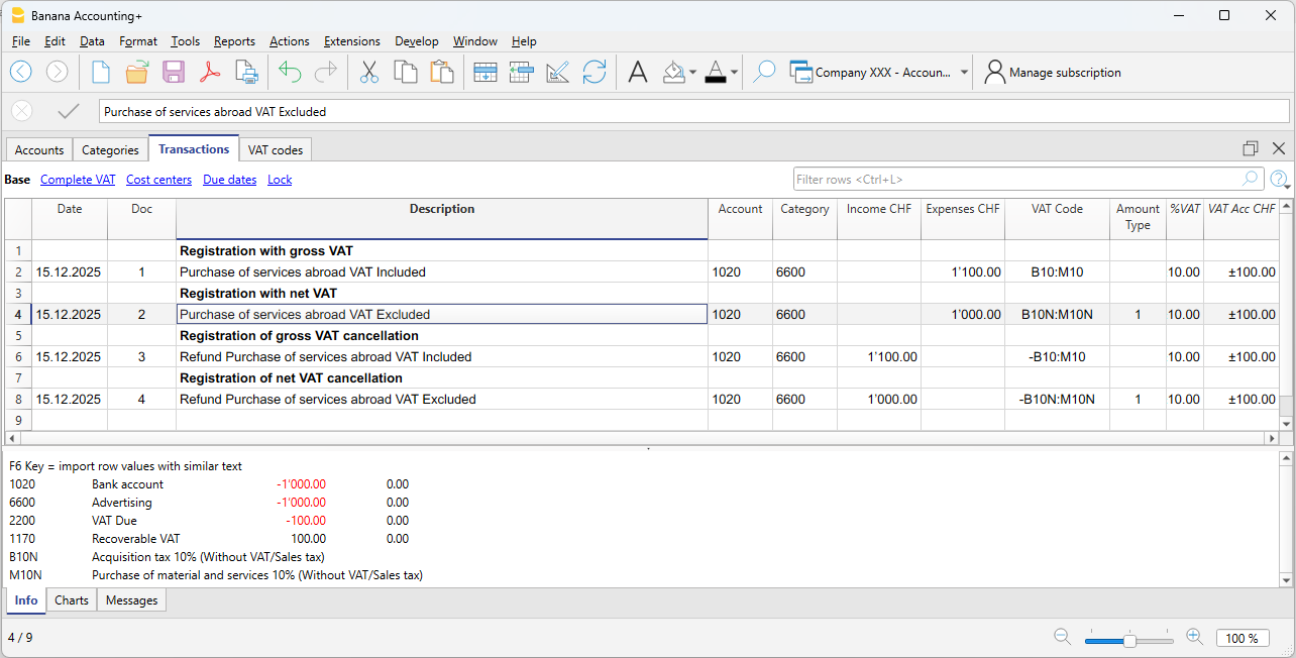
Nota
Gli esempi sono indicativi e devono essere adattati alle aliquote e alle disposizioni fiscali del proprio Paese.
In sintesi
Nella contabilità Entrate/Uscite di Banana, il reverse charge:
- non è un automatismo
- si basa sull’uso corretto dei codici IVA
- utilizza il doppio codice IVA quando l’IVA è dovuta e recuperabile
- riflette fedelmente la logica fiscale dell’operazione.
Le modalità operative sono pensate per garantire precisione contabile e chiarezza nei controlli IVA.
VAT Summary (Report)
The VAT Summary is a document or a section of an accounting ledger where transactions subject to Value Added Tax (VAT) are summarized for a specific period (monthly, quarterly, or yearly).
Main elements of the VAT summary
- VAT payable: total amount of VAT due on issued or collected invoices (sales).
- VAT receivable: total amount of VAT recoverable on received or paid invoices (purchases).
- VAT to be paid or credited: Difference between VAT due and VAT recoverable.
- If VAT payable > VAT receivable: The company must pay VAT to the State.
- If VAT receivable > VAT payable: The company has a VAT credit that can be offset or claimed for a refund.
The VAT Summary in Banana Accounting Plus is a journal that records VAT transactions and balances, based on the set parameters and selected options.
It is automatically generated by the program through the Reports > VAT Summary menu and can be saved and archived in PDF format. All transactions with a VAT code, depending on the selected options, can be broken down by account, VAT code, and percentage.
There are two main groups:
- Total Due
- Total Recoverable
The difference between these two totals results in the VAT to be paid or recovered with respect to the FTA (Federal Tax Administration).
Below is an example of a VAT summary table for the first quarter of 2025:
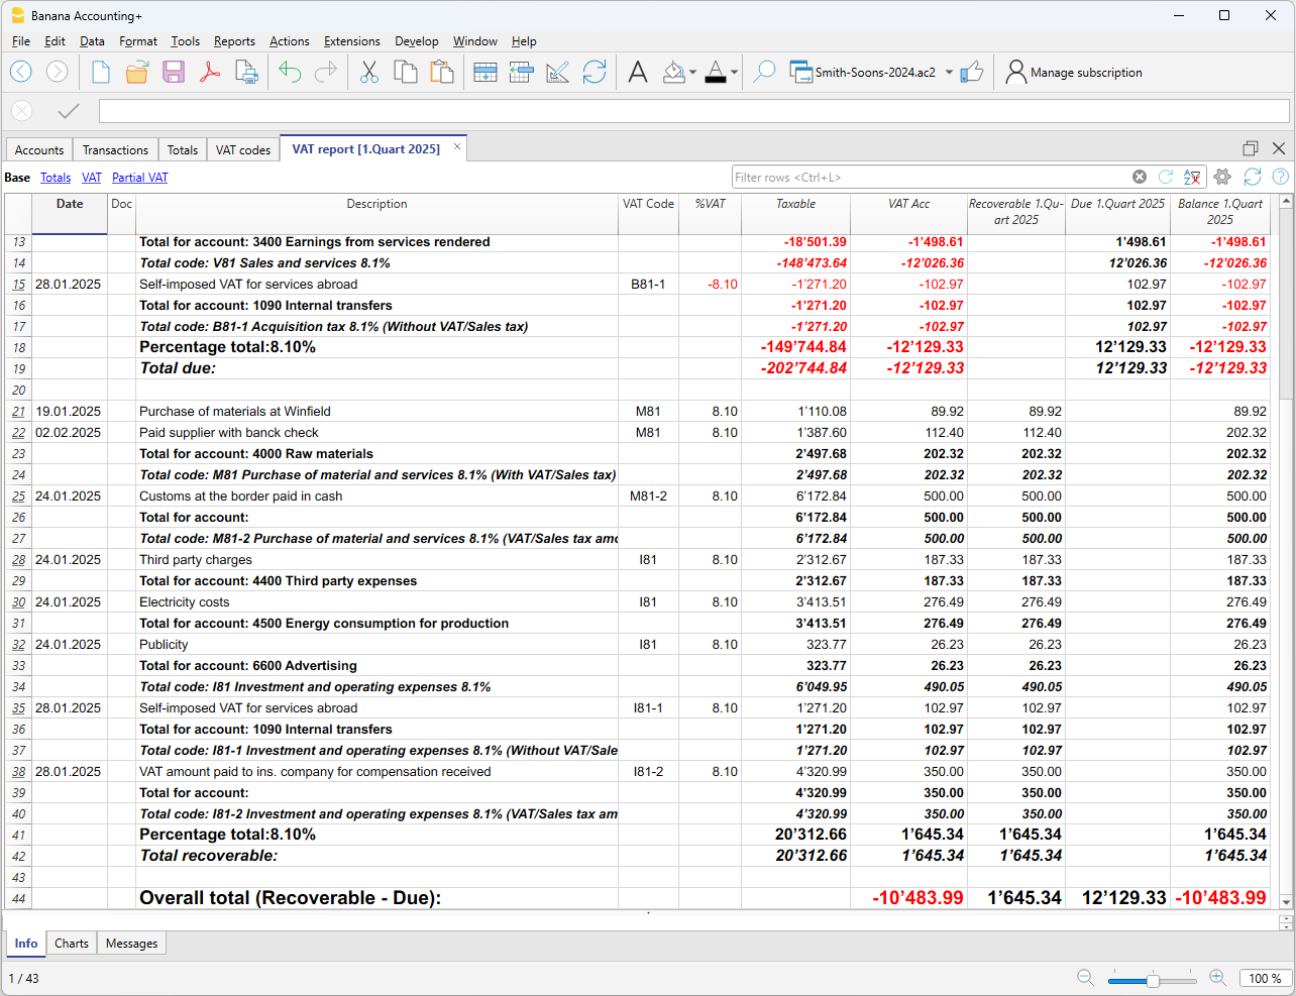
For users who do not wish to use automated solutions for managing and submitting VAT data online, the VAT Summary is essential for calculating the VAT amounts to be manually entered into the Swiss paper VAT return or the FTA online portal.
If you wish to have a fully automated Swiss VAT return and electronic VAT data transmission, we recommend using the new VAT extensions, available in the Advanced plan of Banana Accounting Plus.
Comparison between VAT summary and VAT extension
To better understand the differences between the VAT Summary and the VAT Extension, below are their main features:
VAT Summary
- Available in all plans of Banana Accounting Plus, in all accounting applications with VAT management.
- It is an integral part of accounting because it represents a ledger where all VAT transactions are recorded.
- It is particularly important as it provides details that allow monitoring of sales.
- Serves as a basis for manually preparing the VAT declaration and settlement.
- It is a support tool for auditors and tax inspections, facilitating the verification of VAT records.
- In case of tax audits, it provides all the details necessary to verify VAT transactions.
- Does not allow automatic preparation of the VAT form. Everything must be manually reported.
- The user must identify and manually sum the amounts to be reported in the various sections of the VAT return.
- Does not provide automatic submission of data to the Federal Tax Administration (FTA).
VAT Extension
- Available only with the Advanced plan of Banana Accounting Plus.
- A set of advanced features to automate VAT management and data submission to the FTA.
- Filters, calculates, and automatically fills in VAT amounts in the correct sections of the VAT return.
- Always performs calculations according to predefined rules, reducing the risk of errors.
- Automatically generates an XML file for electronic submission of VAT data to the FTA portal.
- Creates a PDF file with a facsimile of the VAT return, facilitating documentation and archiving.
At the end of the return, there is a section where any calculation and rounding differences are reported.
Thanks to the VAT Extension, VAT management becomes simpler, faster, and free from manual errors, improving administrative efficiency.
The Advanced plan includes the two VAT calculation and reporting methods:
The VAT summery dialog
The VAT report is obtained by clicking on the menu Reports > VAT report

When activated, the following options allow you to include the following data in the VAT report:
Include movements
All transactions with VAT are included.
Include totals for accounts
The totals of transactions with VAT are included, grouped by single account.
Include totals by codes
The totals of transactions with VAT are included, grouped by single VAT code.
Include totals by percentages
The totals of transactions with VAT for each individual rate are included.
Include unused codes
Also included are the unused codes present in the VAT Codes table.
Use own grouping (group and Gr)
Transactions with VAT are grouped according to the grouping of the VAT Codes table.
Order registration by
This function allows you to sort the recordings based on the selected option (date, doc.,
description, etc ....).
Partial Report
By specifying a code or a group and checking the appropriate boxes, the total of transactions with VAT is obtained:
- just the code indicated (by selecting from the list)
- just the indicated group (by selecting from the list).
Other sections
Information for the other sections is available on the following web pages:
VAT Report / transactions with totals by code
The overall total in the last row of the VAT report has to correspond with the amount for the end of period of the Automatic VAT account, Balance column, on the condition that both of them refer to the same period.
The data of the VAT report can also be transferred to and elaborated by other programs (f.i. Excel, XSLT) and be presented in formats that are similar to the forms of the tax authority
For Switzerland, one can automatically obtain a document similar to the form that has to be sent to the VAT office. This form shows the amount to enter for each number. Please consult (in German, French, or Italian) Swiss VAT Report.
Periodic VAT return and payment
In VAT management, each country requires specific VAT accounts within the chart of accounts. These accounts are used to record and manage input and output VAT:
- VAT payable – Account where VAT amounts related to sales and services are recorded.
- VAT receivable – Account where VAT amounts on purchases of goods and services are recorded.
- VAT payment account – Account where, at the end of the period, the balances of VAT payable and VAT receivable are transferred.
The account balance represents the VAT to be paid to the tax authorities or the credit to be received. This account is cleared once the VAT payment is made.
In Banana Accounting, to manage VAT, you must choose an accounting model with VAT that already includes the following settings:
- In the Banana chart of accounts, the VAT accounts are already set up according to the country
- The VAT Codes table is already prepared with country-specific VAT codes
- In the menu File > File properties, basic data > VAT section, the two VAT accounts where VAT is automatically recorded are set, one VAT payable account and one VAT receivable account.
- You can also set only one VAT account. This is used for both VAT payable and VAT receivable.
- In the VAT Codes table, you can set a specific VAT account for a single VAT code.
- If these settings are missing, it is possible to:
- Add an additional VAT account in the chart of accounts, named Automatic VAT account.
- Set the automatic VAT account as default by going to File > File properties, basic data > VAT section.
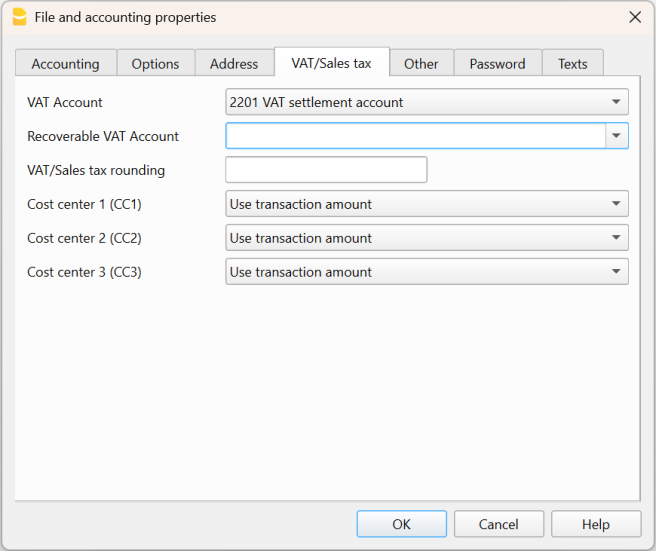
How to automatically clear VAT accounts at the end of the period
To better understand how the automatic VAT account is used, let’s look at a practical example.
Note: the VAT account numbers shown in the following example refer to the numbering used in Switzerland. In your own chart of accounts, you must adapt the account numbers according to your country.
- VAT account 2201 – Represents the automatic VAT account.
- VAT account 2200 – Represents the VAT payment account.
At the end of the period, to clear the balance of the automatic VAT account, the VAT amount recorded automatically must be transferred to the VAT payment account. This step allows you to determine the VAT to be paid or the possible VAT credit, simplifying accounting management.
In our example shown in the image, at the end of the period, scheduled for VAT submission and payment, the balance of the automatic VAT account shows a balance of 10,995.92.

The balance of account 2201 VAT Report (automatic VAT account) must be cleared with a reversal entry by entering:
- In the Debit column, account 2201 VAT report (automatic VAT account)
- In the Credit column, account 2200 VAT due (VAT payment account).
This entry is made in this way if there is an amount owed to the tax authorities. If there is a VAT credit, the VAT account transactions are reversed.
This operation results in:
- Clearing of the balance in account 2201, VAT Report (automatic VAT account).
- Transferring the VAT balance to the VAT due account (VAT payment account).

Payment of the VAT due account balance
When the VAT amount is paid to the tax authorities, the balance of the VAT due account is cleared.
For the entry:
- Enter the date, document number, and description in the respective columns.
- In the Debit column, enter the VAT Due account.
- In the Credit column, enter the liquidity account.
- In the Amount column, enter the VAT amount paid.
With this system, it is possible to monitor the balance of each quarter, and in case of errors, it is possible to identify in which period the balance no longer matches.
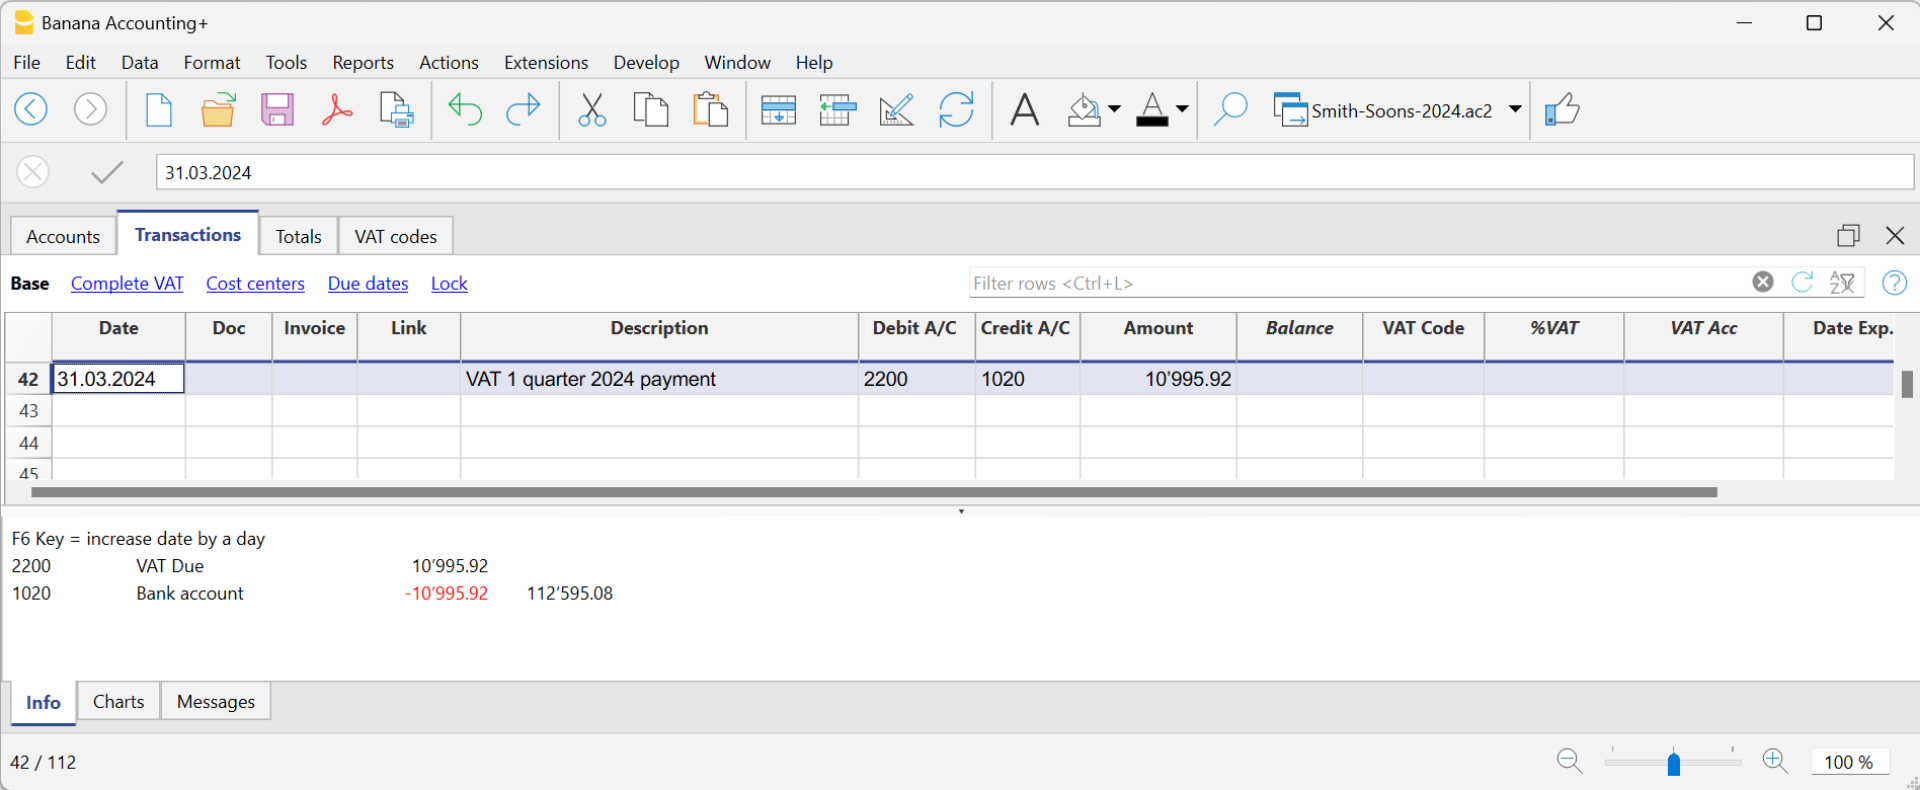
Ledger of account 2200 VAT due after recording the payment

Reconciliation of turnover with VAT returns
Importación y automatización
Las funciones de importación y automatización de Banana Accounting le permiten integrar fácilmente los datos de sus extractos bancarios y automatizar sus transacciones.
Estas herramientas simplifican la gestión diaria, reducen los errores y mejoran la eficiencia del trabajo contable.
Gracias a estas funciones, usted puede:
- Ahorrar tiempo importando automáticamente transacciones y datos;
- Reducir errores de contabilización gracias a las reglas de automatización;
- Garantizar el equilibrio de las transacciones mediante la cuenta de transferencia;
- Mantener su contabilidad siempre actualizada;
- Trabajar más rápido, con mayor precisión y de forma más integrada.
Importar en la contabilidad
La función Importar en la contabilidad le permite insertar automáticamente transacciones, contactos u otros datos desde archivos externos en su archivo contable.
Puede importar transacciones desde extractos bancarios, programas de facturación o hojas de cálculo, eligiendo el formato más adecuado (CSV, Excel, MT940, ISO 20022, etc.).
Durante el proceso de importación, Banana asocia los datos con las cuentas correctas, simplificando enormemente la contabilización de las transacciones.
Automatización
Las funciones de Automatización le permiten acelerar los flujos de trabajo repetitivos o complejos.
Puede definir Reglas de Importación, crear extensiones personalizadas o utilizar scripts que realicen automáticamente acciones específicas como actualizar tablas, importar datos o generar informes.
La automatización le permite mantener su contabilidad actualizada de forma rápida y precisa, con una intervención manual mínima.
La cuenta de transferencia en las importaciones
Durante la importación de transacciones, la cuenta de transferencia actúa como una cuenta temporal para garantizar el equilibrio de los asientos. Al importar asientos de transferencia desde diferentes cuentas bancarias, para evitar registrar una transferencia dos veces al importar datos de varios bancos, el uso de la cuenta de transferencia como cuenta contrapartida asegura que los saldos sean correctos.
Es un método útil para verificar y equilibrar correctamente las transacciones importadas.
Importar datos de otros programas
La función Importar datos de otros programas le permite importar archivos contables completos desde otros programas o versiones anteriores de Banana.
Puede transferir fácilmente el plan de cuentas, los saldos iniciales, las transacciones y los contactos, manteniendo la continuidad en su trabajo. Puede importar datos usando varios formatos, como .Txt, Excel, CSV, etc.
Banana también incluye extensiones que le permiten importar datos desde otros programas, tales como:
Comando Importar en la contabilidad
El comando para la importación se activa desde el menú Acciones > Importar en la contabilidad y permite importar datos desde archivos en las siguientes tablas:
- Registros - Movimientos bancarios
Para importar extractos bancarios en la tabla Registros. - Registros - Movimientos genéricos
Para importar movimientos en la tabla Registros. - Cuentas
Para importar cuentas en la tabla Cuentas. - Códigos IVA
Para importar códigos de IVA en la tabla Códigos IVA. - Cambios
Para importar tipos de cambio en la tabla Cambios. - Archivo
Importa los datos en varias tablas y también en las Propiedades del archivo de contabilidad. Este tipo de importación se usa, por ejemplo, para la conversión del plan contable.
Para recuperar datos de otros programas, consulta la página Recuperar datos de otros programas.
Procedimiento para la importación
- Elige la tabla de destino de los datos.
- Elige el tipo de archivo a importar.
- Indica el nombre del archivo.
- Elige los movimientos a importar.
Formatos de importación
Dependiendo del tipo de tabla de destino, hay disponibles diferentes formatos de importación.
- Importación desde otros archivos de Banana Contabilidad (.ac2)
Diseñados para convertir datos desde archivos. - Archivos de texto con encabezado (CSV/TXT)
Para archivos creados que exportan los datos en el formato requerido por Banana Contabilidad.
Las indicaciones técnicas sobre cómo preparar estos archivos están disponibles en inglés. - Formatos de archivo predefinidos (genéricos)
ISO 20022 (genérico). - Importación mediante una extensión de importación
Generalmente para extractos bancarios.
La extensión de importación es un programa adicional de Banana Contabilidad que convierte los datos desde un formato específico.
El usuario debe instalar la extensión correspondiente.
Si se necesita importar desde otros tipos de archivo no incluidos en la lista, se puede desarrollar una Extensión Banana de importación específica.

Parámetros de importación
Nombre del archivo:
- Indica el nombre del archivo del cual se deben importar los datos.
- Para ciertos tipos de importación (por ejemplo, extractos bancarios)
- También puedes indicar varios archivos a la vez, seleccionándolos con el cuadro de diálogo o escribiéndolos separados por punto y coma ";".
- Puedes indicar un archivo zip que contenga varios archivos de importación.
- Si importas varios archivos, todos deben ser del mismo tipo.
Importar datos desde el portapapeles (Excel)
Con esta opción los datos no se leen desde un archivo, sino desde el portapapeles.
Se utiliza para importar datos desde archivos que Banana no puede leer directamente, como por ejemplo un extracto bancario disponible solo en Excel, o proveniente de otro programa.
La ventaja de importar los datos en lugar de utilizar simplemente copiar y pegar es que los datos son convertidos por el programa de importación y completados automáticamente.
Procede de la siguiente manera:
- Abre el archivo Excel que contiene los datos.
- Selecciona los datos a importar, incluidas posibles filas de encabezado.
- Ejecuta el comando Copiar (Ctrl+C).
Esta opción solo se muestra para ciertos tipos de importación.
UTF-8
Marca esta casilla si los datos a importar están en formato UTF-8.
Esta opción se muestra solo para ciertos tipos de importación.
Gestión de Extensiones...
Este comando lleva al diálogo Administrar Extensiones.
Úsalo para:
- Buscar, añadir o eliminar una extensión de importación.
- Cambiar los parámetros de la extensión.
Usa también este comando para cambiar la configuración de la extensión.
Configuración
El botón permite cambiar la configuración de la extensión.
El botón es visible en la versión 10.1 y solo si la extensión permite establecer parámetros.
Botón OK
Inicia la importación.
Informe de errores
Si durante la ejecución de una importación se generan errores, lo primero que debes hacer es actualizar las Extensiones de Importación.
Si los errores persisten, envíanos un comentario, puede que el formato del archivo haya sido actualizado por el banco o institución de origen, y en ese caso también actualizaremos nuestro filtro de importación.
Importa tus movimientos a Banana Contabilidad+
En esta página se trata la importación de transacciones desde extractos bancarios en Banana Contabilidad Plus. Es una de las funciones más utilizadas y útiles, que permite automatizar la introducción de transacciones en la tabla de Registros.
Puede importar en Banana Contabilidad Plus el archivo de transacciones bancarias, tanto de entrada como de salida, desde su cuenta. Es necesario indicar el número de cuenta y la contrapartida.
También es posible automatizar la importación mediante el uso de las Reglas de autocompletado (plan Advanced).
En cambio, para la importación de archivos con otros tipos de transacciones, por ejemplo importaciones desde otro archivo de contabilidad en partida doble de Banana, consulte la página Importación de transacciones genéricas. Para este tipo de archivos no es posible aplicar las reglas de autocompletado.
Procedimiento para la importación
- En el menú Acciones > Importar en contabilidad > en el campo Importar seleccione Registros
- Elija el tipo de archivo que desea importar.
Vea las explicaciones que siguen. - Con el botón Examinar, seleccione uno o más archivos desde los cuales desea importar las transacciones.
- Configure los parámetros según sea necesario.
Vea también: Importar en contabilidad.
Pasos siguientes
Una vez confirmado mediante el botón OK, los datos se leen y se muestran los siguientes diálogos:
- Diálogo importar transacciones
Donde se deben indicar las instrucciones para completar las filas importadas. - Aplicar reglas (solo plan Advanced)
En el momento de la importación se pueden guardar reglas para que el programa complete automáticamente las transacciones en todas las futuras importaciones.
Formatos de importación de extractos bancarios
En el diálogo de importación de transacciones puedes elegir entre los diferentes tipos de archivo:
- Extensiones de importación para extractos bancarios (la mayoría solo con el plan Advanced)
Son programas adicionales que deben ser instalados por el usuario y que convierten los datos para que puedan ser importados en los formatos previstos por Banana Contabilidad Plus.
A través del botón Gestionar extensiones puedes instalar las extensiones desarrolladas para la importación de extractos bancarios de diferentes bancos, tarjetas de crédito y otros formatos.
Una vez que la extensión está instalada, aparece en el menú Extensiones, y está lista para la importación.- Extracto bancario Camt ISO 20022 - Suiza (plan Professional)
Esta extensión lee el formato estándar proporcionado por los bancos suizos.
Esta extensión también decodifica el número de referencia del pago, generado por el Diseño de facturas CH10, e inserta el número de factura o del cliente. - Lista actualizada de las Extensiones Banana para la importación.
- Extracto bancario Camt ISO 20022 - Suiza (plan Professional)
- Formatos predefinidos incluidos en Banana Contabilidad Plus (plan Professional)
Son formatos estándar que diversos bancos ponen a disposición y que están incluidos en Banana Contabilidad Plus:- Extracto bancario MT 940
- Extracto bancario ISO 20022 genérico
Diversos bancos en Europa ponen a disposición el extracto bancario en el formato estándar ISO 20022.
- Formato genérico con Transacciones Entradas y Salidas TXT (plan Professional)
Se trata de un archivo de texto tipo CSV, que utiliza como separador el tabulador y presenta como columnas los importes de entrada y salida de una cuenta.
Nombre del archivo
Indique un archivo o también varios archivos separados por punto y coma ";". También puede indicar un ZIP que contenga varios archivos de importación.
Importar varios archivos al mismo tiempo:
- Si su banco le proporciona el camt053 diario, puede seleccionar todos los archivos del mes e importarlos en un solo paso.
- Si su banco le proporciona archivos Zip, puede elegir el archivo que contiene todos los extractos.
Los archivos de importación deben obviamente ser del mismo tipo. No se pueden importar formatos diferentes al mismo tiempo.
Estructura del archivo de importación
El archivo de importación contiene las transacciones típicas de un extracto bancario:
- Fecha
- [número de operación] opcional
- Descripción
- Importe de entrada o de salida.
En el momento de la importación, el usuario indica en qué cuenta deben registrarse las transacciones, de modo que las transacciones contables ya se creen con la cuenta Debe o Haber completada.
Se pueden crear extensiones de importación para cualquier extracto bancario.
Ver Indicaciones técnicas para importar un archivo Entradas y Salidas (en inglés).
Preguntas frecuentes
No veo el formato para el extracto bancario de mi banco. ¿Qué hago?
Haga clic en el menú Extensiones → Gestión de extensiones... y luego en el botón inferior Actualizar extensiones. Active el filtro para el formato deseado.
Aparece el mensaje "Este archivo ISO 20022 no contiene un extracto bancario (camt.052/053/054)". ¿Cómo es posible?
Este mensaje de error aparece si el archivo ISO 20022 no contiene un extracto bancario. El formato ISO 20022 es un formato genérico que puede contener diferentes tipos de información, como el extracto bancario y las confirmaciones de ejecución. En Banana Contabilidad Plus solo es posible importar extractos bancarios (camt.052/053/054).
Mi banco no está en la lista de formatos compatibles. ¿Se puede añadir?
Es posible crear nuevas extensiones para formatos aún no implementados. También está disponible un soporte de pago para la implementación de formatos personalizados.
En el ebanking, al ingresar el pago, debe elegir la opción "orden individual" en lugar de "orden colectiva". Solo así los pagos se importan como órdenes individuales.
Descarga tus movimientos bancarios
Para poder mantener la contabilidad empresarial actualizada, es fundamental importar regularmente los movimientos bancarios. Los movimientos permiten automatizar el proceso de contabilización, evitando la introducción manual de los asientos individuales y eventuales errores.
Dónde descargar los movimientos
Los documentos que contienen las transacciones bancarias, independientemente del método de adquisición, deben guardarse siempre en la misma carpeta. Esta puede estar dentro de la carpeta principal de la contabilidad o en una externa. Para una gestión ordenada, se recomienda dar una estructura a las carpetas creando una carpeta general y subcarpetas más específicas: de este modo se reduce el riesgo de errores, sobre todo si se decide importar los movimientos manualmente.
Manteniendo los datos siempre en la misma ubicación, se evitan problemas de importación y no es necesario actualizar cada vez la ruta predeterminada para la importación. Además, se desaconseja abrir y modificar estos archivos antes de la importación, ya que esto puede causar errores en el reconocimiento de las transacciones.
Diferentes formatos de archivos con movimientos bancarios
Nuestro software ofrece numerosas extensiones que permiten importar datos contables en varios formatos. Entre los formatos más comunes se encuentran CAMT, CSV y XLSX.
El formato CAMT (Cash Management), definido por el estándar ISO 20022, es utilizado por los bancos para proporcionar extractos bancarios electrónicos de forma estructurada. Los archivos contienen información detallada como fecha, importe, descripción y referencias de cada transacción. Hay diferentes tipos de archivos CAMT disponibles:
- camt.052: extracto bancario intradía (movimientos durante el día)
- camt.053: extracto bancario de fin de día
- camt.054: notificación de débitos y créditos con detalles de las operaciones individuales
El formato CSV (Comma-Separated Values) es un archivo de texto que utiliza comas para separar los datos contenidos en las celdas de una tabla. Este formato es compatible con la mayoría de los programas. El formato CSV varía según el banco y se actualiza regularmente.
El formato XLSX es un archivo de Microsoft Excel utilizado para almacenar hojas de cálculo. El archivo XLSX puede contener datos, fórmulas, formatos, gráficos y varias hojas dentro del mismo documento.
Recientemente hemos desarrollado una nueva extensión que permite importar archivos CAMT de todos los bancos, haciendo que la adquisición de movimientos sea aún más fácil e inmediata.
Métodos para descargar los movimientos
Las formas principales de obtener estos datos son tres:
- La banca online
- El multibanking
- El software de Mammut Soft Computing AG
Dependiendo del método utilizado, se debe prestar más o menos atención a la ubicación de los archivos. La descarga manual desde el portal bancario requiere mayor atención.
Banca online
El método manual, tradicional y más difundido, consiste en acceder directamente al portal de banca online de su banco. Una vez iniciado sesión, es posible navegar a la sección dedicada a los movimientos de la cuenta y descargar los archivos en uno de los formatos estándar compatibles con los programas de contabilidad.
Este proceso, aunque sencillo, requiere una interacción manual: el usuario debe acceder a la plataforma bancaria, seleccionar la cuenta y descargar y guardar los archivos en su ordenador para luego importarlos en el programa contable.
Multibanking
El multibanking representa una evolución respecto a los métodos manuales tradicionales, pensado para empresas o profesionales que gestionan numerosas cuentas bancarias distribuidas en diferentes bancos. Gracias a esta funcionalidad, es posible acceder a una sola plataforma o interfaz de e-banking que agrupa varias cuentas, incluso de diferentes entidades, simplificando así la interacción con cada banco. La mayoría de las soluciones de multibanking se basan en el estándar internacional EBICS (Electronic Banking Internet Communication Standard), que garantiza un intercambio seguro de información y órdenes de pago entre las empresas y los bancos.
Las principales fases para implementar el multibanking son:
- Actualización del contrato con el banco principal
El primer paso consiste en contactar con el banco principal para solicitar la activación del servicio de multibanking. Será necesario firmar una adenda al contrato existente, que autorice al banco a actuar como gestor de varias cuentas bancarias. - Firma de los mandatos con los bancos conectados
Para cada banco tercero que se desea conectar, es necesario firmar una autorización que permita al banco principal acceder a la información de las cuentas correspondientes. - Habilitación técnica y entrega de credenciales
Una vez completados los pasos contractuales, será necesario seguir las instrucciones técnicas para habilitar el acceso mediante API o herramientas de terceros. Esto puede incluir la entrega de credenciales o la activación de métodos específicos de autenticación.
Una vez establecidas todas las conexiones bancarias, es posible descargar de forma centralizada los movimientos y datos bancarios, y procesar las operaciones de pago desde una única herramienta. Aunque sigue siendo en parte un proceso manual, el multibanking permite optimizar tiempo y recursos, reduciendo el número de accesos y simplificando la gestión general.
Software de Mammut Soft Computing AG
Una solución más moderna y completamente automatizada es la que ofrece el software desarrollado por Mammut Soft Computing AG. Este sistema, una vez implementado, permite omitir por completo el paso manual de descarga de archivos bancarios, ya que el guardado ocurre automáticamente en una carpeta definida durante la implementación.
El software está enfocado en las interfaces de intercambio de datos entre bancos y empresas, ofreciendo conexión a múltiples bancos en todo el mundo y recuperando de forma segura y automatizada los datos bancarios en los formatos necesarios. Estos datos se sincronizan automáticamente con el sistema contable, haciendo innecesaria la intervención del usuario.
Los pasos a seguir para comenzar a usar el software Mammut Soft Computing AG son los siguientes:
- Elección de la solución
Según las necesidades, se puede optar por la solución en la nube o la instalación local (on-premise), esta última consiste en la instalación física en los dispositivos del usuario. - Configuración de las conexiones bancarias
Para permitir la configuración y activación de la conexión con los bancos, es necesario firmar los contratos bancarios correspondientes. Estas conexiones con los bancos (EBICS, SWIFT, API) permiten descargar extractos y enviar pagos. Mammut ofrece asistencia para la activación ante los bancos. - Autorización de acceso a las cuentas
El cliente, para quien se lleva la contabilidad, concede al fiduciario el acceso a sus datos, para que toda la información necesaria esté disponible. - Integración con el software contable/ERP
El software se conecta al sistema contable o de gestión interna para la exportación e importación automática de los datos bancarios.
El verdadero valor añadido del software es la actualización constante de la contabilidad: descargas automatizadas de todos los bancos y sincronización directa con el sistema contable aseguran que los datos estén siempre actualizados y listos para su uso.
Importación y contabilización automatizada
Una vez que se dispone de los movimientos, es posible aprovechar las diversas funcionalidades que ofrece Banana. Independientemente del método establecido para la descarga de los datos bancarios, la función “Importar movimientos bancarios en formato ISO 20022 (avanzado) [BETA]” permite automatizar la actualización de la contabilidad en modo partida doble o ingresos/gastos utilizando los archivos CAMT (052/053/054). El programa lee los archivos XML desde una carpeta designada, los guarda en una base de datos local, identifica las transacciones nuevas que aún no han sido registradas y las propone para la importación, evitando duplicados.
Esta funcionalidad está disponible únicamente con el plan Advanced de Banana Contabilidad Plus. También se puede probar con los planes Free o Professional hasta 70 líneas de transacción.
Una vez importados, los movimientos bancarios se transforman automáticamente en operaciones contables completas gracias a nuestras reglas de autocompletado (plan Advanced), ahorrando tiempo y evitando errores de introducción. De este modo, la contabilidad se realiza de forma más rápida, eficiente y precisa.
Diálogo Importar movimientos
El diálogo Importar transacciones se activa desde el menú:
Contenido del diálogo
La visualización de los elementos del diálogo depende del tipo de archivo que se está importando:
- Transacciones por cuenta individual y extractos bancarios
Se visualizan todos los elementos. - Transacciones de contabilidad en partida doble u otras
No se visualizan los siguientes elementos:- Cuenta
- Cuenta temporal de contrapartida
- Aplicar reglas.
- Agrupación por factura
Este elemento solo se muestra si el archivo de importación contiene datos en la columna DocInvoice.
Diálogo Importar Transacciones
A continuación se muestra la ventana de diálogo que permite integrar los datos en la contabilidad de la mejor manera.

Cuenta de destino
Esta opción aparece cuando se importan datos desde extractos bancarios o postales o transacciones de entrada y salida de una cuenta en formato texto.
- Introduzca el número de cuenta bancaria de su plan de cuentas, correspondiente al extracto importado.
- Si se deja en blanco, el programa inserta la cuenta [A] (Account) para que se pueda entender si es un movimiento en Débito o Crédito.
Seleccionar transacciones
Fecha inicio, Fecha fin
Introduzca la fecha inicial y final del período relativo a las transacciones a importar. Es posible seleccionar el período automáticamente mediante las casillas debajo de las fechas.
No importar si ya existe la misma Referencia externa, Fecha e Importe
Si está activada, esta función permite no importar transacciones ya registradas, para evitar duplicados. Esta opción solo se activa si en los movimientos (archivo) a importar existe la columna "Ref.Externa"; de lo contrario, estará deshabilitada.
Ordenar transacciones por fecha
La opción está activada por defecto y permite tener las transacciones importadas en orden cronológico.
Completar las transacciones con
Autocompletado de valores
La opción es relevante para contabilidad con IVA y multimoneda.
Si está activada, permite completar automáticamente los valores faltantes en los datos importados (por ejemplo, el tipo de cambio en la tabla Tipos de cambio).
Aplicar reglas (solo plan Advanced)
La opción no está disponible para importaciones desde archivos de contabilidad en partida doble (formato ac2).
Ver: Reglas para el autocompletado de transacciones.
- Si esta opción está activada, al confirmar con OK, se abre el diálogo Aplicar Reglas.
- Si no ha activado esta opción, puede acceder a las Reglas también desde el menú Acciones > Transacciones repetidas > Aplicar reglas...
- Esta opción se activa por defecto si ya existen reglas de importación en la tabla de Transacciones repetidas.
Cuenta temporal de Contrapartida
La opción no está disponible para importaciones desde archivos de contabilidad en partida doble (formato ac2).
Se indica una cuenta que sirve para completar la contrapartida de la transacción. La cuenta debe luego ser reemplazada manualmente o mediante reglas de autocompletado por la contrapartida correcta.
El programa propone por defecto la cuenta comentada [CA] (ContraAccount).
Una vez completadas las transacciones, no debería haber movimientos que usen la cuenta temporal.
Número de documento inicial
La opción no está disponible para importaciones desde archivos de contabilidad en partida doble (formato ac2).
Es el número de documento que se asigna a la primera transacción entre las importadas.
El número se incrementa automáticamente.
Agrupar transacciones por número de Factura
Si el archivo de importación contiene valores en la columna DocInvoice, en el diálogo también estarán disponibles las siguientes opciones:

- Agrupar transacciones por número de factura
En este caso, las líneas de una misma factura se agrupan para que haya un solo asiento para la misma cuenta y el mismo código de IVA (ver explicación sobre importación de datos de facturas en inglés). - Cuenta de destino para diferencias de saldo
Cuando se usan códigos de IVA, puede haber diferencias de redondeo de algunos centavos.
En ese caso, Banana Contabilidad Plus crea para cada factura una transacción adicional para registrar la diferencia.
Obviamente, hay que asegurarse de que los datos proporcionados para la importación estén equilibrados entre Débito y Crédito. En caso contrario, la fila de la transacción mostrará la diferencia entre Débito y Crédito.
Modificación de las transacciones importadas
El programa crea transacciones y las añade al final de la tabla Registros.
Las transacciones pueden ser modificadas o eliminadas.
En la contabilidad en partida doble, en las columnas CuentaDébito y CuentaCrédito, y en la contabilidad Ingresos / Gastos, en las columnas Cuenta y Categoría, el programa inserta símbolos.
Estos símbolos deben ser reemplazados por la cuenta o categoría adecuada.
- [A]
Este símbolo se indica si en el diálogo no se ha especificado ninguna cuenta.
En lugar del símbolo [A], se debe introducir la cuenta correspondiente al banco en la contabilidad. - [CA]
Este símbolo indica que en la celda debe indicarse la cuenta de contrapartida, para que los movimientos en Débito se compensen con los del Crédito.
Para las filas con una sola contrapartida, en la misma línea está tanto la cuenta o el símbolo [A] como el símbolo [CA] de la contrapartida.
Para las filas con múltiples contrapartidas, cada línea tendrá la cuenta o el símbolo de contrapartida [CA]. Si no se indica el símbolo [CA], sería imposible entender si el movimiento es en Débito o Crédito.
Importar archivo ISO20022
Banana Contabilidad Plus permite la importación de transacciones bancarias en diferentes formatos.
El formato ISO 20022 es un estándar internacional que debería estar ya disponible por parte de todos los bancos europeos. Este formato también puede denominarse ISO xml, xml, camt.053, camt.054 u otros. La importación de transacciones bancarias en formato ISO20022 es posible de dos maneras:
Importación ISO20022 manual genérica
Importación manual de transacciones, un archivo a la vez, disponible con el plan Professional:
- El usuario descarga el archivo ISO20022 desde su banco y lo guarda en una carpeta en su ordenador.
- Luego, desde Banana, importa manualmente este archivo.
Esta importación es posible gracias a la extensión Extracto bancario Camt ISO 20022 Suiza (Banana+) para Suiza y a un filtro genérico distribuido con la aplicación para otros países.
La importación debe repetirse manualmente cada vez.
Importación ISO20022 avanzada [Beta]
Importación avanzada de transacciones desde múltiples archivos al mismo tiempo, disponible con el plan Advanced. Acelera significativamente el trabajo porque el usuario ya no necesita verificar para qué período se deben importar los movimientos:
- El usuario define una carpeta que contiene los archivos ISO20022 de varias cuentas bancarias.
- En Banana, con un comando, el programa avisa si hay nuevos movimientos que deben ser importados.
Esta nueva función de importación avanzada es posible gracias a la extensión Swiss Camt ISO20022 Reader.
Esta funcionalidad está disponible únicamente con el plan Advanced de Banana Contabilidad Plus. También se puede probar con los planes Free o Professional hasta 70 líneas de transacción.
Requisitos:
- Uso de Banana Contabilidad Dev-Channel con el plan Advanced.
- Uso de una contabilidad en Partida Doble o de Ingresos y Egresos.
Importa los movimientos bancarios en formato ISO 20022 (genérico)
Banana Contabilidad Plus permite la importación de transacciones bancarias en diferentes formatos.
El formato ISO 20022 es un estándar internacional para la transmisión de datos financieros que debería estar ya disponible por parte de todos los bancos europeos.
Este formato también puede denominarse ISO xml, xml, camt.053, camt.054 u otros. En algunos bancos, el formato ISO 20022 puede no estar disponible por defecto y debe ser solicitado. El formato ISO 20022 reemplaza el antiguo estándar MT940.
Con la importación de datos bancarios en formato ISO20022, Banana Contabilidad Plus también permite cerrar automáticamente las facturas abiertas de los clientes.
La categoría CAMT agrupa los formatos utilizados para el envío del extracto bancario, movimientos contables y confirmación del estado de cuenta:
- camt052: Reporte contable
- camt053 (incluida la versión 4): Extracto bancario
- camt054: Aviso de débito y crédito.
Vista previa del archivo ISO 20022
Banana Contabilidad Plus ofrece la posibilidad de ver el contenido de un archivo camt en vista previa.
Importación de datos en la contabilidad existente
Proceda como se indica en la página del menú Acciones > Importar en contabilidad.
Con esta función también es posible abrir un archivo comprimido. En este caso, el programa solicitará seleccionar el archivo desde el cual importar los datos dentro del archivo comprimido.
Notas técnicas sobre la conversión del archivo ISO 20022
El estándar ISO 20022 codifica los datos contables del extracto bancario de forma muy precisa. Sin embargo, también deja cierta libertad para incluir información adicional de la cuenta y de los movimientos.
Al leer el archivo, Banana intenta adaptarse al modo en que se ha estructurado el archivo ISO 20022.
- Lee como saldo inicial las codificaciones similares.
- Lee como saldo final las codificaciones similares.
- Todos los movimientos contenidos son leídos y convertidos en transacciones:
- Fecha de la operación (Fecha)
- Fecha valor
- Importe del movimiento (positivo o negativo)
- Descripción
Por el momento, Banana Contabilidad Plus reúne las diversas descripciones en un solo texto. En el futuro se prevé la posibilidad de extraer esta información de forma más específica e indicar otras columnas de destino. - Separación en movimientos individuales o con detalle
Para los que incluyen detalle, hay una línea para el movimiento total y líneas adicionales para los movimientos individuales que lo componen.
Especificaciones nacionales
Cada país y/o banco tiene la posibilidad, según sus necesidades, de incluir información adicional en el archivo ISO 20022. Banana Contabilidad Plus ofrece un filtro genérico distribuido con la aplicación, así como filtros más específicos por país y/o banco distribuidos como Extensiones Banana. Para importar correctamente esta información adicional en la contabilidad, es necesario instalar y utilizar el filtro más adecuado para su país y/o banco (por ejemplo, Extracto bancario Camt ISO 20022 Suiza (Banana+)).
Import bank transactions in the ISO20022 format (advanced) [BETA]
This new feature allows you to update your accounting by automatically importing bank transactions from Camt files (052, 053, 054). Thanks to this innovation, you can:
- Accelerate the entire transaction recording process.
- Reduce the risk of manual errors.
- Avoid duplicates, since only transactions not yet present in your accounting are imported.
The program reads the Camt files from a selected folder, saves their content in a local database, and detects any new transactions not yet recorded. These are then proposed for import into your accounting, greatly simplifying financial management. Once imported, you can leverage auto-completion rules to further streamline your work.
This feature is currently in BETA version, available for experimental use with Banana Accounting Plus (Advanced plan) in double-entry or income & expense accounting. We welcome any suggestions and feedback to improve it.
Prerequisites
- Use Banana accounting Dev-Channel with the Advanced plan.
- Use a Double-Entry or Income & Expense accounting file.
Data Preparation
Before starting the import, make sure you meet the following requirements:
- Organizing Camt Files:
Create a dedicated folder containing all the Camt (*.xml) files you want to import into your accounting.
You can organize the files within the folder as you prefer, for example, by accounting year or by financial institution. - Access Permissions:
Ensure that the selected folder is both readable and writable by the program. This guarantees the proper saving of data and import information. - Setting IBANs:
For each account in the accounting file, make sure you have entered the IBAN in the 'BankIban' column of the 'Accounts' table.- If the column is not present, add it through the menu: Tools → Add/Remove functionality → Add address columns to the Accounts table.
- Write the IBAN in uppercase, without spaces or special characters.
- Swiss Camt ISO20022 Reader Extension:
Install the Swiss Camt ISO20022 Reader extension. This is required for the program to correctly interpret Camt files and start the import process.
First Use
The first time you use the "Import bank transactions (Camt ISO20022)" command, available under the Actions menu, the program will ask you to select the folder containing the Camt files. This choice will be saved, so that for subsequent imports the program will automatically use the same folder without asking for the path again.
Note that the first execution may take longer. The program must read, process, and save all the files in the folder, and it analyzes the content of each file. During this phase, a progress bar will display the current status of the operation, indicating both the percentage of completion and the number of files processed out of the total. The same progress indicator is shown both during the reading of the files from the folder and during the opening and reading of their contents.
On subsequent imports, the process will be much faster since the program will read and import only the content of new files, already knowing which data has been previously saved in the database. This way, future operations require significantly less time and ensure a smoother, more efficient workflow.
File Processing

The processing of Camt files occurs in two distinct phases:
- Reading Files in the Folder:
In the first phase, the program analyzes the selected folder and identifies all the files present, adding them to the internal database. During this process, a progress bar is displayed, indicating how much of the file reading has been completed compared to the total number of files. - Reading the Content of the Files:
Once file reading is completed, the program moves on to the second phase, in which it opens the files saved in the database, reads their content, and processes the data. In this phase, a dedicated progress bar is also shown, clearly displaying the percentage of completion and the number of files processed.
If, for any reason, one of these processes is interrupted, the program retains the data already saved. On the next import execution, it will automatically resume from where it left off, without having to start over. This ensures an efficient workflow and avoids repeating already completed processing steps.
Bank Transactions Import Dialog
The import dialog provides an overview of the processed files, the parameters used, and the transactions to be imported. You can modify the parameters in the dialog at any time, and the data will be recalculated immediately.
Folder Tab

The “Folder” tab provides a general overview of the import, showing the currently selected folder, the files to be processed, and some options to filter the content.
- Select Folder:
Here you can view and modify the working folder path. The program constantly checks the validity of the selected path and, if the folder does not exist or is not accessible, it displays an error. - Renaming or Moving the Folder:
If you change the folder’s name or location, remember to update the path in this dialog. The program stores the last used path and, if it cannot find it, will show a warning. - Renaming Files in the Folder:
You can freely rename the files in the folder; the program does not rely on the file name but on its content. Even if two files have different names but identical content, the program considers them duplicates and will only import one of them. - Ignore Subfolders:
By default, this option is enabled, allowing you to exclude the files located in subfolders. This is useful if, for example, you only want to import files relevant to the current accounting period, avoiding older or irrelevant data. If you disable this option, all Camt files in subdirectories will be included in the database, regardless of date or file organization. - Ignore Files Older Than...:
If you set a date in this field, the program will not read the content of files older than that date. By default, files older than the accounting opening date are saved in the database but not analyzed. Adjusting this date allows you to further refine the time filter. If you enter an invalid date, the program automatically replaces it with the current date. - Read All Files:
Clicking this button forces the immediate re-reading of all files in the folder instead of waiting for the normal daily check. This function is especially useful when you add new files and want to import them right away, without waiting for the next automatic update.
Bank Accounts Tab

The “Bank Accounts” tab provides a detailed overview of all the bank accounts present in your accounting. For each account, the program shows both static information (such as the current balance in your accounting) and dynamic data, updated based on the latest imports.
Information Displayed for Each Account
- Accounting Balance:
Shows the current amount recorded in the accounting for that account. - Last Bank Balance:
Displays the most recent bank balance detected directly from the Camt files. This lets you instantly compare the figure in your accounting with the actual bank amount. - New Transactions:
Indicates how many new movements, not yet recorded in accounting, have been detected in the Camt files. - Total New Transactions:
Shows the total monetary value of the new transactions to be imported for that account, helping you quickly assess the volume of pending operations. - Last Import:
Indicates the date when the folder was last fully read, providing a useful time reference for when the last update occurred. - Status:
- Updated: There are no new movements to import for this account.
- New transactions: Unrecorded movements have been found, ready to be imported into the accounting.
Transaction Details Tab

In the “Transaction Details” tab, you will find all the banking operations identified in the Camt files that are not yet imported into the accounting, organized by account. This view allows you to quickly analyze pending movements, verify their relevance, and select which ones to import.
- Selecting Transactions to Import:
You can temporarily exclude specific transactions or, if you prefer, all those related to a particular account using the provided checkboxes. Excluded transactions are not permanently removed; they will be proposed again the next time you open the dialog, allowing you to reassess their import at any time. Currently, it’s not possible to permanently exclude a transaction. - Consider Only Transactions Starting from a Specific Date:
To reduce the number of displayed movements, you can set a date from which to consider new transactions for import. By default, the program uses the accounting start date. By setting a different date, it will only display operations occurring after that day, ignoring previous ones. This function is particularly useful if, in the past, transactions were imported without a unique ID (ExternalReference column), typically when importing from CSV files. In these cases, simply set a date after the last recorded transaction to avoid re-proposing older movements. If you enter an invalid date, the program automatically replaces it with the current date. - Unique Identification of Transactions:
Transactions from Camt files (052, 053, 054) should always include a unique ID as required by the ISO20022 standard. This identifier enables the program to accurately detect which movements have already been imported and which are new, reducing the risk of duplicates or errors.
Settings Tab

Settings Tab
In the “Settings” tab, you can manage some advanced aspects of the import process, including the possibility to restore the initial data state and define how to recognize already processed files.
- Delete Saved Data:
This function allows you to delete all data related to previous imports stored in the internal database. Once deletion is confirmed, you will be automatically redirected to the “Folder” tab, where the default values will be restored.- New Import: If you want to perform a new import after deleting the data, simply click on the “Read all files” button.
- Limited Impact on Import Data: Deleting data from the internal database does not affect any information already present in the accounting.
- Complete Database Removal: The command here only clears the database tables. If you want to completely remove the database, you must manually delete the “*.db” file in the selected folder.
- Always Verify the Existence of Files Using Hashing:
This option allows you to choose how the program identifies already processed files:- Hashing (slower): If you select this option, the program will compute a unique hash for each file, ensuring accurate duplicate detection even if names or paths change. However, this method can slow down file reading.
- Check Name, Date, and Size (default): If the checkbox is not selected, the program simply compares the file name (including path), creation date, and file size to determine uniqueness. This approach is faster but may not be as robust in scenarios where files are renamed while retaining the same content.
Changing the accounting account assigned to an IBAN
It is possible to change the accounting account associated with an IBAN directly in the Accounts table.
However, if bank transactions for the same bank account have already been imported in the past using a different accounting account, it is necessary to delete the data stored in the database.
This operation can be performed from the Settings tab of the import dialog, using the Delete saved data button.
Afterwards, the data must be reloaded from the folder using the Read all files button, available in the Folder tab.
This procedure allows the program to recreate the correct associations between the IBAN and the accounting account according to the new settings.
Deleting the data from the database does not affect in any way the accounting data already recorded.
Database File
The program uses an SQLite database to store import-related data. The first time you activate this function, if the selected folder is valid, a database file (*.db) will be created in it.
It is important not to move or delete this file, as the program uses it as a reference for all subsequent operations. In case of loss or deletion, the program will generate a new .db file, forcing you to re-read and re-process all the files in the folder.
What is Saved in the Database?
- File List:
All the files detected in the folder are saved. If you have chosen to ignore subfolders in the settings, the files they contain will not be saved. This option is enabled by default. - Bank Accounts and Related Data:
The database stores information about the bank accounts present in the accounting. If these data are modified in the accounting file, the database updates them accordingly. - Imported Transactions:
Transactions found in the opened and read files are saved in the database, allowing you to reprocess or view them later without having to re-read the files. - Import History:
The program records who performed the import operations, when they were executed, and with which software version, providing a detailed historical trace of activities.
Log File
During the import process, the program generates a log file to help identify and diagnose potential issues. In case of anomalies or unexpected behavior, the log file provides detailed information about the operations performed, aiding developers in understanding the source of the error.
If you need assistance locating or interpreting the log file, contact our support team: they will guide you step-by-step to find the file within your active directory.
Features currently not available
These features, requested by users, are currently not available:
- Extraction of the customer invoice number and customer account from the QR reference number
For this functionality, it is recommended to use the dedicated extension: Bank Statement Camt ISO 20022 Switzerland (Banana+) .
Troubleshooting
If no transactions are displayed for import despite having selected the correct folder, check the following:
- Bank Accounts: Make sure that the data related to bank accounts (including IBANs) in the “Accounts” table is complete and correct.
- Accounting Period: Check that the currently set accounting period includes the dates of the transactions you want to import. If the transactions fall outside the defined period, the program will not propose them for import.
If the problem persists after these checks, contact our technical support for further assistance.
Import transactions (generic)
The following explanation refers to the import of data into the Transactions table from files containing transactions of the double-entry type, from Banana Accounting, or other formats.
The Import of bank transactions is similar to importing transactions, but is dealt with separately in detail on the appropriate page.
Import procedure
- Via Actions in the menu > Import to accounting > In the Import box, select Transactions
- Choose the file type from which to import
See explanation below. - With the Browse button, choose the file from which to import the transactions
- Set the parameters as required.
See also: Import into accounting
Once OK is confirmed, the data are read and the following dialogue is displayed:
- Import transactions dialogue.
Where instructions must be given for the completion of the imported rows.
Importing from other Banana Accounting files
In the type of file to be imported, the programme provides a number of configurations to import data from other Banana Accounting files:
- To import transactions from an Income & Expenses accounting file (*ac2)
In order to import transactions from an Income & Expenses accounting file into a double-entry accounting file, it is necessary that the categories of the Income & Expenses file correspond to the accounts of the double-entry accounting file. - To import Cash book transactions (*ac2)
See the specific page Import Cash book transactions. - To import Double-entry accounting transactions (*ac2)
In order to import transactions from a double-entry accounting file into another double-entry accounting file, it is necessary that the accounts correspond. - To Import Fixed Asset register
Imports transactions from the Fixed Asset register .ac2 file.
Import TXT/CSV files
This format must be used to export data from another programs, which provides an export format compatible with that required by Banana Accounting. See the information at the following link:
Importing account statements with import extensions
Import Extensions are additional programs that must be installed by the user and convert the data for import into Banana Accounting.
There are extensions for importing bank statements from various banks, credit cards and other formats.
These extensions only work with the Advanced plan. All old filters will be updated over time and the new versions will only be usable for those with the Advanced plan.
Search for and install an extension:
Search and install an extension:
- Click on Manage Extensions
- Choose Import.
- Navigate to the desired extension and click onto Install.
- If the Settings button appears, it means that this extension has parameters that you can customise.
Once the extension is installed, it appears in the list of available types, directly in the Extensions menu, and you can choose it for import.
Import data from a Cash book file
Cash movements can be managed separately from the main accounting file via the Cash Manager. On a regular basis, the movements are imported into the main accounting file, grouping them according to a chosen period.
In this case you have two separate files:
- One file contains all the general accounting data (including the cash account).
- A file contains only the cash register data.
In order to integrate the cash data into the main accounting, a link must be established between the main accounting and the Cash Manager file.
There are two different ways to create the link:
- In the Cash Manager file, give the categories the same numbers as the accounts of the main accounting (double-entry accounting or Income / Expense).
- Enter the corresponding accounts of the main accounting file in the Category2 column (Categories table).
If the Category2 column is not present, it must be displayed via Data → Columns setup.
Set up the internal transfer account
When importing the cash data into the accounting file, certain settings are required so that there are no overlaps of accounting entries for payment operations between the cash account of the main accounting and the transactions imported from the Cash Manager file.
In the Main accounting file:
- In the Accounts table, enter the Internal transfer account.
In the Cash Manager file:
- In the Categories table, Categories column in the Revenue group, enter the internal transfer account (the same number set in the main accounting) as a category for payments from the bank or postal current account.
- Alternatively, in the Categories table, Categories2 column in the Revenue group, enter the internal transfer account. In this case, a category is set in the Categories column to determine payments from the bank. The internal transfer account, located in the Categories2 column, creates the link when you import the transactions into the main ledger.
Payments from the bank account to cash account
Whenever a payment is made from the bank account to the cash desk, the movement is recorded both in the main accounting file and in the cash register file. To avoid overlapping of accounting entries when importing data from the cash desk, the internal transfer account account is used
- The receipt of funds is recorded in the cash register file, using the tour account as category or alternatively the category for payments from the bank account, if the tour account has been set in the Category2 column.
- The outflow of funds is recorded in the main accounting file, with the bank account in credit and the internal transfer account in debit.
When importing the cash register data into the main accounting file, the tour account is reset.
Import the cash register data
- Open the main accounting file
- Click Action→ Import to accounting
- In the window that appears, from the drop-down menu Import → select Transactions → Cash book movements (* .ac2) "
- Using the Browse button, select the Cash Manager file.

The explanations of this window are available at the page Import to accounting.

In accounting
Destination account
You must select the cash account number, present in Double-entry accounting or Income / Expense accounting, where the movements are to be imported.
Initial document number
An initial document number can be entered which will be attributed to the first imported transaction. In subsequent recordings, the program automatically assigns a progressive number, starting from the initial one entered.
If you do not wish to assign progressive numbering automatically, leave the box empty.
Select movements
Start date / End date (inclusive)
Enter the start and end date of the period to which the imported transactions refer.
Group transactions
By activating one of the options it is possible to choose how the movements of the period should be grouped:
- No period groupingAll rows are imported with their column contents. The Doc number present in the corresponding column of the cash register file is also imported.
- If you want to use a different numbering in the accounting and simultaneously keep the original document of the file, in the Cash Manager insert the document in the DocProtocol column.
- Monthly - groups the transactions by month.
- Quarterly - groups movements by quarter.
- Semi-annual - groups the movements by semester.
- Annual - groups the transactions by year.
One registration per account
If several categories are grouped into a single account in the accounting, but separate transactions are desired for each category, this box must be activated; the program creates recordings for each category. When using VAT codes, postings are created not only by category, but also by different VAT codes for the same category.
Note
When you have an accounting with VAT, the VAT calculations may be slightly different. If the transaction amounts are entered net, the cash account balance may also differ due to rounding differences.
The accounting file is updated with the cash register data.

Import transactions from Paypal
On the page Web filter for PayPal transactions you will find the information about the new feature that makes it possible to import all the Paypal transactions directly into Banana Accounting and the instructions on how to proceed (see below).
We have also prepared specific predefined templates for double-entry or multi-currency accounting that you can look at as an example or use as a separate accounting file just for the accounting transactions from Paypal.
More information about all types of import filters can be found on the Import filters page.
- Banana extension for importing Paypal transactions - how to proceed
- examples for the Double-entry accounting
- examples for the Multi-currency accounting
Learn more
- Double-entry accounting
- Multi-currency accounting
- Import filters - complete list
Importar cuentas
Este comando importa las cuentas desde un archivo de Contabilidad en partida doble o desde una Contabilidad Ingresos / Gastos (*.ac2) o de texto (*.txt), integrándolas automáticamente en el plan contable actual.
Para importar las cuentas desde otro archivo, proceda de la siguiente manera:
- En el menú Acciones > Importar en contabilidad > en el campo Importar seleccione Cuentas.
- Seleccione el tipo de archivo *.ac2 o de texto para importar las cuentas.
- Con el botón Examinar, elija el archivo desde el cual desea importar las cuentas.

Las cuentas o categorías pueden integrarse en la contabilidad actual activando las siguientes opciones:

Opciones
Importar también centros de coste
En caso de que existan centros de coste, se importan también sus cuentas.
Añadir cuentas inexistentes
Si está activada, esta opción permite añadir todas las cuentas nuevas al plan contable.
Reemplazar texto de la descripción
Si se importan cuentas ya existentes pero con una descripción diferente, la descripción de la cuenta existente
se reemplaza con la descripción importada.
Reemplazar saldo de apertura
Si se importan cuentas ya existentes pero con un saldo inicial diferente, el saldo de apertura de la cuenta
existente se reemplaza con el saldo importado.
Importar códigos de IVA
La función está disponible solo en la Contabilidad con IVA y permite importar los Códigos de IVA en los siguientes archivos:
- Archivos de contabilidad (*.ac2).
- Archivos de texto con encabezado de columnas (archivos de texto *.txt).
Importar desde un archivo de contabilidad
Si gestionas varias contabilidades y utilizas códigos de IVA personalizados, puedes preparar la tabla de códigos de IVA e importarla en los demás archivos.
- Preparar la tabla de Códigos de IVA en tu archivo contable.
- Comando Acciones > Importar en contabilidad > Códigos de IVA
- Seleccionar el nombre del archivo que contiene la tabla de Códigos de IVA actualizada.
- Elegir reemplazar todas las filas.
Opciones de importación de Códigos de IVA
Al importar desde otro archivo, se dispone de varias opciones.
Añadir nuevos códigos y nuevos grupos
Si se selecciona esta opción, se añaden los nuevos códigos y se mantienen los ya existentes.
Sustituir todas las filas
Si se selecciona esta opción, todos los códigos de IVA existentes se reemplazan con los importados.
Esta opción debe elegirse si se desea recuperar todos los códigos de IVA por completo.
Mensaje Cuenta de IVA no encontrada
Si aparece el mensaje Cuenta de IVA no encontrada, debe introducirse la cuenta de IVA automáticamente desde el menú Archivo > Propiedades del archivo > sección IVA.
Importar arquivo
La función permite importar datos desde otro archivo de Banana Contabilidad del mismo tipo.
Para importar datos desde un archivo de Banana Contabilidad, proceda de la siguiente manera:
- En el menú Acciones > Importar en contabilidad > en el campo Importar seleccione Archivo.
- Seleccione el tipo de archivo *.ac2 para importar los datos.
- Con el botón Examinar, elija el archivo desde el cual desea importar los datos.

A continuación se muestra la ventana de diálogo con varias opciones que permiten definir qué datos importar desde el archivo.

Archivo de origen
Es el archivo del cual se toman los datos.
Archivo de destino
Es el archivo que recibe los datos.
Opciones
Importar transacciones
Se importan todas las filas de la tabla Registros presentes en el archivo de origen.
Importar transacciones repetidas
Se importan todas las filas de la tabla Registros memorizados presentes en el archivo de origen.
Importar transacciones del presupuesto
Se importan todas las filas de la tabla Presupuesto presentes en el archivo de origen.
Reemplazar importes de la tabla Cuentas
Los importes de las columnas Apertura, Presupuesto y Anteriores de la tabla Cuentas del archivo de destino se eliminan y se reemplazan con los importes presentes en el archivo de origen.
Las cuentas deben coincidir, ya sea por tener los mismos números de cuenta, o bien cuando se usa la opción Convertir números de cuenta.
Reemplazar propiedades del archivo (datos base)
Los datos de las propiedades del archivo de destino se reemplazan con los del archivo de origen.
Convertir números de cuenta
Usando esta función, los números de cuenta importados se reemplazarán con los indicados en la columna alternativa.
Si se utiliza esta función, también se debe especificar la columna donde están los números de cuenta que deben usarse en la importación en lugar de los existentes.
Junto al número de cuenta debe haber una columna que indique el número alternativo que se usará en la importación.
Si no se especifica ninguna correspondencia, se usará el número de cuenta original presente en el archivo de origen.
- Las correspondencias de cuentas están en el archivo de origen
Esta opción se utiliza cuando, por ejemplo, se lleva la contabilidad en un país con una determinada numeración y regularmente se importan transacciones a una contabilidad con un plan de cuentas con una numeración diferente.- Añadir en el plan de cuentas una nueva columna de texto (Comando Organizar columnas).
- Para cada cuenta, indicar en la tabla el número de cuenta de destino.
- Las correspondencias de cuentas están en el archivo de destino
Esta opción se utiliza cuando, por ejemplo, se desea cambiar a un plan de cuentas con una nueva numeración y agrupaciones.- Crear un nuevo archivo de contabilidad con el nuevo plan de cuentas.
- Añadir en el plan de cuentas una columna para introducir las correspondencias de cuentas (comando Organizar columnas).
- En esta columna, indicar los números de cuenta de la tabla de origen.
Separar las cuentas con un punto y coma "1000;1001" para indicar que varias cuentas deben agruparse en esta cuenta.
- Columna que contiene las correspondencias (Tabla Cuentas)
Es la columna añadida donde se introducen las correspondencias de cuentas.
Esta opción se utiliza cuando se pasa de un plan de cuentas a otro y cuando es necesario convertir las cuentas de una numeración a otra.
Para más información sobre la conversión del plan contable, consulte la página sobre migración de datos contables a nuevos planes.
Resultado y posibles errores
El programa importa todos los datos de la contabilidad anterior, convirtiendo los números de cuenta.
Si el programa señala errores (faltan cuentas u otros), probablemente se deba cancelar la operación de importación, completar las correspondencias y luego repetir la operación.
El programa, al detectar planes de cuentas diferentes, no puede verificar automáticamente que todos los datos se hayan importado y agrupado correctamente.
Por lo tanto, es recomendable revisar manualmente el resultado, comprobando que los totales del balance y de la cuenta de resultados sean correctos.
Opciones avanzadas de importación
Para otras necesidades de conversión más complejas, consulte los scripts que permiten personalizar completamente la conversión e importación.
Importar cambios
Esta opción está disponible solo en las Contabilidades en partida doble multimoneda. Permite importar los tipos de cambio desde la tabla de cambios de otro archivo.
Cómo proceder:
- En el menú Acciones > Importar en contabilidad > en el campo Importar seleccione Cambios.
- Seleccione el tipo de archivo *.ac2 del historial de cambios o el archivo de texto.
- Con el botón Examinar, elija el archivo desde el cual desea importar los datos.
Nota
El historial de cambios es un archivo que contiene solo la tabla de Cambios, donde se almacenan los tipos de cambio correspondientes a fechas específicas.

A continuación se muestra una ventana con opciones:

Seleccionar fecha
En la ventana se muestran fechas con los tipos de cambio usados recientemente. Si se selecciona una fecha, el programa toma los cambios utilizados en esa fecha determinada.
Reemplazar cambios
Si se activa esta opción, en la tabla de cambios se reemplazan todas las filas con los cambios importados.
Actualizar filas
Si se activa esta opción, en la tabla de cambios se actualizan solo las filas que tienen valores diferentes.
Advanced Bank Transaction Import (Beta version)
The new feature allows you to update your accounting by automatically importing bank transactions from Camt files (052, 053, and 054). The program reads the files stored in a dedicated folder, identifies new transactions, and suggests importing only those transactions that have not yet been recorded.
- The feature is available in the Dev Channel, Beta version.
- You need to install the Swiss Camt ISO20022 Reader extension and correctly associate IBANs with the accounting accounts.
How it works
- Download the Camt file from your bank.
- Open the folder containing the Camt files and select it.
- The program reads and processes the files, storing the information in a local database.
- It automatically identifies new transactions thanks to the unique identifiers defined by the ISO 20022 standard.
Only transactions that have not yet been recorded are suggested for import. - After the import, you can automatically complete the transactions using Banana Accounting Rules.
More information is available on the Advanced ISO20022 Import page.
Main advantages
The feature provides advanced import options and, thanks to much more detailed settings, bank transactions are read and imported immediately, ready to be posted, including with the use of Rules.
You will benefit from:
- Time savings: your accounting will always be up to date in the shortest possible time.
- Fewer manual errors: all transactions are imported exactly as they appear on your bank statement, reducing the risk of errors.
- No duplicates: only transactions that are not already present in your accounting are imported.
- Faster imports over time: after the initial processing, the program analyzes only newly added files.
- Greater control: before importing, you can review, filter, and select the transactions to be recorded.
- Instant bank reconciliation overview: for each account, the accounting balance, bank balance, and the number and value of new transactions are displayed.
- Integration with completion Rules: after the import, you can apply Banana Accounting's automatic Rules to complete transactions quickly.
- Transaction traceability: the local database keeps a history of imports, and the program generates log files that are useful for audits and support.
Automatización
Importación y autocompletado de transacciones bancarias
Es la funcionalidad que te permite llevar la contabilidad de forma rápida:
- Importa las transacciones bancarias en contabilidad
El programa crea los asientos con fecha, descripción, importe, cuenta y cambio. Los datos adicionales como la contrapartida deben completarse manualmente.
Los formatos estándar, como ISO 20022 o TXT están incluidos en el plan Professional; otros formatos requieren el plan Advanced. - Completa los asientos automáticamente gracias a las reglas (plan Advanced)
Puedes definir reglas de autocompletado para importar las transacciones añadiendo también la contrapartida, el código de IVA, los Centros de coste y otra información que hayas especificado.
Siempre puedes modificar y completar los asientos posteriormente.
Formatos de importación de transacciones bancarias
- Banana Contabilidad Plus lee las transacciones en varios formatos. Consulta la página Importar transacciones.
- Gracias a las Extensiones de importación desarrolladas a medida, puedes importar datos desde distintos extractos bancarios y otros programas estándar. Algunas extensiones están disponibles únicamente en el plan Advanced.
Otros comandos para la importación de datos
Banana Contabilidad Plus ofrece varias modalidades para la importación de datos:
- Importar en contabilidad
Puedes importar en cualquier tabla y desde distintos formatos. - Importar Filas
Todas las tablas permiten importar datos desde el formato CSV. - Copiar y pegar desde Excel u otros programas.
Puedes preparar las transacciones u otros datos en una hoja de Excel y copiarlos y pegarlos en bloque en la tabla Registros o en cualquier otra tabla.
Completado manual y anulación de la importación
Una vez importadas las transacciones u otros datos, puedes fácilmente completarlos y modificarlos. De esta forma, automatizar los procesos es muy fácil, ya que si hay excepciones no previstas, puedes modificar directamente los datos.
Como todos los comandos, también el de importación se puede anular. Así puedes probar fácilmente a importar los datos y comprobar si funciona como esperabas. Si no has elegido el formato correcto o no has configurado bien los parámetros, basta con anular la importación y volver a intentarlo.
Enlaces útiles
Reglas para completar automáticamente los registros importados
La Inteligencia Artificial (IA) se utiliza cada vez más en los sistemas de automatización. En colaboración con nuestros usuarios, hemos desarrollado sin embargo un sistema de autocompletado de los asientos importados basado en reglas definidas y controladas por el propio usuario, por lo tanto, basadas en algoritmos deterministas y no probabilísticos (IA).
Esta funcionalidad automatiza y simplifica el proceso de registro contable, permitiendo ahorrar tiempo y reducir errores en la introducción de datos.
Las Reglas son registros predefinidos que incluyen toda la información necesaria para completar automáticamente las operaciones contables de manera precisa y rápida.
A continuación el vídeo introductorio de las Reglas, y los vídeos sobre cómo crearlas:
- ▶ Vídeo: Importar y completar registros automáticamente (introducción) - 0'55"
- ▶ Vídeo: Reglas para completar registros importados (diálogo Aplicar reglas) - 7'26"
- ▶ Vídeo: Reglas para completar registros importados (tabla Registros memorizados) - 5'54"
Esta funcionalidad está disponible únicamente con el plan Advanced de Banana Contabilidad Plus (versión 10.1 o superior). También se puede probar con los planes Free o Professional hasta 70 líneas de transacción.
¿Qué son las Reglas?
Las Reglas son filas de registros predefinidas que contienen información útil para que el programa pueda:
- Identificar los registros importados que deben completarse
Si introduces en la columna Descripción "Swisscom", la regla se aplicará a los registros importados que contengan en la descripción el texto "Swisscom". - Indicar los elementos para completar el registro
- En la columna Cuenta Débito introduce la cuenta "Gastos telefónicos".
- En la columna IVA introduce el código "I81".
Las reglas de autocompletado se guardan en la tabla de Registros memorizados. Puedes introducirlas y modificarlas directamente en la tabla o utilizar el diálogo Añadir/Modificar reglas durante la fase de aplicación de reglas.

¿Para qué sirven las Reglas?
Normalmente, cuando importas transacciones bancarias en la tabla Registros, debes completar manualmente los registros añadiendo la contrapartida en Débito o Crédito, el código de IVA, los Centros de coste u otra información.
Ejemplo: cuando importas un movimiento de salida que indica un pago a la empresa "Swisscom", deberás completar la columna Cuenta Débito con "Gastos telefónicos" y la columna Código IVA con "I81".
Con la creación de Reglas, los movimientos importados son completados automáticamente por el programa, sin intervención manual.
Dependiendo del método utilizado para crear las reglas, estas pueden generarse antes o durante la importación. Una vez creadas, se aplican automáticamente en todas las futuras importaciones.
Procedimiento de trabajo
- Importa los movimientos bancarios
El programa crea las filas con fecha, descripción, importe, cuenta, número de documento, tipo de cambio. - Crea la regla utilizando uno de los métodos disponibles.
- En la tabla Registros, el programa completa automáticamente todos los movimientos importados con contrapartida, códigos de IVA, centros de coste y más.
- En la tabla Registros memorizados el programa guarda los registros con las Reglas.
Métodos para crear Reglas
Hemos creado un sistema que ofrece diferentes métodos para crear Reglas. Tú eliges cómo prefieres trabajar:
- Reglas desde la tabla Registros
- Reglas desde la tabla Registros memorizados
- Reglas desde el diálogo Aplicar Reglas
Ventajas de las Reglas
Las ventajas del sistema de autocompletado son inmediatamente evidentes:
- Completas los registros en segundos.
- Alto nivel de control y precisión.
- Evitas errores y omisiones.
- Puedes delegar fácilmente el trabajo de importar datos contables.
- Puedes ver cómo se han registrado ciertos movimientos.
- El auditor puede definir cómo registrar determinadas operaciones.
- Funciona de inmediato, incluso sin una base de datos de aprendizaje.
- Puedes añadir, modificar y eliminar reglas en cualquier momento.
Paso al nuevo año
Cuando creas el archivo del nuevo año desde el menú Acciones > Crear nuevo año, todas las Reglas presentes en la tabla Registros memorizados se trasladan e insertan en el nuevo archivo.
Cuando importas los movimientos del extracto bancario, las Reglas se aplican de inmediato.
Puedes añadir nuevas Reglas y adaptar las existentes a nuevas necesidades, como por ejemplo el cambio del IVA, la adición o eliminación de cuentas.
Copiar Reglas de un archivo a otro
Cuando creas un nuevo archivo, puedes copiar las reglas de un archivo a otro desde la tabla Registros memorizados:
- Ve a la tabla Registros memorizados
Asegúrate de que la disposición de las columnas sea la misma en ambos archivos. - Selecciona las filas de las Reglas que deseas copiar.
- Copia las filas desde el menú Editar > Copiar filas, o con la combinación Ctrl + C.
- Pega las filas copiadas en la tabla Registros memorizados del nuevo archivo desde el menú Editar > Pegar filas copiadas, o con la combinación Ctrl + V.
Algoritmos deterministas vs. probabilísticos (IA)
La Inteligencia Artificial (IA) se utiliza cada vez más en los sistemas de automatización. Sin embargo, los sistemas basados en algoritmos probabilísticos no son adecuados para el ámbito contable, donde los registros deben ser exactos.
En colaboración con nuestros usuarios, hemos desarrollado un sistema para el autocompletado de registros importados basado en Reglas, es decir, en algoritmos deterministas.
Es un enfoque más alineado con la lógica contable, porque:
- El enfoque probabilístico conlleva una serie de riesgos en el ámbito contable y fiscal, y es difícil de controlar.
- Las reglas ofrecen un nivel de control y precisión muy elevado.
Por ejemplo, los pagos realizados a compañías de seguros pueden asignarse con precisión a una cuenta según el número de contrato. - Todas las reglas constituyen una valiosa base de conocimiento.
Se enumeran en la tabla de Registros memorizados, pueden modificarse fácilmente (por ejemplo, cuando cambia el IVA) y sirven como referencia y herramienta de control. Puedes:- Ver cómo se registran determinadas operaciones si no lo recuerdas.
- Explicar a quienes llevan la contabilidad cómo registrar las operaciones.
- Definir para el auditor cómo registrar ciertas operaciones.
- Adaptar las reglas si cambian los códigos de IVA o se añaden o eliminan cuentas, centros de coste, etc.
- Eliminar reglas que ya no se aplican.
- Copiar y pegar las reglas en otra contabilidad y adaptarlas según tus necesidades.
- No requieren fase de aprendizaje y funcionan perfectamente incluso para pagos que ocurren solo una o pocas veces al año.
- Las reglas pueden adaptarse de inmediato a cambios normativos. En cambio, la Inteligencia Artificial aprende del pasado y tiende a repetir lo ya hecho, incluso si la situación ha cambiado.
Funcionalidades actualmente no disponibles
Estas funciones, aunque solicitadas por algunos usuarios, no están disponibles actualmente:
- Posibilidad de cambiar el texto del registro, para acortarlo y simplificarlo.
- Para los registros en varias líneas, posibilidad de usar fórmulas que calculen los importes en función del importe del registro importado.
- Posibilidad de aplicar una regla según la fecha del registro (condición: columna Fecha).
Cómo funcionan las reglas de autocompletado de registros importados en 3 pasos
A continuación se explica el procedimiento de funcionamiento de las Reglas y cómo se aplican.
El proceso puede resumirse en tres pasos:
- Importar los movimientos bancarios en la tabla Registros.
- Crear las reglas.
- Aplicar las reglas para el autocompletado de los registros.
1. Importar los movimientos bancarios
Cuando se importan los movimientos bancarios, el programa inserta una cuenta de contrapartida temporal [CA]. Normalmente, la contrapartida debe completarse manualmente en cada registro.

En la imagen de ejemplo, en la tabla Registros se observa que:
- (1) - Las celdas tienen la misma contrapartida temporal, relacionada con ventas a través de Twint.
- (2) - La celda tiene una contrapartida temporal relacionada con gastos mensuales de mayo.
- (3) - La celda tiene una contrapartida temporal relacionada con gastos telefónicos de Swisscom.
- (4) - La celda tiene una contrapartida temporal relacionada con costes de seguros, póliza nº 892-948.
- (5) - La celda tiene una contrapartida temporal relacionada con costes de seguros, póliza nº 987-650.
A continuación se explica el procedimiento de funcionamiento de las Reglas y cómo se aplican.
El proceso puede resumirse en tres pasos:
- Importar los movimientos bancarios en la tabla Registros
- Crear las reglas.
- Aplicar las reglas para el autocompletado de los registros.
1. Importar los movimientos bancarios
Cuando se importan los movimientos bancarios, el programa inserta una cuenta de contrapartida temporal [CA]. Normalmente, la contrapartida debe completarse manualmente en cada registro.
En la imagen de ejemplo, en la tabla Registros se observa que:
- (1) - Las celdas tienen la misma contrapartida temporal, relacionada con ventas a través de Twint.
- (2) - La celda tiene una contrapartida temporal relacionada con gastos mensuales de mayo.
- (3) - La celda tiene una contrapartida temporal relacionada con gastos telefónicos de Swisscom.
- (4) - La celda tiene una contrapartida temporal relacionada con costes de seguros, póliza nº 892-948.
- (5) - La celda tiene una contrapartida temporal relacionada con costes de seguros, póliza nº 987-650.
2. Crear las Reglas
Las Reglas sirven para completar automáticamente todas las contrapartidas temporales de los registros importados, añadiendo también códigos de IVA, centros de coste, enlaces y más.
Las reglas son registros modelo ya completos, presentes en la tabla Registros memorizados, donde:
- La columna Descripción contiene el texto (una o más palabras clave) que debe contener el registro importado.
- Las columnas Cuenta Débito y Cuenta Crédito contienen la Contrapartida que sustituirá la temporal.
Hemos creado un sistema que ofrece diferentes métodos para crear las Reglas:
- Reglas desde el diálogo Aplicar reglas
- Reglas desde la tabla Registros
- Reglas desde la tabla Registros memorizados
Sea cual sea el método utilizado, las Reglas creadas se guardan en la tabla Registros memorizados.

En el ejemplo, en la tabla Registros memorizados se ha creado una Regla para los siguientes movimientos:
- (1) - Para los movimientos "Twint", la regla reemplaza la contrapartida temporal con la cuenta "Sales". También se ha añadido el código de IVA.
- (2) - Para el movimiento "Interac Electronics", la regla reemplaza la contrapartida temporal con la cuenta "Goods". También se ha añadido el código de IVA.
- (3) - Para el movimiento "Swisscom", la regla reemplaza la contrapartida temporal con la cuenta "Admin".
- (4) - Para el movimiento "Best insurance" con número de póliza "892-948", la regla reemplaza la contrapartida temporal con la cuenta "Insurance Health".
- (5) - Para el movimiento "Best insurance" con número de póliza "987-650", la regla reemplaza la contrapartida temporal con la cuenta "Insurance Car".
3. Aplicar las Reglas para el autocompletado (Resultado)
En la tabla Registros, el programa completa automáticamente los registros importados añadiendo la cuenta de contrapartida, el código de IVA, etc., independientemente del método utilizado para crear las Reglas.

En el ejemplo, en la tabla Registros los movimientos importados han sido completados automáticamente:
- (1) - Para los movimientos "Twint", la contrapartida temporal fue sustituida por la cuenta "Sales", y se añadió el código de IVA.
- (2) - Para el movimiento "Interac Electronics", la contrapartida temporal fue sustituida por la cuenta "Goods" y se añadió el código de IVA.
- (3) - Para el movimiento "Swisscom", la contrapartida temporal fue sustituida por la cuenta "Admin".
- (4) - Para el movimiento "Best insurance" con número de póliza "892-948", la contrapartida temporal fue sustituida por la cuenta "Insurance Health".
- (5) - Para el movimiento "Best insurance" con número de póliza "987-650", la contrapartida temporal fue sustituida por la cuenta "Insurance Car".
Además, el programa reconoce los registros con código de IVA y completa todas las columnas relacionadas con el IVA (cuenta de IVA e importes).
Create Rules from the Apply Rules Dialog
One of the methods for creating Rules is from the Apply Rules dialog. The main advantages are as follows:
- You can see all imported transactions.
- The imported transactions are divided into incoming and outgoing transactions, with Rules and without Rules.
- For each group of identical transactions, the Rule being applied is shown in bold.
- Rules that are duplicated or in conflict are highlighted.
- You can add new rules and modify or delete existing ones.
- By changing the conditions of a Rule (description, amount, account), you can immediately see the list of transactions that comply with it.
- You can decide which rules to activate and which to deactivate.
Below is the complete procedure for creating Rules from the Apply Rules dialog.
1. Give the command Import into accounting
Before accessing the Apply Rules dialog, you must first import bank, postal, or other transactions as follows:
- Use the command from the Actions menu > Import into accounting > Transactions
- Select the appropriate format and indicate the path where the file with your bank statement data is located
- In the dialog that opens:
- Enter the account related to the statement from which you are importing the transactions (bank, postal service, etc.).
- Specify the start and end dates for the period of the transactions to import.
- Indicate the temporary contra account if you want it to be different from the default "[CA]".
You can use any account, and if you write it in square brackets, it will not be accounted for. - Activate the Apply Rules option (available only with the Advanced plan of Banana Accounting Plus).
- Confirm with OK.

2. Dialogue Apply Rules
The program opens the Apply Rules dialog.
In this dialog, you will find:
- The temporary contra account you entered previously or the default one "[CA]".
- The bank account entered, where all transactions imported from your bank or postal account are recorded.
- The imported transactions from the bank account, divided into:
- Incoming transactions without rules (Money In without rules).
- Outgoing transactions without rules (Money Out without rules).
- Incoming transactions with rules (Money In with rules).
- Outgoing transactions with rules (Money Out with rules).

3. Create new rules
To create new Rules:
- Position yourself on one of the transactions for which you want to create a rule.
- Go to the right-hand side until you see "...".
- Click on Add New Rule.

The Add Rule - Edit Rule dialogue appears.
In this dialog, you need to enter:
- In the Description, the text (keyword) that the program uses to find the matching Rule in the imported transactions.
Example:- Best Insurance Contract 892-948
applies to lines that contain exactly the specified text. - +Best Insurance Contract 892-948
applies to lines that contain the words "Best Insurance" and "892-948" in any position.
- Best Insurance Contract 892-948
- The contra account, used to replace the temporary contra account.
- Any other information (Cost centers, VAT codes, etc.).
Important: where there is a contract number, a policy number, a customer number, etc., it is recommended to add a "+" in front of the rule. The + allows the rule to search for individual words (or sequences of numbers) regardless of their position within the description of the imported transaction.
The program shows the transactions found based on the entered conditions to which the new rule will be applied. In the example, we have a single transaction.
- Confirm with OK.

4. Confirm Apply Rules
In the Apply Rules dialog, you will see:
- The row of the created Rule ("NEW") where the data of the temporary counteraccount [CA] and the other information entered in the rule are indicated.
- Below are the lines of the transactions to which the rule has been applied.
You can decide when to execute the Apply Rules command:
- You can apply the rules selectively and continue working on the others.
- You can exit the dialog and return later.
- You can cancel the operation of applying the rules and repeat it later.
- The Apply Rules command also saves any changes you made to the rules.
By clicking on the buttons:
- Apply Rules:
- The program adds the new Rules to the Recurring transactions table.
- The program completes the transactions in the Transactions table.
- The dialog remains open so you can add the rules to the other transactions.
- OK
- Confirms the applied rules and closes the dialog.
- Confirms the applied rules and closes the dialog.

Undo changes made
Once the dialogue is closed, you will see the completed transactions in the Transactions table.
If you wish, you can undo the changes you have made:
- Menu Edit > Undo edit
- With the Cancel button (green arrow).
To also cancel the import of the data, you need to repeat the Cancel command a second time.
Complete other transactions with Temporary contra account
After importing bank transactions, the aim is to complete all transactions so that there are no more transactions with Temporary contra accounts [CA].
You can manually complete the remaining transactions. This is useful for special cases that do not tend to repeat.
You can create new rules by chosing one of the following methods:
Adding information to completed transactions with rules
It is possible to add supplementary information to the Rules through the Recurring Transactions table.
Auto-completion rules from the Apply Rules dialogue
The Apply Rules window offers an excellent level of control over changes to accounting transactions because it shows a preview of existing rules, with an indication of which transactions match each one and which transactions do not yet match any rules. You then have the option of creating new rules, modifying or deleting existing ones.
▶ Video: Rules for completing imported transactions (Apply Rules dialogue)
The dialogue may be displayed:
- From the Import Transactions dialogue, when the Apply Rules option is checked
Rules are only applied to imported rows
- From the Actions menu > Recurring transactions > Apply rules...
Rules are applied to the entire contents of the Transactions table
The Apply Rules dialogue, coupled with the import of banking data, becomes a crucial tool for setting up all repetitive records. In this dialogue window, when faced with multiple repetitive transactions of the same type, it suffices to set the rule for just one of the transactions, and the rules are automatically applied to all other transactions in the dialogue, eliminating the need to set the rule again.
Once the rules are confirmed, all transactions are listed in the Transactions table, ensuring consistency and accuracy in records of the same type, and speed in accounting for all transactions.
This dialogue box is divided into three sections:
Apply rules to transactions with...
- Temporary contra account:
This field is mandatory.
It filters all imported transactions that contain that specific contra account, e.g. [CA], which was indicated in the Import transactions dialogue. - Account:
Filters all imported transactions that contain a specific account, usually a bank account or [A], which has been indicated in the Import Transactions Dialogue.
The rule-based auto-completion system assumes that once the transactions have been completed, there is no longer any transaction containing the temporary contra account.
Imported data corresponding to rules or not
The window shows all transactions that have temporary contra accounts indicated above (e.g. [CA]). These are grouped in four main sections:
- Incoming transactions with rules
Transactions with positive change of account (credit) and with indication of the rule to which they correspond - Outgoing transactions with rules
Transactions with negative account variation (debit) and with indication of the rule to which they correspond - Incoming transactions without rules
Transactions with positive change of account (credit) and not belonging to any rule - Outgoing transactions without rules
Transactions with negative account variation (debit) and not belonging to any rule
Contextual commands
From the row of a transaction without a rule, a simple click or the three dots (...) to the right, or a right click anywhere on the row, opens a menu allowing you to:
- Add/Edit Rule
- Cancel an existing rule
- Change an overlapping rule

The commands at the bottom of the dialogue
- Expand All/Collapse All: displays or hides the elements of the Transactions.
- Display unused rules: checking this option displays all rules defined in the Recurring transactions table; if the option is not checked, the programme only displays rules that have matches.
- Display rows without rules: if this option is checked, all imported transactions are displayed; if the option is not checked, the programme only shows transactions that match a rule.
- Remove accounts between [ ]: in multi-row transactions, the import account is placed in square brackets [ ] in the detail rows. If this option is activated, the programme removes the import account from the detail rows.
Rules with transactions on multiple rows can only be defined in the Recurring transactions table. - OK: this button applies the active rules and closes the window.
- The temporary contra account is replaced in all transactions that have a match with a rule.
- New or changed rules are also saved in the Recurring Transactions table.
- Cancel: this button closes the window without applying the rules.
- If there have been changes to one or more rules, you will be asked for confirmation before closing the window.
- With this button you cannot undo the Apply Rules command; to do so, you must close this window and use the Undo command from the Edit menu.
- Apply Rules: this button applies the rules without closing the window.
- The temporary contra account is replaced in all transactions that have a match with a rule.
- Rules that are added or changed are saved in the Recurring transactions table.
- If you wish to undo changes, you must close the window and use the Undo command from the Edit menu.
Tips on how to use the Apply Rules window
The most effective way to work with the Apply Rules window is as follows:
- Check that the transactions matching rules are correct.
- Use the Apply Rules button to update the Transactions table with the selected rules.
- Add new rules for the remaining transactions and check that they are applied correctly.
- Use the Apply Rules button again.
- Repeat steps 3 and 4 until all recurring transactions are associated with rules.
Recurring transactions table
Rules are saved and may be edited in the Recurring transactions table.
You can complete or add rules also with transactions on multiple rows in the Recurring transactions table.
As time goes by, you will see that more and more imported transactions will have matches with rules; the more rules you add, the more your accounting work will be reduced.
Apply Rules dialog – Add Rule
From the Apply rules dialogue you may access the Add/Edit rule section as follows:
- By right-clicking on one of the transactions or rules:
- For transactions that already have a rule, you can choose Edit Rule or Delete Rule.
- For transactions that do not have a rule, you can choose Add New Rule.
Add New Rule example
The following example in the dialogue below is an outgoing transaction of the payment of a health insurance.
To add a new rule:
- Right-click on the movement row and choose Add New Rule.
- The dialogue Add rule appears.
- Fill in the fields available.
- Confirm with OK.

Add New Rule dialogue
The Add New Rule dialogue shows the data of the selected transaction from which you are creating the rule.
- Complete the rule with the matching parameters (conditions) and the rule completion parameters.
- All rules are saved in the Recurring Transactions table (rules for completion), where you can also:
- Edit, add and delete rules.
- Add any other column for completion, which is not available in this dialogue (e.g. Notes or DocLink columns).
- Colour the row if you want to highlight the imported transaction.
- Add transactions on multiple rows (SplitRule).

The Rule
- Rule type.
The programme, depending on the type of transaction, if in credit or debit on the bank account, sets the rule as Money in or Money out transaction. - Rule title.
It is optional, it is displayed in the Apply Rule dialogue.
Conditions
These are the elements that are used to check whether there is a match for each individual transaction.
- A match is given if all conditions are found.
- If a match is given, the entry is listed among the transactions with rule.
The description
In the description, enter the text to be searched in the text of the imported transaction. If the text is found the transaction will be considered suitable for applying the rule, if the other conditions are then met.
- Exact word or phrase
- If you write only Best Insurance 982-948 as a condition of the rule, only transactions containing those words in that exact order will be considered matches.
- If you write only Insurance, as a condition of the rule, all entries containing this exact word will be considered matches.
- All words (starting with the "+ "sign)
- If you write +Best Insurance 982-948 as a condition of the rule, all records containing these exact words, in any position, will be considered matches.
All words must be present in the description of the transaction.
The position of the words in the sentence is not relevant.
The "+" sign is not considered in the search.
- If you write +Best Insurance 982-948 as a condition of the rule, all records containing these exact words, in any position, will be considered matches.
- List of words (using |)
- If you enter "coffee|restaurant", the program searches for imported transactions that contain the word "coffee" or "restaurant".
- This mode is useful for identifying multiple categories without having to create separate searches.
- Upper and lower case
When searching for input text, no case difference is made.
The text you enter is applied to both upper and lower case text.
Amount
If you indicate an amount in the rule, only transactions with the same amount, as well as a match in the Description, will be considered as matches.
If you do not indicate any amount, any transaction of any amount that meets all other criteria will be treated as a match.
Account
In this field you will already find by default the account from which you imported the transactions. If you leave the account field empty, all transactions, imported from any account, that meet all other criteria will be considered as matches.
Actions
These are the elements used to complete the transaction row if a match is given.
If the contra account or other items to be completed are not present, you can abort the Apply rules command, add the missing account, and call up the Actions > Recurring transactions > Apply rules... command.
Contra account
Enter the account in your chart of accounts that is to be matched in the rule. In this example, the correct contra account is the Health Insurance account.
VAT
You can already enter in the rule the VAT code that the programme must add to each movement considered as a match.
CC1, CC2, CC3
You can already enter in the rule the Cost Centres that the programme must add to each movement considered as a match.
By confirming with the OK button, the new rule is saved. You will return to the previous window where the imported movements with and without rules are displayed again.
Matching Transactions
This table shows all imported transactions selected in the Apply Rules dialogue, which fall under this rule.
Buttons
- The Delete button, cancels the rule.
- The OK button, saves the rule data.
Be aware though that, until you do not give the command Apply Rules, the new rules won't be saved in the Recurring transactions table.
Rules from Transactions table
One of the methods provided for creating Rules is from the Transactions table. The main advantages are as follows:
- You work directly in the Transactions table that you already use regularly. You are already familiar with the table.
- You see all the columns.
- You create Rules simply by completing the imported transactions.
You complete the transactions manually only the first time when creating the Rules. For subsequent imports, the program applies the already created Rules to the new imported transactions. - Speed in creating Rules.
Select the rows with completed transactions and, with a single click, create all the rules in the Recurring Transactions table. You only need to modify the description of each rule to ensure a precise match for future transactions. - You do not need to insert Rules through additional dialogs.
- You do not need to manually enter all the Rule data in the Recurring Transactions table.
Below is the complete procedure for creating Rules from the Transactions table.
Import transactions
In the Transactions table, import transactions from bank, postal, or credit card statements.
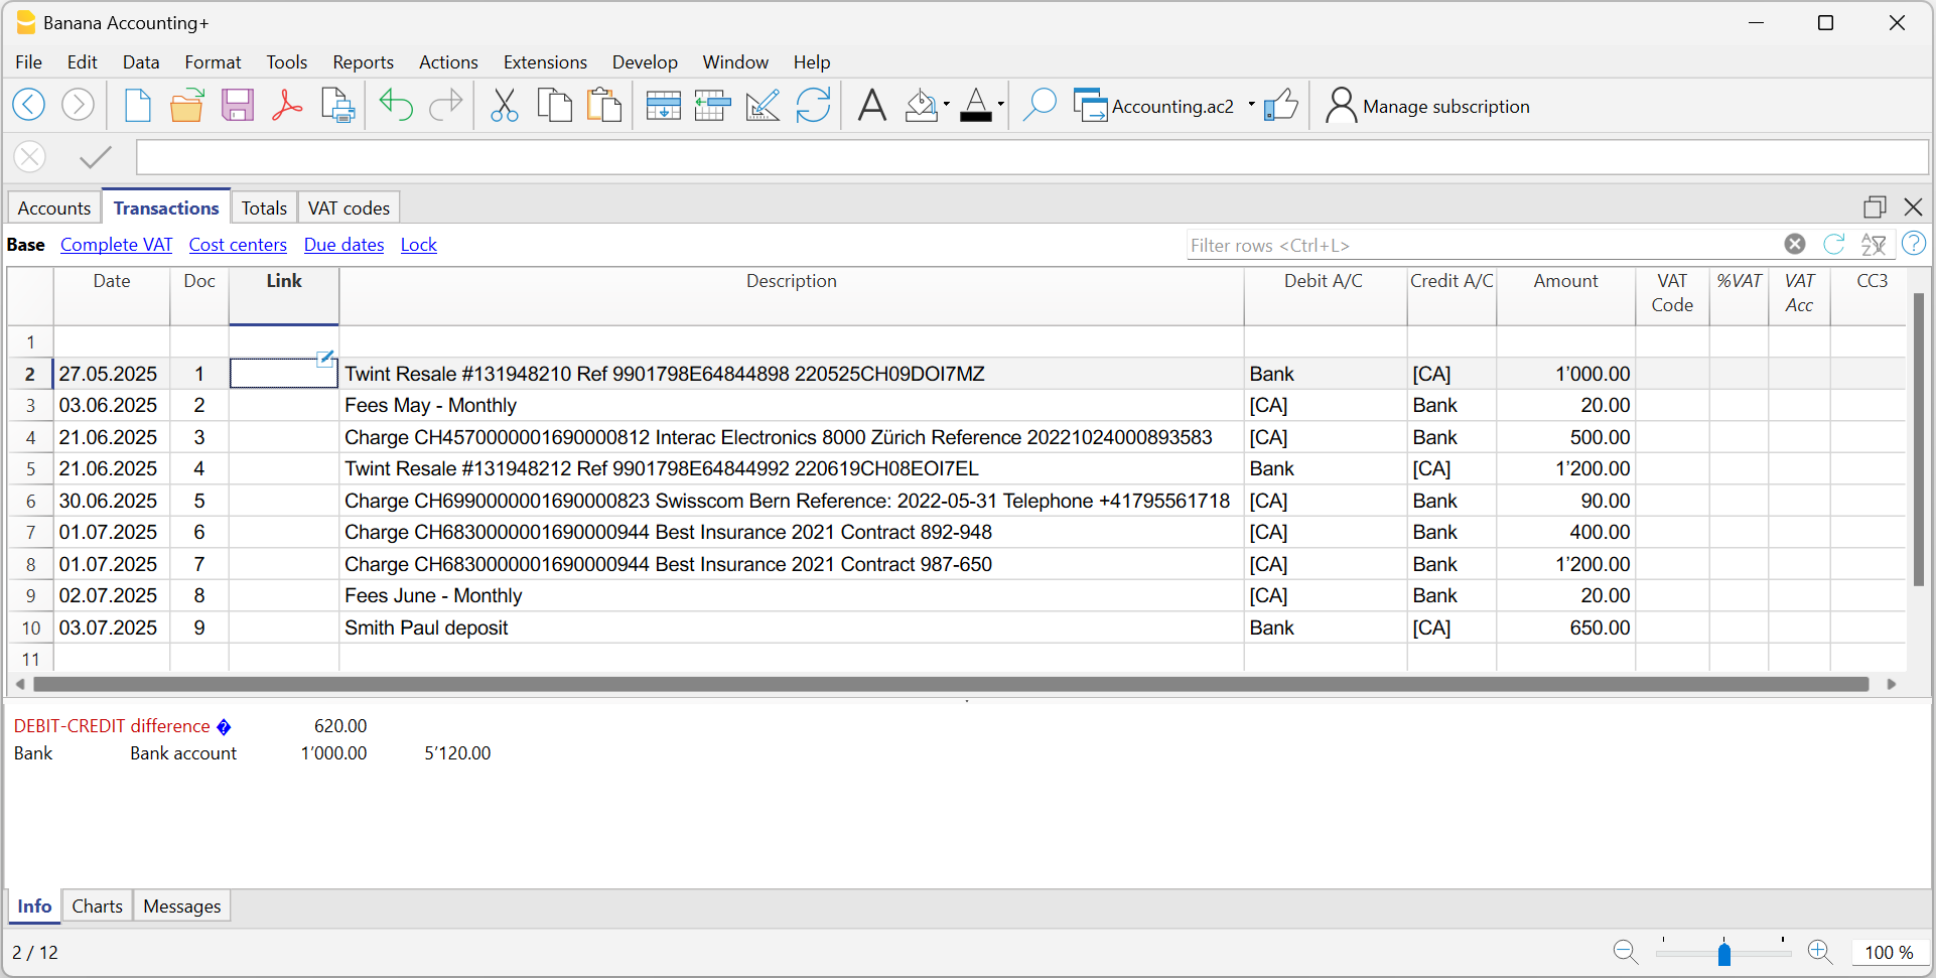
Complete the imported transactions
For each imported transaction, enter the counterpart, VAT code, cost center, or other information.
When you import a transaction that needs to be recorded on multiple lines, the program inserts a single entry with the total amount and a temporary counterpart [CA].
Proceed as follows:
- Remove the temporary counterpart account [CA] from the transaction.
- Insert new rows following the transaction. For each row, enter the complete transaction with description, counterpart, amount, any VAT code, and cost center.
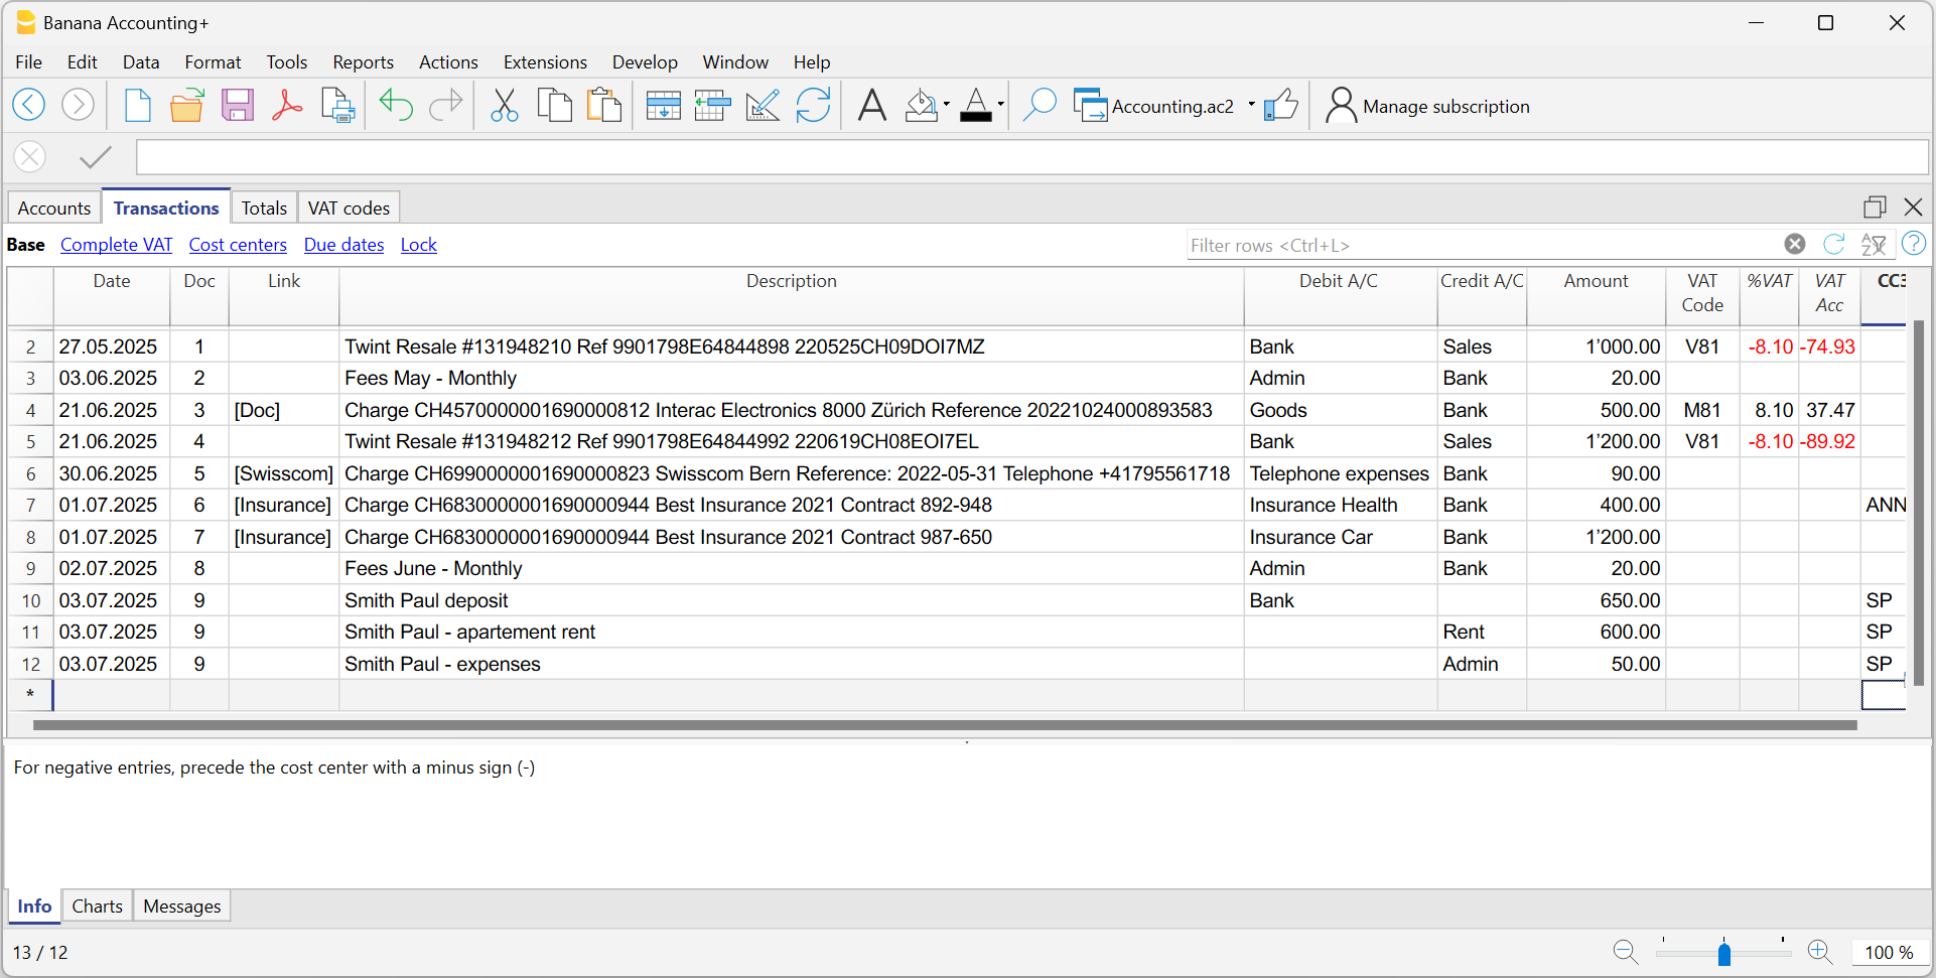
Create Rules
Starting from the completed transactions, you can create Rules:
- Select from the Transactions table the entries to which you want to apply Rules.
- Right-click on a transaction without rules > Create rules from selection.
Alternatively, go to the Actions menu > Recurring Transactions > Create rules from selection.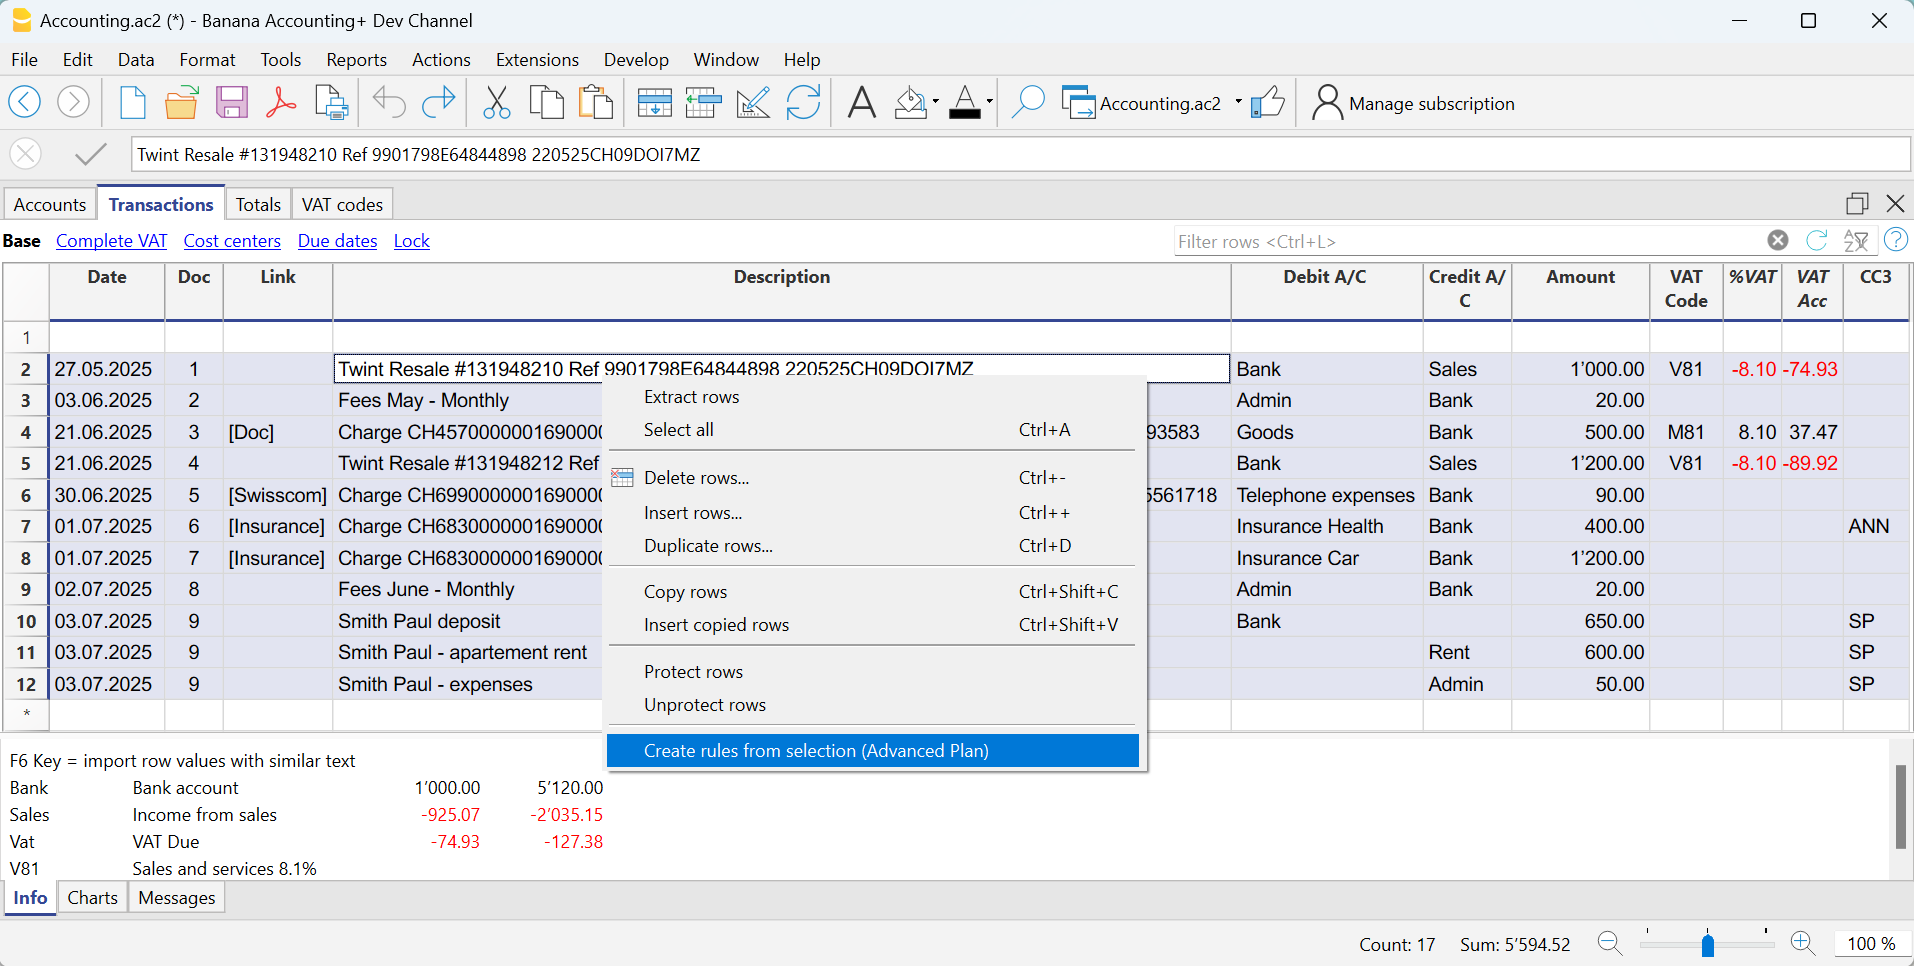
All selected transactions are transferred to the Recurring Transactions table, exactly as they were completed in the Transactions table.
How to complete the Rules
In the Recurring Transactions table, you need to complete the Rules:
- Edit the Description column.
Modify the text of the description to search for in the transactions from the imported bank statement. Initially, the program automatically uses the description found in the imported transaction.
Replace this text with one or more keywords so that the program can find matches in the description of the imported transaction (e.g., +Best Insurance).
See also Condition on Description - Debit and Credit Account Columns
The Debit and Credit columns show the counterpart and the imported bank account.- First, check whether the indicated counterpart is already the desired one; if not, update it accordingly.
- The main import account, used to identify matching transactions, must not be marked as a commented account (account enclosed in square brackets).
If the account matches the bank's main account from which the transactions are imported and is marked as a commented account, the brackets must be removed, otherwise the rule will not be applied correctly.
This may happen with detailed transactions imported from the statement for which no specific rules exist yet. - Alternatively, you can remove the main import account and leave only the counterpart. In this case, the rule will be applied based on the Description column (match with the transaction description) and will be valid for all imported bank accounts.
- For multi-line transactions, edit the Doc column.
In the first row of the transaction, enter empty square brackets [] in the counterpart column.
In subsequent rows, enter !RuleSplit in the Doc column (see rows 7,8,9 in the image below).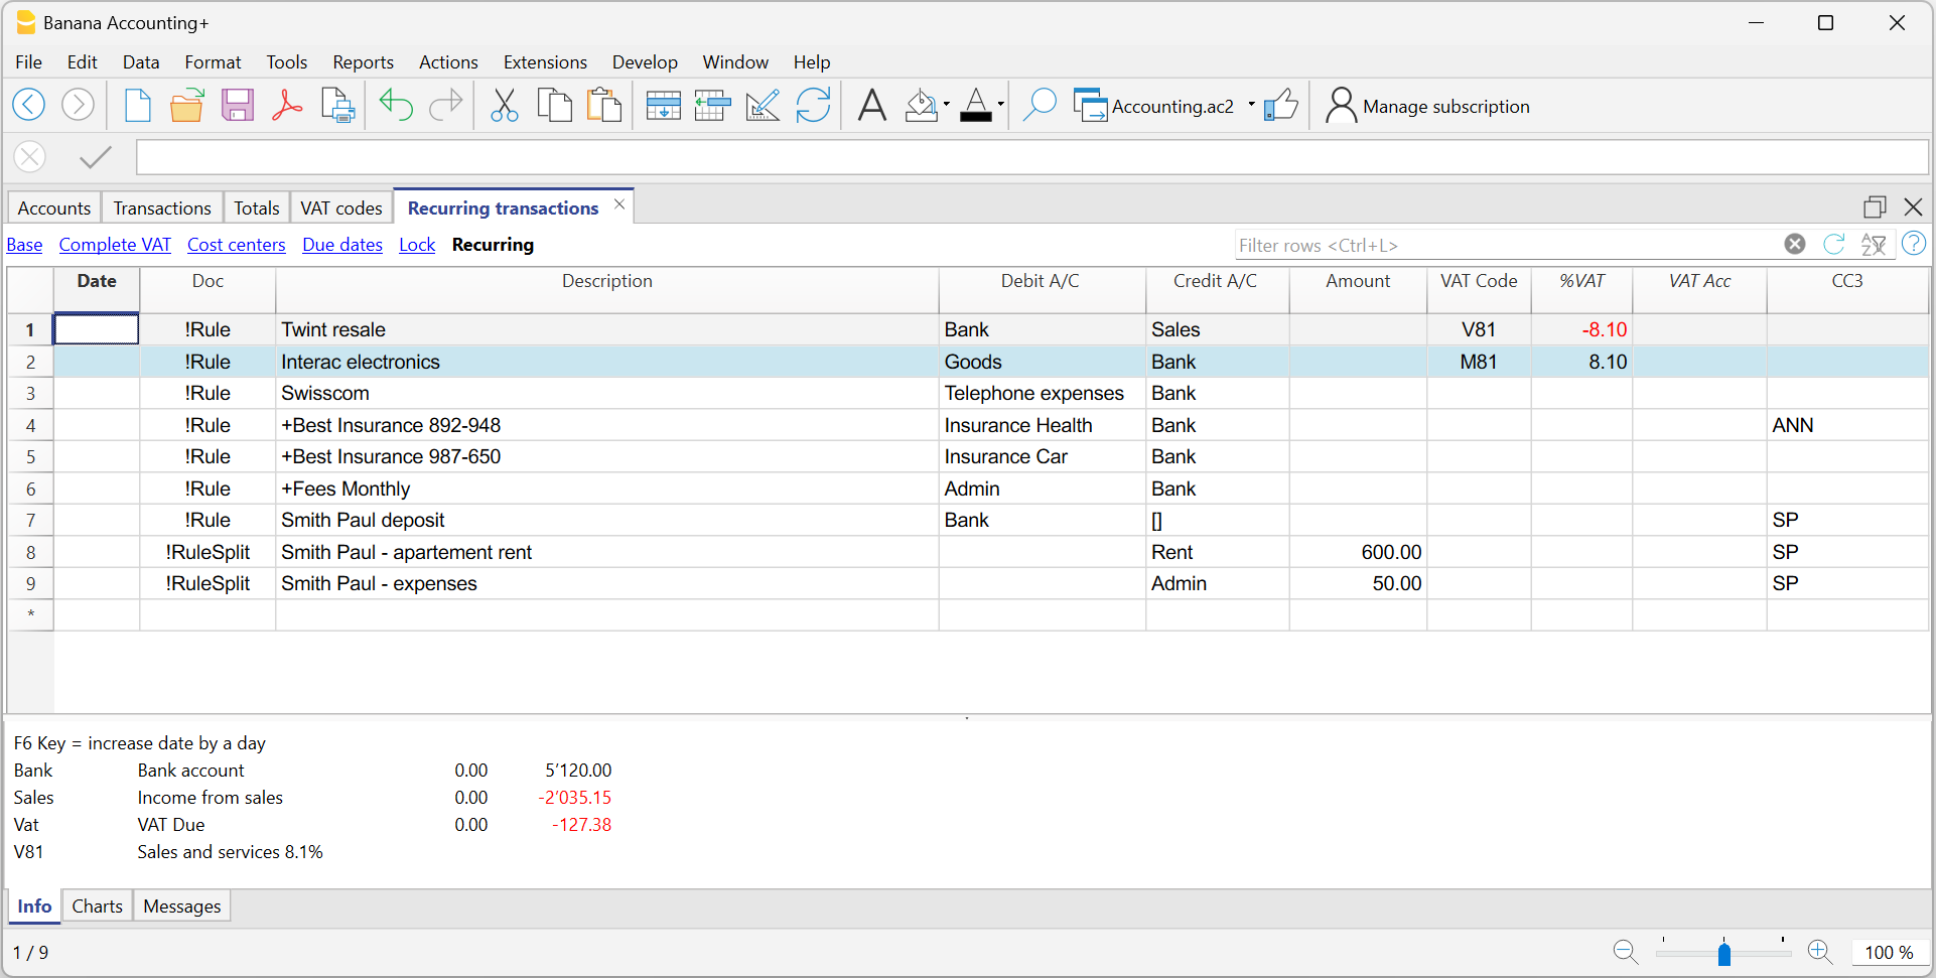
The explained procedure only needs to be performed the first time to set up the Rules. For future imports, the Rules found are applied automatically. You only need to complete the new imported transactions without a rule using the same procedure.
To find all imported transactions in the Transactions table that do not have a rule, you can use the Row filter function, entering the text "[CA]".
Recurring Transactions table Rules
The rules can be accessed via the command Actions > Recurring Transactions > Transactions table.
- Rule rows are those that contain !Rule or !RuleSplit in the Doc column.
- In rule rows, the columns have a different meaning:
- Condition Columns
Contain the values to be compared to determine whether the rule should be applied.
The condition columns are: Doc, Date, Description, Account Debit/Credit, Amount. - Action / Substitution Columns
Contain the values that will be applied and complete the imported transactions.
All columns that are not used as condition columns are considered substitution columns.
- Condition Columns

Condition columns
Condition columns (or search columns) contain the data used to search for matches in the imported transactions.
- Doc column (required)
- Must contain !Rule or !RuleSplit
- !Rule indicates it is a rule.
- !RuleSplit indicates that the rule above must also create split transactions.
- Must contain !Rule or !RuleSplit
- Description column (required)
- The Description column must contain the text to be searched in the description of imported transactions.
- When a description begins with text in square brackets, it is used as the rule name. The rule name is optional and can be used to better identify rules.
- Account column (recommended)
- In double-entry accounting: use the Debit column (to filter incoming transactions) or the Credit column (to filter outgoing transactions).
- In income and expense accounting: use the Account column.
- This is usually the bank account from which the transactions are imported.
- Date column (optional)
- Limits the application of the rule to a specific period of the transactions.
- Amount column (optional)
- Limits the application of the rule to a specific amount or range of amounts.
- In income and expense accounting: use the Income (incoming transactions) or Expense (outgoing transactions) column.
Substitution Columns
Substitution columns must be filled in with additional information.
- DocLink column
- Contra Account column
Enter the contra account that replaces the temporary contra account [CA] or the temporary contra selected in the Apply Rules dialog.- In double-entry accounting: use the Credit column (for incoming transactions) or the Debit column (for outgoing transactions).
- In income and expense accounting: use the Category column.
- VAT Code column
Enter the VAT code to be applied to the imported transaction.
The program automatically completes all VAT-related columns. - Cost Centers (CC1, CC2, CC3) columns
Specify the cost center to assign to the imported transaction. - Notes column
Enter any additional information to be included in the imported transaction. - Other columns
All columns that are not condition columns, except ExternalReference, are considered substitution columns.
ExternalReference is a reserved column used by the bank import to identify each transaction and prevent duplicates.
The DocLink column
In this column, it is not possible to insert a specific link to a document because each transaction will have its own document. However, you can add an annotation in square brackets (e.g., "[Doc]") to distinguish the rows that need to be associated with a digital document.
Once the transactions are imported, it may be necessary to link them to accounting documents. To speed up this process, it is recommended to proceed as follows:
- In the DocLink column of the Recurring Transactions table, use text enclosed in square brackets [ ].
- Within the square brackets, enter the text that should be searched for in the name of the supporting document file.

- In the Transactions table, the transactions are imported with the text in square brackets in the Link column.

- In the Transactions table, use the Row Filter function and enter the text "!link![ ]". This will display all the rows in the Link column that contain square brackets where a link to the supporting document needs to be added.
- When editing the Link column in the Transactions table, the program will show, in the auto-completion, the files of supporting documents that have not yet been linked to a transaction and contain the text entered between the square brackets.
For example, if you enter "[invoice]," the program will display all the unlinked files containing the text "invoice" in the cell.
It is possible that after importing transactions with the Rules, some transactions may need to be manually completed with additional information.
To quickly find the transactions that need to be completed, you can use one of the following methods:
- Using the Notes Column
To quickly locate the transactions that need to be completed, we recommend adding temporary search texts that can be used to filter the transactions. For example:- In the Notes column of the Recurring Transactions table, or in any other column of the Rule row (except for those predefined for the Rule), enter a hashtag, such as #city.
- In the Row Filter function of the Transactions table, enter the same hashtag. This will display the rows that you need to complete.
- Coloring Rule Rows
You can color the Rule rows in the Recurring Transactions table. The row color will be transferred to the Transactions table and used to highlight the transactions to which the rule is applied.
To identify only the colored rows, you can use the Row Filter function by entering the text "!_co!"

Split row transactions
Normally, when you import transactions from a bank statement with the Rule, a single counterpart account is recorded. If the total amount of the counterpart needs to be split across multiple counterpart accounts, you can create a multi-row Rule.
For example:
- You regularly receive a payment of 550 that must be recorded on three different accounts and therefore on three rows:
- (550) rent collection (no contra-account, as this involves recording the global amount split over three rows)
- (500) flat rent (contra account rent)
- (50) extra expenses (contra-account for extra expenses) .
To create a multi-row Rule:
- The first row corresponds to the total amount collected.
- In the Doc column, enter the text !Rule.
- In the Description column, enter the text to search for in the imported transactions.
- In the counterpart column, enter square brackets [].
In the following rows: - In the Doc column, enter the text !RuleSplit.
- In the Description column, enter the text to search for in the imported transactions.
- In the counterpart column, enter the counterpart accounts.
- In all other columns, input the values that should be included in the additional rows. In this example, we have added the tenant’s Cost Center.
In the following example, you can see the tenant’s Cost Center.
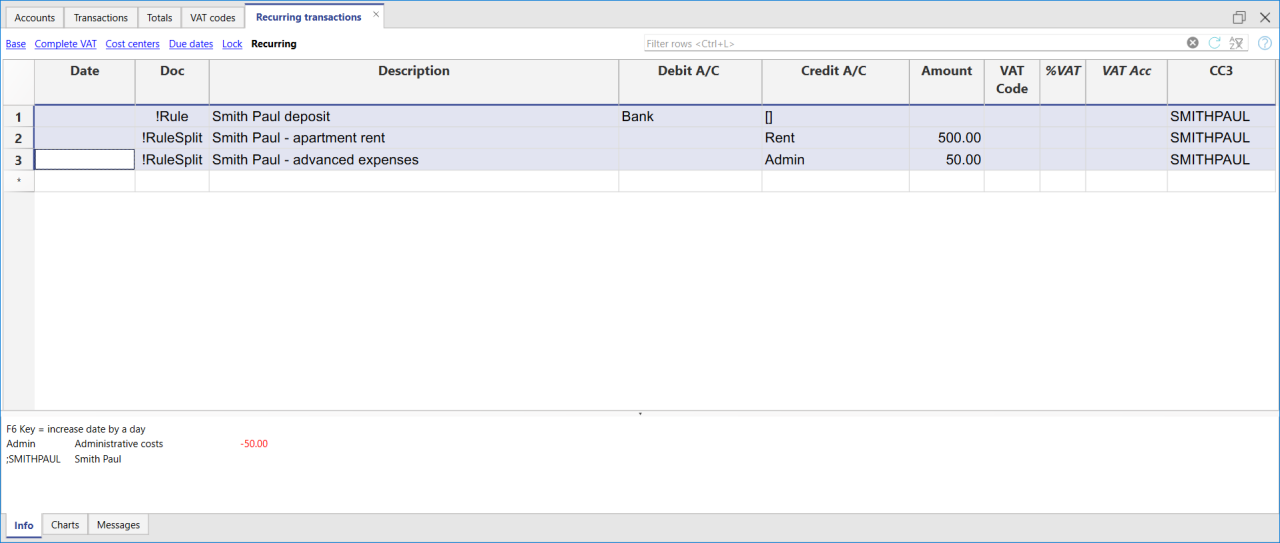
In the example of a multi-row rent transaction, it is assumed that the collected amount is always 550. If the collected amount is different from 550, the transaction will need to be completed manually.
Modifying rules in the Recurring Transactions Table
All completion Rules saved in the Recurring Transactions table, even if they were created from the Apply Rules dialog, can be modified, deleted, or new ones can be created in anticipation of a future import without a Rule.
Set a different description from the imported one
All imported transactions display the description from the bank statement in the Description column of the Transactions table. Typically, these descriptions are very detailed.
It is not possible to automatically change this description at the time of import.
If you wish to change the imported description, you can use the Notes column in the Recurring Transactions table.
Note: if the Notes column is already used for your own annotations, it cannot be used to modify the description.
If the Notes column is not being used, proceed as follows:
- Display the Recurring Transactions table.
- Make the Notes column visible by going to the menu Data > Columns set up > check the Notes column.
- In the Notes column, enter the description text that you want to appear in the Transactions table (Description column).
Repeat this step for each desired transaction.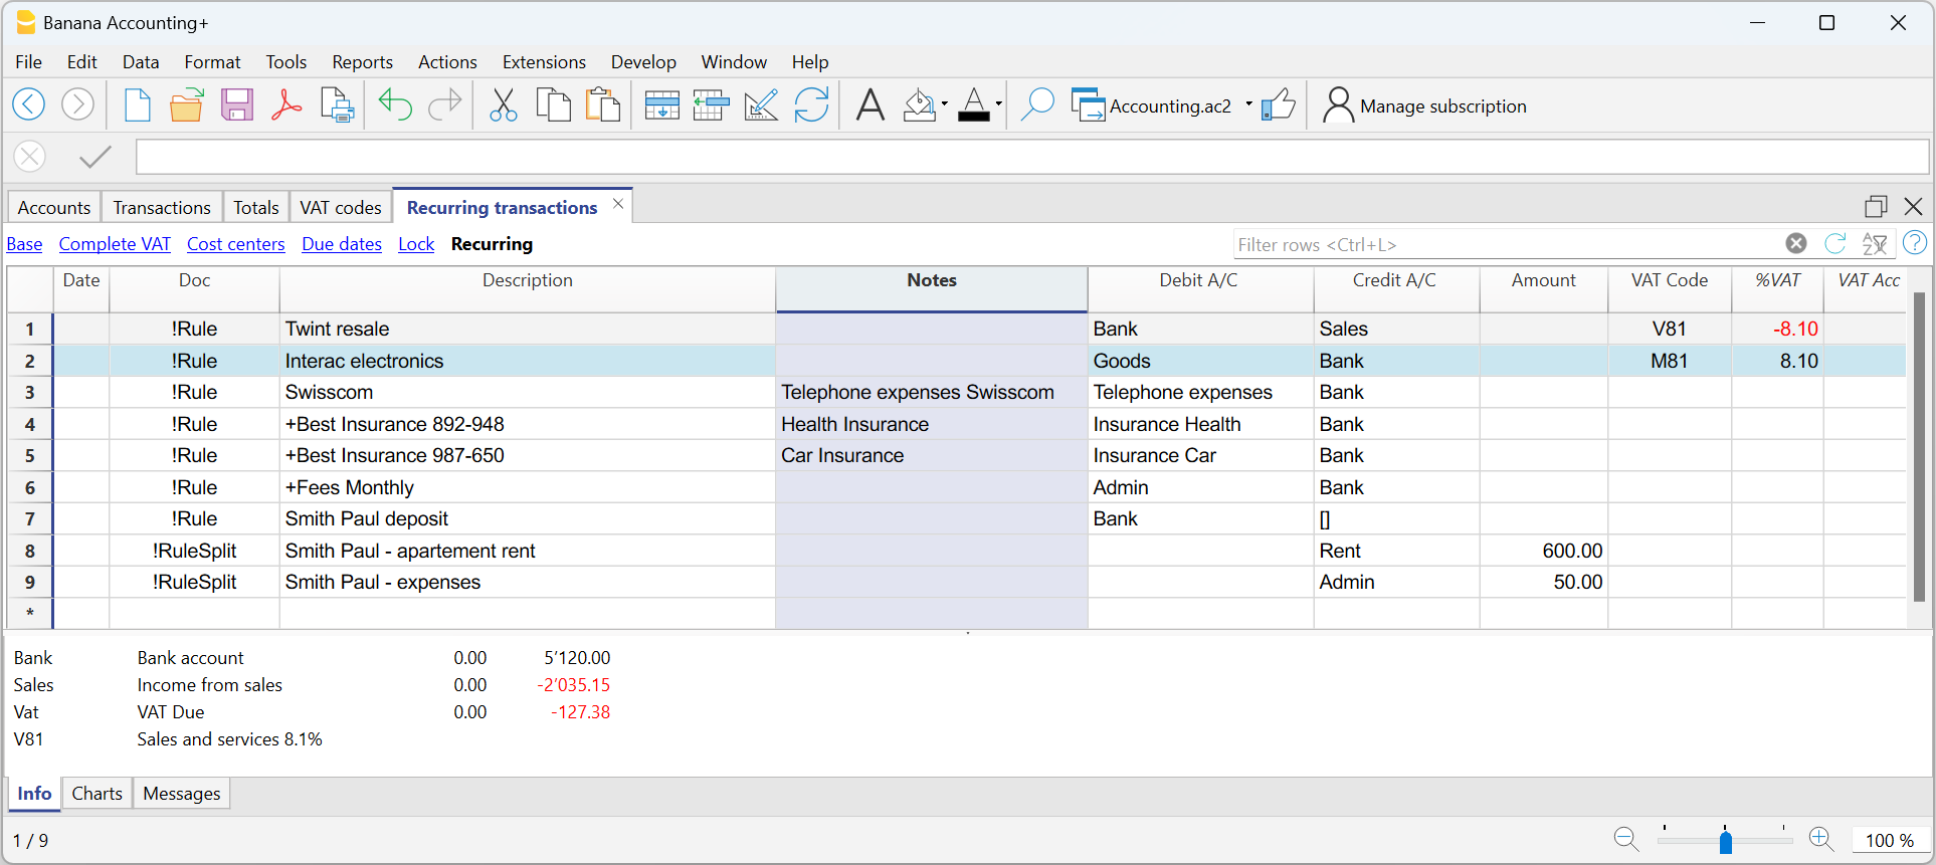
Import the transactions - After importing into the Transactions table, make the Notes column visible (menu Data > Columns setup > check the Notes column)
The Notes column will display the notes defined in the Recurring Transactions table.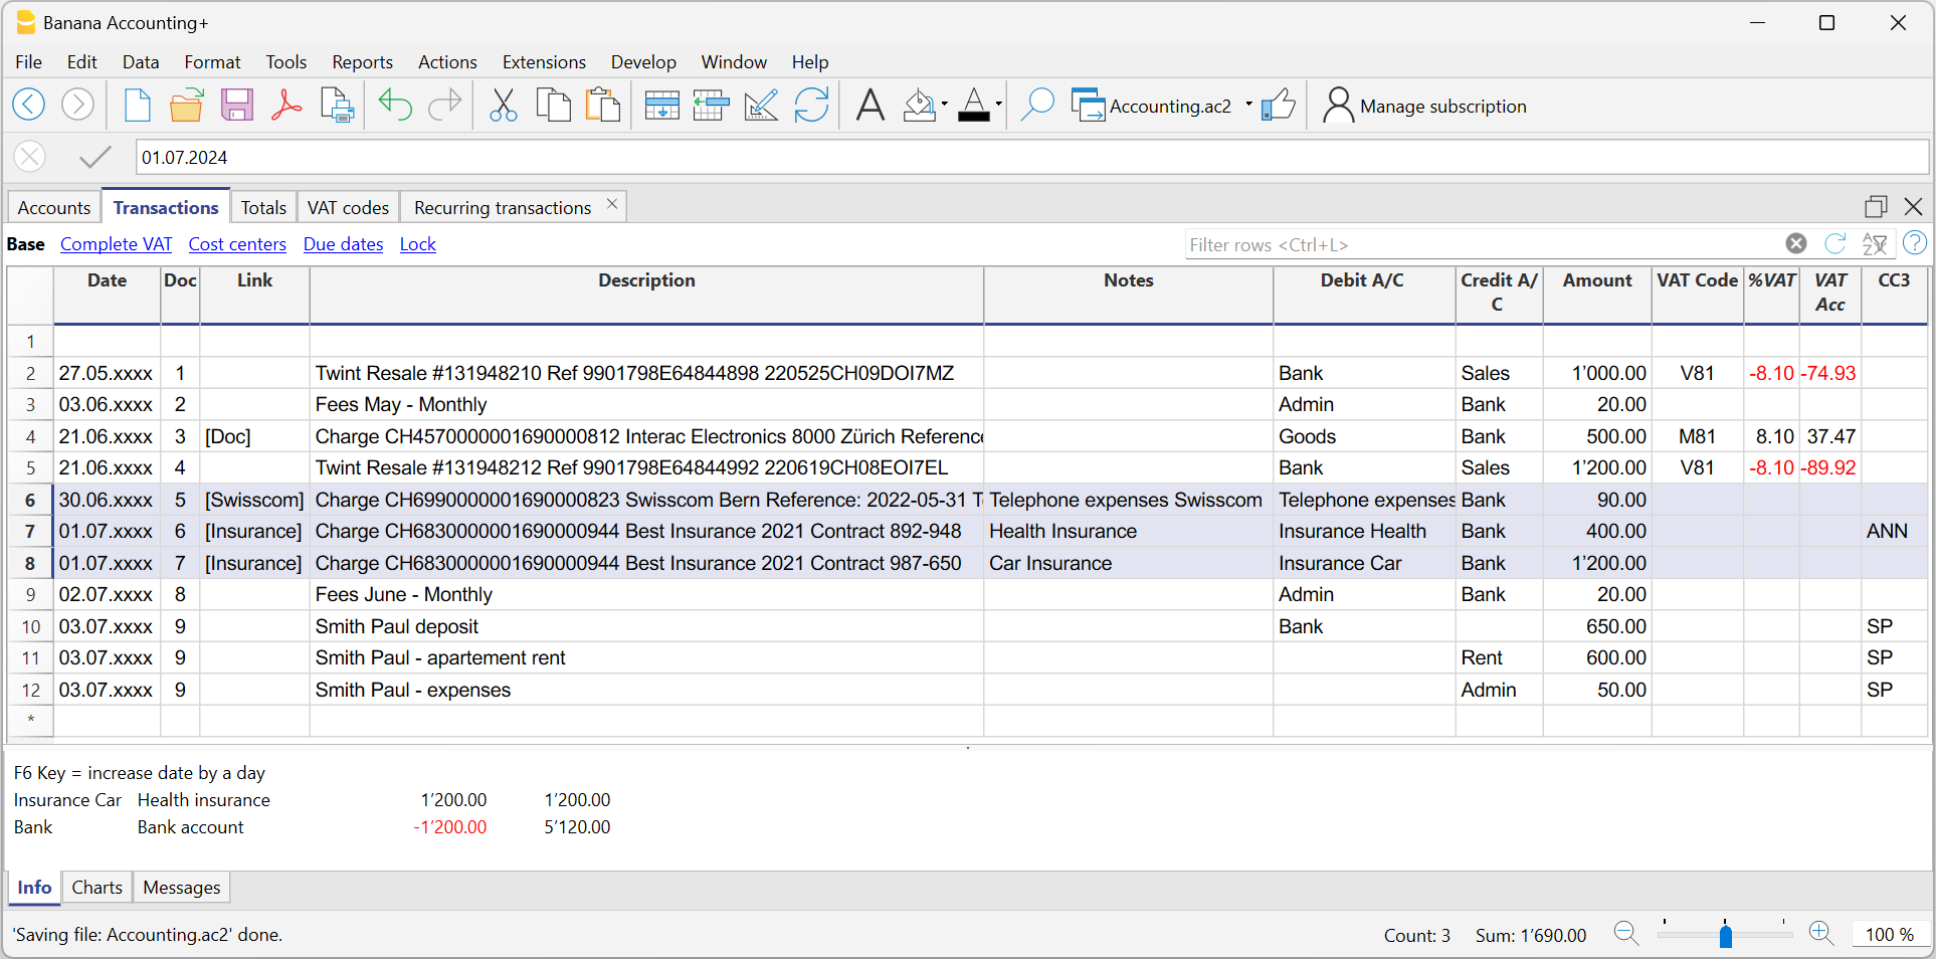
- For each transaction, copy the content from the Notes column and paste it into the Description column.
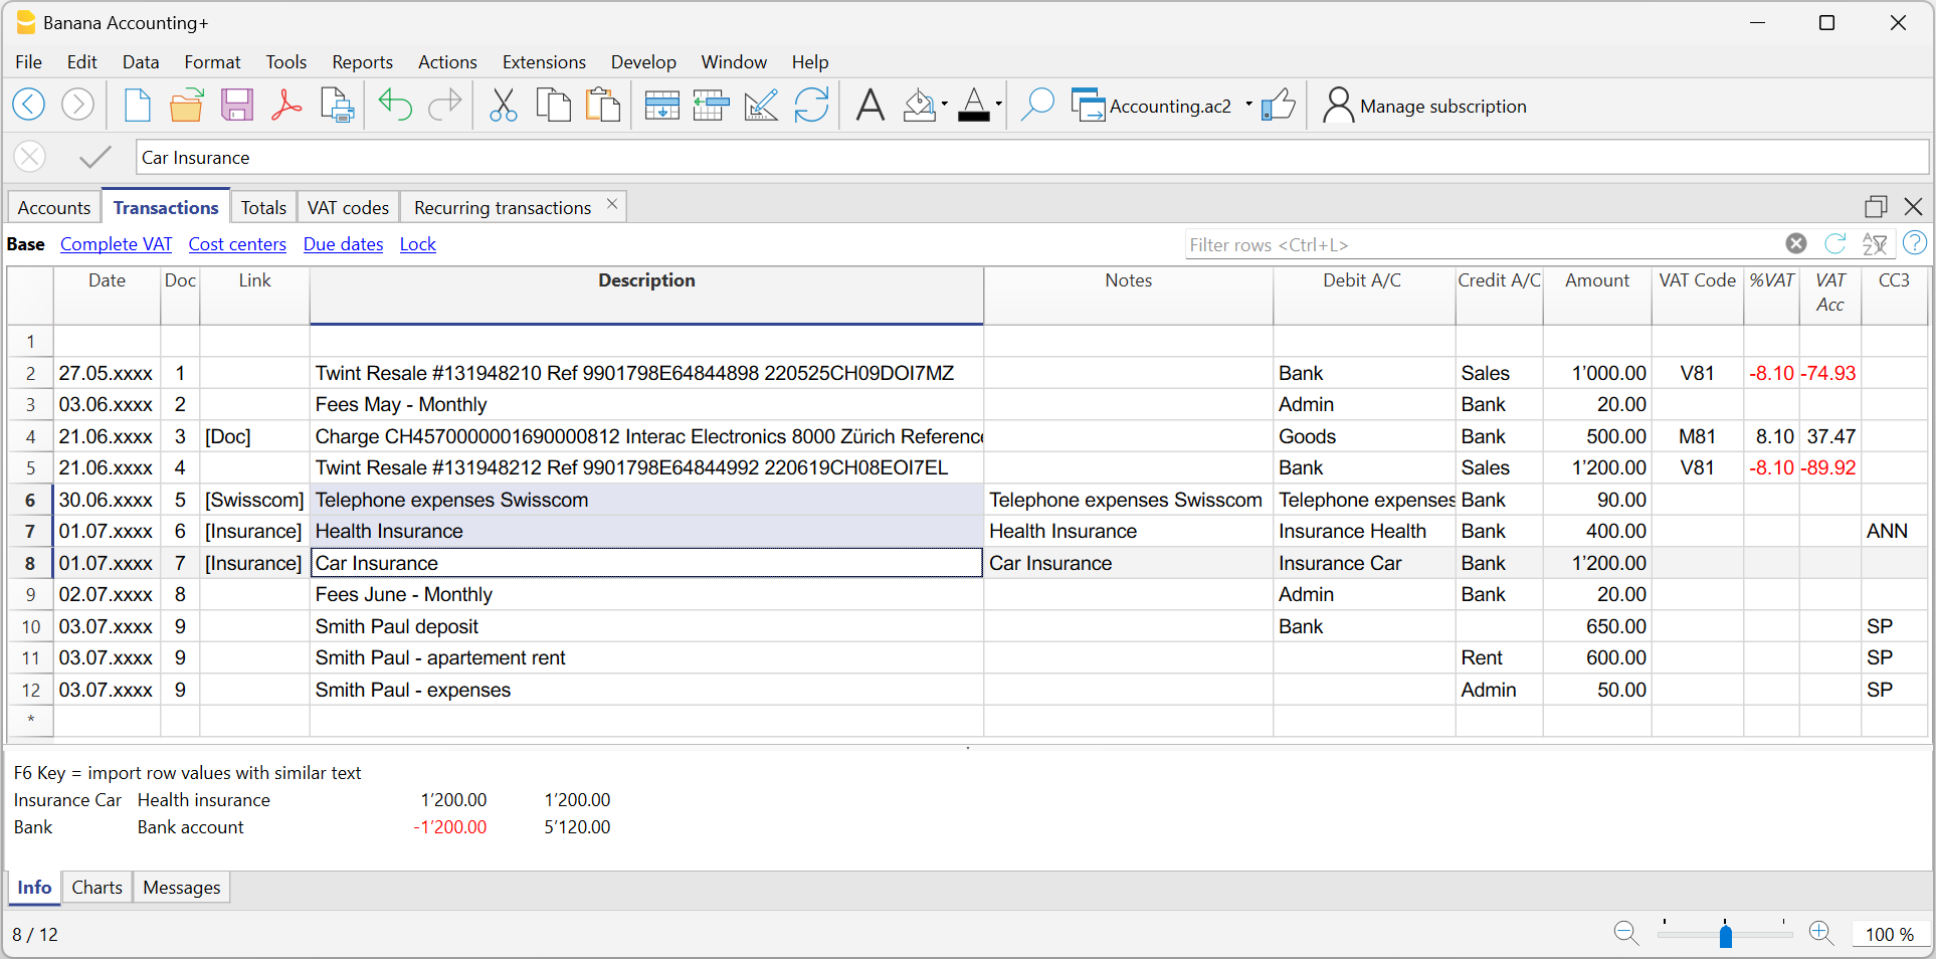
- For each transaction, copy the content from the Notes column and paste it into the Description column.
In the Recurring Transactions table, it is not possible to directly add custom columns.
To use a custom column in the Recurring Transactions table, you need to add the custom column to the Transactions table.
Once the column is added to the Transactions table, it will also be visible in the Recurring Transactions table and can be used to set a different description from the imported one.
Therefore, the insertion procedure is the same as described in the section Set a Different Description from the Imported One - Notes Column.
Create a new year with rules
When you create a new year using the command Actions > Create New Year, the existing Rules in the Recurring Transactions table are automatically carried over to the new year's file.
Accounting with the same rules
If you manage several similar accounting files (for example for clients with similar characteristics), it can be useful to reuse rules that have already been created, avoiding rewriting them every time.
When the accounting files have the same chart of accounts, or at least a compatible structure, you can copy the Recurring transactions from one file to another.
How to copy the rules
- Open the source file (the one that contains the rules to be reused).
- Display the Recurring transactions table using the command
Actions > Recurring transactions > Recurring transactions table. - Select the rows you want to copy.
- Use the Copy rows command, Edit > Copy rows.
- Open the destination file and display the Recurring transactions table.
- Paste the rules using the command Edit > Insert copied rows in the Recurring transactions table.
You can also create a dedicated accounting file, used as a rule library.
In this way, when you create a new accounting file, you can easily copy the necessary set of rules and paste it into the destination file.
Condiciones para las reglas
Las condiciones de las reglas son criterios que definen cuándo debe aplicarse automáticamente una regla de autocompletado a un registro contable.
Se configuran durante la creación o modificación de una regla en el diálogo Aplicar reglas, o directamente en la tabla de Registros memorizados.
Las condiciones pueden hacer referencia a la Descripción, a la Cuenta, al Importe y a la Fecha.
Una regla se aplica solo si se cumplen todas las condiciones definidas. Si incluso una sola condición no se cumple, la regla no se ejecuta. Las condiciones vacías se ignoran.

Condición sobre la Descripción
Introduce una palabra o frase corta como palabra clave para identificar los movimientos que deben automatizarse, según el texto en la columna Descripción del extracto bancario.
Banana Contabilidad compara automáticamente el texto de la descripción de cada movimiento con el indicado en la regla y, si encuentra una coincidencia, aplica la regla asociada.
Para obtener mejores resultados, se recomienda utilizar solo palabras clave representativas (por ejemplo, el nombre del proveedor o del servicio), para aplicar la regla a múltiples movimientos similares.
Los textos de búsqueda pueden introducirse de distintas maneras:
- Palabra o frase exacta
- Si introduces por ejemplo "Best Insurance 982-948", el programa busca movimientos importados que contengan exactamente "Best Insurance 982-948".
- Si introduces solo "Insurance", el programa buscará todos los movimientos que contengan la palabra "Insurance".
- Todas las palabras en cualquier orden (+ al inicio)
- Si introduces "+Best Insurance 892-948", el programa buscará los movimientos importados que contengan las palabras "Best", "Insurance" y el número "892-948", en cualquier orden.
- Todas las palabras deben estar presentes en la descripción del registro, pero el orden no es importante.
- El símbolo "+" no se considera en la búsqueda.
- Lista de palabras (usando |)
- Si introduces "café|restaurante", el programa buscará los movimientos que contengan la palabra "café" o "restaurante".
Esta opción es útil para identificar varias categorías sin tener que crear búsquedas separadas.
- Si introduces "café|restaurante", el programa buscará los movimientos que contengan la palabra "café" o "restaurante".
- Mayúsculas y minúsculas
- La búsqueda de texto no distingue entre mayúsculas y minúsculas. El texto se aplicará igual independientemente del uso de mayúsculas.
Todo el texto introducido en la Descripción se transfiere a la columna Descripción en la tabla Registros memorizados.
- La búsqueda de texto no distingue entre mayúsculas y minúsculas. El texto se aplicará igual independientemente del uso de mayúsculas.
Atención: NO utilices como descripción todo el texto del extracto bancario, ya que es único para cada movimiento.
Condición sobre la Cuenta
- Introduce la cuenta desde la que se importan los movimientos (banco, postal, etc.).
- El programa contabiliza automáticamente en Débito o en Crédito según el tipo de movimiento.
- Si el campo Cuenta se deja vacío, la regla se aplica a todas las cuentas que cumplan la condición sobre la descripción.
Condición sobre el Importe (o Importe en moneda)
- Permite aplicar una regla solo cuando el registro tiene un importe específico.
- Alternativamente, si el importe no es conocido con precisión, puedes definir un rango de importes, indicando un valor mínimo, máximo o un intervalo específico en el cual aplicar la regla.
- Disponible desde la versión 10.2.3 de Banana Contabilidad Plus (Dev Channel)
- La condición debe:
- empezar con el símbolo !
- escribirse entre corchetes [ ]
- usar el importe sin formato: sin separador de miles y con punto como separador decimal
(otros formatos no son reconocidos) - Los operadores disponibles son: mayor >, menor <, mayor o igual >=, menor o igual <=, distinto <>
- Ejemplo: para seleccionar registros con importe mayor o igual a CHF 1'000.00:
[!>=1000.00]

En la imagen se muestra el diálogo Aplicar reglas donde es posible seleccionar el campo Importe y definir un intervalo de cifras (en este ejemplo, se aplica la cuenta 1510 Mobiliario e instalaciones a los registros que tienen la descripción "Compra material de oficina" y un importe mayor o igual a CHF 1'000).
El uso de este filtro es útil cuando se desean asignar contrapartidas diferentes según el importe del registro.
Ejemplos de condiciones aplicables a la columna Importe
| Sintaxis | Significado |
| [!=1000.00] | registros con importe exacto de CHF 1'000.00 |
| [!>1000.00] | registros con importe superior a CHF 1'000.00 |
| [!>=1000.00] | registros con importe igual o superior a CHF 1'000.00 |
| [!<1000.00] | registros con importe inferior a CHF 1'000.00 |
| [!<=1000.00] | registros con importe igual o inferior a CHF 1'000.00 |
| [!>=1000.00 !<=2000.00] | registros con importe entre CHF 1'000 y CHF 2'000 |
| [! |!100.00 |!<150.00] | registros con importe exacto de CHF 100.00 o de CHF 150.00 |
Condición sobre la Fecha
A partir de la versión 10.2.3 de Banana Contabilidad Plus (Dev Channel), puedes aplicar una regla a registros que se encuentren dentro de un periodo de tiempo determinado (por ejemplo, solo los registros de enero).
Cómo proceder:
- Añade una nueva regla como se explica en la página Diálogo Aplicar reglas - Añadir regla
- Selecciona el campo Fecha
- Introduce la condición de filtro en el campo Comentario.
La condición debe:- empezar con el símbolo !
- escribirse entre corchetes [ ]
- usar el formato de fecha ISO YYYY-MM-DD
(otros formatos no son reconocidos)
- Ejemplo: para seleccionar los registros con fecha anterior al 01.04.2025:
[!<2025-04-01]

En la imagen se muestra el diálogo Aplicar reglas donde se puede seleccionar el campo Fecha y definir un intervalo (en este ejemplo se aplica a registros anteriores al 1 de abril de 2025).
El uso de este filtro es útil para diferenciar procesos por mes, trimestre o año, por ejemplo si hasta una fecha determinada se aplica un código de IVA y después cambia por la adopción de un nuevo método.
Ejemplos de condiciones aplicables a la columna Fecha
| Sintaxis | Significado |
| [!=2025-03-31] | registros con fecha 31.03.2025 |
| [!>2025-03-31] | registros con fecha posterior al 31.03.2025 |
| [!>=2025-03-31] | registros con fecha igual o posterior al 31.03.2025 |
| [!<2025-03-31] | registros con fecha anterior al 31.03.2025 |
| [!<=2025-03-31] | registros con fecha igual o anterior al 31.03.2025 |
| [!>=2025-03-31 !<=2025-06-30] | registros entre el 31.03.2025 y el 30.06.2025 |
| [! |!2025-03-15 |!<2025-03-18] | registros con fecha 15.03.2025 o 18.03.2025 |
Cómo definir condiciones en la tabla Registros memorizados
Las condiciones pueden introducirse directamente en la tabla Registros memorizados con la misma sintaxis explicada en los párrafos anteriores.

Tabla de Registros memorizados
La tabla Registros memorizados se utiliza para guardar los registros que se usan repetidamente.
Contiene tres tipos de registros repetidos:
- Transacciones repetidas recuperadas mediante la columna Doc en la tabla Registros.
Tienen en la columna Doc un código identificativo sin signos de puntuación. - Reglas para completar los registros importados.
Sirven para definir cómo deben completarse los registros importados.
Tienen en la columna Doc el código "!Rule" o "RuleSplit". - Registros automáticos con frecuencia regular.
Se utilizan para generar automáticamente registros que se repiten con una cierta frecuencia, por ejemplo mensual, trimestral, semestral o anual.
Tienen en la columna Doc el código "!Auto".
Visualizar y organizar columnas y vistas en la tabla Registros memorizados
Antes de introducir registros repetitivos, debes visualizar la tabla Registros memorizados desde el menú Acciones > Registros memorizados.
La tabla Registros memorizados no permite guardar configuraciones propias de visualización, sino que utiliza las vistas y configuraciones de columnas de la tabla Registros.
Para personalizar las columnas y su disposición en la tabla Registros memorizados, debes:
- Crear una nueva vista en la tabla Registros.
- Organizar las columnas en la tabla Registros en el orden deseado.
- En la tabla Registros memorizados, selecciona la vista creada en la tabla Registros. Se visualizarán las columnas en el mismo orden que esa vista.
Insertar transacciones repetidas mediante la columna Doc
- Si está presente la columna "Fecha fin" (ver Registros automáticos), también puedes indicar una fecha después de la cual el registro no debe recuperarse más en la tabla Registros.
Los registros que ya no se usan deben eliminarse manualmente.

La tabla Registros memorizados en la Contabilidad de Ingresos y Egresos
La funcionalidad de la tabla Registros memorizados es la misma que en la contabilidad de partida doble, solo cambian las columnas:
- En la contabilidad de Ingresos / Egresos se utilizan las columnas Cuenta y Categoría.
- La columna Cuenta corresponde a la cuenta bancaria, postal, tarjeta de crédito... Indica de dónde sale el dinero o hacia dónde va.
- La columna Categoría indica la categoría del gasto o ingreso. Representa el motivo por el que gastaste o ganaste dinero.
- Las columnas Entradas y Salidas son donde se indica el importe del movimiento.
- En la contabilidad de partida doble se utilizan las columnas Cuenta Débito y Cuenta Crédito, y la columna Importe.

Número progresivo de documentos "docnum"
Si en la columna Doc de la tabla Registros necesitas una numeración distinta a la automática, introduce en la tabla Registros memorizados una fila con el código "docnum" en la columna Doc. Para las filas siguientes se utilizará el tipo de numeración especificado en la columna Descripción.
- "0": si no necesitas numeración automática.
- "1": para numeración progresiva.
- "caja-1": para numeración progresiva con prefijo "caja-" (caja-2, caja-3).
El programa reemplaza el número al final del texto con un número progresivo. - Si en las sugerencias deseas que se visualice solo una fila por código, precede la descripción de la siguiente manera:
- Un "*": muestra solo esta fila y no las que tienen un código similar.
- Un "**": muestra solo esta fila, pero no se recupera (solo fila de título).
- Un "\*": permite iniciar la descripción con un asterisco, sin que se interprete como un comando.
Recuperar transacciones repetidas en la tabla Registros
En la tabla Registros puedes recuperar las filas definidas en la tabla Registros memorizados:
- En la tabla Registros, introduce la fecha en la fila del registro. También puedes añadir otras columnas no presentes en la tabla Transacciones Repetidas, según la vista activa.
- En la columna Doc de la tabla Registros, selecciona uno de los códigos definidos en la tabla Registros memorizados (columna Doc) y pulsa Enter:
- El programa inserta las filas repetitivas que tienen el mismo código.
- Si necesitas modificar o completar algún valor, siempre puedes hacerlo.
- Las filas almacenadas en la tabla Transacciones Repetidas también se pueden recuperar escribiendo el código en la columna Doc y presionando la tecla F6.
Copiar registros de la tabla Registros a la tabla Registros memorizados
Los registros repetitivos también pueden insertarse copiando las transacciones presentes en la tabla Registros y pegándolas en la tabla Registros memorizados.
Procede de la siguiente manera:
- En la tabla Registros, selecciona las filas que deseas copiar.
- Menú Editar > Copiar filas.
- Ve a la tabla Registros memorizados.
Menú Editar > Pegar filas copiadas
También puedes usar los atajos Ctrl + C y Ctrl + V para copiar y pegar los registros.
Automatic transactions with recurring deadlines
Automatic transactions are useful for facilitating the recording of repetitive entries, such as subscriptions, insurances or taxes. By using automatic transactions, you only have to enter the entry of interest once, set a few parameters such as the start date, the frequency and the end date and then Banana Accounting Plus will inform you when an automatic transaction is ready to be created and will create it for you.
In Banana Accounting Plus, there are two ways to create automatic transactions:
- From the Recurring Transactions table
- From the Manage Automatic Transactions dialogue.
Requirements
- This feature is available in the latest release of Banana Accounting+ Dev Channel.
- It requires the Advanced plan. If you do not have this plan, you can request a promotional code valid for 1 month via the contact form.
- You need to add the End Date and Repeat columns to your accounting file.
- This feature is in Beta Test; we kindly ask you to test it and report any problem.
Adding the End Date and Repeat columns to your accounting file
To be able to activate the commands for automatic transactions, the End Date and Repeat columns must be added; without these columns the commands will not be displayed.
- Open your accounting file or create a new accounting from the File menu > New command.
- Select the command from the Tools menu > Add/Remove Functionalities...
- The Add/Remove Functionality dialogue will appear with the list of available functionalities.
- Select the option Add End Date and Repeat columns in Transactions table.
If this option is not available, check the Banana version and the plan you are using, as described in the Requirements section. - Click on the OK button.

Creating an automatic transaction from the Recurring Transactions table
- Select the command from the Actions menu > Recurring transactions > Create automatic transaction.
- The Recurring transactions table will appear with a new row, showing the date of the day in the Date column and the text !Auto in the Doc column, which serves to identify the automatic transaction.
- Update the Date column with the date of the first occurrence you wish to schedule.
- Display the End Date and Repeat columns with the command from the Data menu > Columns setup...
Make sure to check the Visible box for both the End Date and Repeat columns.
If these columns are missing, you can add them as described in the Adding the End Date and Repeat columns paragraph.
Note: The new columns are added to the Transactions table, but are only used in the Recurring Transactions table, visible in the Recurring view. - Add the desired repetition to the Repeat column. For example, if you want a quarterly repetition, enter the text 3MS in the Repeat column.
- If the automatic transaction has an expiry date, set it in the End Date column.
- Complete the Description, Debit Account, Credit Account and Amount columns.
- Select the command from the Actions menu > Recurring transactions > Manage automatic transactions to display the scheduled transactions.
Note: If you use the command from the Actions menu > Recurring transactions > Create automatic transaction from an existing transactions in the Transactions table, the Description, Amount and Accounts columns will show the text of the original transaction.
The Create automatic transaction command is also available in the context menu of the Transactions table (right-click on a transaction, and choose the Create automatic transaction command).
Creating an automatic transaction from the Manage automatic transactions dialogue
- Select the command from the Actions menu > Recurring transactions > Manage automatic transactions.
- The Manage automatic transactions dialogue will appear.
- Click on New automatic transaction button at the bottom of the dialogue.
- Complete the necessary fields:
- Start date
Date from which the first automatic transaction will start. When the transactions are generated, this date will be updated with the date of the last automatic transaction created. - End Date
- Repeat
- Description
- Account
- Contra-account
- Amount
- CC1, CC2, CC3
- Name or description (optional)
- Start date
- Click on the OK button.
Auto-completion rules for income and expenses accounting
In Income and Expenses Accounting and the Cash manager, the functionality for Completing Imported transactions works in the same way as for Completing transactions in Double-entry Accounting.
The main difference is as follows:
- In the Income / Expenses accounting, the columns Account and Category are used.
- The Account column refers to the bank account.
- The Category column is where the category is specified. It represents the counterpart account entered automatically.
- The Income and Expense columns are where the amount for the transaction is indicated.
- In double-entry accounting, the Debit Account and Credit Account columns, along with the Amount column, are used.
Therefore, even with income and expense accounting, it is possible to create rules using one of the following methods:
- Rules from the Apply Rules dialog.
- Rules from the Transactions table.
- Rules from the Recurring Transactions table.
The Recurring transactions table in Income / Expenses accounting
In the Recurring Transactions table, all imported transactions to which Rules have been applied are saved:
- The columns associated with the amount are the Income and Expenses columns.
- If no amount is specified, the rule will be applied to both outgoing and incoming transactions.

The Clearing account in import operations
The clearing account is an interim account used to record temporary transactions. It is specifically used in the following cases:
- Post self-taxation and recovery operations on purchase tax (VAT on services abroad).
- Import data into the main accounting from the cash book and credit cards.
- Record the net salaries debited by the bank, pending the complete recording of the gross salaries with the various monthly deductions.
- Recording incoming payments in camt.054 and camt.053 formats to avoid duplicate credits.
Use of the clearing account when importing data from the cash book or credit card
When the cash book or credit card movements are kept in separate files from the main accounting, it is used as a counterpart account in order not to create overlapping records in the import, regarding payments from the bank to the cash or credit card accounts.
- In the cash book or credit card file, the receipt of funds will be recorded (the cash book or credit card account balance is increasing).
- The outflow from the bank or postal current account and the increase in cash book or credit card will be recorded in the main accounting file.
The internal transfer account must be used as a counter-entry, both in recording the withdrawal from the bank (main accounting), and for payment at the cash book or on the credit card (separate file).
When you import the cash book or credit card data, into the main accounting file, the internal transfer account is reset to zero:
- The data imported from the cash file or the credit card account will be recorded as credits in the clearing account.
- The movements relating to payments already recorded with debit on the bank or post office account, will be credited to the clearing account.
More details on importing with the clearing account are available on the Importing data from the Cash book file.
Using the Clearing account for camt054 and camt053 Receipts
Those who collect payments via QR-IBAN can use the camt054 XML file to automatically import and record incoming payments. At the same time, they can import the entire electronic bank statement using the camt053 XML file.
- The camt054 XML file contains only the details of receipts for each customer.
- The camt053 XML file, on the other hand, reports the total daily credit without details.
- Payments received on the QR-IBAN account, imported via the camt054 XML file, are transferred daily to the associated IBAN account (bank account listed in the chart of accounts).
Problem: If both XML files (camt054 and camt053) are imported into the bank account ledger, the same credit is recorded twice: once with the details of individual receipts (camt054) and once with the total daily amount (camt053). This results in a duplication of credited amounts.
To solve this issue, the transfer account is used by following the procedure described on the page Bank Statement Camt ISO 20022 Switzerland (Banana+).
Retrieving data from other programs
Banana Accounting Plus allows you to retrieve transactions from other programs, both as a first step to start your accounting and on a recurring basis.
Import bank transactions
This is the most common data import situation. Please refer to the dedicated section:
You can use these features to import data either on a recurring basis or as a one-time operation.
Example of importing a bank CSV file using Excel
If you need to import bank data and no import extension is available, you can also proceed via Excel by creating a data structure similar to that of the Transactions table and then copying and pasting the data:
- Create an Excel sheet called "Transactions" with the same columns as the Transactions table in your accounting file.
- Date, Doc, Description, Debit account, Credit account, Amount
- Import the bank data into Excel in a separate table.
- Copy it or transfer it using formulas into the Transactions sheet.
- Select and copy the Transactions data in Excel.
- Go to the Transactions table in Banana Accounting.
- Move to the end and give the Paste command.
The program will add new rows.
To convert data from one format to the Banana Accounting format, you can also use formulas, as shown in the example in this image, where the
The Debit and Credit accounts are assigned using a formula based on the sign of the amount.

Multi-currency accounting columns
If the accounting is multi-currency, also add the columns.
- Currency code
- Amount in base currency.
If you have the amount in foreign currency and in base currency, the exchange rate is calculated by Banana Accounting.
Additional tips
- If the amount columns do not contain thousand separators, Excel may not convert them into numbers. In this case, select the entire column and use the "Replace" command, then enter the thousand separator.
- If the data is sorted in reverse order compared to how you keep it in Banana, before proceeding with field mapping, position yourself on the Date column, click the arrow on the right and sort from oldest to newest.
- You can add any additional columns you need.
- With Excel Office Scripts, you can also create a macro to automate file conversion.
Use ChatGPT or another AI assistant
If the data is not confidential, you can use ChatGPT or another AI assistant to create an Excel file with the same columns as those in the Transactions table.
- Upload your transaction file to the AI assistant.
- Indicate that it is a file containing bank transactions and, if possible, briefly explain the format, logic, and meaning of the columns.
- Ask to transform the content into an Excel file and specify that:
- The file must be compatible with Banana Accounting, so that the assistant can correctly use the format information.
- The columns must correspond to those of the Transactions table in Banana Accounting, for example:
Date, Doc, Description, Debit account, Credit account, Amount. - It must complete the Debit account and Credit account with the related bank account number, based on the sign of the amount.
- Specify the character used in the file as the thousands and decimal separator, for example.
Thousands separator ".", decimals "."
- Open the generated file in Excel and verify the result.
- You may need to make manual changes or provide further instructions to the AI assistant to refine the result.
- When the file is correct, select and copy the data from Excel.
- Go to the end of the Transactions table in Banana Accounting and paste it.
Recurring import from other programs
It may also be necessary to regularly import data:
- Import monthly transactions from the payroll program.
- Import invoices issued with an invoicing program.
- Import payments recorded with the invoicing program.
- Import sales recorded in an online shop.
- Import data from another accounting program.
- Import data from a cash register management program (for example for a restaurant or a hotel).
In these cases, there are two possibilities:
- Make sure your application exports the data in the txt (TSV) file format, specifically prepared for import into Banana Accounting.
See the Instructions for creating a file to import into Banana Accounting (in English). - Use an import extension that converts the data exported from the program into the format accepted by Banana.
- Check whether there is already a prepared extension.
See: Import extensions. - Create an import extension.
See: Develop an Import Extension
- Check whether there is already a prepared extension.
Creating a new accounting file starting from existing data
If you want to use Banana Accounting starting from accounting managed with other software, or if you want to reconstruct the accounting from existing data.
Retrieving data from audit files or other formats
You can recreate an accounting file in Banana Accounting starting from files that contain all accounting data such as:
One-time data import with Excel
If you start keeping your accounting with Banana and need to retrieve transactions from another accounting software, it is probably faster to use Excel to copy and paste the data.
- With the old accounting program, export the data in a format readable by Excel (CSV, txt, ..).
- Import the data into Excel (see below)
- In Excel, arrange the columns exactly in the same sequence as they appear in the Transactions table of Banana.
- Instead of changing the column order, it may be more convenient to add new columns next to the existing ones and copy the data there, or use formulas to retrieve and convert the data. With formulas, you can remove spaces, modify texts or convert amounts and dates.
- Open the new accounting file in Banana Accounting.
- In Excel, select the data to copy and use the Copy (Ctrl+C or Copy from the Edit menu) command.
- Go to Banana and use the Paste (Ctrl+V or Paste from the Edit menu) command.
This method is useful for retrieving data from MS-Money, Intuit Quicken and QuickBooks, and from most other accounting programs.
Import from other programs to switch to Banana
To facilitate switching to Banana Accounting from other programs, we have developed some extensions that allow users to import into Banana Accounting transactions already entered in other software. We therefore recommend consulting the specific pages related to the program you want to migrate from:
Analytical accounting
Banana Accounting Plus offers various features for analyzing costs, revenues, and results. The following pages explain the characteristics of each solution and when to use it.
Cost and Profit Centers
The Cost and Profit Centers in Banana Accounting Plus allow you to allocate costs and revenues to specific activities, departments, projects, or other analysis units, even if they are independent of one another. They allow you to monitor costs, revenues, and results separately, without changing the structure of the chart of accounts. For more information, see the Cost/Profit Centers page.
Segments
The Segments in Banana Accounting Plus allow you to systematically divide the accounting by organizational units, branches, sectors, or other business dimensions. For each segment, you can obtain a separate Income Statement and other reports, without having to create specific accounts for each unit. For more information, see the Segments page.
Projects, branches and sectors
To manage projects, branches, sectors, or other separate activities, Banana Accounting Plus allows you to use Cost Centers and Segments. Depending on your analysis needs, you can monitor the costs and revenues of individual activities or obtain separate reports for the different units of the organization. For more information, see the Projects, sectors and branches page.
Cost and profit centers
The Cost and Profit Centres of Banana Accounting Plus are used to analyse and monitor the performance of different areas or divisions of a company: organisational units, departments and branches, even if they are not related to each other. They allow records to be catalogued according to different criteria than normal accounts. The main objective is to minimise operating costs and optimise revenues, while guaranteeing the quality and efficiency of services.In Banana Accounting Plus, the cost and profit centre feature is available in all accounting applications.
Cost centers and profit centers are used solely for internal information purposes to monitor and control operating costs; therefore, they are not included in the Financial Statements.
▶ Video: Cost and profit centers
If you wish to have a Balance sheet broken down by projects, sectors or branches, we recommend using Segments.
Registering transactions in cost/profit centers
In Banana Accounting, cost/profit centers are recorded in the Transactions table, specifying the accounts related to the cost/profit centers in the appropriate columns, as set in the Accounts table. Cost centers are attributed to the transaction row and can be used simultaneously with segments.
Here are the most frequent uses:
- Cataloging specific expenses
- Events and manifestations
- Clients, suppliers, members
- Additional details for certain expenses (e.g., accessory expenses)

The columns for entering data are located in the Cost Centers view. If they are not visible, you can display them from any view via the menu Data > Columns setup. Three different columns are available: CC1, CC2, CC3, each of which is independent of the others.
For registration, proceed by entering:
- The date, the description, and other usual elements
- The Debit and Credit account
- The amount and any applicable VAT code
- In the appropriate column (CC1, CC2, CC3), enter the cost/profit center account without the preceding punctuation.
- To record a credit on the cost/profit center, precede the cost center with a minus sign.
In the Income/Expenses accounting and the Cash Manager, you can set the option Record (+/-) cost centers as categories so that the cost centers follow the sign of the category.
If an overall amount needs to be divided among multiple cost/profit centers at the same level, multiple transaction rows must be created. Each row specifies the amount to be allocated to the cost/profit center and the relevant account.
Recording cost centers in the Income & Expense Accounting and Cash Manager
In the Income & Expense accounting, cost centers can be set either in the Accounts table or in the Categories table, depending on the purpose for which they are created:
- Cost/profit centers related to customers/suppliers or to members/donors should be set in the Accounts table.
- Cost/profit centers related to expenses or revenues (such as refunds to members, events, projects, etc.) should be set in the Categories table.
To record an entry in a cost/profit center, simply enter the abbreviation or number defined in the Accounts table in the column designated as the cost/profit center.
When an amount needs to be reversed from a cost/profit center, it must be entered in the corresponding column with a minus sign (-) in front of the center’s abbreviation/number.
In the example:
- In the member 1 profit center, the CC3 column contains the abbreviation MEMBER 1 to indicate the credit for the membership fee owed by member 1.
- When member 1’s fee is collected, the CC3 column contains -MEMBER 1, so that the payment is recorded in member 1’s account and the credit owed by member 1 is thus zeroed out.
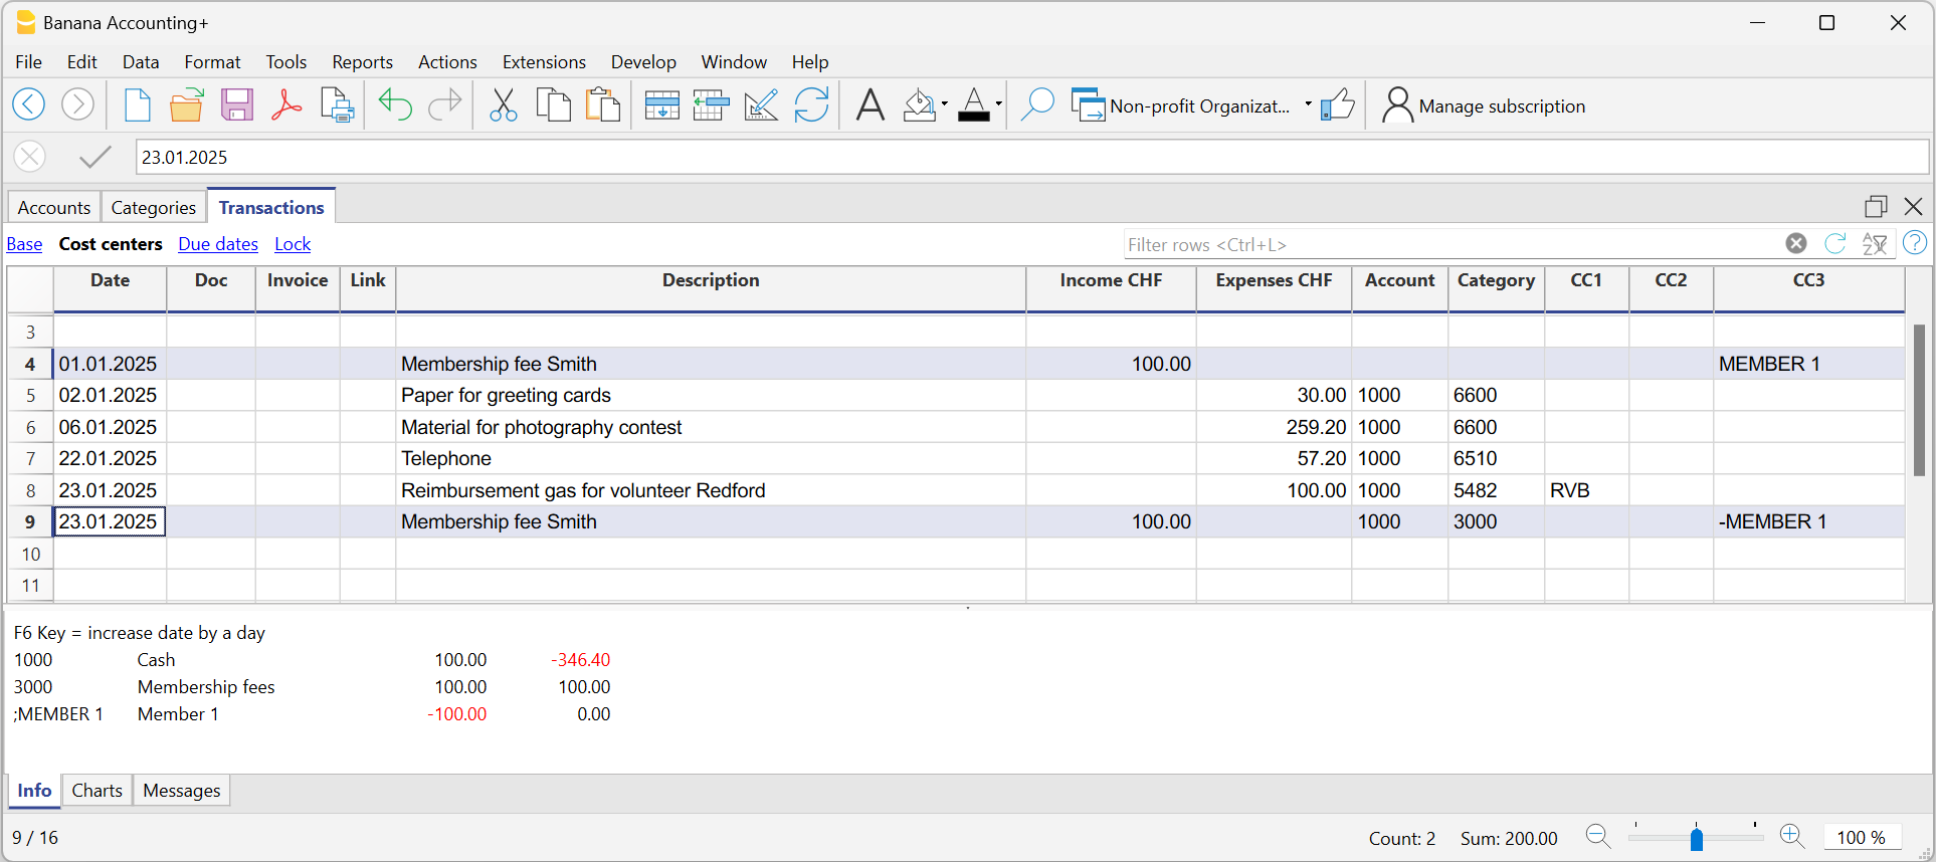
In the Income & Expense accounting and in Cash Manager, you can enable the option Record (+/-) cost centers like the category so that cost centers follow the category's sign.
However, be cautious when using this option, because if there are transactions that always go into the income or expenses column, while for the cost/profit centers the amount should be reversed, the program will sum up the amounts in the related cost/profit center ledgers.
In the previous example, the membership fee (credit and payment) is recorded in the income column for both entries. However, in the MEMBER 1 profit center, you need to reverse the amount to zero out the credit for member 1.
In this case, if you use the Record (+/-) cost centers like the category option, the balance in the corresponding profit center ledger would be incorrect. Since in both transactions the amount is always recorded in the Income column, in the corresponding profit center ledger it would be added instead of reversed, which is necessary to zero out the credit for member 1. Therefore, in these cases, you should not use this option, but rather manually place a minus sign before the cost/profit center.
It is therefore recommended to use this option only in cases where you are certain that the amount recorded in the cost/profit center aligns with the category.
Accounts of cost/profit Centers
The accounts of cost centers are set up in the Accounts table, except for the Cash Manager, where they are set up only in the Categories table.

- The Cost and Profit centers (CC) are accounts, preceded by the ".", "," and ";" signs
- There are three levels of cost centers:
- CC1 preceded by a period "."
- CC2 preceded by a comma ","
- CC3 preceded by a semicolon ";"
- Each level is independent of the other.
- For each level, there can be an unlimited number of cost and profit centers.
- A superior level can be used without using an inferior one.
- Cost center codes can be alphabetic or numeric.
- Cost centers can have their own grouping, different to that of normal accounts.
For the same level of cost centers, subgroups can be created. Be careful not to mix cost center groups with other groups of a different level or with normal accounts or segments. - Each cost and profit center has its own account card, complete with transactions and balances.
- A transaction on the cost center is independent of the account recorded in debit or credit.
It is possible to record on cost centers even if there is no account in the debit and credit column (as in the case of customer/supplier ledger with VAT on cash basis).
Setting up cost centers in the Accounts table
To set up the cost/profit centers in the Accounts table, proceed as follows:
- Create a specific section for the cost centers at the end of the chart of accounts:
- Enter a Section with an asterisk * for a section change and in the Description column, enter the title cost and profit centers.
- In the next row, on the Section column enter 03 and 04 for a profit center and the related description.
- Add rows for the cost center:
- In the Group column, enter the group to which the cost center account is assigned
- In the Account column, Add the cost or profit centers:
- With a preceding dot (.) for transactions in the CC1 column.
- With a comma (,) for bookings in the CC2 column.
- With a semicolon (;) for transactions in the CC3 column.
- In the Gr column, indicate the group into which the amounts are to be totaled.
- In a Multi-currency accounting, the account currency is also specified.
- Add the cost center groups
- In one and the same group, total only for one specific level.
- As for normal accounts, different levels can be created.
VAT amount with cost and profit Centers
In the File and accounting properties command, in the VAT tab you can set the amount of cost centers with the following options:
- Use transaction amount - The amount of the cost center is registered according the transaction amount
- Use amount excluding VAT - The amount of the cost center is registered net of VAT.
- Use amount including VAT - The amount of the cost center is registered including VAT.
Account card cost center
The cost center is treated as any other account, so each cost center has its own account card with account balance and account transactions.
Unlike all other accounts, the cost center account does not have a contra account. If you want to view the contra account we recommend using the Segments.
In order to view all cost center account cards, click on the menu Reports > Account/Category cards > Cost centers (Filter option).
Differences between Cost/Profit Centers and Segments
Cost and profit centers are units where costs or profits are assigned and accumulated with the purpose of monitoring a specific business area (departments, divisions, projects, operational units, or even specific machinery) to improve efficiency and expense management, and they serve an internal control function.
Segments, on the other hand, are assigned to a part of the business activity for external reporting purposes and strategic analysis. They are used to analyze profits and other financial metrics across different business areas, sectors, subsidiaries, projects, markets, customers, and other business dimensions to assess their economic performance
- Cost centers CC3 in Banana Accounting are used to manage Customers and Suppliers with VAT on a cash basis and to manage Members in non-profit organizations.
Differences in Settings and Transactions
In Banana Accounting, the settings and transactions for cost/profit centers and segments differ as follows:
Accounts Table
- Up to 3 cost/profit centers (CC1, CC2, CC3) can be set up, and each can have an unlimited number of cost/profit centers. They are entered in the Account column of the Accounts table with a comma, a period, and a semicolon (respectively, CC1, CC2, CC3) before the account number (or account code).
- Segments can be set up to 10 levels, and each level can have an unlimited number of segments. They are entered in the Account column of the Accounts table, with a double colon (:, ::, :::, etc.) before the code or number that defines the segment.
Transactions Table
- Cost/profit centers are recorded only in the CC1, CC2, CC3 columns of the Cost Centers view. The account is recorded without any punctuation in front.
- To record on the credit side of a cost/profit center, the cost center must be preceded by a minus sign.
Segments are recorded in the Debit and Credit columns, after the main account (e.g., 4000:P1). This means that the amount recorded in the Amount column is assigned to both the 4000 account and the P1 segment. Alternatively, they can be recorded in the specific Segment column of the Accounts table. - Segment amounts follow the debit and credit designation of the accounts.
Reports
- With Cost/Profit Centers, it is not possible to generate a Balance Sheet and an accounting report.
- Using Cost/Profit Centers, you can obtain an account statement for each cost and profit center.
- In the Accounts table, you can view the totalization of the different groups of cost and profit centers.
- With Segments, it is possible to generate a balance sheet with the breakdown of levels, showing the profit or loss for each segment.
- In the Accounts table, the total of the different segment groups is also visible, and you can view the account cards for the various Segments. Accounting reports are also possible.
- With Segments, you can also obtain a multi-level Report that combines accounts and segments, but specific extensions must be used.
Related documents:
Segments
Segments are used to systematically separate costs and revenues by unit, department, or branch. Using segments, you can generate an Income Statement divided by unit, department, or branch, without having to create specific accounts for each unit.
For example, a museum can use segments to track revenue, staff costs, and setup expenses for each individual exhibition.
In transactions, segments follow the account, unlike Cost Centers, which are specific to each entry and used for less structured categorizations (e.g., all expenses for an event or purchases for a specific purpose).
You can use both cost centers and segments simultaneously.
Segment Features
- Segments are accounts preceded by a colon ":".
- Account codes may use numbers or letters.
- Up to 10 segment levels are supported.
- The level is determined by the number of colons preceding the code:
- :LU → level 1 segment
- ::P1 → level 2 segment
- :::10 → level 3 segment
- Each level can include an unlimited number of segments.
- Segment levels are independent of one another.
- Segments do not have a class (BClasse) or a currency code.
- Calculations related to segments are made in the base currency.
- In transactions, the segment follows the debit or credit account.
There cannot be entries for segments without an associated account. - Account cards can be generated for transactions involving specific segments.
Segment Level Titles
Segment level titles are used to indicate what a specific segment level refers to.
- A segment consisting only of separators ":", "::", ":::", etc., allows you to specify a description for the level.
- Enter the segment level explanation in the Description column.
For example:
":" "Projects"
"::" "Branches"
Setting up Segments
Segments must be set up in the Accounts table, in the Account column, at the end of the chart of accounts.
- Enter an asterisk in the Section column to define the segment section.
- In the Description column, type the segment title.
- Enter segments using :
- In the Account column, prefix the segment identifier with a single colon for first-level segments.
- Second-level (and possibly third-level) segments are prefixed with :: or :::, depending on the level.
- Optionally, enter a description for the segment.
Unassigned Segment {}
If in the transactions you enter the debit or credit account without specifying a segment, the amount is recorded in the "empty" or unassigned segment.
In the chart of accounts, you can define a description for the unassigned segment of the level by following the colon with the text ":{}".
The unassigned segment symbol "{}" is useful for indicating in account cards and scripting that you want to see entries not assigned to any segment.

Transactions
Segments are recorded in the Transactions table, immediately following the main account.
When a segment includes multiple levels, you must follow the main account with the first-level segment, then the second-level one, and so on.

Using "-" as a segment separator
In transactions, the dash "-" can be used as a segment separator instead of the colon ":".
- In the file properties (basic data), activate the option Use dash (-) as segment separator.
- In the transactions, use the dash as separator.
- If using "-" as a separator, do not use accounts that contain dashes.
Segment Column
This column allows you to enter segments independently of the account.
- The Segment column is hidden by default; to use it, make it visible via the Data > Columns setup menu.
- Segments entered in the Segment column are applied to the accounts used in the transaction (columns Debit, Credit, VAT Account), if those accounts do not already specify a segment.
- You can use the Segment column along with segments directly in the Debit and Credit columns.
- When using the Segment column, the amount is recorded on the segment both in debit and credit, so the balance of the segment in the accounts table will be zero.

Movements between Segments
Usually, cost allocation is done for each individual accounting entry. However, in some cases, it's better to register costs to an account and only allocate them to segments at the end of the year. This applies, for example, to administrative costs that are distributed as a percentage across different company departments.
Here's how to proceed:
- During the year, enter transactions using the Debit and Credit columns, but leave the segment blank or assign the full amount to a single segment.
For example, all office supply costs may be recorded without a segment. - At the end of the year, enter allocation transactions for distributing the respective portion of each segment to a specific expense or income account:
- In the entry, use the same account in both the Debit and Credit columns.
- Indicate the source segment (which can be empty) and the destination segment.
- For example, to allocate office supply expenses to different departments:
- Create one transaction for each department.
- In each row, the credit account has no segment.
- The debit account includes the segment of the corresponding department.
- The amount is the portion of expenses to be allocated to that department.
- These entries assign each department its portion of unallocated expenses.

Opening Balances for Segments
Segments with an opening balance should preferably be entered as transactions, so that they can be associated with an account. If you enter the initial segment balance in the Opening column (Accounts table), it is assigned to the unallocated "{}" segment.
To assign opening balances to specific segments and accounts, you must enter opening transactions in the Transactions table.
- In the DocType (Type) column, enter value 01.
- The date must match the accounting start date.
With the segment opening entry, the amount is removed from the “empty” segment and assigned to the specific segment.
If the balance to be allocated is negative (credit), the account without a segment must be in the Debit column and the one with the segment in the Credit column.
Example of Segment Opening Transaction
Suppose account 1000 has an opening balance of 100.00 (without a segment, so assigned to the empty segment) and you want to assign 80.00 to segment 01 and 20.00 to segment 02, proceed as follows:
- The opening entries have the accounting start date and DocType value 01.
- The first entry has 1000:Events in the Debit column and 1000 in the Credit column. Amount: 80.00.
- The second entry has 1000:Courses in the Debit column and 1000 in the Credit column. Amount: 20.00.

Create New Year Command
The Create New Year or Carry Forward Opening Balances commands automatically generate opening entries for all segment levels.
If you don’t want to carry forward opening balances for a segment level, delete the automatically generated opening transactions.
Segment Account Card and Balance
Attention: do not interpret the segment movement as a standalone value.
The value shown for a Segment in the Balance or Movement column of the Accounts Table or the Categories Table should not be interpreted as an independent or standalone accounting value disconnected from the main account or category.
A segment is a subdivision of the total values of an account or category. It does not represent a separate accounting movement. As a result, the same movement may appear duplicated or zeroed out depending on how it's recorded.
- The amount recorded for a segment always follows the corresponding account or category.
- From an accounting perspective, it must always be considered in relation to a specific account or category.
- Typically, segments are used to subdivide the balance sheet or income statement into detailed columns without creating separate accounts for each entity.
To activate this feature, go to the menu Report > Accounting Report or Report with groups > Subdivision Section and enable Subdivision by Segment.
Segment Card Results in Double-entry Accounting
In double-entry accounting, the segment follows the account used in the Debit or Credit column, or both. Depending on how it's entered, the segment card shows different results:
- If in the Transactions table the segment is used in either the Debit or Credit column, the segment card displays the transaction amount.
- If the segment is used in both Debit and Credit, the segment card will show the amount on both sides, so the balance is zero.
- If the segment is entered in the Segment column, the amount appears in both Debit and Credit columns in the card, again resulting in a zero balance.
- In the Accounts table, the segment balance is the total of the transactions of accounts using that segment.
The segment card will only show a balance if the segment is used exclusively with Profit & Loss or Balance Sheet accounts.
Segment Card Results in Income & Expense Accounting
In income and expense accounting, the segment follows the account or category. Depending on how it's recorded, the segment card behaves as follows:
- If in the Transactions table the segment is entered after the category, the card shows the registered amount.
- If the segment is used in both the account and the category, the movement appears twice in the segment card (duplicated).
- If the segment is entered in the Segment column, the amount again appears twice (once for the account, once for the category).
- In these last two cases, the segment balance in the Accounts or Categories table may be double the recorded amount.
Reports
Segment-based reports can be generated from several accounting documents:
- Enhanced Balance Sheet by Groups
- Accounting Report
- Account Card
- Multi-level report
To generate reports that combine accounts and segments (e.g., all expenses for branch LU of P1), use Banana Extensions.
Subdivision Report by Level
In the Enhanced Balance Sheet by Groups, in the Subdivision section, specify the segment level you want to use.

Summary Report
This is a summary of all segments defined in the chart of accounts, with optional breakdown by period or by segment.

Unassigned Segment Report
The "empty" segment aggregates all entries without a specified segment. You can define a title for this segment in the accounts table. Also, enable the option Segment Header: Description in the Subdivision section.
Differences Between Segments and Cost Centers
Segments are assigned to part of the business activity for external reporting and strategic analysis. They are used to analyze profit and other financial metrics across different business areas, markets, customers, and other dimensions for evaluating performance.
Cost and profit centers are units where costs or revenues are assigned and accumulated to monitor a specific business area (departments, divisions, projects, operations, or even specific machinery) for internal control and management purposes.
- Objective: segments focus on assessing overall financial performance, while cost centers focus on cost tracking and management.
- Focus: segments are typically used for external reporting and strategic decisions, while cost centers are used for internal detailed cost analysis.
- Structure: segments are based on strategic criteria like product lines or markets, while cost centers can be any internal operational unit incurring costs.
- Accounting: segments are more relevant to financial and managerial accounting; cost centers are primarily used in analytical accounting.
Differences in Setup and Transactions
In Banana Accounting, the setup and registration of cost/profit centers and segments differ:
Accounts Table
- Segments can be defined up to 10 levels, each with unlimited segment codes. Entered in the Account column of the Accounts table, with colons (:, ::, :::) before the code.
- You can define up to 3 cost/profit centers (CC1, CC2, CC3), each with unlimited codes. They are entered in the Account column using punctuation (comma, dot, semicolon) before the account number or code.
Transactions Table
- Segments are recorded in the Debit and Credit columns after the main account (e.g., 4000:P1). Alternatively, they can be entered in the Segment column.
- Cost/profit centers are entered only in the CC1, CC2, CC3 columns of the Cost Centers view. Enter the code without punctuation.
Reports
- With Segments, you can generate a Balance Sheet with level subdivision, showing profit/loss per segment.
- In the Accounts table, totals of segment groups are visible, and you can view account cards by segment. You can also generate Accounting Reports.
- Segments also support multi-level reporting combining accounts and segments, but require specific extensions. Cost centers do not support Balance Sheet or accounting reports.
- With cost/profit centers, account cards can be generated per center.
- In the Accounts table, group totals for cost/profit centers can be displayed.
Further Reading
Differenze tra Centri di Costo e Segmenti
I Segmenti e i Centri di costo/profitto permettono di classificare e analizzare i dati contabili secondo criteri aggiuntivi, senza dover creare conti specifici per ogni attività.
I Segmenti sono indicati soprattutto quando si desidera ottenere una suddivisione sistematica del Bilancio e del Conto economico, per esempio per succursale, dipartimento o unità.
I Centri di costo/profitto sono invece indicati per attribuire costi e ricavi a specifiche attività o finalità, per esempio progetti, manifestazioni o eventi.
Segmenti e Centri di costo/profitto possono essere utilizzati contemporaneamente.
La seguente tabella riassume le principali differenze.
Funzionalità | Segmenti | Centri di costo/profitto |
|---|---|---|
| Impostazione | ||
| Numero di livelli | Fino a 10 livelli | Fino a 3 livelli: CC1, CC2 e CC3 |
| Numero di elementi | Numero illimitato di segmenti per ogni livello | Numero illimitato di centri per ogni livello |
| Impostazione nella tabella Conti | Nella colonna Conto, facendo precedere l'identificativo da :, ::, ::: ecc., in base al livello | Nella colonna Conto, utilizzando la punteggiatura prevista per CC1 (.), CC2 (,) e CC3 (;) |
| Indipendenza dei livelli | ✅ Sì, i diversi livelli sono indipendenti tra loro | ✅ Sì, i diversi livelli sono indipendenti tra loro |
| Registrazioni | ||
| Registrazione | Il segmento segue il conto Dare o Avere, per esempio 4000:P1 | Il centro di costo/profitto viene indicato nelle colonne CC1, CC2 o CC3 |
| Colonna specifica | ✅ Sì, consigliato inserire nelle colonne Dare e Avere o colonne Conto e Categorie (Entrate / Uscite) | ✅ Sì, colonne CC1, CC2 e CC3 |
| Associazione al conto | ✅ Sì, il segmento segue il conto | ❌ No, inserito nelle colonne specifiche |
| Utilizzo contemporaneo | ✅ Può essere utilizzato insieme ai Centri di costo/profitto | ✅ Può essere utilizzato insieme ai Segmenti |
| Analisi e report | ||
| Scheda conto | ✅ Sì, per ogni segmento | ✅ Sì, per ogni centro di costo/profitto |
| Totalizzazione nella tabella Conti | ✅ Sì, per i diversi gruppi di segmenti | ✅ Sì, per i diversi gruppi di centri di costo/profitto |
| Bilancio e Conto economico | ✅ Sì, con suddivisione per livello di segmento | ✅ Sì, ma senza suddivisione (solo elenco centri di costo e profitto) |
| Report contabile | ✅ Sì | ❌ No |
How to manage projects, departments, and branches
With the Segments feature it is possible to manage different sectors of a company or different projects of an association and to obtain for each one the balance sheet and the complete profit & loss statement with the breakdown of revenues, costs and profit or loss.
The segments are set out in the Chart of Accounts. When you enter a transaction, you also indicate the segment. Segments can also be used to manage branches, divisions or areas of business. A museum can use them to have reports of different exhibitions, a transport agency to have reports for each individual vehicle.
Setting up segments in your Chart of Accounts
It is useful for a company with several branches that organizes events and courses and wants separate statements for each field of activity and branch.
First level field of activity, accounts preceded by a colon ":":
- Courses
- Events
Second level branches, accounts preceded by a double colon "::":
- Rome
- Milan
It is generally more convenient to use acronyms rather than long names.
- Watch the video: Segments
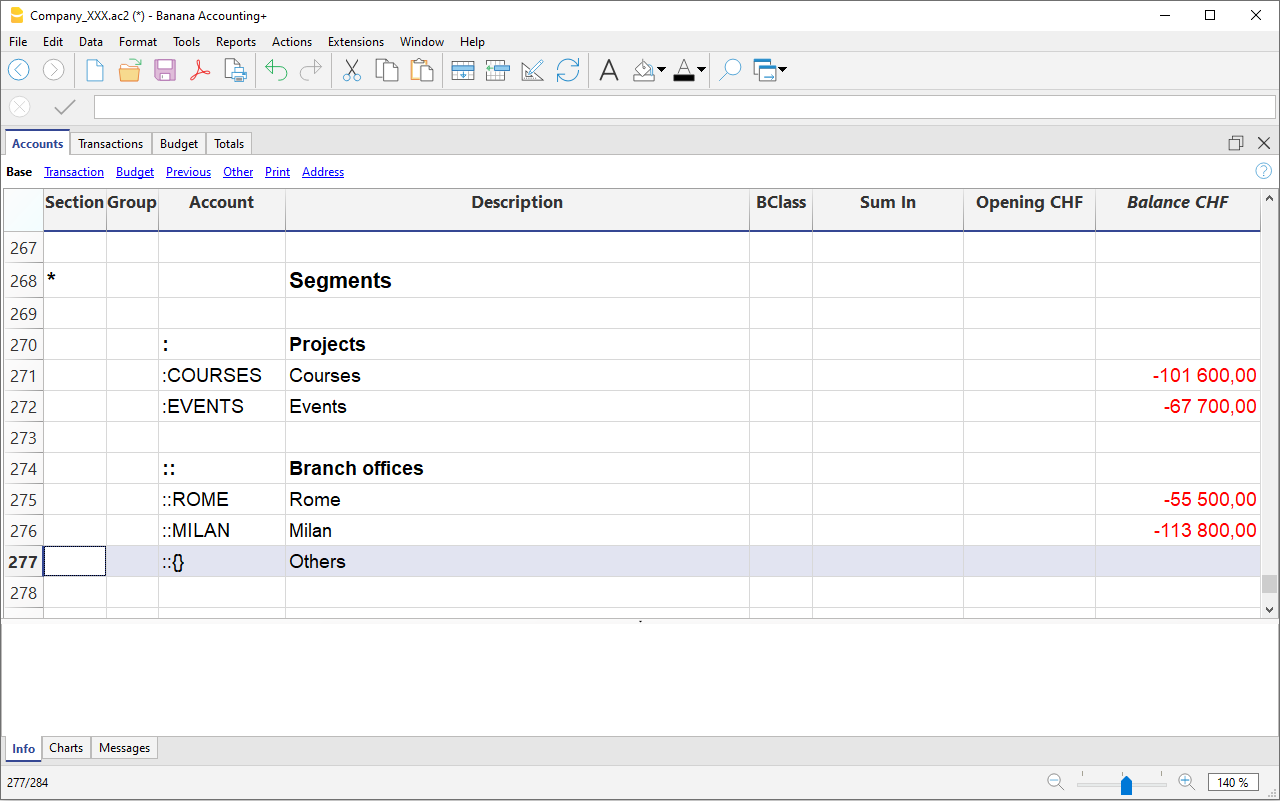
Entering transactions on the segments
Segments are entered into the Transactions table in the Debit and Credit columns following the account numbers.
- Segments can be recorded, by having them preceded after the account by either a colon (:) or a minus sign (-).
- If you want to enter segments with a minus sign preceding the segment code, you must activate the option 'Use minus sign (-) as segments separator, in the File menu, command File properties (basic data) > Options.
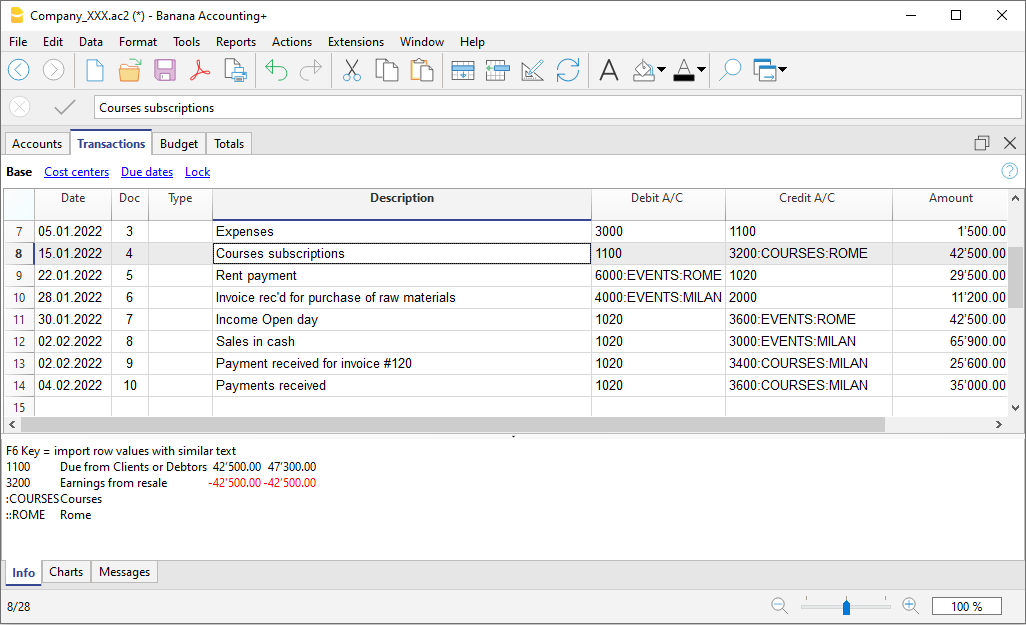
Profit & Loss Statement by segment
The report by segment can be obtained from the menu:
- Reports > Enhanced balance sheet with groups
- In the Chart of Accounts section and in the Sections section, select the Profit & Loss statement.
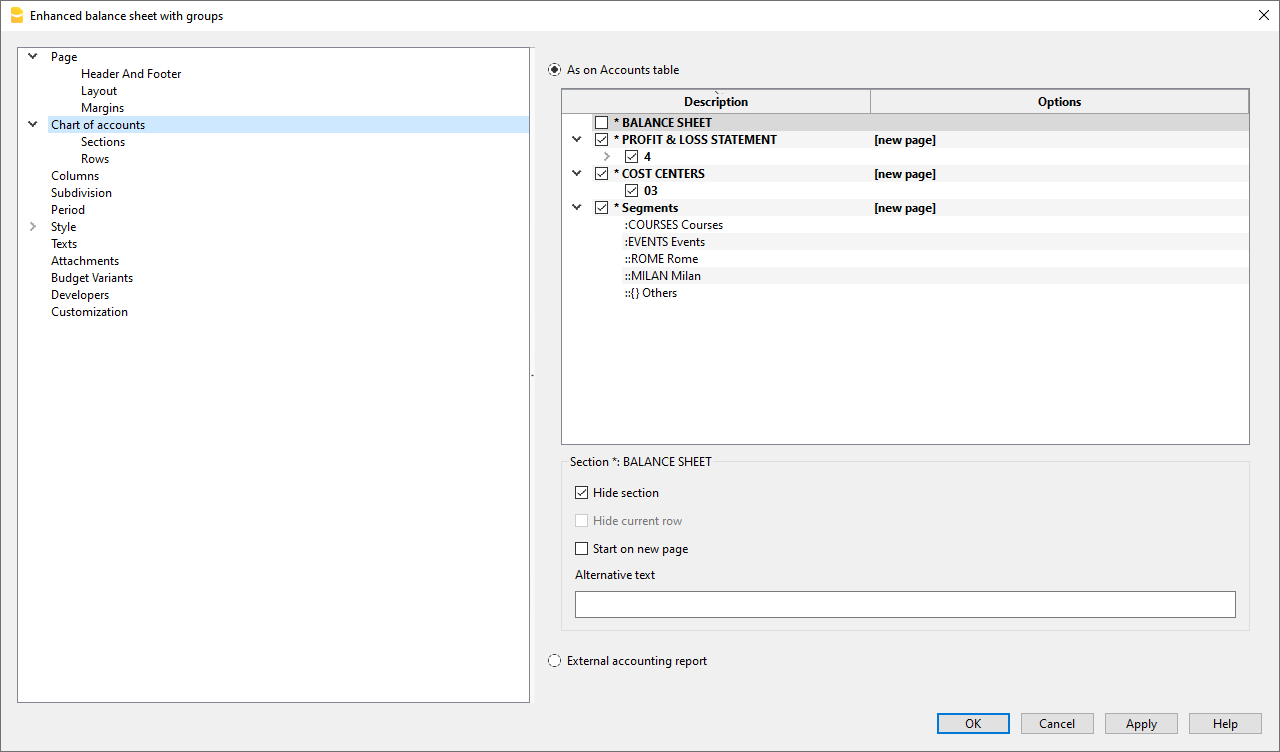
- Activate the Subdivision by segment option
- Select the segment for which the balance sheet should be obtained (by project or by branch office)
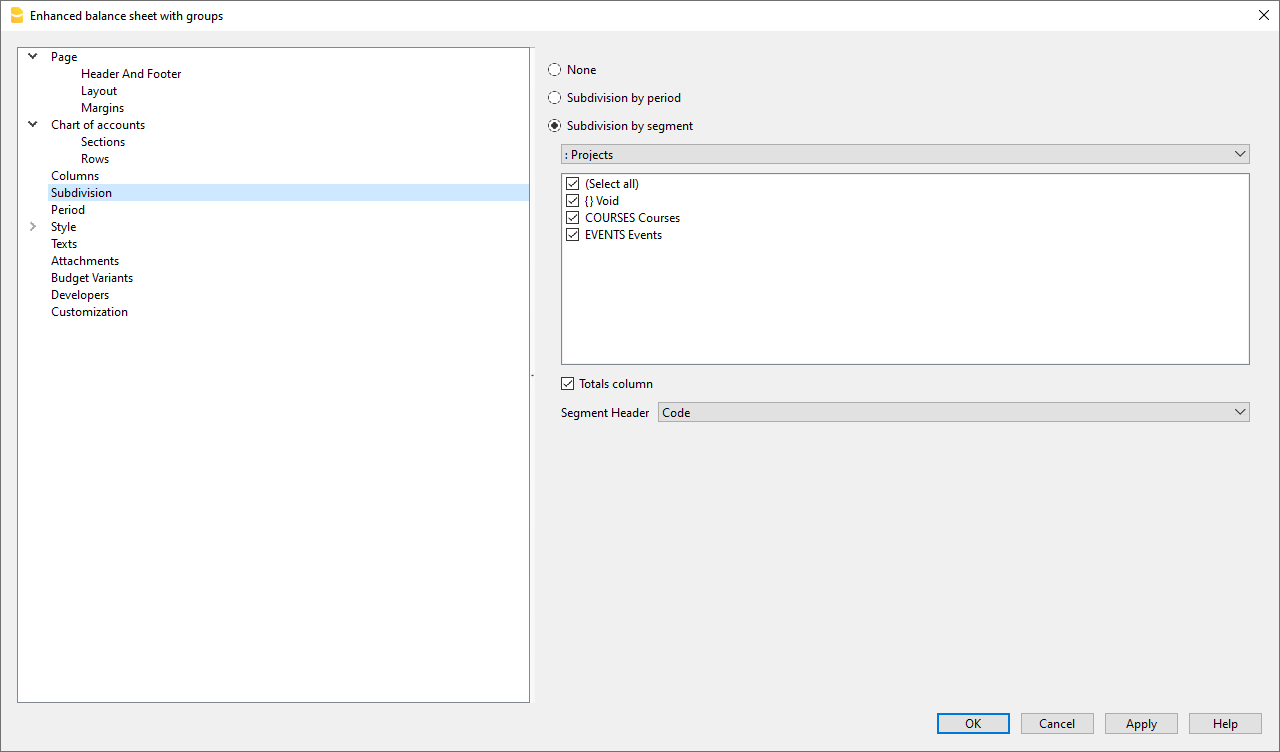
Report by Sector
The different segments appear in this report. The column with the curly brackets {} is that of values not assigned to any segment.
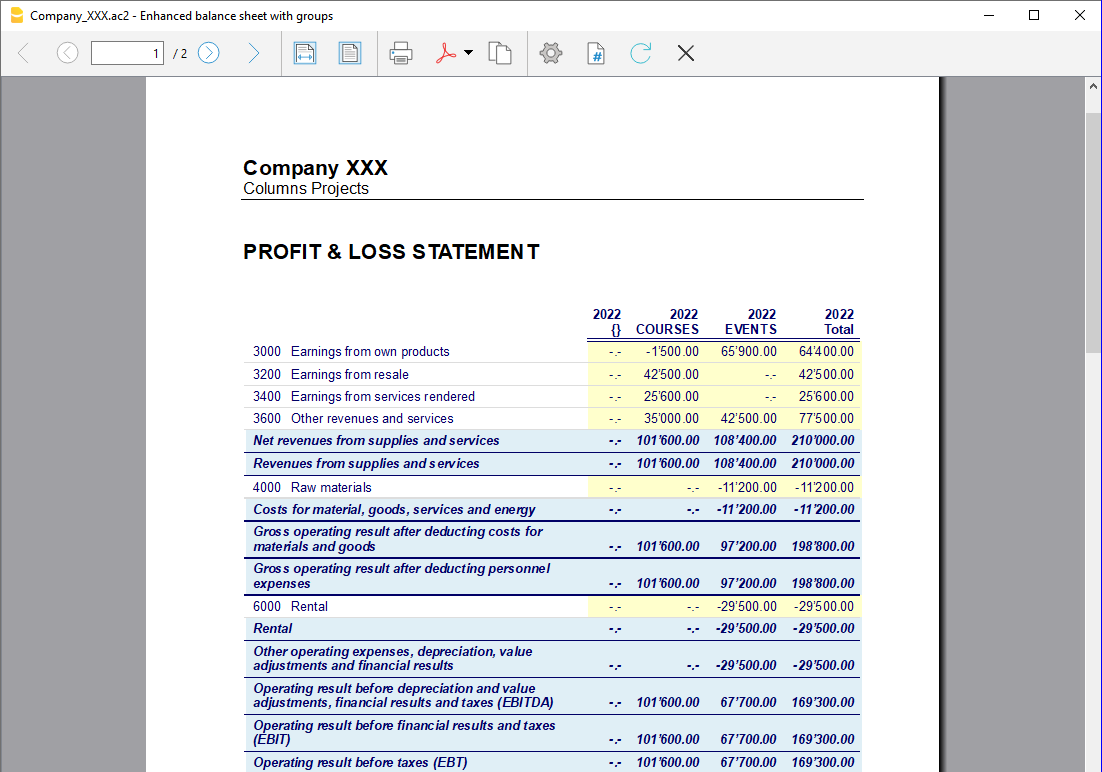
Report by Branch
The report shows revenues, expenses, and profit for the various branches.
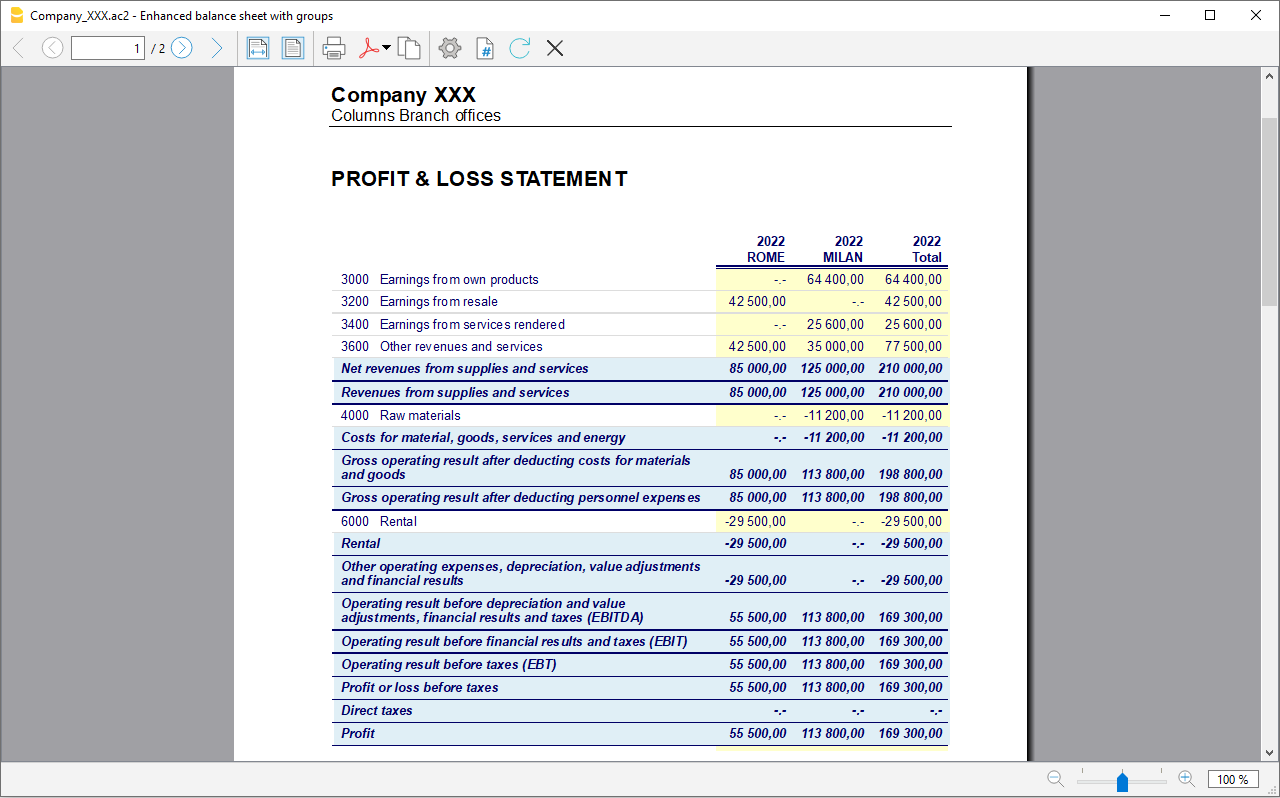
Control y seguridad de los datos
Las funciones de control y verificación de Banana Contabilidad te ayudan a garantizar que la contabilidad sea correcta, completa y coherente.
Con herramientas simples pero potentes puedes identificar errores, bloquear modificaciones no deseadas y monitorear los saldos en tiempo real.
Son funciones pensadas para trabajar con seguridad, ahorrando tiempo en las verificaciones.
Gracias a estas funciones puedes:
- Filtrar los datos para buscar, verificar y cambiar inmediatamente cuentas, importes y textos.
- Verificar la corrección de la contabilidad de forma rápida y automática;
- Detectar y corregir errores antes del cierre o la impresión de los informes;
- Visualizar inmediatamente las diferencias contables.
- Trabajar con mayor seguridad, precisión y tranquilidad.
Filtro de filas
El Filtro de filas permite visualizar solo los registros que te interesan, según criterios como fechas, cuentas, importes o texto.
Puedes usarlo para verificar datos específicos, detectar inconsistencias y modificar directamente las filas filtradas.
El filtro está disponible en muchas tablas e informes, permitiéndote aislar y revisar fácilmente los datos deseados.
Verificar contabilidad
La función Verificar contabilidad realiza una comprobación automática de todo el archivo, señalando errores, desequilibrios o datos faltantes.
Banana verifica la corrección de los saldos, la coherencia entre cuentas de Debe/Haber y posibles importes incorrectos.
Es una herramienta esencial para identificar rápidamente problemas antes de imprimir el balance o cerrar el año.
Bloqueo de registros
El Bloqueo de registros sirve para impedir modificaciones accidentales o no autorizadas en los asientos ya verificados.
Puedes bloquear todos los registros hasta una fecha determinada o solo un periodo específico, asegurando la integridad de los datos una vez verificados o aprobados.
Columna Saldo
La Columna Saldo comprueba que, para cada línea de registro, el importe en el Debe y el del Haber se compensen correctamente.
Cuando las dos partes no coinciden, Banana señala la diferencia, permitiéndote detectar y corregir inmediatamente posibles errores de imputación.
Es una comprobación inmediata que te ayuda a mantener siempre el balance equilibrado.
La función Filtrar filas temporal
Con el Filtro de filas temporal de Banana Contabilidad Plus puedes visualizar solo las filas que corresponden a una palabra clave (u otro criterio de búsqueda), encontrando inmediatamente los asientos deseados.
La gran ventaja es la modificación directa de los datos y el considerable ahorro de tiempo, sin alterar el orden permanente de la tabla. Una vez eliminado el Filtro, las filas vuelven a su orden original.
La función Filtro de filas temporal está disponible solo en el plan Advanced de Banana Contabilidad Plus.
Los usos más comunes del Filtro de filas temporal son los siguientes:
- Encontrar filas con una palabra clave
- Visualizar una ficha de cuenta editable
- Resaltar solo las filas coloreadas
Atención: el Filtro de filas temporal es diferente del comando Ordenar filas (desde el menú Datos), que altera de forma definitiva el orden de las filas.
Encontrar filas con una palabra clave
Introduce cualquier texto (o importe). El Filtro de filas temporal muestra inmediatamente todas las filas que lo contienen.

El texto resaltado en verde es solo con fines explicativos; no aparece en el software.
Después de realizar las comprobaciones y modificaciones necesarias, puedes simplemente eliminar el Filtro (borra el texto o haz clic en el icono en forma de X junto al campo del Filtro) y las transacciones vuelven al orden anterior.
La ficha de cuenta editable
Uno de los usos más comunes del Filtro de Banana Contabilidad Plus es la posibilidad de obtener una ficha de cuenta (o categoría) editable. En la práctica, puedes visualizar las transacciones relativas a una cuenta específica y realizar directamente las modificaciones necesarias.
Cómo obtener una ficha de cuenta editable
En el campo del Filtro temporal, introduce la siguiente combinación:
!=código cuenta
Por ejemplo, si introduces !=1020 obtienes de hecho una ficha de cuenta editable de la cuenta 1020. La secuencia != indica al Filtro que visualice todas las filas en las que hay una celda que contiene el código 1020.

Modificar y volver a la vista completa
Dentro de la ficha de cuenta editable puedes realizar comprobaciones y corregir las transacciones.
Una vez finalizadas las verificaciones, puedes eliminar el Filtro:
- borrando el texto introducido, o bien
- haciendo clic en el icono en forma de X junto al campo del Filtro.
De esta manera, todas las transacciones vuelven a mostrarse en el orden original.
Resaltar filas coloreadas
A menudo se colorean las filas a las que se desea regresar más adelante, para una revisión, para mostrarlas a alguien, o porque son transacciones que deben completarse. La posibilidad de resaltarlas todas juntas evita tener que desplazarse por la tabla de Transacciones y ofrece una visión general clara. El ahorro de tiempo y la practicidad de trabajo son evidentes.
Cómo resaltar las filas coloreadas
En el campo del Filtro temporal, introduce la siguiente combinación:
!_col! o !_color!
El programa muestra todas las filas coloreadas.

También es posible visualizar únicamente las filas de un cierto color. El programa asigna a cada color un número de estilo (a partir del número 2) según cuándo fue asignado por primera vez. Puedes entonces usar, por ejemplo:
- !_co!2 para ver las filas con color de estilo 2 (en el ejemplo, azul)
- !_co!2|3 para ver las filas con color de estilo 2 y 3 (en el ejemplo, filas azules y verdes).
Después de realizar las comprobaciones y modificaciones necesarias, puedes simplemente eliminar el Filtro (borra el texto o haz clic en el icono en forma de X junto al campo del Filtro) y las transacciones vuelven al orden anterior.
Sintaxis básica para el Filtro
El Filtro permite encontrar las filas simplemente introduciendo un texto como criterio de búsqueda. Cuando se introduce el texto a buscar, el programa filtra todas las filas que contienen el texto especificado, separado por espacios.
Aquí algunos ejemplos de Filtro:
- factura mario
Muestra las filas que contienen las palabras "mario" y "factura" en cualquier posición. - mar fac
Dependiendo del número de filas presentes, es posible obtener el mismo resultado incluso introduciendo un texto abreviado. - "factura mario"
Búsqueda de texto que incluye espacios: si se introduce el texto entre comillas, el programa considerará el texto como una sola palabra. - "!~Mario"
Normalmente la búsqueda incluye tanto mayúsculas como minúsculas.
Es posible especificar que la búsqueda sea solo por mayúsculas o minúsculas introduciendo un carácter especial.
El espacio siempre se considera como un separador para el comando Y.
- El espacio significa que las condiciones son aditivas.
- Nunca incluyas espacios en la búsqueda a menos que estén entre comillas, por ejemplo: "factura mario".
- Ejemplos:
- factura mario
El programa considera las filas que contienen ambas palabras "mario" y "factura".- "factura mario"
El programa considera el texto entre comillas como una sola palabra, incluyendo el espacio. Por lo tanto, buscará todas las filas que contengan exactamente "factura mario" (en ese orden).
Caracteres especiales
Es posible utilizar casi todos los caracteres en la búsqueda.
Solo el signo de exclamación "!" y la barra vertical "|" al inicio de una secuencia de texto tienen un significado especial.
- "|" para indicar O (OR)
Al menos uno de los elementos precedidos por "|" debe estar presente en la fila.
En el siguiente caso, la búsqueda mostrará las filas que incluyen "mario" y "factura" o "honorario".
mario |invoice |honorario
La barra vertical es el carácter Alt-124. Si no lo encuentras en el teclado, busca en Google:- "Distribución del teclado windows/mac españa/suiza/us (Estados Unidos)" y mira en la sección de imágenes.
- Especificador de comando "!".
Cualquier texto precedido por el signo de exclamación se considera un comando y tiene un significado especial.
Por ejemplo, para excluir un texto, utiliza la secuencia de comandos "!-".
mario !-factura
Sintaxis avanzada para el Filtro
La sintaxis avanzada de búsqueda es solo experimental: podría estar sujeta a cambios y mejoras.
El carácter "!" al inicio de un texto indica que se trata de un comando especial de búsqueda.
- !
Cuando se coloca antes o después de un espacio, inicia una secuencia de comandos. - !!
Se considera simplemente como un "!" y no como una secuencia de comandos. - !-
El signo menos "-" se utiliza para excluir contenidos y puede combinarse con cualquier otro operador.
!-mario !-1000 !-=1000 !-^pago !-~10 - !~
La tilde "~" debe colocarse inmediatamente después del "!" o del "!-".
Con "~" la búsqueda distingue entre mayúsculas y minúsculas.
!~mario
!-~mario
Caracteres de comando
Son los caracteres que siguen inmediatamente al inicio del comando "!", "!-", "!~" o "!-~".
Pueden usarse también con "-" para excluir y "~" para hacer la búsqueda sensible a mayúsculas y minúsculas.
- !=
Encuentra exactamente el texto especificado en la celda.
!=1000
Puede utilizarse con varios valores separados por el carácter "|".
!=1000|2000|30000
Celda vacía.
Desde la versión 10.1.16 selecciona celdas con valores vacíos.
!= - !+
Contiene el texto especificado. Equivalente a la búsqueda normal, pero permite combinaciones con otros caracteres.
!-+mario excluye filas que contienen "mario".
!~+mario excluye filas con "mario" respetando mayúsculas y minúsculas. - !<>
Distinto del texto proporcionado.
!<>1000 - !.
Caracteres comodín (*, ?) para una búsqueda con caracteres especiales.
!.100*
!.100*|2?0* - !^
Comienza con el texto especificado.
^mar
^mar|hom - !$
Termina con el texto especificado.
!$rio - !_
Búsqueda por palabra completa.
!_100
!_100|200 - !:
Expresión regular.
!:\bmario\b
Mayor, Menor e Intervalos
Caracteres usados para comparar valores numéricos o fechas.
- Fecha en formato aaaa-mm-dd
2024-12-31 - Importe con el "." como separador decimal y sin separador de miles.
1999.99
Comandos de comparación:
- !> Mayor que.
!>100 - !>= Mayor o igual que.
!>=100 - !< Menor que.
!<100 - !<= Menor o igual que.
!<=100 - !<> Distinto de.
- !>< Intervalo exclusivo.
!><99.99|200 - !>=< Intervalo inclusivo.
!>=<100|199.99
Especificación de columnas
Permite especificar la columna en la que ejecutar la búsqueda.
- !descripción!
Búsqueda en la columna "descripción".
!descripción!mario
!descripción!=
!des*!mario
!des*;doc!mario
!descripcion:xml!mario
!debit*!=1000
Mostrar filas con formato
- !_fo! Muestra filas con formato específico.
- !_fo!b Muestra filas en negrita.
- !_fo!i Muestra filas en cursiva.
Mostrar filas con errores
- !_er! Muestra filas con errores o avisos.
- !_er!e Muestra filas con errores.
- !_er!w Muestra filas con avisos.
Combinación de filtros
Puedes introducir varios términos de búsqueda. Por ejemplo, puedes buscar las filas de la cuenta 1020 que incluyen la palabra Alquiler o Electricidad:

El texto resaltado en verde es solo con fines explicativos; no aparece en el software.
Otros ejemplos de combinaciones de filtros:
- 2022 !des*!mario !debit*!=1000
Muestra filas con "2022", "mario" en columnas "des" y "1000" exacto en las columnas "debit". - |!PeriodTotal_?_C:xml!<> |!PeriodEnd_?_C:xml!<>
Muestra las filas con un importe, en columnas cuyo nombre XML comienza con PeriodTotal_ y termina con _C
o bien cuyo nombre XML comienza con PeriodEnd_ y termina con _C
Motivación de la sintaxis del Filtro
La sintaxis avanzada de búsqueda puede parecer inusual, pero deseamos una sintaxis que:
- No interfiera con la búsqueda natural, permitiendo al usuario realizar la mayoría de las búsquedas de forma intuitiva, combinando los textos tal como está acostumbrado en las aplicaciones para smartphone.
- No esté ligada a un idioma específico, utilizando solamente símbolos.
- Permita todo tipo de búsquedas, de modo que pueda usarse para expresar los filtros introducidos por el usuario de manera similar a Excel.
- Abra la posibilidad de incluir comandos específicos de Banana, como color, errores, etc.
Hemos evaluado varias otras sintaxis de búsqueda, pero todas utilizan caracteres comunes como el guion "-", el "+", u otros como "\", "(", "*", "?", que se usan frecuentemente en contabilidad.
Por eso decidimos crear una sintaxis especial donde el signo de exclamación "!" se utilice como indicador de comando. El "!" normalmente se usa al final de una frase, por lo tanto es poco probable que interfiera con la búsqueda.
¡Todos los comentarios y sugerencias son bienvenidos!
GPT de Banana Contabilidad Plus para usar el Filtro
Este GPT de Banana Contabilidad fue creado utilizando ChatGPT y está diseñado para generar una sintaxis avanzada de búsqueda para filtrar las filas en la tabla de Transacciones.
El generador de comandos GPT para la sintaxis avanzada de búsqueda (Filtro) es solo experimental: podría estar sujeto a cambios y mejoras.
Requisitos
Para utilizar este GPT, es necesario:
- Descargar e instalar la última versión de Banana Contabilidad Plus
- Tener una cuenta de ChatGPT.
- Para utilizar este GPT, es necesario tener una suscripción a ChatGPT Plus. Sin ella, es posible probar el servicio gratuitamente hasta un máximo de diez solicitudes. Posteriormente, se debe actualizar a ChatGPT Plus o esperar unas horas antes de poder realizar más solicitudes.
Cómo funciona
- Abre el GPT de Banana Contabilidad Plus desde este enlace:
- En el campo Mensaje abajo, introduce una frase que describa lo que deseas buscar dentro de la tabla Transacciones con el Filtro. En general, cuanto más específicas sean las solicitudes, mejores serán los resultados.
- El GPT procesará tu solicitud y devolverá el resultado correspondiente.
Según el input proporcionado al GPT, se generará una cadena de texto que contiene el comando necesario para filtrar las filas en la tabla Transacciones. - Copia la cadena de texto generada.
- Pega la cadena copiada en el Filtro de la tabla Transacciones en Banana Contabilidad Plus.

Ejemplos de mensajes para introducir en el GPT
A continuación se muestran ejemplos de mensajes para introducir en el chat del GPT, junto con los resultados generados correspondientes:
- "Encuentra todas las transacciones del tercer trimestre de 2024"
- Resultado: "!date:xml!>=2024-07-01 !date:xml!<=2024-09-30"
- "Busca las filas con un importe de 450.00"
- Resultado: "!amount:xml!=450.00"
- "Busca las filas con un importe mayor a 200"
- Resultado: "!amount:xml!>200"
- "Busca las filas con el valor 3001 en la columna Cuenta Haber"
- Resultado: "!accountcredit:xml!=3001"
- "Dame las filas con el valor 1020 en la columna Cuenta Haber y un importe entre 1500 y 4000"
- Resultado: "!accountcredit:xml!=1020 !amount:xml!>=<1500|4000"
La función Ordenar filas temporal
La función Ordenar filas temporal de Banana Contabilidad Plus permite ordenar temporalmente las filas de una tabla, sin modificar su disposición permanente. Es una función muy útil para buscar inmediatamente datos, tanto textos como importes.
Una vez eliminada la función, las filas de la tabla vuelven a su orden original.
Para cambiar el orden de las filas de una tabla de forma definitiva es necesario usar el menú Datos > Ordenar Filas.
La función Ordenar filas temporal es una de las nuevas funcionalidades. Les rogamos nos envíen sus comentarios sobre cómo mejorarla. Está disponible solo en el plan Advanced de Banana Contabilidad Plus.
Esta herramienta permite ordenar rápidamente el contenido según la columna desde la cual se aplica la función Ordenar:
- Haga clic con el botón derecho del ratón en el encabezado de la columna donde necesite un ordenamiento.
- Sitúese sobre la pequeña flecha y seleccione el criterio de orden ascendente o descendente.
Ventajas
- Puede ordenar las filas visualizadas, en sentido ascendente o descendente, según la columna deseada.
- A diferencia de Excel, cuando elimina el ordenamiento de visualización, las filas vuelven al orden original sin necesidad de usar el comando Deshacer.


En el encabezado de la columna elegida para ordenar los datos aparecerá una flecha.
Nota importante
La función Ordenar filas temporal es diferente del comando Ordenar filas (del menú Datos):
- Ordenar filas temporal es un ordenamiento de filas en pantalla de forma temporal, concebido para agilizar la revisión y modificación de los datos introducidos previamente. Es posible eliminar fácilmente los criterios de ordenamiento para volver al orden original de las filas. Esta función está disponible solo con el plan Advanced.
- El comando Ordenar filas (del menú Datos) modifica de forma permanente el orden de las filas de la tabla y solo puede deshacerse con el comando Deshacer. Este comando está disponible para todos los planes.
Verifcar y recalcular la contabilidad
Banana Contabilidad ofrece varios comandos para recalcular los datos y verificar la corrección de la contabilidad. Es buena práctica realizar estas comprobaciones regularmente, especialmente si el programa señala errores o diferencias.
Los principales comandos y funciones para el recálculo y control de la contabilidad son los siguientes:
- Atajos de teclado para iniciar el recálculo de la contabilidad:
- Mayúsculas + F9 (Windows y Mac)
- Cmd + 9 (Mac)
- Menú Acciones > Verificar contabilidad para realizar verificaciones amplias de la contabilidad.
- La Columna Saldo resalta las diferencias en la tabla de Registros entre las columnas Debe y Haber. La columna Saldo puede activarse desde el menú Datos > Configurar las columnas.
Si se detectan errores o diferencias, es recomendable corregirlos antes de continuar con otras operaciones contables.
Recalcular (Mayús + F9) y verificar contabilidad
La combinación Mayúsculas + F9 ejecuta automáticamente las siguientes acciones:
- Verifica la versión del programa en uso e informa sobre la disponibilidad de actualizaciones
(se recomienda usar siempre la última versión). - Reinicia y re-calcula los saldos de las cuentas, centros de coste y segmentos.
- Reescribe todas las operaciones como si se introdujeran nuevamente.
- Señala posibles errores en las siguientes tablas:
- Cuentas
- Transacciones
- Códigos IVA
- Tipos de cambio
- Contabilidad multimoneda
- Actualiza los saldos iniciales.
- Recalcula los saldos según los últimos tipos de cambio introducidos en la tabla de Cambios.
- Contabilidad con IVA
- Recalcula todos los valores de IVA según los códigos utilizados.
- Cash Manager
- Calcula el saldo progresivo en la tabla de Transacciones.
- Recalcula los totales de las tablas de Cuentas y Categorías.
- Cash Manager e Ingresos / Gastos
- Recalcula los totales de las tablas de Cuentas y Categorías.
- Contabilidad con presupuesto
- Actualiza las columnas Diferencia presupuesto y Año anterior en la tabla Cuentas.
Diálogo Verificar contabilidad
El comando Acciones > Verificar contabilidad abre una ventana de diálogo con opciones de verificación avanzadas.

Recalcular contabilidad y ejecutar verificaciones ampliadas
Este es uno de los comandos más importantes para la verificación de la contabilidad, porque:
- recalcula toda la contabilidad,
- ejecuta controles exhaustivos,
- informa sobre posibles errores en la ventana de Mensajes.
También actualiza los textos de las columnas Descripción cuenta y Categorías en la tabla de Registros, si han sido modificados.
Propiedades de datos base
La opción está activada por defecto y comprueba la coherencia de los datos definidos en Archivo > Propiedades archivo (datos base), como por ejemplo:
- fechas de apertura y cierre,
- cuentas de IVA,
- cuentas para diferencias de cambio.
Registros
Diferencias en transacciones
- Verifica posibles diferencias entre el Debe y el Haber (o entre Cuentas y Categorías).
- Las filas afectadas se indican en la ventana de Mensajes.
- El importe total de la diferencia es visible en la ventana de información inferior.
- Las diferencias también se destacan en la Columna Saldo.
Incluir diferencias intermedias
- Verifica que no existan diferencias intermedias en las transacciones múltiples.
- Las diferencias suelen deberse a transacciones incompletas o importes incorrectos.
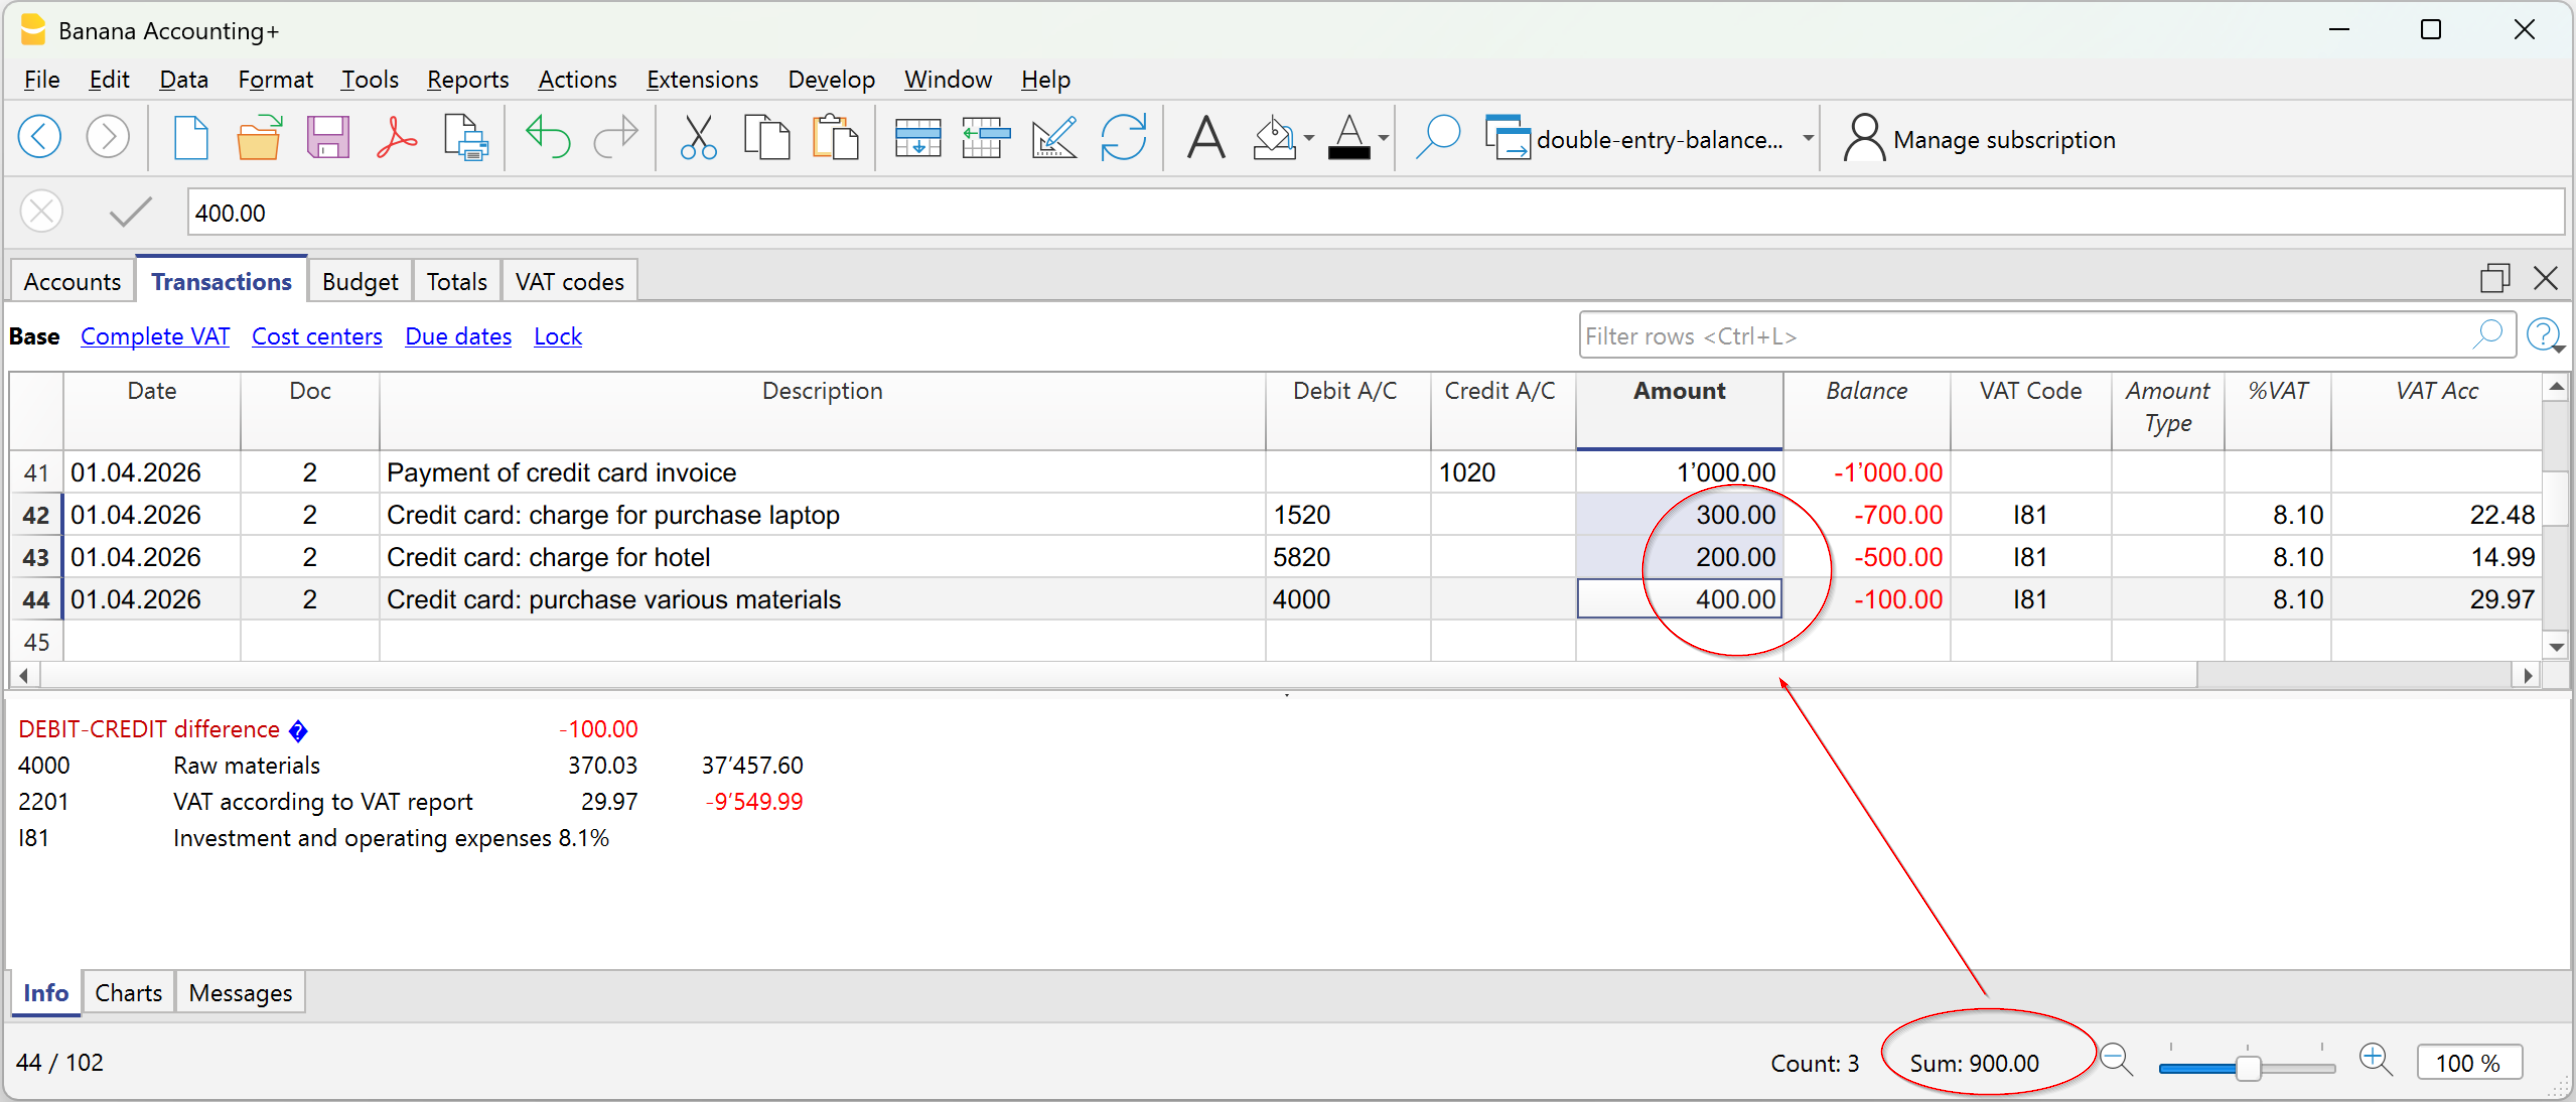
Saldos de verificación (#CheckBalance)
- Compara el saldo contable con el saldo real (banco o correo) introducido manualmente.
- Se informan las diferencias indicando las cuentas afectadas.
Más información sobre los registros de Check Balance está disponible en la página Registros #CheckBalance.
Mismo documento con fechas diferentes
- Advierte si un mismo número de documento está asociado a fechas diferentes.
- Esta situación puede impedir que el programa determine correctamente la cuenta contrapartida.
Cuentas
Estructura del plan de cuentas
- Verifica que la estructura de los grupos contables sea correcta.
Presencia de diferencias de cambio
- Señala posibles diferencias de cambio aún no registradas.
Los saldos iniciales difieren de los saldos finales del año anterior
- Verifica que los saldos iniciales del nuevo año coincidan con los de cierre del año anterior.
- Las diferencias entre los saldos finales del año anterior y los saldos iniciales del nuevo año se indican como importe total en la ventana de Mensajes.
Artículos
Saldos iniciales de las cuentas de Activos
- Verifica que el valor inicial de los Artículos coincida con el saldo de la cuenta de Activo asociada.
- El control se realiza solo para artículos con cuenta de Activo asignada.
Incluir verificaciones ampliadas con la tecla Mayús + F9
Si la opción Incluir verificaciones ampliadas con la tecla Mayús + F9 está activada, el programa ejecuta automáticamente todas las verificaciones seleccionadas en el diálogo Verificar contabilidad también mediante el atajo de teclado.
Si la opción no está activada, con Mayús + F9 solo se realiza el recálculo de la contabilidad.
Lock transactions with the Blockchain technology
Banana uses an accounting data certification system based on a technique that today is called blockchain. The certification method based on the chaining of data blocks "blockchain" is considered so reliable that it is used to ensure the validity of bitcoins and all modern crypto-currencies.
Banana.ch was the first company in the world to use blockchain technology in accounting. The method was filed as a patent in 2002 (US Patent No. 7,020,640). This method ensures high levels of data integrity and compliance with legal regulations.
For more information, see Blockchain for ensuring the integrity of accounting movements.
The lock transactions command
With the Lock transactions command of the Actions menu, the accounting transactions are locked and marked with control codes that can certify, over the years, that the transactions have not been modified.
- The validity of a possible already existing lock is being verified
- The transactions until the lock date are being numbered progressively and are being locked. For each transaction, the digital code of the row and the progressive one are being calculated.
The calculation of the digital codes is being done according to the sequence of the columns. - In the accounting is being indicated that transactions with an equal or earlier date than the lock date will no longer be accepted.
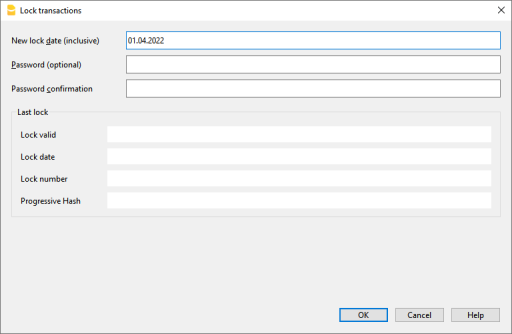
Date of new lock (inclusive)
Specify the date up until when the transactions will be locked.
Password (optional)
It is possible to insert a password to eventually unlock the transactions or to carry out a new lock in the future.
If the program finds no errors in the transactions included in the lock date, it will lock the transactions, calculate and assign individual numbers and codes to each row of transactions which can be viewed in the Lock view on the Transactions table.
Last lock
The data of the following fields are automatically filled out by the program based on the last executed lock.
Lock valid
A "Yes" is shown if the lock is valid.
Date of lock
The date of the last executed lock is shown.
Lock number
This is the value automatically entered by the program in the last row of the LockNum column.
When the lock is repeated, if the value of the last row lock number is unchanged, it means that the lock is valid and that the data have not been altered; if however the value is changed, the program shows the following codes:
- (-1) if the lock is invalid from the first row
- (-2) if there are rows that have the same LockNum.
Progressive Hash
This is the control code present in the last transaction.
Transactions: Lock View
All digital codes are shown along with all the information that the program used to create the digital signature.

- LockNum: the progressive number that identifies the row
- LockAmt: the cumulative transactions total, similar to the total at the end of the page, as required by some national regulations
- LockLine (hidden column): the digital code calculated according to the row values.
- LockProg: the global electronic signature (SHA-256).
The digital code LockProg
This is the main element of the certification; it uses the blockchain methodology.
The digital code is calculated according to the following values:
- The contents of the current entry, including amounts, descriptions and the description of the account at the moment of the lock
- The progressive number (LockNum)
- The cumulative balance (LockAmt)
- The progressive code of the preceding entry (LockProg).
In case the accounting data undergo even the slightest modification (for example, a date or an amount is changed), the digital code will be different. If the control number remains the same, it implies that the data are original and therefore have not been changed.
Check Lock
With the Actions menu → Check lock info command, the program verifies the validity of the lock and displays the data.
- The program recalculates the digital control codes and verifies if they correspond with the ones related to the transactions.
- If the codes correspond, the lock is considered valid, and therefore the data are original
- If they do not correspond, it means that the data have been changed and that they are not the original ones calculated at the time of the lock.

Unlock transactions
The Menu Actions → Unlock transactions command removes the lock and the control codes. If the lock was set with a password it will be necessary to reenter the password in order to remove the lock.
If later on you want to relock the transactions, and they have not been modified, the control numbers will be the same as the ones of the earlier lock; if however some data have been changed, the control numbers will be different.
Partial lock
If the transactions have been locked, it is possible to unlock them even partially, from a specified date. If a lock password has been set, in order proceed unlocking the transactions, you need to enter it in the specific field.

Why unlock the accounting?
In principle, the locked accounting should not be unlocked. It might happen that, after the lock, you find errors in the accounting and see the need to make corrections.
To have the opportunity to make further changes, users kept a copy of the file before the lock. If they found errors, they would restore the previous situation. In the meantime other transactions had perhaps been made, so often it happened that restoring previous versions of the accounting proved wrong. To avoid this unnecessary waste of time it was decided to make the Unlock transactions command available.
The certification must not be confused with data security. The data certification is a methodology that ensures that the accounting data are original. To prevent data from being modified, the methodology is the one related to data security. Data security procedures, however, can only be implemented in an environment that limits data access.
If the file is fully available to the user, such as when it is on a PC, people have complete control of the data. They can thus replace files easily. With a certification one cannot prevent that the data are being altered, but it will allow you to know if the data are the original ones.
The person who keeps the books is responsible for the accounting and decides whether a change is permissible or not.
Organizing the certification and data verification
Once you locked the transactions of the period, you need to:
- Print the lock information or print the last certified transaction row with its specific certification number (LockProgr).
- Sign and store this information along with the accounting documentation or in any other safe place.
In order to check that the accounting data are the original ones, you need to proceed as follows:
- Impart the Show lock info command.
- Go back to the document that shows the digital control number
- Check whether the row identified with the LockNum still has the same digital control number
- If the number matches , the accounting data are the same as those certified
- If the number does not match , it means that the accounting data have been modified.
Banana works on developing applications that make it possible to compare two files and obtain indications regarding data that have been altered.
Data security
Digital certification ensures that the data are still the original ones. It does not prevent the modification of data.
It is the responsability of the accountant to ensure that the data are not altered. Each administration must be organized according to its size and needs.
Those who want to make sure that the data are not being altered by unauthorized persons , must employ other methods and tools, such as :
- Save the data to a secure system (protected network drive), password protected.
- Keep the copies of the data.
- Encrypt archives.
Long-term archiving
The accounting file contains the entered data. In order to open the file and obtain a report or an account card, you need to have the program at your disposition.
Banana Accounting gives the possibility to export all the accounting data, and its printouts as well, to Pdf, Html and Xml.
The generated file can be saved on a CD and accessed on any computer even after many years, even by persons who do not have the Banana Accounting software.
Columna Saldo para detectar las diferencias contables
La columna Saldo está presente en la tabla de Registros en los archivos de contabilidad de partida doble, multimoneda, contabilidad de ingresos/gastos y gestor de caja. Es muy útil porque detecta diferencias contables en la tabla de Registros.
La columna Saldo muestra un valor solo cuando existe una diferencia contable.
Si el asiento es correcto y el saldo es igual a cero, la celda permanece vacía y la columna no muestra ninguna anomalía.
Por lo tanto, la presencia de un importe en la columna Saldo indica que el asiento está incompleto o contiene un error que debe ser verificado y corregido.
▶ Ver el video: La nueva columna Saldo (en inglés)
Cómo visualizar la columna Saldo
La columna Saldo no es visible por defecto. Se puede activar desde el menú:
- Datos > Configurar las columnas > Saldo
La columna Saldo se puede colocar en la posición deseada utilizando los botones Hacia arriba (mueve la columna a la izquierda) y Hacia Abajo (mueve la columna a la derecha) en la ventana de diálogo Configurar columnas.
Motivos de las diferencias en la columna Saldo
Cuando se detectan discrepancias contables, es fundamental identificar la causa y proceder a su corrección.
Las diferencias pueden deberse, en particular, a las siguientes razones:
- la celda de la Cuenta Débito, la Cuenta Crédito o la Categoría está vacía o contiene un valor incorrecto
- en los asientos con múltiples cuentas o categorías, los totales de los importes no coinciden
- en los asientos con código de IVA, la repartición del IVA o la cuenta del IVA no son correctas.
Nota: en los asientos compuestos, el programa puede mostrar temporalmente una diferencia entre el Débito y el Crédito hasta que se complete el asiento.
La columna Saldo en la contabilidad de partida doble
En la contabilidad de partida doble, la columna Saldo detecta las diferencias entre las columnas Débito y Crédito.
Cuando la contabilidad es correcta, la columna Saldo no debe contener ningún valor (celdas vacías):
- el saldo es igual a cero cuando la suma de los importes en Débito y Crédito se compensan;
- en los asientos con múltiples cuentas o categorías, puede aparecer un saldo hasta que se completen todos los asientos implicados. Con el último asiento, el saldo debe volver a cero.

El ejemplo mostrado en la imagen corresponde a un registro relacionado con el pago de varias facturas. Las cuentas y sus respectivos importes se introducen en varias líneas:
- En la primera línea, en la columna Haber, se ha registrado la cuenta bancaria 1020, por un importe total pagado de 1'000.
- En las líneas siguientes, en la columna Debe, se han registrado:
- la cuenta 1520 – Inversiones, por 300
- la cuenta 5820 – Viajes, por 200
- la cuenta 4000 – Compras de material, por 400.
El total de los importes registrados en el Debe es, por tanto, de 900, mientras que el importe registrado en el Haber es de 1'000.
Por lo tanto, el registro presenta una diferencia de 100. Esta diferencia se muestra en la columna Saldo, en la última línea del registro, lo que permite identificar inmediatamente que el registro no está cuadrado.
La columna Saldo en la contabilidad de Ingresos/Gastos
En la contabilidad de Ingresos/Gastos y en Cash Manager, la columna Saldo detecta las diferencias entre las columnas Cuenta y Categoría.
Cuando la contabilidad es correcta, la columna Saldo no debe tener ningún valor (celdas vacías):
- El saldo es cero si la suma de los importes en las columnas Cuenta y Categoría se compensa (sin diferencia).
- Para los asientos con varias cuentas, aparece un saldo hasta que se completen todos los asientos en las cuentas y categorías implicadas. Con la última línea del asiento, el saldo debe quedar en cero.
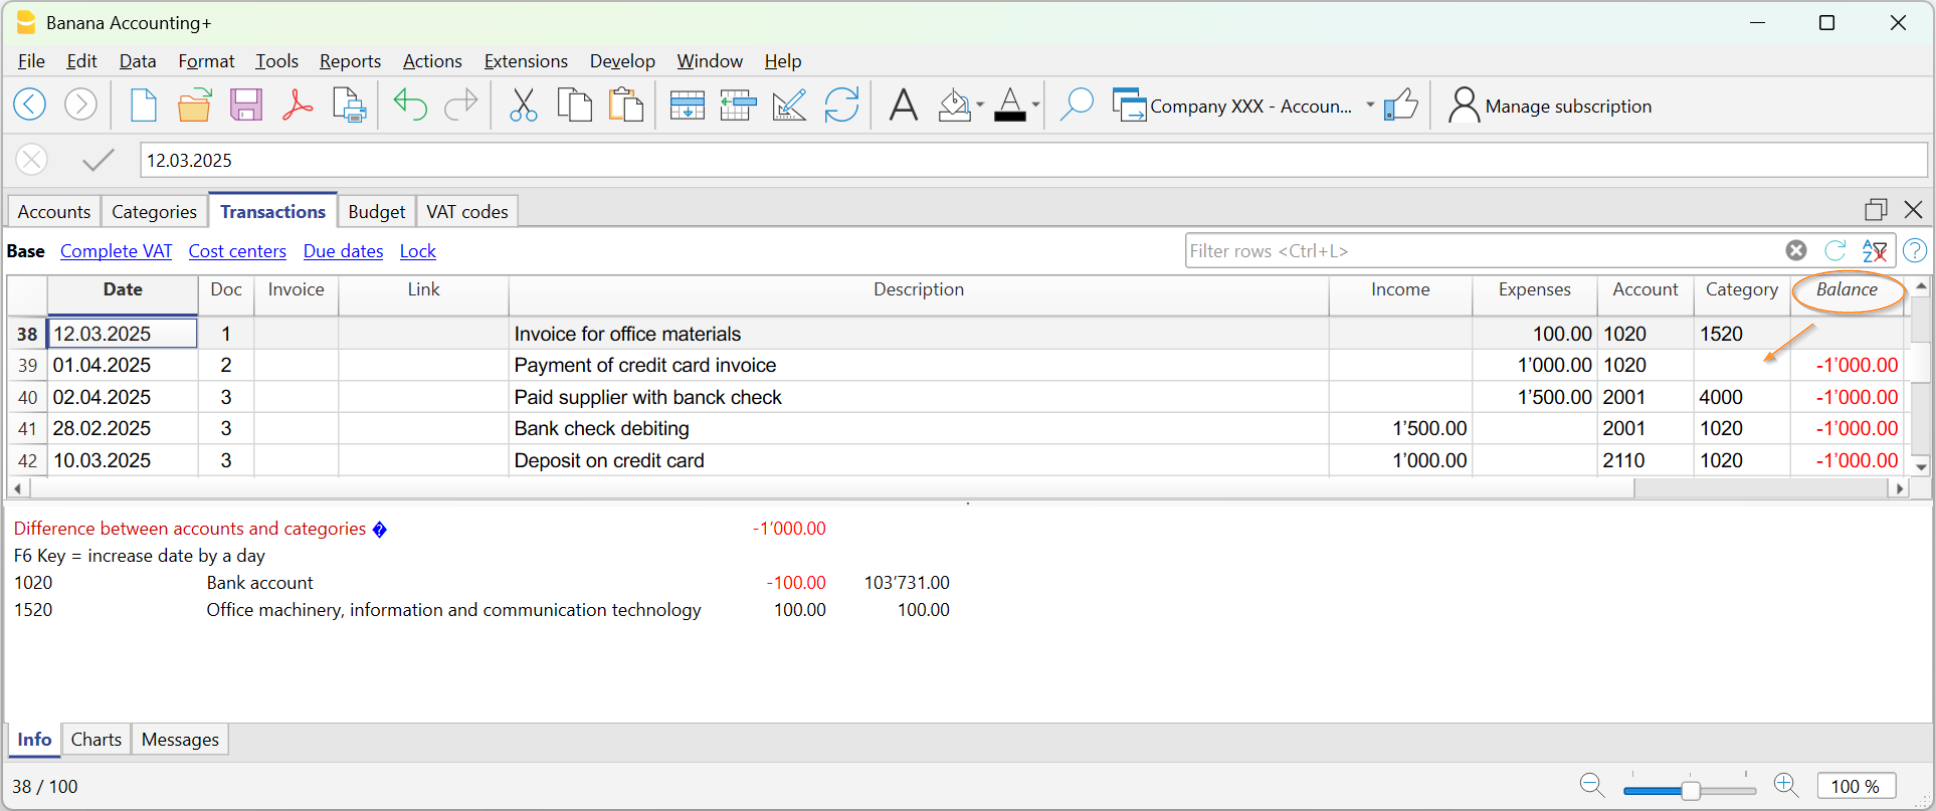
En la imagen de ejemplo se ha generado una diferencia de 1000:
- En el asiento, en la fila Doc 2, no se ha ingresado la categoría en la columna Categoría. Por lo tanto, al haberse registrado el importe solo en la cuenta, se ha generado una diferencia de 1000.
Verificar la contabilidad
El comando Verificar contabilidad también incluye la verificación de la columna Saldo.
Si la columna Saldo no está en cero significa que hay errores. Para encontrar la primera fila donde se ha generado la diferencia contable:
- revise la columna Saldo para identificar la primera fila donde comienza la diferencia.
- utilice el comando Verificar contabilidad, que indica la fila donde empieza la diferencia.
Export from Banana Accounting+
Banana Accounting Plus offers several exporting possibilities. It is possible to export the data of a single table (export rows), of several tables (export files), or only the data contained in the print preview. You can choose to export in different formats: PDF, Xml, Excel, Html, txt, Json, etc.
New! It is now also possible to export the PDF file that also includes all digital attachments. All accounting is therefore truly included in one file.
The PDF export with digital attachments is only available in Banana Accounting Plus with the Advanced plan.
See all the advantages of the Advanced plan.
With Banana Accounting it is possible to export data from a single table or from multiple tables (files), in various formats.
Export rows
Choose Data > Export rows menu in order to export the content of a single table.
If rows are selected before giving the command, the option Only selected rows will be activated in the export dialogue.
Export file
Chose File > Export file command from the File menu in order to export several tables simultaneously.
In the Export file dialogue the following sections are also used:
- Those specific to the file type (see export formats).
- Include tab - to define the tables and the reports that must be included in the export
- Period (Accounting) tab, to define the period
- VAT tab (in the accounting files with VAT management)
- Customization tab
Export Print Preview
In the print preview toolbar:
- Click on the arrow beside the Adobe PDF button
- Choose the option that's right for you:
- Export to PDF
- Export to Html
- Export to Excel
- Copy to clipboard
Export formats
To set up a specific export, each format has one or more sections with options.
You can choose between different formats:
- PDF
This format allows to export the entire accounting file content in a unique PDF file.
New! Export PDF file including digital attachments - Excel
Creation of presentations in Excel, comparisons, estimates, index calculations, budget analysis, graphs that are directly linked to the accounting values. - HTML
With this format the data and accounting statements can be easily accessed with an Internet browser (Explorer, Mozilla, Opera).
This format fully complies with the legal requirements related to long-term archiving of accounting data. - XML
This format is the standard used for exchanging data. The accounting data can be easily read and reused with other programs or with XSLT style sheets. - Export rows in TXT
This format allows to export the table rows in a text format.
Export to Excel
To export to Excel click on the File → Export file → Export to Excel menu.

File name
In this area, you must enter the name of the new file that the program creates for exporting data. If, on the other hand, an existing file is selected using the Browse button, the program will overwrite the file with the new data.
Display files instantly
The program for viewing the newly created MS Excel archive is launched. In this way you can see the export result immediately.
Options
Define cell names
This option will automatically assign a name to each cell as the file is exported. For example, the cell that contains the balance for account 1000 will receive the name: "Accounts_1000_Balance" in Excel. This means the user can univocally identify each cell independently from its position on the sheet and thus create Excel reports that don't have to be corrected if the account plan is changed.
Define table names
With this option, the program will automatically give a name to the whole area of the cells belonging to a table, at the moment the file is exported. For example, the area formed by the cells belonging to the Accounts table will be identified by the name DB_Accounts. This option is necessary if database functions are used, when creating reports in Excel.
Use names Xml (English)
The cell names can either be defined in their original accounting language, or with their English name. In the original language, the names will be understandable to someone who speaks that language, but they will not be universally understood like a name in English would be. By selecting this option the user would have, for example, "Accounts_1000_Balance" instead of "Conti_1000_Saldo".
Protect tables
The entire content of cells is locked when selecting this option so that it is only possible to edit the format. This prevents the possibility of making any unintentional changes to the exported data. The user can remove this protection at any time by using the appropriate command in Excel.
Other Tabs
For the explanations of the other tabs, please visit the following pages:
Export result
Exporting to Excel creates a file with html content but with the extension '.xls'. The file is opened by Excel and converted automatically. Excel however warns that the file is not an actual Excel file, simply respond 'Yes' to continue.
Each accounting table is displayed in a different sheet in the Excel file
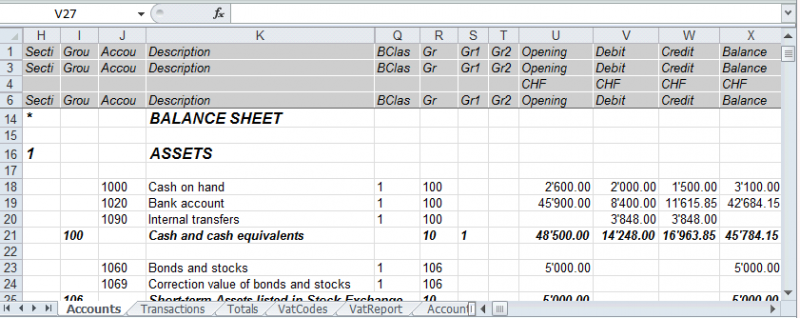
Use the cell names instead of the row/column references:
- The names return the desired value even when a new row or column is being entered.
- The names are easy to use and understand
"Accounts_1000_Balance" refers to the balance of the 1000 account
"Accounts_1000_Description" returns the value of the cell that contains the description of the 1000 account - The names can be used in the formulas
"=Accounts_1000_Balance" returns the value of the cell that contains the balance of the 1000 account
"=Accounts_1000_Balance/1000" divides the balance of the 1000 account by 1000 - By using the names, it is possible to create links to various files.
A link to a cell is being composed of:
- File name
- Table name
- Cell name
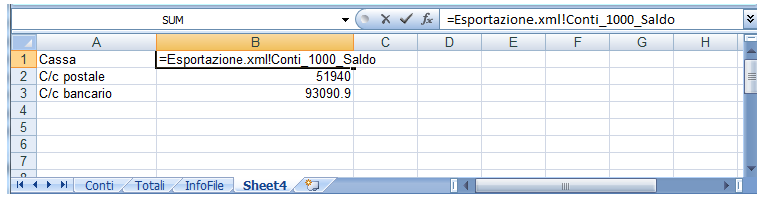
Copy/paste data from Banana to Excel
With Banana Accounting it is always possible, in addition to exporting, to copy/paste Banana data into Excel: only some cells, columns, or the whole table.
Some users have reported to us that in rare cases and only from Mac computers, when exporting data from Banana to Excel, the format of the amounts is not optimal.
However, the situation is easily resolved by simply selecting the columns with the amounts in Excel and changing the cell format to the "Number" type.
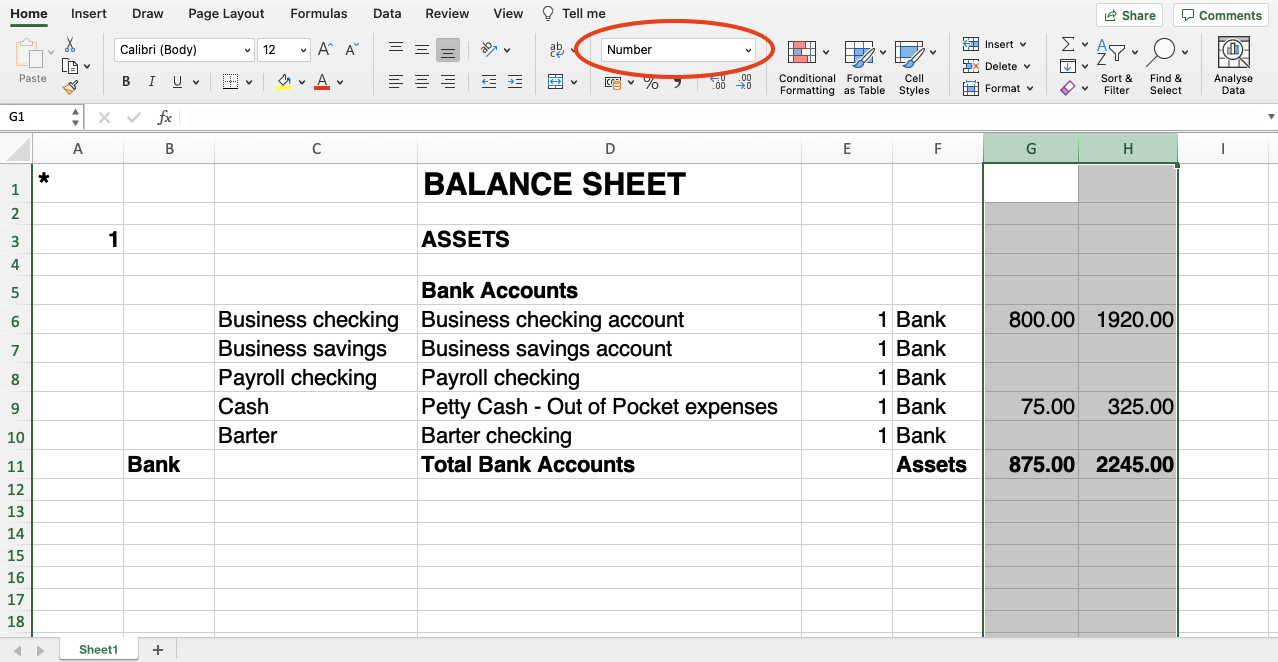
Include Tab
Via File → Export file → Export to Excel → Include section will open the dialog box that allows you to choose the tables and reports to include.

Recheck accounting
By ticking this box, the accounting will be rechecked before it is exported.
Include
Contains the list of tables and reports that can be exported. The list of data may vary depending on the type of file and accounting.
View
It is possible to select the view where the data are to be imported. This option is available for the export in PDF, Html and Xml format.
Period
This group allows you to indicate options for exporting tables with periods.
Accounts/Categories by period
Refers to the Accounting Period choice and indicates which repetition per period is desired.
VAT/Sales tax report
This option allows to export the VAT/Sales tax report according to the selected period.
Create periods for the whole year
By selecting this function, the partial balances for the whole year will be exported, and not only the ones of the specified accounting period or the selected export period.
Max number of periods
The maximum possible number of periods.
Export to Html
To export to Html click on the File menu → Export file → Export to Html.

File Name
In this area, the user must insert the name of the new Html file that the program will create to export the data. If however the user selects an existing file through the Browse button, the program will overwrite it with the new data.
Display file immediately
As soon as the Html file has been created, the software to view it will be launched. In this way, the result of the export can be seen immediately. It is best to remember that browsers like Mozilla and MS Explorer use a cache mechanism for files. When the export is made for a second time, it is possible that the user will see the previous version until the browser Reload button is pressed.
File creation options
Headers 1, 2 and 3
These are the file headers.
Other Options
For the explanation of other tabs, please visit the following pages:
Html Options Tab
From the menu File → Export file → Export to Html → Html Options section opens the dialog box that allows you to activate options when exporting the file in Html format.

Use style sheet CSS
Selecting this cell will allow the user to connect a style sheet to the exported file. By default the program will automatically use its own style sheets and incorporate it into the document.
Use predefined style sheet
The program's default style sheet is used. Disabling the box automatically activates the External style sheet option, where you can select the name of a personal style sheet.
External style sheet
File name
In case an external style sheet is being used, select the file name of the style sheet with the Browse button.
Include style sheet within html file
When the data are sent in HTML format, the style sheet file must also be sent. To avoid sending two separate files, by activating the box, it is possible to embed the style sheet in the Html accounting file.
Selecting the cells will allow the program to file the data with various graphic options:
- Export visible columns only
- Table with border
- Columns with headers
- Preserve page breaks within the table
- Export as data - data will be exported without any formatting
Export in Xml
To export to Xml click on the File menu → Export file → Export to Xml.

File Name
Enter the name of the new file to create or choose an existing one using the Browse button.
Display file immediately
The program for viewing the newly created Xml archive is launched. This way you can see the export result instantly. Remember that browsers such as Mozilla and MS-Explorer use a document cache mechanism. When exporting a second time, if you do not press the Update button on your browser, you may still see the previous version.
Style sheet XSLT
In this area you can set the style sheet (external Xml file) on the basis of which the program must graphically arrange the accounting data. Banana Accounting does not make Xslt files available.
Options
It is possible to choose between the following options:
- Export visible columns only.
- Include view list.
- Export as data.
Other Tabs
Other sections
For the explanations of the other tabs, please visit the following pages:
Export rows in txt
In order to export rows, please select the Data → Export rows → Export rows in Txt menu. The following options options are available:

File name
Enter the file name or select an existing one using the Browse button
Format
Select the desired format.
Display file immediately
As soon as the file has been created, the software to view it will be launched. In this way, the result of the export can be seen immediately. Please notice that browsers such as Mozilla or MS-Explorer have a documents cache mechanism. It is then possible that, when exporting a second time, you will still see the previous version if you don't use the Refresh browser's button.
Options
If activated, different options will allow the export of:
- selected rows only
- visible columns only
- columns header
- unicode (Utf-8)
Budget and Financial Forecasts
Banana Accounting allows you to create budgets and financial plans using the same methodology as accounting.
Integrated budget management makes it possible to simulate the future development of the business in a simple and professional way, without having to use separate tools for economic and financial planning.
Budgeting in Banana Accounting differs from many other management systems because it is not a separate module or a simple budgeting tool, but is integrated directly into the accounting logic of the program.
The planning function, with forecasts for costs, revenues and liquidity, is integrated and available in all Banana Accounting Plus applications.
Introductory videos
These videos show practical examples of budgeting and financial planning in the different accounting types available in Banana Accounting.
- Double-entry accounting
- Income & Expense Accounting
The advantage of managing the budget within the same accounting file
Banana Accounting allows you to create budgets and financial plans using the same methodology as accounting.
Integrated budget management makes it possible to simulate the future development of the business in a simple and professional way, without having to use separate tools for economic and financial planning.
Budgeting in Banana Accounting differs from many other management systems because it is not a separate module or a simple budgeting tool, but is integrated directly into the accounting logic of the program.
The planning function, with forecasts for costs, revenues and liquidity, is integrated and available in all Banana Accounting Plus applications.
Introductory videos
These videos show practical examples of budgeting and financial planning in the different accounting types available in Banana Accounting.
- Double-entry accounting
- Income & Expense Accounting
The advantage of managing the budget within the same accounting file
- Directly in the Budget column of the Accounts table.
Enter the budget amounts on an annual basis.
In reports by period, the program divides the amounts according to the period (month, quarter, half-year, year). In this case, the allocated budget values are the same for each period.
- Using the Budget table, ideal for highly customizable and precise budgets.
This is an advanced and detailed budget because, in addition to the amounts, future transactions are entered like normal transactions. In this case, if a transaction does not apply to the entire year but only to a specific period, when entering the forecast transaction you can indicate the period or the end date to which it applies.
In the reports, you always have updated:- Future costs and revenues
- Forecast financial position
- Liquidity plan
- Forecast balance sheet and income statement
The two methods differ in the level of detail, available features and type of planning they provide.
Comparison table
Below is a comparison table between the budget entered in the Accounts table column and the budget entered in the Budget table.
| Feature | Budget in column | Budget in table |
|---|---|---|
| Where it is located | In the Accounts table, Budget column | Dedicated table: Budget |
| Activation | Always available (by default) | To be activated: Tools > Add new features > Add Budget table |
| Level of detail | Annual budget by account/category | Detailed transactions with dates and recurrence |
| Data entry | Total amount for the year | Individual transactions with date, account and category |
| Additional entries | Amounts only | Quantities, Prices, Calculation formulas |
| Transaction recurrence | Not available | Available (Repeat column) |
| Future liquidity by period | Not calculated | Calculated automatically (forecast cash/bank balances) |
| Results | Totals by account/category | Periodic details (day/month/year) + totals |
| Typical use | Simple forecasts, annual budget | Detailed forecasts, precise financial planning |
Annual budget in columns
In Banana Accounting Plus, you can quickly set up an annual budget directly in the Accounts or Categories table. This approach is ideal if you want a simple and fast planning method, useful for immediately keeping the expected profit or loss of the year under control.
When to use the annual budget in the Accounts or Categories table:
- If you want simple planning of costs and revenues, without periodic details.
- If you only need an overall view of the year’s costs and revenues.
If instead you want to break down forecasts by month, quarter or project, use the Budget table, which offers more detailed financial planning tools.
Budget Columns in the Accounts or Categories table
In the Accounts and Categories tables, Budget view, the following columns are available:
- Budget → where you manually enter the forecast amounts for each income and expense account. This column is active only if the Budget table has not been activated. If it is active, you need to deactivate it.
- Entry rules:
- Income (Credit) → negative (Accounts table).
- Expenses (Debit) → positive (Accounts table).
- Income → positive (Categories table).
- Expenses → negative (Categories table).
- Entry rules:
- Budget Difference (Diff.Budget) → automatic column that shows in real time the difference between the current balance and the forecasted amount.
Each time you enter a transaction, the program automatically updates this difference, so you can compare the budget with the actual values.
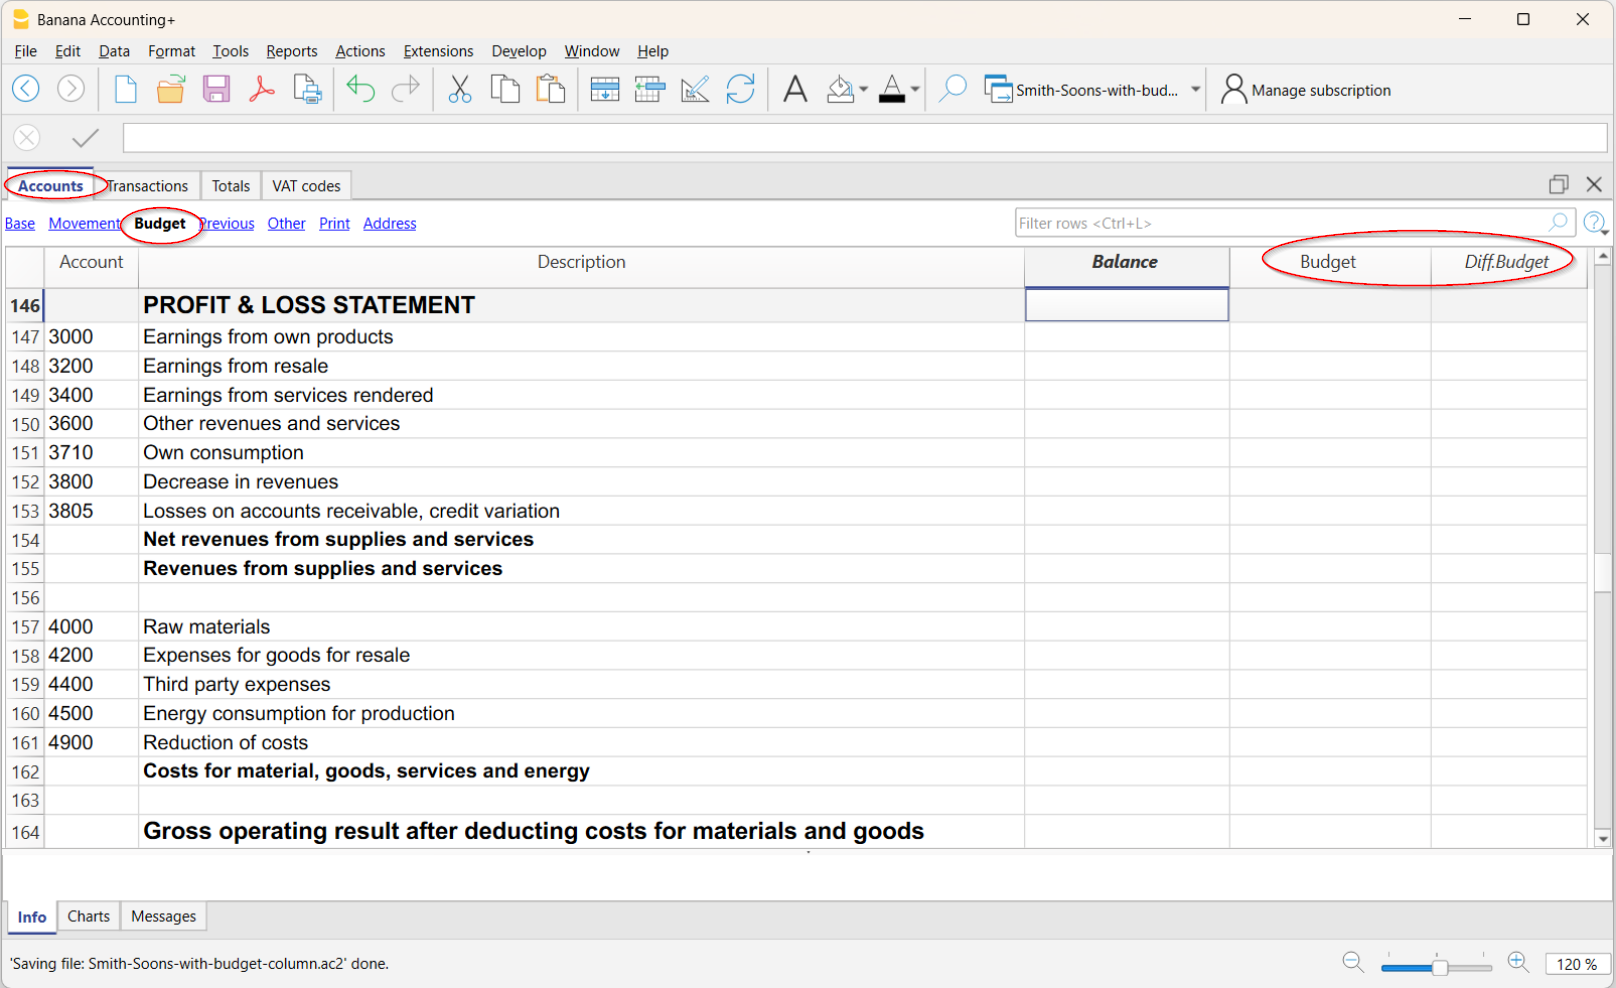
Annual budget and periodic printouts
If you print monthly or quarterly reports, Banana automatically splits the value of the annual budget into monthly portions, calculated based on the start and end dates of the year set in the menu File > File and accounting properties.
- The amount is divided by the number of months in the accounting period.
- Any rounding differences are added to the last month.
Example: with an annual budget of 10,000 → the program will generate 11 monthly amounts of 833.33 and 1 of 833.37.
If the display is by quarter, the value of the quarter is the sum of the individual months, not the annual value divided by quarters.
For a different planning structure that offers specific monthly, quarterly, or half-yearly details, you need to use the Budget table.
Adding a new Budget column
If you have specific needs, you can add new supplementary budget columns.
To add a new column, go to:
- menu Data > Columns setup > Add
- Give the new column a name
- Confirm with OK.
Examples of how to use new Budget columns:
- Manage different scenarios (e.g. optimistic budget, conservative budget).
- Keep a copy of the initial budget to compare it with the updated one.
To create a copy:- In the Accounts table, place yourself on the first row and select the entire column (by clicking on the column header).
- Edit menu > Copy.
- Place yourself on the first row in the added budget column where you want to paste the data.
- Edit menu > Paste.
- Budget for the following year.
- Alternative budgets for internal comparison.
When you add a supplementary budget column, you must set
- Data Type as Amount.
This way the program will calculate group totals.
For more information, see also:
Deactivate the Budget table
If you want to use the Budget column in the Accounts table to set the annual budget, the Budget Table must not be active.
If it is active, to deactivate it, go to the menu:
- Tools > Add/Remove functionalities
- Select Remove Budget table.
Once the table is removed, you can directly enter the budget amounts in the Budget column of the Accounts table.
Precision budgeting and financial forecasting in the Budget table
Precision financial planning is Banana Accounting's advanced budgeting system.
It allows you to build the company's financial future with the same rigour as actual accounting, creating detailed forecasts transaction by transaction and using the same chart of accounts and the same Debit/Credit logic as the accounting.
The forecast is not managed as a separate element: accounting and forecast data are part of the same system. Costs, revenues, financial position and liquidity therefore remain linked, and Banana automatically calculates the related projections.
In this tutorial, you will see how to use this method to create a complete economic and financial forecast, keep it up to date over time and compare it with actual data.
Origins of the system
Precision financial planning was developed from the need to use the same rigorous structure for the future that is already available for analysing the past.
Accounting makes it possible to know precisely how much has been sold, which costs have been incurred, how much customers still have to pay, which debts need to be settled and how much liquidity is available.
To make decisions, however, it is equally important to be able to look ahead and answer questions such as:
Precision financial planning is Banana Accounting's advanced budgeting system.
It allows you to build the company's financial future with the same rigour as actual accounting, creating detailed forecasts transaction by transaction and using the same chart of accounts and the same Debit/Credit logic as the accounting.
The forecast is not managed as a separate element: accounting and forecast data are part of the same system. Costs, revenues, financial position and liquidity therefore remain linked, and Banana automatically calculates the related projections.
In this tutorial, you will see how to use this method to create a complete economic and financial forecast, keep it up to date over time and compare it with actual data.
Origins of the system
Precision financial planning was developed from the need to use the same rigorous structure for the future that is already available for analysing the past.
Accounting makes it possible to know precisely how much has been sold, which costs have been incurred, how much customers still have to pay, which debts need to be settled and how much liquidity is available.
To make decisions, however, it is equally important to be able to look ahead and answer questions such as:
- sales and purchases
- receipts and payments
- salaries and other recurring costs
- investments and depreciation
- financing and repayments
For each event, you can specify when it will occur and the amount. If it is a recurring transaction, you can enter it only once and define the frequency and repetition period.
Banana uses these transactions to automatically generate future projections.
In practice, it is like doing the accounting of the future today.
An economic, balance sheet and financial forecast
Planning does not only mean forecasting costs and revenues.
Every business decision can simultaneously affect the financial result, financial position and liquidity. Precision financial planning keeps these effects linked by using accounting logic.
You can therefore automatically obtain:
- forecast income statement
- forecast balance sheet
- liquidity development
- comparison between budget and actual results
Each forecast transaction produces the corresponding accounting effects and keeps the different components of the forecast consistent.
Example: from sale to liquidity
Suppose you forecast a sale with payment at a later date.
Recording the sale determines:
- the expected revenue
- the receivable from the customer
When you also enter the expected receipt, the system determines:
- the decrease in the receivable from the customer
- the increase in liquidity
You can therefore see not only how much you expect to earn, but also when you expect to receive the money.
Liquidity-focused planning
A positive financial result does not necessarily mean having enough money to meet payments.
A company can be profitable and still face difficulties if receipts come after payments, or if investments, financing repayments or other outflows temporarily absorb the available liquidity.
This is why liquidity is a key element of precision financial planning.
By linking costs, revenues, receivables, payables, investments, financing, receipts and payments, you can see how planned operations will affect financial availability over time.
Planning thus becomes a tool for anticipating possible liquidity shortages and assessing decisions in good time, such as postponing an investment, changing payment terms or obtaining financing.
How to build the forecast
With Banana Accounting, you do not need to create a separate structure for planning.
You use:
- the same accounting file
- the same chart of accounts
- the same Debit/Credit logic
Future transactions are entered in the Budget table.
For each transaction, you can define, among other elements:
- date
- description
- Debit account and Credit account
- amount
- repetition frequency
- validity period
When necessary, you can also use VAT codes, cost centres, segments, formulas, quantities and prices.
For recurring transactions, you do not need to enter all future transactions. Enter the transaction only once, define the frequency and period, and Banana automatically generates the related projections.
The process can be summarised as follows:
Chart of accounts → Forecast transactions → Dates and repetitions → Forecast reports → Comparison with actual results
On the following pages of the tutorial, you will see step by step how to set up and use these elements.
Automating planning
Detailed planning can include a large number of future transactions. To avoid having to enter and update them manually one by one, Banana Accounting lets you automate many forecasting operations.
You can use repetitions, formulas, quantities and prices to automatically generate future transactions. This makes it possible to plan recurring operations, such as rent, salaries, sales, purchases and other periodic costs, by entering only the information needed to determine how they will develop over time.
Formulas also allow you to create forecasts based on other values and automate calculations such as depreciation, interest and other financial projections.
When you change a value on which the forecast is based, Banana automatically recalculates the linked values and updates the related projections.
In this way, you can also create detailed multi-year plans and keep them up to date without having to manually rebuild the entire budget.
Precise forecasts by period
With Precision Budgeting, you do not only get a forecast for the entire year.
Each transaction is assigned to the period in which you expect it to occur. You can therefore obtain detailed reports by month, quarter, year or other periods.
For example, if a cost is expected only in June, July and August, with different amounts for each month, you can enter the corresponding transactions with the expected dates and amounts.
In the reports, Banana will show each cost in the corresponding period, without affecting the other months.
The forecast therefore reflects when an event occurs and for what amount, instead of simply distributing an annual value evenly over the twelve months.
Planning that evolves over time
Financial planning should not be a static document prepared once a year.
During the course of business, conditions change: new orders arrive, some costs increase, investments are brought forward or postponed, and receipts may occur at different times from those originally expected.
You can update the plan at any time by:
- changing amounts
- changing dates
- adding new transactions
- deleting forecasts that are no longer valid
Banana automatically recalculates the projections and the related reports.
This makes it possible to use the system for continuous planning or a rolling budget, regularly updating forecasts based on the new information available.
The budget therefore does not remain a snapshot created at the beginning of the year, but becomes an operational tool that evolves together with the business.
Budget and actual results in the same system
One of the advantages of integration is that the forecast and actual accounting use the same structure.
As the accounting is updated, you can compare:
- what you had forecast
- what actually happened
- the related differences
You can therefore identify variances, understand their causes and use the information obtained to progressively update and improve future forecasts.
Compared with planning managed using separate spreadsheets, you do not have to manually keep the income statement, balance sheet and liquidity aligned: the links are created by the same accounting logic used to build the forecast.
An advanced tool
Precision financial planning is an advanced tool because it uses accounting logic to create and keep economic, balance sheet and financial forecasts linked together.
To make full use of its possibilities, it is therefore useful to be familiar with accounting, financial planning and receipt and payment flows.
This approach requires greater understanding than a simple annual budget, but it allows you to create much more detailed forecasts and consistently analyse the effects of future decisions on profitability, financial position and liquidity.
Who it is for
Precision Budgeting is aimed in particular at accounting experts, fiduciary firms, accountants and consultants who want to integrate detailed economic and financial planning into their accounting.
The system can be used both for your own accounting and for your clients' accounting.
For accounting professionals, this means going beyond recording and analysing what has already happened and offering clients a tool to:
- plan future business activities
- monitor profitability and liquidity
- assess investments and financing
- compare forecasts with actual results
- identify possible financial needs in advance
Precision financial planning therefore makes it possible to use accounting expertise not only to analyse the past, but also to support decisions about the future.
Financial Planning based on the double-entry method
The planning system of Banana Accounting is based on the same double-entry method used for accounting.
It is planned by always indicating an account of origin (credit) and one of destination (debit). This allows for a precise vision of the capital flows and offers the possibility to have a comprehensive vision which includes:
- Budget forecasts, therefore relating to the financial situation, liquidity, assets, third party and own means.
- Income statement forecast: revenues, costs and operating result.
Plan Execute Control
The planning of Banana Accounting is an integral part of the Plan-Execute-Control.
This offers a constant and dynamic control of the financial situation and evolution.

Planning and accounting in a single file
The same file contains both accounting and planning data. You can get started with a file prepared to keep the accounting and then add the schedule later, or you can start with a file to keep the planning and then also manage the accounting.
Common elements
- Basic accounting data
Header, currency, accounting period, address, other parameters. - Accounts and Categories table
Where to set up the Chart of Accounts with accounts and groups total.- Opening balances (Opening column)
They are inserted in the Accounts table and are used as the initial situation for both accounting (current values) and forecasts. - Annual Budget (Quote column)
- With the Budget table
The Budget column of the Chart of Accounts will be protected and the program indicates the budget amounts, calculated on the basis of the contents of the Budget table, referring to the accounting period. - If there is no Budget table
You enter the budget data manually.
When forecasting, the program generates the monthly value, dividing the annual value by the number of months of the accounting period.
- With the Budget table
- Opening balances (Opening column)
- The other tables
- VAT Codes Table
- Exchange rate table
Accounting data (past and present)
- The Transactions table
Where past (historical) movements are entered.
The Registration table is always present in the accounting file. If you don't use it, you can hide it - Current value (accounting, past and present)
This is the balance or movement of the period of an account or group.
In the reports, you can display the column of the Current value.
These are the values calculated on the basis of the accounting data, calculated taking into account the- Opening balances (Accounts table).
- The movements of the Transaction table
- Account card (historical)
These are the movements of an account or group prepared on the basis of the initial balances plus Transactions.
The Budget data
They are those used to make forecasts, budgets and schedules.
The term Budget is always used in the program for future data.
- The Budget table
Future budgeted transactions are inserted.
The method is the same as the one used in the Transactions table, there are the same columns, plus other specifications for planning.
Movements related to the future, included in the Budget table- Static values (as in the Transactions table).
- They use calculation formulas, which the program solves when calculating the forecast.
- Repetitive movements, which the program uses to automatically generate forecasts.
- The Budget value (future)
The forecasted value. In the reports you can display the column of the Estimate value, calculated taking into account- Opening balances (Accounts table)
- Transactions in the Budget table (if any).
- If the Budget table does not exist, using the value contained in the Budget column of the Accounts or Categories table.
- Budget Account card (future)
These are the transactions of an account or group prepared on the basis of the opening balances and budget transactions.
The Difference Budget values
Difference between the budget and current values (actual, final).
In the reports, there is a column for comparison, which displays the difference.
Mixed projection values (from a certain date)
The value at a certain future date calculated as follows:
- On the basis of current values and up to the indicated start date .
- Starting from the date indicated on the budget values.
Mixed projection values are only available through scripts and the web server.
Types of accounting
The accounting method chosen for accounting is used to insert budget transactions or movements.
- Income and Expense (Cash Manager and Income and Expense accounting)
- Double-entry (Double-entry and multi-currency accounting).
For budget calculations, the program internally always uses the double-entry based engine. The results and reporting that are obtained are therefore very similar.
Accounting, planning and forecasting period
Accounting or forecasting is always related to a period. The following periods are differentiated:
- Accounting period
Is the one defined in the file properties, with start and end date. - Budget period
It is the period for which the planning data is entered.. - Forecast period
It is the period used by the program to calculate the forecast. It is indicated when a print is requested.
For more information, see the Forecasting period.
Breakdown by period
With the double-entry method, each operation has its own date in the planning. When printing, the user chooses whether to have a forecast by month, quarter, semester or year, and the program will calculate everything automatically. Contrary to spreadsheets, there is no need, anymore to decide at the beginning whether to make forecasts by month, quarter or year and to divide the amounts manually in the columns.
Automatic projections
Thanks to the possibility of indicating that certain operations are repeated in the future, the program has the necessary elements to automatically prepare forecasts for future years. You can thus know how revenues, costs, liquidity and other assets and liabilities will evolve in the weeks, months, quarters and years to come
Details with all the operations
With the double-entry method, the forecasts are prepared by inserting transactions. The program is able to present the account card with the detailed movements for each account. This view is very useful for investigating elements and represents another advantage of liquidity-oriented planning, which is difficult to achieve with planning prepared with spreadsheets.
The calculation journal
The basis for all accounting and budget processing is the calculation journal. To prepare Financial Statements, Income Statement, Account Cards, VAT Reports, the program creates an internal data structure which is called a calculation journal. Movements are accessible through the API accounting with Journal function.
The logic for creating the calculation journal works as follows:
- It is created starting from the data entered by the user.
- For each financial movement, including also the opening balances, there is a row, where the main elements are:
- Origin
Indicates whether the transaction relates to accounting (current) or planning (budget). - Operation type
Opening balance, movement, carry forward, invoice compensation. - Date (the relevant date)
- Description
- Account
- Account Type
Indicates whether it is a normal account or a cost or profit center. - Amount (accounting base currency)
Positive values indicate an increase (debit), negative values indicate a decrease (credit) - Amount account currency
- Other columns
- All those that are present in the Transactions table.
- Several others that are used for calculations.
- Origin
The calculation log is emptied every time recalculation is performed and then the following are added:
- The rows of current transactions (relating to actual accounting).
- The rows of the budget movements.
The rows of current values (actual)
The rows for current values are added to the temporary journal starting from:
- Initial balances contained in the Accounts table
For each account with a balance, one row is created.- Date is the date of the start of accounting.
- Account is the account.
- The amount is the opening balance.
- Accounting movements from the transactions table.
If the movement has multiple accounts, debit account, credit account, VAT account, cost center, a row is generated for each account with the relative amount in positive or negative.
The rows of the budget values
The rows for the budget values are added to the temporary journal starting from:
- Initial balances contained in the Accounts table
As with accounting values, a budget line is created for each account with a balance.
- Planning movements (with the Budget table)
As for accounting, for each movement on the account, rows are created based on the Budget table.- Static ones, with all the values set.
- Repeated movements
- For the entire projection period defined, based on the repetition code, the program creates duplicates of the budget lines and sets the date.
- The program generates repeated rows based on the contents of the Start Date, End Date and Repetition columns
- If the projection period is the calendar year and in January there is the registration of the rent with monthly repetition, the program creates duplicates for the following 11 months.
- If the registration is on January 31, for the months that do not have 31 days, the day will be the last of the month.
- If the first registration is on March 28 and the repetition code is indicated as the end of the month, in the following months the day will become the last of the month.
- As for accounting entries, if there are multiple accounts on the budget row, one row is generated for each account.
- Movements starting from the annual Budget (if there is no Budget table)
If there is no Budget table, the budget rows are created based on the content of the Budget column of the Accounts and Categories table:- The number of months It is calculated how according to the accounting period.
- One row is created for each month.
- The amount contained in the Budget column is divided by the number of months.
- If there is a rounding difference, an additional row is created for the final month.
After creation, the rows are sorted by ascending order.
Amount column calculation
Once the calculation journal has been created, the contents of the amount column of all the budget rows which contain a formula or a quantity or unit price are recalculated.
Resolution of formulas in Javascript:
- Javascript interpreter creation
Every time the calculation journal is created, an instance of a Javascript interpreter, specific for the resolution of the Budget formulas, is also created - Javascript interpreter initialization
The Javascript interpreter is initialized by running scripts.- The default Banana Accounting scripts.
- The content of the _budget.js file possibly present in the Documents table.
This way the user can initialize variables or create his own calculation functions.
- Resolution of formulas
- The formulas contained in the rows of the temporary journal are solved one after the other in the progressive sequence of date.
- The state of the Javascript interpreter is maintained after each operation, therefore the formula can refer to variables defined in a row with a previous date.
- The formulas contained in the repetition lines are also executed by order of date, so the result varies according to when it is performed.
The calculation sequence is as follows
- The budget rows are processed by order of date (if they have the same date in the order of entry).
- The transaction amount is calculated, with this priority:
- If there is a formula by solving it
- If the quantity and the price are present, by multiplying them
- Otherwise the value contained in the amount column is kept.
- For multi-currency accounting, the currency amount formula is first performed and then the base currency amount formula.
If there is no formula for amount in base currency, the program reverts to the historical exchange rate and calculates the equivalent value in base currency. - For VAT accounting, VAT is recalculated based on the transaction amount.
- The previously processed rows are used for the calculations of the following lines:
- The balance of the accounts, as of the date of the estimate line, includes only the previously processed amounts.
- If you use a formula for calculating the balance for the whole year in a February transaction, you will only have the balance until February.
Calculation column Total Budget table
The Total column is calculated automatically and contains the total amount of the budget for the accounting period indicated in the file properties (start and end date of accounting).
- If it is a single transaction, the Total is equal to the amount.
- If it is a recurring operation, the Total is the sum of the amounts of all repetitions that fall within the accounting period.
- The Total column is empty if the date is preceding or goes beyond the accounting period.
Calculation of the current value, forecast and comparison
Once the calculation journal is generated, it is used to calculate the Balance Sheet and all the other processing necessary for accounting.
For the periods defined in the report, the program calculates:
- The current value (based on Transactions).
- The Budget values.
The following values are calculated for current and budget data:
- Balance at the beginning of the period.
- Debit movement
- Credit movement
- Movement (Total)
- Balance at the end of the period (Start + Movements)
The comparisons between Current and Budget are also calculated:
- Absolute Difference (Budget - Current).
- Percentage change
Automatic and manual recalculation
The budget values are automatically recalculated:
- If there is a change in the Budget table.
- If the accounting start or end date is changed.
- If the Accounts table is modified.
- When requesting a report and the Transactions table has been changed.
After each recalculation the program automatically updates:
- The Budget column in the Accounts and Categories table.
- The Total column in the Budget table.
If you modify the VAT table or the _budget.js file or other Javascript files that are used in the calculation of the formulas, you must perform a recalculation manually (Command check and control accounting).
The calculation speed depends on:
- Number of accounts and groups in the Accounts and Categories table
- Number of rows inserted in the Budget table.
- Number of rows with repetition.
- Presence of formulas.
- Schedule period set. The longer the period, the greater the number of repeat lines.
Manual recalculation
If the calculation takes a long time, it may prove difficult to enter data in the Budget table. You can switch to manual recalculation by checking the Recalculate totals manually option in the File menu → Files and accounting Properties → Options tab.
To have the updated values, you must therefore use the Recalculate Totals command.
Berechnungslogik des Budgets
Die Grundlage für alle Buchhaltungs- und Budgetberechnungen bildet das Berechnungsjournal. Für die Erstellung von Bilanz, Erfolgsrechnung, Kontoauszügen und MWST/USt-Auswertungen erzeugt das Programm eine interne Datenstruktur, das sogenannte Berechnungsjournal.
Auf die Buchungen kann über die Buchhaltungs-API mit der Funktion Journal (nur auf Englisch) zugegriffen werden.
Erstellung des Berechnungsjournals
Für die Verarbeitung der Buchhaltungs- und Planungsdaten erstellt Banana Buchhaltung automatisch ein internes Berechnungsjournal, das auf den vom Benutzer erfassten Daten basiert.
Im Berechnungsjournal wird für jede finanzielle Buchung – einschliesslich der Anfangssalden – eine Zeile erzeugt. Jede Zeile enthält die wichtigsten Informationen, die für die Berechnungen benötigt werden, darunter:
- Herkunft der Buchung, um zwischen effektiven Buchungen und Planbuchungen zu unterscheiden
- Art der Buchung, z.B. Eröffnungssaldo, Buchung, Übertrag oder Rechnungsausgleich
- Buchungsdatum
- Beschreibung
- Konto
- Kontotyp, z.B. normales Konto, Kostenstelle oder Profitstelle
- Betrag in der Basiswährung
- Betrag in der Kontowährung
- zusätzliche Spalten der Tabelle Buchungen.
Positive Beträge entsprechen Sollbuchungen, negative Beträge Habenbuchungen.
Das Berechnungsjournal wird bei jeder Neuberechnung automatisch neu erstellt. Dabei führt das Programm folgende Schritte aus:
- Das bisherige Berechnungsjournal wird gelöscht.
- Die Zeilen der effektiven Buchungen werden erzeugt.
- Die Zeilen der Planbuchungen werden erzeugt.
- Alle Berechnungen für Berichte und Auswertungen werden ausgeführt.
Für die Finanzplanung verwendet Banana Buchhaltung dieselbe Berechnungslogik wie für die doppelte Buchhaltung. Dadurch entstehen konsistente Ergebnisse und Berichte für alle unterstützten Buchhaltungsarten, darunter:
- doppelte Buchhaltung
- Einnahmen-Ausgaben-Rechnung
- Buchhaltung mit Fremdwährungen.
Erzeugung der effektiven Werte
Zur Berechnung der effektiven Werte fügt Banana Buchhaltung dem Berechnungsjournal automatisch die Zeilen der effektiven Buchungen hinzu.
Die effektiven Werte werden auf Grundlage folgender Daten erzeugt:
- der Anfangssalden in der Tabelle Konten
- der Buchungen in der Tabelle Buchungen
Anfangssalden
Für jedes Konto mit einem Anfangssaldo erstellt das Programm automatisch eine Journalzeile mit:
- dem Eröffnungsdatum der Buchhaltung
- dem Konto
- dem Betrag des Anfangssaldos
Diese Zeilen bilden die Ausgangssituation der Buchhaltung und dienen als Grundlage für alle weiteren Berechnungen.
Buchungen
Anschliessend fügt das Programm die Journalzeilen hinzu, die aus den effektiven Buchungen erzeugt werden.
Eine Buchung kann mehrere Journalzeilen erzeugen, beispielsweise für:
- Soll-Konto
- Haben-Konto
- MWST/USt-Konto
- Kostenstellen
- Profitstellen
- Segmente
Für jedes betroffene Konto wird eine Journalzeile mit dem entsprechenden Betrag erzeugt:
- positiver Betrag für Sollbuchungen
- negativer Betrag für Habenbuchungen
Dieses Verfahren ermöglicht dem Programm eine einheitliche Berechnung von:
- Salden
- Buchungen
- Bilanzen
- Berichten
- Budget-Ist-Vergleichen
Erzeugung der Budgetwerte
Zur Berechnung der Budgetwerte erzeugt Banana Buchhaltung automatisch Budget-Journalzeilen im Berechnungsjournal.
Die Budgetwerte werden auf Grundlage folgender Daten erzeugt:
- der Anfangssalden in der Tabelle Konten
- der Planbuchungen in der Tabelle Budget
- oder der Werte in der Spalte Budget der Tabellen Konten und Kategorien, wenn die Tabelle Budget nicht vorhanden ist.
Anfangssalden
Wie bei den effektiven Werten verwendet das Programm auch für das Budget die Anfangssalden der Tabelle Konten.
Für jedes Konto mit einem Anfangssaldo wird automatisch eine Budget-Journalzeile erzeugt, die die Ausgangssituation der Finanzplanung darstellt.
Planbuchungen
Wird die Tabelle Budget verwendet, erzeugt das Programm automatisch die entsprechenden Budget-Journalzeilen aus den erfassten Planbuchungen.
Die Funktionsweise entspricht derjenigen der Buchhaltung: Für jede Planbuchung werden die entsprechenden Budget-Journalzeilen erstellt.
Verarbeitet werden können:
- Planbuchungen mit festgelegten Beträgen
- Planbuchungen mit Formeln
- Planbuchungen auf Grundlage von Mengen und Preisen
- wiederkehrende/wiederholende Planbuchungen
Wie bei den Buchungen wird auch bei Planbuchungen, die mehrere Konten umfassen, für jedes betroffene Konto automatisch eine eigene Budget-Journalzeile erzeugt.
Wiederkehrende/wiederholende Planbuchungen
Für wiederkehrende Geschäftsvorfälle können in der Tabelle Budget wiederkehrende Planbuchungen erfasst werden.
Anhand des Wiederholungscodes erstellt Banana Buchhaltung automatisch die entsprechenden Budget-Journalzeilen für den gesamten festgelegten Planungszeitraum.
Die wiederkehrenden Buchungen werden anhand folgender Angaben erzeugt:
- Anfangsdatum
- Enddatum
- Wiederholungscode
Wird beispielsweise im Januar eine Mietbuchung mit monatlicher Wiederholung erfasst, erstellt das Programm automatisch die entsprechenden Budget-Journalzeilen für die elf folgenden Monate.
Ist eine Buchung auf den 31. eines Monats festgelegt, verwendet das Programm in Monaten mit weniger als 31 Tagen automatisch den letzten Tag des jeweiligen Monats.
Ebenso werden bei Buchungen, die als Monatsende definiert sind, die folgenden Termine automatisch auf den letzten Tag jedes Monats gesetzt.
Wiederkehrende Planbuchungen können zudem enthalten:
- Formeln
- Mengen
- Einheitspreise
- Kostenstellen
- Segmente
- MWST/USt-Codes
Dadurch lassen sich detaillierte Finanzplanungen erstellen, die automatisch aktualisiert werden können.
Jahresbudget ohne Tabelle Budget
Wird die Tabelle Budget nicht verwendet, erzeugt Banana Buchhaltung automatisch die entsprechenden Budget-Journalzeilen auf Grundlage der Werte in der Spalte Budget der Tabellen Konten und Kategorien.
Dabei:
- berechnet das Programm automatisch die Anzahl der Monate des Buchhaltungszeitraums
- erzeugt es für jeden Monat eine Budget-Journalzeile
- verteilt es den Jahresbetrag gleichmässig auf die einzelnen Monate.
Allfällige Rundungsdifferenzen werden automatisch dem letzten Monat zugewiesen.
Nach der Erzeugung werden alle Budget-Journalzeilen in aufsteigender Reihenfolge sortiert, damit Berichte und Budgetauswertungen korrekt erstellt werden können.
Berechnung der Spalte Betrag
Nachdem das Berechnungsjournal erstellt wurde, berechnet Banana Buchhaltung automatisch den Inhalt der Spalte Betrag für alle Budget-Journalzeilen, die Folgendes verwenden:
- Berechnungsformeln
- Mengen
- Einheitspreise
Dadurch entstehen dynamische Budgetwerte, die automatisch anhand der Planungsdaten aktualisiert werden.
Auswertung der Berechnungsformeln mit JavaScript
Für die Verarbeitung der Berechnungsformeln in der Finanzplanung verwendet Banana Buchhaltung einen integrierten JavaScript-Interpreter.
Jedes Mal, wenn das Berechnungsjournal erstellt wird, erzeugt das Programm automatisch eine neue Instanz des JavaScript-Interpreters für die Budgetberechnungen.
Initialisierung des JavaScript-Interpreters
Bevor die Berechnungsformeln ausgeführt werden, wird der JavaScript-Interpreter initialisiert. Dabei werden geladen:
- die vordefinierten Skripte von Banana Buchhaltung
- der Inhalt der Datei _budget.js, sofern sie in der Tabelle Dokumente vorhanden ist
Dadurch können Sie:
- benutzerdefinierte Variablen initialisieren
- eigene Berechnungsfunktionen erstellen
- individuelle Automatisierungen für die Finanzplanung definieren.
Reihenfolge der Auswertung von Berechnungsformeln
Die Berechnungsformeln in den Budget-Journalzeilen werden schrittweise in chronologischer Reihenfolge ausgewertet.
Haben mehrere Planbuchungen dasselbe Datum, verwendet das Programm die Reihenfolge, in der die Buchungen erfasst wurden.
Während der Berechnung:
- bleibt der Status des JavaScript-Interpreters erhalten
- können die Berechnungsformeln Werte und Variablen verwenden, die in den vorhergehenden Journalzeilen berechnet wurden
- werden die Berechnungsformeln wiederkehrender Planbuchungen in chronologischer Reihenfolge ausgewertet.
Das bedeutet, dass das Ergebnis einer Berechnungsformel davon abhängen kann, zu welchem Zeitpunkt sie innerhalb der zeitlichen Abfolge der Finanzplanung ausgeführt wird.
Priorität bei der Berechnung des Betrags
Für jede Planbuchung berechnet das Programm den Betrag in folgender Reihenfolge:
- Berechnungsformel
- Menge × Einheitspreis
- manuell eingegebener Betrag in der Spalte Betrag
Ist eine Berechnungsformel vorhanden, verwendet das Programm deren Ergebnis.
Ist keine Berechnungsformel vorhanden, aber Menge und Einheitspreis sind definiert, berechnet das Programm den Betrag automatisch durch Multiplikation der beiden Werte.
In allen anderen Fällen bleibt der manuell eingegebene Betrag unverändert.
Buchhaltung mit Fremdwährungen und MWST/USt
In Buchhaltungen mit Fremdwährungen:
- wird zunächst der Betrag in der Kontowährung berechnet
- anschliessend wird der Gegenwert in der Basiswährung berechnet.
Ist keine spezielle Berechnungsformel für die Basiswährung vorhanden, verwendet Banana Buchhaltung automatisch den historischen Wechselkurs zur Berechnung des Gegenwerts.
Bei Buchungen mit MWST/USt berechnet das Programm die MWST/USt automatisch anhand des endgültigen Buchungsbetrags neu.
Fortschreitende Berechnungen
Die Berechnungsformeln werden schrittweise entsprechend der zeitlichen Abfolge der Planbuchungen ausgewertet.
Das bedeutet, dass jede Planbuchung Folgendes verwenden kann:
- Salden
- Werte
- Ergebnisse
die bis zu diesem Zeitpunkt berechnet wurden.
Wird beispielsweise in einer Planbuchung vom Februar eine Berechnungsformel verwendet, die den Saldo eines Kontos abfragt, berücksichtigt das Programm nur die bis Februar berechneten Buchungen und nicht die Buchungen der folgenden Monate.
Dieser Ansatz ermöglicht realistische und konsistente Finanzsimulationen entsprechend der zeitlichen Entwicklung der Finanzplanung.
Berechnung der Spalte Total in der Tabelle Budget
Die Spalte Total der Tabelle Budget wird automatisch vom Programm berechnet. Sie zeigt den Gesamtbetrag einer Planbuchung innerhalb des in den Dateieigenschaften festgelegten Buchhaltungszeitraums an.
- Handelt es sich um eine einmalige Planbuchung, entspricht der Wert in der Spalte Total dem Betrag der Buchung.
- Handelt es sich um eine wiederkehrende Planbuchung, entspricht der Wert in der Spalte Total der Summe aller Wiederholungen, die innerhalb des Buchhaltungszeitraums liegen.
- Die Spalte Total bleibt leer, wenn das Datum der Planbuchung vor oder nach dem festgelegten Buchhaltungszeitraum liegt.
Berechnung der effektiven Werte und Budgetwerte
Nachdem das Berechnungsjournal erstellt wurde, verwendet das Programm dieses zur Berechnung der Bilanz sowie aller weiteren Auswertungen der Buchhaltung.
Für jeden im Bericht definierten Zeitraum berechnet das Programm automatisch:
- die effektiven Werte auf Grundlage der Buchungen
- die Budgetwerte auf Grundlage der Planbuchungen
Berechnete Werte
Sowohl für die effektiven Werte als auch für die Budgetwerte berechnet das Programm automatisch:
- Anfangssaldo des Zeitraums
- Sollbuchungen
- Habenbuchungen
- Gesamtbewegung des Zeitraums
- Endsaldo des Zeitraums
Der Endsaldo ergibt sich aus dem Anfangssaldo zuzüglich der Bewegungen des Zeitraums.
Budget-Ist-Vergleich
Banana Buchhaltung berechnet automatisch die Abweichungen zwischen den effektiven Werten und den Budgetwerten.
In den Vergleichsberichten werden angezeigt:
- die absolute Abweichung als Differenz zwischen Budget- und Ist-Werten
- die prozentuale Abweichung
Dadurch lassen sich einfach analysieren:
- die Zielerreichung
- die Abweichungen gegenüber dem Budget
- die wirtschaftliche und finanzielle Entwicklung des Unternehmens
- allfällige Unterschiede zwischen der geplanten und der effektiven Liquidität.
Abweichungswerte
Die Abweichungswerte stellen die Differenz zwischen den Budgetwerten und den effektiven Werten der Buchhaltung dar. Banana Buchhaltung berechnet diese Werte automatisch auf Grundlage:
- der effektiven Werte aus den Buchungen
- der Budgetwerte aus der Finanzplanung
In den Berichten und Auswertungen können spezielle Vergleichsspalten angezeigt werden. Diese zeigen:
- die absolute Abweichung zwischen Budget- und Ist-Werten
- die prozentuale Abweichung
Die Abweichungswerte ermöglichen:
- die Zielerreichung zu überprüfen
- Abweichungen zwischen Budget- und Ist-Werten zu erkennen
- Veränderungen bei Aufwänden, Erträgen und der Liquidität zu analysieren
- die finanzielle Entwicklung des Unternehmens im Zeitverlauf zu überwachen.
Kombinierte Finanzplanung
Banana Buchhaltung ermöglicht auch die Kombination von:
- effektiven Buchhaltungsdaten
- Budgetdaten
Bei dieser Art der Berechnung:
- werden bis zu einem bestimmten Datum die effektiven Buchhaltungswerte verwendet
- ab dem festgelegten Datum die Budgetwerte
Dadurch lassen sich aktuelle Finanzsimulationen erstellen, die Folgendes miteinander verbinden:
- bereits erfasste Ergebnisse
- zukünftige Budgetwerte
- die erwartete Entwicklung der Liquidität und der Vermögenslage
Diese Funktion steht zur Verfügung über:
- Skripte
- den Web Server
- die API von Banana Buchhaltung
Automatische und manuelle Neuberechnung
Banana Buchhaltung berechnet die Budgetwerte automatisch neu, sobald Daten geändert werden, die sich auf die Finanzplanung auswirken.
Eine automatische Neuberechnung erfolgt beispielsweise:
- nach Änderungen in der Tabelle Budget
- nach Änderungen des Anfangs- oder Enddatums der Buchhaltung
- nach Änderungen in der Tabelle Konten
- nach Änderungen der Buchungen beim Erstellen eines Berichts oder einer Auswertung.
Nach jeder Neuberechnung aktualisiert das Programm automatisch:
- die Spalte Budget in den Tabellen Konten und Kategorien
- die Spalte Total in der Tabelle Budget
- die Budgetberichte
- die Budget-Ist-Vergleiche.
Neuberechnung der JavaScript-Berechnungsformeln
Werden Elemente geändert, die in den Berechnungsformeln verwendet werden, muss die Neuberechnung manuell ausgeführt werden. Dies gilt beispielsweise bei Änderungen:
- der Tabelle MWST/USt
- der Datei _budget.js
- anderer JavaScript-Dateien, die in den Berechnungsformeln verwendet werden.
In diesen Fällen führen Sie den Befehl Buchhaltung nachkontrollieren und nachrechnen im Menü Aktionen aus.
Berechnungsgeschwindigkeit
Die Geschwindigkeit der Neuberechnung hängt von verschiedenen Faktoren ab, unter anderem von:
- der Anzahl der Konten und Gruppen in der Tabelle Konten
- der Anzahl der Zeilen in der Tabelle Budget
- der Anzahl der wiederkehrenden Planbuchungen
- der Anzahl der Berechnungsformeln
- der Dauer des Planungszeitraums
Je länger der Planungszeitraum ist, desto mehr Budget-Journalzeilen werden automatisch vom Programm erzeugt.
Manuelle Neuberechnung
Bei umfangreichen oder komplexen Finanzplanungen kann die kontinuierliche automatische Neuberechnung die Dateneingabe in der Tabelle Budget verlangsamen.
In diesem Fall können Sie die manuelle Neuberechnung über das Menü Datei > Eigenschaften (Stammdaten) > Registerkarte 'Optionen' > Totalsummen manuell nachrechnen (F9) aktiviert werden.
Ist diese Option aktiviert, werden die Budgetwerte nur noch mit dem Befehl Totale neu berechnen aktualisiert.
Starting a financial forecast
You can easily prepare financial forecasts including liquidity plans, balance sheet and income statements.
The procedure is the same as for creating the accounting.
▶ Video: Financial Planning | Double-entry
1. Create the accounting/forecast file
With the File → New command , create a financial forecast file, using the accounting type and the accounting template that best suits your needs.
You can also start by using one of the templates already prepared for learning, which also contain examples of budget transactions.
- Financial planning for the family (with the Cash Manager)
To plan your family's expenses and income. - Financial planning for the opening of a restaurant (Income and Expenses Accounting)
This template uses alphabetical account numbers, which make comprehension more immediate.
With income and expenses; even without accounting knowledge, you can create a professional planning, including the liquidity plan, asset forecasts, costs and income. - Financial planning for the opening of a restaurant (Double-entry Accounting)
For complete financial forecasts, with the double-entry bookkeeping system, intended for those who are familiar with the double-entry bookkeeping method.
This model uses alphabetical account numbers, which make it easier to understand.
There are also sample files for more advanced functionalities:
- Double-entry accounting, using the quantity and formula columns
The different possibilities of using the formula column are listed. With examples and explanations. - Multi-currency accounting with examples of budget transactions with formulas
To use multi-currency specific formulas. - With examples of transactions on more complex themes.
Once created you can save the file under a new name, preferably composed of the company name and the year "company-2020.ac2".
2. Customize the file
Once you have created the file, adapt it to your specific needs:
- Set the File properties.
- The company name.
- The Accounting period.
Normally it is the one corresponding to the calendar year. However, you can indicate another one as needed. See Period for the forecast.
- Customize the Chart of Accounts.
You can change the description, add or delete accounts or groups.
If necessary, you can adapt the Chart of Accounts at any time later. - If it’s an activity already in progress, enter the Opening Balances.
3. Enter financial budgeting movements
In the Budget Table you can now enter the financial forecast movements.
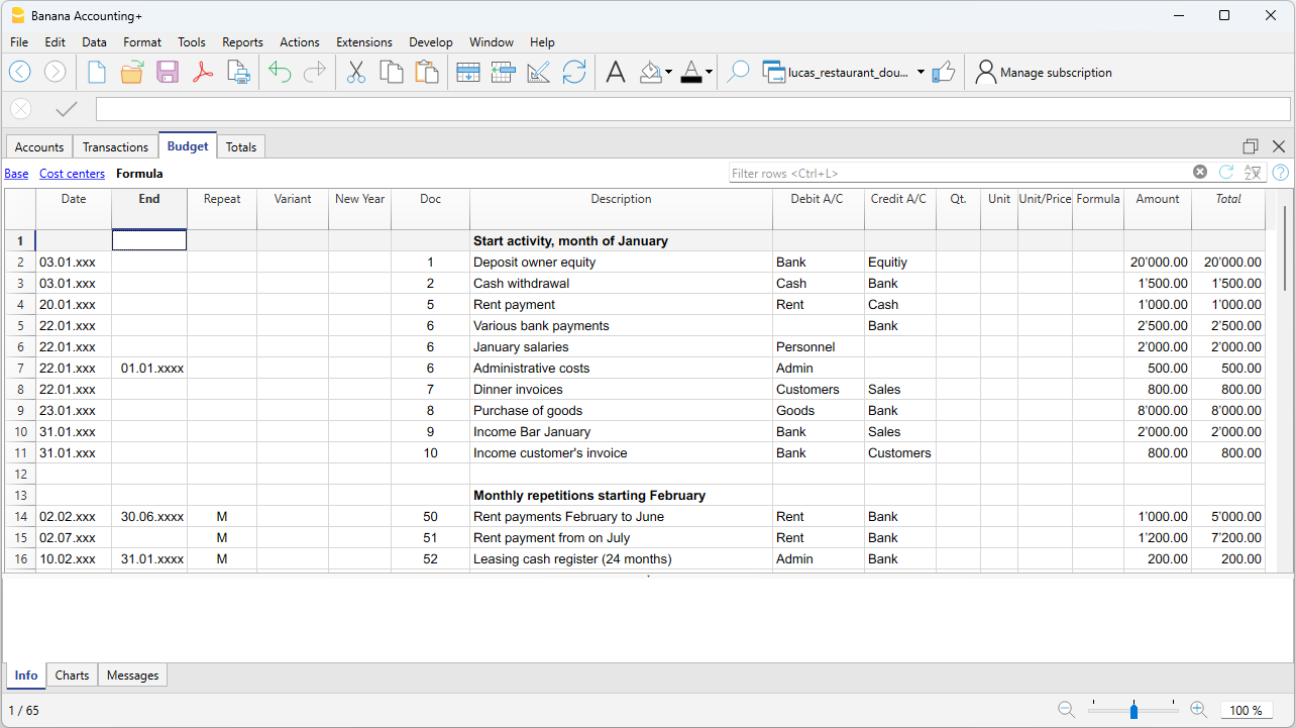
4. View the forecasts
The forecast data are visible:
- In the Charts window.
- In the Accounts table, in the Budget column.
- In the Reports, in the Budget column.
- In the Account card, Budget values.
Adapt the forecast
You can change, add or delete transactions at any time. The forecast will be immediately recalculated.
Budget table
Financial planning transactions are entered in the Budget table. It's setup is similar to the Transactions table of the accounting type you are using, but has specific columns that speed up entering the budget data.
You can also modify the data as you wish, to display reliable forecasts that are always perfectly updated.
Easy and comprehensive forecasts
- You can enter all the operations in detail.
- You have comprehensive forecasts because they are based on the double-entry method:
- Based on the transactions entered, the program calculates and displays the forecasts.
- Indicate when an operation will be performed, and if and until when it will repeated.
- Indicate the account of origin and destination.
- Indicate the expected amount.
- You can complete the registration with:
- Customer account
- Accounts Payable.
- VAT code
- Cost / Profit Center
- Segments.
- Add more columns for additional information.
- You can enter the transactions in the order you want, so as to form groups.
- You can enter additional information to facilitate the transfer of data to the new year.
Budget table columns
The Budget table columns are very similar to the Transactions table columns. To facilitate understanding, letters have been used for account designation in the following example. If you have accounts with numeric accounts, you will obviously use your own account numbers.

Below you will find explanations for each Budget column:
- Date
The future date when you expect the operation to take place.
If an exact date is not available, for example a monthly sales budget, enter the end of the month date. - Repeat
A repetition code is entered. for further information on use, also see Dates and Repetitions.
When the forecast is calculated, the program internally creates copies of the rows with the date set successively and based on the indicated repetition code.- Blank - no repetition takes place.
- The initial row keeps the date indicated in the Date column..
- The date of the copy rows is progressively increased as defined by the repeat code.
- If the repetition is monthly or yearly, in the created rows:
- It is generally used on the same day as the Date column.
- If the day is greater than the number of days in the month, the last day of the month is used.
- If the end of month indication "ME" or end of the year "YE" is indicated, the last day of the month/year will be used.
- Basic codes for repetition:
- "D" for a daily repetition (Day)
- "W" for a weekly repetition (Week)
- "M" for a monthly repetition (Month)
- "Y" for a yearly repetition (Year)
- Multiples
If the code is preceded by a number, the repetition occurs with the multiplied frequency.- "2M" for bimonthly
- "3M" for quarterly
- "6M" for six months
- Repetition with a later date at the end of the period.
The "M" and Y "codes with the" E "at the end move the repetition date to the end of the month.- "ME" monthly repetition, but with a date at the end of the month.
If you enter the date 1.1.2022 the next date will be 28.2.2022 and the one after 31.3.2022
If the date is 28.2.2022, the next date will be 31.3.2022. - "3ME" for quarterly end of month
If you start on 30.6.2022, the next date will be 31.12.2022. - "6ME" for half-yearly end of the month
- "YE" each year, but at the end of the month.
If the date is 28.2.2022 the next date will be 28.2.2023. - "5YE" every five years, but at the end of the month.
If the date is 28.2.2022 the next date will be 28.2.2027.
- "ME" monthly repetition, but with a date at the end of the month.
- End - End date:
- Generally to be left blank.
- Enter the date after which there must be no repetition.
For a lease, the date on which the lease ends will be indicated as the final date.
- Variant
To indicate a possible variant relating to the budget, in combination with the Extensions. - Management of a New Year
To indicate how the transfer should take place when a new year is created.- No value - the date is incremented by one year.
- "1" The date remains the same.
- "2" The transaction is not transferred to the new year.
- Description
A descriptive text for the operation that appears in the account card.- You can use Calculation formulas by entering the value between ${} (see Javascript template literals).
When the account card is prepared the formula is resolved and the result is replaced.- For example the text "Amount ${10+20} year" will be "Amount 30 year".
- If you have defined a variable "quantity=10" and "price=20"
The text "Quantity: ${quantity} Price: ${price}" will result in "Quantity: 10 Price: 20". - You can use all the formulas, but to avoid confusion, it is recommended to avoid entering value assignments in the Description column.
- You can use Calculation formulas by entering the value between ${} (see Javascript template literals).
- Debit and Credit Account, CC1, CC2, CC3
As in the Transactions table, the accounts in which the transactions are to be registered are indicated.
Segments and cost centers can also be used. This way, a budget may also be prepared for segments or cost centers. - Quantity
The quantity which, multiplied by the unit price, returns the total amount (see Quantity and Price columns) - Unit
A description referring to the quantity, for example: m2, ton, pcs. - Price/Unit
The unit price which, multiplied by the quantity, returns the total amount- In the Income and Expense accounting, enter a negative value to have the amount entered in the Expenses column.
- Formula (in base currency)
Allows you to enter Calculation formulas, in Javascript, plus the programming functions of the Banana Accounting Extensions.
If there is a formula (or any text), the value in the Amount column is set based on the result of the formula.- In double-entry accounting, the result of the formula must always be a positive number.
- In the income and expense accounting, if the result is positive, it will be considered as an revenue, if negative as a cost.
- FormulaBegin
The text that you insert in this column is inserted before the text used in the Formula and then used for calculation.- The main use of the FormulaBegin to insert a variable setting like "A=", in the Formula you then only insert the value, so that it easier to modify.
- In multi-currency accounting, the FormulaBegin refers to the Currency Formula column.
- Amount (in base currency)
The amount that is used for the forecast.
In the event in the row includes a repetition, the amount of the first transaction is indicated. The amounts of subsequent repetitions are visible in the account card.
The amount is automatically calculated in the following cases:- If you entered a value in the Quantity or Unit price columns, the amount is calculated based on the contents of these two columns.
- In double-entry accounting, the result is converted into a positive value.
- In the income and expense accounting, if the result is positive, it will be considered as an revenue, if negative as a cost.
- If a formula has been entered, the amount will be the result of the formula.
The formula also has priority over quantity and price.
- If you entered a value in the Quantity or Unit price columns, the amount is calculated based on the contents of these two columns.
- Total
This is the total of the repeated row amounts that fall within the Accounting and Forecasting Period set in the file properties.
If there is no date or if the start or end date are outside of the accounting period, this column will remain empty.
Columns in Income and Expense accounting
For the Cash Manager and the Income and Expense Accounting, the amounts are indicated are follows:
- Income and Expense Columns
The budget amounts are entered in the income and expense columns. - Use of Quantity, Price and Formula columns
When the program automatically calculates the amount based on the Quantity, Price or Formula columns, the result will be entered in the Revenue column if it is positive, and in the Expense column if it is negative.
In the Quantity and Price columns you can indicate a positive or negative value.
Columns in multi-currency accounting
- Amount in account currency
Is the amount in the currency of the transaction account (see multi-currency transactions).
This amount is used to calculate the basic currency value at the indicated exchange rate.
If there is a formula, the value is the result of the formula calculation.
If the row includes a repetition, the amount of the first transaction is indicated. - Account currency amount formula
A Calculation formula can be entered.- If the line includes a repetition, the amount of the first transaction is indicated. The amounts of subsequent repetitions are visible in the account card.
- The FormulaBegin column refers to this column.
- Exchange rate
It is the exchange rate that is applied to convert the amount into the account currency into the base currency. - Total amount in the account currency
Is the total of the amounts of the repeated lines in the currency of the account, whose date falls within the accounting period defined in the file properties
If there is no date or if the start or end date is outside the accounting period, this column remains empty.
See also: Tutorial File Budget Formulas For Multi-Currency Financial Planning
Period for the financial forecast
The planning system based on the double-entry method allows you to prepare forecasts indicating when the operation will take place.
Unlike Excel, where you set up a sheet with the columns for the forecast periods (month, quarter or year), with Banana Accounting you simply indicate the expected date for the event. The assignment to a period is generated automatically by the program when it processes the data. You can decide to display forecasts by day, week, month, 2 months, quarter, semester, annual, 2, 5 or 10 years.
- Forecasts can be made for one or more years.
- Based on the data entered, the program calculates the liquidity, Balance Sheet and Income statement projections for the period in question.
- Daily forecasts can be obtained, particularly useful for liquidity, or even by month or year.
See Prints and financial forecast reports.
Accounting, planning and forecasting period
Accounting or forecasting is always relevant to a period. The following periods are differentiated:
- Accounting period
This is the one defined in the file properties, with start and end date.
Generally, it will be the same as the calendar year, but it can have any start and end date. - Planning period
The period for which the planning data is entered.- The schedule does not require a planning period to be set.
- It is generally assumed that it is the same as the accounting period.
- The planning period may be different from the accounting period. In the Budget table, rows are inserted which take effect beyond the accounting period.
- Transactions with dates outside the accounting period.
- Repetitive transactions without an end date or with an end date that is beyond the the accounting period.
- Forecast period
The period used by the program to calculate the forecast.- It is indicated when a print is requested.
- Use the accounting period as default.
- It can be set freely and in this way forecasts can be obtained for several years and even for several decades.
- The accounting period is used as the Forecast period for the calculation of the content of the Total column in the Budget table and of the Budget column of the Accounts and Categories tables.
- These values therefore refer to the accounting period defined in the file properties.
- If you change the accounting start and end date, the forecasts are recalculated.
- It is indicated when a print is requested.
Forecast with monthly logic
Forecast movements are entered in the Budget table indicating the date on which these are expected to occur. For the purpose of liquidity forecasting, it is important to indicate dates for revenues and costs as precisely as possible.
For all other income and expenses that occur on a day of the month or rather at the beginning or the end, such as rent, wages, bank charges and other expenses or income, it is important to indicate by selecting the day close to the actual day of payment.
For other revenues and expenses, approximations will be made. For example - except in special cases - for restaurant revenues, which come in daily, it is not adequate to make day-to-day forecasts. In this case it is sufficient to indicate the overall sales that are expected to occur in the month. We recommend to indicate day 15, the middle of the month.
Forecast for the current year
Movements with or without repetition are inserted in the Budget table.
The calculation of the forecast is generally generated, taking into account the movements that fall within the current accounting period, as defined in the file properties.
- The total amount for the current period is indicated in the Total column of the Budget table.
- The estimate balance for the current period is indicated in the Budget column of the Accounts and Categories table.
- In the various printouts, if it is indicated as the All period, there are forecasts for the current period.
If the file is also used to keep the accounting, the accounting period must obviously be the one referring to the accounting. Even when the file is used for forecasts only, it is better to set the accounting period referring to only one year. In fact, if a period of two years is entered in the base data, the values of the forecasts, in the Total and Accounts column, will be for the two years. This can lead to confusing values.

Forecasts over several years
If you insert the forecast movements with a repetition code, the program is able to prepare forecasts that extend beyond the defined period.
To obtain forecasts over several years, the movements are entered in the Budget table.
- Opening balances
- These are inserted in the Accounts table.
- Forecast movements prior to the accounting period.
- For special cases, it is also possible to insert transactions with dates prior to the accounting period.
- Attention must be paid, because these operations will change the balances at the time of opening.
- For these transactions, the Total column will be empty because it is outside the accounting period.
- Forecast movements for the accounting period.
- Movements are indicated with the date falling within the accounting period.
- If there are operations that will also repeat in the following years, the annual repetition code must be set to "Y".
- If the repetition of the operation occurs during several years, indicate the number of years before the Y, i.e. for every 2 years indicate "2Y", 5 years "5Y", 10 years "10Y".
- If the repetition does not extend beyond a set date (for example the payment of a lease), the end date must be indicated.
- Forecast movements for the following years.
- The future date, on which the transaction is expected is indicated.
- The repeat code and the end date can be indicated.
- For these transactions, the Total column will remain empty because they are outside the accounting period.
Use of formulas
The formulas allow you to automate amortization and interest calculations. When an investment increases, the income statement is also immediately updated. Formulas are especially useful when making forecasts over multiple years.
You can use the formulas to automatically adjust the amount in the repeat rows .
- The calculation of depreciation can be based on the balance of the fixed assets account.
- Interest can be calculated directly on the bank account movements.
- You can determine a sales progression.
- Purchases can be defined as a percentage.
Print with the forecast period
Thanks to the fact that movements with the repetition code or with the dates of the following years have been inserted in the Budget table, the program is able to calculate forecasts for future years.
When the report is printed, indicate the start and end date in the Period section.
Considering that the start date is January 1, 2022:
- If you want a 2-year forecast, indicate the end date as 31 December 2024.
- If you want a 5-year forecast, indicate the end date as 31 December 2027.
- If you want a 20-year forecast, indicate the end date as 31 December 2042.
The possibility of getting a forecast is available for the following printouts:
All accounting reports can contain accounting values, forecast values, or both together. The parameters available are the same for accounting reports and forecasts.
Thanks to these reports, you may generate a
- Provisional Balance Sheet,
- Provisional Income statement,
- Liquidity planning,
- Investment planning,
- Financing planning
and more, for future interest periods.
Columns divided by period
In the Subdivision section you can use the program to create columns for the period.
You can thus display the evolution by month, quarter or year.
With Customization you can set up print formats and call them up again later. If you run forecasts over several years, it is will be useful to have pre-set customizations, overall, per year, 5 years or with the comparisons between the final balance and the estimate, which can be called up immediately .
Budget - Four-year forecast

Income statement - Four-year forecast

Budget transactions
In order to prepare financial forecasts, based on the double-entry method, transactions are entered in the Budget table. Indicate origin and destination accounts for each one. The program has the information necessary to prepare Balance Sheets and Income statements, that will however relate to the future and not the past.
When one is planning with Excel, the Income statement is set up first, then the revenues and costs are listed. Generally, the liquidity and investment plan is prepared only later and on separate sheets.
When making forecasts with the double-entry method, we proceed instead as if we were keeping an accounting for the future. All the transactions that are expected to occur will be listed. The program will then automatically prepare the Balance Sheet and Profit and Loss account for the indicated period.
Structuring of budget transactions
For the preparation of a financial plan, we generally proceed by listing the different elements in the following order:
- Capital injections.
- Third party capital injections.
- Setting up expenses.
- Investments.
In furniture, equipment. - Recurring fixed costs.
Rent, staff, social security charges, energy, subscriptions. - Recurring revenues.
- Variable revenues
The turnover which is typically seasonal. - Variable costs.
Commissions, costs of the goods sold and others, which are related to the expected volume of revenues. - Year-end transactions.
Depreciation, taxes, interest on loans, dividends.
By the time you enter sales and variable costs, you already have the cost and capital structure. It will be possible to know instantly, whether the expected turnover will allow the company to generate sufficient profits and liquidity to guarantee its sustainability over time.
Amount and Formula column
As a rule, to prepare a budget, simply use the Amount column.
For more elaborate estimates, there is the possibility of indicating quantities, unit prices, or a formula. The program will automatically calculate the value in the Amount column.
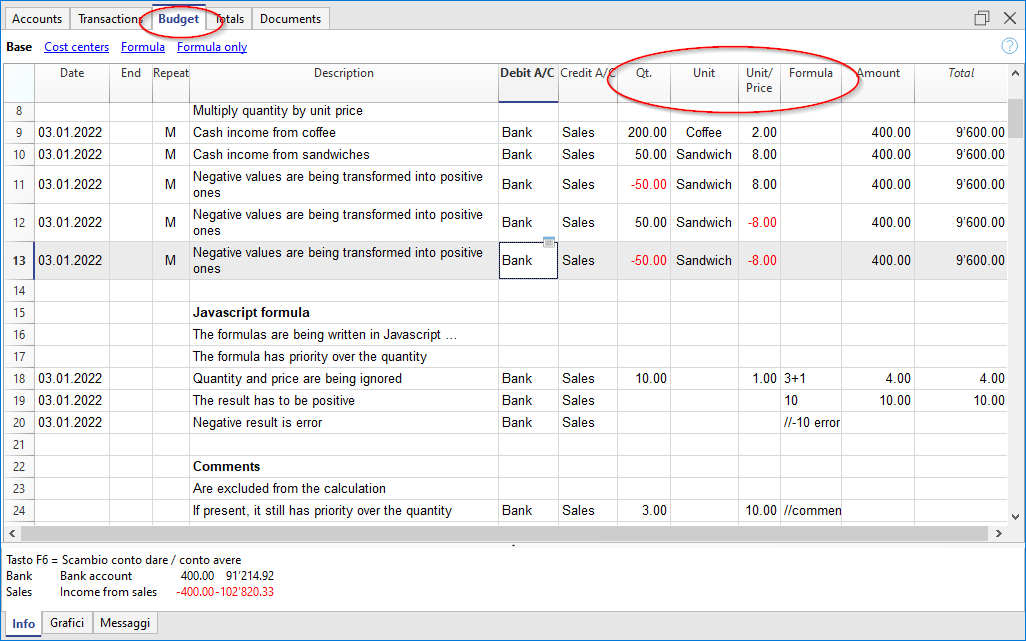
Updating forecasts
With the double-entry method, thanks to the possibility of indicating each operation in detail, it becomes easier to update and improve the forecast. Initially, estimates of different costs or investments will be entered. As you get closer to the operational phase and there will be more precise data, just replace the existing ones. Even when the activity has started and exact elements are known, the forecast can be updated easily. Precise and reliable indications on profitability and liquidity are thus available.
Dates and repetitions in financial forecast transactions
The Date column
The value contained in the Date column is the one that will validate the forecast.
- If there is no date, the transaction will be taken into account at the beginning of the planning.
If you require a forecast indicating a period, the amounts will be taken into account in the balance value at the beginning of the period.
Due to the fact that it does not fall within the period, no amount will be displayed in the Total column. - Dates in the accounting period set in the file properties.
These are the ones commonly used. The total amount will be indicated in the Total column, taking into account repetitive movements, within the accounting period. - Dates prior to the period.
You can enter movements that precede the forecast period. However, you must be careful that they do not conflict with the opening balances entered in the account table.
Due to the fact that it is not within the period, no amount will be displayed in the Total column. - Dates after the period.
If you make forecasts over several years, they allow you to indicate transactions for the years to come.
Due to the fact that it is not within the period, no amount will be displayed in the Total column.
The End date
This is used in combination with repetition, to indicate the last date beyond which there is to be no repeat.
- Must generally be left empty.
If you enter a date when it is not necessary (for example the end of the accounting period) the forecasts for the following years will not include this operation. - For leasing transactions.
Indicate the date on which the payment of the last installment will be made as the end date. - For loan repayment.
Indicate the last expected payment date. - For changes in the amount at set deadlines.
In the case, for instance, that the amount of a recurring transaction is adapted at certain deadlines (salary increase).- Create a transaction row with repeat "M" and End date as per the last payment before the increase.
Create transaction rows with Dates when the increase begins. - If the increase follows a precise and regular automation, this can also be programmed with formulas.
- Create a transaction row with repeat "M" and End date as per the last payment before the increase.
Repetitions
For recurring expenses or income, the repetition code is recommended (refer to Documentation on the columns).
- When calculating the forecast, the program creates copies of the operation and progressively increases the date, taking into account the indicated frequency.
- If there is no end date, the program will generate internal copies of the records for the entire period of the forecast indicated at the time of the report when calculating the forecast.
- If the start date is January, the frequency is monthly
- If the forecast period is the year, it will generate rows from February, 1 original row and 11 automatic rows, for a total of 12.
- If the forecast period is 10 years, it will generate rows starting from February, 1 original row and 119 automatic lines (11 the first year + 12 * 9 for the following ones), for a total of 120 lines.
- If the start date is January, the frequency is monthly
- If you want the program to automatically calculate forecasts for subsequent years.
- For recurring operations, indicate the relative repetition code.
- For transactions that occur only once a year (for example depreciation at the end of the year), indicate the repetition code "Y", so that the depreciation is also calculated in the following years.
- Don't use the repetition only if the operation will not occur in the following year.
Total column of the Budget table
The Total column is calculated automatically and represents the sum of the amounts of the current row and the repetition amounts that fall within the accounting period. The Total column is empty if the transactions have an earlier date or extend beyond the accounting period.
Schedule with precise date and monthly logic
Forecast movements are entered in the Budget table indicating the date on which these are expected to occur.
However, it is not always possible to predict all revenues and expenses with a daily precision. When making a forecast it is therefore useful, in some cases, to use approximations, generally reasoning on a monthly basis. In any case, it is useful to always follow a specific logic so that reliable liquidity forecasts can also be obtained in the short term:
- Punctual operations (capital payment, investments) are indicated with the date on which they are expected to occur.
If there is no precise date, it is useful to indicate them on the 15th day of the month in which they are expected to occur. - Recurring charges that have a precise payment date are to be set with the expected payment date and the relative repetition code:
- Bank charges, interest, amortization are to be indicated at the end of the month, quarter or year that they will take place.
- Rentals on the due expected date of payment.
- Salaries and social security charges
- For the calculation and monthly payment on the day that wages are paid.
- For thirteenths, bonuses or whatever at the moment they are paid.
- Payments for advances and adjustments of social security charges on the expected payment date.
- Payments and VAT adjustments on the typical payment due day.
- Revenue Forecasting.
The preparation of the forecasts depends on the type of activity.
If you do not know the exact day, but you will know that it will happen in a certain month, it is recommended to indicate the 15th of the month- Punctual revenue.
They are to be indicated on the date on which it is expected to take place or mid-month. - Recurring revenue.
To be indicated on the date of entry or mid-month. - In many cases a monthly forecast is well suited. The revenue can be indicated on the 15th of the month.
- If the revenues are recurring, the revenue can be entered with the monthly repetition. Using formulas you can predict growth.
- If there are seasonal differences, it is helpful to have a sales forecast row for each month.
- Forecast of projects or major works.
If there is a calendar with receipts, a transaction row is to be indicated for each expected entry. It can be approximated by indicating the 15th of the month. - Forecast for customers.
For a consultant or commercial advisor, who works both with budgets and projects, it can prove very useful to set up a detailed revenue forecast for each client, with the expected payment dates. This forecast will also be very useful to check if the customer has actually paid.
- Punctual revenue.
- Variable costs.
- Constant expenses linked to the turnover (a restaurant for example ), are indicated with the same date as the turnover. With a formula you can also calculate as a percentage value of the turnover.
- Costs can also be linked to other elements, such as the number of employees, rented premises or other.
Forecasting with the cash principle
Planning for small business and cash activities (such as shops, restaurants) it is useful to proceed with the cash principle, then indicate the revenues with the date on which they will be collected and the costs when paid.
For important operations, such as the purchase of a machine whose payment is deferred over time, it is however useful to insert forecast movements with precise details:
- Purchase of machinery (asset registration with suppliers) with date of purchase.
- Payment of the machinery, with the date(s) on which payment is expected.
Forecasts with the accrual method
In this case, the insertion of the operations takes into account when the payment will be made.
- Cash transactions.
They are obviously registered normally. - Transactions expected to be settled in the near future.
For simplicity, the operations that fall within the forecast month or the one immediately following, it can be useful to use the cash principle. - Deferred payments.
If the dates are not known with precision, you can use the 15th of the month.- Transactions with precise payment terms.
- One movement indicates the purchase date with the counterpart in the supplier account.
- One of the other movements indicates payment on the scheduled dates.
- Transactions with precise payment terms.
- Deferred collections.
- With precise payment terms, as is the case with a project:
- A movement indicates the billing date and the customer account with the counterpart.
- One of the other movements indicates payment on the scheduled dates.
- Late payment.
This is the case when a part of the revenues is collected in the short term, a percentage is collected later. It can be done like this:- Enter the revenue as cash collection.
- With the same date, a movement is created that moves a part of the collection to the customer account.
- At a later date, the cash collection is indicated with the client account of the counterpart.
- With precise payment terms, as is the case with a project:
- Use of variables for deferred collections and payments( see Example use of variables)
When the same value must be reused at the time of payment, it can prove very useful to use the formula column and variables.- In the billing transaction, the amount is assigned to a variable.
- In the payment movement, the variable is inserted so that the amount is automatically taken over.
- Variables can also be used to define the percentage of the amount that will be deferred, for example.
Examples of financial forecast movements
Scheduling transactions are entered like normal entries, with the date, description, amount, debit and credit account.
In addition, the Repeat column is used, which allows recurring transactions to be entered on a single line.
Below are several examples, taken from the template below, to which we refer for further explanation.
Start-up forecast registrations
These are forecast entries as those registered in the Transactions table.
The example shown here refers to the start of the activity, so it concerns transactions that are not repeated.

Monthly repetitive entries
Below are examples of entries with monthly repetition, code 'M'. The column Total shows the total amount for the year.
The first two entries refer to the rent, which from February to June is 1'000 monthly, while from July it is 1'200.
The date 2024, when the lease redemption amount must be paid, is also indicated. In this line, in the column Total, there is no amount, because the movement does not fall within the dates of the accounting period defined in the file properties.
The repetition code "ME" Month End is used for administrative expenses counted by the bank. For subsequent entries the day 28 is not used, but the last day of the month, thus March 31, April 30.

Quarter-end
Here we indicate some typical entries that repeat at the quarter end. We enter the 3ME repetition, which means repeat every 3 months, with end of month date.

End of Year
At the end of the year there are operations which are carried out. Use Repeat 'Y' so that these operations are also performed for subsequent years.

Forecast of income and purchase of goods
The income forecast is specific to each activity. In this case, the income and purchase forecast is shown month by month, with a specific amount.
Starting in March, the annual 'Y' repetition is indicated, so that these transactions are repeated in subsequent years.

Purchases and next year sales
The months of January and February, in the first year, were not considered significant for the following years, so they did not have a repeat.
For the first two months of the second year, we have to set sales. We also set the annual 'Y' repetition, so that we can repeat the income in the following year.

Forecasting with quantity and price
The Quantity, Unit and Unit Price columns of the Budget table allow you to prepare forecasts faster.
The value of the Amount column is calculated by the program by multiplying the Quantity by the Unit Price (under the condition that Formula column is empty).
The Quantity, Unit Price columns are set as visible in the Formula View.

Advantages of using the Quantity and Prices columns
The quantity and price columns are useful for making predictions based on quantities. For example:
- In the Unit column you can indicate what the price refers to.
- The Quantity column indicates the number of seats served daily.
- The Price column indicates the estimated revenue for each cover.
- The Amount column will be calculated automatically based on the values indicated.
This approach offers several advantages:
- All elements of the planning can be precisely detailed in the Budget.
- We remember the quantities and prices used to make the estimate.
- Changing the schedule is very simple, you can change the element you want only.
- How the profit varies, can be seen with a change in the quantities sold or in the price.
Break-even analysis.
Using formulas in the Budget table
The addition of Javascript formulas in the Budget table of Banana Accounting Plus, opens up several possibilities.
The use of formulas is available in Banana Accounting Plus with the Advanced plan only.
See all the advantages of the Advanced plan.
Formula column
The Formula column allows you to enter calculation formulas. The estimate amounts can thus be calculated on the basis of other values of the same budgeting (see Examples of formulas).
- Indicate the cost of goods based as a percentage of sales.
- Increase your sales budget based as a percentage of growth.
- At the end of the year, calculate the depreciation based on the value of the investments made.
- Quarterly, calculate interest on the bank account based on actual usage (days / 365).
- Monthly, calculate interest on the bank account based on actual usage (days / 365).
If you enter a value in the Formula column, the Amount column is calculated by the program based on that formula.
Formula Begin Column
In the Formula Begin column you can enter any formula, that is pre-pended to Formula and resolved (see documentation of the table Budget):
It is useful to specify a variable name and the assignment operator, so that you can easily change amounts:
- Instead of writing in the Formula "Price= 100", you can write
- Formula Begin "Price="
- In Formula "100" , so you can easily see the amount and change it
Formulas in Description column
You can also enter formula in the column text, so that the text is completed automatically when you request an account card (see documentation of the table Budget).
The Formula in the Description should be entered within curly brackets preceded by the dollar sign.
- Assuming that in the formula you have defined the variable Price "Price= 100"
- In the Description text you can use the variable price
"Sell of goods at price ${Price}" will results in the account card in
"Sell of goods at price 100"
Within the Description column you can use any Javascript formula, but you should avoid use assignment or other calculations, and use only the Description to for retrieving values.
Example files
For examples of the formulas, refer to the following explanations:
- Template with transactions using the Quantity and Formula columns.
- Template with transactions for Multi-Currency accounting using the Formula column in the base currency.
- Also refer to Examples of using formulas in financial forecasts.

Calculation formulas in Javascript
- The formula must be expressed in the Javascript language (not to be confused with the Java language).
- If there is a formula (or any text), the value in the Amount column is set according to the formula result.
- You can use all the functions of the Javascript language, plus the APIs provided by Banana.
Decimal separator
In JavaScript only the point "." is used as a decimal separator
If you use a different separator, the one used for numbers in the local format, the number is likely to be truncated.
Amount = result of the last instruction
In Javascript the semicolon ";" is used to separate expressions.
If the Javascript formula contains multiple expressions separated by ";" the value of the Amount column will be the result of the last executed expression.
- 10*3 //30 will be returned
- If there is a sequence of several operations separated by a semicolon ";", the last operation will be resumed.
10*3;7; //7 will be returned - If there is a return, the value is resumed after the return.
return 10; // 10 will be returned.
Variables
Javascript variables are the most powerful elements of programming, as they let you give a name to a value stored in the computer's memory, so you can easily save, reuse, and update that value in your formulas.
Variables do not exist in Excel formulas, but are similar to the name of the cells, with the difference that the name can be freely assigned.
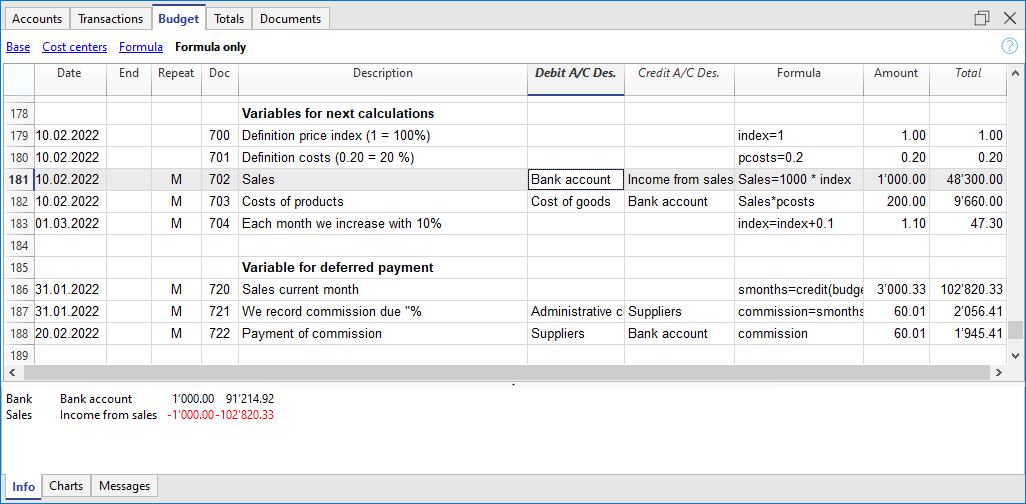
What is a variable?
A variable is like a labeled box where you store a value. For example:
price = 10This means you’re giving the name price to the value 10. You can then use "price" in other calculations:
total = price * 5This will multiply the value of "price" (which is 10) by 5 and store the result in a new variable "total".
You can also reassign the value of a variable later:
price = 20Variable initialization
To create a variable, just write a name, an equal sign (=), and a value.
There are two different ways to create and initialize a variable, and they behave slightly differently:
- Variable with the word "var"
var price = 10- This creates the variable "price" and the value 10 is assigned to it.
- The value will not appear in the Amount column. The cell looks empty.
- The value will be used and displayed only when you refer to "price" in another row.
- Variable without "var"
price = 10- This also creates the variable "price" and the value 10 is assigned to it.
- The value appears directly in the Amount column of the same row.
- Useful when you want to both define the variable and see its value immediately.
You can define and use variables directly within the rows. By entering the variable name in the formula, the saved value is taken over.
Nullish coalescing operator "??"
Sometimes, you want to give a variable a value only if it doesn’t already have one.
You can do this using a special symbol called the Nullish coalescing operator "??", in this case the value specified after the operator "??" is used only if the price has not been already assigned.
price = price ?? 10;
This means: “If price doesn’t already have a value, set it to 10. Otherwise, keep the current value.”
Before using "??", make sure the variable exists. You can write:
var price
price = price ?? 10
Or simply:
var price = price ?? 10The Nullish coalescing operator is useful for repetitions, due that it allows to assign an initial value, the first time only. So you can than increment the value and by the next repetition the value will not be assigned again.
Note: The Nullish coalescing assignment operator "??=" is not supprted.
Objects
Javascipt objects are variables that allow you to save multiple values, each indicated with a property.
The prices object is created below, indicating the curly brackets. To access and save the values, instead use the square brackets or indicate in the name of the property after the name of the object.
prices = {}
prices['car'] = 10;
prices.car = 10;
prices['computer'] = 20;
prices.computer = 20;
Array
Javascript Arrays are created using square brackets and also to access them.
The first element of the array has index 0.
costs = [1,2,3];
costs[0]=3;
result = prices['car'] - costs[0];
Repetition and variables
For more information on the calculation sequence, see Planning Logic.
- All rows (including those created for repetitions) are sorted by date. If there are rows with the same date, the order is that of insertion in the table.
- After the sorting, the rows (including the formulas) are recalculated.
- In the formulas, you therefore only have access to the budget data up to that date.
- A variable must be defined in a row that has the date preceding the row where it is used.
- If the budget entry has a repetition the variable will be reassigned each time.
sum = 10; - If you want to calculate the grand total instead.
- In an initial line create the variable with value zero.
sum = 0; - In the line that repeats in the sum also include the previous value.
sum = sum + 10;
or use the "+="
sum += 10
- In an initial line create the variable with value zero.
- Use the Nullish coalescing operator "??" for assigning a value to a variable that is not yet initialized.
Automatic variables
- budgetCurrent
It is a table that contains the budget rows after the repetitions creation.
These are used to record values in conjunction with the JRepeatNumber. - DEBUG is a variable that can be "true" or "false".
If "true", in the messages, all the results of the formulas are being displayed. - row
Is a Javascript object that refers to the current row.- The values of the cells can be retrieved with the value function ("columnNameXml").
row.value("date") returns to the date of the transaction. - row.value ("JRepeatNumber") returns the progressive of the repetition.
The first repetition is 0.
- The values of the cells can be retrieved with the value function ("columnNameXml").
- _totalPrice
This is the value of the Quantity column multiplied by the UnitPrice column.
Equivalent to the formula "row.value('Quantity')*row.value('UnitPrice')"
Budget Functions
In addition to the budget API defined in the accounting class API, there are specific functions.
budgetGetPeriod(tDate, period)
This function is used in combination with the use of repetition.
When repetitions are indicated, it is advisable to refer to a calculation period and not to a precise date.
- Parameter tDate.
The date to which the calculation of the period refers. Usually the date of the recording line. - Period parameter.
Abbreviations- For the current
- "BC" current bi-monthly (2 months)
- "DC" current day
- "MC" current month
- "QC" current trimester
- "SC" current half-year
- "YC" current year.
- "WC" current week
- For previous
- "BP" previous bi-monthly
- "DP" previous day
- "MP" previous month
- "QP" previous quarter
- "SP" previous shalf-year
- "YP" previous year
- "WP" previous week
- For the current
- Returned values.
An object composed of two dates- startDate
- endDate
// example
t = BudgetGetPeriod ('2015-01-01', 'MP') returns
t.startDate // 2014-12-01
t.endDate // 2014-12-31
Specific budget functions
The following are similar to those available with Banana.document, but can be used without indicating the object Banana.document.
To be taken into account:
- Instead of the startDate parameter, you can use one of the abbreviations "MC", "MP", explained in the budgetGetPeriod.
- If you use an abbreviation, the function calculates the start and end date of the period, based on the date of the current registration.
- It makes sense to use the end date only if it is earlier than the row date.
If it is equal or higher, it has no effect because the values after the current row are not yet available, because they have not been processed. - If the registration row date is April 15th:
- budgetBalance("1000","MP") the balance of the 1000 account returns at the end of March.
- budgetBalance("1000","MC") returns the balance at the current time is the same as budgetBalance("1000").
- budgetTotal("1000","QP") returns total of the movement for the previous quarter.
- budgetTotal("1000","QC") returns the total of the movement for the previous quarter, up to the current date.
budgetBalance(account, startDate, endDate, extraParam)
The balance up to the current row.
budgetBalance('1000', 'MP'); //returns the balance of 1000 at the end of the previous month- If budgetBalance returns a negative amount, the program generates an error, because it is not possible to enter negative values in the Amount column of the Budget table.
- When the account balance is not known in advance, it may be useful to enter two transactions using the debit() and credit() functions.
- Only one of the two transactions will show the correct balance, while the other will have an amount of 0, depending on whether the balance is a credit or a debit.
- The two transactions must of course reverse the debit and credit accounts: for example, in the first transaction debit 2210 and credit 1000; in the second debit 1000 and credit 2210.
debit(budgetBalance('1000'));  //returns the balance of account 1000 on the day of the transaction, 0 if negative

credit(budgetBalance('1000')); //returns the balance of account 1000 on the day of the transaction, 0 if positive
budgetOpening(account, startDate, endDate, extraParam)
The balance at the beginning of the period.
budgetTotal(account, startDate, endDate, extraParam)
The difference between the debit and the credit movement of the period.
budgetTotal('1000', 'MC'); //returns the total movement of the 1000 account for the current monthbudgetInterest( account, interest, startDate, endDate, extraParam)
Calculates the interest on an account, for the period indicated (at the maximum the current date)
If you use it to calculate interest on an account at the end-of-period, the row where the formula is shown should always be the last one for this date.
- Account parameter
This is the account number on whose movements interest will be calculated - Interest parameter,
Indicates the interest rate in percent.- Positive (2.5, 4, 10) calculates the interest on the account's debit movement
- Negative (-2.5, -4, -10) calculates the interest on the account's credit movement.
credit(amount)
- If the amount parameter is negative returns the amount as a positive
credit(-100) // returns 100 - If the amount parameter is positive, returns 0 (zero)
credit(100) // returns 0
This function is useful in conjunction with the other budgetBalance functions to work only on the balances you need.
If you want to calculate the percentage on sales, using this function is easier.
credit(budgetTotal('1000')) // enter the value only if it is a negative.
debit(amount)
- If the amount parameter is positive, returns the amount
debit(100) // returns 100 - If the amount parameter is negative, returns 0 (zero)
debit(-100) // returns 0
Useful if you have to make calculations using only the debit amount and avoid using the credit amount
include
Includes and executes a Javascript file, with the possibility to create its own functions and variables that can be recalled in the script.
- Include "file:test.js"
Executes the contents of the indicated file. The name refers to the file on which one is working. - Include "documents:test.js"
Executes the contents of the text document contained in the documents table.
This has to be a file of the "text/javascript" type.
Functions for multi-currency accounting
They can also be used for accounting without multi-currency, in this case the account is always in basic currency.
budgetBalanceCurrency(account, startDate, endDate, extraParam)
The balance in the account currency up to the current line.
budgetExchangeDifference (account, [date, exchangeRate])
This formula recalls the Banana.document.budgetExchangeDifference function.
budgetOpeningCurrency(account, startDate, endDate, extraParam)
The balance in the account currency at the beginning of the period.
budgetTotalCurrency(account, startDate, endDate, extraParam)
Starting with version 9.01, the following functions are also included : budgetCreditCurrency, budgetDebitCurrency.
User defined functions
The user can define personal function with the JavaScript language, and recall them in the formulas.
It is possible to define functions:
- Directly in a formula
- In a JavaScript coded attachment; this attachment must have as row id the "_budget.js" name
- In a text of the Documents table, that needs to be included with the Include command
Note:
In the user functions it is currently not possible to use functions that access current accounting data (currentBalance, ...).
function Taxcalculation(profit)
{
   var percentage = 10;
   if (profit > 50000)
      percentage = 10;
   else if (profit > 100000)
      percentage =20;
   return profit * percentage / 100;
}
Banana Accounting Plus GPT Budget formula creator
The GPT budget formula creator is only experimental: it might be subject to changes and improvements.
This Banana Accounting GPT was created using ChatGPT and is designed to generate calculation formulas to be used in the Budget table of Banana Accounting Plus.
Requirements
To use this GPT, you must have a ChatGPT Plus subscription. Without it, you can try the service for free for up to ten requests. After that, you’ll need to either upgrade to ChatGPT Plus or wait some hours before making additional requests.
How it works
- Open the Banana GPT from this link:
- In the Message field at the bottom, enter a sentence describing what formula you want to create. Explain what your purpose is. Generally, more specific requests will yield better results.
- GPT will process your request and return the corresponding result.
Based on the input provided to the GPT, examples and text strings are generated containing the formulas. - Copy the generated formulas.
- Paste the copied formulas into the Formula column of the Budget table in Banana Accounting Plus.
Examples of messages to enter in GPT
The following are examples of messages to enter into the GPT chat, along with their respective generated results:
Example 1
Input text:
I have the sales amounts for January, February and March 2024. Now I want to calculate the sales forecast for the same months in 2025. I predict that sales will increase by 20% compared to sales in 2024. Let me have the formulas keeping in mind that I want to see the calculated values right away, and then also the example records to enter.
Response:
| Date | Description | Account Debit | Account Credit | Formula |
| 2025-01-31 | January sales expected 2025 | 3000 | 4000 | var jan24 = 1000; jan24 * 1.2 |
| 2025-02-28 | February sales expected 2025 | 3000 | 4000 | var feb24 = 1200; feb24 * 1.2 |
| 2025-03-31 | March sales expected 2025 | 3000 | 4000 | var mar24 = 1500; mar24 * 1.2 |
Examples of the use of formulas in financial forecasts
The possibility to enter formulas is available in Banana Accounting Plus only with the Advanced plan. Update now!
Below you will find some examples of how to use formulas to automate financial forecasts.
Please refer to the specific documentations:
- Javascript formulas in the Budget table
- Templates with transactions using the Quantity and Formula column
Parameters
When planning, it can be useful to define variables that can and will be used later.
It is useful to create a parameter section with a posting date of January 1st, or another date that corresponds to the first day of the Budget. The parameter variables will then be used in the following rows.
// 30%
costOfGoodsSold = 0.3
// 5%
interestRateDebit = 0.05
// 2%
interestRateCredit = 0.02
// 10 %
latePaymentPercentage = 0.1
This way, all parameters that can be set are displayed instantly. When a parameter is changed, the forecast is recalculated.
Repetitions or values per month
By using the Repeat column, you can plan for the whole year on one recording row.
If however, the activity has seasonal variations, it is recommended to use a forecast by month. For each month, a row is created with the sales amount for the month.
If you wish to make forecasts automatic for several years, it is useful to insert the repetition "Y" in this row, so that the row of the year is also used for the next one.
Prices and sales quantities
When making a sales plan it will be easier to enter values using the quantity and price column. For example, a restaurant can enter the number of covers served per day, week or month and the program automatically calculates the amount. By changing the number of covers or the price, the impact on liquidity and on the result for the year is instantly displayed.
Use of formulas with variables for growth
When you use formulas, remember that they are expressed in the Javascript language:
- The variable must be defined before being used, hence the line, in which it is defined, must be a date preceding the the line in which it is used.
- Thousands separators in numbers can't be used.
- The decimal separator is always the "." (Full stop)
- The names are different for uppercase / lowercase.
You can assign a value to a variable (this name can be freely chosen) and enter the variable name in the following lines to resume the value.
By changing the value assigned to the variable, all the lines, in which the variable is used, are automatically modified.
As an example, you may set the expected sales amount, proceeding with the following months, by using a formula to increase the amount.
- Create a "S" (sales) variable , by entering the following text in the Formula column.
Sales=1000
The value 1000.00 will be inserted in the amount column - In the following lines use the variable by simply inserting the variable name in the formula:
Sales
The value 1000.00 will be inserted in the amount column - You can add 10% to the amount (multiplying by 1.1)
Sales*1.1
The value 1100.00 will be inserted in the amount column (The value of the Sales variable does not change) - You can increase the value of S
Sales=Sales+200
The value 1200.00 will be inserted in the amount column (The value of the Sales variable will change) - If the variable is used in the following line, there will be the new calculation
Sales
The value 1200.00 will be inserted in the amount column
You can also define a variable to define the percentage of growth.
- Percentage=1.1
- Amount=200
- In formulas you can use the variable name instead of the number
- Sales*Percentage
- Sales=Sales+Amount
Variables and repetitions
Let's say you expect the turnover to rise by 5% every month.
- Enter two lines where you assign the value to the variable, without putting any account with the start date of the year.
Sales=1000
Increment=5 - Then create a line with the repetition where you enter the accounts and the formula
Sales=Sales*(1+Increment/100)
Each time the row is repeated the value of the variable S will be increased by 5% and consequently also the amount of the transaction. By simply changing the growth percentage, the forecast will be recalculated.
In a row you can also insert multiple Javascript instructions, by separating them with a semicolon ";"
Sales=1000; P=5
Use of budget formulas
There are functions that allow you to access the balances and movements of the accounts for planning up to the row that is calculated.You can enter a formula that through the budgetTotal function, recovers the value of the sales account "SALES" of the previous month.
credit( budgetTotal("SALES", "MP") )
The budgetTotal function takes account numbers and periods as arguments. An abbreviation can be used instead of the period.
- MP stands for previous month.
- QP stands for previous quarter.
Revenues show in Credit, therefore the value returned by the function will be negative and will not be accepted as an amount in the double entry accounting.
Therefore use the credit () function, which uses the negative value and turn it into a positive value.
Objects for incrementing sales or costs
Instead of using a single variable you can group the elements in an objects, for sale or costs.
s = {} // sales
s.p1 = 100 // product 1
s.p2 = 200 // product 2
c = {} // costs
c.rent = 500
c.utilities = 200
c.admin = 100
You can now use a function to increments all element by a value
// function to increment the values within an object by a percentage
function Increment(obj, perc) {for (v in obj) { obj[v]+=obj[v]*(perc/100)}}
// Increment all values
Increment(s,20) // Increments sales by 20%
Increment(c,10) // Increments costs by 10%
// Decrement use a negative number
Increment(s,-10)// Decrements sales by 10%
Increment(c,-5) // Decrements costs by 5%
If you want to initialize the element in a repetition row use the Nullish coalescing operator "??"
// initialize objects
s = {} // sales
c = {} // costs
// repetition rows assign the value only the first time
s.p1 = s.p1 ?? 100
s.p2 = s.p2 ?? 200
c.rent = c.rent ?? 500
c.utilities = c.utilities ?? 200
c.admin = c.admin ?? 100

// Begin next year increments values
Increment(s,20) // Increments sales by 20%
Increment(c,10) // Increments costs by 10%
You can see an example how to insert all data:
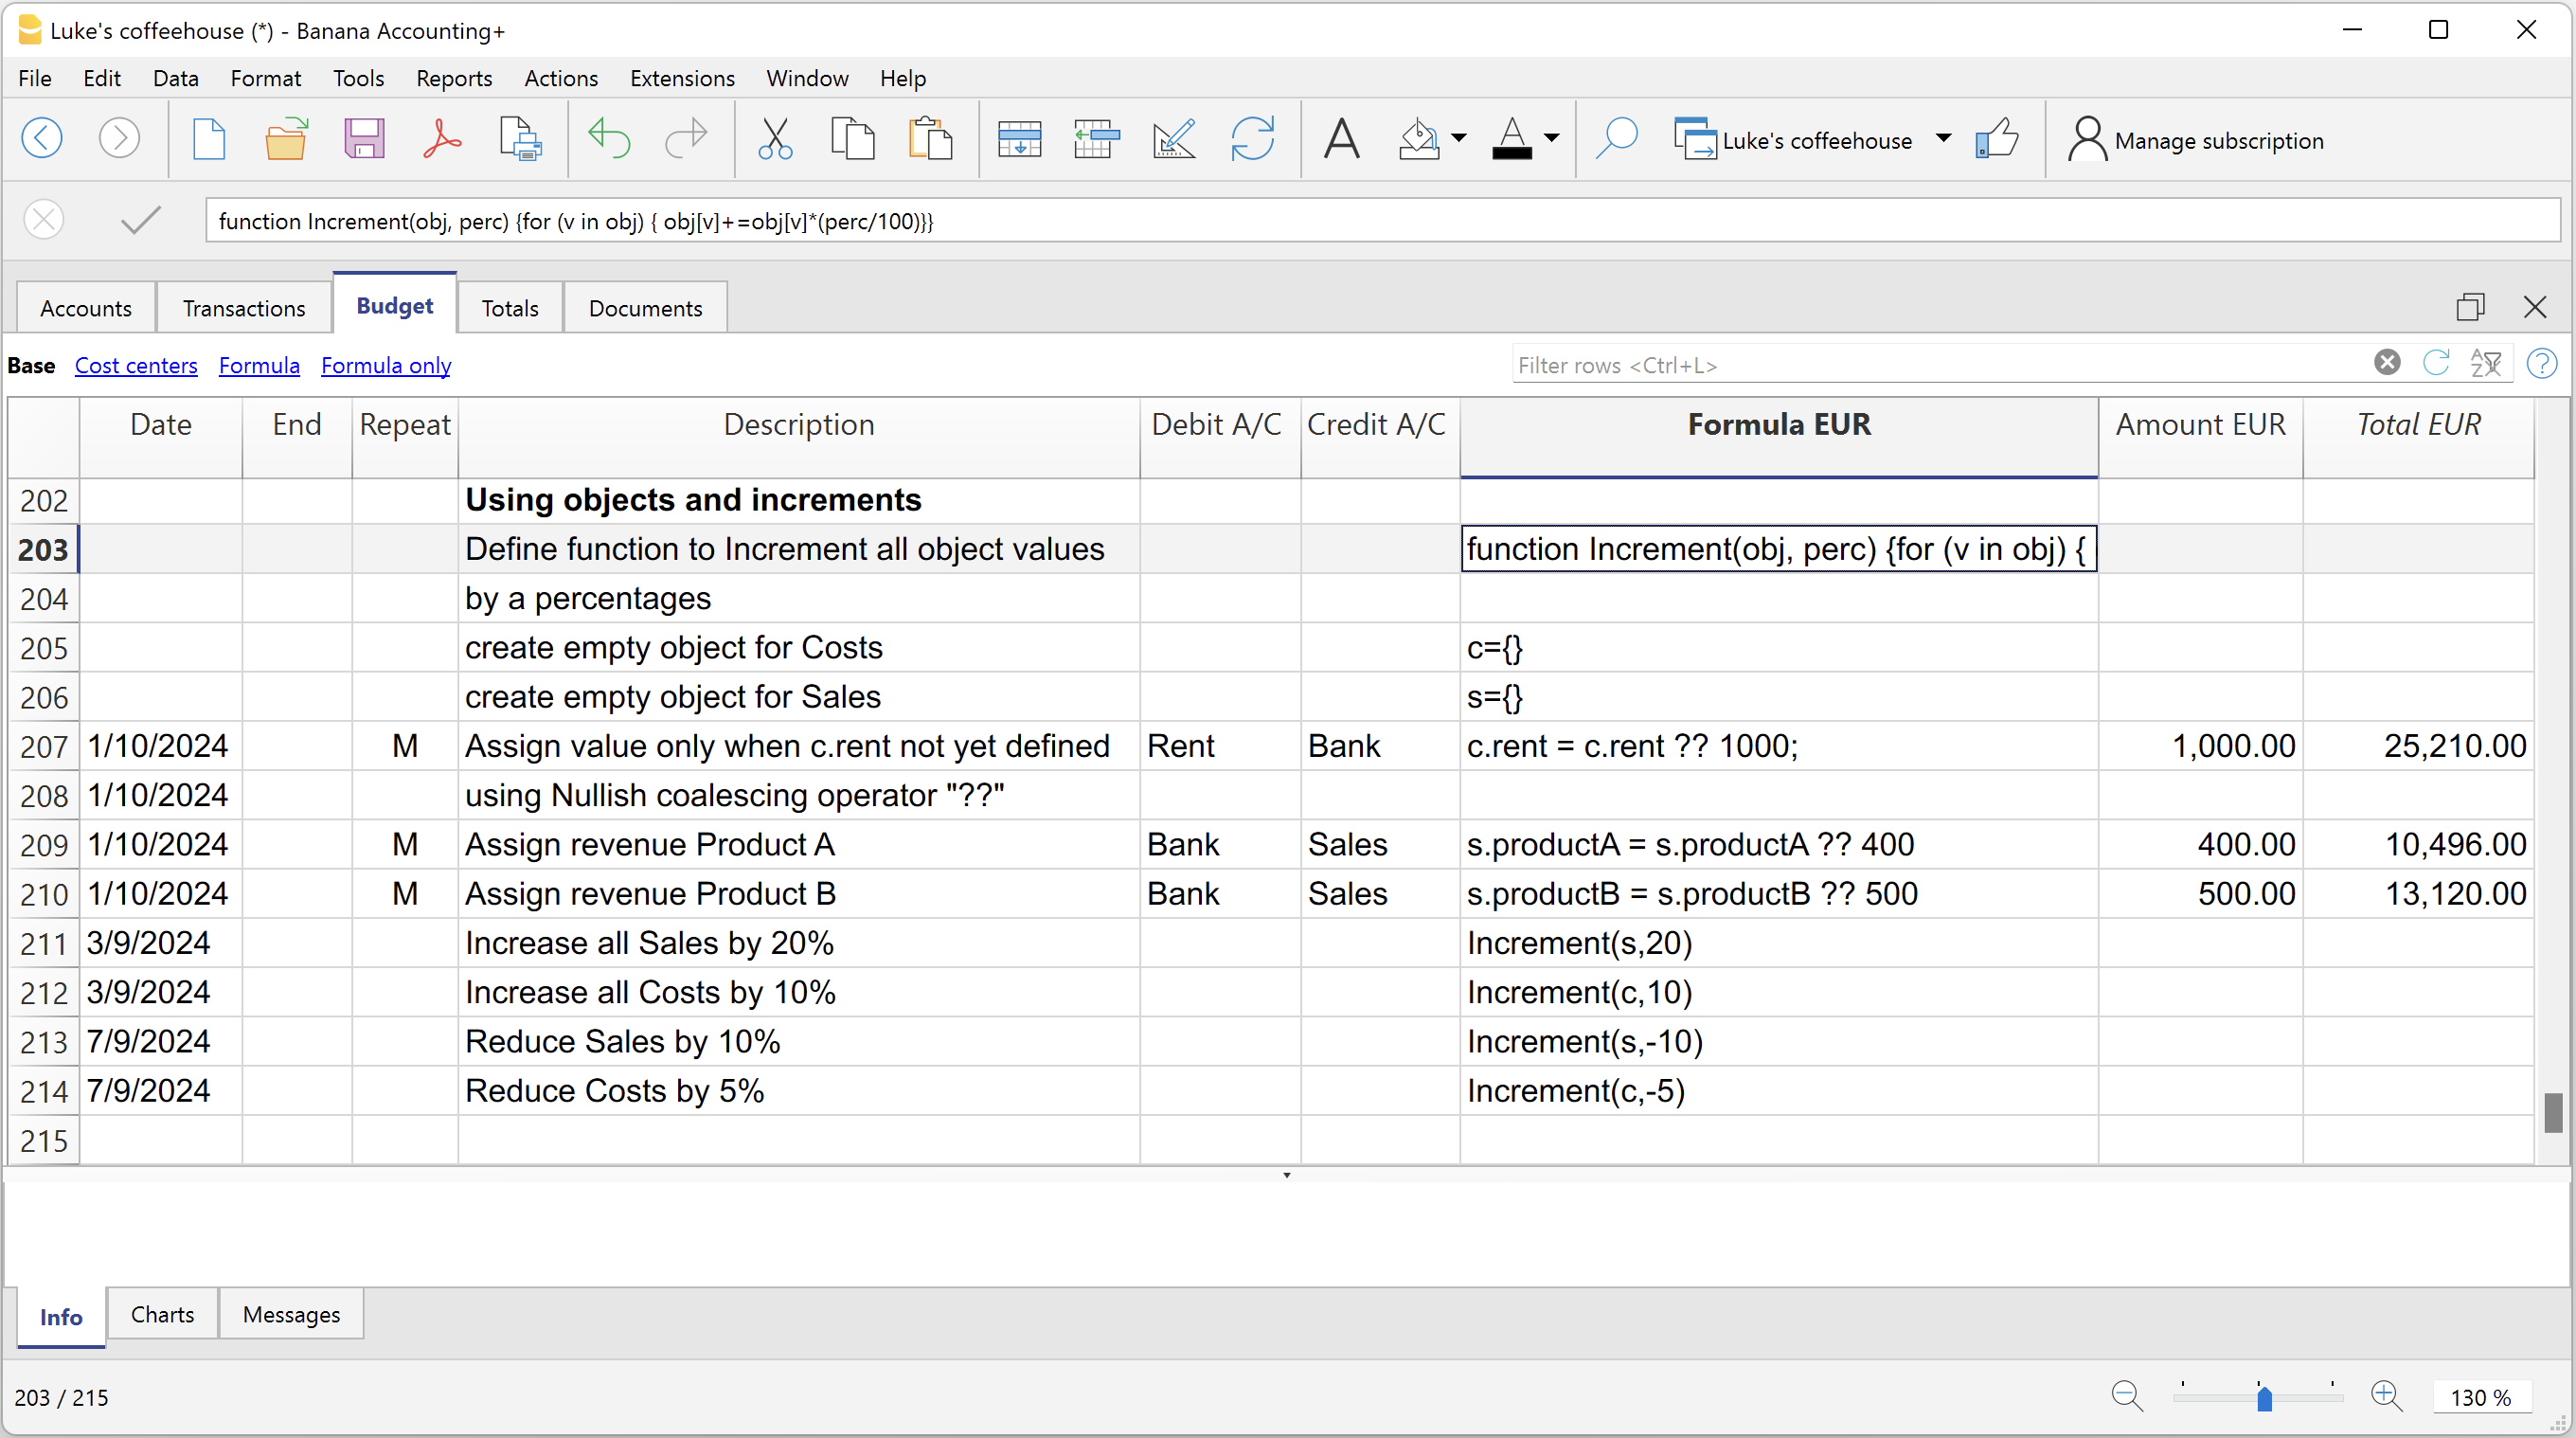
Variables for monthly sales
Sales may vary for each month. In this case it is useful to use separate registrations for each month with the variable name.
sales_01 = 1000
cost_01 = sales_01 * costOfGoodsSold
sales_01 = 1100
Deferred payments
If you want a very precise liquidity plan, it is useful to separate the sales, which are paid immediately and those that are deferred.
One approach may be to record all sales as if they were paid cash, assigning the value of the monthly variable to the amount.
sales_01 = 1000
A registration is then entered, which reverses the sales that are deferred, calculating the amount with the formula.
sales_01 * latePaymentPercentage
A payment registration with the same formula will then be inserted for the following month.
Selling costs
There are costs that can be related to sales (cost of goods) or to other costs (social charges, in relation to wages).
Cost calculation with variables
If the sales are defined with variables, the sales costs can also be indicated as a percentage of the sales.
- You can define variable S for sales and variable C for the percentage of the cost.
Sales=1000
Cost=60 - The formula for the calculation will be:
Sales*Cost/100
You can also use the same approach to calculate social security charges.
This formula can possibly be entered in a repetitive row.
Sales cost calculation with budget functions
When the costs are related to sales, the budget formula can also be used.
credit( budgetTotal("SALES", "MC") )*60/100
When the costs related to sales, "MC" stands for the current month.
This formula will return the sales value of the current month, turn them into a positive and multiply them by 60 and divide by 100.
The date must be beyond the sales registration dates, obviously.
It may be used it in a repeat row, inserting the month end date. Therefore, the costs of the sale will automatically be calculated based on the sales entered with the transaction.
The formula can be combined with variables.
- At the beginning of the year define the percentage of costs.
Cost=60 - Therefore, the formula C is used.
credit( budgetTotal("SALES", "MC") )*Cost/100
When you change the contribution percentage or any sale, the schedule will be updated automatically.
Sales commission calculation at the end of the year
At the end of the year, you calculate the commissions of 5% on the total net sales with this formula:
credit( budgetTotal("SALES", "YC") )*5/100
The bugetTotal function returns the movement of the sales account for the period "YC", current year. With the credit () function, the amount is turned into a positive value and then multiplied by 5 and divided by 100.
If you make forecasts over several years, remember to insert the repetition "Y" in the row, so that the same formula will be also calculated for the previous year. As indicated above instead of entering the 5 directly in the formula, you can assign it with a variable.
- Commission=5
- credit( budgetTotal("SALES", "YC") )*Commission/100
If the percentage changes from one year to the next, it is sufficient enter a transaction with the following year date that resets the variable for commissions.
Inflation with variables
If you want to forecast over several years, you can also take inflation into account.
- At the beginning of the planning, assign a base variable for prices and inflation (2%).
Base=1;Inflation=2 - When you use the Sales variable, you multiply it by the inflation rate
Sales=Sales*Base - At the beginning of the following year, with annual repetition, you increase the price base
Base=Base+Base*Inflation/100
Depreciation calculation
Thanks to the formulas, the calculation of depreciation can be automated.
If you change the value of your investments in planning, depreciation will be automatically recalculated. Make sure that the date of the depreciation calculation line has a date superior to that of the investments. Date is generally 31st December .
Depreciation calculation on book value
To calculate the depreciation of the "EQUIPMENT" account, insert a line at the end of the year with the following formula and the debit and credit accounts appropriately set up to register the depreciation.
budgetBalance("EQUIPMENT")*20/100
The budgetBalance function returns the balance to that date. The amortization of 20% is then calculated on this.
Use the debit function, in case you think the asset account can go into credit.
debit(budgetBalance("EQUIPMENT"))*20/100
Calculation of depreciation on the initial value
To calculate the initial value of the investments, it is necessary to use variables to remember the value of the initial investment.
Equipment=10000
If the depreciation is spread over 5 years, the formula will be inserted in the year-end depreciation line
Equipment=10000/5
The annual repetition "Y" and the end date, which corresponds to the date of the last installment of the amortization, will be inserted in the row to prevent the amortization from running on indefinitely.
For each investment you will have to create a variable and a specific row of depreciation. Numbers can also be entered in variable names.
Equipment1=10000
Equipment2=5000
Interest calculation
The budgetInterest( account, interest, startDate, endDate) function allows you to automatically calculate interest based on the actual use of an account.
The parameters are:
- Account
Whose movements are used to calculate interest, in case it will be the bank account or the loan. - Interest
The interest rate in percentage.
If the value is positive, interest on the debit balances is calculated.
If the value is negative, interest on the credit balances is calculated.. - Initial date, which may also be an acronym.
- End date, which may also be an acronym.
- The returned value is the interest calculated for 365/365 days.
Interest expense on the bank account
To calculate the interest expense of 5%, insert a line with the end date of the quarter and the repetition "3ME", which contains the formula
budgetInterest( "Bank", -5, "QC")
The interest rate is negative, because "QC" means current quarter. The debit and credit accounts must be the usual ones for recording interest expense. If the interest decreases the bank account balance will also be used in the registration. However, another account can be used if it is paid with another account.
It is important that the "3ME" repeat is used so that the date used will always be the last of the quarter.
To calculate the interest of the month use the abbreviation "MC"
budgetInterest( "Bank", -5, "MC")
Interest on the bank account
For interest income of 2%, use positive interest instead.
budgetInterest( "Bank", 2, "QC")
Interest on fixed-term loan accounts
For fixed-term loans, interest will be calculated and recorded on the specified date.
- Create an separate account for each loan.
Use the budgetInterest function indicating exactly the start and end dates .If the date is indicated as text, the notation "yyyy-mm-dd" should be used, then "2022-12-31" - Use variables.
As indicated for depreciation, the loan amount can be assigned to a variable. The interest calculation will be done with a Javascript calculation formula,- Define the loan variable
Loan=1000 - 5% interest calculation, for 120 days.
Loan*5/100*120/365.
- Define the loan variable
Profit tax calculation
Profit is the total of the group's profit for the specified period.
To calculate a 10% profit tax, use the following formula.
credit(budgetTotal("Gr=Result","MC"))*10/100
- Use the the budgetTotal function parameter in the "Gr = Result" group, which indicates that instead of an account it has to calculate the movements for the group.
- MC, current month, is indicated as the period.
- The budgetTotal function will return a positive value if there is a loss and negative (credit) if there is a profit.
- the credit function takes only negative values into account, therefore if there is a loss the tax will be zero.
Payments with deferred or different deadlines
For deferred payments or with different deadlines, you can proceed in two ways:
- Use variables to which payment amounts are to be assigned.
Use the variable in question when recording the payment. - Create customer or supplier accounts for different credit deadlines.
Other cases
Please tell us about your other requirements, so we can add more examples.
Budget separate from accounting
Preparing the file
If the Budget table is not visible in the accounting file, proceed to display it via the Tools → Add/Remove functionalities → Add Budget Table menu.
The Transactions table remains as preset in any case. If you don't need it, use the Data → Tables setup menu and un-tick Transactions table so it is not displayed.
The process will be the same whether you are managing only an accounting, a budget or both:
- Create an accounting file.
- Set the file properties.
- Set up the Chart of Accounts.
- Enter opening balances (if any).
- Enter the forecast values in the Budget table.
Accounting and budgeting are usually performed in the same Banana Accounting file. If you wish to manage the Budget separately from the accounting, just enter the Transactions in the Budget table only. In this case, the Transactions table, is left empty of posting of movements.
A Budget only file is used:
- To set up the Budget of a Startup:
- Prepare the financial plans of a new company, that has not yet started.
- Initially, if you don't have precise ideas, it might prove useful to select a template with few accounts, without VAT.
- If you plan to keep the accounting as well, it's helpful to start with one of our pre-set Charts of Accounts.
- For an existing company that keeps the accounting with another program:
- The Chart of Accounts will be modeled on the one used for the accounting.
- There are three possibilities to compare with the actual balance sheet:
- You can export the Budget data of Banana Accounting and import it into the accounting program.
- In case you wish to make a comparison between the Budget created in the Banana Accounting file and the actual data of your program on the other hand, you have to export the data and import them into the Budget file (Banana Accounting Budget table).
- Create Excel spreadsheets and report the Banana Accounting Budget data and the accounting data present in your own program.
Further information on Budget transactions can be found at the following links:
Budget period
It is not necessary to define the budgeting period. You can set up the budget for a year and still get forecasts for the following years.
Annual Budget
As a rule, the budget is prepared for the accounting period defined in the File properties, which is generally identical to the calendar year.
- Enter the opening balance at the beginning of the period in the Opening column of the Accounts table.
- Enter the forecasted data for the current year in the Budget table.
When requesting Reports, the program will use the accounting period, if you do not specify a period different from the one present in the File Properties
When you want to budget for the following year, you create a file for the new year. The program reports the budget postings, which can then be modified (see Create new year ... in Actions menu).
Multi-year budgeting
With Banana Accounting you can have planning over several years available. The planning period is free and is set at the time the report is requested.
To make a budget over several years, generally proceed by setting the budget for the first year, then extending it for the following years.
Technically, therefore, proceed as if you were establishing an annual budget, extending it for the following years:
- In the File properties, the date of the first year (which is generally the calendar year,) is indicated as the start and end date.
- The opening balances are entered in the Chart of Accounts.
- The movements of the budget are inserted in the Budget table
- Operations that are specific to the first year only, are indicated without repetition.
- Indicate the repetition code for all other operations, which are presumed to also be repeated in subsequent years.
- Operations that take place only once a year are indicated by the annual "Y" repetition code. For example, the calculation of depreciation, that is done at the end of the year.
- Specific operations for subsequent years are indicated with the respective date on which they occur.
- For repetitive operations that are limited to a single year or to a specific period (fixed-term leasing transactions) the End date will be indicated. After that date, no repetition will be made.
- Formulas may be used to make the amount of the row to be repeated automatic .
- The calculation of depreciation can be based on the balance of the fixed assets account.
- Interest can be calculated directly on the movement in the bank account.
- A progression of sales can be specified.
- Purchases can be defined as a percentage of the cost.
- To obtain the budget (Enhanced Balance Sheet or Enhanced Balance Sheet with groups, Account cards) indicate the start and end date of the required budget.
Changeover to the new year
The Banana Accounting function for Creating a new year ... also carries forward the budgeting transactions.
- At the level of each row you have the possibility to indicate whether the operation should be carried over or not, and whether the original data should be kept or replaced by that of the new year.
- Creating the budget for the new year is therefore very simple, because it is only a question of changing the items of expenditure and income that are expected to change.
Reports financial forecasting
There are several ways to access financial forecasting data. You can access all the information that interests you.
- Provisional Balance sheet
- Provisional Profit and Loss Account
- Liquidity Planning
- Forecasting sales
- Financial forecasting for customers
- Financial forecasting for suppliers
- Investments Planning
- Corporate finance Planning
- Project Planning
- Planning with segments
Budget table: Total column
The Total column contains the total amount of the budget for the accounting period indicated in the file and accounting properties (accounting start and end date). This delivers an instant indication of how much a certain expense will be for the current year.
For further information refer to Budget table columns and Dates and repetitions.
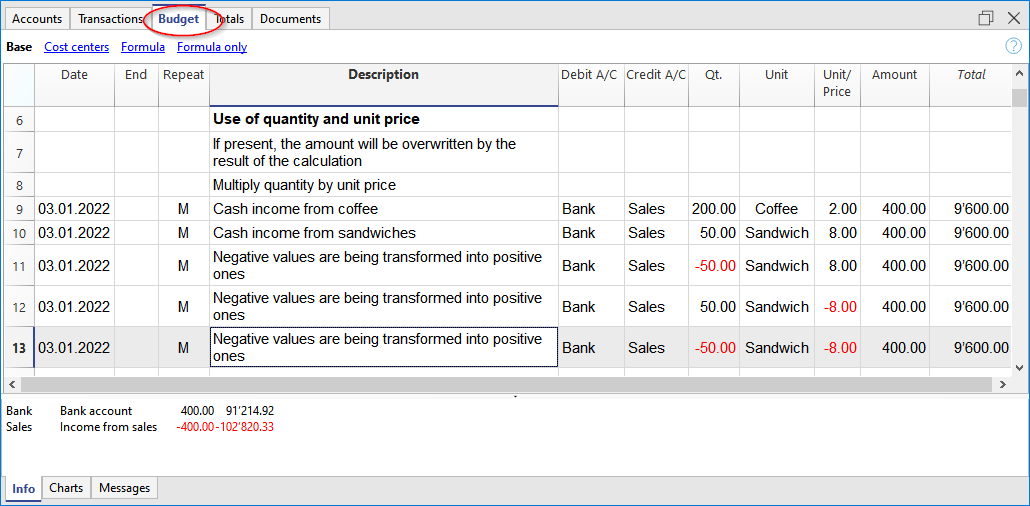
Evolution Charts - Charts window
In any table you are in, you will see the evolution of the account or group, on which the cursor is located, in the Charts window.

Budget column in the Accounts and Categories table
The Accounts and Categories table displays the updated budget values for the accounting period indicated in the file and accounting properties (accounting start and end date).
- Budget column
Indicates the total budget of the account for the accounting period.
The value indicated is inclusive of the initial balance and budget movements for the period. - Budget difference Column
Indicates the difference between the Budget and Balance column.

Account card with budget data
Via the Account card command, or in the Budget table, you can get the detail with all the forecast movements, by clicking on the button next to the account.
- In the Account card dialogue
- You can choose the account, cost center, group or segment whose movements you want to view.
- You can choose to view current data or budget data.
- In the Period accounting card, you can indicate the calculation period. If you choose an end date, beyond the accounting dates, the program automatically creates a projection of the indicated data.
- By opening the account card from the Budget table, the card for budget movements is displayed.
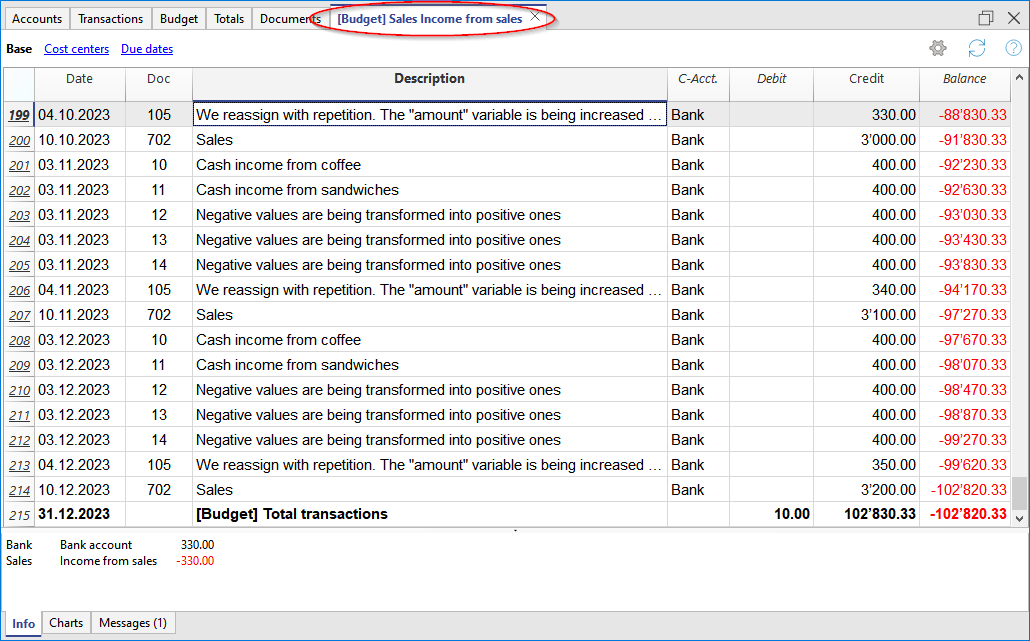
Enhanced Balance Sheet with groups
All the prints that are available for accounting, can include financial forecasts.
- It is sufficient to set up the Budget and Budget difference columns.
- In the Period Section, indicate the desired forecast period. You can also indicate a period over several years and the program immediately calculates and displays the forecast.
- In the Subdivision Section, you can select to display data by month, quarter, year or by choosing a segment.
Watch the video tutorial that shows how to create and print the Enhanced Balance Sheet with groups.
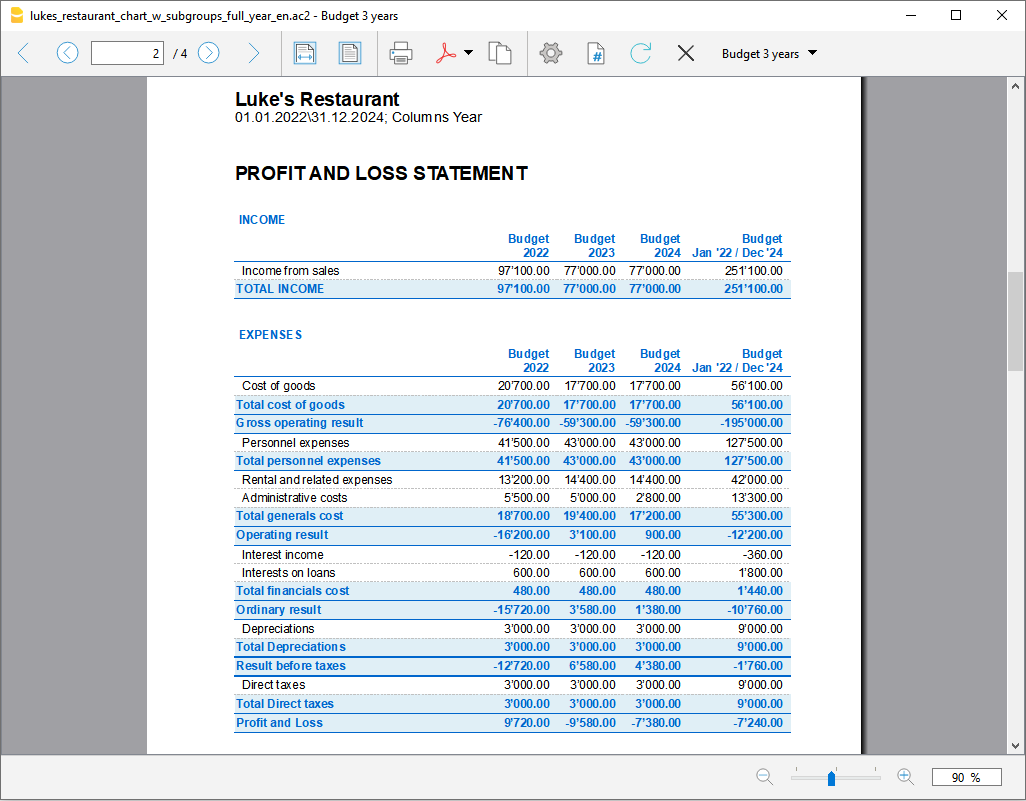
All customizations available in accounting are also applicable for planning:
- Select the desired grouping level.
Presentation with the account details or only with groups. - Choice of sections to include.
Balance Sheet only, Income Statement, Cost Centers can be printed. - Choice of the accounting period.
If you choose an accounting period beyond the accounting dates, the program automatically creates the projections up to the indicated date. - Breakdown by period (monthly, quarterly, half-yearly, annual).
By combining the calculation period and the frequency, ad hoc reports can be created.- By indicating a 1 year period without subdivisions, the forecast for the year is obtained.
- By indicating a 1 year period with quarterly subdivision, there is a printout with the columns for each quarter.
- By indicating a 6 months period with monthly subdivision, the month by month evolution can be seen in detail.
- By indicating a 5 years period with annual subdivision the columns with the evolution for the 5 years is available.
- Comparison between current and budget values.
- Addition of other columns.
- Change of print style.
- Saving Print Setups.
Print settings can be saved as a composition and can be recalled later.
You can create as many compositions as you require.
Provisional Profit and Loss account
The Profit & Loss statement forecast presents the profits, costs and result for a future period. It is an important tool for tracking the management of the company which allows you to understand how the situation will evolve, from an economic and financial point of view.
With Banana Accounting, thanks to the forecasts with the double entry method, you have complete forecast budgets that you can organize in different ways. The program also calculates forecasts over several years.
You can have a very precise vision of the evolution of the economical situation.
The structure of the Profit & Loss statement is the same as that used in accounting file. When printing, you can indicate which values to display, those of the final balance, or the budgeted balance or of both.
The forecast values are calculated taking into account the opening balances and forecast movements indicated in the Budget table. When you change a budget entry, the forecasts are instantly updated. You can simulate and test, relocate a payment, add an investment, modify sales and see how the profit and loss statement changes over time.
Profit and Loss statement values can be displayed in several ways.
Use of quantities and formulas
The quantity and price columns of the Budget table allow you to prepare more realistic forecasts, using the same methodology as spreadsheets. This allows for faster simulations. It is sufficient that you change the price and you access the new forecasts of the Profit & Loss statement automatically and also those of the Balance Sheet and Liquidity.
The formulas allow you to automate cost calculation, so that for example, when you change sales the purchase costs change in percentage. In this way you can use precise income statement forecasts that update automatically. Formulas are particularly useful when making forecasts over multiple years.
Detailed forecasts
The Income statement forecast, based on the double entry method, allows you to obtain the forecasts of the costs and revenues, using the same accounts and groups as those of the accounting file. The same structure of the items, that make up the income statements, is used for forecasting. Values and reports are available automatically to display in detail, day by day, how liquidity evolves and the situation of customers.
The structure of the Chart of Accounts, on which the forecast is also based, is customizable. This can be done by simply using the main groups and the accounts that are part of it, or more in a more complex way, by also inserting subgroups, for a more detailed view.
The structure of the Profit and Loss Account is gradually scaled and allows you to view the interim and final results for the year after paying the taxes.
PROFIT AND LOSS STATEMENT
- Revenues.
- Cost of goods.
Gross operating result (total of Revenues and Costs).
- Staff costs
- General costs.
Operating result (total of the gross operating result, personnel costs and general costs).
- Financial costs.
Operating result before taxes and depreciation(Total of operating result and financial costs).
- Depreciation.
Operating result before taxes (Total of ordinary Result and Depreciation).
- Taxes
Net operating result (total of the Result before taxes and Taxes and duties).
Accounts / Category Table
In the Accounts table, for Double entry accounting, and in the Categories table for Income and Expense accounting, the forecast values for all the accounts (or categories) and groups of the Profit and Loss statement are displayed. With a glance you have an instant view of the forecasted Profit and Loss statement. The values refer to the accounting period and the variations are compared to the current balance.
If you require more details, you can add accounts or groups.

Profit and loss with groups
Through Enhanced Balance Sheet with groups command, you can view the Provisional Profit and Loss Statement, choosing the presentation mode you need.
- Indicate in the Sections options to display the values of the Budget
You can display the current (accounting) values, the budget values or both. - Set up the Period.
If a period that exceeds the accounting period, is indicated, the program will automatically switch to budgeting over several years. - Indicate the subdivision by period required.
- In the Rows section, you can exclude accounts and thus have a view of groups only.
- If you think you're use this print setting again, create a Customization.
Using the different options you can customize your prints. Below are some examples.
Annual Budget Profit and loss
This print was set up with only the budget values for the current year.
You can also display the change as an amount and a percentage.

Budget Profit and loss statement and current year comparison
The final (current) values are compared with those of the forecast.

Quarterly forecast Profit and loss statement
In the Subdivision section set quarterly and the program shows the forecast Profit and Loss statement for the various quarters.
The evolution of the budget forecast during the year will now be displayed.

Budget and quarterly Profit and loss statement
This print is set up to print the budget and the final balance. Thus we have the budget and current situation for the quarters.

Three-year forecast for Profit and Loss account
If you insert the forecast movements with the repetition code, the program is able to prepare forecasts beyond the defined period.
To obtain forecasts over several years, the transactions are entered in the Budget table with repetition (Y).
The printout is set up to obtain the estimate of the Profit and Loss statement over three years.

Accounting Report for Budget Profit and Loss
From the Reports → Accounting Report menu you can get printouts of the Profit and Loss Statement displayed as in the accounts table, but with the required column values.
The options are similar to those explained for the Enhanced Balance Sheet by groups.

Liquidity Planning
Cash is King is the motto that indicates how important liquidity is. It is the main engine for carrying out business activities, meeting commitments and producing profits. To invest safely, it is essential to evaluate the ability to produce liquidity and its evolution over time a rational way.
The financial forecast of Banana Accounting is an important business management tool, which allows you to understand if there will be enough financial means to meet commitments and reduce your debt exposure to the maximum.
Liquidity projections are calculated on the basis of the initial balance and forecasts included in the Budget table. When a budget movement is changed, the forecasts are instantly updated. You can run different simulations, assign a payment, add an investment, modify sales and see how liquidity evolves.
Liquidity values can be displayed in several ways.
Accounts table
Set up accounts and liquidity groups in the Accounts table. In the Budget column you will also see the updated forecast balances for the accounting period. At a glance you will know what the liquidity situation will be at the end of the year.

Evolution graphs
When you open the Charts window, positioning the cursor on an account or a group you will see the graph representing the evolution of Liquidity.
In the legend are visible Current, Previous and Budget. By clicking on each one it is possible to hide or make visible the respective graphs.
Account card with Budget Group liquidity
Using the Budget Account card command, all forecast movements of the account card are displayed. Day by day you can see which movements will have an impact on the liquidity.

The Account card command allows you to specify if you want to see current or budgeted movements.
- Select budget movements.
- Set the period
If you indicate a period that exceed the accounting period, the program will automatically generate Forecasts over several years. - If you indicate a group, you will see the movements of all the accounts belonging to that group.
- When you are in the Budget table, you can access the account card with a click on the icon next to the account.
Liquidity in the Enhanced Balance sheet with groups
In the Enhanced Balance Sheet with groups you may select to work with values subdivided by column per period. In this way you can see the evolution of liquidity by day, week, month, quarter, semester, year, etc.
- In Sections options indicate the display of the Budget data.
- Select the Liquidity group.
You can choose to also display the liquidity accounts. - Set up the Period.
If a period that exceeds the accounting period, is indicated, the program will automatically switch to budgeting over several years. - Indicate the subdivision by period required.
- If you think you will use this print setting again, create a Customization.

Budget Liquidity Accounting Report
The Accounting Report is similar to the Enhanced balance sheet with groups, with the difference that the display of the data takes place in the Accounts table in columns.
You can therefore use the Accounting Report to get an instant view of the evolution of liquidity accounts.

Forecasting sales
Sales for a company are the main source of income and liquidity. Unlike costs that are more easily planned, sales are more difficult to budget. As a rule of thumb, you may base yourself on the figure of the sales of the previous year for the same period or, on the possibility important events that are in the pipeline and could lead to an increase in sales or even to the acquisition of new customers.
Based on this concept, Banana accounting, with the forecast based on double-entry accounting, allows you to simulate and project different scenarios over time. Just change the budgeted amounts for sales and the program automatically updates the forecasts and displays detailed reports for the current year or for future years.
The sales projections are calculated on the basis of the forecasts included in the Budget table and can be displayed in different ways.
Accounts table
Set up accounts and sales groups in the Accounts table. In the Budget column you will also have the updated forecast balances for the accounting period. You can check what the evolution of sales will be during the year, at a glance

Evolution charts for sales
When you open the Charts window, positioning the cursor on an account or a group you will see the graph representing the evolution of the Sales.
In the legend are visible Current, Previous and Budget. By clicking on each one it is possible to hide or make visible the respective graphs.
Account card with Budget for sales
Using the Budget Account card command, all forecast movements of the account card are displayed. Day by day you will be able to see the evolution of sales and which movements will have the greatest impact.

The Account card command allows you to specify if you want to display current or budgeted movements.
- Select the budget movements.
- Activate the account or group of Sales
You can also activate all sales accounts - Set the period.
- If you indicate a period that extends beyond the accounting period, the program will automatically generate Forecasts over several years.
- If you indicate a group, you will see the movements of all the accounts belonging to that group.
- When you are in the Budget table, you can access the account card with a click on the icon next to the account.
Income statement with Quarterly sales Budget
With the Enhanced Balance Sheet with groups you can choose which data columns to display and the reference period, to see the evolution of sales by day, week, month, quarter, semester, year, etc.
- In Sections options, you can select the Budget data to be displayed.
- Choose the sales group. You can choose to display sales accounts as well.
- Set up the Period.
If a period that exceeds the accounting period, is indicated, the program will automatically switch to budgeting over several years. - Indicate the subdivision by period required.
- If you think you will use this print setting again, create a Customization.

Accounting report with Sales estimate
The Accounting Report is similar to the Enhanced Balance Sheet with groups, with the difference that the data is displayed in columns, as in the Accounts table.
You can use the Accounting Report to have an instant view of the evolution of the sales accounts.

Financial forecasting for customers
Customers forecasting completes financial planning with customer data. For example, a company can forecast sales by indicating accounts for the most important customers.
Forecasting with the double entry method also allows you to indicate accounts for individual customers. Depending on the requirement, customer management can be done with balance sheet accounts, profit and loss accounts or with cost and profit centers.
When changing a budget movement, the forecasts for each customer are also updated individually.
Accounts table
Set up the customers in the Accounts table. In the Budget column, the forecast balances are automatically updated for the accounting period. At a glance, you can view what the forecast for the individual customer will be.

Evolution chart
When you open the Charts window, positioning the cursor on an account or a group you will see the graph representing the evolution of the Customers.
In the legend are visible Current, Previous and Budget. By clicking on each one it is possible to hide or make visible the respective graphs.
Customer Account card with budget data
With the Budget Account card command you have the possibility to see in detail all the movements for each customer.

- Select Budget movements.
- Indicate the customer account or group.
- Set up the period.
If you indicate a period that extends beyond the accounting period, the program will automatically generate Forecasts over several years. - When indicating a group, you will see the movements of all the accounts belonging to that group.
- When in the Budget table, you can access the customer's card with a click on the small icon next to the account number.
Customers in Enhanced Balance sheet with groups
With the Enhanced Balance Sheet with groups you can choose which data columns to display and the reference period, to see the evolution of the customer by day, week, month, quarter, semester, year, etc.
- In Sections options you can select the Budget data to be displayed.
- Choose the Customers group. You can choose to also view the accounts of each individual customer.
- Set up the Period.
If a period that exceeds the accounting period, is indicated, the program will automatically switch to budgeting over several years. - Indicate the subdivision by period required.
- If you think you will use this print setting again, create a Customization.

Accounting Report with Customers Budget
The Accounting Report is similar to the one for Enhanced balance sheet with groups, with the difference that the display takes place in columns, as in the Accounts table.
You can therefore use it to get an instant view of the evolution of customer accounts.

Provisional Balance Sheet
The Balance Sheet forecast displays the Balance Sheet for a future period. It is an important tool for tracking the management of your company and allows you to verify what the company's capital structure, the state of assets, of liabilities and the equity will be like.
With Banana Accounting, thanks to the forecasting with the double entry method, you have complete forecast budgets and that you can arrange in different ways. The program also calculates forecasts over several years.
You can access a very precise vision of what the future balance sheet will look like.
The structure of the budget is the same as that one used in the accounting file. When printing, you can indicate which values to display, those of the final balance, the budget or both of those.
The forecast values are calculated taking into account the opening balances and forecast movements indicated in the Budget table. When you change a budget entry, the forecasts are instantly updated. You can simulate and test, relocate a payment, add an investment, modify sales and see how the budget changes over time.
Budget forecast values can be displayed in several ways.
Detailed forecast
The financial forecast, based on the double entry method, allows to obtain the forecasts of the balance sheet values, using the same accounts and groups as those of the accounting file. The same structure of the items that make up the financial statements is used for forecasting. Values and reports are available automatically to display in detail, day by day, how liquidity , the situation of customers evolves and many more.
The Banana Accounting forecast presents the values for assessing the financial, equity and economic situation. The structure is customizable, it can be presented in a simple way, including the main groups and the accounts that are part of it, or in a more complex way, by inserting subgroups, for a more detailed view.
| ASSETS | LIABILITIES |
Current assets
Fixed assets
| Third party capital
Equity
|
Accounts table
In the Budget column of the Accounts table you access forecast values for all accounts and balance groups available. In a glance you have an instant overview of the budget. The values refer to the accounting period and the variations are calculated automatically with respect to the current balance.
If you need more details, you can add accounts or groups.
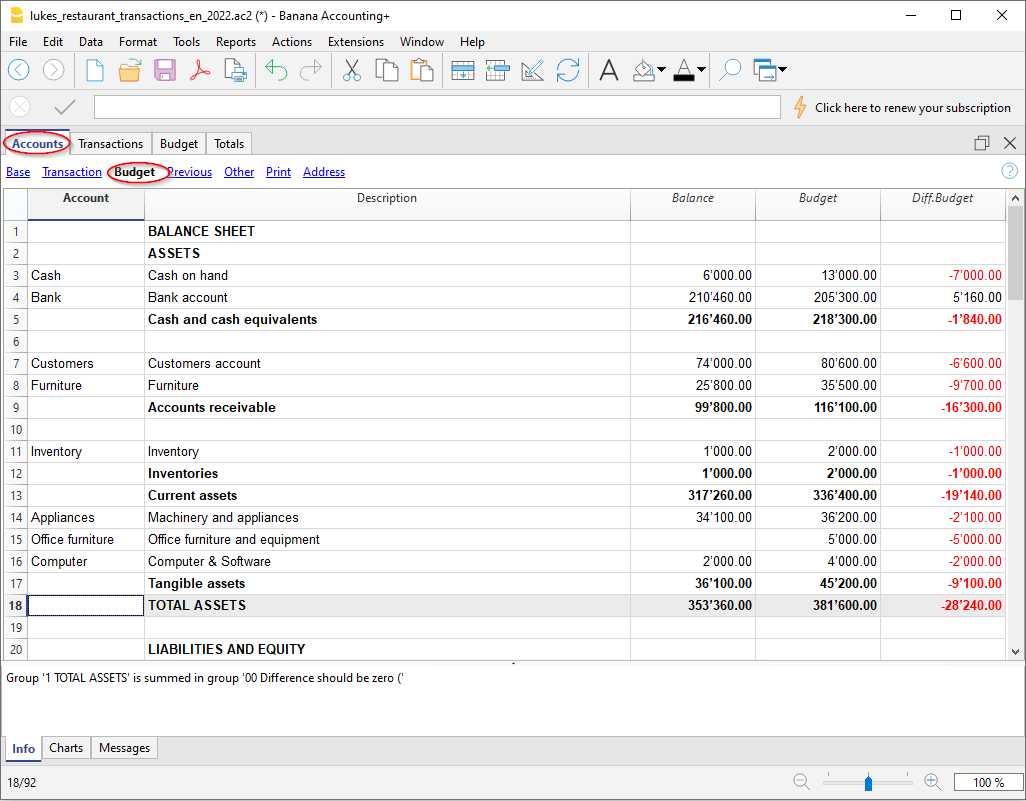
Enhanced Balance sheet with groups
Through Enhanced Balance Sheet with groups command, you can view the Provisional Balance Sheet, choosing the presentation mode you need.
- Indicate in the Sections options to display the values of the Budget
You can display the current (accounting) values, the budget values or both. - Set up the Period.
If a period that exceeds the accounting period, is indicated, the program will automatically switch to budgeting over several years. - With the subdivision by period the data are presented with the subdivisions chosen for the period.
- In the Rows section, you can exclude accounts and thus have a view of groups only.
- If you think you will use this print setting again, create a Customization.
Using the different options you can customize your prints. Below are some examples.
Enhanced Balance sheet annual Budget groups
This print has been set up to produce only the budget values for the current year.
Budget and Current Balance sheet
The actual (current) values are compared with those of the budget. You can also display the change in the comparison as an amount and a percentage.

Quarterly budget
IIn order to obtain an annual budget with a quarterly breakdown, the quarter must be indicated in the section Subdivision → Subdivision by period. The program will show the budget for the year, divided into 4 quarters.
Budget and current quarter Balance sheet
This printout is set up to display both the budget and the annual final balance with the breakdown per quarter. Thus we have the expected and current situation at the end of the quarters.

Three-year budget
This printout is set up to print the three-year budget forecast.
In the Period section set the reference period to three years and in the Subdivision section → Subdivision per period set to one year. In the File properties (File menu) there must be 3 years as the start and end period (e.g. start 01.01.2022 - end 31.12.2024).
Budget Accounting Report
From the Reports → Accounting Report menu you can get printouts of financial statements displayed as in the accounts table, but with the required column values.
The options are similar to those explained for the Enhanced Balance Sheet by groups.

Financial forecasting for suppliers
Supplier forecasting completes financial planning with supplier data. For example, a company can plan purchases by indicating purchases by indicating accounts for the most important suppliers. It will thus be able to analyze and optimize the relationship with the various suppliers, perhaps by requesting payment extensions.
Forecasting with the double entry method also allows you to indicate accounts for individual suppliers. Depending on the need, suppliers management can be done with balance sheet accounts, profit and accounts or with cost and profit centers.
When changing a budget movement, the forecasts for each individual supplier are also updated.
Accounts table
Set up accounts for suppliers in the Accounts table. In the Budget column, the forecast balances are automatically updated for the accounting period, according to the beginning and the end date, set up in the File properties. At a glance, you can view what the forecast for the individual supplier will be.

Evolution chart
When you open the Charts window, positioning the cursor on an account or a group you will see the graph representing the evolution of Suppliers.
In the legend are visible Current, Previous and Budget. By clicking on each one it is possible to hide or make visible the respective graphs.
Account card with Supplier budget data
With the Budget account card command you have the possibility to see in detail all the movements for each supplier.

- Select budget movements.
- Indicate the supplier’s account ot the supplier's group.
- Set up the period.
If you indicate a period that extends beyond the accounting period, the program will automatically generate Forecasts over several years. - When indicating a group, you will see the movements of all the accounts belonging to that group.
- When in the Budget table, you can access the customer's card with a click on the small icon next to the account number.
Suppliers Enhanced Balance sheet with groups
Through the Enhanced Balance Sheet with groups you can choose which data columns to display and the reference period, to see the evolution of the supplier by day, week, month, quarter, semester, year, etc.

- In Sections options you can select the Budget data to be displayed.
- Select the Suppliers group. You can also choose to view the accounts of each individual supplier.
- Set up the Period.
If a period that exceeds the accounting period, is indicated, the program will automatically switch to budgeting over several years. - Indicate the subdivision by period required.
- If you think you will use this print setting again, create a Customization.
Accounting Report with Suppliers Budget
The Accounting Report is similar to the one for Enhanced balance sheet with groups, with the difference that the display takes place in columns, as in the Accounts table.
You can therefore use it to get an instant view of the evolution of the Supplier accounts.

Investments Planning
The investment plan presents the expected evolution of the equipment, stocks, movable or immovable values that are necessary for the company.
With Banana Accounting, thanks to the forecasting with the double-entry method, you can track what the evolution of assets will be over time. You generate comprehensive forecasts, which you can organize in different ways. The program also calculates forecasts over several years.
The structure of the accounts is identical to the one used for accounting. When printing, you can indicate whether to select which values to display, the final ones only, the forecasted ones or both together.
You also have the Income statement forecasts, so you can display the evolution of amortization and interest. When a budget movement is changed, the forecasts are immediately updated. You can run simulations, assign a payment, add an investment, change sales and see how asset accounts evolve.
For the Investment Plan, you have the same options as in the Liquidity Planning and the Provisional Profit and Loss Account.
Using formulas
The formulas allow you to automate calculation of depreciation and interest. When you increase an investment, the Profit and Loss statement will also be instantly be updated. Formulas are particularly useful when making forecasts over multiple years.
Chart of Accounts
In the Budget column of the Chart of Accounts the forecast values for all accounts and balance groups are displayed, and therefore, for all those relating to investments equally. With a glance, you have an instant view of the values referring to the accounting period.

If you require more investment details, you may add accounts or groups.
Evolution charts
When you open the Charts window, positioning the cursor on an account or a group you will see the graph representing the evolution of the Suppliers.
In the legend are visible Current, Previous and Budget. By clicking on each one it is possible to hide or make visible the respective graphs.
Investments Account card with Budget data
Using the Budget Account card command will offer you the possibility to see in detail, all movements of the budgeted investments. You have the evolution, day by day, of every single Assets account and also of the depreciation accounts.

The Account card command allows you to specify if you want to see current or budgeted movements.
- Select budget movements.
- Indicate the account or the Investments group.
- Set up the Period.
- If you indicate a period that exceeds the accounting period, the program will automatically generate Forecasts over several years.
- If you indicate a group, you will see the movements of all the accounts belonging to that group.
- When you are in the Budget table, you can access the account card with a click on the small icon next to the account.
Investments in the Enhanced Balance sheet with groups
Through Enhanced Balance Sheet with groups you can choose which data columns to display and the reference period, to see the evolution of the investments by day, week, month, quarter, semester, year, etc.
- In Sections options you can indicate to display the Budget data.
- Choose the Investments group. You can also choose to display the accounts of each individual asset relating to an investment.
- Set up the Period.
If a period that exceeds the accounting period, is indicated, the program will automatically switch to budgeting over several years. - Indicate the subdivision by period required.
- If you think you will use this print setting again, create a Customization.

Accounting Report with Investments Budget
The Accounting Report is similar to the one for Enhanced balance sheet with groups, with the difference that the display takes place in columns, as in the Accounts table.
You can therefore use it to get an instant view of the evolution of the investments accounts.

Corporate financing plan
The corporate financing plan presents the expected evolution of the accounts relative to the origin of third party and own capital.
With Banana Accounting, thanks to the forecasting with the double-entry method, you have complete forecasts that you can arrange in different ways. The program also calculates forecasts over several years.
The structure of the accounts is identical to the one used for accounting. When printing, you can indicate whether to select which values to display, the final ones only, the forecasted ones or both together.
When a budget movement is changed, the forecasts are immediately updated. You can run simulations, assign a payment, add a new debit, change sales and see how liabilities accounts evolve.
For the Corporate financing plan, you have the same options as for the Liquidity Planing and the Provisional Profit and Loss Account.
Using formulas
The formulas allow you to automate calculation of depreciation and interest.Formulas are particularly useful when making forecasts over multiple years.
Chart of Accounts
In the Budget column of the Chart of Accounts the forecast values for all accounts and balance groups are displayed, and therefore, also for all those relating to funding. With a glance you get an instant view of the values referring to the accounting period.

If you require more details on third party capital, you may add accounts or groups.
Evolution graphs
When you open the Charts window, positioning the cursor on an account or a group you will see the graph representing the evolution of the financing of the company.
In the legend are visible Current, Previous and Budget. By clicking on each one it is possible to hide or make visible the respective graphs.
Account card with Budget for third party capital data
Using the Budget Account card command you have the opportunity to see on a day-to-day basis, how each account payable evolves, debt amortization, interest expense and understand the impact they have on financing.

The Account card command allows you to specify if you want to see current or budgeted movements.
- Select budget movements.
- Indicate the account or group of loans.
- Set up the Period
If you indicate a period that exceed the accounting period, the program will automatically generate Forecasts over several years. - If you indicate a group, you will see the movements of all the accounts belonging to that group.
- When you are in the Budget table, you can access the account card with a click on the icon next to the account.
Enhanced Balance sheet with groups
Through Enhanced Balance Sheet with groups you can choose which data columns to display and the reference period, to see the evolution of the funding of the company by day, week, month, quarter, semester, year, etc.

- In Sections options you can indicate the Budget data to be displayed.
- Choose the Third party capital group. You can also select to display the accounts of each individual funding account.
- Set up the Period.
If a period that exceeds the accounting period, is indicated, the program will automatically switch to budgeting over several years. - Indicate the subdivision by period required.
- If you think you will use this print setting again, create a Customization.
Accounting Report for Third party capital Budget
The Accounting Report is similar to the one for Enhanced balance sheet with groups, with the difference that the display takes place in columns, as in the Accounts table.
You can therefore use it to get an instant view of the evolution of third party accounts.

Project planning with profit and cost centres
Financial planning of projects allows you to take control over the income and expenses of a project. It is used to evaluate investments and returns on a project and to track its implementation.
Budgeting with the double-entry method allows you to indicate profit and cost centers as well. You only need to set up cost centers for the different projects, and in parallel to the balance and income statement forecasts, you will have the forecasts available for each individual project.
- Watch the video: Cost and profit centers
The projections are calculated on the basis of the initial balance and the forecasts entered in the Budget table. When a line is changed the budget, forecasts are instantly updated. You can produce simulations, reassign a payment, add an investment, modify sales and spot how the project changes.
Values of projects can be displayed in several ways.
Accounts table
Profit and Cost centers are set up in the Accounts table. After each movement, the updated balances of the forecast for the accounting period of reference are displayed in the Budget column. At a glance you can know immediately what the situation of the projects will be at the end of the year.

Evolution chart
When you open the Charts window, positioning the cursor on an account or a group you will see the graph representing the evolution of the projects.
In the legend are visible Current, Previous and Budget. By clicking on each one it is possible to hide or make visible the respective graphs.
Account card with budget data
With the Budget Account card command you have the possibility to display all the movements for the single project in detail, day by day.

The Account Card command allows you to specify whether you want to display current or budget transactions.
- Select budget movements.
- Indicate the cost or profit center accounts, or the group.
- Set up the Period.
- If you indicate a period that extends beyond the accounting period, the program will automatically switch to Forecasts over several years.
- When you indicate a group, you will see the movements of all the accounts belonging to that group.
- When in the Budget table, you can access the cost center tab by clicking on the small icon next to the account number.
Enhanced Balance sheet with groups
With the Enhanced Balance sheet with groups you can choose which data columns to display and the reference period, to see the evolution of the projects by day, week, month, quarter, semester, year, etc.
- In Sections options you can select the Budget data to be displayed.
- Select the Projects group. You can also choose to view the accounts of each individual project.
- Set up the Period.
If you indicate a period that extends beyond the accounting period, the program will automatically switch to Forecasts over several years. - Indicate the desired subdivision by period.
- If you think of continuing to use this print setting, create a customization.
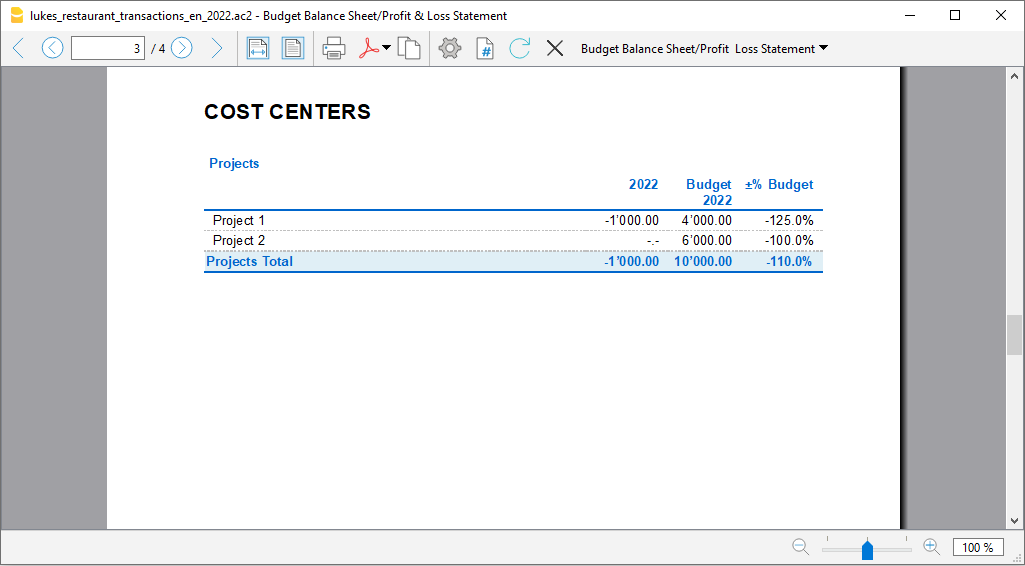
Projects Budget Accounting report
The Accounting report is similar to the Enhanced balance sheet with groups, with the difference that the display takes place in columns, as in the Accounts table.
It can therefore be used to display an instant view of the evolution of the projects.

Planning with segments per sector and branch
The financial planning by sectors allows you to run budget and income statement forecasts for each sector or branch of the company. With the Segments, you can then evaluate the different areas of the company and understand what contribution it makes to the overall business.
The forecast, with the double-entry method, also allows you to indicate the segments which are set in the Accounts table, at the end of the chart of accounts and are used both for accounting and forecasting. When recording the movements of the forecast, the accounts of the segments must be entered when necessary. Banana Accounting executes the Balance Sheet and Profit and Loss Statement of the forecast as well, with the subdivision by the different segments.
The projections are calculated on the basis of the initial balance and the forecasts entered in the Budget table. When a budget movement is changed, forecasts of the project are instantly updated. You can produce simulations, reassign a payment, add an investment, modify sales and spot how the project changes.
Sector or branch data with segments can be displayed in several ways.
Chart of Accounts
Segments are set up in the Chart of Accounts. When indicating the segments for the Balance Sheet and Profit and Loss statement accounts, the balance of the segment will always result as zero in the accounts.

Account card with Segments budget data
With the Budget Account card command you have the possibility to examine all the movements for each segment in detail.
 The Account card allows you to specify whether you want to display the current or budget movements.
- Select budget movements
- Indicate the required segment, or the group.
- Set up the Period.
If you indicate a period that extends beyond the accounting period, the program will automatically switch to Forecasts over several years. - If you indicate a group, you will see the movements of all the segments belonging to that group.
- When in the Budget table, you can access the Budget Account card by clicking on the small icon next to the account number.
Enhanced Balance sheet with groups
With the Enhanced Balance sheet with groups you can choose to divide the values into separate columns for each segment. Thus, you dispose of the Balance Sheet and Profit and Loss statement for each sector.
- Indicate that you wish to display the Budget values in the Columns section.
- In Sections you may choose to view the balance sheet or the profit and loss statement only.
- Set up the Period.
If you indicate a period that extends beyond the accounting period, the program will automatically switch to Forecasts over several years. - Indicate the required subdivision by segments.
- If you plan to continue to using this print setting, create a customization.

Accounting report for the Budget of Segments
The Accounting report is similar to the Enhanced balance sheet with groups, with the difference that, the display takes place in columns.
It can therefore be used to display an instant view of the evolution of the segments.

New year for financial forecasting
The Banana Accounting function to Create a New Year also takes up the budget movements.
For each row in the table Budget, in the New Year column, you have the possibility to indicate:
- Whether the operation is to be carried forward or not,
- If the date is to be kept or replaced with the date of the new year.
Creating the budget for the new year is therefore simple, because you have to modify or add the expense and income items that are expected to change.
Next year’s budget in the current accounting
In Banana Accounting, in addition to the Budget column (used to enter the current year's budget), you can add a custom column to manually enter the budget for the following year. This allows you to plan the future budget without changing the current year's one.
This feature is particularly useful, for example, for associations, where at year-end members are asked to approve both the final accounts and the budget for the following year.
How to add the Next Year Budget column
You need to add the Next Year Budget column in the Accounts / Categories table.
- Go to the Accounts table of your accounting file.
- From the Data menu > Columns setup > Add.
- Enter the title: Next Year Budget (e.g. Budget year xxxx).
- Set Data type = Amount, so Banana automatically calculates the group totals.
- Confirm with OK.
The new column for the next year's budget will be visible in the Accounts table.
Entering the values
In the column you added, enter the estimated amount for the next year for each cost and income account.
- Income (Credit column) → negative amounts.
- Costs (Debit column) → positive amounts.
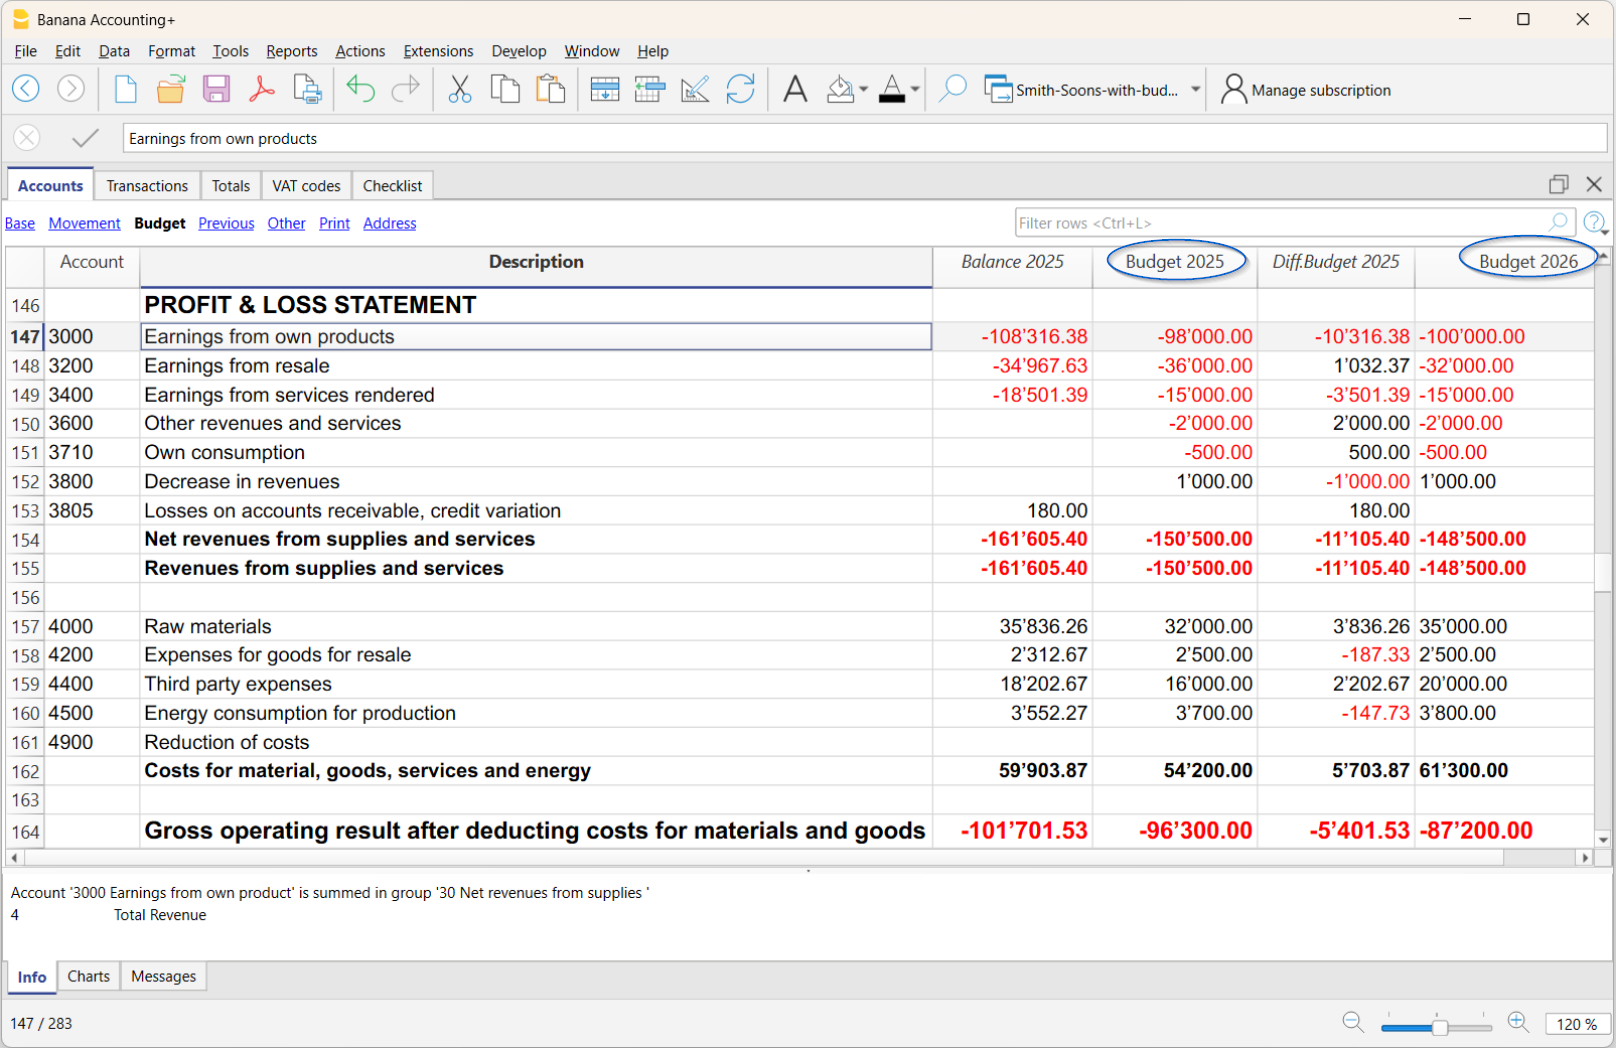
Print the Balance Sheet with the integrated Next Year Budget
Once all the budget values have been entered in the Next Year Budget column, you can print a balance sheet, integrating the new column in addition to the current year's budget column.
To print, go to:
- Reports > Enhanced Balance Sheet with groups menu
- In the Profit and Loss Account Columns section, activate:
- Current (if you want to display the actual column)
- Budget, Difference (if you want to display the variance column between Budget and Actual of the current year)
- Click on the Advanced button and then on Add:
A dialog opens listing all columns from the Accounts table that you can include in the report- Activate the added column for the Next year’s budget
- Confirm with OK.
- In the Profit and Loss Account Columns section, activate:
The balance sheet will then show, in addition to the current data, also the budget for the next year.
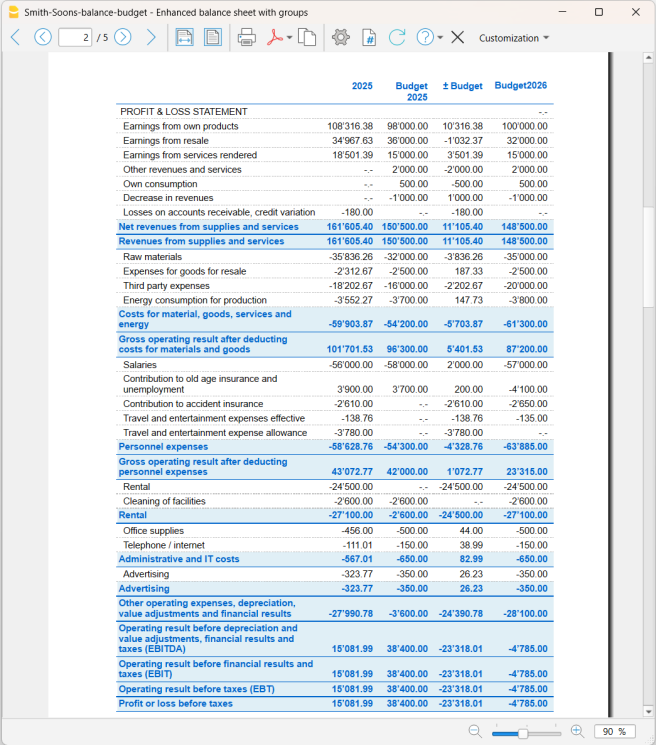
Preparing the Liquidity Plan
The liquidity plan is very important not only for startups, which need to assess possible investments based on available financial resources, but also for established companies to maintain balance over time.
A careful analysis of cash flows allows you to monitor that there are always sufficient funds available to meet financial obligations, such as salary payments, suppliers, taxes, and other operating expenses. Preparing a liquidity plan is essential for several reasons:
- Strategic planning: provides crucial information for strategic planning and decision-making, allowing the company to seize investment and growth opportunities promptly.
- Operational sustainability: ensures that the company always has sufficient funds to operate without interruptions, maintaining operational continuity.
- Prevention of liquidity crises: avoids emergency situations where the company cannot meet its financial obligations, preventing potential insolvency or bankruptcy.
- Optimization of financial costs: allows for efficient planning of financial resources, reducing financing costs and improving the return on available resources.
- Improvement of relationships with third parties: effective liquidity management strengthens the trust of investors, suppliers, employees, and other stakeholders in the company.
How to prepare the liquidity plan
To draft a liquidity plan, it is necessary to analyze a series of historical data and documents.
Data collection
Start by gathering a series of useful documents for the planning process:
- Bank Statements: to check recent transactions and balances from bank, postal, and credit card statements.
- Debtors and Creditors Accounts: to examine the receivables the company needs to collect and the payables it needs to settle.
- Current Balance Sheet: to draft a current balance sheet for an overview of all accounts.
- Balance Sheets of previous years and periods: to assess, based on historical data, especially revenue trends.
Banana Accounting Plus offers innovative features to create a liquidity plan, using the same chart of accounts as the accounting system and integrating it into the same accounting file without the need for separate spreadsheets.
To create the liquidity plan, forecasts are entered into the Budget table as regular entries, using the Debit, Credit, Amount columns, VAT codes if any, cost centers, and segments.
Estimating Inflows and Outflows
When forecasting costs and revenues, it is better to be cautious. Therefore, it is recommended to not underestimate costs and not overestimate revenues, while also considering unforeseen events to avoid liquidity shortages. It is also advisable to develop a strategy to identify which costs can be reduced because they are not strictly necessary and which revenues can be optimized.
Future Outflows
Enter forecasts for future costs based on historical data and potential extraordinary expenses:
- Operating Costs: forecast operating expenses such as salaries, rent, utilities, and production costs.
- Debts and Payments: plan payments to suppliers and loan repayments.
- Other Outflows: consider other expenses like taxes, extraordinary maintenance, or investments.
Future Inflows
Enter forecasts for future revenues:
- Revenue: based on sales from the previous year for the same period, market trends, and marketing strategies, prepare estimates for sales or services. If reliable data is not available, rely on historical data from previous years.
- Other Inflows: include other possible sources of income, such as interest from investments or potential loans.
Below is an image of the table. For an explanation of the columns, refer to the page Budget Table Columns.

Liquidity Plan from the Balance Sheet
Use the command Enhanced Balance Sheet with Groups to access the forecast balance sheet report.
- In the Sections options, enable the display of the Budget for the Balance Sheet (Assets and Liabilities).
You can view current (accounting) values, budgeted values together or separately. - Set the Period.
If you specify a period beyond the accounting period, the program automatically generates multi-year forecasts. - Specify the Period Breakdown you want.
- In the Rows options, you can exclude accounts and view only the groups.
- If the setup will be used in the future, it is advisable to create a Customization.
Liquidity Plan Report from the Accounts Table
The Accounting Report is similar to the Enhanced Balance Sheet with Groups, with the difference that data is displayed in columns, like in the Accounts table.
You can use the Accounting Report to get an immediate view of the liquidity accounts' evolution.

Banana Integrated Investment Accounting
Banana Integrated Investment Accounting combines professional double-entry accounting with investment management in a single, integrated solution. Manage shares, bonds, funds, and other financial instruments in multiple currencies, directly within your accounting file.
It brings advanced investment accounting features, typically found only in specialized software, within reach of businesses, accounting professionals, and private investors.
By integrating investment management directly into double-entry accounting, every investment transaction becomes part of your financial accounting. You can keep track of investments, book values, realized and unrealized gains or losses, and exchange rate differences, while maintaining an up-to-date Balance Sheet and Profit & Loss statement.
- ▶ Banana Integrated Investment Accounting - video 3'15"
Using Investment Accounting in a Separate File
Investment Accounting can also be managed in a separate file, independently from your main accounting file. This approach may be useful when:
- you use another software solution for your financial accounting;
- you want to keep detailed investment data separate from your main financial accounting;
- you want to maintain separate investment accounting and integrate only the required data into your main accounting, for example at the end of the year.
In this way, Banana Investment Accounting can be used either as a fully integrated solution within your financial accounting or as a separate system dedicated to managing and monitoring your investments.
Portfolio Accounting is officially available from Banana Accounting Plus release 10.2.8. For the time being, it is available with the Banana Accounting Plus Advanced plan for only CHF 179/year (€169/year). In the future, it may be offered under a specific subscription plan.
A Valuable Tool for Accounting Professionals
An increasing number of companies and individuals hold significant and increasingly complex investment portfolios. For accounting professionals, this creates new opportunities to provide specialized, value-added services.
Banana Investment Accounting makes it possible to manage financial accounting and investments within the same accounting system. By extending traditional accounting services to include investment accounting, professionals can better serve clients with complex financial assets and create opportunities for additional services, including financial reporting, investment monitoring, and advisory support.
Banana Investment Accounting can be particularly useful for:
- Companies holding and managing different types of investments
- Pension funds managing multi-asset investment portfolios
- Family offices managing multi-asset investment portfolios
- Independent accountants providing investment accounting services
- High-Net-Worth Individuals and Ultra-High-Net-Worth Individuals managing complex investment portfolios
- Non-profit organizations managing investments or endowment funds.
The Advantages of Double-Entry Accounting
Many people managing investments still rely on accounting software that does not integrate investment management. As a result, they often need separate spreadsheets to calculate book values, gains and losses, and other investment-related information. This can be time-consuming and makes reconciliation more difficult, especially when investments are held with multiple banks or custodians that provide reports using different formats and valuation methods.
With Banana Investment Accounting, investment transactions are integrated directly into a consistent double-entry accounting system. Investment data and financial accounting remain connected and can be reconciled and verified at any time.
Key advantages include:
- In the Items table, you can define your investments, including shares, bonds, funds, and other financial instruments, together with information such as the investment ID, currency, Asset Account, opening quantity, and prices.
- In the Transactions table you can record purchases, sales, dividends, interest, charges, and other investment transactions, together with the investment ID, amount in transaction currency, exchange rate, quantity, and unit price.
- When an investment is sold, the Investment Accounting extension can calculate the realized gain or loss and, where applicable, the exchange rate gain or loss, and create the related accounting transactions.
- At any time during the year, the extension can calculate unrealized gains and losses and create the adjustment transactions required to align book values with current market prices and exchange rates.
- The accounting data is immediately reflected in the Balance Sheet and Profit & Loss statement, providing an up-to-date view of your financial position.
- The detailed investment and accounting data remains available for reconciliation, customized reporting, performance analysis, and tax-related reporting.
- Your accounting data remains under your control: Banana Accounting runs locally on your computer, and you decide where your accounting files are stored.
Investment Accounting
Multi-currency investment accounting is one of the most complex areas in accounting.
It combines financial accounting, based on the double-entry method, with the need to track individual investments in a way that resembles inventory management, including quantities, purchase prices, book values, and market values.
- Introduction to Investment and Portfolio Accounting
Professional accountants working in finance are generally familiar with investment accounting and its specific requirements. For those who are less familiar with this specialized area, investment accounting can be challenging. Therefore, we have prepared a theoretical guide that explains the key concepts and challenges, including how to determine the book value of investments and how to calculate realized and unrealized gains and losses, including those arising from exchange rate differences. - How to start
A practical guide that explains the logic and workflow of Banana Investment Accounting. It covers the main steps:- Set up the accounting file and the information required for your investments.
- Record daily investment transactions in chronological order and follow the appropriate workflow to ensure that book values are calculated correctly.
- At the end of the year, update investment values to reflect current market prices and exchange rates and record the corresponding unrealized gains or losses.
- Banana Investment Accounting can also be used by finance and accounting professors to improve investment accounting education.
Table-based accounting
Banana Accounting uses a table-based interface similar to Excel, where accounting and investment data is entered and displayed in tables. This provides a clear overview of the information and makes it easy to search, select, and modify data.
If you are already familiar with investment accounting, this brief overview will help you understand how Banana Accounting works and whether it fits your needs. You will also find links to more detailed information.
A typical Investment Accounting template or file includes the following elements:
- File properties
- Company names, Currency and Accounting Period.
- Settings specific to Investment accounting.
- Accounts Table
- It contains the chart of accounts and defines how data is grouped for the Balance Sheet and Income Statement.
- This is where you enter the Opening amounts.
- Items Table
- It lists and identifies all investments, such as bonds, shares, and funds.
- The Asset Investment column links each security to its corresponding Balance Sheet account — a key element of the entire solution.
- Exchange Rate Table
It defines the currency codes and stores both opening and current exchange rates for accurate multi-currency management. - Transactions Table
- It records all investment transactions.
- This is where you enter the double-entry account, amounts, and exchange rate for financial accounting.
- This is where you enter the Item code, quantity, and price required for investment accounting.
- Double-Entry Accounting Reports
The software provides access to all standard accounting reports, such as the Balance Sheet, Income Statement, Account Cards, and more. - Investment Accounting Extensions
You need to install the Investment Accounting Extension, which provides specific functionalities for investment management, including profit and loss calculations, valuation reporting, and other analytical tools tailored to securities accounting.
Accounts Table
Within the Accounts table you define all the accounts including the ones necessary for the Investment accounting: Balance Sheet accounts for investments, Profit and Loss Accounts.
- The accounting chart is fully customizable based on your specific needs.
- In the Account table you also enter the opening amounts and you see the current balance.

Items Table with Investments
In the Items table, you enter the information for each investment.
Using the Asset Account, each investment is linked to the corresponding investment account specified in the Accounts table.
You also enter the opening quantity and price.

Transactions Table with Investment Details
The Transactions table is the core of the accounting system, where you enter double-entry accounting transactions.
- For investment transactions, you specify the investment ID, quantity, and price.
- You can easily manage all the information in one place, including purchases and sales of investments, realized and unrealized gains or losses on investments, realized and unrealized exchange rate gains or losses, commissions, expenses, and more.
- You can import transactions from bank statements and create rules that automatically complete them.

Balance Sheets & Income Statements
With a predefined, fully customizable chart of accounts and presentation, you can manage the accounting of any type of business, financial corporation, foundation, non-profit organization, or private fortune.
Instantly generate Balance Sheets, Income Statements, and all other double-entry accounting reports ready for auditing.
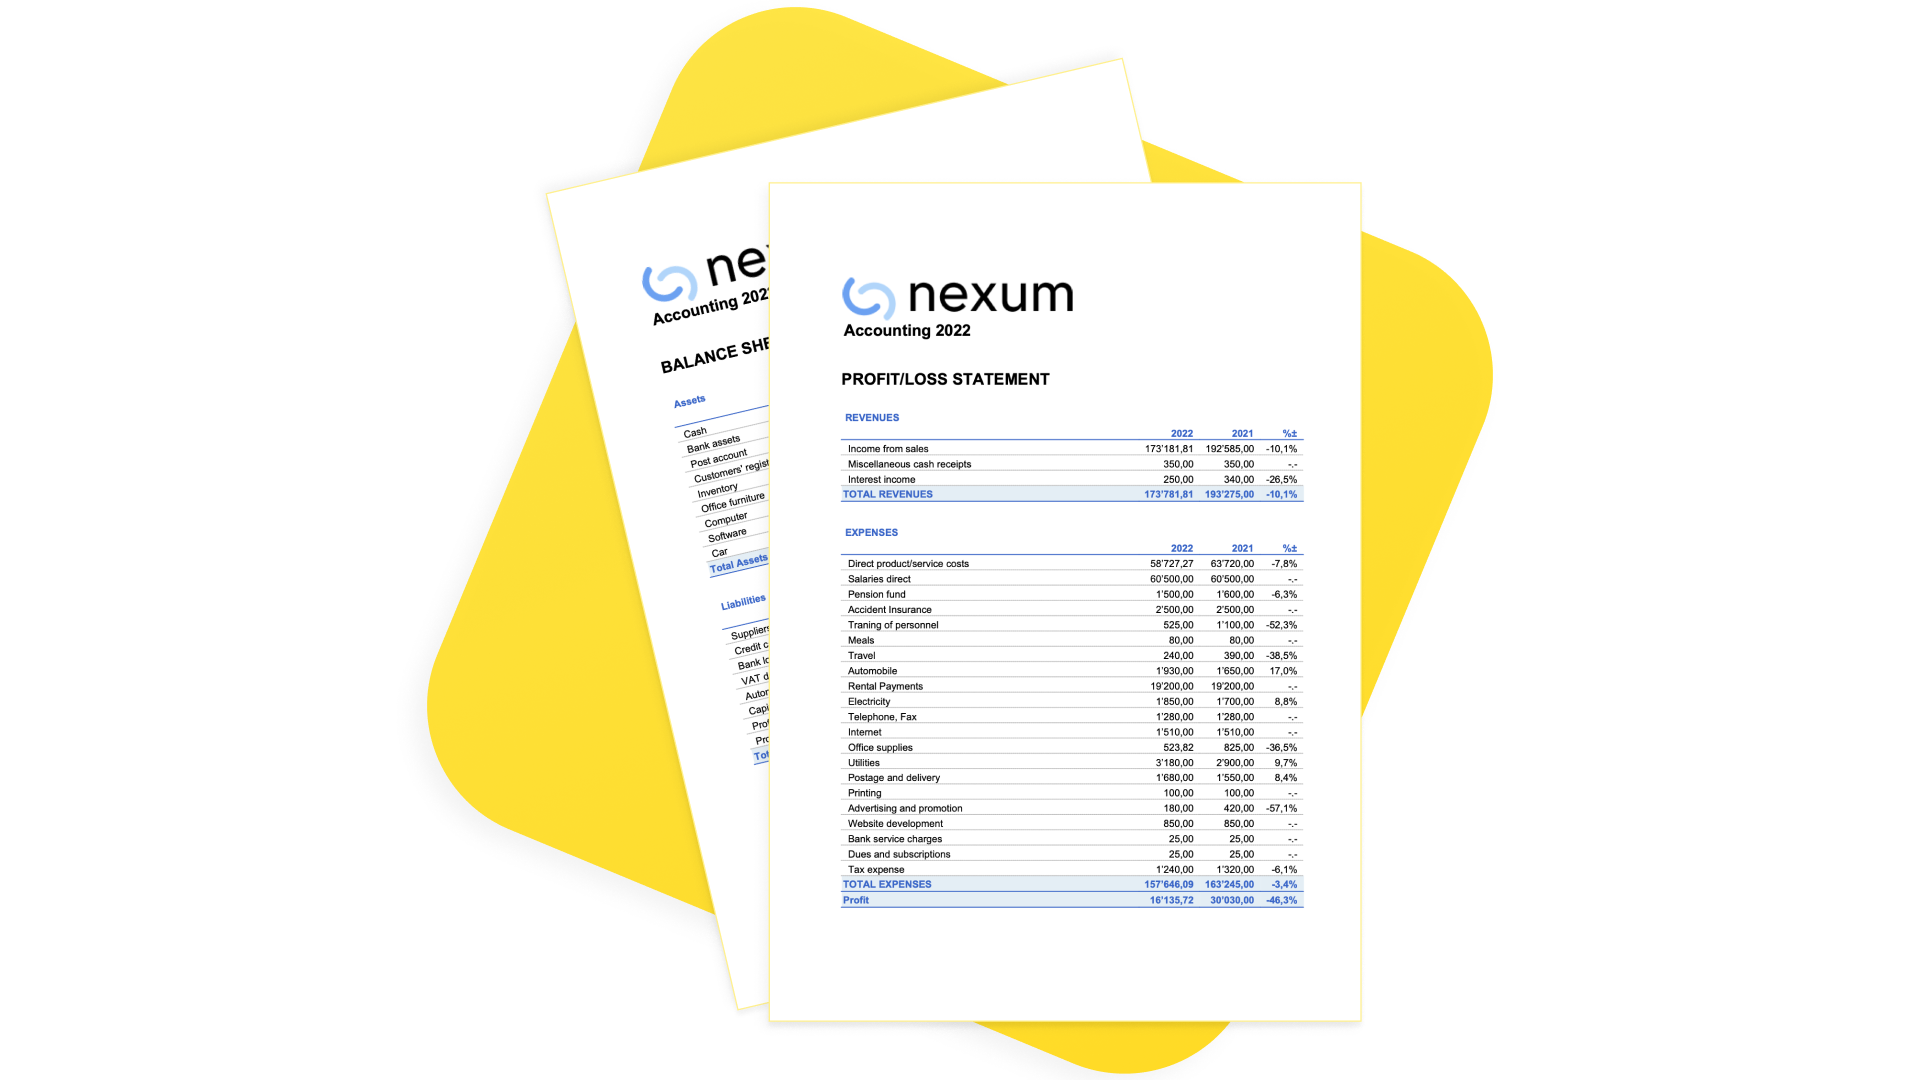
Investments and Portfolio Reporting
The software provides multiple investment and portfolio reports.

Documentation
Limitations
The current version has some limitations:
- Market prices are not automatically retrieved from financial data providers.
Current prices can be entered manually or imported using the Investment Accounting Extension. - The current account value of each item is available as a report, but it is not displayed in the Items table.
Dedicated Newsletter
Subscribe to our newsletter to stay updated on new features and tips for Investment Accounting in Banana. Interested? Just write to us at info@banana.ch and mention that you’d like to subscribe to the Investment Accounting newsletter.
Is there more you need?
The solution is already used by several customers, but we still consider it to be under development, as we continue to improve it based on user feedback and requests.
We also plan to add the automatic import of investment data (ISIN, quantity, price, commissions) from bank statements.
Please feel free to reach out if you have any specific questions or requests. Given the time invested in development and the high value it provides to customers with specific investment accounting needs, we may offer it through a specific subscription plan in the future.
How to start with an Investment Accounting
This page outlines the main steps required to set up an Investment Accounting file in Banana Accounting and links to the detailed documentation for each topic.
Download Banana Accounting
You need to install Banana Accounting Plus on your computer.
Investment Accounting is available with Banana Accounting Plus version 10.2.8 or later, and is included at no additional cost in the Advanced plan, available for only CHF 179/year (€169/year).
- Download Banana Accounting+ (version 10.2.8 or later).
See how it works by using one of our templates. - Adapt your current accounting in just a few steps.
- Install the Investment Accounting extension using Extensions > Manage Extensions.
Before You Start
Investment Accounting combines double-entry accounting with investment management to manage investments within a single accounting system
This page assumes that you are already familiar with concepts such as:
- book value of investments
- valuation methods
- realized and unrealized gains and losses
- exchange rate gains and losses.
If you are new to investment accounting, please refer to the Theoretical Introduction before continuing.
Setting Up the Accounting File
There are two ways to start working with Investment Accounting:
- Adapt an existing accounting file
If you already use Banana Accounting, you can add the Investment Accounting functionality to your existing accounting file by configuring the required accounts, Items, and settings. Each Asset account represents the accounting value of one or more investments. - Start from a template
You can also create a new accounting file from one of the provided templates. Templates already include the required tables, columns and settings, allowing you to start working immediately.
Available templates:
Setting Up the Exchange Rate Table
The Exchange Rate Table defines the currencies used in the accounting file and stores both opening and current exchange rates.
Before setting up the Accounts table, you need to define the currencies in the Exchange Rate Table.
- The current exchange rate is used as the default for revaluation and for calculating exchange rate differences (unrealized exchange rate gains or losses).
- The opening exchange rate is used to convert the opening amount of an account or the opening value of investments.
Setting Up the Accounts Table
Set up the chart of accounts and its structure (see Account table).
- Adapt the chart of accounts to your needs by modifying, adding or removing accounts and groups.
- Add the Asset accounts that will be used for the investments.
- For each Balance Sheet account with an opening amount, specify the opening amount in the account currency.
- Managing Cryptocurrencies
Cryptocurrencies such as Bitcoin and Ether can be managed like other currencies. The main difference is that they may require 6, 18, or more decimal places. Templates are usually set up with 2 decimal places, but you can easily convert the accounting file to use more decimal places for foreign currencies.- Menu Tools > Convert to a new file.
Setting Up the Items Table
Each investment (share, bond, fund, ETF, etc.) is represented by an Item. In the Items table you set up the list of securities (see Items table).
- Create an entry (a row with an ItemId) for each investment.
- Each Item must be linked to an Asset Account.
- The Item and its Asset Account must use the same currency.
- The sum of the opening values of all Items linked to the same Asset Account should equal the opening amount of that Asset Account.
- The sum of the current values of all Items linked to the same Asset Account should equal the current balance of that Asset Account.
- Specify the opening quantity and the opening price.
- The opening quantity and price should match the current quantity and price in the previous year's file.
- Also specify the Asset Type (1 Shares, 2 Bonds).
- The program calculates the current quantity by adding the opening quantity to the quantities of all transactions for the corresponding Item (ItemId).
- You need to manually enter the current price of the investment.
- You can also use the Update Market Prices command.
Enter or Import transactions
Transactions record both the accounting information and the investment-specific information.
In the Transactions table, you enter the transactions.
- Enter normal accounting transactions (debit credit).
- You can enter transactions manually.
- You can import transactions from a bank statement.
- Complete the Investment transactions.
For transactions involving investments, you need to enter additional investment information.- Enter at least the ItemId.
- For purchase and sales also, enter the Quantity.
- When you enter the quantity and an amount is already present, the program automatically calculates the unit price.
- Make sure that the Balance Sheet account is the same as the Asset Account defined for the investment.
- If you want to separate commissions, bank charges, interest, etc., you need to split the transactions across multiple lines.
- For each element, you should create a separate line.
- When selling investments, you also need to calculate the realized gain or loss on the investment and the related exchange rate gain or loss.
- Use the Calculate sales data command to automatically create the supplementary transactions.
End of Year Revaluation
Year-end revaluation updates the accounting value of investments to their market value by generating unrealized gain or loss transactions.
At the end of the year, or whenever you want to prepare financial statements based on market values, you need to recognize unrealized gains and losses.
- In the Exchange Rate table, update the current exchange rate with the rate you will use at the end of the period.
- In the Items table enter the market price of each investment in the Current Price column.
- Use the Create Adjustment Transactions command.
- The program automatically creates the transactions required to adjust the value and record the unrealized gain or loss.
- The Quantity column will contain a neutral number (±123.00), so that the quantity can be used to calculate the transaction amount without changing the current quantity of the Item.
- For exchange rate differences, use the Create Exchange rate differences command.
End of Year Operations and Checks
Before printing the final Balance Sheet, you need to complete all end-of-year adjustments and checks. See:
Adapt existing accounting file for Investment Accounting
If you already have a double-entry accounting file in Banana Accounting, you can extend it with Investment Accounting functionality instead of creating a new file. This page explains the additional configuration steps required before you can start managing investments.
Add Items Table and Transactions columns
If your accounting file was not originally created for Investment Accounting, you first need to enable the required tables and columns.
Complete the following steps:
- Add the Items table and the investment-specific columns to the Transactions table.
- Complete the fields by entering all the requid information about your investments.
After enabling the functionality, make sure that the ItemId column is visible in the Transactions table: menu Data > Display Columns, and check the ItemId column.
Adjusting the Chart of Accounts
Review your chart of accounts and add the accounts required for investment accounting.
In particular:
- Add the Asset Accounts that will hold your investments;
- Add any income and expense accounts required for investment transactions, such as realized and unrealized gains and losses, commissions, interest and dividends.
Note: If you currently use an Income & Expenses accounting file, convert it to a Double-entry Accounting file before continuing.
Change the Decimal Precision for Unit Price
Some investments require prices with more than four decimal places.
If necessary, increase the Unit Price decimal precision using:
This is particularly useful for cryptocurrencies, bonds and other securities quoted with many decimal places.
Example Templates for Investment Accounting
If you already have an accounting file, you can adapt it for Investment Accounting. Before making the necessary changes, we recommend reviewing one of the example templates, which illustrates the recommended accounts, tables and settings.
The templates illustrate the recommended structure of an Investment Accounting file and show how securities, Asset Accounts, Items and investment transactions work together.
You can use these templates either as a starting point for a new accounting file or as a reference when adapting an existing one.
The following templates are provided as reference examples for Investment Accounting:
- Multi-currency Example Template
The template includes:- Investment Asset Accounts (using account names instead of account numbers).
- The Items table with sample investiments.
- Profit and loss accounts for realized and unrealized gains and losses.
- Exchange rate gain and loss accounts.
- Example investment transactions.
The tutorial file contains practical examples of investment transactions in a multi-currency accounting file.
- Double-entry Example Template with accounts and tables
The template includes:- Asset Accounts (identified by account names rather than account numbers).
- The Items table with sample investments.
- Profit and loss accounts for realized and unrealized gains and losses
- Example investment transactions.
This template is intended for investment accounting in a single accounting currency.
Theoretical Introduction to Investment and Portfolio Accounting
Multi-currency investment accounting combines financial accounting, based on double-entry bookkeeping, with investment accounting, which uses inventory-like information such as quantities, unit prices, and investment values.
This combination makes it possible to manage both the accounting value of investments and the information required to track individual securities, including their quantities, prices, and valuations in different currencies.
Investment Accounting requires an understanding of both financial accounting and the specific principles used to track and value investments. This introduction provides a practical overview of these concepts and explains how they are applied in Banana Investment Accounting.
It covers key topics such as quantities and unit prices, book value and market value, investment valuation, realized and unrealized gains or losses, and the effects of exchange rate changes on investments denominated in foreign currencies.
This introduction provides a high-level overview of Investment Accounting and does not address specific accounting, regulatory, or tax requirements that may apply to individual circumstances or jurisdictions. Users should verify the appropriate accounting and tax treatment for their circumstances with their auditors or professional advisors.
Banana Investment Accounting can also be used by finance educators as a practical tool for teaching Investment Accounting.
Terminology
In the industry, several equivalent terms are used, which may vary depending on the context, such as Investment Accounting, Portfolio Accounting, and Securities Accounting. In this text, the term Investment Accounting will be used as a synonym for Securities Accounting. Portfolio Accounting, on the other hand, more specifically refers to information and trading systems for securities.
In Banana Accounting, investment accounting uses the inventory functionalities, specifically the Items table and the Item ID as the code for the security. Each Item therefore represents a security, although Items can also be used simply for other purposes, such as creating invoices.
When an Item is linked to an Asset Account, the program treats it as an asset with an accounting value. The term “asset” is therefore applicable to securities management, but it can also refer to other types of assets or, hypothetically, even to other balance sheet elements, including liabilities.
The use of different terminology can naturally be confusing, but this situation arises from the program’s flexibility, which allows the same features to be used in multiple ways. The investment accounting setup is therefore an additional extension of these core functionalities.
The Purpose of Investment Accounting
Online investment platforms provided by your bank or broker are designed to help you follow the market, compare assets, and make informed buy or sell decisions. However, they do not give you full control over your investments from an accounting perspective.
The purpose of Investment Accounting is to provide a comprehensive financial overview of your investments. It allows you to maintain an inventory of all your securities, track quantities and historical changes, and seamlessly integrate investment values, purchases, sales, and market fluctuations into your accounting records. Additionally, it ensures that revenues such as interest and dividends and costs like expenses and commissions are accurately reflected within your Balance Sheet and Income & Expense accounting.
Beyond financial tracking, Investment Accounting helps you optimize the fiscal impact of your investments, ensuring that tax-related aspects such as capital gains, withholding taxes, and deductions are properly accounted for. It also supports compliance and auditing, providing structured and transparent records that facilitate regulatory reporting and financial reviews.
Investment Accounting Goals and Future Developments
Over the years, we have refined the Investment Accounting solution in close collaboration with financial specialists, particularly those in the Swiss financial sector.
Our objective has always been aligned with their needs: to deliver a straightforward, reliable, and professional way to manage investments directly within financial accounting software. Traditionally, such functionality has only been available in specialized and costly financial systems.
With Banana Accounting, we have focused on creating a solution that is simple, intuitive, and efficient, yet powerful enough to give you full control over your investments while streamlining compliance and reporting.
We have also developed and introduced highly innovative features, such as the unique neutral numbers (±123.00) — exclusive to Banana Accounting. This groundbreaking concept makes it incredibly easy to record transactions that affect the value of investments without changing their quantity, ensuring both precision and simplicity in day-to-day accounting operations.
We highly value your feedback and suggestions, as they help us continuously improve the solution, its documentation, and this introduction.
Please use the form at the bottom of this page to get in touch with us — we’ll be glad to hear your thoughts and ideas.
Learning Tool for Finance Students
In line with our company’s mission, we aim to provide a solution that enhances financial literacy and supports practical learning.
By integrating investment management directly into Banana Accounting, students of Finance, Accounting, and Auditing can explore how an investment accounting solution works, gain hands-on experience, and avoid time-consuming manual exercises.
Using a professional accounting tool, they can easily experiment with real-world and complex scenarios, from managing investments to recording transactions, and immediately see how each operation affects the Balance Sheet and the Income Statement.
Differentiating Investments from Bank Deposits & Cryptocurrency Holdings
From an accounting perspective, it is crucial to distinguish between bank deposits or cryptocurrency holdings and investments (securities) based on how they are recorded and valued.
Bank Deposits & Cryptocurrency Holdings – Tracked with an Accounting Balance
- Bank deposits and cryptocurrency holdings are monetary assets recorded as part of a company’s or individual’s cash or financial reserves.
- These holdings are easily tracked using a standard accounting balance, as they have a single value expressed in the account’s currency.
- If held in foreign currency or cryptocurrency, their value is adjusted using the exchange rate at the reporting date.
- Example: A bank account with $10,000 is recorded as a cash asset, converted into the base currency if needed (e.g., €9,090 at an exchange rate of 1.10).
Investments (Securities) – Require an Inventory-Like System
- Investments such as stocks, bonds, and mutual funds share similarities with inventory management, as they involve:
- A quantity (e.g., number of shares or bond nominal value).
- A unit price (e.g., market price per share or bond percentage value).
- An exchange rate, if denominated in a foreign currency.
- Unlike bank holdings, investments cannot be tracked using a simple accounting balance because their value changes not just due to exchange rates but also due to market price fluctuations and transactions (buying, selling, reinvesting).
- Proper Investment Accounting ensures that each transaction and value change is accurately recorded, much like how an inventory system tracks stock levels and price variations over time.
Why Investment Accounting Matters
Because investments behave more like an inventory of financial instruments, traditional accounting methods used for bank balances are not sufficient to track them accurately. Instead, a dedicated investment accounting system is required to properly manage:
- Purchases & Sales – Tracking quantities and cost basis.
- Market Value Changes – Adjusting for price fluctuations.
- Revenues & Expenses – Including dividends, interest, and commissions.
- Exchange Rate Effects – Converting values in foreign currencies.
By structuring investment records similarly to inventory management, Investment Accounting ensures full control and accurate reporting of financial assets.
Structure of the Investment Accounting File
Banana Accounting is a highly modular financial accounting system that allows you to create files with features activated only when needed.
The multi-currency investment accounting setup is among the most advanced, as it combines double-entry financial accounting with inventory-style management for tracking securities, quantities, and valuations. A typical Investment Accounting template or file includes the following elements:
- File properties
- Company names, Currency and Accounting Period.
- Settings Specific to the Investment accounting .
- Accounts Table
- Contains the chart of accounts and defines how data is grouped for the Balance Sheet and Income Statement.
- Enter the Opening amounts.
- Items Table
- Lists and codes all investments, such as bonds, shares, and funds.
- The Asset Investment column links each security to its corresponding Balance Sheet account — a key element of the entire solution.
- Exchange Rate Table
Defines the currency codes and stores both opening and current exchange rates for accurate multi-currency management. - Transactions Table
- Records all investment transactions.
- Enter the double entry account, amounts and exchange rate for the financial accounting.
- Enter the Item code, quantity and price specific for the Investment accounting.
- Double-Entry Accounting Reports
Provides access to all standard accounting reports such as Balance Sheet, Income Statement, Account Cards, and more. - Investment Accounting Extensions
You need to install the Investment Accounting Extensions to add specific functionalities for investment management, including profit and loss calculations, valuation reporting, and other analytical tools tailored to securities accounting.
The Investment Accounting Elements
To understand investment accounting, it is important to understand the following key elements:
- Accounting period.
- Information regarding the investment.
- Investment Classification by Measurement Type.
- The Quantity element.
- Price and valuation methods.
- Investment account.
The connection between the financial accounting and the Investments Inventory System. - Book Value and Book Price.
- Realized Gains and Losses
- Unrealized Gains and Losses
- Investments Revenues and Costs.
- Impact of exchange rates
- Double-Entry Investment Transactions.
- Investments and Account Reconciliation.
- Investments (Items) card.
Accounting period
Financial accounting is always relative to a specific period. In the accounting you specify the start and end date:
- The balance sheet is prepared for a specific date (instant).
- The Balance at the beginning of the period (opening balance).
- The current balance or the balance at the end of the period.
- The Profit & Loss is prepared for a period (duration).
- Revenues, costs, gains, losses, and taxes are always related to a specific period.
Inventory systems do not have an accounting period concept. They record purchases and sales continuously over time.
There is a conceptual difference in the temporal logic between Financial Accounting, an Inventory system, and Portfolio management systems.
- Portfolio management systems
- Only track events that affect the change in a position (purchase or sale).
- The profit or loss is calculated based on the difference between purchase and sale.
- Accounting systems
- Require an initial balance and therefore a specific valuation. Quantity and price per unit for each investment at the beginning of the period.
- Require an end balance and a valuation of each investment. Quantity and price per unit for each investment at the end of the period.
The end quantity and price will become the opening quantity and price for the following year. - Under the fair value method, the Investment Value is adjusted and recorded as an unrealized gain or loss.
If the Investment Value increases over time, an increase in value and a gain are recorded for the period and contribute to the overall profit or loss. - When an investment is sold, the realized gain or loss is determined by comparing the value of the sale with the Book Value attributable to the quantity sold.
Information Regarding the Investments
To properly manage and account for investments, it is essential to record key identifying information and classify them based on their measurement type.
Every investment should be clearly defined with standard financial identifiers:
- Investment Id (ItemId):
The ItemId is used to uniquely identify the Investment. You can use a ticker symbol or an ISIN as the ItemId. - Ticker Symbol.
The unique exchange-listed symbol for publicly traded securities (e.g., AAPL for Apple Inc.). - ISIN (International Securities Identification Number).
A globally recognized unique identifier for financial instruments (e.g., US0378331005 for Apple Inc.). - Description.
The full name and type of the investment (e.g., "Apple Inc. – Common Stock" or "U.S. Treasury Bond 10Y"). - Investments can be grouped to provide clearer overviews and totals.
Investments are entered in the Items table.
Investment Classification by Quantity Type
Investments can be classified based on how their quantity and Unit Price are expressed:
- Investments Measured by Nominal Value (Asset Type = 2)
(e.g., Bonds, Treasury Notes)- These securities are expressed in terms of face value (nominal value).
- The Book Value is determined based on the purchase price, which may be different from the nominal value due to discounts or premiums.
- Example: A €100,000 corporate bond might be acquired at 97% of face value, meaning the actual acquisition cost is €97,000.
- Investments Measured by Effective Quantity (Asset Type = 1)
(e.g., Shares, ETFs, Mutual Funds)- These securities are recorded based on the number of units owned.
- Each unit has a Market Price, and the total investment value fluctuates accordingly.
- Example: 200 shares of XYZ Corp. at €50 per share have a Market Value of €10,000.
By properly identifying and classifying investments, Investment Accounting ensures accurate tracking of quantities, values, and financial reporting.
Quantity Element
Investment accounting shares similarities with inventory systems. When buying or selling investments, a quantity element is involved, which can be expressed as either an effective quantity or a nominal value.
The key quantities to manage include:
- Quantity at the beginning of the accounting period. Recorded in the Items Table.
- Quantity changes during the accounting period.
Tracked through transactions. - Current Quantity.
Calculated as the initial quantity plus increases and minus decreases.
Unit Price and Valuation
Each investment has a Unit Price, or simply a price.
- For quantity-based investments, such as shares, the Unit Price is expressed per unit.
- For nominal-value investments, such as bonds, the Unit Price is generally expressed as a percentage of nominal value.
The investment value is determined by multiplying the Quantity by the applicable Unit Price.
Cost Attribution Methods
Cost attribution methods determine how the historical cost of an investment is allocated to individual units when multiple purchases are made at different prices.
These methods affect the calculation of realized gains or losses, but do not determine the measurement basis of the investment itself.
- Weighted Average Cost (WAC)
The cost per unit is calculated as a weighted average of all purchase prices.
This method smooths price fluctuations over time and is commonly used for investment accounting. - Moving Average Cost with Market Adjustments (MAC-MA)
This method is based on the Weighted Average Cost approach but includes periodic adjustments to reflect market prices.
It combines cost averaging with market valuation elements.
This method is used by the Banana Accounting Investment Extension. - First-In, First-Out (FIFO)
The earliest purchased units are considered sold first.
In rising markets, this often results in lower costs and higher reported profits. - Last-In, First-Out (LIFO)
The most recently purchased units are considered sold first.
This method can reduce reported profits in rising markets but is rarely used for investments and is not permitted under IFRS.
FIFO
The FIFO (First-In, First-Out) method assumes that the investments purchased first are also the first to be sold.
FIFO is an accepted cost attribution method under IFRS and various national GAAP frameworks. In some jurisdictions, it may also be used for tax purposes when calculating realized gains on investment sales.
Banana Investment Accounting does not automatically calculate realized gains using the FIFO method, but the corresponding amounts can be calculated and recorded manually.
Weighted Average Cost (WAC)
The cost per unit is averaged over time with each purchase, smoothing price fluctuations.
Moving Average Cost with Market Adjustments (MAC-MA)
Investments may be measured at fair value, in which case their accounting value is periodically adjusted to reflect market prices.
Banana Investment Accounting uses the Moving Average Cost with Market Adjustments (MAC-MA) method, which combines moving average cost calculations with periodic market value adjustments. This approach allows the Book Value of investments to be adjusted to reflect market prices while maintaining the quantity information required for investment tracking.
Example Calculation (MAC-MA)
Step 1: Purchases and Moving Average Cost
- Buy 100 shares @ $10 → Cost = $1,000
- Buy 50 shares @ $15 → Total Cost = $1,000 + $750 = $1,750
- Total Quantity = 150 shares
- Moving Average Cost per share = $11.67
Step 2: Market Value Adjustment
Assume the market price increases to $14 per share.
- Market Value = 150 × $14 = $2,100
- Current Book Value = $1,750
- Unrealized Gain = $2,100 − $1,750 = $350
After recording the market value adjustment:
- Quantity = 150 shares
- Book Value = $2,100
- Book Price = $14 per share
- The $350 increase is recorded as an unrealized gain.
Step 3: Sale of Investments
Assume 50 shares are then sold at $15 per share.
- Selling Value = 50 × $15 = $750
- Book Value of Quantity Sold = 50 × $14 = $700
- Realized Gain = $750 − $700 = $50
After the sale:
- Remaining Quantity = 100 shares
- Remaining Book Value = 100 × $14 = $1,400
- Remaining Book Price = $14 per share.
Investment Valuation Methods in Accounting
Investments can be accounted for using different measurement bases and different cost attribution methods.
These two concepts serve different purposes and should not be confused.
Measurement bases define the value at which investments are recognized in the financial statements, independently of how costs are attributed upon sale.
- Historical Cost
Investments are recorded at their original purchase price, without considering subsequent market fluctuations, except in cases of impairment or disposal.
Compatible with: WAC, FIFO - Fair Value (Mark-to-Market)
Investments are remeasured at their current market price, reflecting changes in market conditions in real time.
Compatible with: MAC-MA. - Lower of Cost or Market (LCM)
Investments are measured at the lower of historical cost or current market value, applying a conservative valuation approach to prevent overstatement. - Amortized Cost
Used primarily for fixed-income securities.
The investment value is adjusted over time based on interest income and principal repayments, using an effective interest method. - Net Realizable Value (NRV)
Investments are measured at the estimated selling price minus any costs necessary to complete the sale. - Intrinsic Value
The investment is valued based on fundamental analysis of its underlying economic value rather than observable market prices.
This approach is typically used for analytical purposes rather than formal accounting measurement. - Recoverable Amount
The investment is measured at the higher of its fair value less costs to sell and its value in use.
This basis is commonly applied in impairment testing.
Market value of an investment
The market value of an investment is the current price assigned to it in the financial market, and this price can fluctuate according to market conditions. When securities are bought or sold, the portfolio management system informs the holder of the exact market price at which each transaction occurred. Unlike the book value, which is determined by the accounting process, the market price is directly provided by the market and does not require any calculation by the holder.
Within the Investment Manager, the market value of an investment is entered in the "Price Current" column of the Items table. By entering this market price, you can use the valuation report feature to calculate any unrealized gains or losses, which represent the difference between the current Market Value and the Book Value of the investment. This provides a snapshot of the potential profit or loss if the securities were sold at the current market price, even though they have not yet been sold.
Fair Value Adjustments and Realized vs. Unrealized Results
When investments are measured at fair value, changes in market prices give rise to fair value adjustments. These adjustments reflect changes in the value of an investment after initial recognition and before its disposal.
Accounting standards differ in how these fair value changes are presented and whether a distinction is made between realized and unrealized gains and losses.
IFRS approach
Under full IFRS, a clear distinction is made between:
- Realized gains and losses, arising from the sale or disposal of an investment; and
- Unrealized gains and losses, arising from changes in fair value while the investment is still held.
Depending on the classification of the financial instrument, unrealized fair value changes may be recognized:
- in profit or loss, or
- in other comprehensive income (OCI), for financial instruments measured at fair value through other comprehensive income (FVOCI).
In all cases, unrealized results remain analytically distinct from realized gains and losses, even if they are recognized in equity rather than in profit or loss.
IFRS for SMEs, Swiss GAAP FER, and International GAAP Approach
Under IFRS for SMEs, Swiss GAAP FER, and most national GAAP frameworks worldwide (including European continental GAAPs as well as accounting systems in North America, Asia, and other jurisdictions), the accounting model for investments is deliberately simplified.
Although investments may be measured at fair value in specific circumstances, these frameworks generally do not require a formal separation between realized and unrealized gains and losses at the equity level and do not apply an OCI or FVOCI model comparable to full IFRS.
When fair value changes are recognized, they are typically recorded directly in profit or loss as part of the period result, without mandatory reclassification into realized, unrealized, or OCI components. The emphasis is placed on prudence, understandability, and practical application, rather than on detailed presentation structures designed primarily for capital-market reporting.
Implications of Using the MAC-MA Method
Banana Accounting uses the Moving Average Cost with Market Adjustments (MAC-MA) method to manage investment portfolios.
This method is compatible with the accounting approaches applied under IFRS for SMEs, Swiss GAAP FER, and most national GAAP frameworks worldwide, which are based on simplified valuation and presentation principles for investments.
Under these frameworks:
- Investments may be measured at fair value without a mandatory formal separation between realized and unrealized gains and losses at the equity level.
- Fair value adjustments, when recognized, are generally recorded directly in profit or loss as part of the period result.
No OCI or FVOCI model comparable to full IFRS is required.
Within the MAC-MA method:
- The moving average cost is used to determine the carrying amount of investments sold and the resulting realized gains or losses.
- Market value adjustments reflect changes in fair value while investments are held and give rise to unrealized gains or losses.
By contrast, MAC-MA is not an IFRS-defined measurement model. Under full IFRS, financial instruments must be classified and measured according to specific categories (such as amortized cost, FVTPL, or FVOCI), each with prescribed recognition and presentation rules.
Accordingly, the MAC-MA method cannot be applied directly for IFRS financial statements and requires appropriate adjustments or reconciliations when IFRS reporting is required.
User Responsibility, Disclosure, and Professional Assessment
The applicability of the MAC-MA method depends on the specific accounting framework, regulatory environment, and tax rules applicable to each entity. In addition, the investment valuation and cost attribution method applied should generally be disclosed in the presentation of the financial statements, in accordance with applicable accounting standards.
Users are therefore required to assess the suitability of the MAC-MA method in consultation with their auditors and tax advisors, taking into account their individual reporting, disclosure, and compliance requirements.
Asset Account and Book Value
Investments are assets that are part of the balance sheet. In financial accounting, unlike an inventory system, there is no direct tracking of quantity and price. Instead, financial transactions are recorded based on monetary amounts, requiring the use of specific accounts to track changes in investments.
When setting up the accounting system, you must create the necessary investment Asset Accounts in the Accounts table to track securities. If you hold investments in multiple currencies, you need one investment account per currency.
- When creating investment elements in the Items Table, you need to specify for each Item a valid Asset account specified in the Account table of the same currency.
- The Asset account of the Item serves as the link between financial accounting and investment accounting.
- For each transaction affecting an investment account, you must also associate the corresponding investment item (Item ID).
If you post an amount to an Asset account without specifying the Item ID, discrepancies will arise between financial accounting and the investment inventory system.
Book Value and Book Price
The Book Value is the accounting value of an investment position. It represents the value assigned to the investment in the accounting records.
The Book Price is the accounting value per unit of the investment. When a single unit book price applies to the position, it is calculated by dividing the Book Value by the quantity:
- Book Price = Book Value / Quantity
Therefore:
- Book Value = Book Price × Quantity
The Book Value changes when transactions or accounting adjustments affect the accounting value of the investment. Purchases and sales may change both the quantity and the Book Value, while valuation adjustments and other book value adjustments may change the Book Value without changing the quantity.
The Book Price depends on the cost attribution and valuation method used. It is particularly important when an investment is sold because it is used to determine the Book Value attributable to the quantity sold.
Reconciliation between Financial Accounting and Investment Accounting
Financial accounting and investment accounting must remain reconciled through the Asset Account:
- The opening balance of each Asset Account must equal the sum of the opening values of all Items linked to that Asset Account.
- The opening value of each Item is calculated as Opening Quantity × Opening Price.
- The current balance of each Asset Account must equal the sum of the current Book Values of all Items linked to that Asset Account.
- The current Book Value of each Item is determined by its opening value and by the transactions and adjustments recorded for that Item through its Asset Account.
Gains and Losses on Investments
Changes in the value of an investment may result in realized or unrealized gains and losses.
- A realized gain or loss arises when all or part of an investment is sold.
- An unrealized gain or loss arises when the Book Value of an investment is adjusted to a different valuation, such as its current Market Value, while the investment is still held.
Realized and unrealized gains and losses are recorded separately through the appropriate accounting transactions.
Realized Gains and Losses
A realized gain or loss arises when all or part of an investment is sold. It represents the difference between the Selling Value and the Book Value attributable to the quantity sold.
- If the Selling Price is higher than the Book Price, there is a realized gain.
- If the Selling Price is lower than the Book Price, there is a realized loss.
The Book Value attributable to the quantity sold is:
Book Value of Quantity Sold = Book Price × Quantity Sold
The realized gain or loss is:
Realized Gain/Loss = Selling Value − Book Value of Quantity Sold
or, when expressed using unit prices:
Realized Gain/Loss = (Selling Price − Book Price) × Quantity Sold
Accounting Treatment
When the sale is recorded in double-entry accounting, the amount received is debited to the bank account and credited to the Asset Account. The realized gain or loss is then recorded separately so that the balance of the Asset Account corresponds to the Book Value of the investment quantity that remains.
When the entire investment is sold, the remaining quantity is zero and the Book Value must also be zero. After recording the sale, but before recording the realized gain or loss:
- A remaining debit balance in the Asset Account represents a realized loss.
- A remaining credit balance in the Asset Account represents a realized gain.
The realized gain or loss is then recorded in the appropriate account so that the Asset Account balance returns to zero.
When only part of an investment is sold, the realized gain or loss relates only to the quantity sold. The remaining balance of the Asset Account must correspond to the Book Value of the quantity still held.
Example – Complete Sale
Assume an investment has:
- Quantity: 10 shares
- Book Value: $200
- Book Price: $20 per share
If all 10 shares are sold at $25 per share:
- Selling Value = 10 × $25 = $250
- Book Value of Quantity Sold = 10 × $20 = $200
- Realized Gain = $250 − $200 = $50
- Remaining Quantity = 0
- Remaining Book Value = 0
The $50 realized gain is recorded in the appropriate Realized Gain account.
If all 10 shares are sold at $18 per share:
- Selling Value = 10 × $18 = $180
- Book Value of Quantity Sold = 10 × $20 = $200
- Realized Loss = $200 − $180 = $20
- Remaining Quantity = 0
- Remaining Book Value = 0
The $20 realized loss is recorded in the appropriate Realized Loss account.
Example – Partial Sale
Using the same initial position, assume that 4 shares are sold.
If 4 shares are sold at $25 per share:
- Selling Value = 4 × $25 = $100
- Book Value of Quantity Sold = 4 × $20 = $80
- Realized Gain = $100 − $80 = $20
- Remaining Quantity = 6 shares
- Remaining Book Value = 6 × $20 = $120
If 4 shares are sold at $18 per share:
- Selling Value = 4 × $18 = $72
- Book Value of Quantity Sold = 4 × $20 = $80
- Realized Loss = $80 − $72 = $8
- Remaining Quantity = 6 shares
- Remaining Book Value = 6 × $20 = $120
The Calculate Sales Data command can calculate the realized gain or loss and create the corresponding accounting transactions.
Unrealized Gains and Losses
An unrealized gain or loss arises when the Book Value of an investment is adjusted to a different valuation, such as its current Market Value, while the investment is still held.
Unlike a realized gain or loss, no sale takes place and the quantity of the investment remains unchanged.
When an investment is adjusted to its Market Value:
- If the Market Value is higher than the Book Value, there is an unrealized gain.
- If the Market Value is lower than the Book Value, there is an unrealized loss.
The Market Value is:
Market Value = Market Price × Quantity
The unrealized gain or loss is:
Unrealized Gain/Loss = Market Value − Book Value
or, when expressed using unit prices:
Unrealized Gain/Loss = (Market Price − Book Price) × Quantity
The adjustment is recorded between the Asset Account and the appropriate Unrealized Gain or Loss account. The adjustment changes the Book Value without changing the quantity.
Example – Unrealized Gain
Assume an investment has:
- Quantity: 10 shares
- Book Value: $200
- Book Price: $20 per share
- Market Price: $25 per share
The Market Value is:
10 × $25 = $250
The unrealized gain is:
$250 − $200 = $50
After recording the $50 adjustment:
- Quantity = 10 shares
- Book Value = $250
- Book Price = $25 per share
Example – Unrealized Loss
If the Market Price is instead $18 per share:
- Market Value = 10 × $18 = $180
- Unrealized Loss = $200 − $180 = $20
After recording the $20 adjustment:
- Quantity = 10 shares
- Book Value = $180
- Book Price = $18 per share
The Create Adjustment Transactions command can calculate the required valuation adjustments and create the corresponding accounting transactions.
Revenues and Costs of Investments
A key function of an accounting system is to track both revenues (such as interest and dividends) and costs (such as commissions, bank fees, and broker expenses) associated with investments.
Revenues and costs related to investments are recorded as transactions linked to the investment (ItemId) but using accounts different from the Asset account. This ensures that these transactions do not affect the Book Value of the investment itself.
Each transaction can be assigned to an appropriate revenue or expense account, allowing for detailed reporting on all income and costs associated with a specific investment. This approach provides clear insights into the performance and profitability of investments while maintaining accurate financial records.
Impact of Exchange Rates on Investments
For investments denominated in foreign currencies, their valuation in accounting is influenced by both market price changes and exchange rate fluctuations. In addition to affecting the value of the investment in the accounting currency, exchange rate changes may give rise to unrealized or realized gains or losses that require appropriate accounting treatment.
Key Factors in Exchange Rate Impact
- Initial Exchange Rate at Purchase.
The exchange rate used to record the investment at the time of acquisition. - Current Exchange Rate at Reporting Date.
The rate used to update the investment’s book value in financial statements. - Market Price and Currency Interaction.
A security's value may increase in its original currency, but if the exchange rate moves unfavorably, the gain may be reduced or turned into a loss when converted. - Realized Gains/Losses on Sale.
When an investment is sold in a foreign currency, exchange rate differences can lead to additional gains or losses beyond market price changes.
Example of Exchange Rate Impact
- You purchase 100 shares of a stock at $200 per share, for a total cost of $20,000.
- At the time of purchase, the USD/EUR exchange rate is 1.10, meaning the recorded book value is €18,182.
- If the stock price remains at $200 but the exchange rate changes to 1.05, the book value in EUR would increase to €19,048, reflecting a gain purely due to currency fluctuation.
Because investments can be impacted by both market price movements and exchange rate variations, a proper Investment Accounting System ensures accurate financial reporting, helping investors and accountants manage risk and maintain compliance.
Impact of Exchange Rates on Investments and Adjustments
For investments denominated in foreign currencies, their valuation in accounting is influenced by both market price changes and exchange rate fluctuations. These fluctuations impact both unrealized gains/losses (before sale) and realized gains/losses (after sale), requiring proper adjustments in financial reporting.
Key Factors in Exchange Rate Impact
- Initial Exchange Rate at Purchase
- The exchange rate at the time of acquisition is used to record the investment's book value in the reporting currency.
- Current Exchange Rate at Reporting Date
- At each financial reporting period (e.g., month-end, quarter-end, year-end), investments in foreign currencies must be revalued based on the latest exchange rate.
- Market Price and Currency Interaction
- A security’s value may increase in its original currency, but if the exchange rate moves unfavorably, the gain could be reduced or even turned into a loss when converted to the reporting currency.
- Unrealized Gains/Losses Due to Exchange Rate Changes
- Even if an investment is not sold, the difference in exchange rates between the purchase date and the reporting date can create unrealized foreign exchange gains or losses, which should be recorded separately.
- Realized Gains/Losses on Sale
- When an investment is sold, the difference between:
- The original exchange rate at purchase, and
- The exchange rate at the time of sale,
determines an additional realized gain or loss due to currency fluctuations.
- When an investment is sold, the difference between:
Example of Exchange Rate Impact
- Step 1: Initial Investment Purchase
- You buy 100 shares at $200 per share, for a total cost of $20,000.
- At the time of purchase, the USD/EUR exchange rate is 1.10.
- The recorded book value in EUR is 20,000 divided by 1.10, which equals €18,182.
- Step 2: Exchange Rate Adjustment at Reporting Date
- At the reporting date, the stock price remains $200, but the exchange rate changes to 1.05.
- The new book value in EUR is 20,000 divided by 1.05, which equals €19,048.
- The unrealized foreign exchange gain is 19,048 minus 18,182, which equals €866.
- This gain is recorded in the foreign exchange adjustment account as an unrealized gain.
- Step 3: Realized Foreign Exchange Gain/Loss on Sale
- Later, you sell 100 shares at $210 per share, for a total of $21,000.
- At the time of sale, the USD/EUR exchange rate is 1.08.
- The converted sale amount in EUR is 21,000 divided by 1.08, which equals €19,444.
- The initial book value was €18,182, so the total realized gain is 19,444 minus 18,182, which equals €1,262.
- This realized gain includes both the market price gain (from $200 to $210) and the foreign exchange gain (due to currency movement from 1.10 to 1.08).
Accounting Treatment
- Unrealized Exchange Gains and Losses
- At reporting periods, any changes in exchange rates affect the book value.
- These adjustments are recorded in an exchange rate adjustment account.
- Realized Exchange Gains and Losses
- When an investment is sold, the foreign exchange gain or loss is finalized and recorded in the profit and loss statement.
End of Year Exchange Rates
Different banks/custodians may use different exchange rates when preparing their reports.
- Due to the accounting principle of consistency, for the end of year revaluation you should always use the exchange rate defined in the Exchange Rate table.
- If, for auditing purposes, you need to reconcile the amounts reported by custodians or banks, you should create an Excel sheet and not change the values or exchange rates in the accounting records.
Double-Entry Investment Transactions
Investment account transactions are recorded in the Banana Accounting Transactions table. The Transactions table includes both standard double-entry accounting columns and additional columns used for investment tracking.
- Investment Id (Item or ItemId).
When recording a transaction that refers to an investment you always need to specify the Investment ID. - Quantity.
- If present, together with the Unit Price it is used to calculate the transaction amount.
- When you enter a positive or negative quantity the program will update the existing quantity for the Investment in the Items Table.
- When using quantities, you must always specify the security’s Asset Account as either the debit or credit account.
If not, the Investment unit price (Balance divided by the quantity) will be wrong. - Positive quantity values (123.00)
- Will increase the existing quantity.
- You will use when
- Buying investments.
- Stock split, which increases the quantity without affecting the value.
- Negative values (-123.00)
- Will decrease the existing quantity.
- You will use when selling investments.
- Neutral Values (±123.00) or zero quantity
- Neutral Values will be used to calculate the transaction amount.
- Neutral Values will not increment or decrement the existing quantity in the Item table.
- They are used to record changes to the Investments without affecting the quantity.
For example, Market price adjustments, the quantity remains the same, but the value of the investment (balance) is changed.
- Price per unit.
If present, together with the Quantity it is used to calculate the transaction amount. - Transaction amount
- If you enter the Quantity and Unit Price, the program automatically calculates the Amount.
- For market price adjustments the amount is entered without quantity or with a neutral quantity.
- Account Debit or Account Credit
- Asset account
- When changing the quantity or the balance of the investment you always need to enter as a debit or credit account that corresponds to the Asset account associated with the Investment.
- Revenues and Cost accounts
- When recording revenues and costs related to the investment, you specify the account that is related to the revenue or cost.
- The program will create reports that calculate all the costs associated with a specific investment.
- Asset account
Examples of Double-Entry Transactions
The Transactions Table is where you enter investment transactions. Here is a brief explanation:
- When buying or selling investments, multiple lines are typically needed to enter the necessary accounts, quantity, and price. The date and item are repeated.
- The Item column (Investment ID) allows you to specify the investment, while the Qt. (quantity) and Unit Price columns provide the necessary information for inventory tracking.
- The Account Debit and Account Credit columns enable you to specify the accounts for bank transactions, asset accounts, revenues, costs, and realized or unrealized gains or losses, including those related to exchange rates.
Opening Value
When starting a new accounting or a new year you need to enter:
- Opening amounts for Investment accounts.
As with any other accounts, enter the opening amount of each Investment account in the account currency.- The program calculates the opening amount in the base currency using the opening exchange rate from the Exchange Rate table.
- The opening balance should equal the sum of the opening values of all investments associated with that account.
- Opening Quantity and Price for Investments.
For each investment, enter the opening quantity and opening price.- The program calculates the opening value by multiplying the opening quantity by the opening price.
- The program also calculates the opening value in the base currency using the opening exchange rate.
Accounts and Investments Reconciliation
When an investment is entered in the Items table, it must be linked to the Asset Account where its accounting value is recorded.
For all investments linked to the same Asset Account, there must be full correspondence between:
- the opening balance of the Asset Account and the opening values of the linked investments
- the current balance of the Asset Account and the Book Values of the linked investments.
The command Reconciliation Report will calculate the book value of all accounts and check for the correspondence. If there are any differences it will notify you.
Investment Accounting Software
An Investment Accounting system is specialized software that records, values, and reports investments such as shares, bonds, ETFs, and investment funds.
Unlike a traditional accounting system, it manages both the accounting value and the investment-specific information required to track securities over time, including quantities, prices, market values, exchange rates, and realized and unrealized gains and losses.
Typical functions include:
- Recording purchases and sales of securities.
- Calculating book value and cost basis.
- Processing interest, dividends, and commissions.
- Perfoming market and foreign currency valuations.
- Calculating realized and unrealized gains and losses.
- Preparing accounting and investment reports.
Professional investment accounting systems may also support multiple accounting frameworks, such as IFRS and GAAP, as well as tax, reconciliation, and compliance reporting.
Elements
Investment accounting software consists of sophisticated solutions that are usually based on general accounting software or ERP (Enterprise Resource Planning) systems. These solutions typically include several components.
These solutions include several components.
- General ledger
- Double-entry accounting engine (Accounting Book of Record, ABOR) – Records all investment-related debits/credits.
- Multi-basis accounting – Supports IFRS, US GAAP, statutory, and tax accounting simultaneously.
- Chart of accounts & financial statements – Provides Balance Sheet and Profit & Loss outputs.
- Trade and transaction capture – Records purchases, sales, income events, fees, and settlements.
- Cash and liquidity management – Tracks cash movements, forecasts, and balances.
- Investment accounting
- Investment Book of Record (IBOR) – Tracks real-time quantities, cash, and exposures.
- Security master and reference data – Provides centralized instrument definitions and reference data, such as ISINs, coupons, and ratings.
- Market data & pricing engine – Imports or calculates prices, FX rates, yields, and curves.
- Valuation and revaluation logic – Calculates fair value, amortized cost, and unrealized gains and losses.
- Performance measurement – Calculates returns and contributions and compares performance against benchmarks (optional).
- Risk and exposure analytics – Provides duration, FX exposure, sensitivity, and VaR metrics (optional).
- Regulatory & compliance reporting – Supports filings (e.g., Solvency II, NAIC, UCITS).
- Reconciliation tools – Matches cash, positions, and transactions with custodians/brokers.
- Client & portfolio reporting – Generates statements, holdings reports, and dashboards.
Accounting and Investment Book of Record
- Accounting Book of Record (ABOR)
An ABOR is a double-entry accounting journal that records financial transactions. - Investment Book of Record (IBOR)
- An IBOR is similar to an inventory system and records the quantities and prices of securities bought and sold.
- It may be maintained in a separate database or as a subledger of the ABOR system.
Investment data from the IBOR is typically integrated into the ABOR through a process that creates double-entry accounting transactions at specified intervals, usually daily.
Single Book of Record
Instead of maintaining a separate IBOR, Banana Accounting uses a single ABOR journal that also integrates the information required for investment accounting.
Double-entry transactions include the information required for investment accounting, such as the Investment ID, quantity, price, and other details.
The Asset Account provides the connection between investment accounting and financial accounting. In the Accounts table, you define the Asset Accounts used to record the accounting value of the investments.
In the Items table, each investment is linked through the Asset Account column to one of the Asset Accounts defined in the Accounts table.
When entering transactions that change the quantity or value of an investment, you must use the Asset Account defined for that investment in the Items table.
The opening balance of each Asset Account must match the sum of the opening values of all investments linked to that Asset Account.
The current balance of each Asset Account must match the sum of the current values of all investments linked to that Asset Account.
Simplicity Through Innovation
Simplicity Through Innovation
Integrating investment management into a financial accounting system while keeping it simple to use is a significant technical challenge. Many investment accounting solutions rely on separate portfolio management systems or complex subledgers, making implementation and daily operation more complicated.
Banana Accounting follows a different approach by extending its standard accounting system with features specifically designed for investment accounting.
One of these is the integrated Items system, which allows investment information to be recorded directly in accounting transactions. Each transaction can include the Investment ID, quantity, and unit price, while the program automatically calculates the corresponding accounting amount. This makes it possible to manage investment movements without maintaining a separate investment journal.
Another distinctive feature is the support for neutral quantities (±). A neutral quantity is entered by typing ±123, which Banana Accounting automatically converts to ±123. Unlike positive or negative quantities, a neutral quantity does not change the number of securities held. Instead, it is used to calculate the accounting amount for transactions that modify the book value of an investment without affecting its quantity, such as market value adjustments, unrealized gains and losses, or other valuation entries.
These innovations allow Banana Accounting to manage complex investment accounting scenarios using the same transaction model employed for standard accounting, reducing complexity while maintaining complete integration between financial accounting and investment management.
Keeping Track of the Book Value
One of the most challenging aspects of investment accounting is maintaining the book value of each investment throughout its entire life cycle.
Unlike portfolio management systems, which primarily focus on market value, portfolio performance, and trading activities, investment accounting must determine and maintain the accounting value of each investment. The book value represents the accounting value of the investment and is used to determine realized and unrealized gains and losses. It may also be relevant for tax purposes, depending on the applicable tax rules.
To maintain the correct book value, every investment transaction must be recorded together with all the information that affects its accounting value. This includes:
- purchases and sales;
- quantities and unit prices;
- commissions and transaction costs;
- interest and dividends;
- realized gains and losses;
- unrealized gains and losses resulting from market value adjustments;
- realized and unrealized exchange rate differences.
Traditional accounting software generally records only monetary amounts and does not manage the quantities and prices required for investment accounting. As a result, accountants often maintain separate spreadsheets to calculate book values, realized gains and losses, and year-end valuations, increasing both workload and the risk of errors.
Banana Investment Accounting integrates investment management directly into the accounting system. By recording quantities, prices, expenses, commissions, and other investment data together with the accounting entries, the information required to maintain the book value of each investment and calculate realized and unrealized gains and losses, including those arising from exchange rate fluctuations, remains integrated within the accounting system.
Using the Moving Average Cost with Market Adjustments (MAC-MA) method, Banana Accounting produces both financial accounting reports, such as the Balance Sheet and Profit & Loss Statement, and investment reports for monitoring securities, eliminating the need for separate spreadsheets and manual reconciliations.
Banana Investment Accounting: Professional Wealth Management for the Individual
Banana Investment Accounting integrates investment management directly into a double-entry accounting system. It allows you to manage securities, maintain their book values, and produce both investment reports and financial statements from a single accounting file.
Unlike traditional portfolio management software, Banana Accounting maintains both investment positions and their accounting book values within a single integrated system. Every investment transaction is reflected in both the investment data and the financial accounting, keeping investment information and the Balance Sheet and Profit & Loss Statement directly connected.
Key Benefits for the Professional Investor
- Unified Financial View: Manage your assets, liabilities, revenues, and expenses within a single, integrated accounting environment. This provides a comprehensive view of your financial position and reduces the need to maintain information across separate systems.
- Professional-Grade Accounting: Leverage a professional accounting solution used by companies, pension funds, and family offices. This ensures your records are structured, controlled, and audit-ready, providing a high level of financial transparency.
- Integrated Reporting: Investment transactions update both the investment data and the financial accounting. This allows you to generate Balance Sheet, Profit & Loss, and investment reports from the same accounting data.
- Complex Investment Management: Manage different types of investments, including shares, bonds, funds, ETFs, and cryptocurrencies, with support for multiple currencies.
- Gain, Loss, and Valuation Calculations: The Investment Accounting Extension can calculate realized gains and losses when investments are sold. Investment values can also be adjusted to current market prices to calculate and record unrealized gains and losses.
- Data Privacy and Control: Banana Accounting runs locally on your computer, and you decide where your accounting files are stored, whether locally or using a cloud storage service of your choice.
Ease of Use & Accessibility
- Excel-Like Interface: Banana Accounting uses a table-based interface similar to Excel, where accounting and investment data is entered and displayed in tables. This makes it easy to view, search, select, and modify data.
- Simple Installation: Banana Accounting can be installed directly on Windows, macOS, and Linux, without requiring a complex server setup.
- Prerequisite Knowledge: A working knowledge of double-entry accounting is required to use the solution effectively.
How It Works: The Double-Entry Advantage
Banana Investment Accounting combines financial accounting, based on the double-entry method, with investment accounting, which uses information similar to inventory management, such as quantities and prices.
- Accounts Table: This table contains the Chart of Accounts and shows the current balance of each account. Transactions entered in the Transactions table update the corresponding account balances according to the double-entry accounting method, providing the data used for the Balance Sheet and Profit & Loss Statement.
- Items Table: In the Items table, you define your investments, such as shares, bonds, funds, and ETFs. Each investment is linked to an Asset Account defined in the Accounts table.
- Transactions Table: Investment transactions, such as purchases, sales, dividends, and fees, are recorded here. Along with the standard double-entry information, such as debit and credit accounts and amounts, you also specify the Investment ID, quantity, and price.
- Automatic Updates: The software automatically updates the quantities in the Items table and the balances in the Accounts table based on the transactions entered. The updated accounting data is reflected in the Balance Sheet and Profit & Loss Statement.
- Investment Reporting: Use the Investment Accounting Extension to generate detailed reports on investments, including quantities, values, gains and losses, and other investment-related information.
Get Started
To get started with Banana Investment Accounting, download Banana Accounting and explore the available documentation, templates, and examples.
Detailed guides and tutorials are available in the Banana Accounting documentation to help you set up Investment Accounting and manage different investment accounting scenarios.
How Finance Professors Can Use Banana Investment Accounting to Enhance Investment Education
Teaching investment and accounting concepts can be challenging when students only see theory or isolated examples. Banana Investment Accounting provides a practical tool for applying these concepts in an accounting environment. By combining traditional double-entry accounting with investment management, the software allows professors to demonstrate how investment transactions, valuations, and market changes are reflected in financial accounting and financial statements.
Whether used in financial accounting, investment accounting, portfolio management, or auditing courses, Banana helps students develop practical skills and understand how accounting principles are applied to real-world investment scenarios.
Students learn not only how investment transactions are recorded, but also why they affect the Balance Sheet, the Profit & Loss Statement, and the book value of each investment. By applying accounting principles and workflows used in professional investment accounting, students can connect theoretical concepts with practical application.
Free for students:
Students can use the Banana Accounting Free plan and manage up to 70 transactions at no cost.
Teaching Benefits
Banana Accounting gives professors a practical tool that supports both traditional accounting education and investment-related courses.
Strengthens Core Accounting Skills
Students learn double-entry accounting through realistic investment transactions and practical examples. Each transaction, whether a purchase, sale, dividend, fee, or adjustment, shows its impact on the Balance Sheet and Profit & Loss Statement. This reinforces the fundamental accounting principles taught in introductory and intermediate accounting courses.
Helps Students Understand Investment Concepts
Banana integrates quantities, prices, book values, and market values directly into the accounting system..
Students can see how:
- book values and market values are determined
- realized and unrealized gains and losses are calculated and recorded
- exchange rate differences affect financial results
This helps students connect investment accounting concepts with their practical accounting treatment.
Connects Theory With Real-World Practice
Students work with realistic investment scenarios, including:
- Recording purchases and sales
- Accounting for bond coupon accruals
- Performing multi-currency valuations
- Preparing year-end adjustments and reconciliations.
These exercises help students apply accounting concepts to situations they may encounter in professional accounting and finance roles.
Helps Reduce Teaching Workload
Ready-made templates, automated calculations, and reports such as the Appraisal, Security Card, and Reconciliation reports reduce the need to create complex spreadsheets and manual examples from scratch.
Suitable for Multiple Courses
Banana can be used across different accounting and finance courses:
- Financial Accounting – Double-entry accounting, financial reporting, and adjustments
- Investment Accounting – Book values, valuations, and realized and unrealized gains and losses
- Investment and Portfolio Management – Investment transactions, market values, and foreign currency effects
- Auditing – Transaction tracing, reconciliation, and accounting controls.
A single tool can therefore support different teaching and learning objectives.
What Professors Can Teach Using Banana Investment Accounting
This section explains concrete learning outcomes:
Securities Valuation and Book Value Tracking
Students learn:
- the difference between book value and market value
- the moving average cost method
- how unrealized gains and losses are calculated and recorded
- how to prepare year-end valuation adjustments using the Investment Accounting Extension.
Investment Transactions: From Theory to Double-Entry
Students practice recording:
- Purchases
- Sales
- Commissions and fees
- Accrued interest (for bonds)
- Dividends and coupons
- Realized gains and losses and exchange rate differences.
Multi-Currency Investment Accounting
Students learn how exchange rate changes affect:
- book values
- realized exchange rate gains and losses
- year-end revaluations using the Exchange Rate Table
- realized and unrealized exchange rate gains and losses.
Investment Reporting and Analysis
Using investment accounting reports, students can work with:
- Appraisal report
- Security Card Report
- Reconciliation and Check Balances.
Students learn to analyze investment positions, valuations, gains and losses, and their relationship with the financial accounting data.
By combining double-entry accounting with integrated investment management, Banana Accounting provides a practical learning environment for teaching investment accounting, securities valuation, portfolio management concepts, financial reporting, and the accounting treatment of investment transactions.
Accounts Table
To manage investments with Banana Investment Accounting, the Accounts table includes both standard financial accounting accounts and specific accounts used for investment accounting.
Each investment is represented by an Item linked to an Investment Balance Sheet Account. Investment transactions combine investment-specific information, such as the Item ID, quantity, and price, with the corresponding accounting entries, keeping investment data and financial accounting directly connected.
Investment accounts are organized into three categories:
- Investment Balance Sheet Accounts – represent the book value of investments
- Investment Value Adjustment Accounts – record realized and unrealized gains and losses and other adjustments affecting investment book values
- Investment Profit & Loss Accounts – record investment income and expenses such as dividends, interest, commissions, and fees.
Together, these accounts provide the accounting structure required to record investment transactions, maintain the book value of each investment, and reflect investment activity in the Balance Sheet and Profit & Loss Statement.
Investment Balance Sheet Accounts
Investment Balance Sheet Accounts represent the book value of investments reported in the Balance Sheet. Each account summarizes the book value of all investments linked to it.
Each investment (Item) is associated with one Investment Balance Sheet Account where purchases, sales, and other transactions affecting its book value are recorded.
The balance of each Investment Balance Sheet Account must equal the total book value of all Items linked to that account.
When to Create Investment Balance Sheet Accounts
The number of Investment Balance Sheet Accounts depends on the organization of the portfolio. Common configurations include:
- You need at least one Investment Balance Sheet Account to record the purchase and sale of investments.
- If you manage different types of securities, such as shares, bonds, or investment funds, it is recommended to create a separate account for each category.
- If you are using multi-currency accounting, you need at least one Investment Balance Sheet Account for each currency.
- If you manage bonds, it is recommended to create a separate Balance Sheet account to record recoverable withholding tax, where applicable.
- Key Characteristics:
- Every Item must be linked to one Investment Balance Sheet Account.
- The currency of the Item must match the currency of its Investment Balance Sheet Account.
- In investment transactions affecting quantity or book value, the Investment Balance Sheet Account is used together with the corresponding Item ID.
- Types of Balance Accounts:
- Investment Balance Sheet Accounts are normally asset accounts because they represent the book value of investments. Other Balance Sheet accounts, including liability accounts where required, may also be used for specific investment-related transactions.
- Account Configuration:
- Account: Account name.
- Description: Account description.
- BClass: 1 for Asset accounts or 2 for liability accounts.
- Sum In: Name of the group.
- Currency (multi-currency accounting only): Account currency.
- Opening (and Opening Currency for multi-currency accounting): The opening balance of the account.
- The opening balance must match the sum of the opening values of all securities (items) linked to the account in the Items table. See also Opening and closing page for more information.
- You can verify the opening balances using Actions > Check Accounting. Select “Items” and “Asset accounts opening balances” to check for inconsistencies.
Investment Value Adjustment Accounts
Unlike Investment Balance Sheet Accounts, Investment Value Adjustment Accounts do not represent the Book Value of investments. Instead, they record gains, losses, and other accounting adjustments that increase or decrease the Book Value of an investment.
They are used to record gains, losses, and other adjustments resulting from:
- the sale of an investment
- a market value revaluation
- an exchange rate fluctuation
- other accounting adjustments.
Investment Value Adjustment Accounts are used in investment adjustment transactions together with:
- the Investment Balance Sheet Account
- the corresponding Item ID.
Realized Gains and Losses
These accounts are used when an investment is sold and a gain or loss is realized.
- Realized Gain on Investments: Records a gain when the Selling Price is higher than the Book Price. The gain is calculated as:
(Selling Price−Book Price) × Quantity Sold - Realized Loss on Investments: Records a loss when the Selling Price is lower than the Book Price. The loss is calculated as:
(Book Price − Selling Price) × Quantity Sold - Realized Exchange Rate Gain: Records a gain when the base currency value of the investment increases due to exchange rate differences upon sale.
- Realized Exchange Rate Loss: Records a loss when the base currency value of the investment decreases due to exchange rate differences upon sale.
Unrealized Gains and Losses
Unrealized gain and loss accounts are used to record changes in the value of an investment while the investment is still held.
- Unrealized Gain on Investments: Records an increase in value when the market value is higher than the Book Value.
- Unrealized Loss on Investments: Records a decrease in value when the market value is lower than the Book Value.
- Unrealized Exchange Rate Gain: Records an increase in the base currency value resulting from exchange rate fluctuations.
- Unrealized Exchange Rate Loss: Records a decrease in the base currency value resulting from exchange rate fluctuations.
Other Value Adjustments:
Other adjustment accounts may be used to record specific changes to the Book Value of an investment that are not directly related to realized or unrealized gains and losses.
- Depreciation: Records decreases in the Book Value of assets resulting from depreciation or similar value adjustments.
- Capitalized Costs: Records costs that are capitalized and therefore increase the Book Value of an investment.
- Income Adjustments: Records investment-related income adjustments that affect the Book Value, where applicable.
- Rounding Differences: Records small adjustments required to correct differences resulting from rounding.
Investment Profit & Loss Accounts
These accounts record income and expenses associated with investments, such as dividends, interest, commissions, and fees.
Unlike Investment Balance Sheet Accounts and Investment Value Adjustment Accounts, these accounts do not represent or adjust the Book Value of an investment. They may be associated with the corresponding Item ID to track income and expenses related to individual investments.
- Common Profit & Loss Accounts:
- Interest Earned: Records interest income earned from investments.
- Interest Paid: Records interest expenses related to investments, borrowing, or margin accounts.
- Dividend Income: Records dividend income received from investments.
- Commission Costs: Records commissions and transaction fees recognized as expenses.
- Charges: Records other charges related to investments.
- Other Income: Records other investment-related income.
- Other Costs: Records other investment-related expenses.

These accounts record income and expenses related to investments but do not affect their Book Value.
Relationship Between Investment Accounts
Together with the linked Items and investment transactions, these account categories form the core of the Banana Investment Accounting model, ensuring consistency between investment positions, Book Values, and financial accounting.
Items Table with Investments List
The Items table contains one row for each investment and provides the information required to track quantities and determine the Book Values and Market Values of all securities managed in Banana Investment Accounting. Together with the Accounts table, it forms the core of the investment accounting model.
Each row represents one investment (Item). The Item identifies the security, tracks its quantity and valuation information, and links investment transactions to the corresponding Investment Balance Sheet Account.
Data to be entered
Enter all investments by specifying the following information:
- Item: The unique ID used to identify the investment, such as an ISIN or ticker symbol.
- Description: The description of the investment.
- Sum In: Defines the group to which the investment belongs, such as stocks, bonds, funds, or other investment categories.
- Groups are used to calculate subtotals in the Items table and organize investment reports.
- Investments belonging to the same group are often linked to the same Investment Balance Sheet Account.
- Asset Account: The Investment Balance Sheet Account to which the investment is linked.
- It represents the connection point between Financial Accounting and Investment Accounting.
- The Asset Account must be an asset Balance Sheet account, as it represents the accounting value of the investment. If a different type of account is entered, such as an Income Statement account, the program displays a warning message.
- The total Book Value of all securities linked to the same Investment Balance Sheet Account must correspond to the balance of that account. The Reconciliation Report verifies that the account balance and the total Book Value of investments remain consistent.
- Asset Type: Defines how the investment quantity and price are expressed:
- 1- Investments Measured by Effective Quantity: Stocks, ETFs, funds, and similar securities.
- 2- Investments Measured by Nominal Value: Bonds, debt securities, and similar investments.
- This internal classification is used by the investment accounting extension to calculate quantities and values. It is not part of the accounting reports.
- Currency (for multi-currency accounting only): The currency of the investment.
- The currency must be the same as the currency of the Investment Balance Sheet Account selected in the Asset Account field.
- Begin Qt: The opening quantity of the investment.
- Price Begin: The opening Book Price per unit of the investment.
- Price Current: The current Market Price per unit of the investment.
- This value can be entered manually or updated using the Import market prices, which allows market prices for multiple securities to be updated at once.
Data calculated automatically
The program automatically calculates:
- Value Begin (also Value Begin Currency for multi-currency accounting): Represents the opening Book Value of the investment.
- Value Begin = Begin Qt × Price Begin.
- In multi-currency accounting, the exchange rate applied between Value Begin Currency and Value Begin is the opening exchange rate without a date specified in the Exchange rates table for that particular currency.
- The sum of the Value Begin amounts of all investments linked to the same Investment Balance Sheet Account must correspond to the opening balance of that account in the Accounts table.
- See also the Opening and closing page for more information.
- Current Qt: Represents the current quantity of the investment.
- It is calculated from the Begin Qt plus or minus the quantity changes recorded in transactions.
- Value Current (also Currency Value for multi-currency accounting): Represents the current Market Value of the investment.
- Value Current = Current Qt × Price Current.
- In multi-currency accounting, the exchange rate applied between Currency Value and Value Current is the current exchange rate without a date specified in the Exchange rates table for that particular currency.
- Value Current represents the Market Value of the investment and should not be confused with its current Book Value.
- The totals for the different groups.
Grouping
Grouping allows investments to be organized into categories such as stocks, bonds, ETFs, or funds.
The Sum In field links each Item to the corresponding group, allowing subtotals to be calculated in the Items table and results to be organized in reports such as the Portfolio Valuation Report.
Grouping and Investment Balance Sheet Accounts serve different purposes. A group determines how investments are organized and totaled for reporting purposes, while the Investment Balance Sheet Account determines where their Book Value is recorded in financial accounting.
Transactions of purchase and sale of investments
The Transactions table is the core of the accounting workflow. It records all investment operations, including purchases, sales, income, expenses, transfers, and valuation adjustments.
By linking accounting entries to the corresponding Item, Banana Investment Accounting keeps the accounting records and the related investment data synchronized.
Before entering investment transactions, you must:
- create the required Investment Balance Sheet Accounts in the Accounts table
- define each investment in the Items table.
This documentation assumes that you are familiar with financial accounting, investment accounting, and the principles used to determine the Book Value and realized gain or loss when an investment is sold.
Recording Investment Transactions
Investment transactions are recorded in the Transactions table and linked to the corresponding Item. This allows Banana Investment Accounting to update the accounting records together with the related investment quantities and Book Values.
The information required depends on the type of investment operation. The sections below explain the general booking requirements, while the specific pages provide detailed instructions and examples for shares, funds, bonds, and other investment operations.
Preparing Transaction Data
Before entering an investment transaction, collect all the information required to complete the accounting entry.
The information is often provided by different sources:
- Bank statement – provides the net amount credited or debited
- Portfolio statement – provides the investment details, including quantity, unit price, currency, and transaction date.
Transactions can be entered manually or imported automatically.
Banana Investment Accounting supports several import methods:
- importing bank statements using Import into Accounting
- copying and pasting data prepared in Excel
- importing data generated by Excel macros
- using customized import extensions for specific banks or portfolio management systems.
Regardless of the import method, every investment transaction must contain the information required to correctly update the related accounting records and investment data.
Transaction Structure
Investment purchases and sales are generally recorded as compound (multi-line) transactions following the principles of double-entry accounting. Each row records one accounting component of the operation, while the same Item is used on all rows related to the investment.
A typical investment transaction may include:
- a row for the bank payment or receipt
- a row for the investment movement, including Quantity and Unit Price and, when applicable, Exchange Rate
- separate rows for commissions, bank charges, taxes, or other transaction costs
- for sales, separate rows for the realized investment gain or loss
- for foreign-currency sales, separate rows for the realized exchange rate gain or loss.
The Item identifies the investment involved in the transaction. Repeating the Item on the related rows allows Banana Investment Accounting to associate revenues, costs, gains, losses, and other accounting entries with the corresponding investment for tracking and reporting purposes.
For sales, the Calculate Sale Data command uses the historical investment data to calculate the realized investment gain or loss and, when applicable, the realized exchange rate gain or loss.
Required booking information
To correctly update both Financial Accounting and Investment Accounting, each investment transaction must include the information required to identify the investment and record the related accounting entries.
The required information depends on the type of transaction. The following information is typically required when recording investment purchases and sales.
Basic Transaction Information
- Date – The transaction date.
- Item – Identifies the investment defined in the Items table. Enter the same Item on all rows related to the investment.
- Description – A short description of the transaction.
Bank Payment or Receipt
This row records the payment for a purchase or the receipt from a sale.
- Debit Account (sale) – Bank account receiving the sale proceeds
- Credit Account (purchase) – Bank account used to pay for the investment
- Amount – Amount credited or debited by the bank for the transaction.
Investment Movement
This row records the purchase or sale of the investment and updates its quantity and the balance of the corresponding Investment Balance Sheet Account.
- Debit Account (purchase) – Investment Balance Sheet Account assigned to the Item in the Items table.
- Credit Account (sale) – Investment Balance Sheet Account assigned to the Item in the Items table.
- Quantity – Positive for purchases and negative for sales.
- Unit Price – Price per unit at which the investment is purchased or sold.
- Exchange Rate – Exchange rate used for the transaction, when applicable.
Banana Investment Accounting uses the Quantity and Unit Price to calculate the transaction amount. In multi-currency accounting, the applicable Exchange Rate is used to convert the amount into the base currency.
Note: The Investment Balance Sheet Account must correspond to the account assigned to the Item in the Items table. If a different account is used, Banana Investment Accounting displays a warning.
Bank Charges and Commissions
Use additional rows to record brokerage fees, bank commissions, taxes, or other transaction costs according to the applicable accounting treatment.
- Debit Account – Expense account for transaction costs recognized as expenses.
Additional Details for Sales Transactions
When an investment is sold, the sale is recorded at the Selling Value. The realized gain or loss adjusts the Investment Balance Sheet Account so that the Book Value attributable to the quantity sold is removed and the remaining balance corresponds to the Book Value of the quantity still held.
The realized gain or loss corresponds to the difference between the Selling Value and the Book Value attributable to the quantity sold.
Realized Gain/Loss = Selling Value − Book Value of Quantity Sold
Book Value of Quantity Sold = Book Price × Quantity Sold
The Book Price used for the calculation is determined according to the MAC-MA method used by Banana Investment Accounting.
These values can be entered manually or calculated using the Calculate Sale Data command.
Realized Gain/Loss on Investment
The realized gain or loss is recorded between the Investment Balance Sheet Account assigned to the Item and the appropriate realized gain or loss account:
- Realized Gain – recorded using the Realized Gain on Investments account.
- Realized Loss – recorded using the Realized Loss on Investments account.
The adjustment ensures that the remaining balance of the Investment Balance Sheet Account corresponds to the Book Value of the quantity still held.
Realized Exchange Rate Gain/Loss
For investments denominated in a foreign currency, an additional adjustment may be required to account for exchange rate differences realized upon sale.
- Realized Exchange Rate Gain – recorded using the appropriate realized exchange rate gain account.
- Realized Exchange Rate Loss – recorded using the appropriate realized exchange rate loss account.
The Investment Balance Sheet Account assigned to the Item is used as the corresponding account for the adjustment.
Transactions that change the Book Value without changing the investment quantity, such as market value adjustments, can be recorded using a neutral quantity or zero quantity, so that the accounting value changes without affecting the Current Quantity. See Adjustment to the Market Price for detailed instructions.
Specific Investment Transactions
The accounting structure and required entries vary depending on the type of investment and transaction. See the following pages for detailed instructions and examples:
- Booking Share Movements – purchases and sales of shares
- Booking Fund Unit Movements – subscriptions, redemptions, distributions, reinvestments, switches, and consolidations
- Booking Bond Movements – purchases, sales, accrued interest, coupons, and withholding tax
- Adjustment to the Market Price – year-end market value adjustments
- Book Rounding Differences – adjustments for rounding differences
- Calculate Sale Data – calculation of realized investment and exchange rate gains or losses on sales.
Booking share movements
Share purchases and sales are recorded as compound transactions, with separate rows for the different accounting components of the operation. This structure makes it possible to record the investment movement, bank payment or receipt, transaction costs, and any realized gains or losses while keeping the Book Value of the investment up to date.
The Item identifies the share involved in the transaction. Enter the same Item on all rows related to the investment so that Banana Investment Accounting can associate the accounting entries with the corresponding investment.
Purchase of shares
A share purchase is generally recorded using separate rows for the investment purchase, transaction costs, and payment.
- Purchase of shares
- In the Debit Account column, enter the Investment Balance Sheet Account assigned to the Item in the Items table.
- Enter the number of shares purchased in the Quantity column.
- Enter the purchase price per share in the Unit Price column.
- Banana Investment Accounting automatically calculates the corresponding amount.
- Transaction costs
- Enter the appropriate account for bank charges, commissions, or other transaction costs in the Debit Account column, according to the applicable accounting treatment.
- Enter the amount of the transaction costs.
- Payment for shares and transaction costs
- Enter the account used to make the payment, normally the bank account, in the Credit Account column.
- The payment corresponds to the total amount debited by the bank for the purchase, including any transaction costs included in the payment.

Sale of shares
A share sale generally requires additional rows because, in addition to recording the sale and the amount received, the Book Value of the investment must be updated and the realized gain or loss must be recorded.
- Sale of shares
- In the Credit Account column, enter the Investment Balance Sheet Account assigned to the Item in the Items table.
- Enter the number of shares sold as a negative value in the Quantity column.
- Enter the Selling Price per share in the Unit Price column.
- Banana Investment Accounting automatically calculates the corresponding Selling Value before transaction costs.
- Transaction costs
- Enter the appropriate account for bank charges, commissions, or other transaction costs in the Debit Account column, according to the applicable accounting treatment.
- Enter the amount of the transaction costs.
- The Selling Value less transaction costs corresponds to the net amount received, unless other transaction components are present.
- Net amount received
- In the Debit Account column, enter the bank account receiving the sale proceeds.
- Enter the net amount credited by the bank after deducting transaction costs and any other amounts included in the transaction.
- In multi-currency accounting, use a bank account with the same currency as the investment.
- Realized Gain or Loss on Investment
- The realized gain or loss corresponds to the difference between the Selling Value and the Book Value attributable to the shares sold.
- Use the Calculate Sale Data extension to automatically calculate the realized gain or loss based on the historical investment data.
- On the same row, the extension records the sale quantity as a neutral number, allowing the quantity to be used for the calculation without changing the Current Quantity of the investment.
- Record a realized gain using the appropriate realized investment gain account, or a realized loss using the appropriate realized investment loss account. Use the Investment Balance Sheet Account assigned to the Item as the corresponding account.
- Realized Exchange Rate Gain or Loss (multi-currency accounting only)
- When an investment is denominated in a foreign currency, its sale may generate a realized exchange rate gain or loss in addition to the realized gain or loss on the investment.
- The realized exchange rate gain or loss reflects the effect of exchange rate differences on the Book Value of the quantity sold when expressed in the base currency.
- Use the Calculate Sale Data extension to automatically calculate the realized exchange rate gain or loss based on the historical investment data.
- Record a realized exchange rate gain using the appropriate realized exchange rate gain account, or a realized exchange rate loss using the appropriate realized exchange rate loss account. Use the Investment Balance Sheet Account assigned to the Item as the corresponding account.

Booking fund unit movements
Fund units are generally accounted for in the same way as shares when they are purchased or sold. However, funds may involve specific transactions such as:
- subscriptions
- redemptions
- distributions
- reinvested distributions
- accumulation units
- switches or conversions between fund classes
- splits or consolidations.
Each fund is identified by an Item and linked to the Investment Balance Sheet Account assigned to that Item. Transactions affecting the number of units are recorded using the corresponding Item, Quantity, and Unit Price.
For funds, the price per unit is often referred to as the Net Asset Value (NAV). The NAV represents the value per fund unit and is generally used as the Unit Price when recording subscriptions, redemptions, reinvestments, and other transactions involving fund units.
Subscriptions and Redemptions
Subscriptions and redemptions of fund units are recorded in the same way as purchases and sales of shares.
A subscription increases the number of units held and the Book Value of the investment. Record the additional units as a positive value in the Quantity column and use the Investment Balance Sheet Account assigned to the Item.
A redemption decreases the number of units held. Record the redeemed units as a negative value in the Quantity column. If the redemption value differs from the Book Value of the units redeemed, the difference is recorded as a realized gain or loss on the investment.
For foreign-currency investments, a redemption may also generate a realized exchange rate gain or loss.
For detailed instructions on purchases and sales, see Booking Share Movements. For the calculation of realized gains or losses, see Calculate Sale Data.
Distribution / Income Units
Income or distribution units periodically distribute income to the investor without changing the number of fund units held.
Record the amount received as investment income and the corresponding increase in the bank account. Use the corresponding Item to associate the income with the investment.
If taxes, withholding taxes, commissions, or other charges are deducted from the distribution, record them on separate rows using the appropriate accounts.

Accumulation Units
Accumulation units do not normally distribute income in cash. Instead, the income generated by the fund is retained within the fund and reflected in the value of the units.
Because no additional units are normally issued and no cash is received, the quantity held does not normally change.
If the accumulated income must be recognized separately for accounting, tax, or reporting purposes, record the required adjustment according to the applicable accounting and tax treatment.
An increase in the NAV does not by itself change the Book Value of the investment. Any adjustment to the Book Value must be recorded according to the applicable accounting treatment.

Reinvestment
When a distribution is reinvested, the distribution income is used to acquire additional fund units instead of being paid out to the investor.
Record the investment income and the acquisition of the additional units as separate accounting components of the transaction. The acquisition increases both the Quantity and the Book Value of the investment, even when there is no net movement on the bank account.
The quantity of additional units is calculated as:
Additional Units = Reinvested Amount / Unit Price (NAV)
For example, if USD 100 is reinvested at a NAV of USD 50 per unit, 2 additional units are acquired. If the NAV is USD 37.50, 2.6667 additional units are acquired.
Fund quantities can therefore include decimal units.

Switch / Conversion
A switch or conversion transfers an investment from one fund or fund class to another. The accounting treatment depends on whether the operation is treated as a sale and subsequent purchase or as an internal transfer.
If the switch is treated as a sale and purchase, record the sale of the old Item and the acquisition of the new Item as separate investment movements. Any resulting realized gain or loss and, for foreign-currency investments, any resulting realized exchange rate gain or loss are also recorded.
If the switch is treated as an internal transfer, decrease the Quantity of the old Item and increase the Quantity of the new Item. Transfer the corresponding Book Value from the Investment Balance Sheet Account associated with the old Item to the Investment Balance Sheet Account associated with the new Item. No realized gain or loss is recorded if the transaction does not constitute a realization.
If both Items are assigned to the same Investment Balance Sheet Account, the transfer changes the quantities and Book Values attributed to the individual Items without changing the overall balance of the Investment Balance Sheet Account.
For Items denominated in different currencies, the transferred values and any exchange rate differences must be recorded according to the accounting treatment applicable to the conversion.

Split / Consolidation
A split or consolidation changes the number of fund units held without changing the total Book Value of the investment.
- In a split, the number of units increases and the Book Value per unit decreases proportionally.
- In a consolidation, the number of units decreases and the Book Value per unit increases proportionally.
No cash movement and no realized gain or loss are normally recorded.

Booking bonds movements
Bond transactions are recorded using the same general transaction structure as other investments, but bonds introduce specific concepts such as nominal value, accrued interest, coupon interest, and withholding tax.
For bonds, the Quantity represents the nominal value of the bond rather than the number of securities held. The Unit Price represents the bond price, generally expressed as a percentage of the nominal value.
Purchase of Bonds
A bond purchase generally includes separate rows for the bond purchase, bank charges, accrued interest, and payment.
- Purchase of bonds
- In the Debit Account column, enter the Investment Balance Sheet Account assigned to the Item in the Items table.
- In the Quantity column, enter the nominal value of the bond purchased.
- In the Unit Price column, enter the purchase price of the bond, generally expressed as a percentage of the nominal value.
- Banana Investment Accounting automatically calculates the corresponding purchase amount.
- Transaction costs
- In the Debit Account column, enter the appropriate account for bank charges, commissions, or other transaction costs, according to the applicable accounting treatment.
- Enter the amount of the transaction costs.
- Accrued Interest
- When a bond is purchased between coupon payment dates, the buyer normally pays the seller the interest accrued from the previous coupon date to the purchase date.
- Record the accrued interest using the appropriate account according to the applicable accounting treatment.
- In the Description column, you can indicate the accrual period and the applicable interest rate.
- Payment of Bonds
- In the Credit Account column, enter the account used to make the payment, normally the bank account.
- The total payment generally includes the bond purchase amount, accrued interest, bank charges, and any other transaction costs.

Collection of Interest Coupons
At each coupon payment date, record the interest earned on the bond. The gross interest may be divided between the net amount received and any withholding tax deducted.
- Net Interest
- In the Debit Account column, enter the bank account receiving the net interest.
- Enter the amount credited by the bank after deduction of withholding tax and any other applicable deductions.
- Recoverable Withholding Tax
- If withholding tax has been deducted and is recoverable, record the recoverable amount using the appropriate Balance Sheet account.
- In Switzerland, a 35% withholding tax may apply to certain Swiss investment income, including interest subject to Swiss withholding tax.
- Gross Interest
- In the Credit Account column, enter the appropriate interest income account.
- Record the gross amount of interest before withholding tax.
The net interest received plus the recoverable withholding tax corresponds to the gross interest, unless other deductions are present.

Sale of Bonds
A bond sale generally requires separate rows for the sale, bank charges, accrued interest, net amount received, realized gain or loss and, for foreign-currency investments, any realized exchange rate gain or loss.
- Sale of Bonds
- In the Credit Account column, enter the Investment Balance Sheet Account assigned to the Item in the Items table.
- In the Quantity column, enter the nominal value of the bond sold as a negative value.
- In the Unit Price column, enter the selling price of the bond.
- Banana Investment Accounting automatically calculates the corresponding Selling Value.
- Transaction costs
- In the Debit Account column, enter the appropriate account for bank charges, commissions, or other transaction costs, according to the applicable accounting treatment.
- Enter the amount of the transaction costs.
- Accrued Interest
- When a bond is sold between coupon payment dates, the buyer normally pays the seller the interest accrued from the previous coupon date to the sale date.
- Record the accrued interest received using the appropriate account according to the applicable accounting treatment.
- Net Amount Received
- In the Debit Account column, enter the bank account receiving the proceeds.
- Enter the net amount credited by the bank.
- The net amount received generally reflects the Selling Value plus accrued interest, less transaction costs and any other deductions.
- Realized Gain or Loss on Investment
- When a bond is sold, the difference between its sale value and its Book Value must be recorded as a realized gain or loss.
- Use the Calculate Sale Data extension to automatically calculate the realized gain or loss based on the historical investment data.
- On the same row, the extension records the sale Quantity as a neutral number, allowing the quantity to be used for the calculation without changing the Current Quantity of the investment.
- Record a realized gain using the appropriate realized investment gain account, or a realized loss using the appropriate realized investment loss account. Use the Investment Balance Sheet Account assigned to the Item as the corresponding account.
- Realized Exchange Rate Gain or Loss (multi-currency accounting only)
- When a bond is denominated in a foreign currency, its sale may generate a realized exchange rate gain or loss in addition to the realized gain or loss on the investment.
- The realized exchange rate gain or loss reflects the effect of exchange rate differences on the Book Value of the nominal value sold when expressed in the base currency.
- Use the Calculate Sale Data extension to automatically calculate the realized exchange rate gain or loss based on the historical investment data.
- Record a realized exchange rate gain using the appropriate realized exchange rate gain account, or a realized exchange rate loss using the appropriate realized exchange rate loss account. Use the Investment Balance Sheet Account assigned to the Item as the corresponding account.

Nominal Value
The nominal value, also known as the face value, is the amount on which the bond interest is calculated.
In Banana Investment Accounting, the nominal value of a bond is entered in the Quantity column.
Interest
Bond interest is generally determined by the coupon rate, expressed as a percentage of the nominal value. The bondholder receives the interest according to the coupon conditions, typically at regular intervals. Interest is calculated on the nominal value of the bond.
Adjustment to the market price
Market price adjustments are generally recorded at the end of the accounting period to adjust the Book Value of investments that are still held to their current Market Value.
The adjustment is based on the difference between the Market Value of the investment and its current Book Value:
Market Value Adjustment = Market Value − Current Book Value before the adjustment
- If the Market Value is higher than the Book Value, the difference is recorded as an Unrealized Gain on Investments.
- If the Market Value is lower than the Book Value, the difference is recorded as an Unrealized Loss on Investments.
The adjustment is recorded between the Investment Balance Sheet Account assigned to the Item and the appropriate Investment Value Adjustment Account.
The investment remains in the portfolio; the adjustment changes its Book Value without changing the Quantity held.
You can automatically create the required adjustment transactions using the Create adjustment transactions extension.

Book rounding difference
Small rounding differences may arise, especially at year-end, because banks, financial institutions, and Banana Investment Accounting may apply different rounding methods to investment prices and values.
When a rounding difference affects the Book Value of an investment, it can be corrected by entering a manual adjustment transaction.
Record the adjustment between the Investment Balance Sheet Account assigned to the Item and the appropriate Rounding Differences account.
The adjustment changes the Book Value of the investment without changing the Quantity held.
Command for calculating profit and loss investment's sales
When an investment is sold, the Book Value attributable to the quantity sold must be removed from the investment, and the realized result of the sale must be recorded.
Depending on the investment and its currency, the sale may require the calculation of:
- Realized Gain or Loss on Investment – the realized result arising from the difference between the Selling Value and the Book Value attributable to the quantity sold.
- Realized Exchange Rate Gain or Loss – for investments denominated in a foreign currency, the realized result arising from exchange rate differences associated with the Book Value of the quantity sold when expressed in the base currency.
The Calculate Sale Data extension uses the historical investment data to automatically calculate the values required to complete the sale transaction, record the realized results, and correctly update the Book Value of the investment.
Calculate Sale Data dialog

Investment Accounting Opening and Closing the Year
Beginning of the year
At the beginning of a new accounting year, make sure that the opening quantities and values of the investments in the Items table are consistent with the corresponding opening balances.
When a new accounting year is created from the previous year, Banana Accounting automatically carries forward the closing investment data and account balances required as opening values for the new year.
If you need to add a new security manually, enter its opening information in the Items table and make sure that its opening value is consistent with the opening balance of the Investment Balance Sheet Account specified in the Asset Account column.
Add a new security
To manually add a new security at the beginning of the accounting year, define it in the Items table and enter its opening values:
- Begin Qt. – Enter the opening quantity of the security. For bonds, enter the opening nominal value.
- Price Begin – Enter the opening unit price of the security.
Banana Investment Accounting automatically calculates the Value Begin based on the values entered in Begin Qt. and Price Begin.
In multi-currency accounting, the corresponding opening value in the base currency is also calculated automatically.

Matching Opening Values with the Investment Balance Sheet Account
The total opening value of the securities must correspond to the opening balance of the Investment Balance Sheet Account specified in the Asset Account column of the Items table.
If multiple Items are assigned to the same Investment Balance Sheet Account, the sum of their Value Begin amounts must equal the opening balance of that account.
For example, if two shares are assigned to the same Shares CHF account, the sum of their opening values in the Items table must correspond to the opening balance of the Shares CHF account in the Accounts table.
This correspondence keeps the investment values in the Items table and the related balances in Financial Accounting aligned.

The following image shows that the opening values in the Items table correspond to the opening balance of the related Investment Balance Sheet Account in the Accounts table.

Opening Exchange Rate
In multi-currency accounting, Banana Investment Accounting automatically calculates the Value Begin of each security in the base currency using the applicable opening exchange rate.
The same opening exchange rate is used to calculate the opening balance of the corresponding Investment Balance Sheet Account in the base currency. This allows the opening Value Begin amounts of the Items and the opening balance of the related Investment Balance Sheet Account to remain consistent.
For more information about the values calculated in the Items table, see Data calculated automatically.
Check initial balances
After entering the opening values, you can verify that the opening values of the securities correspond to the opening balances of the related Investment Balance Sheet Accounts:
- Use the Actions > Check Accounting command. Select the Items and Asset accounts opening balances options.

- Use the Check balances report extension to verify that the opening values of the securities are consistent with the corresponding opening accounting balances.

End of the Year
At the end of the accounting year, enter the current Market Price of the security in the Price Current column of the Items table, normally using the year-end market price.
Banana Investment Accounting automatically calculates the Market Value:
Value Current = Current Qt. × Price Current
The Current Qt. is automatically updated based on the investment transactions recorded during the year.
The resulting Value Current represents the Market Value of the investment.
Closing Exchange Rate
In multi-currency accounting, Banana Investment Accounting automatically calculates the Value Current of each security in the base currency using the applicable current exchange rate.
This allows the Market Value of investments to be expressed in the base currency and used when calculating the required year-end valuation adjustments.
This is particularly important when determining the difference between the current Book Value and Market Value of foreign-currency investments.
Create Adjustment Transactions
Before closing the accounting year, make sure that all required valuation adjustments have been recorded.
You can use the Create adjustment transactions extension to automatically calculate and create the required adjustment transactions based on the difference between the current Book Value and the Market Value of each investment.
The extension records the adjustment in the Investment Balance Sheet Account specified in the Asset Account column of the Items table, using the appropriate Investment Value Adjustment Account as the corresponding account.
After the adjustment, the Book Value of the investment corresponds to its Market Value. Consequently, the balance of each Investment Balance Sheet Account should correspond to the sum of the Value Current amounts of all Items assigned to that account.
To verify the balances, compare:
- the current balance of the Investment Balance Sheet Account in the accounting records
- the Value Current of the related Items in the Items table.
If multiple Items are assigned to the same Investment Balance Sheet Account, its balance should correspond to the sum of the Value Current amounts of all Items assigned to it.

In this example, the corresponding values in the Items table confirm that the Item values are consistent with the balance of the related Investment Balance Sheet Account.

Recording the adjustment using a separate Balance Sheet account
If required by the applicable accounting treatment, auditing requirements, or reporting structure, the valuation adjustment may be recorded in a separate Balance Sheet account instead of directly adjusting the Investment Balance Sheet Account specified in the Asset Account column.
In this case, you can:
- manually record the adjustment transactions
- modify the account used in the transactions generated by the Create adjustment transactions extension.
The Price Current should continue to represent the current Market Price of the investment, and Value Current therefore continues to represent its Market Value.
When the valuation adjustment is recorded in a separate Balance Sheet account, the balance of the Investment Balance Sheet Account alone will not correspond to the Value Current of the related Items. The separate Balance Sheet account used for the valuation adjustment must also be taken into account when reconciling the accounting values with the Market Value of the investments.
Creating a New Accounting Year
When you create a new accounting year using the Create New Year command, Banana Accounting automatically carries forward the closing values required for the new accounting year.
For each Item:
- the closing Current Qt. becomes the Begin Qt. of the new year
- the closing Price Current becomes the Price Begin of the new year.
The closing balances of the Investment Balance Sheet Accounts are also carried forward as opening balances for the new accounting year.
The opening Value Begin amounts of the Items should therefore be reconciled with the corresponding opening balances. When valuation adjustments are recorded directly in the Investment Balance Sheet Accounts, the Value Begin amounts should correspond to those account balances. When valuation adjustments are recorded in separate Balance Sheet accounts, the balances of those accounts must also be taken into account.
After creating the new year, use the Check balances report to verify the consistency between the opening values of the Items and the corresponding opening balances.
Planning and Analysis
The analysis and planning functions of Banana Accounting allow you to better understand the economic and financial performance of your business. With the budget, Cash Flow and chart functions, you can transform accounting data into clear and useful information to make informed decisions.
Thanks to these functions you can:
- Plan the future with a detailed and realistic budget;
- Monitor cash flow and anticipate possible liquidity shortages;
- Compare actual results with forecasted ones to evaluate performance;
- Better interpret accounting data through clear and dynamic charts;
- Make informed decisions based on up-to-date visual analyses;
- Transform accounting into a management and strategic tool, not just a recording tool.
Budget
The Budget function allows you to plan costs and revenues in advance by simulating the future performance of your accounting. You can set up an annual budget in the Accounts table, or have 360-degree planning with specific details by period using the Budget table, where you can record planned operations as transactions and obtain forecasted balance sheets by month, quarter, or year. It is an ideal tool for creating budgets, comparing forecasts with actual results, and monitoring the financial sustainability of projects.
Cash Flow
The Cash Flow shows expected or actual cash flows over time, based on accounting data.
It helps you understand how liquidity changes, when you will have cash surpluses or shortages, and whether incoming funds will be sufficient to cover future expenses.
With the projection function, you can view your financial situation in advance and make informed decisions to better manage liquidity.
Charts
The Charts function transforms accounting and budget data into intuitive visual representations.
You can create bar, line, or pie charts to analyze trends in revenues, costs, liquidity, or other accounting indicators.
Charts make it easy to compare periods or categories and help communicate results in a clear and visual way.
Liquidity management with the Cash Flow report
Starting from Banana+ Dev Channel 10.1.25, a new command Report > Cash Flow Report has been introduced, offering a detailed analysis of liquidity changes recorded in accounting.
This tool allows you to monitor receipts and payments, including future ones, providing valuable insights into your company's financial strength and operational efficiency.
- The logic behind this function is based on comparing the balances of liquidity accounts and the movements of counterpart accounts, which usually represent revenues or expenses.
- By understanding how the movements in liquidity accounts correspond to net cash flows for each period, you can gain an accurate view of your financial situation at any time. This comparison provides valuable information for effective financial planning and informed decision-making, helping you maintain balanced cash flow and achieve your financial goals.
- Thanks to the forecast functionality, you can analyze the evolution of liquidity over the year, using data from existing entries and budget items.
Prerequisites
Currently the Cash Flow report functionality
- Is available in the Dev-Channel version, so please install the latest version of Banana Accounting+ Dev Channel.
- This extension works only with the Advanced Plan, you can request a 1 month promo code from our support service.
- The extension is currently in Beta Test, please check everything and report any problem.
The Cash Flow Table
To view the Cash Flow table:
- select the command from the menu Report > Cash Flow Report
(if the command is not visible, check the prerequisites) - set the parameters in the Cash Flow Report dialog and confirm with OK

Rows
Vertical structure of the report
- Each liquidity account
- Total of all liquidity accounts (cash accounts)
- Counterpart accounts
- Total of counterpart accounts (cash flow total changes)
- Difference (displayed only if the total of liquidity accounts differs from the total of counterpart accounts)
Some commands to filter the rows displayed in the table
- To display only the rows with an amount in the Current view
|!Movement_?_C:xml!<> |!Balance_?_C:xml!<> - To display only the rows with an amount in the Budget view
|!Movement_?_B:xml!<> |!Balance_?_B:xml!<>
Columns
The columns with amounts
- Opening balance (only for liquidity accounts)
The initial amount of the liquidity account for the period. - Closing balance (only for liquidity accounts)
The final amount of the liquidity account at the end of the period. - Movements for the period
- Inflows (hidden column)
Indicates incoming money - Outflows (hidden column)
Indicates outgoing money - Net Cash Flow
- Liquidity accounts
Calculated as Inflows minus Outflows.
Represents the total of all revenues (positive amounts) and expenses (negative amounts) within the account for the considered period. - Counterpart accounts
The origin (positive amounts) and the destination (negative amounts).
- Liquidity accounts
- Inflows (hidden column)
Views
The report has three views
- Current
Uses the opening balances and the actual transaction data. - Budget
Uses the opening balances and the data from the Budget table. - Forecast
- Uses the opening balance and the data from the transactions up to the day before the forecast start date.
- Uses the budget entries starting from the forecast start date (inclusive).
The View Forecast
The forecast combines current accounting data (Transactions table) with budget data (Budget table).
Example:
- In the Transactions table, movements are recorded up to the end of September.
- In the Budget table, the budget for the months of the year is recorded.
- If you set the forecast start date to October 1st, the program will calculate the forecast including:
- Actual opening balance.
- Transactions from January through the end of September.
- Budget data starting from October 1st.
- The liquidity forecast will therefore use the actual liquidity account balances and calculate the forecast through the end of the year based on the budget data.
- The forecast can be particularly useful when combined with a monthly breakdown.
If you use a monthly breakdown, you can view the projected cash flow for October, November, and December, starting from the actual data up to September.
Example of a report for the period 01.01.2025 - 30.06.2025
- Forecast start date: 01.04.2025
- 1st quarter amounts are based on actual transactions.
- 2nd quarter amounts are based on forecasts:
- The opening balance of liquidity accounts is based on actual data.
- The net cash flow is calculated based on budget entries.
- The final balance (projection) is the sum of current and forecast data (transactions + budget).

Report logic
The report will show:
- For liquidity accounts:
the total of all inflows and outflows for the period. - For other accounts:
the total of the entries that affected the liquidity accounts.
How the report works
- The user defines which accounts are liquidity accounts.
- The opening balance of the liquidity accounts is used as the starting value.
- For all entries in the Transactions and Budget tables:
- The program only considers entries involving a liquidity account.
- The amount recorded in the liquidity accounts is analyzed individually for each account.
- The amount recorded in the counterpart accounts is also analyzed separately for each account.
Definition of counterpart account
A counterpart account is an account that does not belong to the list of liquidity accounts.
- For single-entry (debit/credit) records:
the counterpart account is the one used in opposition to the liquidity account. - For entries with multiple rows and different accounts:
The position of the row including the liquidity account does not affect the decision to include or not the entry in the report.- The first liquidity account (whether debit or credit) is considered the main liquidity account.
- All other accounts used are considered counterpart accounts.
Logic for grouping entries
In the Transactions table, accounting movements are listed sequentially, without the possibility to manually define a start and end for each entry. Therefore, the program automatically determines when an entry starts and ends, as well as which accounts are part of it. This logic directly impacts the correct assignment of the counterpart to liquidity accounts.
Understanding the grouping mechanism of entries in Banana is essential for achieving an accurate interpretation and reducing any discrepancies reported in the cash flow report.
Errors and Differences
When the program is unable to determine the counter-account in a multi-line transaction, a difference is reported. This warning does not necessarily indicate an accounting error, but rather the inability to identify the exact counter-account.
In these cases, you can assist the program by specifying the liquidity account in square brackets on the relevant line. This action:
- allows the transaction to be included in the cash flow calculation.
- Acts only as a comment and does not affect the accounting result.
Managing differences
The inflows and outflows in liquidity accounts must always be associated with:
- a source account (for inflows, from where the money comes)
- a destination account (for outflows, where the money was transferred to).
For each entry (whether single or spread over multiple rows), the system reports an error when the total amounts recorded in the liquidity accounts do not match the total amounts assigned to the counterpart accounts.
Differences and errors can therefore arise from:
- Partial or missing counterpart assignments.
- Amount errors between liquidity movements and their counterparts.
Practical examples
Below are some examples of accounting entries split over multiple rows, involving the liquidity accounts 1020 Bank and 1000 Cash.
Although these entries are accounting-wise correct, they can generate ambiguities in cash flow calculation, highlighting a possible discrepancy between the liquidity balance and the total of the counterpart movements.
Doc change (Doc column)
- Example: entry over multiple rows with different docs. Report of a 360.00 CHF difference at row 1.
Date Doc Invoice Description Debit Credit Amount Balance 14.01.2025 1 Various purchases 1020 360.00 -360.00 14.01.2025 2 Purchase on 12.01 4000 30.00 -330.00 14.01.2025 3 Purchase on 13.01 4000 330.00 Correction: indicate the liquidity account in square brackets in the second and third rows.
Date Doc Invoice Description Debit Credit Amount Balance 14.01.2025 1 Various purchases 1020 360.00 -360.00 14.01.2025 2 Purchase on 12.01 4000 [1020] 30.00 -330.00 14.01.2025 3 Purchase on 13.01 4000 [1020] 330.00
Change in invoice number (Invoice column)
- Example: entry over multiple rows with different invoice numbers and an empty Doc column. Report of an 8,000.00 CHF difference at row 1.
Date Doc Invoice Description Debit Credit Amount Balance 18.01.2025 Customer invoice collection 1020 8,000.00 8,000.00 18.01.2025 4545 Payment from customer 1 3000 3,000.00 5,000.00 18.01.2025 4546 Payment from customer 2 3000 5,000.00 Correction: indicate the liquidity account in square brackets in the second and third rows.
Date Doc Invoice Description Debit Credit Amount Balance 18.01.2025 Customer invoice collection 1020 8,000.00 8,000.00 18.01.2025 4545 Payment from customer 1 [1020] 3000 3,000.00 5,000.00 18.01.2025 4546 Payment from customer 2 [1020] 3000 5,000.00
Cash Flow Dialog
The Cash Flow Report dialog window allows you to customize your liquidity reports by selecting specific liquidity accounts, periods, breakdowns, and other settings to tailor the report to your needs. With the ability to save different configurations, you can create and store multiple customized reports.
In the Banana menu, select Report > Cash Flow Report

Basic tab
- Liquidity account or group
- Selection: type the name or ID of the liquidity account or group for which you want to generate the report, then click the Add button.
- When selecting a group (indicated by Gr=), all accounts belonging to that group will be included in the report as liquidity accounts. This is useful for analyzing multiple accounts simultaneously without adding them individually.
- To remove selected accounts or groups, click the "X" button next to the account name.
- Forecast checkbox
- Available only for accounting files that contain the Budget table.
- Select this checkbox to include forecasts in the cash flow report, allowing you to project future liquidity changes based on budget entries.
- Enter the start date from which forecast data should be calculated. This date is inclusive, meaning that from the specified day onward, the report will consider budget data (from the budget table). Data before this date will instead use actual data (from the Transactions table). This feature allows for seamless integration of historical actual data with future projections in the Cash Flow analysis.
Other sections of the dialog
Explanations for the other sections are available on the following pages:
- Period
Defines the reporting period. - Subdivision
Allows you to generate a report divided into multiple periods.
Segmentation by segment is currently not implemented. - Customization
Allows you to save report settings. For example, you can create and save separate configurations for:- Cash Flow Report: including liquidity accounts.
- Working Capital Report: including working capital accounts.
Banana Accounting+ charts
In Banana Accounting Plus, when opening a file, the Charts window is available at the bottom, which offers a graphical representation of the performance of a selected account, group, cost centre or segment.
The chart displays the data of the account or other selected item in a table, according to the settings that can be chosen in the right-hand panel:
- Placing the cursor on the curve or bar of the chart shows the exact values of the amounts.
- Clicking on a point in the chart opens the corresponding account tab at the corresponding position.

Control Panel
Using the right-hand panel it is possible to select the values and period to be displayed, the mode, as well as to print or save the chart.
If the size of the window does not allow all the controls to be displayed, only the controls concerning the legend will be displayed. To display all controls, either the main application window or the bottom window must be enlarged.
Time Values
The following accounting values can be displayed individually or simultaneously in the charts:
- Current - represents actual values.
- Budget - represents the budget values.
- Previous - represents the previous year's values.
By clicking on the name (Current, Budget or Previous) with the mouse, the respective values are displayed or hidden.
Legend
The Legend option selects whether to hide or display the legend within the chart window. As a rule it is hidden, but you can display it in case you need to print or save the chart.
- Off - The chart shows no legend.
- Low - The legend is displayed below the chart, in a central position.
- Left - The legend is displayed bottom left.
- High - The legend is displayed above the chart, in the middle position.
- Right - Legend is displayed bottom right.
Period
The period in years for which data is to be displayed.
1Y, 2Y, 3Y, 4Y, Y (Y indicates years).
Interval
The space between each value on the chart scale can be customised according to the following options:
- 1D (day), 1W (week), 1M (month), 3M (quarter), 6M (semester), 1Y (year).
Value
The chart can display the accounting balance at the end of the period or the accounting movement for the period. Depending on the selected value, the displayed date is adjusted accordingly:
- Balance - the chart shows the balance at the end of the period (e.g. 31 Jan '22 - period end date)
- Movement - the chart shows the movement of the period (e.g. Jan '22 - period)
- Automatic - the chart represents the balance for balance accounts and CC3, and the movement for income statement accounts, CC1, CC2 and segments.
Type
The chart can represent values in the following ways:
- Line - the chart is represented by lines.
- Area - the chart is represented by areas.
- Bar - the chart is represented by bars.
- Auto - the chart is represented as area for balance sheet accounts and CC3, and as bars for income statement accounts, CC1, CC2 and segments.
Print, Save or Copy the Chart
This feature is only available with the Advanced plan of Banana Accounting Plus.

In the top right-hand corner of the chart table, clicking on the Copy symbol displays a menu with the following commands:
- Print - Displays the chart in the print preview.
- Save - Saves the chart as a PNG image.
- Copy - Copies the chart to the clipboard as a PNG image. The copied image can be pasted into any text editor (Word, Excel, ...).
- Copy Data - Copies the values used to create the chart as a data table that can be pasted into any spreedsheet (Excel, Numbers, ...).
Additional features
Through the Add functionalities, Add tables and Extensions tools, you can enrich your accounting file with new tools, data and automations that simplify your work and make management even more complete.
These tools allow you to transform Banana Accounting into a tailored working environment that grows and adapts to your needs, without ever losing the ease of use that distinguishes it.
Add functionalities
The Add functionalities function allows you to activate advanced tools, such as the Budget table for budgeting and financial planning, the Items table used for invoicing, a simple table to enter additional data and link it to other tables, and much more.
You can start with simple accounting and then add additional features as your business and needs grow.
Add tables
With Add tables you can create customized spaces to manage additional data and link them to other tables already in use.
Everything remains in the same file, in an orderly and consistent way.
Extensions
With Extensions, you can add extra features: advanced reports, automatic checks, print templates or integrations with other tools.
Extensions are easy to install and allow you to expand the program’s capabilities only when needed.
Add or remove functionalities
In Banana Accounting Plus, you can customize your file by activating new features without complicating the main structure. To access the various options:
- go to the Tools > Add / Remove Functionalities > Add menu and select the desired option.
Important
- The options available in this dialog are specific to accounting files.
- In productivity applications (such as Offers and Invoices, Timesheet, etc.), the Add / Remove Functionalities dialog shows different options, designed for those types of files.
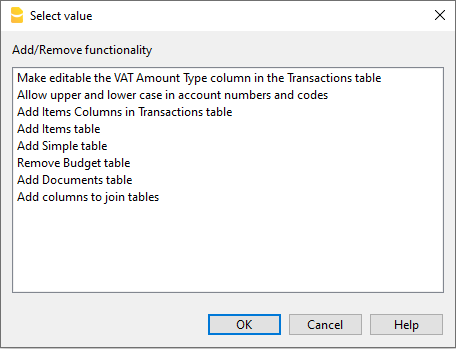
Enable Uppercase/ Lowercase in account description numbers and codes
Allows you to keep the descriptive accounts (Account column) as entered, without automatic conversion to uppercase.
Note: "Cash" and "cash" will be recognized as two different accounts.
Add Items Table
Information is available on the documentation Items Table.
Add Item Columns to the Transactions table
Information is available on the documentation page Items Columns in the Transactions table.
Add Items Table and Item Columns to the Transactions Table
The information can be found on the documentation page Items Table and on the documentation page Items columns in the Transactions table
Add Address columns in the Accounts table
Allows you to add addresses and personal details to the accounts in the Accounts table (customers, suppliers, members, etc.). When this option is selected, the Addresses view is added with all the new columns.
- You can make the columns visible in other views as well via the Data > Columns setup menu.
- To create additional views with specific columns, use the Data > Tables setup menu.
Add and Remove Budget Table
This function enables the accounting file for financial planning by adding the Budget table where you can enter transactions concerning the budget.
See the Budget table for more information.
Changing VAT amount type column in transactions
In accounting files with VAT, in the Transactions table, this function allows the column Amount type (VAT amount type) to be made editable. For each transaction, the program automatically enters the default data from the VAT Codes table (for each code) into the Amount Type column.
- 0 (or empty cell), this means VAT included
- 1 = VAT amount, means VAT excluded
- 2 = VAT amount, the amount of the entry is considered as 100 % VAT amount
If, exceptionally, the amount type for a VAT code changes, you can manually enter 1 or 2.
Note
This function is not compatible with files created in earlier versions that did not support this option.
Add tables
With Banana Accounting Plus, you can create simple tables to enter additional information directly into the accounting file, without using external documents and without complicating the main structure.
These are empty and fully customizable tables, ideal for organizing and collecting data according to your needs. They do not have built-in accounting functions but serve as a practical tool for organizing and collecting data related to business management.
You can add one or more simple tables to your file and, if necessary, link them either to one of the predefined tables in Banana Accounting Plus or to each other.
Possible uses of a simple table
Simple tables can be used to create lists and manage data that supports accounting, such as:
- Employment records
- Information, notes, appointments with customers and suppliers
- Services provided to clients
- Insurance policy deadlines
- Property key management
- Internal management notes and comments
- References to contracts, projects, or ongoing cases
- Task lists related to accounting
Advantages
- Flexibility: you can freely decide the content and structure
- Everything in a single file: your information remains always linked to the accounting
- Simplicity: just add rows and columns, with no accounting knowledge required
- Immediacy: once confirmed with OK, the table is immediately available in the file
How to add a simple table to the file
- Open your accounting file
- From the menu Tools > Add/Remove Functionalities > Add Simple Table
The program adds a new table to the existing file with the name you chose, including the following predefined columns:
- RowId → used to uniquely identify each item.
- Description → description of the item.
- Notes → additional notes or information.

For more information on tables you can add to your file, see the page:
- Simple Table
This page explains how to customize the table, show other predefined columns or add your own.
Examples of simple tables
To give you an idea of the possibilities, here are some examples:
- Internal Notes Table
In accounting, it’s often necessary to add notes about deadlines or messages for colleagues and managers. These notes are sometimes stored in Excel or Word files, risking they get lost or forgotten. By creating a simple table in the same accounting file, notes remain always available and easy to consult.
- Volunteers/Events Table
Useful for recording names, availability, and roles for events or association activities.
- Sales Agents Table
Allows you to collect information about agents, monitor areas of responsibility, and track client relationships.
In this way, simple tables become a real support tool for accounting, adaptable to the specific needs of your business.
How to create an Internal Notes table
In Banana Accounting Plus, you can create a simple table dedicated to Internal Notes, to collect reminders, annotations, and useful references directly within the same accounting file.
This way, you have all the information at your fingertips, without needing to use external documents.
How to create the Internal Notes table
- Open the accounting file
- Create the simple table and name it Internal notes
- Set up the columns:
- RowId = in our example, the Id column was hidden, as we don't need to link it to other tables
Hide this column from the menu Data > Columns setup > Id (uncheck "Visible"). - Description = in our example, we entered the subject of the note
- Notes = the content of the note
- Link = the link to the document related to the note.
Add this column from the menu Data > Columns setup > Links (check “Visible”).
- RowId = in our example, the Id column was hidden, as we don't need to link it to other tables

With this setup, you can create and manage a table of internal notes and documents directly visible in the accounting file, without needing additional files, and consult them at any time.
Using the Internal Notes table
- You can record reminders, checks to perform, document references, and any other useful information.
- The notes are always accessible and linked to the accounting file, without overloading the main structure.
- When notes become numerous, you can simplify searching using the Filter rows feature: just type a keyword, and the program will display all rows containing it.
How to create a Sales Agents table linked to the Transactions table
In Banana Accounting Plus, you can create a simple table dedicated to Sales Representatives (or Agents) and link it directly to the Transactions table.
This way, you can associate each sale with the name of the agent who handled it, keeping all information within the same accounting file, without needing external documents.
Structure of the Sales Representatives table
The Sales Representatives simple table can include the following columns:
- RowId → unique identifier code for the agent (also used for linking).
- Description → additional information about the agent.
- Commission Percentage → commission rate for each agent.
- Notes → specific annotations.
- Links → link to the commission contract or other related documents.

Linking with the Transactions table
To link the Sales Representatives table to the Transactions table:
- Open your accounting file.
- Go to the Transactions table.
- From the menu Tools > Add/Remove Functionalities > Add columns to link tables.
- Select the Sales Representatives table.
- Indicate after which column the link should be added.
- Confirm with OK.
The Transactions table will now include the linked columns:
- RowId → where to enter the identifier code of the Sales Representative
- Sales Representative → the description linked to the Id. When you enter the code, the agent’s name appears automatically.
For each sales transaction, you can select the agent’s name directly from the Sales Representatives table.
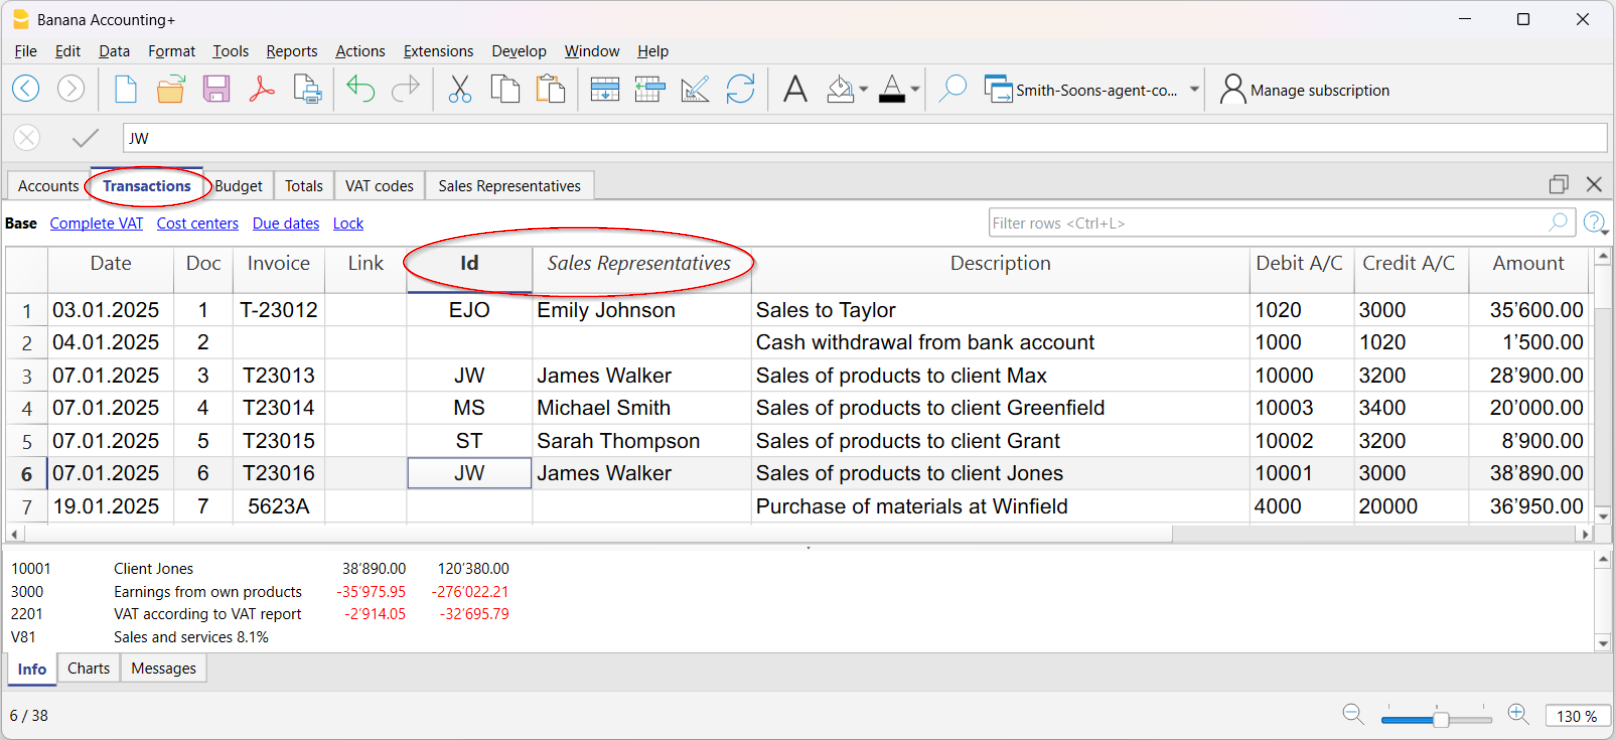
Advantages of linking
- Centralization → all agent information remains in the same accounting file.
- Traceability → each sale can be immediately associated with the agent who completed it.
- Quick analysis → with the Filter rows function, you can display only transactions related to a specific agent.
Calculating commissions
- Filter transactions by agent.
- At the bottom of the info window, you immediately see the total sales amount.
- To calculate the commission, you can:
- In the Amount column, copy the total shown at the bottom of the window (after selecting the cells) and multiply it by the commission rate.
- Export the filtered rows to Excel and apply the commission percentage formula.
With this setup, you can easily manage sales by agent, calculate commissions, and always have an up-to-date history within the same Banana file.
Extensions
Extensions are additional modules of the program that allow the use of supplementary features; most of these are exclusively available with the Advanced plan of Banana Accounting Plus.
Below is the list of the main ones:
VAT Statement 2024 for Switzerland
This extension is exclusively with the Advanced plan of Banana Accounting Plus. For more information...
QR Invoicing for Switzerland
Financial Analysis and Cash Flow
Advanced financial reports and charts for your double-entry accounting, including the financial statement, standard financial reports, Dupont analysis, and Altman index. You can compare historical data over multiple years and forecast data with the current year.
This extension is exclusively available with the Advanced plan of Banana Accounting Plus.
Securities Portfolio Management
To manage securities within your accounting file. It generates reports with details on the movements of your securities, reconciliation, and accounting valuation data for the portfolio.
This extension is exclusively available with the Advanced plan of Banana Accounting Plus.
Construction and Renovation Management
To manage construction and renovation projects. Easily keep track of your project costs, from the estimate phase to allocations and payments. See if costs align with estimates and avoid overruns and surprises. Data classification by expense category and companies involved.
This extension is exclusively available with the Advanced plan of Banana Accounting Plus.
List of all extensions
On our Extensions web page, you can find a list of all available extensions for Switzerland, Italy, and other countries.
Self-Programmed Extensions
For programming experts, it is possible to modify existing extensions or create new ones, and then manually install them into the program.
This possibility is exclusively available with the Advanced plan of Banana Accounting Plus.
Shared dialogs
In Banana Accounting there are dialog boxes that are shared by various functions and reports. One of these is the Period dialog.
This dialog is available in various printouts and reports. Here are some examples:
- Journal by period
- Account card(s), categories, cost and profit centers
- Balance sheet and Profit and Loss Statement
- Income and Expense report
Dialog - Period section
This section appears in various dialogues (eg in the account card, in the balance sheets ...) and has the function of limiting the display or processing of data only for a specified period.
If, for example, you enter a quarter, only the transactions for the quarter will be displayed in the account card and the results for the quarter will appear in the Balance Sheet.
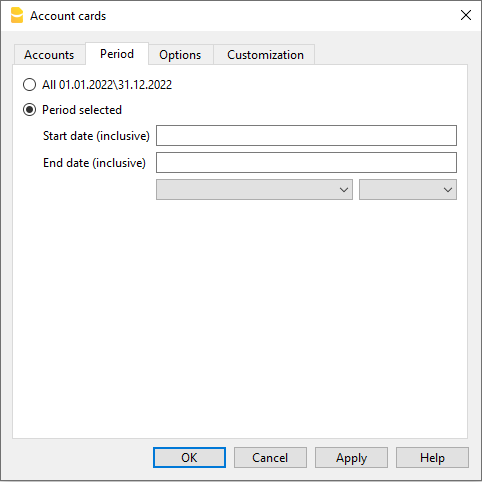
All
All accounting entries will be included.
Period selected
Defines a specified period, indicated by the start and end date.
Movements without date
If movements without dates have been entered in the accounting, they will only be considered if you select All.
On the other hand, if for example you enter, from January 1st to December 31st, the movements without a date will not appear in the report.
Features for Auditors and chartered accountants
With the Advanced plan of Banana Accounting Plus, you have tools designed for audit and accounting professionals. Faster checks, reliable financial statements, and automated processes: less time on controls, more time to deliver value to your clients.
Why choose the Advanced plan of Banana Plus
The Advanced plan combines reliability, automation, and control. It's the ideal solution for professionals who want to work with more precision and less effort. It's not just about managing numbers, but about getting a system that works with you, reducing errors and increasing the value of your service.
Main benefits:
- Efficiency – Automatic checks and verifications that drastically reduce audit times.
- Precision – Features that prevent errors and instantly detect inconsistencies.
- Versatility - Allows you to go beyond simple accounting, also including specialized areas such as forensic accounting, trusts and financial planning.
- Added value – More time for complex mandates and consulting activities.
Set up your client's accounting in just a few minutes
Thanks to the predefined templates of Banana Accounting Plus, you can start working immediately with a ready-to-use chart of accounts, configured based on language, legal form, and business sector. Of course, you can then customize every detail to suit your client's specific needs.

Simplify your client's accounting with automation
Many clients enter transactions independently, but they don't always have in-depth accounting knowledge.
With Banana Accounting Plus, you can set up rules and automations that ensure consistent data and reduce the time spent on manual checks.
Thanks to the automatic features, you can:
- Automatically create recurring transactions
- Store recurring transactions
- Set rules to automatically complete imported transactions from bank statements.
Fewer errors, more efficiency, and more time to dedicate to your clients.
Set up your clients' accounting in no time
If you manage accounting for several clients, you can significantly speed up transactions by importing them directly from bank statements.
- With the Advanced plan of Banana Accounting Plus, you have import filters compatible with .csv files from major Swiss banks.
- With the Professional plan, on the other hand, you can only import files in the ISO 20022 standard format.
In addition, by setting Rules for completing imported transactions, the program automatically enters the counterpart accounts, VAT codes, and other accounting elements (feature available only in the Advanced plan).
This way, you’ll have more time to:
- Handle more mandates
- Focus on more complex accounting
- Offer targeted analysis and consulting
▶ Video: Rules for completing imported transactions (Apply rules dialog).
Instantly spot accounting discrepancies
The Balance column helps you immediately identify any discrepancies between Debit and Credit (or between Income and Expenses), directly highlighting the non-matching amount from the row where it occurs. This way, you can promptly correct the differences and always have accurate and reliable accounting.
Since the discrepancy is also shown in the following rows until it is corrected, keeping an eye on this column allows you to spot errors immediately and prevent them from accumulating.
▶ Watch the Video on the Balance column
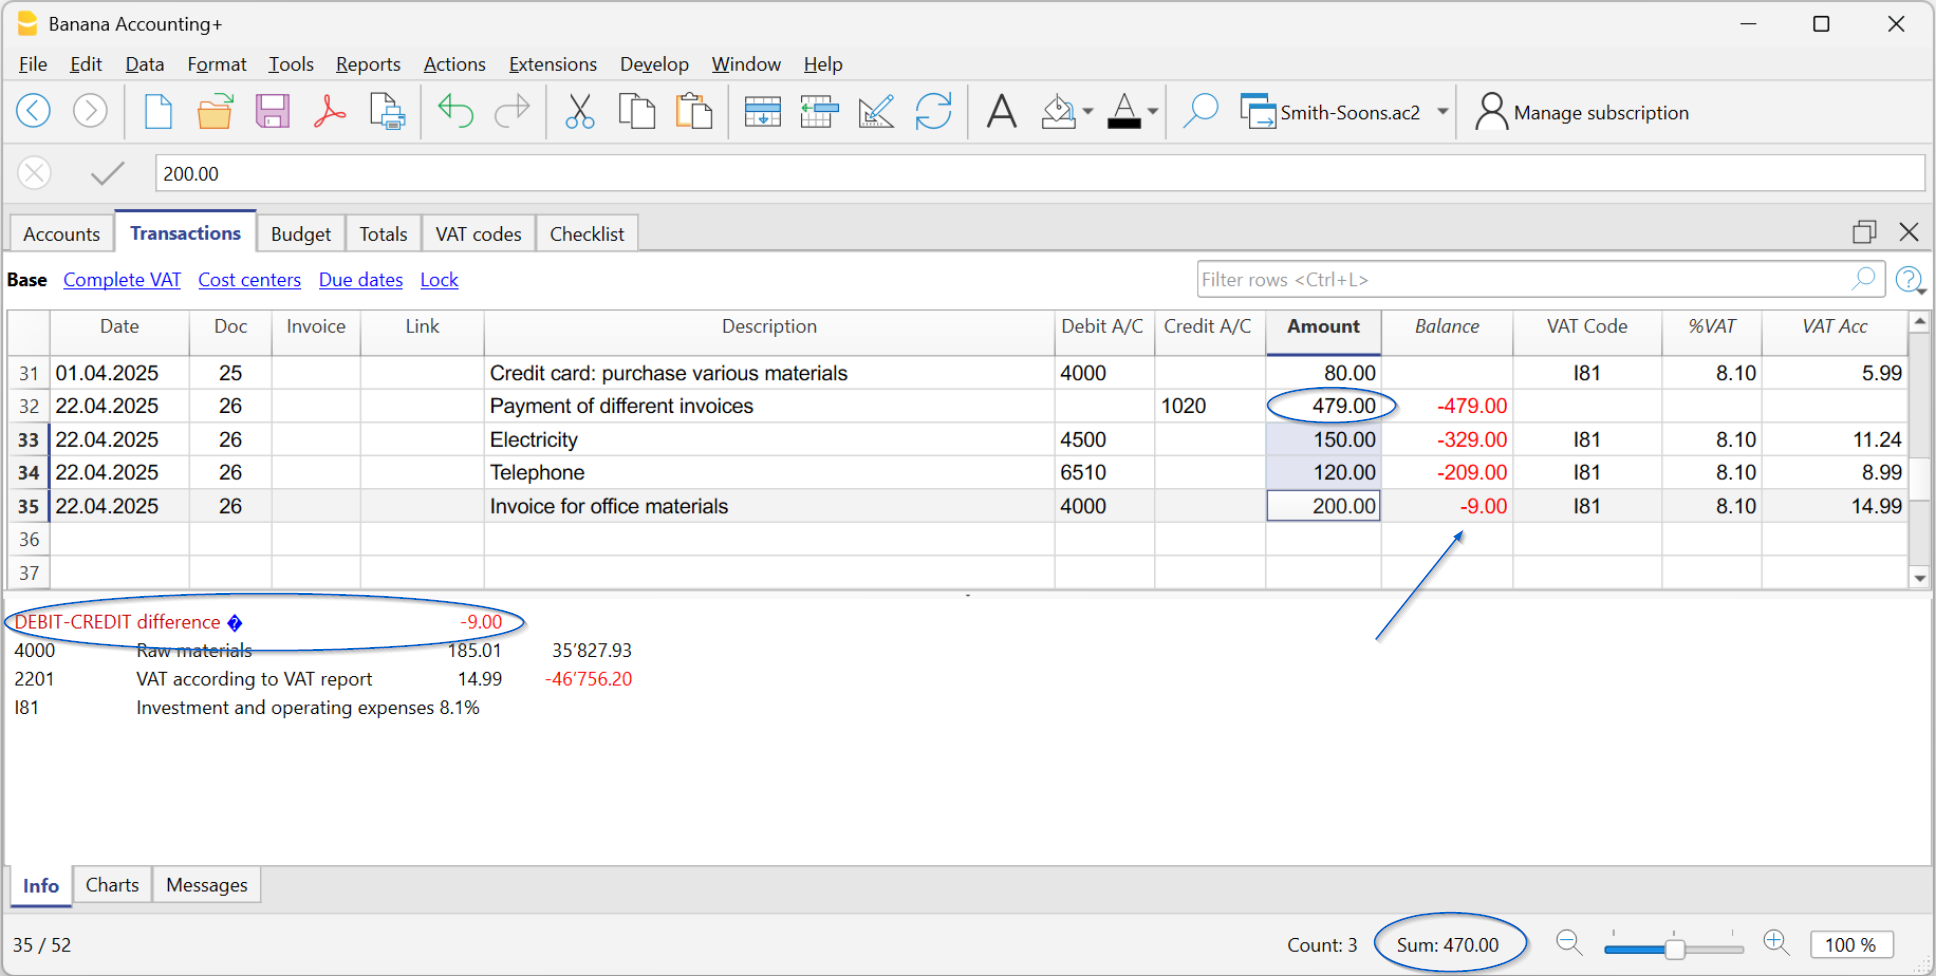
Instant checks and verifications
When the client sends you the Banana file, you have everything under control. With the Check accounting command, the program automatically performs checks on:
- Errors in the chart of accounts, in case it has been modified
- Differences in opening balances (Accounts table).
- Differences in transactions (Transactions table).
- Uncalculated exchange rate differences.
- Bank balances that do not match the statement balances.
More information about balance check transactions is available on the Balance check transactions page.

Find and fix errors instantly
With the Temporary filter feature, you can immediately find any transaction by typing a text or an amount, saving a lot of time in searches and checks.
For example, by entering a supplier’s name, you can check if all invoices have the correct VAT code and directly edit the filtered rows.
Or, by entering a bank account number, all rows of related transactions will be displayed, just like an account card. You can edit and correct directly in the filtered rows.
Client's VAT management
Banana Accounting Plus handles VAT according to Swiss Federal Tax Administration regulations. The Swiss VAT Report is automatically generated thanks to the following extensions, included in the Advanced plan of Banana Accounting Plus:
The extensions are based on current rates and VAT codes linked to the respective boxes of the VAT report.
In Banana Accounting Plus, for accounting transactions, the VAT code entry depends on the two reporting methods provided by Swiss VAT regulations:
- Cash basis reporting (Received).
- Accrual basis reporting (Invoiced).
VAT Return Reconciliation with Turnover
Banana Accounting Plus includes the Swiss Annual VAT Reconciliation extension (currently in Beta version), which allows you to compare the VAT data submitted to the Swiss Federal Tax Administration (FTA) with the data recorded in your accounting file.
The extension generates detailed reconciliation reports and, in the event of discrepancies, enables you to identify the transactions that caused them, making verification and any necessary corrections much easier.
This tool is particularly useful during accounting closing and auditing procedures, but it can also be used before submitting each periodic VAT return to verify the accuracy of the data and ensure that the information reported to the FTA corresponds to the accounting transactions recorded in the books.
Professional financial statements and reports
Thanks to automated functions, you instantly get the Balance Sheet and Income Statement, automatically generated using the Report > Formatted balance sheet by groups command. You can generate, for example:
- Annual and periodic balance sheet and income statement
- Balance sheet and income statement with budget comparison
- Balance sheet and income statement with previous year or period comparison.
- Reports directly in the Accounts table, with column customization.
Reclassified Financial Statements
Forecasts and cash flow analysis
With Banana Accounting Plus, you can offer your clients a more complete and timely financial analysis service. The forecasting and cash flow management features allow you to create real-time liquidity projections, integrating budget data with actual data.
This way, you can monitor liquidity trends, identify potential issues in advance, and support your clients in strategic decision-making.
Advanced management in specific areas
Banana Accounting also offers solutions for specialized fields, particularly appreciated by fiduciaries and accountants.
- Trust accounting
With Banana Accounting, it is also possible to manage the accounting of a trust in a simple and transparent way. Thanks to the flexibility of the chart of accounts, you can clearly separate assets, income, and distributions to beneficiaries, while always maintaining full control of the situation. Banana helps you keep orderly accounting, suitable for reporting requirements and compliant with the principles of clarity and traceability required for managing a trust. More information on the following pages: Trust accounting (double-entry and multi-currency) | Banana Accounting Software - Forensic accounting
Allows you to reconstruct accounting situations, analyze even incomplete data, and document every intervention accurately. More information on the following page: Forensic Accounting and Accounting Reconstruction - Financial planning
Allows you to create forecast scenarios, analyze cash flows, and support strategic decisions. More information on the following pages: Planning and analysis
These solutions allow you to offer a more complete service, going beyond simple accounting management.