Banana Accounting Plus applications
With Banana Accounting Plus, you can easily manage business, association, or personal accounting with the simplicity of a spreadsheet and the accuracy of professional software.
You can choose the application that best suits your needs and grow your management over time without ever losing your data. You can get started right away with one of our templates and always achieve professional results.
Watch the video: ▶ Accounting in 3 easy steps
Choose between two accounting methods
Banana Accounting Plus applications are based on two different recording methods, designed for users with different levels of experience.
This modular structure allows you to start simply and expand features as your needs grow.
- Income and Expense Accounting – ideal for beginners and non-accounting specialists.
Manages income and expenses from multiple accounts in a simple and intuitive way.
Also includes the Cash Manager, which manages income and expenses from a single account (such as cash, bank, or project).
- Double-entry Accounting – ideal for users with accounting knowledge and professionals. Based on the international standard Debit and Credit system, the professional method par excellence.
Also includes Multi-currency accounting for managing foreign currency accounts and exchange rate differences.
- All applications are also available with VAT options. They include tables, columns, accounts, and features for VAT calculation and reporting.
- Extensions for Swiss VAT reports are included in the Advanced plan of Banana Accounting Plus, but can also be tested in the Free and Professional plans up to 70 transactions.
Income / Expense Accounting
The Income and Expense application allows you to record income and payments easily. It's perfect for small businesses, associations, or freelancers who want to keep track of income, expenses, and account balances even without specific accounting training.
In just a few steps, you can find out:
- how much you have earned or spent,
- view the balance of all income and expense categories,
- automatically generate clear and professional reports.
Banana Accounting Plus includes templates with pre-configured accounts and categories, so you can start recording right away. Data entry is very intuitive thanks to the clearly structured columns.
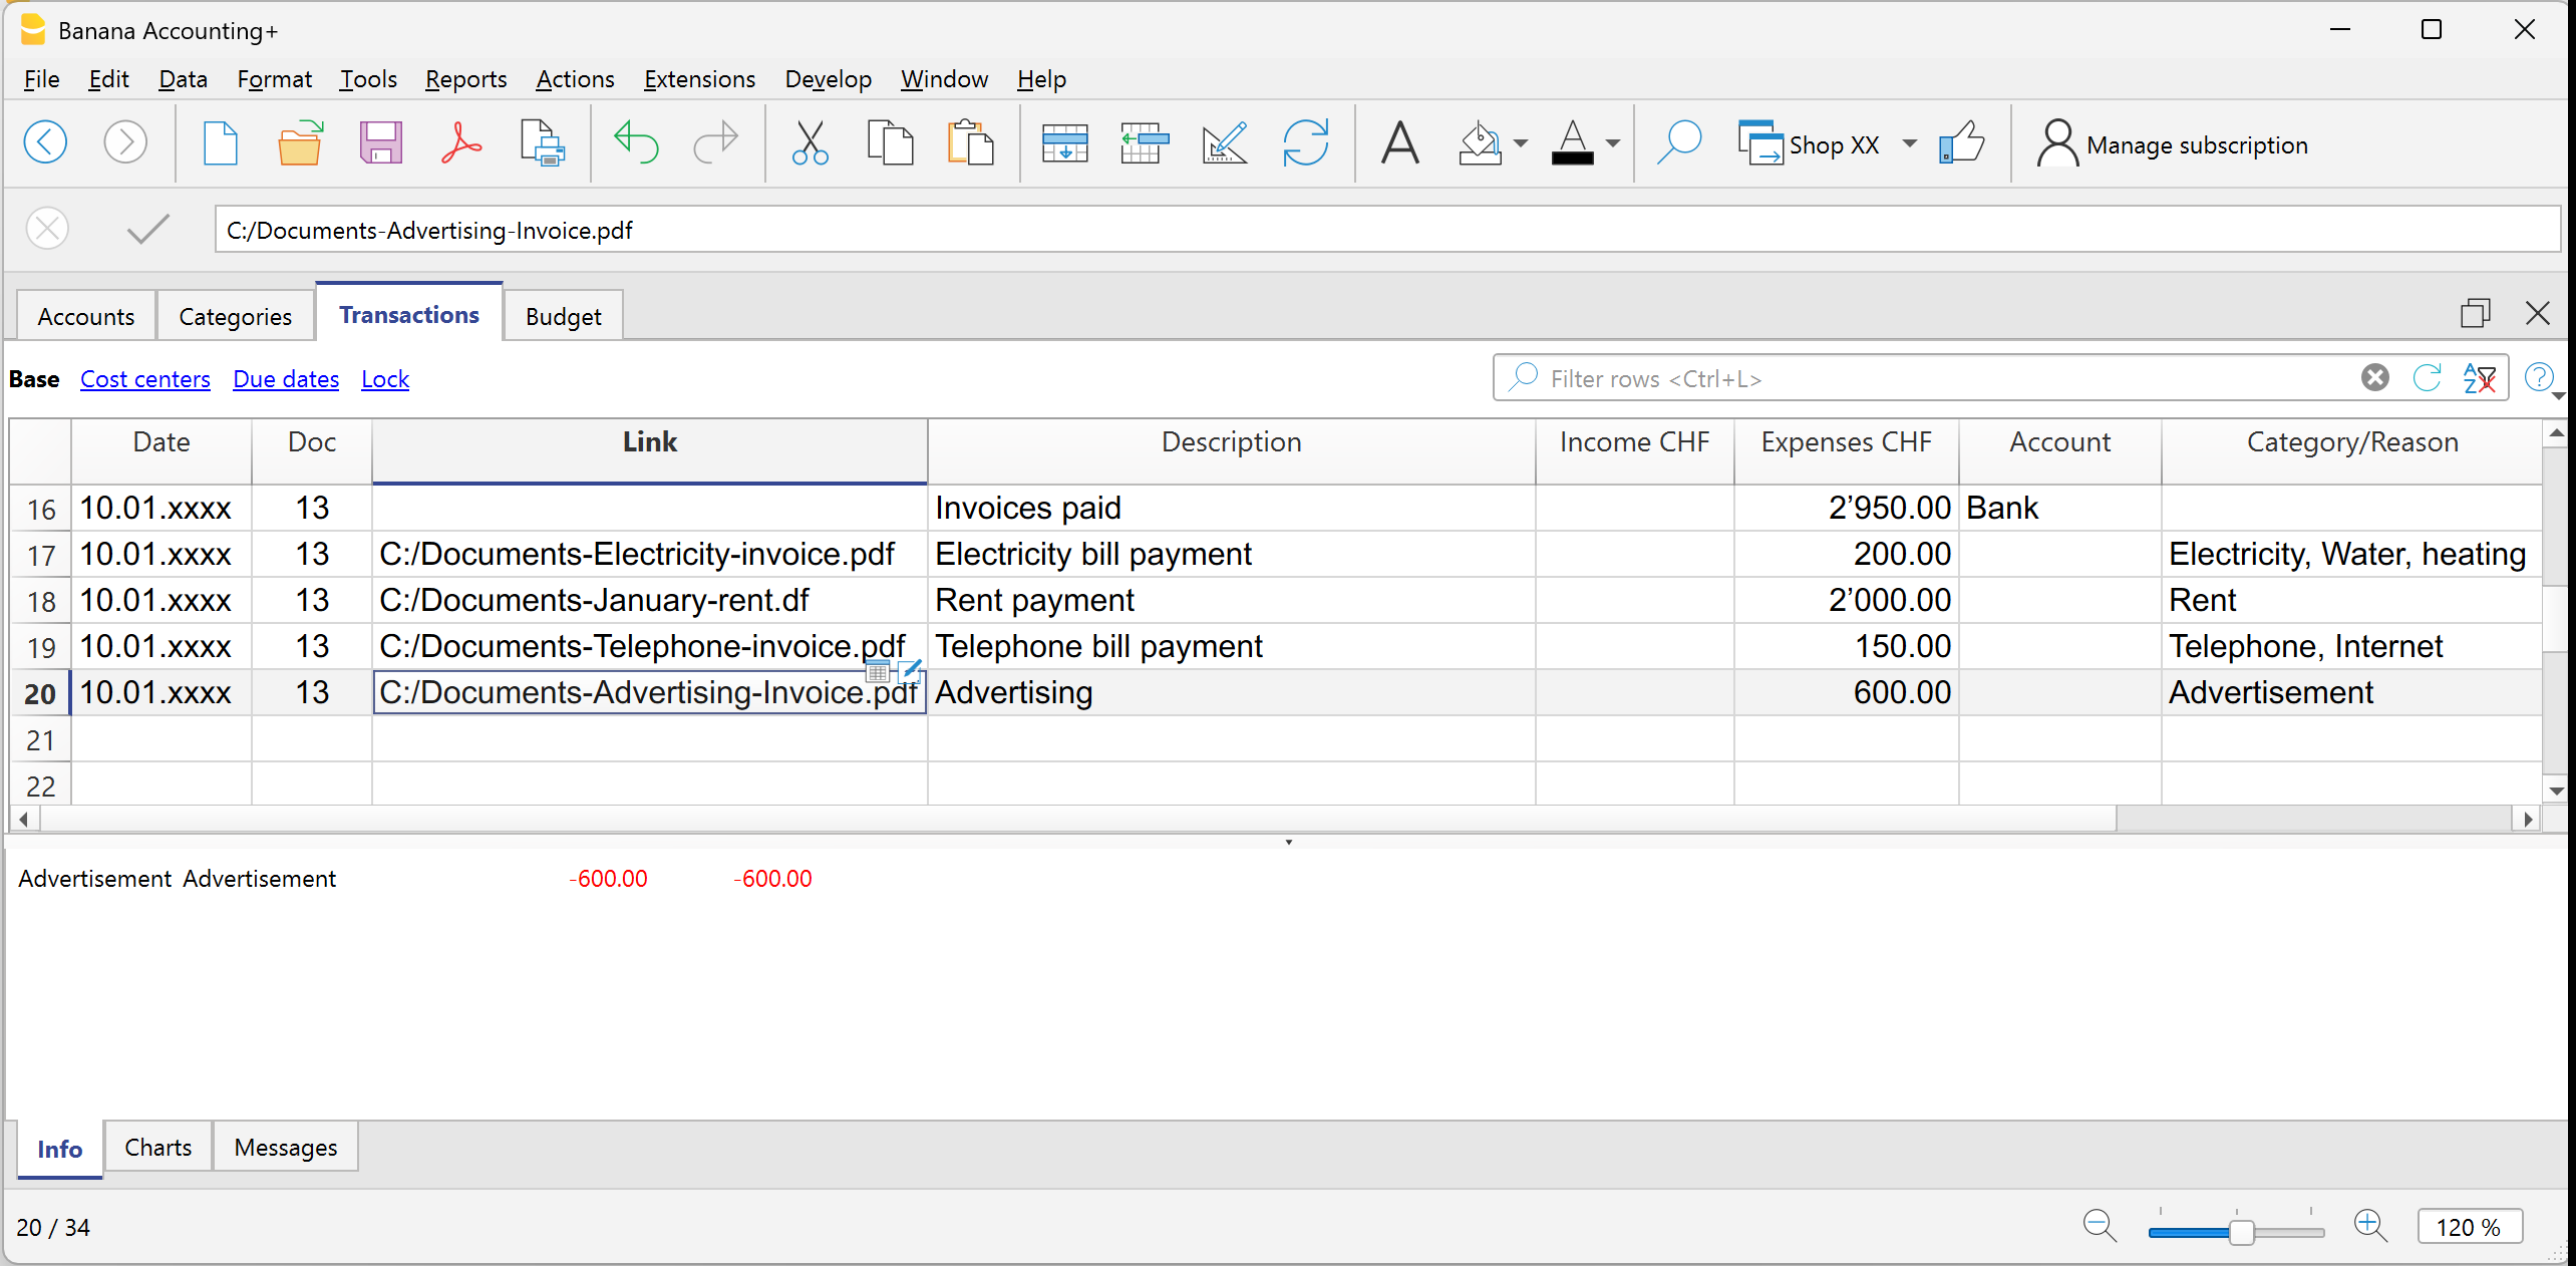
Cash Manager or Cash Book
The Cash Manager, also based on the Income and Expense accounting, offers management of cash account income and expenses or any other account.
It is simple, fast, intuitive, and usable by everyone:
- families who want to monitor expenses;
- teenagers and students learning to manage their savings and first expenses;
- businesses, freelancers, associations to manage liquidity.

Double-entry Accounting
With the double-entry accounting application, Banana Accounting Plus lets you work with precision but with great simplicity, thanks to its familiar spreadsheet-style environment.
It is a complete and professional solution based on the international Debit and Credit accounting system.
Each transaction is recorded in two accounts — one in Debit and one in Credit — to ensure accounting balance.
It is ideal for businesses, accountants, fiduciaries, and expert users who want maximum accuracy and management control.
It provides a complete view of assets, costs, revenues, and business results, with accurate reports ready for tax filing.
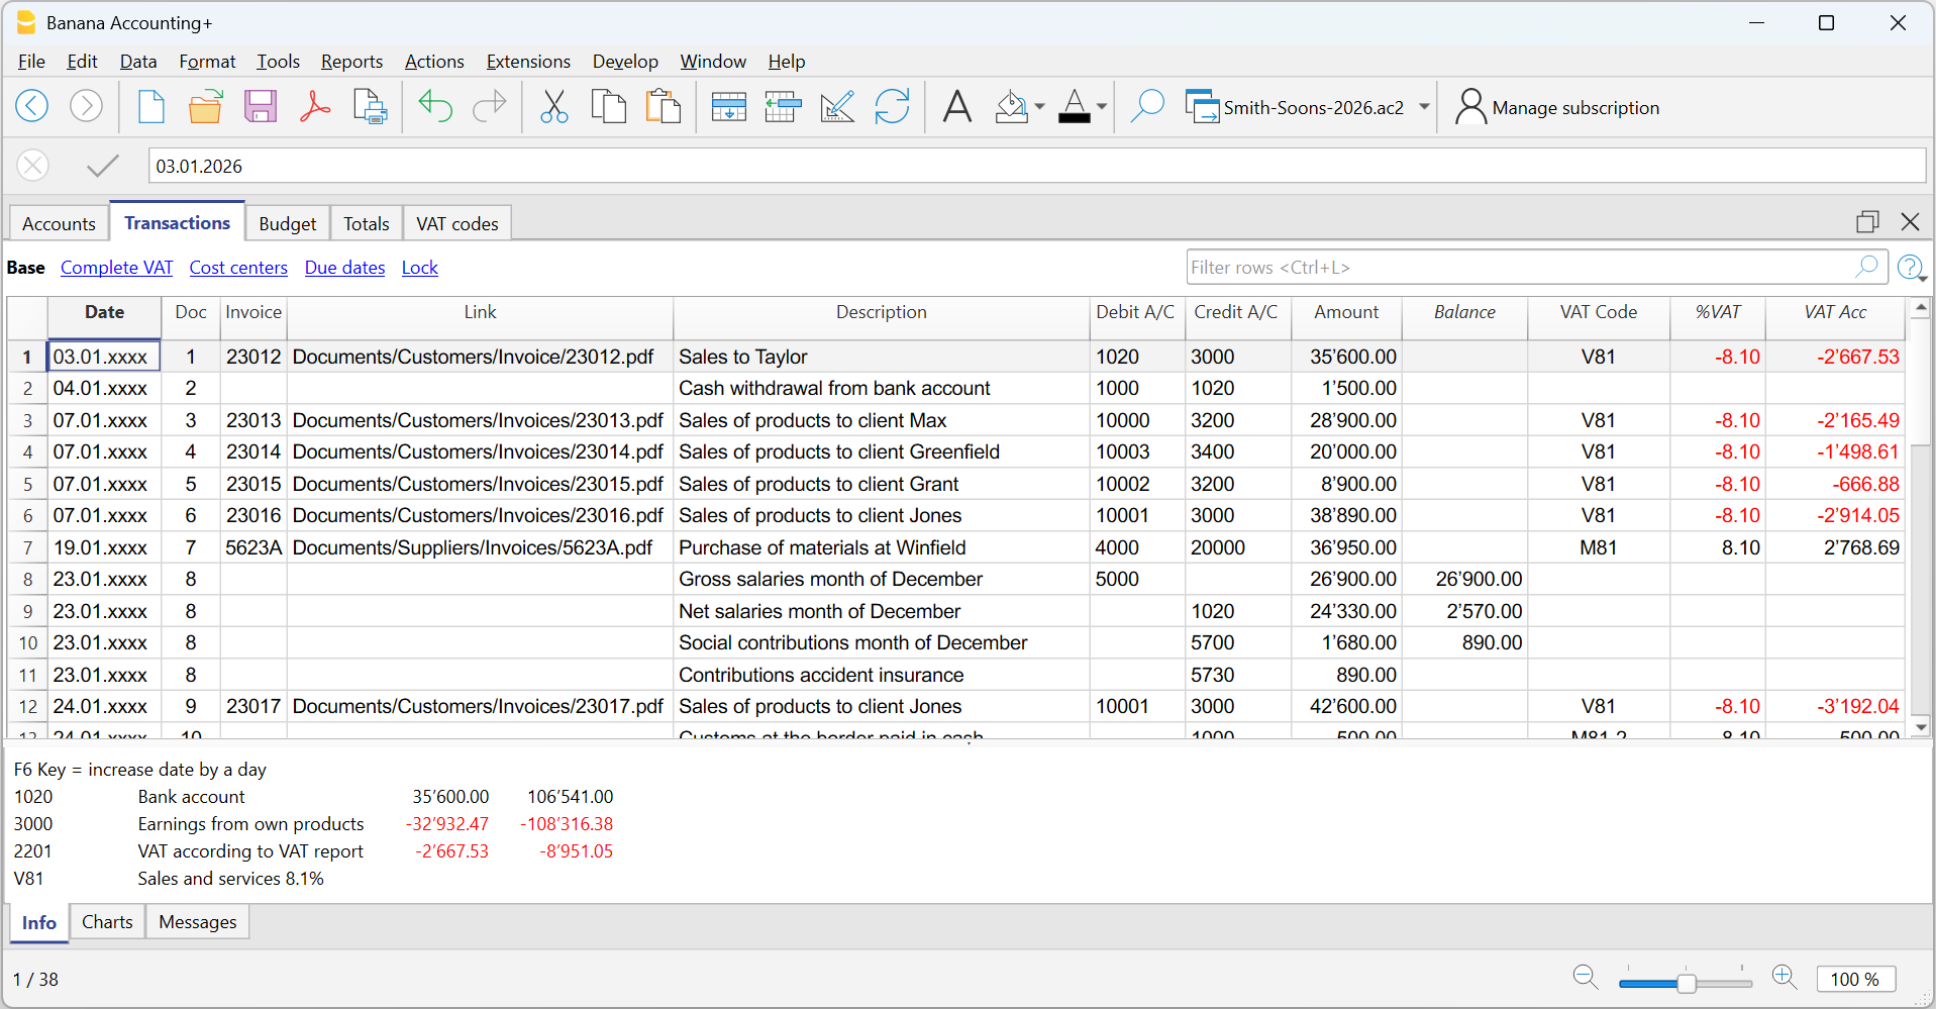
Thanks to its powerful calculation engine, Banana Accounting Plus manages double-entry accounting in a very simple and complete way:
- updates all balances in real time after each transaction;
- automatically detects any imbalance between Debit and Credit;
- allows you to filter rows and modify them directly in the filtered table;
- allows importing bank transactions, saving recurring operations, and attaching digital documents;
- generates balance sheets, profit & loss statements, account ledgers, and journals with one click.
It ensures an up-to-date and consistent view of your business’s financial and economic situation.
Multi-currency Accounting
Multi-currency accounting is based on double-entry accounting and allows you to also manage accounts in different currencies. Easily handle multiple currencies and benefit from automatic calculations for exchange rate fluctuations.
Ideal for those who work abroad, or with foreign countries, and anyone who has financial operations involving multiple currencies; small and medium-sized businesses with international suppliers or customers, import and export companies, financial service firms, investors, travelers, and tourists to keep track of expenses while traveling.

Structure of the Accounting applications
The strength of Banana Accounting lies in its clear and organized structure. Each application is based on tables, with clearly defined columns, similar to a spreadsheet, but with built-in accounting features. This approach combines the simplicity of Excel with the accuracy of professional software.
The main tables are:
- Accounts – available in all accounting applications. Lists cash, bank, customer, supplier, and other accounts, with balances updated in real time.
- In the Cash Manager, the Accounts table handles only one account.
- Categories – available in Income and Expense accounting, including the Cash Manager. Divides income and expenses by type (sales, donations, salaries, expenses, etc.).
- Transactions table – available in all accounting applications. Daily operations are recorded or imported with date, description, and amount by account/category.
- VAT Codes - available in all accounting applications with VAT. Manages the VAT codes to apply in transactions for automatic calculations and reports.
- Exchange Rates – available only in double-entry multi-currency accounting templates. Manages exchange rates of foreign currencies in relation to the base currency (national currency).
After each transaction, Banana Accounting automatically updates all totals and generates professional reports: balance sheets, financial statements, journals, and account ledgers, always ready for printing or export.
Predefined templates for each application
For each application, you will find ready-to-use templates with accounts, categories, and integrated features based on the selected accounting type.
Simply select the most suitable template to get professional reports and start working right away.
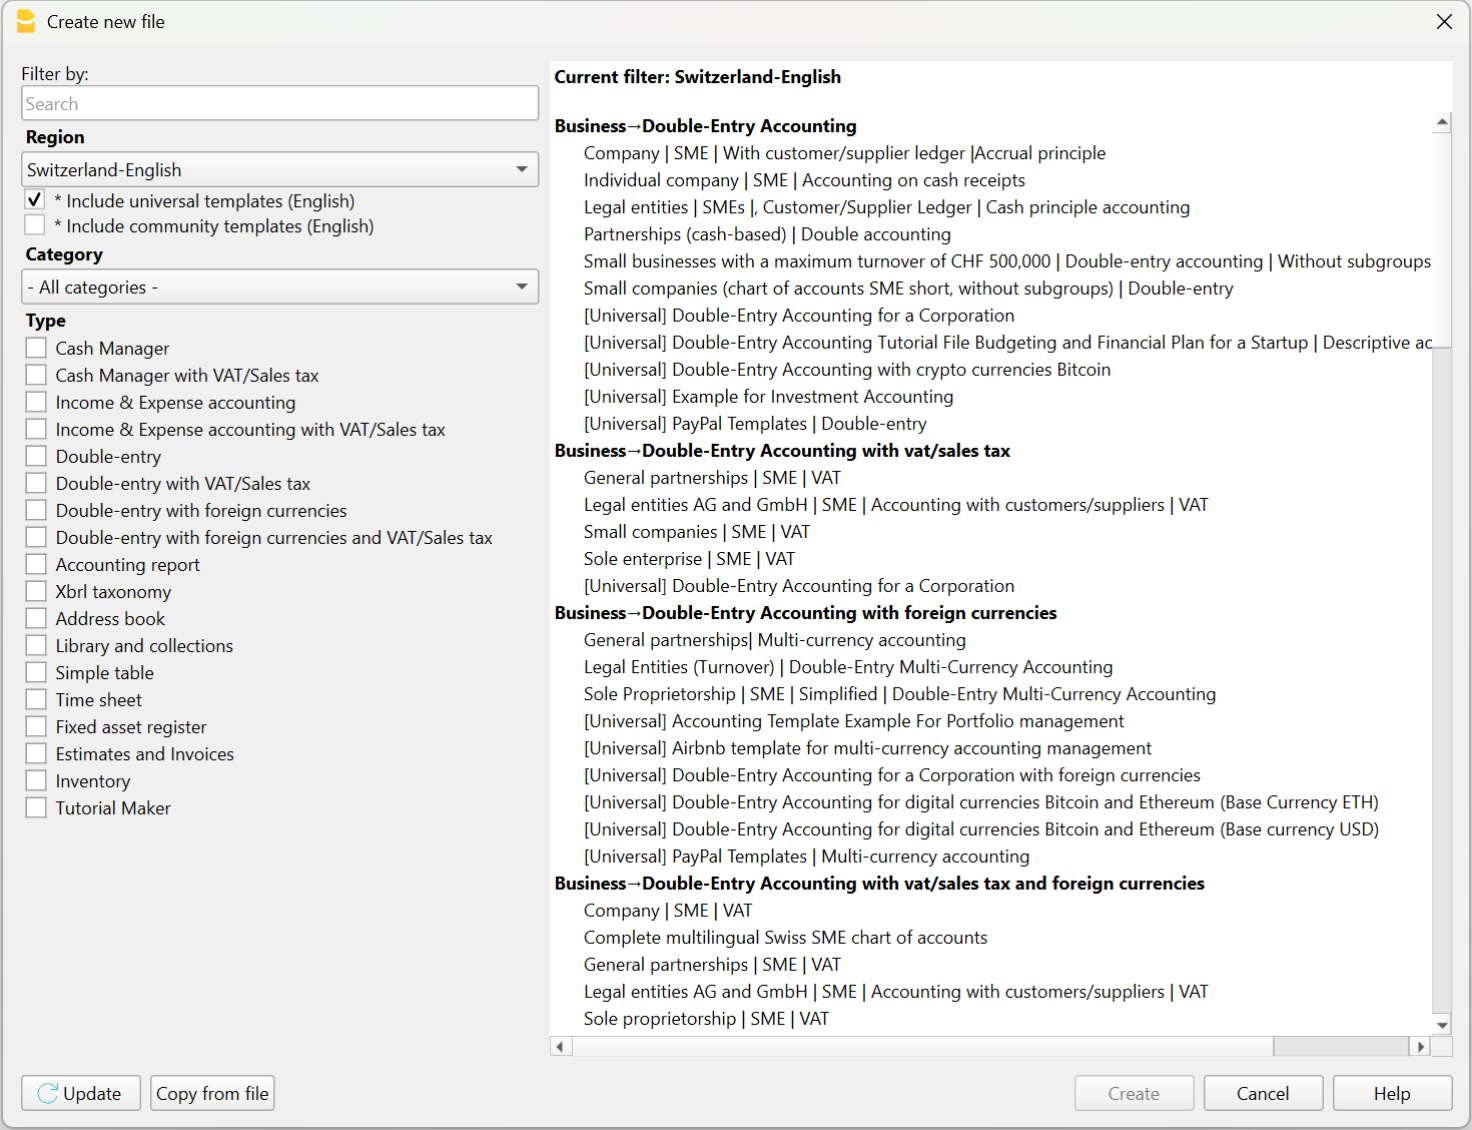
You can open them directly:
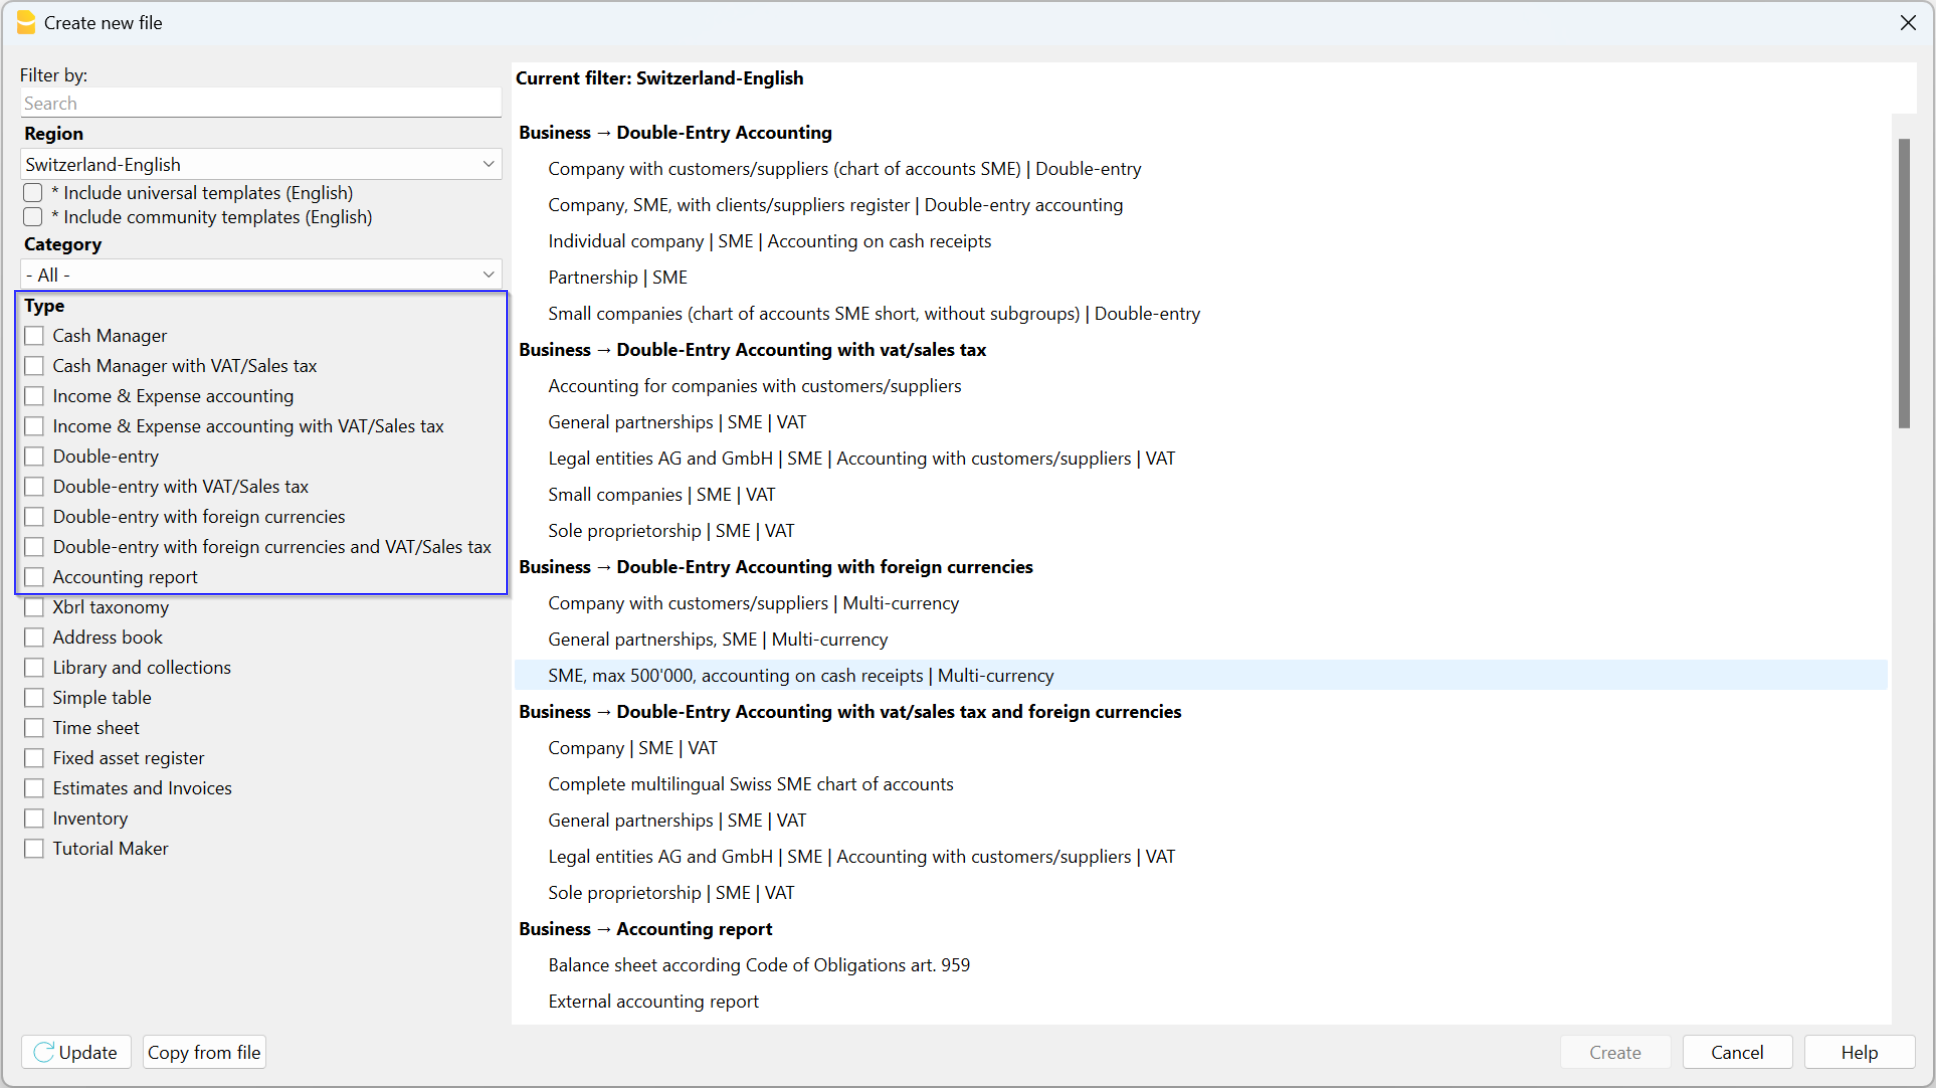
- from the program, via the File > New menu
- from our Template Store, by downloading them to your computer or opening them via the WebApp (directly in your browser – still in testing).
In just a few minutes, you can record your first transactions and get real-time updated reports.
Double-entry accounting with Banana Accounting Plus
Double-entry accounting is an application of Banana Accounting Plus that allows you to manage accounts with precision, flexibility and reliability, following the most recognized and widely used accounting method internationally.
It is the ideal solution for companies, associations, organizations, freelancers, self-employed workers and also for schools, used worldwide by training institutes and universities for practical teaching.
Note: usage requires basic accounting knowledge.
Benefits of double-entry accounting with Banana
Banana Accounting Plus offers various tools that simplify the daily management of double-entry accounting, including:
- Predefined double-entry accounting templates with a pre-set chart of accounts.
- Table structure that allows quick entry of transactions.
- Customizable chart of accounts, with the possibility to add or modify accounts and groups.
- Import from e-banking and Rules for recurring transactions.
- Linking digital documents via dedicated fields.
- Automatic reports such as balance sheet, income statement and account cards.
- VAT management, Customers/Suppliers, Multi-currency and Budget, if needed.
Below you will find an overview of the key elements of the accounting file: from the initial settings to the operational tables, up to the closing, printing, and opening functions.
Getting started
The Getting started page guides you through the first steps with the double-entry accounting file, explaining what to set up initially and how to properly prepare the work.
File Properties
On the File Properties page, you can define the basic accounting data: start and end dates of the accounting period, company name and address, base currency and other additional data.
Accounts Table
The Accounts table includes all asset and income statement accounts (Assets, Liabilities, Costs, Revenues) with real-time updated balances. You can customize the table by adding or removing accounts, changing descriptions, adding your customers and suppliers, etc.
Based on the selected template, the Accounts table suggests the accounts needed to manage your business. You can freely adapt the structure of the chart of accounts, always maintaining data consistency:
- Add or delete accounts and groups at any time.
- Edit descriptions, totals and subtotals.
- Create new sections or custom balance sheet structures.

The grouping system explains how Banana calculates totals and subtotals in the tables (Chart of accounts, Categories, etc.).
Thanks to the group levels, you can set up custom balance sheets, create subtotal groups and analyze in detail the various areas of your management.
For more detailed analysis, you can use:
which allow you to classify transactions by projects, departments or specific activities, without having to create additional accounts.
If your needs change over time, you can always change the chart of accounts by updating its structure easily while maintaining continuity and compatibility with existing data.
In the Accounts table, at the end of the Income Statement, if the equation Assets = Liabilities + Equity is correct, the row Difference must be zero remains empty.
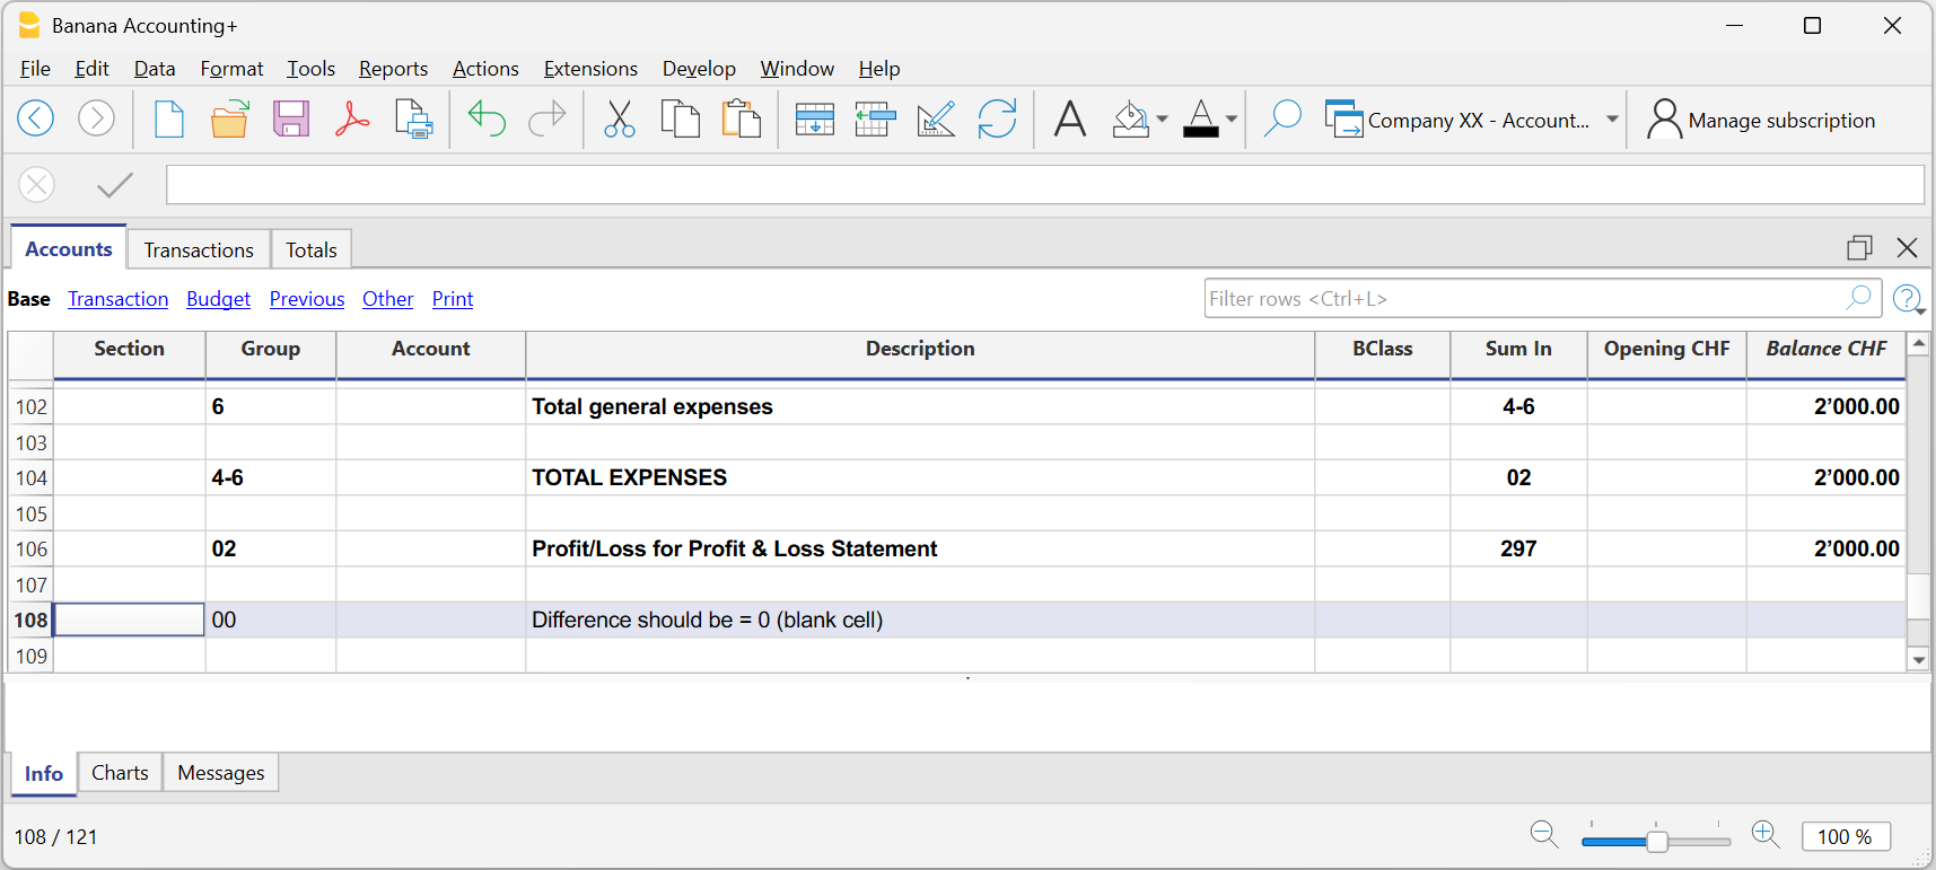
Differences and imbalances are caused by:
- Errors in opening balances
- Errors in grouping
- Errors in transactions
Transactions Table
The Transactions table is the heart of double-entry accounting, where you enter all daily transactions by specifying the accounts involved in the Debit and Credit columns, the dates, amounts, and descriptions. Depending on the selected accounting template, it already has predefined columns.
You can customize the table by adding new columns or changing their layout to suit your viewing preferences.

The Transactions table offers many features to speed up your work and maintain perfect, error-free accounting:
- Smart autocomplete for accounts and descriptions
- Rules for recurring transactions
- Automatic import from e-banking, which instantly fills in rows
- Links to digital documents directly in the row (Link column)
- Advanced search and filters to view only the relevant transactions
- Option to add custom columns or rearrange existing ones
If you use customer and supplier management, the table also automatically updates their balances and supports invoice reconciliation.
Totals Table
In the Totals Table, you get an instant overview of account trends and main balances: it automatically summarizes the accounting results, displaying total assets, liabilities, costs and revenues. If there are any accounting balancing errors, the difference is shown in the "Difference must be zero" row.
Budget Table
In the Budget Table, you can plan both financial and economic aspects. Once you enter the budget values, you can generate a forecast Balance Sheet and Income Statement and also compare them with actual values.
Other Tables
For more specific needs, you can also use the dedicated tables for:
Accounting Closures
Accounting closures verify that the data is complete and correct and prepare the accounting for a new period. Thanks to specific features, Banana Accounting Plus helps you review transactions, identify possible errors, and generate final documents.
Some of the main features:
- Balance column: immediately shows any discrepancies between Debit and Credit.
- Temporary row filter: to display only the transactions you're interested in and edit or correct them directly in the filtered rows.
- Check accounting: a set of tools for automatically verifying data and reporting any errors.
Printouts, Analysis and Automatic Reports
Banana processes the recorded data in real time, offering professional reports and constantly updated analyses to monitor the financial performance of your business.
With just one click, you can generate all the main accounting documents:
- Balance Sheet and Income Statement
- Account cards and Journal
- VAT reports with XML export (only with the Advanced plan)
- Budget and project analysis using Cost/Profit Centers and Segments
Example of Balance Sheet printout
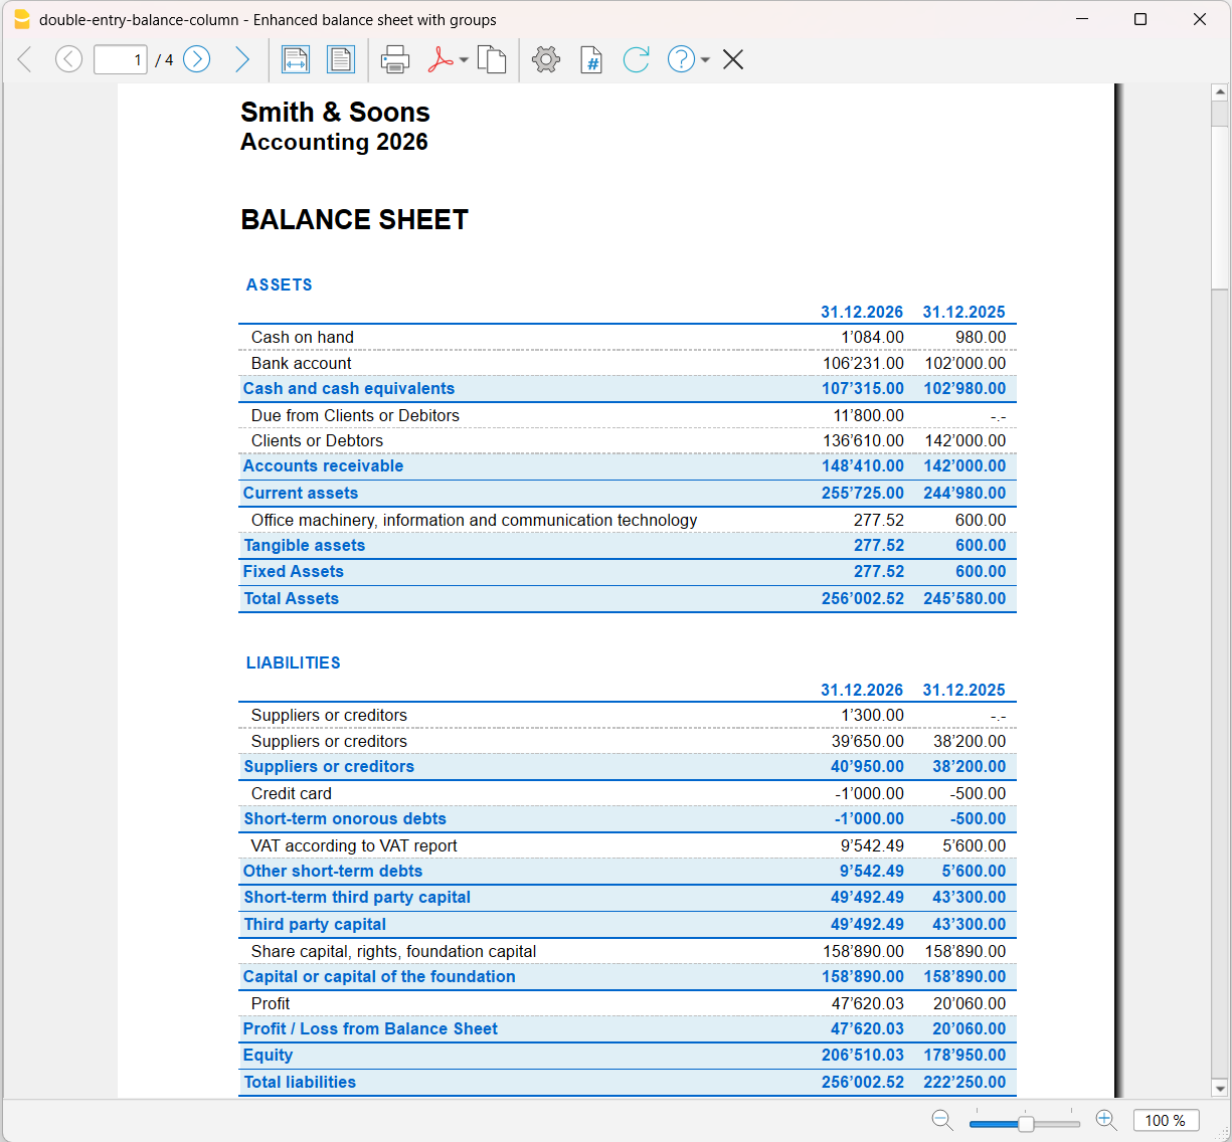
Opening Balances
Opening balances are the starting point of a new accounting year; they are essential for correctly setting the initial balances, the file parameters, and any data to be carried over from the previous year or from another accounting system.
In Banana Accounting Plus, opening is done simply using the Create New Year command: the program creates a new file (to be saved under the new year's name), copying all accounts from the previous year and automatically inserting the opening balances. The new year can be opened even before the previous year is closed. With the Update Opening Balances command, you can automatically update the new year's opening balances once the previous year has been definitively closed or modified.
Useful Links
Come começar uma Contabilidade de partidas dobradas
Criar um ficheiro de contabilidade a partir de um modelo
Siga os seguintes passos:
- Menu Arquivo, comando Novo
- Selecionar a Região, a Categoria e o tipo de contabilidade
- Da lista de modelos que aparece, escolha a que mais se aproxima às suas exigências
- Clique no botão Criar.
Na caixa Procurar, ao inserir uma palavra-chave, o programa visualiza os modelos que contêm a palavra-chave.
Também é possível começar a partir de um ficheiro vazio, ativando a opção Criar arquivo vazio. No entanto, para facilitar o começo e evitar erros de agrupamento, aconselhamos começar sempre com um modelo existente.
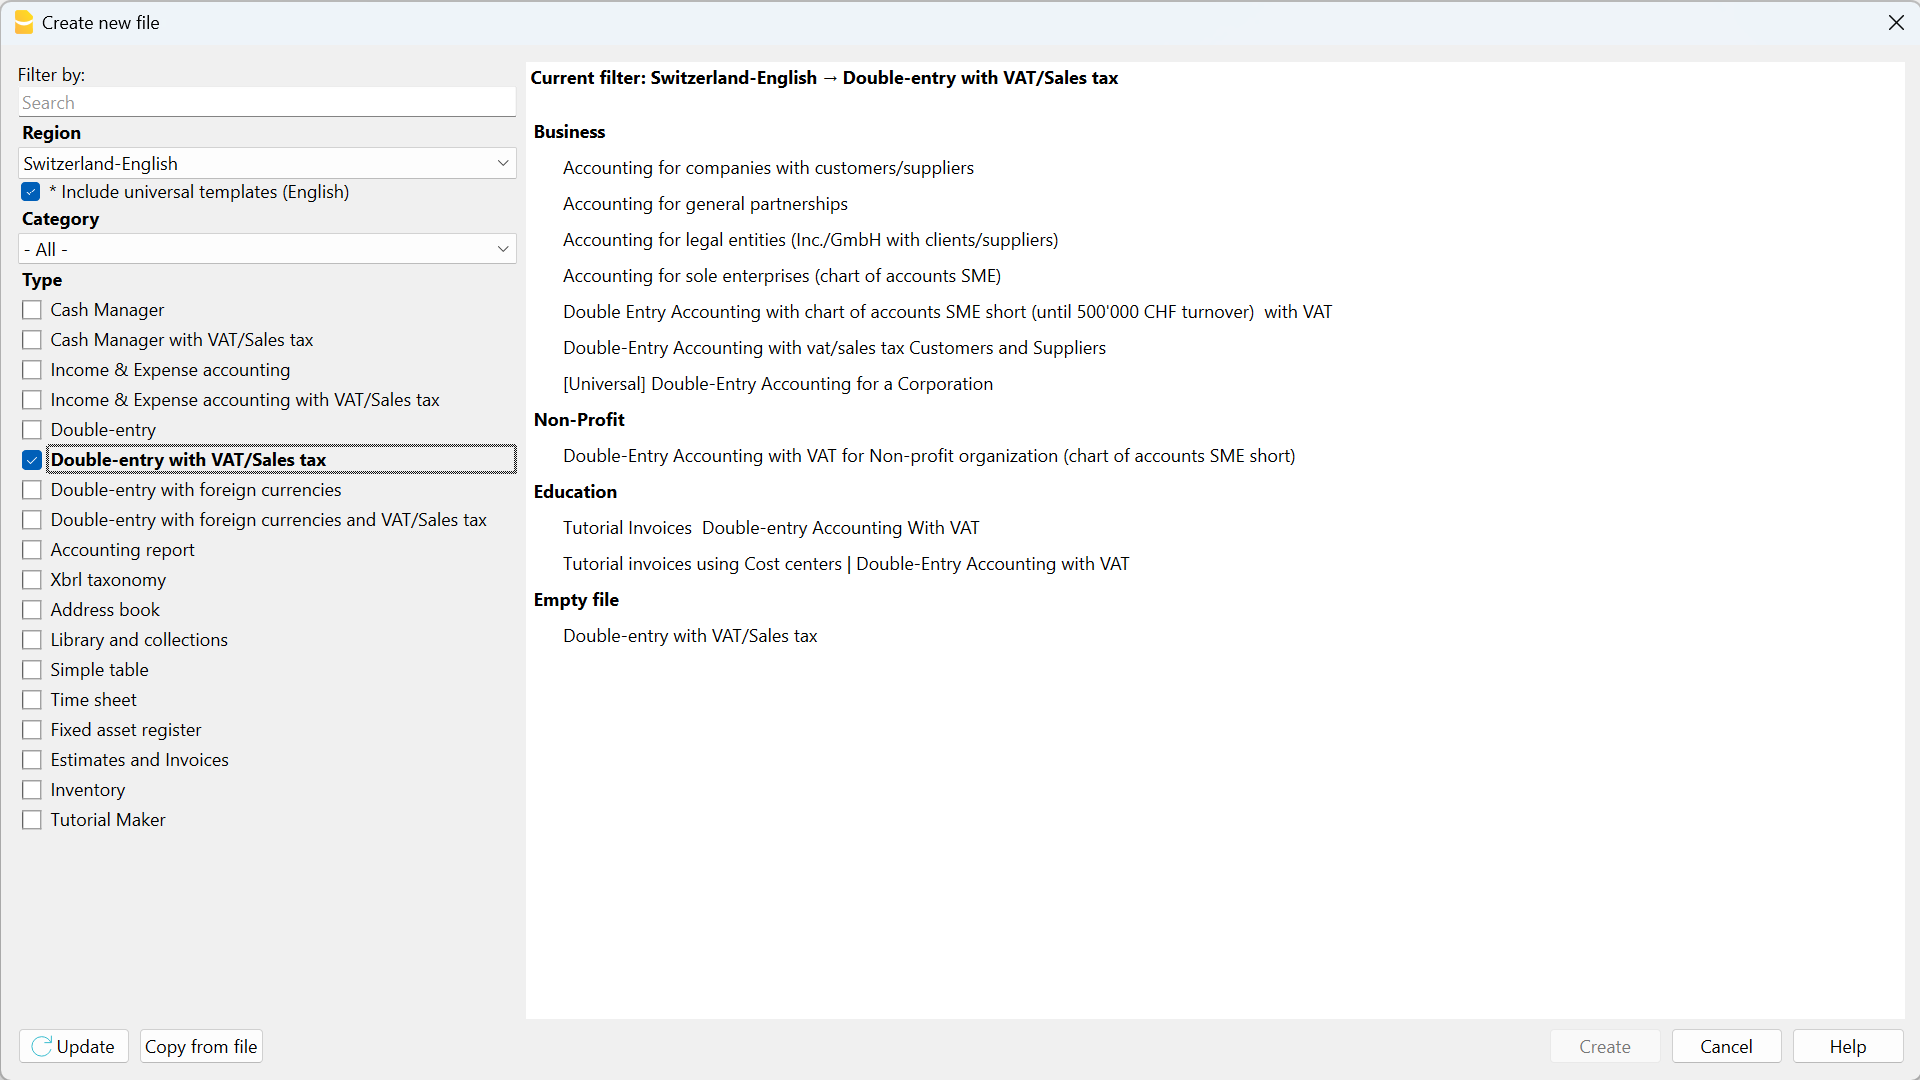
Mais informações sobre como criar um novo arquivo estão disponíveis na página Criar novo arquivo.
Configurar as Propriedades do arquivo
- No menu Arquivo, comando Propriedades do arquivo indicar o nome da empresa que aparecerà no cabeçalho da impressão e de outros dados.
- Selecionar a moeda base com a qual é gerida a contabilidade.
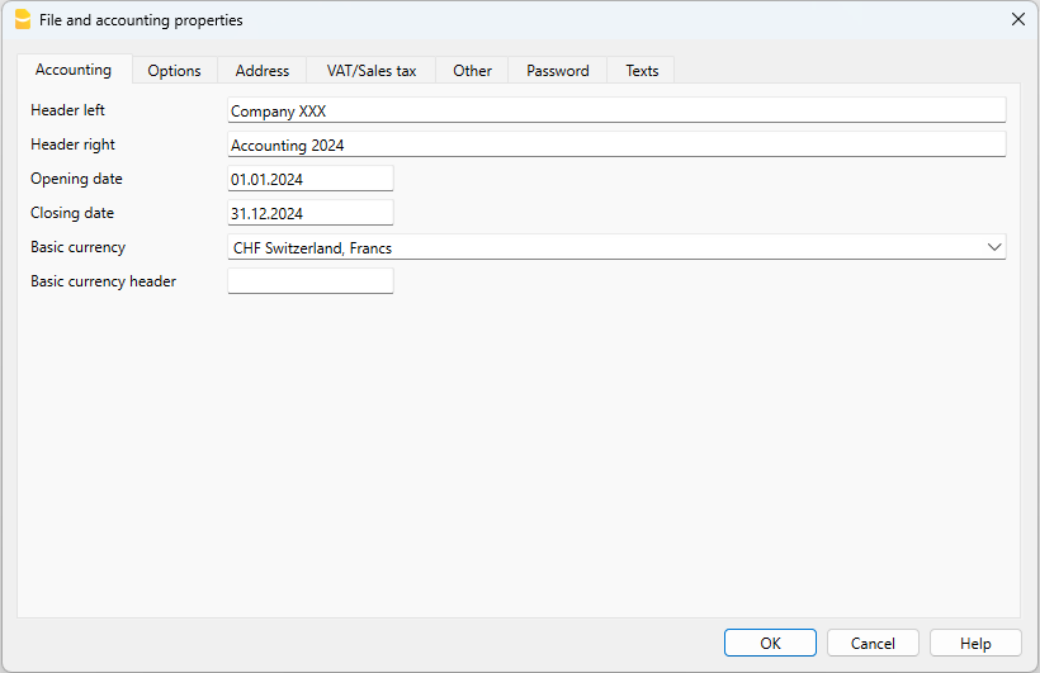
Salvar no disco
Com o comando Arquivo → Salvar como..., guarde os dados e atribua um nome ao ficheiro. Aparecerà o dialogo tipico do seu sistema operativo.
- É aconselhado usar o nome da empresa, seguido do ano "empresa-2020.ac2" para distinguir de outros arquivos de contabilidade.
- Pode guardar quantos arquivos precisar, cada um com o seu próprio nome.
- Pode escolher o percurso e o suporte (guardar num disco, pen USB o cloud).
Se espera ter também documentos ligados à contabilidade do ano corrente, sugerimos criar uma pasta separada para cada ano de contabilidade para reunir todos os arquivos.
Uso do programa em geral
Banana Contabilidade foi inspirado no Excel. O modo de uso e os comandos são o mais semelhante possível aos do Microsoft Office.
Para informações sobre o uso, inviamo-lo a explicação na página Interface.
A contabilidade é mantida ao interno de tabelas e são usadas todas da mesma maneira.
Personalizar o plano de contas
Na tabela Contas é possível personalizar o plano de contabilidade segundo as próprias exigências:
- Adicionar e eliminar contas existentes (adicionar linhas)
- Mudar os números de conta, a descrição (ex: inserir o nome do ccb do próprio Banco), inserir outros grupos, etc.
- Para criar subgrupos, consultar a seguinte página Grupos.
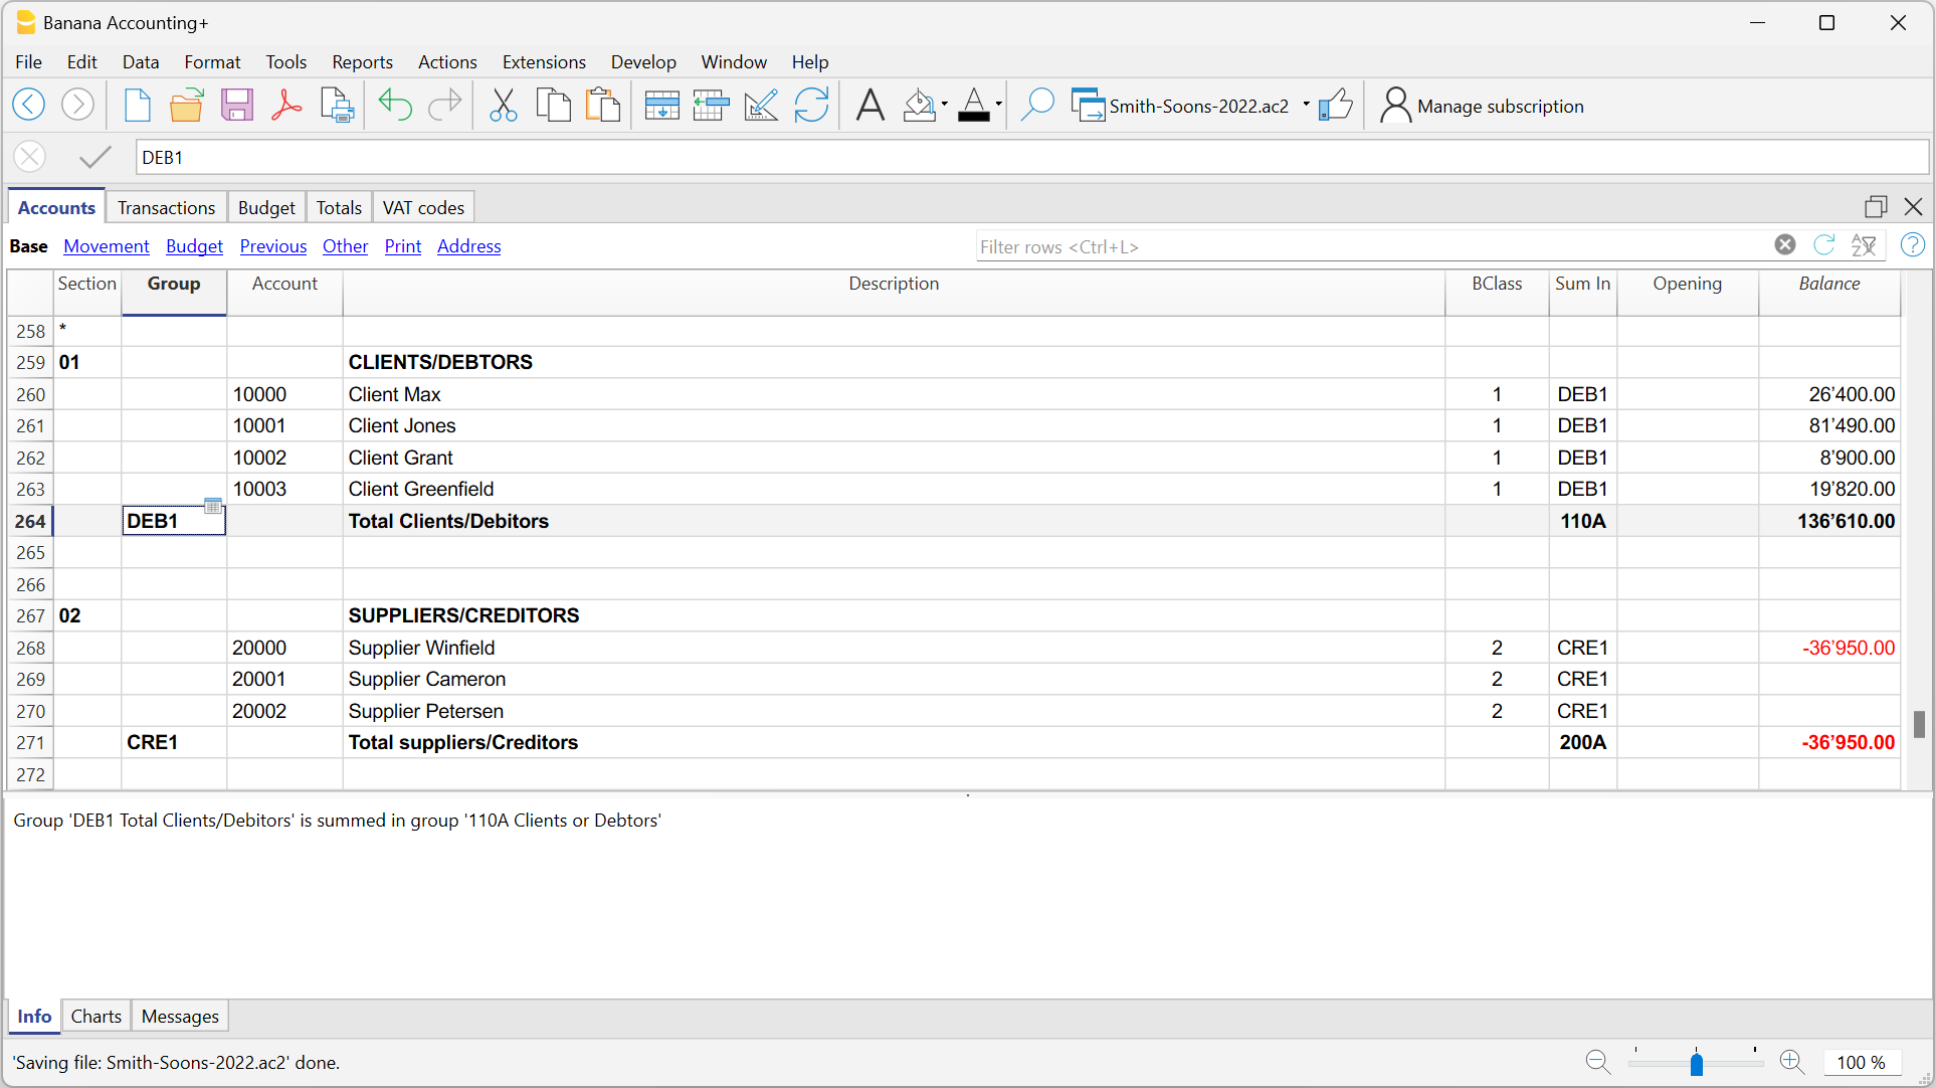
No plano de contas podem-se definir Centros de custo ou Segmentos que servem para catalogar os montantes de maneira mais detalhada e específica.
Os Lançamentos
Os lançamentos devem ser inseridos na tabela Lançamentos e constituem o Livro Jornal.
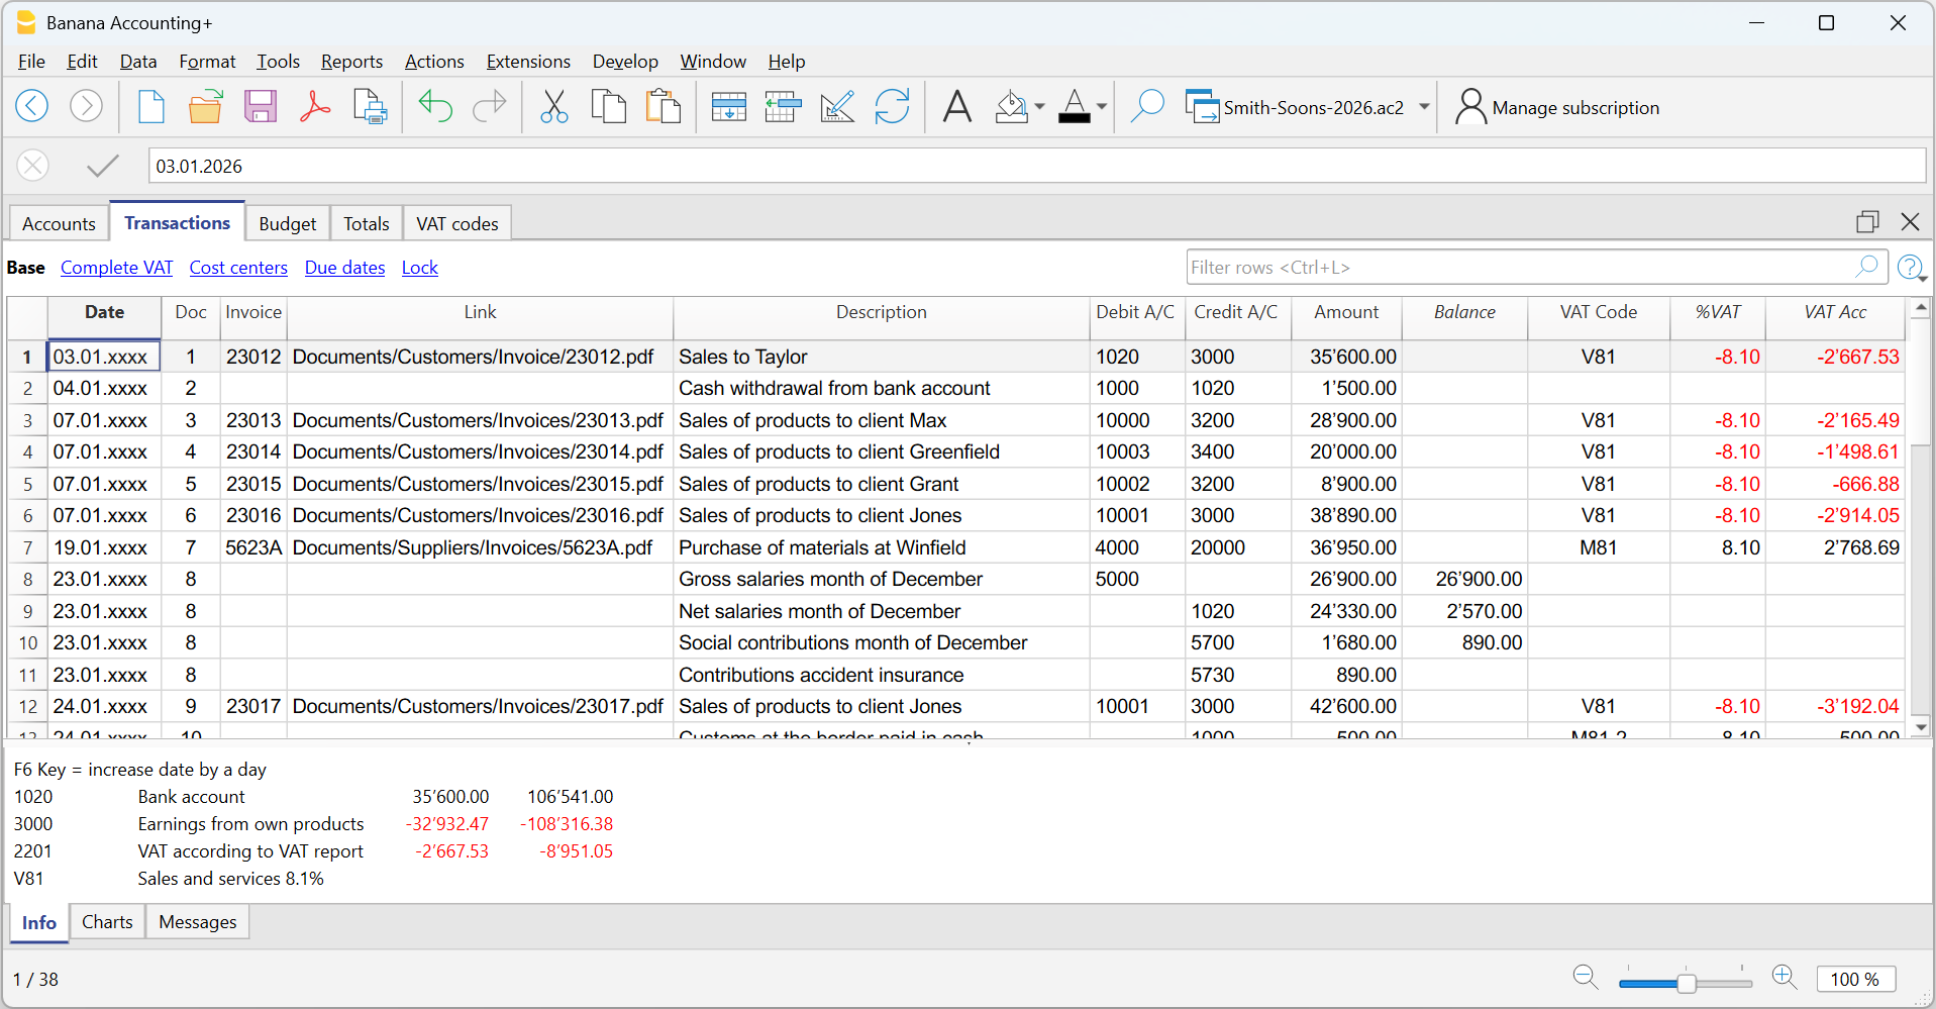
Nas colunas correspondentes:
- Inserir a data
- Inserir o número de documento que foi atribuído ao documento em papel manualmente. Isto permite recuperar facilmente o documento, uma vez contabilizada a operação
- Inserir a descrição
- Na conta Débito inserir a conta de destinação
- Na conta Crédito inserir a conta de proveniência
- Inserir o Valor. Na contabilidade com IVA, inserir o montante bruto; o programa separa o IVA, separando o custo e o produto líquido.
Acelerar a inserção dos Lançamentos
Para acelerar a inserção dos lançamentos utiliza-se:
- a função de Emissão de dados com preenchimento automático que consente recuperar automaticamente dados já inseridos previamente
- a função dos Lançamentos repetitivos (menu Conta2) que permite memorizar numa tabela os lançamentos repetitivos
- a importação de dados do extrato bancário ou postal.
Lançamentos com IVA
Para poder registrar operações com IVA ocorre:
- No menu Arquivo, comando Novo, escolher contabilidade de partidas dobradas
- Escolher um dos planos de contabilidade já existentes, onde se encontra a tabela Códigos IVA, com todos os códigos IVA em vigor.
Para os lançamentos com IVA, consultar a página Lançamentos da gestão IVA.
Lançamentos compostos
Para os Lançamentos compostos, aqueles que concernem débitos e/ou créditos em várias contas (ex: quando se pagam faturas diferentes com a conta corrente bancária) ocorre registrar em mais do que uma linha:
- uma linha para cada conta de débito e/ou crédito.
- quando todos os débitos e créditos forem inseridos, não devem existir diferenças.
Para mais informações, consulte a página Lançamentos compostos.
Controlo faturas clientes e fornecedores
Banana permite ter sob controlo as faturas para pagar e aquelas por receber. Consulte:
As fichas Conta
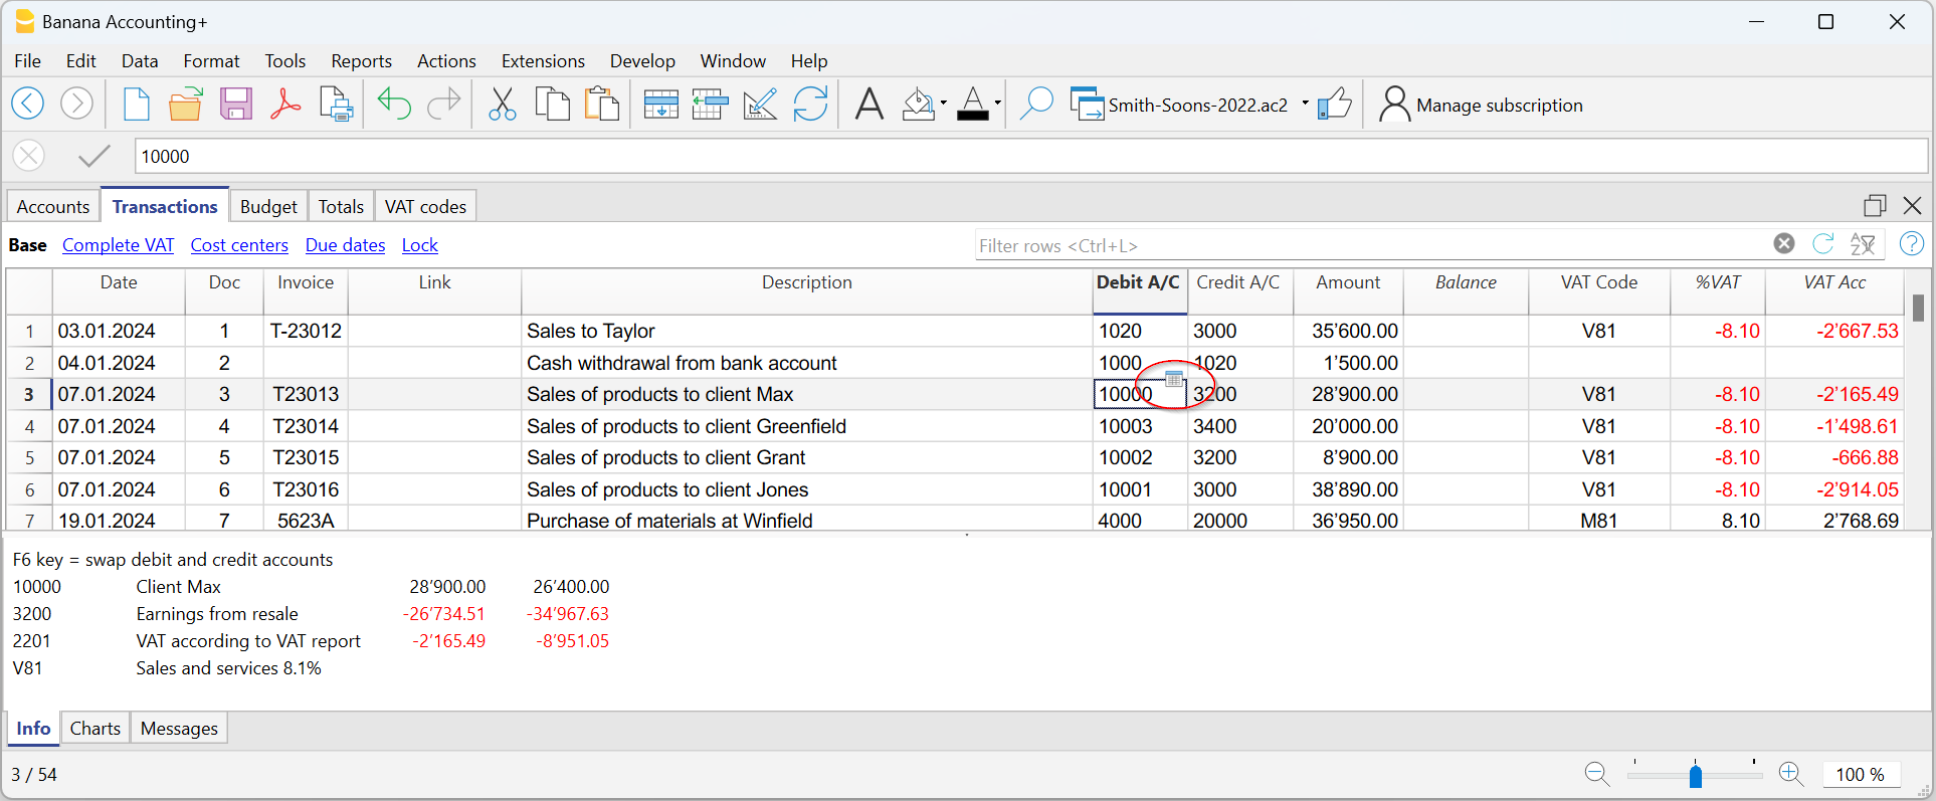
A ficha conta relata automaticamente todos os movimentos registados numa mesma conta (ex: caixa, banco, clientes, etc.).
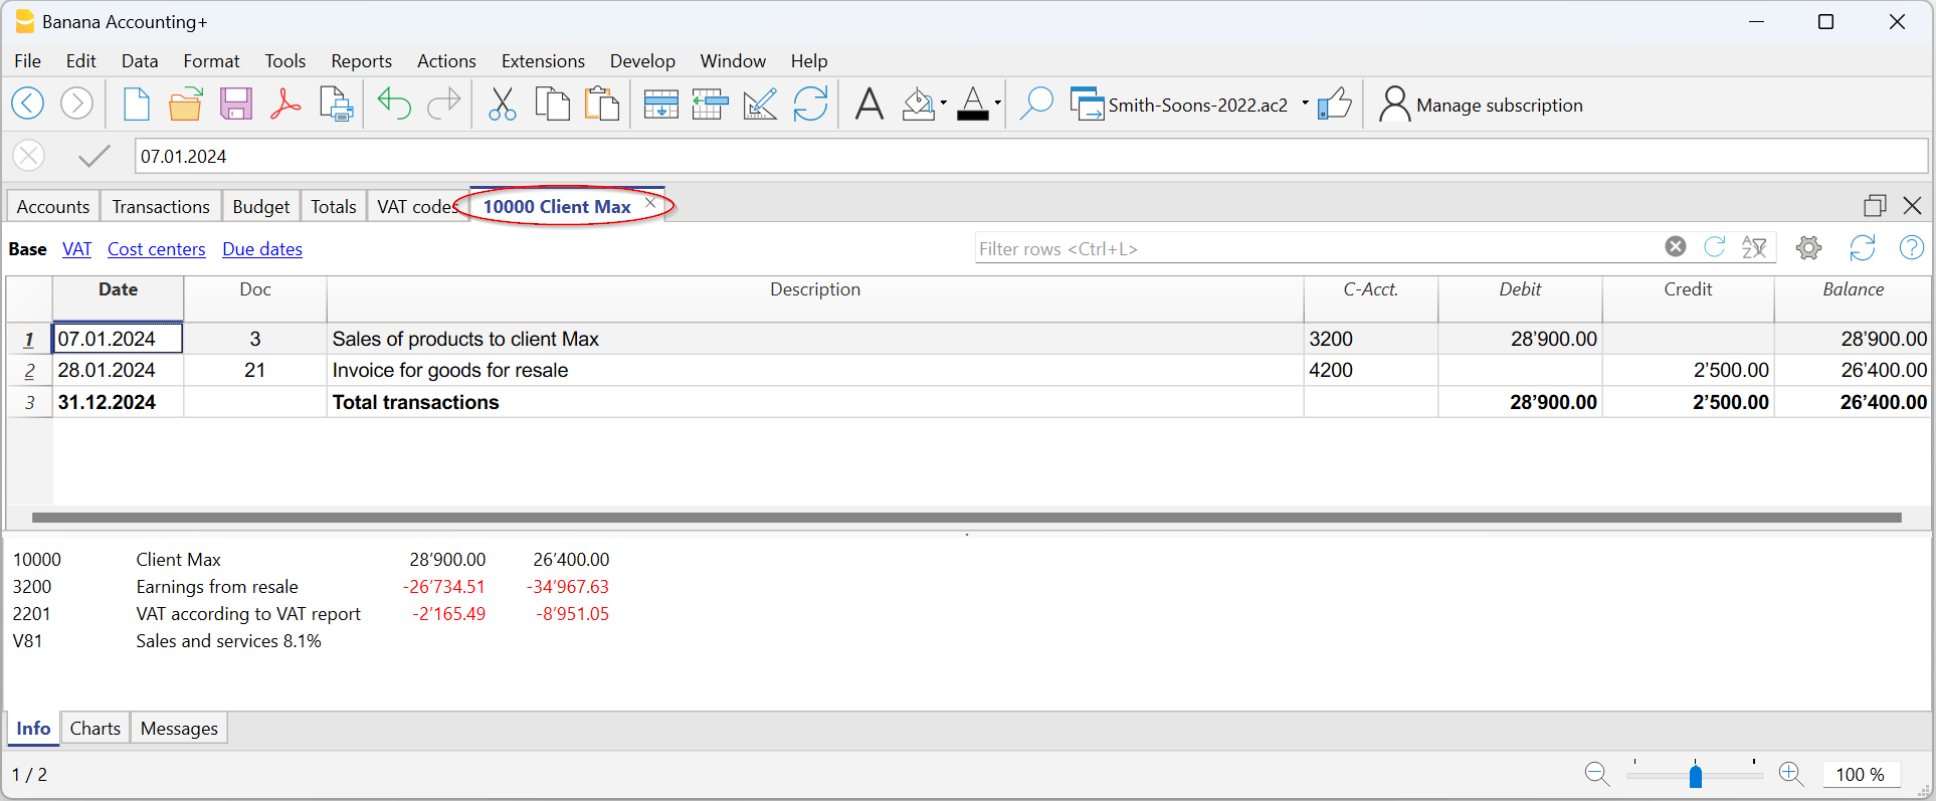
Para visualizar a ficha de uma conta, basta posicionar o mouse no número de conta e clicar no símbolo azul que aparece.
Fichas conta por período
Para visualizar as fichas conta com os saldos referidos num determinado período, ocorre clicar no menu Conta1, comando Razão por conta e na secção Período ativar Período selecionado, inserindo a data de começo e de fim do período.
Para mais informações, consulte a página Periodo.
Imprimir as fichas conta
Para imprimir uma ficha conta, basta visualizar a ficha a partir de qualquer tabela (Contas ou Lançamentos) e acionar a impressão no menu Arquivo..
Para imprimir várias ou todas as fichas conta, clicar no menu Conta1, comando Razão por conta e selecionar as fichas conta para imprimir. Através do filtro presente na janela, pode-se fazer uma seleção automatica de todas as contas, os centros de custo, os segmentos, os grupos, etc.
Mais informações estão disponíveis na página Razões por conta.
O Balanço e o Demonstrativo de Lucros e Perdas
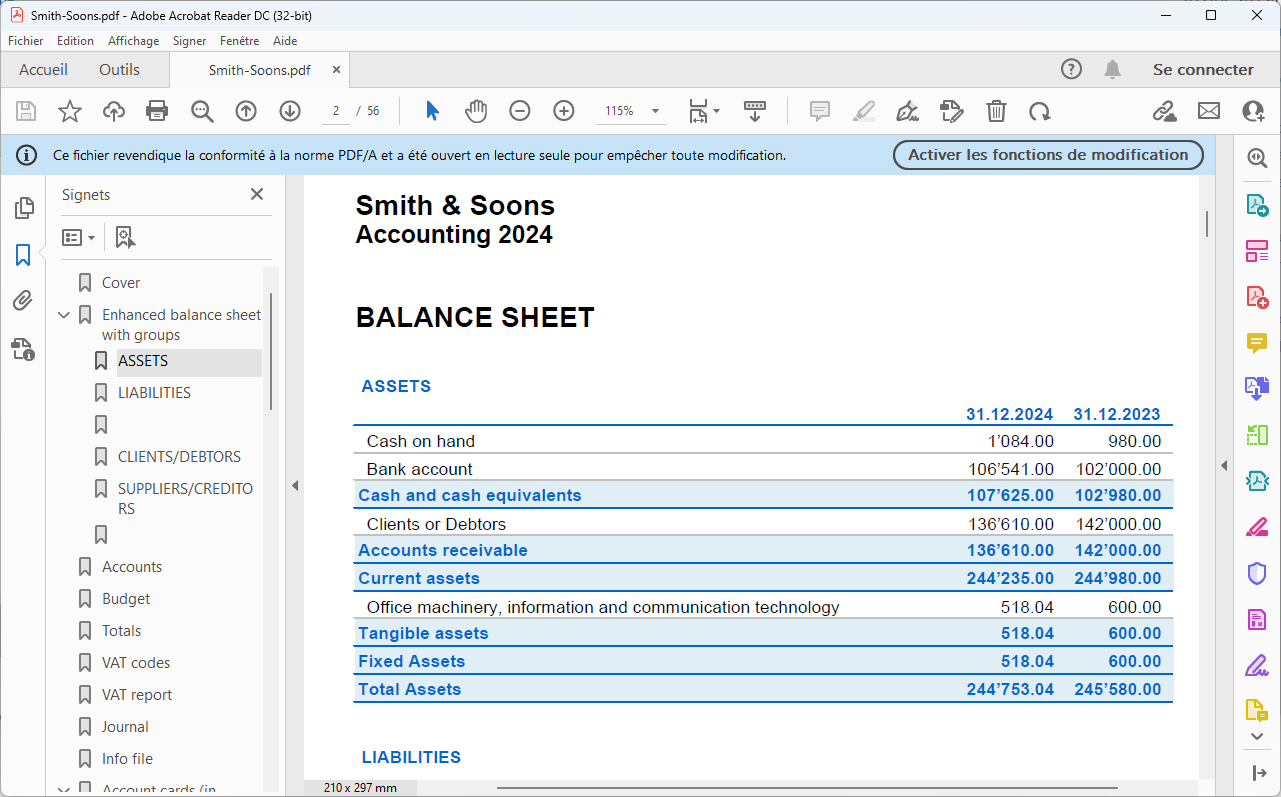
O Balanço visualiza os saldos de todas as contas patrimoniais, Ativas e Passivas. A diferença entra Ativas e Passivas determina o Capital próprio.
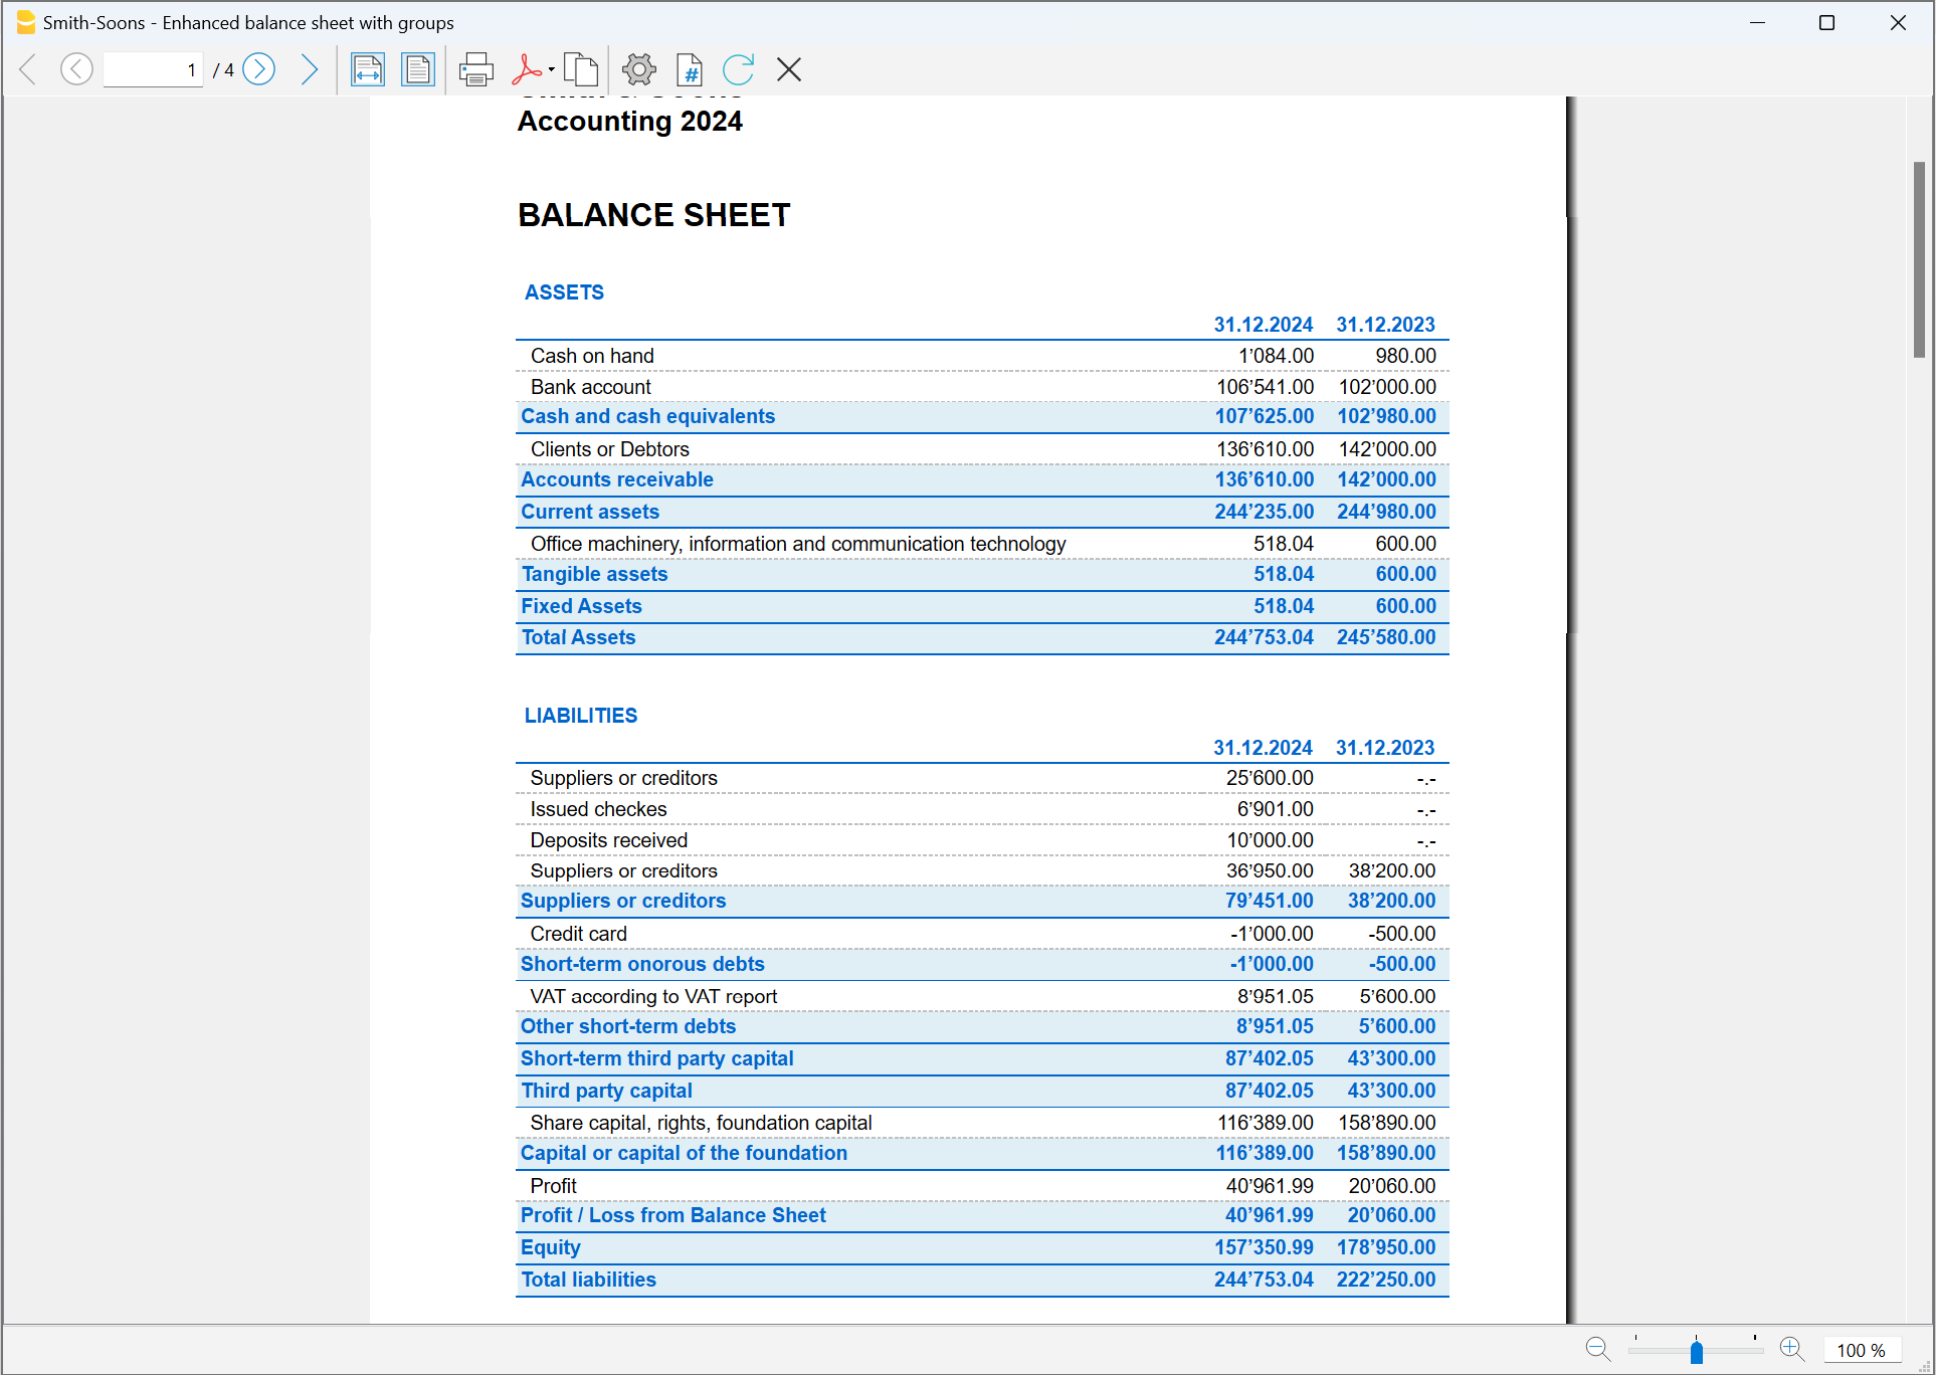
O Demonstrativo de Lucros e Perdas visualiza todas as contas de Custos e Ganhos. A diferença entre Custos e Ganhos determina o Útil ou a Perda.
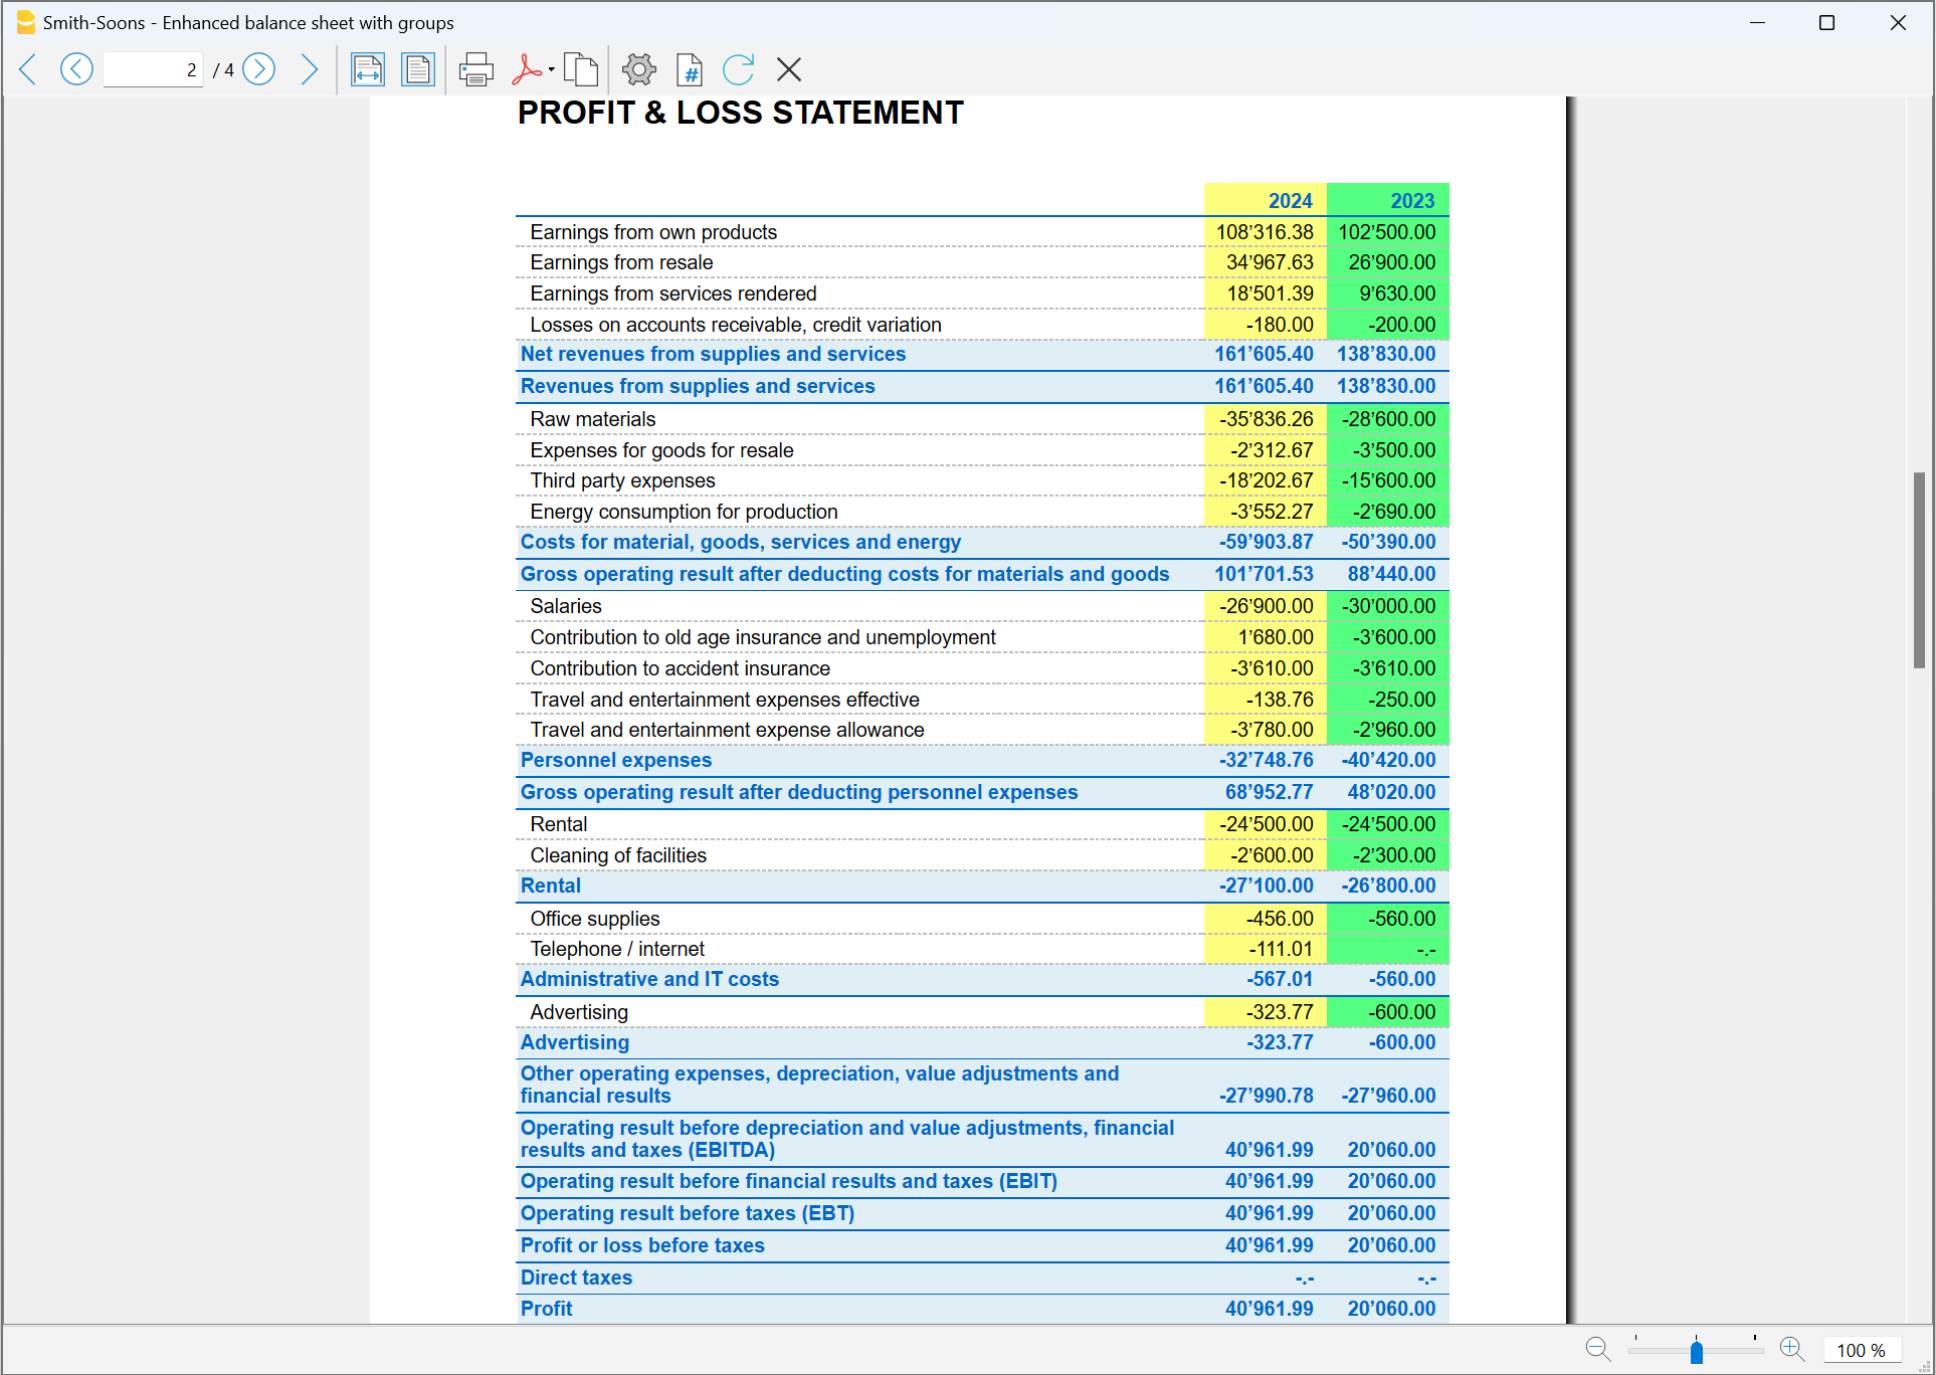
A visualização e a impressão do Balanço faz-se a partir do menu Conta1, comando Balanço Patrimonial Analítico ou Balanço Patrimonial por grupos.
- O comando Balanço Patrimonial Analítico cataloga simplesmente todas as contas sem distinção de Grupos e Subgrupos
- O comando Balanço Patrimonial por grupos cataloga as contas con a separação dos grupos e subgrupos; além disso, apresenta tantas funcionalidades para personalizar as apresentações que não são previstas no Balanço Patrimonial Analítico.
Armazenamento de dados em PDF
Ao fim do ano, quando toda a contabilidade estiver completada, corrigida e revista, pode-se armazenar todos os dados da contabilidade com o comando Criar PDF, no menu Arquivo.
O Orçamento
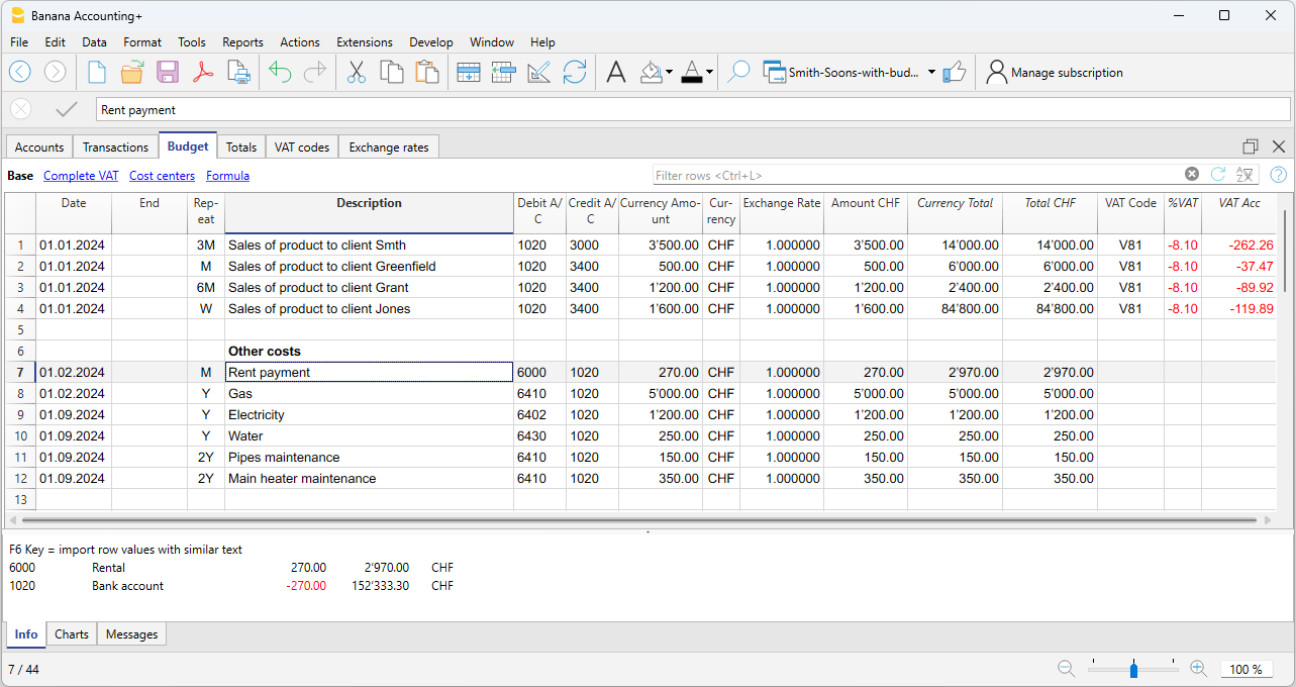
Antes de começar um ano de contabilidade, pode-se criar um orçamento com possíveis despesas e receitas, de modo a ter sob controlo a situação económica e financiária da própria empresa.
O orçamento pode ser configurado de duas maneiras diferentes:
- Na tabela Contas, coluna Orçamento. Em cada conta é indicado o montante do orçamento anual.
Neste caso, quando se elabora o Orçamento no menu Conta1, comando Balanço Patrimonial por grupos, a coluna do orçamento descreve os montantes que se referem ao ano inteiro. - Na tabela Orçamento, que se ativa no menu Ferramentas, comando Adicionar novas funcionalidades.
Nesta tabela registram-se todos os orçamentos de despesas e de receitas com lançamentos. Caso se ative esta tabela, a coluna Orçamento da tabela Contas é desativada automaticamente.
Neste caso pode-se configurar um orçamento detalhado que tenha em conta possíveis variações durante o ano e nos diversos períodos do ano.
Mais informações disponíveis na página Orçamento.
Characteristics | Double-entry accounting
The double-entry bookkeeping application meets the professional criteria for companies and entities of any kind, where accounting is required by law.
- It is a very powerful tool, but is very flexible and easy to use at the same time, as the different features can be activated or deactivated. This allows you to manage both the main accounting as well as structured Chart of Accounts on several levels: with VAT, customer and supplier management, invoicing, cost centers and segments.
- It can be edited at any time, offering everyone perfect results. It is ideal for the experienced accountant who wants to work quickly as well as for beginners. For this reason it is used for teaching accounting in many schools.
▶ Video: How to start a Double-entry accounting
Similar to Excel
Excel-like features and commands
- All the data you enter in the tables are always on display and close at hand.
- You work quickly because you can select, copy and paste recurring transactions on multiple cells and multiple rows.
- If you make a mistake, you can correct it by canceling or restoring operations.
- Add as many rows as you want without limits, or delete the lines you don't need.
- If you have made a mistake on a a value, an account, a VAT code, a description, you are able to correct it in an instant with the Find and Replace function.
- You don't need to enter formulas because the calculations are updated instantly and you have a contextual view (like in spreadsheets).
- Everything you see can be printed or exported to pdf or other formats.
- You can set your company logo to customize the printout headers.
- The columns are customizable, you can move them to position, add new ones and change their width.
- Work with the format that suits you best.
- Colour the lines to immediately identify the transactions that you need to review or show to the accountant or that need to be completed.
Spreadsheet-based
Accounting management is concentrated in three tables, which are used in a similar way to the Excel spreadsheets, but that are already completely set up and programmed with everything needed to keep your accounting quickly and safely.
- Accounts table
Set up all liquidity accounts, customers, suppliers, etc. and enter the opening balances without having to enter them manually in the Transactions table. You can aggregate multiple accounts, such as the cash accounts, bank or post in the liquidity group, so as to have the updated balances and they can be checked immediately. - Transactions table
The centre of keeping accounts, where the transactions are entered or imported. The debit and credit transactions can be completed with additional information to manage customers and suppliers, issue invoices, manage cost / profit centers, segments, quantities and prices and anything else you need. Scrolling through the table you will have a comprehensive view of all the events. It can be modified in order to always keep accounting in perfect order. - Totals table
This displays the totals by Group and is used to check the accounting balances.
Further tables can be added to support additional functionalities.
- Budget table
Prepare financial forecasts, with the double-entry method. Complete with liquidity planning, budget and forecast income statement, customer, supplier, investment, project, segments for one or several years. - VAT Codes table
Set the required rates and parameters to be used in the Transactions table for the automatic calculation of VAT and the reports to be presented to the tax authorities. - Items table
To set up a list of items to be used for billing. The program keeps track of your income and expenses. - Free tables
To meet further needs.
Quick start
Templates
Accounting management focuses mainly on three tables, which are used in a similar way to Excel spreadsheets, but which are already fully set up and programmed with everything needed to keep accounting quickly and safely:
- Easy and immediate start, creating your accounting file starting with a template.
- If you already have your own template in Banana Accounting you can upload it with all the settings and use it for a different accounting.
- Over 1000 templates subdivided by country and type of user, customizable and with user documentation.
- Easy search and use of templates directly in the program.
Accounting setup
- Freely set the currency for your accounting, you can choose it from a list of world currencies or set it freely (cryptocurrencies).
- Freely set an accounting period, even over several years if required and not linked to the classic 1st January to 31st December period.
- Headings and accounting data set in a single dialog box, easy to display.
- Enter as many decimals as you want, from 0 to 27 (selected when the accounting) is created.
- You can change the number of accounting decimals during the year without problems.
Multi-lingual
- You are free to choose the language for your accounting when you create your file.
- Customize the column headers as you wish.
- You can run accounting in multiple languages simultaneously.
- Prints are also customizable in multiple languages.
File and data saving
- All the data is saved in a single file, where you can easily retrieve everything without wasting time.
- A separate file is created for each year. All data refer to the year so there is no confusion.
- Assign the file the name you want.
- With a single license you can manage an unlimited number of accounts.
- Data remains in your full possession.
- Data saved to any media, computer, network, cloud or can be emailed. You can access it wherever you are.
- Simultaneous access by multiple users, but only one person can open the file when in Edit mode.
- Make your accounting more secure by using password protection.
Plan-Execute-Control
In the same file and always with the double-entry method, you can keep the accounting, or your budget or both. The powerful Plan-Execute-Control approach is very intuitively used.
Double-entry accounting method
- Banana Accounting allows you to keep accounting with the international double-entry method and is compliant with international standards.
- Meets the criteria for keeping any accounting.
- Usable in any country.
- Transactions with debit and credit columns.
- Should there be imbalances in the transactions, a related notification will be generated.
Amounts are displayed in the columns in the format used by your computer, without you having to get used to other formats that you are not familiar with.- Debit amounts are indicated in positive and in credit in negative.
- Calculation is done according to the Debit - Credit = 0 equation.
- Balance sheet, Income Statement and all typical accounting printouts.
- All printouts are customizable.
- Choice of display format.
- Transactions according to the cash or accrual principle.
- Protect your data with cutting-edge blockchain technology (patented method).
- The double-entry method is used by many schools around the world to teach accounting.
Chart of Accounts
- Fully customizable Chart of Accounts to better meet your needs.
- The same Chart of Accounts is used for accounting and for financial, asset and income forecasts.
- Balance Sheet and Income statement are adaptable according to the structure and content of your requirements.
- Any national, international or free grouping scheme us supported.
- Off-balance sheet accounts for the management of items that should not be included in the budget, but that you need to mark down.
- Choose your account ID freely (numeric or alpha-numeric account, up to 256 characters).
- You can freely enter the description of the text for up to 256 characters.
- It is no longer necessary to insert the initial and final balances via accounting transactions
Enter the balances directly in the Opening column of the Accounts table and only when you use Banana Accounting the first time. In the following years the carryover will be automatic. - Balance, account movement and totals displayed contextually and always updated.
- For each customer, supplier, partner account you have the columns to enter the addresses and other useful data you need.
- Adding other columns for notes, grouping or amounts.
- If you add amount columns, they are automatically totaled.
You thus have the possibility to create columns with your own data and have very selected details.
Transactions
- You can insert single or compound transactions.
Single ones are registered in a single row, while the compound ones allow you to easily record transactions that will affect multiple accounts. - You can enter with either the cash or the competence method.
- When you enter data, already existing texts are suggested. With one click the transaction will be filled (auto-completion).
- Immediate reporting of errors and differences, with the possibility of completing them later.
- Store recurring transactions to resume them when they reappear without having to rewrite them.
- Predefined columns columns are available in all the tables and can be displayed at your choice.
- Quantity and price columns, for billing or cost control.
- Auto-numbering of documents with different numbers simultaneously.
- Documents are always at hand, by connecting the digital accounting vouchers (PDF, images) to the files, and open them with a click.
- Enter free texts of up to 256 characters as well as on multiple rows.
- Colour the lines to instantly search for the transactions you need to check or correct later, or to report them to the auditor.
- Adding columns to insert any further information.
- Recordings on Cost and Profit Centers.
- Recordings on segments.
- Save the arrangement of the columns (views) to display the content that is most important to you.
- Contextual information about account balance, differences or errors.
- Before the periodic or year-end closings you can use the Check Accounting functions.You will be able to identify errors between the actual balances (e.g. bank balances provided by the statement, and those of the accounting). You will immediately notice the errors and you can correct so as to have everything matched.
- Movements import:
- Speeds up entry of transactions by importing data from digital bank statements.
- You can import transactions in different formats provided by banks.
- Imported rows can be edited, completed or removed.
- It also imports invoice data or from other software.
Financial forecasting
- If you need to create a Budget, you can activate the function by adding the Budget table.
- Work without difficulty with the same methodology you are already used to, based on the double-entry method.
- Financial forecasts complete with liquidity plan.
- Balance Sheet forecasts.
- Income Statement forecasts.
- Automatic projections over several years.
- Entering the transactions through budget postings.
- Recurring income and expenses set with one transaction.
- All the features of accounting available:
- Calculation formulas in Javascript with access to the values of the current forecast:
- Forecast values available in accounting printouts:
- Account card with forecast movements by account or group.
Balance Sheet and Income statement
- Reports with final or Budget data or both, with indication of variations.
- Free arrangement with groups and subgroups.
- Updated results visible directly in the Accounts table.
- Customizable prints:
Watch the video tutorial that shows how to create and print the Enhanced Balance Sheet with groups.- Adding your own logo.
- Choice of columns to include.
- Choice of sections to include.
- Detailed or printout per groups
- Printouts per single period.
- Columns divided by period (month, quarter, semester, year).
- Values from previous year.
- Comparison prediction value.
- Columns with subdivision by segment.
- Added attached notes.
- Grouping as in the Chart of Accounts or according to your own scheme.
- Saving composition.
- Tabular report (similar to customizable printouts, but with the data in the table).
- Export to pdf for data conservation and export to other formats for data processing.
Other accounting prints
- Fully printable content tables or by for selection only.
- Adding your own logo to personalizing documents and prints.
- Journal.
- Account cards with account movements and groups:
- With accounting or forecast movements.
- By period.
- By Account, Group, Cost Center or Segment.
- Accounting or forecasting data.
- Customizable column arrangements.
- Export to pdf or other formats.
Charts
- Contextual, at the foot of the table.
- Different layouts.
- Evolution per accounts and groups.
- Accounting values.
- Forecasting.
- Preceding year.
- Choice of chart type.
Further management
The program also allows you to add additional information to the transaction, allowing you to use the same data needed for VAT management, for tracking customers and suppliers, issuing invoices, generating reports for projects or business sectors and to face the various corporate and tax obligations.
VAT management
- The function can be activated at choice (when creating an accounting).
- VAT code table to indicate the different VAT rates and cases.
- All national specifications supported.
- It can also be used to manage other types of sales taxes (for example US sales tax).
- Entering the VAT code.
- VAT reversal functionality (using the VAT code preceded by the minus sign).
- VAT calculation as per net or gross.
- Automatic breakdown and registration on the indicated VAT accounts.
- VAT control reports:
- By period or complete.
- With or without movements.
- Optionally, with totals per rate, VAT code, account.
- National extensions for VAT reporting based on the requirements of the relative tax authorities.
Customer management and control
- Function activated at choice (adding accounts in the Chart of Accounts).
- Checking invoices and customer payments.
- Customer master data set in the Chart of Accounts.
- Create groups and totals for customers in different groups.
- Open invoices per customer or global overview.
- Customer movement account statement and open invoices.
- Automatic reconciliation, open invoices.
- Customer management also available as cost centers (on a cash basis).
Invoices to customers
- Function can be activated at choice (using the invoice number column in the Transaction table)
- Entering invoices directly into the Transactions table.
- Requires setting up the customer database.
- Entering invoice data as normal row of transactions.
- See issue and print invoices to customers.
- Column to indicate quantities and prices.
- With or without VAT.
- Possibility of modification, correction.
- Print a single invoice with a click or several invoices combined.
- Choice of different print layouts.
- Customize the invoice according to your preferences.
- Exports in digital format via extensions.
- Customizable reminders via extensions.
- Customizable customer account statements via extensions.
Supplier management
- Function activated at choice (adding accounts in the Chart of Accounts.
- Supplier database set in the Chart of Accounts.
Possibility to group suppliers into different groups. - Invoice and payment to suppliers control .
- Open invoices per supplier or full report.
Supplier movement account statement and invoices still open. - Automatic reconciliation, open invoices.
Cost and profit centers
- Function can be activated at choice (adding the cost and profit centers accounts).
- For projects, cost accounting or profitability.
- Setting up cost centers directly in the Chart of Accounts.
- Multi-level grouping.
- Three levels of cost and profit centers.
- Unlimited number of cost centers per level.
- Negative registration (with minus sign).
- Reports such as Balance Sheet and Profit and Loss accounts:
- Balance constantly updated.
- Customizable reports.
- Card of all movements with progressive balance.
- Contextual chart.
Segments
- Function activated at choice (by adding segment accounts).
- Segment column
- The Balance Sheet and Income statement of one or more business sectors.
- Setting up segments directly in the Chart of Accounts.
- Multi-level grouping.
- Up to 10 segment levels.
- Unlimited number of segments per level.
- Balance constantly updated.
- Reports such as Balance Sheet and Profit and Loss accounts:
- Balance Sheet and Income statement for each segment.
Items table
- For invoices and with integrated warehouse or securities management.
- Linking of the articles to the movements of the Transactions table.
- Automatic update of incoming and outgoing movements.
- Initial and final value.
- Adding additional columns.
Control and closure
Error reports and accounting control
- Command to check the accounts.
The accounting is recalculated instantly, as if all operations were entered again. - Reports any wrong settings, differences or errors.
- Each report is linked to a help page that explains the causes and suggests the solution.
- Checks if the account balance matches the real one (cash, bank, VAT).
- Ability to correct.
Transaction protection
- Rows protection.
- Locking of movements entered with digital data certification technology (Bitcoin type).
- Password protection.
- Compliant with legal requirements.
- Sending data to the auditor with the certainty of the impossibility of tampering.
- Unlock movements with date.
Closing and new year
- Automatic procedure to create the new year file.
- Carryover of balances and allocation of profit.
- Work can begin on the new year, even if the previous one has not been closed.
- Command to carry over the closing balances of the previous year.
Exporting and storing data
- Copy and paste directly to and from Excel.
- Export tables to PDF and various other formats.
- Archiving of printouts and accounting data in PDF or other formats.
- Saving the accounting file on any backup device.
Extensions and other features
Added functionalities
- Adding new features.
- Removing features that are no longer needed.
- Conversion from one accounting type to another:
- Accounting with or without VAT.
- Multi-currency accounting or vice versa.
- From Income/Expense accounting to double-entry or vice versa.
Documents Table
Other additional tables
- Addition of other tables where notes or other information can be entered.
- Tables can be customized by adding columns to them.
Extensions
- Default extensions for various prints and other features.
- Quick search and installation.
- Customizable extensions.
- Automatic update.
- Ability to create and install your own local extensions.
Comprehensive documentation
File and accounting properties | Double-entry accounting
This is where the main data of the accounting file are entered, such as the printout heading, the opening and closing dates, the base currency, the company address, the VAT account, the password, etc
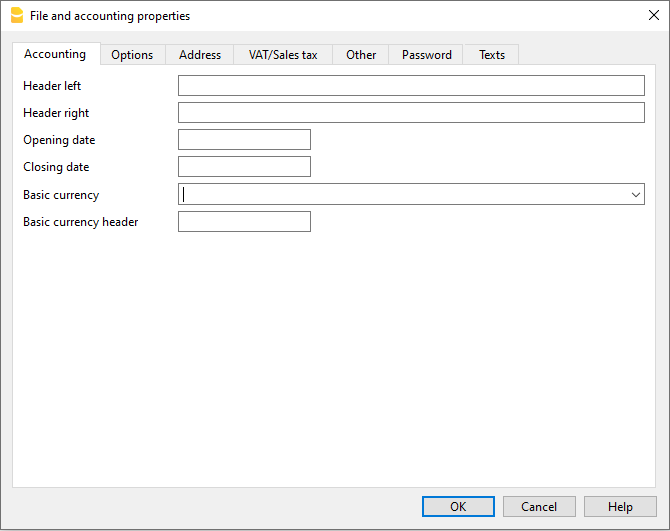
The File and accounting properties window has the following tabs:
Chart of accounts | Double-entry accounting
The Accounts table is the control room of your accounting. It's use is similar to that of an Excel spreadsheet.
In the Accounts table you set up everything you need to manage the accounting and have a quick updated overview of the financial and economic situation of your company.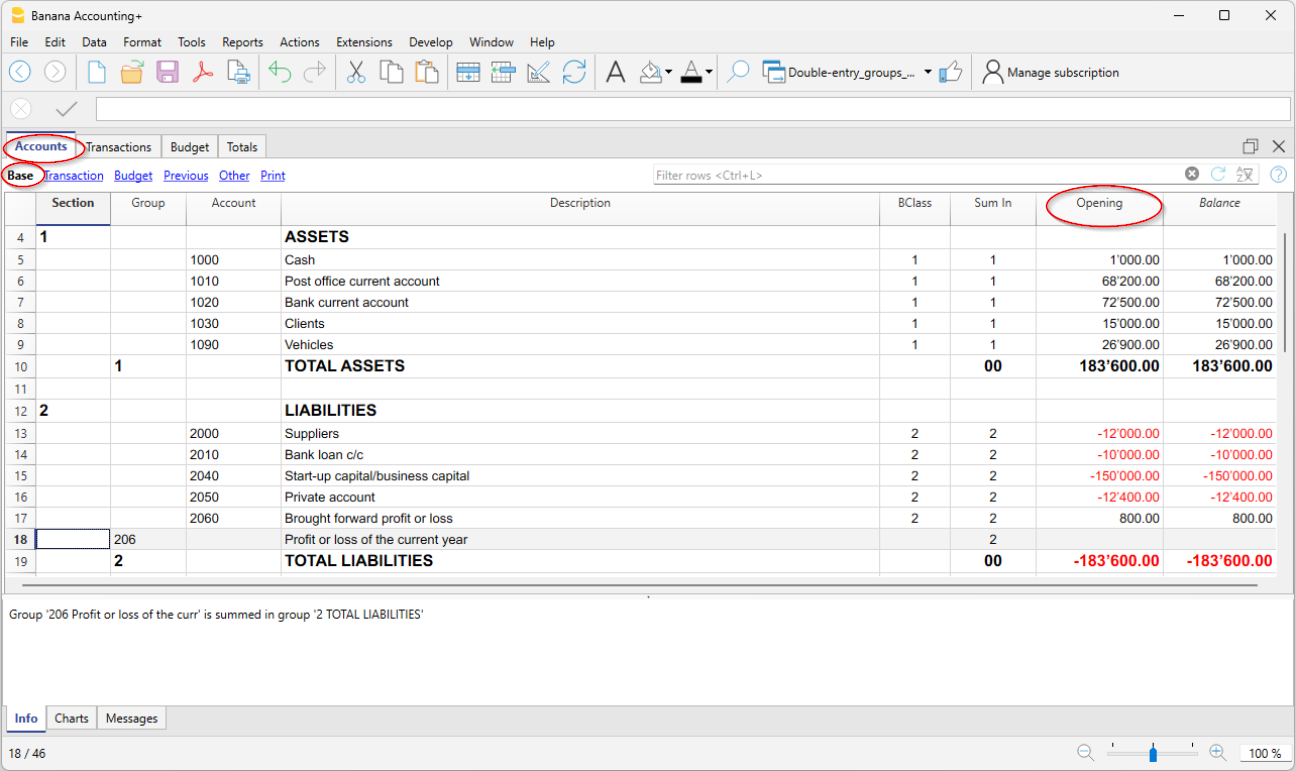
Ready-to-Use Chart of Accounts
Each accounting application by Banana offers a wide variety of chart of accounts templates, already prepared for immediate use. Simply select the file whose template meets your needs, and you'll have the chart of accounts already set up. File templates can be chosen based on the type of business activity and legal regulations.
They have the following characteristics:
- Fully customizable chart and account structure.
- Account and group numbers can be numerical or alphanumeric.
- Ability to add notes or additional columns.
- Grouping and totals adaptable to any national grouping scheme.
- Balances, account movements, and totals displayed and always up to date.
- Cost and profit centers for detailed control of costs and revenues for specific activities or projects.
- Segments for sector reporting (branch).
- Customer database, with control over outstanding invoices, reminders, and statements.
- Supplier database, control over paid and outstanding invoices.
- Management of off-budget customers and suppliers (with cost center) for cash-based accounting.
- Off-balance sheet accounts.
Entering and editing data is simple
- Add and edit accounts quickly and easily by simply inserting or deleting the row.
- There is no limit on the number of accounts to be added in the Chart of Accounts.
- Each account can be set up using numbers or texts.
- The description can also be very long.
- The Groups and Subgroups can be freely arranged to compose the Balance Sheet and the Income Statement.
- The opening balances are immediately entered in the opening column.
- Columns can be added to enter additional information.
- Accounts can be renamed and replaced automatically in the Transactions table as well.
- The columns of the amounts are updated instantly, at glance you know the status of liquidity, capital, sales, profit.
- Then, set the budget and have the comparison with the final balance.
Flexible grouping system
The grouping system is highly flexible and powerful:
- It allows to set up the Chart of Accounts according to any national scheme and to adapt exactly to the needs of the company.
- If you are not satisfied with the arrangement or numbering of accounts and groups, these can easily be changed.
The structure present in the Accounts table is also maintained in the presentation of the Balance Sheet and Income Statement.
Main elements
- Sections
They are used to indicate the subdivisions of the chart of accounts for printing the balance sheet, income statement, etc. - Groups
They allow you to create items that total the accounts and subgroups at multiple levels. - Accounts
These are the elements of accounting where the movements are recorded. They can be indicated in Debit or Credit depending on the nature of the movement, destination or origin.
Each account has a number or abbreviation (account number), a description, the B class and group to which it belongs, the opening balance, current balance, estimate, etc.
Customer and supplier data
You can have specific accounts for issuing invoices and checking payments. They are usually set at the end of the chart of accounts. They can be set up as register with the totals linked to the balance sheet, or as cost and profit centers, with all the details but without links to the balance sheet.
Cost and profit centers
Great to manage projects or have precise details of a specific event, or to manage customers and suppliers on the Cash principle (collected).
- Costs and Profits centers
They are special accounts whose number is preceded by a full stop ".", a comma "," or by a semi-colon ";". Their purpose is to be able to assign some amounts to special accounts other than the general accounting accounts.
Segments
Used to generate financial statements also for different sectors or activities in which the company operates.
- Segments
They are a sort of sub-accounts who's number is preceded by a ":". Their purpose is to be able to assign some transactions to subcategories of the chart of accounts.
Advanced printouts
- Accounting report
It is possible to select just the accounts with transactions, to obtain temporary groupings or accounts grouped according to the BClass or an external grouping scheme. - Enhanced Balance sheet
Prints all the accounts of the accounting divided by Assets, Liabilities, Expenses and Revenue - Enhanced Balance sheet with groups
Allows the user to obtain customized printouts with groups - Specific advanced printouts are available using the Banana Extensions
The Accounts table columns | Double-entry accounting
The Accounts table is made up of several columns. Depending on the Views, columns are displayed simultaneously. Each column has its own purpose.
The data to be entered in the following columns are explained below:
- Section
Codes are being entered that allow the user to print determined parts of the Chart of accounts only, when printing the Enhanced Balance sheet by groups. - Group
Contains the code that defines that this is a group row. The group code is then used in the GR column to indicate the total of an account or group. - Account
The account number, cost center or segment is being entered. - Description
A text to indicate the name of the account, group, or section. - Disable (only visible in the Other view)
By entering 1, the account does not appear in the auto-complete list, but can be used in the Transactions table;
By entering 2, the account is disabled and can not be used. - BClass. It indicates whether the account is 1 = Assets, 2 = Liabilities, 3 = Expenses, 4 = Revenue, see Accounts page.
- Sum in (Gr)
The code of a group is indicated so that the programme totals the amount of the line in the group.
The heading 'Sum in' has been adopted with the Banana Plus version.
The column name has remained Gr, to maintain compatibility with earlier versions of the programme. - Gr1 and Gr2 Enter additional grouping codes to use with external accounting report files.
- Opening balance
- The account balance is entered at the beginning of the year.
- Credit amounts must be entered with a minus sign in front
- The sum of all the amounts, those in debit (positive) and credit (negative) of the accounts belonging to classes 1,2,3 and 4 must result as zero. If the opening balances do not balance, a difference is indicated in the information window. If accounts have been added and the difference is not exact, Recalculate the accounting.
- The opening balance, in the balance sheet accounts, is used to calculate the current balance.
- If values have been entered in the Budget table, the opening balance is used by the program for opening financial planning.
- For further information, see the Double Entry Opening Balances page.
- Debit and Credit movements (Protected columns) The total of the debit and credit movements included in the Transactions table.
- If there are no errors, the totals of the two columns are balanced, otherwise a difference is displayed in the Balance column which must be checked and corrected.
- In line called Difference must be zero, regarding these two columns, it is correct that there are amounts. The important thing is that their values are equal. See also Mathematical Basis of Accounting.
- Balance (protected column)
The balance of the account includes the opening balance and the movements in debit and credit. The balance in debit is positive, while a credit balance is negative (minus sign). - Budget
You enter the budget amount for the current period.- The budgeted amount for costs (debit) must be entered in positive, for revenue in negative (credit).
- If the Budget table has been activated, the Budget column in the Accounts table is protected and the amounts are those calculated on the basis of the budget postings.
- Difference Budget (protected column) The difference between Balance and Budget amount.
- Previous
The balance of the account at the end of the preceding year. With the command Create new year or Update opening balances the values in the Balance column of the file of the preceding year are being carried forward. When a new accounting is being created and the user wants to obtain printouts with the amounts of the preceding year, the values of that year have to be entered manually. - Difference Prev. year (protected column) The difference between the Balance and the amount of last year.
- VATNumber
The VAT number in case this account is linked to a client or a supplier. - VATCode
The VAT code that needs to be applied automatically, when this account is being entered in the debit A/c or credit A/c column of the Transactions. - Address columns
These columns are used to enter the addresses of the customer and supplier accounts. If the columns are not present, they can be added by activating them via the Tools menu > Add new features > Add address columns menu in the Accounts table.
Adding or moving columns
- When an Amount column is being added in the Chart of accounts, the program will calculate the total of the amounts according to the selected grouping scheme
- Columns added of the number type, on the contrary, are not being totaled.
- With the Columns setup command, the columns can be displayed, the sequences can be altered and it is equally possible to add other columns.
- With the Page setup command one can also define the layout of the print (portrait or landscape) and the zoom.
Accounts list sorted by description or other criteria
To obtain lists of accounts sorted in different ways, use the Extract and sort rows command from the Data menu. We recommend you to be very careful when sorting the rows with different criteria in order not to create confusion in the groupings and totals.
Views
- Base The principal columns, the grouping columns and the balances are displayed.
- Transaction The columns with the Debit and Credit transactions are displayed.
- Budget The Budget column and the Difference Budget column are displayed.
- Previous The Previous column and the Difference Prior columns regarding the previous year are displayed.
- Other The Disable column, the VAT number and the Fiscal number column are being displayed.
- Print Only the Account column, the Description and the Balance are being displayed.
- Bank details - this view was added starting with Banana Accounting Plus release 10.2.8 and displays 4 columns with bank account details.
The views can be customized and others can be added with the Views setup command.
Accounts | Double-entry accounting
Accounts constitute the main structure on which all accounting is created. If you open one of the templates included in Banana Accounting, the accounts are already present in the Accounts table and contain all the settings needed to instantly record the transactions in the Transactions table.
The accounts in the Accounts table are divided as follows:
- Balance Sheet Accounts - Assets and Liabilities.
- Profit and Loss Accounts - Expenses and Income.
- Customer and Supplier master Data
- Account Cost and Profit centers - for managing projects or keeping the Customers / Suppliers register
- Segment Accounts - for managing business segments or branches.
The accounts' BClass
The BClass is essential for the correct total of amounts and balances. In the BClass column, each account must be assigned one of the following values, regardless of the account number or group to which it belongs:
- 1 - for Assets
- 2 - for Liabilities (in negative and in red)
- 3 - for Expenses
- 4 - for Income (in negative and in red).
Groups and subgroups do not have BClass, so the cell of the relevant column remains empty.
Revenues in Negative
In Banana Accounting, revenues appear with a negative sign in the Accounts table because the program follows the logic of double-entry bookkeeping:
- Logic of Signs
- Asset and Expense accounts increase in Debit → positive values.
- Liability, Equity, and Revenue accounts increase in Credit → negative values.
Therefore, revenues are negative because they increase in Credit. This does not mean that the company is making a loss; it simply reflects Banana’s way of keeping consistency between Debit and Credit.
- Impact on the Financial Statements
- In the Profit and Loss Statement, Banana calculates the difference: Revenues – Expenses.
- Even though revenues are recorded as negative in the table, in the reports they are shown as positive values, so the final result (profit or loss) is intuitive.
- Practical Advantage
- This method ensures that:
- The total of Debits = Credits.
- Ambiguity in sign usage is avoided in the transactions.
- The generated reports (Balance Sheet, Profit and Loss Statement, Cash Flow Statement) are accurate and easy to read for the user.
For more information, see the page Mathematical Basics.

BClass of off-balance sheet accounts
Off-balance sheet accounts are those whose amounts and balances do not fall within the totals of the balance sheet and income statement accounts. They are accounts that are entered in the chart of accounts to view guarantees and conditional commitments.
Off-balance sheet accounts must have the following BClass:
- 5 for Off Balance Sheet Assets
- 6 for Off Balance Sheet Liabilities
- 7 - 10 - for other Off Balance Sheet accounts
Add a new account or category
In the Accounts table, Base view, you can add new accounts (or new categories in the Income / Expense accounting).
Before adding an account or a category it is important to know:
- The account or category number can consist of numbers, letters and separator characters.
- There cannot be multiple accounts or categories with the same number.
- Each account must have a grouping (Gr) and a class (BClass).
To add an account or a category proceed as follows:
- Go to the row preceding the one where the new account or category will be inserted.
- Add a row with the Edit > Insert row command
- Fill in the respective columns the account or category number, the description, the BClass (1 for assets, 2 for liabilities, 3 for costs and 4 for revenues - only for double-entry accounting), the number of Gr which must be the same as the one entered for the accounts belonging to the same Group.
Warning: if you enter a transaction with an account that does not exist in the chart of accounts and only after creating the new account, you will initially receive an error message; to eliminate it, it is necessary to recalculate the accounting with the command Shift + F9 or through the menu Actions > Recalculate totals.
Rename an account
This is a very useful function because it allows you to change an account and simultaneously have it replaced in the Transactions table. It avoids having to change the account for each transaction that contained the previous account. In addition, it also allows you to rename a group or a VAT code.
- In the Accounts table go to the Account / Category or Group column, or to the VAT Code column of the VAT Codes table.
- Use the Data > Rename command.
- Indicate the new account number, group, category or VAT code.
The program automatically updates the Transactions table with the new VAT number or code.
Delete an account
If an accounting is already started, before deleting an account, make sure that it has not been used in the Transactions table or that it does not have an opening balance.
- Locate the row of the account that is to be deleted.
- Use the command Edit > Delete rows command.
After deleting an account or a category it is advisable to use the Actions > Recalculate totals command. If the deleted account or category is in use in transactions, the program reports an error message.
Opening balances of the accounts
The opening balance of an account is shown in the Opening column.
- Debit (Asset) balances are shown normally.
- Credit (Liabilities) balances are indicated with a minus sign (in negative) in front of the amount
- Typically, only the opening balances of the Asset and Liabilities accounts are indicated.
To carry over the opening balances automatically to the following year, see the Create New Year lesson.
Further details on opening balances are available on the Opening balances page.
Differences in opening balances
To have correct accounting, the total of the opening debit balances must match the total of the opening credit balances, so that there are no differences.
If the total does not correspond there will be a notification of the difference between the initial balances in the Info window.
If any account numbers have been changed and there are differences, perform the Full Accounting Recalculation.
When using Banana Accounting for the first time, to create the opening balance, it is necessary to manually enter the opening balances (Opening column), making sure to enter the balances of the Liabilities with the minus sign (-) in front of the amount.
Further details on opening balances are available on the:
- Differences in opening balances (Double-entry accounting).
- Differences in opening balances (Multi-currency accounting).
Customer and Supplier accounts
Customer and supplier accounts can be entered directly in the Balance Sheet sections, listing the accounts for each customer and supplier and creating two distinct totaling groups, one in the Assets for customers, the other in the Liabilities for suppliers. If the list of customers and suppliers is very extensive, it is possible to create a customers / suppliers ledger at the end of the chart of accounts.
There are several setting options:
- Setting up directly in the Financial Statements, listing customers and suppliers, respectively in the Assets and Liabilities.
- Setting up with the customers / suppliers register, at the end of the accounting plan, with the totalization reported in the financial statements. This setting is ideal for those who manage VAT with the accrual method.
- Setting up with cost and profit centers, at the end of the chart of accounts, without totaling in the balance sheet.
This setting is ideal for those who manage VAT with the cash method.
Accounts with addresses
In the Accounts table, Address view, there are columns to enter the addresses of customers, suppliers or members. If the columns of the address view are missing, you can add them:
The address columns are essential to be able to manage billing, reminders and the control of payments and collections.
More details are available on the Address page.

The Cost and Profit Centers accounts
They are ideal for project management, have precise details on a specific event or for any other need.
- Cost and profit centers
They are accounts that have the number preceded by a period ".", by a comma "," or by a semicolon ";" and are used to attribute the transaction amounts to additional accounts as well, with respect to the basic accounting ones.
All the amounts attributed to the cost and profit centers are separate from the Balance Sheet and the Income Statement and are entirely for information purposes.
The Segment Accounts
To have financial statements also of different sectors or activities in which the company operates.
- Segments
They are similar to sub-accounts that have the number preceded by a colon ":" and are used to attribute the accounting operations to sub-categories of accounts.
Add, rename, delete accounts
Adding a new account or category
With Banana Accounting it is possible to customize the chart of accounts by adding or deleting accounts and categories.
To add a new account or category, proceed as follows:
- Position yourself in the row above the one where you want to add the new account or category.
- Add a new empty row with the command Edit > Add rows.
- Enter in the respective columns:
- The Account number
- The Description,
- The BClass (1 for the Assets, 2 for the Liabilities, 3 for the Expenses and 4 for the Revenue)
- Grouping number (Sum in column) which must be the same as that entered for accounts or categories belonging to the same Totalization Group.
If in the Transactions table you enter a transaction with a non-existing account, the program gives you an error message; to take it away you have to create the new account in the chart of accounts and recheck the accounting with the Shift + F9 key, or with the menu Actions > Recheck accounting command.
Adding a new group
If you want new totalization groups, proceed as follows:
- Position yourself in the row above the one where you want to add the new group
- Add a new empty row with the command command Edit > Add rows.
- Enter in the respective columns:
- The Group number
- The Group Description,
- Grouping number (Sum in column) in which you wish this group to be totalized.
Renaming an account, a group, a category or a VAT Code
This is a very practical function that allows you to rename an account, a category, a group or a VAT code and to have the replacement automatically in the Transactions and Budget table without having to enter them manually.
To rename one of the elements proceed as follows:
- Position yourself in cell where the account or group (Accounts table) or the category (Categories table), that needs to be renamed, is present.
- If it is necessary to rename a VAT code, it is necessary to position yourself in the VAT Codes table, on the cell of the code to be substituted.
- Choose the Data menu > Rename command
- Indicate the new account, group, category or VAT code number.
Removing an account, a group, a category or a VAT Code
- Position yourself on the row number that contains the element that is to be deleted
- Click on the Edit menu > Delete rows.
- Enter the number of rows that you wish to delete
After deleting an account, a group, a category or a VAT code, it is necessary to use the Recheck accounting command. The program will give you a warning message if the deleted element was used in the transactions.
When deleting a group and not all accounts belonging to the deleted group are deleted, you must change the grouping number in the Sum in column for the remaining accounts, otherwise errors will be reported.
Groups
Banana has developed a very practical and immediate grouping system, which allows you to set in the Accounts table all the information necessary to define the structure of the Balance sheet, Profit & loss statement and of other sections of the accounting.
The grouping system is flexible; it allows you to implement any national chart of accounts and at the same time to adapt it to the specific needs of your business. Both very simple and very complex plans and presentations can be created, with multiple levels of totalling, for any type of accounting.
With grouping, the totals of balances, movements and the group budget are displayed immediately.
How it works
To understand how the Banana grouping system works, please refer to our documentation page:
Grouping and totalling system
The Banana grouping and totaling system is based on two columns of the Accounts and Categories table:
- Group (Total row)
- When, in a row, a group identifier is being entered, the row becomes a total row.
- In this row the amounts of the Sum in column, that contain the same identifier, are being totaled.
- In a row, when a group is present, there cannot be an account.
- Sum in
- Sums the row amounts in the indicated group.
- For each account or group row, you indicate the group in which the line is to be totaled.
- The number here must be one of the numbers defined in the Group column.

Main groups in double-entry accounting
Every accounting file template uses its own totaling system. Hereunder explanation of the main groups of double-entry accounting .
In double-entry accounting, the total of the Debit balances (positive) together with the Credit balances (negative) have to result in 0 (zero). In the case of differences, the group line 00 has a non-zero amount.
The calculation sequence to achieve 00 is therefore as follows:
- The 1000 accounts > group 1 (Total Assets) > Group 00
- The 2000 accounts > group 2 (Total Liabilities) > Group 00
- The 4000 accounts > group 4 (Total Expenses) > Group 02 (result Profit & Loss Statement) > Group 206 (Profit/Loss of the current year in the Balance Sheet) > Group 2 (Total Liabilities) > Group 00.
- The 3000 accounts > group 3 (Total Revenue) > Group 02 (result Profit & Loss Statement) > Group 206 (Profit/Loss of the current year in the Balance Sheet) > Group 2 (Total Liabilities) > Group 00.
- The 00 group is the control row where all the amounts are being added together.
- It is the "Grand total" of all the Debit & Credit balances as a result of the transactions entered in the Transactions table.
- If the line in the 00 group shows a difference (non-zero amount), this means that there are mistakes:
- If the difference is shown in the Accounts table, Opening column (all views) there are differences in the opening balances
- If the difference is shown in the Accounts table, Balance column (all views) there are differences in the Transactions table. In the Debit and Credit columns of the movement view, the totals are not balanced.
In cases where the difference is indicated issue the command Check and recalculate accounting. This command suggests any errors that need to be checked and corrected.
- In the Debit and Credit columns of the Movement view (Accounts table), the totals of the balances are always reported. If the totals in the two columns are equal, there are no errors.
The result of Profit & loss statement is added in equity capital
As you can see in the example, the Group 02 (Profit /Loss from Profit & Loss statement) is totalized in the 206 liabilities group (current year result).
With this group organization, we have several advantages:
- The current year operating result is displayed in the balance sheet
- The Total Liabilities will match the Total Assets (provided that there is no accounting error).
Set up of the Chart of Accounts structure
The chart of accounts in Banana Accounting can be set mainly in two different ways:
1. Structure without subgroups (or subtotals).
In this case, the structure is very simple. You list all accounts without subgroups, and total all accounts or categories in the main groups:
For Double-entry Accounting:
- Assets
- Liabilities
- Expenses
- Revenue
For Income/Expense Accounting or Cash Manager (Categories table):
- Income
- Expenses
2. Structure with subgroups
The structure is more complex. The accounts or categories of the main groups are divided into several subgroups, which in turn are totaled into the corresponding main groups.
Here we present a structure of the chart of accounts with an example of Subdivision with subgroups in Double-entry Accounting. Each subgroup can be in turn :
Assets
- Current Assets
- Cash and Cash equivalents
- Customers
- Inventory
- Fixed Assets
- Furniture
- Machinery and equipment
- Computers, software.
- Current Assets
Liabilities
- Third-party capital
- Suppliers
- Bank loans
- Other short-term debts
- Long-term debts
- Equity
- Equity
- Reserve funds
- Profit and loss carried forward
- Profit for the year
- Third-party capital
From the Accounts table, at any time, through the menu File > Print or Print Preview you can print the chart of accounts or part of it.
Always starting from the Accounts table, by selecting the Movement view, you have the printing of the verification balance.
Adding a new group
- Position yourself in the row preceding the one where the new group will be entered
- Add a row with the command Edit > Add Row
- Type in the group column the group number, description, and the number of the column Sum in where you want this group to be totaled.
Adding a totaling level
With this system it is easy to add totaling levels.
When we want to create a subgroup for the Cash & Cash equivalents accounts:
- Enter an empty row after the bank account
- Enter the value 10 into the Group column
- Enter the value 1 into the Sum in column
- Indicate the grouping 10 in columns Sum in the accounts 1000 and 1020
- The sequence for the calculation becomes:
The 1000 account > Group 10 (Cash & Cash equivalents) > Group 1 (Total Assets) > Group 00.
The programme totals the following:
- It totals the accounts in a group row.
For example, the Cash account is totalled in the Liquidity group. - Totallises a group or subgroup in another group, which in turn is totalled in another group, thus building the calculation structure of the Balance Sheet and Income Statement.
For example, the Liquidity group is totalled in Total Assets, which in turn will be totalled in group 00, in the control total row.

In case you want to insert another subgroup, "Current Assets", proceed in the same way.
- Add an empty row above the row of the Total Assets.
- In the new row:
- Indicate the number 11 in the Group column
- Indicate the number 1 in the Sum in column
- In the Clients and Goods for resale (inventory) rows, indicate the grouping 11 in column Sum in.
Title rows (with Sum in)
Also in the title rows it is useful to indicate the grouping Sum in (the group of the total row) to which it belongs.
In this way, in the printouts of the Enhanced Balance Sheet by groups, if the accounts are zero, the title will not be printed.

Deleting subgroups
In case the Chart of accounts shows subgroups that are no longer needed or not wanted, these can be deleted. Just delete the row of the subgroup and modify the grouping Sum in of every account that was part of that subgroup.
Checking of the structure
Once the Chart of accounts has been set up, execute the Actions menu > Check accounting command. In case there are errors, the program issues a warning.
Infinite loop error
This warning appears when a Group is being totaled in a Group of a lower level, reason for which an infinite error loop is being created.
There would be an infinite loop when, in the preceding example, the Assets Group (1) would be totaled in Group 10.
The program, after having calculated the Group 1, would total the amount in Group 10, which in turn would total the amount in Group 1, and then again in 10 without ending.
Profit & Loss Statement with Gross Profit
It is also possible to use a Profit & Loss Statement that starts with the total Business result and that subtracts the costs.
Hereunder the example of the Swiss PME Chart of Accounts is shown.

Related Documents
Sections | Double-entry accounting
In the Section column, there must be an encoding that is used to determine the various settings of the printouts. The various items that make up the financial statements are divided into several sections; each section is as if it were in its own right.
This subdivision into sections allows you to choose whether to print the entire balance sheet and income statement, or choose which sections to print (eg only the balance sheet, or just a group, excluding the other components from printing).
Below we present a table with the coding to be used in the Accounts table, Section column.
| * | Title 1 | the asterisk separates the sections and indicates the main headers |
| ** | Title 2 | to be entered for the secondary headers |
| 1 | Assets | to be entered in the row of the Assets title |
| 2 | Liabilities | to be entered in the row of the Liabilities title |
| 3 | Expenses | to be entered in the row of the Expenses title |
| 4 | Revenue | to be entered in the row of the Revenue title |
| 01 | Client's Register | to be entered in the row of the Client's Register title |
| 02 | Supplier's Register | to be entered in the row of the Supplier's Register title |
| 03 | Cost Centers | to be entered in the row of the Cost Centers title |
| 04 | Profit Centers | to be entered in the row of the Profit Centers title |
| # | Notes | to be entered in the row of the Notes title |
| #X | Hidden data | to be entered in the row from whereon the data have to be hidden |
The type of encoding set in the Section column is used to determine the print settings for Enhanced Balance Sheet with Groups.
Each section is printed as if it were a separate table.
Title section
- *
The asterisk indicates a new section.- * Title 1 generates a level 1 folder.
- This section resets the level type to 1.
- It can contain level 2 sections or folders.
- It will be useful for grouping sections that need to be printed together such as the Balance Sheet, which contains both assets and liabilities.
- **
The double asterisk indicates a level 2 section.- ** Title 2 generates a level 2 folder
When you create a new title section, the numeric section is set to 1.
After a title section, the desired number section must therefore always be reset as well.
Numerical sections
The section number determines:
- How the amounts are printed; the amounts can be displayed as in the chart of accounts or reversed.
The credit amounts (in negative,) if they are inverted, are displayed in positive, while those in positive are displayed in negative. - Which columns are used to display the amounts; either the Balance column or the Period Movement column is used.
- The Balance column indicates the account balance at a certain point in time (balance as of June 30th).
- The Total Period Movement column indicates the amount of the movement in the indicated period; it is used for the income statement and indicates expenses or income for a certain period.
The explanations of the different sections are as follows:
- 1 Assets (amounts as in the chart of accounts, balance column).
- 2 Liabilities (inverted amounts, balance column).
- 3 Costs (amounts as in the chart of accounts, total movement column).
- 4 Revenues (inverted amounts, total movement column).
This section can also be used alone and include both costs and revenues (Income statement). In this case, revenues are shown in positive and costs in negative.
These sections must be unique. There can be only one section, 1 Assets or 2 Liabilities. Similar sections can be used for other sections, ledgers or cost centers.
Derived numerical sections
These are sections that behave like the main sections:
- 01 As Assets (amounts as in the chart of accounts, balance column)
Is used for the customer register. - 02 As Liabilities (inverted amounts, balance column)
Is used for the suppliers register. - 03 As Expenses (amounts as in the chart of accounts, total movement column)
Is used for cost centers. - 04 As Revenue (inverted amounts, total movement column)
Is used for profit centers.
Other Sections
There are other sections types:
- # Used to indicate the notes section (print description only)
To be used for budget annexes. - #X Hidden section. This section is not taken up in the selection of the sections nor in the printout. It is used to indicate a part that you do not want to print.
Disposition and width of columns in print
The disposition and the width of the columns are determined automatically by the program:
- Sections 1, 2, 01, 02 are printed with the balances on the specified date.
- Sections 3, 4, 03, 04 are printed with the movements for the period.
Sections of the Balance sheet report
In order to divide the Financial Statements into the various sections, the code indicated in the Section column must be entered:
- Insert a * on the same row as the Balance sheet title.
- Enter 1 on the same line as the Assets title.
- Enter 2 on the same line as the Liabilities title.

Sections of the Profit & Loss statement
- Enter a * on the same line as the Profit & Loss title.
- Enter 4 on the same line as the Revenue title.
- Enter 3 on the same line as the Expenses title.

Sections of the Profit & Loss statement in a graduated format
In the case of a graduated income statement, the groups of expenses and revenues alternate and consequently there is no clear distinction between the section of costs and revenues, therefore enter only:
- A * on the same row as the Profit & Loss Statement title
- 4 on the blank line below the income statement.

Sections in the customers / suppliers register
The display of the amounts is the same as for assets and liabilities. This coding also applies if customers and suppliers are set up as cost centers.
- Insert a * on the same row as the Customer / Debtors Register title or on a blank row (as in the example).
- Enter 01 on the same row as the Customers Register title
- Enter 02 on the same row as the Suppliers Register title

If there are cost and profit centers, you must enter:
- a * in the same row as the Cost and Profit Centers title or on a blank line
- 03 on the same row as the Cost Centers title or on a blank line (preceding the cost centers).
- 04 on the same row as the Profit Centers title or on a blank line (preceding the Profit Centers).
The cost center amounts will be shown in positive as the costs; profit centers will be displayed in negative as revenue.

Related document:
Enhanced Balance Sheet with groups
Transaction types | Double-entry accounting
In double-entry accounting, there are different types of accounting transactions. Here's how to book them in Banana Accounting.
Simple transactions (on one row)
Simple transactions are the ones regarding two accounts (one Debit account and one Credit account) and entered in one single row.
The document number is different for each registration.
Composed transactions (on several rows)
Composed transactions with more than two accounts involved, have to be entered on several rows. The user should enter one account per row. The counterpart account for the entire transaction has to be entered on the first row.
The document number, entered on the different rows, is the same because we are dealing with one and the same transaction.
Note:
In composed transactions, the dates of the transaction rows should be the same, otherwise, when doing calculations by period, there may be differences in the accounting.

Opening transactions
The opening balances are normally indicated in the Accounts table.
Opening transactions are required in special cases such as:
- In multi-currency accounting, when you need to have different opening exchange rates than those indicated in the Exchange rates table, opening exchange rate. See Opening transactions in foreign currency.
- Entering Opening balances for segments.
The opening transactions are created by inserting the transactions with the opening date equal to the accounting start date and the code 01 in the DocType column.
- Opening transactions do not change the opening balance in the Accounts table.
- The opening balance entered with transactions is used in balance sheet printouts, account cards.
- If for the same account there is the opening balance and the recording of the opening balance, the two amounts will be added together.
This way, you can enter opening transactions that correct the opening of an account. - When entering opening balances in the transactions, it is necessary to make sure that the sum of the debit (positive) and credit (negative) are at zero.
For each debit entry there must be a corresponding credit entry.
It may be useful to have an opening account that serves as a counterpart for entering opening amounts.
After all the opening transactions, the balance of this account must obviously have zero balance.
When entering opening balances, only the debit or credit account is generally indicated. However, it is also possible to indicate a counterpart which is generally a specific account for openings.
Transactions table | Double-entry accounting
The Transactions table is the central hub for keeping the accounts, where all the operations with financial and economic impact are entered. The use is similar to Excel. In the Transaction table the movements are always visible and in perfect order and by scrolling them, you instantly have a clear view of all the events.
All the data entered can be modified and corrected, making it easy to have a perfect accounting.
The Transaction Table is also characterized by the Balance Column, which allows identifying any differences between the Debit and Credit columns and especially the row where the difference originated. Additionally, errors and accounting differences are flagged in the information window at the bottom.
Key features:
- Single or compound entries: Single entries record simple transactions with one Debit and one Credit account, while compound entries are entered on multiple lines with different Debit and Credit accounts. The program suggests previously entered text for quick auto-completion.
- Recording Method: Transactions can be recorded using either the accrual or cash method, ensuring accuracy and compliance with accounting standards.
- Management of Repetitive Operations: Stores repetitive operations for quick future recording, reducing data entry time.
- Customizable Columns: Default columns can be made visible at the user's choice, including quantity, price, and other relevant information.
- Automatic Numbering: Automatically assigns document numbers with different numbering simultaneously, maintaining systematic order and facilitating search and archiving.
- Digital Attachments: Links digital justifications such as PDFs or images to files, accessible with a simple click for complete and organized documentation.
- Exception Management: Highlights rows to quickly identify entries to verify or correct, facilitating the review and control process.
- Data Integration: Imports transactions from various digital bank statements and other programs, speeding up entry of records and ensuring data accuracy.
- Cost/Profit Centers and Segmentation: Allows recording operations on cost/profit centers and segments for detailed analysis and better financial management.
- Balance Verification Entries: Before period or year-end closings, quickly identifies and corrects errors between actual balances, ensuring accurate and updated balances.
Fast insertion
The table is similar to Excel, you can scroll up and down and position yourself in any cell.
There are many features that make entering and editing data very fast.
The following operations are possible:
- Cancel and redo.
- Select one or more cells and copy / paste.
- Add, copy, paste and delete lines, individually or in bulk.
- Search and replace texts.
- Sort the rows by date.
- The auto-complete function suggests the values to enter (for example the list of accounts).
- With the F6 key the values of the row are completed, taking over those of the same row.
- The F4 key resumes the values from the previous row.
- The date is completed with the values from the previous row.
- In the Doc column progressive numbers (with different counters) are suggested.
- In the Debit or Credit Account column you can search for the account by typing it's description.
- In the columns of the amounts you can enter formulas, such as "30 + 25" and the program inserts the result.
Further information is available on the pages:
Movements import
By importing transactions from bank, postal or credit card statements, data entry in the Transactions table is speeded up and errors are avoided. Data is recorded exactly as it appears on the bank statement.
- In addition to the account statements, you can also import data from other programs.
- The program automatically completes the missing values.
- Several formats are available for importing.
- You can copy and paste data from other programs.
- Imported data can be completed, modified or deleted.
- Ability to program extensions to import any type of file.
Further information is available on the Import to Accounting page.
Management of multiple information
A lot of information can be indicated for each entry row:
- The value date and that of the document.
- A progressive number of document and protocol, or external reference.
- Any additional information you need by adding columns.
- Link to a digital document file.
- Add and remove links.
- Open the link and view the content.
- VAT management (if the type of accounting with VAT was chosen in the creation of the file):
- By entering the VAT code in the transaction, the program calculates the VAT automatically.
- Break down and post the VAT on the designated account.
- You can define whether the amount is net or gross of VAT.
- You can indicate that it is a reversal by inserting the minus sign "-" before the VAT code.
- You can indicate a VAT percentage that is not recoverable.
- You can encode special cases with additional codes.
- Cost and Profit centres:
- Up to 3 cost and profit centers for each posting line.
- You can post negative by indicating the "-" sign in front of the cost or profit center account.
- Segments:
- For each debit or credit account you can indicate up to 10 segments.
- Supplier management:
- Management both on the basis of competence (setting as ledger) and cash (setting as cost and profit centers).
- Management of due date and payment, to have the report of open and paid invoices.
- Client management:
- Management both on the basis of competence (setting as ledger) and cash (setting as cost and profit centers).
- Management of due date and payment, to have the report of open and collected invoices.
- Invoices to customers:
- Data entry for the creation of invoices.
- Customer account suggestion.
- Quantity and price (make columns visible).
- For billing or cost control.
- Automatic calculation of the amount.
- Item number (if option activated)
- To connect to the items table.
- Automatic calculation of the quantities of products entered and exited.
- Print invoices.
- Indication of further information needed to print the invoice.
Account card
From the Transactions table you can access any account card, just go to the account cell (in the Debit or Credit column) and click on the small icon that appears in the upper right corner of the cell.
When you are in the account card, clicking on the row number of a transaction takes you back to the Transactions table, on the original transaction precisely.
More information on account cards can be found on the Account / Category Card page.
Verify data
Entering values is very secure. Banana Accounting has functions that allow automatic detection and reporting of errors.
- The program verifies that the entered values are correct.
- If there is an imbalance between the Debit and Credit columns, this will be indicated in red in the Info window.
- Transactions you are unsure about can be left pending and completed later.
- For each error message there is a corresponding help page (requires internet connection).
- In the Info window below you have the following information:
- Description, movement and balance of the accounts used.
- Error reports error messages with a link to the help page.
- Reporting of the debit and credit difference.
- By entering the actual bank balances via the #checkbalance function, you can immediately check the correspondence of the balances in the accounting and avoid errors.
- With the Check accounting command, the program rechecks all the data entered and alerts you to oversights and errors.
- You can colour the rows, change fonts and make them bold.
- You can protect the rows.
- Lock transactions with blockchain technology.
Arrangement of columns
To have a more congenial data entry, you can arrange all the columns in your own order.
You can choose to:
- Move the columns to the right or left.
- Display additional columns or hide unnecessary ones.
- Add own columns
- Save the arrangement of the columns (views).
Further information is available on the Columns setup page.
Transactions table columns and views | Double-entry accounting
The Transactions table has a series of columns and views already set.
The columns of the Transactions table
The columns listed hereunder and preceded by an * are usually not visible.
In order to make them visible, use the Columns setup command from the Data menu.
Date
The date the program uses to attribute the transaction to a certain time frame. The date should be within the limits of the accounting period defined in the Basic data of the accounting. In the Options tab, one can indicate whether the transaction date is required, otherwise this value can also be left empty.
If there are locked transactions, the program triggers an error message when a date equal or earlier to the one of the lock is being entered.
*Date Document
The date of the document can be entered, for example the date of issue for an invoice.
*Date Value
The value date of the bank operation can be indicated. This value is being imported from an electronic bank statement.
Document
The number of the voucher that serves as a base for the accounting transaction. When entering transactions, it is advisable to indicate a progressive number on the document, so that the accounting document of the transaction can be easily traced.
The auto-complete feature proposes progressive values as well as transaction codes that have been defined earlier in the Recurring transactions table.
The program proposes the next document number, that can be resumed with the F6 key.
- In case of a numeric numbering, the program simply increases the highest value found in the Doc column.
- Alphanumeric numbering: the program increases the final numeric part; this is useful when one would like to keep a separate numbering for cash and bank movements:
- If earlier Doc number C-01 has been entered, and one starts to type C, the program proposes C-02.
- If earlier Doc number B104 has been entered, and one starts to type B, the program proposes B-105.
- If earlier Doc number D10-04 has been entered, and one starts to type D, the program proposes D10-05.
In the recurring transactions you can setup transactions groups that can be reloaded with a single code.
In order to add a large number of document numbers, you can also use Excel. You can create the desired quantity of document numbers in Excel and then copy and paste it into Banana, in the column of the Transactions Table.
*Document Protocol
An extra column in case an alternative numbering for the transactions or for the document is required.
The auto-complete feature proposes progressive values that function in the same way as the ones in the Document column. It is used, for example:
- When it is necessary to assign a progressive number to the transactions, different from the document number.
- If the transactions are entered by other people, using another file and then these are imported into the accounting. This way it is possible to use both a progressive numbering referred to the accounting and the original number.
*Document Type
Contains a code that the program uses to identify a type of transaction. If you prefer to use your own codes, it is advisable to add a new column.
- 01 In the reports (as in the account statement), this transaction is considered an opening transaction, so it doesn't show in the period but in the opening balances.
- from 10 to 19: codes for customers' invoices
- from 20 to 29: codes for suppliers' invoices
- from 30 to 1000: codes reserved for future purposes.
*Document Invoice
A number of an issued or paid invoice that will be used together with the invoice control feature for Customers and Suppliers
*Document Original
The reference number present on a document, to enter, for example, the number of a credit note.
*DocLink to external file
Serves to enter a link to an external file, usually the accounting voucher.
Clicking on the small icon in the upper part of the cell, the program opens the document. See insert, edit and open links.
- When a link has been inserted in the cell, a small icon appears and clicking on it opens the document, but only if it is an extension considered to be safe.
- The other small icon allows you to insert and edit the link.
*External reference
The reference number that was allocated by a program that has generated this transaction. This value can be used to check whether a given operation is imported twice.
Description
The text of the transaction.
The auto-complete feature proposes the text of an already entered transaction, or of one that has been entered in the preceding year when the appropriate option has been activated. When pressing the F6 key, the program retrieves the data of the preceding row with the same description and completes the columns of the active row.
In case the description begins with #CheckBalance, the transaction is being considered as one that serves to check the balance.
Please consult our page Check accounting for more information on the subject.
*Notes
Useful to add notes to the transaction.
Debit Account
The account that will be charged.
- It is possible to also enter a segment in the Debit account column. These are usually separated by a ":" or a "-" o un "-".
By inserting the segment separator sign, immediately move to the next segment. - If instead the Enter key is being pressed, the input will end and one moves to the next column.
- The auto-complete feature proposes the accounts and segments of the Plan of Accounts.
- Instead of the account, you can enter a search text. The program proposes the list of accounts which contains the text in one of the columns.
- [Comment]. A value enclosed in square brackets is considered a comment and its content is not taken into account, except in particular situations.
*Debit Account Description
The description of the entered account retrieved from the Chart of accounts.
Credit Account
The account that will be credited.
We refer to the explanation under Debit account for the rest of the information.
*Credit Account Description
The description of the entered account retrieved from the Chart of accounts.
Amount
The amount that will be entered unto the debit and credit account.
*Balance
The Balance column shows the sum of debit and credit. An amount is therefore only displayed for entries in several accounts. At the end of the entry the balance should be zero. If there is a recurring amount it is because there is an error.
VAT columns
Information on the VAT columns can be found att the VAT columns in the Transactions table page
CC1
The Cost center account preceded by "." to be entered without the ".".
- If the initials are preceded by the minus sign "-P1", the amount is recorded in credit.
- [Comment]. A value in square brackets is considered a comment and its content is not taken into account, except in particular cases.
*CC1 Description
The description of the Cost centre, retrieved from the Chart of accounts.
CC2
The Cost center account preceded by "," to be entered without the ",".
- If the acronym is preceded by the minus sign "-P2", the amount is recorded in credit.
- [Comment]. A value in square brackets is considered a comment and the content is not taken into account, except in particular cases.
*CC2 Description
The description of the Cost centre, retrieved from the Chart of accounts.
CC3
The Cost center account preceded by ";" to be entered without the ";".
- If the acronym is preceded by the minus sign "-P3", the amount is recorded in credit.
- [Comment]. A value in square brackets is considered a comment and the content is not taken into account, except in particular cases.
*CC3 Description
The description of the Cost centre, retrieved from the Chart of accounts.
*Expiry date
The date before which the invoice has to be paid. For further information see the Customers and Suppliers pages.
*Payment date
Used in combination with the Show Expiry dates command.
When the invoices customers/suppliers control feature in order to check on the payments is used instead, a transaction has to be entered for an issued invoice and another one for the payment thereof.
*Lock Number, Lock Amount, Lock Progressive, Lock Line
More information at the Lock Transactions page.
Additional columns
From the menu Tools → Add new features → Add Items columns in the Transactions table, the following columns are added.
For more information, see also Items columns in the Transactions table.
ItemId
- The identifier of the item from the Items table. If you enter an item that exists in the Items table, the description, unit, unit price, VAT code and account are retrieved automatically.
Quantity
- The quantity, which multiplied by the unit price gives the total amount (it can also be a negative number).
- If the Items table is present:
- A positive value (+) is added to the quantity of the item.
- A negative value (–) is subtracted from the quantity of the item.
- A neutral value (±) is considered for calculating the total amount, but does not affect the quantity in the Items table.
Neutral values are used in the management of securities, for recording gains or losses. You can specify the quantity and the amount of profit or loss for a specific security, without affecting the available quantity of securities. You can enter the "±" symbol by typing "+" followed by "-". The program automatically recognizes this combination and converts it into the "±" symbol.
- If a quantity is entered and the unit price is empty, and there is an amount in the transaction, the unit price is calculated automatically.
Unit
- A description referring to the quantity, for example: sqm, ton, pcs.
Unit Price
- The price for each unit, which multiplied by the quantity gives the total amount (it can also be a negative number).
- The number of decimals can be modified with the appropriate command in the menu Tools > Add and Remove features.
Transaction amount
- If a value has been entered in the Quantity or Unit Price column, the transaction amount is calculated based on the contents of these two columns and converted into a positive value.
Adding new columns
With the Columns setup command, it is possible to display, hide or move the order of columns, add new ones, or indicate that a column should not be included in the printout.
- The added columns in the Transactions table will be added also in the Recurring transactions table, in the Account card and in the VAT report, without being made visible.
In order to display these columns in the other tables, use the Columns setup command. - If a column of the "amount" type is being added, the entered amounts will be added up in the Account card.
Views
When a new accounting is being created, the following views are being automatically created as well:
- Base: the main columns are being displayed
- Cost centres: the CC1, CC2 and CC3 columns are being displayed
- Expiry dates: the columns Expiry date and Payment date are being displayed
- Lock: the columns relative to the Lock function are being displayed.
With the Views setup command, the views can be customized and personal views can be created.
With the Page setup command, you can modify the print mode of the view.
Recording Bank checks
To enter issued bank checks, the user needs to insert an Issued checks account in the Liabilities.

The check is issued at the moment of paying a supplier and later on is being debited from the Bank current account.

The Issued checks account card after the transactions.

Registrazioni su conto privato
Il conto privato è un conto finanziario, utilizzato nella contabilità per registrare quelle transazioni che non riguardano direttamente l'azienda, ma il patrimonio personale del titolare. Questo conto tiene traccia dei prelievi e degli apporti del titolare a scopi privati; pertanto serve per tenere separate le finanze aziendali da quelle personali, evitando confusione contabile.
Prelievi dall'azienda del privato/socio
I prelievi personali vengono registrati come diminuzione del patrimonio netto. Se il titolare/socio utilizza fondi aziendali per spese personali, l'importo viene addebitato al conto privato.
Esempio di scrittura contabile per un prelievo in contanti:
- Dare: Conto privato (per il prelievo del titolare/socio)
- Avere: Cassa/Banca (per l'importo prelevato).
Apporti nell'azienda dal privato/socio
Gli apporti personali del titolare (es. aumento di capitale o versamenti per coprire spese) vengono registrati come incremento del patrimonio netto.
Esempio di scrittura contabile per un apporto in contanti:
- Dare: Cassa/Banca (per l'importo versato dal titolare/socio)
- Avere: Conto privato (per l'apporto del titolare/socio).
Utili prelevati
Se il titolare/socio preleva utili maturati:
- Dare: Conto utili a nuovo (o Risultato di esercizio)
- Avere: Conto privato
Saldo del Conto Privato/socio
- Saldo positivo: indica che il titolare ha un credito verso l'azienda.
- Saldo negativo: indica che il titolare ha debito verso l'azienda.
Transactions for Balances Verification (#CheckBalance) | Double-entry accounting
Banana Accounting Plus includes the #CheckBalance function in the Check and recalculate accounting command for verifying and matching account balances.
This check is essential for the accuracy of the accounting. It is recommended to perform the balance verification periodically at the end of each month, in addition to the end of the accounting period, to avoid incorrect balances being carried over from month to month.
To perform this check, follow these steps:
- Record the date to which the balance refers.
- In the Description column, enter #CheckBalance followed by the amount corresponding to the balance to be verified (e.g., the actual cash balance, bank account balance from the bank statement, etc.).
- In the Debit column, indicate the account being checked (bank account, cash, VAT account, or another account to be verified).
- The Amount column must be left empty.
With this command, the program will flag any accounts with mismatched balances in the Messages window if discrepancies are found.
Credit card registration with advance payment
Advance payment on Credit cards
Before taking you through the procedure, check that an account for Credit card exists in the liabilities part of the Chart of Accounts. Create it if that is not the case.
The credit card account is added to the group or sub-group of short-term debts, as long as this is pre-requisite of the Chart of Accounts selected. If there are no sub-groups, it must be listed in the liabilities section.
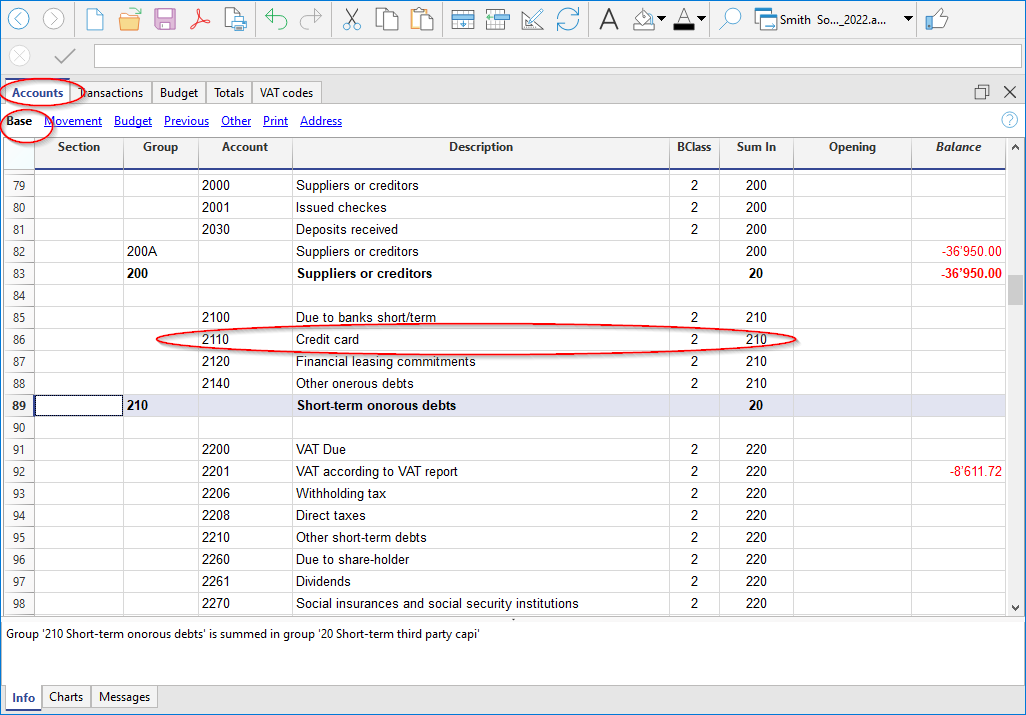
Example:
An amount of CHF 1'000.- is transferred from the bank account to the credit card.
- In Debit the credit card account is recorded
- In Credit the bank account with which the payment is made is recorded.
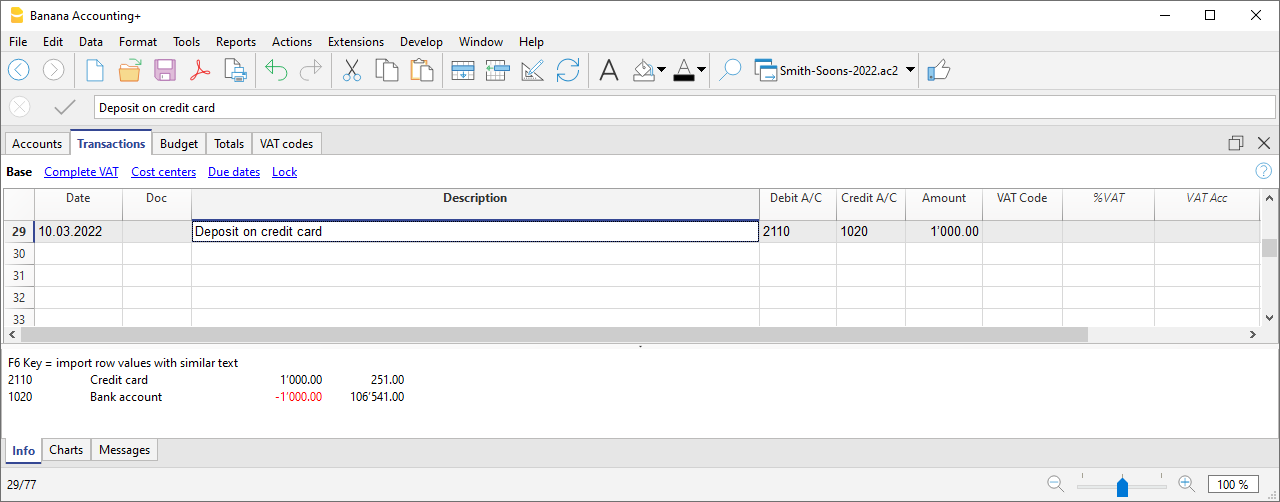
Register your credit card bill
When the credit card bill arrives, you must record all charges listed on the credit card and reverse the credit from the credit card account.
Example:
The credit card statement shows a total of CHF 749.- (detail: CHF 479.- for computer purchase, CHF 150.- for hotel expenses, CHF 120.- purchase of office supplies) (Doc.10)
Enter on several rows:
- All costs related to the expenses listed on the credit card are recorded as a Debit; you post a cost per line.
- Enter your credit card account as a Credit.

Check the credit card account balance
Each time you pay an advance towards the credit card and once all the costs listed on the credit card have been recorded, you must verify that the credit card balance matches the balance stated on the credit card.
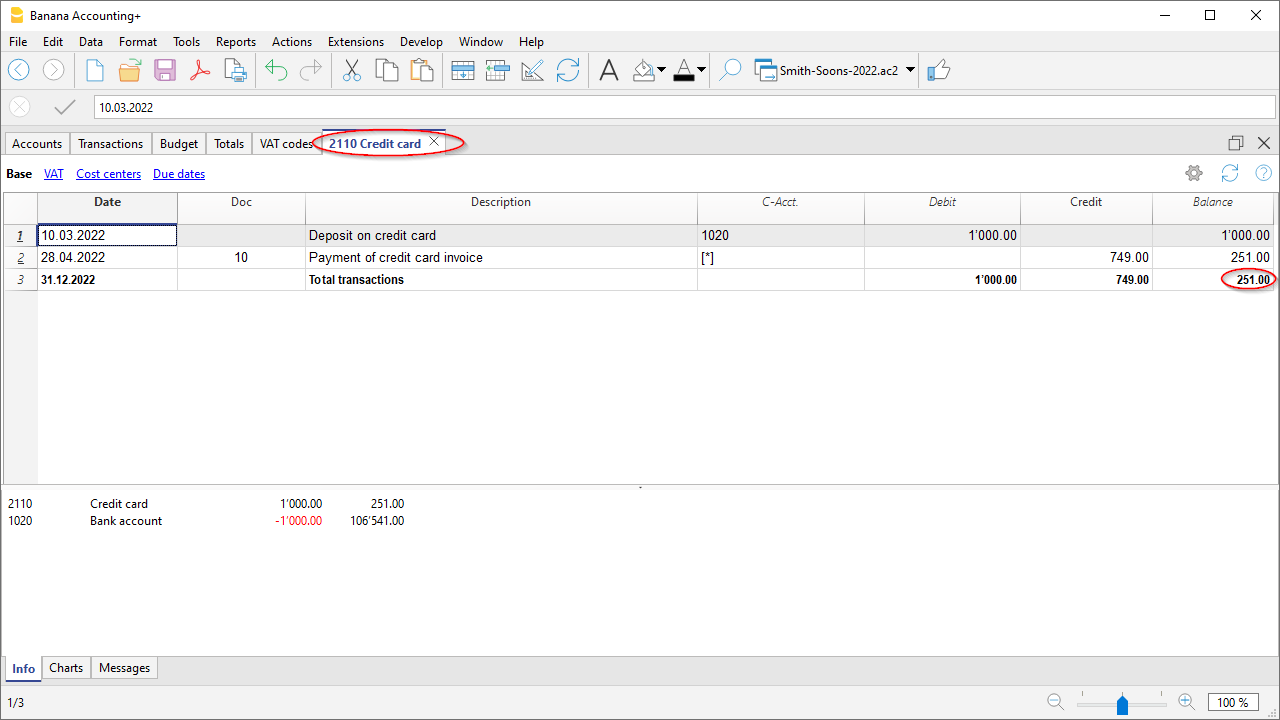
Register your credit card transactions according to the Cash and the Turnover principle
Credit Card with an accounting using the Cash principle
If no down payments are made on the credit card and the invoice is paid in full by the bank, you should record the credit card invoice at the time of payment when the costs should also be recorded.
You need to record on several rows:
- Enter the same date and the same Document No. for each transaction on all the rows that make up for the transaction.
- In the Debit column, enter one account per row, referring to the cost or investment of the credit card transaction.
- Enter the amount of each single transaction recorded in Debit.
- In the Credit column, enter the bank or post office account with which the invoice is paid.
- In the Amount column, enter the total amount paid on the credit card invoice.
- In the case of VAT liability, enter the VAT code for each row in the VAT Code column.

After recording all movements, check your credit card balance by opening the credit card account card.
Credit card and turnover accounting
If the accounting postings are based on turnover, all costs related to credit card purchases are recorded upon receipt of the credit card invoice:
- Enter the same date and the same Document No. for each transaction for all the rows that make up for the transaction.
- All cost accounts are posted as a Debit. Each cost must be recorded on one row.
- In the Amount column, enter the amount of the single transaction recorded in Debit.
- Register your credit card account, as a Credit, as any supplier.
- In the Amount column, enter the total amount to be payed by the credit card.
- In the case of VAT liability, enter the VAT code for each row in the VAT Code column.

When the credit card bill is paid, enter the payment:
- As Debit in credit card account (the debt is extinguished).
- As Credit in the bank or post office account with which the invoice is paid.
- The total amount of the credit card paid is entered as the amount.

Importing transactions from your credit card
Banana Accounting allows the importation of movements from the credit card into the main accounting file.
You must ensure that the chart of accounts includes the credit card account and the transfer account to be used for down payments.
Install the import extension
In order to be able to carry out the import it is necessary that the data format, provided by the credit card issuing bank, is compatible with the formats provided by Banana accounting.
To install the extension related to the data format released by the issuing bank, proceed as follows:
- Menu Extensions > Manage Extensions
- Select the extension corresponding to the format in which the credit card issuer provides the card transactions (international standard format ISO 20022 with the Professional plan or .CSV with the Advanced plan) and click the Install button.
The format will be displayed in the Import into accounting box.
Importing the credit card movements
After having installed the extension for the Banana compatible data format, proceed as follows to import the data:
- Actions Menu > Import into accounting > Transactions:
- Select the format type of the bank that issued the credit card.
- With the Browse button, select the file transmitted by the bank and confirm with OK.
- Enter the period and indicate the credit card account and confirm with OK.
All transactions are imported into the Transactions table. - Enter the counterpart account that refers to the movement for each row.
Import credit card transactions with deposits made
When deposits have been made on the credit card, they are recorded in the accounting system. In this case, after importing the credit card data, there is the problem of the recording of the deposits. In this case a double transaction appears on the credit card account:
- Presence of the credit card account as a counterpart to the bank charges for payments to the credit card.
- Presence of the credit card account in the transactions imported from the credit card.
To avoid this overlap, the transfer account is being used at the time of import.
How to proceed with the import:
- Actions Menu > Import into accounting > Transactions:
- Select the format type of the bank that issued the credit card.
- With the Browse button, select the file transmitted by the bank and confirm with the OK button
- Enter the period and indicate the transfer account. Confirm with the OK button.
All transactions are imported into the Transactions table. - Enter the counterpart account that refers to the movement for each row.
Salary transactions
Companies that have employees must manage salaries, as well as employees’ social security and insurance contributions.
Salaries can be managed in two different ways:
Net salary management is the simplest solution because it provides for:
- recording salaries at the time they are paid
- recording social security and insurance contributions only when advance payments of contributions and employees’ insurance premiums are paid.
Gross salary management is much more complex because transactions must record monthly gross salaries and the social security and insurance contributions deducted from employees’ pay, as well as the withholdings on employees’ salaries.
Net salary transactions
Net salary accounting consists of recording in the accounting only the amounts actually paid to employees. It is a simple and practical method, particularly suitable when payroll processing is carried out using dedicated payroll software or outsourced to a fiduciary firm.
Compared with gross salary accounting, it provides a less detailed view of personnel costs, as it does not separately show the employer's social security contributions and the contributions withheld from employees.
For this reason, the calculation of gross salaries, deductions, and social security contributions is performed by the payroll software or by a fiduciary firm, which submits the required declarations to the relevant authorities. The annual declaration to the AHV Compensation Office is based on the gross payroll, which must be determined from the payroll statements.
What is recorded
With net salary accounting, the following items are normally recorded in the accounting:
- net salaries paid to employees
- advance payments of social security contributions (AHV/IV/EO/ALV), paid monthly or quarterly
- insurance and pension premiums, paid at the beginning of the year or every six months.
- any year-end adjustments.
What is not recorded:
- Gross salary
- Employee deductions
- Liabilities towards social security institutions at the end of the period.
Advantages of net salary accounting
- Simple transactions
- Few accounts to manage
- Faster accounting.
Limitations of net salary accounting
- The gross salary does not appear in the accounting.
- The details of employee salary deductions are not visible.
- Employer and employee contributions are not shown separately.
When to use net salary accounting
Recording salaries on a net basis is recommended when payroll management is handled by payroll software or by a fiduciary firm, and the main purpose of the accounting is to record payments and accounting transactions.
It is particularly suitable when:
- the details of salaries, deductions, and social security contributions are managed outside the accounting
- there is no need to analyse personnel costs separately in the accounting
- you want to keep the accounting simpler and reduce the number of transactions.
Accounts normally used
Only a few accounts are normally required to manage net salaries.
Expense accounts
- 5000 Salaries
- 5700 AHV/IV/EO/ALV Contributions
- 5710 Family allowance fund contributions
- 5720 Mandatory occupational pension contributions
- 5730 Occupational accident insurance premiums
- 5740 Daily sickness allowance insurance
- 5790 Withholding tax
Payment accounts
- 1020 Bank
- Another cash account.
Distinction between the employer's share and the employee's share
With net salary accounting, the accounting records do not directly show the allocation of social security contributions between the employer's share and the share withheld from employees.
Payments made to social security institutions (AHV, occupational pension fund, insurance companies, and other institutions) generally include both shares and are recorded as total amounts. Consequently, it is not possible to identify the employer's share directly from the accounting entries alone.
To determine it, you need to refer to:
- the expense accounts dedicated to social security contributions
- the payroll statements generated by the payroll software.
The accounting correctly records the total personnel cost, while the detailed allocation of contributions is provided by the payroll statements.
Payment of net salaries
When paying employees, the net salary paid is recorded.
In the Transactions table, record the following each month:
- Date: the salary payment date
- Description: the payment description
- Debit: account 5000 Salaries
- Credit: the Bank account
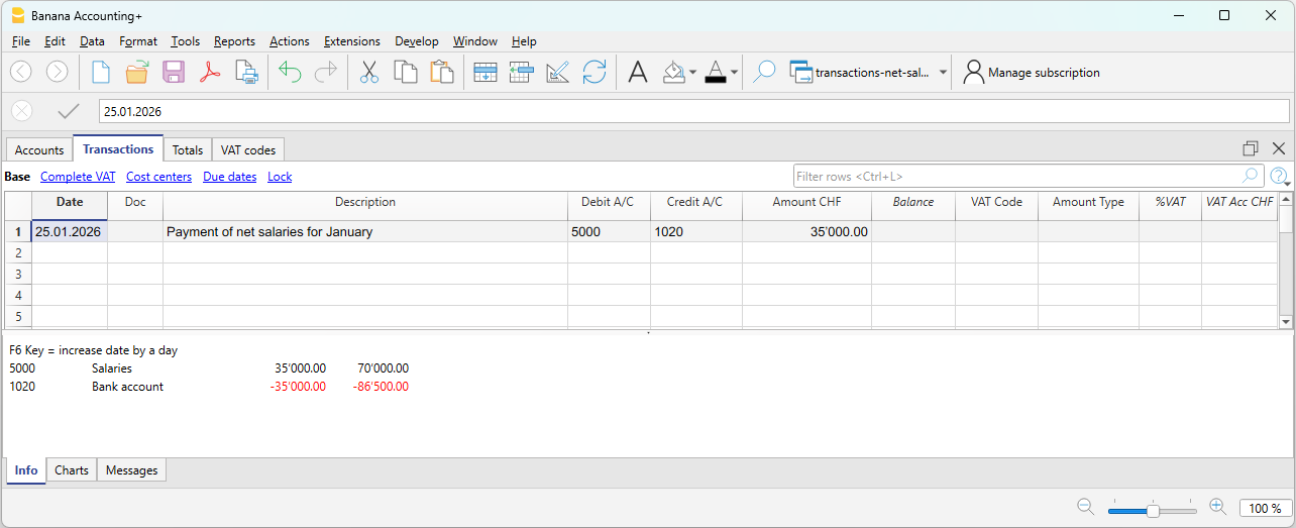
Periodic payment of social security contributions
When paying advance social security contributions, record:
- Date: the payment date of the social security contributions
- Description: the payment description
- Debit: account 5700 AHV/IV/EO/ALV Contributions
- Credit: the Bank account
- Amount: enter the amount of the social security contributions (shown on the advance invoice), including both the employer's share and the employee's share.
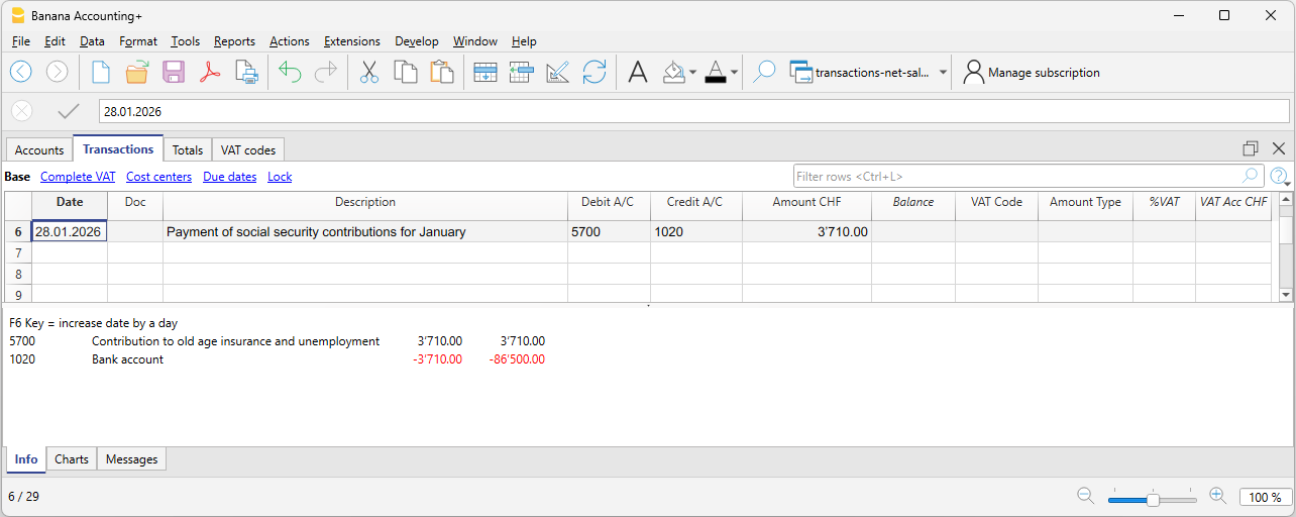
Annual payment of insurance premiums
When paying insurance premiums, for example Occupational Accident Insurance or supplementary Occupational Accident Insurance, record the payment to the insurance company.
- Date: the annual insurance premium payment date
- Description: the payment description
- Debit: account 5730 Occupational accident insurance premiums
- Credit: the Bank account
- Amount: enter the amount shown on the invoice. It includes both the employer's share and the employee's share.
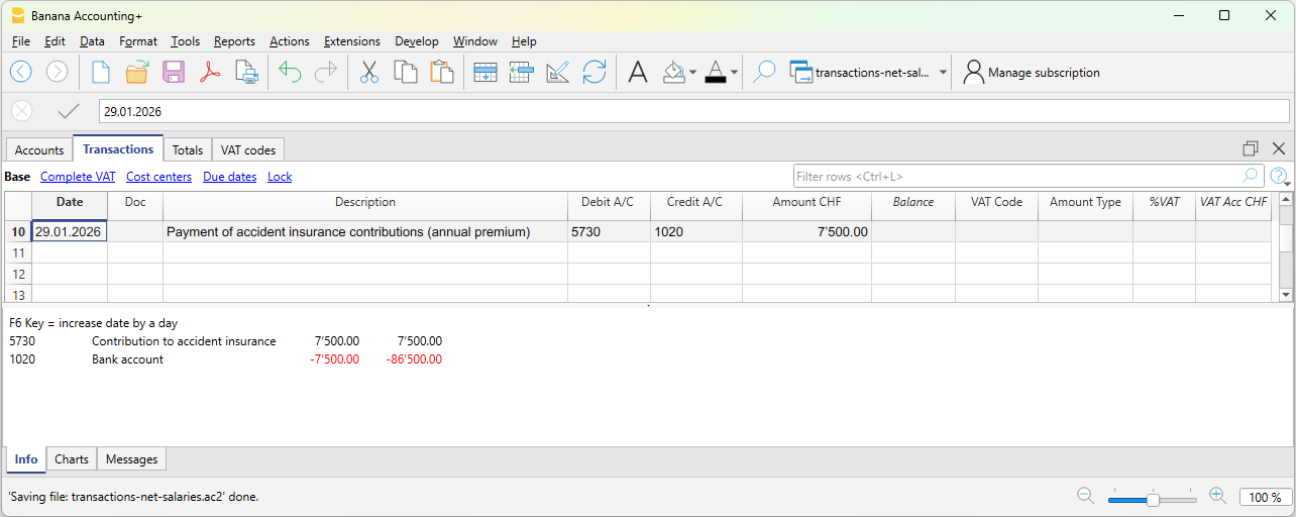
Annual payment of the pension fund premium
When paying the annual occupational pension fund premium:
- Date: the annual pension fund premium payment date
- Description: the payment description
- Debit: account 5720 Mandatory occupational pension contributions
- Credit: the Bank account
- Amount: enter the amount shown on the invoice. It includes both the employer's share and the employee's share.
Payment of the daily sickness allowance insurance premium
When paying the annual daily sickness allowance insurance premium:
- Date: the payment date of the daily sickness allowance insurance premium
- Description: the payment description
- Debit: account 5740 Daily sickness allowance insurance
- Credit: the Bank account
- Amount: enter the amount shown on the invoice. It includes both the employer's share and the employee's share.
Expense reimbursement included in the net salary paid
When the net salary paid includes an expense reimbursement, it is advisable to separate the net salary from the expense reimbursement in the accounting records. This ensures that the salary account is not affected by amounts that do not actually represent salary.
Example:
- Net salary: CHF 4'000
- Expense reimbursement: CHF 200
- Total payment through the bank: CHF 4'200
In the accounting entry, the two amounts must be recorded separately. Therefore, the transaction should be entered using three rows:
In the Transactions table:
- First row – total payment through the bank
- Date: the transaction date
- Description: monthly salary payment
- Debit: leave blank
- Credit: the Bank account
- Amount: the total amount paid CHF 4'200
- Second row – monthly net salary
- Date: the transaction date
- Description: monthly salary payment
- Debit: account 5000 Salaries
- Credit: leave blank
- Amount: the net salary paid CHF 4'000
- Third row – expense reimbursement
- Date: the transaction date
- Description: expense reimbursement
- Debit: the Expense reimbursement account (for example, travel expenses)
- Credit: leave blank
- Amount: the expense reimbursement amount CHF 200
Payment of withholding tax
When paying withholding tax at the end of the quarter:
- Date: the withholding tax payment date
- Description: the payment description
- Debit: account 5790 Withholding tax
- Credit: the Bank account
- Amount: enter the amount calculated by the payroll software according to the requirements of the Withholding Tax Office.
Checks and verification
During the year, social security contributions and some insurance premiums are generally paid as advance payments. The actual amount due is determined only when the final statements or the year-end adjustments are issued.
For this reason, when using net salary accounting, it is essential to carry out regular checks and a thorough verification at the end of the financial year.
For more information, see the Net salary reconciliation.
Gross salary transactions
Gross salary management consists of recording in the accounting the entire salary, including all employee salary deductions and social security contributions.
Unlike net management, this method provides a complete view of salary costs and liabilities toward social institutions.
What is recorded
With gross management, the following are recorded monthly:
- the gross salary
- employee deductions (AVS, LPP, withholding tax, etc.)
- employer’s social security contributions
- liabilities toward social security and insurance institutions (if the accounting is kept on an accrual basis)
- the net salary paid
In gross management, the accounting clearly distinguishes between:
- the employee’s share (deducted from the salary),
- the employer’s share.
The accounting principle
Gross management follows the accrual principle:
Salary costs and the related liabilities are recorded in the period in which they arise, regardless of the time of payment.
Difference compared to net management
Unlike net management, which records only actual payments, gross management records all salary components and the related liabilities.
When to use gross management
Gross management is appropriate when:
- A complete and detailed accounting is required
- You want to monitor personnel costs precisely
- Liabilities toward social security and tax authorities must be recorded
- The accounting is used for analysis and reporting
Accounts normally used
Gross management requires a larger number of accounts compared to net management.
Expense accounts
- 5000 Gross salaries
- 5700 Employer social security contributions
- 5710 Family allowance fund contributions
- 5720 Occupational pension contributions (LPP)
- 5730 Accident insurance premiums (LAINF)
- 5740 Daily sickness allowance insurance
Liability accounts
- 2270 Liabilities to social security institutions (AVS/AI/IPG/AD)
- 2272 Pension fund liabilities (LPP)
- 2273 Accident insurance liabilities
- 2274 Collective health insurance liabilities
- 2209 Withholding tax liabilities
- 2371 Liabilities to employees
Payment accounts
- 1020 Bank
- other Cash accounts
Employer’s share of social security and insurance contributions
In gross salary management, the accounts relating to social security contributions and insurance costs make it possible to clearly identify the portion effectively borne by the employer.
In the dedicated account cards (for example AVS, LPP, accident insurance, etc.), the following are recorded:
- in Debit, the total amounts due to the institutions (employer + employee),
- in Credit, the employee’s share deducted from the salary.
The difference between these amounts represents the employer’s share, i.e. the portion borne by the company as its own expense.
This approach makes it possible to:
- clearly distinguish between company costs and amounts withheld from employees,
- have a transparent view of obligations toward social institutions,
- accurately monitor the impact of personnel costs on the company’s results.
Accounting entry of gross salaries
At the end of the payroll period, the gross salary and the related deductions from employees’ pay are recorded. With gross recording, both the salary cost and the deductions and liabilities toward third parties are recognized.
Example:
- 5000 Gross salaries → Debit
- 1181 Family allowances → Debit
- 5700 AVS/AI/IPG/AD Contributions → Credit (employee’s share, deducted from salary)
- 5720 LPP Contributions → Credit (employee’s share, deducted from salary)
- 5730 LAINF Contributions → Credit (employee’s share, deducted from salary)
- 5740 Sickness contributions → Credit (employee’s share, deducted from salary)
- 2209 Withholding tax liabilities → Credit (fully borne by the employee). The withholding tax deducted from the employee’s salary must be fully paid to the Withholding Tax Office and represents a liability for the company.
- 2371 Liabilities to employees → Credit
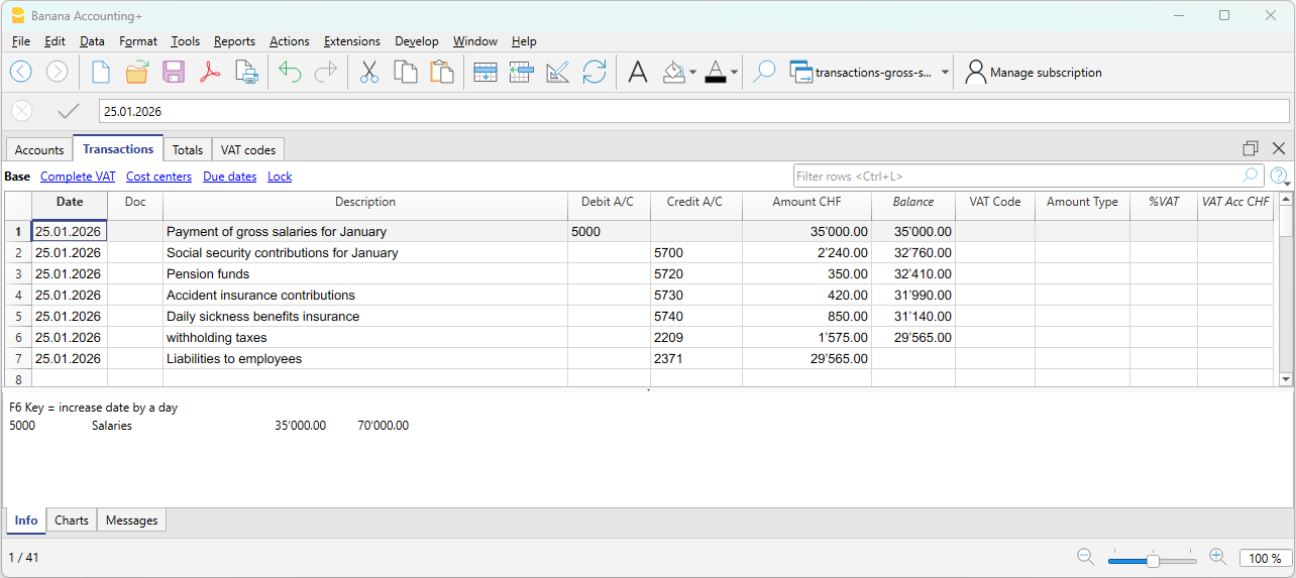
Payment of the net salary
If salaries have been recorded when accrued and the payment takes place later, the payment entry is recorded as follows:
- 2371 Liabilities to employees → Debit
- 1020 Bank → Credit
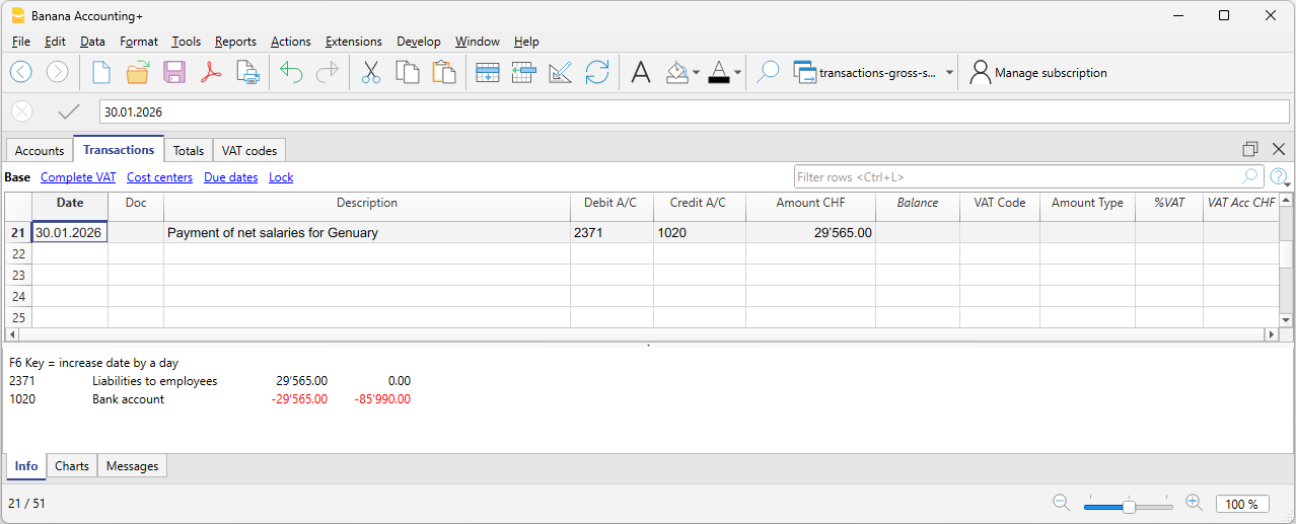
Recording AVS advances and payment
Monthly or at another regular interval, the employer receives from the cantonal AVS office the advance invoices for AVS contributions to be paid. These amounts also include any allowances advanced in the salary of the employee entitled to them.
The advance invoice includes both the employer’s share and the employee’s share.
Recording the invoice:
On 03.01.2026 we record the invoice for AVS advances:
- 5700 Employer social security contributions → Debit
- 2270 Liabilities to social security institutions (AVS/AI/IPG/AD) → Credit
Payment:
On 30.01.2026 we record the payment of the AVS advances:
The contributions are paid according to the invoice, the amount of which is net of any family allowances or other benefits.
- 2270 Liabilities to social security institutions (AVS/AI/IPG/AD) → Debit
- 1020 Bank → Credit
The AVS account plays a central control role:
- in Credit, employees’ salary deductions are recorded
- in Debit, payments to the institution.
The account balance therefore represents the employer’s share.
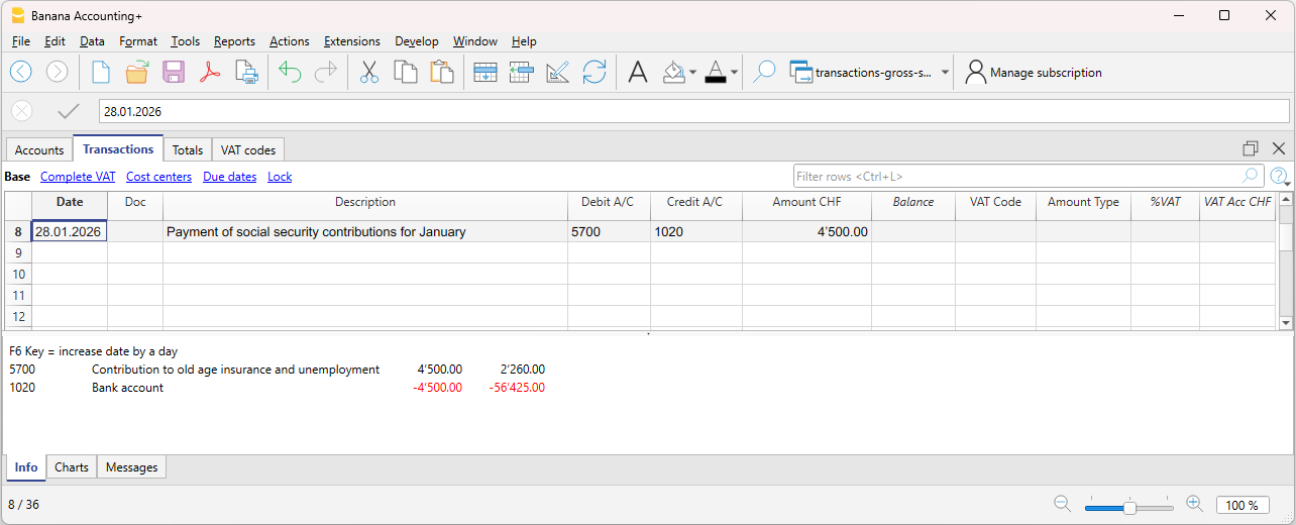
In the AVS contributions account card (see image), advances paid appear in Debit, while contributions deducted from employees’ salaries appear in Credit. The account balance therefore represents the employer’s share. This presentation makes it easy to verify the correctness of contributions and payments made.
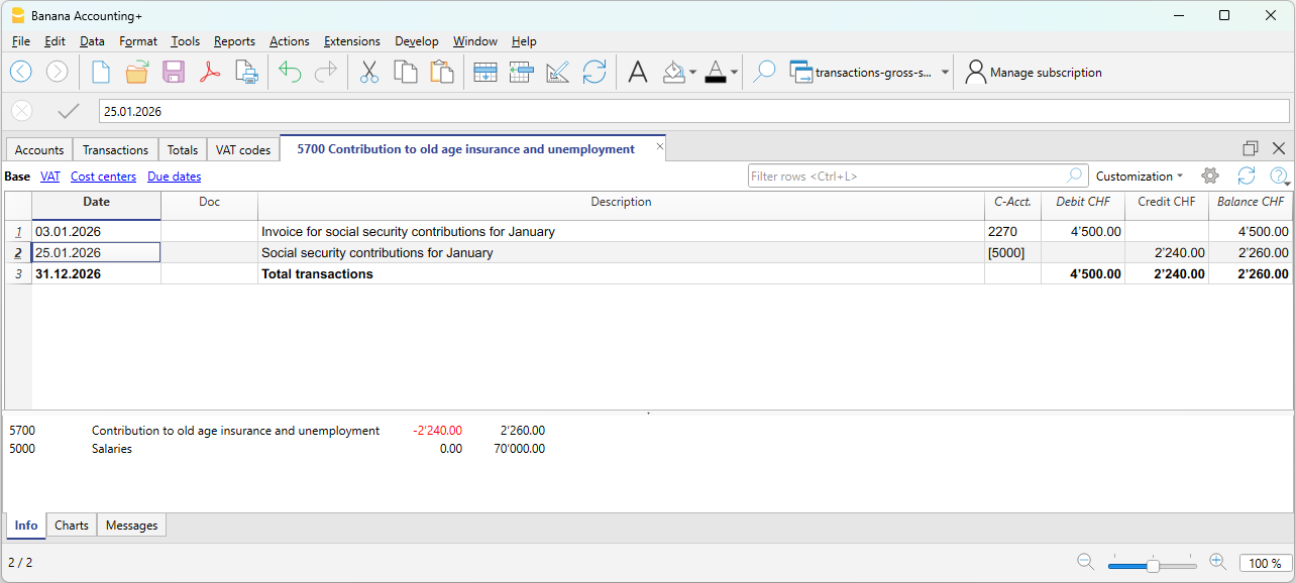
LPP contribution premium and payment
When the annual LPP premium is received, the total cost borne by the employer and the liability toward the LPP insurer are recorded.
When we receive the LPP premium invoice:
- 5720 LPP Contributions → Debit
- 2272 LPP Liabilities → Credit
When we pay the LPP premium invoice:
- 2272 LPP Liabilities → Debit
- 1020 Bank → Credit
Annual accident insurance premium (LAINF) and payment
When the annual LAINF premium is received, the total cost borne by the employer and the liability toward the LAINF insurance are recorded.
When we receive the LAINF premium invoice:
- 5730 Accident insurance premiums (LAINF) → Debit
- 2273 Accident insurance liabilities → Credit
When we pay the LAINF premium invoice:
- 2273 Accident insurance liabilities → Debit
- 1020 Bank → Credit
Annual collective health insurance premium (IGM) and payment
When the annual collective health insurance premium is received, the total cost (including both the employer’s and the employee’s share) and the liability toward the health insurance are recorded.
When we receive the health insurance premium invoice:
- 5740 Daily sickness allowance insurance → Debit
- 2274 Health insurance liabilities → Credit
When we pay the health insurance premium invoice:
- 2274 Health insurance liabilities → Debit
- 1020 Bank → Credit
Payment of withholding tax
The withholding tax, deducted from the monthly salaries of employees subject to withholding tax, must be declared and paid by the employer within the prescribed deadlines. It is borne solely by the employee.
- 2209 Withholding tax liabilities → Debit
- 1020 Bank → Credit
Control and verification
It is important to regularly verify:
- the consistency between accounting and payroll calculations
- the balances of liability accounts toward social institutions
- the payments made
During the year, social contributions are often paid as advances.
Following the final statements from the social institutions, any adjustments are recorded to align costs and liabilities with the amounts actually due.
Advantages of gross management
- Complete view of salary costs
- Greater accounting transparency
- Detailed control of deductions and contributions
- Proper representation of liabilities
Limitations of gross management
- Greater complexity
- More accounting transactions
- Requires more accounts and careful management
Salary Reconciliation and Verification of the OASI Declaration
When salary accounting is managed on a net basis, the annual OASI declaration cannot be verified by directly comparing the Salaries account with the final statement issued by the OASI Compensation Office. This is because the Salaries account contains the recorded net amounts, whereas the OASI statement is based on the gross payroll calculated by the payroll management software.
To verify the accuracy of the annual OASI declaration and the other year-end statements, it is therefore necessary to reconstruct the gross payroll and carry out a series of reconciliation checks.
The reconciliation process makes it possible to verify the consistency between:
- the accounting records
- the payroll statements generated by the payroll management software
- the annual OASI declaration
- the final statements issued by the social security institutions.
Reconciliation objectives
The year-end reconciliation has two main objectives:
- to reconstruct the gross payroll and compare it with the gross payroll declared to the OASI Compensation Office;
- to reconcile the OASI contributions by comparing account 5700 OASI Contributions with the final statement issued by the OASI Compensation Office.
Required documents
The following documents are normally required to perform the reconciliation:
- the accounting file
- the payroll statements
- the annual OASI declaration
- the final statement issued by the OASI Compensation Office
- the occupational pension (LPP/BVG) statements
- the insurance statements (OAI, daily sickness allowance insurance, etc.).
Verification of net salaries
The first check is to verify that the amounts paid to employees match those shown in the payroll statements generated by the payroll management software.
The total net salaries recorded in the accounting records must match the net salaries shown in the payroll statements.
It is also necessary to verify that there are no missing or duplicate transactions and that all entries have been recorded in the correct accounting period.
Any differences must be analyzed and corrected before proceeding with the reconciliation of the gross payroll.
Reconstruction of the gross payroll
To compare the accounting records with the OASI statement, the gross payroll must first be reconstructed.
The reconstruction must be carried out using the data from the payroll management software, which provides the details of the deductions applied to each employee.
Start from the net salaries recorded in the accounting records and add only the deductions withheld from employees, such as:
- OASI, DI, IC, and ALV
- occupational pension (LPP/BVG) contributions
- withholding tax
- other salary deductions.
The following must instead be excluded:
- family allowances;
- expense reimbursements;
- other allowances that are not subject to OASI contributions.
Verification of OASI contributions
During the year, OASI contributions are normally paid as advance payments. The actual amount due is determined only by the final statement.
For this reason, the balance of account 5700 OASI Contributions must be compared with the final statement issued by the OASI Compensation Office.
The account balance must include the advance payments made during the year as well as any year-end adjustments. The total must match the contributions shown on the final statement issued by the OASI Compensation Office.
Verification of other social security contributions
The same principle can also be applied to other social security and insurance contributions by comparing the balances of the related accounts with the annual statements issued by the relevant institutions.
In particular, it is advisable to verify:
- occupational pension (LPP/BVG) contributions;
- occupational accident insurance (OAI) premiums;
- daily sickness allowance insurance premiums;
- other recorded social security contributions or insurance premiums.
Any differences relating to these institutions should also be analyzed and reconciled before the financial year is closed.
Year-end checks
At the end of the financial year, the reconciliation should confirm that:
- the gross payroll matches the gross payroll declared to the OASI Compensation Office;
- the recorded contributions match the final statements issued by the institutions;
- all advance payments and any year-end adjustments have been recorded;
- there are no differences between the accounting records, the payroll statements, and the declarations submitted to the social security institutions.
A complete reconciliation makes it possible to identify any differences before submitting the declarations to the social security institutions and ensures consistency between the accounting records, the payroll management software, and the annual statements.
FAQ
Why doesn't the gross payroll in the OASI declaration match the Salaries account?
- Because under net salary accounting, the Salaries account records only the net amounts paid to employees, whereas the OASI declaration is based on the gross payroll.
Why is the balance of the OASI account different from the advance payments made?
- Because advance payments are normally made during the year. The actual amount due is determined only by the final statement.
How is the gross salary determined?
- The gross salary is reconstructed using the payroll statements generated by the payroll management software.
How do you reconstruct the gross salary starting from the net salary?
- Start with the net salary recorded in the accounting records and add the deductions withheld from the employee (OASI/DI/IC/ALV, occupational pension (LPP/BVG) contributions, withholding tax, and other deductions). Family allowances, expense reimbursements, and other allowances that are not subject to OASI contributions must instead be excluded.
Totals Table
The Totals table presents the totals by Group and is used to check the accounting balance.
It is processed automatically by the program and cannot be modified by the user.
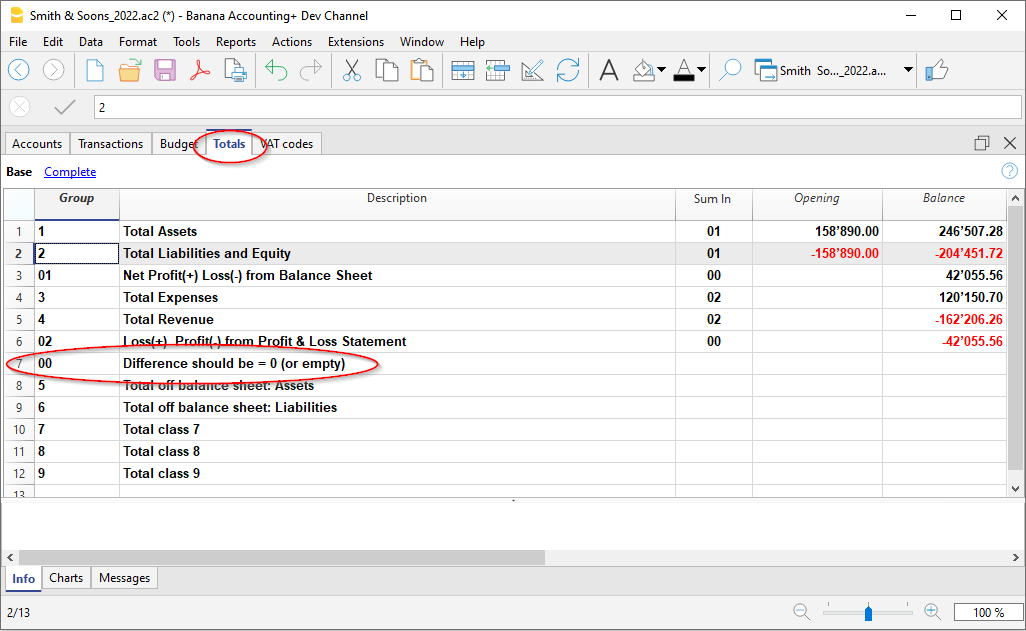
In the Totals table it is possible, to get an idea of the situation of one's own activity at a glance. You see the totals of assets, liabilities, costs and revenues and above all you see if you have a profit or a loss.
The 00 group is very important because it allows you to immediately see if everything is in place or if there are differences in the balances.
Budget Table
The financial planning entries are entered in the Budget Table. It is similar to the Transactions table, but has some columns specific to help speeding up and make budgeting easier.
You can also modify the data as you require, to own reliable and always perfectly updated budgets.
For more information on the Budget table, see the pages:

Year end closings | Double-entry accounting
Year-end closing refers to all control operations, adjustments, and time delimitations carried out at the end of the year, before preparing the final financial statements.
With Banana Accounting, each accounting year has its own separate file. Technically, there is no concept of a formal accounting closure:
- When a new year begins, a new file is created using the Create new year command.
- You can continue working simultaneously on both the new year’s file and the previous year’s file. Once the closing operations are completed, the updated balances are retrieved in the new year's file using the Update opening balances command.
On these pages, we explain the main steps to follow during the accounting year-end closing phase:
Year-end checklist
The year-end checklist reminds you of all the steps needed to correctly close the fiscal year: preliminary checks, adjustments, corrections, and tax reviews.
Closing transactions
The closing transactions are accounting records made at the end of the fiscal year such as adjustments, depreciations, settlements, and corrections that complete the annual financial statements.
Allocation of profit/loss for the year
During the creation of the new year, the program automatically carries forward the profit or loss of the previous year and allows you to allocate it to one or more balance sheet accounts.
The opening balances are updated consistently, ensuring accounting balance.
The allocation can also be postponed and done later.
Distribution of annual profit
The distribution of annual profit defines how the year's positive result is allocated among reserves, dividends, or equity, according to legal and statutory requirements. It is an operation that is carried out after the approval of the financial statements and requires specific transactions.
Documents for the Auditor
The documentation for the auditor lists the documents needed to facilitate and speed up the auditor’s work. It includes account statements, contracts, inventories, supporting documents, reconciliations, and reports.
Changes after closing
Changes after closure may become necessary in case of errors identified later, documents received late, or adjustments requested during the audit. Depending on their nature, the changes must be recorded either in the closed year or in the following one.
Year-end closure checklist
On this page you will find a general checklist for those using Banana Accounting Plus, useful for carrying out all the necessary checks to close the accounting year and start the new one.
We also explain how to proceed if, after closing, differences or missing transactions emerge. More information on the page Changes after closing the accounting year.
Use the Temporary Filter for quick checks and corrections
To perform a quick check, especially at year-end, we recommend using the Temporary row filter function, which shows you all the transactions that match a keyword, phrase, account or a group of elements. You can correct or edit the transactions directly in the rows displayed by the Filter, without having to scroll through the entire Transactions table. When you remove the Temporary Filter, the rows return to their original order. More information on the page:
- Temporary row filter (only with Advanced plan).
Accounting check command
With Banana Accounting you can record quickly, even leaving some operations pending without interrupting your workflow.
The Actions > Check accounting command performs multiple checks, as if re-entering the data from scratch, and immediately reports any detected errors or differences.
Use this command regularly, especially in case of differences or error messages, significant changes (initial balances, VAT codes), and especially before closing the accounting.
Check the opening balances
- In the Accounts table, in the Opening and Balance columns, on the row "Difference must be zero" there must be no amount, otherwise you need to find the error and correct it to balance the opening balance sheet.
Note: in the Transactions view, it's normal to have amounts in the Debit and Credit columns. - Make sure that the accrued and deferred accounts from the previous year have been closed.
- Verify that the opening balances match the final balances from the previous year, already reviewed and declared to the tax office.
- For multi-currency accounting, see the page Opening balances in multi-currency accounting.
Check correspondence of account balances
The first check is undoubtedly to ensure that the account balances match reality. The cash account balance must match the actual cash status. The balance of bank accounts, credit cards, loans or assets must match the statement balance. The same applies to all other accounts with reconciliations, VAT, suppliers, etc.
If there is a difference, you must find the cause and update either the opening balance or the transactions.
Differences in the Transactions table
In the Transactions table (Info panel at the bottom), check that there are no reported differences. In addition to using the Check accounting command, with Banana Accounting Plus you can activate the Balance column in the Transactions table. This column detects all the rows where there are differences. You can then quickly scroll through the column to immediately spot and correct discrepancies, avoiding errors in the new year.
Differences between bank statement balances and accounting balances (CheckBalance function)
The #CheckBalance function checks that accounting balances match the bank statement balances. We recommend running this check not only at the end of the accounting period, but every month, to prevent mismatched balances from carrying over incorrectly month after month.
Information about the verification transactions is available on the page Verification balance transactions.
Multi-currency accounting
If you are using multi-currency accounting, you must also set the closing exchange rates and record the unrealized exchange rate gains and losses. More information on the page:
Checks before closing
To ensure the year’s accounting is complete and consistent, it is important that:
- All transactions of the year have been entered (bank, cash, customers, suppliers).
- There are no unbalanced or inconsistent rows.
- VAT transactions are consistent (if applicable).
- The multi-currency accounting includes all currency movements.
- The exchange rate differences in multi-currency accounting have been calculated.
- The Check accounting command has been run and no errors were found.
Year-end operations
- Record depreciations.
- Enter accruals and deferrals.
- Verify cost and revenue allocation.
- Reconcile bank accounts and customer and supplier balances.
More information on the page: Closing accounting transactions.
Exchange rate differences (if multi-currency)
- Update the exchange rate on 12/31 in the Exchange rates table (use the official rate from the Federal Tax Administration).
- Run the command Create exchange rate difference transactions.
Create a custom checklist
Every year, there are many review and closing operations, and from one fiscal year to another, it’s not always easy to remember everything. To avoid omissions, with Banana Accounting Plus you can create a simple table directly in your accounting file to note:
- All information related to the checks.
- The comments and corrections made by the auditor in the previous year, so as not to repeat the same mistakes.
- The list of documents to print.
- The documents to send to the auditor.
- Links to pages or resources you find useful.
More information on the following pages:
Year-end closure accounting transactions
At the end of the fiscal year, before opening the new accounting year, it is necessary to carry out some closing operations. Some transactions are simple and can be done independently, while others require specific technical skills or have tax and social security implications for which it is advisable to consult an accountant or fiduciary.
Preliminary checks
Before closing, make sure that:
- There are no errors using the Check accounting command.
- Bank balances in the accounting match the bank statements.
- Use the #CheckBalance function.
- There are no differences between the Debit and Credit columns in the Transactions table.
- Display the Balance column and check that there are no discrepancies.
- All transactions for the year have been entered.
- The balance of the automatic VAT account has been transferred to the VAT due account.
Open customer and supplier invoices (with cash accounting)
If you use cash accounting, at the end of the year you must record:
- Customer invoices issued but not yet paid.
- Supplier invoices received but not yet paid.
These entries allow you to correctly allocate costs and revenues to the correct fiscal year.
You can use the Open customer invoices and Open supplier invoices functions.
Open customer invoices as of 12/31
If you use cash accounting, at the end of the year you must record customer invoices that have been issued but not yet paid. This closing operation serves to determine the costs and revenues pertaining to the fiscal year. To make the process easier, you can quickly identify the values as of 12/31 using the open invoices by customer functions.
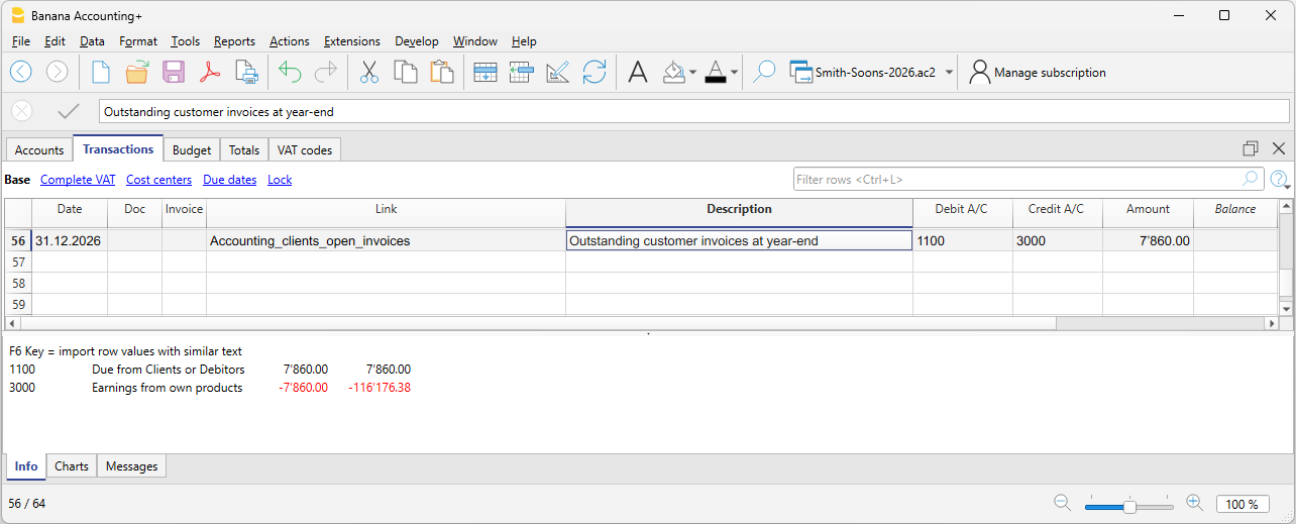
Open supplier invoices as of 12/31
If you use cash accounting, at the end of the year you must record supplier invoices received but not yet paid. This closing operation serves to determine the costs and revenues pertaining to the fiscal year. To make the process easier, you can quickly identify the values as of 12/31 using the open invoices by supplier functions.
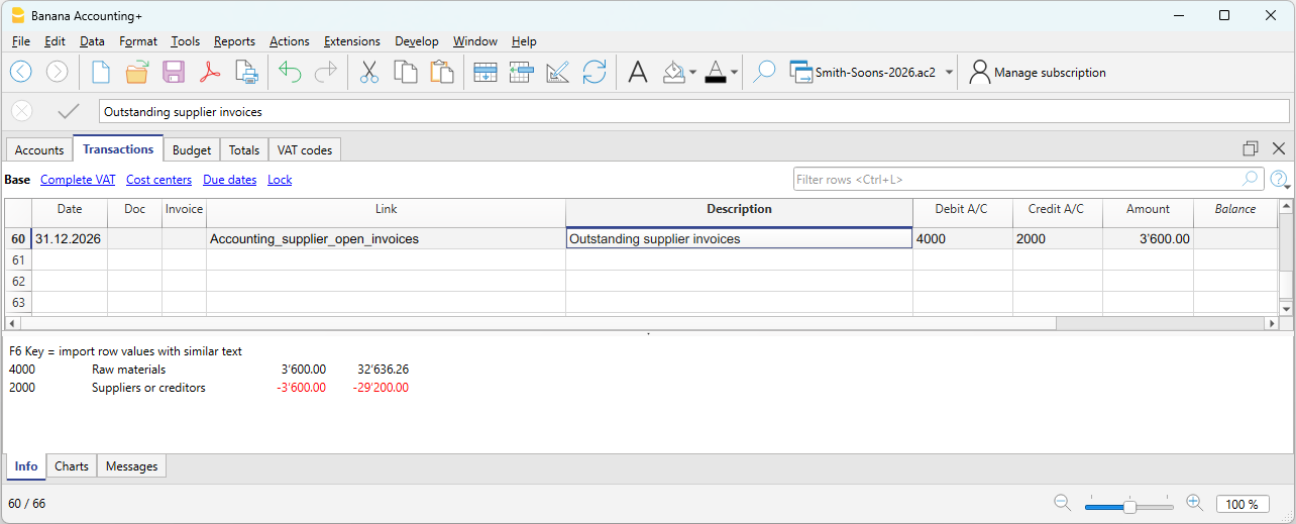
Depreciation
At the end of the fiscal year, you must record the depreciation of movable and immovable assets and consider accelerated depreciation for assets subject to rapid obsolescence.
You can use our application Fixed assets register which automatically creates depreciation transactions that you can import into your accounting file. The depreciation transaction varies depending on the method used:
- Direct depreciation: the depreciation is recorded directly in the income statement, using the depreciation account on the debit side and the asset account on the credit side. In the balance sheet, the asset always appears with its residual value.
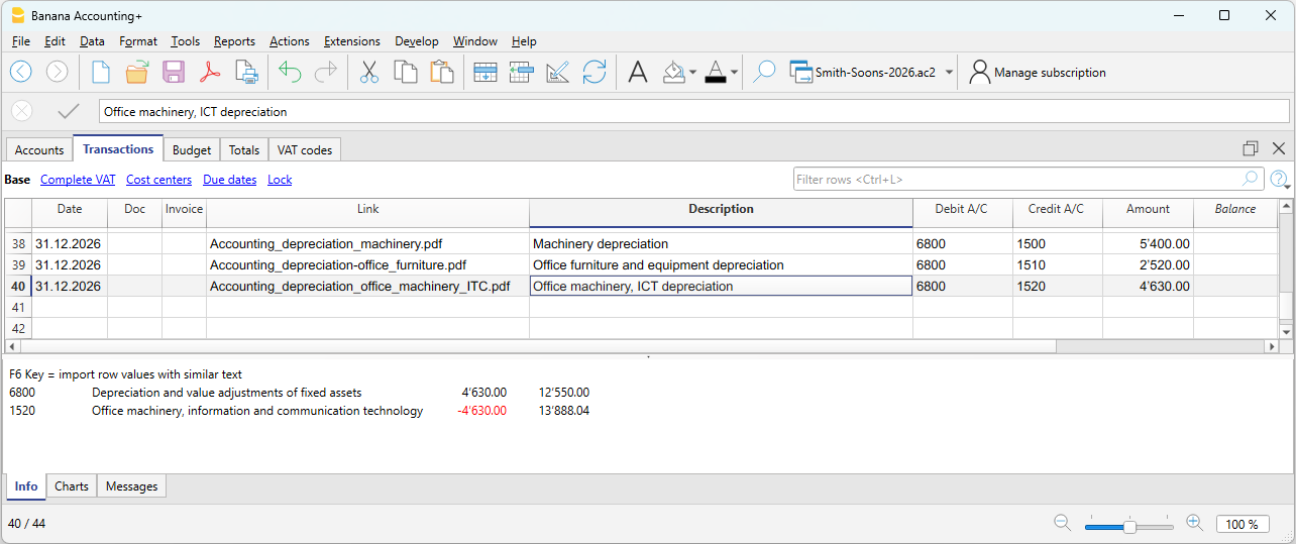
- Indirect depreciation: in this case, the depreciation is recorded not as a reduction of the asset but as an adjustment by posting it to a depreciation fund (reduction of assets).
Inventory adjustment
If you have inventory with goods, or simply a company material inventory, the inventory value at year-end must be adjusted in accounting. During the year, inventory movements are not recorded in the accounting file:
- Incoming and outgoing goods and their respective values are managed and updated in a dedicated inventory file or application.
Our Inventory application makes it easier to manage incoming and outgoing quantities, unit prices and final inventory values, allowing you to quickly determine the adjustment to be recorded at year-end in your accounting.
To calculate the inventory value to report correctly in the Balance Sheet:
- Determine the inventory value.
- Compare the beginning inventory value with the ending value.
- Record the difference as a change in inventory using the income statement account for goods as the offset.
In our example shown in Banana, there is an assumed increase in inventory compared to the opening value. Therefore, inventory (account 1200) is recorded on the Debit side, while the decrease in cost of goods is recorded on the Credit side.
Private use
Private use occurs when the business owner uses goods or services belonging to the company (goods, materials, vehicles, premises, etc.) for personal purposes.
For tax purposes, it is as if the company sells to the owner and therefore it must be recorded as revenue. If the company is subject to VAT, the transaction is VAT taxable.
In Switzerland, according to the VAT Act (LIVA), private use is taxable because it represents a private use of goods for which the company has previously deducted VAT.
The value to be considered is generally:
- Market value of the used item, or
- Purchase cost if lower.
The applicable VAT rate is the one of the good (e.g. 8.1%).
If the owner withdraws goods from the company for personal use:
- Revenue is recorded (as if it were a sale).
- VAT is calculated on the value of the goods.
- Inventory is reduced.
Private use of company vehicles:
If the owner uses the company car for personal purposes, the private use must be recorded as if it were company revenue. If the company is subject to VAT, the transaction is VAT taxable.
- The amount to be recorded is either a flat rate or calculated according to tax rules (e.g. 9.6% of the purchase price per year).
- Private use is considered revenue.
- VAT must be declared as VAT payable.
- The offset can be:
- a reduction in vehicle costs (6900), or
- a reduction in the asset value (vehicle), often preferred for sole proprietorships.
Adjustment of Taxes and Duties account
The adjustment of taxes and duties is a year-end entry that serves to:
- Record the taxes and duties accrued during the year but not yet paid.
- Adjust previously estimated amounts based on the actual tax assessment.
This ensures the correct cost is recognized for the fiscal year and the related liability to the tax authority is recorded.
It is also necessary to check that the advance payments made during the year refer to the current fiscal year.
Tax payments relating to previous years must be recorded to close the accruals present in the "Direct taxes" (balance sheet) account.
If the accrual balance is insufficient or excessive, the difference must be recorded as an extraordinary cost or revenue, or as a prior period item, depending on the nature of the variation.
Adjustment of the Private account
The private account (usually 2850 / 2860) is used in sole proprietorships or partnerships to record:
- Personal withdrawals by the owner
- Personal deposits by the owner
- Use of company assets for personal purposes (private use)
- Private expenses mistakenly paid by the company
- Year-end adjustments
At the end of the year, this account must be adjusted to reflect the correct balance between the owner and the company.
If the private account is an asset (debit balance) and therefore represents a receivable from the owner to the company, interest could theoretically be recognized.
VAT closing and declaration
For companies subject to VAT, it is important at year-end to check the VAT entries and proceed with the closings correctly. Banana Accounting Plus supports data checking and the preparation of VAT declarations (Advanced plan) for Switzerland, making it easier to manage everything in an orderly and compliant manner. At the end of the year, after proper checks and error corrections, you must:
- Record VAT for the fourth quarter (or the last semester in the case of the flat-rate VAT method).
- You must transfer the balance of the automatic VAT account to the VAT due account.
- Before submitting the final VAT declaration:
- Open the PDF files of the VAT reports previously submitted to the FTA.
- Use the VAT extensions to recalculate the VAT reports for each previous period.
- Verify that the newly calculated VAT reports still match those already submitted.
- Use the VAT Summary command to view various reports and create a PDF printout for data archiving. These documents will be useful in case of a tax audit.
Adjustments for AVS/AI/IPG/AD
The AVS/AI/IPG/AD contributions are mandatory social security contributions in Switzerland covering pension (AVS), disability (AI), allowances for military service and maternity (IPG), and unemployment (AD).
- During the year, the AVS contributions account usually records advance payments made to the Cantonal AVS Compensation Office (Debit) and the amounts withheld from employee salaries (Credit).
- If during the year the family allowances paid to employees were recorded in a dedicated account, for example in the “Family allowance contributions” account, to reconcile the accounting with the AVS year-end statement and record the corresponding adjustment, you can transfer the balance from this account to the AVS/AD Contributions account.
Accident insurance adjustments (LAINF, supplementary LAINF)
LAINF and supplementary LAINF contributions in Switzerland are mandatory insurance contributions against professional and non-professional accidents (LAINF) and additional coverage provided by the employer (supplementary LAINF).
With the recording of the December salaries and the payment of the thirteenth salaries, you need to print the salary list showing all gross wages. You must report the total AVS gross wages to the employee insurance providers, who will determine any adjustments to be paid.
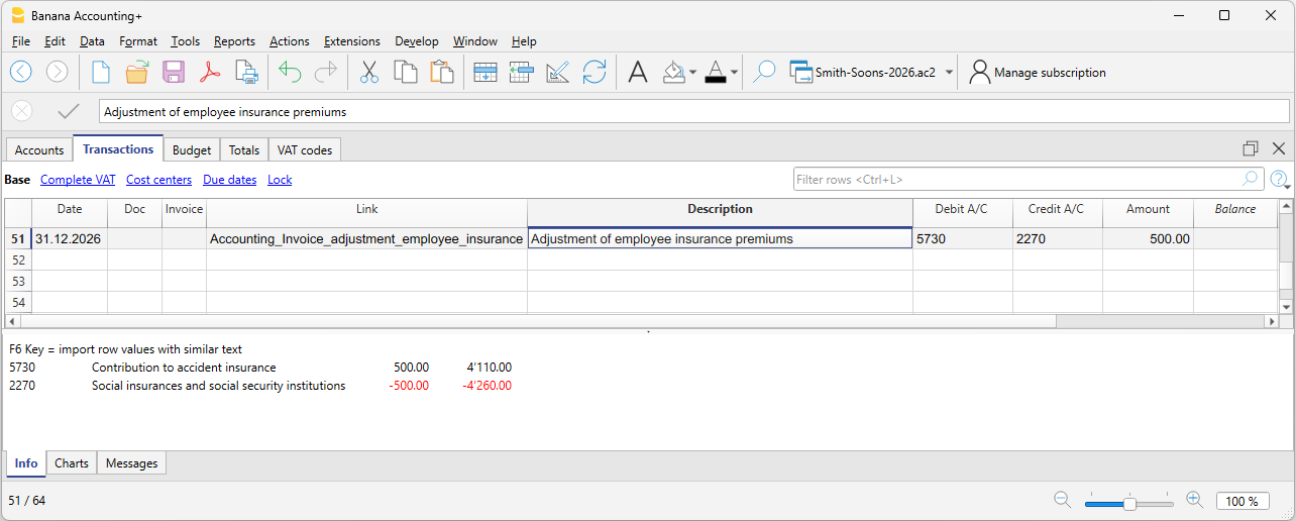
Pension fund adjustments
The pension fund (or LPP) is the mandatory Swiss occupational pension insurance that complements the AVS pension.
Many second pillar (LPP) pension providers calculate the annual premium based on salary estimates provided by the company before the end of the year. Bonuses are not included. Important changes during the year must be communicated promptly so the insurance can adjust the premium. The company may also decide to pay a higher amount in advance to avoid a deficit due to changes during the year.
At the end of the year, the LPP insurance sends a final statement showing either a payable or receivable balance, depending on whether too much or too little was paid.
In the following example, a balance is assumed to be payable. Therefore, the entry will be made in two accounts: Debit to the LPP Contributions account and Credit to the Liabilities to pension institutions account.
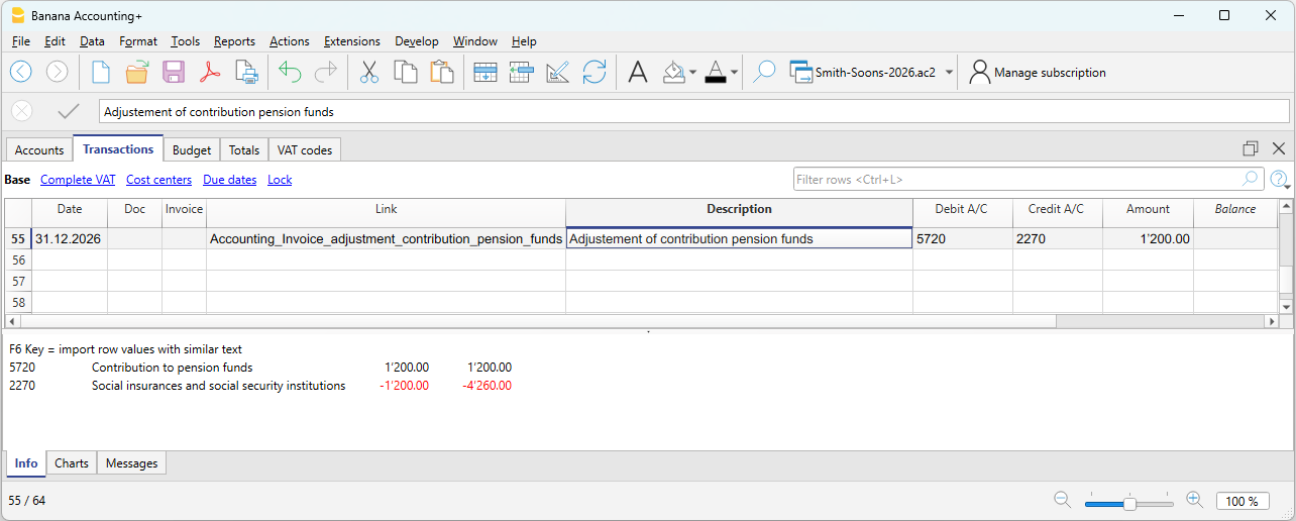
In case of a receivable, the LPP Contributions account is reversed: Debit the Receivables from pension institutions account and Credit the LPP Contributions account (as a decrease).
In the new year, the receivable must be reversed from the LPP Contributions account (for the new year) and the receivable is closed on the Credit side.
Adjustment of the allowance for doubtful accounts (Delcredere)
The allowance for doubtful accounts / Delcredere is a contra asset account associated with receivables. It is used to reduce the value of customer receivables to account for the risk that some may not be collected.
In practice:
- Receivables on the balance sheet are shown at a realistic value.
- The allowance represents an estimate of possible losses.
- It increases the prudence of the balance sheet, as required by the Swiss Code of Obligations.
Debit the expense account "Doubtful accounts" and credit the allowance for doubtful accounts.
Adjustment of withholding tax (IAF)
During the year, the employer withholds the tax at source from the salaries of foreign employees who are not fiscally domiciled in Switzerland. The withheld amounts must be paid to the Tax Office each quarter.
At the end of the year, with the final December report, the declaration for the last quarter’s withholding tax is made. All gross salaries paid are reviewed, and in case of changes or errors, corrections can be made in the final declaration.
Generally, the total amount payable for fourth quarter withholding tax is recorded as a liability as of 12/31 or, if too much was paid, as a receivable. The offset account is always the salaries account (account 5000).
Reimbursements for executive staff
“Executive staff” refers to management figures (CEO, directors, unit heads).
Reimbursements may be for actual expenses incurred by the executive employee on behalf of the company. These are not taxable for the employee and are therefore not subject to AVS, LPP, or withholding tax, provided that they are documented or, in the case of flat-rate allowances, approved through regulations by the FTA.
In this case, they are recorded in accounting as expense reimbursements or personnel expenses.
Accruals and Deferrals in Assets and Liabilities
Accruals and deferrals are year-end adjusting entries used to apply the accrual principle, allocating costs and revenues to the year to which they economically relate, regardless of when the payment is made or received.
Attention
Accruals and deferrals do not concern invoices that are simply unpaid or not yet collected, but adjustments necessary to correctly determine the accrual basis of the financial year.
Difference between accruals and deferrals
At the end of the year, two situations may occur:
- Costs or revenues accrued but not yet recorded → Accruals
- Costs or revenues already recorded but not entirely relating to the current year → Deferrals
Simple rule
- Accruals add what is missing.
- Deferrals postpone what has been recorded in excess.
Accrued income and accrued expenses
Accruals concern costs or revenues already accrued in the financial year, but that will have a financial impact (receipt or payment) in the following year.
They are divided into:
- Accrued income → Revenues to be collected
- Accrued expenses → Costs to be paid
The cost or revenue fully relates to the current year, but has not yet been collected or paid.
Prepaid expenses and deferred income
Deferrals postpone costs and revenues already recorded but relating to the following financial year.
They are divided into:
- Prepaid expenses → postpone part of a cost already recorded
- Deferred income → postpone part of a revenue already recorded.
Accruals and deferrals in the chart of accounts structure of Banana Accounting
Accruals and deferrals are recorded through normal entries in the Transactions table, using specific balance sheet accounts in the chart of accounts.
The accounts are listed in the following subgroups:
Current assets
- 1300 Prepaid expenses (costs paid in advance)
- 1301 Accrued income (revenues to be collected)
Short-term third-party capital
- 2300 Costs to be paid
- 2301 Revenues received in advance
Below we present some examples of accrued income and expenses and prepaid expenses and deferred income created in the Transactions table of Banana Accounting
Accounting method and accruals
- In the Accrual basis method or accrual principle, issued or received invoices are recorded directly in the Customers or Suppliers accounts and appear as open items.
- In the Cash basis method, accruals are necessary at year-end to record costs and revenues accrued but not yet collected or paid.
- In the Hybrid system method, the solution most consistent with the adopted recording method is applied.
Case 1 - Accrued income (Revenues to be collected)
Example: the bank grants interest income of CHF 1’200 for the period 01.10–31.03. As of 31.12, 3 months have accrued (October–December).
Portion relating to the current year:
- 1’200 ÷ 6 months × 3 months = CHF 600
Entry on 31.12
- Debit: 1301 Revenues to be collected CHF 600
- Credit: 6950 Interest income CHF 600
In the Income Statement, CHF 600 is shown for the portion of interest income accrued up to 31.12; in the Balance Sheet, accrued income is shown for interest accrued but not yet collected.
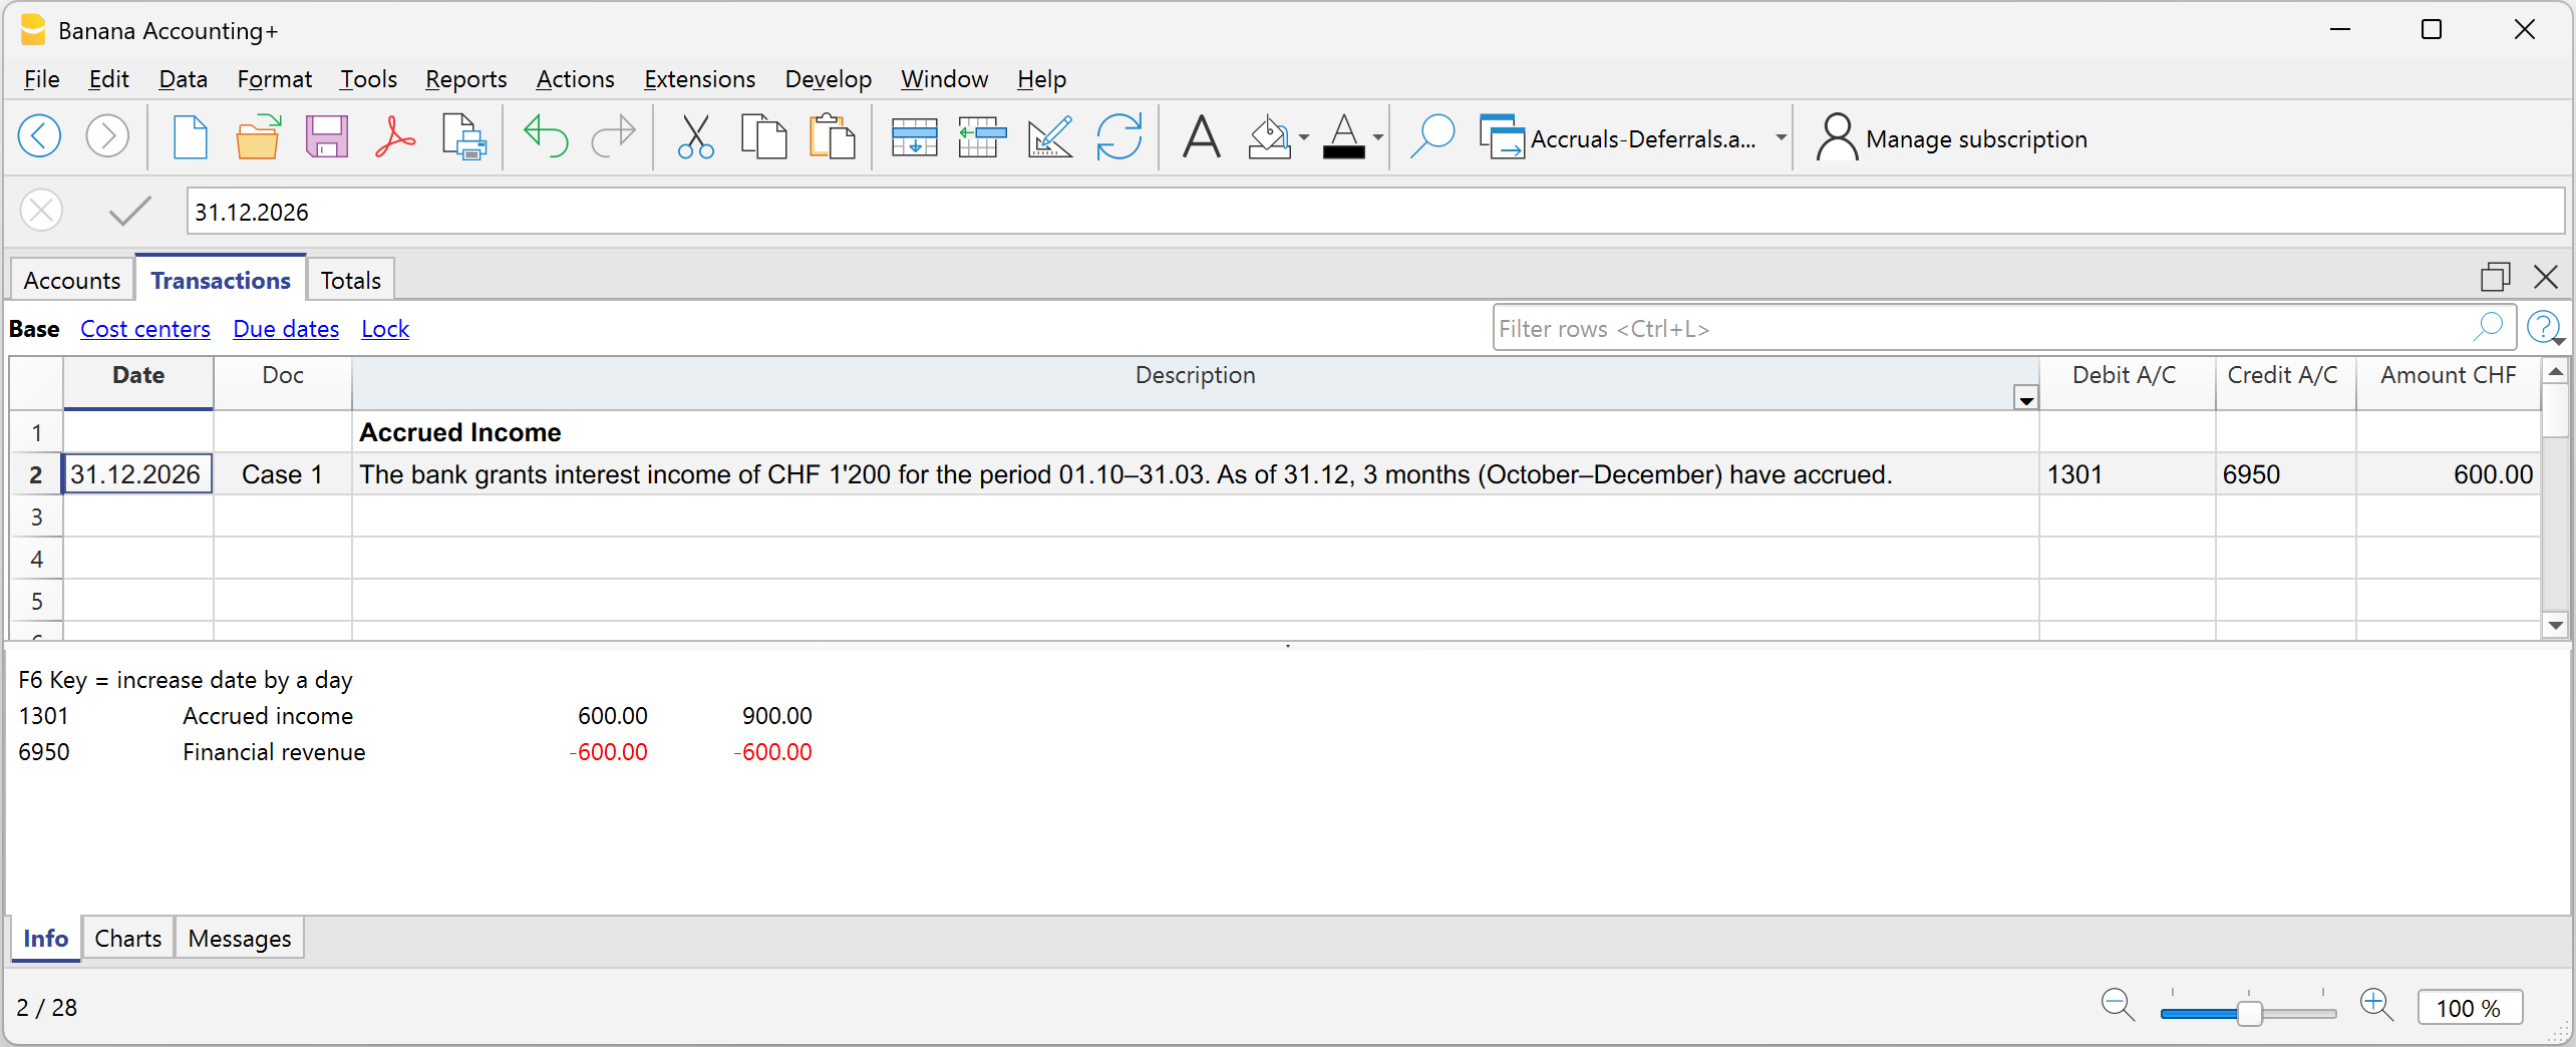
Case 2 - Accrued expense (Costs to be paid)
Example: Interest expense on a loan: CHF 2’400 per year, payable on 31.03 of the following year.
As of 31.12, 3 months have accrued.
2’400 ÷ 12 × 3 = CHF 600
Entry on 31.12
- Debit: 6900 Accrued interest expense CHF 600
- Credit: 2300 account Costs to be paid (liability) CHF 600
In the Income Statement, the interest expense accrued up to 31.12 is shown; in the Balance Sheet, the accrued expense is shown for the liability to be paid.
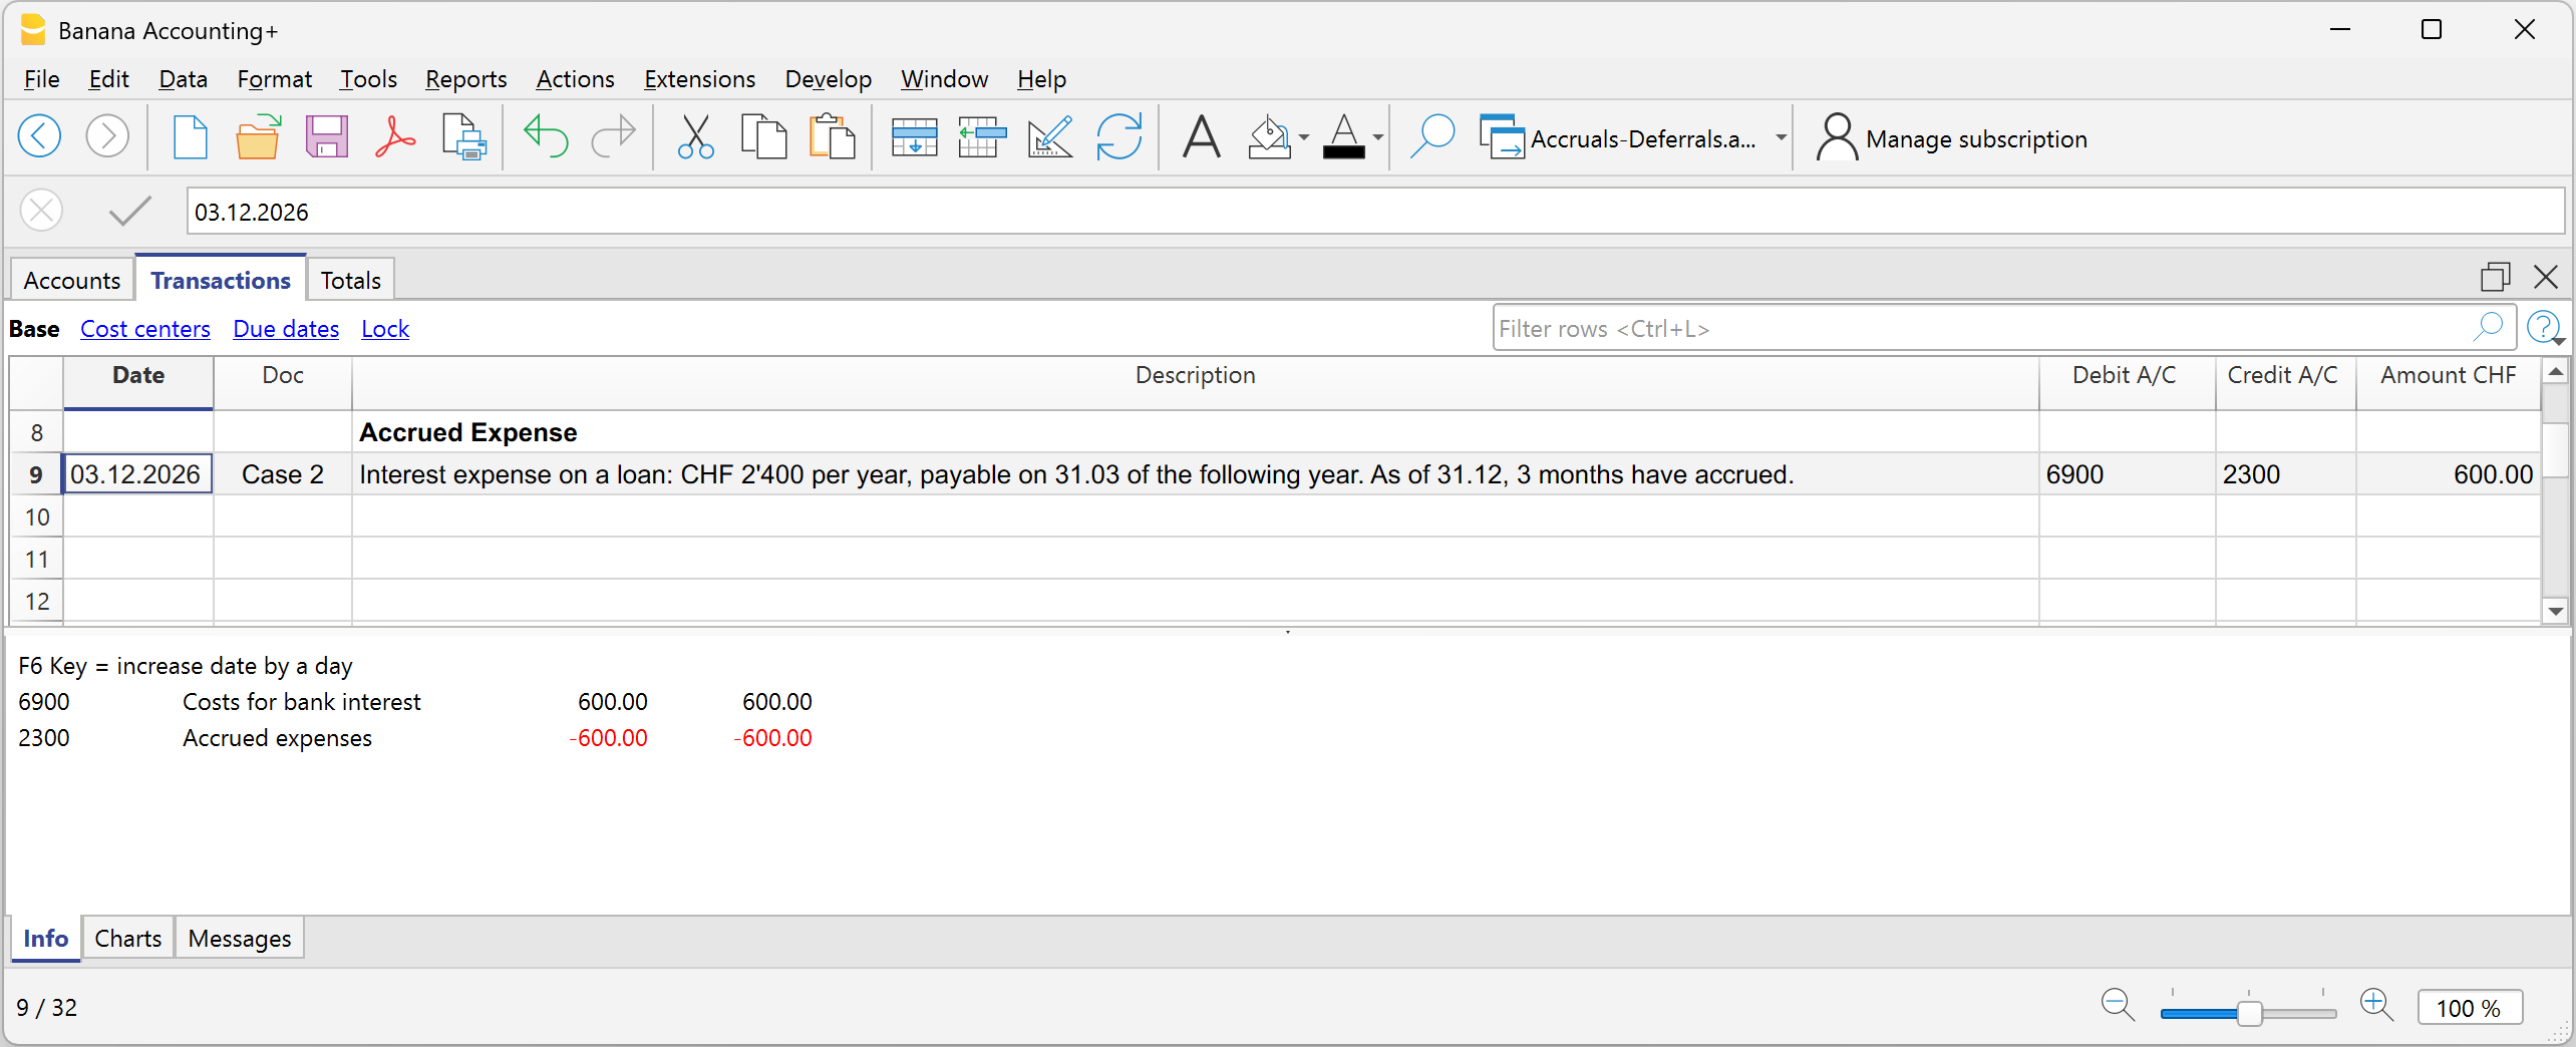
Case 3 - Prepaid expense
Example - Insurance premium paid of CHF 1’200 for 12 months, for the period from 01.10 to 30.09 of the following financial year:
Period relating to the current year:
October–December = 3 months
Portion relating to the current year:
1’200 ÷ 12 × 3 = CHF 300
Portion relating to the following year:
1’200 − 300 = CHF 900
Entry on 31.12
- Debit: Prepaid expenses CHF 900
- Credit: Insurance CHF 900
In the Income Statement, the cost of CHF 300 remains because a reduction of the insurance premium is recorded for the part paid in advance; in the Balance Sheet, CHF 900 remains because it is the portion of cost relating to the following financial year.
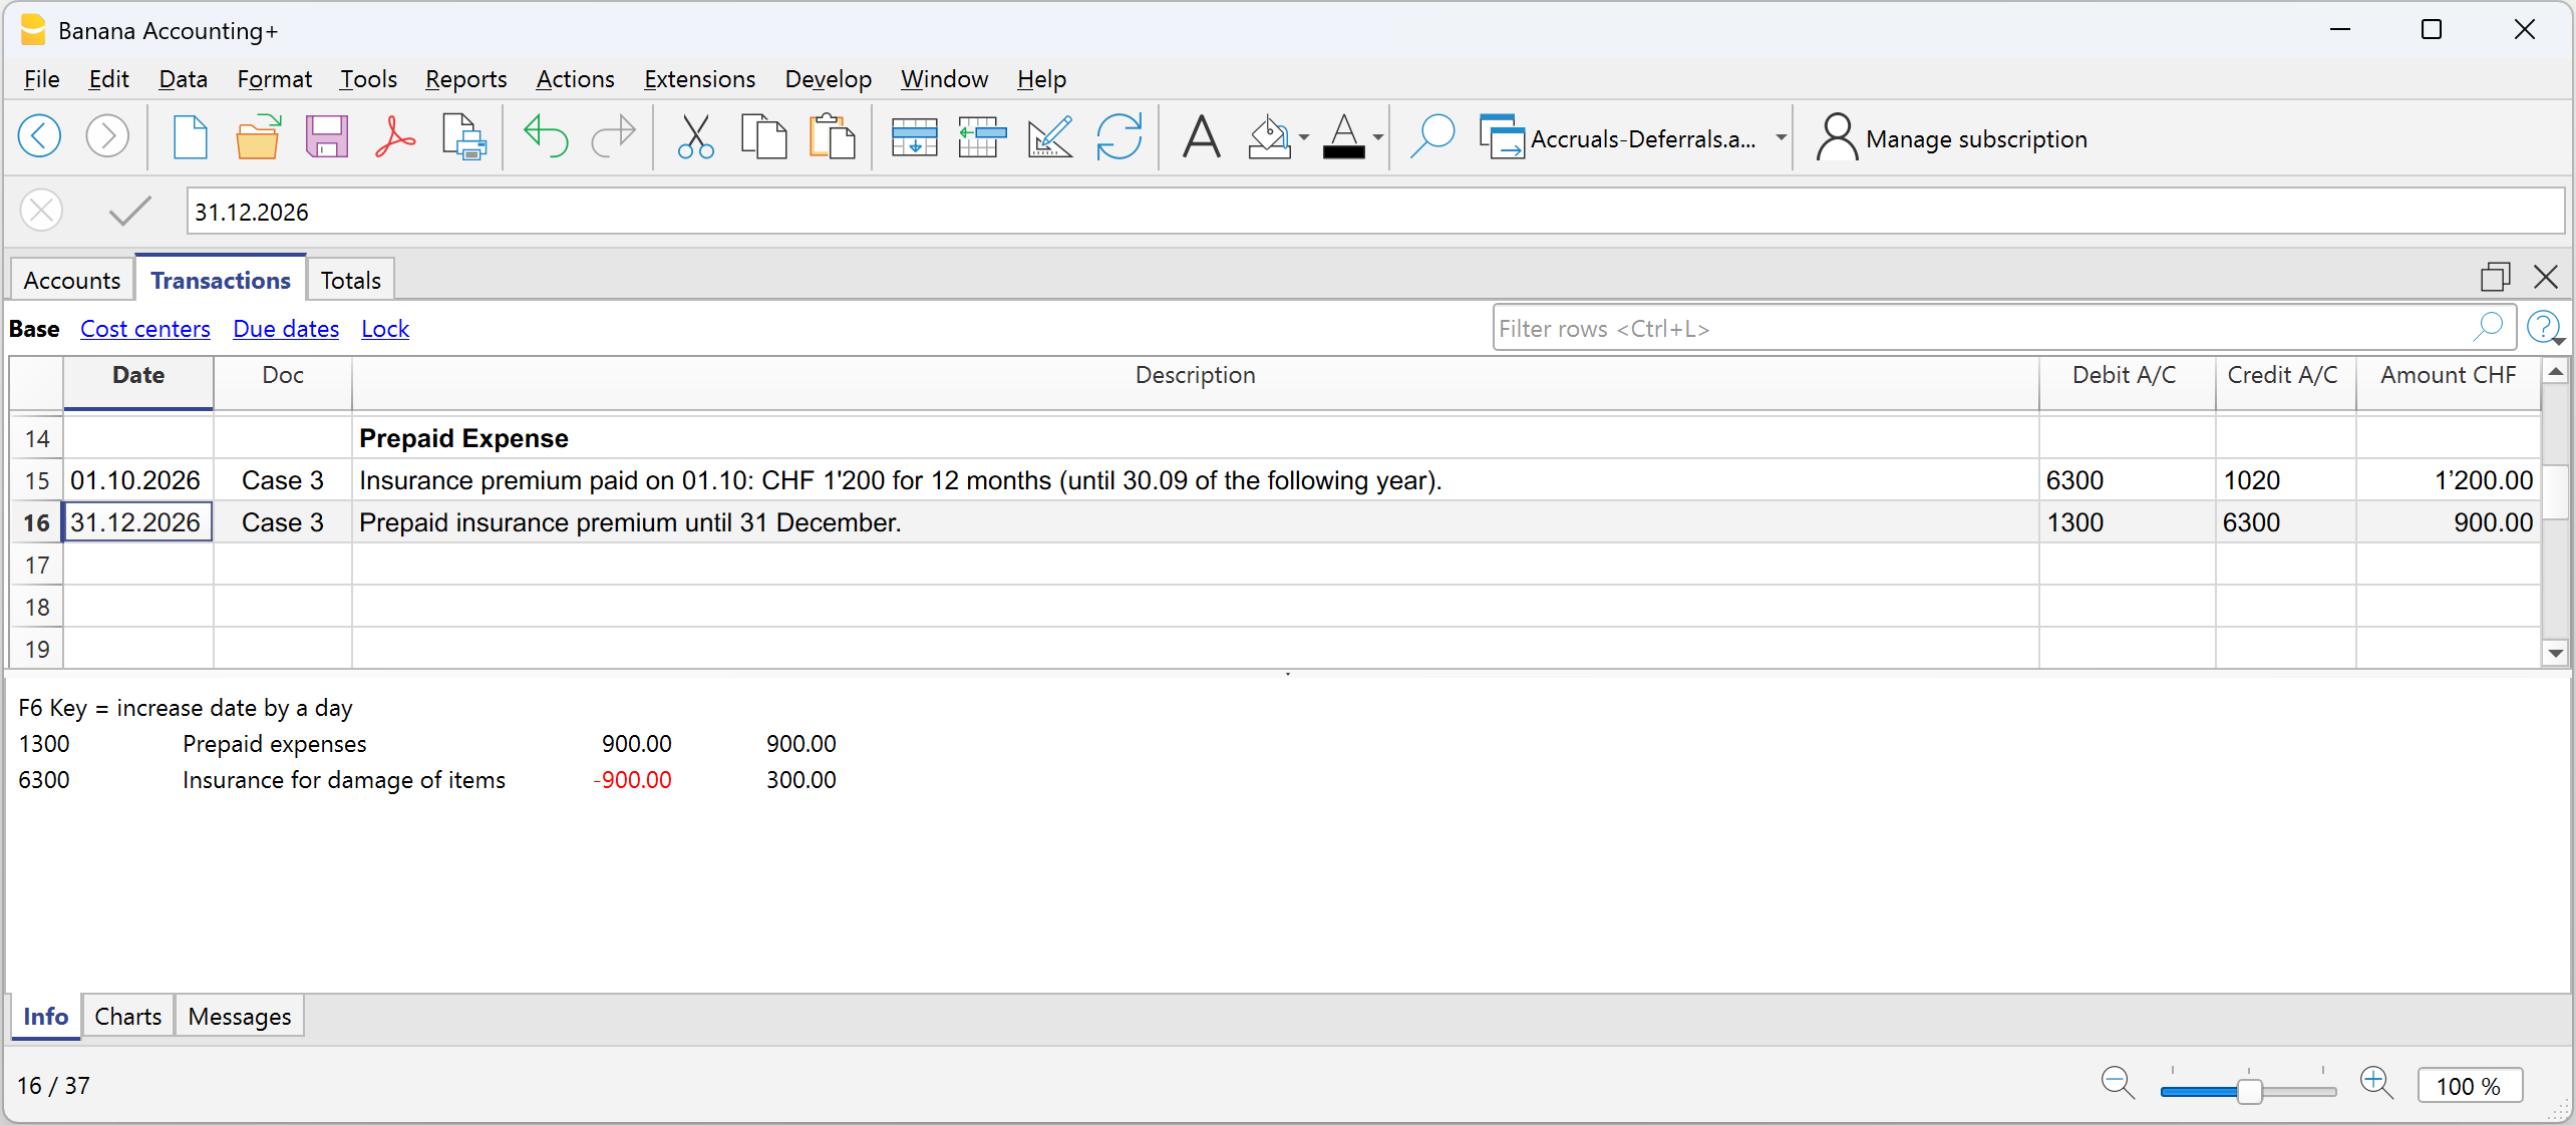
Account card of the Prepaid expense
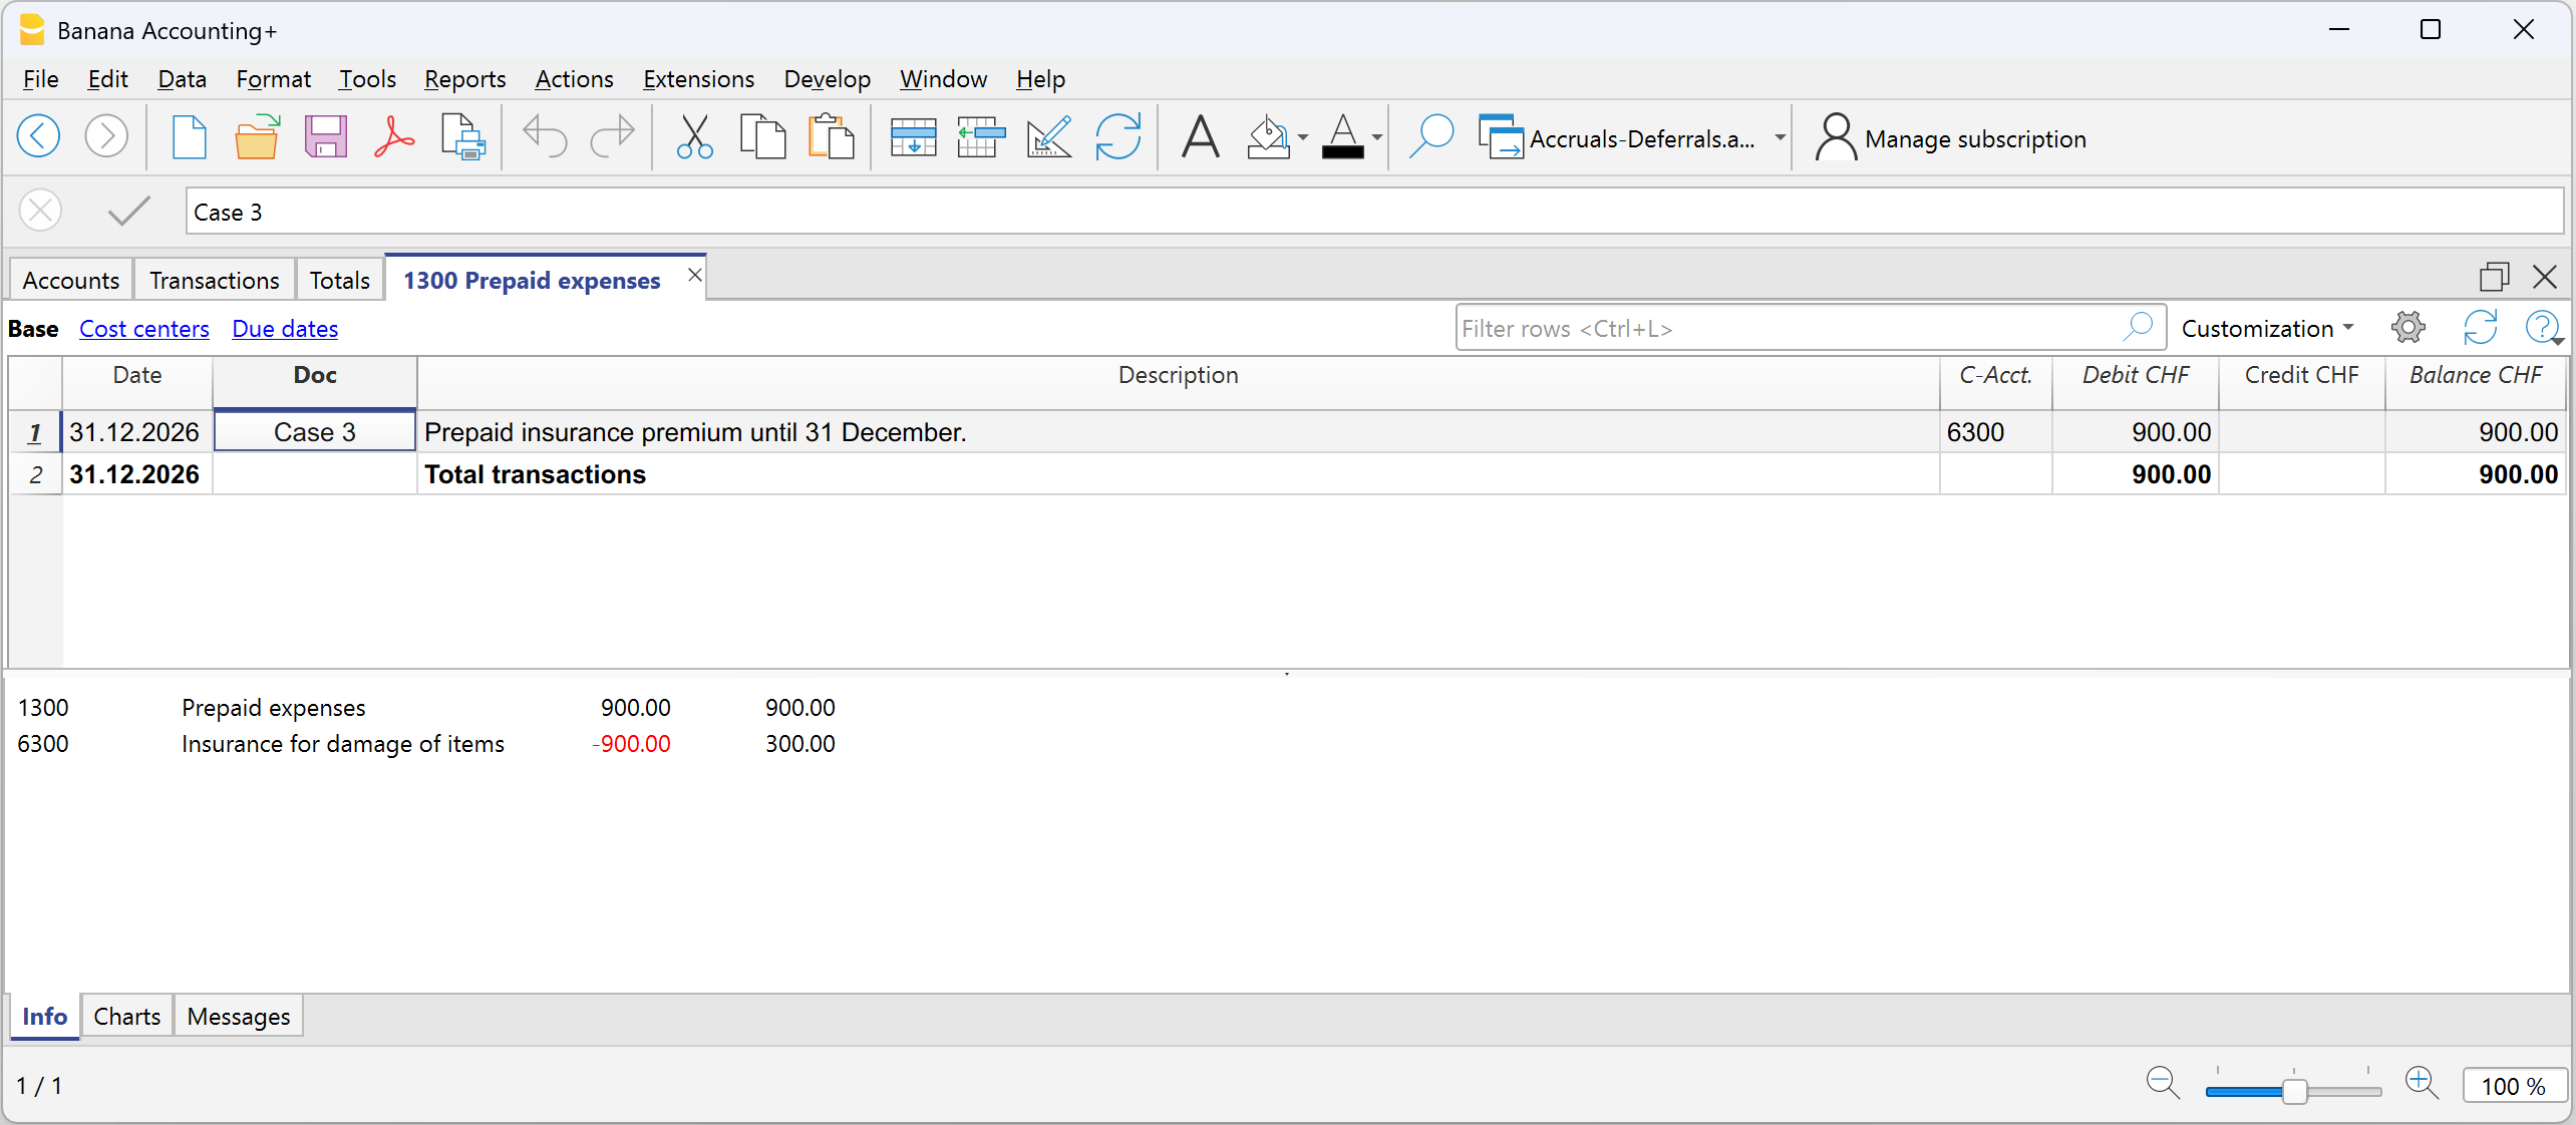
Account card of the Insurance premium expense

Case 4 - Deferred income
Example - Semi-annual rent of CHF 6'000, received in advance on 01.12, for the period from 01.12 to 31.05:
Monthly portion:
6’000 ÷ 6 = 1’000 per month
Portion relating to the current year:
December = CHF 1’000
Portion relating to the following year:
5 months = CHF 5’000
Initial entry:
- Debit: Bank CHF 6’000
- Credit: Rental income CHF 6’000
Entry on 31.12
- Debit: Rental income CHF 5’000
- Credit: Deferred income CHF 5’000 (revenues received in advance)
In the Income Statement, the reduction of rental income must be shown for the part relating to the following financial year; in the Balance Sheet, deferred income is shown for the part of revenue received in advance relating to the following financial year and representing a liability towards the customer.
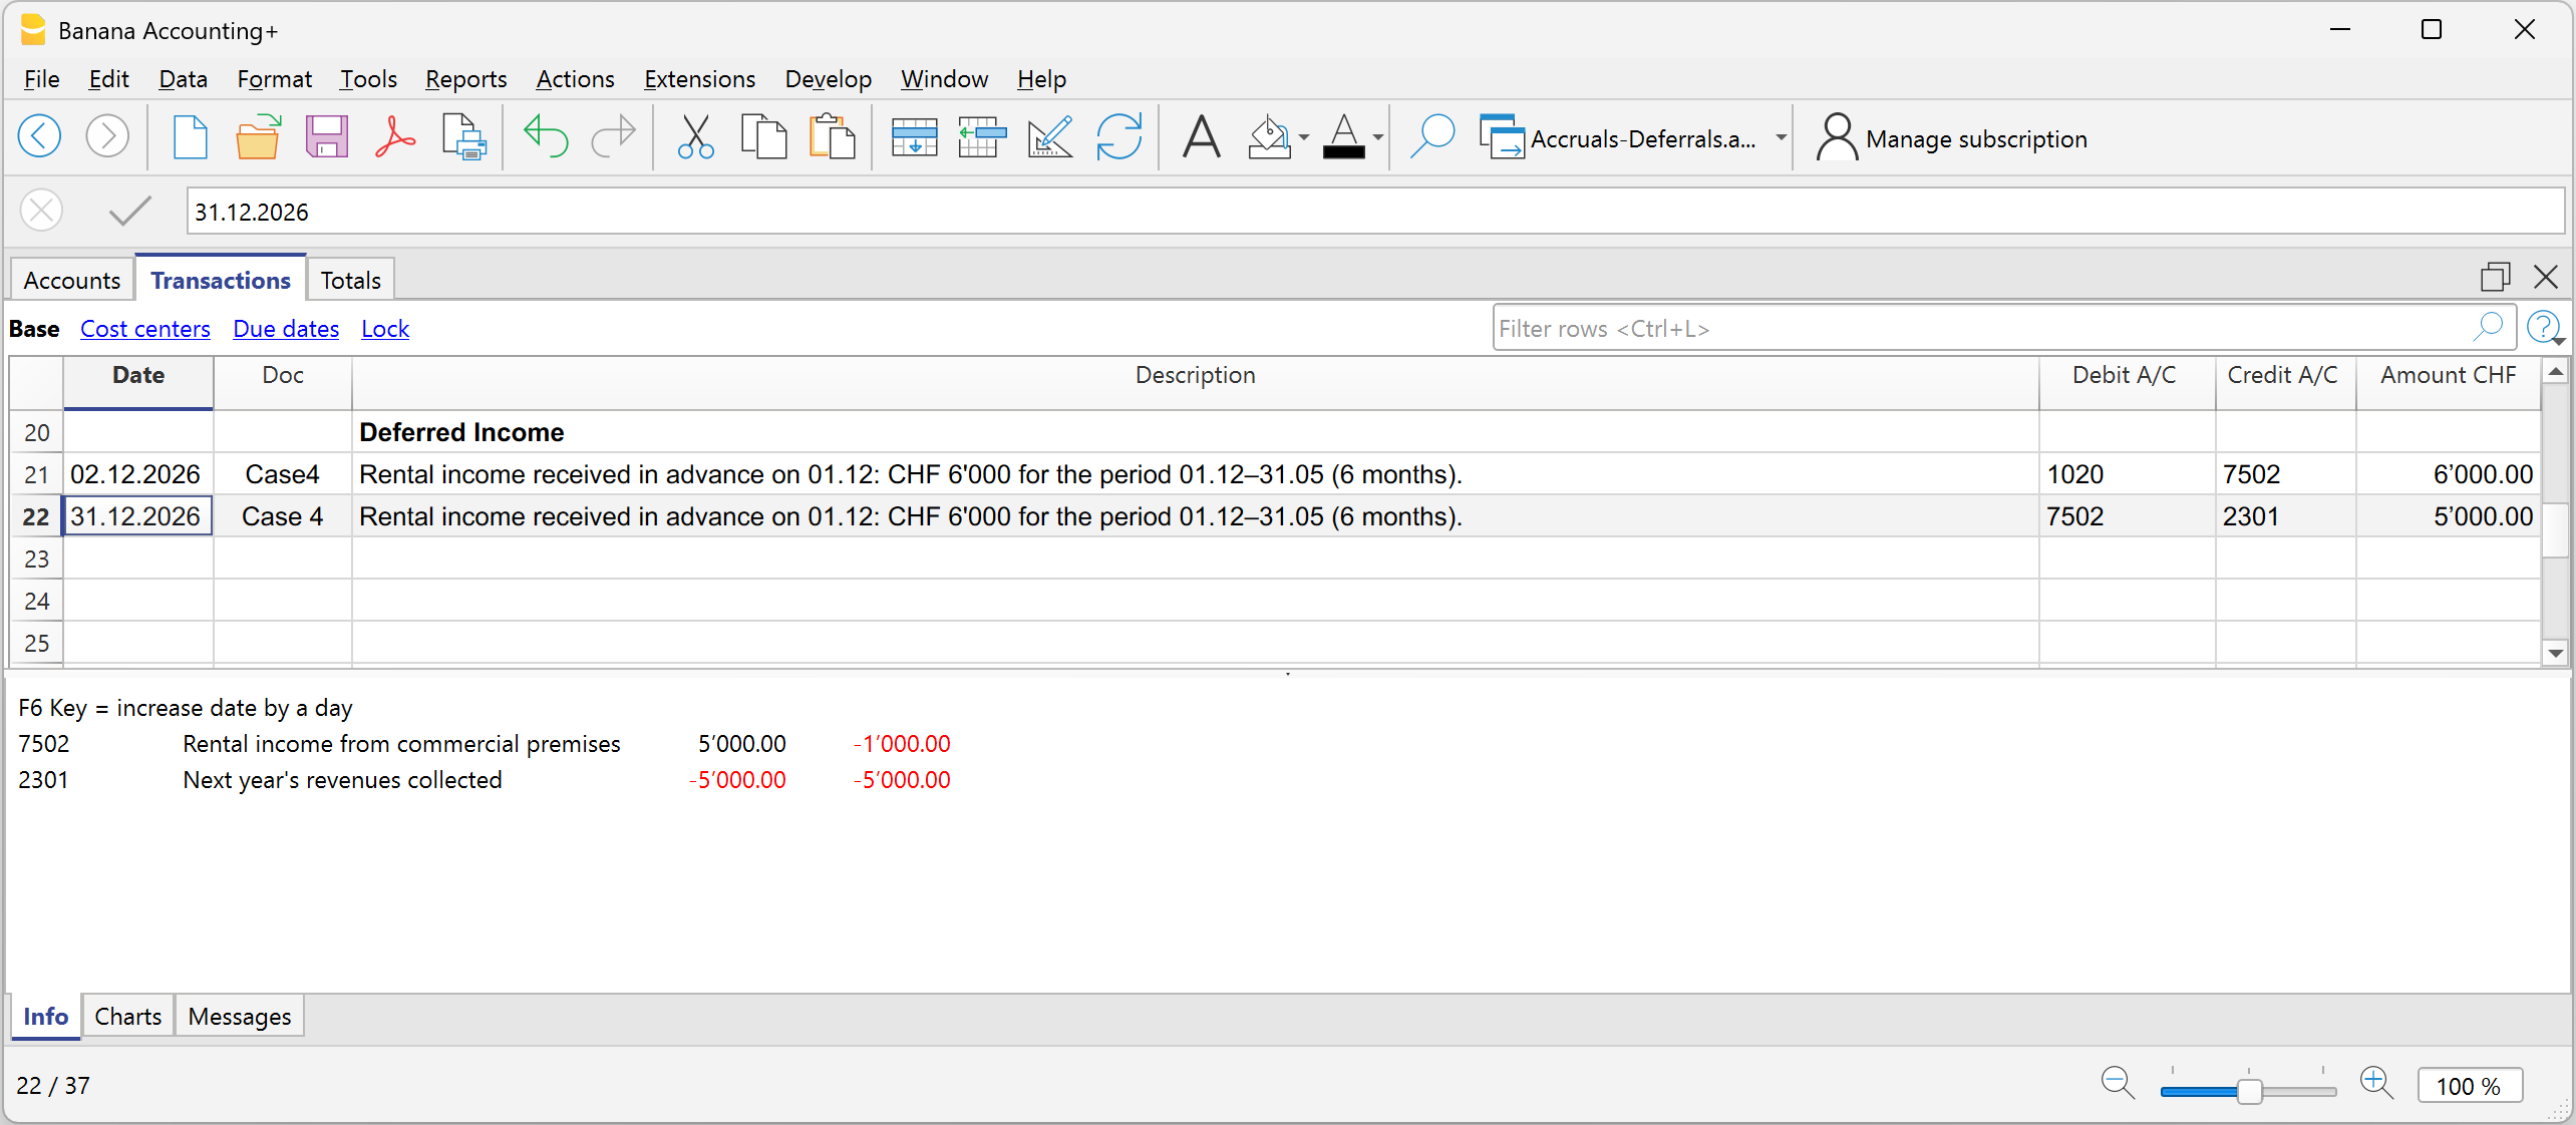
Account card Rental income
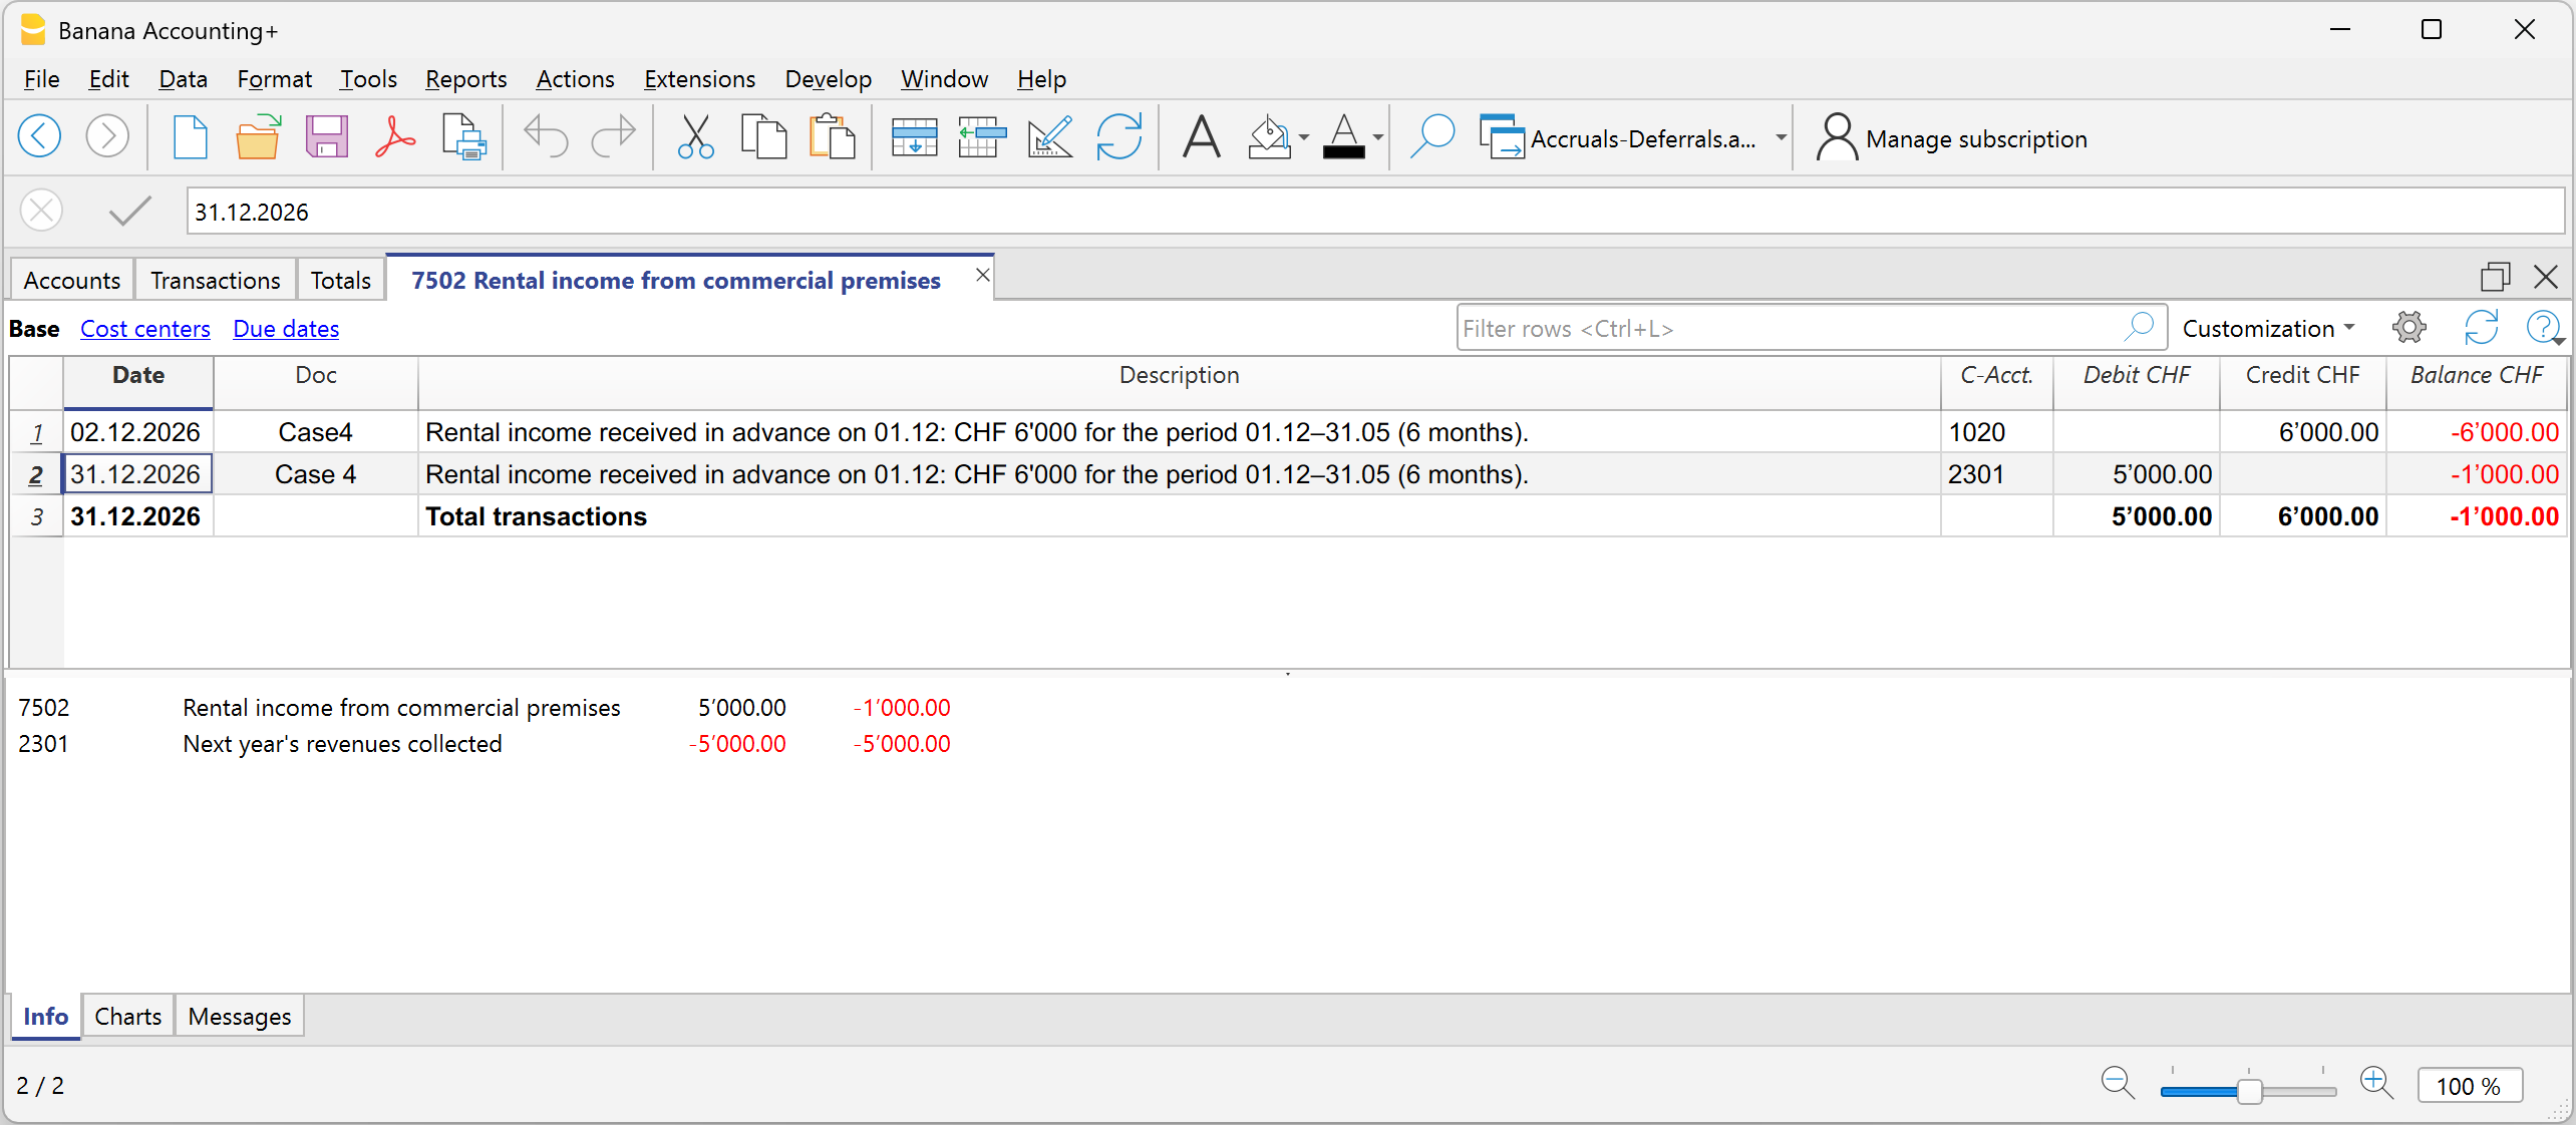
Account card Deferred income for revenues received in advance
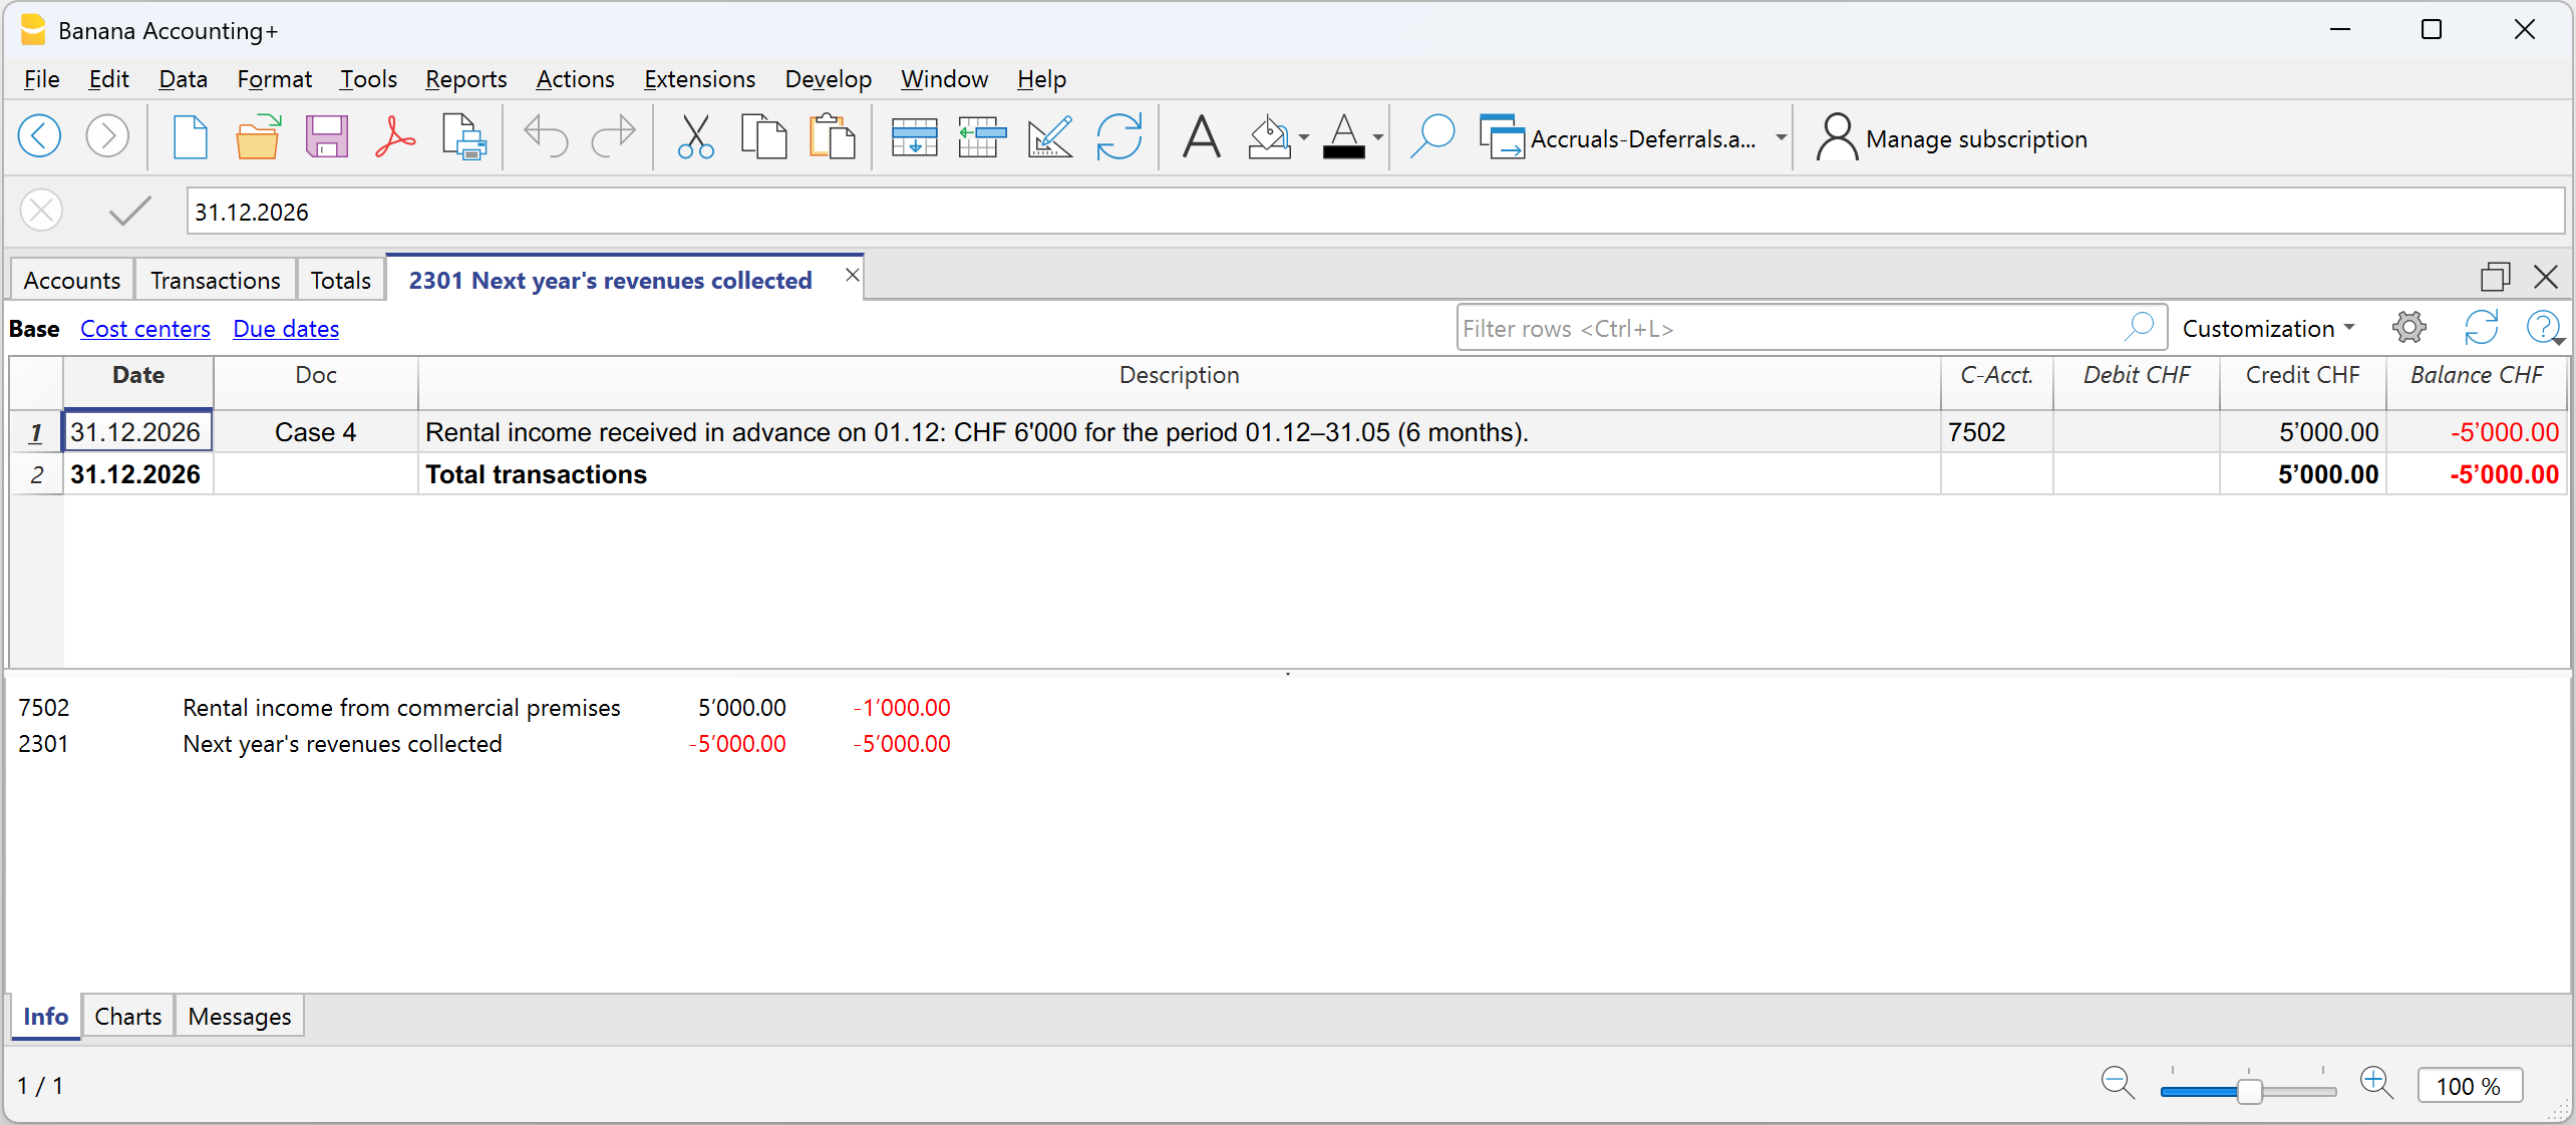
Reversal in the following financial year
At the beginning of the new financial year, accrued income and expenses and prepaid expenses and deferred income are reversed.
To reverse, the same accounts that generated the accruals and deferrals are used:
- the accrual and deferral accounts and the cost and revenue accounts are reversed
- or they are offset at the time of payment or collection.
The reversal is necessary to close the accrued income and expenses and prepaid expenses and deferred income accounts.
In summary:
Accruals add what is missing, deferrals postpone what has been recorded in advance.
Carry forward profit/loss for the accounting period
In Banana Accounting, the profit or loss is automatically allocated during the carry forward of opening balances to the new year using the Create New Year command.
In the dialog window, in the Profit/Loss Allocation section, by clicking the down arrow of the first field, all available balance sheet accounts are displayed.
You can select the account or accounts to which the profit or loss will be allocated. The allocation can be made to a maximum of three accounts, using the three available fields.
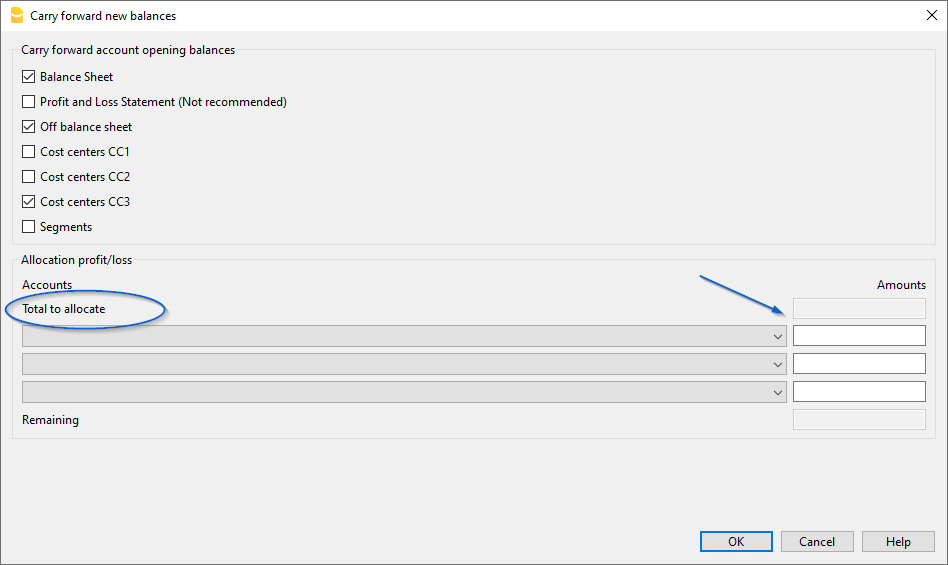
In the field(s) under the Amount column, enter the amount to be allocated for each selected account.
Detailed information about the Create New Year dialog window is available on the documentation page: Carry forward new balances dialog
Profit allocation
In accounting, the recording of profit distribution takes place when the shareholders' meeting or the competent body formally approves the allocation of the profit resulting from the financial statements.
Year-End Closing
At the end of the year, accounts are closed and the profit (or loss) for the year is determined.
- Operating profit = the positive result of operations (revenues > costs).
- The profit is recorded in the Income Statement and carried over to Equity in the Retained Earnings account.
The distribution of profits is the allocation of this result among various items, established by the shareholders' meeting.
Resolution on Profit Allocation
The shareholders' meeting decides how to allocate the profit.
Below we provide some general practice recommendations, but we suggest consulting your trusted professional.
Example of accounts for profit distribution:
- Legal reserve
- Other reserves
- Dividends to shareholders
- Retained earnings
The distribution is not recorded at the time of payment, but on the official decision date (resolution). The payment is only the subsequent phase of settling the debt to the shareholders.
- From the Retained earnings account, the amounts are transferred to the various accounts established by the resolution.
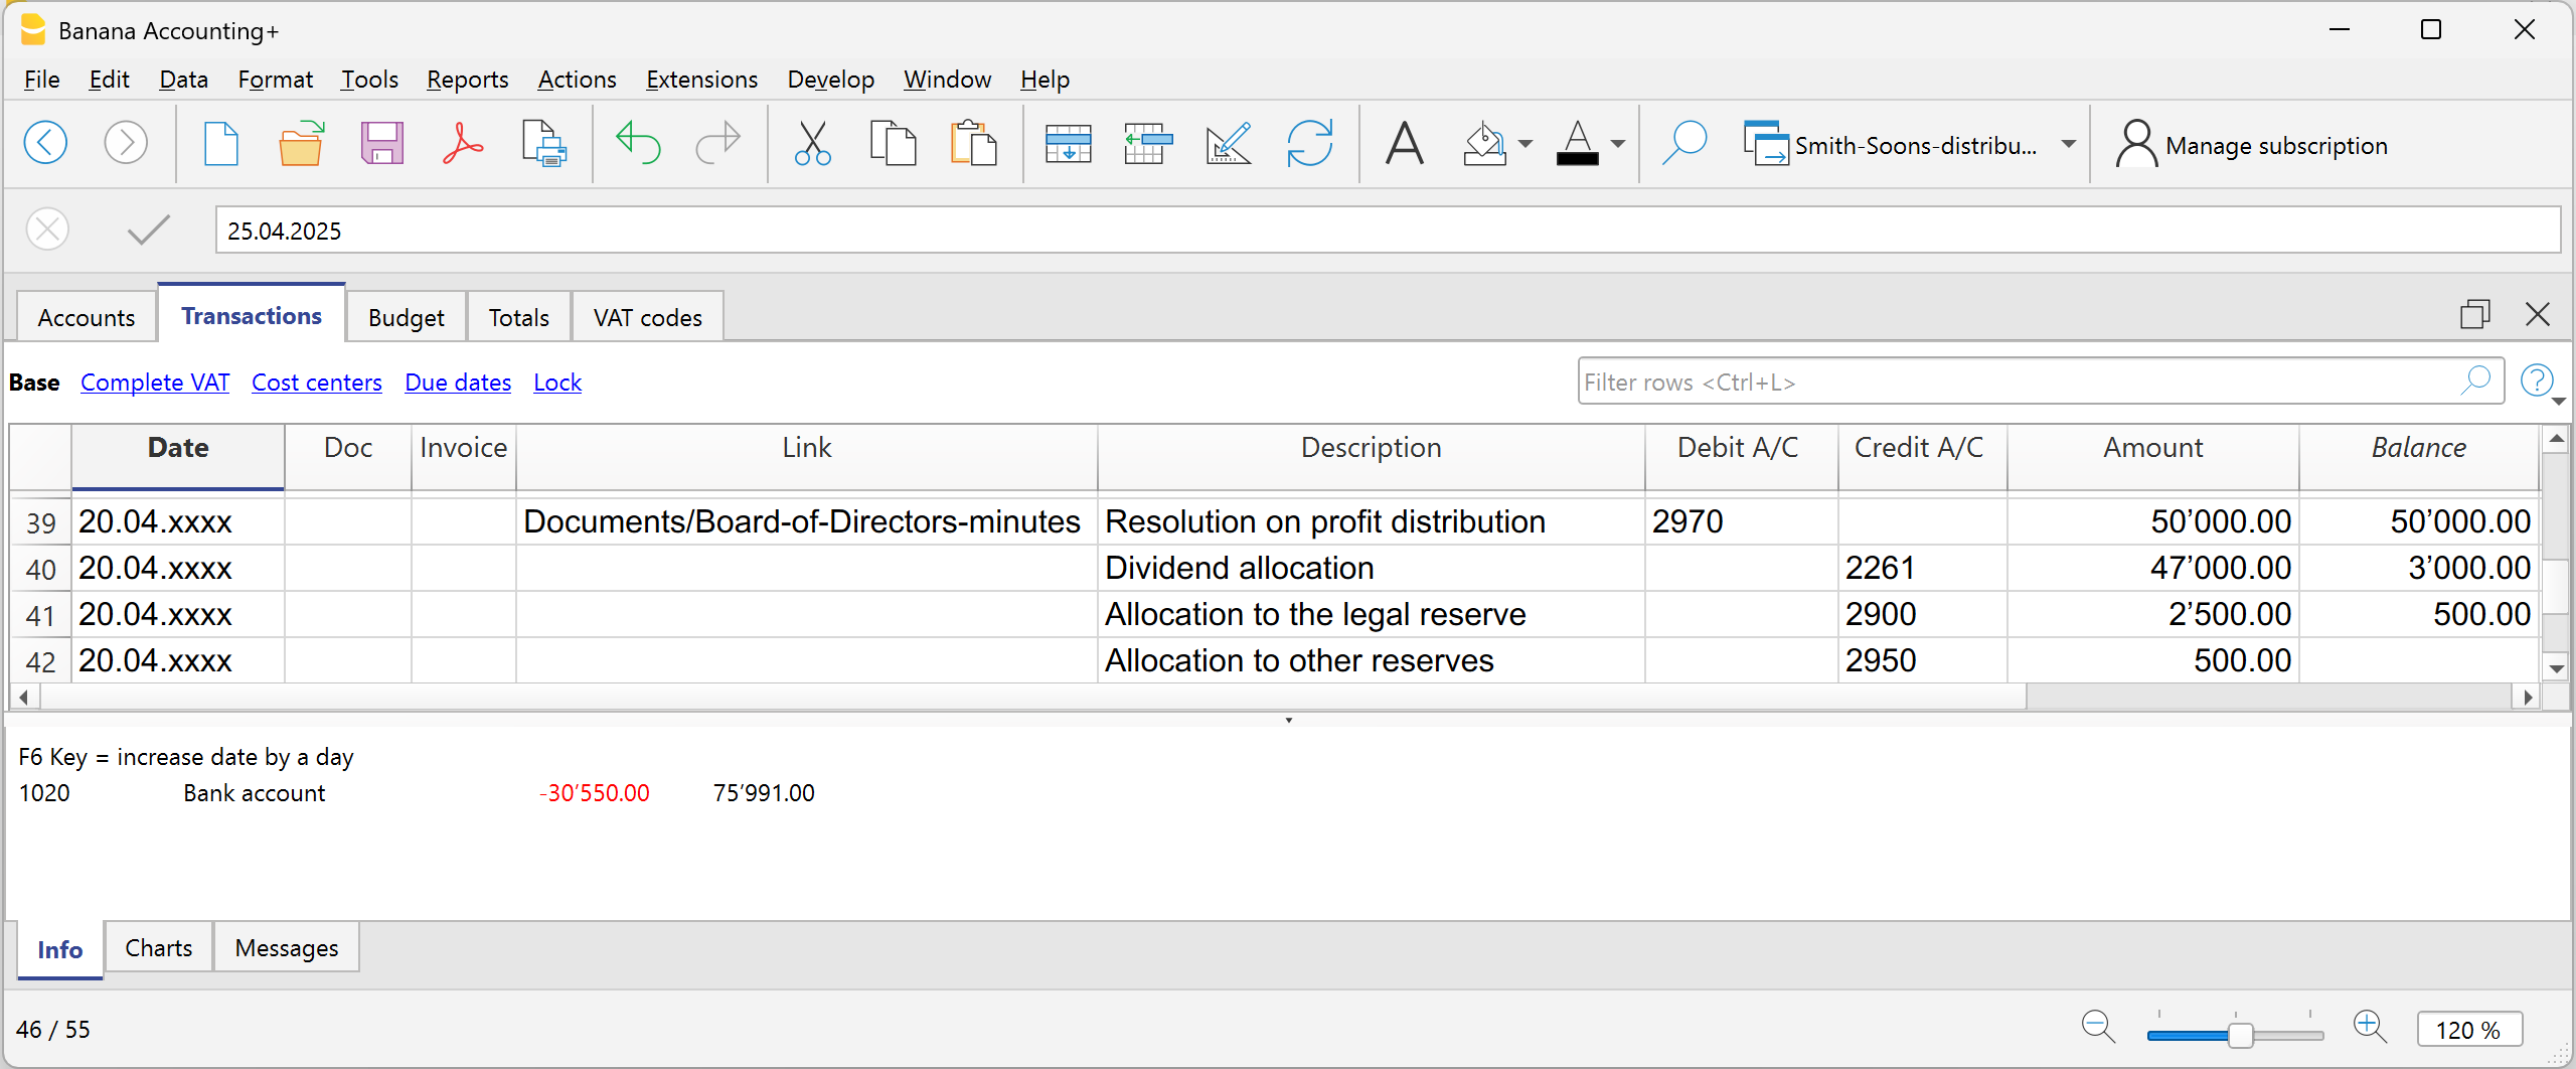
Withholding Tax on Dividends in Switzerland
In Switzerland, when a company distributes dividends to its shareholders, it must withhold a tax called “withholding tax” equal to 35% of the distributed amount.
It is called “withholding” because it is collected at the source, meaning immediately, at the time of payment, before the shareholder receives the money.
The withholding tax on dividends is a mandatory 35% tax deduction, which serves two purposes:
- Ensure tax revenue (the State receives the tax immediately).
- Prevent tax evasion (those who do not declare dividends do not recover the withholding).
Dividend Payment
At the time of dividend payment, the company withholds 35% as withholding tax.
The withholding tax must be declared on the official portal and subsequently paid to the Swiss Federal Tax Administration (SFTA).
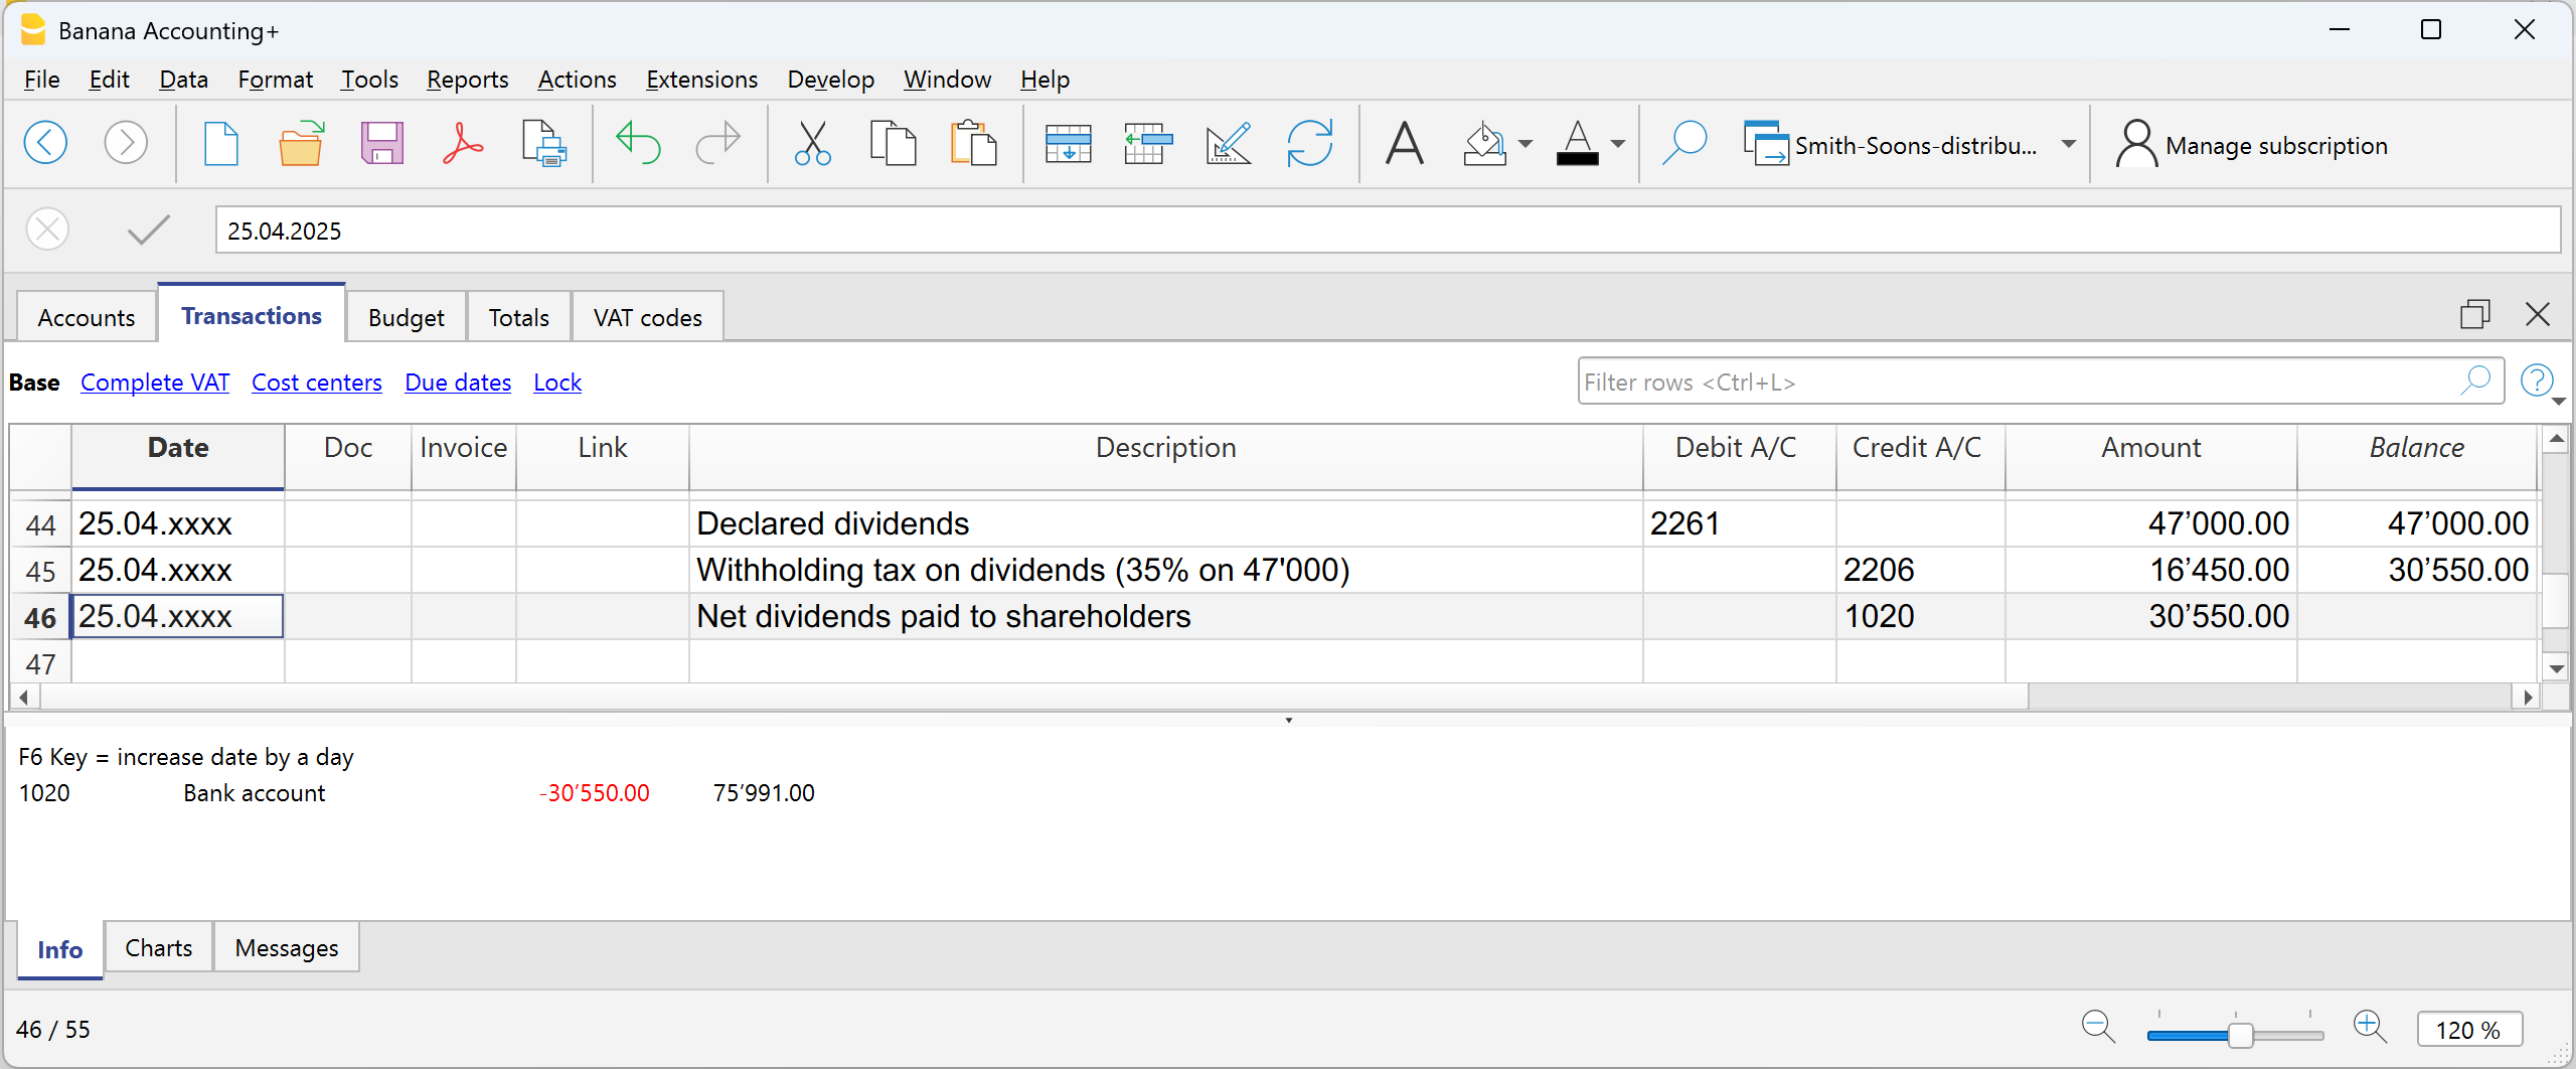
Refund of Withholding Tax on Dividends
- Shareholders residing in Switzerland can recover the full withholding by filing a tax return (the tax office offsets it against taxes due).
- Shareholders abroad can recover it partially, depending on the double taxation treaties between Switzerland and the country of residence.
Preparing the documentation for Audit
Before sending the accounting to the auditor, it’s important to make sure the closing work is complete and consistent. We recommend visiting the page Year-end closure, where you’ll find guidelines on preliminary checks and the Banana Accounting features useful for properly finalizing the year.
Since the documents requested by the auditor may vary each year, we suggest preparing a custom checklist, noting which documents were requested in past years and what closing or adjustment operations were needed.
Preliminary preparation
Good organization throughout the year greatly simplifies the work for both the person doing the accounting and the auditor. We recommend:
Creating a folder for digital documents
Store all digitized documents for the fiscal year in a single folder: invoices, cash receipts, AVS statements, insurance and pension documents, bank communications, and other relevant documents.
Scanning the supporting documents
Regularly scan paper documents. This allows you to have organized and always accessible documentation.
Linking documents to transactions
With Banana Accounting Plus, you can attach supporting documents directly to accounting entries. The auditor will be able to view them with a single click, without searching through paper folders, making the work faster and more efficient.
How to send accounting to the auditor or fiduciary
With Banana Accounting Plus, you can digitally share all fiscal year data: the accounting file (.ac2), digitized documents, and required reports.
Sharing via Cloud
If you store your data on a cloud service (Dropbox, OneDrive, Google Drive), you can share the folder containing the accounting and supporting documents.
For added security:
- Share the most sensitive documents as read-only
- or create a copy of the folder before sharing it
- if necessary, prepare a second folder with edit permissions
See the page Accounting in the Cloud for more information.
Sharing via USB stick
If you store the data on your hard drive, you can copy it to a USB stick or another storage device and hand it over directly to the auditor or fiduciary.
If the auditor or fiduciary doesn’t have Banana Accounting Plus
The auditor can download Banana Accounting Plus for free from our website and use the Free plan to open the accounting file (.ac2).
With the Free plan, they will be able to:
- open and review the accounting
- view the transactions and account details
- access the attachments linked to the entries
The Free plan does not allow saving changes or printing, but it still allows the auditor to carry out all necessary checks.
Sending documentation in PDF format
If you prefer not to share the .ac2 file or if the auditor does not use Banana Accounting Plus, the program still allows you to generate a complete PDF dossier.
Using the command from the File menu > Create PDF dossier you can include:
- Account cards
- Journal
- Enhanced balance sheet with groups
- Accounting report
- VAT summary
- End-of-year PDF printouts
With the Advanced plan, you can also include the digital attachments linked to the entries, creating a single comprehensive document to send via email.
Support for closing operations
If the year-end checks or closing are managed by the fiduciary:
- you can send them the .ac2 file
- or share the Cloud folder that also contains the digitized documents
This way, there is no need to deliver paper files and the fiduciary can work faster by consulting the digital documents independently.
If they do not use Banana Accounting, you can send them the PDF dossier. The fiduciary will be able to review the data and inform you of any changes or entries to be made.
Documents to be sent to the auditor
Below is a list of documents that are normally requested during an audit. You can use it as a base and customize it according to the needs of your company or the requests of your auditor.
Employee Declarations
- AVS salary declaration and adjustment as of 31.12
- Family allowance declaration (included in the AVS declaration)
- Employee salary journal
- Salary account cards
- Salary certificates
- LAINF and complementary LAINF declarations with adjustment
- Sickness benefit declarations
- LPP statement as of 31.12
- Withholding tax calculations, quarterly and annual
Bank/Post Account Statements and Calculations
- Final statements as of 31.12
- Bank calculations for withholding tax
- Loan statements
- Investment statements
- Copy of form 103 sent to the FTA
VAT Declarations
- Quarterly VAT calculations
- Quarterly VAT declarations
- Turnover – VAT reconciliation
- Any VAT adjustments
Documents for Year-End Closing
- List of open customer and supplier invoices as of 31.12
- Inventory valuation
- Details of accruals and deferrals
- Details of fixed assets and depreciation
Official Documents
- Minutes of ordinary and extraordinary meetings
- Tax ruling from the previous year
- Payment order for withholding tax
- Copies of active contracts (leasing, loans, rental)
- Insurance values of buildings
- Documents for any patents
- Annual reports and appendix to the financial statement
Printouts and Archiving
With Banana Accounting Plus you can automatically generate:
- Account cards
- Journal
- Enhanced balance sheet with groups
- Watch the video tutorial showing how to create and print the enhanced balance sheet with groups.
- Accounting report
- VAT summary
- Year-end PDF printouts
PDF Dossier
The Create PDF dossier command allows you to generate a single file with the entire documentation of the fiscal year.
Archiving
It is good practice to keep:
- the accounting file
- the PDF printouts
- backup copies on an external drive.
Tools and exports useful for the auditor
Banana Accounting Plus allows you to export data in various formats.
- The auditor can use the Free plan to open the accounting file.
- Data can be copied and pasted into other programs.
- Tables can be exported in various formats.
- The Create PDF dossier command generates a complete file ideal for reading.
- Extensions allow specific exports:
- Audit File Reports creates reports that can be useful for the auditor and can be copied and pasted into Excel.
- Standard Audit File - for Tax.
Export of data in XML and other formats according to OECD guidelines and for specific countries. - Search the extensions to see if there are specific extensions for your country.
Other Useful Information
Changes after the end of the financial year
Closing the fiscal year is the moment when you verify that the accounting is complete, consistent, and ready for the next year. Once completed, ideally no further changes should be made. However, it may happen that missing transactions, errors, or unrecorded exchange rate differences are identified.
This page explains when it is necessary to make changes after closing and which tools Banana Accounting offers to do so correctly.
When it is necessary to intervene after closing
The most common situations are:
- Exchange rate differences not recorded in multi-currency accounting.
- Missing transactions entered late.
- Posting errors identified afterwards.
In any case, it is important to document the reason for the intervention and ensure that the changes comply with the fiscal and legal framework.
Adjustments in the following year (recommended procedure)
If you have already reviewed the accounting or submitted the tax return, you should not make changes to a closed year.
In this case, we recommend that you:
- Record the adjustment in the new year.
- Clearly describe the issue in the entry or in an attached document.
- Check the tax impact with your accountant.
Multi-currency case
For unrecorded exchange rate differences in a closed year:
- record the difference in a transition account (e.g. Prior year exchange adjustment)
- create an opening entry to reset the account
- allocate the change to the exchange gain/loss account
This procedure allows you to keep balances correct without retroactively modifying the closed year.
Changes to a closed year
If you have not yet reviewed or submitted the tax return, you can still make corrections directly in the file of the closed year. In this case:
- Proceed with caution, limiting yourself only to essential changes.
- Run the Check accounting command again to verify that the entries are correct and balanced.
- Save and reclose the year.
- Open the new year and run the Update opening balances command to realign the balances.
Useful Banana tools to manage adjustments
Create exchange rate difference entries
Allows you to automatically generate transactions for exchange rate differences as of the closing date, using the rates in the Exchange rates table. This is especially useful if the year has not been definitively closed.
Update opening balances
This command, available from the Actions > Update opening balances menu, transfers the final balances of the previous year into the new fiscal year. Use it whenever you make changes to the closed year or to the chart of accounts, to ensure consistency between years.
Check accounting
This command, available from the Actions > Check accounting menu, performs a complete check of imbalances, posting errors, or inconsistent entries. It is recommended after each change, both in the previous year and in the new one.
Common errors and how to fix them
- Opening balances of the Income Statement reported by mistake
Delete the amounts from the Opening column and run Update opening balances. - Profit or loss for the year not reported correctly
Correct the entry in the previous year and then update the opening balances in the new year. - Imbalances after changes to the previous year
Use Update opening balances and run Check accounting again.
Best practices
- Always run the checks and record all exchange rate differences before creating the new year.
- In case of changes after closing, always document the reasons for the intervention.
- Before making changes to a closed year, consider the legal and tax implications with a professional.
- After each adjustment, use the Update opening balances and Check accounting commands to ensure data consistency.
Printouts
All the printouts of the Financial Statements, the profit and loss Statement, and the various accounting Reports are available from the Reports menu. Each command has various options for customizing the various printouts.
To print the content of the tables, please refer to the Page setup section (last paragraph).
Enhanced Balance sheet with groups - colored columns
This example has been realized with the following features:
- Enhanced Balance sheet with groups.
- Columns setup to indicate which columns are to be displayed (in the example the columns of the Current and the Previous year are being displayed)
- Style: Lugano (Groups highlighted), Style properties: Groups and totals: Color.

Enhanced Balance sheet with budget
This example has been realized with the following features:
- Enhanced Balance sheet
- Options Include in print : to indicate which columns to display (in the example the Current, Estimate column is displayed).
- Style: Berlin, colored columns.

Enhanced Balance sheet
This example has been realized with the following features:
- Enhanced Balance sheet
- Options Include in print : to indicate which columns to display (in the example the Current, Previous,% Difference columns have been activated).
- Style: Berlin, colored columns.

Subdivision by semester
This example has been realized with the following features:
- Enhanced Balance sheet with groups.
- Columns setup to indicate which columns are to be displayed (Current and Budget).
- Subdivision -> Subdivision by period in order to set up the sub-divsion by period
- Style: Lugano (Groups highlighted), Style properties: Groups and totals: Color.
- Color column properties to color the columns differently.

Subdivision by segment
This example has been realized with the following features:
- Enhanced Balance sheet with groups
- Subdivision -> Subdivision by segment in order to choose the segment level to be displayed.
- Print style:
When printing the segments, it is not possible to set up the colors of the columns.

Pdf dossier with all the accounting data
The file is being created with a summary that provides access to the different printouts in an easy way.
The following data can be saved in Pdf
- Balance sheet and Profit & Loss statement
- Accounts table, Transactions, VAT Codes, Totals
- VAT reports
- Account cards
If you save this file on a non re-writable CD (to keep together with your accounting documents), this will comply with the legal requirements for archiving the accounting data.
This example has been realized with the following features:
File menu, Create Pdf dossier command

Printing an extra column
In order to print an extra column in the Balance sheet, the following features are used:
- Add a new column in the Accounts table, via the Data → Columns setup menu.
- Enhanced Balance sheet with groups
- Columns - advanced, to make the column visible.
Account cards - Ledger
The account card corresponds to the Ledger and allows you to have a comprehensive list of accounting movements concerning the same account, a cost center, segments and groups.
An Account card contains the following information:
- The name of the account represented by the card.
- The date of the financial transaction.
- The type of financial transaction (e.g., sale, purchase, payment, receipt).
- The amount.
- The description (e.g., the name of the supplier or customer, the nature of the goods or services bought or sold).
Banana Accounting automatically records all transactions entered in the Table Transactions table, allocating them to the corresponding specific accounts. Therefore, the ledger cards are updated every time a transaction is recorded in the Transactions table.
Opening the Account card
There are two methods to open an account card:
First method
This method is recommended when you want to display and print all or several account / category cards.
- Select the Reports → Account Cards in the menu

A dialog box will appear, with the following sections:
For detailed information on the sections, click on the corresponding links.
Second method
- Click on the small icon that appears when you select the cell that contains the account, category or group number.
Updating the Account card
The account or category card is temporary and is calculated at the time of the request. If transactions are changed or added in the Transactions table, the account card is not simultaneously updated.
To update the account card, following changes, the Account / category card command must be issued again, or if the account card is still open, click on the symbol shown in the image below.

Deleting or modifying data
In the accountcards or group cards, it's not possible to directly modify or delete data. If changes are required, they must be made in the Transactions table or in the Budget table (if they concern estimate transactions). After recalculating, the changes are automatically applied to the corresponding account card.
If you are in the account card and you notice an error or a modification to be made, you need to:
- Within the account card, position yourself on the row number related to the modification.
- Double-click on the row number, and the program automatically redirects to the Transactions table, right on the row related to the modification.
- Make the modification and recalculate the accounting (press Shift + F9).
The changes are automatically reflected in the corresponding account card.
The Account Selected column
Starting from any Account card, the Account Selected column, can be displayed, via the Data → Columns setup menu, the account on which the transaction took place will be shown.
When you get an account card of one or more accounts, groups and segments, you will see the exact account that has been used.
The contra account in the account cards
In the Account cards, the "Contrp" Account column (C-Acct.) is present, which indicates the account that completes the transaction.

When there are transactions on multiple accounts (transactions on multiple rows) as in the example below, and there is one account entered in debit and several accounts in credit, or the other way round, the software deducts the possible contra account using the following logic:
- In the first transaction row, the 5000 account is considered the common contra account of the transactions that follow.

- On the Account card 5000, the multiple transaction (Gross salaries for the month of December) displays the [*] symbol as the contra account. It is impossible to have the indication of the contra accounts directly in the account card, because the account has several contra accounts (1020, 5700, 5730). For this reason the program indicates the [*] , which signals that we are dealing with a transaction on multiple accounts.

- On the Account cards of the next transaction rows (1020, 5700, 5730), the common contra account is indicated between square brackets [5700], and indicates a deducted contra account.

Cards of groups and classes
In the Account card of a group or a class, all the transactions of the accounts that belong to the selected group or class are being grouped together.
The accounts of the group or the class can be displayed by making the Account Selected column visible.

Budget Account card
If the budget transactions have been entered in the Budget table, it is possible to have the account or group cards of the budget:
- Via the Reports → Account cards → Budget transactions must be activated.

Print the Ledger (all account cards)
To print the Account cards:
- Reports menu→ Account cards command
- Using the Filter, all the account cards that need to be printed entirely or partially (for example, only accounts, cost centers, segments) can be selected automatically.
- In the various sections Period, Options, Customization, activate the desired options (for ex. period, 1 account per page, ...)
- Press OK to confirm, after having selected the desired options.

For the explanations of the different tabs, please visit the next few pages: Accounts/Categories tab, Period and Options.
The program will show the selected account cards.
In order to print, choose the Print command from the File menu.
When you have activated the Budget table in your file, you may choose which transactions you wish to see (actual transactions or budget transactions).
Include a logo in the account cards
From Banana Accounting 9 it is possible to include a logo in the account cards printout as well. After obtaining your account cards details (with the Reports→ Account cards command), use the File -> Print preview command. From the print preview click on the the Setup icon, and in the dialog window that will open, select your logo with the Logo option (instead of the none option).
You can also check the how to setup a logo page.
Save the settings
In case you regularly print the account cards of specific accounts for example, all those that concern the Sales accounts, it is useful to create a specific customization.
- Go to the Customization tab
- Create a new customization, using the New button
- Indicate the name of the customization, for example "Sales accounts", in the Description field.
- Select the accounts that you want to be printed.
- Set the view options for the tab. It is possible to select and change the view, from those available, but not to create a new one. If you change the layout of a column, for example by changing its header, this will be applied to the associated view of all customisations.
Each time you want to print accounts, select the customisation you have created.
Page setup
In Page setup, you can specify the margins & other settings of the page.
Accounts
You can access this windows by choosing the Reports menu > Account cards command (see the Account cards page).
Accounts
The list of all available accounts appears.
Select all
By activating this option, all the accounts that are part of the Chart of accounts are automatically selected.
If you wish to print one or more account cards activate only the desired accounts.
Selecting accounts with the mouse
- Clicking on the account name selects the account, and if a previous selection was made, it is deselected.
- Clicking on the account tick box (within the checkbox) selects/deselects the account and the previous selection remains unchanged.
- To select multiple adjacent accounts at the same time, simply click on the first one, hold down the left mouse button, move the mouse over the list to select the desired accounts, and press the spacebar.
- To select multiple non-adjacent accounts, hold down the Ctrl key (or Cmd on Mac), and use the left mouse button to move over the list, selecting the desired accounts, and then press the spacebar.
Selecting accounts with the keyboard
- You can navigate the account list using the up/down arrow keys, and select/deselect an account by pressing the spacebar.
Search
The option allows the immediate search of one or more accounts. The account number or description of the account is entered in the box; the program filters the accounts using the search values entered.
You can also enter multiple accounts to be displayed simultaneously, or combine accounts and segments (see developer explanations):
- 1000|1001 will display the transactions for account 1000 and 1001.
- 1000:01 will display all transactions of the 1000 account with the 01 segment.
Sort by account number
If this option is activated, the accounts are sorted according to the selection applied in the Filter (at the bottom of the dialog box). If, for example, there are accounts, cost centers or segments with abbreviations, they are listed in alphabetical order.
Filter
This function allows you to filter all account cards or just a selection, specifically:
- Accounts, cost centre and segments - if no selection is made they are filtered by default
- Accounts/categories (existing cost centres and segments are excluded)
- Accounts, Cost centres (only segments are excluded)
- Cost centres (accounts and/or categories and segments are excluded)
- Segments (accounts and/or categories and cost centres are excluded)
- Groups - existing groups will be shown - you need to select the ones to be printed
- Classes - all classes will be shown - you need to select the ones to be printed.
Actual or budget transactions
When you have activated the Budget table in your file, you may select:
- Actual transactions
The entries in the Transaction tab will be processed.

- Budget transactions
The entries in the Budget tab will be processed.
If the Budget table is not present, but amounts have been entered in the Budget column of the Accounts table (Budget View), these amounts are converted into monthly amounts. The division performed by the program is based on the start and end date of the accounting period (if the duration is 1 year, the division will be into 12 monthly installments).

Account card 00 - Differences in accounting transactions
When there are discrepancies in the transactions (see Debit - Credit Difference error page), to identify where the error is located, the account statement for Group 00 is displayed (or the statement for the group in your chart of accounts that includes all accounts from Class 1, 2, 3, and 4).
You will have a list of all transactions with the successive balances, which after each entering should equal zero. The row where the balance is not at zero contains the error.
Viewing the Details of transactions
Using the Group 00 account statement, it is also possible to view the details of the transactions.
Once you have selected the Group 00 account statement, the list of transactions will appear. Select any column, double-click on the column, and a screen will appear to select the visible columns. Select the "TransactionAmount" column. After making this change, the screen opened from the Group 00 account statement will display the "Transaction" column in CHF with detailed specific amounts.
Double-click on a column:

Select the "MovementAmount" column
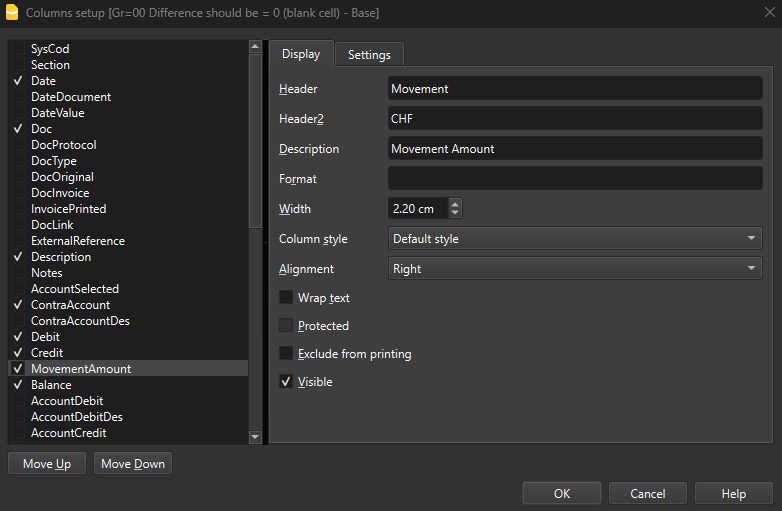
Next, a new column "Movement CHF" will be added, which will display the details of the amounts of individual transactions. This modification can be useful, for example, when a transaction includes VAT, and you want to see the details of that transaction while keeping the VAT separate.
Invoice recording with VAT:

Details of the invoice recording with VAT, with Account Card 00 and the "MovementAmount" column activated:

Period Accounting Card
The explanations of the Period tab are the same as those for the Enhanced Balance Sheet with Groups, tab Period.
Options tab
Via the Reports → Account cards → Options menu you can access the various options that can be included or excluded from displaying and printing.

Lines before end of page
This function was created in order to avoid printing an account partially on one page and partially on the following. If the account card to be printed doesn't have at least a number of rows corresponding to the number input in this field, printing the whole card will be moved to the next page.
One account per page
By activating this function, each card will be printed on a separate page (even those with few transactions).
Repeat column's headers
By activating this function, the column headers will be repeated for each account, within the page.
Include accounts with no transactions
By activating this function, cards without transactions will be printed as well.
View
You can select the columns view to be included in the account cards display and printout:
- Base
- VAT
- Cost centers
- Expiration dates
If no criteria are specified the program will keep the order present in the Transactions table.
Sort column
In the account card, transactions can be sorted according to different data criteria:
- Document date
- Value date
- Expiration date
- Payment date
Journal
In Accounting, the "journal" is a book of original entry where all financial transactions of a company are recorded in chronological order. It is a fundamental tool for recording accounting transactions and plays a crucial role in the bookkeeping process.
In Banana Accounting, the Journal is represented by the Transactions table, where transactions are entered in chronological order. From this table, the program provides a detailed and complete record of all financial activities of the company and serves as the basis for preparing other accounting documents such as the general ledger, balance sheet, and income statement.
Each transaction is recorded with detailed annotations, divided into specific columns:
- Date: The date on which the transaction occurred.
- Description: A brief description of the transaction, indicating the nature of the accounting operation.
- Debit Account: The account debited for the amount of the transaction.
- Credit Account: The account credited for the amount of the transaction.
- Amount: The amount of the transaction.
Journal prints can be generated either by selection or by using a command that also allows defining a period.
For further information, please refer to the following pages.
With Banana Accounting the Journal corresponds to the Transactions table. It is possible to print the entire journal or just a part of it, selecting the rows that you wish to print.
There are different methods to print the Journal:
- Position yourself in the Transactions table and click on the Print preview icon; then click on the Print icon
- From the Transactions table and select from the File menu → Print preview → Print icon.
- From the menu Reports menu → Journal by period ...
Period

You can choose whether to print all or a defined period. To print a specific period, enter the start date and the end date.
Sorting

In the Sort column tab it is possible to choose the criteria by which the journal should be sorted and printed.
Customize the printing of the Journal
To customize the printing of the journal, you can change the arrangement and header of the columns. Information can be found on the Columns setup page; while the options to include in the printout are found in the Page Setup lesson.
Enhanced Balance Sheet
The Balance Sheet represents all the Assets, Liabilities, Expenses and Income at a specific moment. The difference between Assets and Liabilities determines the equity capital. In Banana Accounting, the embellished Balance Sheet has the following characteristics:
- The grouping of the accounts is done according to the contents of the BClass column.
- The Enhanced Balance Sheet (Reports menu), shown in the preview, can be saved in different formats (PDF, HTML, MS Excel) and can be copied to the clipboard.
- It is possible to calculate, display and print the budget at the end of the year, or for a specific period.
- Transactions without date are considered as opening transactions and will not appear in the printouts of the Profit & Loss Statement.
To calculate, view and print out the Enhanced balance Sheet, click on the menu Report > Enhanced balance Sheet. A window appears with several sections allowing you to set the printing parameters.
See also Printout Examples.

Print pages and Include in printout
In these sections, by activating the different options listed, you can choose the content to be displayed and printed in the Enhanced balance sheet.
The option "Previous year balances" is only available if the field All is selected in the Period section. If a specific period is defined instead, the option is not active. In this case, the Enhanced balance sheet with groups should be used instead.
Page headers
Rows 1 - 4
Rows available to define the heading of the balance sheet.
Logo
It is possible to insert the logo in the header of all pages of the report.
If one or more logos have been added in the menu File > Logo setup, you can select one from the list.
If no logo has been added, the Edit button can be used to add the logo.
Print page number
If this option is activated, the number is printed in footer progression.
Print date
If this option is activated, the date is entered in the footer.
Cover page
Print cover page
Activating the function prints the cover page.
Logo
It is possible to insert the logo in the cover page of the report.
If one or more logos have been added in the menu File > Logo setup, you can select one from the list. If no logo has been added, the Edit button can be used to add the logo.
Column headers
The boxes at the bottom of the enhanced Balance Sheet dialogue box are used to insert the current and previous year headings in the printout.
The first two vertical boxes refer to the dates of the balance sheet, the second to those of the income statement.
At the moment, when opening the dialogue window of the Enhanced Balance Sheet, the boxes for entering the current and previous year are not clearly visible.
To view the boxes mentioned, one must scroll all the way down the vertical scroll bar, located on the right-hand side of the dialogue box.
Current year
Insert the final date of the current accounting.
Previous year
Enter the final date of the previous year's accounting in this field.
When switching to the new year from the menu Actions > Create New Year, the header of the previous year is not adapted automatically, so it must be changed manually. This issue will be resolved in the future.
Dialogue not fully visible
To display the Enhanced Balance dialogue box completely, choose one of two procedures:
- Enlarge the dialogue box.
- Slide the scroll bar, located on the right-hand side of the window, downwards.
Other tabs
The explanations for the other tabs are available at the following pages:
Attachments / Notes in the Balance sheet
The notes in the annual report (explanatory notes) are texts that accompany the balance sheet and the income statement.
They serve to:
- explain how the annual report was prepared (principles and criteria used)
- clarify important items or specific aspects of the year (e.g. depreciation, VAT, extraordinary events)
- provide contextual information for a correct interpretation of the data.
The notes do not change the totals of the balance sheet, but they improve its clarity and transparency.
How to insert notes / attachments
In Banana Accounting, the notes are managed as attachments and are included in the balance sheet printout.
The Attachments section is accessible from the menu: Reports > Enhanced Balance Sheet with Groups > Attachments.
The attached texts are printed after the balance sheet and the income statement, each on a new page.
How to prepare the attachments
The notes or attachments to be included in the balance sheet printout can be prepared in two different ways:
- with the Document table
- with the Attachments section of the Enhanced Balance Sheet with Groups
Below you can find the detailed explanations.
Create attachments in the Documents table
The notes or attachments to be included in the balance sheet printout can be prepared via the Documents table.
To make it visible, go to the menu Tools > Add/Remove functionality > Add Documents table.
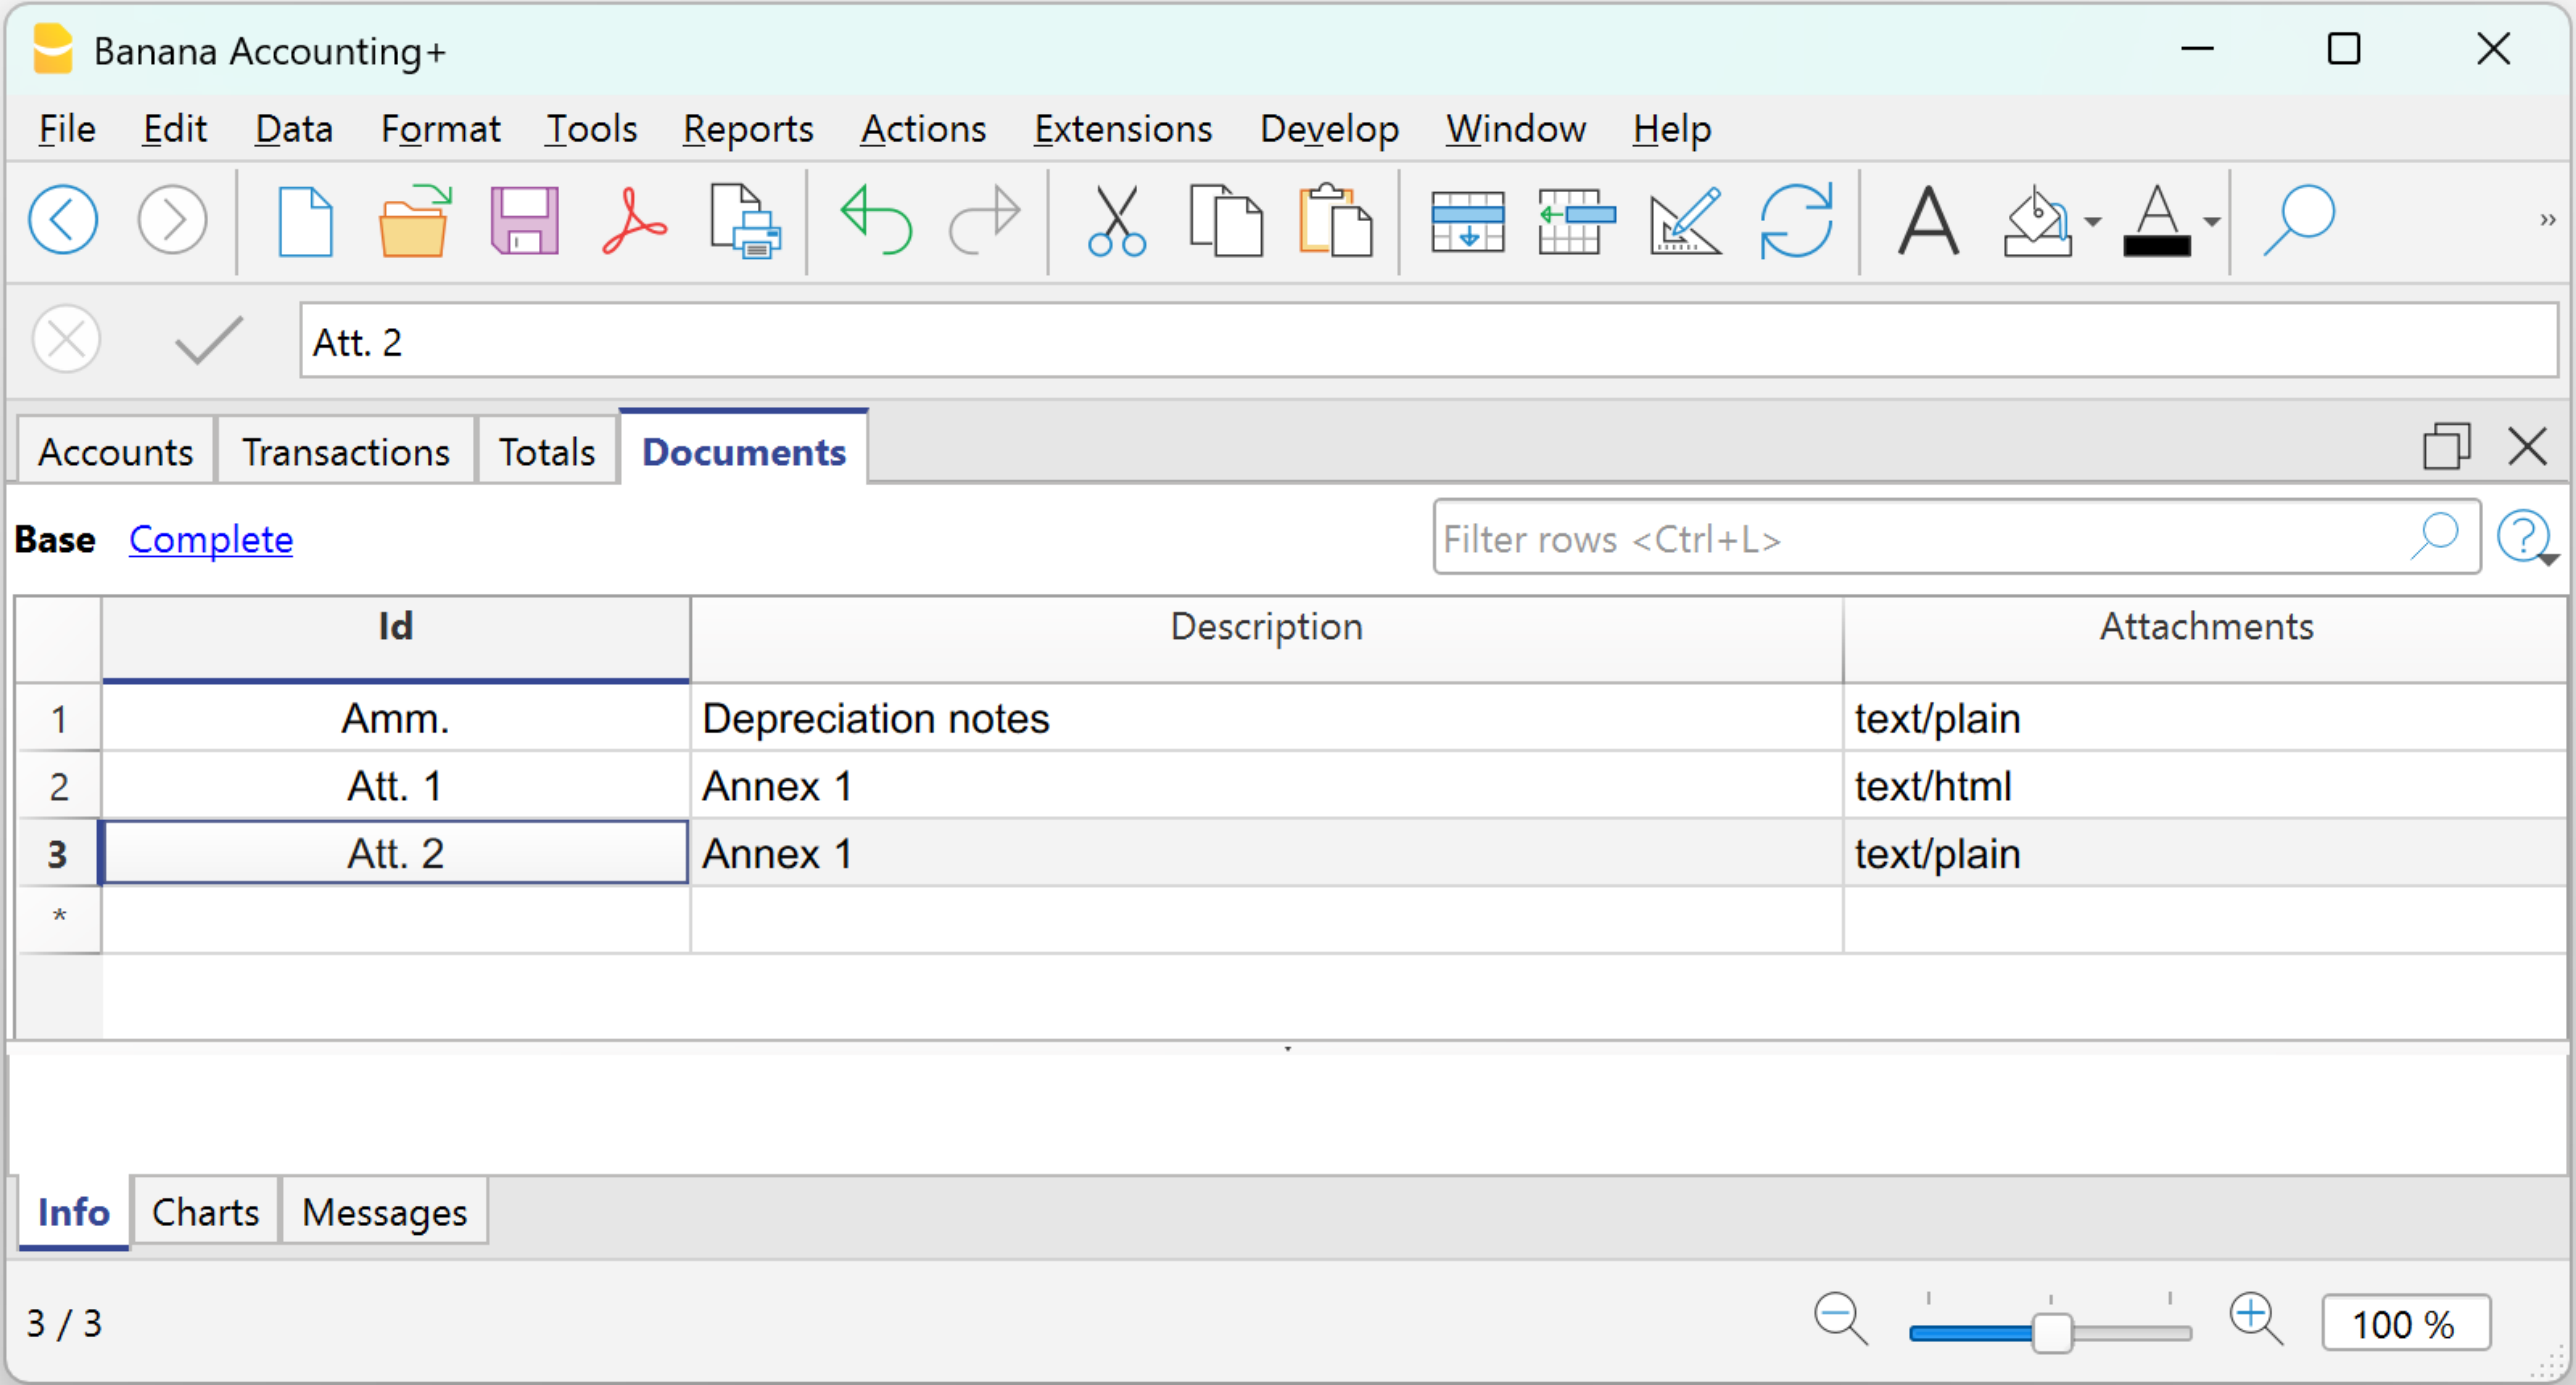
Procedure:
- In the Id column, indicate the type of note.
- In the Description column, enter the description of the note.
The description text is used as the document name in the Attachments section of the Enhanced Balance Sheet with Groups. - In the Attachments column, click the pencil icon, select the document type, and enter the text in the editor.
You can choose between two types of documents:- Text
Plain text with no formatting (e.g. for simple notes). - HTML Text
Text with formatting (bold, bullet points, etc.). You can choose to write the text normally or enter the HTML source code in the dedicated section.
- Text
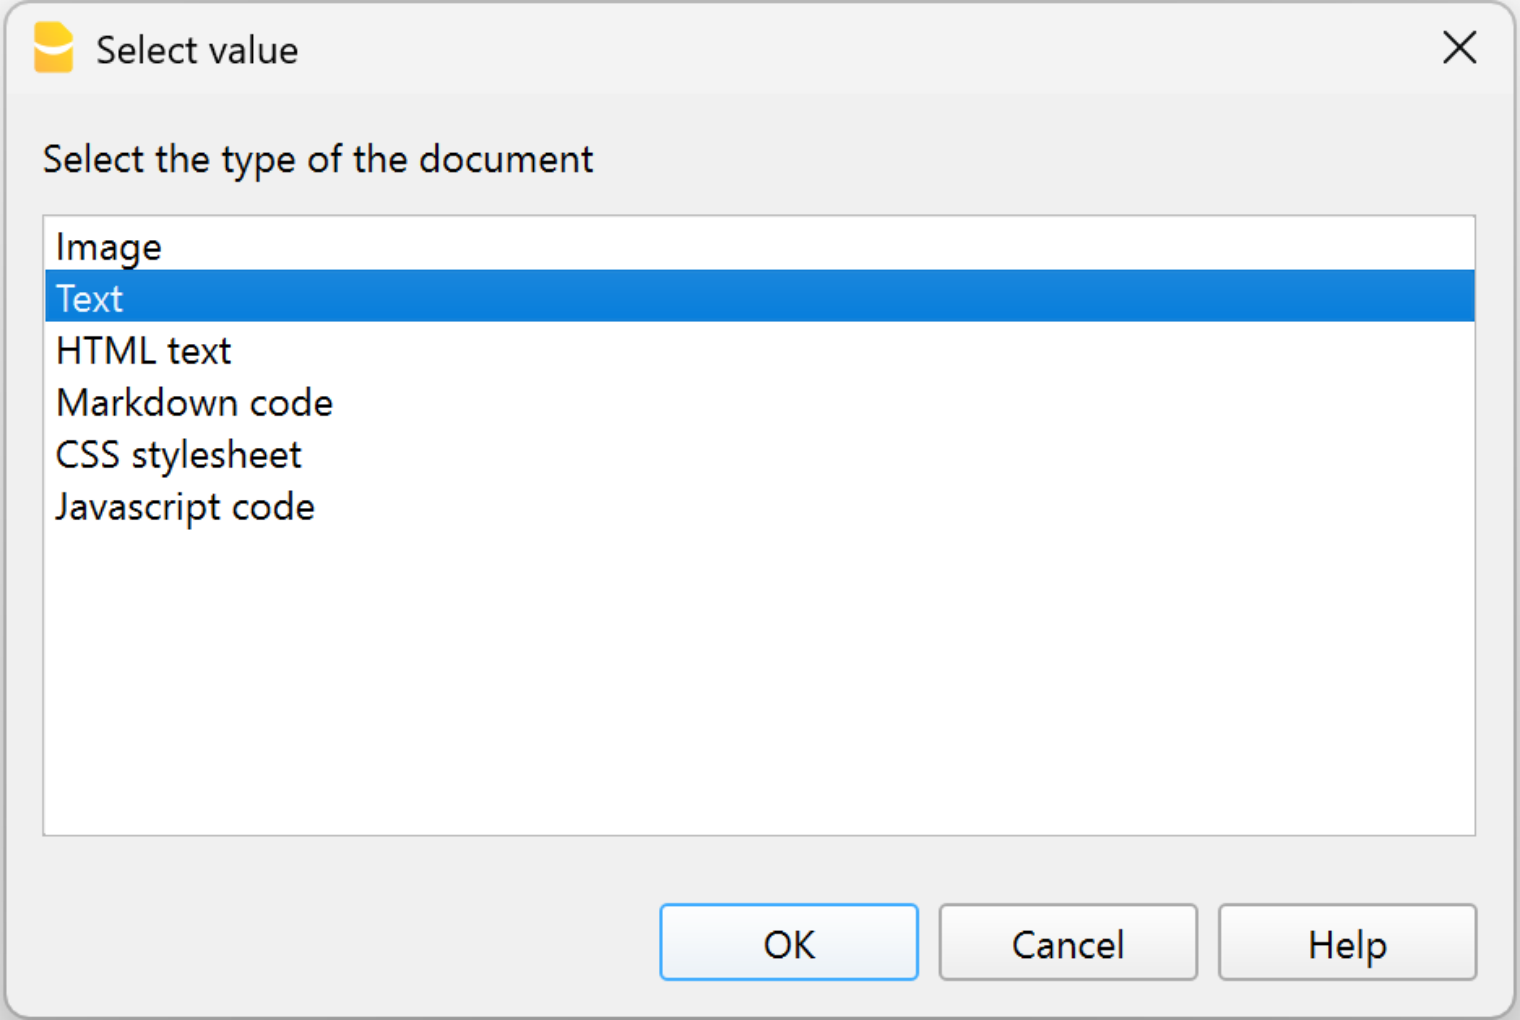
The texts created in the Documents table are displayed in the section Attachments of the Enhanced Balance Sheet with Groups.
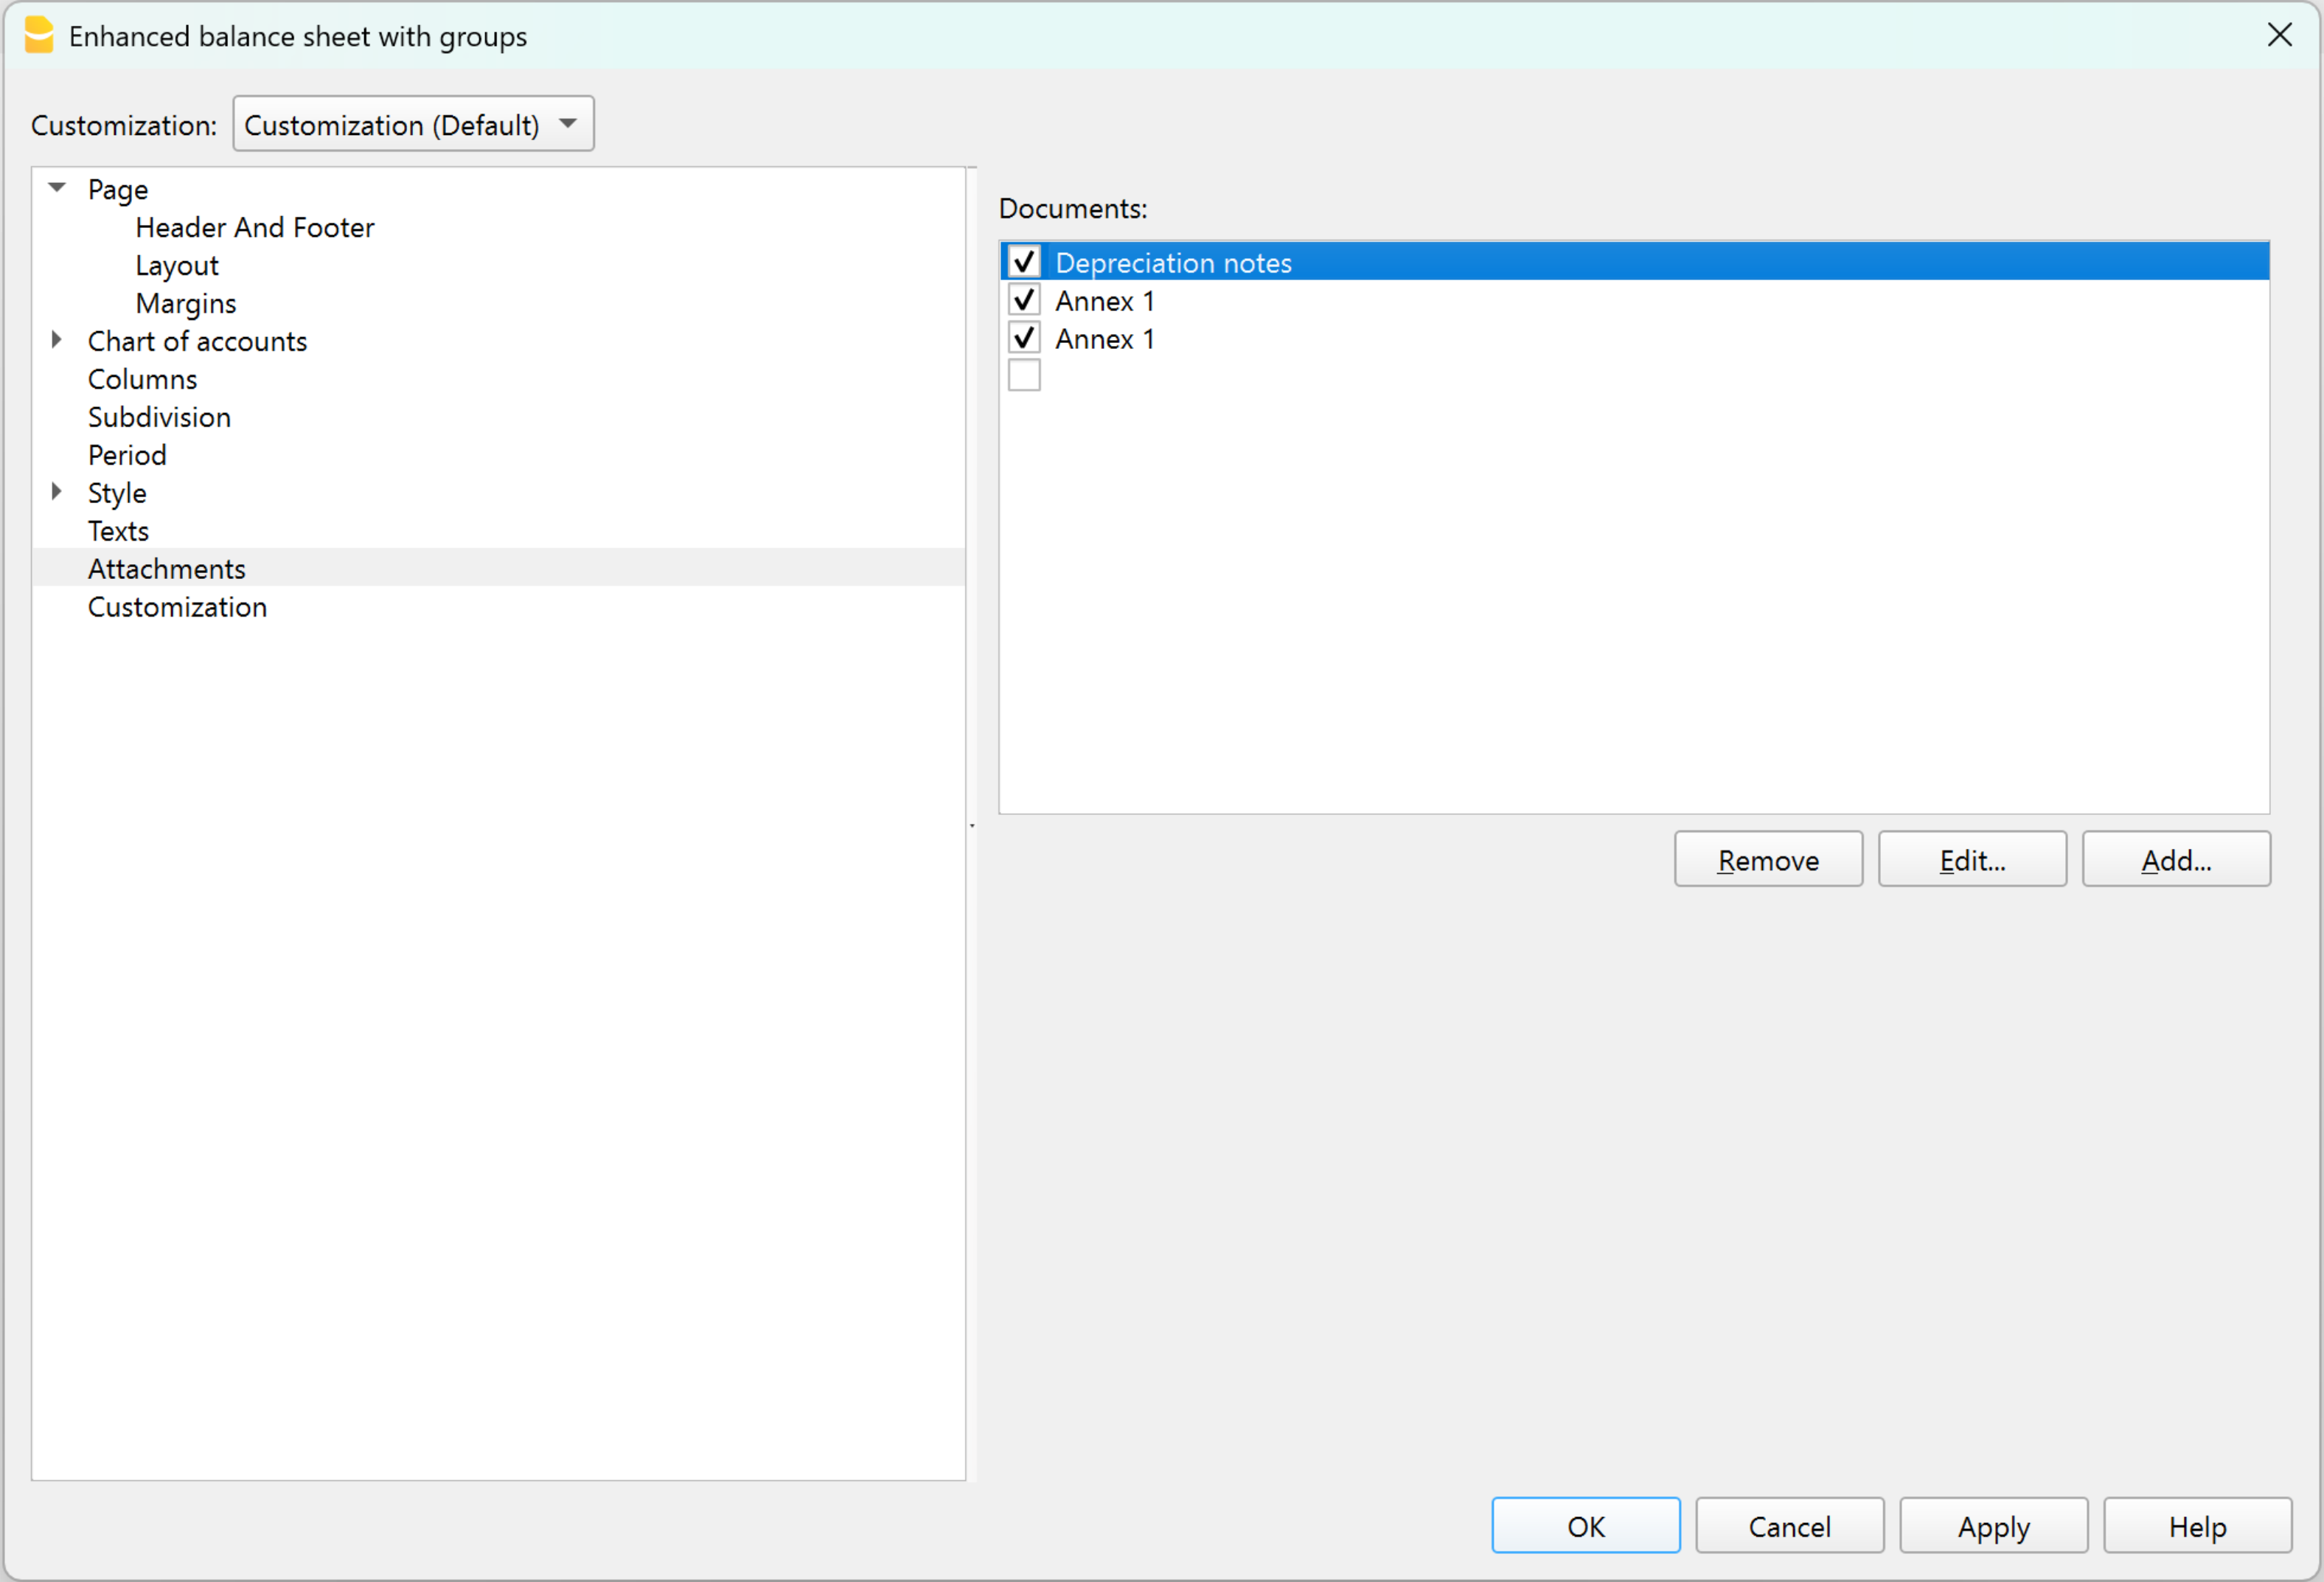
Create attachments in the Enhanced Balance Sheet with Groups
The notes or attachments to be included in the balance sheet printout can be prepared directly from the Attachments section of the Enhanced Balance Sheet with Groups.
Procedure:
- open Formatted Balance Sheet by Groups > Attachments
- click on Add
- The HTML Text editor dialog opens.
- Enter or modify the text in the editor.
You can choose to write the text normally or insert the HTML source code in the dedicated section.
The text is formatted (bold, bullet points, etc.).
The texts entered in the editor are automatically shown in the Documents table.
View and print notes / attachments
In the Attachments section of the Enhanced Balance Sheet with Groups, check the documents to be included in the printout. Only checked documents will be printed. The notes are printed at the end of the balance sheet and income statement, each on a new page.
Enhanced Balance Sheet with groups
Banana Accounting automatically calculates, displays, and prints the Balance Sheet and the Profit and Lost account. These are two fundamental financial documents used by businesses to monitor and report their financial and operational activities.
The Balance Sheet and the Profit and Lost account can be customized both based on the period and the columns to be displayed. Balance Sheets can be generated for monthly, quarterly, semi-annual, and annual periods. Additionally, when selecting a period (e.g., semi-annual), the data can be further broken down by periods (month, quarter).
The Balance sheet with groups differs from the Balance sheet for the following characteristics:
- Displays the subgroups in detail.
- Offers the possibility to exclude groups or accounts (for instance, to display only the total of the group and not the accounts of which the total is composed).
- In the Chart of accounts > Sections it is possible to select which accounts to include or leave out from the printouts
- It is possible to sort by a given period (for example in the first semester, you can choose whether to obtain the data by month or by quarter)
- It is possible to have a subdivision by segment.
In order to calculate, display and print the Enhanced Balance sheet by groups, click on Reports > Enhanced balance sheet with groups command from the menu: a window appears, with different sections that allow the user to define the print setup.

Features:
- Reports with actual balance data, or budget data, or both, with indication of variances.
- Free arrangement with groups and subgroups.
- Updated results directly visible in the accounts table.
- Customizable prints:
Watch the video tutorial that shows how to create and print the Enhanced Balance Sheet with groups.- Addition of your own logo.
- Choice of columns to include.
- Choice of sections to include.
- Detailed or grouped printing.
- Prints for a single period.
- Columns with breakdown by period (month, quarter, semester, year).
- Previous year values.
- Comparison with forecast value.
- Columns with breakdown by segment.
- Addition of attached notes.
- Grouping as in the chart of accounts or according to your own scheme.
- Saving customization
- Tabular reports (similar to customizable prints, but with data present in the table).
- Export to PDF for data preservation and export in other formats for data processing.
See also Print Examples.
FAQ
- If I exclude the groups with a zero balance, the title rows that refer to the excluded groups are still being displayed; how can I erase them?
Go to Sections and activate Hide current row on the title rows that you wish to exclude. - I would like to exclude the display of the period in the titles of the printouts ("1st Semester 2013"); how can I do that?
Go to the Headers section and deactivate the Print period option. - On the cover page, when there are long titles, I would like to be able to choose how to subdivide the texts into two rows and wish to apply bold print. Is this possible?
It is not possible to change the fonts on the cover page. - Some amounts are not included in the indicated period. Why?
Transactions without a date are counted as openings and do not appear in the printouts of the Profit & Loss statement. Be sure to enter the date into all the transactions. - The total groups that contain all the accounts of the classes 3 and 4 are being renamed with the text Profit or Loss, depending on the result of the accounting period. How can I change that text?
Go to the Sections and overwrite the original text in the Alternate text zone of the active row. - How can I display the data of the previous year if it is longer than the standard year?
In the "Enhanced Balance Sheet by groups" dialogue box, under the heading "Columns", for the "Income Statement" section, click on the "Advanced" button, in the "Columns" window click on "Add". At this point, activate the Prior option in the "Print Columns" window. Then close all windows by pressing the "ok" button. You can customize the header of the columns in the "Columns" window, by clicking on the "properties" button, if necessary.
Headers
In the Page → Headers section are the options for heading the pages and the logo when printing the Financial Statements and Income Statement.
Header 1, Header 2, Header 3, Header 4
Enter as headers the text you wish appearing in the printouts. The headings inserted are shown on the first page (cover page) and on each sheet as main headings.
Logo
It is possible to insert the logo in the header of all pages of the report.
If one or more logos have been added in the menu File→Logo Setup, you can select one from the list.
If no logo has been added, the Edit button can be used to add the logo.
Print period and/or subdivision
This option is active only when a specific period has been defined. When you deactivate this option, the period will not be indicated in the titles of the printouts.
Footer
Print page numbers
By activating this function, page numbers will be printed.
Print date
By activating this function the date will be printed.
Cover page
Print cover page
By activating this function the cover page will be printed.
Logo:
It is possible to insert the logo in the header of all pages of the report.
If one or more logos have been added in the menu File→Logo Setup, you can select one from the list.
If no logo has been added, the Edit button can be used to add the logo.
Layout
In the Page → Layout section you set the font size and the page orientation for printing the Balance Sheet and Income Statement.

Font size
The display of the printout varies according to the entered value.
Page orientation
You can select the page orientation: automatic, landscape and portrait.
Logo
The Set Logo option is available in various Banana Accounting dialogs. The main Logo settings such as width, height, and alignment must be entered from the File > Logo Setup menu.
Each printout refers to these settings. Depending on the type of document to be printed, the corresponding option must be activated to include the logo in the printout.
Below is an example of how to retrieve and use the logo in the Enhanced Balance Sheet with groups printout.

It is possible to insert the logo in the header of all report pages.
If one or more logos have been added in the File > Logo Setup menu, you can select one from the list.
If no logo has been added, you can add one using the Edit button.
Margins
In the Page → Margins section you set the margins for printing the Balance Sheet and Income Statement.

Top, Bottom, Left, Right
It's the distance between the page border and the content.
Header
Is the distance between the page header and the content.
Footer
Is the distance between the page footer and the content.
Increase margins to printable area
If the content exceeds the page margins it will be automatically adjusted to fit the printable area.
Sections
The Section section shows how the chart of accounts is structured and subdivided.
The structure is set up using the Section column in the Chart of accounts.
It allows you to set:
- Items to be printed together.
- Page changes.
- Items to be excluded from the print.
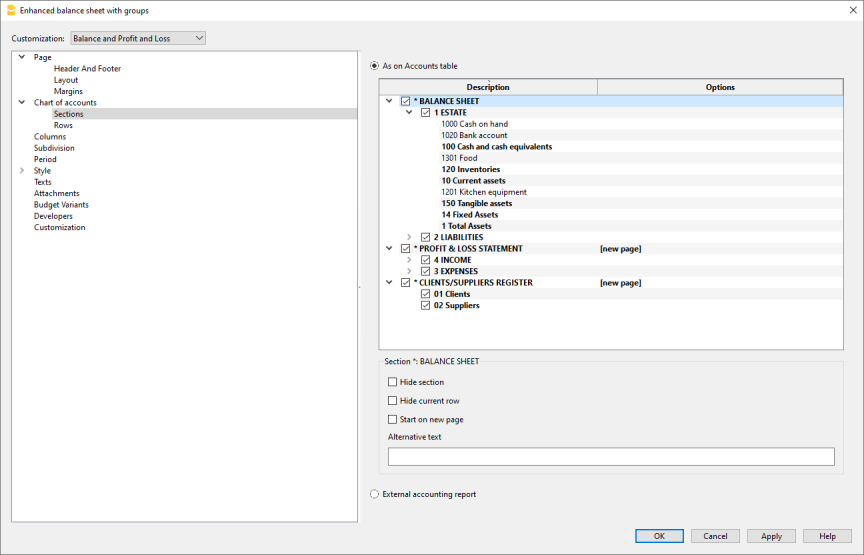
As on Accounts table
The display and the printout settings of the Enhanced Balance Sheet with groups, are the same as in the Accounts table.
By clicking on the arrow on the left you can display the components of the section. Normally only groups with a balance are displayed.
To also display the groups with zero balance, go to the Rows section and click on view groups with zero balances.
To preserve the structure of the accounting report with empty rows, the "Empty rows" option in the Rows section must not be activated.
Depending on the selection, there are different sections with different options:
- Sections 1, 2, 3, 4, 01, 02, 03, 04... refer to the main items of the Balance Sheet
- Account sections refer to the selected account
- Group sections refer to the selected group
Section*
If you select a section with an asterisk, you will have the following options:
Hide section
Click on the section that you wish to hide.
Hide current row
Click on the row that you wish to hide.
Start on new page
Click on the header that you want to have on a new page and activate the option.
Alternative text
Enter an alternative text if you want to have a different one for the selected section or row.
If you select a number or a group section (1, 2, 3, 4.....), there are extra options:

Group for % calculation (%)
Is visible when you select a section (assets, liabilities, costs, income ....).
It is the group that serves as the basis for calculating the percentage of the section accounts and groups.
- Determined by the software.
The group is established by the program. As a rule, it is the last group in the section (total assets, liabilities, costs and income). - Group indicated by the user.
For the income statement, a group must be indicated (for example, total sales).
Hide child rows
If you select a group and you activate this function, child rows of this group won't be printed in the Enhanced Balance Sheet.
Show as account
If you select a group and you activate this function, the group will be displayed as an account in the Balance sheet. 
External accounting report
Print the Enhanced Balance Sheet by groups, based on the structure of the Accounting report file.

Report File
You can select the file of the External Accounting report with the Browse button.
Grouping column
Column in which the accounts refer to the groups defined in the External Accounting report. Available columns: Gr1, Gr2, Gr, BClasse and GrVat.
Signal missing grouping
Checks whether all accounts belong to a group in the External Accounting report.
Rows
In the Chart of Accounts → Rows section you can choose to print the following elements: Accounts, Accounts with zero balance, Accounts with transactions, Groups with zero balance, Empty rows.
Double entry columns setup
The Chart of accounts > Columns section contains the most important options for customizing the columns to be displayed and printed in the Financial Statements and in the Income Statement and Notes.

Balance Sheet, Profit and Loss Statement and Notes
If the various options are activated, the following data will be included in the display and printing of the reports:
Account number
In addition to the account description, the account numbers are also included.
Current
The balance or movement in the basic currency, referring to the selected period or to the subdivision of the period.
% of row
Includes the column with the percentage referred to the total (e.g.% total assets).
The total group to base the percentage calculation on can be set in the Sections tab.
The group is set by the program, but especially for the Income Statement, it is not always determined ideally, so it must be set manually.
Foreign currency
This option is only visible in a multi-currency file.
By activating the option in the printout, the balance will also be displayed in foreign currency for the selected period or the subdivision of the period.
Opening
The opening balance for the period.
Budget
The amount of the budget, referring to the selected period or the subdivision of the period:
- If the Budget table has not been set up, the amount in the Budget column of the Chart of accounts is indicated.
The total amount of each account is divided over 12 months. - If the Budget table has been set up, the budget amount of the accounts is calculated based on the transactions entered in the Budget table.
Previous period
The amount for the period prior to the selected period or period split.
Previous year
The amount for the same period of the previous year.
Difference
Is the difference between the amount of the current period and that of the other column (Budget, Previous period, previous year).
% Difference
Is the difference between the amount of the current period and that of the other column (Budget, Previous period, previous year).
Year-to-date
The balance or movement from the beginning of the accounting to the date of the last posting.
Advanced
With the Advanced button you can further customize the arrangement, texts and colors of the columns.
Hide/Show.
You can hide or display a column that is indicated in the list.
Change sequence
Use the Move Up and Move Down buttons or drag the column with the mouse.
Add new column
You can include other columns from the Accounts table or one of the columns calculated by the report in the report.
Remove the column from the list
With the Delete button the column is deleted. You can always add it again:
Special cases
Previous accounting year beyond the current accounting period
If the previous accounting year is longer than the normal duration of the current year (for example, it starts in November or December), the Previous column of the Accounts table is used to correctly display the totals of the income statement of the previous year, as otherwise, Banana accounting calculates the totals of the income statement taking the same duration as the current year and the totals will differ from what is displayed in the financial statements of the previous year.
In this case proceed as follows.
- For the Income statement, deactivate the Previous year and Previous period columns
- Click on Advanced ...
- With the Add ... command, add the Columns table Accounts > Prior column
- With the Properties ... command, enter the text to be displayed as the header for the Prior column
- Row 1 > Text > "2021", "2022", ...
- Confirm and display Enhanced Balance Sheet.
Columns (Advanced)
This dialog allows you to see the list of different columns as they appear in the report and to customize their column display, headers, and column content colors or background colors.
You can change the list of columns with the Add or Remove buttons:
- Accounts table columns
Complete list of columns in the Accounts table - Acounting amounts [A]
List of columns calculated for the current accounting period. (A=Actual) - Budget amounts [B]
List of columns calculated on the basis of data from the Budget table. (B=Budget)

The following options are available:
- Hide/Show columns
With the check you can hide or make a column that is indicated in the list visible. - Change sequence.
Use the Move Up and Move Down buttons or drag the column with the mouse. - Add new column
You can include other columns from the Accounts table or one of the columns calculated by the report in the report. - Remove the column from the list
With the Delete button the column is deleted. You can always add it again. - Change text or background colour.
- Change the header or other properties of the column.
Columns - add
In the Balance sheet, Profit and Loss Statement and in the Notes, it is possible to add further columns.
Starting from the Reports menu > Enhanced Balance sheet with groups > Columns > Advanced button > Add button.

Available columns list
The dialog lists all the columns that can be included in the report:
- Columns present in the Accounts table.
- Columns with Accounting amounts .
- Columns with Budget amounts.
Activating the column from the list adds it to the report. In the Advanced dialog you can change the sequence and headings.
By removing the check, the column is removed from the report.
Columns present in the Accounts table
You can include any column of the Accounts table, for example:
- Note.
- Aditional description.
- Description in another language.
- Import or other columns added by you.
Accounting amounts
These are the columns with the amounts calculated by the program, the opening balances and the entered transactions, for the indicated period or for the subdivision period
Amount in the Account currency
Only visible for multi-currency files. Account balances in foreign currency are also displayed.
Current
The balances of the current year will be displayed.
Opening
The Opening balances will be displayed.
Previous (period)
The balances of the previous period are being displayed (month, quarter, semester, etc).
Previous Year
The balances of the previous year are being displayed.
YTD (Year To Date)
This column is only available in the Profit & Loss Statement. The balances from the beginning of the year until the last transaction date are being displayed.
Budget amounts
These are the columns with the amounts calculated by the program based on the budget amounts entered in the Accounts Table or in the Budget Table. If you created the Budget table and if some rows have been entered, the program will use the data of this table for its calculation, even if there are values in the Budget column of the Accounts table. Also see informations on Budget.
Budget (Current period)
The amounts related to the foreseen budget of the current period are being displayed.
Budget Previous
The amounts related to the foreseen budget of the previous period are being displayed.
Budget Previous year
The budget amounts are displayed for the same period as the current one, but from the previous year.
Calculation period annotations
The program cannot calculate values for periods that overlap between different accounting years or for years with start and end dates that do not match.
To obtain balances from the previous year that exceed one calendar year, activate the Prior column. This column replaces the "Previous year" column, which only shows the previous year's balances from 01.01.xx to 31.12.xx.
You get to this column from the menu Reports > Enhanced balance sheet by groups > Columns > Advanced button > Add. Clicking on the Account table columns header will display the list of all the columns defined in the Accounts table. Activate the Prior column.
Headers and options (Columns properties)
In this section there are options to change the column headers in reports.

Headers
Row 1/ Row 2 / Row 3
It is possible to change the columns headers by selecting the Text option (from the drop down menu) and by entering the new header. If you select the Column option, the column name of the selected column will be shown.
Options
Visible
If this cell is activated, the column header will be shown.
Display as a total column
If activated, this option only shows the amounts in the Totals column.
Colors (Columns properties)
The dialog box is accessed via the Reports → Enhanced statement by groups → Columns → Advanced button → Properties → Colors menu. There are options to change the colors of the texts and columns.

Change
With this button you can change the text or the background color
Default color
With this button you can restore the default color for the text or the background.
Subdivision
Via the Chart of Accounts section → Subdivision you can access the options to choose the subdivision of the period (year, semester, quarter, month).

None
Only the data for the overall period are present in print.
Subdivision by period
With the breakdown by period, the program creates columns for the indicated periods. For each period you will see the same columns for the overall period.
The function allows you to view the data of the period for:
- day
- month
- bi-monthly
- quarter
- four monthly
- semester
- year
- 5 years
- 10 years.
The selected period appears in the column header.
In order not to have an excessive number of columns in print:
- Limit the number of items you want to print.
- Indicate a shorter period.
- Indicate the maximum number of periods.

Create periods for the entire year
When the accounting period does not coincide with the calendar year, but you want to view all the months anyway, simply activate this function.
Totals column
This function creates a Totals column of the selected periods in the income statement and in the Totals view.
Maximum number of divisions
The maximum number of periods is by default 36. In particular cases, if you want particular statistics that are very detailed and over long periods, you can manually change this value. A very high maximum number of periods can slow down the program.
Subdivision by Segment
The segments allow you to have reports for a certain section of the company. Segments are defined in the Chart of accounts. With the breakdown by period, the program creates columns for the different segments. For each segment you will see the same columns for the overall period.
Each subdivision takes the name of the header given in the Chart of accounts. The split data (based on your selection) is displayed.
The Subdivision by Segment option is active only if segments have been set up in the Accounts table.
You can select:
- All segments - This way, when new segments are added, they will be automatically added to the printout.
- Blank - The amount not assigned to any segment is displayed.
- Choice of segments - Indicate only the segments you want to see in print.

Totals column
When this option is being checked, the totals for the selected segment will be obtained.
Segment header
You can choose the text to be displayed as column header for the segments.
Period
In the Chart of accounts → Period section, you can limit the processing of data, display and print only to an indicated period or, in the case of a budget, it allows you to obtain forecasts over several years.

All
All accounting entries are included.
Period selected
It means the specified period, indicating the start and end date.
In order to get forecasts over several years, it is necessary to enter the end date of the future year of the budget required, in the File Properties, basic data (File menu). Enter the start and end date of the period in the Period section of the Enhanced balance sheet with groups as well.
To have budgets beyond the accounting period, in the Budget table, the movements must have a repetition code.
The forecast will be displayed in the Budget column.
Movements without date
If transactions without dates have been entered in the accounting, they are considered only if All is selected.
If, on the other hand, you enter, for example, from January 1st to December 31st, the transactions without date are not displayed in the report.
Style Tab
This dialog section includes the option to choose the templates and the number format for printing the Balance Sheet and Income Statement. Each template can be customized by changing the style properties and colors. Columns can also be customized in the Columns section.

Use style
There are different models of the Enhanced balance sheet provided. By selecting one, the user can obtain the Enhanced balance sheet of his choice.
Style property
For each style, the color of the fonts and the backgrounds can be defined.
Value / Change... / Default
These functions allow the user to change style or to restore the default style.
Ignore line formatting
If this function is activated, the formatting will not be maintained.
Number formats
From the menu Report > Enhanced Balance sheet with groups in Banana Accounting Plus, in the Style section you can change the number formats and choose how negative numbers are displayed.

Divide by 1'000
If there are big amounts, by activating this option, three zeros will be taken off.
Show cents
By activating this option the cents will be shown.
Show zero amounts
By activating this option it is possible to choose between having the zero amounts shown with the 0,00 number or with the -,- symbol.
Negative numbers
Negative amounts can be shown with a minus sign before the amount, after the amount or the amount can be shown between parenthesis. You can also activate the option to have the negative numbers shown in red.
Texts
Via the Style → Texts section you can change the texts of the fixed headers that the program uses in the printouts.
To change the value, just double click on the Value cell corresponding to the key to be changed and enter the new text.

Attachments
Attachments are additional text documents (such as reports, explanatory notes, or comments) that can be included in the printing of the financial report to provide complementary information to the accounting data.
The Attachments section is accessible from the Reports > Enhanced balance sheet with groups > Attachments menu. All added attachments:
- Texts are printed after the Balance sheet and Profit & Loss statement.
- Each document begins on a new page

Documents
All documents listed in the Documents table (Html or text format) are listed here.
- You can change the report sequence, just by dragging the item with your mouse
- All documents with a check mark will be printed.
Edit
A text editor will open allowing you to enter new text or edit the existing one.
Add
Adds a new element without text. To add plain text or Markdown documents, use the appropriate commands in the Documents table
If the Documents table is not yet present, the program creates it automatically. It is not immediately visible, but will appear the next time the accounting file is reopened.
Remove
This button will remove the selected element and its content. It's the same as removing a row from the Document table.
Add an attachment with Markdown text
- Add a new document with Markdown text as explained on page Markdown Editor
- Tick (select) the document in the list of attachments.
- The text will be printed together with the financial report.

Notes
- Printing of Markdown text is only available with the Advanced plan subscription.
- This feature is not available in previous versions.
- If the file is open with a previous version of the Banana Accounting software, you will get a message that the file is not totally compatible.
- If you edit this section and you press OK, in order to undo the operation you need to enter the Undo command more that once.
How to create attachments
For more information on how to create attachments or notes in the financial statement, see the page:
Customization
Customizations allow you to create and save print settings and recall them later.
See the page relating to Customizations.
End of Year PDF printouts
From the print preview of a document, you can save in PDF format and print.
You can save in a PDF format the following documents:
- Balance sheet and Profit and Loss Statement
- Accounts, Transactions, VAT, Totals tables
- VAT Reports
- Account cards
This PDF file will have an index that allows for easy access for the different printouts.
If you save this file on a non rewritable CD (to be kept along with the accounting documents), you will comply with the requirements for accounting data archiving.
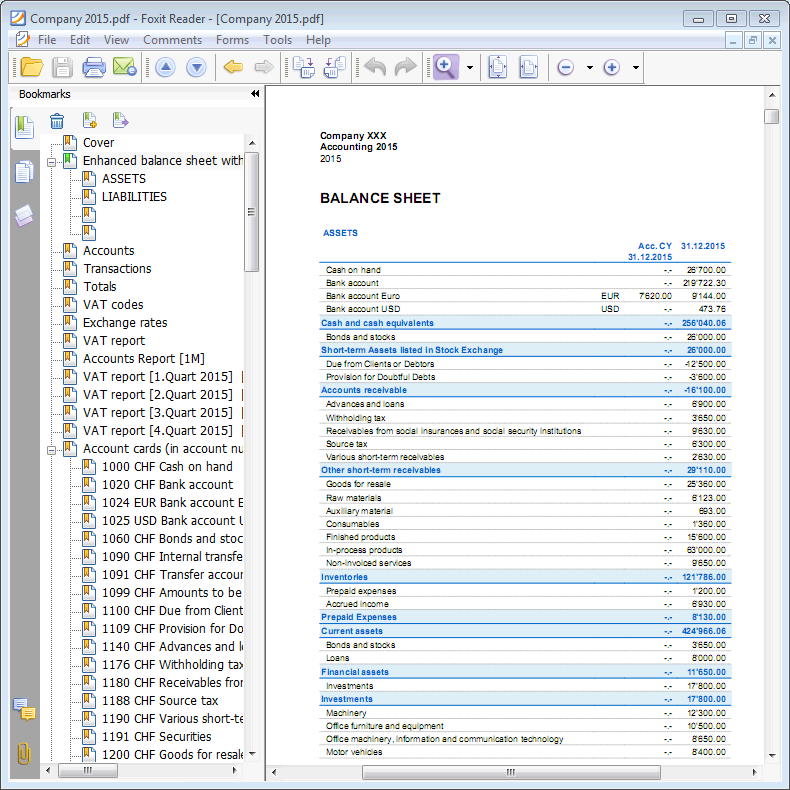
Reports over several years
A statement over several years allows for a simple and immediate comparison of the evolution of your business. Banana Accounting can display balance sheets up to two previous years in the same report, so for example the balances of the years 2022, 2021 and 2020 on a single page.
In order to view the balances over several years it is necessary that the "file previous year" option is indicated correctly in the File and accounting Properties, → Options tab, otherwise Banana Accounting is not able to retrieve the balances of the previous accounting periods, which would therefore remain empty.
In the following example we indicate how to get a report for the years 2022, 2021 and 2020. Here is how to proceed:
- Reports menu → Enhanced balance sheet with groups ...
- Check Current and Previous year in the Columns section.
- Advanced Button (click on the button for both the Balance Sheet and the Profit and Loss Statement).

- From the dialog window that opens, click on the Add button to add a column.

- Scroll down the list until you see -2 Years (we have to go 2 years back, from the current year).

- Confirm with OK to get the report.
Accounting report
The Accounting Report generates and prints an overview of the balances of all accounts in the chart of accounts, grouped according to specific criteria and related to a defined period or its subdivision. The Accounting Report is displayed in a new table called Accounts Report and is based on the column structure of the Accounts table.
To create and print an Accounting Report:
- From the menu Reports > Accounting Report

Basic
Report
Choose the desired grouping:
- Like in the accounts table – the report lists accounts as shown in the accounts table, including Opening and Balance columns.
- Accounts by class – the report lists accounts, but without subgroups.
- External Accounting Report – The report is displayed through a file external to the accounting file, with a specific grouping defined by the user. It is created by selecting Menu > File > New > Accounting type > Accounting Report.
The report is always shown in the Accounts Report table, as illustrated in the following image.

Note: The rows of the accounting report are protected. If they are unprotected, the data can be modified, but it is not possible to save the changes.
Accounting Report Dialog
Options
Choose which accounts to include or exclude from the report:
- Show only group totals – only group totals are displayed.
- Include accounts with transactions – only accounts with movements are included.
- Include accounts with zero balance – accounts with zero balance are also included.
- Exclude groups without accounts – groups that only contain accounts with zero balance are excluded.
- Entries without a date are considered as openings and do not appear in the Profit and Loss report.
Other Sections
Explanations of the other sections are available at the following web pages:
Report Output
A new table is created where the results are displayed.
Print the logo in the accounting report
To include a logo in the accounting reports, after creating the report, follow these steps:
- Menu File > Print Preview > Page Setup
In the dialog window that opens, under Logo, specify the logo (instead of selecting None).
See also the page on how to insert the Logo.
VAT summary (only for files with VAT options)

XBRL CH report
This document is Work in Progress
Definition of XBRL
The acronym for XBRL is eXtensible Business Reporting Language and this is the global standard of digital business and financial reporting.
It is the representation standard used to codify accounting data.
An XBRL report, historically called an instance document, contains the facts reported by a specific entity.
Each fact is associated with a concept defined by the applicable taxonomy and with contextual information such as:
- The reporting entity.
- Reporting period.
- Unit of measurement.
The taxonomy defines the applicable reporting model, including the available concepts, labels, relationships, presentation structures, calculation rules, references and validation constraints.
A taxonomy defines the reporting model for a specific domain, including:
- The concepts that can or must be reported.
- Their labels and relationships.
- Presentation and calculation structures.
- References and validation rules.
It was developed by XBRL International, a global non-profit organization that operates in the public interest with the goal of improving:
- Accountability.
- Transparency of corporate performance globally.
- Providing an open standard for data exchange for corporate reporting.
The XBRL CH
Scope
The XBRL CH taxonomy provides a standardised framework for:
- Representing Swiss financial statements and tax-related information in a structured Machine-readable format.
Its financial reporting concepts are based on the Swiss Code of Obligations, while additional concepts support the reporting needs of cantonal tax authorities.
Its purpose is to facilitate:
- The preparation.
- Processing.
- Analysis.
- Electronic transmission of financial and tax-related information for legal entities.
It is not intended for individual tax returns.
State of Development of the XBRL CH Taxonomy
Swiss XBRL is a recent standard.
The first version was published in 2025.
It is currently in a pilot phase and is not yet in production.
The XBRL CH Association and the Swiss Tax Conference developed the taxonomy, defining a standard for the presentation of balance sheets and annual financial statements for Swiss companies.
The taxonomy of XBRL CH, is based on the Swiss Code of Obligations and practical needs.
The taxonomy concepts include references to the Swiss SME chart of accounts.
In Banana Accounting, the accounts in the entity’s operational chart of accounts are mapped to the corresponding XBRL CH taxonomy concepts through the XBRL Mapping Reference field.
The mapping between the chart of accounts and the XBRL chart of accounts was based on the chart of accounts for SMEs and is under development.
Legal forms covered
This taxonomy is applicable to:
- Stock companies (AG).
- Limited liability companies (GmbH).
- Cooperatives.
- Associations and foundations subject to accounting requirements under the Swiss Code of Obligations.
Users
Companies
- To digitize operational accounting and financial data structured according to the XBRL CH taxonomy.
Fiduciaries
- To manage the financial statements of multiple clients in a more standardized manner.
Receiving authorities/entities
- To achieve greater consistency and standardisation of accounting and financial data.
Auditors and consultants
- To perform financial analyses more efficiently, having a uniform basis.
Content
The content of the XBRL CH file corresponds to the following documents:
- General and tax-relevant data (Global common document).
- Statement of Financial Position.
- Statement of Income.
- Statement of Cash Flows.
- Notes to Statement of Financial Position.
- Allocation of Profits.
- Allocation of Reserves.
These components are designed to support financial and tax reporting by Swiss SMEs.
The financial statement component are based on the requirements of the Swiss Code of Obligations, while the taxonomy also includes concepts relevant to the reporting needs of cantonal tax authorities.
The components actually reported depend on the reporting entity and applicable legal and reporting requirements.
Global common document
This data allows the tax authority receiving the XBRL file to identify:
- The company.
- The company's fiscal period.
- The currency used for tax returns.
Specifically, the following information is required:
- Reporting period (corresponding to the tax period of the declaration).
- Company information (name, address, city, zip code, legal form).
- Identification information (UID number).
- Currency.
Statement of Financial Position
The Statement of Financial Position, also known as the balance sheet, presents the entity's financial position at the end of the reporting period.
It reports:
- Assets: representing the entity's economic resources.
- Liabilities: representing its obligations to third parties.
- Equity: representing the residual interest attributable to the entity's owners.
In the the XBRL CH taxonomy, each line items is identified by a standard concept and associated with:
- The reporting entity.
- The reporting date.
- The relevant currency.
Statement of Income
The Stetement of Income, also know as income statement or profit and loss statement, presents the entity's income and expenses for the reporting period and resulting net profit or loss.
In the XBRL CH taxonomy, it is identified as "200 - Stament of Income".
Each amount is mapped to a standardised concept and associated with the reporting entity, the relevant reporting period and the reporting currency.
The taxonomy organises income and expense items within:
- A defined hierarchy.
- Uses calculation rules to validate certain subtotals.
- Resulting profit or loss.
Extension: XBRL Report Switzerland (eBilanz) [TEST]
With the XBRL Report Switzerland (eBilanz) [TEST] extension offered in Banana Accounting, you can:
- Map the operating chart of accounts to the XBRL file.
- Create an instance of the XBRL file.
The Banana Accounting extension is currently available for testing and is not intended for production use.
XBRL Mapping Reference
Mapping Definition in the Context of the XBRL File
Mapping is an association process that occurs between the reference chart of operating accounts and the corresponding XBRL concepts.
XBRL concepts are the individual information items that define an account, such as "Equity" grouping all the accounts corresponding to that item, such as shareholders' equity, capital reserves, premiums, etc.
The account mapping reference in the XBRL file is the Swiss chart of accounts for SMEs. Therefore, any association made through the accounts used in operational accounting will reference the Swiss chart of accounts for SMEs.
The mapping is in development and is not final.
If you find any inaccuracies, missing mappings, or have suggestions, we would appreciate your feedback. Your contribution will help improve the quality and completeness of the XBRL mapping.
Mapping process
The XBRL extension includes a standard mapping between the accounting operating accounts and groups in the Swiss chart of accounts for SMEs (Swiss chart of accounts for SMEs) and the corresponding XBRL concepts.
The XBRL file export process occurs through mapping, in which each accounting element is associated with the element of the selected taxonomy.
The accounts and groups defined in the Swiss chart of accounts for SMEs are associated with one or more XBRL tags.
If your operational chart of accounts differs from the Swiss chart of accounts for SMEs, the extension allows you to add an "SME Account" column to the account table.
To allow for customization of the mapping, you can also use the "SME Accounts" column to associate the account with the SME chart of accounts, ensuring correct mapping in the XBRL application.
The tables below list the concepts used in the XBRL extension.
The account and group number ranges refer to the Swiss chart of accounts for SMEs.
Mapping Table SME Accounts with Xbrl concepts
Version 20260610 / XBRLCH 2025-05-31
| Group | From Account | To Account | XBRL Tag Debit XBRL Tag Credit (if different) | Reverse Sign | Description |
| 1 | ct:Assets | No | Total assets | ||
| 10 | ct:CurrentAssets | No | Current assets | ||
| 100 | 1000 | 1051 | ct:CashAndCashEquivalents ct:ShorttermInterestBearingLiabilities | No | Cash and cash equivalents |
| 106 | 1060 | 1079 | ct:CurrentAssetsWithMarketprice ct:ShorttermInterestBearingLiabilities | No | Short-term assets listed on the stock exchange |
| 109 | 1090 | 1099 | ct:OtherReceivablesByThirdParties ct:OtherShorttermLiabilitiesToThirdParties | No | Transfer accounts |
| 110 | ct:TradeReceivables ct:TradePayables | No | Receivables from deliveries and services | ||
| 110 | 1100 | 1109 | ct:TradeReceivablesByThirdParties ct:TradePayablesToThirdParties | No | Receivables from deliveries and services from third parties |
| 110 | 1110 | 1119 | ct:TradeReceivablesByParticipations ct:TradePayablesToParticipations | No | Receivables from deliveries and services from participations |
| 110 | 1120 | 1129 | ct:TradeReceivablesByShareholdersAndGoverningBody ct:TradePayablesToShareholdersAndGoverningBody | No | Receivables from deliveries and services from related parties and governing bodies |
| 114 | 1140 | 1199 | ct:OtherReceivablesByThirdParties ct:OtherShorttermLiabilitiesToThirdParties | No | Other short-term receivables |
| 120 | 1200 | 1289 | ct:InventoryAndUnbilledServices | No | Inventories and non-invoiced services |
| 130 | 1300 | 1303 | ct:AccruedIncomeAndPrepaidExpenses | No | Accrued income and prepaid expenses |
| 14 | ct:NoncurrentAssets | No | Fixed assets | ||
| 140 | 1400 | 1470 | ct:FinancialAssets | No | Financial assets |
| 148 | 1480 | 1489 | ct:Participations | No | Participations |
| 150 | 1500 | 1599 | ct:MobileTangibleFixedAssets | No | Movable tangible assets |
| 160 | 1600 | 1689 | ct:LandAndBuildings | No | Fixed tangible assets |
| 170 | 1700 | 1799 | ct:IntangibleAssets | No | Intangible assets |
| 180 | 1850 | 1851 | ct:NonPaidInCapital | No | Unpaid share capital or foundation capital |
| 2 | ct:EquityAndLiabilities | Yes | Total liabilities | ||
| 20 | ct:CurrentLiabilities | Yes | Short-term third party capital | ||
| 200 | 2000 | 2068 | ct:TradePayables | Yes | Accounts payable |
| 210 | 2100 | 2170 | ct:ShorttermInterestBearingLiabilities | Yes | Short-term interest-bearing debts |
| 220 | 2200 | 2279 | ct:OtherShorttermLiabilities | Yes | Other short-term debts |
| 230 | 2300 | 2303 | ct:DeferredIncomeAndAccruedExpenses | Yes | Accruals and deferred income |
| 233 | 2330 | 2391 | ct:ShortTermProvisions | Yes | Short-term provisions |
| 24 | ct:LongtermLiabilities | Yes | Long-term third party capital | ||
| 240 | 2400 | 2491 | ct:LongtermInterestBearingLiabilities | Yes | Long-term interest-bearing debts |
| 250 | 2500 | 2570 | ct:OtherLongtermLiabilities | Yes | Other long-term debts |
| 260 | 2630 | 2695 | ct:LongtermProvisions | Yes | Long-term provisions and similar statutory positions |
| 28 | ct:Equity | Yes | Equity | ||
| 280 | 2800 | 2810 | ct:IssuedCapital | Yes | Nominal capital or capital of the foundation |
| 290 | 2900 | 2985 | ct:RetainedEarningsAccumulatedLosses | Yes | Reserves and profit or loss carried forward |
| 2900 | 2903 | ct:FiscallyRecognisedCapitalReserves | Yes | Fiscally recognisedcapital reserves | |
| 294 | 2940 | ct:RevaluationReserve | Yes | Revaluation reserve | |
| 295 | 2950 | ct:StatutoryProfitReserves | Yes | Statutory profit reserves | |
| 296 | 2960 | 2961 | ct:VoluntaryProfitReserves | Yes | Voluntary profit reserves |
| 297 | 2970 | ct:ProfitOrLossCarriedForward | Yes | Profit or loss carried forward | |
| 2979 | ct:ProfitOrLoss | Yes | Annual profit or loss | ||
| 3 | ct:OperatingIncome | Yes | Net revenues from supplies and services | ||
| 30 | 3000 | 3097 | ct:ProductionRevenues | Yes | Manufactured products revenues |
| 32 | 3200 | 3297 | ct:TradingRevenues | Yes | Revenues from resale of goods |
| 34 | 3400 | 3497 | ct:ServiceRevenues | Yes | Revenues from provided services |
| 36 | 3600 | 3691 | ct:OtherOperatingRevenues | Yes | Other revenues from deliveries and services |
| 37 | 3700 | 3790 | ct:SelfPerformedServices | Yes | Own contributions and own consumption |
| 38 | 3800 | 3809 | ct:RevenueReductions | Yes | Decrease in revenues |
| 39 | 3900 | 3940 | ct:ChangesInventoriesUnfinishedFinishedGoodsAndUnbilledServices | Yes | Changes in inventories of semi-finished products, finished products and value of non-invoiced services |
| 4 | ct:ExpenseForMaterialsGoodsAndServices | No | Costs for material, goods, services and energy | ||
| 40 | 4000 | 4096 | ct:ProductionMaterialExpense | No | Material costs |
| 42 | 4200 | 4296 | ct:TradingGoodsExpense | No | Costs of goods for resale |
| 44 | 4400 | 4496 | ct:ExpensesForPurchasedServices | No | Expenses for purchased services |
| 45 | 4500 | 4540 | ct:EnergyExpenseForProduction | No | Energy consumption for production |
| 46 | 4600 | 4660 | ct:ProductionMaterialExpense | No | Other costs of materials, goods for resale and services |
| 47 | 4700 | 4702 | ct:OtherDirectExpenses | No | Direct purchasing expenses |
| 48 | 4800 | 4886 | ct:ChangesInventoriesUnfinishedFinishedGoodsAndUnbilledServices | No | Changes in inventories, material and goods losses |
| 49 | 4900 | 4906 | ct:ProductionMaterialExpense | No | Purchase price reductions |
| 5 | ct:PersonnelExpense | No | Personnel expenses | ||
| 50 | 5000 | 5090 | ct:SalaryExpense | No | Personnel expenses - Production |
| 52 | 5200 | 5290 | ct:SalaryExpense | No | Personnel expenses - Trading Activities |
| 54 | 5400 | 5490 | ct:SalaryExpense | No | Personnel expenses - Services Activities |
| 56 | 5600 | 5690 | ct:SalaryExpense | No | Personnel expenses - Administration |
| 57 | 5700 | 5790 | ct:SocialSecurityExpense | No | Social insurance expenses |
| 58 | 5800 | 5890 | ct:OtherEmployeeExpensesTotal | No | Other personnel expenses |
| 59 | 5900 | 5901 | ct:CompensationFromThirdParties | No | Benefits from third parties |
| 6 | ct:OtherOperatingExpense | No | Other operating expenses, depreciation, value adjustments and financial results | ||
| 60 | 6000 | 6090 | ct:RentalExpense | No | Facility expenses |
| 61 | 6100 | 6145 | ct:RepairsMaintenanceEnhancementsOrLeasing | No | Maintenance, repairs, replacements (MRR): leasing of movable tangible assets |
| 62 | 6200 | 6282 | ct:VehicleExpenses | No | Vehicle and transport expenses |
| 63 | 6300 | 6371 | ct:InsuranceContributionFeeApprovalExpenses | No | Property insurance, charges, fees, permits |
| 64 | 6400 | 6462 | ct:EnergyAndDisposalExpense | No | Energy and disposal costs |
| 65 | 6500 | 6590 | ct:AdministrativeAndITExpense | No | Administrative and IT expenses |
| 66 | 6600 | 6690 | ct:AdvertisingExpense | No | Advertising expenses |
| 67 | 6700 | 6791 | ct:AllOtherOperatingExpense | No | Other operating expenses |
| 68 | 6800 | 6849 | ct:DepreciationAndValueAdjustmentFixedAssets | No | Depreciation and value adjustments to fixed assets positions |
| 69 | 6900 | 6999 | ct:FinanceExpenseIncome | No | Financial expenses and revenues |
| 7 | ct:ExpenseFromAuxiliaryOperationsAndOperationalProperties ct:RevenueFromAuxiliaryOperationsAndOperationalProperties | No | Ancillary operating result | ||
| 70 | 7000 | 7019 | ct:ExpenseFromAuxiliaryOperationsAndOperationalProperties ct:RevenueFromAuxiliaryOperationsAndOperationalProperties | No | Result from ancillary activities |
| 75 | 7500 | 7519 | ct:ExpenseFromAuxiliaryOperationsAndOperationalProperties ct:RevenueFromAuxiliaryOperationsAndOperationalProperties | No | Result from operational real estate |
| 8 | ct:NonOperatingExpenseAndIncome | No | Non-operating, extraordinary, non-recurring or unrelated to the period result | ||
| 80 | 8000 | 8100 | ct:NonOperatingExpenseAndIncome | No | Non-operating costs and revenues |
| 85 | 8500 | 8719 | ct:ExtraordinaryExpensesAndIncome | No | Extraordinary, non-recurring or unrelated to the period expenses and revenues |
| 89 | 8900 | 8901 | ct:DirectTaxes | No | Direct taxes |
| 9200 | ct:ProfitOrLoss | No | Profit or loss for the year |
Update opening balances
The Update Opening Balances (Actions menu) command takes data from the previous year's file and updates the opening balances for the current year.
When do you need to use the Update Opening balances command?
The Update Opening Balances command is required in the following cases:
- You have created the New Year with the Create New Year command, but you still made changes to the previous year's file (additional transactions, new accounts, ..).
- You decided to change the allocation of the the profit or loss for the year.
Check the previous year accounting
In order to avoid differences between the previous year closing balances and the New Year and opening balances, it is important, before using the Update opening balance command, to make sure that you have carried out all the checks, verification operation and all the closing accounting entries as indicated in the Year end closure page.
The Update Opening balances dialog window
In order to access this dialog, use the Actions menu → Update opening balances command.
You need to enter the path to where the previous year's file is located:
- The program will suggest the name of the saved file
- If the file's name or the location path is changed you the Browse button

Operations carried forward by this command
The command resumes the data from the previous year, without changing its contents. This command can therefore be repeated without any impact on the previous year's file.
The command performs the same operations as in Create New Year , except those referring to the creation of the file.
If the opening balances of the Profit and Loss Account accounts were reported in error, follow the information on the Difference in opening balances page (item 5 Solutions) to correct this.
Change of the Chart of Accounts of the previous year
If after creating the New Year you add accounts to the previous year and carry over the balances, the program may indicate an error.
- Update the Chart of Accounts for the current year.
- Repeat the Update Opening balances operation
You can import changes with the Import Accounts command.
Edit current year chart of accounts
If, after creating the new year, you change the numbering of the accounts, when you issue the command Update opening balances, the programme will indicate that it cannot find the accounts.
In this case, you must update the account balances manually:
- Opening column ( Accounts table > Base view)
- Previous column ( Accounts table > Previous view)
Opening balances | Double-entry accounting
On this page, you will find all the information you need to enter, modify, and restore initial balances (or opening balances) in Banana Accounting.
Opening balances when starting an accounting
When using Banana Accounting for the first time, the opening balances need to be inserted manually in order to create the opening balance sheet.
- Position yourself in the Accounts table, Base view, Opening column.
- Enter the opening balances of the Assets and Liabilities accounts manually. Liabilities are to be entered preceded by the minus sign.
- Check if the total Assets equal the total Liabilities so that your accounting squares. If there are differences in the opening balances you need to check and correct them.
Difference in opening balances
At the opening of the accounting year, the Assets accounts (positive) must balance with the Liabilities accounts (negative). If this is not the case, the accounts do not balance and error messages are displayed in the information window at the bottom; in this case, the reasons must be checked and corrected, until the message Difference in opening balances disappears. For more information and solutions see:
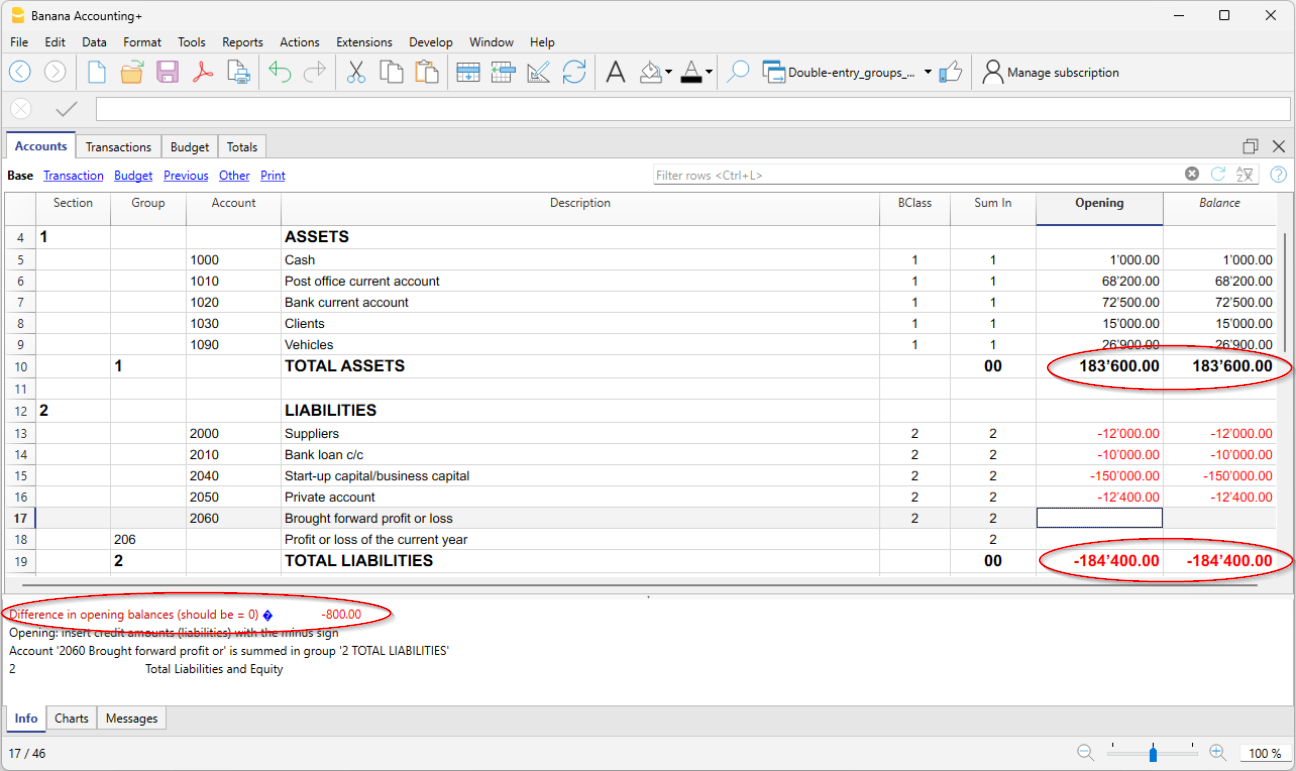
Opening balances of Cost Centers
In the Accounts table, the Opening column can also be used to enter the opening balances of the Cost Centers.
Opening balances for Segments
To enter the opening balances of the segments, opening transactions must be entered instead.
More details are available on the Segments page.
Opening balances for an already started accounting
If you start a new accounting, taking over work already done with other programs, there are two possibilities:
- Start accounting from the beginning of the year, by entering the opening balances for the beginning of the year (Accounts table, Opening column) and the transactions (Transactions table) that have already been previously recorded with other programs (also see Transferring data from other software). Thus you will have all the accounting details in one file.
- Starting from the date when the accounting is resumed:
- Enter the opening balances (Accounts table, Opening column), taking over the values of the other accounting.
In addition to entering the opening balances of the Assets and Liabilities accounts, it is also necessary to enter those of the Expenses (positive amounts) and Revenues (negative amounts). - The operating result up to that point must be disclosed in the Profit / Loss carried forward account.
If it is a profit, the opening balance must be entered in negative, if it is a loss as a positive. - Check that the sums of the opening balances are zero, so that the program does not signal any differences.
- Enter the new entries in the Transactions table.
- Enter the opening balances (Accounts table, Opening column), taking over the values of the other accounting.
Opening balances as opening transactions
Opening balances can also be entered as opening transactions in the Transactions table.
For each opening transaction, proceed as follows:
- Indicate the accounting start date as the transaction date.
- In the Doc Type column, enter the code "01".
- Indicate the debit or credit account and the amount.
- The total of the opening debit balances must match those in credit.
Opening balances entered as transactions are used when preparing reports. The opening balance of the transactions is added to the amount entered in the Opening column of the Accounts table.
Balances of the previous year
If you start a new accounting by taking over an existing accounting and you want the previous year's values to appear on the printouts, it is necessary to enter the previous year's balances in the Previous view, Previous Year (Prior) column of the Accounts table:
- Enter the closing balances of the previous year of the Assets accounts.
- Enter the closing balances of the previous year of the Liabilities accounts (insert the minus sign in front of the amount).
- Enter the last year's closing balances of the Expenses.
- Enter the final balances of the previous year of Revenues (insert the minus sign in front of the amount).
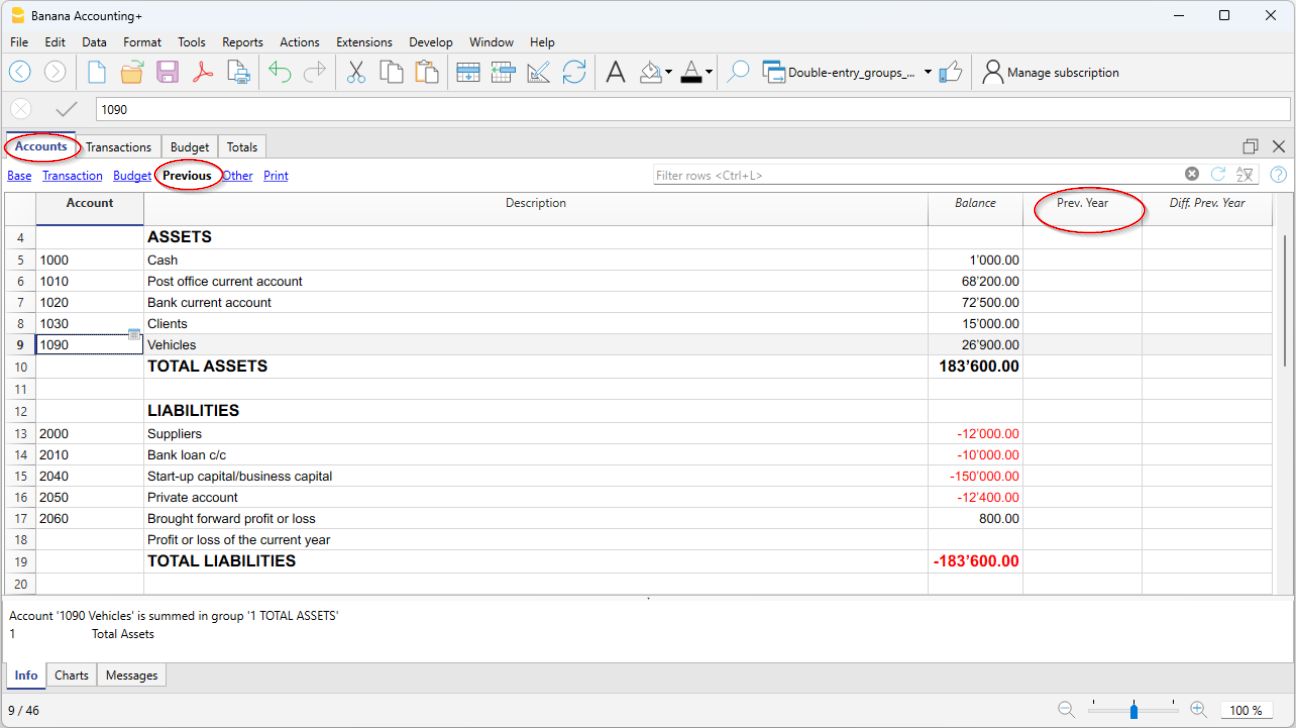
Create new year
When you start the new year, the program automatically carries over the opening balances to the following year.
Consult the Create New Year lesson.
If for some particular need, opening balances need to be changed, these can be modified manually in the Opening column of the Accounts table. After each modification, make sure that there are no accounting differences. Anyway, we recommend carrying over the opening balances with the Create new year command or, if the accounting for the new year has already been created, use the Update opening balances command.
The account card is in automatic and it is not possible to directly enter the opening balance or make changes.
To change an opening balance of an account card, you need to go to the Accounts table, Opening column, whereas to correct movements, you need to change the entry in the Transactions table.
Print opening balances
To print the opening balances:
- To print the contents of the table, use the Print / Preview command, by selecting the rows of the Balance Sheet.
- You can also use the Accounting printouts and set the printout for the Balance Sheet part and the opening column only.
Create New Year | Double-entry accounting
The Actions > Create New Year command prepares a file for the new year based on the accounting file that is about to be closed. The command does not modify the current file, so it can be executed without any effect.
Transition logic to the new year
With Banana Accounting, you have a separate file for each year. When the new year begins, the operational logic is as follows:
- With the Actions > Create New Year command, the program creates a new file for the following year using the same chart of accounts, settings, and balances of the current year that is being closed.
- Once the file for the new year is created, you must save it with a new name.
- The operation of creating the new file can be repeated if you decide not to save the file.
- It is possible to work on both files simultaneously:
- In the new file, the entries for the new year will be recorded. You can also make changes to the chart of accounts, VAT, or other items without affecting the previous one.
- In the previous year's file, you will continue to enter transactions to complete the year and carry out the typical closing operations, such as verifying balances, printing financial statements, etc.
- In the file for the new year, using the Actions > Update Opening Balances command, the changes made in the previous year's file are imported. This operation should be performed at the latest when there are no more changes in the previous year.
Note: Users with a subscription to the Professional plan of Banana Accounting Plus will see the following message at the bottom after creating the new year file: Active subscription: Professional Plan. Advanced plan features are available up to 70 transactions.
Check and close the previous year's accounting
Before updating the opening balances, to avoid discrepancies between closing and opening balances for the next year, it is important to ensure that all checks, verifications, and closing accounting entries have been completed.
In Banana Accounting Plus, in the Advanced plan, there is a Filter feature that is especially useful during closing to quickly search for rows with the same texts or values, based on the key entered for the filter (word, account, amount, etc.). With this function, you can make corrections directly on the filtered rows without having to scroll through the Transactions table—very convenient especially at year-end when the number of entries is high.
For more details, refer to the following pages:
- Filter (paragraph Filter rows)
- Check and close double-entry accounting
- Closing and exchange rates for multi-currency accounting
Specific information for setting closing rates and recording unrealized exchange gains and losses.
Operations performed by the Create New Year command
The Create New Year command, based on the parameters set by the user, automatically performs the following operations:
- Creates a new file (unnamed) with the same chart of accounts and settings as the open file, without transactions.
- Copies the data from the Balance column of the current file and inserts them into the Opening column of the new file (only for the specified classes).
- Adds the previous year's profit or loss to the opening balance of the account(s) specified for allocation (usually the Retained Earnings account).
- Copies for all Balance Sheet accounts the data from the Balance column of the current file and inserts them into the Previous Year column of the new file.
- Updates file properties:
- Sets the start and end dates of the fiscal year, adding one year to the existing ones.
- In the Options section, sets the name of the previous year’s file and enables the option to use previous year’s transactions for autocomplete.
- In multi-currency accounting, it sets the opening exchange rates to match the closing exchange rates of the previous year.
- If there is data in the Budget table, it carries forward the transactions to the new year according to the settings.
- If the Segments option is enabled, it creates opening entries for the segments.
Carry forward new balances dialog
The Carry forward new balances dialog allows you to specify parameters for creating the new year's file:

Carry forward opening balances of accounts
The opening balances of the activated items are carried forward:
Balance Sheet
Transfers balances of asset, liability, and equity accounts. This option should generally be activated.
Income Statement (not recommended)
Cost and revenue account balances should NOT be carried forward to the new year.
Activate this option only in special cases and only if you are sure of the implications.
Off-Balance Sheet
Transfers accounts with BClass (5 and 6 for off-balance asset and liability accounts and 7 - 10 for other off-balance accounts). If the closing balances should not be carried forward, deactivate the relevant option.
Cost Centers
Activate only if cost centers are used to manage positions that must continue over time, such as customers, suppliers, and members.
Cost Center CC1
Those starting with a dot ".".
Cost Center CC2
Those starting with a comma ",".
Cost Center CC3
Those starting with a semicolon ";".
For more information see the page Cost/Profit Centers.
Segments
The opening balances of segments are created with opening entries in the Transactions table.
- For more information see the page Segments.
- The program creates one entry for each combination of account and segment, reproducing exactly the final situation of the previous year.
- It is preferable not to enter segment opening balances using the Opening column. If this was done in the previous year, the program will again transfer the balance into the Opening column of the new year.
Note: adjusting operations such as recording and closing transitional accounts must be entered manually.
Allocation of profit/loss
When carrying forward the opening balances into the new year, the amounts indicated are added to the profit carryforward accounts.
Total to be allocated
The program automatically shows the amount of profit or loss to be allocated.
Accounts
Select the account or accounts (up to three) in which the result of the financial year should be allocated. If there are more than three destination accounts, you must manually enter the amount in the appropriate fields.
If only one account is indicated, the amount will be automatically entered in the selected account from the list.
The program automatically updates the opening balances. The total assets exactly match the total liabilities.
Allocation of the financial result to more than three accounts
In this case, automatically allocate the result only to the Retained Earnings account and continue with the creation of the new year.
In the new year (new file), in the Transactions table, perform a multiple entry to transfer the result from the Retained Earnings account to the desired accounts.
Postpone the allocation of the financial result
If you do not want to allocate the financial result yet, you can still proceed with the creation of the new year by clicking the OK button. You can later allocate the result from the Actions > Update Opening Balances menu. The program will display the same window as the Create New Year command.
Save the new file
The program creates a new accounting file for the new year:
- Confirm the Basic data of the new year. The program takes the headers from the previous year and automatically enters the start and end date of the new year.
- Click on the File menu > Save As, indicating the folder where you want to store the new accounting file. It is recommended to use the company name and year as the filename.
See also Organize your accounting files.
If there are differences or other error messages, you may choose not to save the created file and repeat the new year file creation later.
Professional Plan message with Advanced features up to 70 rows
The message that appears in the active Professional Plan, Active Plan: Professional Plan. Advanced features are available up to 70 rows, simply confirms that the Advanced plan features are also active and can be used free of charge for up to 70 transactions, without affecting the use of the Professional plan, where entries can continue without any limit. This message disappears automatically once 70 rows are exceeded.
Update opening balances
After saving the file for the new year and making modifications in the previous year, click on the Actions > Update Opening Balances menu to carry forward and reallocate the profit.
This operation can be repeated multiple times and can be performed safely, as data integrity during the transition to the new year is guaranteed and no data is lost.
If you want to switch to another type of accounting in the new year (with multi-currency or VAT), proceed with the creation of the new file and then use the Tools > Convert to New File command.
If instead you want to create a copy of the file without carrying forward the balances, use the Tools > Create File Copy command.
Modify carried forward balances
Once the balances have been carried forward into the new year (new file), if you need to modify the opening balances, you can manually change the amounts in the following columns:
- Opening column in the Accounts table.
- Previous column ( Accounts table > Previous view) , for balances related to the previous year.
- In the Transactions table for Segments.
If you have made changes in the previous year's file, click on the Actions > Update Opening Balances menu to carry forward and update the opening balances again.
Check the Rules in the Recurring Transactions table
When the Create New Year command is executed, the program carries over into the new year's file all the transactions that have Rules.
Before proceeding to post the transactions for the new year, it is advisable to check and update all the Transactions with Rules in the Recurring Transactions table.
If the conditions are no longer valid, you may:
- Modify the account, counterpart, VAT code, CC3, or segments.
- Delete outdated transactions.
- Add new transactions with Rules.
If, in the Recurring Transactions table, in addition to the transactions with rules, you have also saved:
you must also check and update these.
Performing this check immediately helps prevent errors and later corrections both in the Transactions table and in the Recurring Transactions table.
Resuming texts in the new year / Smart Fill
When a new year is created, the descriptive texts from the previous year are also transferred. This feature simplifies and speeds up the entry of transactions in the new year.
If you do not want the descriptive texts to be carried over automatically, simply disable the Smart Fill function:
- from the menu File > File and accounting properties > Options.
Differences in the opening balances | Double-entry accounting
At the opening of the Accounting year, the amounts of the Total Assets should correspond to the Total Liabilities. Otherwise, the accounting balance will not square and it is necessary to verify the reasons and correct the error, so that there is no Difference in the opening balances message displayed in the information window .
There may be several causes that lead to a difference in the opening balances:
- When using the program for the first time, the liabilities were not entered with a minus sign in front of the amount.
- The result of the previous year was not automatically allocated when creating a new year.
- The balances for expenses and income have been carried over, when creating a new year, whilst they should not have been.
- When opening balances have been entered manually, the previous year's operating result has not been taken into account. In this case the difference corresponds to the carried forward profit or loss.
- When allocating the profit to multiple accounts is performed manually, thousands separators and decimals other than those provided in Banana Accounting were used for the amounts.
The solutions for each single error are explained in the error explanation page, at the https://www.banana.ch/doc/en/contamsg_en_tot_teid11des?portal=banana link.
In the example, the program reports a difference in opening balances of 800.-
After having checked and corrected the opening balances the Total Assets must correspond to the Total Liabilities.
It is also possible to check and square the balances in the Totals Table.
Contabilidade de partidas dobradas com multimoeda
A contabilidade multimoeda baseia-se no método das partidas dobradas, consentindo também a gestão de contas e movimentos com moedas estrangeiras.
Os tópicos são comuns à contabilidade de partidas dobradas. De maneira a encontrar informações mais detalhadas, aconselhamos consultar a página de Contabilidade de partidas dobradas.
Características
- Contabilidade de partidas dobradas com contas e movimentos com moeda estrangeira
- Utilizo de qualquer moeda, códigos de moedas standard ou definidos livremente (para usar qualquer moeda virtual)
- Moeda com algarismos decimais configuráveis de 0 a 28. Geralmente usam-se 2 algarismos decimais, mas pode-se configurar a contabilidade para usar 0 algarismos decimais, ou 3 algarismos decimais (Tunisia) ou mais se se usa para cryptomoedas. 9 algarismos decimais (Bitcoin) o 18 (Ethereum)
- Cálculo automatico de câmbio, em base à taxa inserida na Tabela Taxas de câmbio
- Cálculo automatico das diferenças de câmbio
- Balanços, Contas económicas e relatórios, também numa segunda moeda
Para passar de uma contabilidade normal a uma com as multimoedas, veja o comando Convertir para novo arquivo.
Informações
Plano de contas, propriedade de contas e tabela câmbios
É aconselhado escolher um plano de contabilidade, partindo dum exemplo já existente no Banana Contabilidade e modificá-lo segundo as próprias necessidades. É fundamental que no plano de contabilidade estejam configuradas as Contas em moeda estrangeira e as Contas utéis e despesas de câmbio.
- Configurar o plano de contas
- Grupos e subgrupos
- Propriedades de conta - secção moeda estrangeira
- Configurar a Tabela Taxas de câmbio
Lançamentos
As operações de contabilidade têm que ser usadas como os lançamentos da contabilidade de partidas dobradas
Impressões
Convertir a contabilidade dobrada numa multimoeda
Veja a página Convertir em nuovo arquivo para adicionar as funcionalidade multimoeda à contabilidade dobrada.
Como começar uma contabilidade multimoeda
Criar uma contabilidade partindo de um modelo
Siga os seguintes passos:
- Menu Arquivo, comando Novo
- Selecionar a Região, a categoria e o tipo de contabilidade
- Da lista de modelos que aparece, escolha aquele que melhor se adapta às suas exigências
- Clicar no botão Criar.
Na caixa Procurar, ao inserir uma palavra-chave, o programa visualiza os modelos que contêm a palavra-chave.
Também é possível iniciar com um arquivo vazio, selecionando a opção Criar arquivo vazio. No entanto, para facilitar o início e evitar erros de agrupamento, aconselhamos começar sempre com um modelo existente.
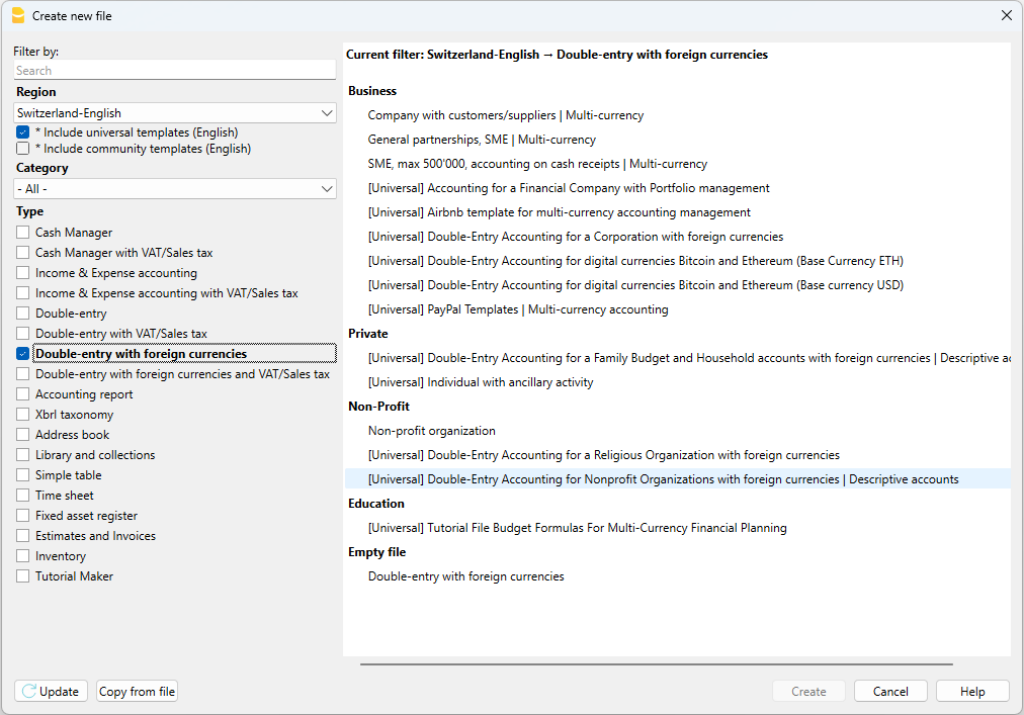
Mais informações sobre como criar un novo arquivo estão disponíveis na página Criar um novo arquivo.
Configurar as Propriedades do arquivo
No menu Arquivo, comando Propriedades do arquivo
Secção Contabilidade
- Indicar o nome da empresa que aparecerà no cabeçalho das impressões e de outros dados.
- Escolher da lista ou inserir as iniciais da moeda para a contabilidade.
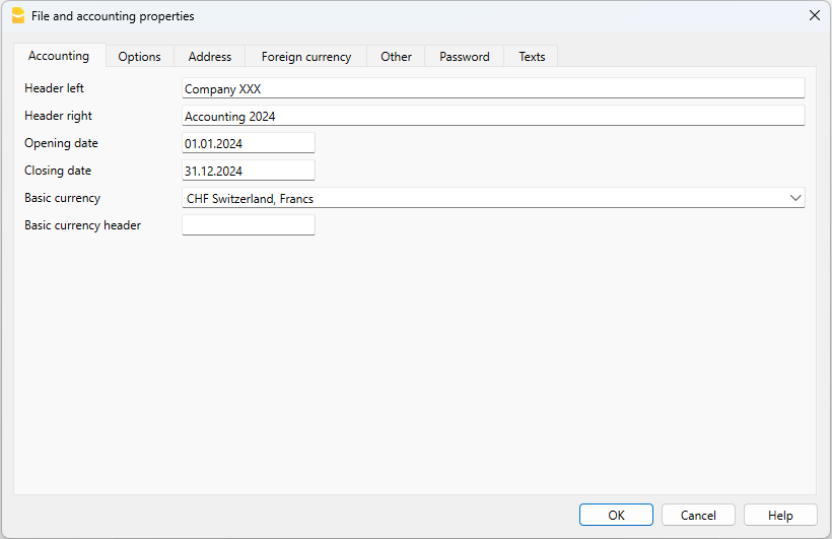
Salvar no disco
Com o comando Arquivo → Salvar como..., guarde os dados e atribua um nome ao ficheiro. Aperecerà o dialogo tipico do seu sistema operativo.
- É aconselhado usar o nome da empresa, seguido do ano "empresa-2020.ac2" para o distinguir de outros arquivos de contabilidade.
- Pode guardar quantos arquivos precisar, cada um com o seu próprio nome.
- Pode escolher o percurso e o suporte (guardar num disco, pen USB o cloud).
Se espera ter também documentos ligados à contabilidade do ano corrente, sugerimos criar uma pasta separada para cada ano de contabilidade para reunir todos os arquivos.
Uso do programa em geral
Banana Contabilidade foi inspirado no Excel. O modo de uso e os comandos são o mais semelhante possível aos do Microsoft Office.
Para informações sobre o uso, inviamo-lo a explicação na página Interface.
A contabilidade é mantida ao interno de tabelas e são usadas todas da mesma maneira.
A tabela Taxas de Câmbio
Na tabela Taxas de Câmbio configuram-se as iniciais da moeda, que serão usadas na tabela contas e lançamentos.
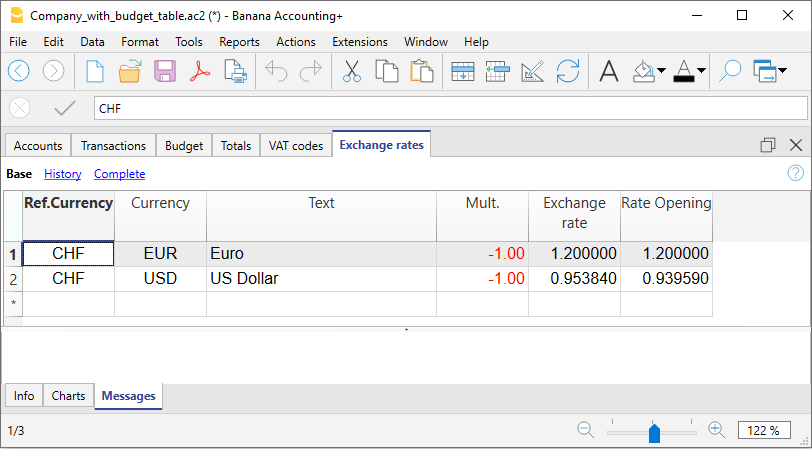
Personalizar o plano de contas
Na Tabela Contas moeda estrangeira, é possível personalizar o plano contábil segundo as próprias exigências:
- Adicionar e eliminar contas existentes (adicionar linha)
- Mudar os números de conta, a descrição (ex: inserir o nome do ccb do próprio Banco), inserir outros grupos, etc.
- Para criar subgrupos, consultar a seguinte página Grupos.
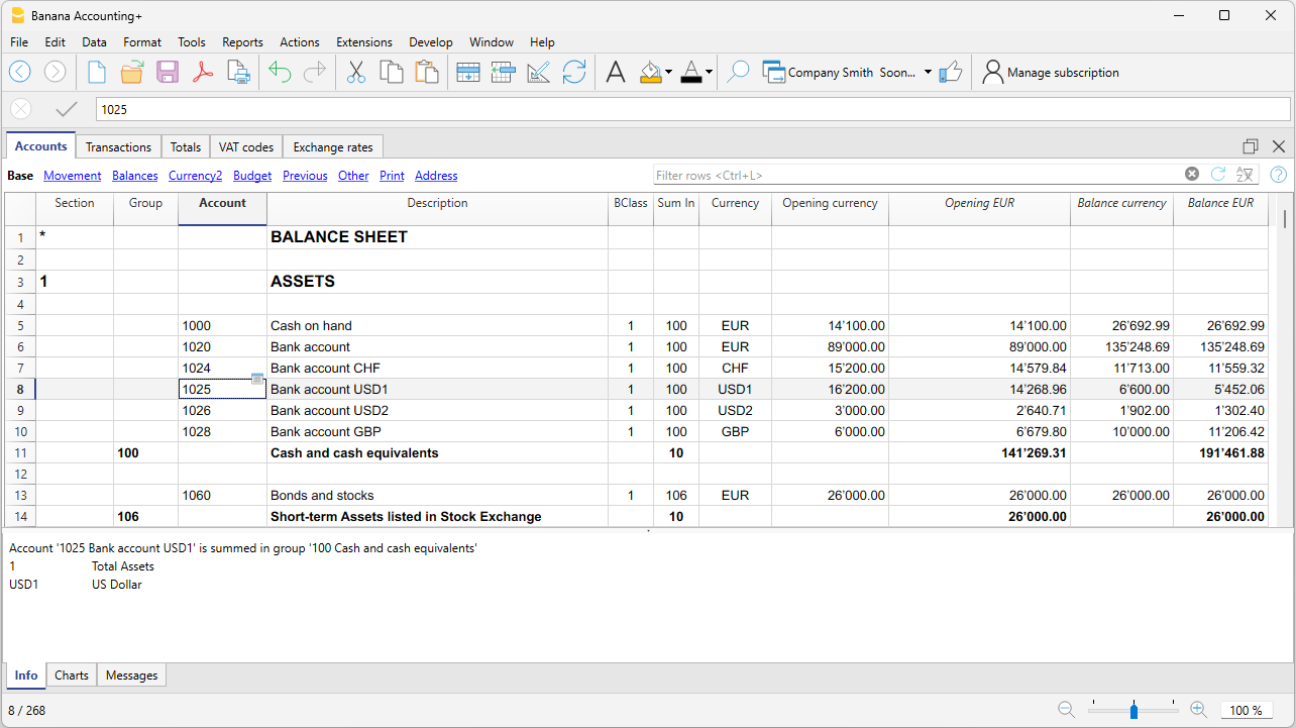
A tabela Lançamentos
Os lançamentos em multimoeda têm que ser inseridas na tabela Lançamentos e fazem parte do Livro Jornal.
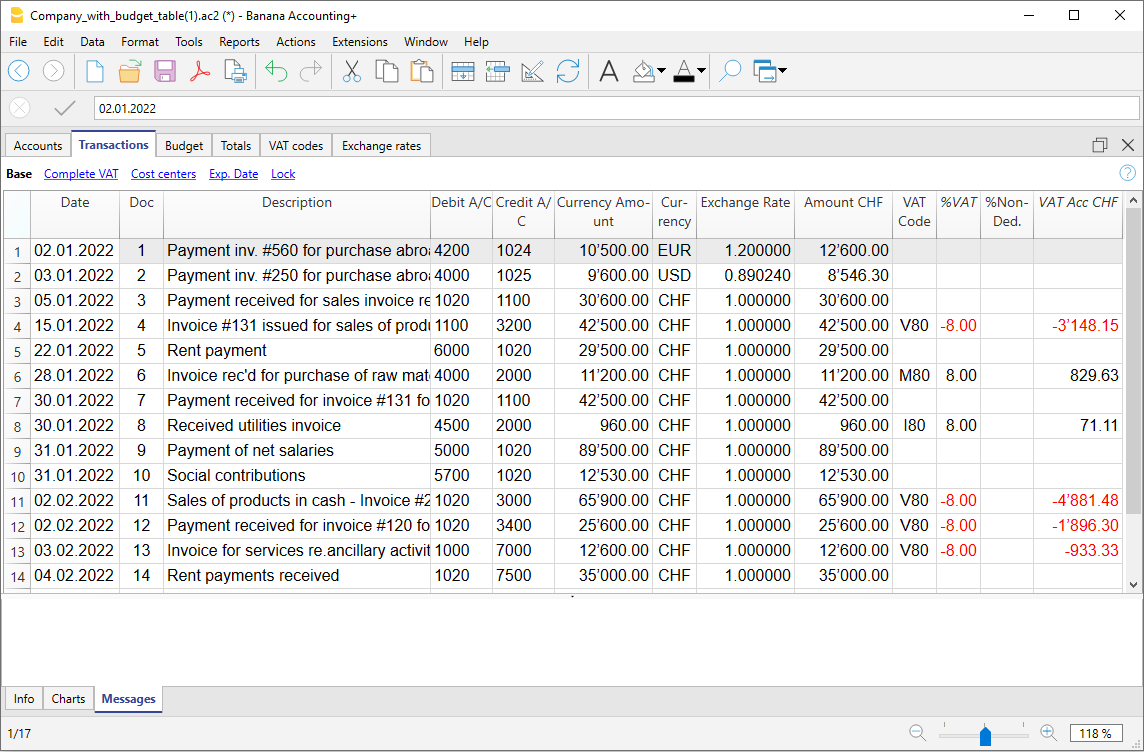
Acelerar a inserção dos Lançamentos
Para acelerar a inserção dos lançamentos utiliza-se:
- a função de Emissão de dados com preenchimento automático que consente recuperar automaticamente dados já inseridos previamente
- a função dos Lançamentos repetitivos (menu Conta2) que permite memorizar numa tabela os lançamentos repetitivos
- a importação de dados do extrato bancário ou postal.
Controlo faturas clientes e fornecedores
Banana permite ter sob controlo as faturas para pagar e aquelas por receber. Consulte:
As fichas Conta
A ficha conta relata automaticamente todos os movimentos registados numa mesma conta (ex: caixa, banco, clientes, etc.).
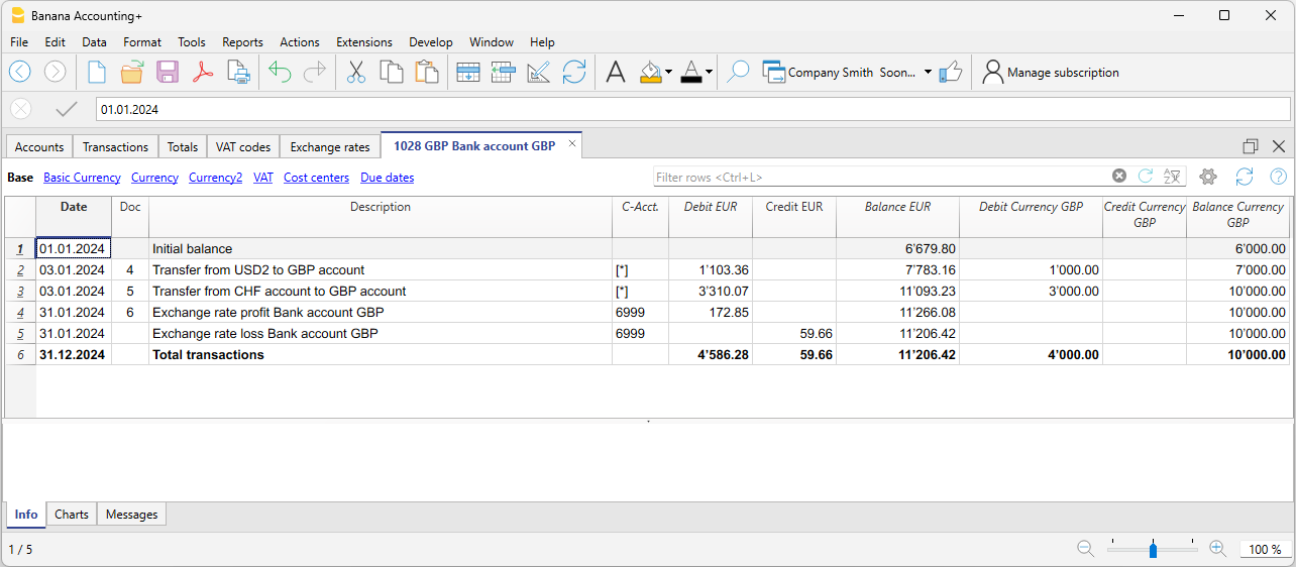
Para visualizar a razão de uma conta, basta posicionar o mouse no número de conta e clicar no símbolo azul que aparece.
Fichas conta por período
Para visualizar as razões de conta com os saldos referidos num determinado período, ocorre clicar no menu Conta1, comando Razão por conta e na secção Período ativar Período selecionado, inserindo a data de começo e de fim do período.
Para mais informações, consulte a página Periodo.
Imprimir as fichas de conta
Para imprimir uma ficha conta, basta visualizar a ficha a partir de qualquer tabela (Contas ou Lançamentos) e acionar a impressão no menu Arquivo.
Para imprimir várias ou todas as fichas conta, clicar no menu Conta1, comando Razão por contas e selecionar as fichas conta para imprimir. Através do filtro presente na janela, pode-se fazer uma seleção automatica de todas as contas, os centros de custo, os segmentos, os grupos, etc.
Mais informações estão disponíveis na página Razões por conta.
O Balanço e o Demonstrativo de Lucros e Perdas
O Balanço visualiza os saldos de todas as contas patrimoniais, Ativas e Passivas. A diferença entra Ativos e Passivos determina o Capital próprio.
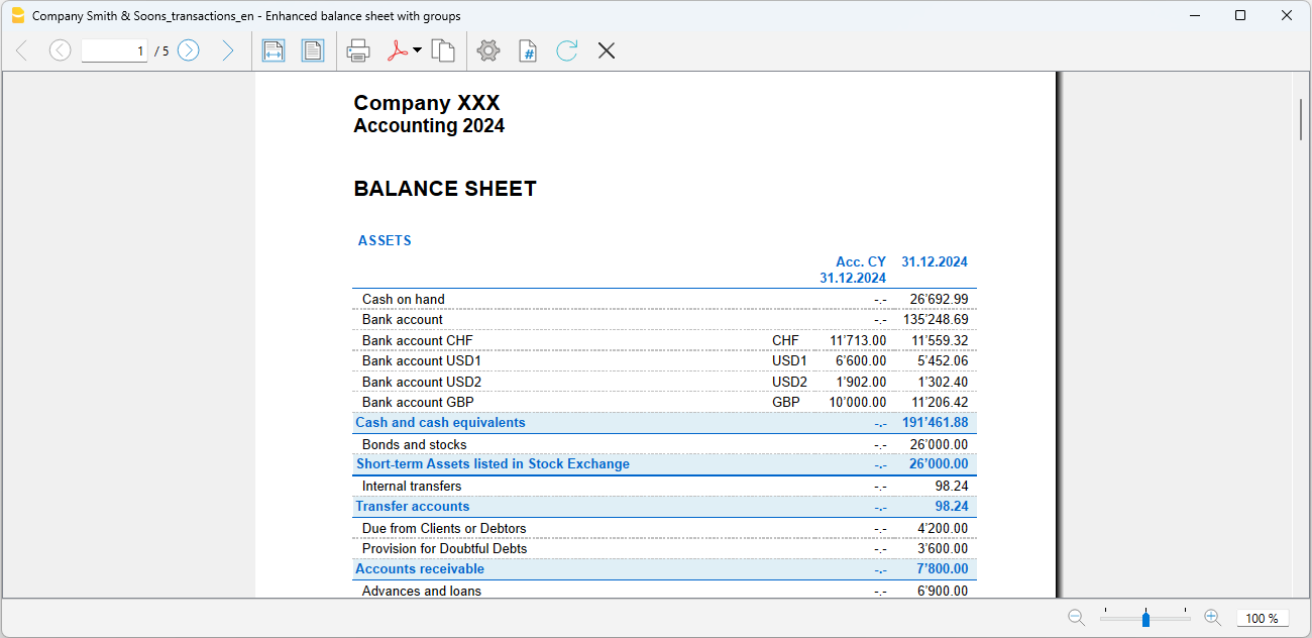
A visualização e a impressão do Balanço faz-se a partir do menu Conta1, comando Balanço Patrimonial analítico ou Balanço Patrimonial por grupos.
- O comando Balanço Patrimonial Analítico cataloga simplesmente todas as contas sem distinção de Grupos e Subgrupos
- O comando Balanço Patrimonial por grupos cataloga as contas con a separação dos grupos e subgrupos; além disso, apresenta tantas funcionalidades para personalizar as apresentações que não são previstas no Balanço Patrimonial Analítico.
Armazenamento de dados em PDF
Ao fim do ano, quando toda a contabilidade estiver completada, corrigida e revista, pode-se armazenar todos os dados da contabilidade com o comando Criar PDF, no menu Arquivo.
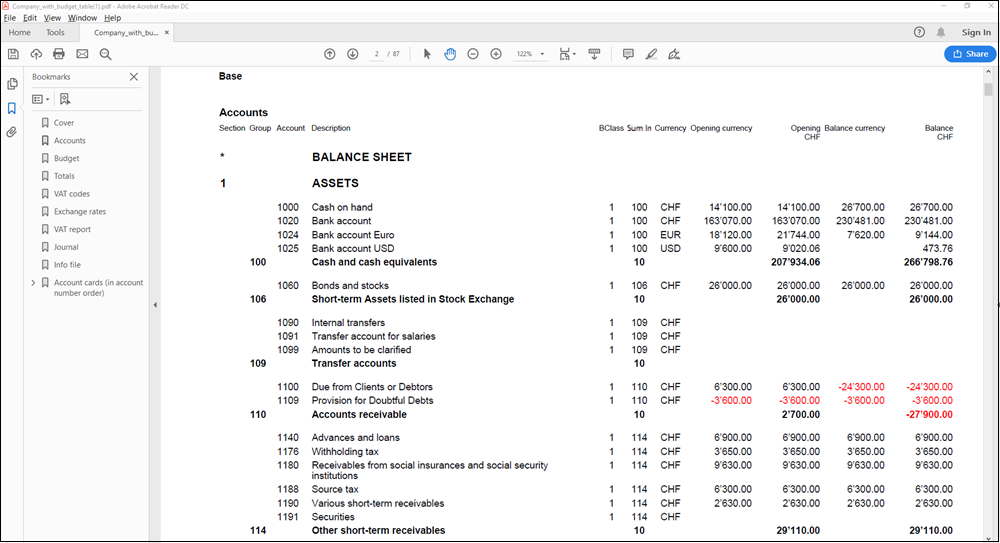
O Orçamento
Antes de começar um ano de contabilidade, pode-se criar um orçamento com possíveis despesas e receitas, de modo a ter sob controlo a situação económica e financiária da própria empresa.
O orçamento pode ser configurado de duas maneiras diferentes:
- Na tabela Contas, coluna Orçamento. Em cada conta é indicado o montante do orçamento anual.
Neste caso, quando se elabora o Orçamento no menu Conta1, comando Balanço Patrimonial por grupos, a coluna do orçamento descreve os montantes que se referem ao ano inteiro. - Na tabela Orçamento, que se ativa no menu Ferramentas, comando Adicionar novas funcionalidades.
Nesta tabela registram-se todos os orçamentos de despesas e de receitas com lançamentos. Caso se ative esta tabela, a coluna Orçamento da tabela Contas é desativada automaticamente.
Neste caso pode-se configurar um orçamento detalhado que tenha em conta possíveis variações durante o ano e nos diversos períodos do ano.
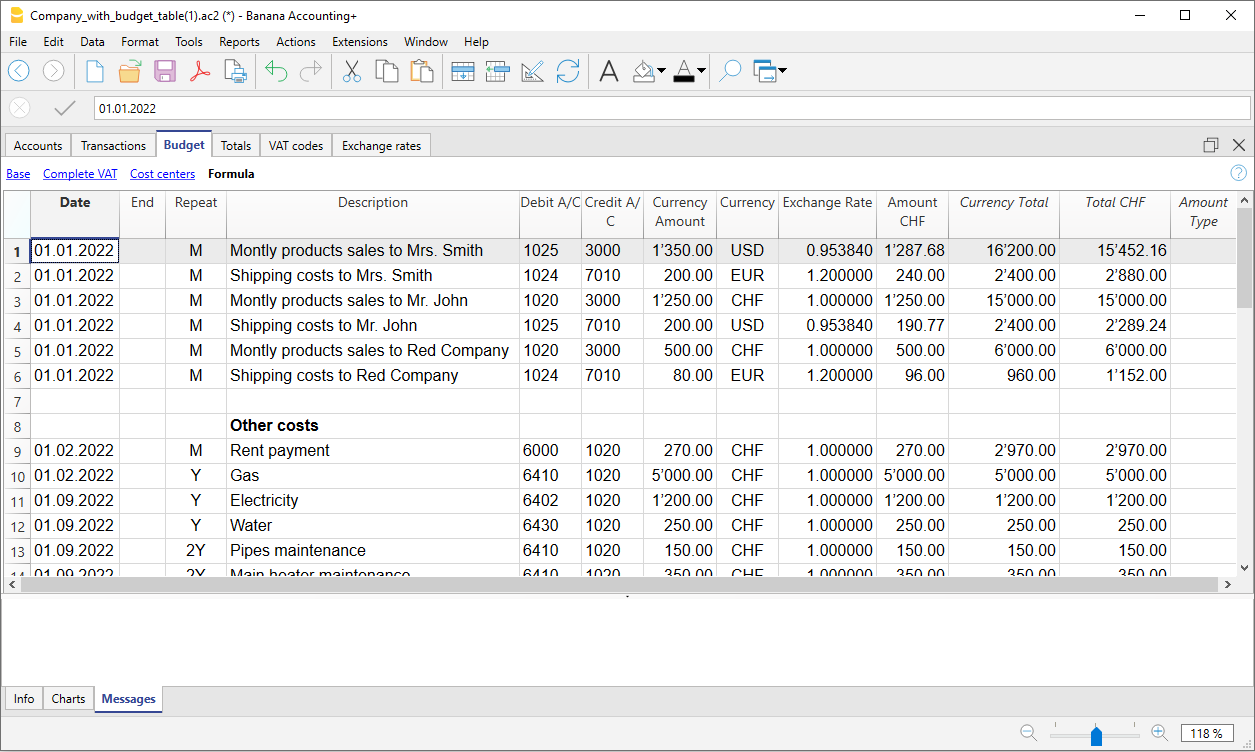
Mais informações disponíveis na página Orçamento.
Characteristics of the Multi-currency accounting
Thanks to Banana Multi-currency accounting, you can easily work on an international level, in the language you want and with the foreign currency accounts you need. Again, the structure is that of spreadsheets, similar to Excel and with all the resources of the other Banana applications. The functions are based on the Double-entry accounting methodology. Should you need to manage VAT you can activate the VAT features at any time.
It will prove particularly interesting for those who have foreign operations, for associations that generally operate all over the world or run projects and simply for those who require accounts in foreign currency in their bookkeeping.
The multiple functions of Multi-currency
- Manage as many accounts as you wish in foreign currency
You don't need to have separate managements to handle accounts in other currencies. In the same Chart of Accounts used for your accounting, enter the accounts in foreign currency, set the exchange rates in the exchange rate table for exchange differences and you are ready to transact. - You can set any currency, standard or freely defined curdrency codes (to use any digital currency).
- Decimals for currencies can be set from 0 to 28. Generally 2 decimals are used, but the accounting can be set to use 0 decimals, or 3 decimals (Tunisia) or more if it is used for crypto currencies. 9 decimal (Bitcoin) or 18 (Ethereum)
- Same methodology as double-entry accounting
You will work with the same double-entry accounting method, therefore register the debit and credit and you will have all the reports and details of a professional accounting. - Automatic exchange rate calculation
The moment you create a foreign currency account, you will not need to calculate the equivalent in foreign currency manually, the program automatically calculates the exchange rate. You can enter the exchange rate either by updating the exchange rate in the Exchange rate table or directly in the Transactions table in the Exchange rate column. - Transactions in different currencies
You are able to enter all necessary cases of transactions in foreign currency, including transfers and those that do not include the basic currency. This allows for complex operations to be carried out in your accounting. - Complete reports with balance sheet, income statement
Accounts of both the balances in foreign currency and of the equivalent value in the basic currency (national currency) will be displayed in the Balance Sheet and Income Statement.
If you have foreign business relationships and you need to present the Balance Sheet and Income statement in a second currency, this is possible without creating separate reports in Excel, just go to the Accounts table, select the Currency2 tab and you will have the display of all the accounts in the second currency and as well as in the basic currency.- Watch the video tutorial that shows how to create and print the Enhanced Balance Sheet with groups.
- Account cards with amounts in foreign currency and basic currency
The account cards can be viewed with the columns of the amounts in basic and foreign currency. This allows you to evaluate the balances in both currencies. - Free exchange rates in the Exchange table
You can set the exchange rates for various needs: variable exchange rates, fixed exchange rates, different exchange rates for the same currency, for example to manage investments and without affecting accounts with the same currency. - Automatic exchange rate differences
When you need to calculate the exchange rate differences, just update the exchange rate in the Exchange rate table and use the relative command; the differences will be entered in the Transactions table automatically. - Budgets are also possible with the Multi-currency
In the Multi-currency accounting file you can also budget the liquidity of the accounts in a foreign currency, as well as all the budgets related to the Balance Sheet and Income aspects. You can print Budgets and forecast reports, or combine them, with the columns of the Budget, Balance Sheet and relative variations. - Automatic check for unrecorded exchange differences
When using the Check Accounting command, you will no longer have unrecorded exchange differences, because if they exist, they will be reported. This function is particularly important to avoid having exchange rate differences in the opening balances when you create the new year. - Financial statements, economic accounts and reports, also in a second currency.
Multi-currency accounting, based on the double entry has many other characteristics identical to the double-entry accounting, which you can refer to on the following page:
Theory of multi-currency accounting
In this section, the basic theoretical notions about currency exchange are being explained.
Exchange rates and accounting issues
Every nation has its own currency and to obtain another currency it is necessary to buy it using the appropriate exchange rate. The price of a currency, as compared to another one is called the exchange rate. To exchange money means to convert the amounts of one currency into another. The exchange (exchange rate) varies constantly and indicates the rate of conversion.
For example, on January 1st
- 1 Euro (EUR) was equal to 1,22637 US Dollar (USD)
- 1 US Dollar was equal to 0,81529 Euro
- 1 EUR was equal to 1,08222 Swiss Franc (CHF)
- 1 EUR was equal to 126,52 Japanese Yen (JPY)
Basic Currency
Amounts referring to different currencies cannot be totaled directly. It is necessary to have a basic currency to refer to and to be used for the totals.
The central point of accounting is that the totals of the “Debit” balances must correspond to the totals of the “Credit” balances. To verify that the accounting is balanced, there must be a single currency with which to do the totals.
If there are different currencies, the basic currency must be indicated before anything else. Once the basic currency has been selected and some transactions have been executed, the basic currency can no longer be altered. To change the basic currency, the accounting must be closed and another one created with a different basic currency.
The basic currency is also used to establish the Balance Sheet and to calculate the profit or loss of the period.
Each amount has its equivalent in basic currency
To be able to add the totals and verify that the operations balance, it is necessary to have the equivalent in basic currency for every transaction. This way you can check that the total of the Debit entries is the same as the total of the Credit ones.
If the basic currency is EUR and there are transactions in USD, there needs to be an exchange value in Euros for every transaction in US Dollars. All the EUR amounts will be totaled to verify the accounting balances.
Account currency
Each account has its own currency symbol which indicates in which currency the account will be managed.
You must therefore indicate what the currency of the account will be. Each account will then have its own balance expressed in its own currency.
Only transactions in that currency will be permitted on this account. If the account is in EUR, then there can only be EUR entries on this account; if the account is in USD, then there can only be entries in USD currency on this account.
When you have to manage entries in YEN, then you have to have an account whose symbol is the YEN.
Account Balance in basic currency
For each account, alongside the balance in the account’s own currency, the balance in basic currency will also be kept, in order to calculate the balance sheet in basic currency.
The account card for the USD bank account has to correspond exactly to the bank statement as far as the USD amounts are concerned.
The value in basic currency will always be specified for each accounting entry. If the account is in USD, in the entries there will also be its value in EUR, beyond the amounts in USD. The EUR balance will be determined by the sum of all the entries expressed in EUR. The actual balance in basic currency will depend on the exchange rate factors used to calculate the exchange value of each single entry to EUR.
If on a given day you take the actual balance in USD and convert it to EUR at the prevailing daily exchange rate, you will get an exchange value that differs from the balance of the account in basic currency. This difference is due to the fact that the exchange rate used for entries on a daily basis is different from the actual daily exchange rate.
Thus there is a difference between the actual value at the daily exchange rate and the accounting balance in basic currency. This accounting difference is called the exchange rate difference.
The difference between the balance in basic currency and the calculated value has to be registered, when the accounting is closed, as an exchange rate profit or loss.
Balances in another currency (currency2)
All the accounting reports will be calculated in basic currency. If you take the basic currency values and change them into another currency, you will get the balance in another currency. The program has a Currency2 column where all the values are automatically entered and presented in the currency specified as Currency2. The logic for the conversion of the amounts is the following:
- If Currency2 is the same as the account or operation currency, then the original value will be used.
- If the account is in USD and Currency2 is USD, the USD amount will be used.
- In all other cases the basic currency amount will be used and changed into Currency2.
- The daily exchange rate is used. Even for past entries, the exchange value in Currency2 will be expressed on the basis of the most recent exchange rate, and not on the historical one used on the day of the entry.
You need to pay attention to the fact that a balance converted to another currency will show small differences in the totals. Often the converted value of a total is not equal to the sum of split exchange values, as can be seen from the following example:
|
Basic currency EUR |
Currency 2 USD |
|
|
Cash |
1.08 |
1.42 |
|
Bank |
1.08 |
1.42 |
|
Total Assets |
2.16 |
2.84 |
|
Personal capital |
2.16 |
2.85 |
|
Total Liabilities |
2.16 |
2.85 |
In the basic currency, total assets are equal to total liabilities. It is permitted to present a Balance Sheet that contains differences only if they are understandable and if it is indicated that they were due to calculations from another currency.
Accounts table, Currency 2 view

Converting currencies
Open a multi-currency model of Banana Accounting Plus
Learn more about the multi-currency feature of Banana Accounting Plus
Below, we explain the theory of how exchange rates work.
Variability of exchange rates
The purchase/sale of currencies occurs in a free market. The price (exchange rate) is based on the law of supply and demand. The differences in the exchange value can be more or less important according to the fluctuations of the exchange rate.
The exchange rates in the following examples, are not the actual daily ones, but are fictitious to explain the problematic.
| Date | Exchange rate EUR/USD | Equivalent in EUR of USD 1000.00 | Equivalent value difference compared to 01-01 |
| 01-01 | 1.32030 | 1'320.03 | |
| 31-03 | 1.33350 | 1'333.50 | 13.47 |
| 30-06 | 1.34750 | 1'347.50 | 27.47 |
| 30-09 | 1.42720 | 1'427.20 | 107.17 |
The exchange rate
The exchange rate refers to the basic currency. There are always two different exchange values between two currencies, according to the currency that is used as the basic currency.
For the USD and Euro currency, there are therefore two different exchange rates:
- If the basic currency of the exchange is EUR then the exchange rate is 1.32030
1 Euro (EUR) corresponds to 1.32030 US Dollars (USD) - If the basic currency of the exchange is USD then the exchange rate is 0.75800
1 US Dollar corresponds to 0.75800 Euros
In the current document, the Euro will be regularly used as the basic currency, to which other currencies will be compared.
Inverse exchange rate
Having the exchange of EUR/USD at 1.32030, it is possible to find the exchange rate of USD/EUR by dividing 1 by the exchange rate.
| Exchange rate | Inverse exchange rate 1/exchange rate | Inverse exchange rate rounded to 6 digits |
| EUR/USD 1.32030 | 0.75800 | 0.758000 |
The exchange values calculated with an inverse exchange can turn out to be different from the original one due to rounding.
| Exchange rate | Inverse exchange rate | Exchange value 10000 x original exchange rate | Exchange value 10000 x inverse exchange rate | Difference |
| EUR/USD 1.32030 | 0.75800 | 13'203.00 | 13'192.61 | 10.39 |
Don't use inverse exchanges rates in order to avoid differences.
For the transition to the Euro, for example, the use of inverse exchange rates was prohibited.
Multiplier
There are currencies that have very large exchange rate values.
Always on January 1st
- 1 US Dollar = 670,800 Turkish Lira
- 1 Turkish Lira (TRL) = 0.00000149 US Dollar (USD)
Instead of using that many zeros, it can be said that
- 1000 Turkish Lira (TRL) = 0.00149 US Dollar (USD)
In this case, the multiplier is 1000 instead of 1.
Preciseness
As a rule, an exchange rate is specified with a preciseness of at least 6 figures after the decimal.
There are, however, cases where it is necessary be more precise.
- 1 Turkish Lira (TRL) = 0.00000149 US Dollar (USD)
When the preciseness is changed and the exchange is rounded in a different way, the amounts also change. The preciseness with which the exchange is specified is very important.
Minimum denomination
Especially for paper money, minimum denominations are used. As a rule the lowest denomination for Swiss francs is five centimes (0.05). When an exchange occurs, for example EUR/CHF:
1 EUR = 1.60970 CHF
| EUR | Exchange rate | Actual exchange value in CHF | Rounded to lowest CHF denomination | Difference | Effective exchange rate |
| 10.00 | 1.60970 | 16.09 | 16.10 | 0.01 | 1.61 |
Calculation of exchange rates and values
When the Euro is the basic currency
The exchange factor for EUR/USD is 1.32030
1 Euro (EUR) is equal to 1.32030 US Dollars (USD).
Calculation of the exchange value:
Multiply the basic currency amount by the exchange factor:
EUR 100 x 1.32030 = USD 132.03
Calculate the basic currency amount:
Divide the destination currency by the exchange rate:
USD 132.03 / 1.32030 = EUR 100
Calculate the exchange factor:
Divide the basic currency amount by the destination currency amount:
Exchange rates for purchases and sales
Banks carry out the purchase and sale of currencies and include a transaction margin. They apply different exchange rates depending on whether a determined currency is being bought or sold.
Sale: the bank receives domestic money and provides (sells) foreign money.
Purchase: the bank receives (purchases) foreign money and provides domestic money.
Currency exchange and banknotes exchange (premium)
Currency exchange: exchange for scriptural transactions (from one account to the other).
Banknote exchange: exchange for banknotes.
Premium: commission for converting a scriptural amount to cash.
To exchange currency, the banks maintain a lesser margin (the difference between purchase/sale) compared to exchanging banknotes. When a scriptural value is to be transformed (credit on the account) into cash currency, the bank applies a commission, called a premium.
Differences when changing back to basic currency
When an amount is exchanged into another currency, it is expected that the reverse exchange will result as identical to the original amount .
| Basic amount | Exchange rate | Exchange value | Return |
| 100.00 | 1.32030 | 132.03 | 100.00 |
However, you do not always come up with the same amount when converting currency back. Because of rounding errors, there may be cases where the same return value cannot be obtained.
| Basic amount EUR | Exchange rate | Exchange value in USD | Return in EUR | Difference in EUR |
| 328.67 | 1.32030 | 433.94 | 328.66 | |
| 328.68 | 1.32030 | 433.95 | 328.67 | 0.01 |
| 328.69 | 1.32030 | 433.96 | 328.68 | 0.01 |
Differences of totals through splitting
The total exchange value of the components of an amount does not always result in the same exchange value as the overall amount.
In this example, the amount of 2.16 EUR produces an exchange value in USD of 2.85. By splitting the amount and adding the two exchange values, 2.84 will result.
| Amount in EUR | Exchange rate | Exchange value in USD |
| 2.16 | 1.32030 | 2.85
|
| 1.08 | 1.32030 | 1.42 |
| 1.08 | 1.32030 | 1.42 |
| Total 2.16 | 2.84 | |
| Difference | 0.01 |
These mathematic differences cannot be eliminated if they are not recorded properly.
Revaluations and exchange rate differences
Exchange rates vary all the time and therefore the exchange value to basic currency also varies. Between one period and another, there will inevitably be exchange rate differences.
Exchange rate differences are not accounting errors but simple adjustments of the values made necessary in order to keep the accounting figures in line with fluctuations.
As you open the accounting, the figures in the balance column are equal to those present in the opening column. When there are entries, these will update the figures in the balance column.
The calculated balance column contains the exchange value of the basic currency for the account balance, at the daily exchange rate (of the exchange rate table). The difference between the balance in basic currency and the calculated balance is the exchange rate difference.
|
|
Currency at opening |
Exchange value at opening in EUR |
Basic currency balance in EUR |
Calculate balance at 30.03.200xx in EUR |
Exchange rate difference |
||
|
Exchange rate |
|
|
1.32030 |
1.32030 |
1.30150 |
|
|
|
|
|
|
|
|
|
||
|
Cash |
EUR |
93.80 |
93.80 |
93.80 |
93.80 |
|
|
|
Bank |
USD |
100.00 |
75.74 |
75.74 |
76.83 |
1.09 |
|
|
Real estate |
EUR |
1'000.00 |
1'000.00 |
1'000.00 |
1'000.00 |
|
|
|
Total Assets |
|
|
1'169.54 |
1'169.54 |
1'170.63 |
|
|
|
|
|
|
|
|
|
|
|
|
|
|
|
|
|
|
|
|
|
Loan |
USD |
-500.00 |
-378.70 |
-378.70 |
-384.17 |
-5.47 |
|
|
Personal capital |
EUR |
-790.84 |
790.84 |
-790.84 |
-790.84 |
|
|
|
Total Liabilities |
|
|
-1'169.54 |
-1'169.54 |
-1'175.01 |
|
|
|
|
|
|
|
|
|
|
|
|
|
|
|
|
|
|
|
|
|
Loss |
|
|
|
|
-4.38 |
|
|
On March 30th the EUR/USD exchange rate is different from the one at the beginning of the year. In the above example, there were no accounting entries during the three-month period. The situation, from an accounting point of view, has not changed since the beginning of the year. Despite this the total of the updated balance, using the rate at the end of March, is different when compared to the beginning of the year. The credit bank balance and the loan in USD have a different value in EUR. There are therefore consequences for the accounting even though there have been no entries.
In the above example, you will notice that the Euro is now worth less against the dollar compared to the beginning of the year. The dollar is therefore worth more against the Euro.
The exchange value of the balance on the account in USD is greater than it was at the beginning of the year. You have a greater value of the asset and therefore a profit on the exchange rate.
On the liability side there is a USD 500.00 loan. Now the exchange value in EUR is greater compared to the value input at the beginning of the year. The value of the loan has increased and brings about a loss due to the exchange rate difference.
In the following example we shall use the hypothesis that there has been the opposite development. We imagine that the Euro has increased in value and is therefore worth more against the USD. The exchange value in EUR of an amount in dollars is less than the one at the beginning of the year.
|
|
|
Currency at opening |
Exchange value at opening EUR
|
Calculate balance at 30.03.20XX Eur (Hypothetical) |
Exchange rate difference |
|
Exchange rate |
|
|
1.32030 |
1.36150 |
|
|
|
|
|
|
|
|
|
Cash |
EUR |
93.80 |
93.80 |
93.80 |
|
|
Bank |
USD |
100.00 |
75.74 |
73.44 |
-2.30 |
|
Real estate |
EUR |
1'000.00 |
1'000.00 |
1'000.00 |
|
|
Total Assets |
|
|
1’169.54 |
1'167.24 |
|
|
|
|
|
|
|
|
|
|
|
|
|
|
|
|
Loan |
USD |
-500.00 |
-378.70 |
-367.24 |
11.46 |
|
Personal capital |
EUR |
-790.84 |
-790.84 |
-790.84 |
|
|
Total Liabilities |
|
|
-1’169.54 |
-1'158.08 |
|
|
|
|
|
|
|
|
|
|
|
|
|
|
|
|
Profit |
|
|
|
9.16 |
9.16 |
As a consequence of an increase in the Euro/dollar exchange rate, you have a USD bank deposit with an exchange value in EUR which is less than at the beginning of the year. The total worth has diminished and there is therefore a loss.
The USD loan has a lower exchange value in EUR. A lesser liability is an advantage for the company and there is thus an exchange rate profit.
Exchange rate profit
You have an exchange rate profit when:
- The exchange value of your assets increases (increase of the investments)
- The exchange value of the liabilities decreases (decrease of the loans).
Exchange rate losses
You have an exchange rate loss when:
- The exchange value of your assets decreases (decrease of the investments)
- The exchange value of the liabilities increases (increase of the loans).
Accounting features for exchange rate differences
Exchange rates can evolve in different ways. Often they rise, only to fall again. The principle rule for accounting is that the figures provided on the Balance Sheet must be true ones. When you present your Balance Sheet, the exchange values of foreign currency accounts must be made at the exchange rate on the day of presentation.
The exchange rate difference is calculated as if you had to definitively convert the amount to basic currency. In reality there is no definitive conversion so you are only dealing with a correction to the accounting.
Closing exchange rate
At the end of each year it is necessary to prepare the complete Balance Sheet. The exchange rates thus have to be updated with the closing exchange rates. It is also necessary to enter the exchange rate differences once and for all; if these are not entered, then there will be differences in the opening balances.
Entering exchange rate differences
|
|
|
Currency balance |
Account balance EUR |
Calculate balance at 30.03.xx EUR (hypothetical) |
Exchange rate difference |
|
Exchange |
|
|
1.32030 |
1.36150 |
|
|
|
|
|
|
|
|
|
Bank |
USD |
100.00 |
75.74 |
73.44 |
-2.30 |
|
|
|
|
|
|
|
|
Exchange rate difference |
EUR |
|
-2.30 |
|
|
|
|
|
|
|
|
|
|
Bank |
USD |
100.00 |
73.44 |
73.44 |
0.00 |
As can be seen from the above example, the bank balance is USD 100.00. For the accounting it has been valued at 75.74 EUR. Today’s actual value, though, is only EUR 73.44. There is a difference of EUR 2.30 EUR in basic currency. The entry must therefore decrease the EUR amount. You proceed with a transaction that debits the bank account and credits the exchange rate loss account by EUR 2.30.
As you can see, the actual bank account balance of USD 100.00 has not been altered. The entry only alters the basic currency balance.
When entering the exchange rate difference, you need to ascertain that the exchange value in basic currency corresponds to the actual exchange value, calculated at either the daily exchange rate or the closing one.
The figures in the account currency must not be altered. You must therefore proceed to make an entry that only alters the basic currency balance on the specific account.
You will have the exchange rate profit or loss account on the contra account.
Transactions at purchase exchange rates
Transactions valued at the purchase exchange rate
When the positions, valued with exchange rates at the time of purchase (historical) are increased or decreased, you will have to calculate the exchange rate of the exchange rate table, taking into account the development of the amounts of increase.
|
|
USD amount |
Exchange |
EUR exchange value |
Total USD |
Total EUR |
Historical Exchange |
|
Acquisition of shares |
100'000.00 |
0.9416 |
106'202.00 |
100'000.00 |
106'202.00 |
0.9416 |
|
Increase of shares |
50'000.00 |
0.8792 |
56'870.00 |
150'000.00 |
163'072.00 |
0.919839 |
Investments and special exchange rates
Investments valued at the exchange rate of the time purchase
Certain investments (shares, real estate abroad) are valued using the exchange rate of the time of purchase (historical exchange) and not the current one. The exchange rate profit and loss is not accounted for until it is actually realized. You must therefore make certain these accounts do not get valued using the current exchange rate.
In order to input a fixed historical exchange rate, you need to create an additional currency on the Accounts table (e.g. USD1) with a fixed exchange rate.
It is essential that in the Fixed column of the Exchange table, when viewed in Complete, for each currency with a fixed exchange rate, Yes must be inserted; otherwise, the currency and its related account are still revalued.
This currency will then only be used for this specific account ( ex: USD1) with a fixed rate.
If you have to make a transfer from the USD account to the USD1 account, you proceed exactly as if you were working with two different currencies. For this reason you will have to use a two-row entry.
Opening with special exchange rates
By inputting the opening balances in the Opening column, foreign currency amounts will be converted to basic currency at the opening exchange rate.
If this system does not prove flexible enough (i.e. you need various special rates or there are rounding differences) the opening can be done manually by making normal entries, indicating the amounts and the exchange rates you want for each account. In this case, the "Opening” column of the Accounts table will be left blank.
File properties | Multi-currency accounting
See also the File Properties (Basic Data) page for information about the other sections of the dialog.

Account for exchange rate profit
From the accounts list, select the account for the exchange rate profit present in the Chart of Accounts.
You can only choose from class 3 and 4 accounts that are in basic currency.
In the Accounts table, it is also possible to specify the exchange rate difference account for each individual account.
Account for exchange rate loss
From the accounts list, select the one for the exchange rate loss present in the Chart of Accounts.
Currency2
In this section, all foreign currencies entered in the Exchange Rates table are displayed. If no foreign currencies have been entered in the Exchange Rates table, the section remains empty.
Currency2 is used to display account balances in the Accounts table in a currency other than the base currency.
To add a new currency in the Currency2 section, proceed as follows:
- In the Exchange Rates table, insert a new row.
- In the Ref. Currency column, enter the base currency of the accounting file.
- In the Currency column, enter the desired foreign currency.
- In the menu File > File and Accounting Properties, under the Currency section, the new currency will be displayed and can also be defined as Currency2.
Decimal points Currency2
This is the number of decimal points to be used when rounding the amounts in Currency2.
Change the basic currency in the multi-currency accounting
In multi-currency accounting all amounts are shown both in the account currency and in the basic currency. If you change the basic currency all exchange rates and amounts in basic currency must be re-entered manually.
It is recommended to change the base currency at the beginning of the year, when there are no operations yet. Anyway, you can still do it during the year, for example, if you want to change the basic currency of an existing accounting file (for example if your accounting file is in EUR and you want it in USD), proceed as follows:
- Save the file under a different name
- In the File properties
- Indicate the new basic currency
- Delete the reference to the previous year file ('Options' section)
- In the Exchange rates table enter the exchange rates referred to the basic currency:
- If there are many transactions to be converted, you can enter median exchange rates for each month in the exchange rate table, indicating the beginning of the month's date).The program will use the historic exchange rate in the transactions.
- In the Chart of accounts:
- Replace the old currency with the new one
You can use the Find and Replace function - If there are opening balances, you need to re-enter them in the new currency
- Also, the Previous year balance, budget and other columns must be converted
- Replace the old currency with the new one
- In the Transactions table:
If there are transactions, you need to correct them row by row:- For those transactions that are already in the correct currency, with the F6 key the program recalculates the amount in the new basic currency.
- For other transactions you need to enter the right amount in the basic currency and then press F6.
- In the Budget table:
Proceed just as in the Transactions table - Use the Check accounting command of the Actions menu, fix possible errors, and keep using the Check accounting command until there are no more error messages.
Currency 2 balances conversion
Currency 2 is displayed in the Currency2 view of the Accounts table. It allows you to get an estimate of all account balances, including those in the base currency, in a different foreign currency defined as Currency 2.
To convert account balances into Currency 2, the currency must be defined in the Exchange Rates table, even if it is not listed in the Chart of Accounts. Currency 2 represents a temporary value: each time the exchange rate is updated, the converted balances are automatically recalculated.
The conversion uses the exchange rate indicated in the Exchange Rates table, in the Exchange Rate column.
If the Currency 2 exchange rate is changed, the amounts shown in the Currency2 view of the Accounts table are updated accordingly.
Since this is a current conversion and not a historical one, there may be differences between the balances in the original currency and the converted ones. For more details, see the Exchange rate issues page.
If you want to convert account amounts into a Currency 2 that is not yet present in the Exchange Rates table, you must first add it to the Exchange Rates table and then select it as Currency 2 in File > Basic data file properties, Foreign currency section.
Conversion logic
The conversion of amounts into Currency 2 takes into account the account currency, with the following logic:
- If Currency 2 matches the account currency, the amount in the account currency is used directly.
- If Currency 2 matches the base currency, the amount in the base currency is used.
- In all other cases, the amount is converted from the base currency to Currency 2 using the current exchange rate from the Exchange Rates table (Exchange Rate column).
Historical exchange rates are not used.
Exchange rates table
In the Exchange Rates table, the basic currency (accounting currency) and foreign currencies with all their related parameters are entered.
Before setting up the Exchange Rates table, it is necessary to set up in the Accounts table, foreign currency accounts with their respective codes; you also need to define the basic currency in the File menu > File and accounting properties.

Exchange rates with and without date
There are two types of exchange rates:
- Exchange rates without date
For each currency used there must be an exchange rate line without date.
The exchange rate rows without a date are used as reference rates to convert foreign currencies into the basic currency according to the current exchange rate. They are used:- When there is no historical exchange rate (exchange rates with dates).
- At year end, to define official closing rates and calculate exchange rate differences (end of the accounting period).
During the closing process, it is mandatory to use exchange rate rows without a date in order to calculate exchange rate differences.
- Current exchange rate and closing exchange rate
- It is the exchange rate entered in the Exchange rate column; it is the current exchange rate or the closing exchange rate.
- This exchange rate is automatically used in the transactions, when there is no historical exchange (exchange rows with date).
If you modify the exchange rate in the Exchange rates table, the exchange rates and amounts previously used in the journal rows are not changed. - It is used for the calculation of the balance column calculated in the accounts table and for the conversion to Currency 2.
- Every time transactions in foreign currency are recorded, the resulting exchange rate differences are displayed in the Calculated Balance column of the Accounts table (Balances view). These differences are the foundation for calculating exchange rate differences and for the conversion into Currency 2.
- Closing exchange rate
- It is used as an exchange rate for exchange rate differences postings.
- It becomes the opening exchange rate when creating a new year.
- Opening exchange rate
It's the exchange rate entered in the Rate Opening column and it is used in the following cases:- When first creating a multi-currency file in Banana Accounting Plus
- When creating the new fiscal year, the opening exchange rate is automatically taken from the previous year's closing rate (in the Exchange Rate column).
The opening exchange rate is automatically used in the Accounts table to convert the opening amounts in foreign currency into the opening amounts in the basic currency of your accounting file.
If you need to edit the opening exchange rate, you must use the Recalculate accounting command.
- Current exchange rate and closing exchange rate
- Exchange rates with date (historical exchange rates)
When dates are entered in the Exchange Rates table, and foreign currency transactions are recorded in the Transactions table based on a date specified in the Exchange Rates table, the program selects the exchange rate with the date equal to or closest to but not exceeding the date of the transaction entry.
The program uses the historical exchange rate in these cases:- When entering transactions at a specific date and in the Exchange rates table there is an historical exchange rate.
- When creating exchange rate differences and specifying to use historical exchange rate.
In exchange rates with a date (historical exchange rates), no opening exchange rate should be indicated (Opening Rate column).
Columns of the Exchange rates table
All the columns available for the Exchange rates table are visible in the Complete view.
Date
Rows without a date are used as reference exchange rates by the program. Rows with a date are used as historical exchange rates.
Ref. Currency
It is the starting currency (basic currency) for the exchange (EUR in the example).
Currency
This is the destination currency (foreign currency). It's value is converted into the Reference currency.
Text
A text to indicate the foreign currency description
Fixed
True or false. If there is a fixed exchange rate, enter Yes in this column. In this case, for the foreign currency with a fixed exchange rate, the same rate is used consistently until it is modified. Typically, a fixed exchange rate is applied when there are accounts whose value should not undergo continuous fluctuations, such as real estate investments.
Mult. (Multiplier)
The multiplier is usually 1, 100 or 1000 and is used to obtain the effective exchange rate. The multiplier is used for currencies which have a very low unit value in order to avoid having to insert exchange rates with many zeros. In our templates, the negative multiplication (-1) is used in the Multiplier column of the Exchange rates table.
In this case:
- In the Ref. (Reference) Currency column, the base currency of the accounting system is entered
- In the Currency column, the foreign currency is entered.
When in the Ref. Currency and Currency columns the abbreviations of the currencies are reversed, the Multiplier 1 (positive exchange rate) must be entered in the column.
If transactions have already been made with the same currency, do not change the multiplier, otherwise the programme will report errors in the entries due to incorrect exchange rates.
Exchange rate
It is the current or closing exchange rate of the currency against the reference currency.
This is also used to calculate exchange rate differences. Before calculating exchange rate differences, it is necessary to update the rate in this column according to the official closing rate.
The exchange rate and the multiplier are being applied according to the following formulas
- With multiplier > 0
Currency amount = Ref. currency amount* (exchange rate / |mult.|)
- With multiplier < 0
Ref. currency amount = Currency amount * (exchange rate / |mult.|)
Opening Exchange rate
This is the exchange rate at the moment the accounting is opened. To be indicated only on a row without date.
- It is used to convert the opening amount of the foreign currencies into the opening amount of the accounting’s basic currency.
- Should be corresponding to the closing exchange rate of the preceding year.
When transitioning to the new fiscal year, the opening exchange rate is automatically updated based on the closing exchange rate from the previous year entered in the Exchange Rate column (Exchange rates table).
If the closing exchange rates are not equal to the opening exchange rates, the Assets and Liabilities might result into different totals; see Differences in the Opening Balances. - The opening exchange rate should never be changed in the course of the year, otherwise exchange rate differences are being created in the total of the opening balances.
- The opening exchange rate should not have a date.
Minimum
The minimum exchange rate accepted. If an inferior exchange rate is used for the transactions, there will be a warning.
Maximum
This column shows the maximum exchange rate accepted. If a superior exchange rate is used for the transactions, there will be a warning.
Decimal Points
The number of decimal points to be used when rounding the amounts of the foreign currency.
Modifications in the Exchange rate table
The current exchange rates for foreign currencies can be modified in the Exchange rates table, specifically in the Exchange rate column for rows without a date. In this scenario, when a transaction with an account in a foreign currency is entered in the Transactions table, the program automatically uses the exchange rate set in the Exchange rates table. If a change is made to an exchange rate in the Exchange rates table, there are no repercussions on previously entered transactions; the new exchange rate is applied to future transactions.
It is also possible to manually modify the exchange rate directly in the Transactions table by entering the desired rate in the Exchange rate column. This modification does not affect the exchange rate present in the Exchange rates table.
- Modification of the Opening exchange rate
If the opening exchange rate is modified, the next time you recalculate the accounting, the balances in basic currency of the accounts will be recalculated with the new exchange rate. Therefore, if you have opening balances, pay attention when modifying the Opening exchange rates.
If you modify the opening exchange rates and there are opening balances, it is important to recalculate the accounting. - Modification of the multiplier
- When changing the multiplier of a currency already used in the Transactions table, the program will report a warning as soon as the accounting is being recalculated. The transaction amount and the correct amount in the basic currency will have to be reentered.
- When the accounting is being recalculated, the opening balances in basic currency will be recalculated as a result.
Direct exchange rates
Direct exchange rates are those where the basic currency and the foreign currency are indicated on the same row.
In the example below, the direct exchange rate is EUR → USD.

Indirect exchange rates
Indirect exchange rates are those where a direct exchange between two currencies is not being indicated (not recommended).
The exchange rate is deducted by the program based on other combinations of entered exchange rates

Historical exchange rates
As explained above, if an exchange has a date, the program considers it to be a historical exchange rate.
In the cases indicated here, the program chooses the exchange rate with a date equal to or less than the date of the transaction row.
- When entering transactions, if there is a historical exchange rate, it is proposed and used as the default exchange rate.
- When the exchange rate differences transactions are created and the option to use the historical exchange rate is activated.
- In rows with a date, the opening exchange is not used.

If you import several historical exchange rates at the end of your accounting period, that is, when you have already entered accounting transactions, simply manually delete the transactions exchange rates (Exchange rate column, Transactions table) to make sure that the program uses the imported exchange rates instead of those entered in the transactions.
Monthly average exchange rate
When entering a monthly average exchange rate, this must be inserted manually in the Exchange rate table, in a row without date. In the Transactions table, for foreign currency accounts, the average exchange rate will always be included until it is updated again in the Exchange rate table.
For the monthly average exchange rate, we recommend consulting the page of the exchange rates proposed by the Swiss Confederation, available in Italian, French or German.
Incompatible exchange rates from previous versions
When the basic currency is entered as the reference currency, the exchange rates with a multiplier greater than 1 can present calculation differences between Banana Plus and the previous versions. In these rare cases, while opening an accounting file of a previous version, a warning message appears and the file is being opened as "read only".
- Open the file in Banana Plus and confirm the warning message;
- Recheck the accounting (Shift + F9);
- The warning messages "Transaction multiplier is not the same as the one in the Exchange rate table" can be ignored;
- Verify whether the balances and the result of the accounting period present differences compared to those displayed in earlier versions. If there are no differences, just save the accounting under a new name; otherwise, it is necessary to proceed as follows:
- In the Exchange rate table, correct the exchange rate by multiplying it with the value of the multiplier and define the multiplier as 1 for the exchange rates with a multiplier greater than 1. For example, if we have a multiplier of 100 and an exchange rate of 0.9944608, correct the exchange rate to 99.44608 and the multiplier to 1.
- Recheck the accounting (Shift + F9).
- The warning messages "Transaction multiplier is not the same as the one in the Exchange rate table" can be ignored, or it is possible to delete them by clicking, in the corresponding transaction row, on the amount in basic currency and by pressing the F6 key
- Verify whether the balances and the result of the accounting period correspond with the ones indicated in earlier versions
- Save the file under a new name
- At this time, you can define the exchange rates and the multiplier in the preferred format, reverse or direct, with or without multiplier, verifying the balances and the result of the accounting period after each modification.
Chart of accounts | multi-currency accounting
In contrast to Double-entry bookkeeping, Multi-currency Accounting has the Exchange rate table and columns for calculating foreign currency amounts and balances.
Grouping of the Accounts table
For the Accounts and Groups grouping system, please refer to the Grouping System page.
Setting the basic currency
The base currency is set from the menu File > Accounting properties
Account Currency
Each account has a currency abbreviation, which may be that of the base currency or a foreign currency abbreviation, indicated in the exchange rate table.
Assets and liabilities accounts can be set up in different foreign currencies in addition to the base currency (in the example EUR).
- Foreign Currency Accounts
Accounts in foreign currencies are set up in the Accounts table. In the Currency column , for each foreign currency account the currency code must be entered.
In the Exchange rate table, for each foreign currency, the abbreviations of the foreign currencies, set in the Accounts table, and the opening exchange rate must be entered.
In the example below, the base currency is EUR. The abbreviation of the base currency EUR appears in the column headings with the amounts in base currency.
- Accounts in base currency (accounting currency)
Accounts in base currency are set up in the Accounts table. In the Currency column, the abbreviation of the base currency must be entered.

Income and Expense accounts, other than in basic currency (EUR in the example), can also be set in different currencies.

Explanation of multi-currency accounting columns
Currency
Enter the symbol of the account currency. For foreign currency accounts, the symbol must also be present in the exchange rate table.
Opening currency
The initial balance is entered for each account, whether it is a basic or foreign currency account
Opening balance (basic currency)
- A protected column calculated by the program.
- The initial balance in basic currency is calculated by the program.
- For basic currency accounts, the opening balance in the Opening currency column is reported.
- For foreign currency accounts, the balance is converted according to the exchange rate in the exchange rate table.
Balance currency
- Protected column used by the program.
- The balance is calculated by the programme and corresponds to the sum of the opening balance (for accounts in foreign currency, this is the balance converted into the base currency) and the amounts of the transactions in base currency and in foreign currency (amounts converted according to an exchange rate, which can be found in the exchange rate table).
Balance
- Protected column used by the program.
- The balance is calculated by the program and corresponds to the sum of the opening balance (for accounts in foreign currency it is the balance converted into basic currency) and the amounts of the transactions in basic currency and in foreign currency (amounts converted according to an exchange rate present in the exchange rate table).
Calculated balance
- Protected column used by the program.
- This is the account balance in currency converted at the current exchange rate (exchange rate from the exchange rates table in the row without a date).
- This column therefore indicates the balances as if the exchange rate differences were recorded.
- Any exchange rate difference is added to or deducted from the respective income statement account for recording the exchange rate difference accounts.
Exchange rate difference account
- Visible in the Other view.
- In this column, you can enter an exchange rate profit or loss account for a given account.
The account you enter will be used by the Create Exchange Rate Difference procedure instead of the exchange rate profit and loss accounts defined in the multi-currency file properties. - In the Exchange Rate Difference Account column you can specify:
- "0;0" This means that no exchange rate difference is to be calculated for this account.
It is used for historical exchange rates, which must not change. - Two accounts separated by semicolons, "Currency Exchange loss account; Currency Exchange rate profit", e.g. "6949;6999".
If there is a loss the first account will be used, if there is a profit the second. - "One account only" for example "6949".
This account will always be used whether there is an exchange rate profit or loss.
- "0;0" This means that no exchange rate difference is to be calculated for this account.
Opening balances
Information on how to enter opening balances in multi-currency accounting is available on the Opening balances page in multi-currency accounting.
Exchange Profit and Loss Accounts
In the chart of accounts, it is necessary to insert the predefined accounts for the exchange gain and loss to be reported in the File menu File properties → Foreign currency.
Accounts for exchange rate differences must have BClass 3 (Costs - Exchange Loss) or 4 (Revenue - Exchange Profit).

Revaluation accounts and historical exchange rates
Exchange rates are fluctuating. The actual value of the balance in the account currency varies therefore depending on the foreign exchange fluctuation.
The basic currency amount of an account is being calculated using the opening exchange rate and the exchange rates that are indicated in the transactions. Because this value corresponds to equivalent of today's exchange rate, it is necessary to revaluate the account.
The revaluation takes place by calculating the exchange rate differences. With the automatic calculation of exchange differences, the software enters an amount in basic currency (exchange difference) so that the balance in basic currency is equal to the counter value (calculated balance column).
There are accounts (related to investments, for example) for which a so-called historic exchange rate is being used. By an historical exchange rate, we mean an exchange rate that doesn't vary over time.
There are two ways to have currencies that do not vary:
- Create an additional currency code in the exchange rate table (e.g. USD2) to which the same exchange rate will always be attributed.
- In the currency description, indicate that this is a historical exchange rate.
- This currency must then be used for the account with the historical exchange rate and of course also in the entries for the account.
- For each new account with a different historical exchange rate, create a new currency symbol.
You can create as many currency symbols as you need for different accounts with historical exchange rates. - Change the exchange rate of the historical account if there are additional purchases or sales that require an adjustment of the value, while creating a transaction for the exchange rate profit or loss.
- Entering opening balances as Opening transactions.
- Instead of using the opening balances column, the opening balances are entered as transactions. You can assign the opening exchange rate you want.
- In the Account exchange difference column enter the value "0;0" indicating that the account should not be revalued.
Group totals in foreign currency
Normally, the columns with amounts in foreign currency don't have totals, as it makes little sense to calculate totals for values in a different currency.
If you have a group that includes only accounts in a specific currency, the currency symbol can be indicated at a group level and, in the Accounts table, the program totals these amounts. If there were to be accounts with various currency symbols, there would be no amount indicated (the program would not report an error either).
Transactions table multi-currency accounting
Explanations of the columns
In the Transactions Table of the multi-currency accounting, other than the columns of the double-entry accounting, there are the following extra columns:
- Currency amount
This is the amount of the currency specified in the column with the currency symbol.
This amount is used by the program to update the balance of the related account in currency. Currency
This is the currency symbol of the currency to which the amount refers.
The currency symbol has to be the one of the basic currency, specified in the File and accounting properties (File menu), or the currency symbol of an amount indicated in the Debit A/C or Credit A/C columns.You can also use a different currency as long as the indicated Debit A/C and the Credit A/C are basic currency accounts.In this case the amount in currency is used as a reference, but will not be used for accounting purposes- Exchange rate
Used to convert the foreign currency amount in its basic currency equivalent. - Amount in Basic currency
The transaction amount, expressed in basic currency.
This amount is used by the program to update the balance of the related account in basic currency. Exchange rate multiplier
Normally not visible in the view, this value is multiplied by the exchange rate.
Useful advice
- While being positioned on the Currency Amount column and pressing the F6 key, the program rewrites all values with the earlier explained logic, as if there were no values present. This feature is useful when the Debit A/C or the Credit A/C is modified.
- If there is a registration with a single account in basis currency (in 'Multiple transactions' - see Transaction types) and its value of the Currency column has been changed manually in a currency symbol of a foreign currency, it is necessary to be positioned on the cell of the Currency column and press the F6 key in order to update the exchange rate and calculate the amount in basic currency.
- Smart fill for the Exchange rate column
The program suggests several exchange rates, picking them up from the Exchange rates table or from exchange rates previously used in the transactions.
Types of transactions in multi-currency accounting
All amounts, whether in basic currency or foreign currency must always be entered in the Currency Amount column.
As regards the exchange rates, multiplier and historical exchange rates, please refer to the Exchange rates table page.
Attention: in the transaction examples, the basic currency is the Euro.
For each transaction, there are two accounts (debit account and credit account). In the program, only one foreign currency per transaction row can be used. So there can be the following direct combinations:
- Entries between two accounts in basic currency with the amount in basic currency (in the image, transactions n.1 in the Doc column). The account currency is the basic currency.
Entries between two accounts in basic currency with the amount in foreign currency (Doc 2)
The indicated accounts are in basic currency, but the currency symbol and the amount in currency, indicated in the transaction row, are not in basic currency, but in a different currency.To insert the different currency, the user has to manually change the currency symbol.
This is being used when one goes abroad and money is being exchanged in order to pay in local currency. In this case we do not have a specific account.
For the calculation of the balance (both accounts being in basic currency) only the amount of basic currency column is being used.- Entries between an account in foreign currency and one in basic currency (Doc 3)
The currency needs to be the one of the account in foreign currency.
For the calculation of the balance of the account in foreign currency, the program uses the amount in foreign currency and for the balance in basic currency, the program uses the amount in basic currency. - Entries between two accounts with the same foreign currency (Doc 4)
The currency needs to be the same as the account currency of both accounts (USD1 and USD2). In order to update the exchange rate and calculate the amount in basic currency, it is necessary to be positioned on the cell of the Currency column and press the F6 key. - Entries with two accounts in different foreign currencies (Doc 5)
For example, the bank makes an exchange operation between two foreign currencies:
In this case, the transaction needs to be recorded on two rows.
The amount in basic currency needs to be the same. It is useful to use an amount close to the current exchange rate to avoid excessive exchange rate differences.
In order for the amounts in basic currency to be equal, the amount in basic currency needs to be indicated manually, and the program will calculate the exchange rate. - Exchange rate differences (Doc 6)
The goal of this transaction is to realign the balance of the basic currency account with the equivalent of the Foreign currency account at today's exchange rate.
On the Foreign currency account, only the amount in basic currency related to the exchange rate differences is being recorded.
They are automatically generated with the Create transaction for exchange rate variation command.- For the exchange rate profits, the program automatically indicates the account to be revaluated in debit and the exchange rate profit account in credit. The exchange rate profit account is indicated in the File and Accounting properties (Basic Data), or in the specified account -> Exchange rate differences account column of the Other view (intended for one or several specific accounts).
- For the exchange rate losses, the program automatically indicates the account to be revaluated in credit and the exchange rate loss account in debit. The exchange rate loss account is indicated in the File and Accounting properties (Basic Data), or in the specified account -> Exchange rate differences account column of the Other view (intended for one or several specific accounts).
- The Currency amount is being left empty
- The Currency symbol is the basic currency
- In the Basic currency amount column, the amount of the revaluation of the account (profit or loss) is being indicated.
Establishing the exchange rate
The accountant is the one who decides which exchange rate to use for each single operation. Generally, the following rules are being applied:
- For normal operations, the exchange rate of the day is being used
- For buying or selling currency, the values indicated by a money exchange office or a bank are being used.
First the amount in foreign currency is being indicated in the program and then the amount in basic currency. The program calculates the exchange rate. The exchange rate indicated by the bank can be slightly different, because banks specify exchange rates with few figures after the decimal point and often round the amounts. - When several operations with the same exchange rate are being recorded, it is useful to update the exchange rate in the Exchange rates table, so that the program can automatically apply it.
- For operations from abroad that are subject to VAT, the national authority might impose a standard exchange rate. In this case, that exchange rate should be inserted in the Exchange rate column of the transaction
- To purchase real estate or equity investments, an historical exchange rate is being used. In that case, a currency symbol needs to be created in the Exchange rates table (for example USD1) with an historical exchange rate, that is not being subject to the fluctuations of the exchange rate.
One can create as many currency symbols as desired for all historical exchange rates.
Transactions with VAT
The VAT account and the account from which the VAT is being deducted have to be in basic currency. It is impossible to use a VAT code to deduct the VAT from a foreign currency account. In order to record operations with VAT that have accounts in foreign currency as their counterpart, two transaction rows have to be used:
- First, the amount of the purchase is being recorded on an Internal transfers account in basic currency and the related VAT code is being applied. The amount in basic currency has to be calculated using an exchange rate in accordance with the requirements of the Tax administration.
- In a second row, the balance of the Internal transfers account is being put to zero; as its counterpart, the account in foreign currency should be entered.
The amount used for this transaction, both in basic currency and in foreign currency, has to be excluding VAT. Obviously, the exchange rate that has to be used is the same one as the one being used in the preceding transaction.
In the example, the basic currency is the EUR. We are dealing with a national purchase, but paid from a foreign currency account (USD).
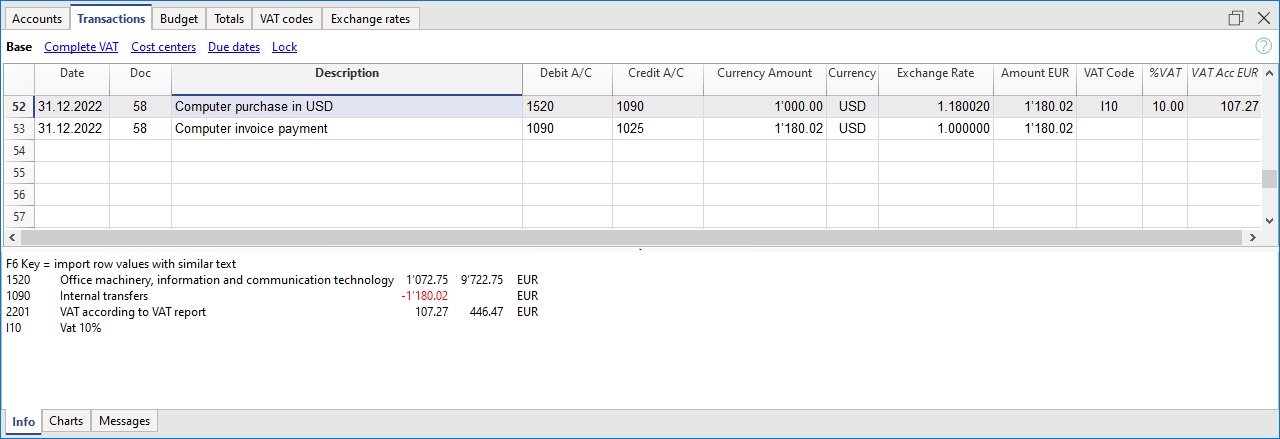
VAT and foreign currency transactions
In transactions with foreign currency accounts, it is possible to record VAT with a gross amount (Amount type 0, with VAT).
If you enter net values (Amount type 1, without VAT), the program indicates an error, because the calculation of the gross value would in many cases be incorrect due to the rounding up of VAT and of the exchange rate.
In these cases it is advisable to enter the gross value. See also the Explanations of the error.
Automatism while entering multi-currency transactions
When a new transaction is being entered, the data in the above mentioned columns have to be completed.
When some values of the transaction row are modified, the program completes the transaction with the predefined values. If these values do not satisfy the user's requirements, these have to be modified in the transaction row.
The modification of the values in the Exchange rates table have no effect on already entered transaction rows. Thus, when the exchange rate in the Exchange rates table is modified, this has no influence whatsoever on already inserted transactions.
- When the amount in currency is entered and there is either a Debit A/C or a Credit A/C, and no other values are entered, the program operates as follows:
- the currency symbol is retrieved from the account in use, giving priority to the account that is not in basic currency;
- the exchange rate, defined in the Exchange rates table, is applied with the following logic:
- the historical exchange rate is applied, with a date earlier or equal to the transaction date
- tf there is no historical exchange rate to be found, the exchange rate from the row without date is applied.
- the multiplier, defined in the Exchange rates table, is applied or the number 1 if it is the basic currency;
- the amount in basic currency is calculated.
- When the amount in currency is modified (and there are already other values present), the program operates as follows:
- the amount in basic currency is calculated with the existing exchange rate
- If the currency symbol is modified the program operates as follows:
- the exchange rate with the multiplier is applied and the amount in basic currency is calculated (like above)
- If the exchange rate is modified the program operates as follows:
- the amount in basic currency is calculated using the entered exchange rate
- When the amount in basic currency is modified the program operates as follows:
- the exchange rate is recalculated.
Info window
In the info window, the program indicates:
- Differences, if any, between the Debit and Credit total movements in basic currency
- Explanation on the different uses of the F6 key
For the accounts related to the transaction row on which one is positioned, the program always indicates in the Info windows:
- the account number
- the account description
- the transaction's amount in basic currency
- the current account balance in basic currency
- the account currency symbol
- the transaction's amount in the account currency (if different from the basic currency)
- the current account balance in currency (if different from the basic currency)
Transactions for opening balances
For multi-currency accounting, when entering the opening balances in the Accounts table, the program converts the amounts into basic currency, using the opening exchange rate defined in the Exchange rates table, Opening exchange rate column.
To use historical exchange rates as opening balances, you can create another currency symbol or create transactions in the Transactions table with the opening balances. This way you can use different exchange rates for different accounts.
- Enter a single transaction for each account with an opening balance (Assets and Liabilities), indicating the initial accounting date and the Debit or Credit account.
- In the DocType column enter the "01" value to indicate that it is an opening value.
- In the Banana Accounting reports or printouts this amount will be shown as opening balance.
- However the transaction doesn't update the Opening balance column in the Accounts table
When using opening transactions, please consider that:
- In order to avoid the revaluation of the accounts with the current exchange rate, in the Accounts table, enter the "0;0" value in Exchange rate difference account column
- The software allows you to add both some opening balances in the Accounts table and some opening transactions in the Transactions table (Assets and Liabilities).
In both cases the amounts are considered in the calculations and, if it is the same account, they are added together.
We do not recommend using the two methods simultaneously to avoid hard-to-find errors and differences. - Opening transactions must be entered manually.
Any debit and credit differences are shown as a transaction difference.
Data transfer from earlier versions
In version 4 or earlier, the absence of a currency symbol in the Transactions table was being interpreted as a transaction in basic currency.
In version 7 and in version 8, each transaction needs to have its own currency symbol. Therefore, when you update from version 4 to version 7 or 8, in the accounting file, the transactions without a currency symbol need to be completed. To do this, a new Currency column must be added to the Transactions table by executing the Columns setup command from the Data menu.
Transactions| Double entry accounting multicurrency
Types of Multi-Currency Transactions
With the multi-currency accounting application, it is also possible to record transactions involving accounts in foreign currencies. In the Transactions table, in addition to transactions in the base currency, foreign currency transactions are also entered: all the transaction elements are specified, including the amount and the account in foreign currency, and the exchange rate applied to the transaction. The amount in the base currency is calculated automatically based on the entered exchange rate.
All amounts, both in base currency and foreign currency, must always be entered in the 'Amount' column.
For information regarding exchange rates, multipliers, and historical rates, refer to the page Exchange rates table.
Note: in the transaction examples, the base currency is Euro.
Each transaction has two accounts (debit and credit). The program allows only one foreign currency per transaction row. The following direct combinations are possible:
- Transaction between two base currency accounts with amount in base currency (in the image, transaction no. 1 in column Doc 1)
The currency of both debit and credit accounts is the base currency. - Transaction between two base currency accounts with amount in foreign currency (Doc 2)
The debit and credit accounts are in base currency, but the currency code (currency column) and amount entered in the transaction row are in a foreign currency.
To enter the foreign currency, manually change the default base currency code.
This is used when traveling abroad and exchanging money to pay in local currency. In this case, there is no specific account in the accounting.
For balance calculation (as both are in base currency), only the base currency amount column is used. - Transaction between a foreign currency account and a base currency account (Doc 3)
The currency must match the foreign currency account.
To calculate the foreign currency account balance, the program uses the foreign currency amount, and for the base currency balance, it uses the base currency amount. - Transaction between two accounts with the same foreign currency (Doc 4)
The currency must match the accounts used (USD1 and USD2). To update the exchange rate, position on the Currency cell and press F6. - Transaction with two accounts that have different foreign currencies (Doc 5)
For example, the bank performs a currency exchange between two foreign currencies.
In this case, the transaction must be entered in two rows (with the same date).
The base currency amount must be identical. It's advisable to use a realistic exchange rate to avoid large exchange rate differences.
To ensure that the base currency amounts on both rows are the same, manually enter the base currency amount and let the program calculate the exchange rate. - Exchange rate difference transactions (Doc 6)
The purpose of this transaction is to realign the base currency balance with the foreign currency equivalent at the current exchange rate.
Only the base currency amount related to the exchange difference is recorded on the account.
These are automatically generated with the Calculate exchange rate differences command.- For exchange gains, the program automatically enters the revalued account as debit and the exchange gains account as credit, taken from File Properties, Basic Data, or from the account indicated in the Exchange differences column of the Other view (in the Accounts table) – defined for one or more specific accounts.
- For losses, the program automatically enters the revalued account as credit and the exchange losses account as debit, taken from File Properties, Basic Data (menu File), or from the account indicated in the Exchange differences column of the Other view (defined for one or more specific accounts).
- The foreign currency amount is left blank
- The currency code is the base currency
- In the base currency amount column, the revaluation amount (gain or loss) is indicated
Setting the Exchange Rate
The accountant decides which exchange rate to use for each transaction. Generally, the following rules apply:
- For regular operations, use the exchange rate of the day.
- For currency buying and selling operations, use the rates provided by the exchange office or the bank.
In the program, first enter the amount in foreign currency and then the amount in base currency; the program will calculate the exchange rate. The rate provided by the bank may be slightly different as banks often round rates to a few decimal places. - If you carry out multiple transactions at the same rate, it is helpful to update the exchange rate in the Exchange Rates table so that the program can use it automatically.
- For foreign operations subject to VAT, the national authority may prescribe a standard exchange rate. In this case, enter this rate in the Exchange Rate column of the transaction.
- For the purchase of real estate or investments, use the historical exchange rate. In this case, you need to create a currency code (e.g. USD2) with the historical rate in the Exchange Rates table, which will not fluctuate.
You can create currency codes for all desired historical rates.
Transactions with VAT
In a multi-currency accounting with VAT, to correctly record transactions without error messages, it is essential that the VAT account and the account from which VAT is deducted are in base currency. It is not possible to apply a VAT code to an account in foreign currency.
To record transactions with VAT that involve foreign currency accounts as counterparties, you must use two transaction rows:
- First, record the purchase amount on an intermediate account in base currency and apply the appropriate VAT code.
The base currency amount must be calculated using the exchange rate in accordance with tax authority regulations. - In a second row, clear the intermediate account and use the foreign currency account as the counterparty.
The amount used for this transaction, both in base and foreign currency, must be net of VAT.
You must use the same exchange rate as in the previous transaction.
In the example, the base currency is EUR. A domestic purchase is assumed, but payment is made from a foreign currency account (USD).

Transactions with VAT and Foreign Currency
In transactions involving foreign currency accounts, VAT can be recorded using the gross amount (Amount Type 0, VAT included).
If net values are entered (Amount Type 1, VAT excluded), the program displays an error because calculating the gross value would often be incorrect due to rounding differences in VAT and exchange rate.
In these cases, it is recommended to enter the gross amount. See also Explanation about the error.
Automation During Entry of Multi-Currency Transactions
When entering a new transaction, the data in the previously mentioned columns must be completed.
If certain values in the transaction row are changed, the program completes the transaction with default values. If these values do not meet your needs, they must be modified directly in the transaction row.
Modifying the values in the Exchange Rates table has no effect on transactions already entered. So, if you change the exchange rate in the Exchange Rates table, it will not affect existing transactions.
- When entering the foreign currency amount and either the Debit or Credit account is already filled, and there are no other values, the program behaves as follows:
- the currency code is taken from the account used, giving priority to the non-base currency account;
- the exchange rate is taken from the Exchange Rates table based on the following logic:
- the historical rate with the date equal to or earlier than the transaction date is used
- if no historical rate is found, the rate from the exchange rates row without a date is used
- the multiplier defined in the Exchange Rates table is used, or 1 if it's the base currency.
- the base currency amount is calculated.
- When the foreign currency amount is modified (and other values already exist), the program:
- recalculates the base currency amount using the existing exchange rate
- If the currency code is modified, the program:
- retrieves the exchange rate and multiplier and recalculates the base currency amount (as above).
- If the exchange rate is modified, the program:
- calculates the base currency amount using the entered exchange rate.
- If the base currency amount is modified, the program:
- recalculates the exchange rate.
Info Window
In the info window, the program shows:
- Any differences between the total debit and total credit in base currency.
- Information about using the F6 key.
For the accounts related to the transaction row you are on, the program always displays the following in the Info window:
- account number
- account description
- transaction amount in base currency
- current account balance in base currency
- account currency code
- transaction amount in account currency (if not in base currency)
- current account balance in account currency (if not in base currency)
Opening Balance Transactions
For multi-currency accounting, when entering opening balances in the Accounts table, the program converts the amount into base currency using the opening exchange rate defined in the Exchange Rates table, Opening Exchange Rate column.
To use historical rates for opening balances, you can create another currency code or create entries in the Transactions table with the opening balances. This way, different exchange rates can be used for the accounts.
- Enter a transaction for each account with an opening balance (Assets and Liabilities), indicating the start date of the accounting and the debit or credit account.
- In the DocType column, enter the value "01" to indicate it is an opening balance.
- In Banana Accounting's calculations and printouts, this amount will be treated as an opening balance.
- However, the transaction does not update the opening balance column in the Accounts table.
Points to consider when using opening transactions:
- To avoid revaluation of accounts at the current exchange rate, enter "0;0" in the Exchange Rate Difference Accounts column in the Accounts table for accounts that should not be revalued.
- The program allows entering opening balances either in the Accounts table or as opening transactions (Assets and Liabilities) in the Transactions table.
In both cases, the amounts are included in the calculations, and if it’s the same account, they are summed.
It is not recommended to use both methods simultaneously to avoid errors and hard-to-find differences. - Opening transactions must be entered manually.
Any debit and credit differences will be shown as a difference in the transactions.
Useful Tips
- By pressing the F6 key while on the Amount column, the program rewrites all values using the logic explained above, as if no values existed. This function is useful when changing the Debit or Credit account.
- If there is a transaction with a single base currency account (in compound transactions) and the Currency column has been changed to a foreign currency, to update the exchange rate, position on the Currency cell and press F6.
- Smart fill for the Exchange Rates column
The program suggests various rates, taking them from the Exchange Rates table or from rates previously used in transactions.
Importing Data from Previous Versions
In version 4 or earlier, the absence of a currency code in the Transactions table was interpreted as base currency.
In version 7, each transaction must have its own currency code. Therefore, when upgrading from version 4 to version 7, you must complete the transactions that lack a currency code. To do this, you need to add a new Currency column to the Transactions table by executing the Arrange Columns command from the Data menu.
Exchange rate differences
Create transactions for exchange rate differences
For theoretical aspects please visit the Revaluations and exchange rate differences page.
- The exchange differences transactions are adjustment transactions that balance out the foreign currency account balance with the basic currency calculated balance. In essence, it is a matter of re-adjusting the values in the basic currency, taking into account exchange rate loss or gain, due to the fluctuations of the exchange rates.
- If these exchange rate differences are not recorded, there may be differences in the opening balances of the following year.
- The exchange rate differences can be calculated at the end of the closing year or during the accounting period (for example at the end of a quarter). In this case the historical changes can be useful, as they allow you to have different exchange rates at specific dates.
- The program calculates the exchange rate difference based on the balances at the specified date. It is therefore possible to calculate the exchange rate difference at a specific date, even if you have entered transactions after that date.
- For further explanations, see also the Exchange rate differences not booked page
- Exchange rate differences are not calculated on the accounts belonging to the profit and loss account. Exchange rate profit/losses, which are generated by exchange rate differences, are financial and non-operating items and are therefore not included in the determination of operating income or the profit and loss account.
The Calculate exchange rate differences dialog
The Create transaction for exchange rate variation... command, from the Actions menu, calculates the revaluations for the foreign currencies accounts.
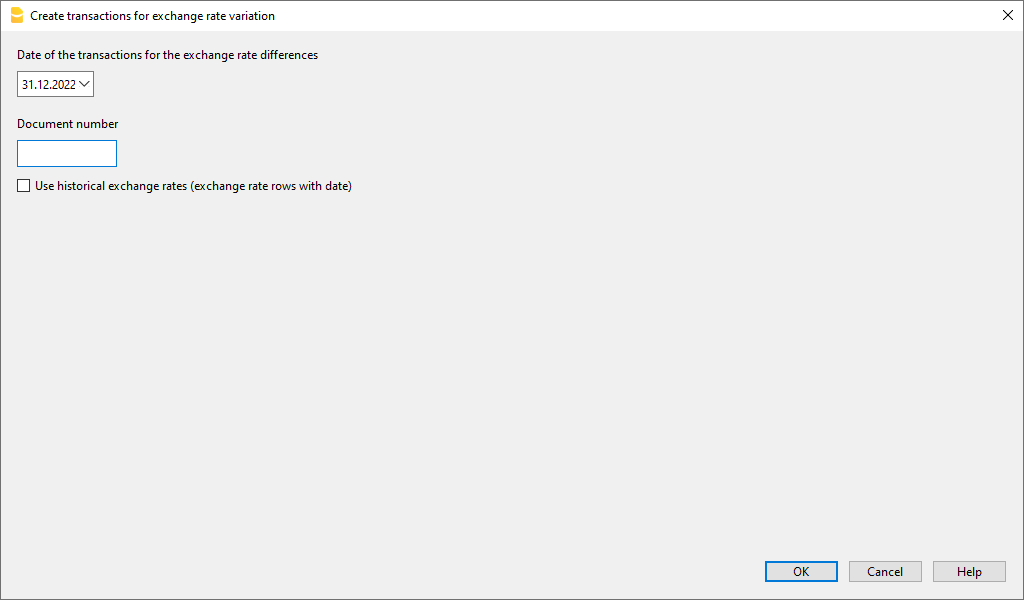
Date of the transactions for the exchange rate differences
The program is able to calculate the exchange rate difference on a date even if there are postings beyond the date.
- Enter the date for your exchange rate differences transactions.
- The program will suggest the final date of the current month, related to the last entered transaction.
- If there are transactions for exchange rate differences with the same date, the program asks whether they should be replaced. The program considers the transactions for the exchange rates differences as existing if they have the same date, doc, description, accounts and currency and when there is no amount in the account currency.
Document number
Enter the document number your exchange rate differences transactions should have.
Use historical exchange rates (exchange rate rows with date)
- Use when option is not activated
- If in your Exchange rate table there are no historical exchange rates (exchange rates with a date) this option is not activated.
- The program will use the exchange rate in your Exchange rate table of the rows without date
- if you are using historical exchange rates for the year closure, be careful that the exchange rate used should be the same as the current one.
- Use when option is activated
- The program will indicate the date of the exchange rate, found in the Exchange rates table, that will be used to calculate the exchange rate difference.
This is going to be the exchange rate with a date equal or prior to the indicated date. - When calculating exchange rate differences at year end we suggest this option not to be activated
- When booking exchange rate difference transactions at year end, the historical exchange rate must be the same as the current exchange rate, otherwise you get an error message saying that the exchange rate differences have not been calculated (even though they have been).
- The program will indicate the date of the exchange rate, found in the Exchange rates table, that will be used to calculate the exchange rate difference.
Values used to create the transactions
For more information, we refer to our page Multi-currency transactions.
Amount of the transaction
- Transactions for exchange rate differences are being created only for the accounts in foreign currency which, at the specified date, have a different balance in basic currency compared to the calculated one.
- For the amount in basic currency, the difference between the account balance in basic currency and the account balance in foreign currency converted in basic currency is being used.
Account balance
For the calculation of the exchange rate differences, the balances in the account currency and in basic currency are being used, at the specified date.
Exchange rate profit and exchange rate loss accounts
As exchange rate profit and loss accounts are being used, in order of priority:
- The indicated accounts entered in the specific column of the chart of accounts.
- The exchange rate profit & loss accounts indicated in the File and Accounting properties.
Position of inserted rows
When using the command, while in the Transactions table, the rows are being inserted at the position of the cursor.
Otherwise, they will be inserted at the end or at the previous position in case they are replacing existing transactions.
Before using the command
- In the File and Accounting properties of the File menu, Foreign Currency section, make sure that the Exchange rate profit and loss accounts are being indicated. It is equally possible to indicate the same account for both the exchange rate profits or losses.
- Make sure that the accounts in foreign currency are being updated and that the balances in foreign currency of these accounts (for example bank accounts) correspond to the balance indicated by the bank.
- Update the current exchange rates of the Exchange rate table.
You should indicate the closing exchange rates or those of a period's end in the rows without a date, in the Exchange Rate column (do not modify the opening exchange rate in the Rate Opening column). In order to calculate the Exchange rate differences, the program uses the exchange rates of the rows without a date. If these last ones are absent, the program produces an error message.
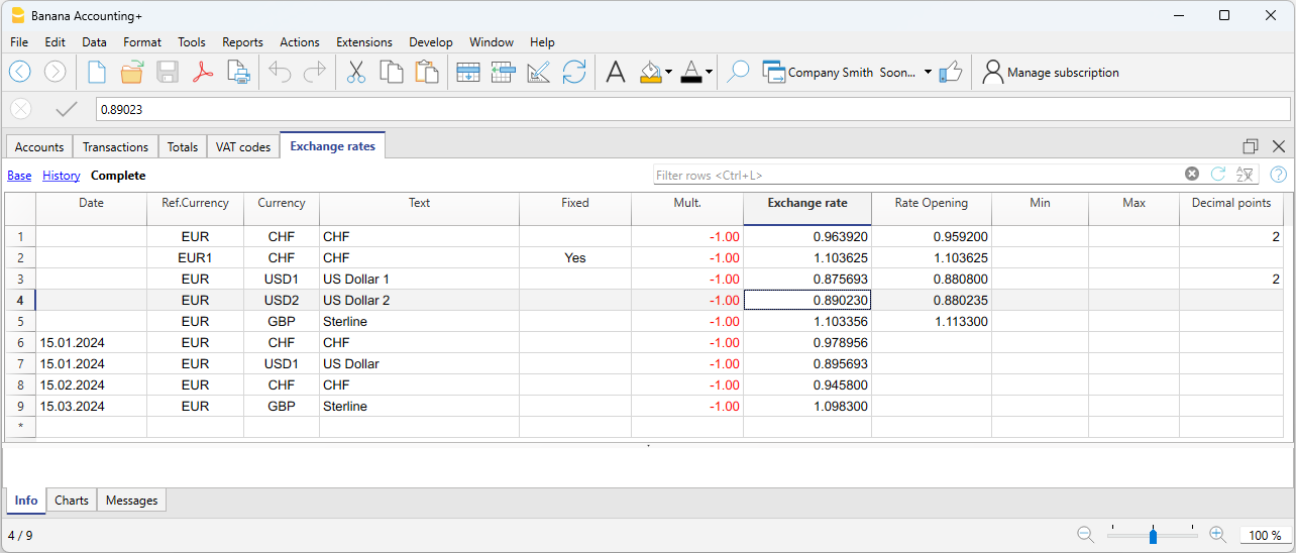
Opening exchange rates for the New Year
To make the Opening balances of the New Year in Basic currency correspond exactly with the closing balances of the preceding year, the Opening Exchange rates of the New Year, indicated in the Exchange Rate table, have to be the same as those being used for the closing of the accounting, so:
- The closing exchange rates have to be indicated in the Exchange rate column of the rows without a date;
- The opening exchange rates have to be indicated in the Rate Opening columns of the rows without a date.
The procedure of creating a new year or of the updating of the opening balances, copies the closing balances (Exchange rate column, rows without date) of the previous year into the opening exchange rates (Exchange rate table, Rate Opening column, rows without date) of the new year's file.
Exchange rate differences with cost centers
The Create transaction for exchange rate variation... command does not include any exchange rate differences present in cost centers in currencies other than the accounting currency. These differences must be recorded manually at the end of the year. The transaction should present only the accounting currency amount; indicate this amount first, then the cost center involved and the cost center currency. When the currency is entered, the amount in the currency of the accounting will be deleted and must be re-entered.
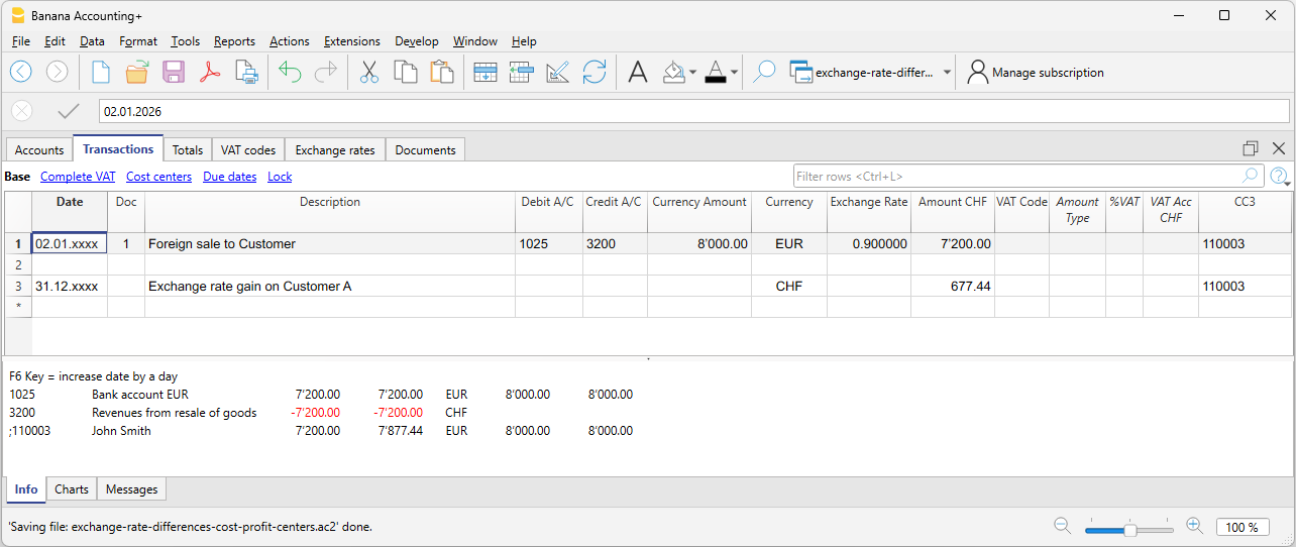
Budget
In the Budget Table the financial planning is entered. The entry of the transactions is identical to that of the Transactions table.
Depending on the type of accounting there can be different columns for the Budget.
There are also columns for entering Quantities and Prices and calculation formulas.
For more information about the Budget, see the Budget Table page.
Opening Balances in Multi-Currency Accounting
Opening balances when starting with Banana Accounting
When using Banana Accounting for the first time, the opening balances must be entered manually to generate the Balance Sheet.
Before proceeding to enter the opening balances, it is important to make some fundamental settings:
Exchange rates table
- In the Exchange rates table, set the foreign currencies and the corresponding opening exchange rate, referred to the basic currency.
The opening exchange rate is only inserted if Banana Accounting is used for the first time, and is automatically updated in the subsequent years, when creating the new year via the Actions → Create new year menu, based on the final exchange rate of the the previous year's file. - The opening exchange rate must always be indicated in an undated row and must never be modified, except for errors or in case of special situations.
- The opening exchange rates must be identical to those of the previous year. See Differences in opening balances.
Accounts table
- Make sure that there is an account to record the exchange differences in the Chart of Accounts (Income Statement) and that this has been indicated in the File → File Properties (Basic Data) → Foreign currency menu.
- The opening balances must be entered in the Base view of the Accounts table, Opening currency column, for both the basic currency and the foreign currency.
- The Opening column (basic currency) is protected. The program automatically calculates the exchange value for the basic currency according to the opening rate indicated in the exchange rate table.
- Liabilities balances must be entered with a minus sign in front of the amount.
- After entering the opening balances of the financial statements, check that the total Assets are equal to the Liabilities, so that the accounting is balanced. If there are any differences in the opening balances, they must be checked and corrected.
- Go to the Accounts table, Base view, Opening column.
- Manually report the opening balances of the Assets and Liabilities accounts. Liabilities balances must be entered with a minus sign in front of the amount.
- Check that the total Assets is equal to the total Liabilities to have a balanced accounting. If there are any differences in the opening balances, they need to be checked and corrected.

Opening balances of Cost Centers and Segments
In the Accounts table, the Opening column can also be used to enter the opening balances of the Cost Centers.
To enter the opening balances of the segments, opening transactions must instead be made. More details are available on the Segments page.
Start with Banana Accounting during the year
If you start a new accounting, taking over work already done with other programs, there are two possibilities:
- Start accounting from the beginning of the year, by entering the opening balances at the beginning of the year (Accounts table, Opening column) and the transactions (Transactions table) that have already been previously recorded with other programs (also see Transferring data from other software). Thus you will have all the accounting details in one file.
- Starting from the date when the accounting is taken over:
- Enter the opening balances (Accounts table, Opening column), taking over the values of the other accounting.
In addition to entering the opening balances of the Assets and Liabilities accounts, it is also necessary to enter those of the Expenses (positive amounts) and Revenues (negative amounts). - The operating result up to that point must be disclosed in the Profit / Loss carried forward account.
If it is a profit, the opening balance must be entered in negative, if it is a loss, in positive . - Check that the sums of the opening balances are zero, so that the program does not signal any differences.
- Enter the new entries in the Transactions table.
- Enter the opening balances (Accounts table, Opening column), taking over the values of the other accounting.
Opening balances as opening transactions
Opening balances can also be entered as opening transactions in the Transactions table, both for all balance sheet accounts and for some categories of accounts, such as those of the segments, which must be manually posted in the Transactions table.
For each opening transaction, proceed as follows:
- Indicate the accounting start date as the transaction date.
- In the Doc Type column, enter the code "01".
- Indicate the debit or credit account and the amount.
- The total of the opening debit balances must match those in credit.
Opening balances entered as transactions are used when preparing reports. When there are opening balances in the Opening column of the Accounts table and the opening balances of some accounts are also manually entered in the Transactions table (e.g. opening segments balances), these are automatically added to those present in the Opening column of the Accounts table.
Entry via transactions can be useful if different opening rates than those of the exchange rate table are required. If you use this procedure, you need to be clear about the accounting and legal implications.
Balances of the previous year
If you start a new accounting by taking over an existing accounting and you want the previous year's values to appear on the printouts, it is necessary to enter the previous year's balances in the Previous view, Previous Year column of the Accounts table:
The previous amounts are displayed in the printouts of the Enhanced balance sheet in the Previous Year column.
- Enter the closing balances of the previous year of the Assets accounts.
- Enter the closing balances of the previous year of the Liabilities accounts (insert the minus sign in front of the amount).
- Enter the last year's closing balances of the Expenses.
- Enter the final balances of the previous year of Revenues (insert the minus sign in front of the amount).

Create new year
When you start the new year, the program automatically carries over the opening balances to the following year.
Consult the Create New Year lesson.
Print opening balances
To print the opening balances:
- To print the contents of the table, use the Print / Preview command, by selecting the rows of the Balance Sheet.
- You can also use the Accounting printouts and set the printout only for the Balance Sheet part and the opening column.
Year end closing operations | Multi-currency accounting
At the end of the accounting year, before moving into the New Year, in addition to checking for errors and differences in the accounts, it is necessary to perform a series of closing operations. These are very important because they give a correct and complete overview of your business, and they also have fiscal implications.
Technical aspects and new year
With Banana Accounting each accounting year has its own separate file; technically there is no concept of accounting closure:
- When a New Year starts a new file is created with the Create New Year command.
- You can keep working on both the New Year's file and the previous year file at the same time. Once the closing operations are complete, you can update the opening balances of the New Year's file.
Tax matters
Before closing the accounting, a series of operations with tax implications must be carried out. This includes balancing the inventory account, recording depreciations, accruals (both active and passive), filing VAT declarations, determining how and on which accounts profit should be allocated, and performing various other verification and control operations.
From a program perspective, the amount of profit at the end of the year may be irrelevant, but it significantly changes from a tax standpoint. These aspects need to be reviewed with your tax advisor and accountant. If you're managing accounting for the first time, it can be helpful to consult an expert before proceeding with closures to understand the requirements. Accountants are usually very busy towards the end of the year and in the months leading up to the tax filing deadline; therefore, it may be useful to meet with your accountant or send them the accounting records a few months before closing to determine the appropriate course of action.
The Check Accounting command
Banana Accounting allows you to quickly record transactions and even leave some operations pending without interrupting the workflow
The Actions > Check Accounting command performs a series of checks, as if entering the data again from the beginning, and whenever errors or discrepancies are detected, they are reported.
It is recommended to use the Check Accounting command regularly and every time there are differences or error reports, significant changes (initial changes, VAT codes), and especially before closing the accounts.
Control and verification operations
Before printing the final financial statements it is important to proceed with the verification operations:
Checking the opening balances
- Differences in opening balances
Current year opening balances must correspond to previous year's final balances, and there must be a balance between the Assets and Liabilities payable, otherwise the accounting is not correct. - In the Accounts table, in the Opening and Balance columns, the row 'Difference must be zero' should not have any amount. Otherwise, it is necessary to find the error and correct it to have the opening balance squared. Note: In the Movement view, in the Debit and Credit columns, it is normal to have amounts
- Differences in opening exchange rates
As a rule, opening exchange rates are set at the beginning of the year. It may happen however that some verification procedures have been left pending; therefore before closing the accounting it is important to make sure that:- The exchange rates at the beginning of the year are the same as the final ones on 31.12 of the previous year,
- The exchange rates used are the ones provided by the Federal Administration, as indicated below.
- Differences between bank balances on bank statements and account balances (CheckBalance function)
It is important to check the correspondence of bank, postal, credit card, and other account balances that have to be included in your tax returns. - Differences in the Transactions table
In the Information window at the bottom of the screen, no difference must be shown. Banana Accounting Plus, in the Transactions table, also offers the possibility to view the Balance column, which allows you to detect all the rows where differences are created. - Ensure that the active and passive carryovers from the previous year are closed.
- Verify that the opening balances match the final balances of the previous year, already audited and declared to the Tax Office.
- For multi-currency accounting, refer to the specific page Opening balances for multi-currency accounting
- Detailed explanations can be found on the Double-entry accounting closing operatitions page.
- The Actions > Check Accounting command performs a series of checks and reports any differences and errors.
Closing accounting transactions
In a multi-currency accounting, as in double-entry accounting, before moving on to the New Year, some closing accounting operations are necessary. These are adjustment transactions, value adjustments, and adjustments related to personnel contributions. Here are the main ones:
Import payroll transactions into the accounting file
This operation is only applicable if the payroll is managed using specific software that allows for the import of transactions into the Banana Accounting Plus file.
The import is performed from the Actions menu > Import into accounting > Import transactions with column headers.
Remember to include the recording of the December thirteenth salary installment if it is not generated by the payroll software.
Adjustment of the Delcredere account
Companies that include potential losses in their turnover must adjust the Delcredere account.
Detecting open invoices from customers and suppliers as of December 31st.
To streamline the process, you can quickly identify the values as of December 31st using the function for open invoices by customer and open invoices by supplier.
Closures and VAT declaration
Before submitting the VAT declaration, we recommend the following checks:
- Use the Check Accounting command. In case of errors and discrepancies, you will find messages in the information window at the bottom, in the Messages section.
- Verify that there are no differences in the Balance column of the Transactions table.
- Check bank balances to ensure they match those sent by the bank.
- Verify that the automatic VAT account after reversing the balance in the due VAT account (VAT to be paid to the tax authority) is zero. The due VAT account should show the amount to be paid or the credit amount to be received.
- Before submitting the final VAT declaration, review the VAT statements from previous quarters again to ensure that the amounts paid to the tax authority are still consistent with those displayed.
- Use the VAT Summary command to view various reports and create a PDF printout for data archiving. These will be useful in case of tax audits.
Adjust the Source tax account
After calculating and recording the December salaries, based on the calculation sent to the Source Tax Office, register the adjustment.
Reimbursements for upper-level employees
If applicable, include in the December salary the amount specified by the tax authorities as a flat-rate reimbursement.
Adjustment of Private Account
Verify the balance of the private account. In the case of debit/credit relationships between the company and the owner(s) or related individuals, record active or passive interests according to the terms of the loan agreement or prevailing tax regulations.
Adjustment of the Taxes and Duties Account
Verify that the installments paid during the year correspond to the current year. Payments of taxes related to previous years should be recorded when closing the related provisions that appear in the "Direct Taxes" account (balance sheet). If the balance of the provisions is not sufficient or is excessive, the difference should be recorded as extraordinary expense/income or related to previous periods.
Registration of AVS/AD/IPG/AD Adjustments
- Throughout the year, in the AVS contributions account, advances paid to the AVS Compensation Fund (credited) and contributions withheld from employees' salaries (debited) are usually recorded.
- If family allowances paid to employees during the year have been recorded in a dedicated account, for example, in the "Family Allowance Contributions" account, to reconcile the accounts with the AVS closing balance and record the corresponding adjustment, the balance of this account can be transferred to the AVS/AD Contributions account.
Registering Lainf, Complementary Lainf, and LPP Pension Adjustments
When recording the last salaries of December and the payment of the thirteenth salaries, it's necessary to print the list of salaries showing all gross salaries. The overall AVS gross amount must be communicated to the personnel insurance companies, which will determine any adjustments to be paid.
In multi-currency accounting, similar to double-entry accounting, certain closing accounting operations are required before moving to the new year. These include adjustment entries, value adjustments, and reconciliations related to personnel contributions.
On the Year end closing operations page in double-entry accounting, both accounting and tax-related closing operations are listed.
Below, we will address the topics related to closing entries for exchange rate differences.
Year-end exchange rates and unrealized gains/losses
In order to obtain financial statements, foreign currency accounts must be converted to the base currency at the current or historical exchange rate. Exchange rates variations result in unrealized exchange rates gains or losses. These must be recorded with the following command from the Actions menu:
- Create transactions for exchange rate differences
- Please refer to this page for the entire subject of setting exchange rates and calculating unrealized gains and losses.
- Please note that the closing exchange rates must be entered in the Exchange rate table in rows without a date. These exchange rates are taken over by the program for the calculation of the opening balances of the New Year. If exchange rates with dates are entered, there will be differences in the opening balances of the New Year.
- If there are rows with dates in the Exchange Rates table (historical exchange rates), when closing the accounts, for calculating exchange rate differences, it is recommended not to activate the Use historical exchange rates (rows with dates) option. This ensures that the program uses the updated exchange rate found at the beginning of the exchange rates table, in the rows without dates (in the Rate column)
After the recording of the exchange rate differences, the balances in basic currency are updated according to the closing exchange rates entered in the Exchange rates table (rows without date). In the Chart of Accounts, the balances in the Balance column are equal to those in the Calculated Balance column.
Sending the file to the accountant for closures
If closures and/or checks are carried out by your trustee, you can simply send the file of your accounting created with Banana Accounting Plus via email or save the data on a USB stick.
- If your trustee uses Banana Accounting, you can simply transmit the AC2 file via email or through a USB flash drive. You can also save your file and digital documents in a shared folder with your trustee on Dropbox. You will no longer need to bring heavy binders of paper documentation to the trustee. Furthermore, the trustee will work quickly without having to search through paper documentation.
- If your trustee doesn't have Banana Accounting, you can create a PDF of the accounting data through the File > Create PDF folder menu and transmit the documentation via email. The trustee will indicate all the changes and additions to be recorded to properly close the accounting period.
Alternatively, your trustee can open your accounting file using the Free plan of Banana Accounting Plus, downloading it from our Download page. If your file has more than 70 transactions, your trustee won't be able to add new transactions or make changes, but they can still view all the data, obtain details of each account with a simple click on the account number, etc., and advise you on possible corrections or improvements.
Once the closing and verification entries are executed, it is recommended to lock the transactions
- Actions > Lock Transactions
The transactions rows will be numbered and will have a blockchain code that ensures their security.
End of year printouts
For end-of-year financial statement printouts, you can find the information by clicking on the following links:
PDF Folder
The Create PDF folder command allows you to have all the documents of the entire accounting exercise (account sheets, journal, VAT statements, monthly, quarterly, and annual reports...) in a single PDF file.
You can archive the accounting data by saving the accounting file and prints in PDF format. Optionally, make backup copies on an external disk drive.
On the Preparing documentation for the Audit page, we have published a series of notes and suggestions regarding the documentation to be sent to the auditor. The completeness of the documentation is a good basis for making the auditor's work more efficient and faster.
In Banana Accounting, the allocation of profit or loss occurs automatically at the beginning of the new year. For more information, please refer to the Create New Year page.
Normally, once the closure has been completed, there should be no recorded modifications. However, sometimes there is a need to make changes to the accounts, as in the following cases:
- Unrecorded exchange rate differences at closure
- Unrecorded missing transactions
- Errors in the transactions.
In these cases, it is recommended to proceed as follows:
- If you have already submitted the data to the authority, or if the accounts have already been audited and the balance sheet presented to shareholders or stakeholders definitively, do not make any changes to the accounts, as any modifications could be considered falsifications, with potential legal consequences.
- Make necessary adjustments in the following year, clearly describing the issue in a document that you will need to attach to the adjustment transactions.
- If you forgot to record exchange rate differences, follow the information on our website under Differences in opening balances.
- Obviously, depending on the situation, there may be tax consequences, so it is better to seek advice from your accountant.
- If the legal framework allows you to make changes to a closed year:
- Proceed with caution, limiting yourself to only the truly necessary modifications. If you forgot to record exchange rate differences, follow the information on our website under Create exchange rate differences.
- Review the accounts and perform all necessary checks to ensure that the changes do not cause any issues.
- After the modifications, open the file for the following year and update the opening balances using the Update opening balances command.
Printouts
All the printouts of the Balance Sheet, Profit and Loss Statement, and the various Accounting Reports are available from the Reports menu. Each command has various options for customizing the various printouts.
To print the content of the tables, please refer to the Page setup section (last paragraph).
The printouts have the same features as those of the Double-entry accounting, but with the display of columns and values of foreign currencies, exchange rates and counter values in basic currency.
The principal printouts available:
Account card multi-currency accounting
Columns and views of the account card
In the Account card, there are three groups with of columns. In the headers of the Debit, Credit and Balance columns, the initials of the respective coins are indicated.
- Basic currency
Indicated are the opening balance, the transactions, and the balance in basic currency. - Account currency
The transactions in the Account currency are being indicated.
When the accounts are in Basic currency, these values are identical to those of the Basic currency. - Currency2
For every transaction, the amount in Currency2 is being indicated. The logic of for converting amounts depends on the account currency, see Converting to Currency 2 on the Multi-Currency File Properties page.
For the account card the amounts of the transactions are converted with the following logic:- For the opening or carry forward rows, the account balance is converted.
- For the transactions
- The Debit and Credit amounts in Currency 2 are converted.
- The balance of the account in Currency 2 is calculated by adding the amounts in Currency 2 resulting from the conversions.
It is possible that the final balance of the Currency 2 account is not equal to the balance of the currency account converted to Currency 2. See the Exchange rates issues page for possible rounding differences
-
Transaction currency
It is not visible if it is not equal to the account currency or not in Basic currency. If an account is registered in a currency different from the account currency, but equal to Currency2, the amounts in Currency2 will not be the original ones, but those converted from the basic currency.
Views of the Account cards
In the multi-currency account card there are several views, each of which displays certain columns at the same time. As you move from one view to another, the columns change.
You can change the arrangement of the columns and create additional views. More details about the views can be found at the following link: Tables setup.
Data editing
It is not possible to modify the data in the Account card. Double-click on the (underlined) row number to go back to the original corresponding row of the Transactions or Budget table. More details are available on the Account card page (paragraph Updating the Account card).
Info Window
In the lower part of the screen, the Info window, the values of the accounts related to the active transaction are being indicated.
- Account number
- Account description
- Transaction amount of the account in Basic currency
- Actual Account Balance in Basic currency
- Account's currency symbol
- Transaction amount of the account in the Account currency
- Actual Account Balance in Account currency
Enhanced balance sheet multi-currency accounting
The Enhanced Balance Sheet in the multi-currency accounting is done the same way as the one in double-entry accounting. Information is available at the following link: Enhanced Balance Sheet.
The difference consists in the fact that the foreign currency accounts report the amounts in foreign currency as well as in basic currency (amount converted).
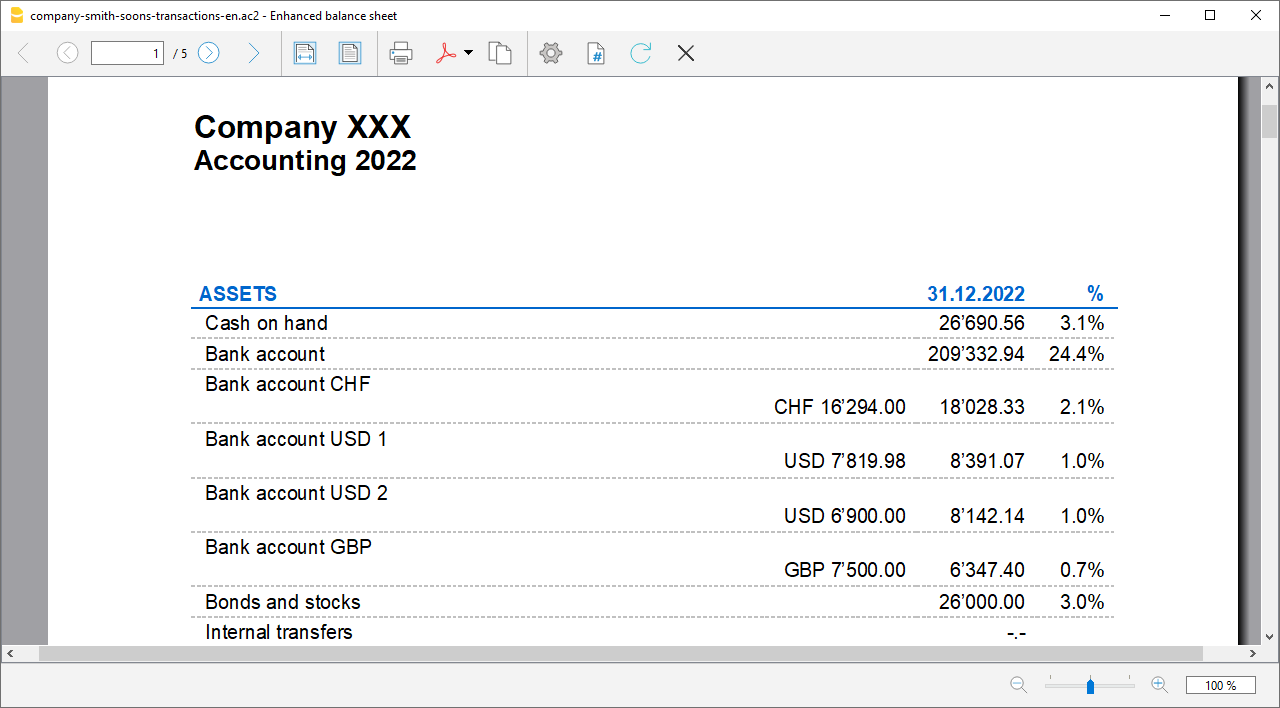
Enhanced balance sheet by groups multi-currency accounting
The Enhanced Balance Sheet by groups in multi-currency accounting is done the same way as the one in double-entry bookkeeping. Information is available at the following link: Enhanced Balance Sheet by groups.
Watch the video tutorial that shows how to create and print the Enhanced Balance Sheet with groups.
The difference consists in the fact that the foreign currency accounts report the amounts in foreign currency as well as in the basis currency (amount converted).
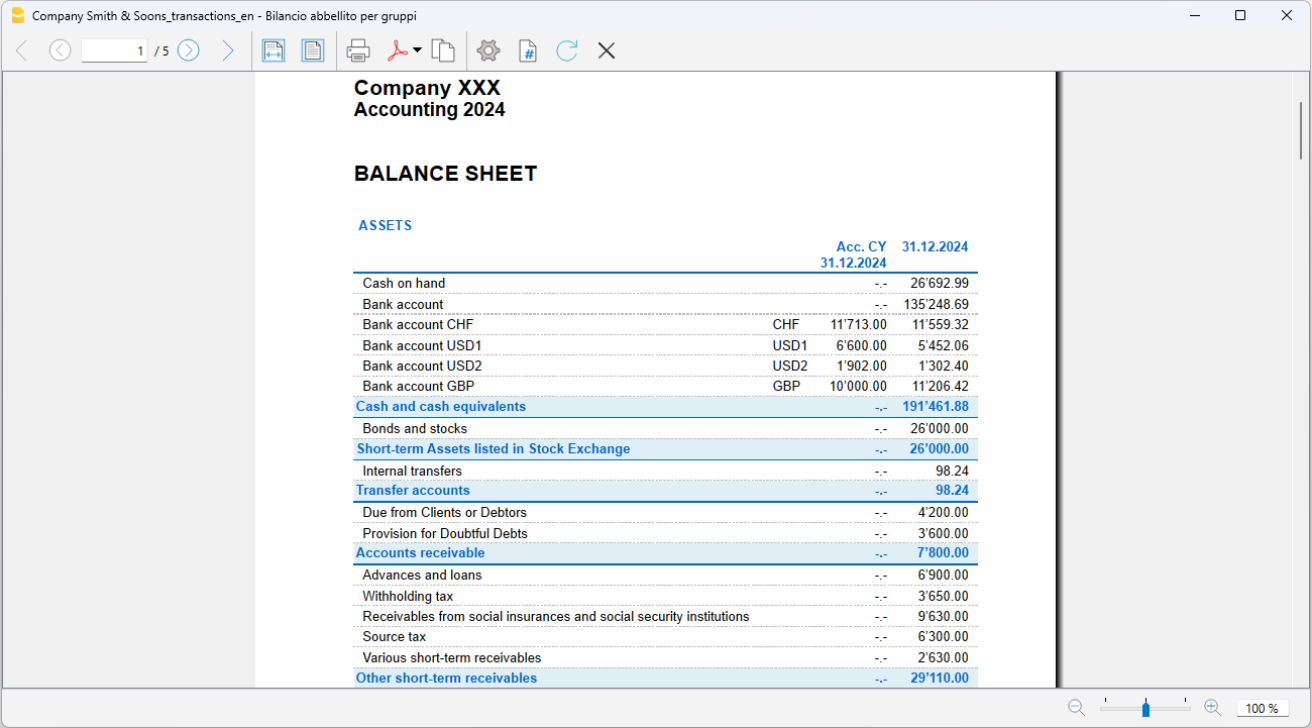
Accounting reports multi-currency accounting
Accounting Reports in multi-currency accounting are done the same way as the ones in double-entry bookkeeping. Information is available at the following links: Accounting report; External accounting report; XBRL CH report
Bilancio in una seconda moneta
Banana Contabilità consente di visualizzare il bilancio anche in una seconda moneta, oltre alla moneta base (normalmente la moneta nazionale).
La funzione della seconda moneta (Moneta 2) permette di visualizzare il bilancio e i saldi dei conti in una valuta diversa dalla moneta base, senza generare registrazioni contabili.
Come ottenere un bilancio in una seconda moneta
- Impostare un file in partita doppia Multimoneta
- Inserire la sigla della moneta base:
nel menu File > Proprietà file (Dati base) > sezione Contabilità - Inserire la sigla della seconda moneta
nel menu File > Proprietà file (Dati base) > sezione Moneta estera - Impostare la seconda moneta nella tabella Cambi.
Nota importante
I saldi dei conti, nella vista Moneta 2, vengono convertiti in base all’ultimo cambio impostato nella tabella Cambi e sono visibili nella Tabella Conti – vista Moneta 2.
Come evitare il ricalcolo automatico dei saldi in moneta 2
Quando il cambio viene modificato, il programma ricalcola automaticamente tutti i saldi nella Moneta 2, in base all'ultimo cambio inserito nella tabella cambi.
La conversione dei saldi nella Moneta 2 è sempre visibile nella Tabella Conti – vista Moneta 2.
Ogni variazione del cambio influisce esclusivamente sulla visualizzazione dei saldi e non modifica i valori contabili nella moneta base.
Se si desidera evitare che i saldi in moneta 2 vengano ricalcolati ogni volta che si modifica il cambio, è possibile procedere come segue:
- Inserire nella tabella Cambi una moneta supplementare per la Moneta 2 (ad esempio USD 1).
- Nelle Proprietà file (Dati base), sezione Moneta estera, selezionare la sigla della moneta supplementare inserita, che apparirà nell’elenco delle monete estere.
- Quando si desidera visualizzare i saldi nella Moneta 2, impostare manualmente il cambio desiderato per la relativa sigla nella tabella Cambi.
Maggiori informazioni sono disponibili alla pagina:
New Year | Multi-currency Accounting
Before moving on to the new year make sure you have carried out all the checks, verifications and closing entries as indicated on the following pages
- Year end closure of the Double-entry Accounting
- Year end closure of the Multi-currency accounting for exchange rate issues
All accounting information relating to the opening of the new financial year can be found on the page
In the following, we will limit ourselves to information on exchange rate issues in Multi-currency accounting.
Creation of a new accounting period
When switching to a new accounting year, the program automatically carries over the opening balances to the following year. More details are available on the page Create new year.
Also in the Multi-currency accounting, it is possible to decide to switch to the new year, even if the previous year has not been definitively closed (because entries have not yet been made, exchange differences have not yet been calculated, or the operating result has not been distributed).
It is important, however, that before closing the year, the exchange rate differences are calculated in the year that is about to close, from the menu Actions → Calculate exchange rate differences.
Then, in the new accounting period previously created, you can update the opening balances from the menu Actions → Update opening balances.
Differences in opening balances
In the event that there are differences in the opening balances in the new accounting period, we advise you to carry out all the checks and controls suggested on the Checks and verifications page.
If the differences are due to exchange rate differences not calculated in the previous accounting period, follow the instructions on the page Differences in the opening balances.
Print opening balances
To print the opening balances:
- To print the contents of the Table use the Print/Preview command, selecting the rows of the Balance sheet.
- It is also possible to use the Accounting Printouts and set the print only for the part of the Balance sheet and the opening column.
Differences in the opening balances | Double-entry accounting multicurrency
When the opening balances do not match the closing balances of the previous year, the program indicates a currency exchange difference in the initial balances.
This happens because the foreign currency values, converted into the base currency, are no longer aligned.
The most common causes are:
- Exchange rate differences not recorded in the previous year.
- Changes to foreign currency transactions after the exchange rate differences were created.
- Use of a historical exchange rate instead of the closing rate, which is present in the Exchange Rates table, in the Exchange Rate column.
- During the year, you can use the exchange rates with a date from the Exchange Rates table (historical rates).
- For year-end closing and opening of a new accounting file, you must not use historical exchange rates.
The program considers only the exchange rates of the rows without a date.
If you recorded the exchange rate differences using a historical exchange rate, remember to also update the row without a date in the previous year:
The exchange rate indicated must match the last rate used to generate the exchange rate differences.
The procedure is described on the documentation page Exchange Rates Table in the following paragraph.
How to record exchange rate differences
To correctly record exchange rate differences, you must:
- Update the Exchange Rates table, column Exchange Rate, with the official rate of 31.12, provided by the Federal Tax Administration.
- The closing rate must appear in the rows without a date.
- It is not possible to use a historical exchange rate (rate with a date), otherwise exchange rate differences may occur.
If, when opening the new year (from the menu Actions > Create new year), or when updating opening balances (from the menu Actions > Update opening balances), the exchange rate differences are not recorded, the program will indicate a difference in the initial balances in the new accounting year.

To resolve this issue, there are two possible solutions:
- If the accounting year has not yet been definitively closed (and, if applicable, also audited):
- Enter in the Exchange Rates table, column Exchange Rate, in the rows without date, the official exchange rates of 31.12 (or the closing rates provided by the company's statute).
- Activate the command from the menu Actions > Create exchange rate difference transactions.
- Open the file for the new year and Update opening balances.
- If the accounting year has been definitively closed (and, if applicable, also audited):
- Open the newly created accounting file.
- Enter in the Assets or Liabilities (Accounts table), in case of a positive or negative exchange rate difference, a new account Unrecorded exchange rate differences, or simply record the amount in account 1090 Transfer account (as in the example below).
- In the Opening currency column, enter the amount corresponding to the exchange rate difference.

- In the accounting of the new year, in the Accounts table, Opening currency column, a balance related to the exchange rate differences has been generated.
To adjust the difference, proceed as follows:- In the Transactions table, on January 1st (or on the statutory opening date), record the exchange rate difference amount in the account Unrecorded exchange rate differences, or as shown in the example, in account 1090 Transfer account, using as counterpart the exchange rate differences account (Gains and/or losses on exchange) in the income statement.

After recording the adjustment for exchange rate differences, the account used should have a balance of 0, or equal to the balance prior to recording the exchange rate difference.
If it is a gain on exchange, the difference amount should be entered in a liabilities account, or in assets with a minus sign in front of the amount.

This amount, which initially affects the income statement of the new year, is then canceled with the first exchange rate update operation, which can be done according to your needs during the year. Otherwise, if the exchange rate update is only done at year-end, the exchange rate gains and/or losses account will still be correctly adjusted.
Warning:
If the exchange rates are updated only at year-end, the interim Balance Sheet and Income Statement will be “affected” by the amount of the Exchange Rate Difference related to the Opening adjustment.
Accounting with cryptocurrencies
Banana Accounting allows you to manage any currency, including the Bitcoin, Ethereum and any other cryptocurrency, even the ICO (Initial Coin Offering), using any abbreviation and allowing for up to 27 decimals and freely settable exchange rates. Precise values and account statements are generated. In Banana Accounting, you will always have the exact values for each individual currency.
Any currency can be selected as the base currency, EUR, US$, Bitcoin and any currency can be managed.
Single or multiple currencies
When you are keeping accounts, you must first decide whether you are doing so in one single currency or if multiple currencies are required.
The Cash book and Income & Expense accounting work with one single currency, whereas Double-entry accounting allows for you to keep accounts in several different currencies.
The base currency is defined in the File prpoerties of the accounting (of the File menu). The program displays a list of predefined currencies, but you may indicate any other currency code.
For Double-entry accounting, amounts are indicated in the account currency as well as the base currency. Amount in the base currency can be added up and are therefore used for the preparation of the Balance Sheet, the Profit & Loss statement, as well as the different reports.
When selecting Multi-currency accounting, the currencies that you require can be be set up in the Exchange rates table, indicating the exchange rates between the different currencies. National or cryptocurrencies can be managed without restrictions and any code can be used.
Changing decimal points for the accounting
Decimal points are implemented when the accounting file is created, in order to avoid rounding up differences. Amounts are rounded up according the same method, thus avoiding differences that sometimes occur in Excel.
When starting a new accounting, it is advised to use an existing template, which is usually set up with 2 decimal points.
If you need to manage your accounting or accounts with a higher number of decimal points, you need to "re-create the file" with the following command
- Tools Menu → Convert to new file ...
The program will generate a copy of your file with the new Outline created for your new file, including the appropriate decimal points required. For Multi-currency accounting you will have to indicate:
- The decimal points in the base currency.
- The decimal points for accounts in foreign currencies.
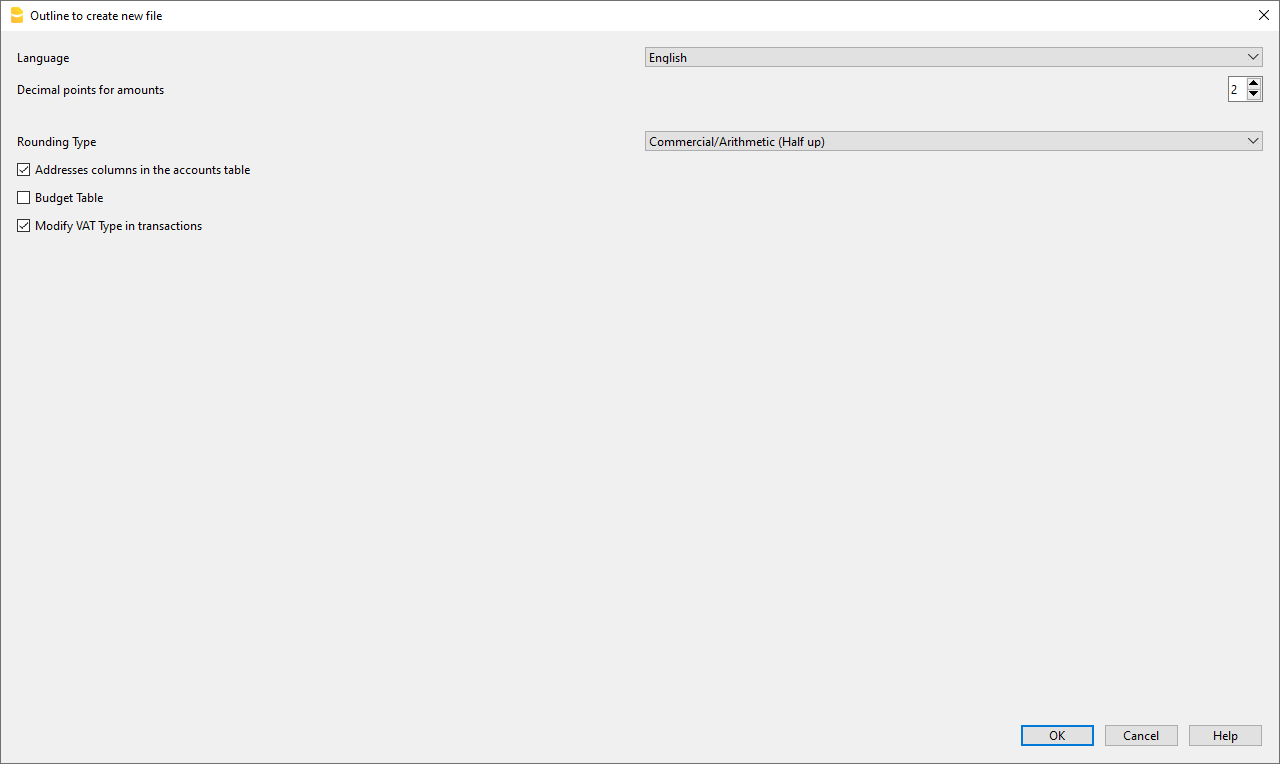
Setting up decimal points for foreign currencies
When using multi-currency accounting in Double-entry accounting, rounding up needs to be indicated for amounts in foreign currencies.
Decimal points for foreign currency should generally not be inferior to those in use for the base currency.
When managing cryptocurrencies such as ETH, you must indicate 18 as a value in the conversion file.
The different currency codes must be indicated in the Exchange rates table, with the related opening and current exchange rates.
The currency code must be indicated for each account in the Accounts table of the Chart of Accounts.
In the Currency column, the amounts are therefore displayed therefore with the maximum number of decimals, also for the currencies that do not use as many decimals. If you want to have a smaller number of decimals, you can set it up in the format of the desired column. For example with "0.00000" will display only 6 decimals.
Currencies and decimal points
Currency codes are available and can be consulted in the relative Wikipedia page, with indication of decimal points commonly used.
- Currencies generally use 2 decimal points.
- Currencies with 0 decimal points are
- BIF Burundian Franc
- CLP Chilean peso
- DJF Djiboutian franc
- GNF Guinean franc
- ISK Icelandic króna
- JPY Japanese yen
- KRW South Korean won
- PYG Paraguayan guaraní
- RWF Rwandan franc
- UGX Ugandan shilling
- UYI Uruguay Peso en Unidades Indexadas
- VUV Vanuatu vatu
- XOF CFA franc BCEAO
- XPF CFP franc (franc Pacifique)
- Currencies with 3 decimal points are
- BHD Bahraini dinar
- IQD Iraqi dinar
- JOD Jordanian dinar
- KWD Kuwaiti dinar
- LYD Libyan dinar
- TND Tunisian dinar
- Currencies with 4 decimal points are
- UYW Unidad previsional
Cryptocurrencies
There is a multitude of cryptocurrencies, each carrying their own name and code.
There is no indication for their decimal points. For the best known they are
- BTC Bitcoin with 9 decimal points.
- ETH Ethereum with 18 decimal points.
Multiple other virtual currencies are based on the Ethereum blockchain and require 18 decimal points.
Indicate the appropriate decimal points for the required currency in the Outline create new file dialog (see image above).
Income & Expense accounting
The Income and Expense Accounting is exclusive to Banana Accounting Plus and is designed for those who are not accounting specialists.
Thanks to the intuitive interface, you can easily enter your income and expenses, and generate professional reports in just a few clicks, even if you’ve never done accounting before. You always have everything under control: your data is clear, organized, and visible in the table.
Ideal for those new to accounting
This type of accounting is based on a table and column structure, similar to Excel, but specifically designed for accounting management. There’s no need to enter formulas: everything is made to be intuitive and straightforward. You can edit and correct the data at any time, without worrying about making mistakes.
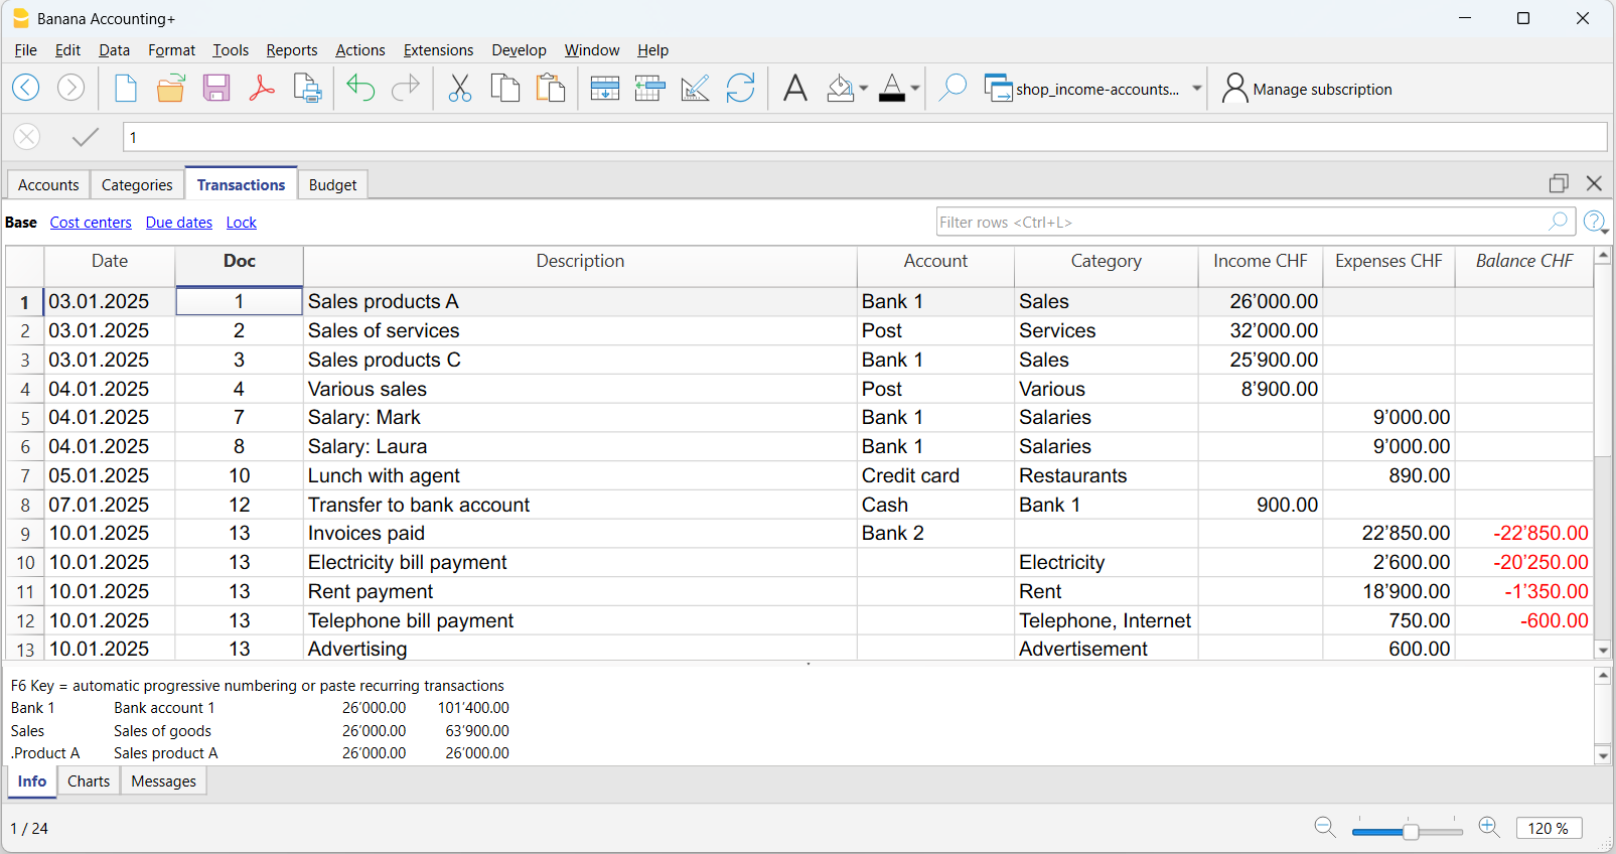
A versatile solution ideal for:
- Micro businesses and freelancers
- Associations, foundations, and guardianships
- Families and individuals
- Accounting management of projects or real estate
Everything you need to get started right away
Easily enter income and expenses
Recording income and expenses is very simple. In the Transactions table you’ll find all the columns ready for you to enter data in a clear and organized way. You just need to enter:
- The date
- Optional document number and link to the digital document
- The amount received or spent
- The account where the money comes from or is going to (cash, bank, post)
- The category, which represents the reason for the income or expense (rent, phone bills, etc.)
The program takes care of the rest!
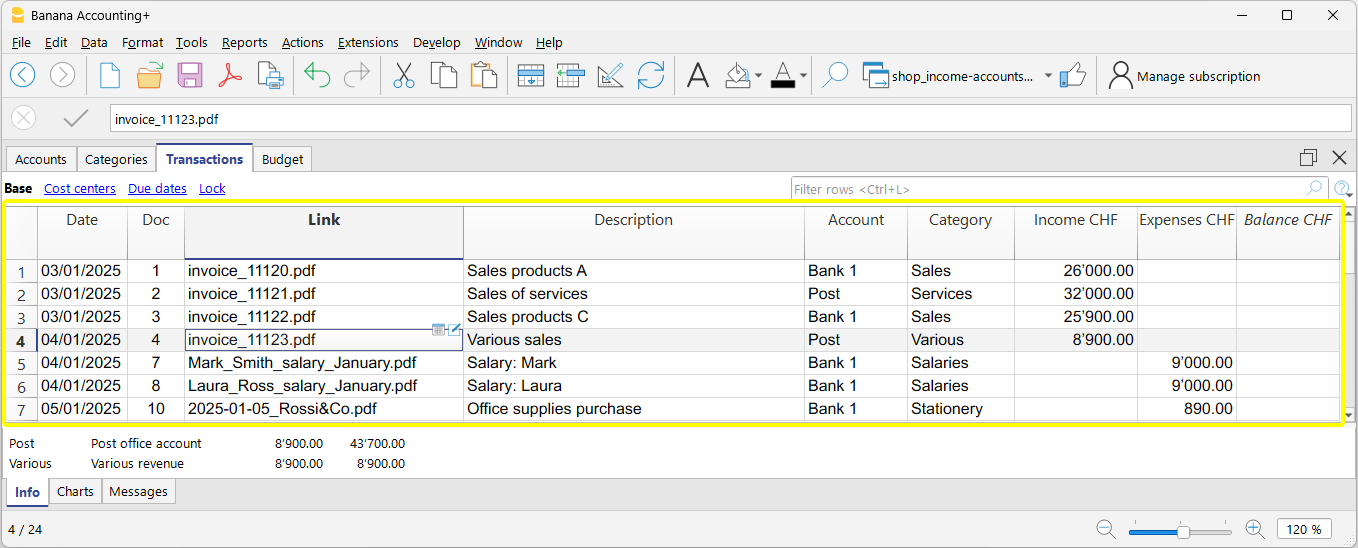
At any time, you can correct and edit the data you've entered, copy and paste data, highlight rows with colors, filter rows by keyword, and much more. All entered data remains always visible both in the Transactions table and in the account and category cards.
To work faster, check the page Speed up data entry.
All your documents at your fingertips
Thanks to the Link column, visible in the Transactions table, you can directly attach a receipt or PDF invoice to each transaction, providing the following advantages:
- Instant access to documents, without having to search for them manually.
- Optimal preparation for tax inspections or audits by authorities.
- Easier collaboration with your accountant, who can see documents already linked to the accounting transactions.

Import your bank transactions
Despite its simplicity, with the Income / Expense accounting you can import transactions from your bank, postal accounts, and credit cards, taking full advantage of the power of professional accounting software. Additionally, by using Rules, you can instantly have a complete and accurate accounting.
You save time, avoid mistakes, and ensure that your data is always up to date and accurate from the start.
Automated checks
Many features check for errors and discrepancies to ensure your accounting is always correct. This allows you to work with greater peace of mind and confidence, knowing your accounting is always consistent, accurate, and ready for any audits or reviews.
Automatic and ready-to-print reports
A report is a document that neatly shows all the money coming in and going out over a period of time. It’s like a summary that helps you understand where the money comes from and how it was spent.
After each transaction, the program automatically updates all the balances of Accounts and Categories, automatically generating professional reports.
The report created by Banana puts everything together, in order, to help you monitor your finances and know whether you are in surplus (money left over) or deficit (you spent more than you earned).
Available report types
From the Report menu, you can choose from:
- The Enhanced statement displays all accounts and categories without subgroups
- The Enhanced statement with groups displays all accounts and categories including subgroups
- Period reports are also available.

Additional printouts
Also from the Report menu, you can access the following printouts:
- Journal – printout of the transactions in the Transactions table
- Account cards (ledgers) – details of the transactions of one or more accounts or categories with totals
Expand features at your own pace
With Banana Accounting Plus, you can start simply and, when needed, move on to more advanced features without changing your working method. For example:
- You can add Cost centers and Segments to analyze in detail projects, departments, or activities, without needing to create new accounts or categories. Using the same report layout, you can check which sectors are most profitable and which generate costs that can be optimized.
- As you become more familiar with accounting and your business grows, you can choose to switch from Income / Expense accounting to double-entry accounting. With the Convert to new file function, your data is automatically transferred to a double-entry accounting file, preserving your work.
Common information for double-entry accounting
In the Income and Expense documentation pages, you will find detailed and specific information. For all general features, please refer to the double-entry accounting documentation. In particular:
Examples of Income / Expense Accounting Templates
Banana Accounting includes a series of templates with predefined chart of accounts, designed to help you get started quickly based on your activity or needs.
Universal templates are standard models but easily adaptable for any country.
Income and Expense Templates for Micro-businesses
- Accounting for Business (Switzerland)
- Accounting for Freelancer (Switzerland)
- Income and Expense Accounting for Yacht (Universal)
Income and Expense Templates for Associations and Non-Profit Organizations
- Parish with Numeric Accounts (Universal)
Income and Expense Templates for Individuals and Families
- Household Budget and Home Accounts (Universal)
- Family Accounting (Switzerland)
- Easily manage your vacation expenses (Universal)
Start now with Income and Expense Accounting!
The Income and Expense Accounting of Banana Accounting Plus is a unique tool that allows you to immediately start your business with full control, meeting the reporting requirements set by the authorities, at a minimal cost! It is the only tool that gives you the flexibility to grow and change without losing your work and without wasting time and resources.
Como começar uma contabilidade de Despesas e Receitas
Criar uma contabilidade partindo de um modelo
Siga os seguintes passos:
- Menu Arquivo, comando Novo
- Selecionar a Região, a categoria e o tipo de contabilidade
- Da lista de modelos que aparece, escolha aquele que melhor se adapta às suas exigências
- Clicar no botão Criar.
Na caixa Procurar, ao inserir uma palavra-chave, o programa visualiza os modelos que contêm a palavra-chave.
Também é possível iniciar com um arquivo vazio, selecionando a opção Arquivo vazio. No entanto, para facilitar o início e evitar erros de agrupamento, aconselhamos começar sempre com um modelo existente.
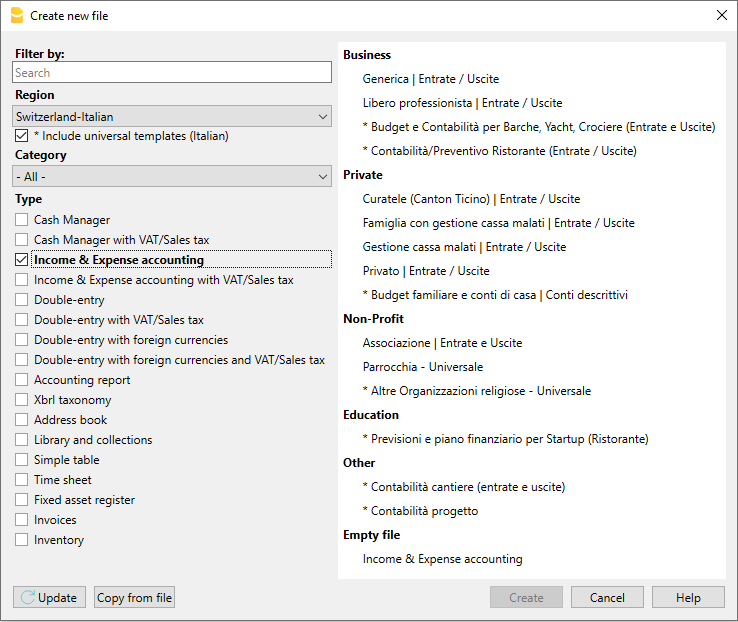
Mais informações sobre como criar un novo arquivo estão disponíveis na página Criar um novo arquivo.
Configurar as Propriedades do arquivo
Configurar os próprios dados nas Propriedades do arquivo e salvar o arquivo com nome.
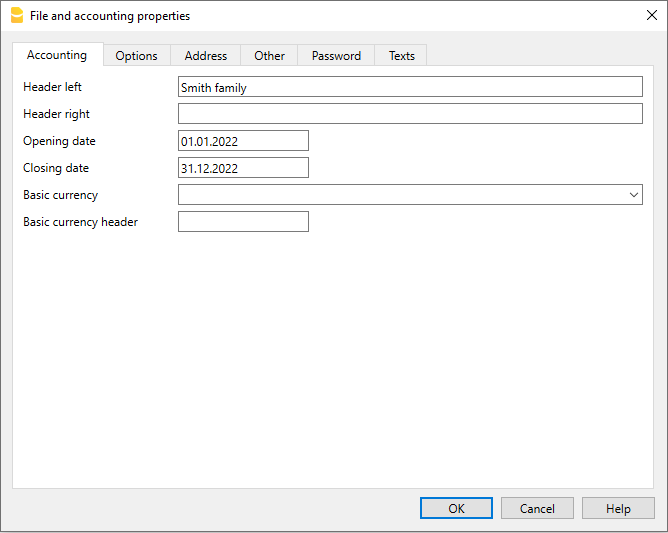
Salvar no disco
Com o comando Arquivo → Salvar como..., guarde os dados e atribua um nome ao ficheiro. Aperecerà o dialogo tipico do seu sistema operativo.
- É aconselhado usar o nome da empresa, seguido do ano "empresa-2020.ac2" para o distinguir de outros arquivos de contabilidade.
- Pode guardar quantos arquivos precisar, cada um com o seu próprio nome.
- Pode escolher o percurso e o suporte (guardar num disco, pen USB o cloud).
Se espera ter também documentos ligados à contabilidade do ano corrente, sugerimos criar uma pasta separada para cada ano de contabilidade para reunir todos os arquivos.
Personalizar a tabela Contas
Na tabela Contas é possivel personalizar as contas patrimoniais, segundo as próprias necessidades:
- podem-se mudar os números de conta
- pode-se mudar as descrições
- na coluna Abertura, insira o saldo inicial.
Os saldos de abertura das contas passivas têm que ser inseridas com i sinal de menos antes do montante.
Esta operação é efetuada só na primeira vez em que se usa Banana Contabilidade, visto que cada vez que o programa cria un ano novo (menu Conta2, comando Criar novo ano) o saldo de abertura é atualizado automaticamente.
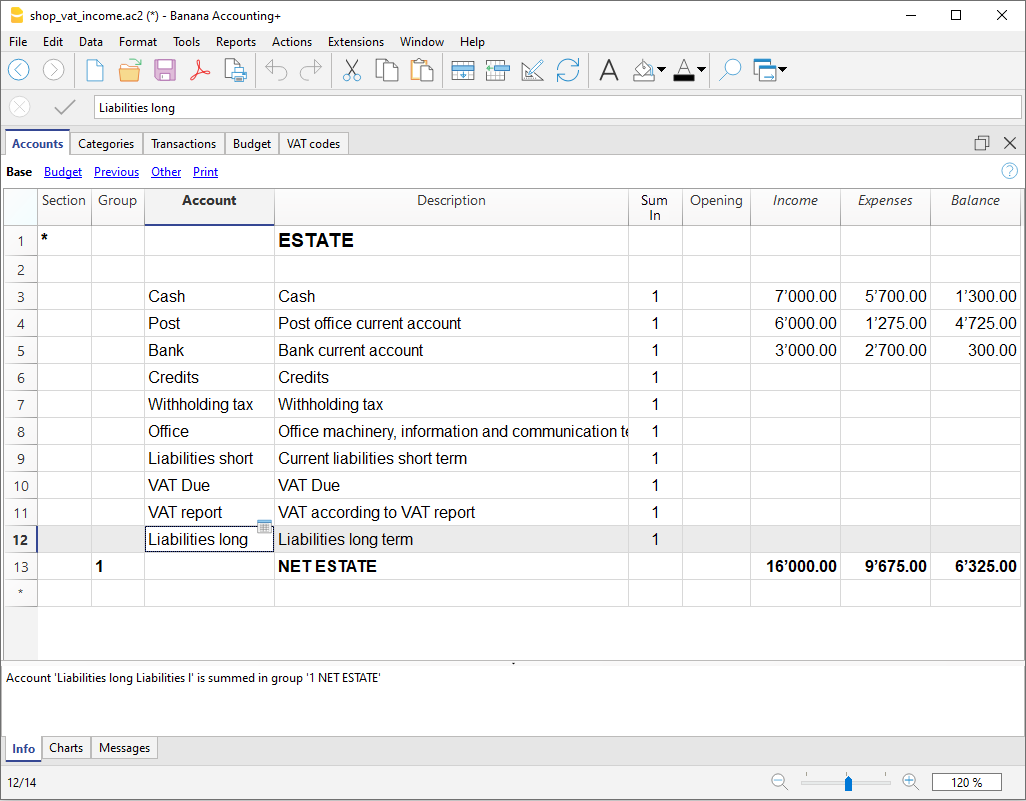
Personalizar a tabela Categorias
Na tabela Categorais é possível personalizar as categorias de receita (ganho/receitas) e de despesa (despesas/custos).
Os números das categorias podem ser mudados, assim como as descrições.
As categorias, ao início do ano, não devem ter nenhum saldo de abertura, para poder determinar os resultados do ano de contabilidade correspondente.
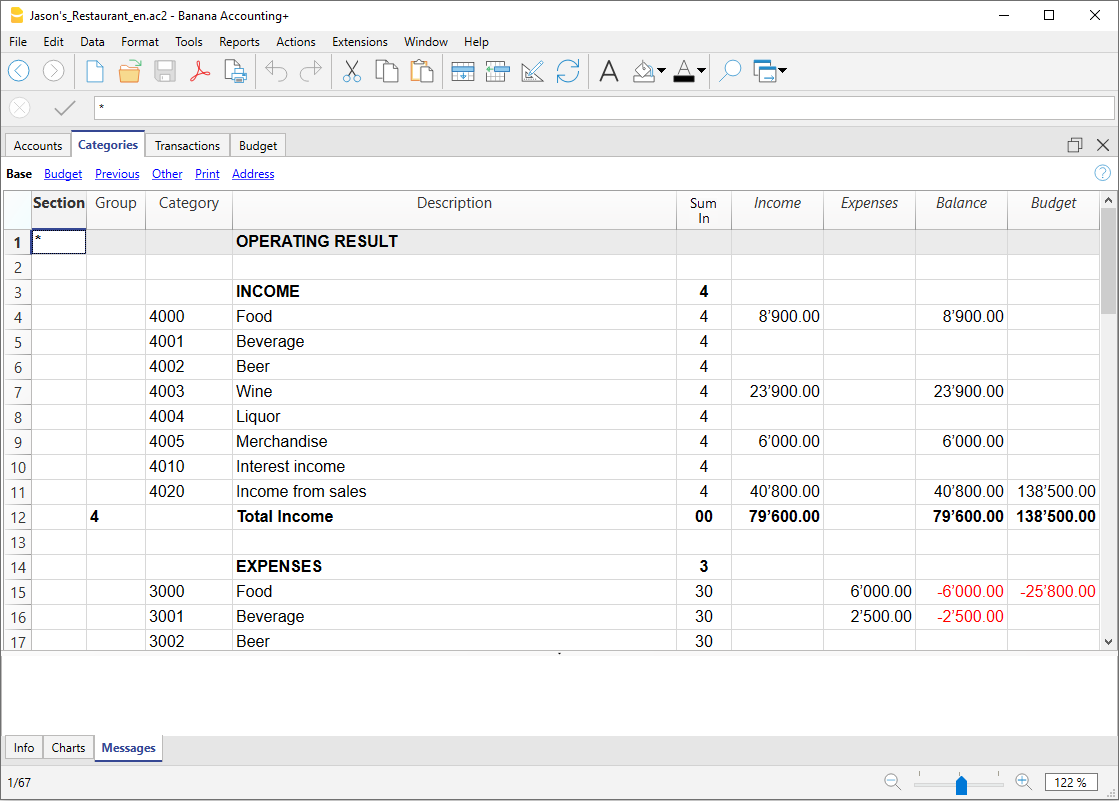
Tabela Lançamentos
Na Tabela Lançamentos inserem-se as receitas e as despesas, indicando a conta sobre a qual foi efetuado o movimento e a categoria à qual é atribuida a despesa ou a receita.
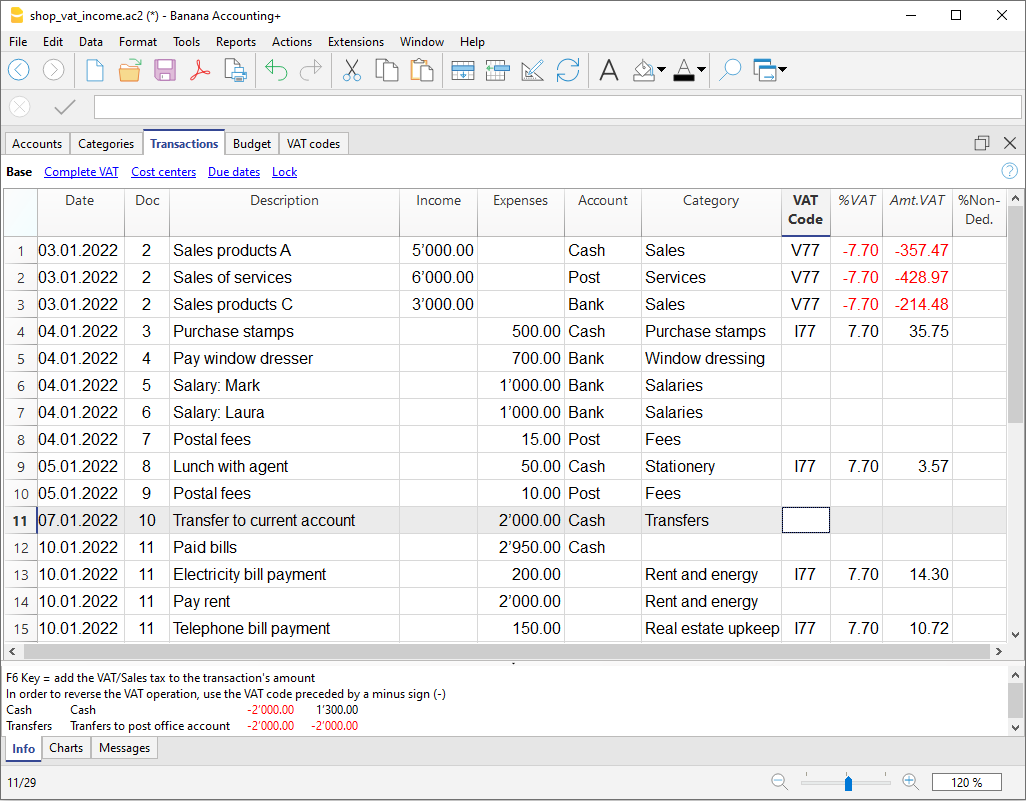
Nas colunas correspondentes:
- Inserir a data
- Inserir o número de documento que foi atribuído ao documento em papel manualmente. Isto permete recuperar facilmente o documento, uma vez contabilizada a operação
- Inserir a descrição
- Na coluna Receitas, inserir o montante ganho
- Na coluna Despesas, inserir o montate gasto
- Inserir a 'conta' (uma conta presente na tabela Contas, ex: Banco)
- Inserir a 'categoria' de despesa ou de receitas (uma categoria presente na tabela Categorias).
Acelerar a inserção dos Lançamentos
Para acelerar a inserção dos lançamentos utiliza-se:
- a função de Emissão de dados com preenchimento automático que consente recuperar automaticamente dados já inseridos previamente
- a função dos Lançamentos repetitivos (menu Conta2) que permete memorizar numa tabela os lançamentos repetitivos
- a importação de dados do extrato bancário ou postal.
Lançamentos com IVA
Para poder registrar operações com IVA ocorre:
- No menu Arquivo, comando Novo escolher como Tipo a Contabilidade de Despesas e Receitas com IVA/ICMS
- Escolher um dos Modelos já predisposto segundo a nação e que seja do tipo Contabilidade de Despesas e Receitas com IVA/ICMS.
Para os lançamentos com IVA, consultar a página Lançamentos.
Lançamentos compostos
Para os Lançamentos compostos, aqueles que concernem débitos e/ou créditos em várias contas e/ou categorias (ex: quadno se pagam faturas diferentes com a conta corrente bancária) ocorre registrar em mais do que uma linha:
- na primeira linha, registe o montante total de receitas ou de despesas e a conta da qual partem os pagamentos das faturas
- em cada linha sucessiva, registe o montante de receitas ou de despesas e na coluna categoria, insira a categoria de receita ou de despesa.
Cada montante único é registado numa linha. Quando todas as receitas e despesas única forem inseridas não deveria existir nenhuma diferença.
A ficha Conta
A ficha conta permete obter um elenco completo dos movimentos que fazem parte da mesma categoria ou do mesmo grupo.
- Para abrir uma ficha conta clique na célula que contem o número da conta, seguido de um clique no símbolo azul pequeno presente no canto superior direito da célula.
- Para abrir mais fichas conta ocorre selecionar o comando Razão por conta do menu Conta1.
- Para atualizar as fichas conta, depois de modificar a tabela Lançamentos, ocorre clicar no símbolo azul, com duas setas circulares, que se encontra no canto superior direito da ficha conta.
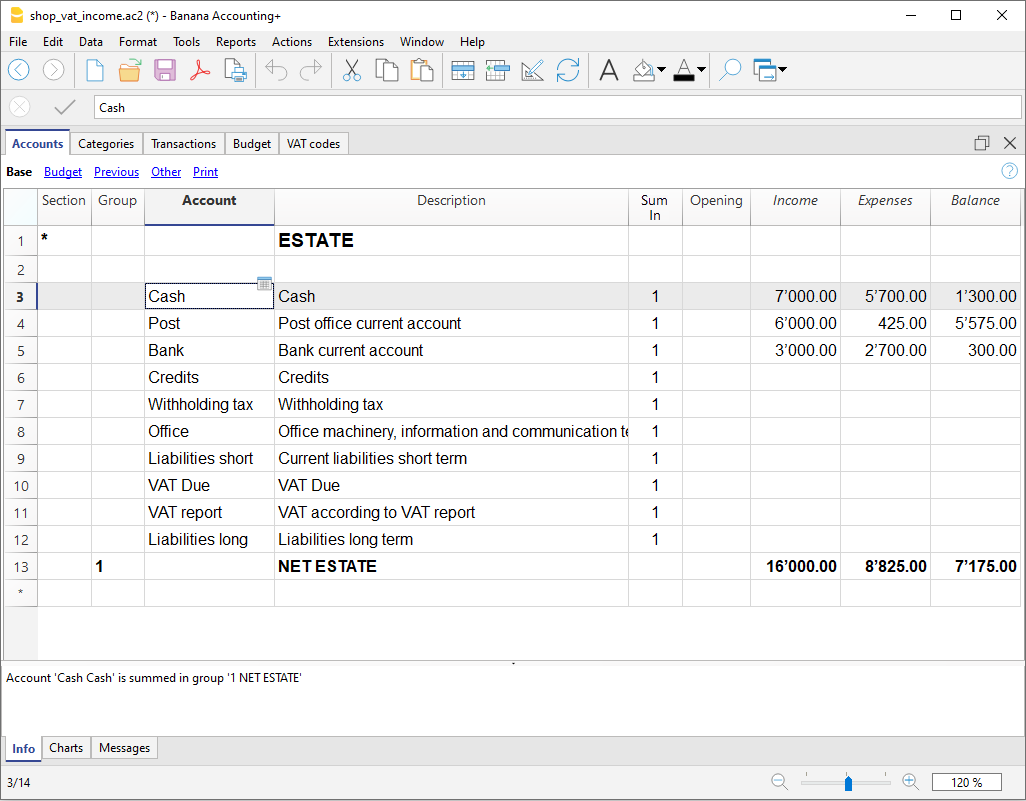
A ficha Categorias
A ficha categorias permete obter um elenco completo dos movimentos que fazem parte da mesma categoria.
- Para abrir uma ficha categoria clique na célula onde se encontra o número da categoria, seguido de um clique no símbolo azul pequeno que se encontra no canto superior direito da célula.
- Para abrir mais fichas categoria ocorre selecionar o comando Razão conta do menu Conta1.
- Para atualizar as fichas categoria, depois de modificações na tabela Lançamentos, ocorre clicar no símbolo azul, com duas setas circulares, que se encontra no canto superior direito da ficha.
Fichas conta por período
Para visualizar as fichas conta com os saldos referidos num determinado período, ocorre clicar no menu Conta1, comando Razão conta e na secção Período ativar Período selecionado, inserindo a data de começo e de fim do período.
Para mais informações, consulte a página Periodo.
Imprimir as fichas conta
Para imprimir uma ficha conta, basta visualizar a ficha a partir de qualquer tabela (Contas ou Lançamentos) e acionar a impressão no menu Arquivo.
Para imprimir várias ou todas as fichas conta, clicar no menu Conta1, comando Razão conta e selecionar as fichas conta para imprimir. Através do filtro presente na janela, pode-se fazer uma seleção automatica de todas as contas, os centros de custo, os segmentos, os grupos, etc.
Demonstrativo analítico
Para visualizar o Demonstrativo analítico e o Demonstrativo analítico por grupos, clicar no menu Conta1 e depois no comando Demonstrativo analítico ou Demonstrativo analítico por grupos. Também é possível fazer demonstrativos por período.
- O Demonstrativo analítico visualiza todas as contas e as categorias sem eventuais subgrupos
- O Demonstrativo analítico por grupos visualiza todas as contas e as categorias também com os subgrupos
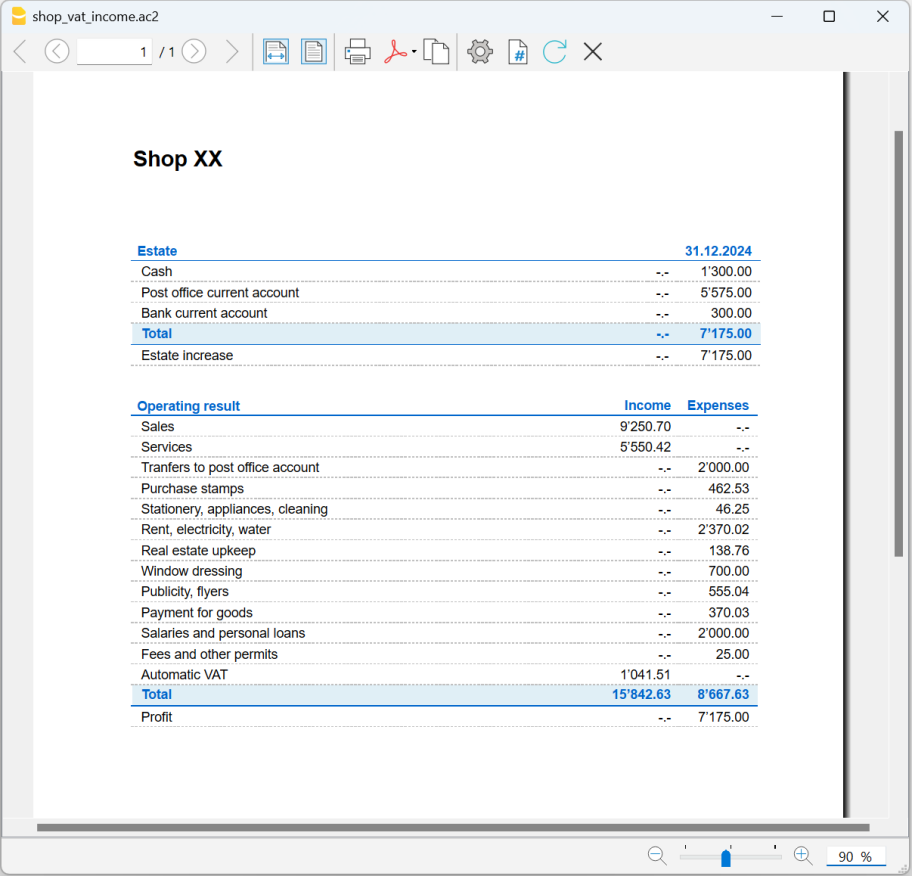
Armazenamento de dados em PDF
Ao fim do ano, quando toda a contabilidade estiver completada, corrigida e revista, pode-se armazenar todos os dados da contabilidade com o comando Criar PDF, no menu Arquivo.
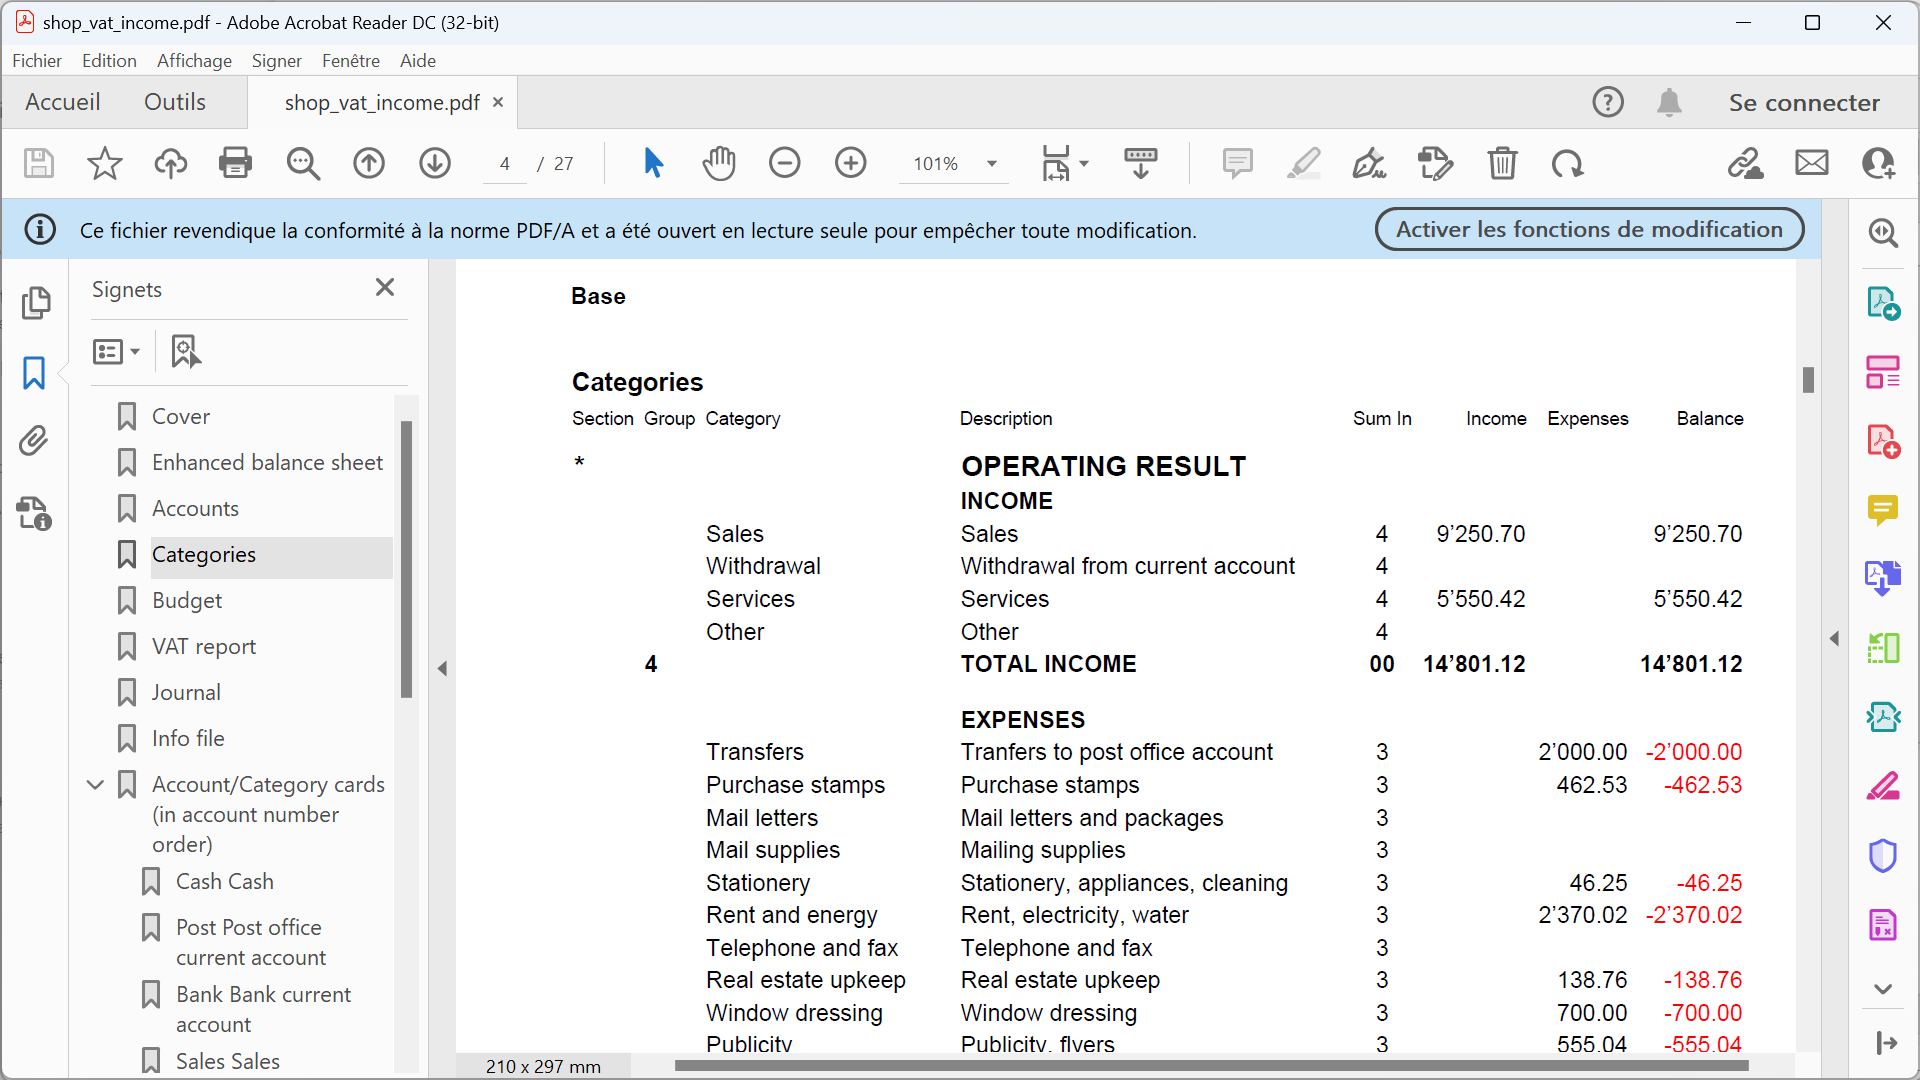
O Orçamento
Antes de começar um ano de contabilidade, pode-se criar um orçamento com possíveis despesas e receitas, de modo a ter sob controlo a situação económica e financiária da própria empresa.
O orçamento pode ser configurado de duas maneiras diferentes:
- Na tabela Categorias, coluna Orçamento. Em cada conta é indicado o montante do orçamento anual.
Neste caso, quando se elabora o Orçamento no menu Conta1, comando Demonstrativo analítico por grupos, a coluna do orçamento descreve os montantes que se referem ao ano inteiro. - Na tabela Orçamento, que se ativa no menu Ferramentas, comando Adicionar novas funcionalidades.
Nesta tabela registram-se todos os orçamentos de despesas e de receitas com lançamentos. Caso se ative esta tabela, a coluna Orçamento da tabela Contas é desativada automaticamente.
Neste caso pode-se configurar um orçamento detalhado que tenha em conta possíveis variações durante o ano e nos diversos períodos do ano.
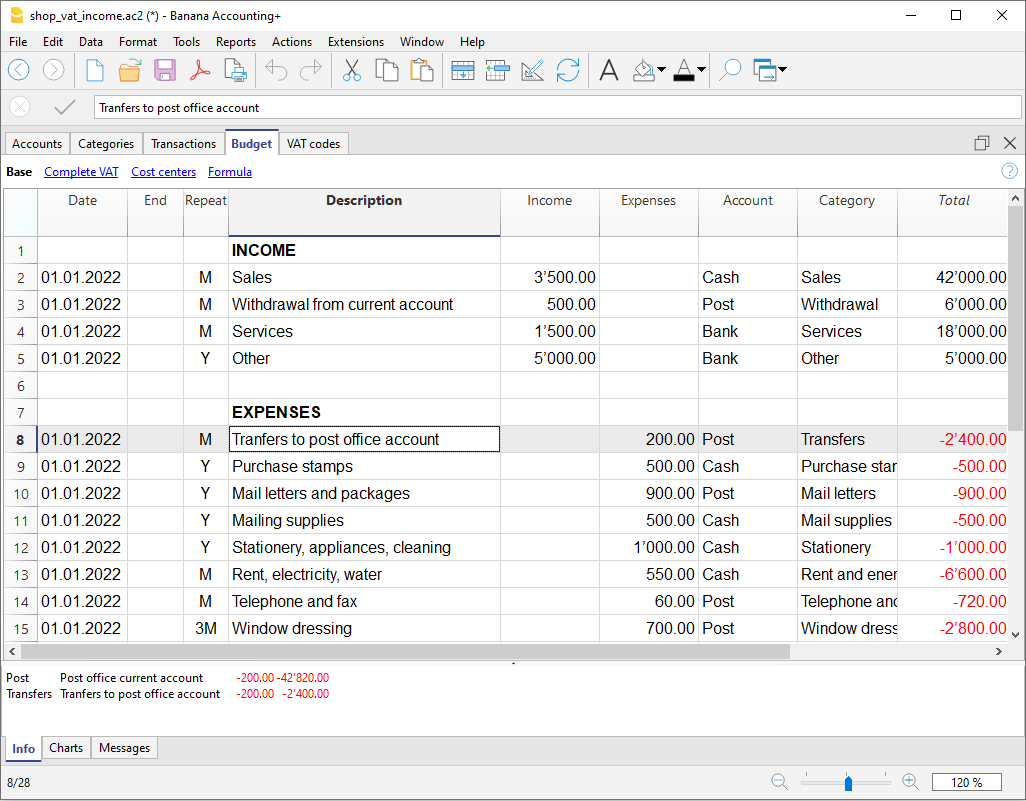
Accounts table | Income /Expense accounting
The Accounts table is made up of all the items of what you own (cash, assets, receivables) and what you owe (debts, loans, taxes).
In accounting terms:
- what you own → Asset accounts or Assets.
- what you owe → Liability accounts or Liabilities.
The difference between what you own and what you owe is your net worth, meaning what remains after subtracting debts from your assets.
- Net worth = Assets − Liabilities
With the Accounts table, you can always keep your financial situation under control in a simple and organized way.
- You can immediately see how much liquidity you have
- The amount of your receivables and debts
- The amount of your net worth
Structure of the Accounts table
The Accounts table at the structural level is mainly composed of the following elements:
- The asset and liability accounts in the Accounts column
- The totalization groups in the Group column
In the example below, in the Accounts table, all accounts are grouped in Group 1 (Total assets). The asset accounts are added to the liability accounts and the difference determines the Net Worth. - The opening balances must be entered the first time the file is created in the Opening column.
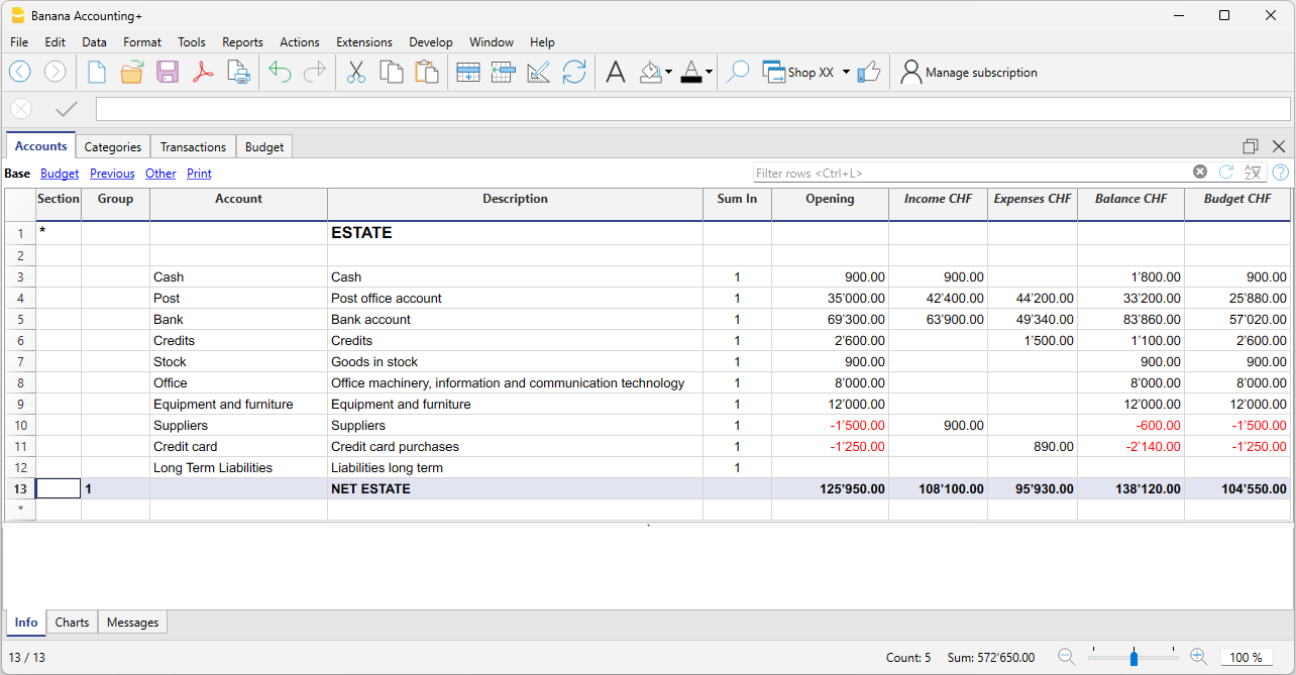
The final balances of the asset accounts are always carried forward as opening balances in the file for the following year.
Positive asset accounts (Assets)
Positive asset accounts represent the goods and values you own, so they are the resources available to you.
Some examples of positive asset accounts:
- Cash on hand or in the bank.
- Invoices to be collected from customers (money they owe you).
- Goods in stock.
- Assets such as equipment, furniture, computers, cars.
The amounts are positive.
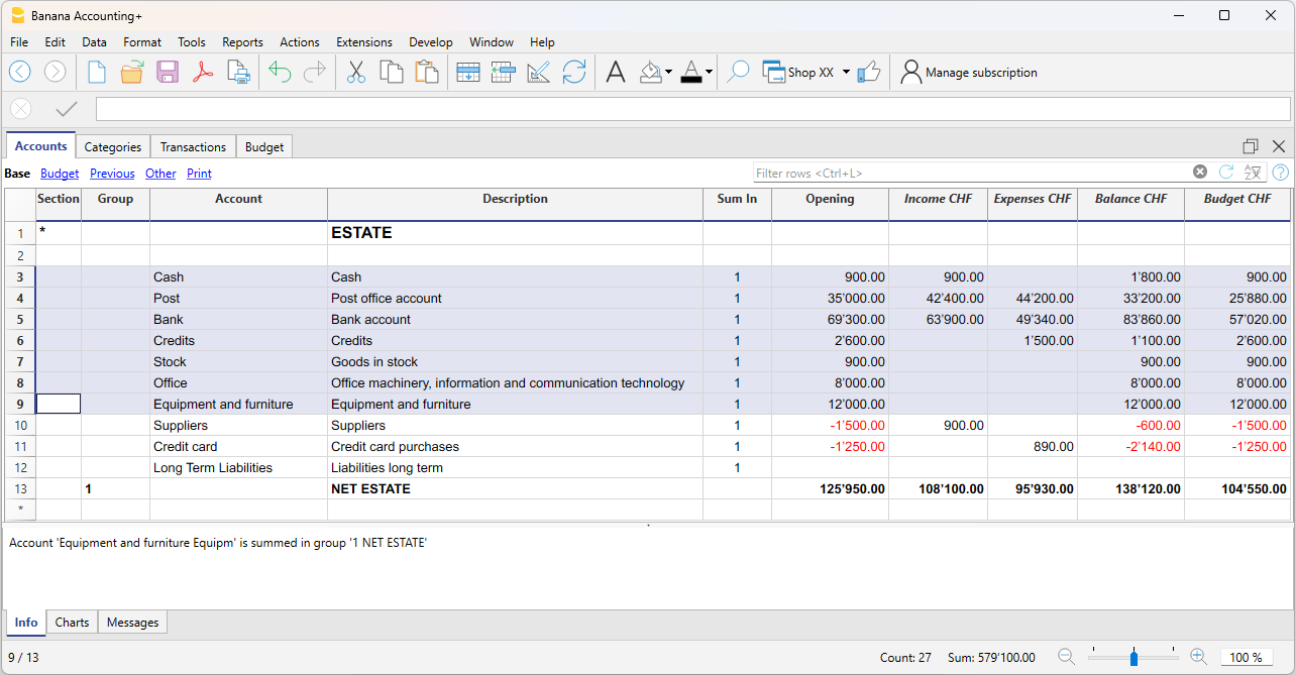
Negative asset accounts (Liabilities)
These accounts indicate debts and obligations to be settled, such as:
- Debts to suppliers
- Loans to be repaid
- Taxes to be paid
- Contributions still due
These are therefore amounts you owe to third parties. The amounts are negative and shown in red.
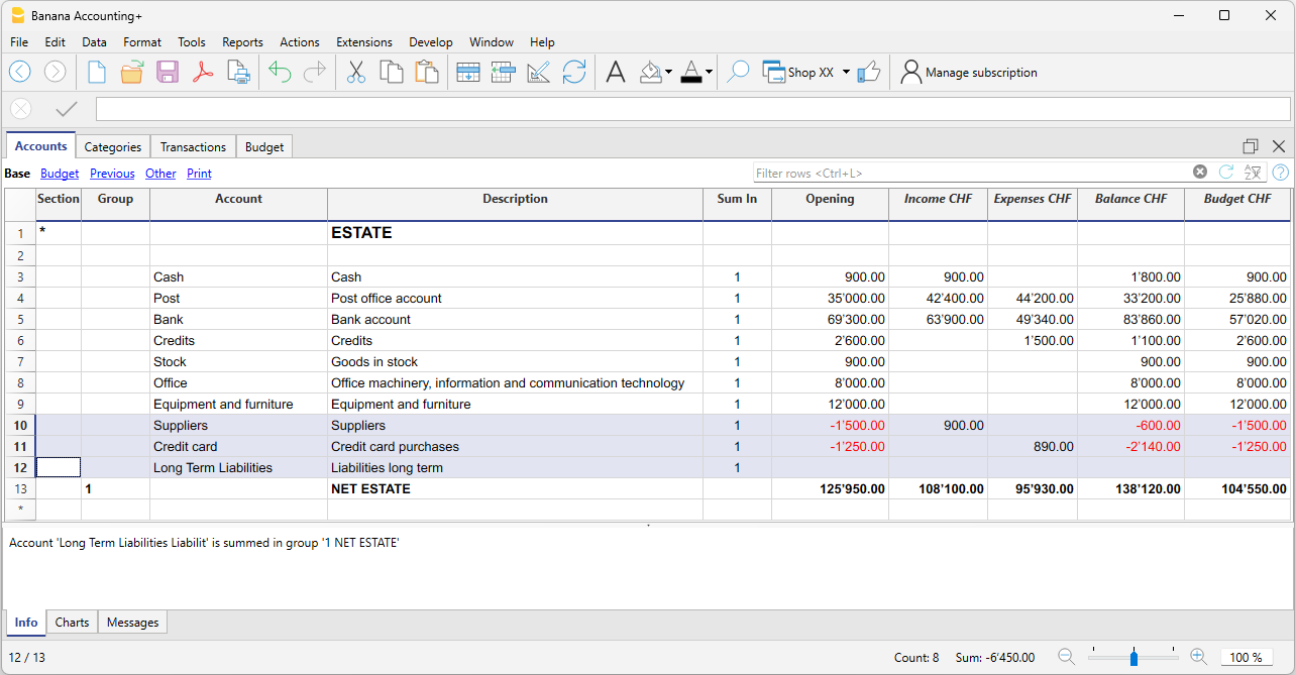
Net Worth
Net worth is the difference between positive and negative asset accounts. It represents what actually remains after subtracting your debts from what you own.
- Net Worth = Positive asset accounts − Negative asset accounts
The value of your net worth reflects your financial strength and your ability to carry on operations without relying on external financing.
A positive net worth indicates that the entity (business or individual) has a book value greater than its debts. A negative net worth means that the value of the negative accounts exceeds the positive ones, signaling potential financial difficulties.
Columns of the Accounts table
In the Accounts table, you can view the account balances, the columns for incoming and outgoing transactions, and the budget. You therefore get an immediate and constantly updated view of your financial situation. Asset values are shown as positive amounts, while liabilities (debts) are shown as negative.
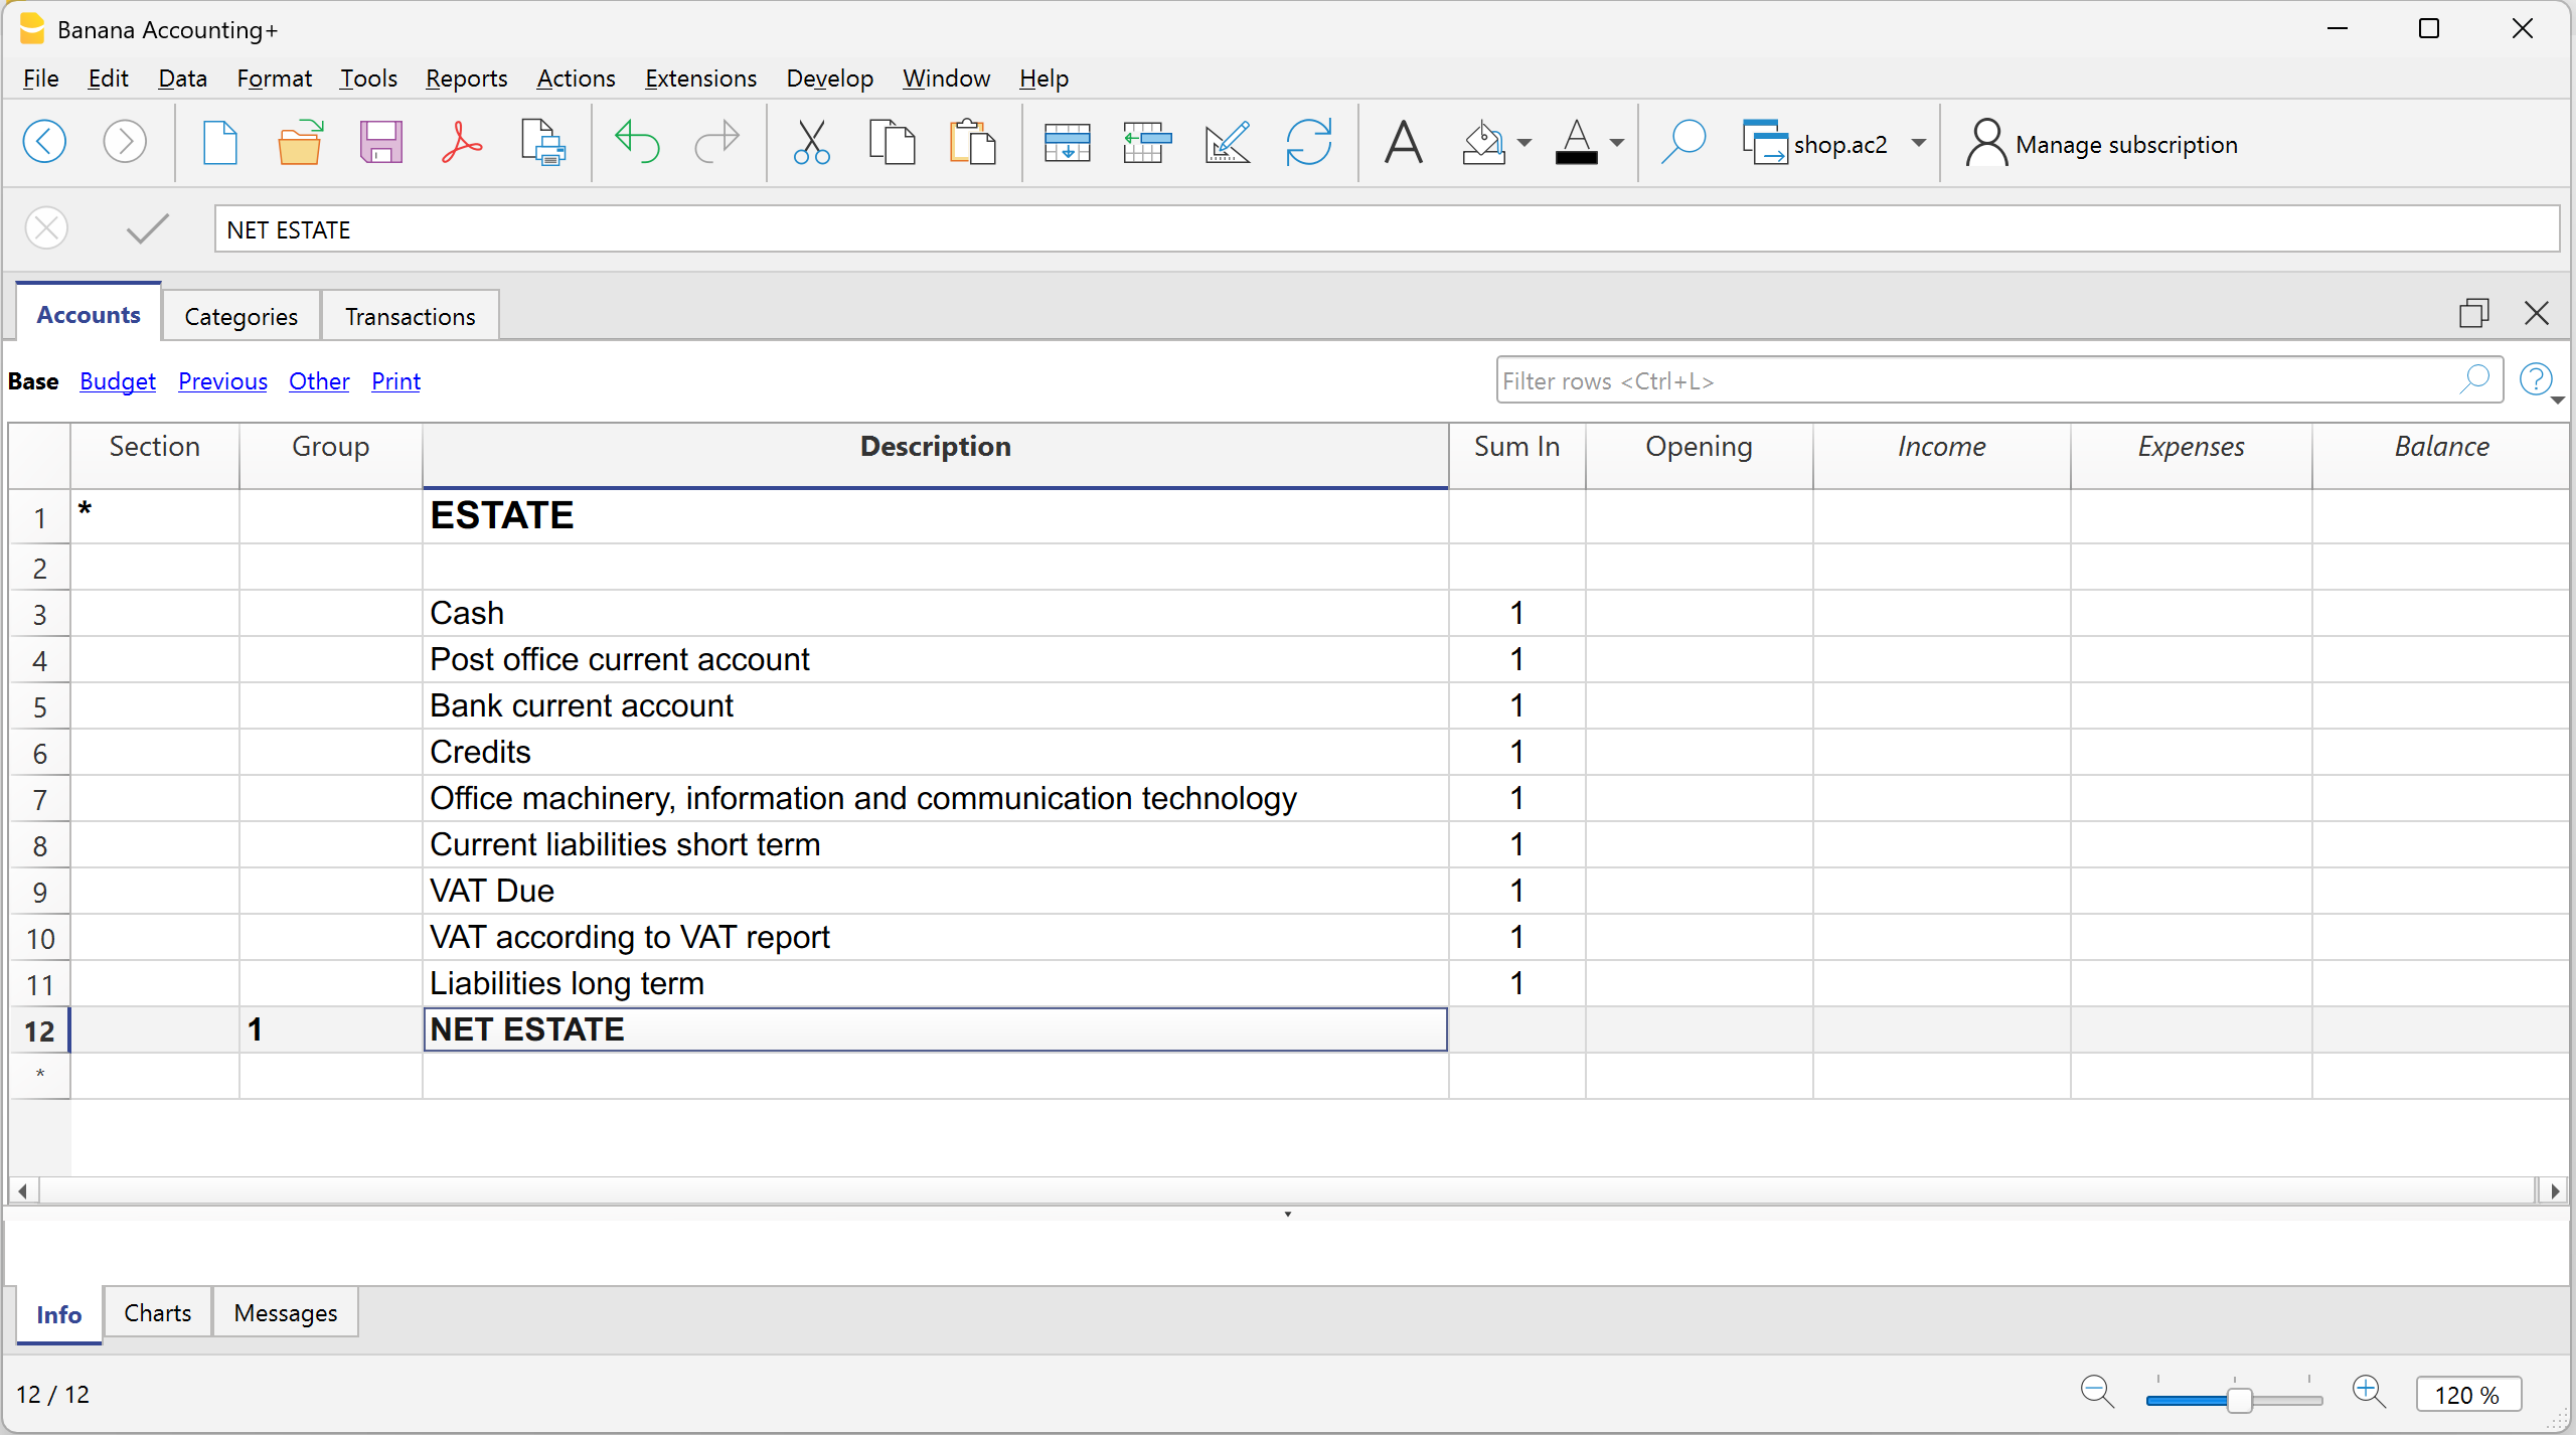
As you enter income and expenses (in the Transactions table), you immediately see the updated balances of the various accounts in the Accounts table.
Below are the main columns of the Accounts table. The column display changes depending on the selected view.
You can add additional columns, both system and custom, via the menu Data > Columns setup.
Section
An asterisk is entered to indicate a section change. For example, to separate Total assets from cost centers.
The values entered in the Sections table are essential for displaying the enhanced Balance Sheet with groups.
More details about Sections are available on the web page Sections.
Group
Values are entered here that summarize the categories sharing the same grouping in the Sum in column. These are essential for totalization.
Account
Enter the account number or code to manage (cash, bank, post).
Description
Enter a description for the account. This description is automatically used in the Account Description column of the Transactions table (if visible).
Sum in (Gr)
Enter the code of a group so that the program can total the row’s amount into that group.
The "Sum in" header was introduced in Banana Plus and replaces the "Gr" used in previous versions.
Opening
This shows the opening balances. These must be entered manually only the first time you open Banana Accounting or use a new file. Later, at the beginning of a new year with automatic opening, this column is automatically filled with the closing balances from the previous year.
Income
This column is protected and shows the balance of incoming transactions. After each entry, the balance is updated automatically.
Expenses
This column is protected and shows the balance of outgoing transactions. After each entry, the balance is updated automatically.
Balance
This column is protected and shows the total balance between income and expenses. After each entry, the balance is updated automatically.
Sections
The Sections available in the Accounts and/or Categories table allow you to define the group of accounts and categories you want to print using the Report > Enhanced Statement with Groups command.
- Sections are indicated in the Sections column of the Accounts table and the Categories table.
- A * (asterisk) marks the start of a section.
- A ** (double asterisk) marks the start of a subsection.
- A # marks the beginning of the notes section.
- A section ends when a new one begins.
- Unlike double-entry accounting, in income and expense accounting you cannot use numeric sections.
- If no section is indicated, the first time the command is used, the program will insert it automatically:
- In the Accounts table: "Balance Sheet"
- In the Categories table: "Operating Result"
- It is useful to create separate sections if you have cost centers, segments, or customer/supplier ledgers. This allows you to print reports focused only on what you need.
Personalizing the Accounts table
In the Accounts table, you can customize the asset accounts according to your needs:
- You can change the account numbers
- You can change the descriptions
- In the Opening column, enter the initial balance of your accounts.
For more information, visit the following pages:
Account for allocating results from previous years
In Income/Expense accounting, the total line that groups income and expenses directly represents the net worth (equity). For this reason, there is no need to create a specific dedicated account.
Viewing results from previous years
If you want to display the amount of results from previous years, you need to:
- Add an account "Results from previous years".
- Manually enter the amount in the Opening column (in the Accounts table) at the beginning of each new year.
Categories Table | Income/Expense accounting
The Categories table contains a list of all the items that represent the reasons why you have income and expenses. It is the central tool for organizing and analyzing income and expenses, and for monitoring the progress of your activity.
In the Categories table, all income and expenses are organized in a clear and orderly way.
The categories are divided into two groups:
- Income categories
- Expense categories
The difference between income and expense categories determines the result (profit or loss).
- Operating result = Income - Expenses
Income categories
Income categories are the items that represent the reasons why you received income, so they include all sources of earnings.
Examples of income categories:
- Sales, Membership fees, Donations, Public grants, Bank interest

Expense categories
Expense categories represent the reasons why you incurred expenses.
Examples of expense categories:
- Rent, Utilities, Office supplies, Salaries, Travel expenses

Profit or Loss (Operating result)
The difference between total income and expenses is your profit or loss (Operating result), automatically calculated by the program.
- Operating result (for the year) = Total income – Total expenses
In Banana Accounting, for automatic total calculation reasons, income amounts are shown in red and negative. In reports and printouts, the amounts appear as positive.

The columns of the Categories table
Below are the main columns of the Categories table. The column view changes depending on the selected view.
You can add extra columns, either system or custom ones, using the menu Data > Arrange columns.
Section
An asterisk is inserted in the row where a title is added, which will then be used in the enhanced report with groups (in our example, the asterisk is inserted in the row with the Result title).
If there are other sections beyond income and expenses (e.g. cost and profit centers), another asterisk can be inserted in the Sections column, also on the title row. More details are available on the web page Sections.
Group
An identifier (number or code) is entered that matches what is entered in the Total in column for each category. It is used to total all the categories that belong to the same grouping in the Total in column (in the example, Group 4 totals all income categories and Group 3 totals all expense categories).
Category
Enter the category number that identifies the income or expense.
Description
Enter a description to identify the income or expense category. This description is automatically copied to the Category description column in the Transactions table (if displayed).
Total in (Gr)
Enter the code of a group so that the program totals the amount of the row into that group.
The header "Total in" was introduced with the Banana Plus version, while "Gr" was used in previous versions.
Each category has an identifier that defines in which group it should be totaled (in the example, all income categories have group 4 in the Total in column, because they are totaled in Group 4, Total income).
Income
This column is protected and shows the balance of the income transactions. After each entry, the balance is automatically updated.
Expenses
This column is protected and shows the balance of the expense transactions. After each entry, the balance is automatically updated.
Balance
This column is protected and shows the total balance between income and expenses. After each entry, the balance is automatically updated.
Customize the Categories table
In the Categories table, you can customize the income and expense items:
- Change the category numbers
- Change the category descriptions
- Add new categories
- Delete unused categories
For more information, visit the following pages:
Speed up your transactions | Income/Expense accounting
In the Transactions table, to speed up data entry, you can use several automation functions.
Keyboard shortcuts
Keyboard shortcuts let you perform actions instantly, without opening menus or using the mouse.
They are a great way to save time and make your work smoother.
With keyboard shortcuts you can, for example:
- Copy and paste data.
- Quickly move between cells, columns, and tables.
- Insert the current date with one keystroke.
- Apply formatting such as bold text.
- and much more.
Data entry with auto-completion
In the Transactions table, when you start typing in the Description column, the program suggests a list of previously entered transactions with the same text at the bottom of the window. If you want to reuse a previous transaction:
- Type the first letters of the description.
- Press F6.
- The transaction is automatically recalled: you just need to adjust the amount (if different) or any other necessary details.
This trick is very useful for repetitive operations, because it saves you from retyping everything each time.
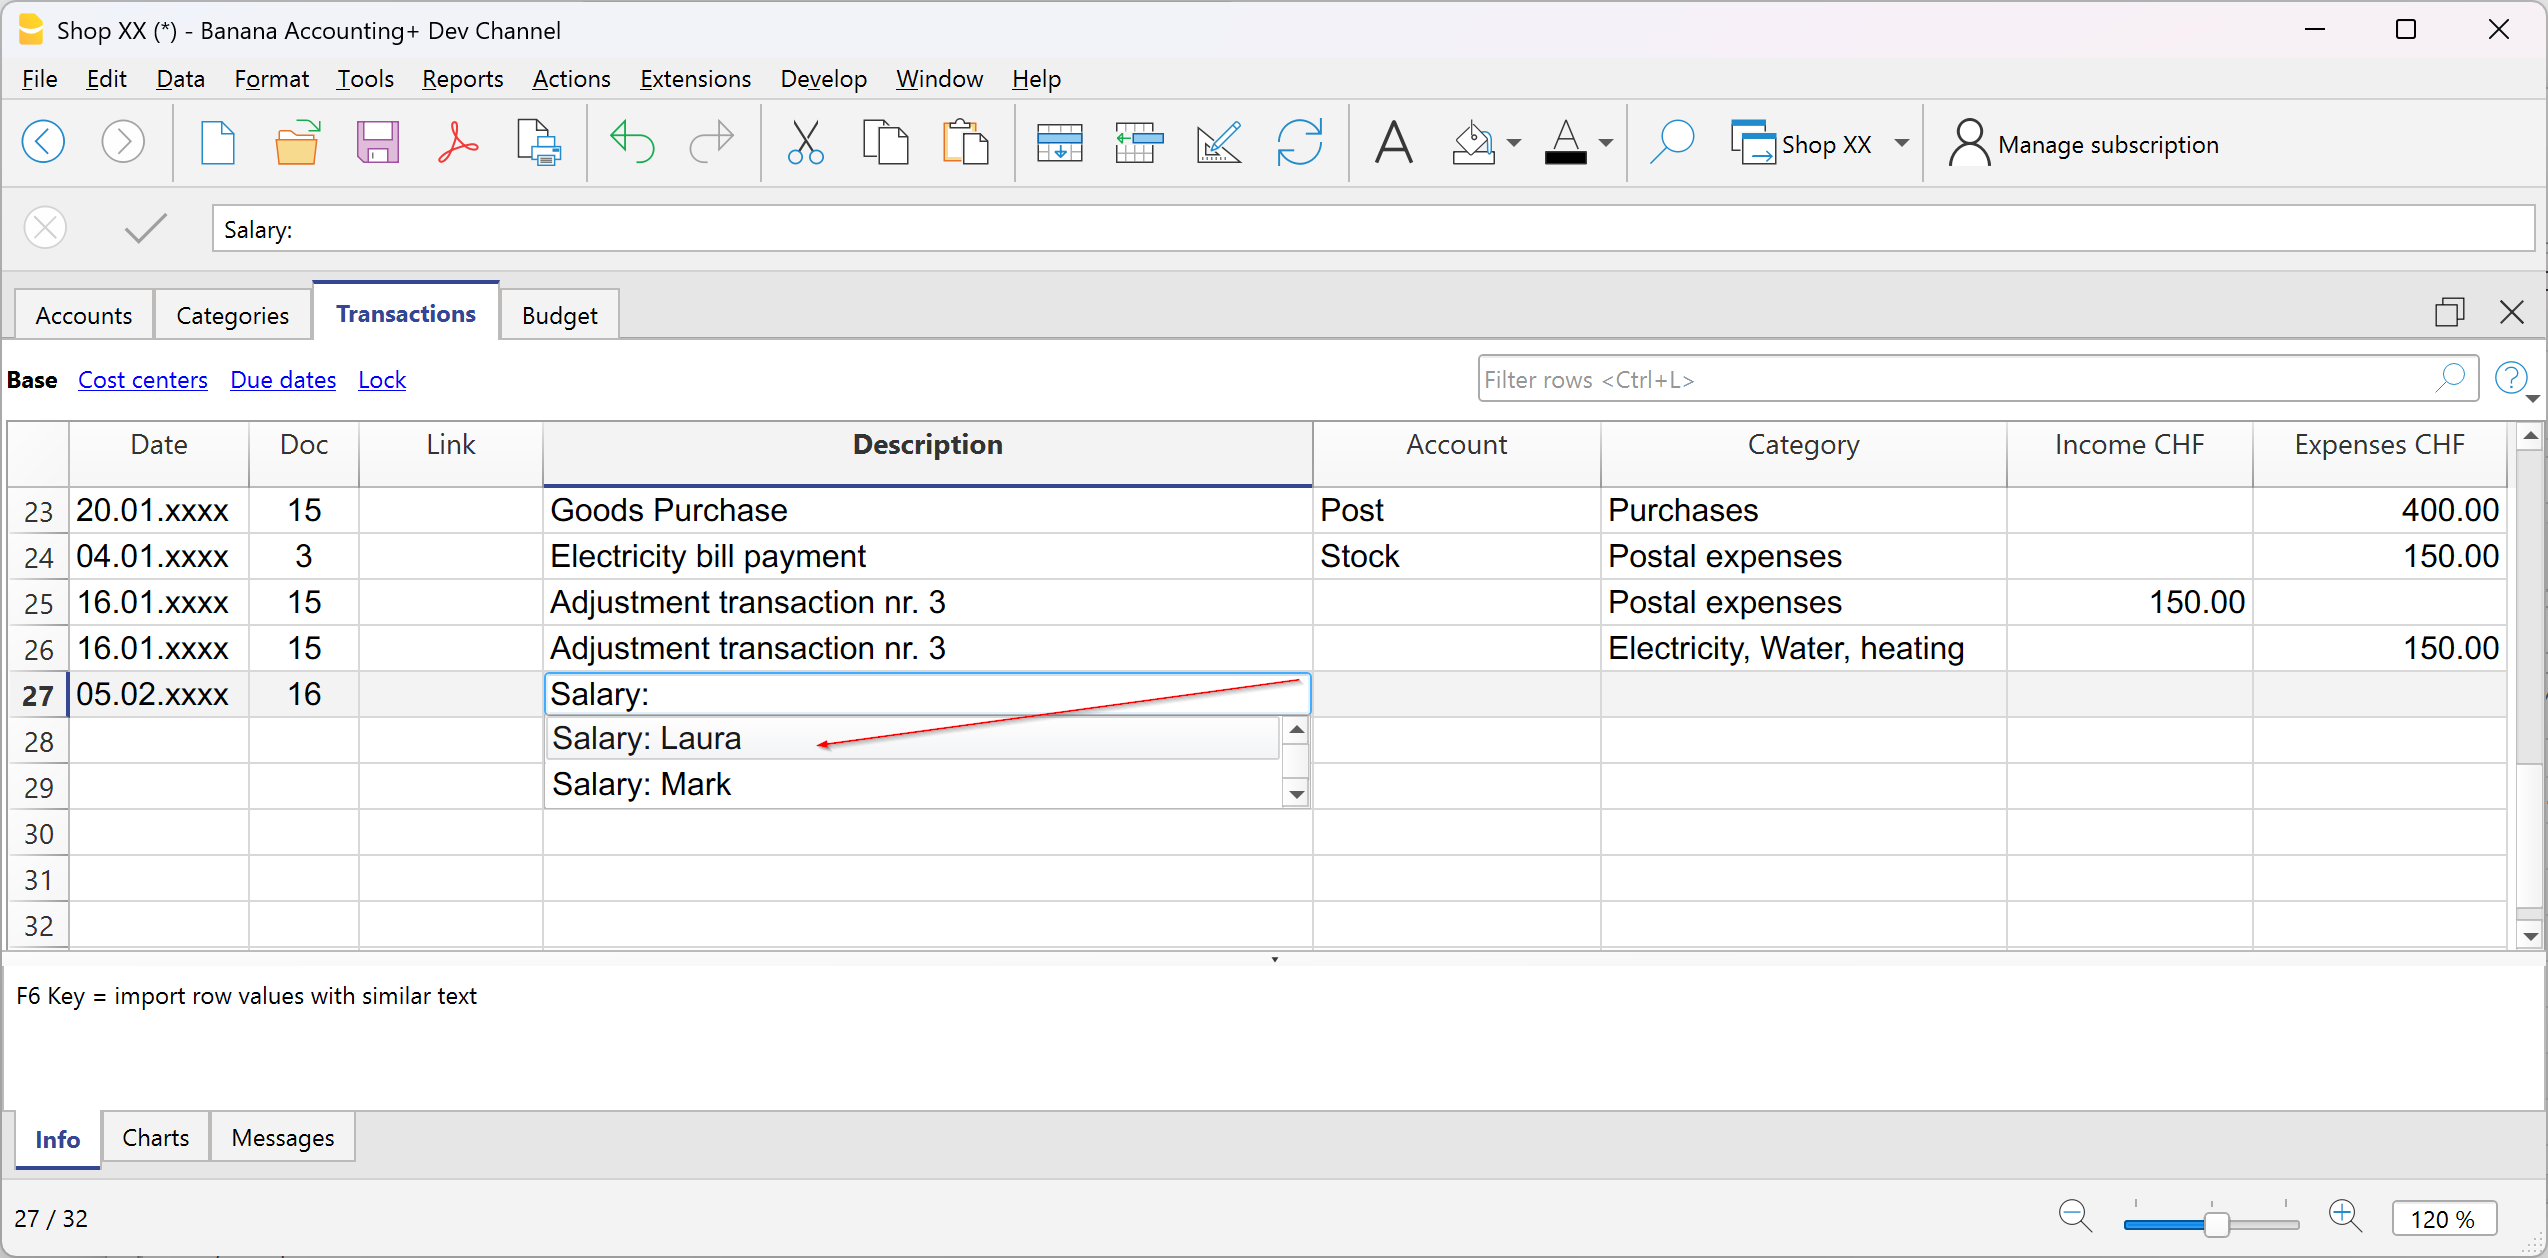
Recurring transactions
In the Recurring transactions table you can save operations that are repeated during the year and reuse them when needed in the Transactions table.
More information can be found on the page:

Importing bank transactions
You can download your bank, credit card, or other account statements, as long as they are in a format compatible with Banana Accounting (csv, ISO 20022, ...), and import all the transactions into the Transactions table. This saves a lot of time and avoids errors.
More information about importing is available on the page:
Setting Rules in automatic import
Even with Income and Expense accounting, you can take advantage of the advanced Rules function to further automate your work.
With Import Rules you can automate the recording of repetitive transactions. For each imported transaction that you expect to recur, you can create a Rule, assigning not only the counterpart account (that is, the reason for the expense or income), but also other details such as cost center, VAT code, row color, and so on. This way, in subsequent imports, the program will automatically apply the Rule to the corresponding transactions, importing them already complete with all the information you have defined.
More information is available on the page:
Import bank transactions | Income/Expense accounting
Download the file with your transactions from your bank and import it directly into the Transactions table. The date, description, account, and amount will already be filled in; you will only need to assign the income or expense category.
Proceed as follows:
- Go to the Actions menu > Import into accounting.
- Select your bank. If you don’t see it in the list, click the button at the bottom left Manage extensions. Search for it and install it in the dialog window that opens, then return here.
- Select the format of the file downloaded from the bank, postal account, or credit card.
- Confirm with the OK button.
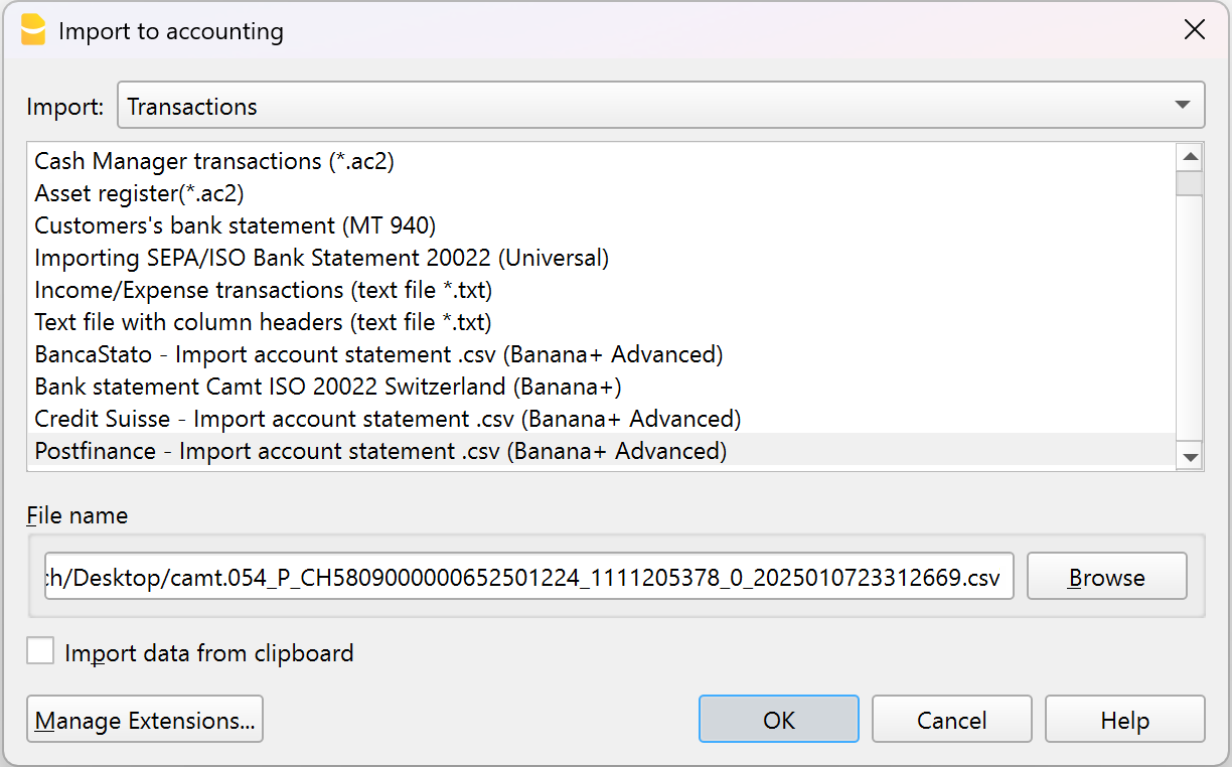
Standard formats such as ISO 20022 and .txt are available with the Professional plan, while bank-specific .csv files are included only in the Advanced plan.
Once you have selected the import file, the next dialog will appear:
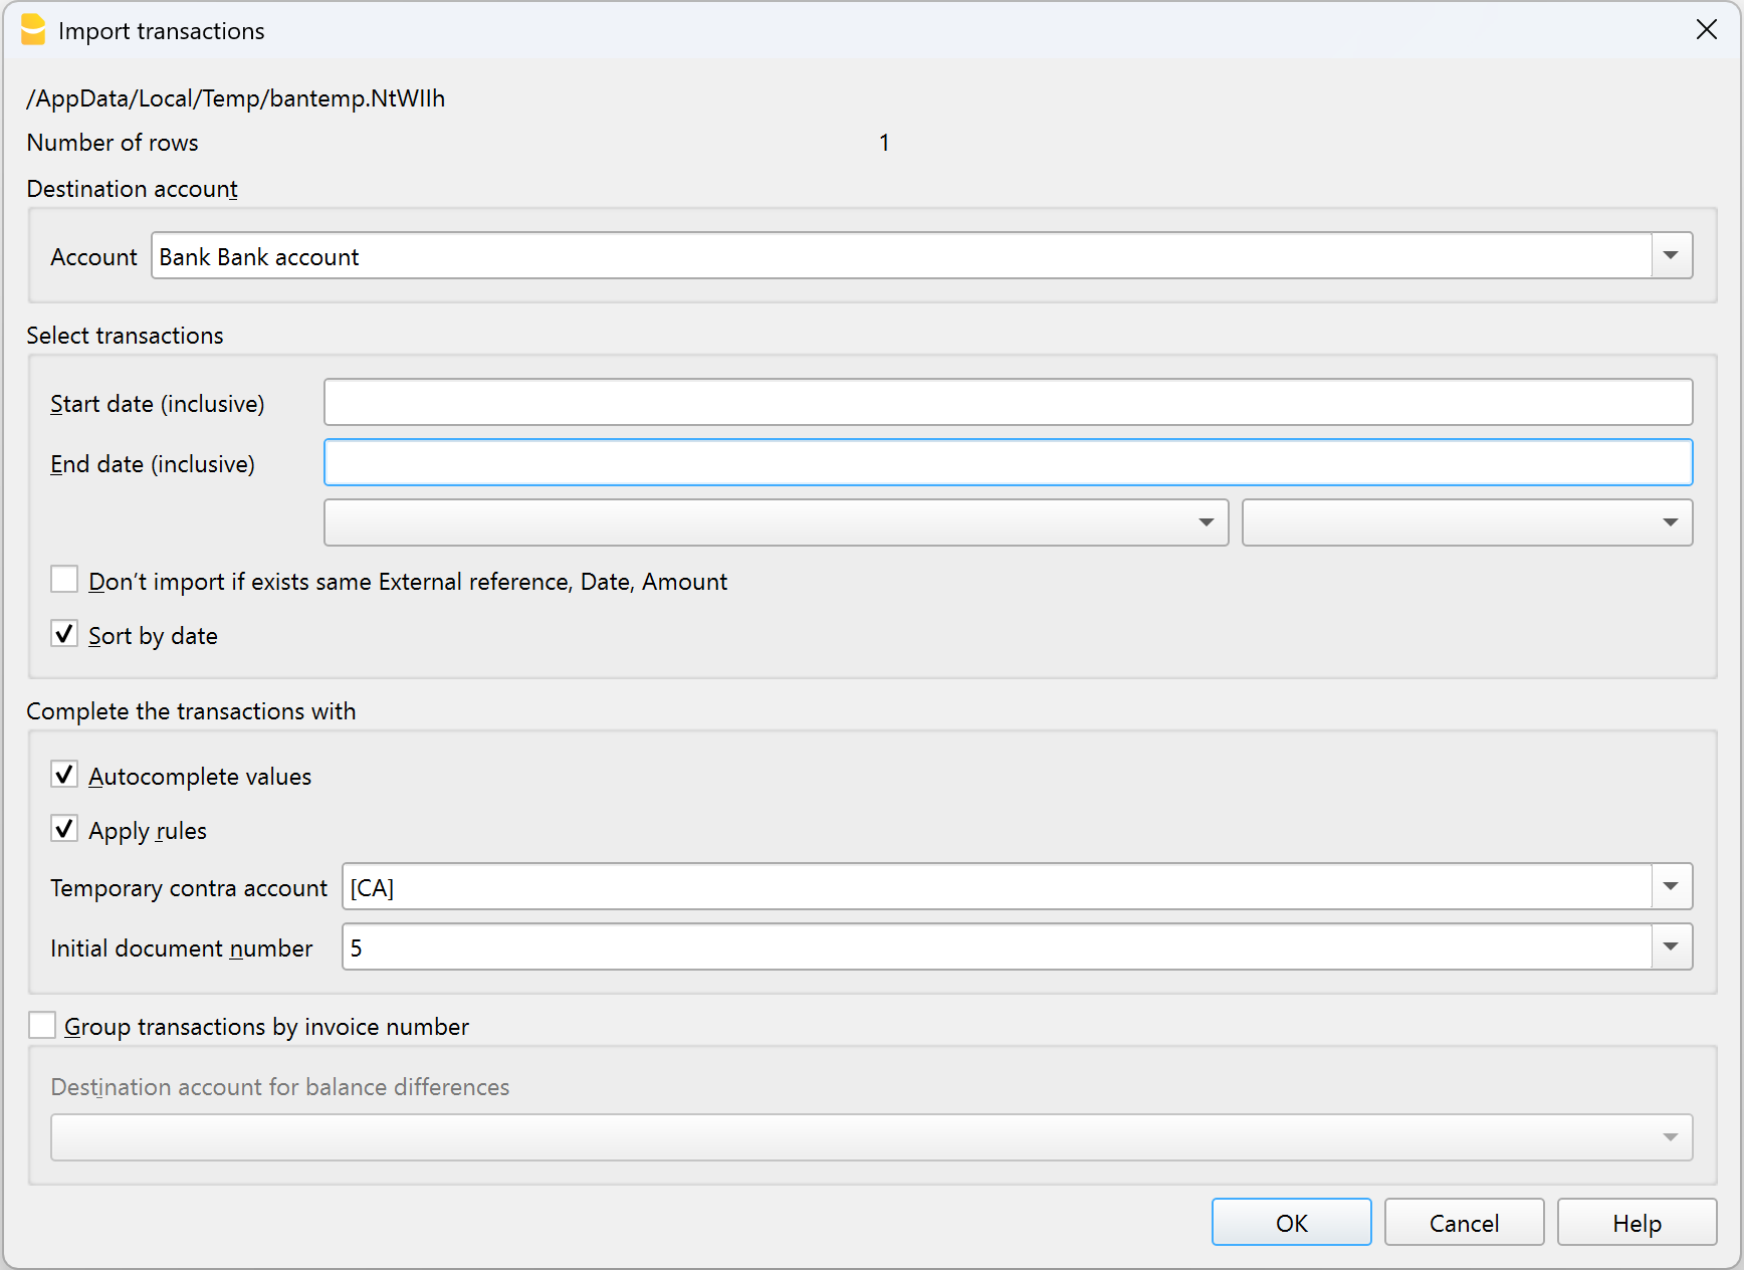
The program will import all transactions into the Transactions table: you will only need to enter the counterpart, any VAT code, cost centers, or segments.
From this dialog, you can also enable the Apply Rules option (available only in the Advanced plan) to further automate transaction entry.
More information about importing is available on the page:
Recurring transactions | Income/Expenses accounting
The Recurring transactions table allows you to save transactions that repeat during the year and automatically recall them in the Transactions table when needed. You can store, for example:
- Salaries
- Rents
- Subscriptions
- Periodic payments
How to save a recurring transaction
- Go to the Transactions table.
- Select one or more transactions that are repeated.
- Copy them (Ctrl+C).
- Paste them into the Recurring transactions table (Ctrl+V).
In the Recurring transactions table you can also manually enter the transactions that are repeated during the year.
How to recall a recurring transaction
- In the Transactions table, place the cursor on the row where you want to insert it.
- Double-click in the Doc column: a list of saved transaction codes will appear.
- Select the code of the transaction you want to use.
- Press Enter.
The program automatically inserts all the transaction data: you only need to update the amount or date if necessary.
Advantage: with this method you avoid rewriting identical operations each time, saving time and reducing the risk of errors.
More information is available on the page:
Rules for automatic completion of imported transactions | Income/Expenses accounting
Even with Income and Expense accounting, you can take advantage of the advanced Auto-completion Rules for imported transactions to further automate your work. Rules are available only in the Advanced plan of Banana Accounting Plus.
With Rules you can automate the recording of recurring transactions. For each imported transaction that you expect to recur, you can create a Rule, assigning not only the counterpart account (i.e. the reason for the expense or income), but also other details such as cost center, VAT code, row color, and so on. This way, in future imports, the program will automatically apply the Rule to the corresponding transactions, importing them already complete with all the information you have defined.
You can set up Rules:
- from the Transactions table
- from the Apply Rules dialog
- from the Recurring transactions table
Below we explain how to set up Rules from the Transactions table
Rules from the Transactions table
In the Transactions table you can use already imported and completed recurring transactions to create Rules.
- Select the imported transactions (after completing counterpart, VAT if applicable, cost centers, and segments).
- Right-click and choose Create rules from selection from the menu that appears.
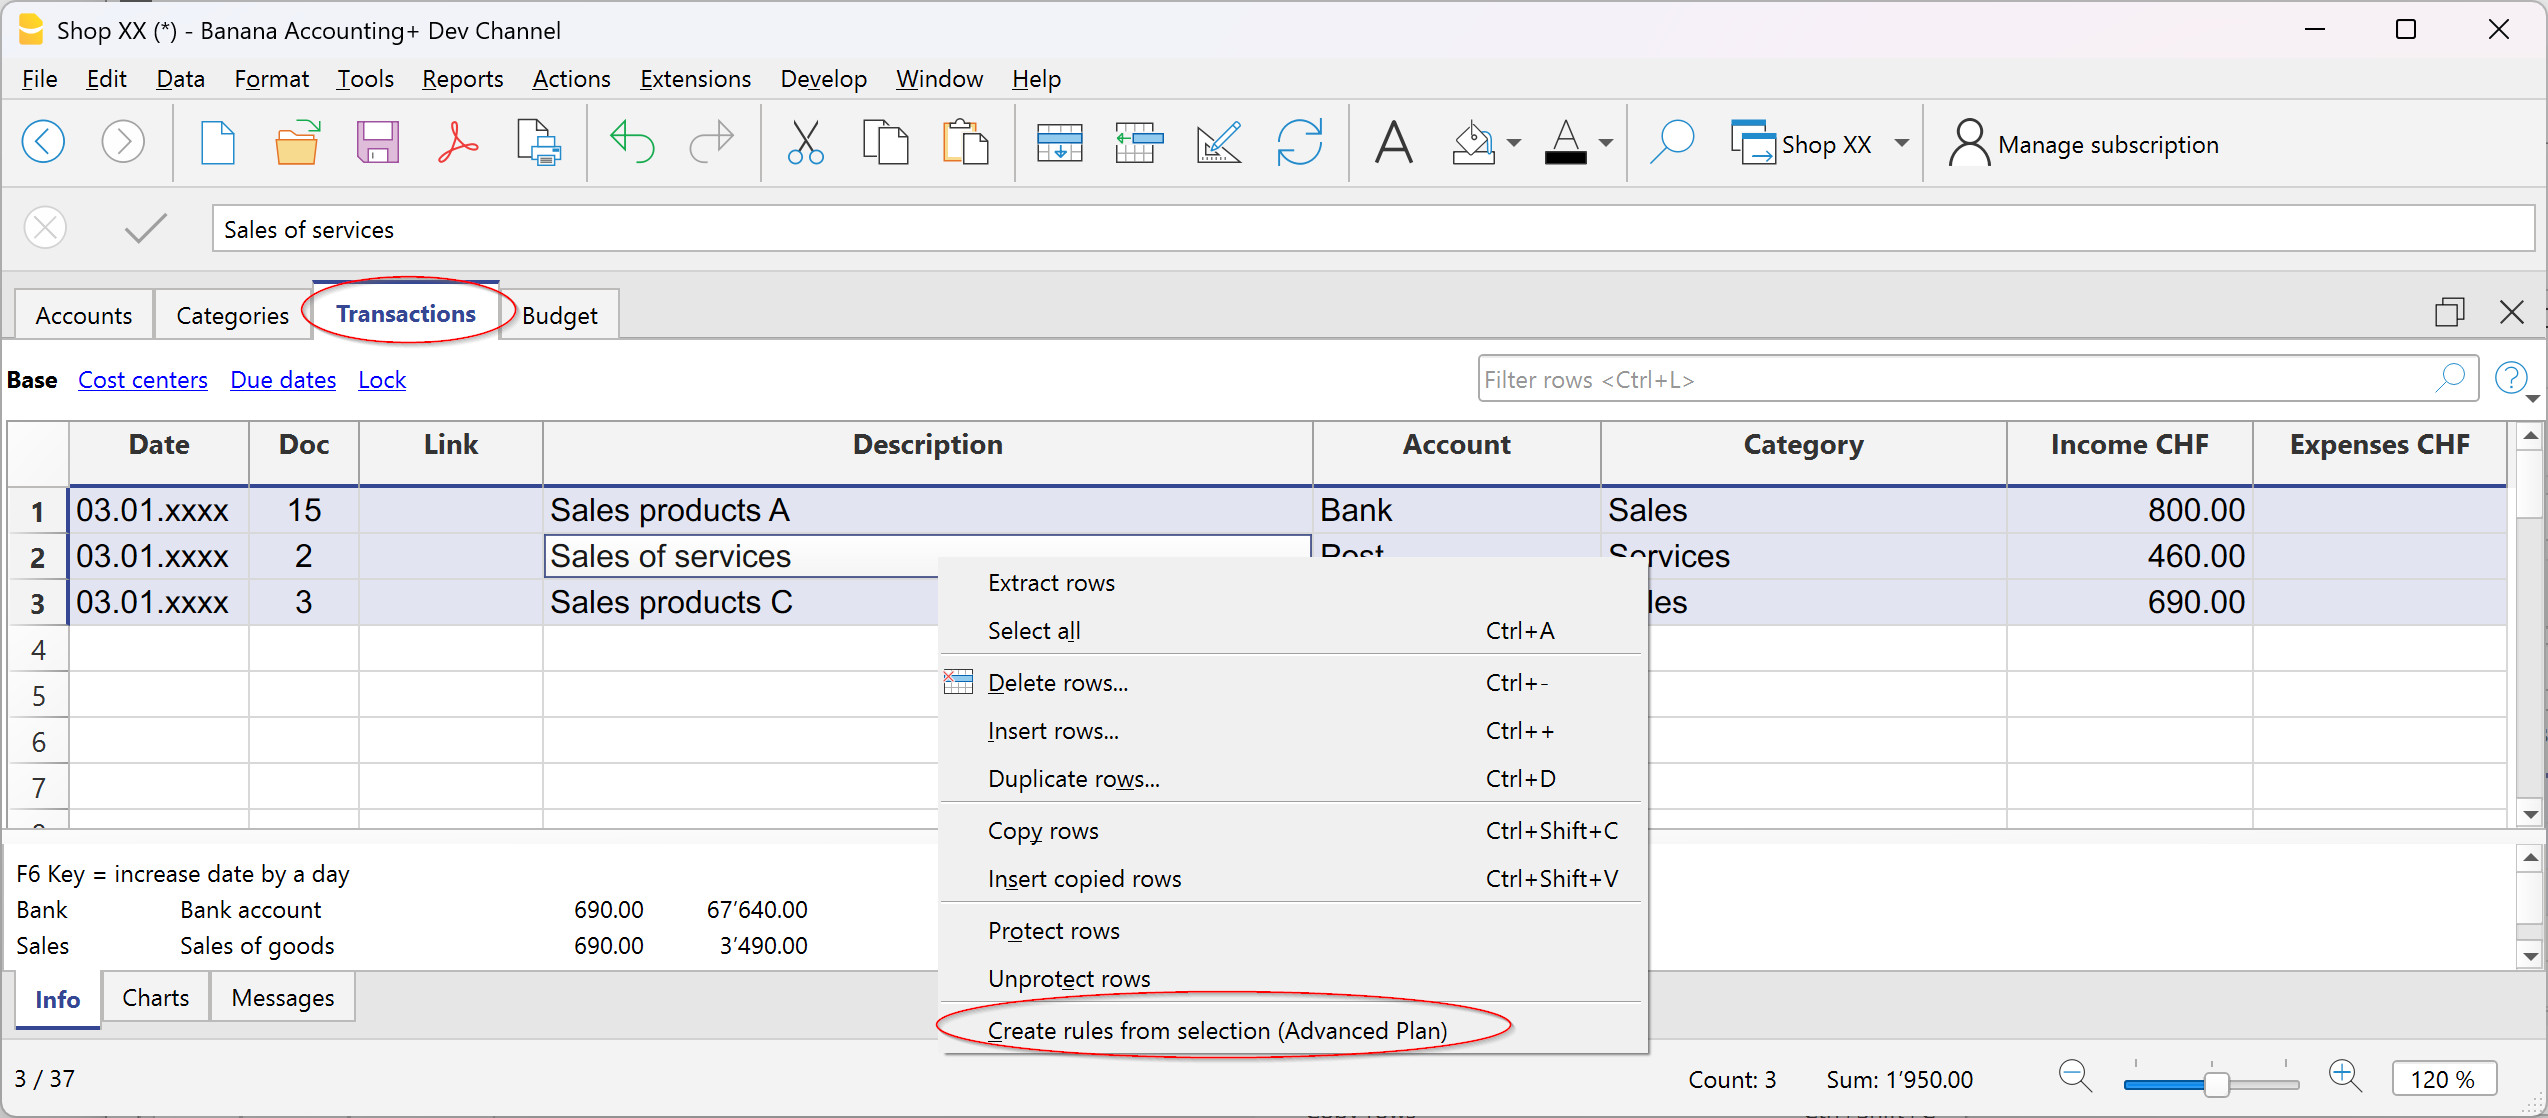
Transactions with rules are saved in the Recurring transactions table and can be identified in the Doc column by the “!Rule” identifier.
By saving rules complete with all details, at the next data import from the bank or postal statement, the program will insert the transactions automatically completing the counterpart and all the other stored elements. The amount is updated based on the latest import.
In the Recurring transactions table you can edit rule-based transactions at any time:
- add more transactions with rules
- delete transactions with rules that are no longer needed
- modify rules of already existing transactions
Rules from the Apply Rules dialog
Rules can also be set at the moment when transactions are imported from the bank statement or other statements through the Apply Rules dialog.

More information is available on the following pages:
The indicated pages use double-entry accounting files as examples, but the principles are the same for income/expense accounting.
Rules from the Recurring transactions table
This procedure requires manually entering recurring transactions directly in the Recurring transactions table before recording the transactions in the Transactions table.
To follow this procedure, see the information on the following page:
The indicated page uses double-entry accounting files as examples, but the principles are the same for income/expense accounting.
Customising Accounts and Categories | Income/Expense accounting
All Banana Accounting templates already include the Accounts and Categories tables, with all the essential items to manage your accounting. However, if you want to adapt the chart of accounts to your business, you can easily customize these tables.
Customize Accounts
The Accounts table contains the items that represent what you own (assets) and what you owe (liabilities).
You can modify it as you wish:
- Change account descriptions
Example: in the Bank account row, enter the name of your bank (e.g. UBS Bank).
Add new accounts
If you have multiple bank accounts, add a new row and enter the bank name.
The same applies to customers and suppliers: you can create a separate account for each one, with the corresponding description. - Change account numbers
If the template uses numbers, you can replace them with descriptive names or assign different numbering. - Remove unused accounts
If you don’t need them, simply delete the corresponding row.
Customize the Categories table
The Categories table contains the reasons for your income (revenues) and expenses.
You can also freely adapt the items here:
- Change category descriptions
Example: instead of Sales, you can write Retail sales or Sales to resellers. - Add new categories
Insert a new row and define the item you need. - Change category numbers
You can replace numbers with descriptive names or assign new ones. - Remove unused categories
If you don’t need them, delete the row.
Advanced customization
As your business grows, you might need more detailed information. With Banana, you can expand the structure by adding:
- New total groups (subtotals), to get more homogeneous breakdowns.
- Customer and Supplier ledgers, to monitor each balance.
- Cost and profit centers, to analyze expenses and revenues.
- Segments, to differentiate sales or costs by area, sector, or project.
- Project management, to monitor specific activities.
- Invoicing and reminders features, if you want to issue invoices and manage reminders.
Example of customization in the Accounts table
In the following example, we explain how to add the Liquidity group in the Accounts table. This group allows you to see the total liquidity, separate from other amounts.
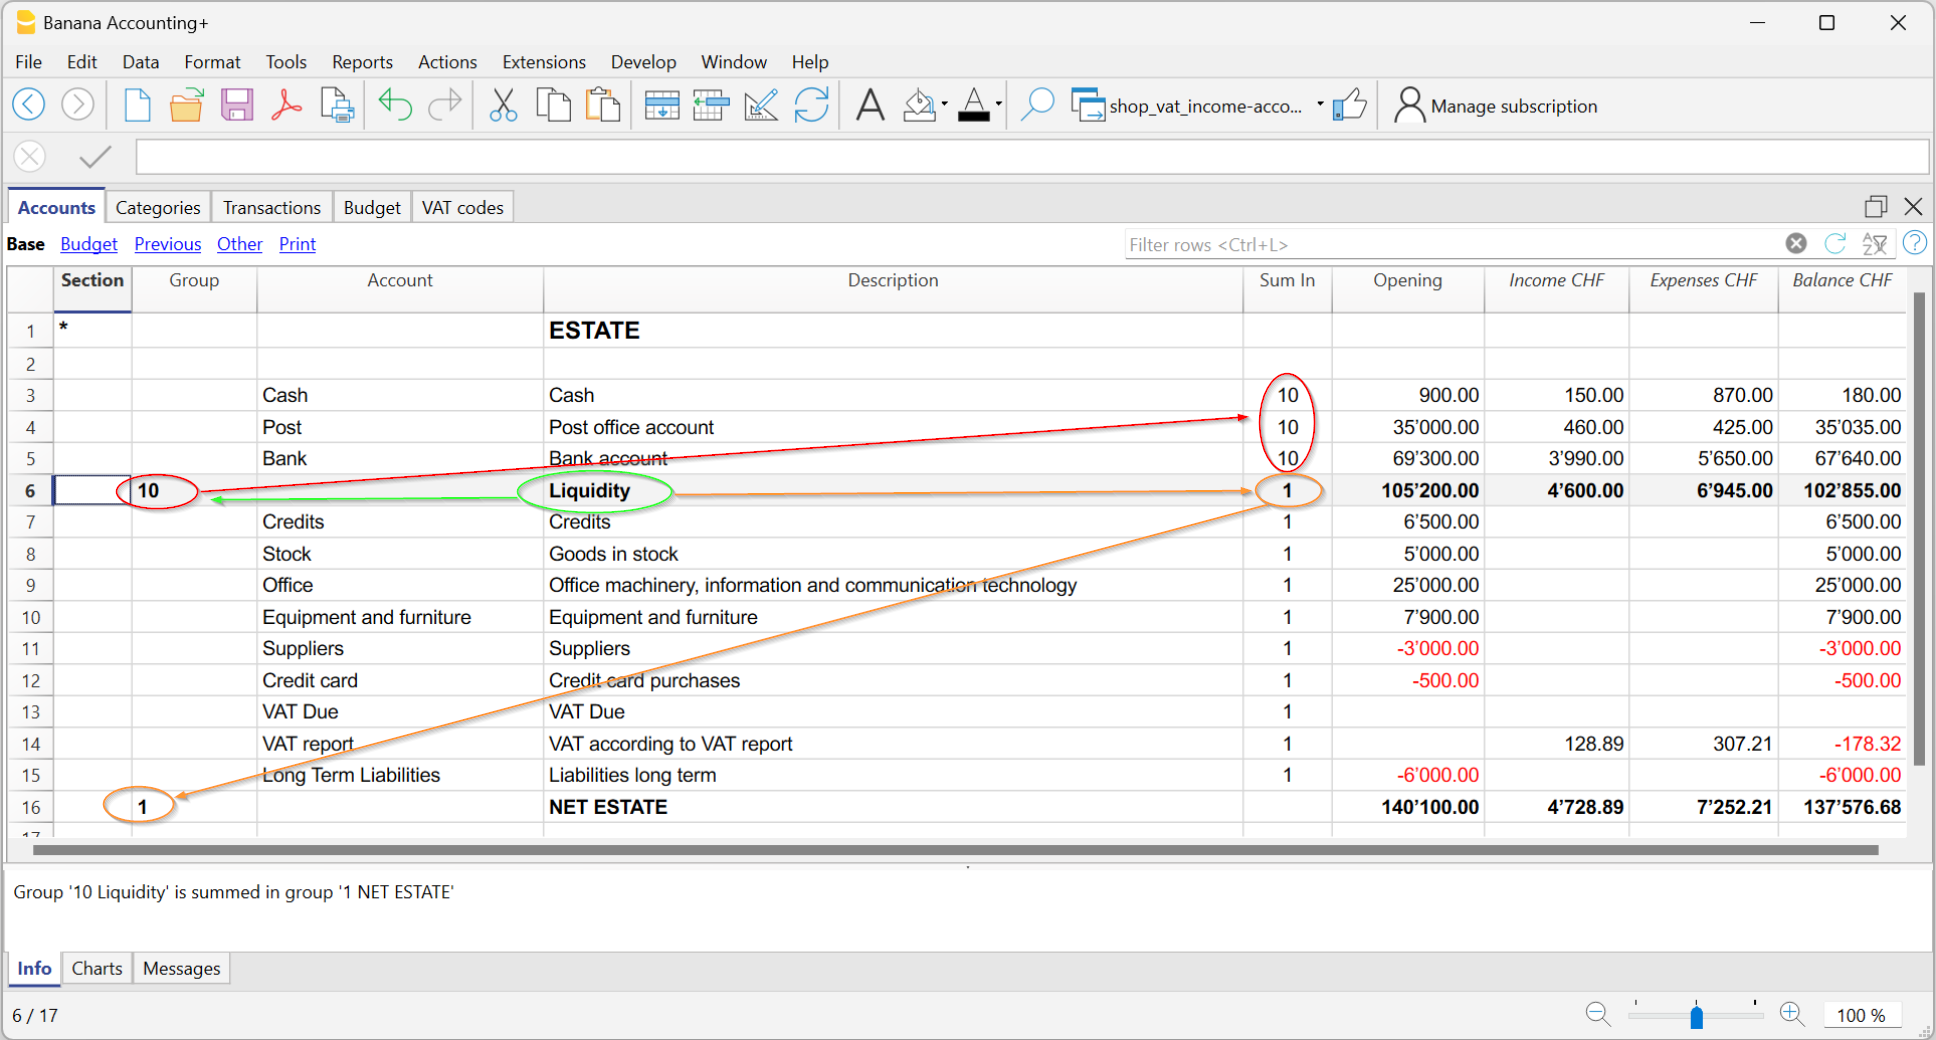
You can create a total group to sum the accounts related to liquidity (cash, postal account, bank).
- Add a new row below the bank accounts.
- In the Group column, enter the code 10 (new group).
- In the Sum in column of the Cash, Postal, and Bank rows, write 10.
This way, they will all flow into Group 10. - In the Sum in column of the Liquidity row (Group 10), write 1 so the total flows into Group 1 – Equity.
Result: a new "Liquidity" subtotal separate from other amounts.
You can also find information on the pages:
Opening Balances | Income/Expense accounting
Opening balances are the values your accounting starts with when you begin a new year or create a new file.
They represent your financial situation at the beginning of the year or your accounting period.
- What you own → cash in hand and bank, assets, receivables.
- What you owe → debts, loans, taxes to be paid.
- Net worth → the difference between what you own and what you owe.
Opening balances the first time you create a file
The first time you use Banana Accounting or create a new file:
- Manually enter the balances in the Accounts table, Opening column.
- Active accounts (positive) → enter them normally.
- Passive accounts (debts) → enter them with a minus sign (-) before the amount.
From the second time on, it's no longer necessary: when you use Actions > Create New Year, the program automatically carries over the balances.

Start with Banana Accounting during the year
If you start with Banana mid-year, you can choose one of the two methods:
- Start from the beginning of the year
- In the Accounts table, Opening column, enter the initial balances you had at the beginning of the year.
- In the Transactions table, enter all the transactions of the year (previously done with other programs), so you will have a complete file. To import data, you can use copy and paste or see the information on the page Retrieving data from other programs.
2. Start from the current date
- Enter the opening balances in the Accounts table (Opening column).
- Enter Income (positive) and Expenses (negative) balances in the Categories table.
- Enter only the new transactions in the Transactions table.
Previous year balances
If you start a new accounting file based on an existing one and want your reports to also show the previous year’s values:
- Go to the Previous view of the Accounts table.
- Enter last year's closing balances in the Previous Year column.
Note:
- Positive asset accounts → enter normally.
- Negative asset accounts → use a minus sign.
- Income categories → enter as positive.
- Expense categories → enter as negative.

Create a new year
To move to the next year:
- Go to the Actions menu > Create New Year.
- Save the new file with a clear name (e.g. Accounting 2026).
The program will automatically carry over the opening balances to the new file.
For more details, see the page Create New Year.
Print opening balances
You can print the opening balances in two ways:
- Print/Preview → print the Accounts table selecting only the rows in the Opening column.
- Accounting reports → configure the report to display the Opening column.
Transactions table | Income/Expense accounting
The Transactions table is the core of accounting management: this is where all accounting transactions are entered, always visible and sorted chronologically. Each entry can be modified or corrected at any time, ensuring maximum flexibility.
Main columns of the Transactions table
The column display varies depending on the selected view. You can add extra columns through the Data > Columns setup menu.
Below is a list of the main columns of the Transactions table.
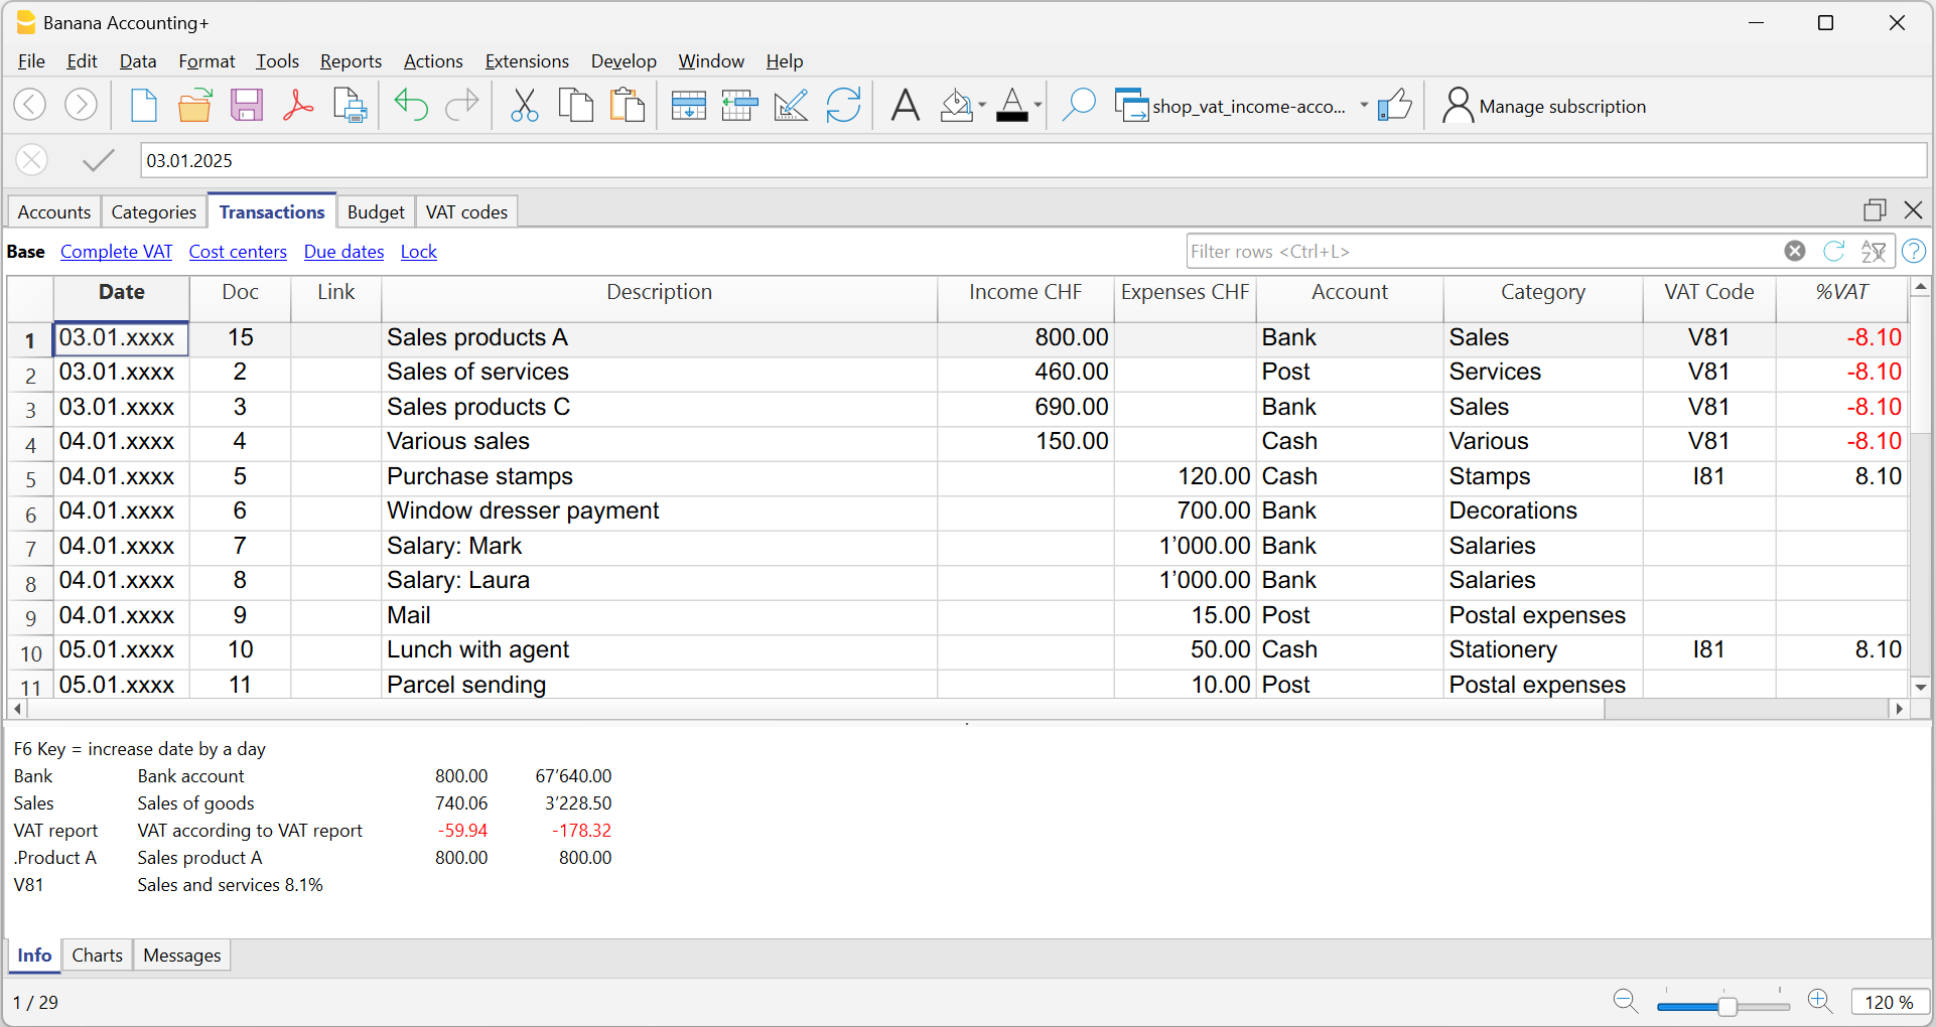
Date
The date of the income or expense transaction.
Doc
The document number. Usually it matches the number assigned to the physical document to be recorded. With the increase of digital documents, the use of the Doc column has become less essential.
Link
In this column, you can enter the link to the digital document corresponding to the accounting transaction.
Description
The description used to identify the income or expense transaction.
Income
The income amount. You can also add a value as a “comment or commented” within square brackets [...].
All values within square brackets are not considered by the program as actual values, but as annotations.
Expenses
The expense amount. You can also add a value as a “comment or commented” within square brackets [...].
All values within square brackets are not considered by the program as actual values, but as annotations.
Account
The asset account involved in the transaction, selected from those defined in the Accounts table (e.g. cash, bank, post office, customers, suppliers…). You cannot enter a category in this column. You can also add an account as “commented” within square brackets [...].
All accounts within square brackets are not considered by the program as actual values, but as annotations.
Category
The category that explains the transaction, selected from the Categories table (e.g. Sales, Rent).
Alternatively, you can also enter an account from the Accounts table, useful for transactions between asset accounts (internal transfers).
You can find more details on the pages:
In the Category column, you can also add a “commented” category within square brackets [...].
All categories within square brackets are not considered by the program as actual values, but as annotations.
Category Description
In the Category column, a category defined in the Categories table is entered (or an account, in case of internal transfers).
If the description of a category is modified in the Categories table, to display the updated text, it is necessary to recalculate the accounting.
Balance Columns
The Balance column is not predefined: the user can choose whether to display it or not.
It is a very useful column, as it highlights differences between income and expenses. By recording line by line, it allows you to immediately identify and correct any discrepancies.
In the example, the Balance column shows the discrepancy in row 4:
- the account is missing in the Account column

Entering transactions | Income/Expense accounting
The Transactions table is the core of accounting: here you enter all incoming (income) and outgoing (payments) transactions. After each entry, the amount is automatically updated in the account and category cards, so you always have totals under control.
You can enter transactions in two ways:
Record data automatically
With Banana Accounting Plus you no longer need to waste time with manual entries: thanks to automation features you can record data automatically, quickly and accurately.
Speed up data entry
To speed up transaction entry, use the following automation features:
- Data entry with auto-completion – automatically retrieves previously entered data.
- Recurring transactions – allows you to store recurring entries in a dedicated table.
Import data from bank statement
With Banana Accounting, you can speed up your work by entering transactions directly from your bank statement. Instead of recording each operation manually, simply import the file you downloaded from your bank (usually in CSV or ISO20022 format). For more information, visit the page Importing data from bank or postal statements.
Apply Rules to imported transactions
Transactions with Rules – You can define instructions for the software to automatically complete imported transactions from bank statements, with contra account, cost centers, segments, and VAT code if needed.
Manual entry
Manual entry is quite intuitive. However, we explain the most common operations.
Manual entry of an income
Below is a practical example of an income. Specifically, it's a merchandise sale.
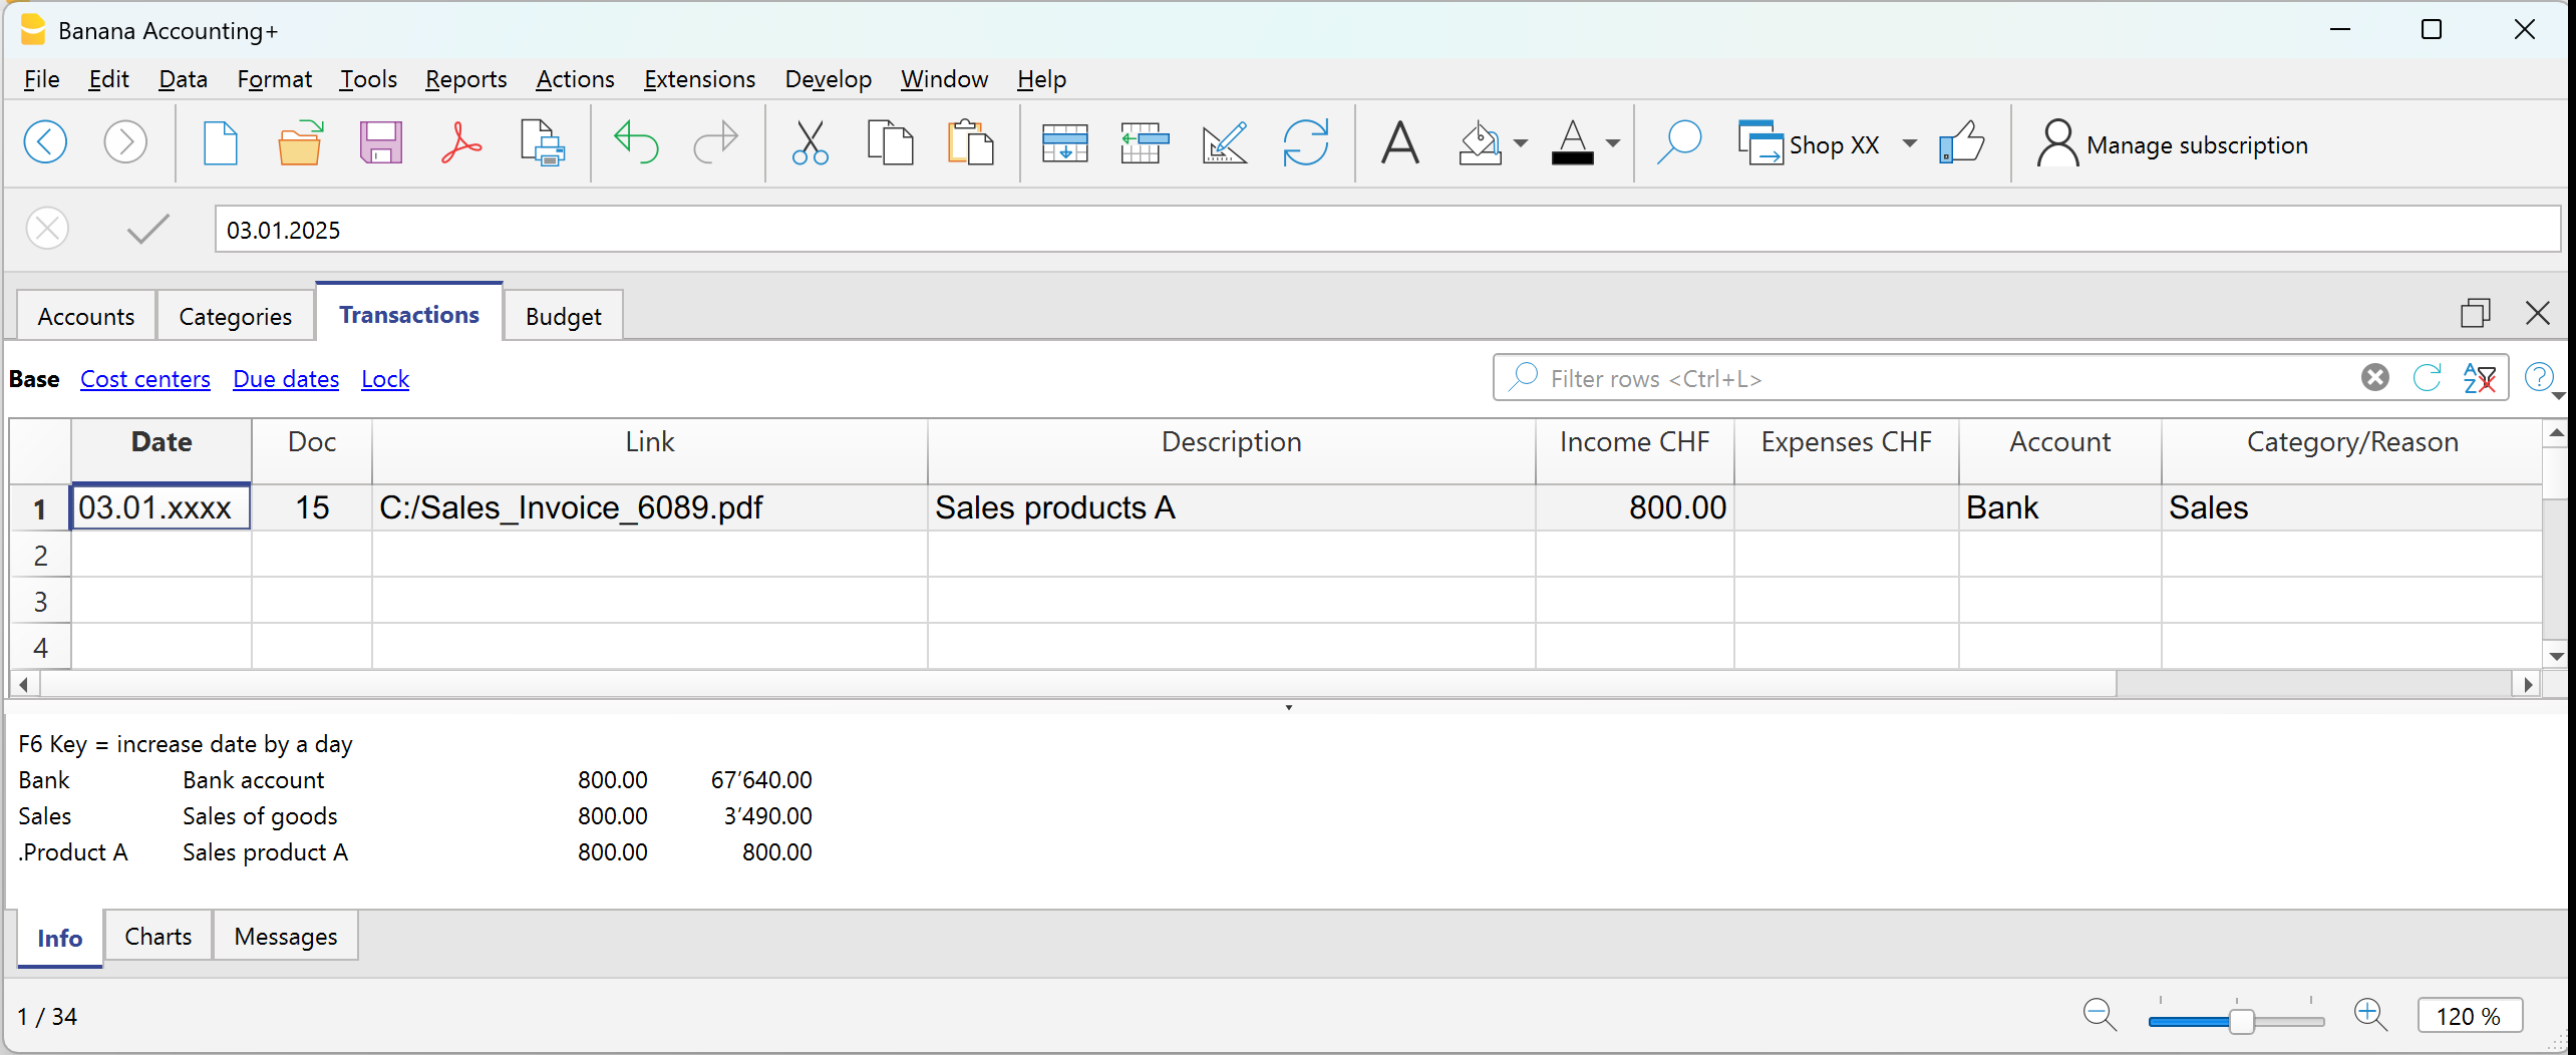
Example: payment received for a sale via bank.
- Date → enter the date of the document (e.g. invoice date).
- Doc → document number (optional).
- DocLink → link to the digital document (if available).
- Description → short description (e.g. Sale of goods to customer Rossi).
- Income → amount received.
- Account → liquidity account used (e.g. Bank).
- Category → reason for the income (e.g. Sales).
The amount will be shown as positive both in the account card and the category card.
Manual entry of an expense
Below is a practical example of an expense. Specifically, it's a merchandise purchase.
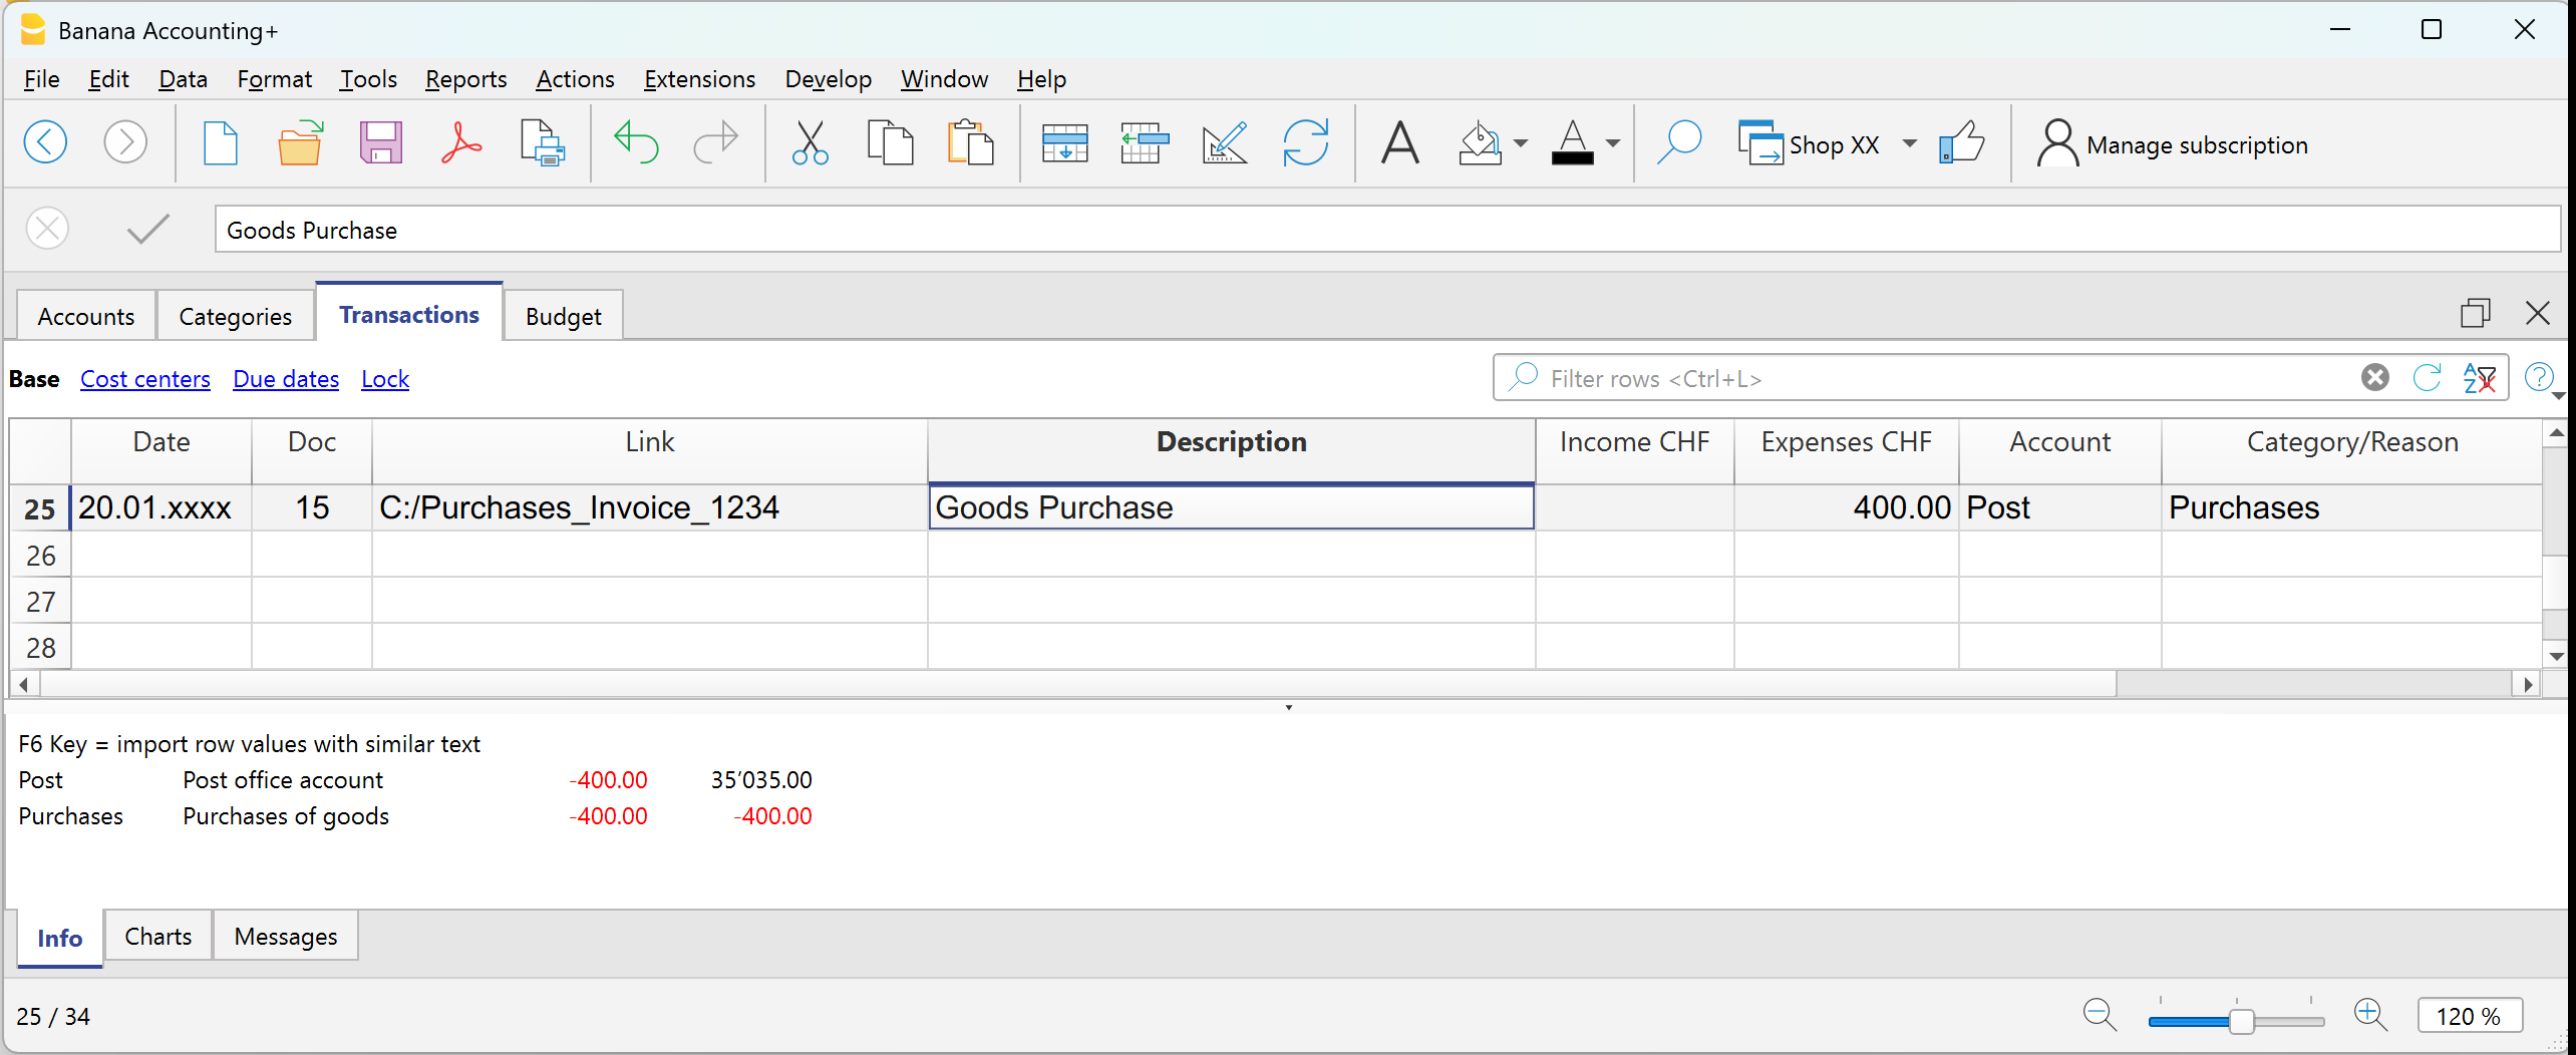
Example: paid invoice for merchandise purchase via bank.
- Date → enter the date of the document.
- Doc → document number (optional).
- DocLink → link to the digital document.
- Description → short description (e.g. Purchase of goods from supplier Bianchi).
- Expenses → amount paid.
- Account → liquidity account used (e.g. Bank).
- Category → reason for the expense (e.g. Purchases).
The amount will be shown as negative both in the account card and in the category card.
Multi-row transaction
When you have a transaction that involves multiple accounts and/or categories, you must enter it using multiple rows.
Example: payment of several invoices using cash.
- Use the same date and document number for all rows.
First row:
- Enter the total amount paid in the Expenses column.
- In the Account column, indicate the liquidity account used (e.g. Cash).
- Leave the Category column empty.
Following rows:
- Enter each paid invoice in a separate row, with the amount in the Expenses column.
- The Account column remains empty.
- In the Category column, indicate the corresponding expense item.
If you have enabled the Balance column, you will see that the remaining total decreases row by row, until it reaches zero.
Transactions between two accounts | Income/Expense accounting
In Income / Expense accounting, a transaction is generally recorded with one account entered in the Account column and one category entered in the Category column.
- The accounts are those listed in the Accounts table.
- The categories are those listed in the Categories column.
It is also possible to record a transaction involving multiple accounts or categories, by entering one account or category per row, until the entry is complete.
When you need to record a transaction that involves two accounts, without using a category, you can use the Category column to enter the second account from the Accounts table.
An example could be the recording of a cash withdrawal from the postal account. The transaction should be entered as shown in the example below.
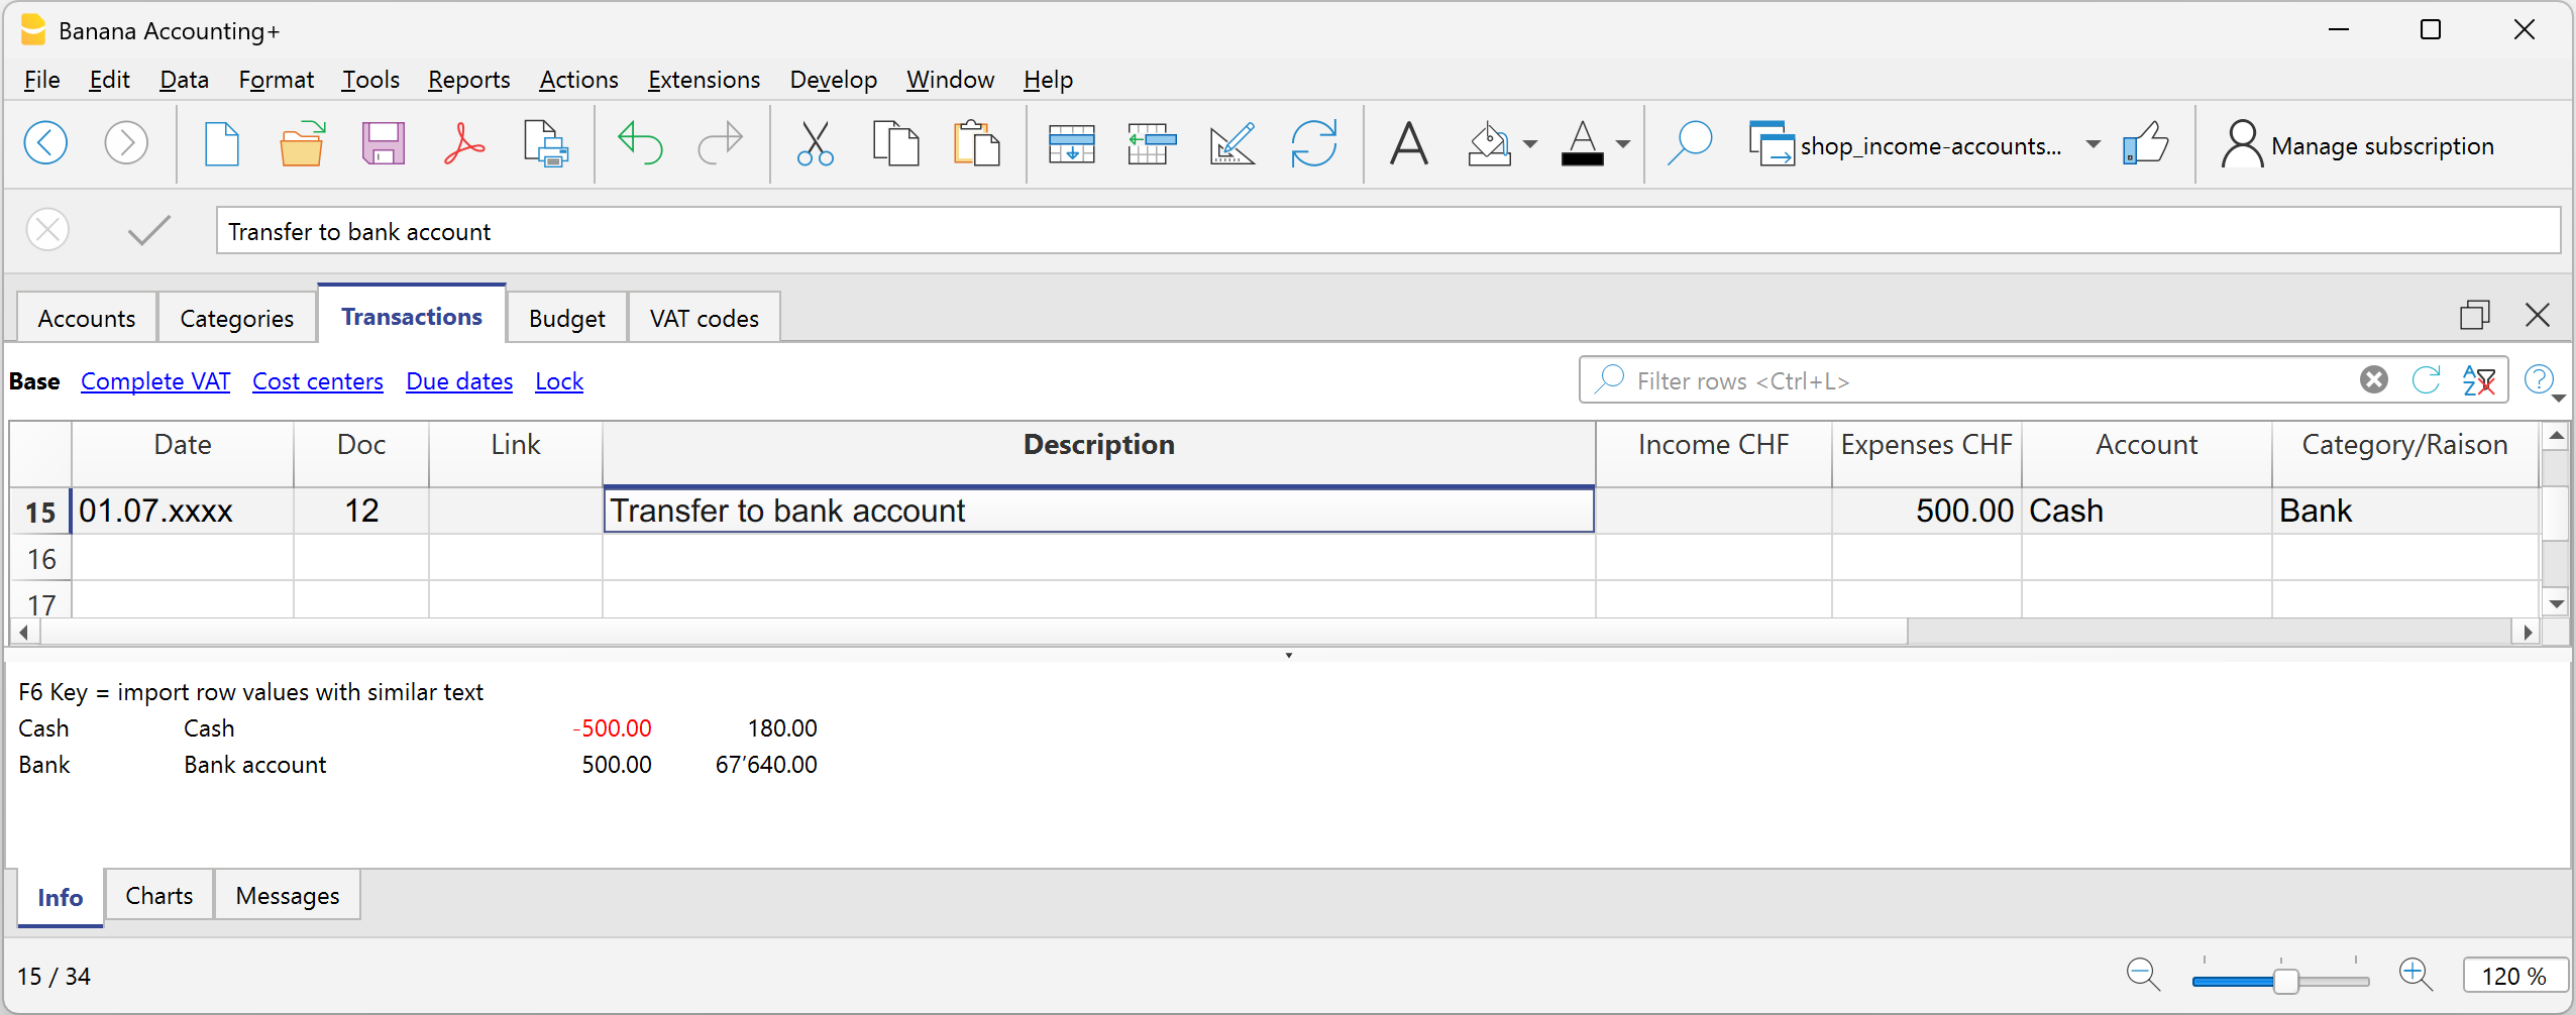
- Enter the Date and Description in the respective columns
- In the Income or Expense column, enter the amount
- In the Account column, enter the first account
- In the Category column, enter the second account
Transactions between two categories | Income/Expense accounting
In Income / Expense accounting, a transaction is generally recorded with one account, entered in the Account column, and one category, entered in the Category column.
It is also possible to record a transaction involving multiple accounts or multiple categories, by entering one row for each account or category, until the transaction is complete.
- The accounts to be used in the trasnsactions are those listed in the Accounts table.
- The categories to be used in the transactions are those listed in the Categories table.
When it is necessary to record a transaction between two categories, it is not possible to do so on a single row. A category cannot be entered in the Account column.
Therefore, the transaction between two categories must be recorded over two rows:

- On the first row:
- Enter the Date and Description in the respective columns
- Enter the amount in the Income or Expense column
- Leave the Account column empty
- Enter the first category in the Category column
- On the second row:
- Enter the Date and Description in the respective columns
You can also copy the data from the previous row - Enter the amount in the Income or Expense column.
If necessary, you can reverse the income or expense amount compared to the previous entry. - Leave the Account column empty
- Enter the second category in the Category column
- Enter the Date and Description in the respective columns
Transactions with VAT | Income/Expense accounting
To record transactions with VAT in Banana Accounting, you need to use an Income / Expense template with the VAT management option.
These templates already include all the settings needed to manage VAT:
- The Accounts table includes VAT report and VAT payable accounts.
- In File properties > Basic data > VAT, the VAT report account is set.
- The VAT Codes table already contains VAT codes updated according to regulations.
How to record transactions with VAT
The Transactions table includes specific columns for VAT. If you activate the Complete view, you can see all the dedicated columns.

For each transaction, enter:
- Date → the date of the document (invoice, receipt, etc.).
- Doc → the document number (if available).
- Invoice No. → enter the invoice number from the customer or supplier.
- Doc Link → enter the path to the PDF document to attach.
- Description → short text describing the operation (e.g. Sale of goods or Rent payment).
- Income/Expense → the amount received or paid.
- Account → an account related to the transaction from the Accounts table (e.g. Cash, Bank).
- Category → the reason for the transaction represented by a category from the Categories table (e.g. Sales, Rent).
- VAT Code → indicate the applicable rate:
- V81 → sales.
- M81 → purchases related to main business activity.
- I81 → purchases related to investments or general costs.
Automate the VAT code
To speed up entries, you can make the VAT code fill in automatically.
- Go to the Accounts and Categories table.
- From the menu Data > Columns setup, activate the VAT Code column.
- Enter the VAT code in the corresponding rows. The VAT code must exist in the VAT Codes table. For Switzerland, for example:
- On fixed asset purchase accounts → I81.
- On sales categories → V81.
- On purchase categories → M81 or I81.
This way, when you enter a transaction linked to that account or category, the program will automatically fill in the VAT Code and immediately calculate the related data.
Learn more
- VAT Summary
- Swiss VAT Management
- Various VAT transaction cases (double-entry accounting)
- Swiss VAT reports → Only with Advanced plan.
Record credit card transactions | Income/Expense accounting
Credit card purchases are becoming increasingly common, not only in businesses but also in households. In order to have a better control of the expenses for credit card purchases, it is necessary to record the movements in your accounting. In this regard, it is necessary to verify that the Accounts table contains the credit card account, otherwise it should be added.
Record credit card transactions with advance payments
The credit card account is a debit account and is entered in the Account column.

In Income/Expense accounting, whenever advance payments are made on the credit card, you must record as follows:
- Enter the date, the description
- In the Expenses column, enter the expense amount
- In the Account column, enter the liquidity account (bank, post office).
- In the Category column, enter the credit card account.
When the credit card invoice arrives and the expenses are covered by the advance payments, it is necessary to record the credit card transactions to identify the costs incurred and write off the credit.
In this case you record on multiple rows:
- Enter the same date and the same Document No. for each transaction for all the rows that make up for the transaction.
- Enter the description indicating the type of expense.
- In the Expenses column enter the total amount paid by the credit card.
- In the Account column enter the credit card account.
- In the next rows to record each expense paid by credit card, record in the Expenses column the amount of the expense, and in the Category column, the category of the expense.
After all transactions have been recorded, check your credit card balance (open your credit card account card).
Transactions on private account | Income/Expense accounting
The private account is a financial account used in accounting to record transactions that do not directly concern the business, but rather relate to the owner's private sphere. This account tracks withdrawals and contributions made by the owner for personal purposes; it serves to keep business and personal finances separate, avoiding confusion in the company's bookkeeping.
Withdrawals from the company by the owner
If the owner uses business funds for personal expenses, the amount is debited to the private account. The amounts withdrawn by the owner appear in the Accounts table, in the Income column of the private account, because they represent a receivable of the company from the owner. In the Balance column of the private account, the amount is positive.
Deposits into the company by the owner
If the owner deposits private funds into business accounts, the amount is credited to the private account. The amounts deposited by the owner appear in the Accounts table, in the Expenses column of the private account, because they represent a liability of the company to the owner. In the Balance column of the private account, the amount is negative.
Balance of the private/partner account
- Positive balance: indicates that the owner owes money to the company.
- Negative balance: indicates that the company owes money to the owner.
Credit card December invoice paid the following year | Income/Expense Accounting
The December credit card invoice is usually received in January of the following year, and consequently, the payment is also made in January.
All expenses listed in the December credit card invoice belong to the previous year; therefore, they must be recorded in the accounting of the previous year.
Recording the December credit card invoice
To record it correctly, it is necessary to have the liability account Costs to be Paid in the Accounts table, which is a transitional account. If it is not present, it must be added.
In the Transactions table, enter:
- Date and any document number in the respective Date and Doc. columns.
- Description
- Total credit card amount in the Expenses column
- Costs to be Paid account in the Account column
- Expense category in the Category column. If the invoice includes multiple expenses, record each expense on a separate row.
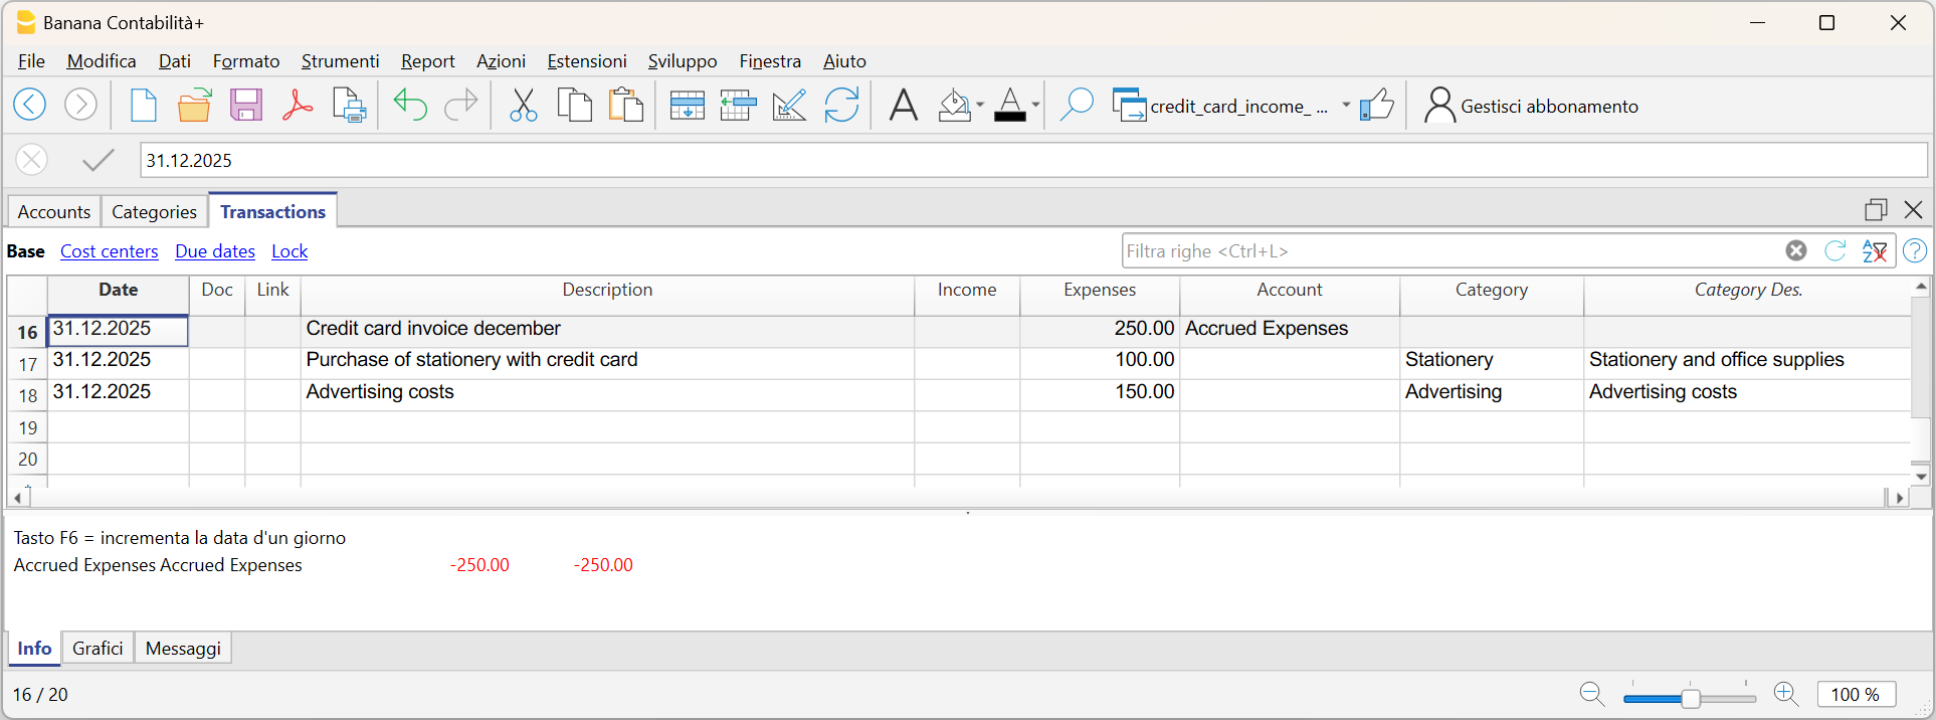
Recording the payment of the December credit card invoice in the following year
In the following year, when the new year is created, the balance of the Costs to be Paid account is displayed as an opening balance in the Accounts table.
When the credit card invoice is paid, the Costs to be Paid account is cleared.
To record the payment of the credit card invoice, enter:
- Date, any document number
- Description
- Total amount of the credit card invoice in the Expenses column
- Liquidity account from which the invoice is paid in the Account column
- The Costs to be Paid category in the Category column.
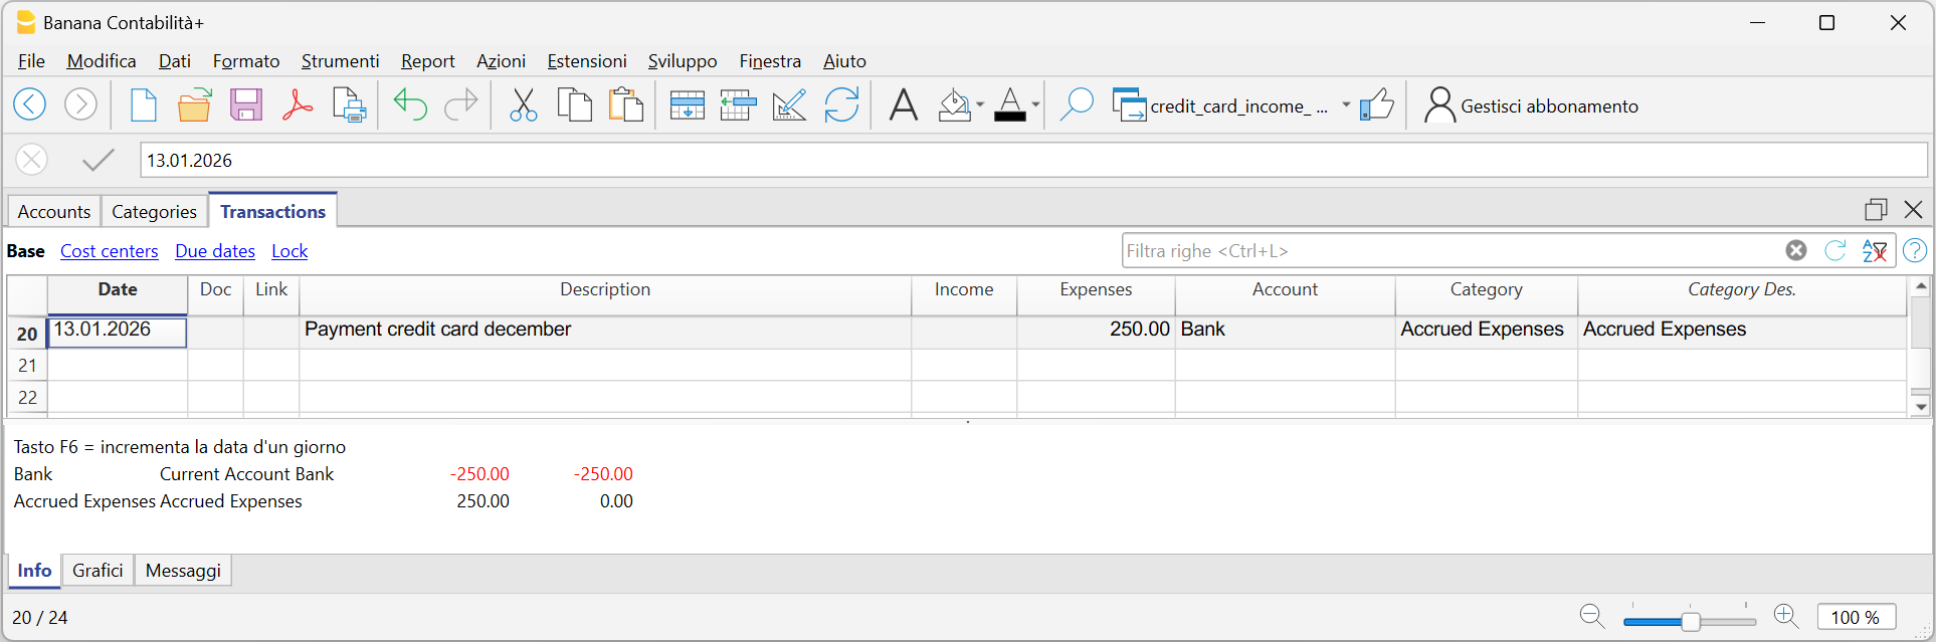
Budget |Income /Expenses Accounting
The annual budget is a tool that allows you to plan income and expenses in advance for the year, providing a clear view of the future and helping you make the best decisions. During the year, you can compare the budget with the actual values (actuals) to assess how reality aligns with your planning.
Thanks to the budget, you can:
- Make informed decisions: understand whether conditions allow you to invest in a project or if it's better to cut some expenses.
- Monitor financial performance: by comparing budget and actuals, you can easily see if you're spending more or less than planned.
- Manage responsibly: for associations, organizations, and small businesses, it is also a tool of transparency and good management.
How to set up the budget in Banana Accounting
There are two available methods:
- Annual budget in the Accounts or Categories table
A very simple and traditional method:
- Enter the budget values directly in the Budget column of the Categories table.
More information is available on the Budget in column page.
- In the Accounts table, you can also add additional columns to manage different types of budgets.
A useful case is adding a column dedicated to the next year's budget, so you can plan the future while staying in the current year's accounting file.
More details are available on the page Budget for the next year in the current accounting.
- Enter the budget values directly in the Budget column of the Categories table.
- Full financial planning using the Budget table
This is a more advanced and detailed approach:
- You activate the Budget table and enter forecasted transactions not only for costs and revenues but also for liquidity.
- The Budget column in the Accounts table is updated automatically based on the transactions recorded in the Budget table.
This method gives you a dynamic view of financial developments, month by month or quarter by quarter, including liquidity.
The following sub-pages explain how to manage the budget in an Income and Expenses file.
If you are using a double-entry accounting file instead, refer to the section on budgeting by clicking the following link: https://www.banana.ch/doc/en/node/10211.
Comparison between Budget in column and Budget in the Table Budget
Here below is a comparison table between the budget in column in the Accounts table and the budget in the Budget table.
| Feature | Budget Column | Budget Table |
|---|---|---|
| Where it is located | In the Accounts table, Budget column | Dedicated table: Budget |
| Activation | Always available (default) | Must be activated: Tools > Add /Remove functionalities > Add Budget Table |
| Level of detail | Annual budget per account/category | Detailed entries with dates and repetition |
| Data entry | Total amount for the year | Individual entries with date, account, and category |
| Additional fields | Only amounts | Quantity, Price, Calculation formulas |
| Recurring transactions | Not available | Available (Repeat column) |
| Future liquidity by period | Not calculated | Automatically calculated (forecasted cash/bank) |
| Results | Totals per account/category | Periodic details (day/month/year) + totals |
| Typical use | Simple forecasts, annual budget | Detailed forecasts, precise financial planning |
Annual budget in column | Income/Expense accounting
This is an annual budget, set in the Budget column of the Categories table.
The Budget column is active only if the Budget table has not been activated. If the Budget table is already active, you need to deactivate it.
In addition to the Budget column, there is the Budget Diff. column, visible in the Budget view. It shows the difference between the expected and actual values. It updates automatically as accounting transactions are recorded.
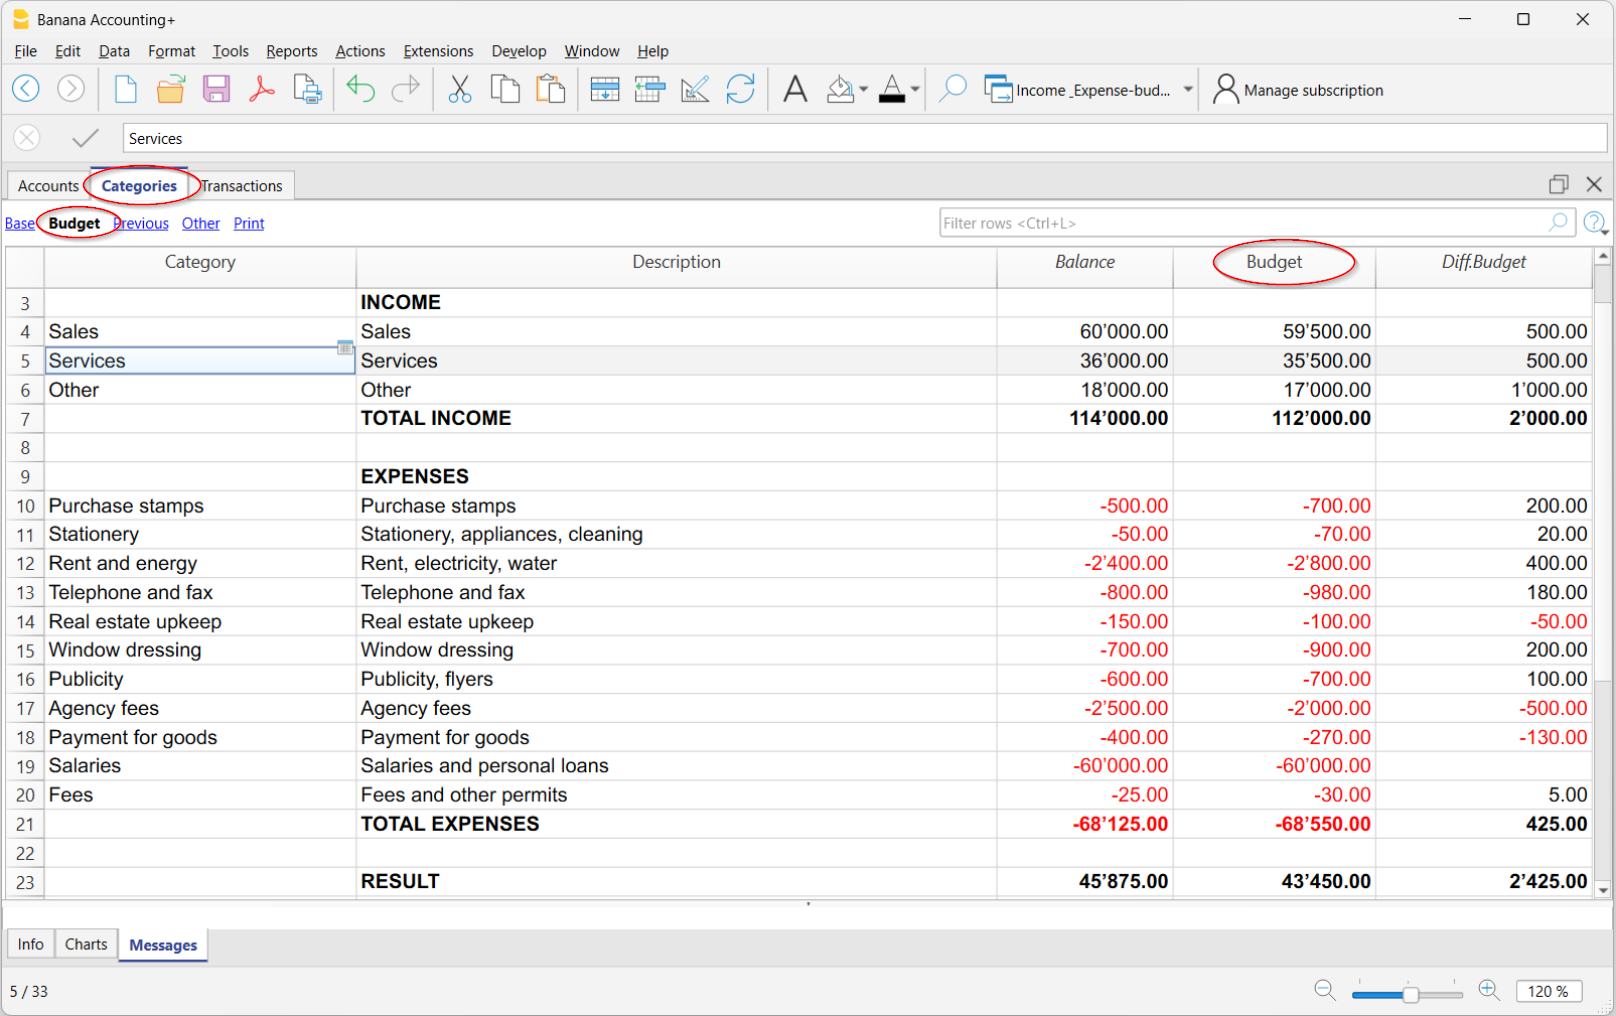
Deactivate the Budget table
If you want to use the Budget column in the Categories table to set the annual budget, the Budget Table must not be active.
If it is active, to deactivate it, go to the menu:
- Tools > Add/Remove Functionalities
- Select Remove Budget Table.
Once the table is removed, you can directly enter the budget amounts in the Budget column of the Accounts table.
Budget Printing
You can print the Budget using one of the following methods:
- Directly from the Categories table:
To print, go to the Categories table and select the Budget or Print view. From the menu File > Create Pdf, the program displays the PDF ready to print.- Budget View
The printout shows the columns as they appear in the Categories table. - Print View
The printout appears like the Categories table but without the Sum In column and other grouping columns. In this case, you need to show the Budget columns using the menu Data > Columns setup.
- Budget View
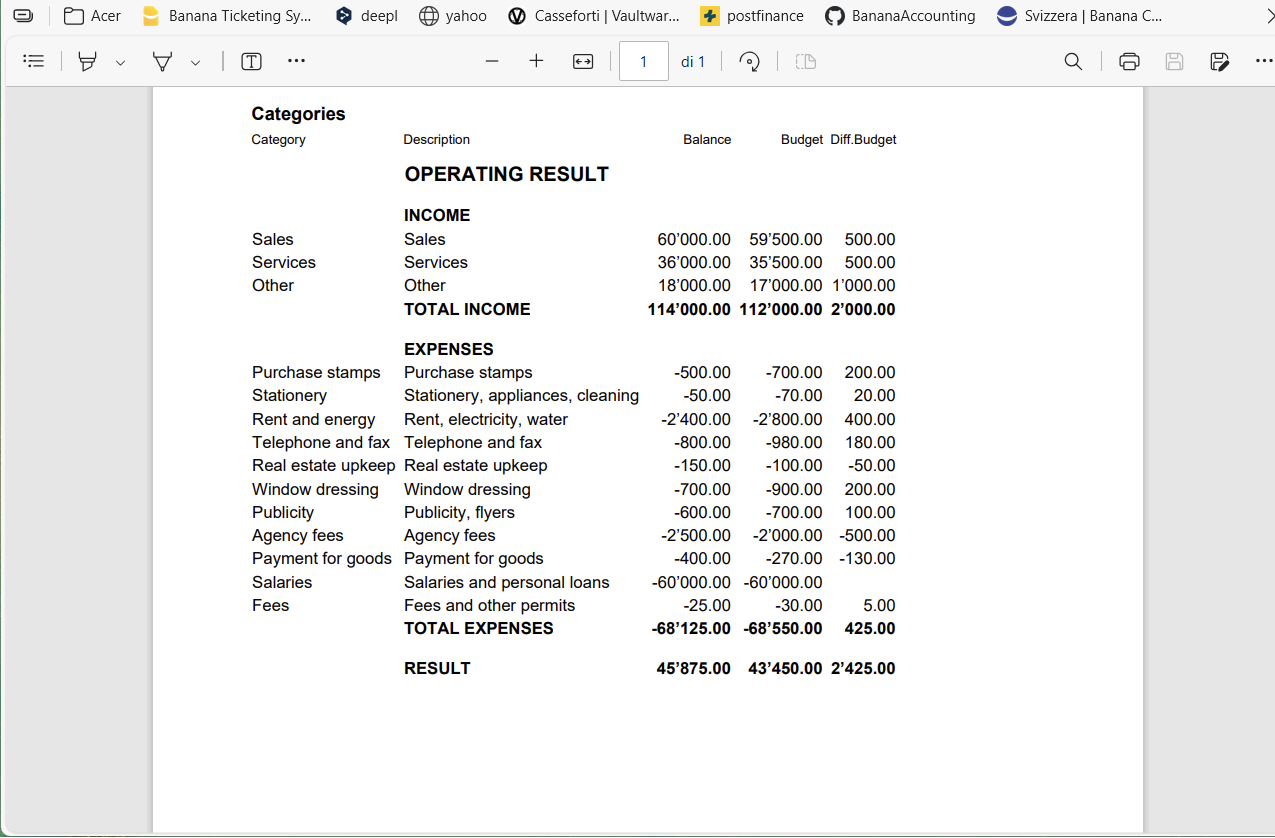
- From the menu Report > Enhanced Balance sheet with Groups.
In the Columns section, the Budget option must be enabled for the Categories and optionally for the Accounts.
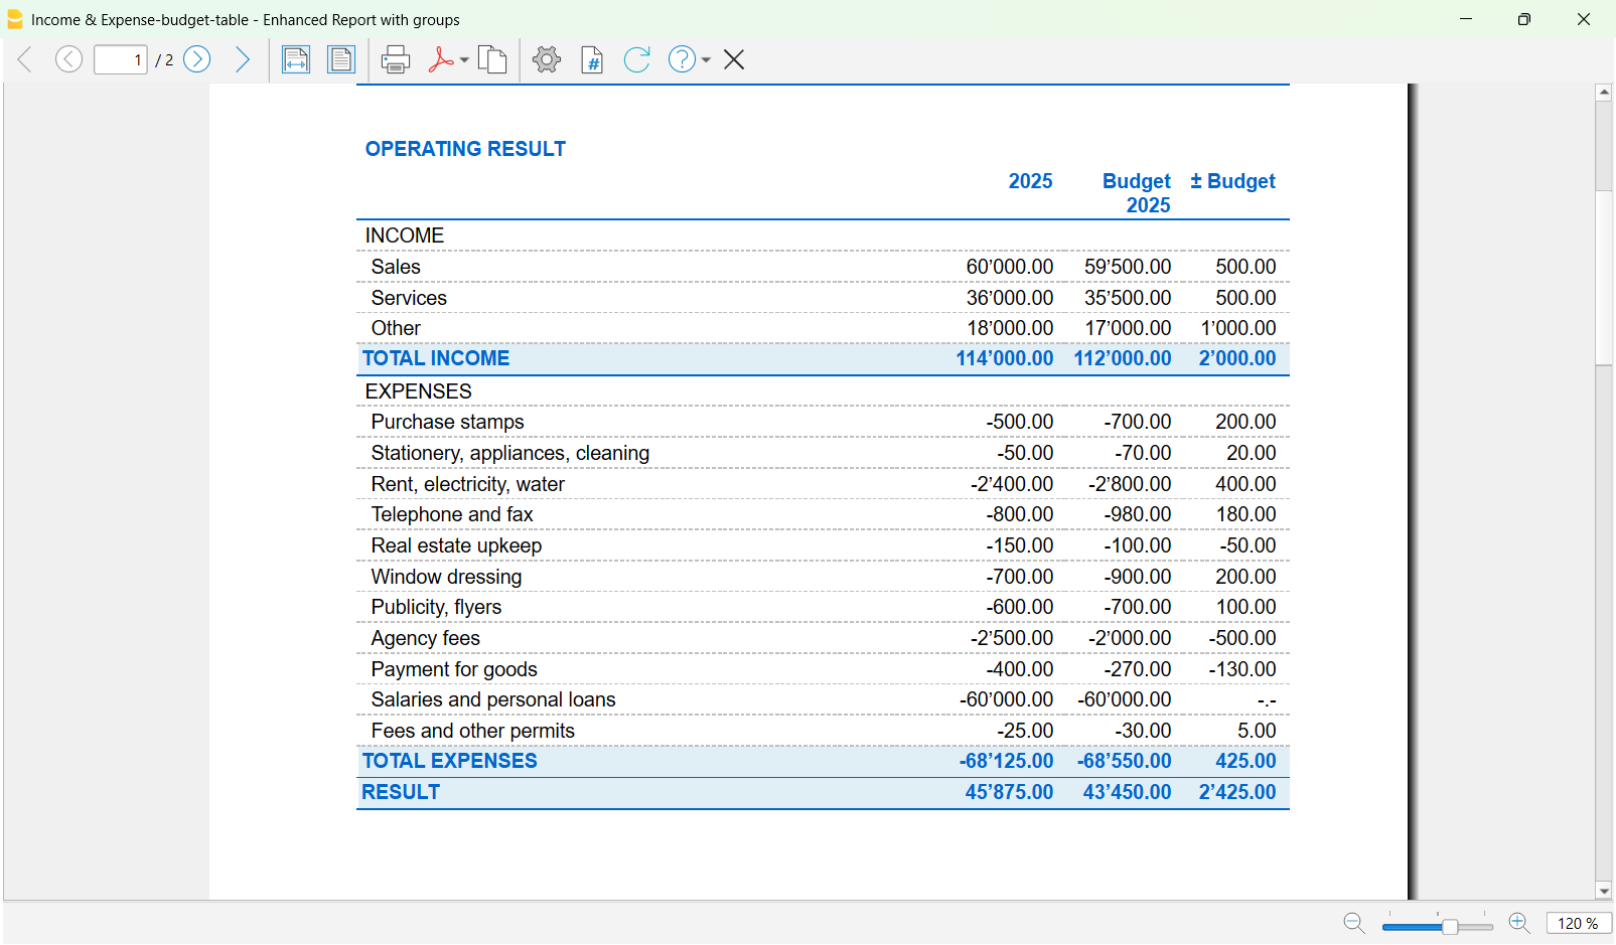
Budget for the following year in the current accounting | Income / Expense accounting
In Banana Accounting, in the Categories (or Accounts) table, you can add, in addition to the column for the current year's budget, an extra column to create a Budget for the following year. This is a very practical solution, for example for associations, where members must approve not only the final accounts of the year, but also the budget for the following year.
How to add the Budget column for the following year
You need to add the Budget for the following year column in the Categories table.
- Go to the Categories table of your accounting file.
- From the Data menu > Columns setup > Add.
- Enter as the title of the new column: Budget following year (e.g. Budget year xxxx).
- Set the Data type = Amount, so that Banana automatically calculates the group totals.
- Confirm with OK.
The new column for the following year’s budget will be visible in the Categories table.
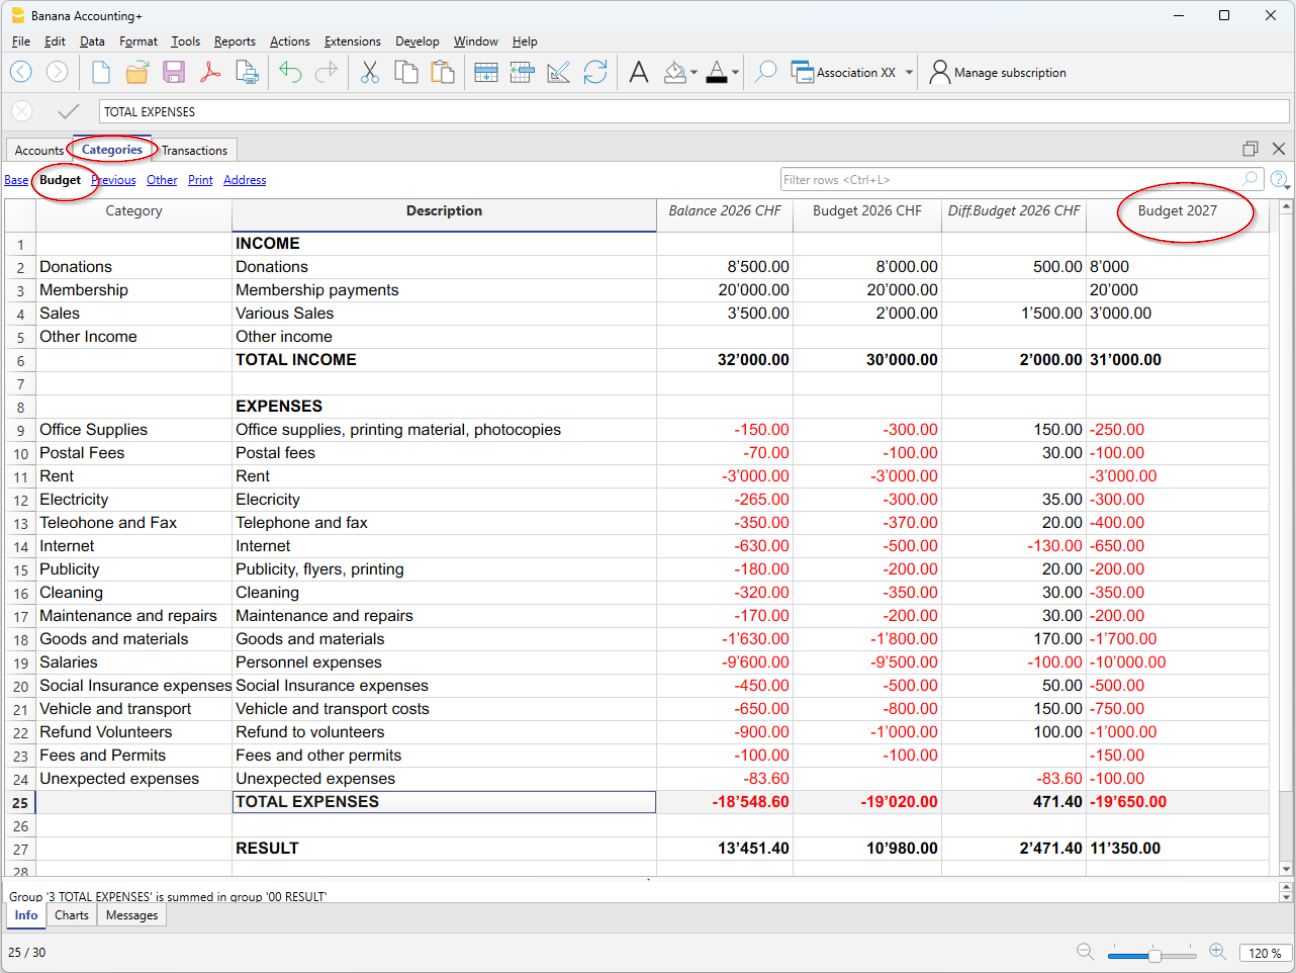
Entering the values
In the column you added, enter the estimated amount for the following year for each income and expense category.
- Income column → positive amounts
- Expense column → negative amounts.
Printing the Budget
Currently, it is not possible to print the Statement with the additional Budget column for the following year. It will be available soon.
At the moment, the Statement must be printed directly from:
- The Categories table, in the Budget view
- or from the Print view, displaying the Budget columns via the menu Data > Columns setup
In this view, the Section, Group, Sum In and Opening columns are not displayed. - Create the PDF from the File > Create PDF menu
Before creating the PDF, you can also select the rows of the Categories table.
Budget, Financial Forecasts and Liquidity Plans
The advanced budget allows you to create a very detailed budget. Based on the transactions and dates entered, the program automatically calculates the expected results for each period.
▶ Video: Income and Expense Accounting Budget
Activate the Budget Table
To activate the Budget table, go to the menu:
Once activated, the table will be available in the accounting file.
Entering the forecasts
In the Budget table, enter the future transactions by indicating:
- Liquidity account (e.g. bank, cash).
- Category (reason for expense or income).
You can also specify:
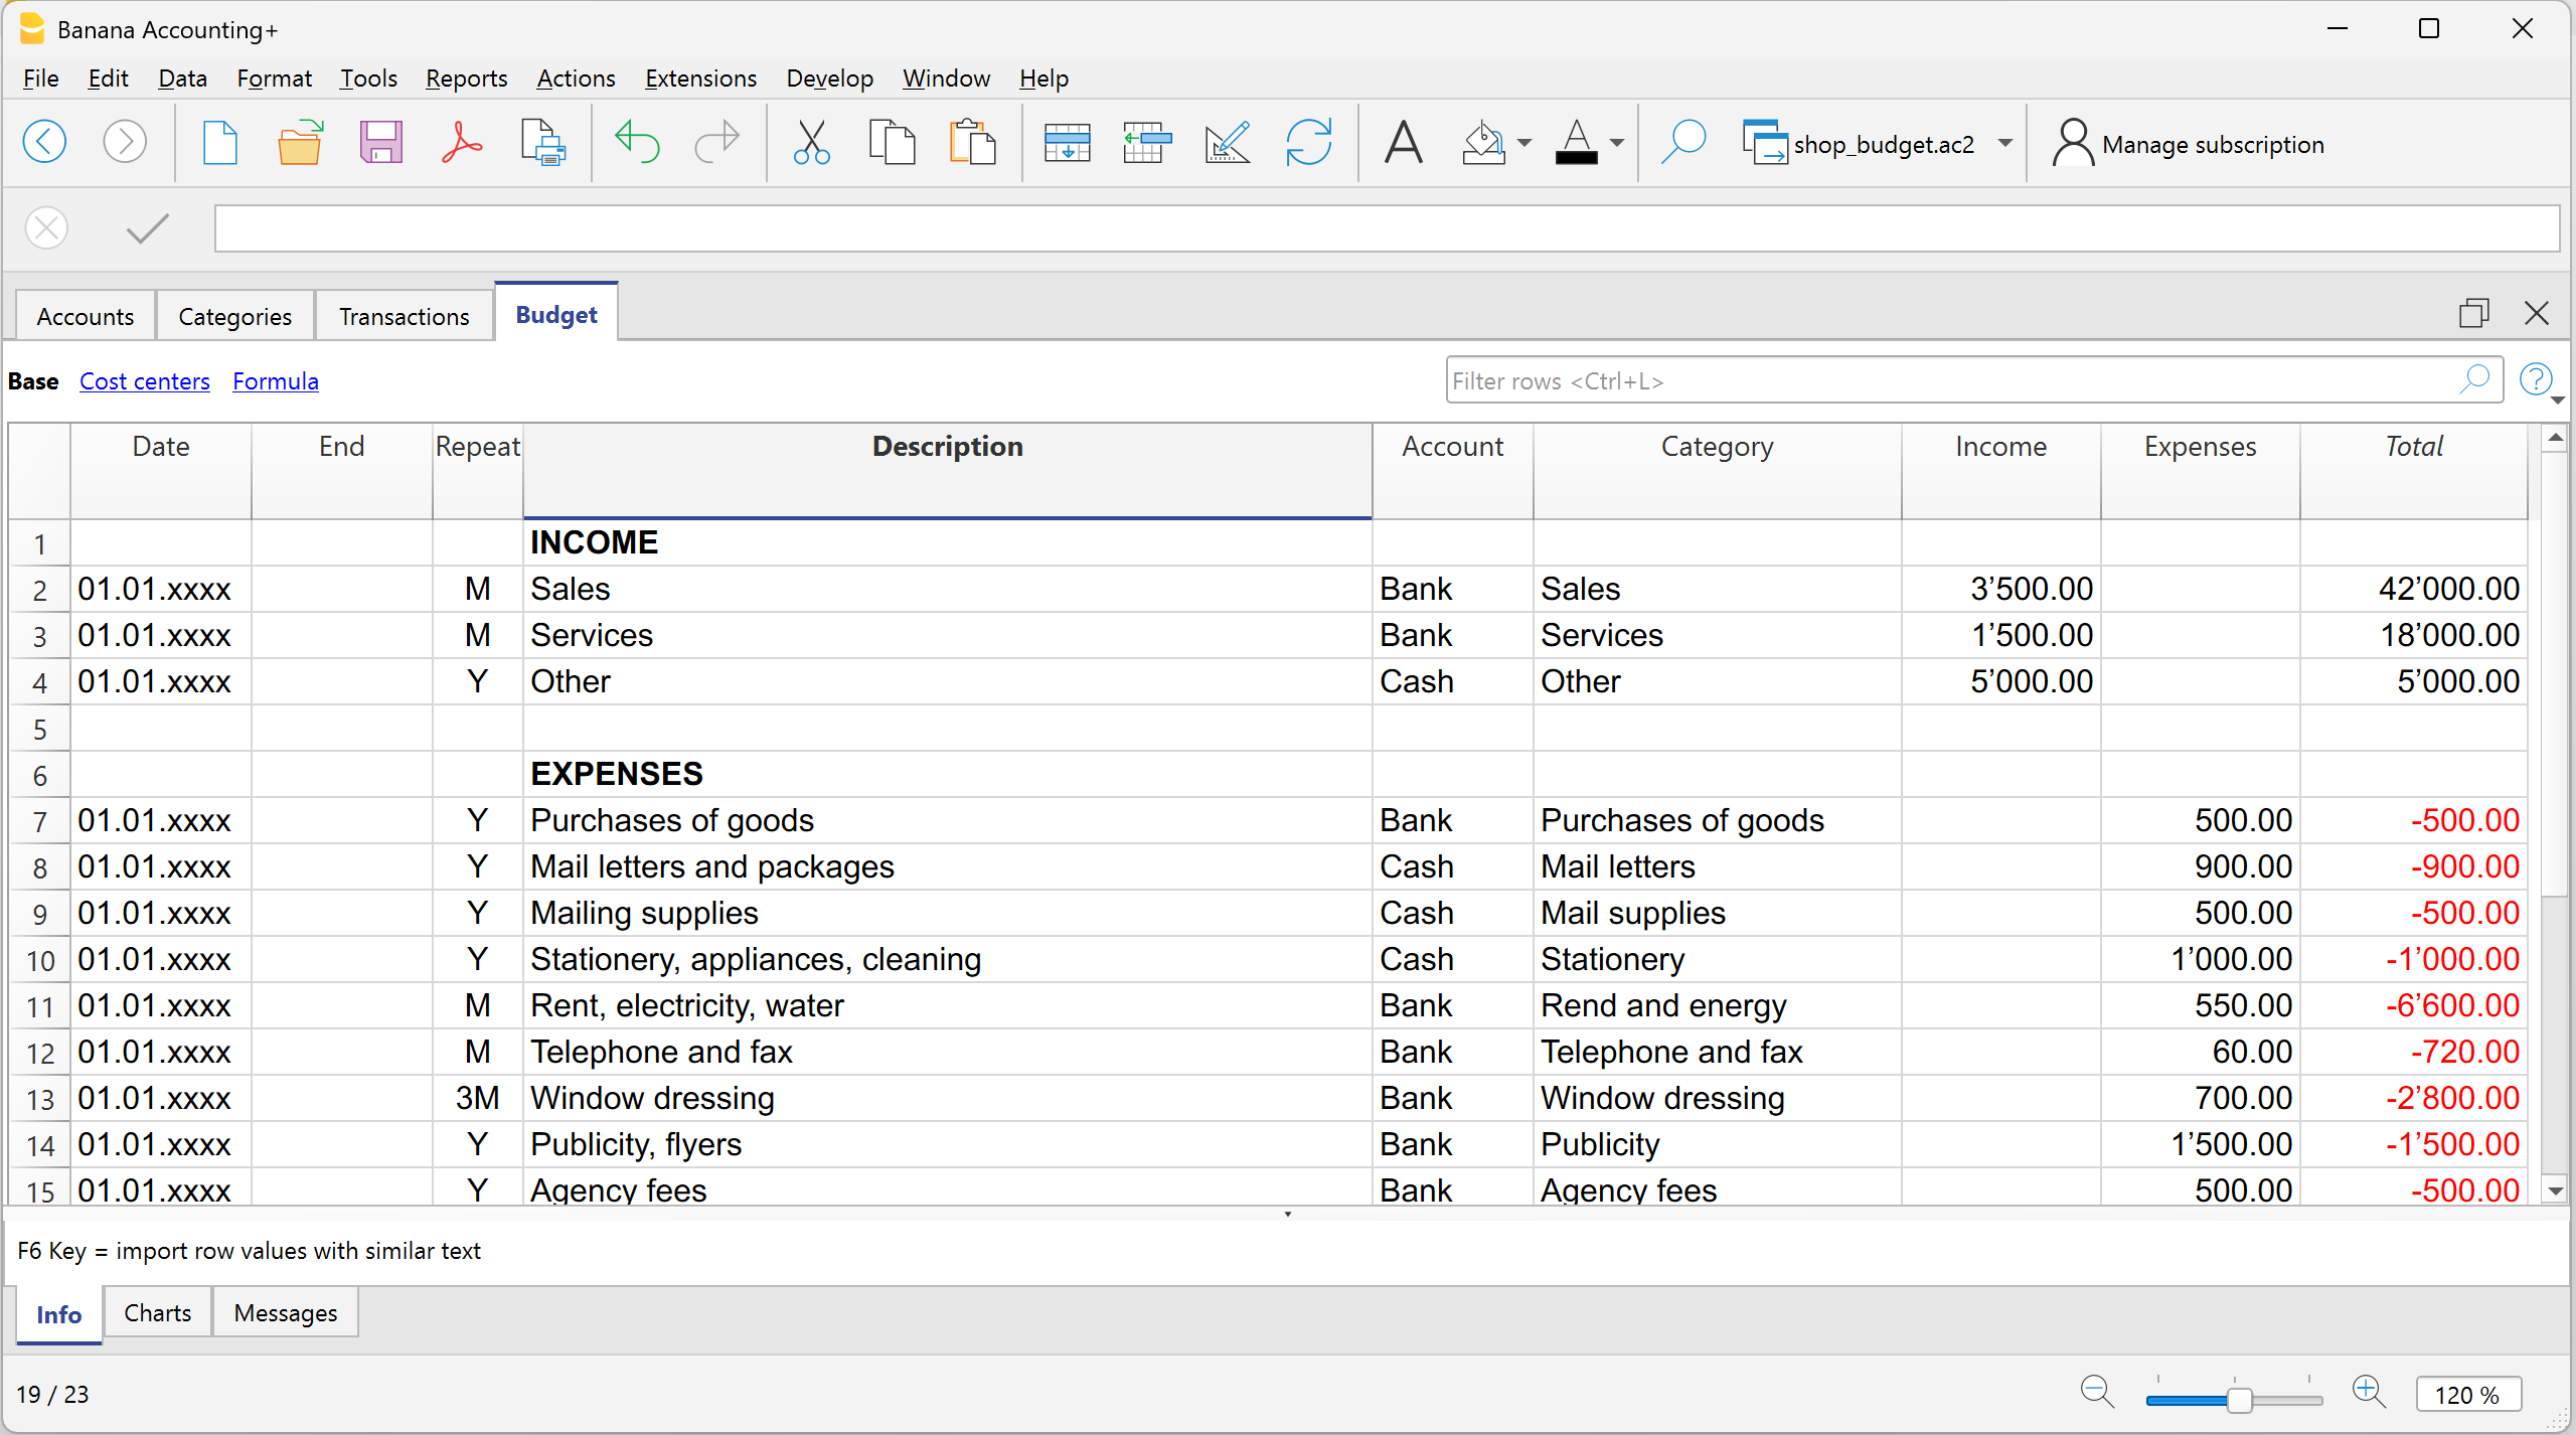
Columns of the Budget table
In the Income and Expense Accounting, the columns of the Budget table are the same as in the double-entry accounting, with a few differences:
- Budget amounts → entered in the Income or Expenses columns.
- Instead of the Debit/Credit columns → there are the Account (items of what you have and what you owe) and Category (reason for income or expense) columns.
- Optional columns: Quantity, Price, Formula → if filled in, the program automatically calculates the amount. When the program automatically calculates the amount based on the Quantity, Price or Formula columns, the result is entered in the Income column if positive, and in the Expenses column if negative.
Both positive and negative values can be entered in the Quantity and Price columns.
More information:
Results
Thanks to the data entered for the expected future transactions and the recurrence, the program automatically calculates:
- Expected income and expenses.
- Future liquidity movements, showing at any time how much money will be available.
- Specific results per period, useful for detailed analysis and forecasts.
Printing the Budget
You can print the Budget using one of the following methods:
- Directly from the Accounts table, Budget view.
This method is used when selecting the budget in the Accounts or Categories table (on a yearly basis).
The printout appears with the same column layout as shown in the image.
- From the menu Report > Enhanced balance sheet with groups.
This method is used when using the detailed budget from the Budget table.
In the Columns section, you need to activate the option:- Budget for the Categories and optionally for the Accounts.
Printouts | Income/Expense accounting
In the Accounts and Categories tables, the updated balances of all accounts are always visible: you can check your assets, receivables, and payables at any time.
After each transaction, the balances are updated automatically, without needing to generate reports: just open the Accounts or Categories table to keep the situation under control.
To print the contents of the tables, see the page Page setup (last paragraph).
Advanced printouts
All printouts are executed from the Reports menu, which contains the main functions:
Journal – (Chronological list of all transactions).
- Command Journal by period.
Allows you to view and print the entire period or a specific range.
Account, category, or group cards – (Detail of transactions for each account or category).
- Command Account / Category cards.
You can print all cards or just a selection.- In the Period section choose the desired interval
- In the Options section, activate or exclude elements to include in the printout.
- The Customization section allows you to save print settings for future use.
Enhanced Statement – (Formatted income and expense report)
- Command Enhanced Statement
Prints the list of income and expenses without subtotals (in case subgroups were entered in the Accounts and Categories table).
Enhanced Statement with groups – (Formatted income and expense report with more details)
- Command Enhanced Statement with groups
Same as above, but with the option to display and print group subtotals as well.
Accounting Report – (Summary report with various comparison options)
- Command Accounting Report
Displays in the Accounts table the reports with the chosen options. It is possible to generate reports by period, with comparisons between periods or previous years. Each report can be divided into sections and customized, with the possibility of saving the settings for later use.
Journal | Income/Expense accounting
In Banana Accounting, as in all applications, transactions are entered in the Transactions table.
If you want to print the Journal (that is, the complete list of all accounting entries), you can do it in two ways:
- from the Transactions table
- from the Journal by period command (Reports menu)
Printing the Journal from the Transactions table
- Go to the File > Page setup menu to set margins and print options.
- Return to the File > Print menu to obtain the journal with all entries.
Printing the Journal from the Reports menu
From the Reports menu select the Journal by period command.
This option allows you to print the journal with more filter options.
- Enter the start and end dates of the period you want to print.
- Confirm to obtain the journal of the selected period or the whole year.

Sorting options
In the Column for sorting section you can decide by which type of date to sort the entries, for example:
- by document date,
- by transaction date,
- or other available criteria.
More information about the Period section is available on the page Period of common functions.

Example of Journal Preview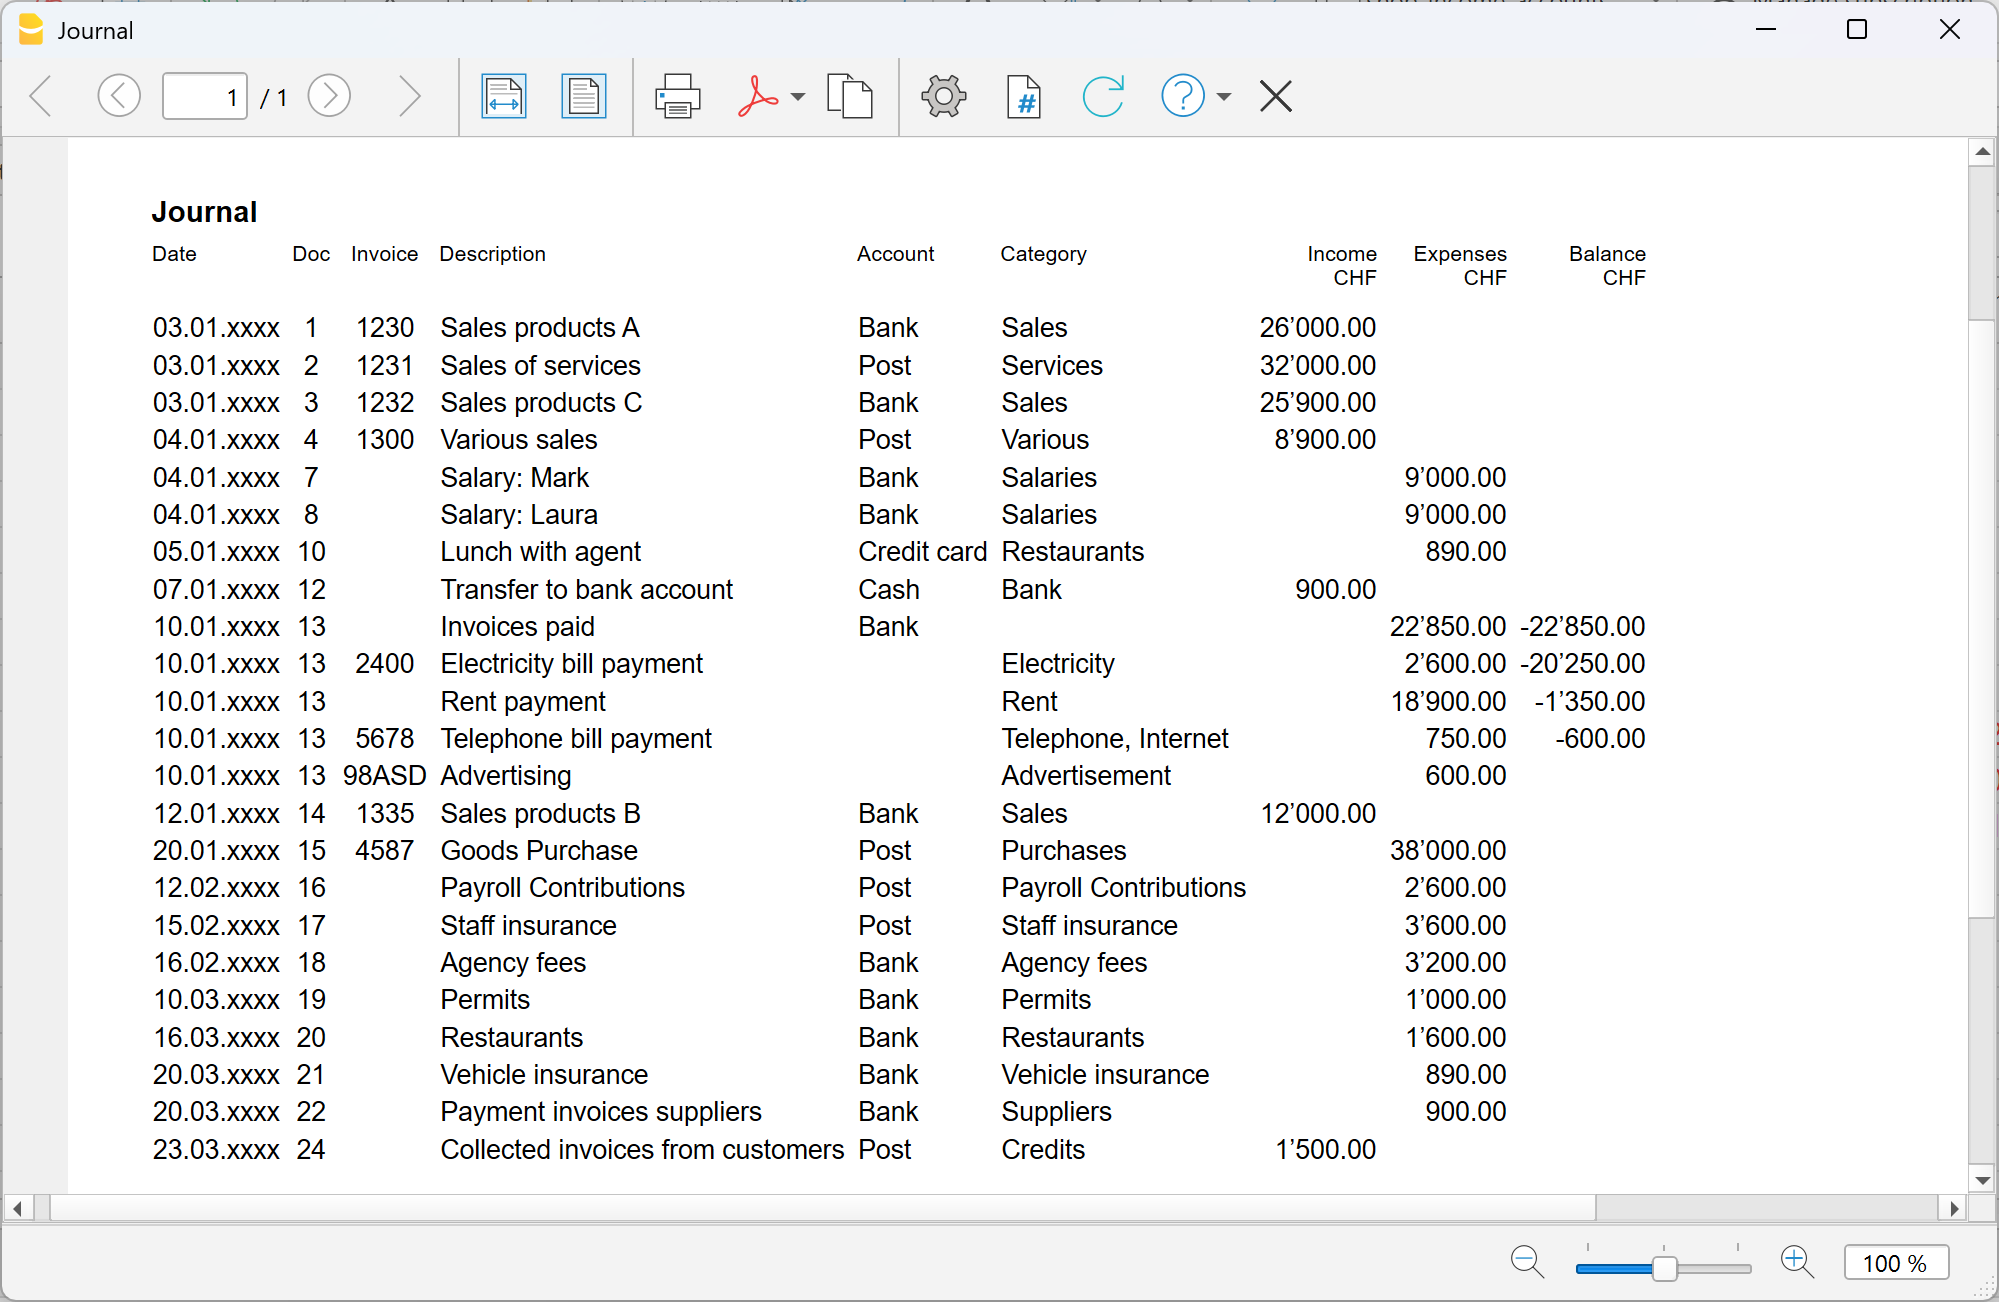
Account/Category Cards | Income/Expense Accounting
In Banana Accounting, as in all applications, transactions are entered in the Transactions table.
If you want to print the Account card and Category card (the complete list of all entries for a specific account, category or group), you can do it in two ways:
- in the Cash account card you see all cash movements,
- in the Customers card you find the receipts collected from customers,
- in the Rent category card you see all payments related to rent.
In accounting, the set of all account cards is called the General Ledger.
How account/category cards work
When you record a transaction in the Transactions table, Banana Accounting automatically updates the account and category cards.
- Each income or expense is posted to the corresponding account and category.
- In this way, every new transaction is immediately reflected in the cards.
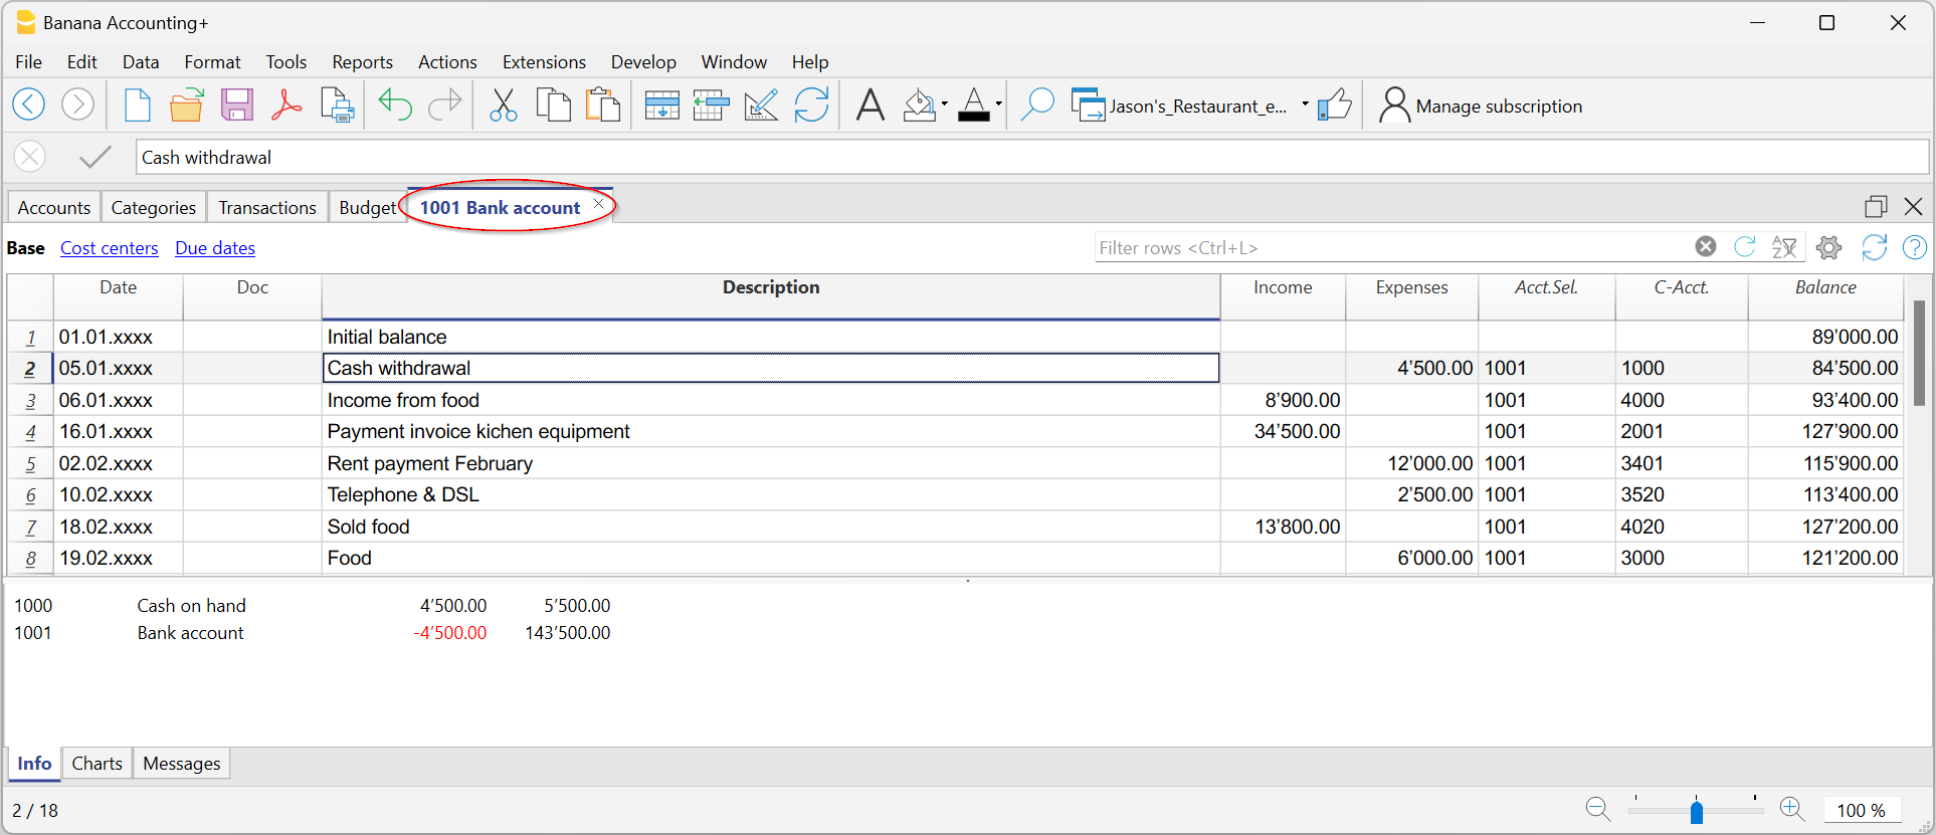
Structure of Account and Category cards
Each Account card or Category card has a header, i.e. the name of the account or category (for example UBS Bank or Rent), which distinguishes it from the others.
The card is made up of several main columns, which neatly list the data of each recorded transaction.
The most important columns are:
- Date → the date of the transaction.
- Document number (if present) → for example the related invoice or receipt.
- Description → a short text explaining the operation (e.g. payment to supplier Rossi).
- Income / Expenses → the amount recorded as positive (income) or negative (expense).
- Selected account → shows the number of the account or category to which the card belongs.
- Contra account → the account linked to the transaction (e.g. Rent expense paid via Bank).
- Balance → the running balance of the account or category, updated line by line.
In this way, each card becomes a sort of automatically updated “account statement”, allowing you to check in detail the movements of a single account or category.
Open the account or category card
You can open it in two ways:
- From the Transactions table or from the Accounts or Categories table → click the account/category number and then the small blue icon that appears.

- From the menu Report > Account cards → useful if you want to open or print multiple cards at once.

The account/category cards dialog has the following sections:
For detailed information about the sections, click the corresponding links.
Update the account or category card
The cards are recalculated on request.
If you modify or add transactions:
- reopen the card with the command Report > Account/Category cards,
- or, if the card is already open, click the refresh icon (two circular arrows).
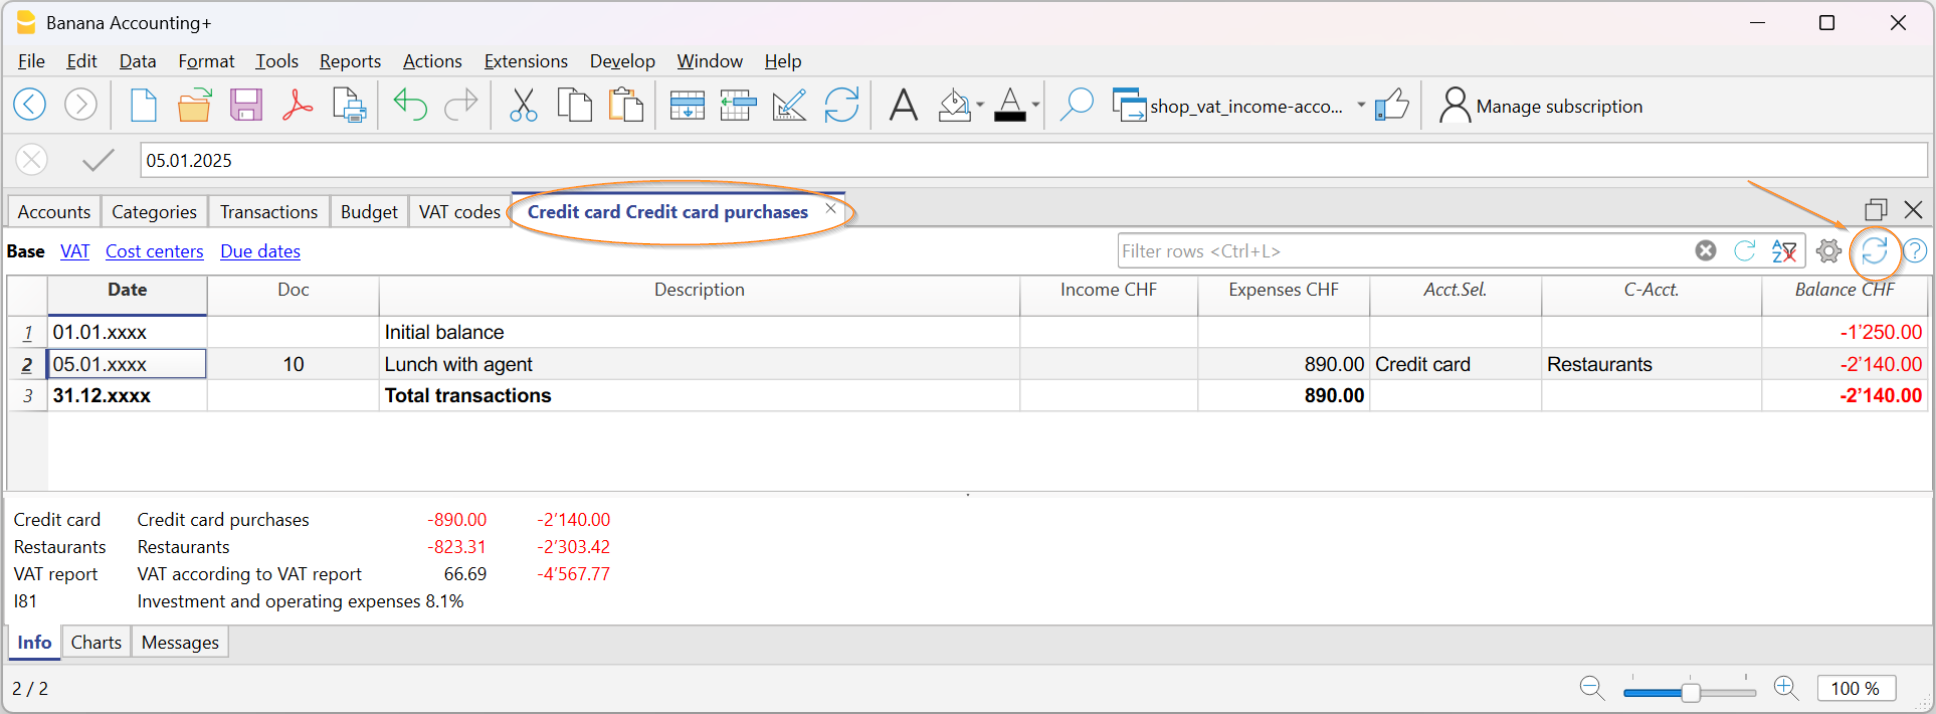
The Selected Account column
From any account card, via the menu Data > Columns setup you can make visible:
- Selected account column, indicating the account on which the movement took place.
When you obtain a card for one or more accounts, categories, groups, and segments, you can see exactly which account was used.
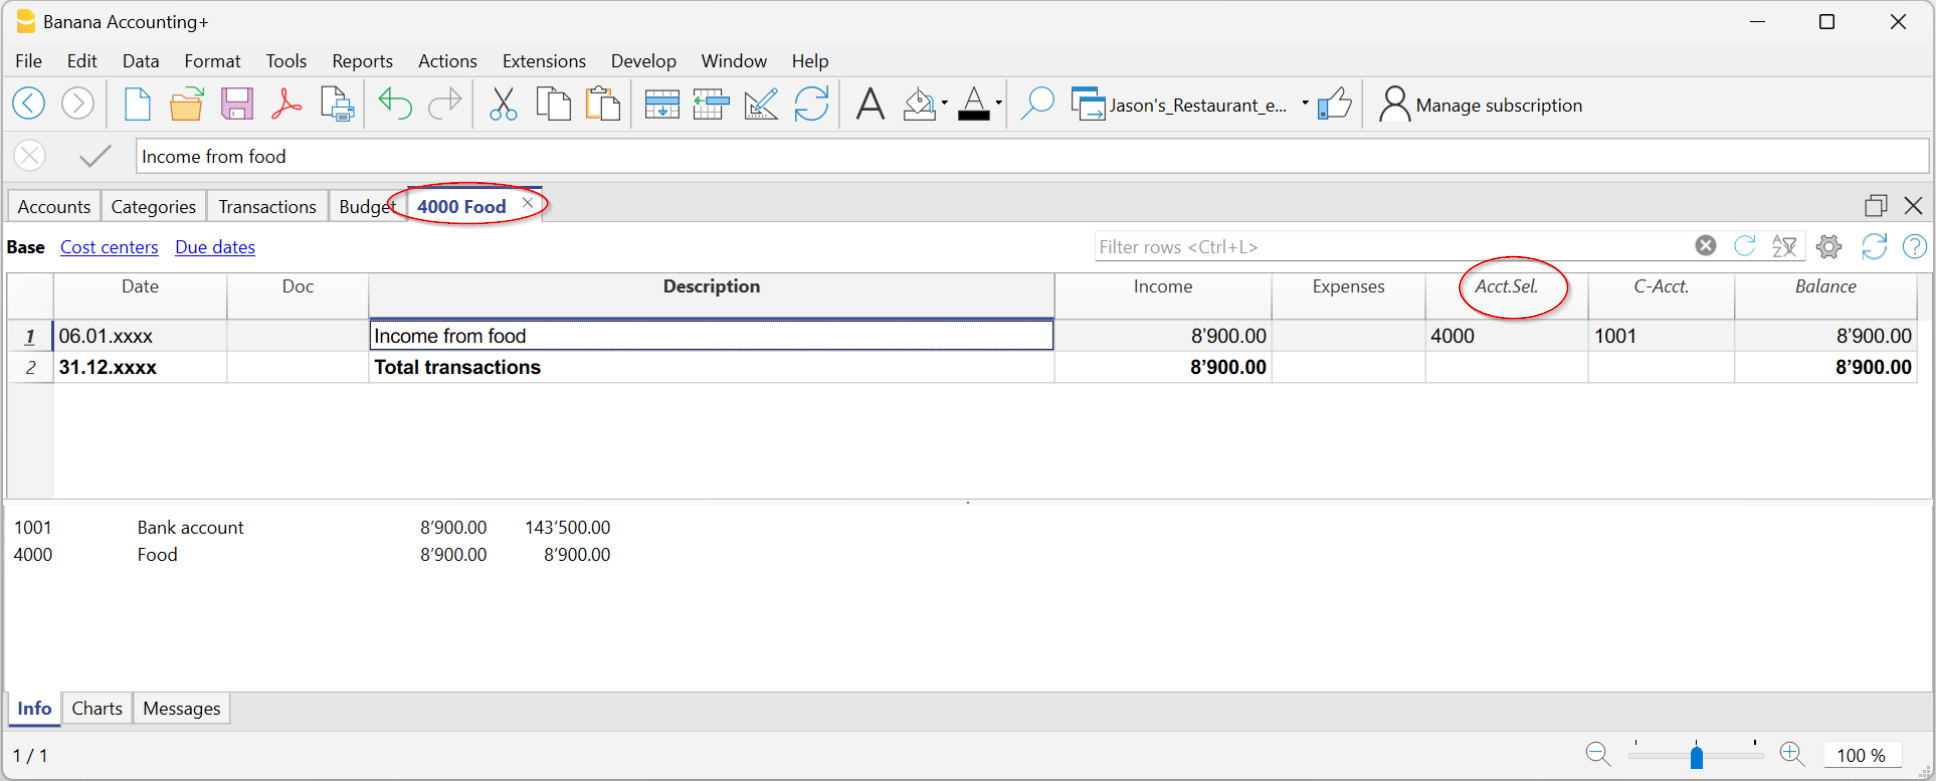
The Contra Account column
In the account or category cards you can see:
- the C-Acct column, which indicates the contra account that completes the transaction.

Print account cards
You can print a single account/category card, a selection, or all cards.
To print one account card:
- display the card from any table (Accounts or Transactions)
- Start printing from File > Print.
To print multiple account cards:
- Menu Report > Account cards, choose which cards to include and confirm.
- You can also use the Filter to automatically select Accounts, Cost centers and Segments.
- Once shown in preview, start printing from File > Print.
Print Account cards by period
To view the account cards with balances for a specific period:
- click the menu Report > Account cards.
- in the Period section, enable Specified, entering the start and end dates.
- For more information see the page Period.
Print Budget account cards
If budget transactions have been entered in the Budget table, you can display the budget account/category or group cards:
- Report menu > Account/Category cards > Budget transactions.

Delete or edit data in account or category cards
In the cards you cannot modify or delete transactions.
If you need to correct:
- Go back to the Transactions table (or to the Budget, if it concerns planned transactions).
- Make the change.
- Recalculate the accounting (Shift + F9).
- Reopen the card to see the update.
From the card you can also go directly to the transaction to edit:
- double-click the row number.
Group cards
A group card is a statement that combines the data of several accounts or categories belonging to the same group.
In practice, instead of seeing the movements of a single account (e.g. only Bank), you can view all those of an entire group (e.g. Liquidity, which includes cash, post and bank).
To open and print a group card:
- Go to the menu Data > Columns setup
- Enable the Selected account column.
In this way, in the group card you will also see the accounts that make up the group.

Accounts and Categories in the Formatted report with groups
From the menu Report > Enhanced report with groups you can open a dialog that lets you decide how to print accounts and categories.
In this window you can:
- choose whether to include accounts, categories or both
- decide which groups to show (e.g. only administrative expenses, only sales)
- enable or disable some display options (e.g. show period balances, hide empty items, etc.)
- customize the look of the printout (headers, margins).
This way you can get a clear and organized report, with group totals and a layout suitable for official printouts or for presenting data to third parties.

Add a logo to account/category cards
If you want to personalize the account cards with your business logo, you can do it directly at print time.
Proceed as follows:
- File > logo setup and insert the logo
- Go to Report > Account cards and open the card you are interested in.
- From File > Print preview click the settings icon.
- In the dialog that opens, look for the Logo option.
- Instead of None, select Logo.
In this way, every printed account card will also show your logo, making the documents more professional.
For more details you can see the page Logo settings.
Create a print customization for account cards
If you often print the same cards (for example all the sales ones), you can create a customization that saves you from repeating the same settings every time.
Here’s how:
- Go to Report > Account cards.
- In the Customization section, click New.
- Enter a name that clearly describes the print, for example Sales accounts.
- Select the accounts you want to include.
- From File > Page setup define margins and other print settings.
From now on, whenever you need to print those cards, just select the saved customization: in a few clicks you’ll have the report ready.
Enhanced Statement | Income/Expense Accounting
The Enhanced statement is a clear summary of the financial position and performance of your business.
What it’s for:
- to see income and expenses,
- to check the result of the period
- to have an overview of the financial trend.
How to view the Enhanced statement
- Go to Report > Enhanced statement.
- You can see a preview and, if you want, save the report in PDF, HTML, or Excel formats, or copy it to the clipboard.
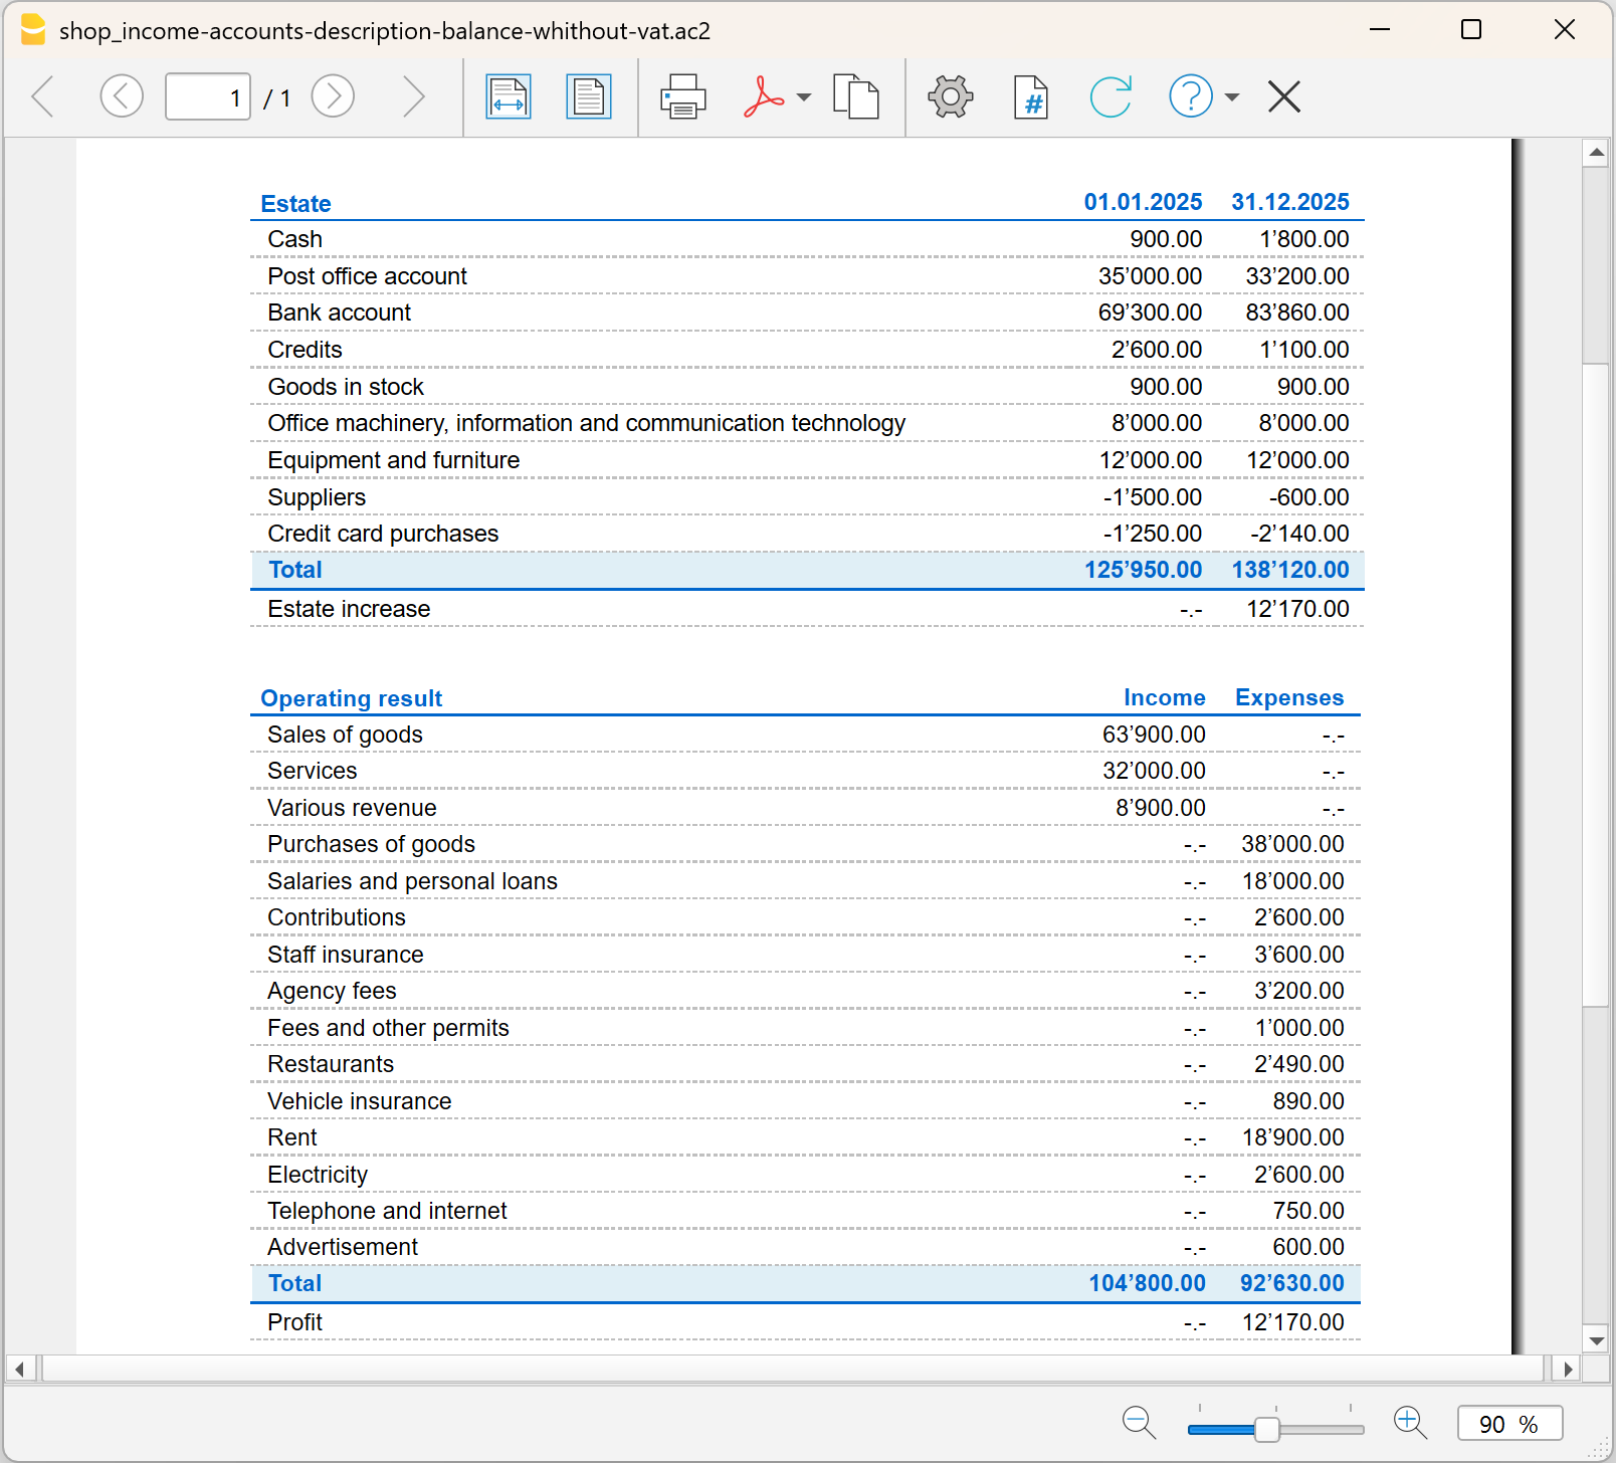
Customize the Report
The report can be customized in different ways. Below you find the explanation of the different options.

Page header
- Lines 1–4: space to enter a title or other information.
- Logo: you can insert your business logo.
- If you have already loaded logos in File > logo setup, you can select one from the list.
- Alternatively, using the Edit button, you can add a new one.
Column header
- Start date: start of the accounting period.
- End date: end of the accounting period.
- Previous year: end date of the previous period (for comparisons).
Cover page
- You can print a dedicated cover page.
- Here too you can insert a logo, choosing from the ones set or adding a new one.
Print pages
You can choose what to include:
- Accounts → list of accounts.
- Categories → list of categories.
- First page → prints the document header.
- Page break after accounts → prints accounts and categories on two separate pages.
Include in printout
In the Include in print section you can enable other choices, such as showing or not certain data (some options, for example budget balances, are not available if you choose a specific period).
Other sections
The explanations for the other sections are available at the following pages:
Enhanced Statement with Groups | Income/Expense Accounting
The Enhanced report with groups is a statement that shows a summary of the financial position and performance of your business. Compared to the Enhanced report, it is the most complete and detailed version, because, in addition to the main totals, it also displays subgroup totals.
This way you not only have an overview, but you can also analyze in detail income and expenses grouped by categories or sections, getting a more precise and in-depth picture.
How to get the Enhanced report with groups
- Go to Report > Enhanced report with groups.

Options of the Enhanced report with groups
From the Enhanced report with groups dialog you can:
- Include all groups → all the groups present in the Accounts and Categories tables are printed.
- Exclude single groups or accounts → if you don’t want to show them in the report.
- Split by period → for example, in the first half-year you can choose a monthly or quarterly breakdown.
- Split by segments → useful to distinguish results by projects, sectors, or other business areas.
All the sections of the Enhanced report with groups are explained on the page Enhanced Balance Sheet with groups, with reference to double-entry accounting.
The exceptions in the contents are the following:
In the options, besides the Accounts settings there are also those related to Categories, but the approach is the same.
Accounting Report | Income/Expense Accounting
The Accounting Report is a tool that allows you to view the Accounts or Categories table based on the options you choose in the configuration dialog.

What you can view
You can decide the type of grouping to display:
- Accounts → the report lists all the accounts with the following columns:
- Opening
- Income for the period
- Expenses for the period
- Transactions of the period
- Final balance
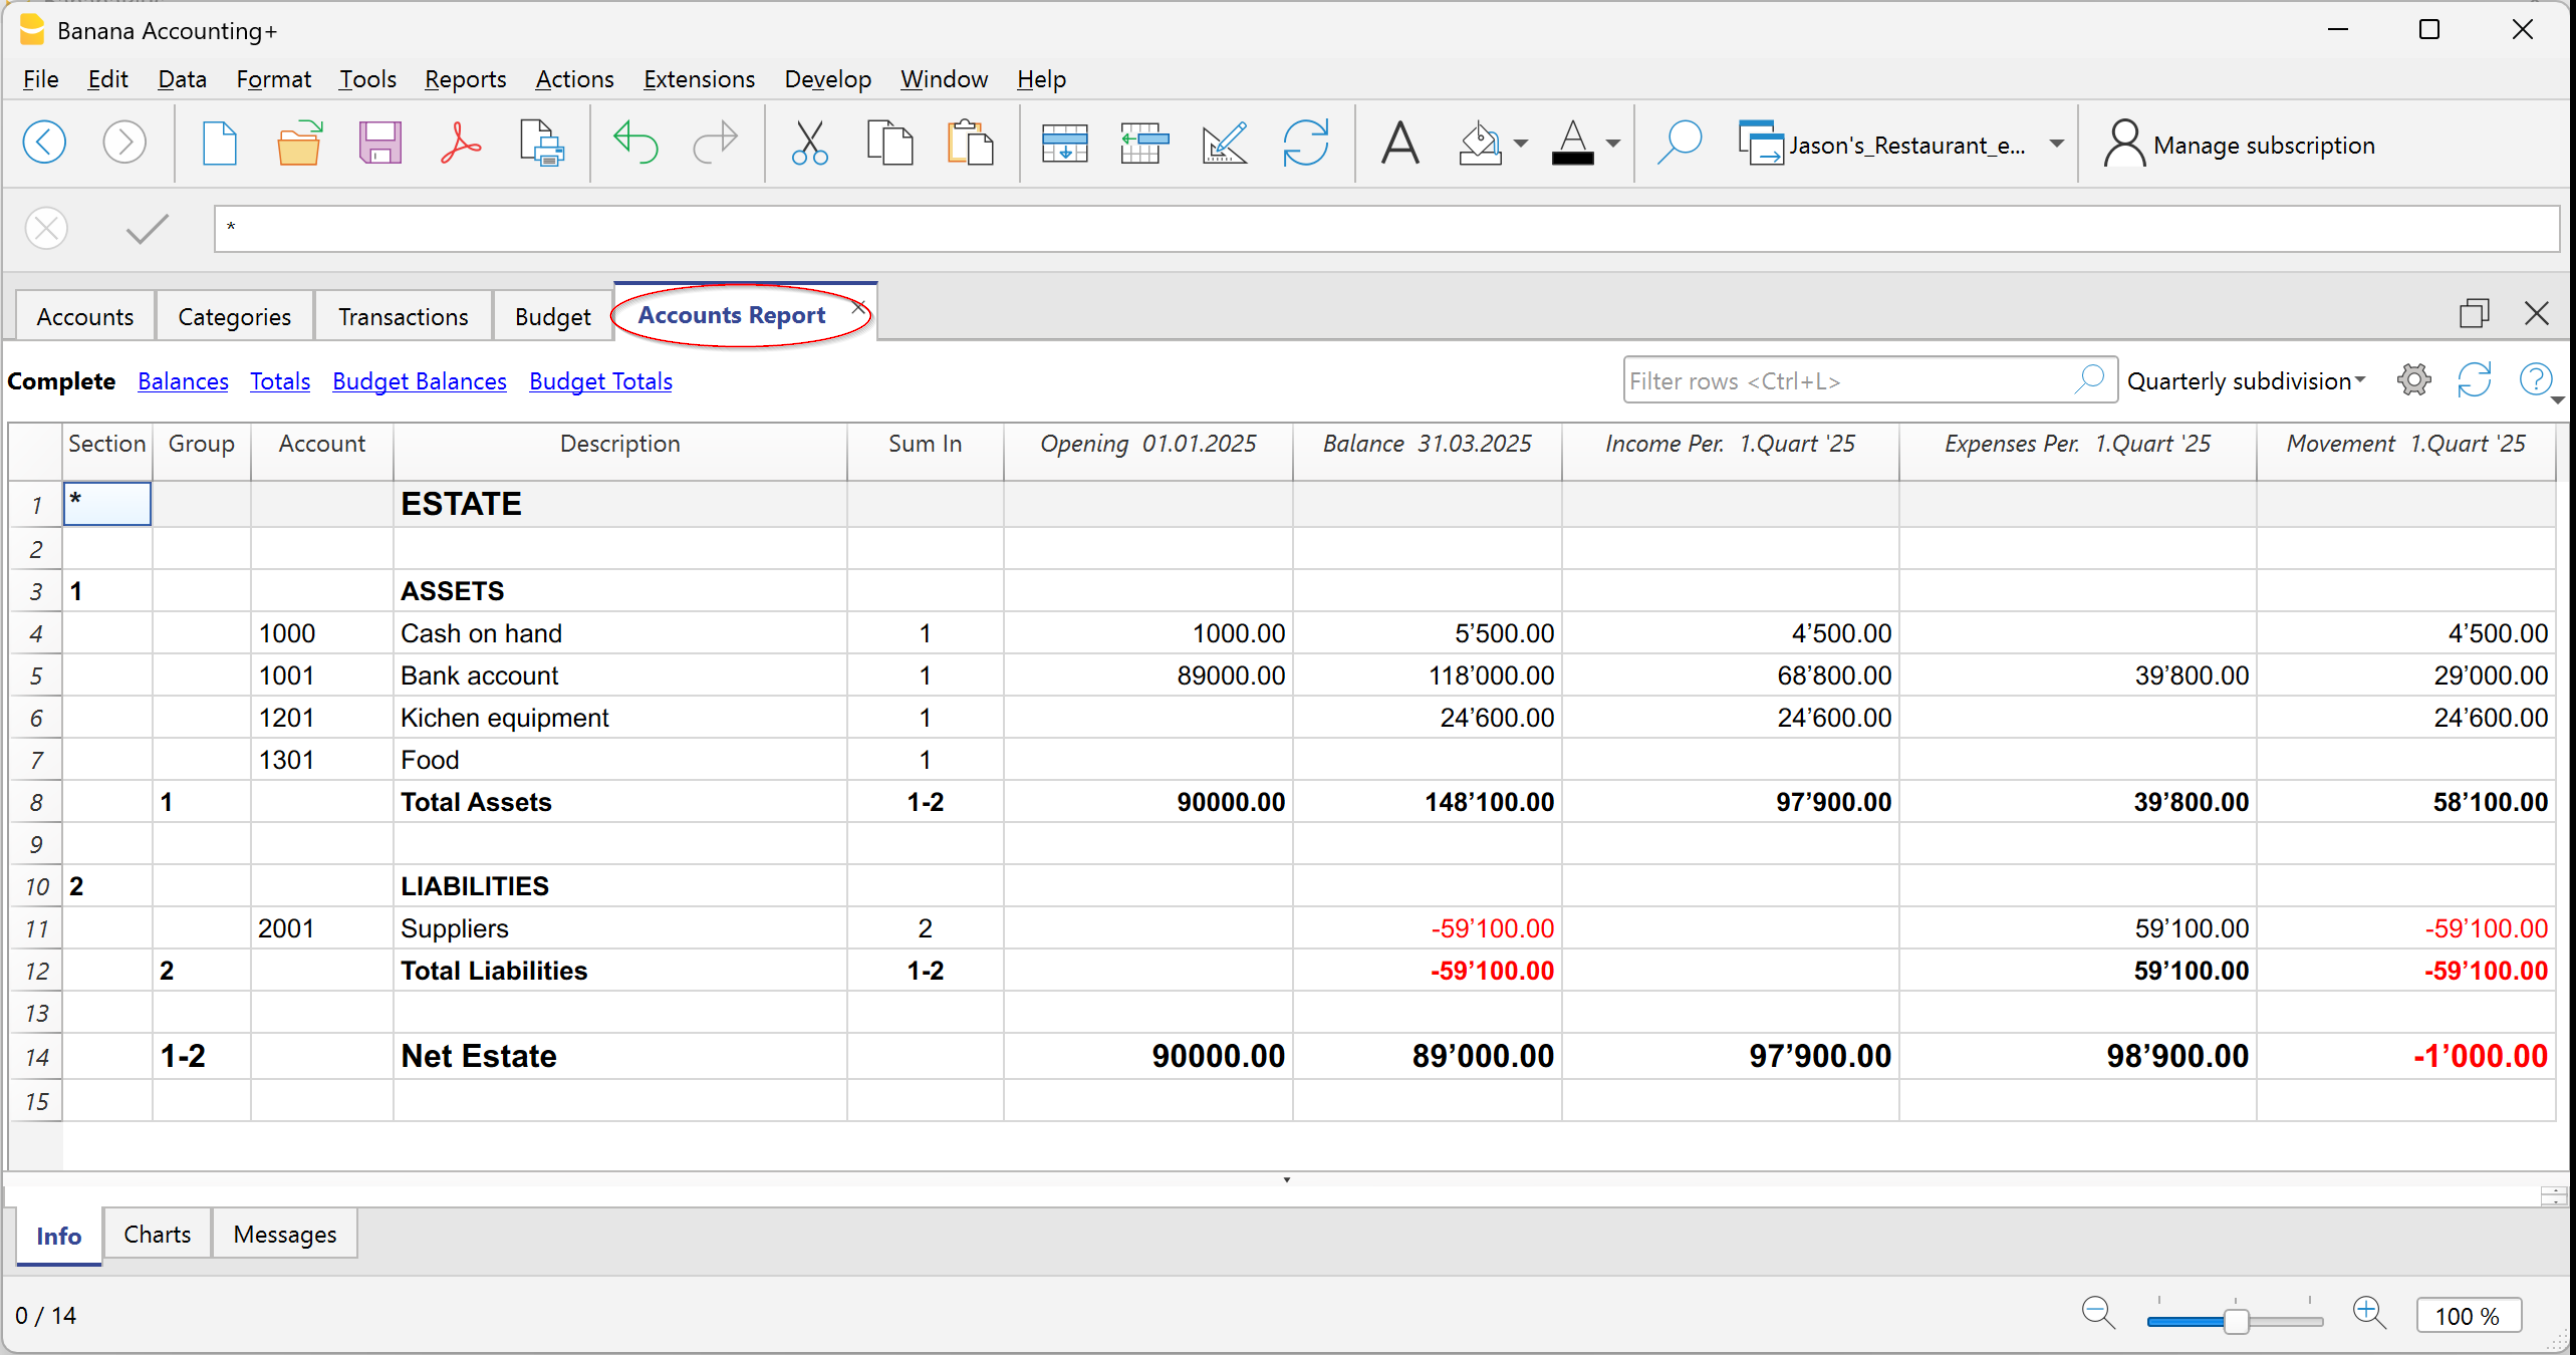
- Categories → the report lists all the categories with the same columns:
- Income for the period
- Expenses for the period
- Transactions of the period
- Final balance
In the categories report, the Opening column is always empty.
This is because categories are used to calculate the annual result (that is, the difference between income and expenses) and should not have opening balances carried over from the previous year.
Therefore, each year categories start from zero, so it is possible to correctly calculate the result only for the current period.

Print options
You can choose whether to include or exclude certain items:
- Exclude accounts → only the categories will be printed.
- Include accounts without transactions → also shows accounts that have no transactions.
- Include accounts with 0 balance → also includes accounts that have no balance.
- Exclude groups without accounts → hides groups made up only of accounts with a zero balance.
Other sections
For the other sections, see the following web pages:
VAT Report | Income/Expense Accounting (only with VAT option)
The VAT Report in Banana Accounting is a report that gives you a complete and up-to-date overview of all VAT transactions recorded in your accounting. It is a useful tool both for internal control and for preparing periodic VAT returns.
The VAT Report function is only available in the Income and Expenses templates with VAT.
What the VAT Report is for in Banana Accounting
With the VAT Report you can:
- clearly see VAT on sales (VAT payable),
- check VAT on purchases (VAT receivable),
- calculate the VAT balance to be paid or recovered,
- get a summary of the transactions divided by VAT codes.
This way you always know your VAT position without having to make manual calculations.
How to get the VAT Report
Based on the transactions with a VAT code, the program calculates and displays the VAT Summary.
To get the VAT Summary:
- From the menu Reports > VAT /Sales tax report.
- In the window that opens you can select:
- the period to analyze (e.g. month, quarter, year),
- optional filters to display only certain codes or transactions.
The program processes the data and shows you a report with the totals of VAT collected and paid.

VAT Report options
When you generate the VAT Report, you can activate several options that allow you to create a customized VAT Report, from the details of individual transactions to totals by account, code, or rate, so that you always have your VAT position under control.
Include transactions
Shows in detail all the accounting records with VAT.
Include totals by Accounts
Sums up VAT operations grouped by each account (e.g. Bank, Cash).
Include totals by Code
Shows the totals of VAT operations grouped by VAT code (e.g. V81, M81, I81).
Include totals by Percentage
Groups the totals of VAT operations based on the applied VAT rate (e.g. 8.1%).
Include unused codes
Adds to the report also the VAT codes present in the table but not used in transactions.
Use own (group and Gr)
VAT operations are sorted according to the groupings defined in the VAT Codes table.
Sort transactions by filter
You can choose how to sort the transactions: by date, document number, description, etc.
Partial Report
Allows you to get a VAT summary limited to a specific element:
- only one VAT code (by selecting it from the list),
- only a group of codes (for example all codes related to purchases).
What the VAT Summary contains
The report shows, for each VAT code:
- the taxable amount (the amount on which VAT is calculated),
- the VAT rate applied,
- the corresponding VAT amount,
- the overall totals of VAT payable and VAT receivable.
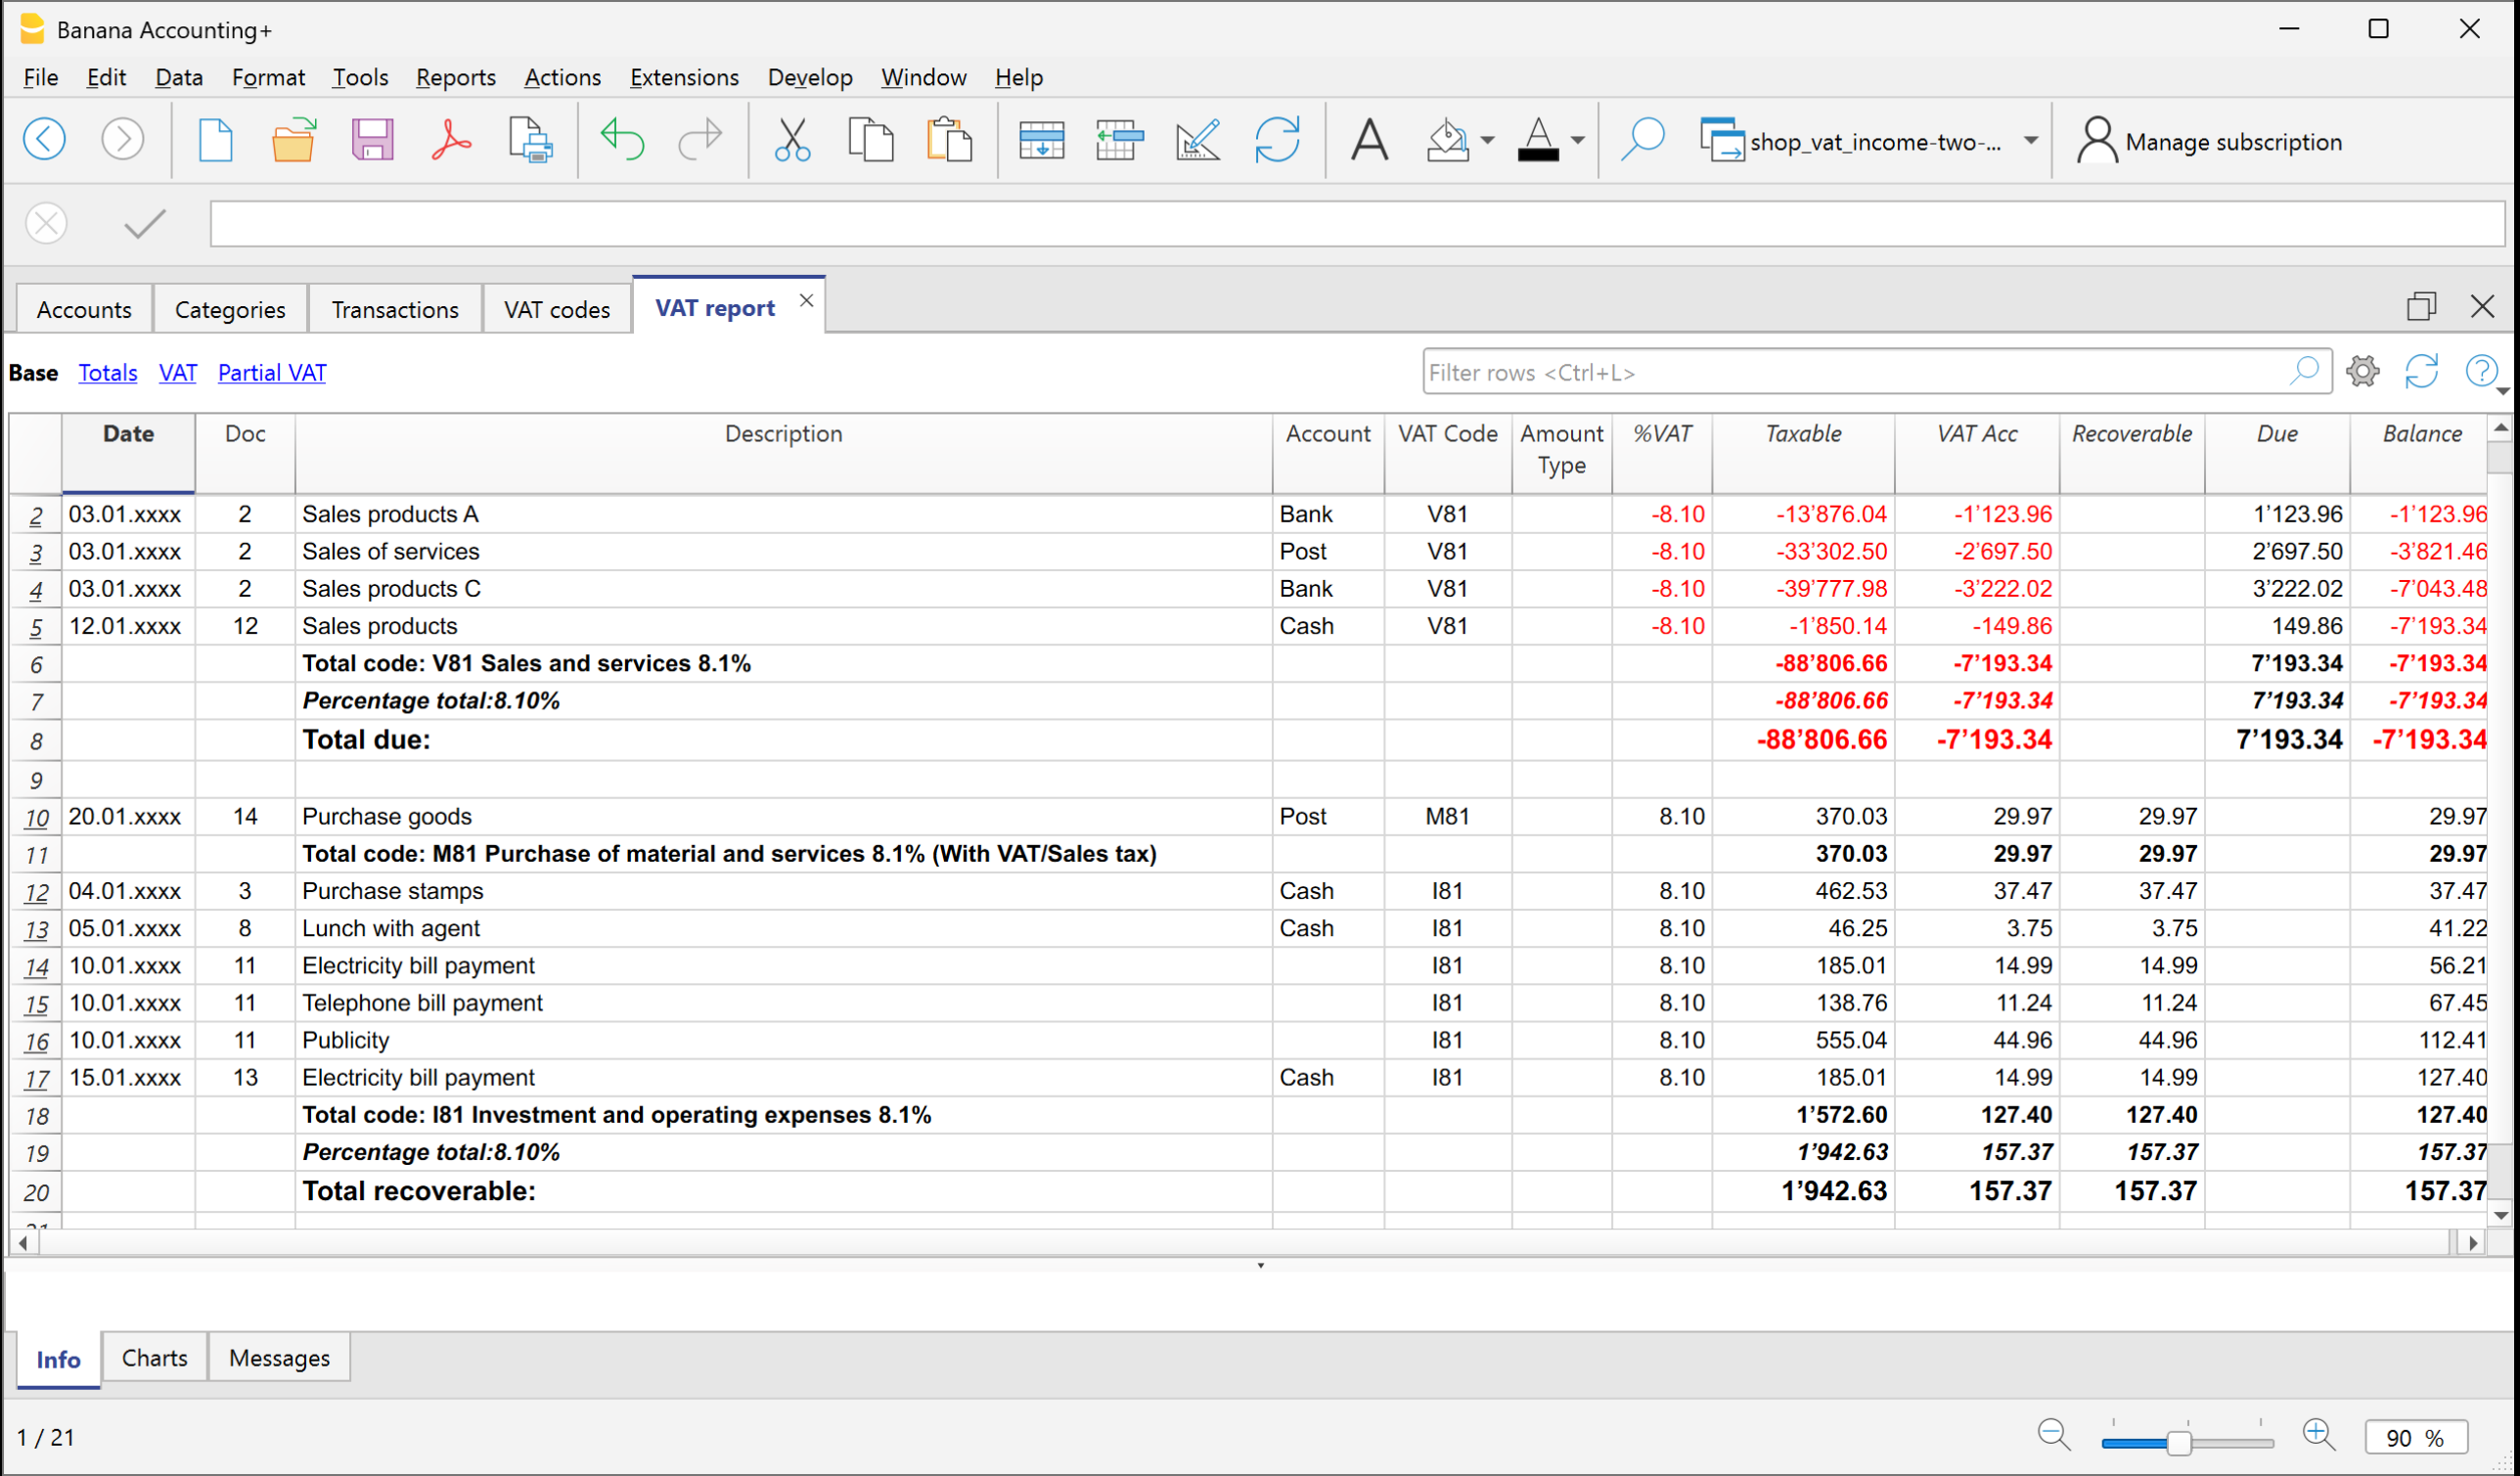
Printing and saving the VAT Report
The VAT Report can be:
- printed on paper,
- saved in PDF, HTML or Excel for digital archiving,
- copied to the clipboard to be pasted into other documents.
Save accounting data as PDF | Income/Expense Accounting
At the end of the year, when the accounting has been completed, checked, and reviewed, you can create an archive of your data in PDF format.
To do this:
- Go to the menu File > Create PDF dossier.
The program gathers all the main accounting information of the year into a single PDF document. You can keep the file as a digital archive, print it, or share it.
This allows you to have an organized and non-editable copy of your accounting, useful for long-term storage or for presenting to auditors, partners, or external entities.

Closures, Accounting Aspects – Advanced Concepts
On this page you will find useful information for closing the accounting at the end of the year.
If you do not have basic accounting knowledge or do not feel confident in carrying out these operations, we recommend contacting a trustee or a professional accountant. This way you will be sure that the closing is done correctly and in compliance with tax regulations.The suggestions provided in no way replace the advice of your trusted tax consultant.
At year-end closing, before moving on to the new year, some adjustment and correction entries must be made. These are needed to correctly determine the year’s result and ensure that the accounting reflects the true financial and economic situation.
Salaries and staff
- Import salary transactions - if you use dedicated payroll software, you can import the transactions into Banana (Actions > Import into accounting > Import transactions with column headers).
- Thirteenth month salary - remember to record it in December, if not already managed automatically.
- Social security adjustments (AVS/AD/IPG/AD) - reconcile AVS contributions paid with the statements from the Compensation Office.
- Pension adjustments (LAINF, LPP, etc.) - report the total gross salaries to the insurance companies for possible corrections.
- Withholding taxes - record the adjustment based on the statement received from the Tax Office.
- Executive reimbursements - if applicable, include in the December salary the amounts established by the tax authorities.
Accounting adjustments
- Doubtful accounts (Allowance for doubtful debts) - record any expected losses on receivables.
- Depreciation - record the depreciation of movable and immovable assets as of 31.12. You can use the Fixed assets register application to automatically generate the entries.
- Inventory - update the values with the Inventory application to have accurate counts of quantities and values.
- Open customer and supplier invoices - record balances as of 31.12 using the dedicated functions (open invoices by customer - open invoices by supplier).
- Private use - record personal use of company assets (e.g. car) with the appropriate VAT.
- Private account - check and record any interest income or expenses relating to the owners.
- Taxes and duties - check the advances paid during the year, close the provisions from previous years and record any differences as extraordinary costs/income.
VAT closing and return
- Use the Check accounting command to verify that there are no errors.
- Make sure the VAT payable account correctly shows the amount to be paid or recovered.
- Check the quarterly VAT statements and compare them with the amounts paid to the FTA.
- Use the VAT Report to generate detailed reports and archive the data in PDF.
Collaboration with the trustee
If the closing is handled by your accountant/trustee:
- you can send the ac2 file by email or share it via Dropbox,
- if they don’t have Banana, you can create a PDF of your file from File > Create PDF dossier and send it,
- alternatively, they can open the file with the Free plan of Banana Accounting Plus (view-only mode beyond 70 rows).
Year end Closing Checks | Income/Expense Accounting
Accounting closings are all the verification and control operations carried out at the end of the year (or accounting period) to ensure that the data is correct and that the year’s result is calculated without errors.
With Banana Accounting, many operations are simplified and automated, but it is important to use the available functions, including:
- The Balance column highlights any discrepancies and carries them forward to the following rows until they are corrected.
Tip: keep an eye on this column during the year to immediately correct errors and prevent them from accumulating.
With the Filter rows (only with the Advanced plan), you can quickly search for transactions with the same texts, amounts, or accounts, and correct them without scrolling through the entire table.

Automatic accounting check
The Check accounting command (Actions menu) automatically performs a series of checks to immediately detect any errors or differences.

We recommend using it:
- when error messages appear
- after modifying Accounts, Categories, or VAT Codes
- during the annual closing
- after creating the new year and making further changes.
Errors are shown in the Messages window, with the indication of the table and row to be corrected.
With the Check accounting command, the program searches and reports:
- Differences in the Transactions table
All amounts must balance: income and expenses must not generate differences. Differences between accounting balances and actual balances
With the CheckBalance function you can automatically compare recorded balances with those from bank statements and detect discrepancies.
This is essential to ensure the truthfulness and accuracy of the accounting: the balances of the accounts must match the actual balances:- bank and credit card accounts must match bank/postal statements,
- the cash balance must match the actual cash,
- the VAT payable account must match the balance of the VAT Report account.
More information about Verification entries is available on the page Verification balance transactions.
- Summation errors in the Accounts and Categories table
If in the Accounts or Categories table you have added, deleted, or renamed accounts, groups, or subgroups, grouping errors may occur.
These are reported by the Check accounting command and must be corrected, otherwise the totals in the reports will be wrong.
- Differences in opening balances
In the Accounts table, the balances of the balance sheet accounts must always exactly match the closing balances of the previous year (previous year’s file).
Differences may occur for the following reasons:- In the previous year’s file, transactions were added or deleted after creating the new year.
- In the previous year’s file, errors were corrected after creating the new year.
- In these cases, to correct the opening balances, you need to use Update opening balances.
How to start the new year
In Banana Accounting, each year has its own separate file:
- from the menu Actions > Create New Year you generate the new year’s file,
- you can work simultaneously on the old file and on the new one,
- once the closing is complete, update the balances in the new file with Update opening balances.
Annual Report printing
The Annual Report is the document that summarizes all the year’s income and expenses, showing the final balance and the result (profit or loss).
It is based on the following calculation scheme:
- Sum of income → revenues and proceeds.
- Sum of expenses → costs and charges.
- Difference between income and expenses → profit or loss.
You can prepare it from the menu Reports > Enhanced statement with groups, customizing columns and print settings.
Carry forward the year’s result in Income / Expenses accounting
In Income/Expenses accounting, it is not necessary to allocate profit or loss, because the Net worth total in the Accounts table already represents equity.
The year’s result (income – expenses) is automatically carried forward into the balance sheet.
If you also want to display the results of previous years, you can create a specific account Previous years’ results and manually enter the amount in the Opening column.
Locking transactions
Once the checks and closings are completed, you can lock the transactions:
- From the menu Actions > Lock transactions
- The rows will be numbered and protected by a blockchain code that ensures their integrity.
PDF Dossier
With the Create PDF dossier command you can save all the year’s documents (account cards, journal, report, VAT report, etc.) in a single PDF file. We recommend saving it and, for security, making copies on external media.
Create a new year | Income and Expense Accounting
At the end of each fiscal year, to start working with the new year, you don’t need to close or delete anything. With Banana Accounting, each year has its own separate file.
The Create New Year command prepares the file for the next year without modifying the current one. You can therefore run it safely: the old year’s file remains intact.
Create the new year file
To create the New Year proceed as follows:
- Go to Actions > Create New Year.
- The program generates a new file that contains:
- the same chart of accounts,
- the same settings,
- the closing balances of the old year, carried forward as opening balances.
- Immediately save the file with a clear name, for example Accounting_2026.ac2.
You now have two separate files:
- one for the previous year,
- one for the new year.
Which operations are carried out by the Create New Year command
When you use the Create New Year command, the program:
- Creates a new unnamed file (so you can decide how to save it).
- Transfers the balances:
- the closing balances of the accounts → carried forward as opening balances,
- the balances of the report → carried forward in the Previous year column.
- Updates the file properties: new start and end dates of the fiscal year, link to the previous year’s file, auto-completion of transactions (via the Options section).
- Transfers the transactions to the Budget table if present (https://www.banana.ch/en/doc/node/9710), keeping the chosen settings.
Work in parallel
If you have not finished the accounting of the previous year you can work on both files:
- In the New Year file → record the transactions of the new year. You can also change the chart of accounts, VAT rates, or other settings without affecting the old year.
- Previous year file → complete the missing entries, perform final checks, print the reports, and close the accounts.
Update opening balances
If, after creating the new year, you add more entries in the old year’s file:
- Open the new year’s file.
- Actions > Update opening balances.
In this way, the latest changes are also transferred to the new year. It is advisable to do this only when you are sure the previous year is final.
Note for Professional Plan users
If you have a Professional Plan subscription, inside the new file you may see a message regarding the Advanced functions.
Professional Plan. The functions of the Advanced plan are available up to 70 transactions
This means that you will be able to use the Advanced plan functions up to 70 transactions: it is a trial mode automatically included.
Check the accounting of the previous year
Before updating the opening balances in the new year, make sure that the old year’s data is complete and correct. This prevents differences between closing balances and opening balances.
What to do:
- Record all closing entries (invoices, taxes, depreciation, etc).
- Use the Accounting check command to automatically verify that there are no errors.
- If you have the Advanced plan, use the Filter to quickly find and correct rows with the same account, text, or amount.
- Print or save the final reports for archiving.
Carry forward profit/loss in Income and Expense accounting
In Income/Expense accounting it is not necessary to allocate profit or loss as in double-entry accounting.
The difference between income and expenses is automatically carried forward as an increase or decrease in equity.
If you want to keep track of accumulated profits or losses over the years, you can create a specific account “Previous years’ results” in the Accounts table and manually enter the amount in the Opening column.
Review Rules in the Recurring Transactions Table
When you run the Create New Year command, the program transfers to the new year’s file all the transactions that have Rules.
Before recording the transactions of the new year, it is recommended to check and update all the Transactions with Rules in the Recurring Transactions table.
If the conditions are no longer valid you can:
- Modify account, counterpart, VAT code, CC3 or segments.
- Delete transactions that are no longer valid.
- Add new transactions with Rules.
If in the Recurring Transactions table, in addition to transactions with rules, you have also stored:
you must also check and update these.
Performing this check right away helps to avoid errors and later corrections both in the Transactions table and in the Recurring Transactions table.
Update opening balances | Income & Expense accounting
The Update opening balances command is used to retrieve the data from the previous year’s file and update the opening balances of the current year’s file. It is very useful when, after creating the new year, changes are still made in the old year’s file.
When to use the Update opening balances command
The Update opening balances command is used in the following cases:
- you created the new year with Create New Year, but the fiscal year is not yet closed;
- you added or modified transactions in the previous year;
- you added new accounts or made changes to the chart of accounts of the old year.
Check the accounting of the previous year
Before launching the command, it is essential to check that the previous year is complete and correct:
- record all closing operations (invoices, credit notes, depreciation, taxes, etc.);
- use the Check accounting command to verify totals;
- make any final prints.
This way you avoid differences between the closing balances of the closed year and the opening balances of the new year.
How to access the Update opening balances command
- Go to Actions > Update opening balances.
- A dialog box opens with the path of the previous year’s file.
- Banana automatically suggests the saved file name.
- If the name or location of the file has changed, click Browse to select it.
What the Update opening balances command does
- Retrieves balances from the previous year’s file.
- Does not modify the old year’s file in any way.
- Can be repeated multiple times without risk.
It is important to know that Update opening balances performs the same operations as the Create New Year command, but without creating a new file.
If you modified the chart of accounts of the previous year
It may happen that, after creating the new year, you added new accounts in the previous year’s file. In this case Banana will display an error.
To solve this:
- add the same new accounts also in the new year’s file;
- repeat the Update opening balances command.
If you want to speed up the operation, you can use the Import Accounts command to align the two charts of accounts.
Cash Manager
The Cash Manager (or Cash Book) is an application of Banana Accounting Plus, to manage the cash or any other account. It is free and unlimited because it is included in the Free plan of Banana Accounting Plus. It is ideal for:
- Families - to keep track of expenses and income and plan a family budget.
- Children and Students - to learn how to manage their first expenses and be aware of their savings.
- Companies and Associations - to budget and manage cash income and expenditure, keep the first note and manage cash in a separate file from accounting.
Check out our resources for an easy and immediate start:
Getting Started with the Cash Manager
For a quick and easy start, choose one of our Cash Manager templates and save it as a name. For more information visit the generic page of How to get started with Banana Accounting Plus.
In the Transactions table you are immediately operational and can enter incoming and outgoing transactions. Entry is extremely easy and intuitive, even for those with no accounting knowledge.
The Transactions Table
The Transactions table is at the heart of the Cash Manager's bookkeeping.
It allows you:
- Clarity and order of the columns: thanks to the table layout you always have an immediate and complete overview of the data entered.
There are main columns, already predefined, in which you can enter:- The date of the transaction
- Any document number
- The incoming or outgoing amount
- The category for the entry or exit
- To insert digital attachments: in the Transactions table, you can also make the DocLink column visible, which allows you to add the receipt or invoice to each movement in PDF format, ensuring the immediate availability of the documents in case of future audits or to transmit them to the accountant.
- To always make corrections: if there are errors, you can easily correct them, ensuring correct and accurate results every time.
Speeding up the transaction registration
Banana Accounting Plus offers several functions to speed up the data entry process, such as:
- Auto-completion. In the Description column, by typing the first few characters, the programme automatically suggests similar movements that have already been entered previously and, by pressing F6, completes the current movement with the selected data.
- Recurring Transactions. It is possible to store recurring transactions in a special table, taken from the menu Actions > Recurring Transactions, and to resume them with a single click, saving time and simplifying work.
Reports and Printouts
After each transaction, the programme automatically updates all account balances in the Category table and in the account. You can easily print statements and reports for easy monitoring of income and expenditure and the status of available cash in the cash account.
Professional and accurate reports at the touch of a button:
From the menu Reports > Enhanced statement or Enhanced statement with groups, get your reports in no time. Reports by period are also possible.
- The Enhanced statement displays all accounts and categories without any subgroups.
- The Enhanced statement with groups displays all accounts and categories also with subgroups.
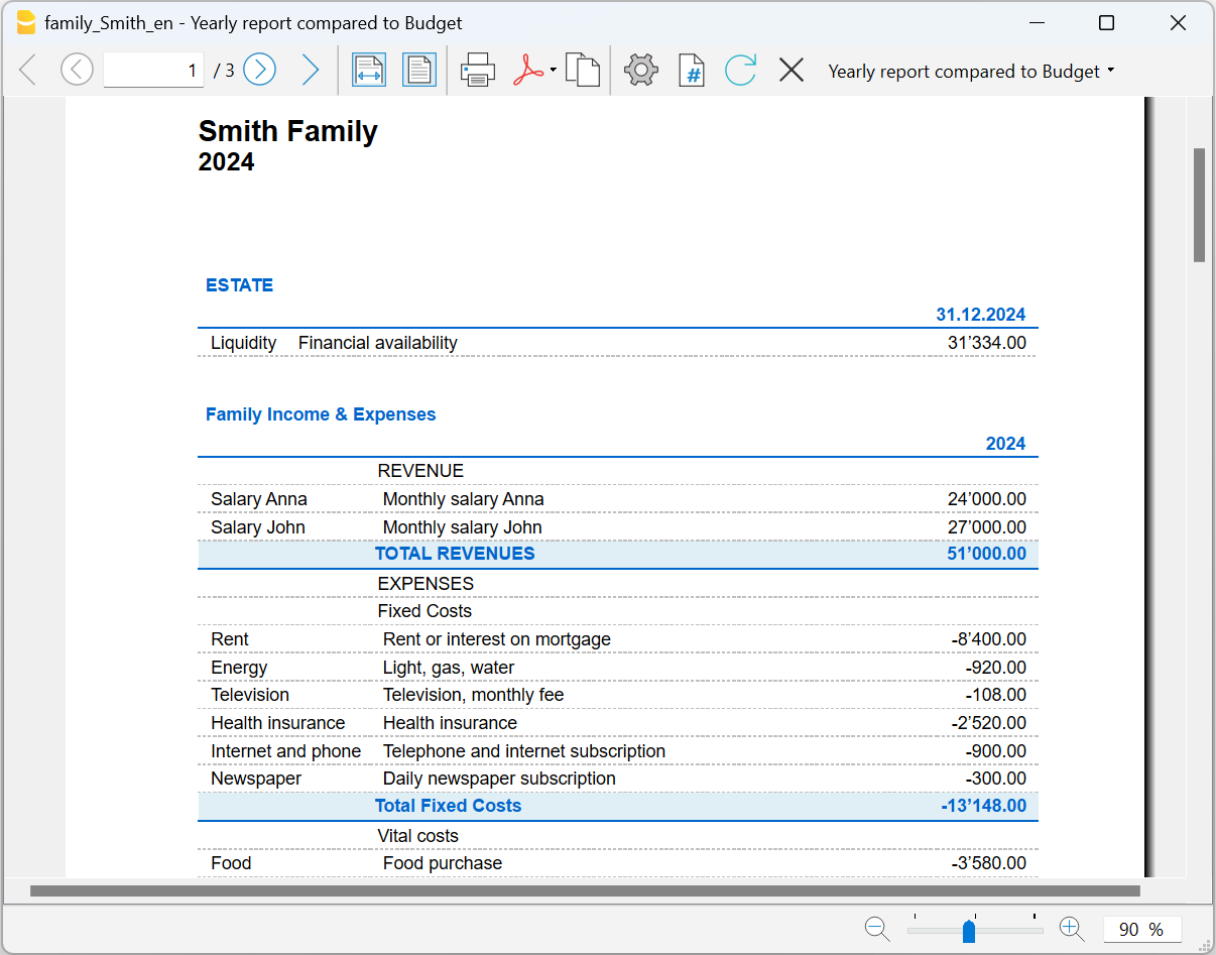
PDF data archiving
All accounting data, over a period of years, must be available at all times, both for tax purposes and for any internal requirements.
Simple and comprehensive archiving. From the menu File > Create Pdf dossier, you can easily archive all accounting data in a single PDF document. This allows you to store the entire accounting for the year in an orderly and complete manner, making it easier to access and consult the data in the future.
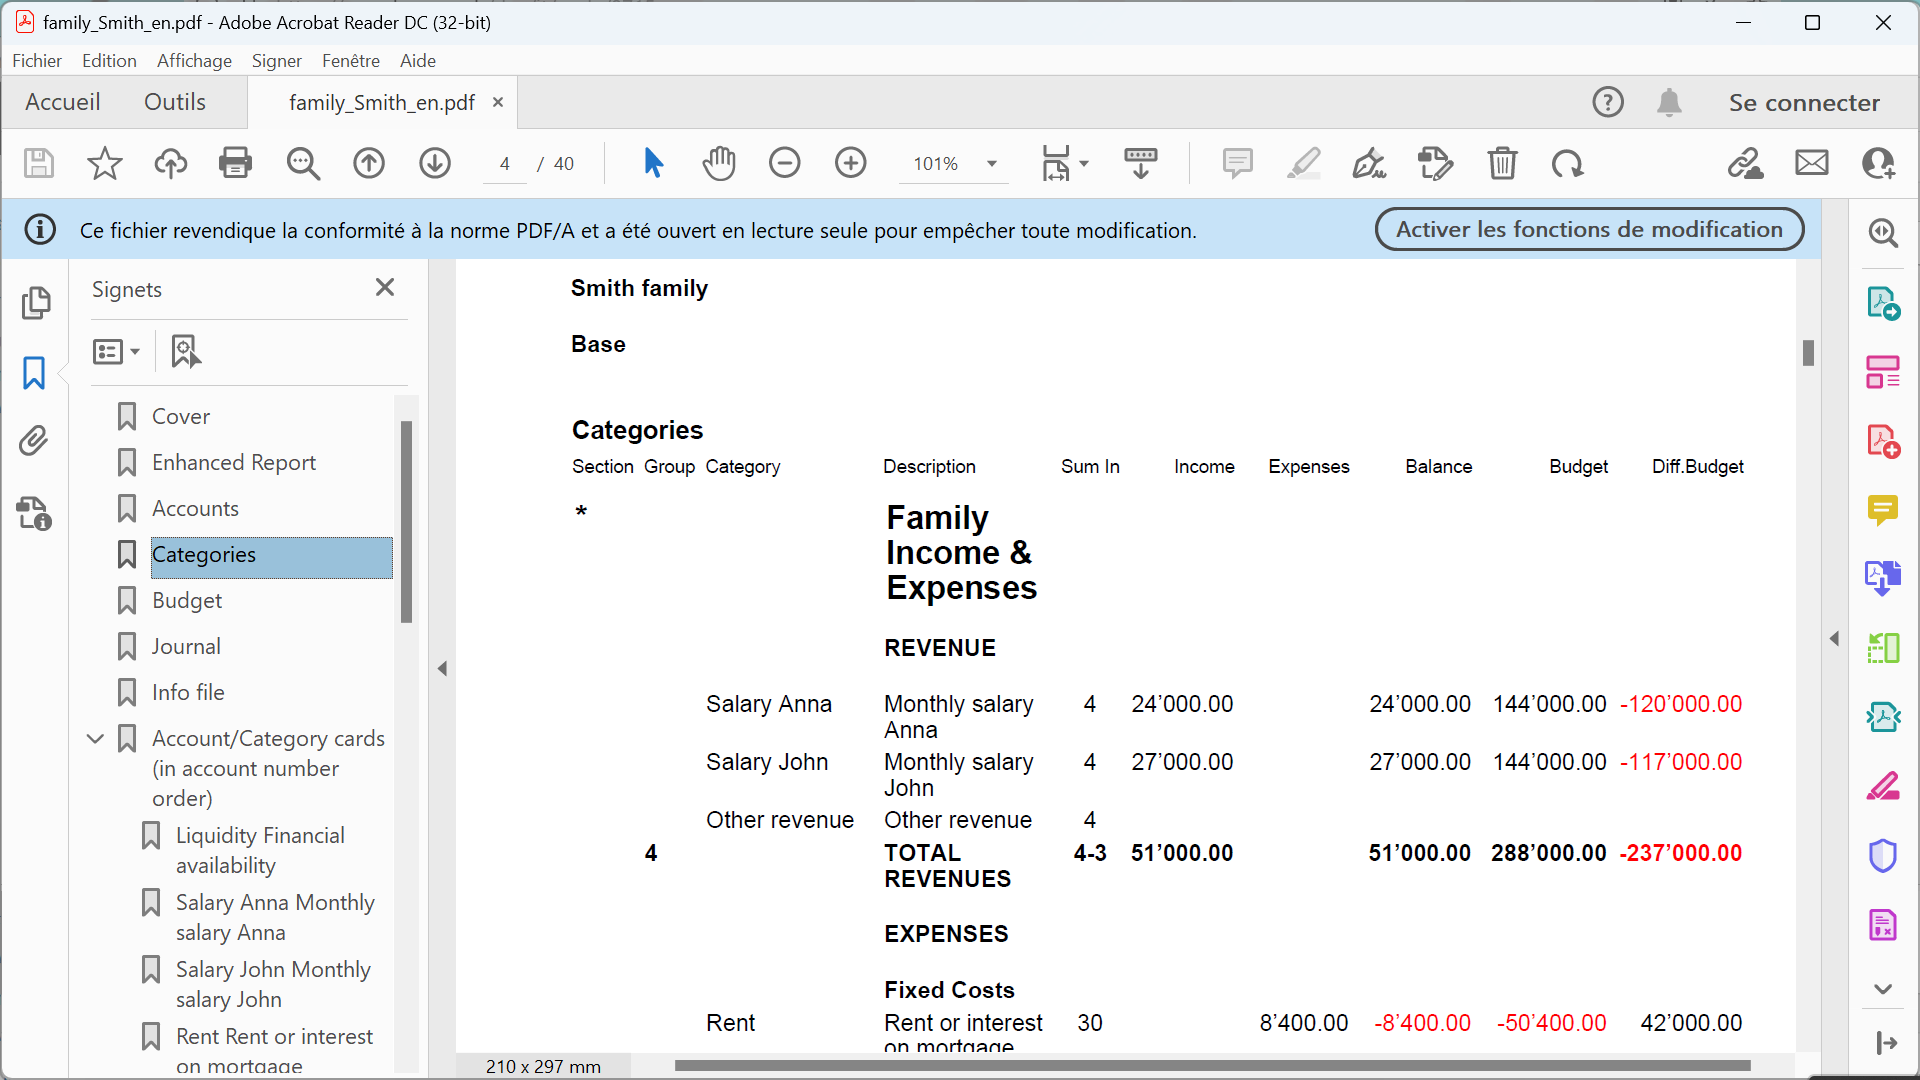
Topics common to other applications
- Add, cancel an account
- Rename an account
- Insert groups
- Cost and profit centers
- Segments
- The Balance column
Printouts
Como criar um Cash Manager
Criar um ficheiro de contabilidade a partir de um modelo
Siga os seguintes passos:
- Menu Arquivo, comando Novo
- Selecionar a Região, a Categoria e o tipo de contabilidade
- Da lista de modelos que aparece, escolha a que mais se aproxima às suas exigências
- Clique no botão Criar.
Na caixa Procurar, ao inserir uma palavra-chave, o programa visualiza os modelos que contêm a palavra-chave.
Também é possível começar a partir de um ficheiro vazio, ativando a opção Criar arquivo vazio. No entanto, para facilitar o começo e evitar erros de agrupamento, aconselhamos começar sempre com um modelo existente.
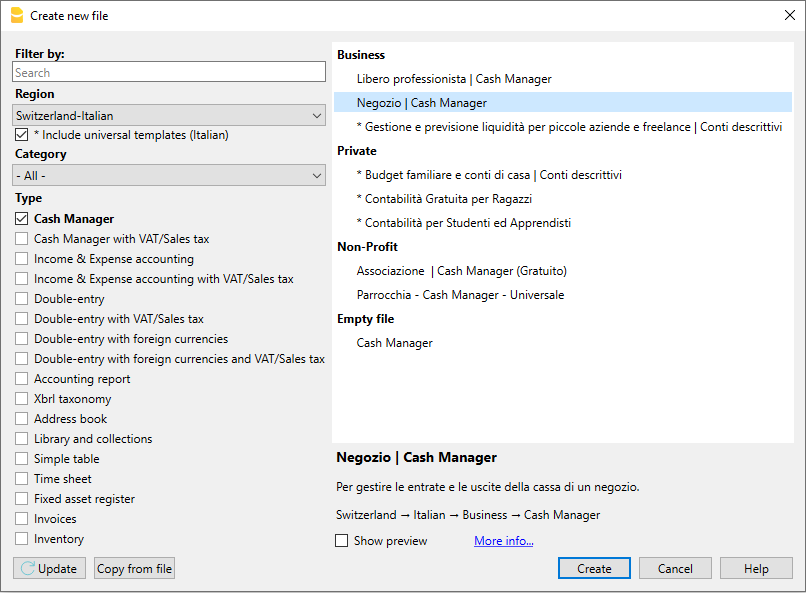
Mais informações sobre como criar um novo arquivo estão disponíveis na página Criar novo arquivo.
Configurar as Propriedades do arquivo
Configurar os próprios dados nas Propriedades do arquivo (inglês) e salvar o arquivo com nome.
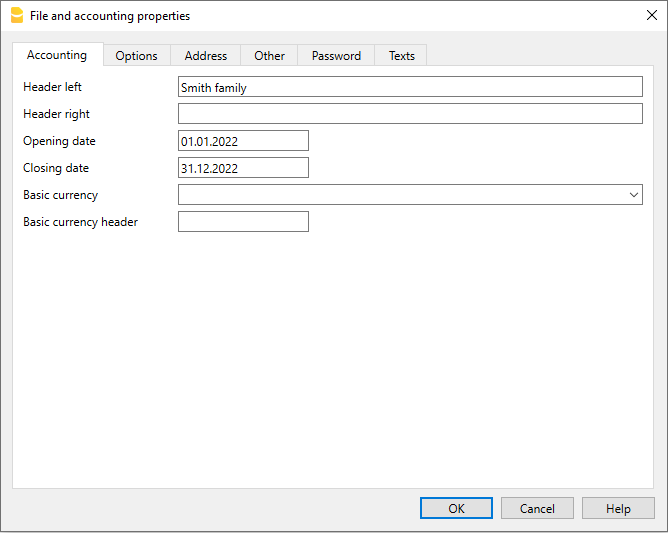
Salvar no disco
Com o comando Arquivo → Salvar como..., guarde os dados e atribua um nome ao ficheiro. Aperecerà o dialogo tipico do seu sistema operativo.
- É aconselhado usar o nome da empresa, seguido do ano "empresa-2020.ac2" para distinguir de outros arquivos de contabilidade.
- Pode guardar quantos arquivos precisar, cada um com o seu próprio nome.
- Pode escolher o percurso e o suporte (guardar num disco, pen USB o cloud).
Se espera ter também documentos ligados à contabilidade do ano corrente, sugerimos criar uma pasta separada para cada ano de contabilidade para reunir todos os arquivos.
Inserir o saldo inicial da conta
No Livro caixa, na tabela Contas, insira a conta que pretende gerir e na coluna Abertura, insira o saldo inicial. Com a passagem ao ano novo, com o comando Criar novo ano do menu Conta2, o saldo de abertura é referido automaticamente.
Não é possível inserir mais de uma conta.
Personalizar a Tabela Categorias
Na tabela Categorias personalizar as categorias de receitas e de despesas, segundo as próprias necessidades. É possível:
- mudar os números de categoria
- mudar a descrição
- eliminar categorias
- adicionar categorias
- inserir subgrupos
- eliminar subgrupos
Todos os saldos das categorias determinam os resultados do ano de contabilidade (ganho ou perda) e, por este motivo, ao início do ano não pode existir saldo algum.
Adicionar novas categorias
Se houver necessidade de adicionar novas categorias num grupo já existente, proceda da seguinte maneira:
- Inserir linhas (menu Editar, comando Inserir linhas...) antes da linha do Grupo do total
- Inserir na coluna Categoria o número ou iniciais da categoria
- Inserir a descrição para identificar a categoria
- Inserir na coluna GR, o mesmo GR das outras categorias, que pertecem ao mesmo Grupo de total.
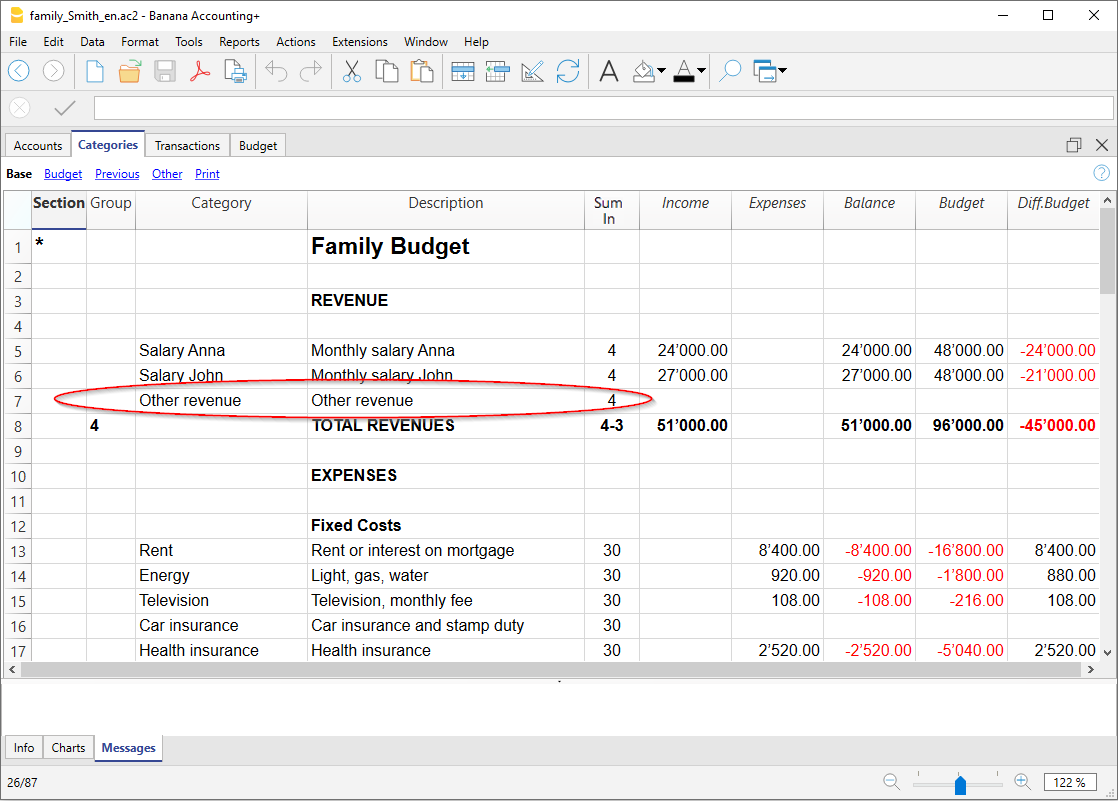
Adicionar subgrupos
Para adicionar novos subgrupos, proceda da seguinte maneira:
- Inserir linhas (menu Editar, comando Inserir linhas...) na zona onde deseja inserir o novo subgrupo
- Na última linha vazia inserir na coluna Grupo um número ou inicial para o total (no exemplo PA - Resultado Patrimonial Inicial)
- Inserir a descrição para identificar o novo subgrupo
- Inserir na coluna GR o Grupo do total (no exemplo T - Diferença Total).
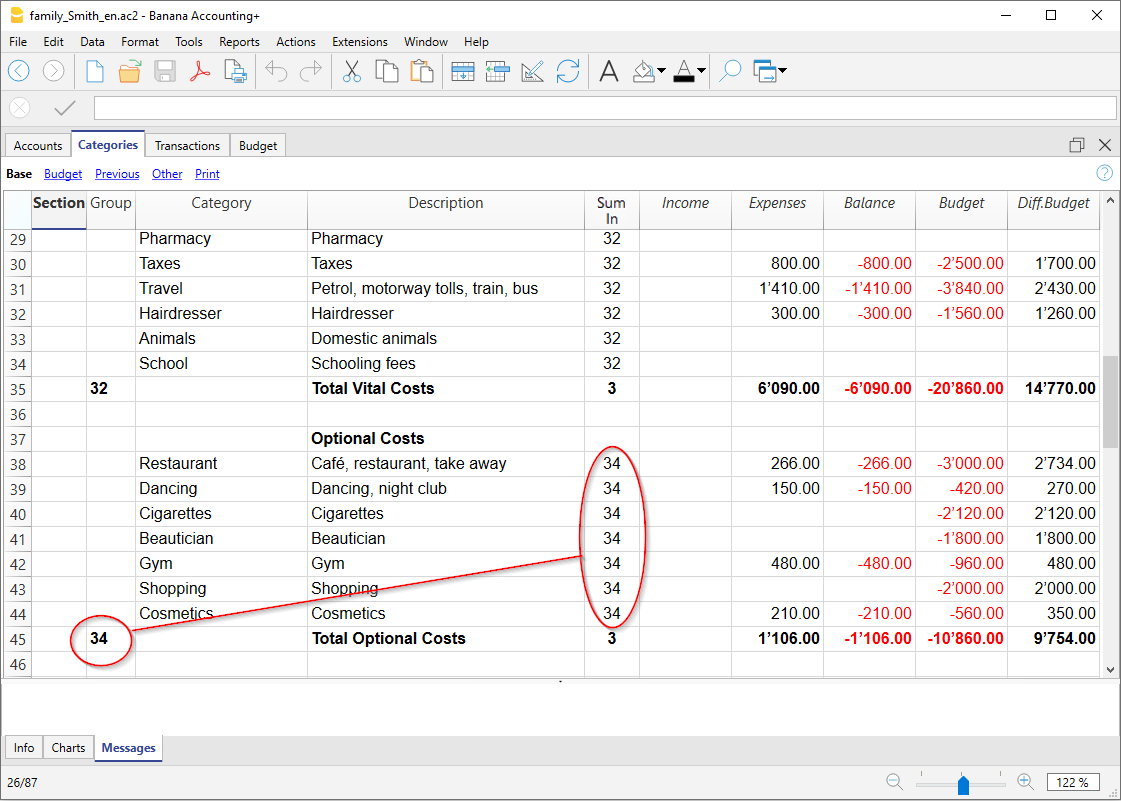
Eliminar categorias e subgrupos
Para eliminar categorias ou subgrupos ocorre selecionar as linhas com as categorias e o subgrupo para eliminar e selecionar o comando Excluir linhas do menu Editar.
Lançamentos
Na Tabela Lançamentos são inseridas as receitas e as despesas, indicando a categoria à qual é atribuida a despesa ou a receita.
Acelerar a inserção dos Lançamentos
Para acelerar a inserção dos lançamentos utiliza-se:
- a função de Emissão de dados com preenchimento automático que consente recuperar automaticamente dados já inseridos previamente
- a função dos Lançamentos repetitivos (menu Conta2) que permete memorizar numa tabela os lançamentos repetitivos
- a importação de dados do extrato bancário ou postal.
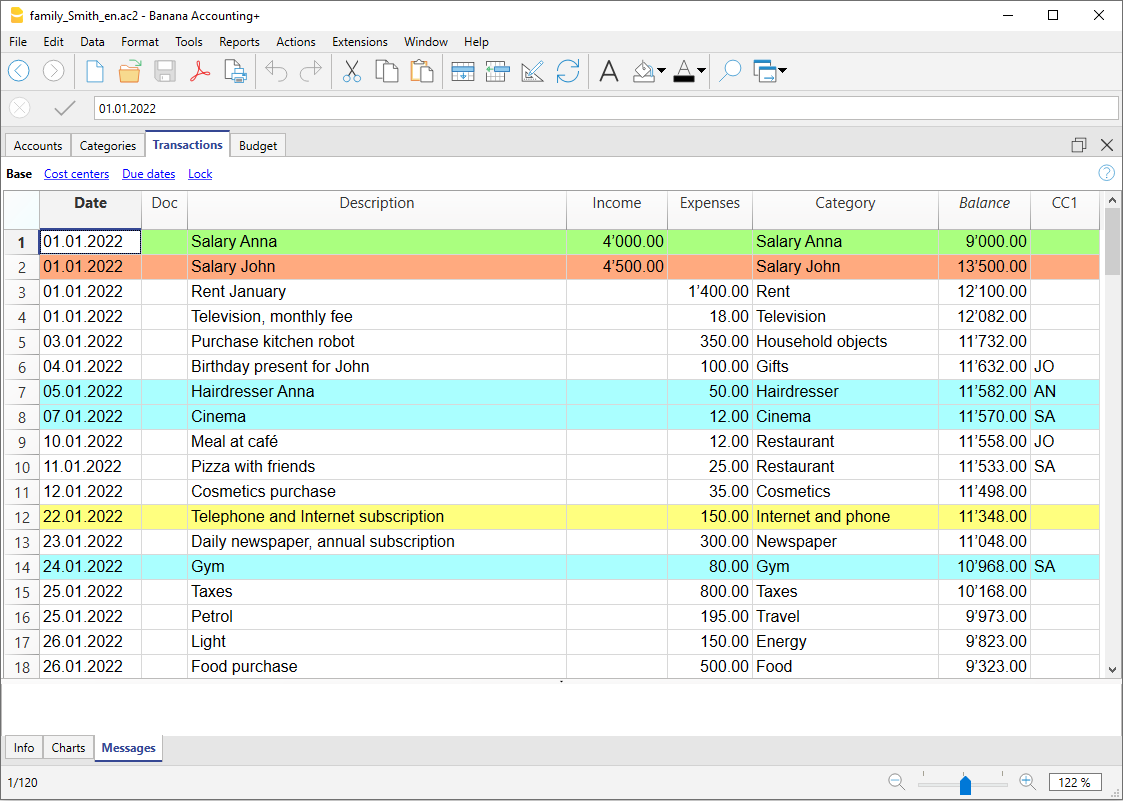
Lançamentos com IVA
Para poder registrar operações com IVA ocorre:
- No menu Arquivo, comando Novo escolher como Tipo o Cash Manager com IVA
- Escolher um dos Modelos já predisposto segundo a nação.
Para os lançamentos com IVA, consultar a página Lançamentos.
A ficha Categoria ou Grupo
A ficha categoria ou grupo permete obter um elenco completo dos movimentos que fazem parte da mesma categoria ou do mesmo grupo.
- Para abrir uma ficha categoria ou grupo clique na célula onde se encontra o número da conta, categoria ou grupo, seguido de um clique no símbolo azul pequeno que se encontra no canto superior direito da célula.
- Para abrir mais fichas categoria ou grupo ocorre selecionar o comando Razão conta do menu Conta1.
- Para atualizar as fichas categoria ou grupo depois de modificações na tabela Lançamentos, ocorre clicar no símbolo azul, das duas setas circulares, que se encontra no canto superior direito da ficha.
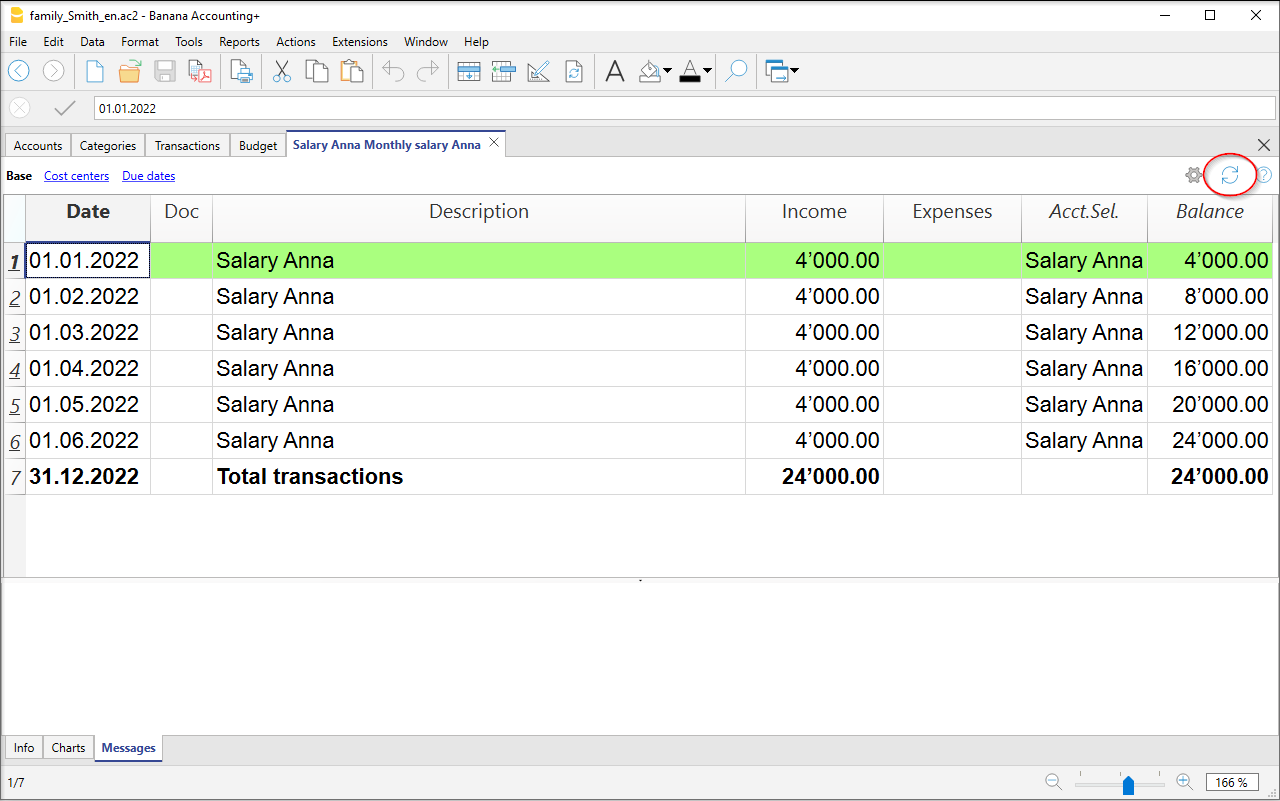
Fichas de categoria por período
Para visualizar as fichas categoria com os saldos referidos num determinado período, ocorre clicar no menu Conta1, comando Razão conta/categoria e na secção Período ativar Periodo selecionado, inserindo a data de começo e de fim do periodo.
Para mais informações, consulte a página Periodo (inglês).
Imprimir as fichas categoria
Para imprimir uma ficha categoria, basta visualizar a ficha a partir de qualquer tabela (Contas ou Lançamentos) e acionar a impressão no menu Arquivo.
Para imprimir várias ou todas as fichas conta, clicar no menu Conta1, comando Razão por contas/categorias e selecionar as fichas conta/categoria para imprimir. Através do filtro presente na janela, pode-se fazer uma seleção automatica de todas as categorias, os centros de custo, os segmentos, os grupos, etc.
Mais informações estão disponíveis na página Razão de contas/categorias.
Demonstrativo analítico
Para visualizar o Demonstrativo analítico e o Demonstrativo analítico por grupos, clicar no menu Conta1 e depois no comando Demonstrativo analítico ou Demonstrativo analítico por grupos. Também é possível fazer demonstrativos por período.
- O Demonstrativo analítico visualiza todas as contas e as categorias sem eventuais subgrupos
- O Demonstrativo analítico por grupos visualiza todas as contas e as categorias também com os subgrupos
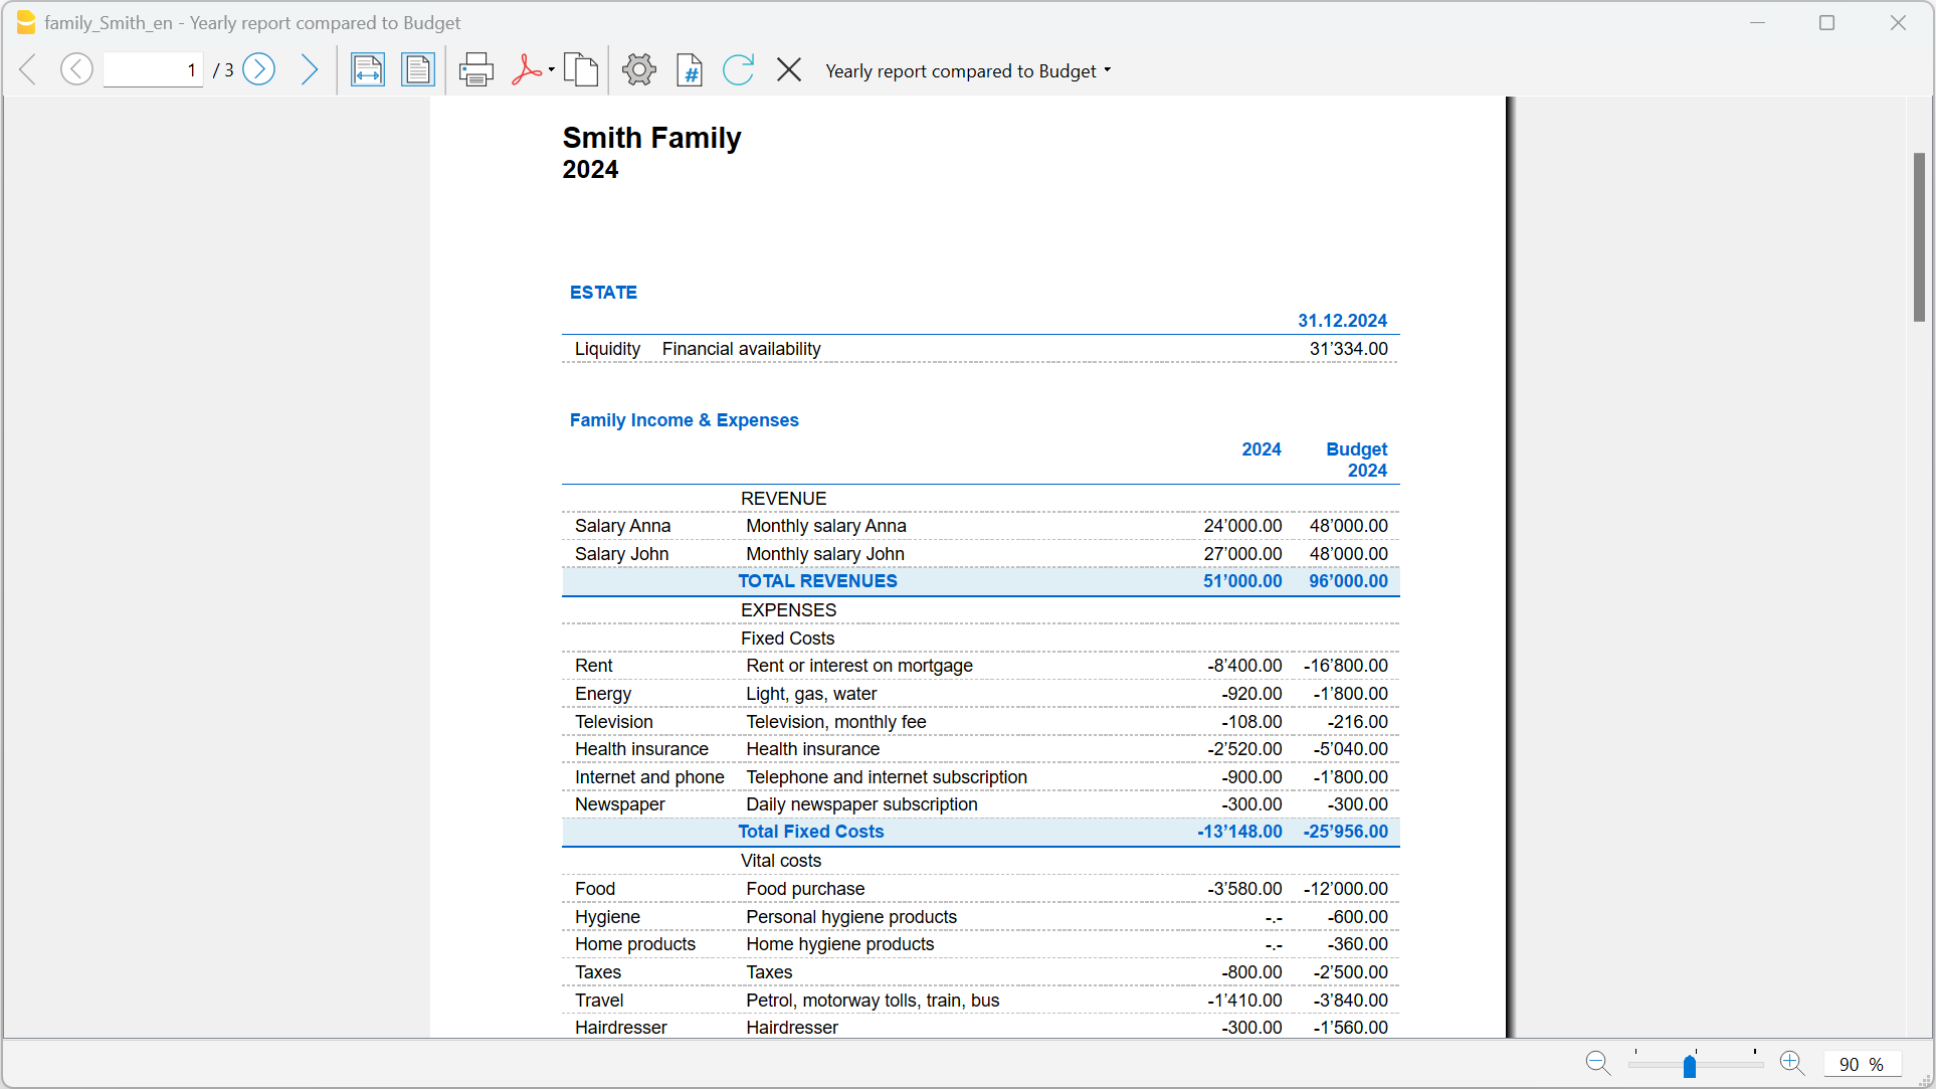
Armazenamento de dados em PDF
Ao fim do ano, quando toda a contabilidade estiver completada, corrigida e revista, pode-se armazenar todos os dados da contabilidade com o comando Criar PDF, no menu Arquivo.

O Orçamento
Antes de começar um ano de contabilidade, pode-se criar um orçamento com possíveis despesas e receitas, de modo a ter sob controlo a situação económica e financiária.
O orçamento pode ser configurado de duas maneiras diferentes:
- Na tabela Categorias, coluna Orçamento. Em cada categoria é indicado o montante do orçamento anual.
Neste caso, quando se elabora o Orçamento no menu Conta1, comando Demonstrativo analítico por grupos, a coluna do Orçamento descreve os montantes que se referem ao ano inteiro. - Na tabela Orçamento, que se ativa no menu Ferramentas, comando Adicionar novas funcionalidades → Adicionar tabela Orçamento.
Nesta tabela registram-se todos os orçamentos de despesas e de receitas com lançamentos. Caso se ative esta tabela, a coluna Orçamento da tabela Contas é desativada automaticamente.
Neste caso pode-se configurar um orçamento detalhado que tenha em conta possíveis variações durante o ano e nos diversos períodos do ano.
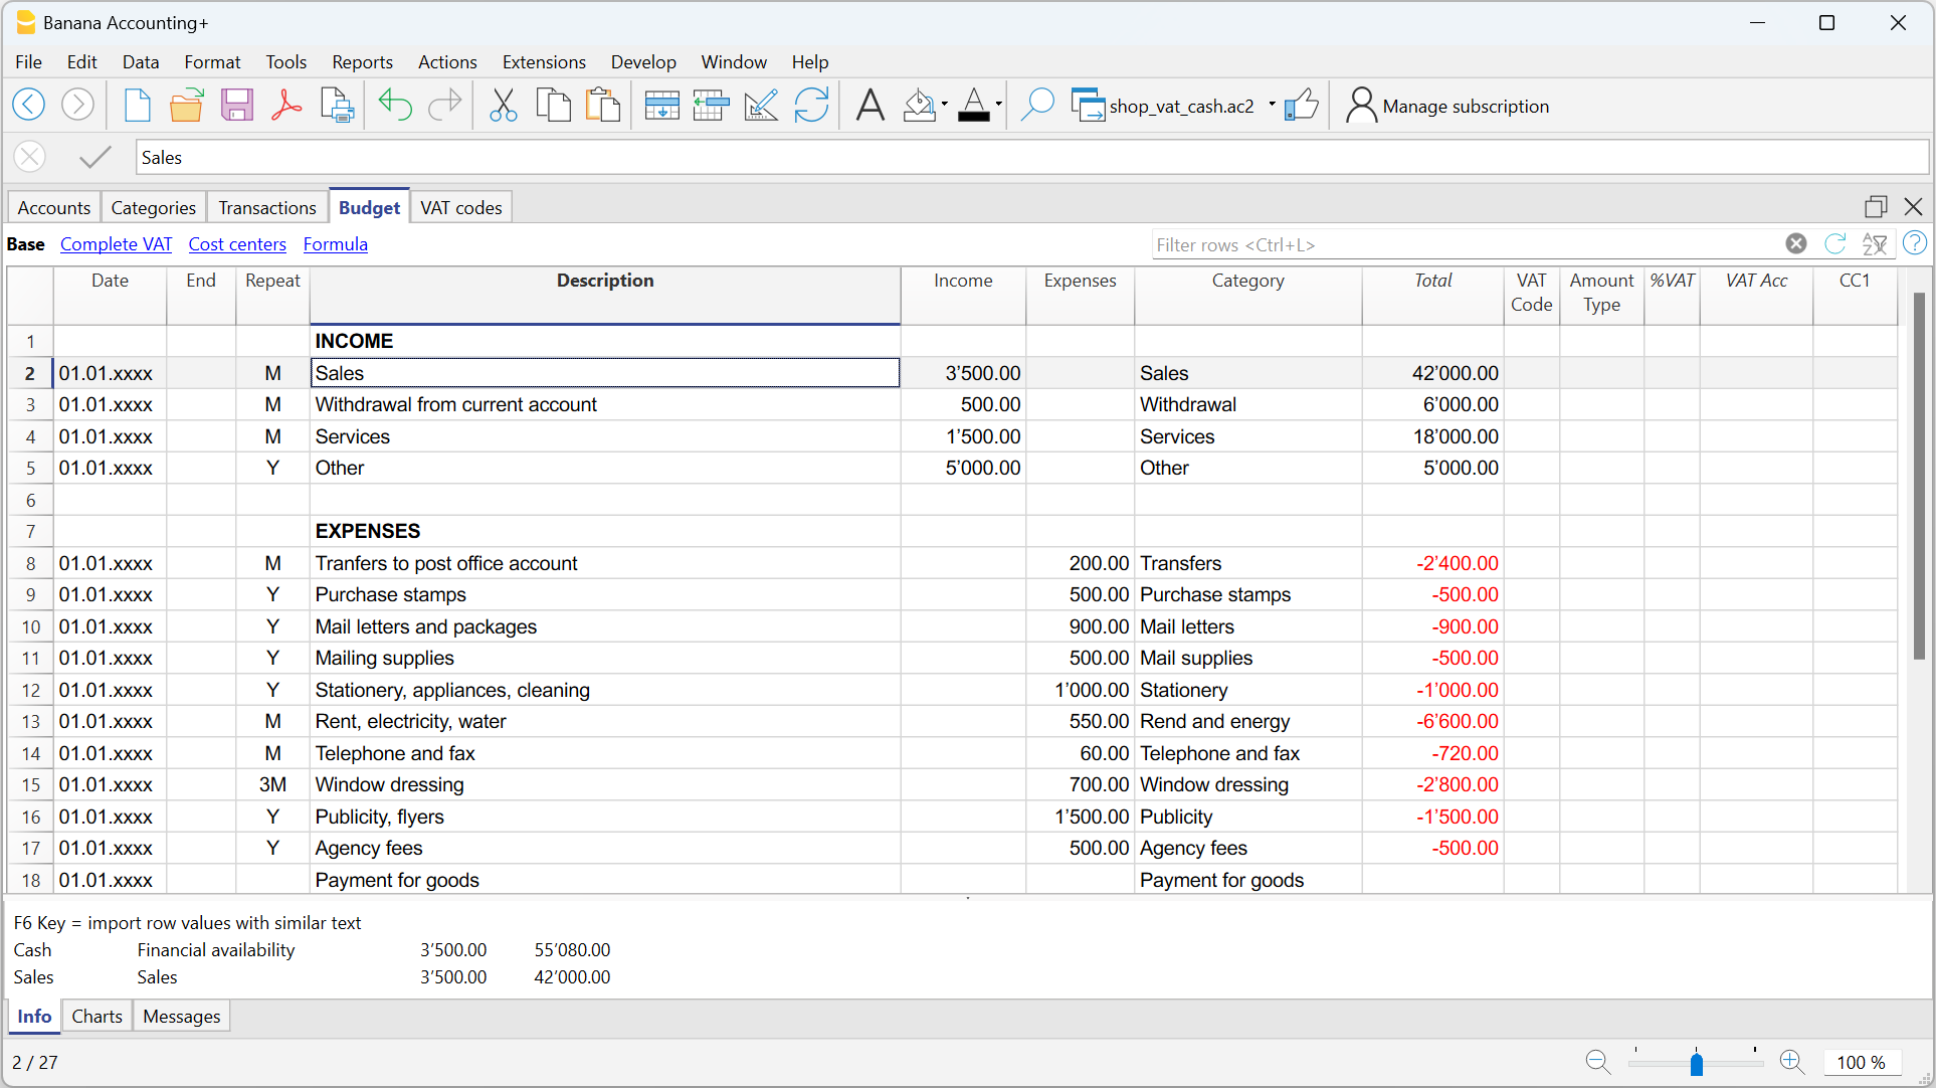
Cash Manager Accounts Table
The Cash Manager Accounts table contains only one account and no other accounts can be added.

The columns of the Accounts table:
The main columns of the Categories table are listed below. The display of columns changes according to the selected View.
Additional columns can be added either system or own columns via the menu Data > Columns setup.
Group
This column remains empty.
Account
Enter the number or initials of the account to be managed (cash, bank, post office).
Description
Enter a description relating to the account entered.
Opening
You need to enter the opening balance only the first time you use a new file or when using Banana accounting for the first time. At the beginning of the new year with automatic opening, the account balance is automatically updated.
Income
The column is protected and shows the balance of income transactions. The balance is updated automatically after each transaction.
Expenses
The column is protected and shows the balance of outgoing expenses. After each transaction the balance is updated automatically.
Balance
The column is protected and shows the total balance between income and expenses. After each transaction the balance is updated automatically.
Cash Manager Categories table
The Categories table presents the Income and Expenses situation.
The Categories table
In the Categories column, for each income and expense, the respective categories are set.
In addition to the Categories column, there are columns to set:
- Sections
- The Totalization groups.
For further information on the grouping system, refer to the Grouping system. - Any Cost and Profit centers.
In the example there are three main groupings:
- Group 4 - Totals all the Categories that have grouping 4 in their Sum in column (total Income)
- Group 3 - Totals all the Categories that have grouping 3 in their Sum in column (total Expenses)
- Group 00 - Totals groups 3 and 4 (Total Income and Expenses), which determine the Result for the accounting period.

The columns of the Categories table
The main columns of the Categories table are listed below. The display of the columns changes according to the selected View.
You can add additional system columns as well as your own columns via Data > Columns setup.
Section
An asterisk is inserted in the row where a title is entered, which will then be taken over in the Enhanced Statement with groups
(in our example the asterisk is inserted on the line of the title Operating result).
If other sections are provided in addition to income and expenses, such as cost and profit centers, another asterisk can be inserted in the Sections column, again on the title row. More details are available on the Sections page.
Group
Enter an identifier (numerical or sign) identical to the one entered for each category in the Sum in column. The totals for each category belonging to the same grouping of the Sum in column will then be added up (in our example, Group 4 totals the Income Category and group 3 the Expenses category).
Category
Enter the Category number that will identify the type of expense or income.
Description
A description is entered to identify the income or expenses category. This description is automatically taken from the Category Description column of the Records table (if displayed).
Sum in (Gr)
The code of a group is indicated so that the programme totals the amount of the line in the group.
The heading ‘Sum in’ has been adopted with the Banana Plus version.
The column name has remained Gr, to maintain compatibility with previous versions of the programme.
Each category has an identifier that is used to define in which group it is to be totalled (in the example, all revenue categories, in the Sum in column, have the grouping 4, because they are totalled in Group 4, Total Revenue).
Income
The column is protected and shows the balance of income transactions. The balance is updated automatically after each transaction.
Expenses
The column is protected and shows the balance of outgoing expenses. After each transaction the balance is updated automatically.
Balance
The column is protected and shows the total balance between income and expenses. After each transaction the balance is updated automatically.
Customising the Categories table
You may customise the entry and exit categories in the Categories table according to your needs. You can:
- Change category numbers
- Change description
- Delete or add categories
- Insert or delete subgroups
All category balances determine the operating result (profit or loss) and must therefore have no balance at the beginning of the year.
Adding new Categories
If you need to add new categories to an existing group, proceed as follows:
- Insert empty rows (menu Edit > Insert Rows) before the Totalisation Group row
- Enter the category number or abbreviation in the Category column
- Enter a description to identify the category
- Enter in the Sum in column , the same grouping number as the other categories, belonging to the same Totalisation Group.
Adding Subgroups
To add new subgroups, proceed as follows:
- Insert empty rows (menu Edit > Insert rows) in the area where you wish to insert the new subgroup
- In the last empty row enter a number or abbreviation for the totalisation in the Group column (in the example "34 - Total Optional Costs")
- Enter a description to identify the new subgroup
- Enter in the Sum in column the Totalisation Group (in the example "3 - Total Costs").
Deleting categories and subgroups
To delete categories or subgroups, select the rows with the categories and subgroup to be deleted and issue the command Delete rows from the Edit menu.
Opening Balances | Cash Manager
You only need to enter the Initial Balance the first time you use Banana Accounting Plus.
Opening balances when you start with Banana Accounting
When creating a new file for the first time with Banana Accounting, the opening balances must be entered manually in the Accounts table, Opening column.
When you move to the new year, using the Actions > Create new year command, Banana accounting reports all the opening balances automatically.
It is not possible to enter more than one account; for this you must use the Income/Expense Accounting.

Start with Banana Accounting during the year
If you start a new accounting, taking over the work already done with other programs, you have two possibilities:
- Start accounting from the start of the year, by entering the opening balances at the beginning of the year (Accounts table, Opening column) and the transactions (Transactions table) that have already been previously recorded with other programs (also see Transferring data from other software). Thus you will have all the accounting details a single file.
- Starting from the date when the accounting is resumed:
- Enter the opening balances (Accounts table, Opening column), taking over the values of the other accounting.
In addition to entering the opening balances of the Cash in the Accounts table, it is also necessary to enter the income (positive) and expenses (negative) balances in the Categories table. - Input the new entries in the Transactions table.
- Enter the opening balances (Accounts table, Opening column), taking over the values of the other accounting.
Balances of the previous year
If you start a new accounting by taking over an existing accounting and you want the previous year's values to appear on the printouts, it is necessary to enter the previous year's balances in Accounts and Categories > Previous view > Previous Year column:
- Enter the closing balances of the previous year's Cash (Accounts table).
- Enter the closing balances of the previous year's Expenses (Categories table).
- Enter the final balances of the previous year of Revenues (insert the minus sign in front of the amount).

Create new year
When you start the new year, the program automatically carries over the opening balances for the following year.
Consult the Create New Year lesson.
Print opening balances
To print the opening balances:
- To print the contents of the table, use the File > Print / Preview command, by selecting the rows of the Balance Sheet.
- You can also use the Accounting printouts and set the printout only for the Statement part and the opening column.
Transactions table of the Cash Manager
The transactions of the Cash Manager are entered in the Transactions table.
There are specific columns to enter:
- the date
- the document number
- the description
- the income or expense amount
- the category relevant to the income or expense in the Category table
- should the transaction be subject to VAT tax, enter the VAT code in the VAT code column.
The VAT codes are listed in the VAT codes table.
Speeding up the recording of the Transactions
In order to accelerate the recording of the transactions, you can use:
- the Smart fill function that allows the automatic auto complete of data that have already been entered at an earlier date.
- the Recurring transactions function (Actions menu), used to memorize recurring transactions into an appropriate table.
Examples of transactions without VAT
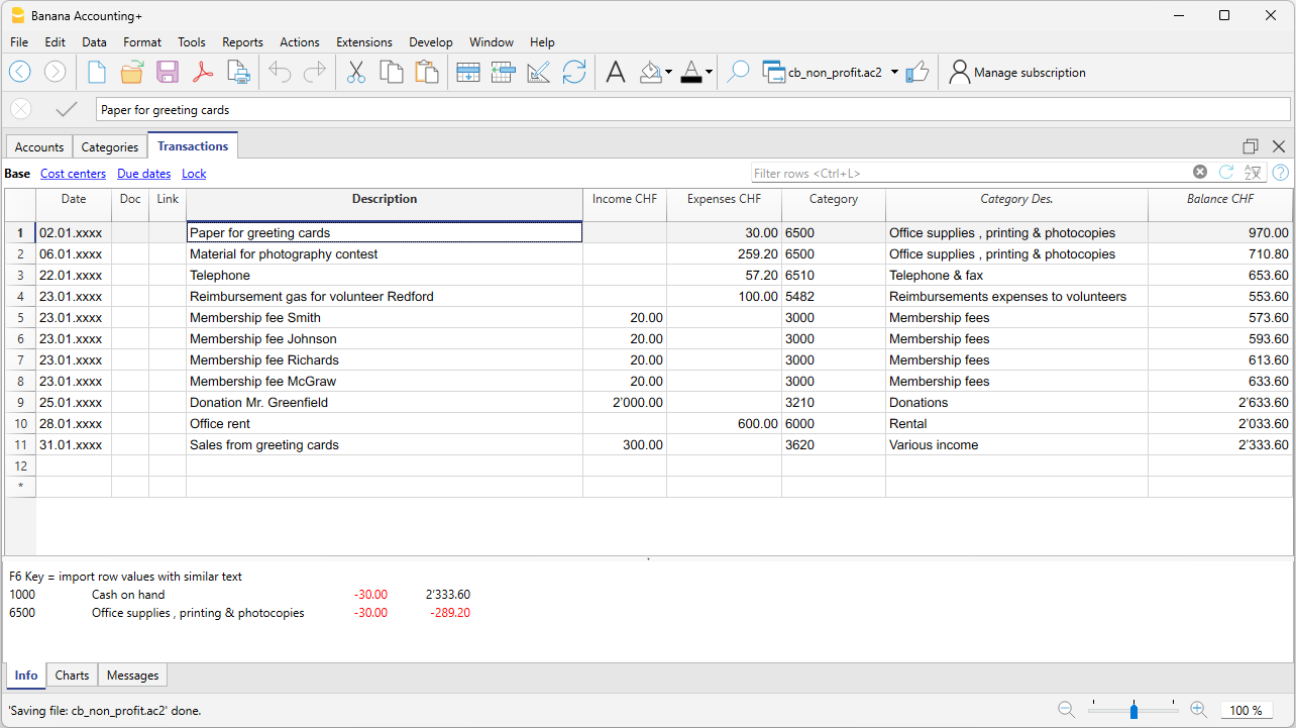
Examples of transactions with VAT
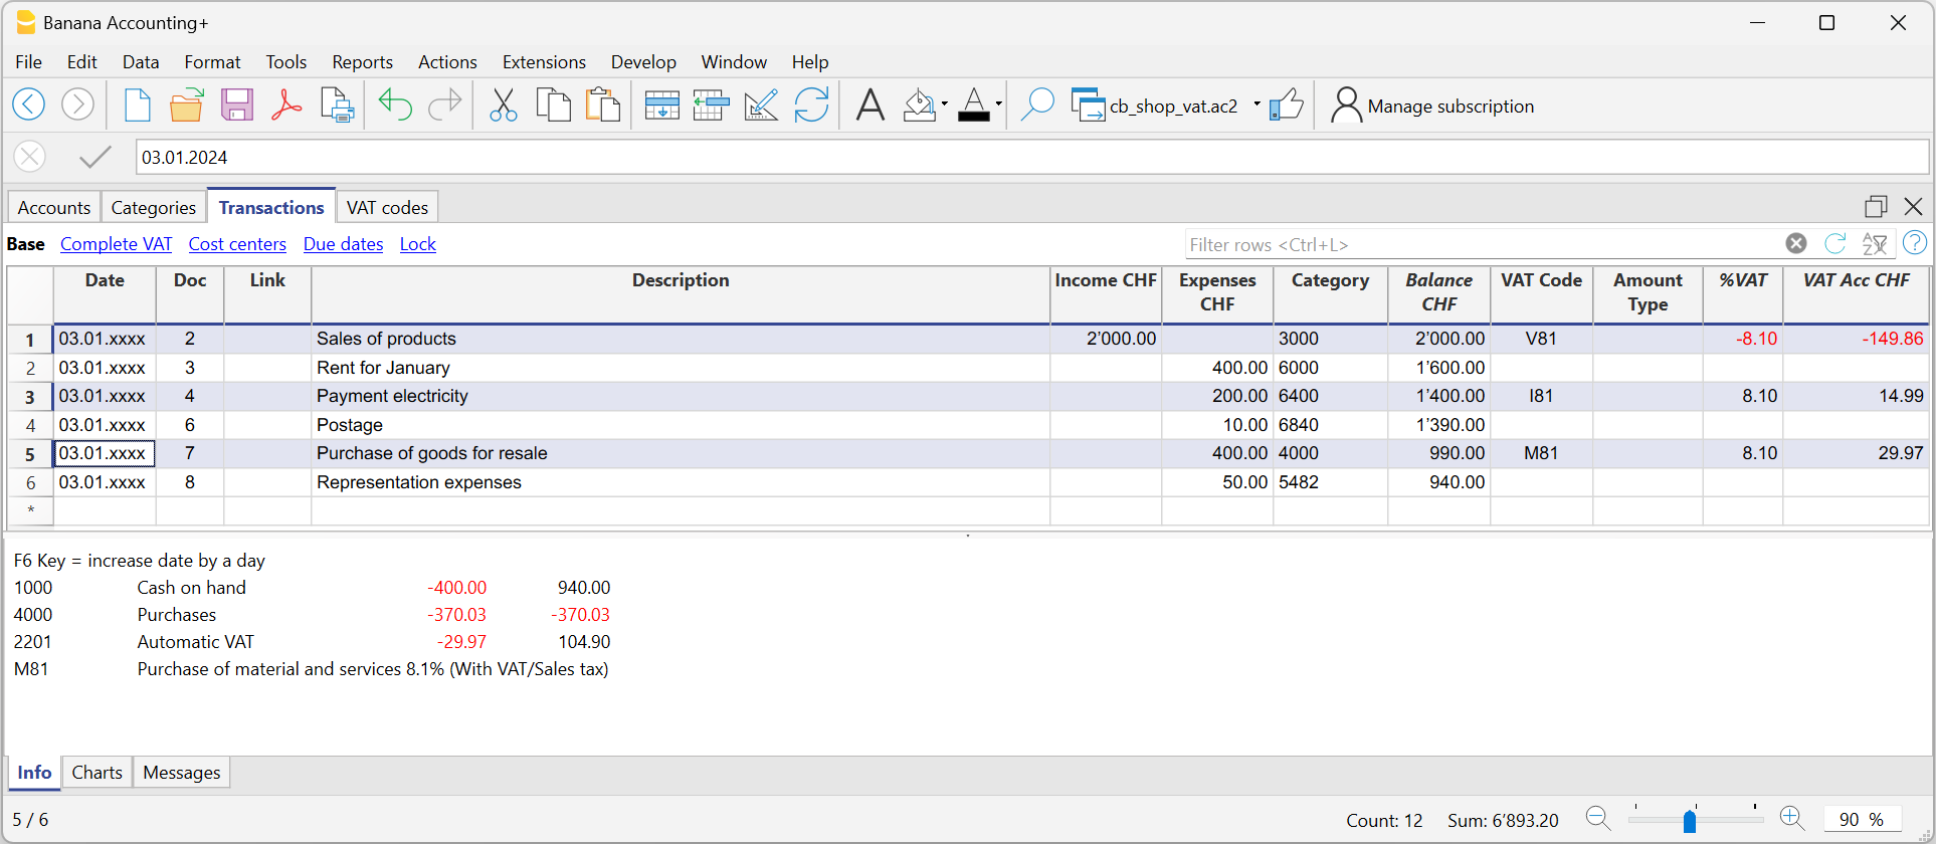
Category card
To display the transactions of a category, click once on the small blue arrow appearing in the upper right corner of the cell.
The display of entries in the Categories table is similar to the one in the Transactions table.
When new transactions are added or changes are made (i.e. in the Transactions table), it is possible to update the tab of a category by clicking on the Update symbol (blue symbol, of two circular arrows, located in the right part of the window).

Budget table of the Cash Manager
Financial planning is carried out in the Budget table.
Before starting a financial year, you can budget expenses and estimate income to keep the economic and financial situation under control.
The budget can be set in two different ways:
- In the Categories table, under the Budget column. For each category, the annual budget amount is indicated.
In this case, when you generate the Budget from the Report menu using the command Enhanced Statement with groups, the Budget column shows the amounts that refer to the entire year. - In the Budget table, which can be activated from the Tools menu > Add/Remove functionalities > Add Budget Table.
In this table, all budgeted expenses and incomes are recorded with transactions. If this table is activated, the Budget column in the Accounts table is automatically disabled. In this case, you can set a detailed budget that takes into account possible variations during the year and in different periods of the year.

Create new year
It is possible to transition to the new year automatically in the following ways:
- Open the file of the year that has just ended and from the Actions menu > Create new year.
- Confirm the basic file Properties.
- Save the file with a new name.
- The account, carrying over the initial balance.
- The categories are carried over without bringing an initial balance, as they start from zero, to determine the operating result of the new year.
Printouts
Instant information
In the Accounts and Categories tables, the balances of the accounts and the categories of income and expenses are displayed immediately. After each individual entry, the balances are updated automatically, and there is no need to generate reports to keep the situation under control; you simply need to position yourself in the Accounts and Categories table.
To print the content of the tables, please refer to the Page setup section (last paragraph).
Advanced printouts
All printing is run from the Reports menu, where the different functions for printing are located:
- Journal - command to define the period. You can display and print the whole table or just a specified period.
- Account/Category cards - Account cards / Categories. You may select all cards or define your selection.
Define the required period in the Period tab and click the required settings in the Options tab. Print settings can be saved in the Customization tab so they can be resumed without them to be having defined again.
- Enhanced statement - Enhanced statement command. You may also print a defined period and various options and customizations may be included.
- Enhanced statement with groups - Enhanced statement with groups command. You may also print a defined period and various options and customization may be included.
- Accounting report - Account report command. The required options are displayed in the Accounts table. Reports are possible for current, previous periods or previous years; each period may contain subdivisions and the customizations can be saved.
Example of printout of Enhanced statement with groups

Cash Manager account / category card
The account or category card corresponds to the ledger and allows you to have a complete list of the accounting entries concerning the same account, the same category, a cost center, a segment or a group.
Open the account card
There are two ways to open and print an account or category card.
First method
This method is recommended when you want to view and print all or several account/category cards.
- Via the Reports > Account / Category Cards menu

A dialog box with the following sections appears:
For detailed information on the sections, click on the corresponding links.
Second method
This method can be used when you need to open only one card at a time within the tables.
- Click on the small icon that appears when you select the cell that contains the account, category or group number.

Update the account card
The account or category card is temporary and is calculated at the time of the request. If transactions are changed or added in the Transactions table, the account card is not updated simultaneously.
To update the account card, following changes, it is necessary to use the Account / category card command again, or if the account card is still open, click on the symbol shown in the image below  .
.

Note
It is not possible to change the data in the account, category or group card. Within the account card, by double clicking on the row number, the program switches to the corresponding row of the Transactions table or of the Estimate.
The Account Selection column
In the Account selected column, which can be made visible, starting from any account card, via the Data > Columns setup menu, the account on which the transaction took place will be displayed.
When you get an account card of one or more accounts, categories, groups and segments, you see exactly which account is used.
Cards of groups or classes
In the account card of a group or class, all the transactions of those accounts belonging to the selected group or class are regrouped.
The accounts or categories of the group or class can be viewed by making the Account Selected column visible.
Budget Account card
Once the budget transactions have been entered in the Budget table, it is possible to have the account or group cards of the budget:
- Reports menu > Account / category cards > activate Budget transaction.

Print the ledger (account cards)
To print the cards:
- Reports menu > Account cards
- Through the Filter it is possible to automatically select all the account cards to be printed or partially (eg only accounts, cost centers or segments).
- In the various sections Period, Options, Customization the desired functions are activated (eg period, one account per page ....).
- Confirm with OK after setting the desired options.
The selected account cards will be displayed on screen. To print, click on the File > Print menu.
Insert a logo in the account cards
As per Banana 9 version, it is possible to insert a logo also in the printout of the account cards.
After creation of the account card detail, proceed as follows:
- Reports menu > Account cards
- File menu > Print preview
- In the dialog box that opens, under Logo, indicate your logo (instead of none).
More detailed information is available on the Logo setup page.
Save the settings
If you happen to regularly print the cards of certain accounts, for example all those of sales, it is useful to create a relevant customization:
- Report menu > Account cards > Customization section
click on the New button - Indicate the name in the description, for example "Sales Accounts"
- Select the accounts you want to print
- From the File > Page setup menu you can determine the margins and other page settings.
Whenever you need to print the accounts, select the customization you created.
Movement Column
The Movement column, available in the Account card table, shows the debit and credit movements in a single column: positive amounts for debit entries and negative amounts for credit entries. The amounts are the same as those contained in the Debit and Credit columns.
A single column should allows for better control of your accounting.
You can activate the Movement column in the Account card, via the Data → Columns setup menu.


Journal Cash Manager
Journal
As in all Banana Accounting applications, transactions are entered in the Transactions table. If you want to print the Journal (list of all transactions), you can proceed in several different ways:
- Position yourself in the Transactions table and click on the Print preview icon; then click on the Print icon
- From the Transactions table and select from the File menu > Print preview > Print icon.
- From the menu Reports menu > Journal by period ...
Journal by period
Banana Accounting, through the menu Report > Journal by period, offers the possibility to print the Journal with the movements of the entire period or of the selected period, by entering the start and end date of the period.

The information on the Period section is available on the Period page of the common functions.
In the Sort column tab, you can select the base on which type of date to order and print the journal.
Enhanced Statement
The information on the Enhanced Statement is identical to that of the Enhanced Statement of Income / Expenses.
Enhanced Statement with groups
The information on the Enhanced Statement with groups is identical to that of the Enhanced Statement of Income / Expenses.
Accounting report
The information in the Cash Manager Accounting Report is identical to that of the Income / Expenses Accounting Report.
VAT/sales tax report (only with VAT option)
Information on the VAT Report is available on the web page VAT/Sales tax report.