In this article
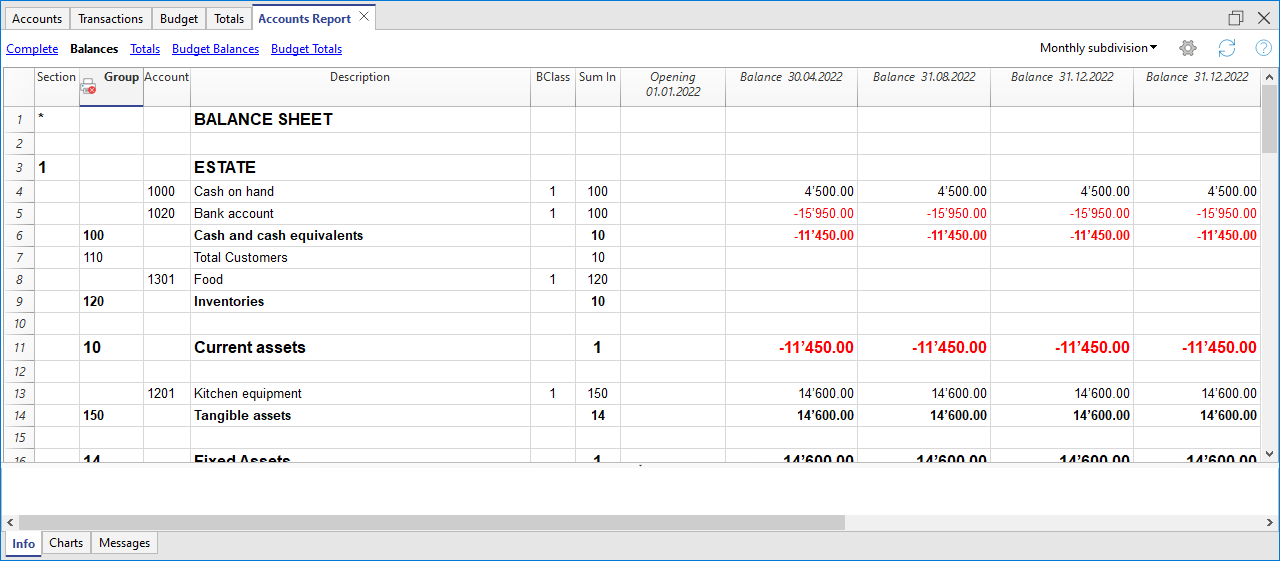
The Accounting Report generates and prints an overview of the balances of all accounts in the chart of accounts, grouped according to specific criteria and related to a defined period or its subdivision. The Accounting Report is displayed in a new table called Accounts Report and is based on the column structure of the Accounts table.
To create and print an Accounting Report:
- From the menu Reports > Accounting Report
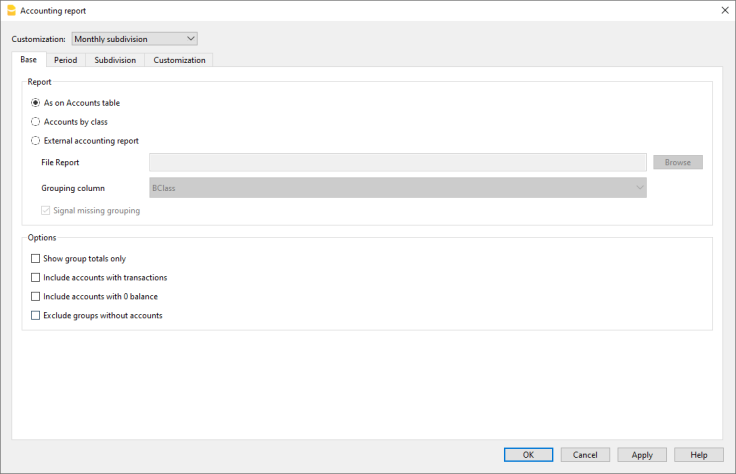
Basic
Report
Choose the desired grouping:
- Like in the accounts table – the report lists accounts as shown in the accounts table, including Opening and Balance columns.
- Accounts by class – the report lists accounts, but without subgroups.
- External Accounting Report – The report is displayed through a file external to the accounting file, with a specific grouping defined by the user. It is created by selecting Menu > File > New > Accounting type > Accounting Report.
The report is always shown in the Accounts Report table, as illustrated in the following image.
Accounting Report Dialog
Options
Choose which accounts to include or exclude from the report:
- Show only group totals – only group totals are displayed.
- Include accounts with transactions – only accounts with movements are included.
- Include accounts with zero balance – accounts with zero balance are also included.
- Exclude groups without accounts – groups that only contain accounts with zero balance are excluded.
- Entries without a date are considered as openings and do not appear in the Profit and Loss report.
Other Sections
Explanations of the other sections are available at the following web pages:
Report Output
A new table is created where the results are displayed.
Print the logo in the accounting report
To include a logo in the accounting reports, after creating the report, follow these steps:
- Menu File > Print Preview > Page Setup
In the dialog window that opens, under Logo, specify the logo (instead of selecting None).
See also the page on how to insert the Logo.
help_id
dlgdoppiabaseprospetto::tabdoppiabaseprospetto