In this article
Below is an explanation of how to proceed to:
- switch to a chart of accounts with a different numbering;
- retrieve and convert the existing accounting data, including transactions, into the new chart of accounts.
Conversion for the new year
If you want to start a new year with a new chart of accounts, there are two possible approaches.
1. Convert the previous year and then create the new year
In this case you will have two files:
- the file of the year being closed, which contains:
- the Accounts column with the old account numbers;
- the Accounts_1 column with the new account numbers;
- the file for the new year, based on the new chart of accounts.
This approach is recommended because it allows the charts of accounts of the two years to be aligned.
Furthermore, it allows you to continue making changes in the closing year and to later retrieve the opening balances in the file for the new year.
2. Create the new year and convert the new year file
The file for the year being closed remains unchanged.
For the new year, you initially get an intermediate file, with the old chart of accounts but with carried forward balances.
The conversion of the new year's file can be performed immediately or even after some transactions have already been entered.
With this method, since the previous year's file keeps the old account numbers, it will no longer be possible to retrieve later changes made in the previous year into the new year.
- Create a new accounting file
- Create a new file via the File > New menu.
- Choose a predefined chart of accounts template.
- Adapt the chart of accounts to your needs.
- Add the matching accounts in the Accounts table
- Open the Data > Columns setup menu.
- Click the Add button.
- Insert the column with the description Account_1.
For each account in the new chart, in the Account_1 column enter the corresponding number from the old chart of accounts.
- If an account remains unchanged, the Account_1 column can also be left empty.
- If multiple accounts must be grouped into a single account, indicate the numbers separated by semicolons, for example:
1000;1001
In this case, the first account must be repeated, otherwise only the last one will be considered. - If instead one account must be split into several accounts, the split must be performed manually.

Start the import
- Activate the command from the Actions > Import into accounting > Import file menu.
- With the Browse button, select the accounting file with the old chart of accounts.
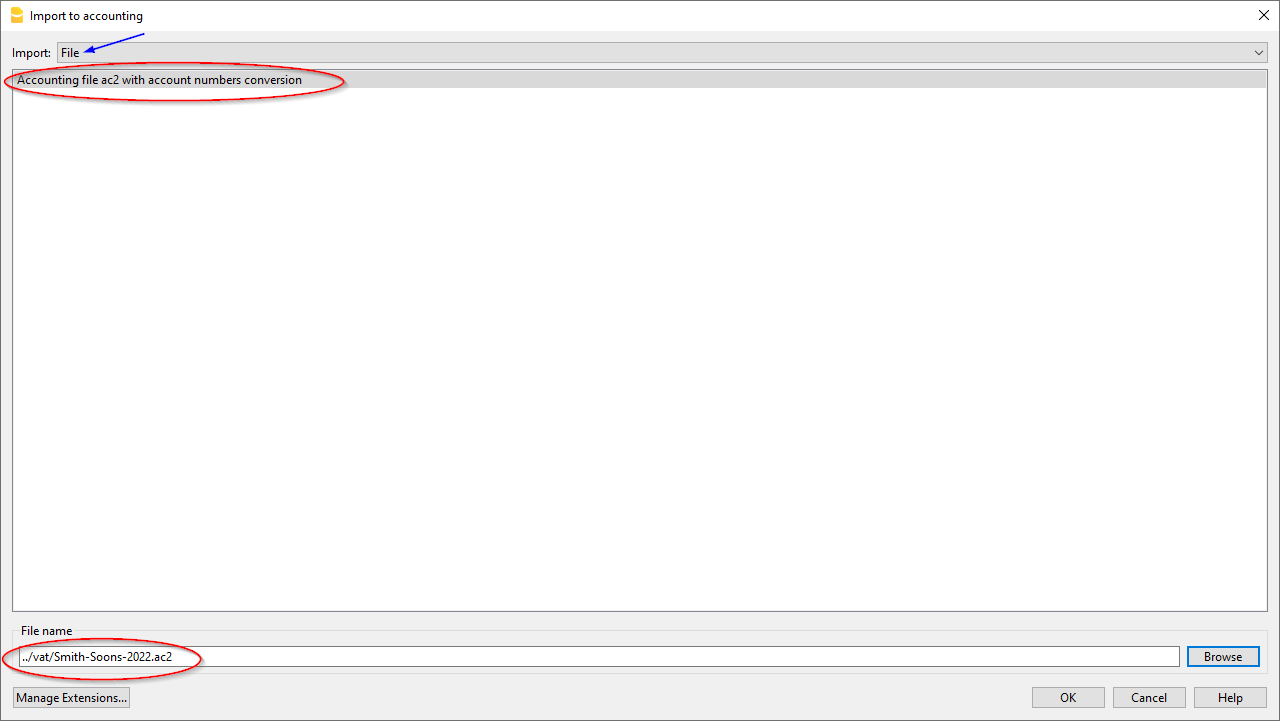
- Click OK to proceed to the next window.
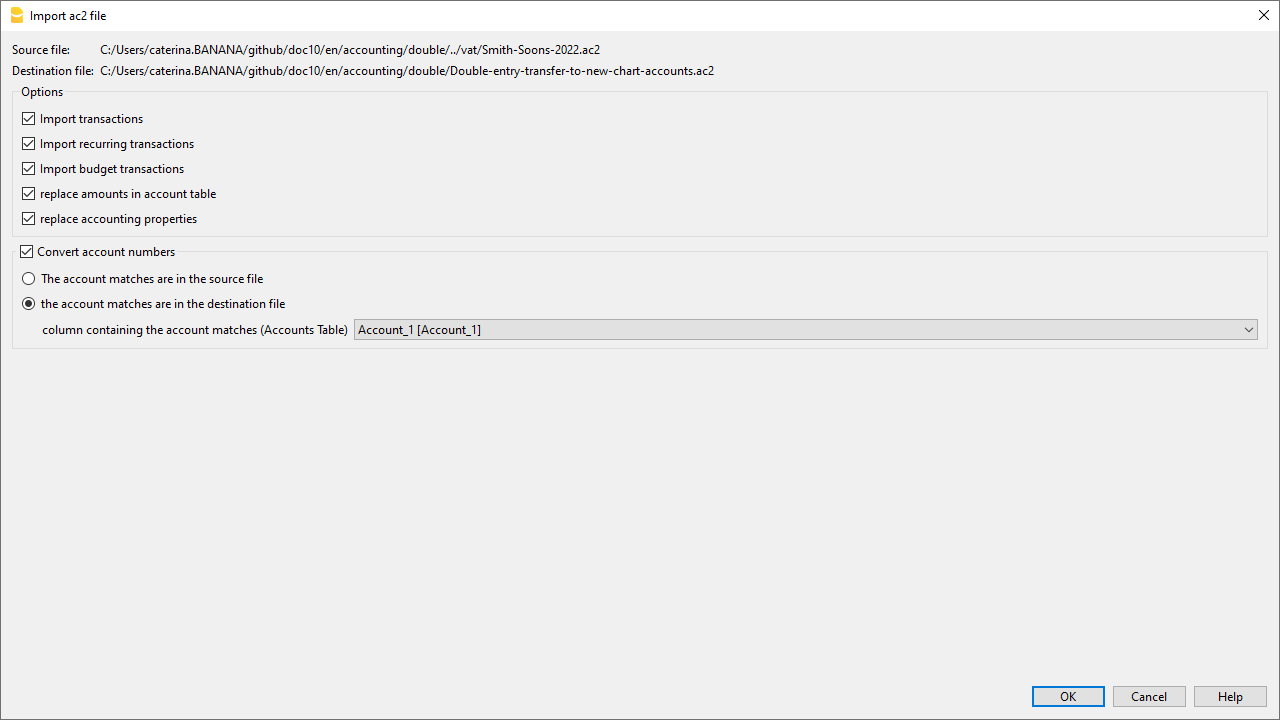
- Set the import options:
- enable the Convert account numbers option
- indicate that the matchings are present in the destination file.
- Start the import.
Repeat the import
If errors are reported and the operation needs to be repeated, it is essential to undo the previous import so that the destination file is empty.
Otherwise, the opening balances and transactions would be duplicated.
Splitting an account into multiple accounts
When switching to a more detailed chart of accounts, it may be necessary to split one account into several.
After the import, proceed manually as follows:
- in the chart of accounts, split the opening, budget and previous balances into several accounts;
- review each transaction of the account to be split and assign the more specific account;
- if necessary, create additional transactions to split an amount into several parts;
- proceed in the same way for the transactions in the Budget table.
Result and possible errors
If the program reports errors (missing accounts or other issues), it is often necessary to:
- undo the import;
- complete or correct the matchings;
- repeat the import operation.
Since the program works with different charts of accounts, it is not possible to automatically perform in-depth checks on the correctness of the groupings.
It is therefore recommended to manually check the result, ensuring that the totals of the balance sheet and income statement are correct.