La interfaz de Banana Contabilidad Plus
¿Es nuevo en Banana Contabilidad Plus? No hay problema. En esta página le mostramos brevemente lo que encontrará en la pantalla principal y cómo funcionan los distintos elementos.
A primera vista, Banana Contabilidad es similar a Excel, basado en tablas, y su modo de uso es muy práctico e intuitivo. Pero pronto descubrirá que Banana Contabilidad Plus ofrece mucho más.
- ▶ Vídeo: La interfaz de Banana Contabilidad Plus
- Consejos y comandos para introducir datos rápidamente

1. La barra de menús
La barra de menús cambia según la aplicación que esté abierta. Cada menú contiene comandos específicos. Los menús en las aplicaciones contables son: Archivo, Modificar, Datos, Formato, Herramientas, Informes, Acciones, Extensiones, Ventanas, Ayuda.
Desde el menú Ayuda puede gestionar los datos de la suscripción a Banana Contabilidad Plus.
Advertencia: En los sistemas operativos Mac, la barra de menús se encuentra en la parte superior, a la derecha del logotipo de Apple con forma de manzana.

Novedad: En el menú Ventana dispone de varios comandos, que le permiten, entre otras cosas:
- Cambiar la disposición de las ventanas de datos (en paralelo o en cascada)
- Elegir diferentes configuraciones desde el comando Apariencia:
- Elegir qué elementos de la interfaz mostrar, para adaptarlos a pantallas pequeñas.
- Elegir el tema de visualización.
- Hacer visible el menú Desarrollo.
2. La barra de herramientas
La barra de herramientas proporciona acceso rápido a los cuadros de diálogo y comandos más utilizados.
Basta con pasar el ratón por encima del icono deseado y esperar un momento para ver una descripción de su función.
Novedad: Si tiene varios archivos abiertos, ahora puede ver fácilmente con cuál está trabajando y cambiar entre ellos de manera muy sencilla desde la barra de herramientas.

3. Área de introducción de texto
Normalmente, los textos se escriben directamente en la celda, pero también aparecen en el área situada debajo de la barra de herramientas, donde también pueden editarse. Varias funciones aceleran y automatizan su introducción.
4. Las tablas
Cada archivo consta de varias tablas que muestran diferentes contenidos contables o de aplicación. Pase de una tabla a otra simplemente tocando el nombre de la tabla con el ratón. Las tablas varían según la aplicación que esté abierta. Trabajar con tablas permite tener siempre los datos ordenados y agrupados según el contenido.
Existen tablas principales (fijas) y tablas auxiliares (que aparecen tras ciertos comandos). Las tablas auxiliares (es decir, generadas por el usuario) deben actualizarse si hay un cambio o adición de datos, simplemente haciendo clic en el icono en la parte superior derecha de la tabla 

Además de los diversos informes disponibles, Banana Contabilidad Plus permite imprimir todo lo que ve en pantalla en cualquier tabla (ver Configuración de página - último párrafo). Para más información, visite la página Impresiones/Previsualización.
5. Las vistas
Las vistas son diferentes formas de visualizar los datos de una misma tabla, mostrando solo ciertas columnas. Son muy útiles cuando se quiere mostrar los datos de forma diferente, sin alterar la configuración básica. Pase de una vista a otra simplemente tocando el nombre de la vista con el ratón.
Las vistas se encuentran en el área situada debajo de las tablas y pueden personalizarse con el comando Configuración de tablas. También existe la posibilidad de crear nuevas.
6. El filtro
La función Filtrar filas, disponible en el plan Avanzado de Banana Contabilidad Plus, permite buscar, encontrar y modificar al instante transacciones introducidas previamente. Junto con Ordenar filas temporalmente, representa una innovación importante para acelerar el control contable.
Para más información, visite la página Filtrar y ordenar filas temporalmente.
7. Ayuda contextual
En Banana Contabilidad Plus, la ayuda contextual le ofrece asistencia inmediata relacionada exactamente con lo que está haciendo. Esto se realiza de varias formas complementarias:
- A - La ventana de mensajes de error, que el programa muestra cuando detecta un posible error:
- Si pulsa OK se le muestra cada mensaje individual.
- Si pulsa Ayuda se le lleva a la página que explica el mensaje de error con posibles soluciones.
- Si pulsa No avisar, todos los mensajes de error se guardan en la ventana Mensajes de error.
- B - Símbolo de signo de interrogación en la parte superior derecha de la tabla

Un clic en el símbolo le lleva a nuestra página de Documentación, donde puede encontrar información detallada sobre el uso de la tabla y todas las demás funciones del programa.
- C - Símbolo de signo de interrogación en la parte inferior
 de la ventana de Información o Mensajes
Al hacer clic en este símbolo se accede a la página que explica el mensaje de error y las posibles soluciones. - D - Botón de Ayuda en los cuadros de diálogo
Al hacer clic en este botón se muestra la página de explicación en línea del cuadro de diálogo abierto o del mensaje de error.

8. Las columnas
Las columnas son los elementos verticales de la tabla. Cada columna tiene su propio encabezado. La disposición, tamaño, descripción, formato, ancho, estilo y alineación de las columnas pueden personalizarse mediante las funciones del menú Datos > Configuración de columnas.
En algunas columnas los datos son introducidos por el usuario, mientras que en otras el programa introduce los datos automáticamente, por lo que no pueden ser modificados por el usuario (por ejemplo, las columnas de la ficha de cuenta).
También puede añadir nuevas columnas a través de Datos > Configuración de columnas, pero si contienen valores no serán procesados por el programa.
9. Buscar y reemplazar
La función Buscar y reemplazar se activa desde el menú Datos y permanece visible hasta que se cierra manualmente. Es muy práctica para encontrar y cambiar textos rápida y fácilmente en la tabla. No debe confundirse con el comando Renombrar (solo en el plan Advanced), que cambia el nombre de una cuenta, código de IVA u otro, en todo el archivo.
10. Las ventanas de información
Esta es el área situada en la parte inferior de la pantalla, donde se muestra información útil sobre la tabla y la casilla en la que se encuentra. Esta área se divide en tres ventanas muy útiles que proporcionan información inmediata:
- La ventana Información informa sobre el contenido de la fila y la celda en la que se encuentra (por ejemplo, nombre y saldo de la cuenta, código de IVA y descripción del código utilizado).
- La ventana Mensajes, informa sobre los mensajes de error.
- La ventana Gráficos, muestra el gráfico del contenido de la celda o fila en la que se encuentra (por ejemplo, si está en una cuenta, aparece el gráfico con la evolución de la cuenta).
Pase de una ventana a otra simplemente tocando el nombre de la ventana con el ratón.
La ventana Información
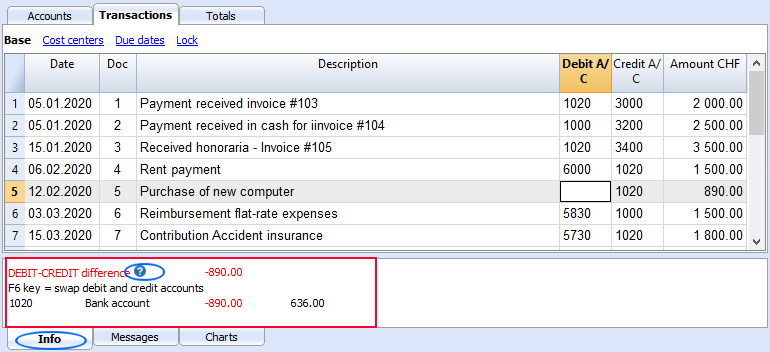
La ventana Información muestra la información referente a la celda y la línea en la que se encuentra: los nombres y códigos de las cuentas involucradas en el apunte, los importes y los saldos restantes. Cuando hay un error, la diferencia se muestra en rojo.
- Al hacer clic en el símbolo del signo de interrogación se accede a la página donde se explica el error.

La ventana Mensajes
Cuando el programa detecta errores, aparece un cuadro de diálogo para informarlos:

- Pulse OK para ver cada mensaje individualmente.
- Si pulsa No avisar, todos los mensajes de error se guardan en la ventana Mensajes de error.
- Pulsando Ayuda accede a la página que explica el error con posibles soluciones (Ayuda contextual).
La ventana Mensajes contiene una lista de errores que han sido detectados por el programa.
- Desde la ventana Mensajes, haga doble clic sobre el mensaje de error para ir a la línea que generó el error.
- Al hacer clic en el símbolo del signo de interrogación accede a la página que explica el mensaje.

La ventana Gráficos
Al seleccionar una cuenta o un grupo, se obtiene el gráfico en la ventana Gráficos en la parte inferior. El gráfico proporciona inmediatamente la evolución de la situación, incluida una comparación entre la situación prevista y la real. Tiene una visión inmediata a lo largo del tiempo sin necesidad de consultar los importes.
Con el plan Advanced de Banana Contabilidad Plus, ahora también es posible copiar, exportar e imprimir gráficos, así como copiar al portapapeles los datos que generaron el gráfico. Más información en la página de Gráficos.

11. La barra de estado
Está situada en la parte inferior de la ventana del programa y contiene la siguiente información:
- Número de línea de la celda seleccionada/número de filas en la tabla.
- Si el Filtro está activo, también se indica el número de filas visibles.
- Si se seleccionan varias celdas de tipo numérico o contador de tiempo, se obtiene:
- Conteo: Número de celdas seleccionadas que contienen números.
- Suma: Suma de los valores de las celdas seleccionadas.
En la imagen superior, se seleccionaron 3 celdas numéricas (1'500 + 1'500 + 1'910) y de hecho el total es 4'910 en la barra de estado.
- Zoom
- Para agrandar o reducir el tamaño de las tablas.
- Para cambiar el tamaño del texto de los menús, utilice la configuración del sistema operativo.
- Ver también Opciones del programa.

Novedades
En la última versión del Banana Dev Channel, es posible copiar la suma de los importes al portapapeles.

The guiding principles of Banana Accounting
When you start looking for accounting software, you are faced with a sea of possibilities: from completely “do-it-yourself” Excel solutions, to complex management systems designed for large companies, to many intermediate options. It is normal to feel a little disoriented.
With Banana Accounting we want to make this choice much simpler and more reassuring.
Our software has been designed to be:
Easy to start with: the table-based interface is simple and easy to understand, similar to an Excel spreadsheet, therefore familiar and immediately intuitive even without advanced accounting knowledge.
Clear and readable: data is always presented in an organized and transparent way, so you always know where you are and how to proceed. See how the program works, so you can understand it and have full control of your activity.
Flexible and adaptable: with a modular software, you can start small and expand the features as your business grows.
Free and without constraints: your data always remains accessible, exportable and editable. If one day you want to switch to other solutions, you will not encounter barriers or limitations.
In other words, Banana Accounting not only simplifies the start of your accounting management, but also accompanies you throughout your growth journey, leaving you the freedom to always choose the best path for you.
Useful links
Table-based interface
In Banana Accounting Plus the data is entered and displayed in tables. This interface, inspired by Excel and faithful to the centuries-old accounting tradition, is extremely intuitive and productive. In all areas of the program, for the Chart of Accounts, the Transactions, the Budget, the Exchange, the VAT Codes and also to view the Account Cards, the table system used is always the same.

The typical Excel interface gives the user numerous advantages to optimize their work.
Easy data entering
Everything is very intuitive, because you are able immediately to see what you have to do and where to enter the data. You can move around freely to enter, make changes and delete data at any time. During the input, the program also suggests values based on the text you typed in, or you can put it on hold to complete the work later.
Fast data entering
The cells allow instant data entry, which can be copied and pasted to speed up the work even more. With the suggestion of the values to be entered, auto-completion is available, which offers the possibility to choose a value already used previously for example.
Secure data
The user is always sure that the data entered is correct, as he will find tables readily prepared uniquely for data types and with the integrated formulas. In case you enter wrong values, the program will signal the error with a text warning message, so the user understands where he has made a mistake and can immediately correct it.
On-line interface use including heuristic principles
This high productivity and ease of use is the result of a scientific approach to improving user interaction. In the early nineties a group of researchers led by Jackob Nielsen, developed the 10 heuristic rules for the interface design. These principles have become and remain the reference point for the creation of software, websites and apps.
Banana Accounting is the only software that meets all 10 rules and that is why it is easy to use and highly productive. Below these principles and how they are implemented in Banana Accounting are presented.
1. Visibility of system status
“The system should always keep users informed about what is going on, through appropriate feedback within reasonable time.”
- If you add or delete a line, change the format, the color, you will instantly see the result of the operation.
- When you resume accounting, or you are interrupted by the phone, you immediately see what the last recorded entry was.
- The calculations (account balances and others) are updated and visible immediately.
- Multiple windows can be displayed simultaneously.
- The preview window does not block the use of the program, it can be kept open in parallel.
- In the Info window below, you will find additional information about the transaction, account or other on which you are positioned.
- In the Graphs window, you can see the evolution of the account balance on which you are positioned. If the cash drops below zero, you will be able to notice it immediately.
2. Match between system and the real world
“The system should speak the users' language, with words, phrases and concepts familiar to the user, rather than system-oriented terms. Follow real-world conventions, making information appear in a natural and logical order.”
The spreadsheet was created for the world of accounting. It is the native mode of accounting (Cash book, Accounts list).
- Entering data in the table leads to an immediate change in status. Everything is updated immediately accordingly.
- The Transactions table contains all movements, exactly as expressed in the accounting.
- The Accounts table contains and displays the Balance Sheet and the Profit/Loss Statement, with accounts and groups, and the related updated amounts, complete with balances, movements, budgets or discrepancies.
3. User control and freedom
“Users often choose system functions by mistake and will need a clearly marked "emergency exit" to leave the unwanted state without having to go through an extended dialogue. Support undo and redo.”
Within Banana Accounting, the user has full control and freedom:
- You choose the sequence in which you wish to work freely.
- You will never be hindered by the system and can change or suspend your work whenever you need or wish to.
- You can navigate freely within the table and add or change any information.
- You can switch from one table to another.
- You can switch from one file to another.
- Operations can be canceled or restored; you can also decide to not save the file if you notice that the work done does not satisfy you.
- Any dialog and procedure can be interrupted with the Esc key..
- You can protect your data:
- Protect any row from being modified.
- Lock the rows of the Transactions table with blockchain.
It complies with requirements for the accounting data conservation and will prevent ill-intentioned persons from interfering with your accounts, without your knowledge.
- Decide where to save your files.
All accounting data is saved in a file, with a user defined name and can be copied, moved, sent by email, saved to a network or cloud drive, such as is most useful to you.
4. Consistency and standards
“Users should not have to wonder whether different words, situations, or actions mean the same thing. Follow platform conventions.”
Banana Accounting aims to be consistent throughout.
- The mode of use of spreadsheets is kept consistent.
- The interface and the commands conform to Microsoft Excel and Office, reference programs in the administrative field..
Being familiar with that software will put you at ease immediately, the main commands and operating methods are as similar as possible. - In dialogues and other interactions, graphics and logic specific to the operating system in place are used.
- "Compositions" will allow you to save and use setups in a standardized form.
- We aim to maintain continuity from one version to the next. New designs are only put in place if they are considered effective and provide benefits.
5. Error prevention
“Even better than good error messages is a careful design which prevents a problem from occurring in the first place.”
Banana Accounting connects the data structure and the display functions and there is help while inputting rows.
- Columns and Rows will make it clear, which information is to be inserted.
- When in editing mode, the program will propose a list of suggestions, so as to avoid input mistakes.
- In the date column, when only the day is entered, the program will suggest the complete date of month and year based on the previous registration.
- In the document column, the program indicates the following number, regardless of the numbering convention used.
- In the account or code column, existing ones will be displayed and will also allow you to search via entering the description.
- The description column will display texts already used, which can be reused, along with the rest of the transaction.
6. Recognition rather than recall
“Minimize the user's memory load by making objects, actions, and options visible. The user should not have to remember information from one part of the dialogue to another. Instructions for use of the system should be visible or easily retrievable whenever appropriate.”
With Banana Accounting, as with spreadsheets, it is quite clear what should be done by you and how to proceed.
- To add a transaction, an account or a group, a row is added.
- To delete a transaction, an account or a group, the row is deleted.
- To format, change color, copy and paste data, select the zone first and then click the command.
- All commands are visible in the context menu, the top menu or the toolbar.
- Account numbers or other values to be entered are suggested when in modification mode (see previous post).
7. Flexibility and efficiency of use
“Accelerators — unseen by the novice user — may often speed up the interaction for the expert user such that the system can cater to both inexperienced and experienced users. Allow users to tailor frequent actions.”
There are several options for advanced users to work faster:
- You may use Key shortcuts.
- There are contextual commands that automate a certain number of operations (such as reversing debit and credit account allocation).
- You may apply the commands (copy, paste, delete, format) to a whole selected area. Other accounting programs generally allow you to work on one line at a time only.
- Pick up rows of recurring transactions.
- Row settings for recurring transactions.
- "Compositions" to set and save report settings and other commands.
8. Aesthetic and minimalist design
“Dialogues should not contain information which is irrelevant or rarely needed. Every extra unit of information in a dialogue competes with the relevant units of information and diminishes their relative visibility.”
Banana Accounting was and is conceived to generate accounting files that adhere to regulatory requirements and will contain only related necessary data.
- Your accounting can be created with only the required options. Functions such as VAT, multi-currency, cost and profit centers, segments, are not present if not necessary, but can be activated selectively when needed.
- Your spreadsheet can be customised. You may hide columns that you do not need.
- You can create different views of the columns, in order to access them when and how it is most suitable to you.
9. Help users recognize, diagnose, and recover from errors
“Error messages should be expressed in plain language (no codes), precisely indicate the problem, and constructively suggest a solution.”
Banana Accounting has several ways to allow the user to notice any errors or problems:
- Error messages, well described, when you enter or effectuate an incorrect operation.
- Errors or warnings are highlighted in color of the row concerned
- Explanation of the error in the Info window.
- "Check Accounting" command, to recalculate and check all data entered and signal any errors or problems.
- Window displaying the list of all messages, allowing you to locate the row in which the error occurred.
10. Help and documentation
“Even though it is better if the system can be used without documentation, it may be necessary to provide help and documentation. Any such information should be easy to search, focused on the user's task, list concrete steps to be carried out, and not be too large."
- Each error message has its dedicated documentation page, reachable at a click, complete with causes, solutions and links to information pages, which will help you solve your problem.
- When you are using the table, the help command will lead you directly to the relative Help page of the application and the data table.
- Each dialogue has a help button that leads to the specific help page.
- There is a complete and very comprehensive documentation, structured according to the logic of the program and with links to all the related topics.
- Beside this documentation, there is an index that will allow you to understand it's structure and to move around it easily.
- Dialogues created through program extensions written in Javascript, also link to specific help pages.
Accounting software similar to Excel
Over 30% of small companies still use Excel to do simple accounting. Banana Accounting software is an optimal compromise solution between Excel and accounting softwares, because they take from both the most useful and suitable features for accounting. They don't replace Excel, but they enhance and complement it.

Easy, fast and secure data entering
Banana Accounting has the typical Excel interface, which allows you to enter data very quickly and makes the work very intuitive. The user doesn't have to make any complicated setup. The big advantage compared to Excel is that Banana Accounting is ready to use, with the formulas already integrated. When you create a new file you have the table for entering the chart of accounts, for entering the accounting and forecasting transactions, with all the columns already configured.
It is also possible to import bank or credit card transactions, also linking them to digital receipts.
You can modify and cancel transactions at any time. When you have finished and verified the transactions you have the possibility to protect the movements with the blockchain, so that the accounting data complies with regulations.
Financial forecasting and accounting
Banana Accounting allows you to manage financial forecasts (generally made with Excel) and accounting (generally made with accounting softwares). Having "all in one", the management is simpler, faster and you have a more effective control of your business.
Instant results
Banana Accounting is made up of several tables, already linked together. This synergy allows, when entering data, to have automatically the updated results. For example, when you enter transactions, in the Accounts table you can immediately see the new actual or forecast balances. The instant results allow you to have everything under control at any times and to take effective decisions about your financial situation.
Comprehensive and professional reports
Banana Accounting automatically provide several professional accounting reports with accounting data, forecast data or both together. They include for example the balance sheet, income statement, journal, account cards, liquidity plan, invoices and VAT statements.
Planning-Executing-Controlling - integrated method
To carry an activity to it's successful conclusion, you must first of all plan it, then implement and constantly check how it's execution proceeds and make the necessary corrections. This methodology is used for all kinds of project managements as well as in business management for any company, that wishes to expand it's business, needs to rent new space, hire staff, buy equipment, materials and much more. All these activities require planning, implementation plans and constant monitoring of the execution process.

Planning-Executing-Controlling
Planning-Executing-Checking, a method devised by Banana.ch, is unique and innovative because it includes the financial aspects and not only to the economic ones. Every company, that wants to be successful must not only evaluate it's profitability, but also the availability of liquidity and other means of its own to achieve its objectives without incurring the creation of debt.
Banana Accounting is the first program in the world that makes use of this methodology, by integrating all data into one single file based on the same Chart of Accounts, with no need for any additional tools. At the user's choice, the same file may be used, to either prepare the budget, or keep the accounts or to manage both, allowing for a vision of the past, present and future.

Start - Create the file according to your needs
In order to start your work with this innovative method of Banana Accounting, you create the file during the starting phase: choose your type of accounting and a ready set up template that matches the characteristics closest to your requirements.
This will provide you with a tailor-made accounting, including only the functions you need and without any unnecessary complications.

Start - Customize the file
The Chart of Accounts can be adapted to your needs at any time, by changing descriptions, adding or deleting accounts and groups. The mode of use will always be the same, and therefore other Tables can be easily adapted accordingly.

Entering accounting and forecasting movements
Once the file is created, you can choose to keep the Accounts, Budget, or run both. In Banana Accounting everything occurs in the Transactions table, where the movements relating to the operations carried out are entered, and in the Budget table, where the forecasted movements are entered. You are working in real time and may freely copy, paste and correct the data according to your needs. Data integrity is guaranteed thanks to the blockchain system which, if activated, locks recordings with digital seals.
Both the accounting part and the financial budgeting part are based on the double-entry method: for each revenue, expense, investment or other, the destination and source for and of the financial means are indicated.
This innovative approach is much more efficient, because it allows to account for all the events that are expected in the future, both capital and economic ones. Your efficiency will be enhanced towards using other tools, since data are always in line and no longer need to be imported and / or exported.

Bank statements are made available in electronic format, which makes it possible to automate and speed up their insertion in your accounting, via importing data. Most of the information is automatically retrieved and you just have to check that the data has been imported correctly, completing some information.
Instant results
All data are updated instantly. Your entire past, present and future situation is at your disposal at a glance. In the Accounts and Categories tables your account balances, the profit and loss and also the estimate values are displayed. In the info window you will have the updated account balance graphs and also the evolution graphs.
Comparison of data will allow you to understand how the business evolves and what steps you need to take to improve the situation if objectives have not been achieved. If certain expenses or revenues have been incorrectly budgeted, it is possible to modify them in the budgeting to run forecasts that are always updated and in line with the financial and economic reality of the company.

Comprehensive professional reports
The reporting and control phase has also been standardized, making the same reports available for the budgeted data, for the final balance and the combination of both, and it is also possible to compare the evolution of the data for a single month, quarter or year. There are various types of reports for tax and or management purposes that are automatically generated from the data entered.
Management reports

Automation reports

Data can be exported to allow for further analysis with other calculation software, such as Excel.
Banana Accounting equally allows you to program Extensions to automate certain functions or to generate additional reports. Both forecasting and accounting data can be further enhanced in this way.
Modular Custom Accounting
With Banana Accounting, getting started is really easy because you just have to choose the template: when you open it, the accounting is already set up with what you need. Generally, it's enough to slightly adapt the chart of accounts to start entering the transactions right away. Balance sheet, income statement, and many other reports are instantly ready.
The creation of templates designed to meet different types of users is possible only because Banana Accounting is a modular financial management software. This means you can create customized accounting setups by combining components as needed, with a high level of detail.
This major difference from other ERPs on the market allows Banana Accounting, for example, to set up accounting using either the double-entry method or the income and expense method. You can include VAT management, multi-currency, etc.
Start from a predefined template
The predefined templates in Banana Accounting are created by our specialists and designed for specific uses. Banana Accounting includes a wide range of ready-to-use templates, developed for various fields and compliant with the regulations of different countries.
You can view and search the available templates:
- From the File menu > New command
See the list of all templates divided by type of accounting and region. - In the Template Section on the Banana Accounting website.
You can start right away by choosing the template that best suits your needs: you can always adapt it by adding new features or removing those you don't need.
Double-entry or Income/Expense accounting
Like all professional accounting software, Banana Accounting is also based on the double-entry accounting system, which is the global standard and suitable for use in any context.
However, Banana Accounting also offers the option to use Income and Expense accounting, which is more intuitive for those without accounting knowledge. This method replaces the concepts of Debit and Credit with the more familiar terms of Income and Expenses. It is simply a more visual and easier approach, but the internal calculation engine remains the same, allowing you to generate professional reports and results similar to those of double-entry accounting.
Suitable for every need
In Banana Accounting, the data for each fiscal year of an activity is contained in a single file: you can manage an unlimited number of accounting files, each configured for different needs. This way, you can manage business accounting, personal finances, or act as a treasurer for your association. Or, if you're a professional, you can manage the accounts of several clients with a single subscription.
The modularity of Banana Accounting is the key element that makes it extremely easy to use, and that sets it apart from monolithic accounting software, designed only for large companies and packed with mandatory bundled features.
The modularity of the software results in its great flexibility, characterized primarily by the ability to adapt the chart of accounts and the grouping system. You can manage accounting for businesses, non-profit organizations, public entities, individuals, projects, etc.
The software can easily be adapted for use in different countries. When creating an accounting file, you can choose the language, the number of decimal places, and of course the currency.
Multiple application fields
Banana Accounting is a software similar to Excel, designed for individual use, where the user has maximum operational freedom. You can manage as many accounting files as you want, but it is not possible for multiple people to work simultaneously on the same file. Its use is therefore particularly suitable for situations where one or a few people manage the accounting. It is ideal for:
Managing cash book and monitoring cash and bank accounts
Small businesses and entrepreneurial activities
Associations and non-profit organizations
Individuals
Accounting training
Thanks to its modularity and flexibility, it also proves to be a very useful tool for:
Offshore accounting
Management of entities in different jurisdictions, multi-currency and multi-file; allows for maintaining separate and secure accounting records, with customizable reports and no extra costs for each entity.Forensic accounting
Investigative analysis of records and transactions; allows you to import data, verify imbalances, and easily reconstruct flows, with the transparency of the spreadsheet format.Real estate accounting
Management of multiple properties and units; allows you to create separate accounts for each property and obtain immediate reports on profitability, expenses, and condominium statements.Pension fund or financial entity accounting with securities
Monitoring of investments and assets; allows you to manage multi-currency portfolios and value financial instruments with great flexibility.Project accounting
Allows project managers to collect transactions and prepare budgets, with more detail and greater control.Cost and departmental accounting
Allows department managers to collect transactions and prepare budgets with more detail and greater control. The data can then be consolidated into the central system.Small distributed accounting systems integrated into a central system
Branches, local associations, or remote offices; allows local accounts to be managed independently and then easily integrated into consolidated financial statements.
Available components
Banana Accounting offers various modular functions:
- Choice of accounting method, double-entry or income and expense
Simpler for beginners or more formal for those familiar with double-entry. - With or without VAT management
You can work without VAT or activate it and manage registers, rates, and declarations. - With or without multi-currency accounts
Manage multiple currencies in parallel, useful for businesses with foreign clients or suppliers. - Accounting decimals
You can go up to 20 decimals: ideal for cryptocurrencies and minimal currency fractions. - Choice of accounting period
Freely set the fiscal year or custom periods for your business. - Accounting language
Choose the accounting language independently from the interface language. - Add new columns and change table views
Customize tables and views by adding columns, filters, and layouts as needed. - Chart of accounts and grouping setup
Adapt your chart of accounts and structure the groupings as you prefer. - Customizable reports
Generate custom financial statements and reports with configurable filters and settings. - Balance sheet reclassification
Create alternative balance sheet layouts for different financial analyses. - Cost and profit centers
Track expenses and income by projects, departments, or specific activities. - Segments
Add extra levels of analysis to better detail accounts and transactions. - Customer management
Organize deadlines, receivables, and outstanding invoices for each customer. - Supplier management
Monitor payables and payments to your suppliers. - Transactions table with quantities and prices
Link quantities and prices to each transaction, useful for small sales or inventory. - Items table
Manage a list of items with descriptions, prices, and codes, ready for invoicing. - Budget, financial and liquidity planning
Set annual or monthly budgets and compare them with actuals to plan income and expenses and monitor cash flow evolution. - Invoices from transactions
Automatically generate invoices from accounting transactions. - Securities management
Record and monitor investments, stocks, bonds, or other financial instruments. - Certification and transaction locking
Certify and lock transactions to ensure legal data validity. - Extensions
Add extra features (electronic invoicing, reports, printouts) via dedicated extensions.
Different types of components
From a technical point of view, the ability to create customized accounting by choosing its elements is achieved through different technical approaches.
The standard and recommended approach is to start from a predefined template and eventually adapt it.
Of course, it is also possible to start from a completely empty accounting file, but this is rarely done.
Choosing the accounting application
When creating a new accounting file, the first step is to choose the accounting application, among:
- Cash Manager (Cash Book with or without VAT)
- Income / Expense Accounting (with or without VAT)
- Double-entry Accounting (with or without VAT)
- Double-entry Accounting with multi-currency (with or without VAT)
If instead you choose to start from an empty accounting file, you will need to specify:
- The number of decimals for amounts in base and foreign currencies
- The rounding method
- The accounting language
This is a fundamental choice, because these settings cannot be changed later. If the settings of a template are not suitable, or if you want to switch to a different type of accounting, you can use the Tools menu > Convert file to new.
- This command creates a new accounting file with the desired settings.
- All data from the original file is transferred.
However, caution is needed: for example, if you convert an accounting file with VAT to one without VAT, all VAT data will be deleted.
Customizing the chart of accounts
Banana Accounting allows you to customize the chart of accounts by adding numeric or text-based accounts.
Usually, you start from the existing structure and then add the necessary accounts and remove the unnecessary ones. This adjustment can be made at any time.
The Accounts table also includes groups, with a multi-level grouping system that allows you to create any type of balance sheet and income statement structure.
Templates specific to a country usually also include a predefined VAT Codes table, which can also be customized.
The Exchange Rates table can also be customized with the desired currencies.
Using predefined but hidden features
When accounting files are created, there are included features that are normally not visible.
You usually need to make the columns visible using the Data > Columns setup menu command, in order to enter the desired values.
- Cost and profit centers
- Segments
- Notes, Exchange Rate Date columns
- Linking to external documents
- Customer and Supplier management – relevant accounts and groups need to be set in the chart of accounts.
- Invoice printing – Allows printing invoices directly from transaction rows. You must first set up the group and customer accounts.
With the Columns setup command, you can view all the available columns in the table and add new ones to enter additional information.
Possibility to Add New Features
With the Tools > Add/Remove functionalities menu command, you can activate other features. These commands usually add columns or tables already configured for a specific purpose.
- Address columns in the Accounts table
To use accounts also for customers and suppliers, print invoices, or other purposes. - Budget table
For managing financial planning. - Item, quantity, and price columns in transactions
To manage quantities, useful for handling invoices and securities. - Items table
To manage a list of items, useful when issuing invoices.
Also used for integrated securities management. - Simple table
Customizable, useful for managing notes, projects, or others. - Documents table
Allows adding image files (e.g., for logos) or Javascript and CSS files used in extension development or invoice customization.
Extensions
Extensions (or Plug-ins) are Javascript programs that extend the functionality of Banana Accounting.
Extensions are often used together with other customizations. For example, the "Cash Report for ETS" extension requires the chart of accounts to be set with specific groupings. The "Donors" report requires specific cost centers to be used. The Securities Management extension requires the Items table to be present.
Extensions are divided into:
- General extensions – For report creation and input of additional data.
- Data import extensions for accounting – For example, to import bank CSV statements.
- Invoice printing extensions – Scripts for printing invoices.
Extensions must first be installed:
- Extensions available on the Banana Accounting website
From the Extensions menu > Manage extensions command, you can view all the extensions already prepared for different uses.- Extensions usually must be installed manually.
- Some extensions, however, are already linked to specific templates and are installed automatically when the file is opened.
- Extensions are updated automatically when new versions are available.
- Extensions developed directly
- Embedded Extension – The Javascript code is saved within the Documents table.
- Local Extensions – Stored locally.
- Packaged Extensions – Packages that contain a set of features. Generally, the extensions available in the store are packages.
Switching to other accounting software
Banana Accounting is one of the easiest professional accounting software to get started with: an intuitive and flexible tool that adapts to your needs and grows with your business.
But it’s also the kind of software that, should you one day need a more structured solution, allows you to migrate without difficulty. With Banana, you’re never locked in: you can start worry-free and stay free to choose.
Many users gratefully tell us how Banana Accounting helped them start and manage their business in the early years. We are proud to have contributed to the success of so many businesses and individuals, and we’re happy to see them grow and reach even more ambitious goals.
Easy migration from Banana
There are several reasons why switching from Banana Accounting to another program is simple. Here are the main ones:
- Your data always stays with you
With Banana Accounting Plus, all your accounting data belongs to you and remains in your possession at all times. The files for the accounting(s) you manage—both for the current year and all previous years, including receipts and other information—are saved on your local devices or your cloud (OneDrive, iCloud, Google Drive, DropBox, etc.). Even when your Banana Accounting Plus subscription ends, everything remains in your possession, with no special actions needed.
With cloud-based accounting software, the situation is very different: as soon as you stop paying the subscription, you lose access to your data. To comply with data retention obligations, you need to download everything. This makes switching to other solutions much more difficult. - Software always accessible, even after the subscription ends
Thanks to the Free plan of Banana Accounting Plus, available to everyone, you can always open your accounting files and view the chart of accounts, transactions entered, etc. (any printouts will have a watermark). Your access to data is always guaranteed. - Easy export
You can easily transfer data from Banana Accounting Plus to the new software, either by simply copying and pasting from the chart of accounts or transactions, or by exporting the data in various formats, including Excel. - Knowledge that stays with you
Banana Accounting Plus is a professional software that helps you understand the logic of accounting programs, especially double-entry accounting. This makes it much easier to switch to other solutions, since they all follow the same method. - Structured chart of accounts
With Banana Accounting, you can immediately set up a chart of accounts tailored to your company’s accounting and tax needs. If you switch to another solution in the future, you can directly import this structure (if supported), or at least you will already have a clear model of your requirements—an important advantage for making onboarding with the new software faster and easier. - You can start using the other software
With Banana Accounting Plus, you can easily use another software alongside it. You can export the data to test it in the new program while continuing to work in Banana. When you're ready to fully transition, you just need to export the updated data again.
Things to consider when changing software
Switching accounting software always requires some effort and a period of training. Here are some helpful points:
- The right time to transition
You can switch software at any time, but it’s usually easier at the beginning of the year: close the current fiscal year with your current software and start the new year in the chosen one. - Transition period
Plan for a period of overlap. If you transition during the year, continue keeping accounts with your current software until you're sure the new system provides all necessary printouts (financial statements, VAT Report, management control reports). - Check the features
Before switching, check if Banana Accounting already offers what you think is missing—you might avoid migrating altogether. - Move towards double-entry accounting
If you're using Income and Expense accounting and your needs are growing, consider switching to double-entry accounting as a first step. - Don’t take anything for granted
Banana Accounting is flexible and fast—don’t assume other software will have the same functions. Make sure the new program covers both what you’re missing and what you’re used to. Identify the features truly critical to your business and test them before making the final switch.
Fast data entry and validation
In Banana Accounting Plus you will find many features designed to speed up data entry, automate repetitive tasks, and minimize errors.
Each tool is designed to make accounting management simpler, more efficient, and more secure.
The functions are divided into two main categories:
Data entry and editing
Copy, cut and paste
You can copy, cut, and paste data from one cell, row, or table to another, even between Excel and Banana, quickly and safely.
These functions are available in the Edit menu.
Input and shortcut keys
You can speed up data entry using various shortcut keys or by entering a dot "." which performs different functions depending on the column you are in.
Here are the most common ones:
- In the Date column, the dot "." enters today's date.
- In the Time column, the dot "." enters the current time (for example in the Timesheet).
- The F4 key (or Cmd+4 on Apple computers) copies data from the cell above.
You can see the full list from the Help > Shortcut keys menu.
Auto-completion when writing texts, accounts and amounts
Auto-completion automatically suggests texts, accounts or VAT codes previously used. Just type the first characters and confirm with Enter, Tab or F6 to quickly fill in the cell. You can enable or disable the function from the Tools > Program Options > Editor menu.
- Enter key accepts the choice and moves to the next editable cell, either to the right or below, depending on the settings.
- Ctrl + Down Arrow accepts the selected value and moves to the cell below.
- Tab key accepts and moves to the cell on the right.
- Shift + Tab key accepts and moves to the cell on the left.
- F6 key (or Cmd+6 for Mac) accepts the text and executes the associated command (see explanation below).

Note:
To disable auto-completion from the previous year, you need to deactivate the Smart fill with previous year's transactions option from the File menu > File Properties > Options.
Recurring transactions
From the Actions > Recurring Transactions menu you can save transactions that repeat (rent, salaries, subscriptions) and insert them automatically into the Transactions table when needed. It saves time and reduces errors.

Import transactions from bank statements
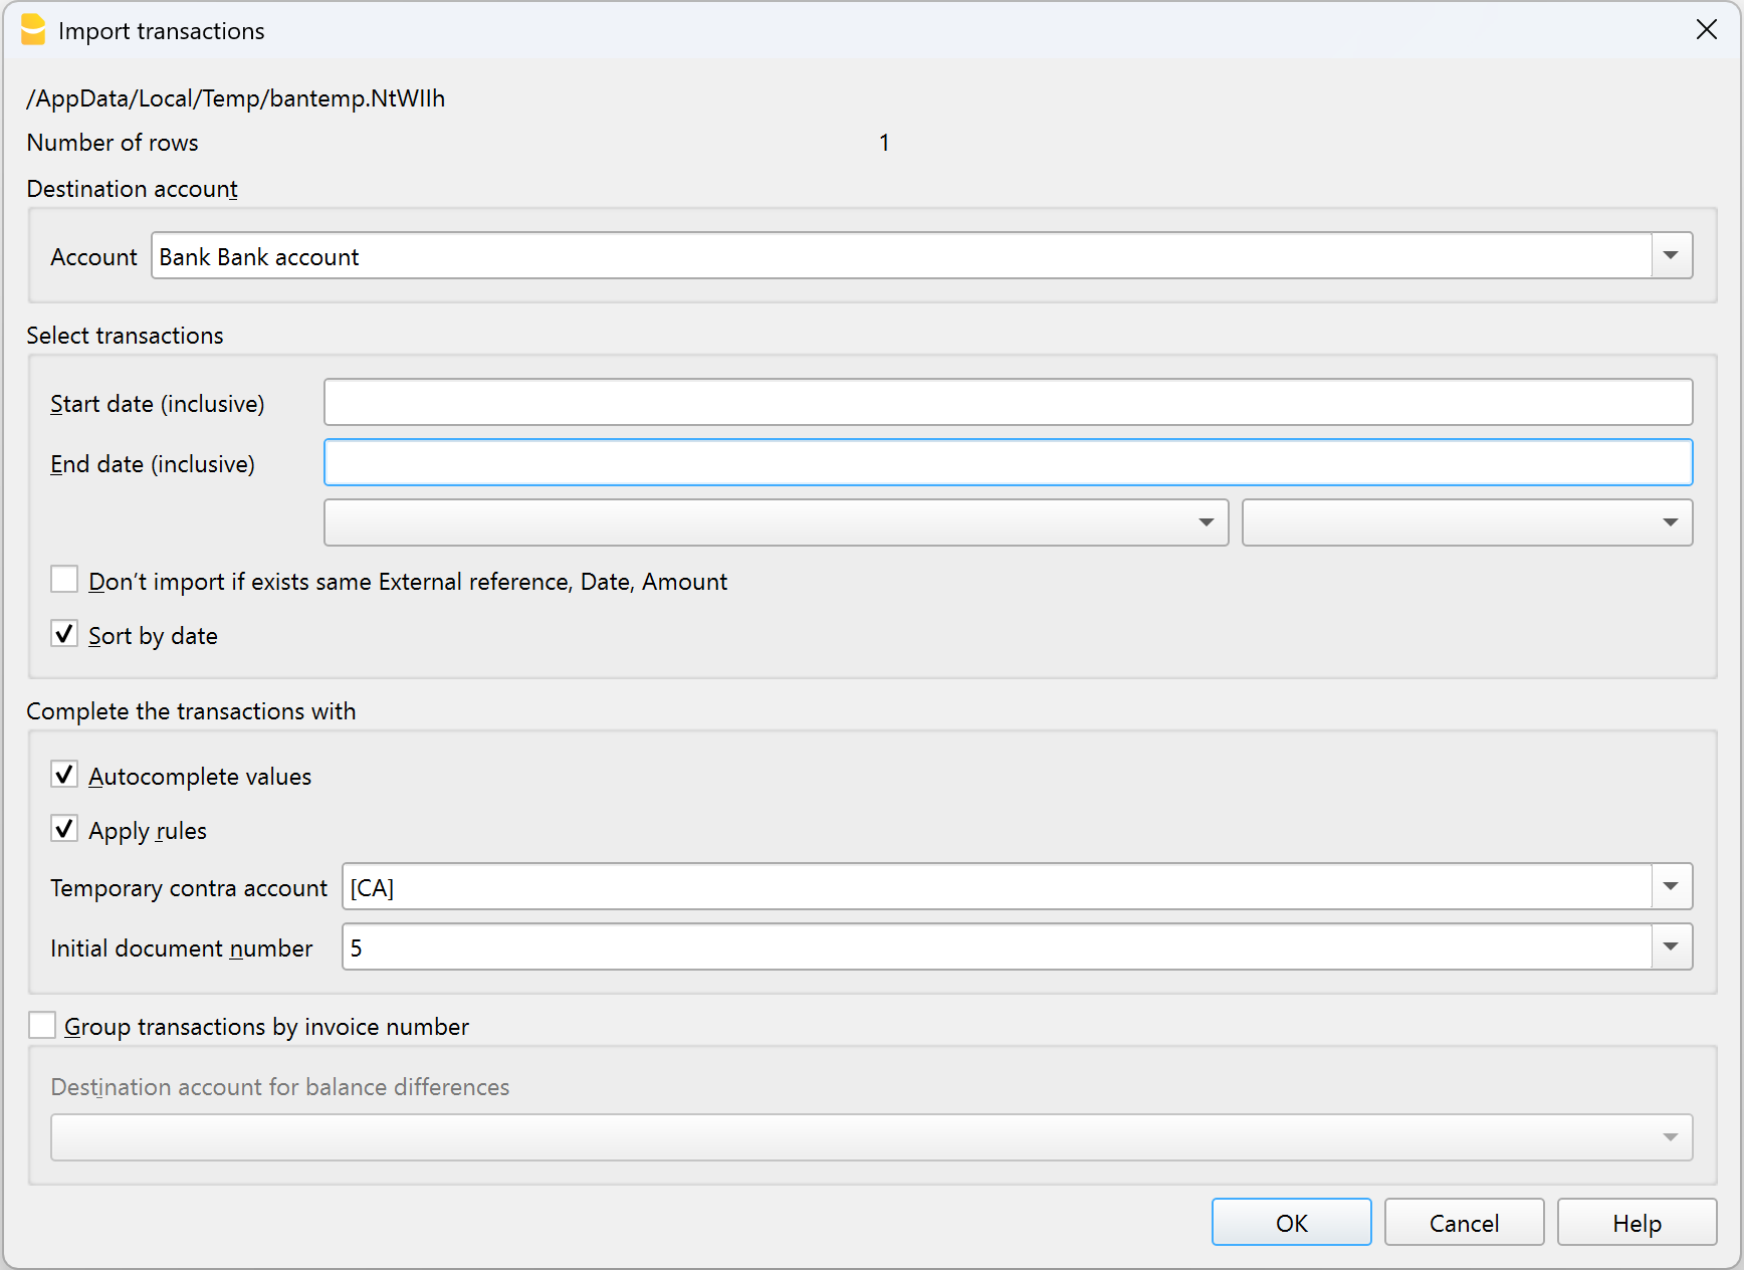
Automatically import your bank, postal, credit card or PayPal transactions into the Transactions table, avoiding manual entry.
- CSV and ISO 20022 (camt.53) formats are supported.
- After importing, just add the account and your accounting is immediately updated.
Completion rules
With Completion rules, you can fully automate the entry of imported transactions. The program recognizes the transaction description and automatically fills in the account, VAT code, and amount. Perfect for those who regularly import statements and want ready-to-go accounting without manual input.
Rules are only available in the Advanced plan.

Integrated calculator
In any Amount-type cell, you can type formulas (e.g. =100*1.07) and press Enter: Banana will automatically calculate the result and insert it into the cell.
A quick way to do immediate calculations without opening external tools.
Copy total
This feature allows you to copy to the clipboard the sum of the selected cells in the Transactions table: just select the amount cells you need, click on “Sum” at the bottom next to Zoom, and paste the result where you need it.
Run command (F6 key)
The F6 key (or Cmd+6 on Mac) performs contextual actions related to the active column, such as:
- recalling a recurring transaction,
- auto-completing a previously used text,
- inserting a progressive number.
You will find all options in the Edit > Run command menu.
Word wrap
If a text is too long, you can view it entirely using Format > Row height auto-adjust, which automatically adjusts the row height to display all content.
Most commonly used functions for checking and detecting errors
Below is a list of the main functions for checking and reporting errors.
Balance column
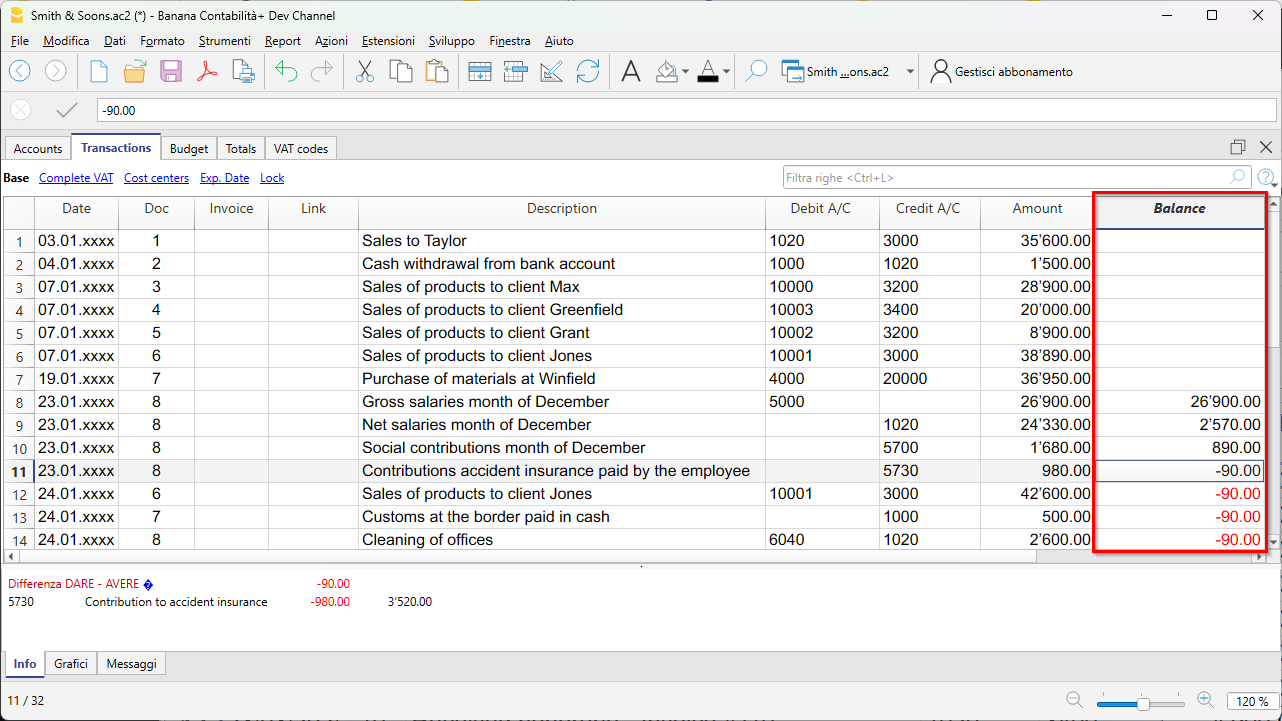
The Balance column, available in the Transactions table, shows the Debit/Credit or Income/Expense balance in real time.
Any differences are immediately highlighted so you can correct them right away.
Check Accounting command
From the Actions > Check Accounting menu, Banana verifies all operations and immediately signals any errors, missing accounts or differences in totals.
It is the ideal tool to use before closing a period, preparing the financial statements or the VAT report.

Totals table
The Totals table provides a concise overview of your business performance, with totals for the main groups.
It is useful for checking the overall balance and verifying the consistency of balances.

Temporary filter and sort rows
The temporary filter and sort functions let you display only the rows you need — for example, a period, an account or a customer — without permanently changing the order of the table. When you remove the filter criteria, the data returns to its original order. Perfect for quickly analyzing and correcting transactions.

File Menu
The File menu in Banana Accounting gathers all the main commands to create, open, save, export, print, and share your accounting files.
From here, you can manage the basic document information, set up the printing options, add your logo, generate PDFs or reports, send files by email, and quickly access your recent or favorite documents. This way, you always have the essential tools at hand to fully organise and use your accounting files.
For detailed explanations of the commands, click on the links in the menu on the left.
Create a new file
To create a new file, go to the File menu and click on the New command.
This command opens the window for creating a new file. From the same window you can access all available templates. We recommend that you start from an existing template and customize it with your data. The window that appears offers the possibility to create a new file in three different ways:
- Using an existing Template (recommended choice)
- Copy data from an existing File
- Use a New empty File
Please note: those who have subscribed to the Professional plan of Banana Accounting Plus, while creating a new file, see the message: Active plan: Professional Plan. The functions of the Advanced Plan are available up to 70 transaction rows. This message can be ignored and automatically disappears once the 70 transaction rows are exceeded.
Start with one of our templates
This will generate a new File based on one of the existing templates. There are multiple templates suitable for every legal form and business.
According to the selected Region, the models available in the language of the nation are displayed. The image shows the templates in English language for Switzerland.

- File menu > New
- In the Region field, select your country/language
- In the Category field, select your activity's category (business, private, non profit, ...)
- In the Type field, choose the type of file you want to create (Cash Manager, income/expense accounting, double-entry accounting, ...)
- You can also search for a template by entering a keyword in the Filter by box.
- On the right side of the window, select the template that most closely matches your needs.
- Click on the file and confirm with the Create button to open the selected template.
All the files with the VAT option have the VAT Codes table adjusted to the new rates.
The chart of accounts can be adapted to your requirements (change of account description, insert or delete groups, sub-groups, etc.)
Save the file with a name
Once you have opened the template with Banana you can save it with your own name by choosing the File menu > Save as command:
- Select the destination folder
It is useful to create an “Accounting” folder for each year, so that you can save the accounting file and also the documents for that year. We recommend that you also consult the page Organize your work. - Select a file name. We recommend a name containing the company name and the accounting year (for example smith_company_2025).
- The software will add the .ac2 extension, typical for the Banana Accounting files.
Adapting a template
- Edit the File properties
- Adapt your Chart of accounts
- Enter your bank accounts.
- Enter or edit the accounts to fit it to your requirements.
While going along with your work, you will still be able to add or edit accounts, if new needs arise.
Start with a Tutorial
Tutorials are existing templates, which contain within them example accounting data (opening balances, entries, budgets, ...). A tutorial is not available for all templates.
The tutorial files are useful for understanding how to structure accounting within a certain template. The example data entered are for demonstration purposes only and can be changed, deleted or replaced with your own data at any time.
When you select a template and it has a tutorial file, the button Create from Tutorial automatically appears next to the template detail description.

Start from an existing File
Starting from an existing file or template, without modifying the existing file.

There are several possibilities to copy data:
- Open the file that is to be your template via the Browse button and indicate the path to locate your file.
- Create a copy of the open file, using the File > Save As command.
- Else, you may create a copy of the open file via the Tools > Create File Copy command. Choose which data to keep in the dialog window. If none of the three options are activated, a file is created with the chart of accounts only.

- Save the file in the folder where you wish to keep the data (normally in the documents folder). Enter the company name and the accounting year as file name, for example smith_company_xxxx.ac2.
- If you are taking over an existing accounting file, you will also need to enter the opening balances in the Opening column.
- If you are working in a multi-currency file, you need to update the opening exchange rates.
Starting from a new empty file
You will be starting from scratch, so you will need to set up the basic accounting data and the entire Chart of Accounts (not recommended).

- Menu File > New.
- Select your country/language
- Select your category
- Select your Accounting template
- On the bottom of the list click on New empty.
- Setup the Outline to create new file

- Setup the File and accounting properties
- Save with File Name.
- Create the Chart of Accounts structure
Related documents
- Income and expenses accounting and Cashbook
- Double-entry accounting
- Double-entry accounting with multi currency
- Utilities documents
Transferring to a new year
When transferring to a new year, there is a specific procedure to follow, in order to create a new year's file and automatically carry forward the opening balances.
New file settings
When the program creates a file with new characteristics, you need to setup the outline of the new file.
Outline to create new file
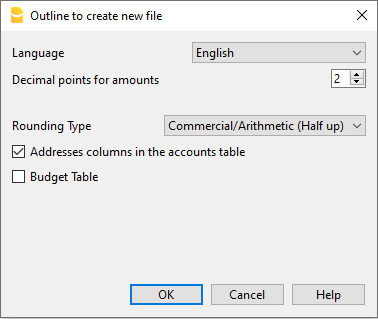
Language
The language used for the columns headers of the various tables.
Decimals and rounding
Decimal points for amounts
In order to avoid accounting differences, the number of decimal points for the amounts is fixed for each file. Two decimal points are normally used, but there are currencies where decimal points are not required so 0 needs to be inserted.
For other currencies that use multiple decimals such as the Tunisian Dinar or crypto currencies such as Bitcoin (9 decimal places), Ethereum (18 decimal places) the appropriate number must be indicated.
Accounting can be managed with amounts of up to 27 decimal places.
Decimal points for amounts in foreign currency
When using a multi-currency accounting, the number of decimals for the amounts in foreign currency must be defined. For example, if the accounting is in EUR and you are managing crypto currencies such as Ethereum, you must enter 18.
Generally, the number of decimals must not be less than the number of decimals in the base currency.
Rounding type
The rounding is applied to amounts with decimals that go beyond the set number of decimals.
If 2 decimals are set, this is the type used to round the digits over two decimals.
Depending on the methods used, the following amounts: 1.005; 1,015; 1,025; 1,035 will be rounded in a different way.
- Commercial/Arithmetic (Half up) rounding to the next whole number: 1.01; 1.02; 1.03; 1.04.. In accounting, this is most commonly used.
- Banking (Half average) rounding up or down towards the nearest even number: 1.01; 1.02; 1.03; 1.04.
Functionalities to be included
For more information on the functions to be included see:
Address fields in accounts table
When this option is activated, the Address view is created in the Accounts table. In this view, the user can enter the addresses of clients, suppliers and members.
Budget Table
When this option is activated a Budget Table is created, where the user can enter his budget transactions.
Accounting files, in different languages can thus be created, and with different decimal points. In order to change the language or the decimal points once the accounting file has been created, the accounting type must be converted via Tools → Convert to new file from the menu.
Accounting with multiple languages
With Banana Accounting Plus, you can create accounting files in different languages, and present the Balance Sheet and Profit & Loss Statement in the language you need.
The available languages are: English, Italian, German, French, Spanish, Portuguese, Chinese, Dutch.

The different languages
- Program language
The one used for the interface, menu dialogues, etc.
You can change it from the Tools menu → Program options.
See red box 1 and 3 in the image above. - Documentation in different languages
You have a complete documentation in different languages, easily accessible by clicking on the help button. - Accounting file language
See red box 2 in the image above.When you create an accounting file, the columns are set in the creation language.
- The language of the column and table header
You can change it at your convenience. For example, instead of using the term VAT, you can use the abbreviation that best suits your country's requirement. - The content in any language
In the cells you can enter texts in any language. - Additional columns for other languages.
You can add columns to have the Balance Sheet and the Profit & Loss Statement in different languages. You can create columns for other languages in the Transactions table and also in all other tables. - Views in different languages
You can easily switch between different languages and just print the output in the desired language. - Balance Sheet and Profit & Loss Statement in different languages
You can customize the printout, and just choose to show the required columns in the final reports.
How to change the file creation language
Each document on Banana Accounting Plus is a separate file. The language of the file is separate from that of the program and is defined when the file is created. (File menu → New).
Column names and headers are assigned at the time the file is created, the creation language is then used.

To change the language of the file and columns, you need to re-create a new file:
- From the Tools menu → Convert to new file command
- In the open dialog box, select the file type equivalent to your existing file and click OK
- In the next window choose the new language of the file and the type of rounding, then click OK
The program creates a new file identical to your previous one, with the new language settings. This new file must be saved with a new name.
Change the current language of the file
The current language is the one the program uses to display the wordings, such as "Opening balance" in the account card or the dates in the reports.
Normally, it will be the same as the creation language, but it may be changed in File properties → Other.
Change the column headings
You can change the column header with the Data menu → Columns setup.
Add columns for different languages
In the Accounts table and also in the other tables (Transactions, VAT codes), you can add additional columns where you can enter the descriptions in other languages.
- From the Data menu →Tables setup → Add new column command
- Use the name of the language (e.g. German, Chinese, etc.) as the column name.
- In the newly created columns, for each row, complete the description in the language that has been added.
Create Views for each language
Create a view for each language to have printout only with the desired language.
- Data menu → Tables setup command
- Create a View for each language.
In each table you can have different views for different languages, or the views that include columns of different languages. - Customize your printout in the language you require. If you want to print in different languages you can create one Customization print for each language so you don't have to change the settings each time, but have them already set up.
Enhanced Balance Sheet for each language
Once you've added the language column to the Accounts table, you can have it appear in the Enhanced Balance Sheet report as well.
- Open the Enhanced Balance Sheet with groups.
- Choose the Customization you want to print.
- In the Customization section with the Duplicate command Create a new Customization for your language.
As customization name, give the name of the language. - Go to the Columns section:
- Advanced button for the Balance Sheet columns
- Add button
In the section of the Accounts table:- Make the column of the language you are interested in visible.
- Hide the Description column of the default language.
- Repeat the operation also for the Profit and Loss columns.
- Next time when you open the Enhanced balance sheet with groups, you will have your language already set up.
- Include the Customization in the Favorites menu.
This allows you to access your report faster.
The predefined texts of the report (date etc.) are displayed in the current accounting language. It may be necessary to change the current language from time to time.
Extensions
If you have specific needs in different languages, they can be programmed as Extensions.
Close / Close all
Close
This command closes the active Banana Accounting file.
Close All
This command closes all open Banana Accounting files.
Open and find a file
To open a file, choose the Open command from the File menu, or use the corresponding icon in the toolbar.
- Accounting files can be opened if they are located on the local computer or accessible through a network drive.
- If they were sent via email, you must first move them to a folder on the computer.
- Only one person at a time can open the file to make changes. If changes are made to a protected file, or one already in use, you must choose a different file name to save it.
- The program notifies that the file has been opened in read-only mode ( the file cannot be changed or saved) in the following cases:
- The file has already been opened by the same user or in another session.
- The file is on non-rewritable media (CD-ROM).
- The file is in a temporary folder that is not writable.
- The file is write-protected or the user does not have permission to modify the file.
- If the file is password-protected, the password dialog will appear.
When the previous accounting year is protected by a password and you want to run the Enhanced Balance Sheet with Groups command, the program will ask for the password of the previous year.
Otherwise, it is necessary to follow one of the recommendations provided in the notes on the page Enter password.
Opening multiple files in the same instance of Banana Accounting
To open multiple files at the same time, go to File > Open and select the desired file. Repeat this operation for each file you want to open.
The files are displayed layered in the same window. To switch from one file to another, use the Next window command available in the toolbar.
Opening multiple files in separate instances of Banana Accounting
It is possible to open multiple files in different instances of Banana Accounting:
- Windows
- Open the first Banana file as usual.
- To open additional files, right-click the program icon in the taskbar at the bottom, select Banana Accounting, and open a file. Repeat this operation for all the files you want to open.
- Mac
- Open the first Banana file as usual.
- To open additional files, open the Terminal and type the following command: "open -n -a BananaPlus", then open a file. Repeat this operation for all the files you want to open.
Note: If a file is already opened in another session, the program will notify you that the file has been opened in read-only mode.
Searching for Banana files on Windows computers
Banana Accounting files have the .ac2 extension. The search function varies depending on your version of Windows.
- Windows 10: click on the Search icon on the Taskbar, type .ac2 or the beginning of the file name, then click the Documents arrow.
- In Windows File Explorer, type the extension "*.ac2" or the name of the accounting file and let Windows search for it.
- In Banana, when the Open File dialog opens (File menu > Open), type the extension "*.ac2" in the search field at the top right, then click the search entire computer icon below or select the folder where you want to find the file.
Searching for Banana files on Mac computers
- In Banana Accounting, in the Open dialog File > Open, type "ac2" or a word from the file name in the Search box (top right). Use the icons to select where to search (entire computer or selected folders).
- Open the Finder and type "ac2", or the beginning or a word from the name of the file you want to find in the search box.
- Right-click on the Finder icon, click Search, and then enter "ac2" or the file name.
Enter password
When the user opens a password-protected file, a dialog box appears to enter the password.
- The file password is set in File> File and accounting properties > Password tab.
- This dialog also appears with the first execution of some commands, which require access to a password-protected file, such as the previous year's accounting.

NOTE
When the previous year is password-protected, and you want to execute the Enhanced Balance Sheet with groups command , or resume transactions from the previous year, the programme will ask you to enter the password for the previous year.
To avoid being repeatedly asked to enter the password, one of the following steps must be taken:
- Enter the same password also in the new year
- Save the file after entering the password for the previous year (the password will remain stored)
If, however, you move the new year or the previous year to a new folder, you will have to re-enter the password (this is the case if you open documents from shared folders that may have different paths from computer to computer). If the file refers to several years, e.g. 2022, 2021, 2020, ... it will be necessary to open each file (thus 2022, 2021, 2020, ...) and re-enter the password for the previous year (2021, 2020, ...) in each year, then save each file. - Delete the previous year file link in File and accounting properties > Options > File from previous year (this solution is only recommended if the previous year link is no longer required)
File compatibility with previous versions
The Banana Accounting files are compatible with the previous versions starting from version 5.12.
This means that the files can be read and written by any version of the program.
We try to preserve compatibility as much as possible, so that files can be exchanged with different versions of the program.
- Newer versions implement new features that are not available in earlier versions. Using these features leads to incompatibility. When opening the file with an older version of the program, you are warned not to use the file, because there may be errors in calculations and/or data loss.
- Newer versions offer new applications. These cannot be opened with older versions.
Below we present the list of changes that lead to incompatibilities. If you use these features you should update the program to the new version.
Version 10 (BananaPlus 2020)
- Using the new Links column.
The new version introduces the possibility of linking a document in every row of any table, through the menu Data → Links.
In previous versions, this possibility existed only in the Transactions table. The ability to add links in any table is a feature that is highly requested by users; unfortunately, it was not possible to implement it, maintaining the compatibility of files created with previous versions. If links are used, the files are no longer compatible with previous versions.
In the new version, when the file is opened, a Link column is added to each table. The data contained in the DocLink column of the Transactions table is copied to the new column, and the DocLink column is deleted. - Accounting Applications:
- Use of the new Segments column.
- Use of VAT code for the Reverse charge.
- Use of the Payments column.
- Use of the BeginFormula column in the Budget table.
- Timesheet
- Added Columns "TimeWork", "TimeAbsence".
- Column Supplement.
- Applications Invoices and Inventory
They are not supported in previous versions.
Version 9
- Accounting applications:
- Items Table.
- Quantity columns in the Transactions table.
- Accounts and VAT codes with lowercase descriptions.
- New features for the Enhanced Balance Sheet with groups.
- New features for the PDF Archive command.
- New Print functionality.
- Timesheet application
It is not supported in previous versions.
Version 8
- Accounting applications:
- Budget table
- Documents table
- Library application
It is not supported in previous versions.
Version 7
- Accounting applications:
- Modification of VAT Base amount in the Transactions table.
File properties
When a new file is created, the basic data need to be entered in the File menu > File and accounting properties.
The file properties (Base data) can vary depending on the chosen accounting type.

For the explanations of the different tabs please refer to the menu on the left.
Accounting Tab
Access this section via the File > File and accounting properties > Accounting section.
Left and right headers
These are the two empty cells at the top where any desired text can be inserted which will be used as a header for print-outs (left and right).
Opening date
The opening date is the date when the accounting begins. It can also be left blank. If a date prior to the opening date is inserted when entries are made, the program will give an error message.
Closing date
This is the closing date of the accounting. It can also be left blank. If a date greater than the closing date is inserted when entries are made, the program will give an error message.
Base currency
The code of the currency in which the accounting is being handled. You can enter any currency code, even the one that are not in the list. When the code of the basic currency is being changed, the program changes the column headers for the amounts in basic currency using the new code.
In the multi-currency accounting files it is mandatory to select the basic currency, which will work as the functional currency, the one used for the calculation of the Balance sheet and Profit & Loss statement.
Changing the Basic currency symbol
If you change the basic currency symbol the program will not change the existing amounts. We advise you to change your basic currency symbol only if you don't have yet entered any opening balances and any transactions.
Accounting file WITHOUT foreign currencies
You can replace the basic currency symbol with the new symbol.
Accounting file WITH foreign currencies
To change the currency code in accounting with foreign currencies refer to the following page Change the basic currency.
Options Tab
This section is accessed via File > File and accounting properties > Options section.

Transaction date required
If this option is activated and then a transaction is entered without a date, there will be an error message.
Recalculate totals manually (F9)
If this option is activated, the program will not automatically recalculate the principal groups of the accounting file, but the user needs to use the F9 key.
File from previous year
By using the Browse button, the user can select a file from the previous year.
Smart fill with transactions from previous year
By enabling this function, the program stores the transactions from the previous year. When the new accounting year is created, during the entry of new transactions, Smart Fill automatically suggests entries that were previously used, making data entry easier and faster. This helps reduce errors and save time, especially for recurring or similar transactions from one year to the next.
If you do not wish to carry over the descriptive texts into the new year, simply disable the option.
Use the minus sign (-) as segments separator
When this option is activated, the segments have to be entered in the Transactions table with the minus (-) sign preceding the segment code. When this option is deactivated, the segments need to be entered with the colon sign (:), as in the chart of accounts. The colon needs to always precede the segment code.
Records (+/-) cost centers according to the category
This function is only active for Income & Expenses accounting and Cash Manager. By activating this box, the amount is entered in the cost center (positive or negative) according to the category.
If, instead, this option is not active, in order to enter a negative value, it is necessary to enter a minus sign before the cost center (-CC).
Related document: Text input, edit and Smart fill
Address Tab
This section is accessed via the File > File and accounting properties > Address tab.
In this section it is possible to enter data concerning the company or person whose accounting is managed.

Foreign currency
This section is accessed via the File > File and accounting properties menu >Foreign currency section.

For the explanations of the different tabs please refer to the corresponding page Starting a multi-currency accounting.
VAT/Sales tax
This section is accessed via the File > File and accounting properties menu > VAT tab.

For the explanations of the different tabs please visit the corresponding page File properties (VAT/Sales tax tab).
Other Tab
This section is accessed via the File → File and accounting properties menu → Other tab.

Current language
There are some file texts that the program generates automatically, (e.g. the lines of the Totals table, the transactions on the account card, and the printout of the Enhanced balance sheet); in this tab, the user can indicate the language for these texts (usually the same as the creation language).
Creation language
This is the language chosen and selected when the user creates an accounting file; this language is used for the column headers. If the user wants to change the creation language, then it is necessary to convert the file to a new one using the Tools menu → Convert to new file command.
Extensions
It is possible to indicate extensions of Banana Accounting. When the file is opened, the program will automatically install the extensions. They can be used for templates or files that are combined with extensions. Other users who open the file receive directions or commands to install the necessary extensions.
The list shows all extensions that can be installed.
Extensions' keywords
Enter a keyword contained in the Banana Accounting extension. Usually these keywords are specified in the installation instructions of the extensions; most extensions don't use keywords to restrict viewing to certain files.
If a script has the @docproperties attribute, the command will be visible in the Extensions menu only for those Banana files that have set the same keyword in the Extensions field. To set multiple keywords, you need to separate them with the ; (example: datev; donations).
Password Tab
This section is accessed via the File → File and accounting properties menu → Password tab.

Files can be protected by using a password.
Enter a password for a file without a password
Confirm old password
Leave the cell empty.
New password
Enter the password.
Confirm new password
Enter the same password that you entered in the New Password box
Change an existing password
- Enter the existing password.
- Enter the new password twice.
- Confirm with OK.
Password compatibility with old versions
Activate this option if you want your password to be compatible with the previous Banana Accounting versions.
This option not recommended because the password is saved in a less secure mode.
How to cancel a password
- Enter the existing password.
- Leave the boxes for the new password empty.
- Confirm with OK.
Forgotten password
For information about a forgotten password, please refer to the Questions and Answers page, Password unlock paragraph.
Note
Using a password does not give a high level of protection. In order to render the data truly inaccessible to third parties, it is necessary to have the appropriate cryptographic software.
Text Tab
This section is accessed via the File → File and accounting properties menu → Texts tab.

In this tab it is possible to enter different keys in order to save extra information, such as the accountant name, for example. These keys and the resulting texts can be taken over and used in scripts.
Key
In this field, input the reference text (e.g.: accountant name).
Value
In this field, it is necessary to input the value related to the key (e.g.: Ocean Avenue, ...).
Add
This button saves the newly entered data.
Remove
This button removes the selected Key.
Save file
Banana Accounting files are not saved within the program itself, but on the drive selected by the user, just like any other file, such as Word or Excel. Banana accounting files have the extension ".ac2", while the program has the extension ".exe" (Windows), ".dmg" (Mac), or ".deb, .rpm, .run, .tgz" (Linux).
Where and how to save files
Banana Accounting files are saved on your computer or on an external drive, such as: external disk, USB stick, Google Drive, Dropbox, or other Cloud services.
To save the file, choose from the menu File > Save As:
- Open the destination folder
- Give your file a name.
By default, .ac2 files are saved in the Documents folder, but you can change the destination folder. Once you've saved the file with a name, use the Save command to save your changes. Each time you save, the previous file is overwritten.
Banana Accounting can save files to any drive that is recognized by the operating system, such as a rewritable disk. From non-rewritable media (CD or DVD), Banana Accounting can only read files.
Saving when closing the program
Every time the accounting data is updated and the work has not yet been saved, a warning message appears when closing the program:
- "The current document xxx.ac2 has been modified. Do you want to save it anyway?"
If you use the Do not Save button, all data will be lost. You must click the Save button to save your changes.
If you want automatic saving when closing files, you can activate the option from the menu:
Tools > Program Options > File Management and enable the Automatically save when you close the program option.
Make sure the data is correct, otherwise it will be saved as is.
Saving a shared file
When multiple users need to use the same file, they cannot use it at the same time. The first user to open the file can save it. The other users open the file in read-only mode.
- Only one user at a time can save the same file.
- Saving is only possible if the file is not in use by others.
Managing files for different accounting entities
To manage multiple accounting files, before saving, we recommend:
- Creating a folder for each company
- Creating a subfolder for each fiscal year.
See also: Organizing work.
Saving and recovering data in case of crash
Banana Accounting automatically saves your work in a temporary file at regular intervals. The time interval between one auto-save and the next can be customized via the menu:

This temporary file is deleted each time the file is saved normally by the user.
In the event of a computer crash or power failure, when restarting the program, if Banana detects an undeleted temporary save file, a window appears as explained on the page File Auto-Recovery.
In this window, the user has the option to confirm recovery. If accepted, the file will be opened and can then be saved manually.
Saving the file with a password
Each file saved on the device and in the selected folder can be protected by a password for added security.
Files are saved in the same way as those without a password.
File compatibility across different operating systems
Files created with Banana Accounting have the extension “*.ac2”, regardless of the operating system used. A file can be saved in Windows, opened and edited on Mac, and then reopened in Linux or Windows.
Therefore, .ac2 files are compatible with:
- Windows
- Mac
- Linux
.ac2 files can also be sent via email and opened with Banana Accounting regardless of the operating system used.
Copying or moving files
*.ac2 files can be copied or moved:
- From one folder to another
- Use Windows Explorer or Mac Finder to locate the folder where the files were saved.
- Copy and move them to the new destination folder (once pasted, if needed, they can be deleted from the previous folder).
- From one computer to another
- By sending an email (as attachments) and saving them on the new computer.
- Files can be saved on a USB stick or an external drive and then moved to the new computer:
- Open the file you want to save.
- From the File menu > Save As, select the desired destination drive.
- You can also copy by opening Explorer and dragging the file to the selected drive.
Saving to Cloud systems
Banana Accounting Plus does not have its own Cloud, but it allows you to work with your own. The program is installed on your computer and runs locally.
As for accounting files, they belong exclusively to you and you can save them wherever you want, including on services like Dropbox and Google Drive that keep files synchronized with cloud storage services.
In the cloud, Banana Accounting overwrites the *.ac2 files and deletes the *.ac2.bak file. The deleted files list in the cloud contains previous versions of the *.ac2.bak file.
Viewing changes
Banana Accounting, Android version, works directly with the Dropbox server. If you make changes on your PC, you usually need to wait a few seconds to see the updates on the server and thus in the Banana Accounting file.
To ensure that the file is properly synchronized with the server from your computer, the file should be marked with a green checkmark.
If you do not see the synchronization symbols (green, red, blue), you need to update the Dropbox application installed on your PC.
Another way to check the synchronization status from your PC is to click the Dropbox icon in the lower taskbar:

Additionally, on Android synchronization does not occur while working with the app. You need to close and reopen it.
Warning:
Banana Accounting cannot detect if files are opened and modified simultaneously on multiple computers. Therefore, it may happen that one person deletes some data while another adds new entries. Only the most recently saved copy of the file is retained. It is important to avoid working on the same file at the same time.
Deleting and renaming files
Banana Accounting does not have a delete or rename function for files; to do this, you must use the appropriate function of the operating system (Windows Explorer or Finder on Mac).
Related resources:
How to minimize the risks of data loss
Security copies (backups)
- For Mac use the "Time machine" function.
- For Windows use the "File History" function.
- Dropbox, OneDrive, iCloud, Google Drive offer the possibility to keep previous versions of your files.
.bak files
The standard format for Banana Accounting files is the .ac2 format. When you save your .ac2 file and the save operation is successful, Banana Accounting:
- Replaces the content of the existing file with the updated accounting data.
- Automatically creates a .bak file with the previous data, but not from the most recent save.
Save operation behavior:
- The data is saved in a temporary file.
- If the save operation is successful:
- The original .ac2 file is renamed by adding the ".bak" extension to the filename.
- Any existing ".bak" file is deleted.
- The new data is saved in the .ac2 file.
The .bak file represents the state of the accounting data at the moment the file is first opened during the current session, even if subsequent saves are made. The goal is to preserve the file as it was before it was opened.
The Create backup copy (.bak) option is enabled by default, but it can be disabled from the menu Tools > Program Options > File Handling
Recovering data from a *.bak file
Important: to update your accounting, only use the file with the ".ac2" extension and do not open the file with the ".bak" extension, otherwise it will be overwritten and all recent changes will be lost. Use it only to recover data.
Recommended recovery procedure:
- Locate the ".bak" file using the File Manager
- Rename the ".bak" file by removing the ".bak" extension, leaving only ".ac2"
- Open the renamed file with Banana Accounting
If the file does not appear in the folder:
- Open the folder where the accounting file is located.
- Open the file with the extension .bak. If it does not appear in the folder, select File type> All files (*.*) in the window below.
- Once the file is opened, save it as a file. Usually it is given the same name as the lost file.
Automatic saving
While in use, Banana Accounting automatically saves changes to a temporary file.
- When the program is closed or a manual save is performed, the temporary file is deleted.
- In case of an unexpected computer shutdown, the program will offer to recover unsaved data upon restart.
Damaged .ac2 file
Events such as hardware failures, viruses, or errors in file transmission via email can damage documents.
- It is always advisable to have backup copies.
- If a file is damaged, our Support Service can evaluate, for a fee, the possibility of recovering the data.
Recover autosave file
This dialog appears when the program closes unexpectedly, and it was not possible to save changes made to the file.
When the program is reopened, it detects that the autosave file (temporary file) has not been canceled, and then asks if you want to retrieve the file.

You can choose from the following options:
- Recover
- The autosave file is copied replacing the original file
- The original file is renamed as indicated in the dialog window
- Don't recover
- The program deletes the autosave file.
- The program opens the original file.
- Ignore
- The program keeps the autosave file and doesn't open any file.
- Next time you open this file, the program will warn you that an autosave file with unsaved changes was found
If the program stops working
If the program is closed normally, it asks whether to save the modified data, and the autosave file is deleted.
The program may however unexpectedly shut down for a number of reasons:
- A power outage or another event that caused an immediate arrest of the operating system
- A problem that led to the crash of the program
- Due to another program or to a situation of the operating system or driver that caused the program to stop.
Try to restart your computer and use the program without other programs.- A flaw in the operating system or a faulty program can cause an interruption of Banana Accounting.
- A computer fault (memory error)
- A virus or some other problem
- A problem in the Banana Accounting software
Usually when, repeating the same command always causes the program to crash.
If the program stops in completely different situations, it is more likely that the problem is due to a computer or operating system (see above)- First of all, make sure that you have the latest version of the program.
Install the updates if necessary. The problem could have been solved in the meantime
- First of all, make sure that you have the latest version of the program.
- Due to another program or to a situation of the operating system or driver that caused the program to stop.
Contact technical support
Countercheck the situation in which the program stops.
- It is important to understand in what situations the program stops, so that technicians can replicate the problem.
- When you contact the technical service:
- Describe the problem and how it can be reproduced - describe the error.
- Enter your system details (you can copy them under Tools menu > Program Options > Info System.
- If the problem occurs in relation to a file, send a copy of the file (removing confidential data).
Local copy of your work
One of the key points of any Desktop application is saving files. The user's work and the data entered must not be lost. Even in the case of a computer crash, the amount of work lost must be minimized.
A new strategy for saving files has been introduced with Banana Accounting+. From the user's point of view nothing has changed, but internally important improvements have been made to make the data saving process even more secure and solid, and to optimize it for use on cloud and mobile disks.
How it works
With the new implementation of the file saving and recovery process, Banana Accounting creates a local copy of the open file and then works on the local copy present in the device (pc, mobile, tablet) until the user saves the document. At this point Banana Accounting returns and saves the modifications in the source file. In the meantime, Banana Accounting regularly saves the modifications made to the document in the local copy.
Banana Accounting proceeds as follows:
- The user selects the file to be opened (source file)
- Banana Accounting create a local copy of the source file
- Banana Accounting blocks the opening of the source file to prevent modifications from multiple users
- Banana Accounting reads the local copy
- Banana Accounting regularly saves (by default every 2 minutes) the modifications made to the document in the local copy
- As soon as the user clicks on the Save button, Banana Accounting returns and saves the modifications in the source file.
- When the file is closed, Banana Accounting unlocks the source file and deletes the local copy.
- If the application cannot close or correctly save the modifications in the source file (electricity interruption or other causes), the local copy remains on the device and the its content can be recovered at the next Banana Accounting launch.
- If the file is temporarily not accessible (example if it is on a disconnected network disk or a USB pen), the user can keep working and the document modifications are saved in the local copy until when the source file is accessible again.
In other words the local copy is both a working document and a recovery document.
Advantages
The autosave feature is always active, so the work that could be lost (with the default settings for file recovery) corresponds at most to the work of the last two minutes.
Access to the file doesn't have to be continuous. Even if a file is temporarily inaccessible (e.g.: the file resides on a network disk or a disconnected USB pen), the user can continue working, and changes to the document are saved in the local copy until the source file is accessible again.
The local copy is not synchronized in the cloud. For this reason, the performance of the application is improved and the amount of data sent to the cloud is minimized.
This process is implemented in the same way on all operating systems: Windows, MacOS, iOS, Linux, Android and WebAssembly, regardless of where the file is saved.
Data recovery
In case of an interruption of the application, the local copy remains on the user's device. The next time the Banana Accounting is started, the application informs the user that changes have been found that have not been saved in the source file.
At this point the user has 3 choices:
- Open the recovered file
The user can decide whether to save the recovered file or to abandon the changes - Ignore the message
The user can later decide what to do - Cancel de recovered file
The recovered file will be canceled
The local copy remains on the user's device as long as the document remains in use or the changes have not been correctly returned to the source file. Once the file has been closed, the local copy is deleted.
The local copies are saved in a folder hidden under the system's user data. The user does not need to access this folder, access to this folder is not recommended. In case our support requires you to open this folder, you can access it through the menu Tools > Program Options > Advanced > System Info > Working copies path > Open path.
Keep in mind
This implementation:
- It does not replace a good backup policy.
- It does not replace a version control system.
Although this implementation is very secure and robust, we cannot guarantee that it will work 100% smoothly in all cases. For this reason, we encourage our customers to adopt a good backup policy and version control system.
Several operating systems provide backup and versioning functions. We ask you to browse the documentation of your operating system....
Create PDF dossier
Exporting to PDF allows you to create a complete accounting dossier, including reports and attached documents.
With Banana Accounting Plus you can export:
- The accounting file
- Reports (Balance Sheet, Profit and Loss Statement, VAT, etc.)
New! It is now also possible to export all digital attachments to the PDF file as well (supporting documents), linked to transactions through the Link column.
If the Link column is not visible, enable it from the menu Data > Columns setup > enable the DocLink option.
The Include attachments function is available only with the Advanced plan of Banana Accounting Plus. See all the advantages of the Advanced plan.
There is also another command, from the menu File > Create PDF, which instead allows you to print only the content displayed on the screen, that is, the current view.
PDF dossier configuration
The content and layout settings must be defined before creating the PDF directly in Banana Accounting.
The generated PDF dossier exactly reflects:
- The report settings
- The page setup
- The options selected at the time of export.
Report settings
The reports included in the PDF dossier use the settings defined in the Reports menu. To modify:
- Layout
- Periods
- Groupings
- or other report options,
access the Reports menu directly before exporting.
Function availability
The Include attachments function is available only:
- In Banana Accounting Plus
- With the Advanced plan
- and if file links have previously been entered in the Link column.
How to create a PDF dossier
To create the PDF dossier choose File > Create PDF dossier.

Base section
File name
Specify the name of the PDF file to create or select an existing file via Browse. If you choose an existing file, the program overwrites it with the new content.
Display file immediately
Automatically opens the newly created PDF dossier in the default PDF reader. Some browsers use caching systems. If you export the PDF multiple times, you may need to refresh the browser page to view the most recent version.
Page options
Header 1, Header 2, Header 3
You can enter up to three different headers that will appear in the PDF file.
Logo
If you have configured a logo via File > Logo setup, you can choose whether to include it in the PDF dossier.
Available options:
- None: the logo is not displayed
- Logo: the logo is included.
See page Logo setup.
Page options
You can include in the PDF dossier:
- Page numbers
- Page numbering restarting for each section
- The date.
Page format
Allows you to select the page format of the PDF dossier.
Save options
Include attachments
The Include attachments option adds to the PDF dossier all documents linked in the Link column of the Transactions table. Attachments are embedded directly into the PDF file. This makes it possible to have in a single file your entire accounting, your reports such as Balance Sheet, Profit and Loss Statement, etc., and all digital supporting documents.
Include section
Recheck accounting
Select this option to have the accounting rechecked before it is exported.
Include
Select the documents to include and display in the PDF Dossier (Balance Sheet, Profit and Loss Statement, Journal, etc.).
Depending on the selected View, each PDF document (Balance Sheet, Account cards, Journal, etc.) may display different columns and contents. To display digital attachments inside the PDF Dossier, it is also necessary to select the Journal item.
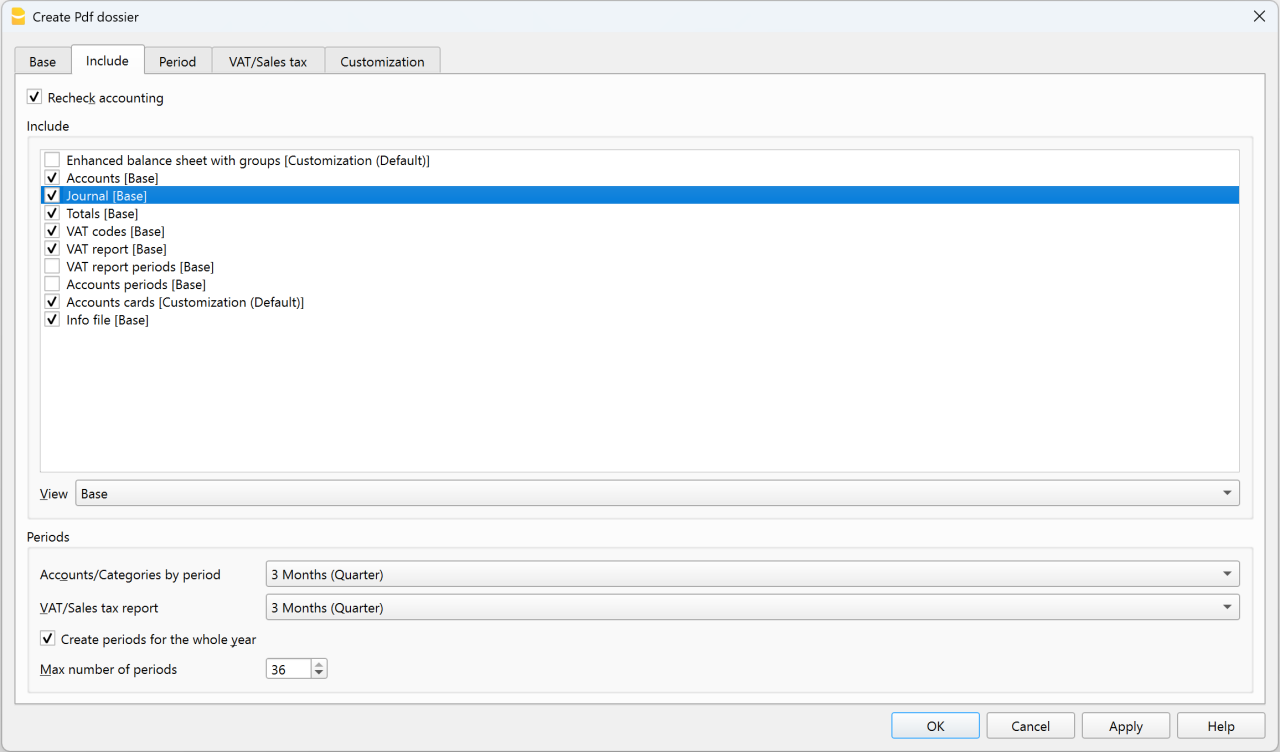
Enhanced Balance Sheet with Groups [Customization (Default)]
Customize the Enhanced Balance Sheet with Groups to adapt its presentation to your needs.
To improve the readability of the PDF dossier, you can choose not to display zero values.
Account Cards [Customization (Default)]
You can also customize the Account Cards so that the presentation of the PDF dossier suits your needs.
Digital attachments
Digital attachments are files inserted in the Link column of individual accounting transactions, such as receipts, invoices or scanned slips.
When creating a PDF dossier and activating the Include attachments option, the attachments are embedded in the PDF file. Once the PDF dossier is generated, on the Journal pages the paperclip symbol is displayed next to the transactions that contain a digital attachment.
By clicking on the paperclip, the attached document is opened and displayed.
Important notes
- The Include attachments option is available only if files have been added in the Link column.
- Digital documents (attachments) are included in the PDF dossier only if the accounting file (.ac2) and the documents are located in the same storage environment: all saved locally or all saved in the cloud.
- Furthermore, to ensure correct linking of attachments in the PDF dossier, digital documents must be organized in the same folder as the accounting file (.ac2) or in one of its subfolders.
PDF reader compatibility
Opening embedded attachments is supported by compatible PDF readers, for example:
- Adobe Acrobat Reader
- Foxit PDF Reader.
Some browsers may not allow opening attachments included in the PDF.
Advantages of the PDF dossier with digital attachments
This function allows you to always have all your accounting documentation in digital format and, at the same time, to easily share, even remotely by email, a single PDF dossier with trustees, auditors or tax authorities, avoiding paper binders and the sending of numerous separate files.
How to open a digital attachment from the PDF dossier
- Create the PDF Dossier with the Include attachments option enabled and the Journal section included.
- Open the PDF Dossier with a compatible PDF reader.
- Scroll through the document to the Journal section.
- Locate the paperclip symbol next to the desired accounting transaction.
- Click on the paperclip to open the attached document.
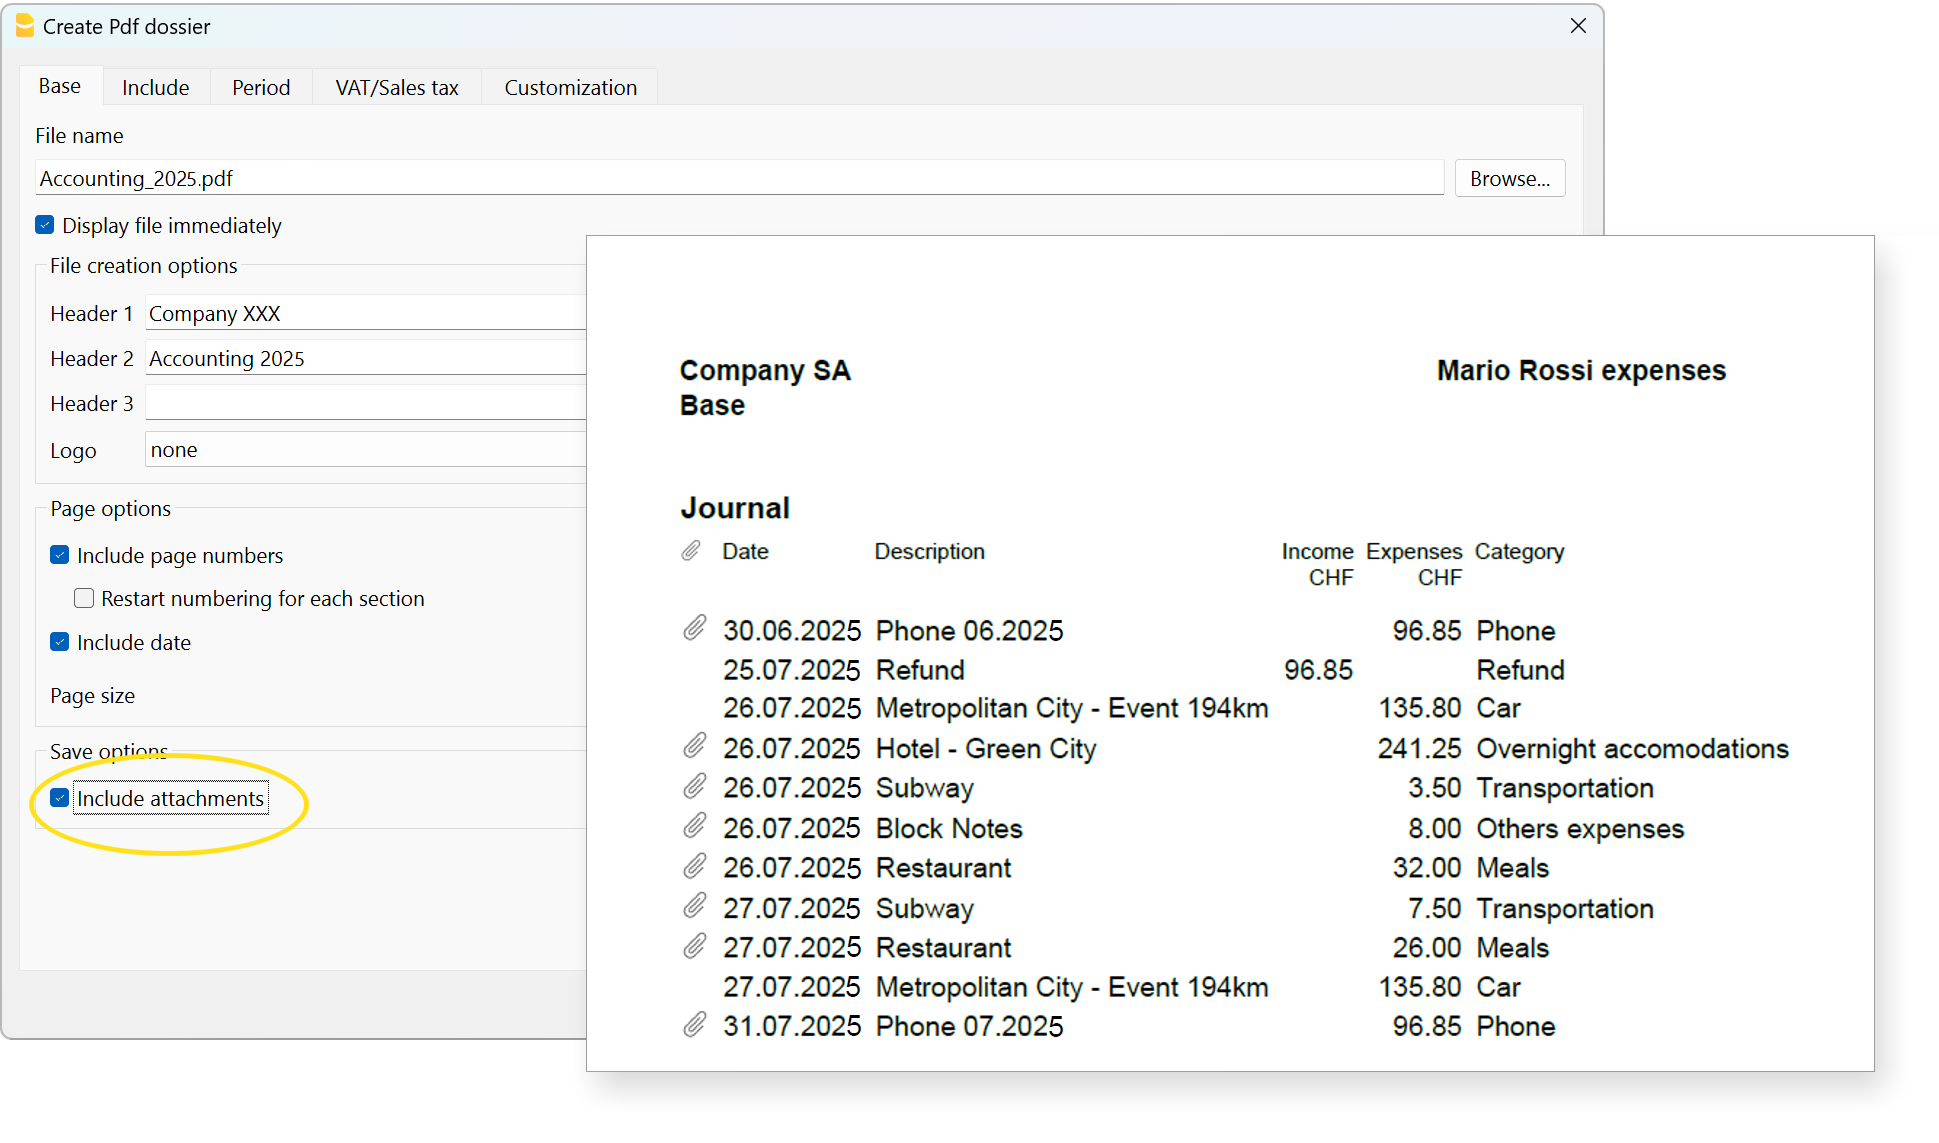
Technical notes
For issues related to PDF format or fonts see the Create PDF page.
Other sections
For explanations of the other sections, consult the following web pages:
Export file
Chose File → Export file command from the File menu in order to export several tables simultaneously.
In the Export file dialogue the following sections are also used:
- Those specific to the file type (see export formats).
- Include tab - to define the tables and the reports that must be included in the export
- Period (Accounting) tab, to define the period
- VAT tab (in the accounting files with VAT management)
- Customization tab
Printouts/preview
Print everything you see on the screen
In addition to the various available reports, Banana Accounting lets you print everything you see on the screen simply by clicking the File > Print menu.
Preview window
All printouts of the various accounting documents and invoices can be saved in PDF, HTML, MS Excel format and copied to the clipboard, allowing you to access them even after some time.

The button opens the Print Setup dialog of your operating system. Below is the dialog for Windows; those for other operating systems are similar. The choices you make are valid only for the current session; if you want to make permanent changes, they must be set through the control panel of your operating system (in this case Windows).
Landscape or portrait printing and other table print parameters must be set using the Page Setup command and they are different for each View.
Print selected cells only
When you have a selection of cells in the table, the Selection option is enabled and the preview and printout refer only to the selected cells. To print the whole table, simply disable the Selection option.
Page size
The page size is taken from the printer preferences. To change or correct the page size, go to the print preferences and select the desired format (e.g. A4). If you have already selected this format (A4), you must select it again to correct the page size.
Print to PDF
Most modern operating systems offer the option to select a PDF printer or to export to PDF directly from the print dialog. This method of creating a PDF has limited features compared to exporting to PDF from the Banana program.
- It is recommended to use the Print to PDF option if exporting to PDF has problems.
- Printing to PDF does not include attachments.
- Printing to PDF is not available for the Create PDF dossier function.
Export to other formats
The printout can be exported to different formats:
- Export to PDF
The format that keeps the printout characteristics. - Export to HTML / Excel / LaTeX
Formats for using the data in other programs.
Copy to clipboard button
The whole report is copied to the clipboard, so you can paste it into Excel or other programs, in these formats:
- Text
- HTML (with formatting styles).
Print settings
By clicking the gear icon in the command bar you access:
- If it is a table, the print setup dialog.
- If it is a report, the specific report dialog.
In the default settings, the program is set to automatically resize the columns or reduce the zoom so that all columns are printed correctly on the page.
Page numbering
The page numbering can be changed by setting the start number and the prefix.
Refresh
By clicking the Refresh button the document is regenerated based on the specific print or report settings.
Printing issues
- If the preview display is slow, it is probably because the default printer is not available.
- It is important to use the updated printer driver.
Accounting printouts
The explanations of the printouts can be found on the following pages:
Page setup
The Print and Preview properties are accessed via the File menu > Page Setup command.
Each View of the table has its own print setting. The name of the view is indicated in the dialogue title.

Left header
This is where the title for the current view is shown. The title can be edited and appears at the top left of the printed page.
Right header
It is possible to enter a different text that will be printed at the top right-hand side of the page.
Logo
Allows you to add a logo:
- Use the Change button to the right of the Logo box; you access the Logo Formats dialog.
- Select Add and insert your own logo.
- From File > Page Setup , enter Logo in place of none.
- Confirm with the OK button.
More details for inserting a logo are available on the Logo setup page.
Margins
It is possible to input the page margins here: Left, Right, Top, Bottom. Measurements are in centimeters.
Shrink page to printable area
This function makes it possible to adapt the printable area when the print goes past the margins of the earlier defined page margins.
Include in print
When these functions are activated, they allow to display the following data:
File headers
This is the text that is being entered in the File properties found in the File menu.
Page headers
The page header will also be included in the printout.
Table name
The table header (f.i. Accounts, Transactions, etc.) is also included in the printout.
Column headers
Allows to display the various table columns.
Large font
The program prints the headers using a slightly larger font.
Page break
When activated, this option maintains the entered page breaks; if not, they will be ignored, even if they are present.
Page numbers
Activate this option to request that the pages be numbered.
Print time
Activate this option to include the time of when the page was printed.
Print date
Activate this option to include the date when the page was printed.
Row number
Activate this option if a progressive number is to be given to each row.
Grid
The grid can be printed just as it is viewed on screen.
Attachments
In the case of exporting to PDF, the attachments are included in the PDF file.
In Banana Accounting Plus this feature is only available with the Advanced plan. Explore all the Advanced plan features. Switch now to the Advanced plan!
Layout
The program automatically adapts the page dimension.
Zoom %
This allows the increase or decrease, on a percentage basis, of the size of the font to be printed.
Reduce to page width
If some columns exceed the width of the page, the program reduces the columns or reduces the zoom so that all the columns will be printed correctly on the page.
As on screen
The print-out will be carried out exactly as presented on the screen.
In case the contents goes past the page dimension:
- If the option "Reduce to page width" is activated, the font size will be reduced;
- If the option "Reduce to page width" is not activated, the part that goes past the paper will not be printed.
Print in black and white
All colors will be converted in gray scales.
Print landscape
To print in landscape format which makes the page read horizontal.
Export to PDF from print preview
From the Print preview you can export any document to PDF using the Create PDF command.
Depending on the documents you want to export to PDF, the program displays a dialog with different options.
Export a single document to PDF
This function allows you to export a document to a PDF file.
To export a document to PDF, you need to:
- From the print preview, click on Export > Create PDF.
- Click on Browse and select or create the folder where you want to save the file.
- Enter the name of the PDF file. The file name will appear in the File name field.
- Enable the Open file immediately option to view the created PDF.
- Confirm with OK
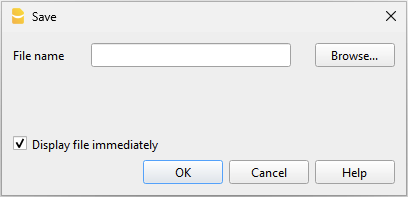
Export multiple documents in a single PDF
This option is only visible if several documents have been selected to export to PDF.
To export multiple documents into a single PDF, you need to:
- From the print preview, click on Export > Create PDF.
- Enable the Save as single file option.
- Click on Browse to select or create the folder where you want to save the file.
- Enter the name of the PDF file.
- Enable the Open file immediately option to view the created PDF.
- Confirm with OK
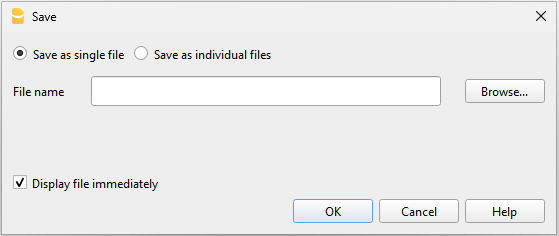
Export multiple documents as separate PDFs
This function allows you to export several documents in one operation, resulting in separate PDF files.
This option is only available:
- With the Advanced plan of Banana Accounting Plus.
- If several documents have been selected to export to PDF.
To export different documents as separate PDFs, you need to:
- From the print preview, click on Export > Create PDF.
- Enable the Save as individual files option.
- Click on Browse to select or create the folder where you want to save the files.
- Customize the file names using the variables available in the dialog window.
- Click on Variables to view the full list of variables.
- Double-click each variable you want to use to compose the file name.
While using the variables, you will immediately see a preview of the file name below.
- Enable the Open file immediately option to view the created PDF.
- Confirm with OK
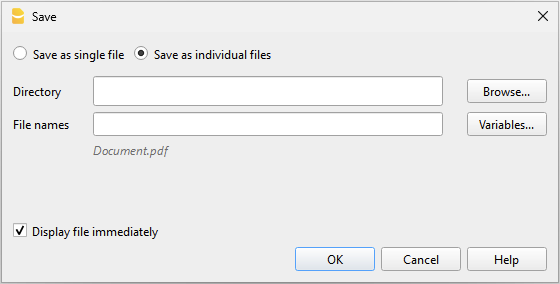
If a file with the same name already exists in the selected folder, the program will ask for confirmation before saving.
Export invoices or customer statements to PDF
The same dialog is also valid for exporting customer statements and invoices to PDF.
For more information, go to the page Export invoices to PDF
Include attachments in PDFs
When a document contains attachments external to the accounting file, the dialog includes the Include attachments option. This option saves the attachments in the PDF file and allows for their export.
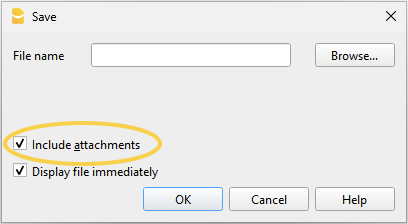
Attachments are local files added as digital links, for example PDF supplier invoices, credit notes or debit notes. The option is visible if links to the documents to be attached have been entered in the DocLink column.
- The attachment entered in the DocLink column is marked with a paperclip symbol. Clicking the symbol opens and displays the attachment.
- Only attachments that are in the same folder as the accounting file or in a subfolder are exported.
For attachments in other folders, a message "access denied" is shown.
This limitation prevents system or confidential files from being exported accidentally. It is therefore recommended to save attached documents in a subfolder of the accounting file. - Files with absolute paths are not exported.
Only some advanced readers like Adobe Acrobat Reader and Foxit allow viewing of attached files. Other PDF readers, such as those in browsers, do not allow viewing of attachments.
For more information, go to the page Create PDF file with digital attachments.
PDF creation parameters
- Page size
- The page size of the PDF is taken from the printer preferences.
- Before creating PDFs to print or send by email, make sure the page size in the print preferences is set to A4.
- PDF/A format
- The file is converted to the PDF/A format, the archiving standard, which is a more limited subset of the PDF standard.
- If certain elements are included, the PDF file will not comply with the PDF/A standard.
- Including any type of attachment is only compliant with the PDF/A-3 standard.
- Links to external documents are not allowed.
- Fonts
- The program creates the PDF using the fonts specified by the user.
- If there are readability issues or the PDF search function doesn't work, you can disable the True Type fonts from the menu Tools > Program Options > Advanced > True Type fonts.
PDF Creation Issues
In some situations, related to specific operating systems, fonts, or characters used, it may not be possible to correctly create a PDF file, or the text may appear cut off or not visible.
In these cases, it is recommended to use the operating system functionality by opening the print dialog window and choosing Print to Pdf.
Export Print Preview Html/Excel
In the print preview toolbar:
- Click on the arrow beside the Adobe PDF button
- Choose the option that's right for you:
- Export PDF
- Export to Html
- Export to Excel
- Copy to clipboard
Page numbering
You can access the page numbering feature by clicking on the  icon on the Print Preview toolbar.

In this dialogue it is possible to assign the number with which to start the page numbering, and the prefix to be inserted in the numbering. Printing of the page number must be enabled or disabled through the settings of the displayed page or report.
Start with
The starting number for page numbering.
Add prefix
The prefix to insert to the page numbering.
Logo setup
Logo setupIn Banana Accounting Plus to insert a logo go to the menu File > Logo setup.
Option tab
You can insert images, size and alignment of the logo and text in the header.
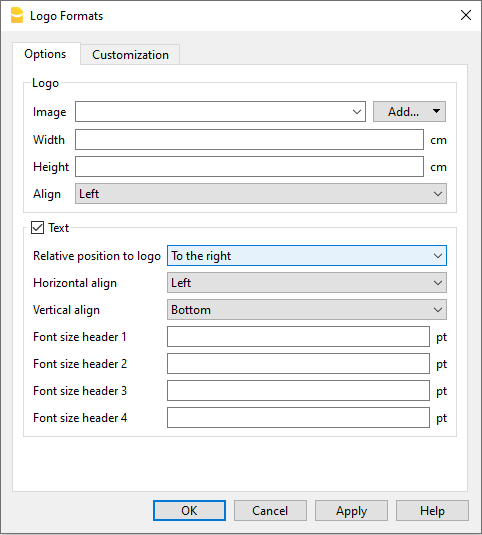
Logo
- Image. Allows you to add, edit and delete a logo.
- Add a logo:
- Insert a logo image via the Add button.
- Multiple images can be added.
- Edit or replace a logo:
- Select an image from the list.
- Edit or replace the selected image via the Edit button.
- Delete a logo
- Select an image from the list.
- Delete the selected image via the Delete button.
- Add a logo:
- Width.
- Enter the width in centimetres of the logo.
- Height.
- Enter the height in centimetres of the logo.
- Alignment.
- Select the position of the logo: left, centre or right.
Text
- When you activate the Text field:
- The header of the various accounting documents is inserted next to the logo image, provided the option to print the logo is activated in the report settings.
- When you deactivate the Text field:
- The logo is simply inserted without the report header information, again provided that the option to print the logo is activated in the report settings.
- Position relative to logo:
- You can choose where to position the text relative to the logo: below, on the left, above, on the right.
- Horizontal Alignment:
- You can choose to align the text left, centre, right relative to the logo.
- Vertical Alignment:
- You can choose to align the text top, centre, bottom in relation to the logo.
- Header font size:
- For printing reports or accounting documents, you can choose to set the font size for each header line.
- For invoicing, the font size can only be set by script.
Customization tab
Through this section you can customise and store various settings for your logo and texts.
If necessary, you can call them up by selecting the name of the desired customisation.
To print an invoice with the logo it is necessary to use a customization with the Logo name, to be entered in the Name box.
To print an enhanced balance sheet or an invoice with a different logo, a new customisation must be created (e.g. the name Logo_balancesheet, this name must be selected in the Embellished balance sheet setup or entered manually in the field Logo name in the Setup of the invoice layout.
Name
The name of your customisation (e.g. Logo1, Logo2,...).
Description
Enter a description for reference of the settings (e.g. 'Logo left, text right',..).
Set as default
With the set as default button you can set a customisation as default.
Options
For further information, see the Customisation page.
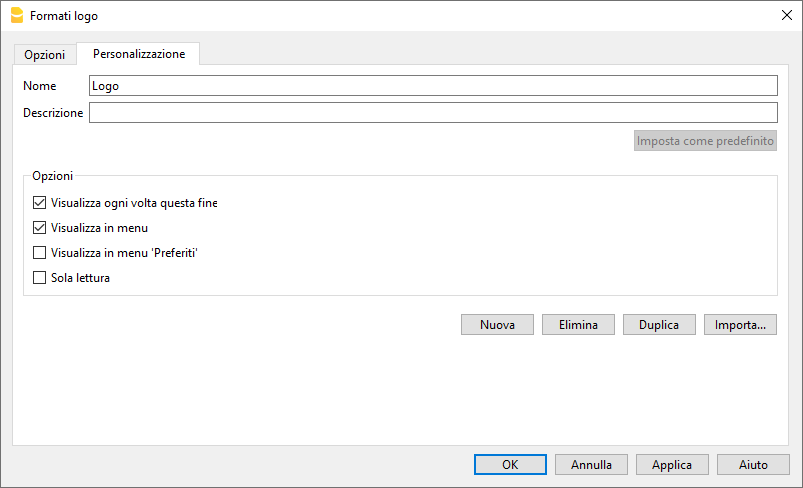
Add logo to all printouts
The logo can be inserted in the various printouts. Click on the links below to access information on how to insert the logo.
- Enhanced balance sheet
- Enhanced balance sheet by groups
- Invoices
- In the invoice header of the CH10 and UNI11 layout via the Invoice Settings > Logo option.
From the Print Preview of the Embellished Balance Sheet and the Embellished balance sheet by groups, the settings for the logo can also be accessed by clicking on the Settings icon (cogwheel).
Create PDF
The Create PDF command is activated:
- from the File menu > Create PDF
- or by clicking the dedicated icon in the toolbar.
The generated PDF exactly reproduces all the content you see on screen, that is, the current view.

There is also another command, from the menu File > Create PDF dossier, which allows you to choose which contents of the Banana Accounting Plus file to include in the PDF.
Save options
Available in Banana Accounting Plus only with the Advanced plan. See all Advanced features. Upgrade to the Advanced plan now!
Include attachments
Saves in the PDF file the attachments indicated in the Link column (for example receipts, invoices or scanned slips).
When this option is active, the paperclip symbol is displayed in the PDF next to the transactions that contain a digital attachment. By clicking on the paperclip, the attached document is opened and displayed.
Important notes
- The Include attachments option is available only if there are file links in the Link column.
- Digital documents (attachments) are included in the PDF only if the accounting file (.ac2) and the documents are located in the same storage environment: all saved locally or all saved in the cloud.
- Furthermore, to ensure correct linking of attachments in the PDF, digital documents must be organized in the same folder as the accounting file (.ac2) or in one of its subfolders.
- Opening attachments is supported only by PDF readers that handle embedded files, such as Adobe Acrobat Reader or Foxit PDF Reader.
Some PDF readers, especially those integrated in web browsers, may not allow opening embedded attachments.
Technical notes
- In print preview and printing (physical printer and the operating system’s virtual PDF printer), all fonts supported by the operating system can be used.
- In Windows, for PDF export, only TrueType fonts that have the Unicode cmap mapping and contain the following tables are supported: "OS/2", "cmap", "cvt ", "fpgm", "glyf", "head", "hhea", "hmtx", "loca", "maxp", "name", "post", "prep".
Error creating the PDF file: %1 - If the program cannot load the specified font, it replaces it with a default font (Helvetica or Arial depending on the operating system) and the user is shown the Unable to use font 1% in PDF file message.
Send .ac2 file via email
To send a Banana accounting file (.ac2) you can use the command from the File menu → Send file via Email...
By choosing this command, Banana Accounting Plus opens the email program of your computer, creates a new message, inserting your Banana Accounting .ac2 file as attachment.
If your email program displays a message informing you that you need to create a Microsoft Outlook profile, you must follow the information found at the following link:
Open file location
The Open File Location command from the File menu opens the Explorer folder (on Windows computers) or Finder folder (on Mac computers) where the file you are working on is located.
To rename, move, or delete the file, it must be closed.
Proceed as follows:
- File menu > Open File Location
- View the folder where the file is saved
- Perform the desired action (copy, rename, move the file).
Sometimes the file may remain locked even if it appears to be closed. In such cases, you may need to exit the program to fully unlock the file.
Archivos recientes y favoritos
Los comandos muestran la lista de los archivos utilizados recientemente y de los archivos favoritos. Estos también aparecen en la página de inicio (Start page).

Archivos recientes
En esta sección, Banana Contabilidad muestra los últimos archivos utilizados y la ruta donde fueron guardados.
Una ruta indica dónde está guardado un archivo en el ordenador. Es como una «dirección» que le guía exactamente hasta el lugar donde se encuentra el archivo, por ejemplo: C:\Documents\Banana\2024\Estimates and invoices.ac2.
Los archivos de Banana no se guardan en el programa, sino que es el usuario quien decide dónde guardarlos.
Modificar o eliminar archivos recientes de la lista
Desde el menú Archivo > Archivos recientes, dispone de dos comandos:
Editar la lista de archivos recientes...
Este comando abre el siguiente cuadro de diálogo:
- Limpiar la lista de archivos recientes
Este comando elimina todos los archivos de la lista de archivos recientes.
También puede modificar o eliminar uno o todos los archivos de la lista de archivos recientes directamente desde la página de inicio (Start page). Sitúe el cursor sobre uno de ellos y haga clic con el botón derecho del ratón (los usuarios de Mac deben utilizar la combinación de teclas Ctrl + botón derecho del ratón).

Tiene disponibles los siguientes comandos:
- Agregar a favoritos...
Este comando añade el archivo reciente seleccionado a la lista de archivos favoritos. - Modificar lista... (vuelve al cuadro de diálogo mostrado anteriormente).
- Abrir ubicación del archivo
Este comando abre la carpeta donde se guardó el archivo y abre automáticamente la carpeta correspondiente en el Explorador de Windows (o Finder en Mac), donde el archivo fue guardado por última vez. Esto puede ser útil para comprobar si el archivo ha sido renombrado. En la misma carpeta también puede encontrar el archivo .bak (archivo de copia de seguridad), que el programa crea y actualiza automáticamente cada vez que guarda el archivo. - Quitar de la lista
Este comando elimina el archivo seleccionado de la lista de archivos recientes. - Quitar todo de la lista
Este comando vacía la lista de archivos recientes.
Si no puede abrir un archivo reciente
Si, al hacer clic en uno de los archivos recientes, aparece el mensaje de error "Archivo no encontrado", significa que el programa ya no puede encontrar el archivo en la ubicación donde estaba guardado.
Es posible que el archivo haya sido movido, eliminado o renombrado. Para obtener más información, visite la página: https://www.banana.ch/doc/es/systemmsg_it_err_filenontrovato.
Archivos favoritos
En esta sección puede crear una lista con los archivos que utiliza con más frecuencia, indicando su ubicación correspondiente.
Añadir un archivo a Favoritos
- Abra el archivo que desea añadir.
- Haga clic en Archivo > Archivos favoritos > Agregar a favoritos.
Modificar la lista de archivos favoritos
- Archivo > Archivos favoritos > Editar la lista de favoritos...

También puede modificar o eliminar uno o todos los archivos de la lista de archivos favoritos directamente desde la página de inicio (Start page). Sitúe el cursor sobre uno de ellos y haga clic con el botón derecho del ratón (los usuarios de Mac deben utilizar la combinación de teclas Ctrl + botón derecho del ratón).
Tiene disponibles los siguientes comandos. Su funcionamiento es equivalente al de los archivos recientes:
- Modificar lista...
- Abrir ubicación del archivo
- Quitar de la lista
- Quitar todo de la lista
¿Dónde se guardan los archivos contables?
Los archivos contables de Banana se guardan en formato .ac2. No deben confundirse con el archivo ejecutable del programa, que tiene la extensión .exe. La gestión de los archivos funciona de la misma forma que con los archivos de Word o Excel (con extensiones .doc y .xls, respectivamente).
Al guardar un archivo, usted elige la carpeta donde desea almacenarlo: en su ordenador (por ejemplo, en C:\Documentos\...), en un servicio de almacenamiento en la nube, en una memoria USB o en cualquier otra ubicación.
Banana Contabilidad muestra accesos directos a los últimos archivos de Banana utilizados (Recientes) y a los que ha marcado como Favoritos.
Por lo tanto, los archivos no se almacenan dentro del programa, sino en la carpeta que usted haya elegido. Banana.ch SA no tiene acceso a sus archivos.
Para obtener más información, consulte también Abrir y guardar un archivo.
Edit Menu
The Edit menu in Banana Accounting gathers the essential commands for working with table data. It allows you to undo or redo actions, copy, cut, and paste cells or rows, select and duplicate data, insert or delete rows, move them up or down, and quickly replicate contents.
It also includes practical functions such as copy with headers for processing in Excel, and row protection to prevent accidental changes. This way, you have flexible and intuitive tools to precisely organize and edit your accounting data.
Undo / Redo operation
These simple commands allow you to cancel or restore the last operation made. To set the maximum number of undo operations, you need to set it in the Tools menu > Program Options > Editor > Max number of Undo Operations.
Copy, Cut and Paste
All rows of Banana Accounting tables and the data they contain (except data in protected tables and cells) can be copied, cut and pasted exactly as in Excel.
- Select the line or the area of data to be copied
- In the Edit menu, select the Copy or Cut command
- Move to the row or the area where the information should be copied
- From the Edit menu, select Paste
The user can also copy/paste by using the icons  or press Ctrl+C to copy, Ctrl+X to cut and Ctrl+V to paste.
There are also the following commands:
- Copy rows, Delete rows and Paste rows: in this case they refer to a full row or rows and not to a cell selection. For this purpose the commands Copy, Cut and Paste should not be used.
- Copy rows copies the cells to the clipboard with the column header, very useful for filtering in Excel.
Select all
This command selects all the rows and columns of the active table.
It's the equivalent to clicking at the top left hand side of the table.
Copy row from above (F4 or Cmd + 4)
This command is very practical and allows you to copy the contents of the cell above to the one you are in. Applicable to a single cell, several cells or an entire row.
Execute command (F6 or Cmd + 6)
This command performs various practical functions depending on the cell in which you are located. More information on the Interface page.
Insert blank rows... (Ctrl and + key)
This command inserts blank rows above the selected row:
- Position the cursor below the line where the empty rows are to be inserted
- From the Edit menu, select the Insert rows command
- In the window that appears, type the number of rows to be inserted
- Confirm with OK.
Add rows...
To insert blank rows below the selected row, follow these steps:
- Move the cursor above the row where additional rows need to be inserted
- From the Edit menu, select the Add rows command
- In the window that appears, key in the number of rows to insert
- Confirm by clicking on OK
There is another procedure to add blank rows:
- Move the cursor above the row where additional rows need to be inserted
- Click on the following icon
 on the Tool bar, one time for each row that you want to add. This procedure is recommended when the amount of rows to be added is rather limited. The sequence for the shortcut key is: Ctrl+Enter.
Duplicate rows...
This command duplicates the selected row(s).
After duplication, the rows remain selected and can be moved with the Move Up and Move Down command.
Copy rows ... (Ctrl + Shift + C) / Copy with column headers
This command copies all the data in the row, including hidden columns, to a temporary area so that it can be inserted again using the Insert copied rows command (or simply by using the Paste command - Ctrl+V, for example when pasting into Excel).
The cell values are copied to the clipboard. When pasting into Excel or software other than Banana, the column headers are also included. This also works when copying only selected rows or cells.
Banana Accounting supports up to two column headers (entered in the two separate fields Header and Header2 in the Columns setup dialog). Starting with Banana Accounting release 10.2.8 - 26182, both headers are copied to the clipboard (previously, only the main header was copied).
Copying the column headers makes it easier to process the data in Excel or other applications.
You can also make copies with the header with the Preview command.
Delete rows... (Ctrl and - key)
In order to delete one or more rows, select the row or rows that need to be deleted and from the Edit menu, click on the Delete rows command.
The deleted lines are copied and saved in memory and can be reinserted with the command Insert copied lines.
This feature of copying lines before they are deleted is very useful for functioning like the Cut command in an Excel spreadsheet.
Move Row Up (Alt + Up)
Moves the selected row one position up.
Move Row Down (Alt + Down)
Moves the selected row one position down.
Protect/Unprotect rows
Using the Protect rows command, from the Edit menu, the user activates rows protection to avoid making any changes by mistake.
Protected rows have light grey row numbers. The protected rows cannot be edited until, by using the Unprotect rows command, the protection is being removed.
To protect Rows:
- Select the desired row(s) to protect
- From the Edit menu, select the Protect rows command
- Confirm the number of rows to be protected by clicking on OK.
To Unprotect Rows:
All rows in system columns are protected and cannot be unprotected.
For example, it is not possible to unprotect rows in account tabs or rows where the program performs automatic calculations.
Data Menu
The Data menu in Banana Accounting provides the commands to search, edit, and organize information within the tables. From here, you can perform searches and replacements, rename items, manage links, and quickly navigate through the data.
You also have tools to extract, sort, import, and export rows, as well as to arrange columns and tables according to your needs. This way, you have full control over the management and organization of your accounting data.
For detailed explanations of the commands, click on the links in the menu on the left.
Find
The Find function is located in the Data > Find menu. The section for the options for searching for data are displayed at the bottom of the table you are in.

Find text
Enter the text or value to search for. The amounts must be entered without the thousands separator.
Entire words only
Search for entire words only: For example, if the search word is Tot, it will not find Totals.
Uppercase / Lowercase
When this option is activated, the program distinguishes between uppercase and lowercase letters.
Selected zone only
With this option, the information is searched only in the previously selected area.
To start the search you need to click on the Find Next button. The first information corresponding to the request is located; to continue the search and find subsequent matches, repeat the Find next command, or use the F3 key.
Find and Replace
The Replace function, linked to the Find function, is activated by clicking on the Data → Replace ... menu. You will find the options for searching and replacing data appears in the section at the bottom of the table you are in.
 The text to search for and the text to replace must be entered in the same format as they appear in the input field. The amounts must be entered without the thousands separator.
Find text
Enter the reference you are searching for.
Replace with
Enter the new reference.
Options
Complete words only
Search for complete words only: For example, if the search word is Tot, it will not find Totals.
Uppercase / Lowercase
When this option is activated, the program distinguishes between uppercase and lowercase letters
Search in the selected zone only
With this option, the information is searched only in the previously selected area.
Replace all
This key performs the replacement of all data at the same time. It is used when a change in the Accounts, Categories, Transactions or VAT Codes table (for example an account number, a VAT code) is necessary. For change of data to be repeated, you can also use the Rename function.
Replace
Replace one item at a time.
Find all
It searches for all the information, based on the entered keyword, and displays it in the information window below.
Find next
Next available information.
Add links to digital documents
The function of linking a digital document, saved on your computer or on the Internet, to an transaction line allows you to open a receipt, invoice or other document directly in the accounting file with a simple click. Your documents will always be just a click away and you can say goodbye to paper and switch to fully digital accounting.
Also refer to Organise accounting files locally, online or in the cloud.
- The function of linking a digital document to a row is available in all tables, also for the Accounts, Items and Other tables.
- From the print preview, with Export to PDF, the programme also allows you to include the linked digital document files in PDF. When auditing, the auditor can also open the attached document (invoice, receipt, other PDF document) in the accounting file.

File names and paths
When entering a path to a file this can be of two types:
- Absolute path.
- An absolute path file name, or more simply 'absolute file name', specifies the complete path to a file, including the disk drive, folders and the name of the file itself.
- It describes exactly where the file is located in the file system.
- Examples of absolute file names:
- "C:/Documents/Images/Photo.jpg"
- "/Documents/Images/Photo.jpg"
- If the accounts folder is moved to another computer with a different path, the file will not be found.
- Relative path to the accounting file folder (Recommended).
- Relative path or more simply 'relative file name' refers to file names that are not absolute, i.e. do NOT begin with a '/'.
- Links with relative paths are understood to be relative to the folder where the accounting file is located.
- Links remain valid even if folders are moved or synchronised to other computers that have different locations, as long as the file remains in the same location relative to the accounts file.
- Does not include details of the disk drive or main folders. The name begins without a slash.
- If the file is in the same folder, only the file name 'invoice.pdf' will appear
- If the file is in the 'attachments' subfolder, it will be 'attachments/invoice.pdf'.
- If the file is in the top folder it will be "../invoice.pdf".
- The symbol '../' means upper folder.
- "../attachments/invoice.pdf' means that the file is in the 'attachments' subfolder of the top folder.
- ".../.../attachments/invoice.pdf' means that the file is in the 'attachments' subfolder of the top two-level folder.
Error File Not Found
If the programme reports that it cannot find the file, the reason may be one of the following:
- The file has been deleted or moved.
- Files have been copied or synchronised to another computer and the path name to the file is absolute.
- The accounting file has been moved and the file names contain relative files.
- The file name contains invalid characters on other operating systems:
- The programme uses the '/' character as path separator, but also accepts '\'.
- Characters such as '*' may not be used in file names.
- Care must also be taken not to use characters such as '*&%'. which are valid on MAC or Linux, but not for Windows.
The Links Column
The DocLink column (in the Transactions table) and the Links column (in all other tables) make it possible to enter a link to an external file (usually a scan of a receipt or an invoice).
- The Links column is usually not visible.
In order to display it, use the Columns setup command from the Data menu. - Once the Links column appears, you can add the link to the digital document; you can also edit the file name directly in the cell where the link has been inserted, without having to edit the file in the folder where it is located.
- It is best to use file names related to the accounting folder (see previous section File names and paths).
- In the Links cell you can enter different types of content:
- The relative or absolute file name.
- A link to an Internet page or file, preceded by 'https://' or 'http://'.
- A customised Url schema.
- A link to a resource contained in the program resources, e.g. ":/image.png".
- A link to a resource contained in the Documents table, e.g. ":documents:doc.pdf".
- A text beginning with an exclamation mark '!', to indicate in the auto-completion in which path to search for files (see the following section Auto-completion in the Links column).
- A text in square brackets [ ], which is used as an auto-complete search when editing.
Useful when creating rules and wanting to indicate the text to insert the link and facilitate searching.
To open the linked document, click on the menu Data > Links > Open Link, or click on the icon that appears in the top right-hand corner of the cell containing the link.

Entering a link to a file
There are three ways to enter a link to a document:
Add Link command
- Place yourself on the row of the table where you wish to create a link and the choose the Data menu > Links > Add link.
- Select the document file that you want to link and click on the Open button (the program inserts the link automatically).
- The program enters the path to the digital file in the Links column, even if the column is not visible.
- The file path is converted into a form relative to the accounting file.

Add Link Icon
- In the table, make the Links column visible. Also see: Columns setup.
- Click on the small icon at the top right of the cell.

- Indicate the path where the chosen file is located.
Directly enter the file name into the cell
The file name of the digital document can be entered directly in the DocLink column cell, without having to select the file in the folder where it is located.
This mode allows you to speed up the insertion work even more.
- Double-click on cell to edit it .
- Type in the file name or enter it using copy and paste.
- The auto-complete function lists the files of documents that are not yet linked.
- To get a list of available files, at least the name of a file must be entered with the file selection dialogue.
Note: It is not possible to insert a link via Drag & Drop.
Auto-completion in the Links column
When you are editing in the Links column, the programme proposes a list of files, according to the following logic:
- Only files whose extension is included among the safe extensions are proposed.
- The file name contains the text entered in the editor.
- If the text contains text separated by a space, all text must appear in the file name.
- If the text is included in square brackets [ ] only the text without the brackets is used.
- If the file is already used in the column, it is not proposed again.
You can start with '*' to ensure that all files are proposed, even those already used.
This way you can search for files that have already been included in the list. - Files contained in search folders.
- Files contained in folders already used.
If you enter the file 'attachments/invoice.pdf', it will propose the documents that are in the 'attachments' subfolder. - Files containing the text you are inserting.
- The folder was not excluded with the commands indicated below.
- Files that do not exceed the Smartfill limit.
Special names for auto-completion
You can change the search logic by entering file names that begin with an exclamation mark '!'.
- !-**1
Disables auto-completion and does not propose any files.
Use this command if, for technical reasons, access to directories is slow. - !attachments
Search for files only in the indicated subfolder - !+attachments
The '+' sign also searches in the indicated folder. - !-attachments
A '-' sign excludes the indicated folder. It takes precedence over other indications.
Serves to exclude a used file folder or the accounting file folder. - Special symbols:
- !.
The dot "." indicates the current folder where the accounting file is located.
To exclude the folder use "!-.". - !folder1*
"*" at the end of the folder name also means including all sub-folders.
If there are many sub-folders with many files, the search may be slowed down. - !*
Includes the folder where the accounting file is located and all sub-folders. - !folder1;folder2
the semicolon ';' is used to include multiple folders.
!../folder1
The ".." refers to the parent folder.
- !.
Texts for inclusion or exclusion folders for self-completion:
- They must be entered in the column where the document link is inserted.
- They can be entered in any row.
- They determine the search for all cells, even those that come before.
Edit a link
Proceed in the same way as when entering a new link.
Rename a link
This feature allows you to change/rename the link. The program will also automatically:
- Rename the file name in its original directory
- Rename all the links to that document recurring in the accounting file.
This way you can change file names without having to open the file manager.
Requirements
- The Rename function from the Data menu is only available with the Advanced plan of Banana Accounting Plus > switch now to the Advanced plan.
More info on the Rename feature.
Opening the link
There are two ways to open the link:
- Position yourself on the row and follow the Data > Links > Open link command
- Or position yourself on the cell of the Links column and click on the icon to open the link.
For security reasons, the program only opens files with an extension that is considered secure, see Program Options > File handling section, from the Tools menu.
Remove a link
There are two ways to delete a link:
- Position yourself on the row and follow via the Data menu > Links > Remove link.
- Clear the contents of the Links cell with Delete.
Export to PDF (Include attachments)
When exporting to PDF, the programme offers the possibility of also including attached files.
Please refer to the Export to PDF documentation regarding this functionality and limitations.
Other useful resources:
Scan documents with Dropbox or other Apps
Smartphone apps like Adobe Scan, Microsoft Lens, Dropbox, and other applications allow you to scan receipts and invoices and save them directly in PDF format. Afterwards, you can transfer them to the desired folder through the smartphone app of the cloud service being used. Compared to a simple photo, they crop the contents, use PDF format, and allow you to insert multiple pages into the same file.

- Start the Dropbox application (other systems have equivalent functions, which you can easily research on your mobile).
- Use the "Scan Document" command.
- Take a picture of the document. To facilitate automatic cropping, insert the receipt in a transparent map that contains a coloured or black sheet.
- Several commands are at your disposal in the preview
- If necessary, use the Rotate Image command to be vertical.
- You can add another page by repeating the scan.
- Choose the pdf format.
- Type the file name using the date you find on the document.
If you do not have your own filing system, use the year-month-day format, the name of the counterparty and a possible observation (ex.: 2022-01-15-Telecom-invoice.pdf ". - When the file is synchronized on your computer.
- Copy it to the accounting documents directory.
- In your accounting file, go to the Transaction table, go on the appropriate row and add the link to the digital document you just scanned.
The Open link command opens the digital document
We advise you to create the accounting documents folder in a child location compared to where your accounting file is located.Here below we include similar screenshots for Adobe Scan, Microsoft Lens and iCloud Drive:
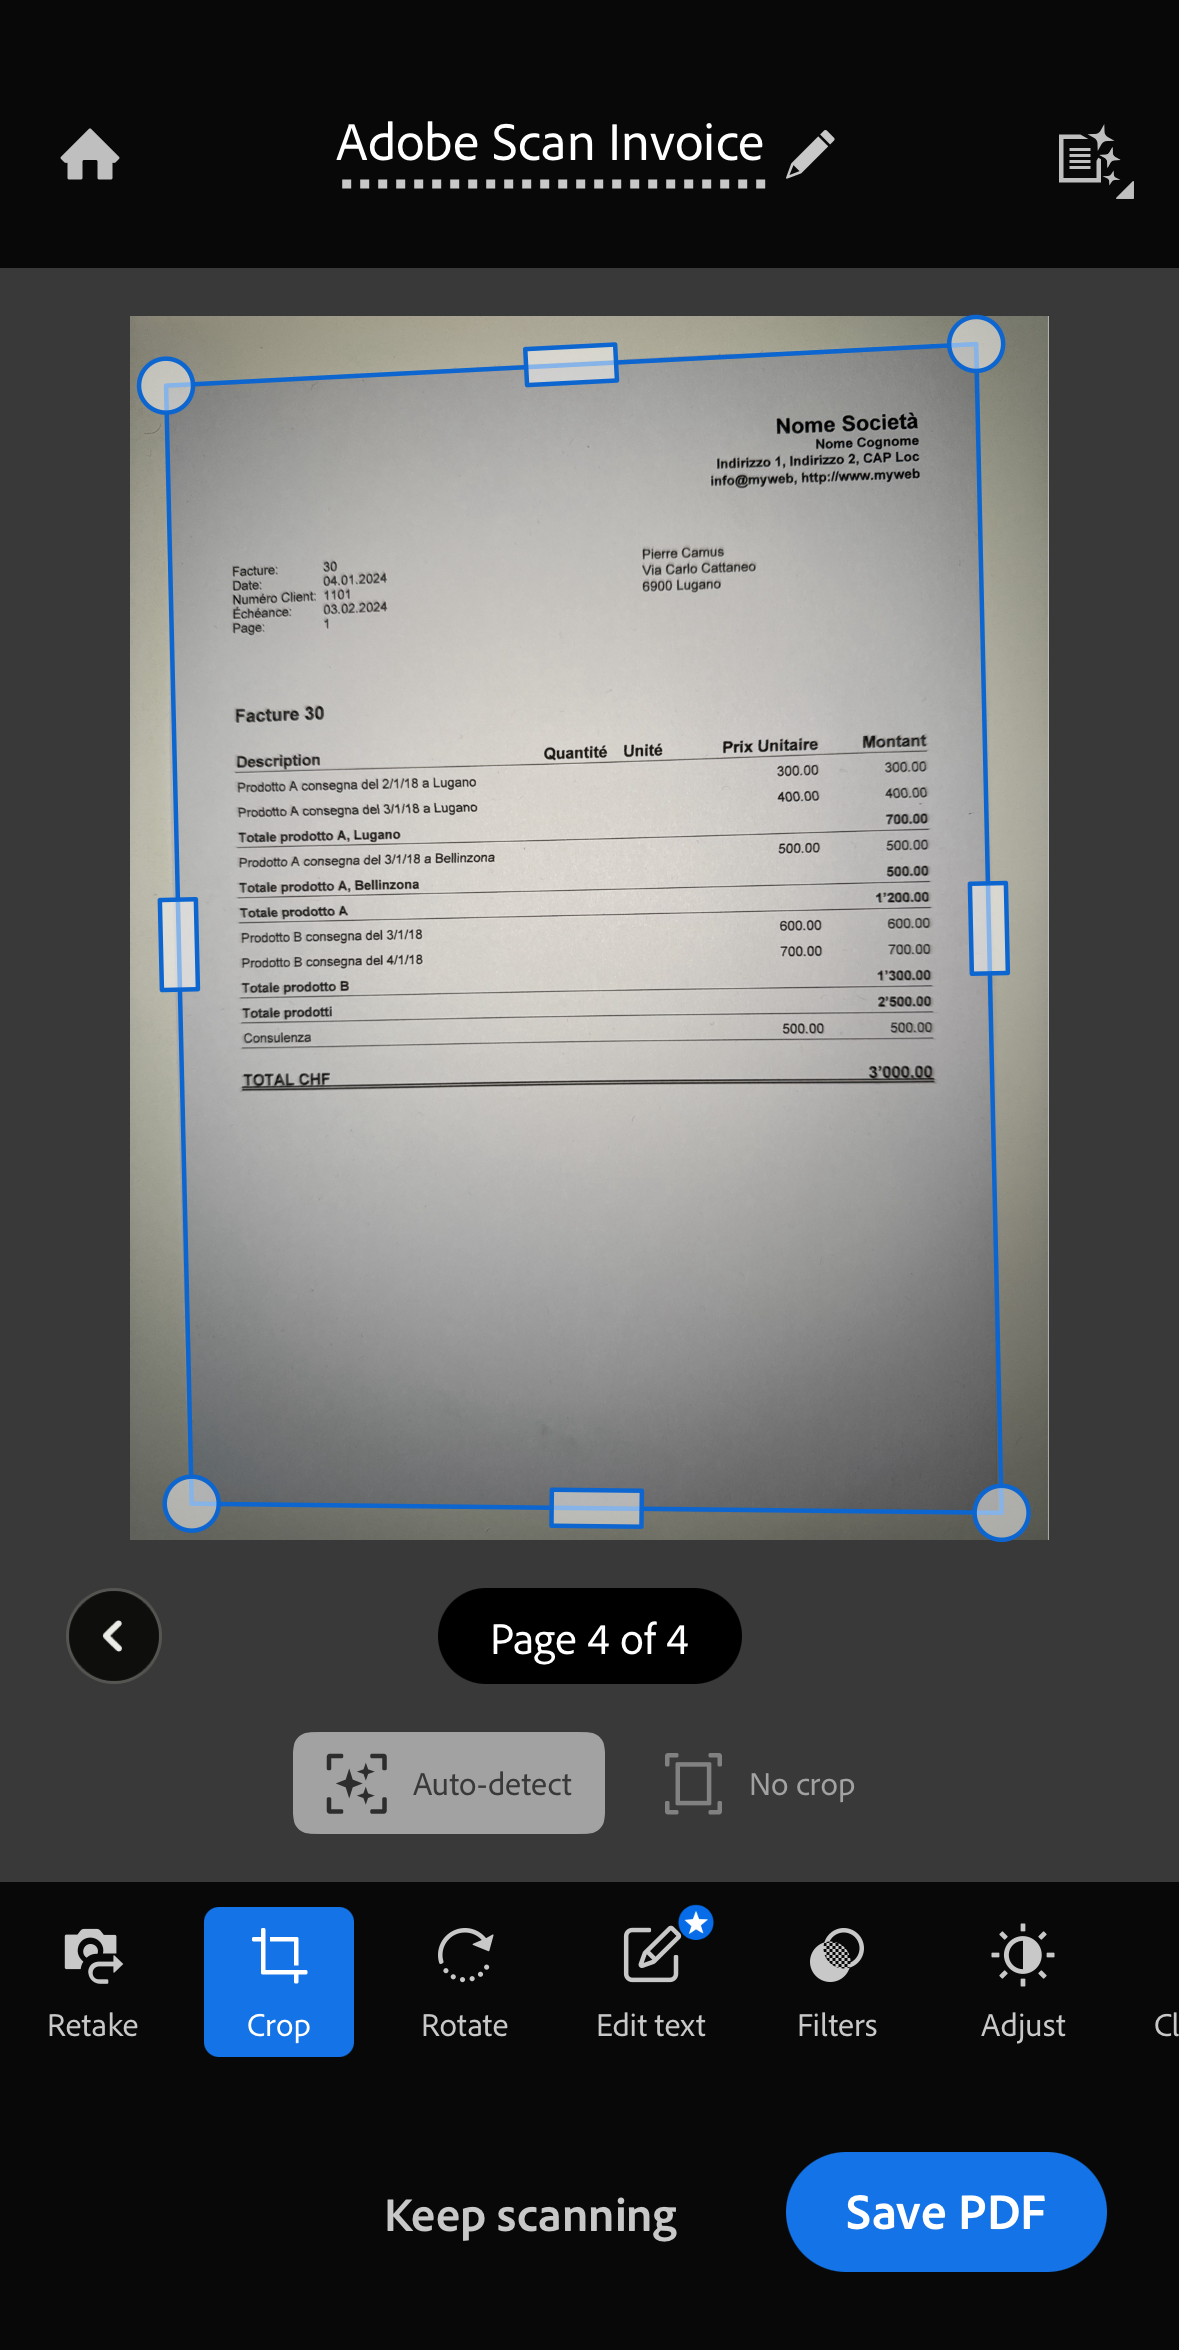
Other useful resources
Go to
The command opens a dialog box that allows you to move to the desired row.

When you are in a selection table (for example in an account card), with the Go to source line command, the program automatically returns to the corresponding row of the Transactions table.
The Rename command in Banana Accounting Plus
The Rename command is a tool in Banana Accounting Plus that allows you to quickly modify:
- an account or category number
- a VAT code
- an item number
- a link (Link or DocLink).
It is accessible from the Data menu and allows you to update a reference automatically, without having to manually search and replace every occurrence in the file.
Warning
The Data > Rename command changes references within the accounting file (accounts, VAT codes, items, links).
It should not be confused with the Rename file function of the operating system, which only changes the name of the accounting file.
Available in Banana Accounting Plus only with the Advanced plan. Switch now from the Professional plan to the Advanced plan, or purchase it directly.
When to use the Rename command
When you need to change an account number, a VAT code or a Link, the command replaces the selected value with the new value and automatically changes it in all tables where it has been used:
- Accounts and Categories table
- VAT Codes table
- Items table
- Transactions tables
- File properties (Basic data)
In the case of links (Link or DocLink), the program also automatically updates the name of the linked file in the folder where it is located.
Example - Change account number in the Accounts column, Accounts table.
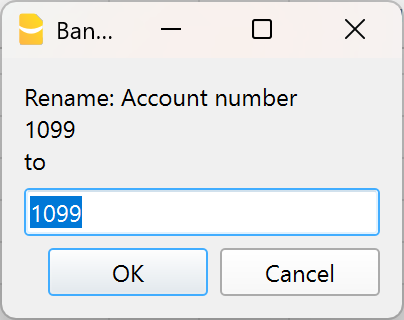
Example - Change link name, in the Doc.Link column of the Transactions table.
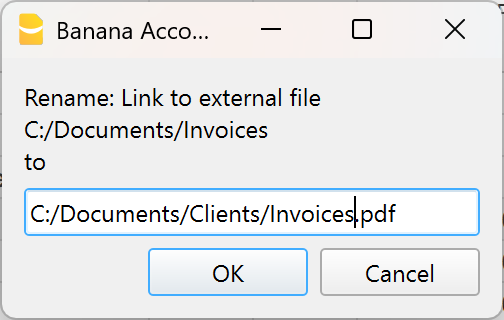
How to rename
- Position yourself on the cell to be modified (account number, category, VAT code, item number or link).
- Select Data > Rename.
- In the window that appears, enter the new reference.
The program automatically performs some checks:
Check for duplicates
It verifies that an identical account or group number does not already exist.
If it exists, a warning message is displayed. If you confirm the operation anyway, the error will be reported.
Check for protected or locked rows
It verifies that the rows where the account is used are not protected or locked. Otherwise, the program indicates that it cannot proceed with the renaming.
Automatic replacement
If there are no obstacles, the value is replaced in all tables and in the Basic data.
NOTE
In the chart of accounts it is not possible to have two identical account numbers. The command does not perform any recalculation: it simply replaces the reference wherever it is used.
Rename a link (Link)
In Banana Accounting Plus it is possible to insert, in the Link column of the Transactions table, links to digital supporting documents (receipts, invoices, tickets, etc.).
The Rename command allows you to modify the link text and automatically updates:
- the file name in the folder where it is saved
- all links to that document present in the accounting
In this way, consistency is maintained between accounting and archived documents.
For more information, see the page dedicated to digital supporting documents.
Import rows
In order to import the rows, click on Data → Import Rows command.
Activate the options of your choice in the following window:

File name
Using the Browse button, select the file from which to extract the data.
Format
This area contains the list of formats with which it is possible to import the data to the table. These include: ASCII format, Text, CSV.
Select what you need.
Options
Import data from clipboard
By selecting this box, the user can import data from the Windows clipboard.
Autocomplete values
It is advisable to select this function when it is necessary to import rows from a less complex accounting file into a more complex one. In this case, in the imported rows, some columns will stay blank. By selecting this function, the program will automatically complete the missing values with those from the current accounting.
Column headers
By selecting this box, not only data, but field headers will be included in the import.
Unicode (Utf-8)
By selecting this box, all the data will be imported in a format readable by Unicode programs.
Extract and sort rows (Extract)
This function is available vie the Data → Extract and sort rows menu ...

Contrary to the Sort rows command, the program creates a separate table where the extracted rows are displayed. Therefore, the rows of the main table are not changed.
Extract tab
In the extract table, you can click on the row number (underlined) to return to the row of the source table.
Column
You have to select the column from which you want to extract the rows.
Condition
You must select the conditions to be applied for the extraction of the lines (eg greater, less, equal, contains text, begins with, ends with ....).
Value
In this field it is necessary to enter the text to be used as a comparison, in relation to the condition (for example, if the condition is = equal, entering 25.01.2022 as the comparison value, the program extracts all the transactions with the date 25 January 2022).
The text is a date if the chosen field is Date, a numeric value if the field is an Amount, a word if the column is a Description.
Add
The button allows you to add other fields for the search.
Clear all
The button allows you to delete the settings chosen for data extraction in the various lists.
Selected rows only
This option is active only when rows have been previously selected and allows the sorting of the selected rows.
Total row
If the function is activated, the program displays the total for the extracted rows that have an amount or a time counter.
Sort tab
The sorting columns are indicated. The options are the same as the Sort rows commands.
Customization tab
Explications for this window are available on the following web page: Customization.
Account list example
It sometimes happens that you require a list containing only the accounts:
- Go to the Accounts table.
- Select Extract and sort command.
- Select Account in the the columns box
- Select Not empty in the the conditions box
If you want to extract the accounts sorted by description:
- Select Order section
- Select Order by button and select Description
If you want to display only certain columns, you can create a new view with the Tables setup command.
Sort rows Dialog
This command changes the sorting of rows permanently.
It is therefore advisable to be very careful before sorting, especially when in the Accounts Table, as it may upset the structure of the chart of accounts.
If you only wish to sort rows temporarily use:
- Temporary Filter and Sort rows.
- Extract and Sort rows that copies the data into a temporary table .
Sort Rows Dialog
This function is activated via the Data > Sort rows menu.

The rows of the table can be sorted according to the contents of the columns. Up to three sorting can be set.
Sort by
Select the type of order you need from the list that appears.
Then by
Allows you to define an additional type of sorting than the main one.
Ascending
The rows are sorted in ascending order, taking into account the type of sorting chosen (date, doc ...).
Descending
The rows are sorted in descending order, taking into account the type of sorting chosen (date, doc ...)
Number
Enable this option if the column chosen as the search condition contains only numbers.
Clear all
The button allows you to delete the settings chosen for sorting the data in the various lists.
Selected rows only
This option is active only when rows have been previously selected and allows the sorting of the selected rows
Customization Section
Through this section, you can customize and save various sorting settings for the rows.
You can choose to sort by Amount, Description, or other criteria, and save the sort settings with different names.
When needed, you can recall the sort settings by selecting the name of the desired sort.
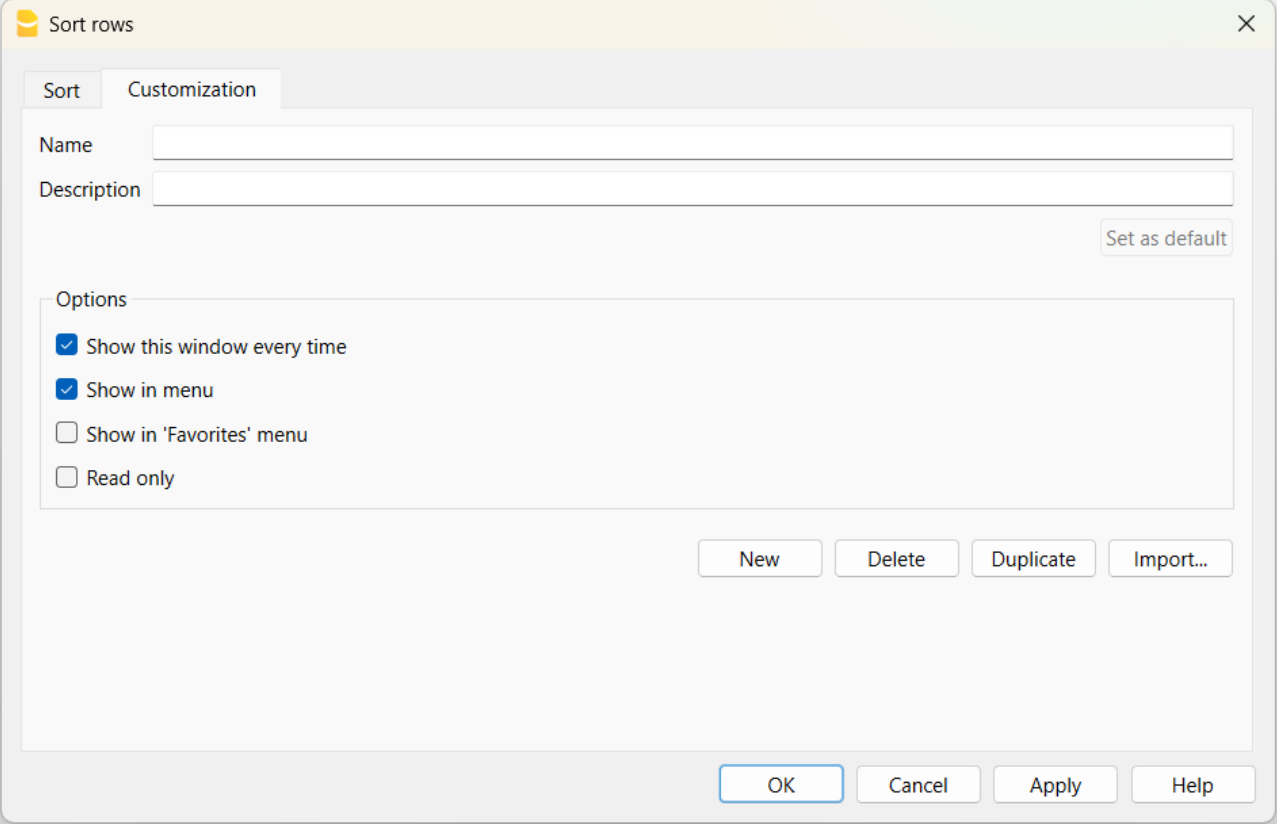
Name
The name of your customization (e.g., Sort by Description, Sort by Amount, etc.).
Description
Enter a description to reference the settings (e.g., "sorting type 1, sorting type 2", etc.).
Set as Default
With the "Set as Default" button, you can set a sort as the default.
Options
For more information, refer to the Customization page.
Columns setup
The command can be activated via the Data > Columns setup menu. With this command, columns can be:
- Displayed
- Hidden
- Renamed
- Moved left or right in the various tables.

Display Tab
Header
This is the column header.
Header 2
This header is used by the program for only a few fields (e.g. Amount column).
Description
This is the column description field. This description will be shown as a tooltip.
Format
This is the format to show numbers, date and time (refer to Columns setup page for specific information).
Width
This section defines the horizontal size of the column.
Column Style
This is a drop-down menu that indicates the style to be used. This style has priority over the style of the row.
Alignment
The user can choose whether to align the text right, left or center.
Wrap text
This option allows the user to view the input text on more than one line.
Protected
This option allows the user to protect the entire column so that no data can be input or edited.
Exclude from printing
When this option is activated, the field will be excluded from printing.
Visible
This option allows the user to make column visible.
The tables can be modified. Columns can be added, headers can be changed, and column sizes and the order in which they are displayed can be altered.
Move up, Move down
The columns can be moved to the right or to the left.
- Just click on the name of the column:
- with the Move up button, the column is moved to the left.
- with the Move down button, the column is moved to the right
- Columns can also be moved simply by dragging them with the mouse.
Add
Add columns in the active table. The columns added by the user have a purely informative function and the program does not perform calculations on any numeric data.
If you add a column of type Amount in some cases, the data entered by the user is used in the calculations. Amount columns are summed only in the following tables:
- Accounts table,
- Account cards table,
- Extract rows table.
Delete
This function is used to delete a column from the list. A system column, however, cannot be deleted.
Settings
Name
Enter the name of the column field to add. The program automatically adds the new column to the list.
XML name
The column name for XML storage and for extensions.
Data type
You can choose from the following predefined data types:
- Text
- You can enter any kind of text, without a line break.
- Comment:
Element in square brackets not considered by the program as a value.
In certain contexts, in the Transactions table, columns Debit account or VAT code, you can enter a commented value, which is not treated as a value, for example: Commented account [1000], Commented VAT code [V10].
- Number
- Numbers with decimal and thousands separators.
- positive "+1'234.00"
- negative "-1'234.00"
- neutral "±1'234.00"
Except for special cases, the entered value equals "0".
You can write "+-" before the amount and the program replaces it with the "±" symbol.
- Comments, text in square brackets [comment]
- Numbers with decimal and thousands separators.
- Amount
- Numbers with decimal and thousands separators.
- positive "+1'234.00"
- negative "-1'234.00"
- neutral "±1'234.00"
Except for special cases, the entered value equals "0". - In tables with totals (Accounts table) the amounts are summed.
- Comments, text in square brackets [comment]
- Numbers with decimal and thousands separators.
- Date
- Dates in the format defined by the operating system.
- Comment, text in square brackets [comment].
- Time
- Time of day in the format defined by the operating system.
- Comment, text in square brackets [comment].
- True / False
- A value is present (Yes) or empty (No).
- Comment, text in square brackets [comment].
- Date/Time (Timestamp)
- Date and time in the international format "2025-09-24T03:49:42.000Z"
- Comment, text in square brackets [comment].
- Time counter
- Hours:Minutes:Seconds.Milliseconds "36:10:02.100".
- Comment, text in square brackets [comment].
- Links (Link)
- A link to a document or a web page.
- Comment, text in square brackets [comment].
- Multi-line text
- Text with line breaks.
- You must also enable the "Wrap text" option.
- Alt+Enter to insert a line break.
- Menu > Format > Calculate row height, to display the full text.
- Markdown
- Like Multi-line text, but assumed to be in markdown format.
- MIME
- Columns with special contents.
- Protected text
- Text not displayed.
Max and min length
Maximum and minimum length of the column.
Max and min value
You can enter maximum and minimum values (numbers and characters).
Decimals
You can define the number of decimals of the column.
Column number
It is a number that is automatically assigned to the column, but it has a purely technical purpose.
All uppercase
When you click this option, all data in the column are converted to uppercase.
Default date and number format on your computer
After installation, the program uses your operating system settings by default.
If you want to change the date, time and number formats in the program, you must change the settings in the Control Panel (Windows) or in System Preferences (Mac).
Detailed instructions for Windows:
- Start > Control Panel
- Under Regional options, click Change the date, time, or number format
- In the dialog that appears, in the Formats section, you can change the date format
- To change the number or currency format, in the same dialog, click the Additional settings button and then the Numbers or Currency sections.
Detailed instructions for Mac OS X:
- From Apple’s apple symbol (top left) choose the System Preferences command
- In the dialog that appears choose Date & Time
- From the window that appears click Open Language & Region... > Advanced > (General), Date and Time
where you can change the number format.
Settings Tab
Name
Enter the field name of the column to add. The program automatically inserts the new column in the list.
Xml name
This is the name of the active field in the Xml format and it is automatically inserted by the program.
Data type
It is possible to choose between the following preset types: Text, Number, Amount, Date, Time.
Max and Min length
Maximun and minimum field length.
Max and Min Value
It is possible to enter minimum and maximum values (numbers or characters).
Decimal points
It is possible to define the field decimal points
Column number
This is a number automatically attributed to a column, and has uniquely a technical purpose.
All caps
By clicking this option all column data will be converted to capital characters.
Date and numbers format by default
Once the program is installed, it automatically uses as default your operating system settings.
If you wish to change your operating system settings, you should go to your Control Panel (Windows) or your System Preferences (Mac).
Here is the step by step process on Windows 8 and Windows 10:
- from the Start → Control Panel menu
- click on International options and then on Change date, time or numbers format
- a dialog window will appear where you can change your data format (in the Format tab)
- in order to change your numbers or currency format, from the same window you can click on the Additional settings button and then on the Numbers or currency tab.
Here is the step by step process on Mac OS X 10.9.5:
- from the Apple logo (on the top left of your screen) click on System Preferences
- from the dialog window that appears choose the Date & time icon
- a new window will appear where you can choose Open language & Region...
- a new window will appear where you can click on the Advanced button
- finally a new window will appear where you can change the numbers format (General tab), date or time format (Date and Time tabs).
Date, time, numbers and links format in Banana Accounting Plus
When no particular formats are specified for the date, time and numbers, they are displayed in the formats specific to the operating system.
- Within Banana, only the display format can be changed.
- To change the input format (when changing a value) you must change the settings of your operating system.
To change the format, click on Data → Columns setup and enter the desired format type in the Format box. The format types are listed below with some explanatory examples:
| Date format | Examples for date |
| d mm yy | 1 01 15 |
| dd m yy | 01 1 15 |
| ddd mmm yyyy | Fri Jan 2015 |
| dddd mmmm yyyy | Friday January 2015 |
| The letter “d” (day) indicates the day, the “m” (month) indicates the month, and the “y” (year) indicates the year. | |
| Time format | Time examples |
| hh:mm:ss:zzz | 04:04:36:089 |
| h:m:ss:zz | 4:4:36:89 |
| Naturally the user can also invert the order of the elements making up the date or the time as desired (e.g.: mm dd yyyy). | |
| As far as the separators are concerned, the user can choose between all of those available on the keyboard (for example: #, @, -, /, ., etc.). | |
| Numbers Format | Example for numbers |
| 0. | 259 |
| 0.00 | 258.85 |
| 0.000 | 258.848 |
| The number of decimal spaces in a number field can be edited according to the user’s needs. Actual calculations are made using all the inserted decimal numbers. Rounding is only done for what is shown on screen. | |
| Link format | Link example | What it does |
| :link: | "receipts/office electricity october.pdf" | shows the full file path |
| :file: | "office electricity october.pdf" | shows the file name |
| :file:16: | "office electrici" | shows the first 16 characters of the file name |
| :file:16:ellipsis: | "office electr..." | shows the first 13 characters of the file name followed by ... (= total 16 characters) |
| :file:-24:ellipsis: | "...electricity october.pdf" | shows the last 21 characters of the file name preceded by ... (= total 24 characters) |
| :link:symbol: | ">>" | shows the >> symbol indicating that a file is linked |
| NB: The link format is applied only when printing on paper or to a PDF file and does not affect the on-screen display. | ||
New column
In each table, you can add new columns.
From the menu Data > Arrange columns > Add button.
Via Data > Columns setup > Add button.
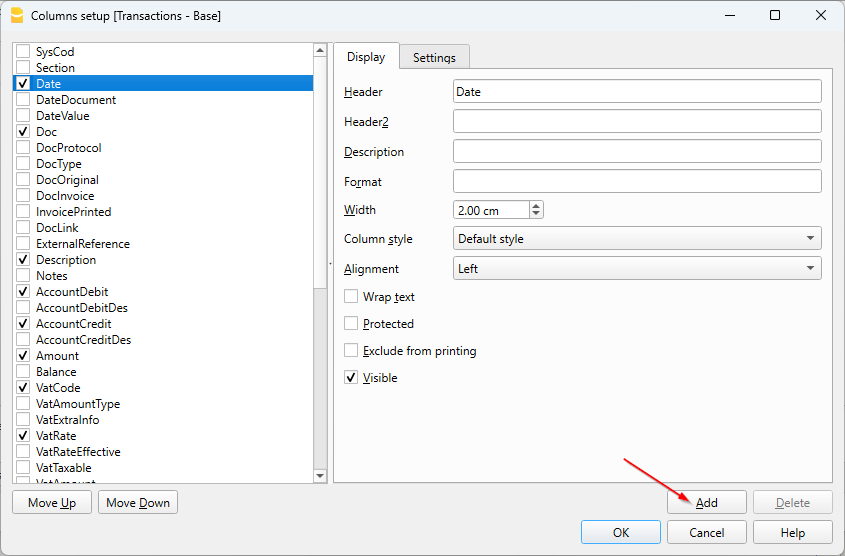

Field name
Enter the field name of the column to add.
Field name Xml
The name of the column to export in Xml and in scripts.
Data type
It is possible to choose between the following predefined types: Text, Number, Amount, Date, Time.
Tables setup
This command is activated via Data > Tables setup menu.
The Tables
These are the elements that contain the data in a format or rows and columns.
- The order of the tables cannot be modified.
- Additional tables are placed at the end of the existing ones.
- The headers of the predefined tables in Banana Accounting cannot be modified.
- The headers of user-added tables (e.g. the Internal notes table) can be modified:
- Go to the table where you want to change the header
- From the Data > Tables setup menu, enter the new name.
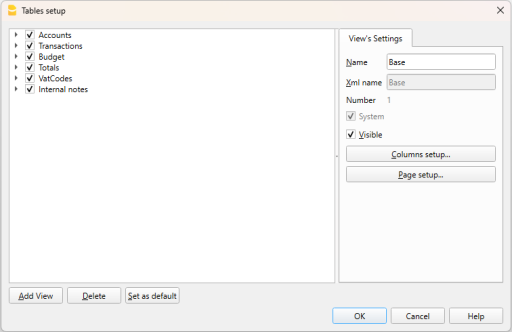
Views
They are indicated below each table.
They are the elements that define how the columns are displayed in the table.
Through the Views, you can define which columns should be visible, the display order, and how the columns are shown.

In order to add tables, please go to the Add new functionalities command.
View Settings
For each table, you can define:
- Name
The name of the table in the file language. This field cannot contain spaces or special characters.
It can only be changed for added tables. - Xml name
The name this is being used for the programming. This field cannot contain spaces or special characters.
It can only be changed for additional tables. - Header
The name that appears in the tables list - Visible
Indicates whether the table is visible or not.
Manage Views
Name
It is possible to enter a new name for the selected View.
Xml name
This is the View name for the Xml export. For system Views this name cannot be changed.
Number
This is a number automatically assigned to the View by the program.
Visible
When this box is checked the View will be visible.
System
When this box is checked the View is a system View and cannot be deleted or edited.
Columns setup
Displays the Columns setup page that allows to edit them, both in displaying them as well as in setting them up.
Page setup
This button leads to the page format settings.
Add
This button adds a new View to the active table.
Delete
This button deletes a View.
Set as default
Defines the View that is being used.
New view
From the menu Data > Tables setup > button Add View, you can add your own views (not provided for account cards).

View name
Enter the name of the view you want to add.
View name Xml
This is the view name for the Xml export.
After its creation, the new view is displayed in the same place as the existing views and will be added at the right side of the others.
Format Menu
The Format menu in Banana Accounting allows you to manage the appearance and readability of your data. From here, you can apply text styles (default, bold, italic), modify the default style for the entire file, adjust the font size, and automatically adapt row height to display long texts.
You also have commands to restore standard row heights and to insert or remove page breaks, which are useful when preparing prints. This way, you can present your data in a clear, organized, and personalized way.
In the Format menu the following commands are present:
Default style
This is the default style for the entire file.
Points
Use different points to define the font size.
Bold and Italic
Highlights in bold or italic texts from the selected cell or row.
Change default style
There is a default style throughout the file. The default style is used when adding a new row.
In order to change the default style:
- attribute the desired style to a row;
- click on the Format → Change default style command from the menu
All the rows with the original default style will then be shown in the new default style.
Calculate row height
When the text for a row is very long, the Calculate row height command from the Format menu allows the user to view it completely, adapting the height of the row.
To adapt the height of the row to the text, the user should:
- choose the Data → Columns setup command menu;
- select the appropriate field name;
- activate the Wrap text option in the Display tab;
- recall the Calculate row height command from the Format menu each time it is necessary.
Calculate all row heights
The Calculate all row heights command is similar to the previous one, with the difference that it operates on all rows of the table
Reset all row heights
Restores row heights to the default value.
Page break
At any point in a file, the user can insert a page break
To insert a page break:
- Place the cursor on the first row, where the new page is to be created
- Open the Format → Page break command
To remove a page break:
- Place the cursor on the row with the page break
- Open the Format and deactivate Page break command
Highlight rows with colours
The possibility of colouring the lines will make it easier to find different types of transactions at a glance.
To color the lines or texts is necessary to select them and then use one of the following icons: 
The first icon will set the background color, the second one the text colour.
- To deactivate the fill color, simply select the row or rows and click on No colour
- To deactivate the text color, position yourself on the line and select Automatic, in this way the color returns to the default color
No colour and Automatic colour
It is recommended to always use No colour and Automatic colour instead of black and white, because when you set the program theme in the Window Menu > Appearance > Display theme we have the following cases:
- Light theme, where texts are displayed in black
- Dark theme, where texts are displayed in white
If you use a light background colour, the texts will be displayed in black. While if the background is dark, the texts will be displayed in white.
If you chose black as the text color and white as the background, the assigned colors would remain the same. The texts may therefore no longer be visible if the theme is changed. To avoid this issue, you should select Automatic for the text and No color for the background.
When you use the row filter to display only coloured rows, the program displays all rows with colours, including rows that have been assigned the colour white or black. If you don't want to see these lines you need to select them and set No color as background or Automatic color as text.
Tools Menu
The Tools menu in Banana Accounting gathers advanced functions that help you manage, customize, and optimize your accounting files.
From this menu, you can view information about the open file, expand the available features, create or convert files into other accounting types, merge different files, and set the program’s general options.
For detailed explanations of the commands, click on the links in the menu on the left.
File info
The File info command, activated in the Tools menu, displays the characteristics of a file.
Columns
By activating the Complete view also the Xml columns are displayed, thanks to which, it is possible to retrieve the values automatically when the table is exported.
- Section: the Group name of the values
- ID: the specific and explicit identification of the value
- Description: contains an explanation of the value
- The rows in bold print are the section titles that group the different elements together
- Value: the formatted value
- Section XML: The name of the section in English
- ID XML: the identification in English
- Value Xml: the field contents in Xml format.
The Section XML and the ID Xml identify the value unambiguously.
Add/Remove functionalities
Banana Accounting Plus allows you to customize and enhance your accounting or productivity file by activating only the features you need. This way, the file remains easy to use, while at the same time it can be adapted to more complex needs.
To open the additional features dialog, go to:
- Tools menu > Add/Remove functionalities and select the desired option.
The available options change depending on the type of file you are using (accounting or productivity). Therefore, there are specific features for:
- Accounting applications - intended for accounting files.
- Productivity applications - intended for productivity files.
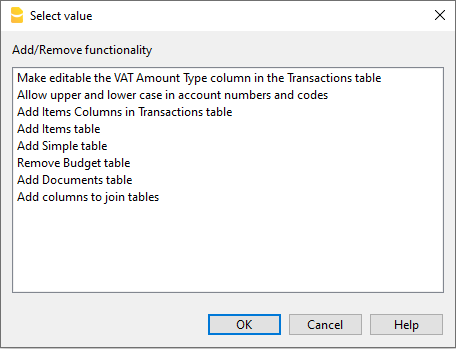
For more information, click on the mentioned links.
Documents table
The Documents table allows you to include text documents, images (including logo) or scripts in the accounting file.
It can be added by the user in two different ways:
- From menu Tools > Add functionalities > Add Documents table.
- This is created automatically when the program needs to save documents (e.g. adding the logo or attachments to the Enhanced Statement, Enhanced Statement with groups from the menu Reports > Attachments section).

The Documents table has the following columns:
- Id
The document's name. Id it is free text but should be unique within the table.- Documents starting with "_" are used for particular features of the programme.
- "_budget.js"
You insert your own functions created for the Budget table.
- "_budget.js"
- The dlgmanageaddons Id is used to save the image used as a logo.
- The attachment_ Id it is used for attachments in the enhanced balance sheet.
- Documents starting with "_" are used for particular features of the programme.
- Description
A brief description of the file (optional) - Attachments
Contains the file. By clicking on the cell it is possible to view or modify the contents of the file.
There are these types of possible content- Image (image/png, image/jpg)
- Normal text (text/plain)
- Formatted html text (text/html),
- Markdown-formatted text (text/markdown),
- Programming in javascript (text/javascript)
- Sheet style CSS (text/css).
Once the Documents table has been added, it can no longer be permanently deleted. If the table was added by mistake and you no longer wish to display it, you can remove it from view via the Data > Tables setup menu. Alternatively, if the file has not yet been saved (neither manually nor through autosave) after adding the table, simply close it without saving to cancel the operation.
Adding a new document

To insert a new document in the Documents table
- Add a new row.
- In the Id column write the name of the file .
- In the Description column you can write the desired text.
- In the Attachments column double-click on the cell or select the edit symbol, select the type of document you want to add.
See also:
Markdown Editor
In Banana Accounting Plus, balance sheets attachments can now also be inserted via markdown language, in addition to html. This is very convenient for inserting tables into attachments.
In Banana Accounting Plus this feature is only available with the Advanced plan.

Markdown is a language that allows you to create formatted text using a normal text editor and a syntax that is easy to write and read.
In Banana+ it is possible to use this language in the attachments of the Documents table and the GitHub Flavored Markdown specification is supported.
Documentation published by github.com:
Adding a Markdown document
- Select the Documents table.
- Add a new row.
- In the Id column write a name that identifies the document.
- In the Description column you can write the desired text.
- In the Attachments column double-click on the cell or select the edit symbol, select the Markdown Text type.
Add a balance sheet attachment with markdown text
How to create a table
To create tables in markdown, the content of the columns must be from the vertical slash sign, preceded and followed by a space " | ".
For the column alignment you must create a row with
- Left: simple hyphens (minimum three hyphens).
- Center: hyphens preceded and followed by the colon ":---:".
- Right: hyphens followed by the colon "---:".
# Notes to the Balance (Example)
The financial statements of Example have been prepared in accordance with the International Financial Reporting Standards (IFRS).
## Cash Positions
| Account | Description | Current Year | Previous Year |
| :---: | --- | ---: | ---: |
| 1000 | Cash | 23'000.00 | 17'000.00 |
| 1020 | Bank account| 9'000.00 | 1'000.00 |
| | **Total** | **32'000.00** | **18'000.00** |
## Other Fixed Assets
| Account | Description | Current Year | Previous Year |
| :---: | --- | ---: | ---: |
| 1000 | Machinery | 13'000.00 | 17'000.00 |
| 1020 | Furniture | 5'000.00 | 4'000.00 |
| | **Total** | **18'000.00** | **21'000.00** |

How to create an unordered list
# Create an unordered list
* First item
* Second item
* Third item
* Fourth item
How to create a task list with checkboxes
# Task list with checkboxes in Markdown
- [ ] Item 1
- [X] Item 2
- [X] Item 3
- [ ] Item 4
- [ ] Item 5

How to change the text color
# Change the text color using HTML syntax
This is normal text in black color, <span style="color:blue">and this text is blue!</span>
<span style="color:red">Another text in red color.</span>

How to change color, font and size of a text
# Change the text color, font and size using HTML syntax
<span style="color:green;font-size:20pt;font-family:Times New Roman;">Change color, font and size of a text</span>

How to apply bold format
# Use double asterisks ( **text** ) before and after the text
**This is a text written in bold**
How to apply italic format
# Use single asterisks ( *text* ) before and after the text
*This is a text written in italic*
How to apply bold and italic format
# Use three asterisks ( ***text*** ) before and after the text
***This is a text written in bold and italic***
Features currently not available
These features, although requested by some users, are not available at the moment:
- Add a link in the markdown text
HTML Editor

Adding the ${...} field
The ${...} field allows the user to add dynamic text to the document, for instance an account's balance or a Banana table. The Banana API interface is available at the following web address https://www.banana.ch/doc/en/node/4714
The command can be added manually or through the command Edit - Add script
Printing a blank line (put a space between the quotes)
${' '}
Printing the current balance of account 1020
${Banana.Converter.toLocaleNumberFormat(Banana.document.currentBalance('1020','','').balance);}
Output of the Accounts table, columns: Account, Group, Description, Balance.
${HTML Banana.document.table('Accounts').toHtml(['Account','Group','Description','Balance'],true);}
It is possible to write the javascript code in a separate document and include the script through the command Banana.include.
The scripts can be saved in the Documents table or in a local file.
${Banana.include('documents:myscript1');rtnValue}
${Banana.include('c://temp//myscript16.js');rtnValue}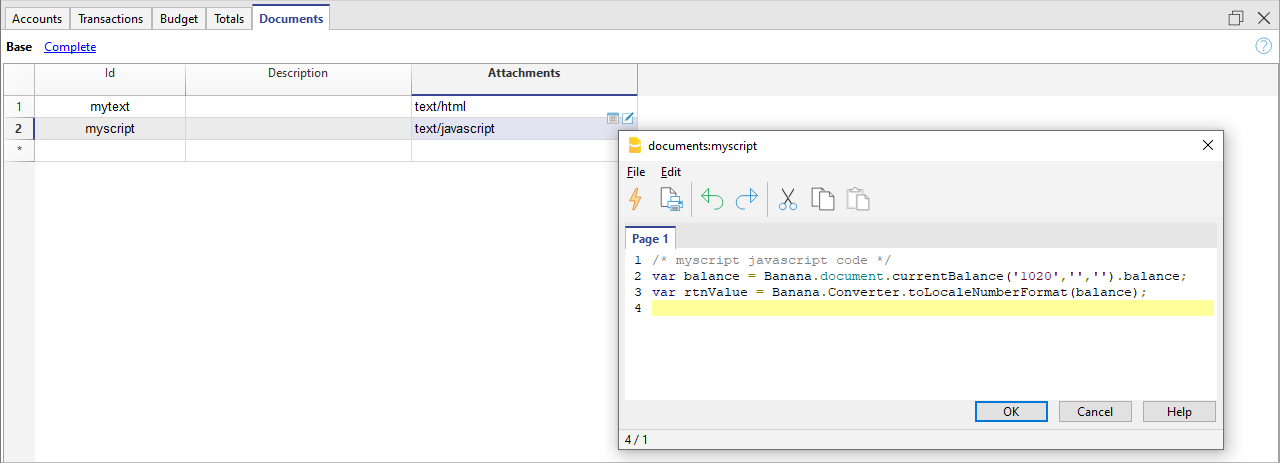
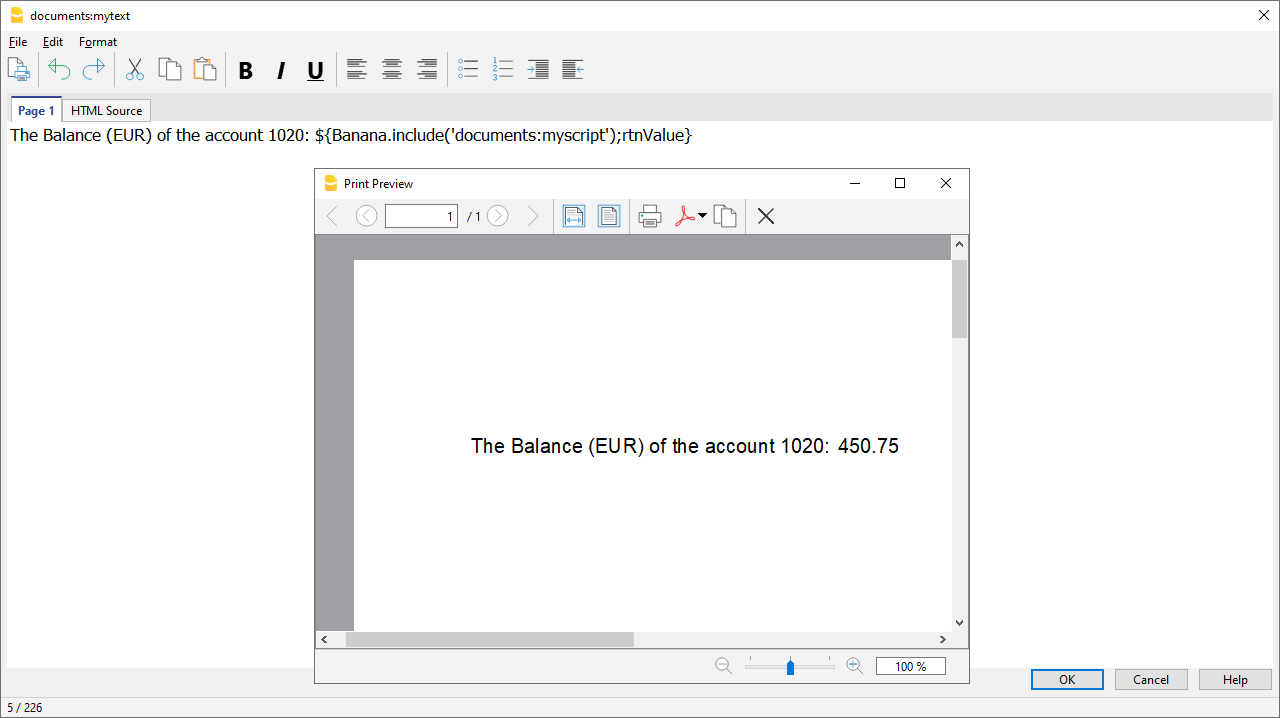
Adding a page break
The command can be added manually or through the command Edit - Add page break
Text in the first page
${PAGEBREAK}
Text in the second page
Troubleshooting
- When taking text from external sources (Word, Internet pages, ...), use the Edit > Paste as plain text command.
This command avoids problems with HTML formatting, which in some cases prevents correct display. - For the examples on this page, use the Copy link on the top right of each example, do not use CTRL+C (or CMD+C).
- If the ${…} field does not work, check that there is no HTML formatting (such as <span>…</span> elements or other) and possibly remove it from the HTML Source code.
- To remove existing HTML formatting from an entire page:
- copy text to clipboard (CTRL+C)
- go to the HTML Source tab and delete all content
- go to the Page 1 tab and paste the copied text with the Edit > Paste as plain text command.
Embedded Extension
Embedded Extensions are extensions written in JavaScript and saved directly in the Documents table of the accounting file. They work exclusively in that specific file without requiring installation. Once created, they are immediately ready to use.
Add an Embedded Extension
- Open an accounting file in Banana Accounting Plus.
- Ensure the Documents table is enabled:
- Add the extension in the Documents table:
- In the ID column enter a name for the extension.
- In the Description column enter a comment.
- In the Attachments column, attach the JavaScript code with a double click on the cell or select the edit symbol in the top right corner, then select Javascript code and confirm with OK.
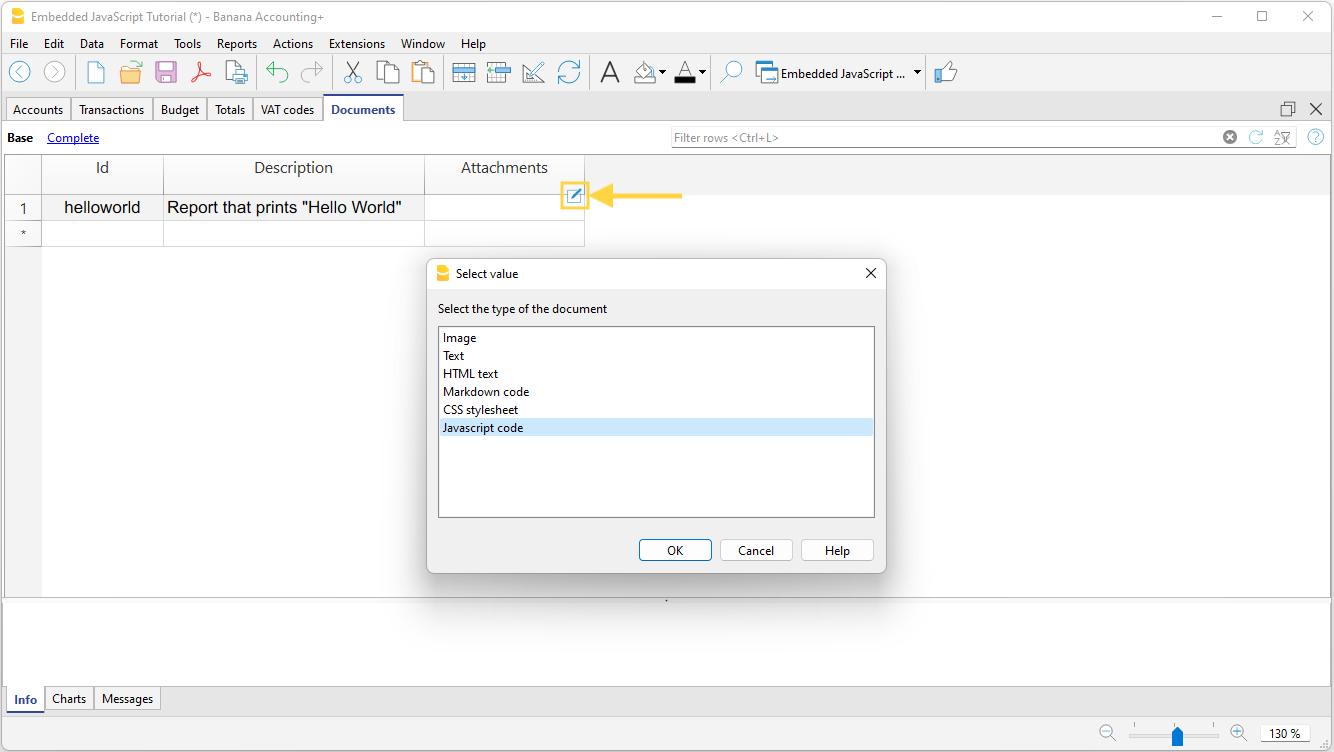
- An editor where you can write your javascript code opens.
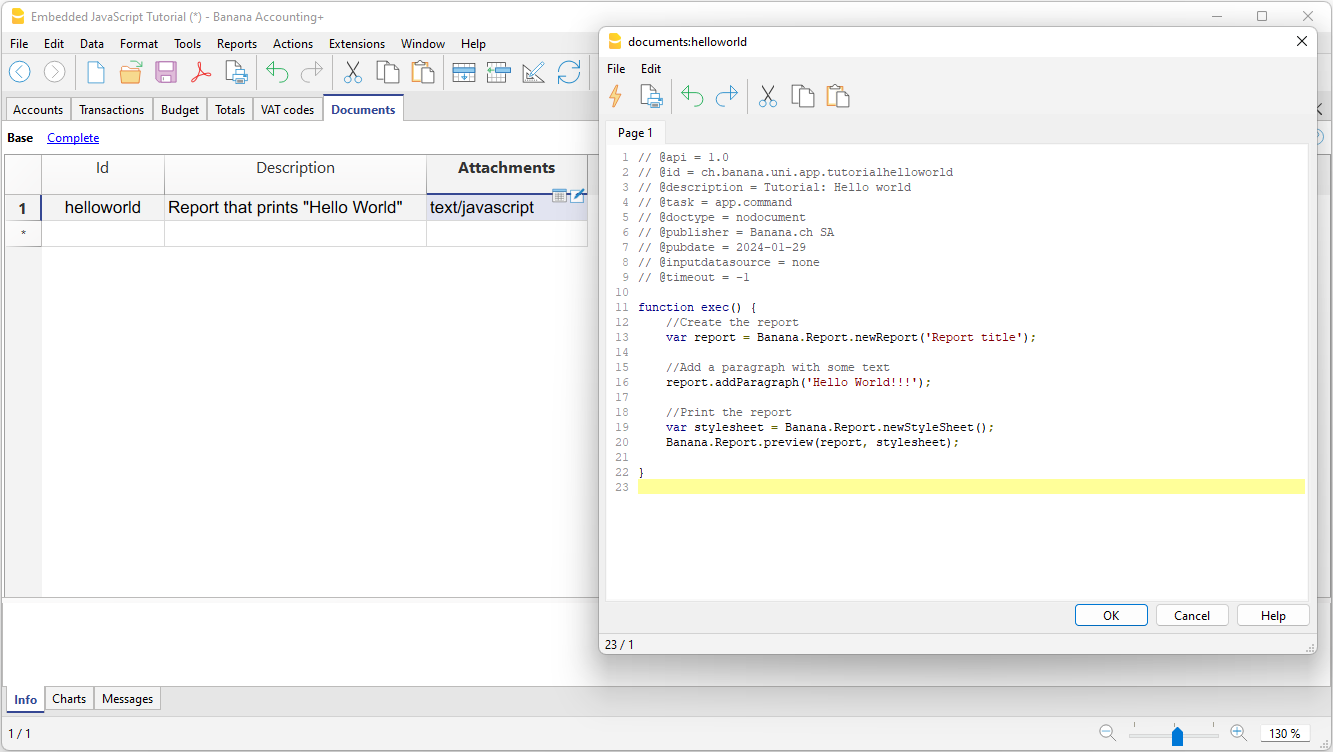
- When you are finished, confirm with OK, and save the accounting file.
Run the Extension
You have two options to run the embedded extensions:
- From the Documents table, click the run symbol in the Attachments cell containing your code.
- From the Extensions menu, select the extension from those listed.
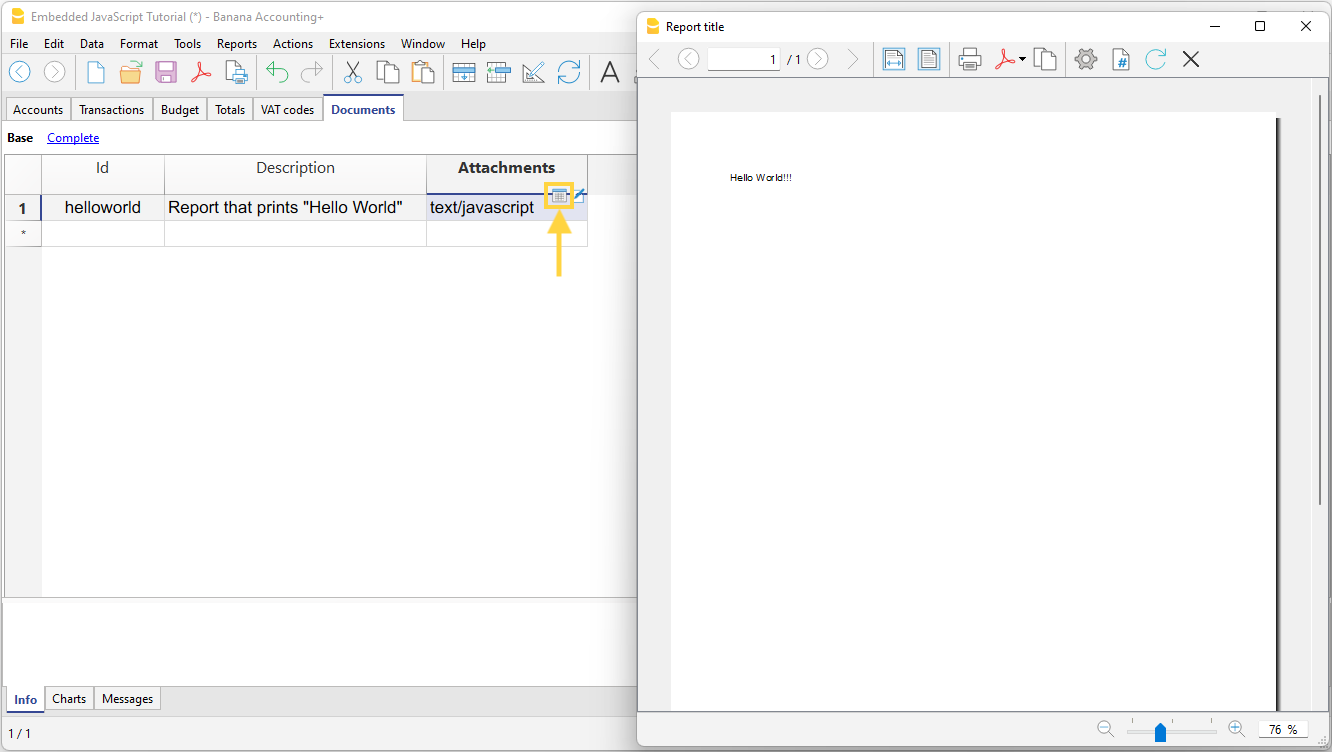
More information
Documentation for developers:
Add Simple table in the file (from Add functionalities)
You can add one or more simple tables to the same accounting file to include additional information without overloading the accounting data structure. Every time you need to add a simple table:
- From the Tools > Add/Remove functionalities > Add simple table menu
The program adds a table to the existing file with the name you assigned, and it includes the following columns:
- Id – Used to create a list of coded items. Each row is assigned an Id code to identify the item
- Description – Enter text to describe the item
- Notes – Enter text for notes or other information

- Assign a name to the table.
- In our example: Internal notes
- Confirm with OK
The new table is added to the file and is immediately available.
Customize the columns
In the simple table you can customize the columns by displaying other predefined columns and/or adding new ones.
Display other predefined columns:
- From the Data menu > Columns setup
- From the list, select the desired column (e.g. the Link column)
- Click on "Visible"
- Confirm with OK.
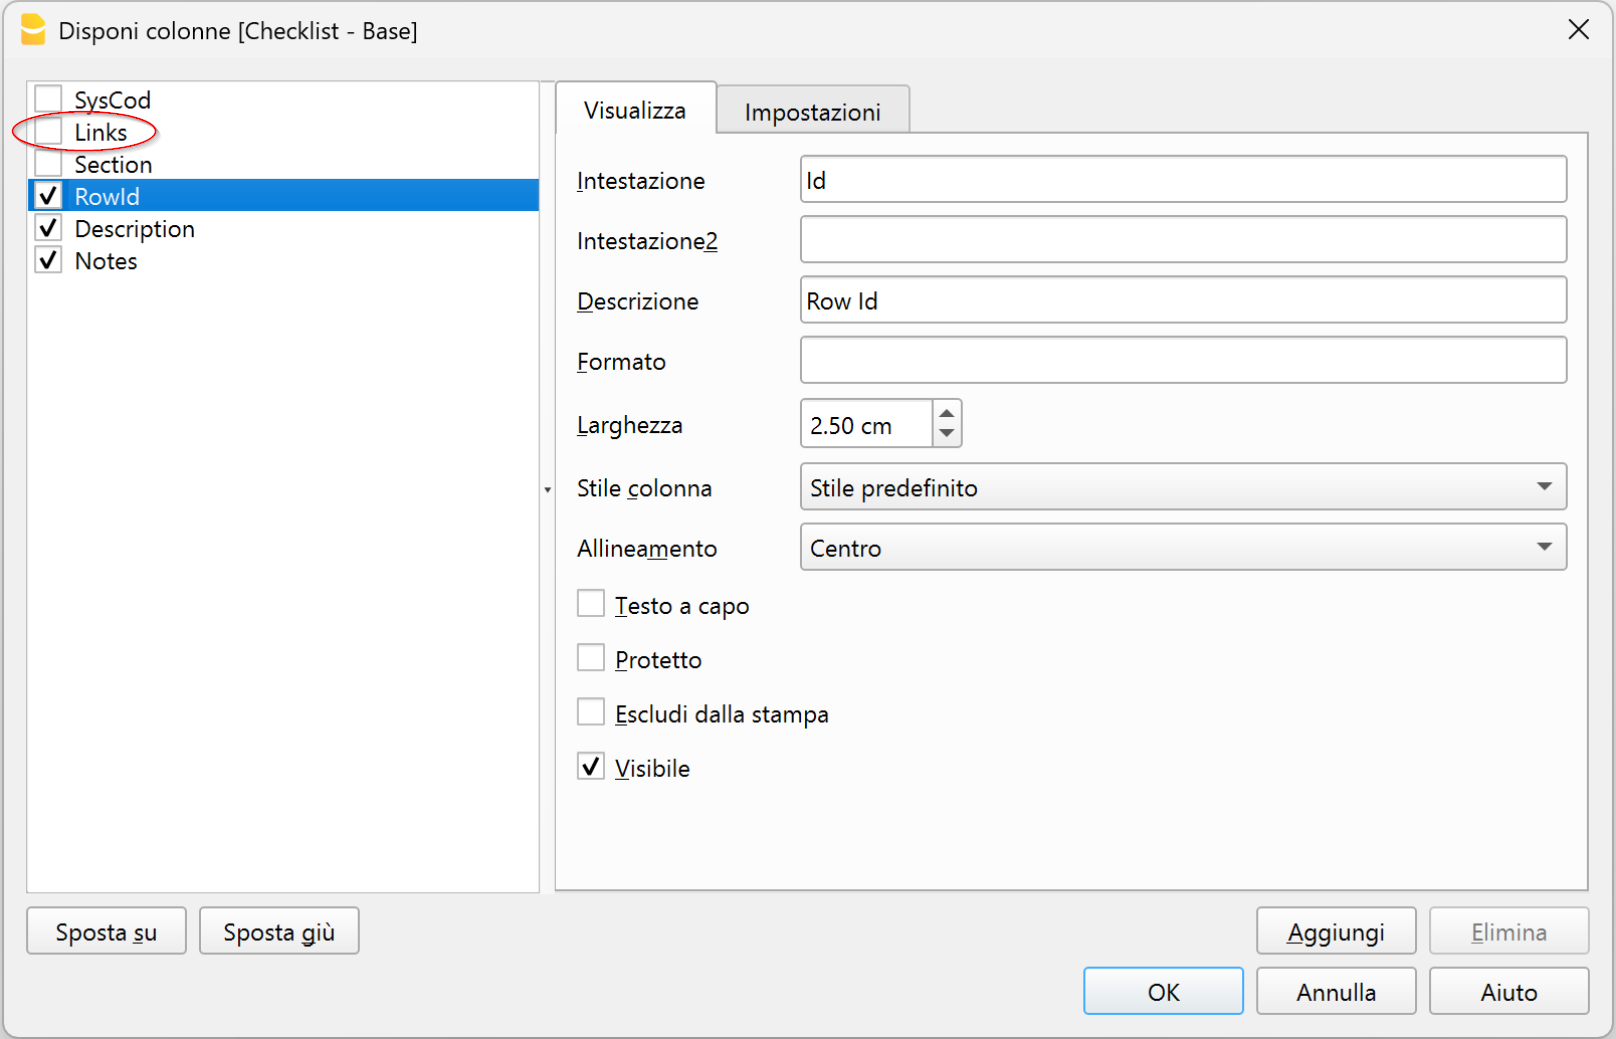
Add new columns:
- From the Data menu > Columns setup > Add
- Give a name to the column (e.g. Date)
- Define the column format (e.g. text, date, amount, currency...)
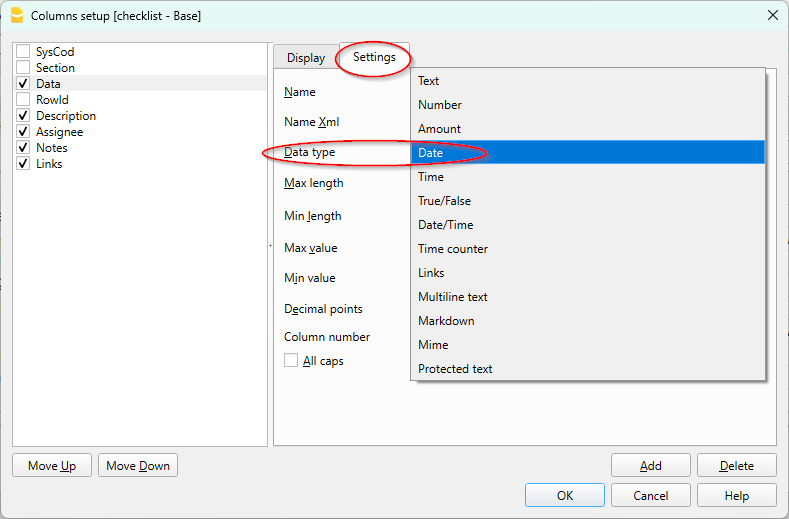
Change the header of a simple table
To change the header of a simple table, go to the simple table:
- Go to the Data menu > Tables setup
- In the dialog, select the simple table you want to change
- In the settings box, change the name
- Confirm with OK.
For more information, visit the page:
Tabella QuickSum (Technical preview)
QuickSum Table è una tabella strutturata, basata su una logica contabile, pensata per la preparazione di capitolati, computi metrici e richieste di offerta all’interno di un ambiente affidabile e controllato.
Vantaggi principali:
- Totali sempre corretti, calcolati automaticamente dal sistema secondo una logica contabile, senza formule manuali.
- Coerenza e tracciabilità dei dati, grazie a una struttura che evita incongruenze e modifiche accidentali.
- Riduzione degli errori, anche in presenza di aggiunte, correzioni o riorganizzazioni delle voci.
- Struttura chiara e stabile, adatta a documenti professionali e allegati contrattuali.
- Utilizzo immediato, simile a un foglio di calcolo, ma con i vantaggi di un sistema contabile.
- Documenti affidabili, pronti per essere condivisi, archiviati o allegati a offerte e contratti.
Technical Preview
La tabella QuickSum è uno strumento ancora in fase di sviluppo e che viene messo a disposizione a un limitato numero di utenti.
Ci sono diverse funzionalità che sono per il momento provvisorie e che subiranno cambiamenti con il tempo.
Per il momento è solo disponibile all'interno della versione Dev Channel.
Funzionamento
La QuickSum Table si usa come una tabella Excel, con colonne per l'identificativo, descrizione, quantità, prezzo e totale, con però i totali in verticale fatti in automatico.
- L'identificatore (ItemId) può essere suddiviso in più livelli tramite i punto ".".
- Gli identificatori devono essere disposti in sequenza ordinata, dal più piccolo al più grande.
- Il programma in automatico fa i totali.
Qui un esempio
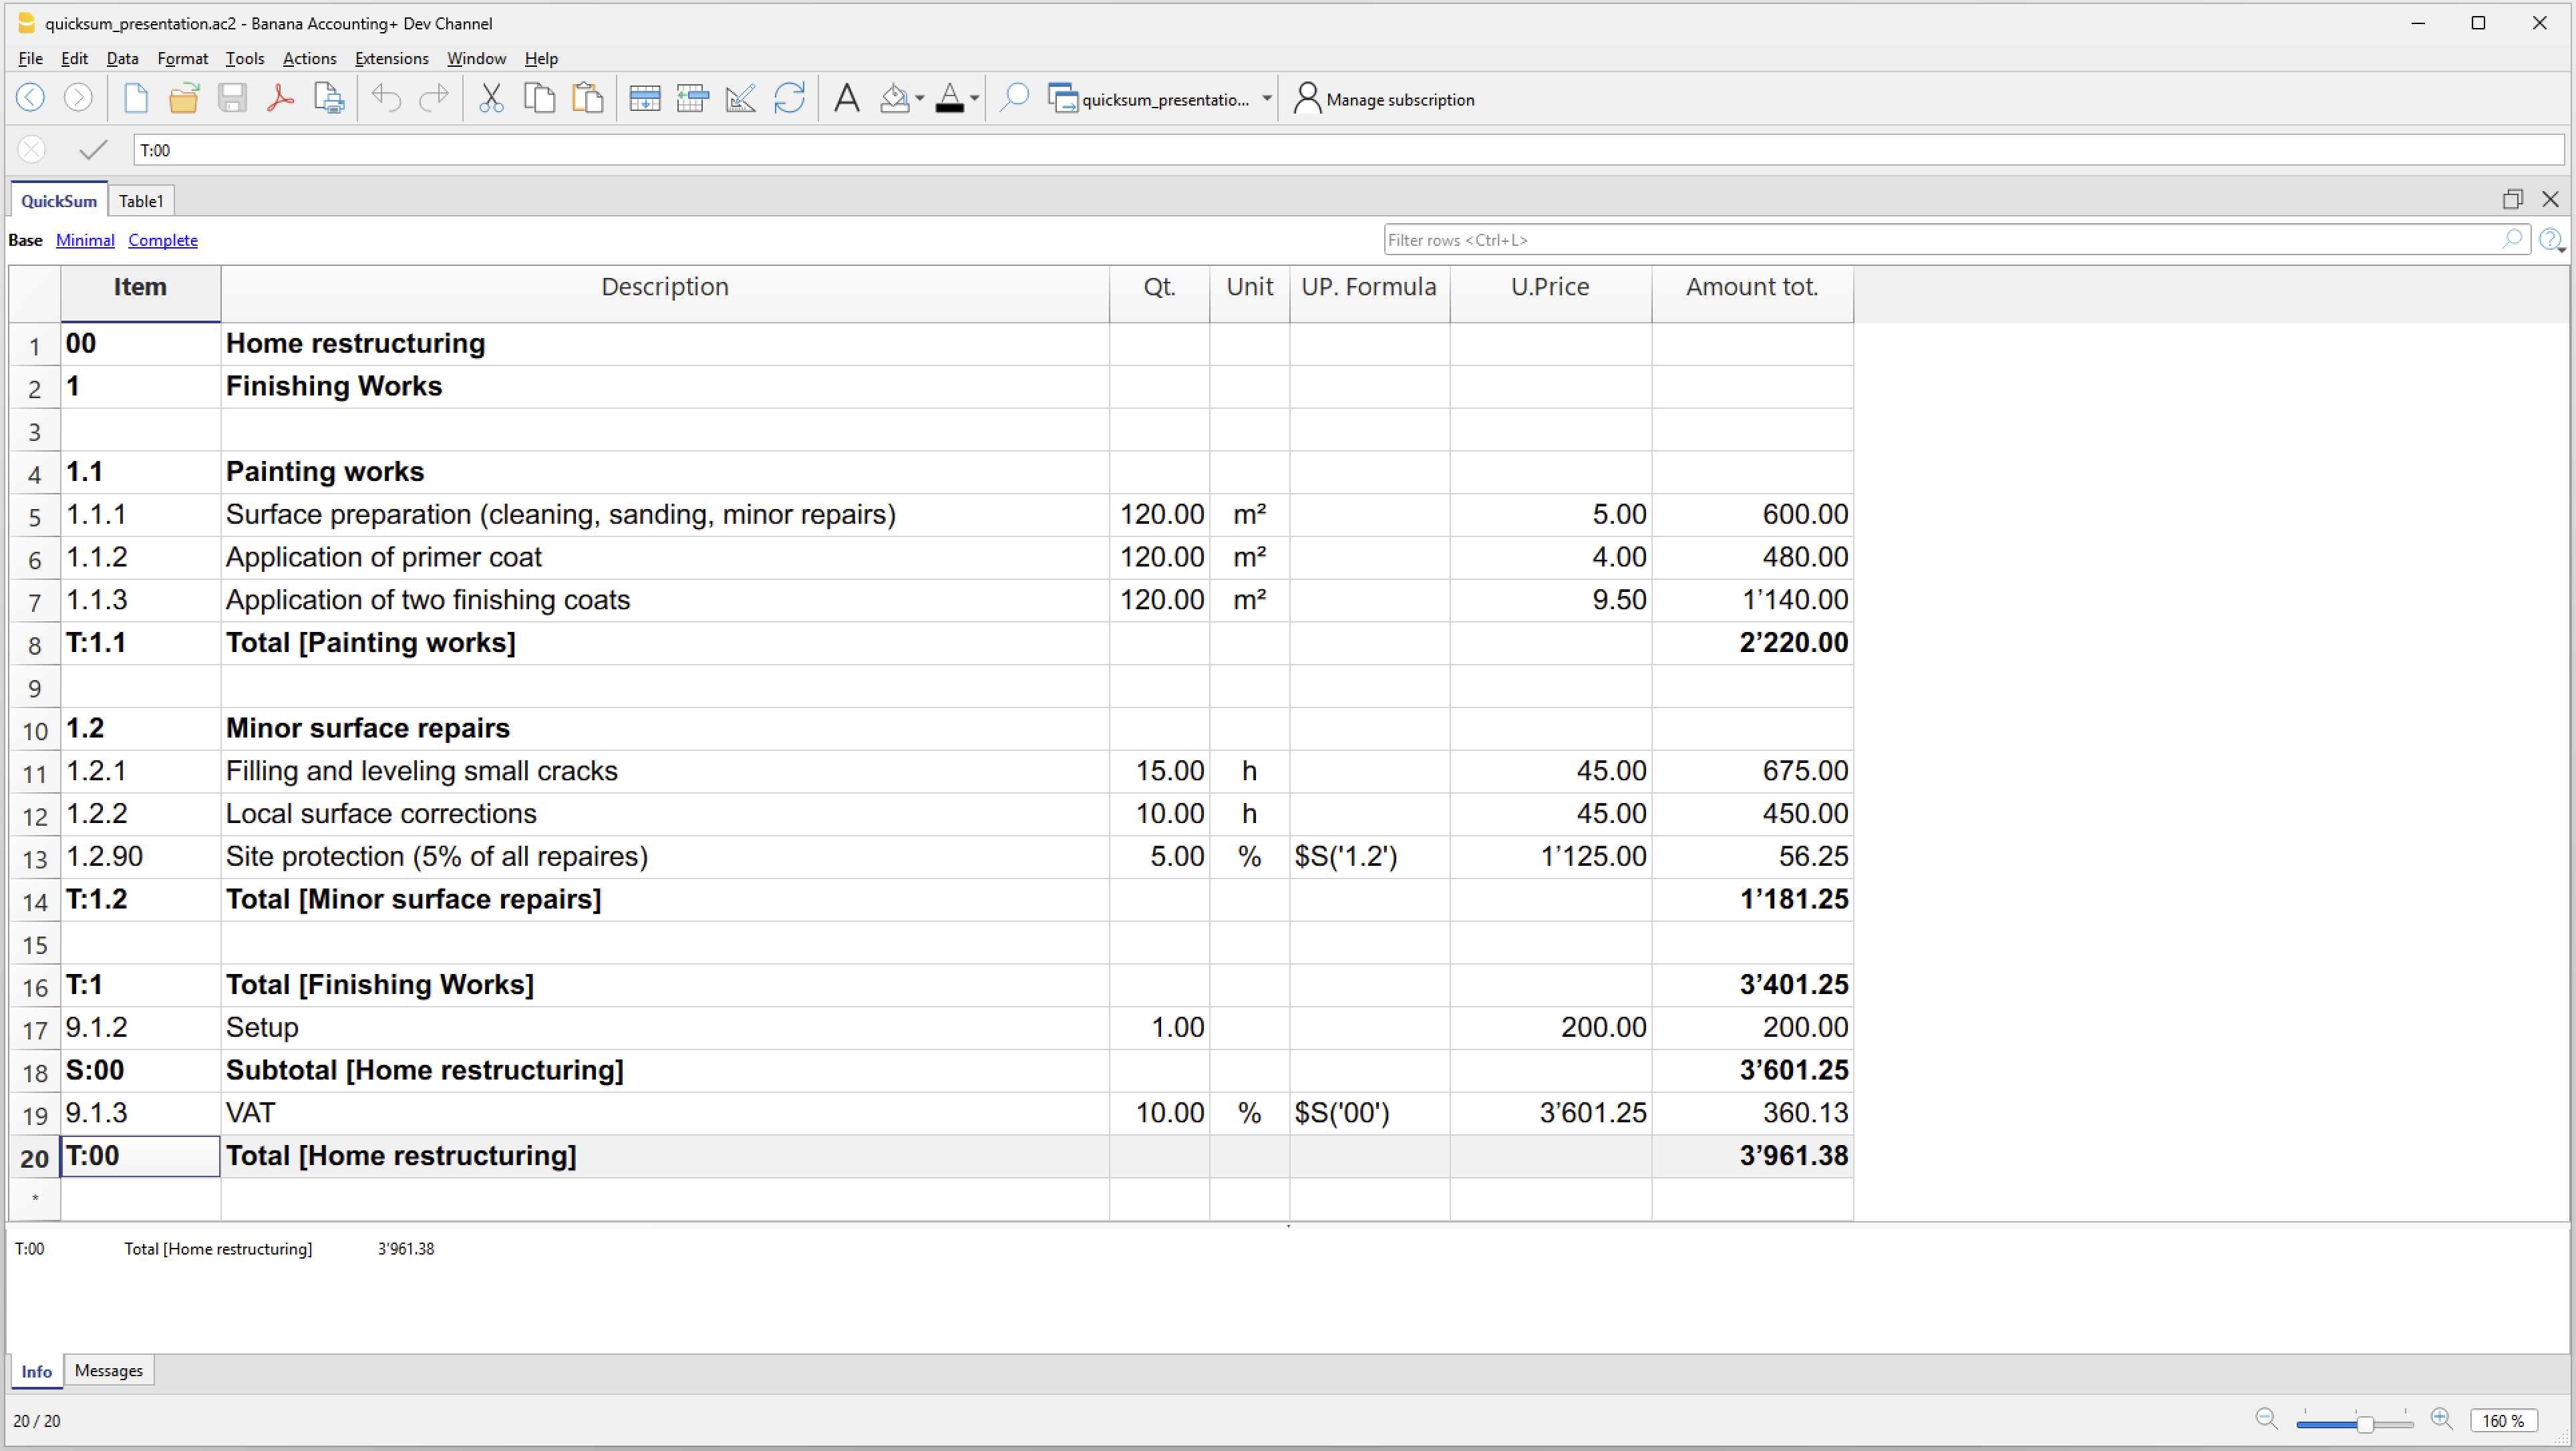
Aggiunta della tabella QuickSum
Attualmente la Tabella QuickSum è ancora in fase sperimentale ed è disponibile solo nella versione interna di Banana Contabilità.
Nella applicazioni di produttività viene aggiunta con il comando Menu Strumenti > Aggiungi Funzionalità > Tabella QuickSum
Le colonne
La Tabella QuickSum ha le seguenti colonne di inserimento dati :
- ItemId
L'id che identifica l'elemento- Può assumere diverse forme come spiegato in seguito.
- Deve essere sempre in sequenza crescente. Prima i valori più bassi e poi quelli più alti.
- Per esempio "2.1.1", "T:2.1.1", "V:2.1.1", "V:T:2.1.1"
- Stile
Per assegnare uno stile, per un uso futuro della stampa. - Codice Modifica.
Per quando la tabella è in modalità blocco, indica quale colonne devono essere modificabili.- D: Descrizione modificabile.
- N: Note modificabile.
- Q: Quantità modificabile.
- P: Prezzo unitario modificabile
- I valori indicati fra parentesi quadre e fra parentesi graffe sono inseriti in automatico dal programma e possono essere sovrascritti.
- Descrizione
La descrizione dell'elemento e anche i valori nel caso di sommario.
Se contiene tre punti "..." significa che vi è un valore da completare. - Note
Una colonna di testo per annotazioni. - Quantità
Un importo numerico. - Unità
Indica il tipo di valore indicato.- Un testo libero.
- "%" la quantità sarà considerata come un percento del prezzo.
- Formula Prezzo Unitario
Se presente la formula viene calcolata e il risultato rimpiazzera il valore nella colonna Prezzo. - Prezzo Unitario
Il prezzo che viene usato per calcolare il valore. - Formula inizio
Nel caso che si vuole indicare la formula in due parti. - Formula testo
- Una formula di calcolo in Javascript.
- Se presente viene eseguita e il risultato andrà a sostituire l'Importo calcolato.
- Importo risultato
Importo calcolato dal programma.- Se esiste una formuala il risultato della formula.
Altrimenti - La quantità moltiplicata per il prezzo unitario.
- Se unità "%" il prezzo unitario in percentuale della quantità.
- Se esiste una formuala il risultato della formula.
- Codice1 e Codice2
Delle colonne che servono per indicare che la riga è di un certo tipo.
Per esempio "S" può significare che a queste posizioni viene indicato uno sconto particolare.
Ci sono poi una serie di colonne che servono per i calcoli e il controllo:
- ItemIdCalc
È l'ItemId usato per il calcolo e considera anche le modifiche dovuta all'attivazione delle varianti. - Formula Prezzo Unitario Calc
È la formula di calcolo del prezzo unitario usata per i calcoli, creata partendo dalla formula del prezzo unitario modificata dal programma tenendo conto dell'attivazione delle varianti. - Formula Calc
È la formula di calcolo usata per i calcoli, creata partendo dalla formula inizio e formula modificata dal programma tenendo conto dell'attivazione delle varianti. - Testo Risultato
- È il risultato in formato testo ottenendo eseguendo la Formula Calc.
- Mostra eventuali errori.
- Sommato in
- Indica in che elemento è stato sommato il valore della riga.
- Permette di controllare l'itemId ne caso sia lasciato vuoto o si sia usato una variante.
L'ItemId
Viene inserito nella colonna ItemId ed identifica la riga e l'elemento. Può avere diverse forme
- Identificatore dell'elemento (ItemId)
Può essere composto dai seguenti elementi, separati da duepunti ";"
Per esempio "2.1.1", "T:2.1.1", "V:2.1.1", "V:T:2.1.1"- Il valore "00" è relativo al totale complessivo.
- Si inserisce all'inizio per indicare il testo del progetto.
- Il Subtotale "S:00" mostra la somma fino a quel momento.
- Il Totale "T:00" può essere usato solo come ultima riga di totale.
Oltre non ci possono più essere totali. - Nella formula $S('00') ritorna il totale complessivo di tutte le righe sommate fino a quel momento.
- Gerarchia.
- Dei valori separati da dei punti "." che definiscono l'emento e la struttura.
- Esempio "1", "1.9", "2", "2.1", "2.1.2", "A.1.2"
- La gerarchia è data dalla separazione.
Quindi gli elmenti "2.1" e "2.1.2" apparteranno all'elmento superiore "2". - La gerarchia determina anche la sequenza degli elementi in ordine alfabetico naturale.
L'elemento "1" dovrà precedere il "1.9" e il "2" e via di seguito.
In caso contrario verrà segnalato un errore.
- Prefisso.
- Determina il tipo di elemento.
- "F": riga finale gerarchia.
- Questo elemento è l'ultimo della gerarchia creata.
- Esempio: "2.1", "2.1.1", "2.1.1.1", "2.1.2", "F:2.1" chiude la sequenza e quindi dopo il "F:2.1" non ci potranno più essere elementi "2.1", "2.1.1".
- "S:" riga di subtotale
- Viene indicata la somma di tutti gli elementi che appartengono alla gerarchia.
- Esempio: "S:2.1" riprenderà la somma di tutti gli elmenti "2.1", "2.1.1", "2.1.1.1", "2.1.2"
- "T:" riga di totale
- Viene indicata la somma finale di tutti gli elementi che appartengono alla gerarchia.
- Esempio: "T:2.1" riprenderà la somma di tutti gli elmenti "2.1", "2.1.1", "2.1.1.1", "2.1.2"
- Chiude la sequenza e quindi dopo il "T:2.1" non ci potranno più essere elementi "2.1", "2.1.1".
- "F": riga finale gerarchia.
- Determina il tipo di elemento.
- Variante.
Vedi sezione successiva di spiegazione.- Un codice che identifica la Variante e precede l'ItemId.
- Deve obbligatoriamente iniziare con la lettera "V" ed esere seguito da dei duepunti ":" .
- Il codice della variante deve precedere gli elementi. V
- Esempi variante
- "VA:" "VA:2.1", "VA:2.1.1"
- "VB:" "VB:2.1", "VB:2.1.1"
- Le righe della variante devono essere in sequenza.
- Se si integrano o sostituiscono una riga devono essere anche nella sequenza.
- Il valore "00" è relativo al totale complessivo.
- Comandi "#"
Il valore viene indicato nella colonna Descrizione- Iniziano con il carattere "#"
- Sono usati internamente per indicare delle fuzionalità
- Gli elmenti non vengono sommati.
- "#scenario" permette di specificare nella colonna Descrizione le Varianti da usare in aggiunta o al posto delle posizioni esistenti.
per esempio la descrizione "VA;VB" - "#options" opzioni di calcolo separate da punti e virgola.
- "lock", attiva il blocco della tabella (comando provvisiorio).
- "onerrorcalculate" continua la calcolazione anche se ci sono degli errori.
- "#columnsSum" indica il nomeXml delle colonne da sommare nei contatori accessibili tramite la funzione "$S()".
- Diverse colonne vengono separate da punto e virgola ";".
- Le colonne "Code1;Code2" sono già considerare e non bisogna specificarle.
- Per esempio "Code3;Code4" .
- "#rounding" è il valore minimo in cui l'importo totale riga viene arrotondato.
- Si inderisce nella colonna Descrizione.
- Per esempio "0.05", "0.10", "1"
- Il separatore decimale deve sempre essere il punto "."
- Righe calcolo hash
Sevono a verificare se il documento è cambiato- "#hash-base"
Il programma inserisce nella Descrizione l'hash calcolato sugli elementi che non sono modificabili.
Se si modificano le celle in cui si possono inserire valori anche quando il documento è in modalità blocco, l'hash non cambia. - "#hash-all"
Il programma inserisce nella Descrizione l'hash calcolato su tutti gli elementi del documento.
Quindi qualsiasi valore viene modificato viene modificato anche l'hash.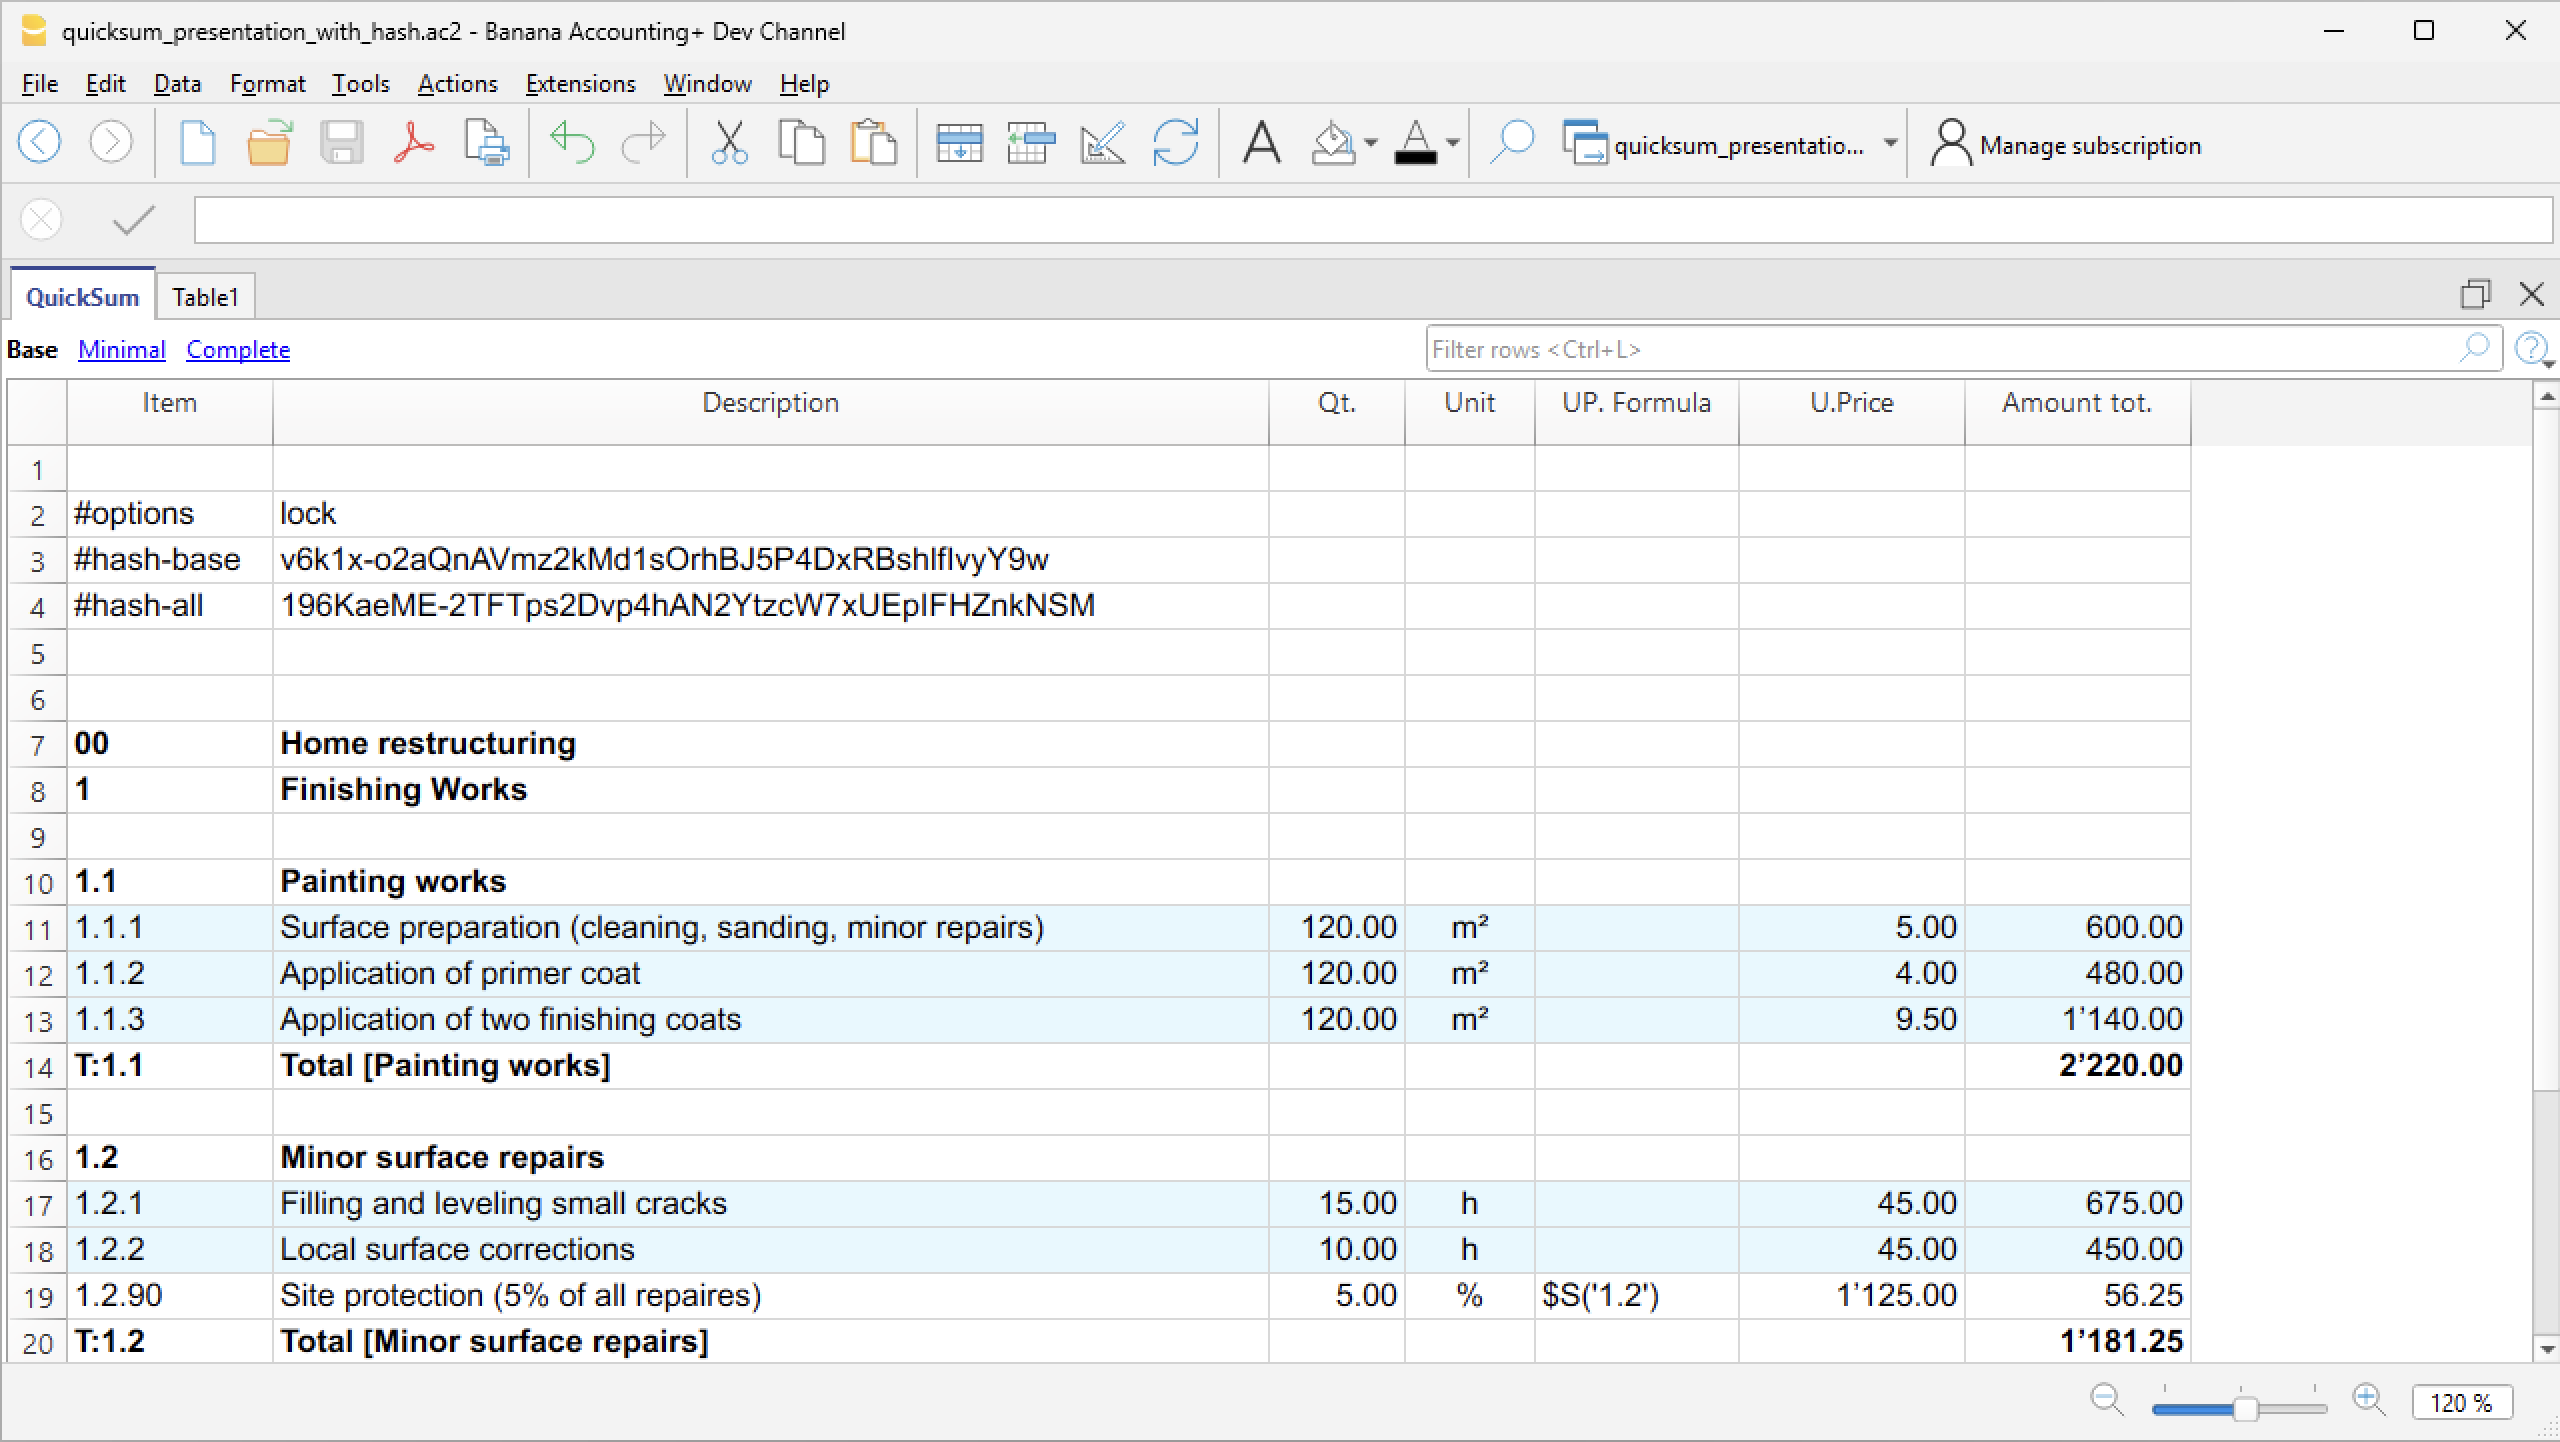
- "#hash-base"
- Commenti fra []
- Sono elementi che sono inclusi in parentesi quadre
"[]", "[testo]" - Gli elmenti non vengono sommati.
- Sono elementi che sono inclusi in parentesi quadre
- Elementi vuoti
- Viene ripreso l'id che precede e non è stato chiuso.
Logica di calcolo e somme
Nella tabella QuickSumi gli importi vengono calcolati e sommati in automatico.
- Dopo ogni modifica tutta la tabella viene ricalcolata.
- Il programma svuota tutte le colonne calcolate.
- Il programma parte della prima riga e continua fino all'ultima.
Se vi è un errore la calcolazione viene interrotta delle righe successive non viene eseguita. - Descrizione righe di Totale "T:" o sottototale "S:"
- Se la descrizione è vuota o termina con elemento commento (fra parentesi quadre), la descrizione viene messa automaticamente dal programma, facendo seguire al termine "Totale" o "Sottototale" l'intestazione dell'ItemId o se non presente il valore dell'ItemId.
- L'intestazione dell'ItemId è considerata la descrizione usata quando è stato usato per la prima volta l'ItemId.
- Calcolo importo riga.
- Vengono usati u contenuti delle colonne Quantità, Unità e Prezzo unitario
- Se vi sono delle formule queste vengono eseguiti e il risultato rimpiazza il valore.
- Il programma dopo ogni riga somma nel contatori dei diversi elementi strutturati.
- Somma il valore della riga nei diversi elementi che compongono l'ItemId strutturato.
- Se per esempio se l'item è "2.1" il programma andrà a sommare l'importo della riga nei seguenti contatori, accessibili con la formual $S('2.1.1') in:
- 2
- 2:{*}
- 2.1
- 2.1:{}
- Se per esempio se l'item è "2.1.1" il programma andrà a sommare l'importo della riga nei seguenti contatori, accessibili nelle formule con la funzione $S('2.1.1') in:
- 2
- 2:{*}
- 2.1
- 2.1:{*}
- 2.1.1
- 2.1.1:{}
- Il programma somma anche nei contatori relative alle colonne, accessibili nelle formule tramite la funzione $S().
Le colonne formule
Le colonne Formula prezzo unitario e Formula permettono di inserire delle espressioni in linguaggio Javascript.
- Gli importi si indicano nel formato di programmazione e non quello internazionale.
- Non vi sono separatori di migliaia.
- Il separatore di decimali è sempre il punto ".".
- Esempi di numeri "12345.67", "-123.45"
- Si può usare tutta la sintassi del Javascript e anche creare funzioni.
- Si possono usare le funzioni predefinite appositamente per la tabella QuickSum:
- $S('itemId')
- Ritorna la somma, fino a questo punto, del contatore specifico dell'item.
- Per esempio
- $S('2') ritorna la somma di tutti i totali che iniziano con 2
- $S('2.1') ritorna la somma di tutti i totali che iniziano con 2.1
- $S('2.1.1') ritorna la somma di tutti i totali che iniziano con 2.1.1
- $S('00') ritorna la somma di tutto
- Si può usare anche con parentesi graffe
- $S('2:{=}') solo gli elementi che sono esattamente 2, quindi senza i sotto elementi.
- $S('2:{+}') solo gli sottoelementi di 2.
- $S('2') = $S('2:{=}') + $S('2:{+}')
- $C('ColumnNameXml', 'Value')
- Sum values with conte
- ColumnNameXml è il nome in inglese della colonna.
- Value è il possibile contenuto della colonna.
- Ritorna la somma degli importi delle righe fino alla calcolazione precedente alla riga attuale, per tutte le colonne che contengono nella colonna specificata il valore indicato.
- Per esempio con un valore specifico
- "$C('Code1','X')" La somma degli importi delle righe che contengono nella colonna Code1 il valore "X".
- "$C('Code1','Y')" La somma degli importi delle righe che contengono nella colonna Code1 il valore "Y".
- Puoi usare anche un distintivo
- "$C('Code1','{*}')" La somma degli importi delle righe con qualsiasi valore (anche vuoto) nella colonna Code1 .
Corrisponde alla somma totale T00. - "$C('Code1','')" oppure "$C('Code1','{}')" La somma degli importi delle righe con la colonna Code1 vuota..
- "$C('Code1','{<>}')" La somma degli importi delle righe che contengono un valore non vuoto nella colonna Code1.
- "$C('Code1','{*}')" La somma degli importi delle righe con qualsiasi valore (anche vuoto) nella colonna Code1 .
- Valori non ammessi
- Nella colonna che viene usata per inserire dei valori non si possono usare
"{}","{*}","{<>}" - Ai fini dei totali per la funzione $C questi valori sono considerati come vuoti.
- Nella colonna che viene usata per inserire dei valori non si possono usare
- $V() L'elenco delle varianti usate nella calcolo separate da punti e virgole.
- Per esempio "VA;VB"
- $S('itemId')
- Arrotondamento finale.Si può inserire una formula prima della riga finale per calcolare l'arrotondamento al minore.
- Per esempio "Math.floor($S('00'))-$S('00')"
- Si può usare la formula anche in altre posizioni cambiando l'Id.
Varianti
La tabella permette di inserire degli elementi varianti per:
- Includere degli elementi.
Per esempio un'offerta che prevede appunto degli elementi opzionali. - Sostituire degli elementi.
Per esempio per cambiare le specifiche tecniche.
La variante viene indicata nell'ItemId, facendo precederla da un identificatore di variante.
- La sigla della variante deve iniziare obbligatoriamente con "V" ed essere separata da un due punti ":" dall'itemId.
- Per esempio "VA:2.1"; "VB:2.1.1"
- "VA:T:2.1" per indicare la riga di totale.
- Meglio usare sempre una sigla maiuscola.
- L'elenco degli elementi appartenenti alla variante deve seguire quello della gerarchia normale.
- Le Varianti possono essere degli elementi supplementari.
- Le Varianti possono sostituire un elemento già esistente.
- Normalmente le Varianti vengono calcolate a se stante.
L'attivazione di una Variante viene effettuata nel seguente modo:
- Andare sulla riga con ItemId "#scenario"
- Nella colonna Descrizione indicare la sigla della varianti che si vuole attivare.
- Se si vogliono attivare separate da un punto e virgola ";".
- Esempio:
- Inserire "VA" per attivare la variante "VA".
- Inserire "VA;VB" per attivare le varianti "VA" e "VB".
- Il programma attiva la variante selezionata "VA" ed esclude le posizioni che sono sotiute:
- Rimuove la sigla della Variante.
- "VA:2.1" diventa "2.1"
- "VA:T:2.1" diventa "T:2.1"
- Se vi è una posizione uguale principale, aggiunge a questa e a tutti gli elementi figli la sigla della Variante che sostituisce preceduta da X.
- "2.1" diventa "XVA:2.1"
- "T:2.1" diventa "XVA:T:2.1"
- "VA:2.1" diventa "2.1"
- "VA:T:2.1" diventa "T:2.1"
- Rimuove la sigla della Variante.
Modalità blocco per inserimento prezzi
La tabella prevede una modalità di inserimento prezzi, che blocca tutte le celle, eccetto quelle che servono a inserire prezzi e altri valori.
L'idea è che il file venga trasmesso alle imprese e queste possano inserire i loro prezzi e vedano subito i totali, senza però avere la possibilità di modificare altri elementi.
Se è attivata questa modalità il programma:
- Blocca tutte le celle eccetto quelle che sono destinate a inserire prezzi, percentuali o testi.
- Le righe dove devono essere inseriti dei valori sono colorate in giallo.
- Le righe già completate con il valore richiesto nella colonna ModifyCode, sono visualizzate in celeste chiaro.
Sarebbe stato più intuitivo il verde, ma non è facilmente distinguibile da persone daltoniche.
Per attivara la modalità blocco (provvisorio):
- Aggiungere una nuova riga a inizio file
- Nella colonna ItemId inserire il testo #options
- Nella colonna Descrizione inserire il testo lock
Le righe con le celle modificate sono indicate nella colonna "Mod. Code" (ModifyCode), tramite un carattere:
- D: Descrizione modificabile.
- N: Note modificabile.
- Q: Quantità modificabile.
- P: Prezzo unitario modificabile
- U: Unità
- Si possono combinare più codici, ad esempio "QP" (Quantità e Prezzo unitario modificabili).
- Il programma in automatico indica il codice in parentesi graffe "{P}", con la seguente logica.
- Il valore in automatico viene messo solo se la cella è vuota o vi è un valore fra parentesi quadre.
- Se vi è un valore nella colonna Quantità e non c'é formula prezzo viene messo "{P}" .
Colore righe
In modalità blocco le righe vengono colorate in automatico con questa logica.
- In giallo le righe che richiedono un inserimento di valore.
- Se vi è un codice di modifica e la rispettiva colonna è vuota.
- Oppure per la Colonna Descrizione contiene tre puntini "..."
Per esempio "Marca: ..."
- In verde chiaro se i valori sono completati.
Verifica dell’integrità tramite hash
QuickSumTable può calcolare un hash crittografico del contenuto della tabella. L’hash permette di verificare se i dati rilevanti del documento sono stati modificati dopo il calcolo.
L’hash non impedisce la modifica del documento, ma consente di rilevarla confrontando il valore memorizzato con quello ricalcolato.
Tipi di hash
QuickSumTable genera due valori distinti.
- Hash Base
- Id riga #hash-base
- L’Hash Base protegge i dati principali e le celle che non sono configurate come modificabili.
- È utile quando alcune informazioni del documento devono rimanere protette, mentre altre possono essere successivamente completate o modificate senza invalidare questo hash.
- Alcuni valori calcolati o dipendenti da formule possono essere esclusi per evitare che variazioni automatiche influenzino il risultato.
- Hash All
- Id riga #hash-all
- L’Hash All comprende un insieme più esteso di dati, incluse le colonne modificabili, le colonne definite dall’utente e alcuni risultati calcolati.
- È utilizzato per verificare l’integrità complessiva della tabella. Una modifica a uno dei valori inclusi produce un Hash All differente.
Comportamento delle righe e delle colonne
- Le righe completamente vuote non partecipano al calcolo. Di conseguenza, l’inserimento o la rimozione di una riga vuota non modifica l’hash.
- Il numero e la posizione fisica della riga non vengono memorizzati, mentre l’ordine delle righe non vuote rimane significativo.
- Le colonne di sistema sono identificate tramite il loro codice interno. Le colonne definite dall’utente sono identificate tramite il loro nome XML, così il risultato non dipende dall’identificatore numerico assegnato internamente.
- Le colonne vengono ordinate in modo deterministico prima del calcolo.
Informazioni tecniche
- L’algoritmo crittografico utilizzato è **SHA-256**.
- Il formato dell’algoritmo è versionato. La versione corrente è **QS1** e viene memorizzata alla fine dell’hash:
- <digest SHA-256>:QS1
- La versione permette a QuickSumTable di riconoscere le regole utilizzate per il calcolo e di gestire future evoluzioni del formato.
- I testi delle celle vengono:
- convertiti in UTF-8;
- codificati in Base64;
La codifica Base64 evita che il contenuto di una cella possa essere interpretato come un separatore, una nuova colonna o una nuova riga. - inseriti in una rappresentazione testuale strutturata della tabella.
Limitazioni
L’hash rileva le modifiche soltanto se il valore originale viene conservato in modo affidabile. Se una persona può modificare sia la tabella sia l’hash memorizzato, può ricalcolare un nuovo valore coerente con i dati alterati.
Per garantire anche l’autenticità dell’autore del documento è necessaria una firma digitale o un altro sistema basato su chiavi crittografiche.
Stampe
Per stampare i dati della tabella QuickSum, esistono le possibilità seguenti.
Stampa tramite l'Anteprima
Con il comando Anteprima di Stampa è possibile creare una stampa della tabella.
Si possono preparare delle Viste apposite in modo da definire quali colonne includere nella stampa.
Tramite la funzione Filtra righe, nella stampa si possono includere solo le righe desiderate. Ad esempio, se si vogliono avere solo le righe di totale:
- Posizionarsi nell'editor del filtro.
- Inserire
!itemcalc!^t:- Questo comando indica di selezionare solo le righe che nella colonna ItemCal iniziano con "T:".
- Sono le righe delle colonne che sono attivate.
Stampa tramite Estensioni
Con estensioni in Javascript è possibile creare dei report di stampa personalizzati, ad esempio che mostrano i dati desiderati con il riassunto dei diversi totali.
- Estensione QuickSum Stampa Capitolato d'offerta
Permette di creare una stampa del capitolato di offerta mostrando tutte le voci che compongono l'offerta e una pagina riassuntiva con tutti i totali.
Errori
La calcolazione parte dalla prima riga e se il programma trova un errore la riga viene messa in colore rosso e la calcolazione degli importi viene interrotta.
- Con l "#options" "onerrorcalculate", gli errori vengono segnalati, ma la calcolazione viene effettuata comunque, anche se è sbagliata.
- Serve per un controllo.
- Deve essere disattivata per avere dei risultati corretti.
Il programma segnale questi possibili errori:
- Per il momento la gestione degli errori è molto basilare e i codici deggli errori vengono visualizzati nella tabella Info.
- "err_Duplicate"
La riga di totale è gia presente. - "err_IdNotNumeric"
Si è attivata l'opzione che richiede che gli ItemId siano numerici, ma l'ItemId contiene altri caratteri. - "err_OutOfSequence";
- L'ItemId non è nella sequenza numerica/alfabetica corretta.
- "2.1" viene prima del "2"
- Si usa un ItemId di livello uguale o inferiore dopo avere fatto un totale.
- Vi è il "T:2.1"
- Successivamente si usa ancora "2.1" o "2.1.1"
- L'ItemId non è nella sequenza numerica/alfabetica corretta.
- "err_TotalWithoutElements"
- Si è indicata una riga di totale ma non è stato specificato alcun elemento.
- Per esempio vi è il "T:2.1", ma non vi è in precedenza alcun itemId "2.1" o "2.1.1"
- "err_UnitPriceFormulaUndefined"
- Il risultato della formula Prezzo Unitario è indefinito.
- Per esempio quando si usa nel "$S('2.1') ma l'item "2.1" non è mai stato usato.
- "err_UnitPriceFormulaError"
Il testo della formula Prezzo Unitario contiene un errore, per cui il codice Javascript non è valido. - "err_FormulaTextError"
- Il risultato della Formula Inizio e Formula assieme è indefinito.
- Per esempio quando si usa nel "$S('2.1') ma l'item "2.1" non è mai stato usato.
- "err_FormulaTextUndefined";
Il testo della Formula inizio o Fromula contiene un errore, per cui il codice Javascript non è valido. - "err_ParseError"
L'ItemId è in un formato non valido. - "wrn_totalRowWithCalcArguments"
Riga di totale "T:" o sottototale "S:" con elementi di calcolo (quantità, prezzo unitario, formula) che non vengono usati. - "wrn_emptyIdWithCalcArguments"
Non vi è un ItemId ma vi sono elementi di calcolo. - "others error"
Altri errori.
Link tables using the RowId column
In Banana Accounting Plus, you can create links between columns of different tables using the RowId column.
This feature allows you to enrich the main table (e.g. Transactions) with information from other tables, simplifying data management and analysis without complicating the structure.
You can create links between:
- Columns of a simple table (added by the user) and one of Banana's predefined tables (e.g. Accounts, Transactions).
- Columns of two or more simple tables added by the user.
How to add linking columns
To link columns between different tables:
- Go to the table where you want to insert the links.
- From the Tools > Add/Remove Functionalities > Add columns to link tables menu.
- Choose the position (after which column to insert the new columns).
- Confirm with OK.
The command only works if the table to be linked contains the RowId column. Along with the RowId, the Description column is also added (you can hide it if not needed).
Dialogs
Select table → lists the tables with a RowId column that are not yet linked. If the list is empty, there are no linkable tables.
Select column position → shows all columns of the current table and lets you choose where to insert the new columns.
Linking a simple table → predefined table
To link a simple table with one of Banana's predefined tables, such as the Transactions table, follow these steps:
- Open the Banana file
- Create the simple table (e.g. Internal Notes)
- Go to the Transactions table and from the Tools > Add/Remove Functionalities > Add columns to link tables menu
- In the dialog that opens, select the simple table you created (e.g. Internal Notes)
- Choose the position of the columns
- Confirm with OK.
In the Transactions table, Banana automatically adds two columns: Id and Description Id from the simple table, with the headers and contents you created in the two columns (Internal Notes).
For more information, see the detailed example:
Linking two simple tables
You can also create links between two simple tables. For example, linking the "Events" simple table with the "Volunteers" simple table:
Add simple table 1
- Id → where you enter the event code or name.
- Description → description of the event
- Add new columns or rename existing ones (Data > Columns setup)
Add simple table 2
- Id → where you enter the volunteer code or name
- Description → where you enter the volunteer's role.
- Add new columns or rename existing ones (Data > Columns setup)
Create the link
- Go to the table where you want to create the link and from the Tools > Add/Remove Functionalities > Add columns for linking tables menu.
- In the dialog that opens, select the name of the other simple table you created
- Choose after which column to place the columns to be linked
- Confirm with OK.
Banana automatically adds the two linking columns, Id and Description, with the headers and contents you created.
For more information, see the example:
Technical notes on table linking
For correct operation, Banana applies some automatic rules:
- Column names: are created as TableNameId and TableNameDescription.
- Automatic description: automatically filled in when you enter a valid Id.
- Updates: if you change the description in the linked table, it also updates in the Transactions table.
- Manual creation: you can manually add columns with these names, following the naming convention.
- Avoid ambiguity: do not use the Id or Description suffixes for columns that are not intended to be linked.
- Optional Description column: you can hide or delete it if not needed.
Limitations
- You can only link a table if it contains the RowId column.
- A table can only be linked to one other table at a time.
- If nothing appears in the Select table dialog, it means there are no linkable tables available.
Linked tables Volunteers/Events
Associations that organize activities and events often need to coordinate their volunteers. With Banana Accounting Plus, you can create two simple tables linked to each other – Volunteers and Events – to centrally manage who participates, which tasks have been assigned, and the organizational details of each event.
This way, all the information stays within the same accounting file, without the need for separate Excel sheets, giving you a clear, up-to-date, and immediate overview.
In Banana Accounting Plus, you can link simple tables to each other using the RowId column.
How to create the Volunteers and Events tables
- Open the accounting file
- From the menu Tools > Add/Remove Functionalities > Add Simple Table
- Create the simple table Volunteers
- Create the simple table Events.
Structure of the Volunteers table
The table can be customized by adding your own columns and displaying other predefined ones. In this example, the structure created is as follows:
- RowId → unique volunteer code (also serves as the linking key).
- Description → volunteer's full name; automatically appears in other linked tables.
- Email → “Notes” column renamed to “Email”.
- Phone number → column added via Data > Columns setup > Add.
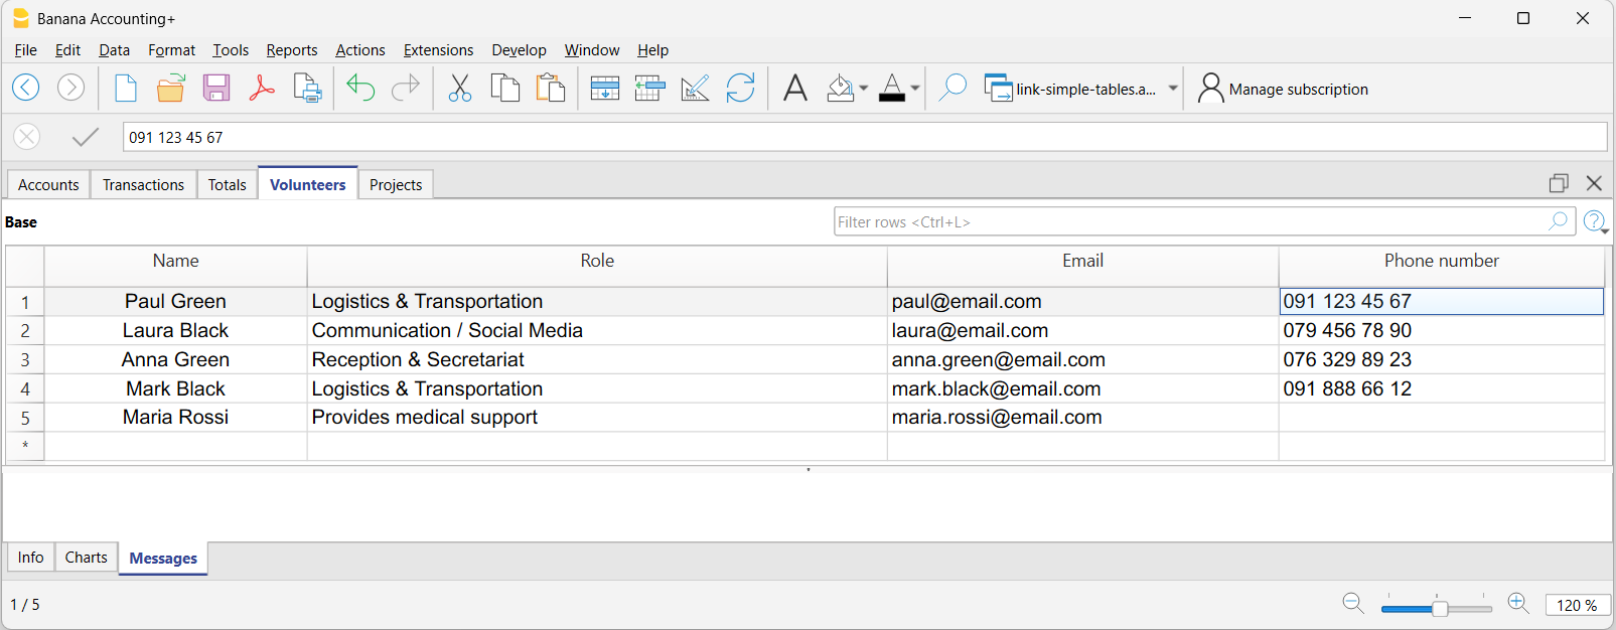
Structure of the Events table
The Events table can include these columns:
- RowId → short code to identify the event (e.g. SPRIFEST).
- Description (DescriptionId) → name of the event (e.g. Spring Festival).
- Date → column added via Data > Organize columns > Add.
- Location → column added via Data > Organize columns > Add.
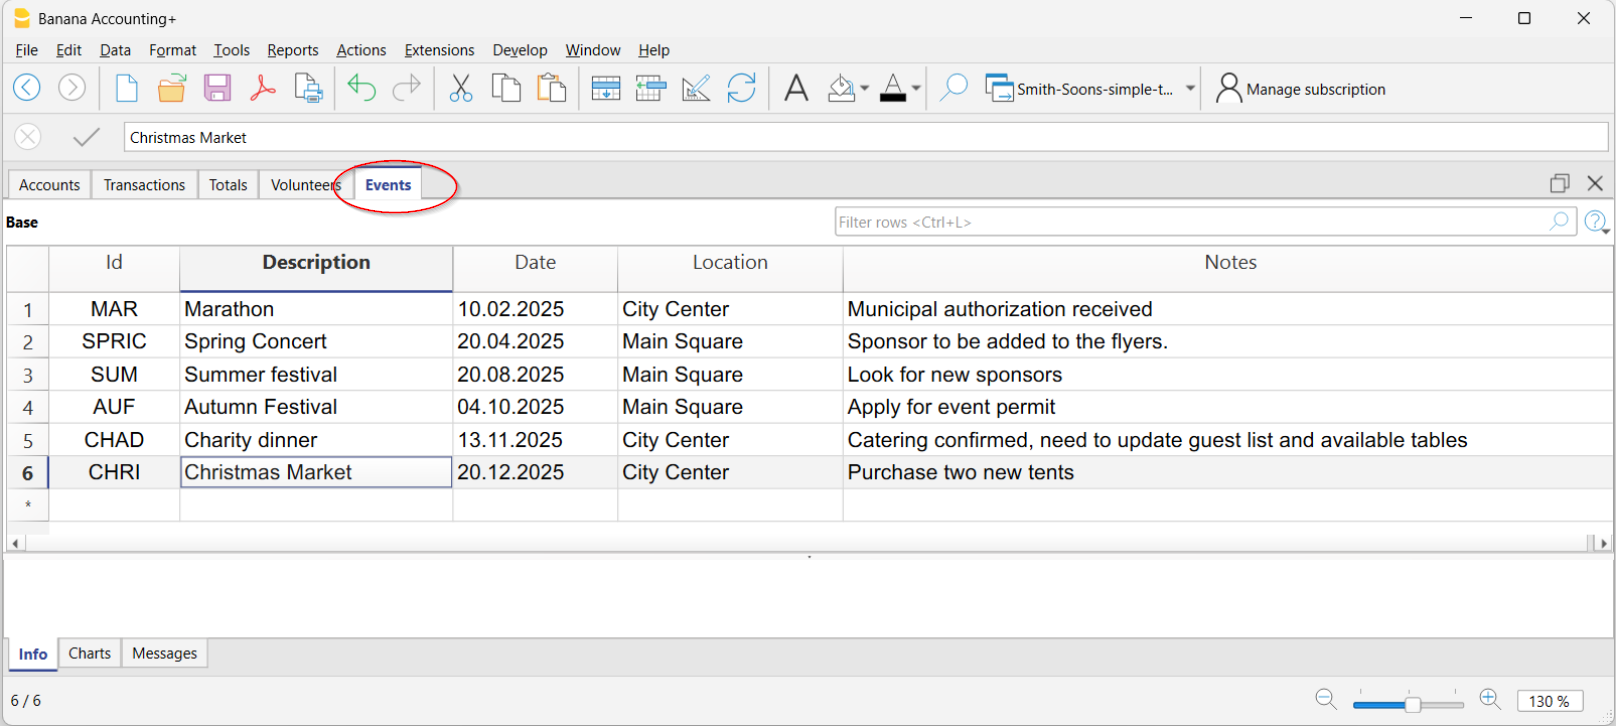
Creating a link between Volunteers and Events
In this example, the Volunteers columns were linked to the Events table.
- Tools > Add/Remove Functionalities > Add columns to link tables
- In the dialog window, select the Volunteers table.
Banana automatically adds the following columns to the Events table:
- Volunteers Id → volunteer's code.
- Volunteers Description → name of the volunteer (or event manager)
When you enter the volunteer code in the Volunteers column, Banana automatically fills in the volunteer's name in the corresponding column.
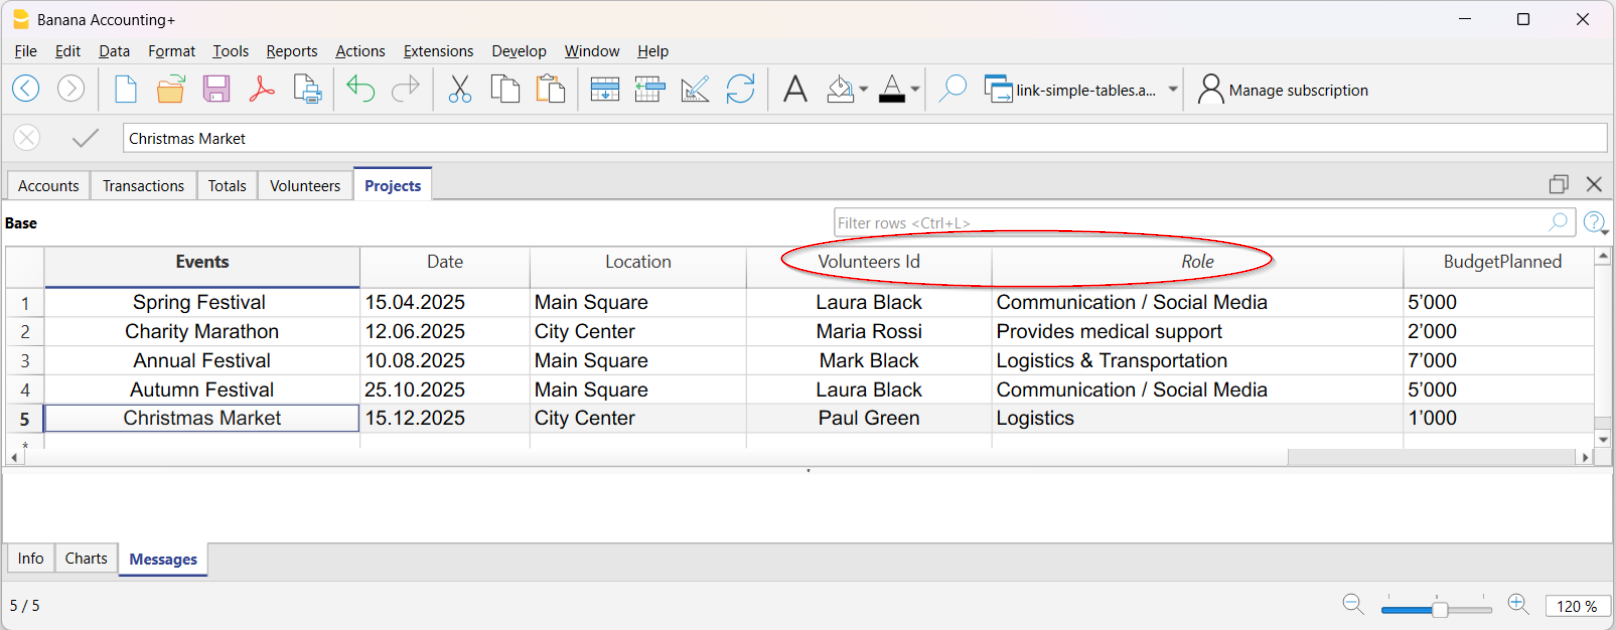
Advantages of linking
- Clear overview → you immediately know who is participating in an event.
- Defined roles → assign specific tasks to each volunteer.
- Automatic updates → if you change data in the Volunteers table, Banana updates it in the Events table too.
- Simplified management → no more separate sheets, everything stays in the same file.
- Activity history → keep a record of volunteer participation over time.
This approach is ideal for cultural, sports, or charity associations that want to manage people and events in a simple, organized, and immediate way.
Create file from external data
Banana Accounting is able to transform data files and convert them into a Banana Accounting file, making it easier to access the content.
For example:
- View CSV file
Banana converts CSV files and displays them in a table.
You only need to drag the CSV file into the Banana Accounting window and the file is converted into a simple table. - View ISO 20022 or MT940 bank statements
The file is converted into a cash book and the operations are displayed as transactions.
Just drag the file into Banana. - Audit file for taxation
The XML file is transformed into a double-entry accounting file, with the related chart of accounts and transactions.
Extensions to create files
File Creator extensions allow you to create file converters for specific data types and give the user the possibility to choose which extension to use.
View ISO 20022 file or MT940
The Banana software allows the user to view and print the contents of ISO20022 - camt. 052, camt. 053 (included version 4), camt. 054 - and MT940 bank statements.
The transactions of the electronic bank statement, with description, amount income or expenses, are being presented in separate columns and can be printed or pasted into Excel.
Open the ISO 20022 or MT940 file
In order to open and see the file :
Download your bank statement in ISO 20022 format
If it is a compressed file, extract the XML file to be displayed with its own utility (p.es. 7zip)S- Install and open Banana Accounting
- Drag the file inside Banana Accounting: Banana immediately shows all entries with text and date, amount and the progressive balance (the file is being opened as "read only")
- The data of the bank statement can then be printed or copied into Excel or other programs.
Additional indications
- The opening balance in the ISO 20022 file is entered into the Accounts table.
- The column width can be adapted with the mouse.
- To align the text of the description on several lines, use the command Format → Calculate all row heights
- To categorize the movements and get statements, enter the appropriate categories in the Categories table and display the Categories column in the Transactions table with the Columns setup command.Or, create a new file with an existing template and categories and accounts already set up, and import the data of the bank statement as explained in the page Import ISO 20022 file.
- In the free Starter Edition mode, files with more than 70 transactions cannot be saved.
More information
For more information with regard to the ISO 20022 Standard, please consult the page Import ISO 20022 file.
View CSV File
When opening, or dragging and dropping a file of the CSV or JCSV type in the Banana window, Banana will automatically create a simple Table type file, resuming the columns and data contained in the CSV table.
Create file copy
You can activate the command from the Tools menu > Create file copy.

This feature allows you to create a new file, identical to the existing one. You can choose to copy the file with the following options:
- Keep Opening balances. If the option is activated, the opening balances of the copied file will be shown in the new file.
- Keep Transactions. If this option is activated, transactions of the copied file will be shown in the new file.
- Keep Recurring transactions. If this option is activated, the recurring transactions of the copied file will be shown in the new file.
- Keep Budget transactions. If this option is activated, the Budget table transactions of the copied file will be shown in the new file.
This feature is very useful when you want to make test changes and have the confidence that you can go back without losing data.
If none of the options are activated, a new file will be created only showing the same accounting plan.
The new file must be saved with a name; by default, the program suggests the template name.
Save the file with a name of your choice by clicking on File > Save As.
Convert to new file
The command is activated from via Tools > Convert to new file.
In the dialog box that appears, the file type you are working on is selected.
A list of possible choices is also listed:

This command converts an existing file (which will not be modified) into another one with different characteristics:
- Change language
- Change the rounding
- Change the file type. For example:
- Pass from an accounting without VAT to one with VAT
- Pass from a Double-entry accounting to a Multi-currency accounting
This is similar to creating a new blank file and then transfer the data manually .
The existing file characteristics can be consulted by executing the Tools > File Info command
Creation and data transfer
The Tools → Convert to new file command:
- Creates a new file of the specified type with the predefined columns setup
- Transfers the data into the new file, proceeding with the necessary conversions
- Saves and indicates the name of the new file.
Switching from an accounting system with more options to one with fewer options
The following cases involve switching from an accounting type with more options to one with fewer options:
Switching from accounting with VAT to accounting without VAT
During the conversion:
- in File and accounting properties, the VAT/Sales tax section is removed;
- the VAT Codes table is removed;
- in the Transactions table, the data in the VAT-related columns is removed;
- in the Accounts table, the VAT accounts can be removed.
Switching from multi-currency accounting to accounting without foreign currencies
During the conversion:
- in File and accounting properties, the Foreign currency section is removed;
- the Exchange rates table is removed;
- in the Accounts table, the Currency and Opening Currency columns are removed;
- in the Accounts table, the accounts related to exchange rate differences can be removed;
- in the Transactions table, the columns related to exchange rates and foreign currencies are removed.
Important: Before switching from multi-currency accounting to accounting without foreign currencies, make sure that the balances of all foreign currency accounts are zero. Otherwise, opening balance differences will be reported in the converted file.
Conversion from a Double-entry accounting to a Multi-currency accounting file
- The currency symbol that is to become the basic currency must be specified in File and accounting properties
- Choose the Multi-currency accounting as destination
- The program creates a Multi-currency accounting, recovering the existing data:
- The Transactions table includes the columns for managing the Multi-currency accounting, as the base currency and a 1.0000 exchange rate
- The existing accounts in the Accounts table are being completed with the base currency symbol
- You must add the predefined accounts for exchange rate profit & loss.
- You must indicate the predefined accounts for exchange rate profit & loss in the File and accounting properties.
- The Exchange rate table will be empty; it is therefore necessary to add the currencies and exchange rates used in the transactions
- In the Accounts table, the accounts in foreign currency have to be added.
In order to change the currency of an accounting file, refer to the File Properties of the File and accounting properties.
Conversion from an accounting without VAT to one with VAT
- Choose the desired type of accounting with VAT as the destination
- The program creates an accounting with the VAT columns, recovering the existing data:
- Add the VAT accounts into the Chart of Accounts
- The File properties regarding the VAT need to be completed, and the default account on which the VAT must be recorded needs to be indicated
- Via Actions > Importa to accounting > VAT codes the applicable rates present in the VAT Codes table can be used.
Outline to create new file
For further details refer to:

Related documents:
The Merge file command in Banana Accounting+
The possibility of merging accounting files together is very useful; it allows, for example, to merge the accounting files of different branches of the same company, or to absorb the accounts of dislocated activities in the accounting file of the parent company, both for associations and businesses.
In Banana Accounting Plus this feature is only available with the Advanced plan. Explore all the Advanced plan features. Switch now to the Advanced plan!
The command is activated vie Tools → Merge File.
It is possible to merge two files, but they have to belong to the same application (for example two double-entry accounting files). It is not possible to merge files belonging to different applications (for example one double-entry accounting file and one income & expense file).
In order to successfully merge two files, it is crucial that they contain the same accounts numbers. Proceed as follows:
- Open the file which will contain the data of both files.
- Select the Tools → Merge File command.
- Select the path and the name of the file to be merged.
- Confirm the merge operation.
- If the files are not identical, even though they belong to the same application, (for example, accounting with VAT/Sales tax and accounting without VAT/Sales tax), a message will appear warning against probable data loss.
Attention: The program does not consolidate the data; instead, it updates the account balances without adding the opening balances.
Program options
The program options are activated via the Tools → Program menu options and contain technical choices for the accounting document.

In the following pages you will find more detailed information.
General
The interface options are activated via Tools → Program Options → Interface.
Program options
Language
It is the language used by the program. You can change this setting if you want to use a language other than the default or if the default is not available.
Font type
You can choose the font.
% Zoom
If you want the data in the tables to be displayed in a different size, just adjust the Zoom percentage.
- The zoom percentage can also be changed with the zoom tool at the bottom right of the status line.
- The purpose of the zoom is to adapt the table content to the window size.
For the text size of menus, dialogues and icons, the operating system settings are used, but can also be adapted by the user.
Line spacing
In this field you can specify the row height of the various tables in the program.
Show negative numbers in red
Negative numbers and amounts are displayed in red in the tables.
Startup
Check for updates
Direct link the www.banana.ch website to the update download page.
Display start page
The news information home page is displayed.
Show recently used files
Recently opened files are displayed.
Start Web Server
Is used to access Banana Accounting data from external programs.
For more information see Integrated Webserver
Editor
The Editor options are activated from the menu Tools → Program Options → Editor.

Behavior
Edit table with single click
- If the function is activated, a single click on the selected cell is sufficient to introduce change.
- If the function is activated, a single click on the cell already selected is sufficient to change.
Autocomplete text (Smart fill)
By activating this option, the program automatically selects the first draft text in the drop down list and automatically fills it in the row where you are.
Add up during selection
By activating this option, the program will add up the selected amounts. Deactivate this function if this instantaneous addition slows certain operations down. One can select non-adjacent amounts by holding down the Ctrl key while selecting individual cells with the left mouse button.
On Enter go to the next row
By activating this option, the cursor will place itself on the next row when pressing the Enter key.
Input
Maximum number of undo operations
Insert the maximum number of undo operations when using the command from the menu Edit → Undo Operation (you undo one operation at a time).
Smart fill rows limit
When inserting data, the program reads the data that has already been entered and tries to suggest how to complete an entry. In cases where there are many rows, this function could slow down the process.
The user can define a limit for the number of rows, above which the smart fill will not be used. If there is no value entered or zero, smart fill will always be used.
File handling
The File Management options are activated via Tools → Program Options → File Handling tab.
Saving documents
This section contains the following options for saving documents.
Saving automatically when closing the documents
If this option is enabled, the data will be saved each time the file is closed.
Save autorecover information
The option allows automatic saving of the file with frequency (in minutes) to be indicated. The program saves the data in a document called autobackup + filename. If the program or computer crashes, you can recover the data by opening this file and saving it as from the File menu.
Create backup copy
When saving to disk with the same name, the pre-existing version of the file is renamed with the BAK extension.
Refer to the Save page for further information.
Files extension
Extension of files considered secure
This option defines the file types (eg: "pfd", "jpg", ...) and the url schemes (eg: "http:", "x-devonthink-item:", ...) that allow to open with a double click in the DocLink column of the Transactions table. Therefore, it prevents you from opening unsafe files or schemes. Extensions must be inserted without the period '.' initial, while the schemes must be inserted with a double dot ':' at the end.
Restore defaults
If certain settings have been changed, program will restore the default settings when clicking on this button.
Advanced
The Advanced options are activated Tools > Program Options > Advanced.

Enable TrueType Fonts
If this option is enabled when printing PDF files, the font selected in the Interface tab is used, otherwise a native font type of PDF files is used (Helvetica or Times New Roman). This option must be disabled if the texts in the generated PDF files are unreadable.
System info
Open the System info dialogue.
Reports Menu
The Reports menu contains commands for displaying and printing various accounting documents. The commands listed will vary depending on the application selected.
By clicking on the various links, the web pages, with detailed information on the various commands, are displayed.
- Cash Manager
- Income & Expense accounting
- Double entry and multi currency Accounting
- Time sheet
- Fixed asset register
- Show Journal
- Items report
- Transactions report
- Inventory
- Estimates and Invoices
- Archive data
- Library and collections
Actions Menu
The Actions menu in Banana Accounting includes the operational commands to keep your accounting up to date and accurate. From here, you can recalculate totals, check data consistency, sort transactions by date, manage due dates and recurring transactions, lock confirmed entries, create a new accounting year, and update opening balances. You can also import external data directly into your accounting.
These are therefore the practical tools to ensure precision, continuity, and completeness in managing your accounting work.
For explanations of the commands, click on the links listed below:
Menú Extensiones
Las Extensiones son funcionalidades del programa para elaborar informes, cálculos, exportaciones, importaciones, reportes de facturas, recordatorios y más.
Deben ser instaladas por el usuario, a través del menú Extensiones > Administrar Extensiones y dentro de la funcionalidad específica, por ejemplo Importar en contabilidad.
El menú Extensiones enumera todas las Extensiones ya instaladas, utilizables con el archivo actual abierto. Al elegir el comando, se ejecuta la Extensión indicada.
Gestión de Extensiones
El comando Administrar Extensiones permite buscar, instalar, cambiar configuraciones y desinstalar Extensiones.
Instalación de una nueva Extensión
Para la instalación de una nueva Extensión consulte la página Gestión de Extensiones.
Extensión Embedded
Las Extensiones Embedded son extensiones guardadas en la tabla Documentos del archivo de contabilidad que funcionan sin instalación.
Información técnica sobre las Extensiones
Algunas informaciones técnicas sobre las Extensiones.
- Son programas escritos en lenguaje Javascript, que hacen uso de las API proporcionadas por Banana Contabilidad.
- Son muy seguras, no pueden ejecutar funciones que tengan un impacto en el sistema operativo.
- Extensiones individuales:
archivo de texto, con extensión .js, que contiene un programa en Javascript, con las características indicadas para ser una Extensión de Banana Contabilidad. - Paquete de Extensiones:
archivo comprimido, con la extensión .sbaa, que puede contener varios otros archivos necesarios para la aplicación, como comandos, imágenes, diálogos. Un paquete puede contener varios comandos. En el menú Extensiones se indica el título del paquete y los comandos que contiene.
Si se desactiva un paquete, todas las Extensiones quedan desactivadas.
Requisitos para la ejecución de las Extensiones
Los comandos para la ejecución de las Extensiones están disponibles únicamente si el archivo actual (aquel en el que se está trabajando) cumple con las características requeridas por la Extensión. Si falta alguna de estas características, la Extensión no es visible o no se puede ejecutar desde el menú Extensiones.
- Las Extensiones están disponibles en el contexto específico:
- Productividad
Comandos que se pueden invocar desde el menú Extensiones. - Importación
Están disponibles con el comando Importar en Contabilidad. - Exportación
Disponibles en el menú Extensiones. Al final el usuario debe indicar el nombre con el que desea guardar el archivo. - Reporte de factura
Extensiones que preparan la impresión de la factura. Están disponibles desde el menú Informes > Clientes > Imprimir facturas. - Reporte de recordatorio
Extensiones que preparan la impresión del recordatorio. Están disponibles desde el menú Informes > Clientes > Imprimir recordatorios de pago. - Reporte de extracto
Extensiones que preparan la impresión del extracto. Están disponibles desde el menú Informes > Clientes > Imprimir declaraciones.
- Productividad
- Asociación a un Tipo de Archivo.
Extensiones que requieren que el archivo actual sea por ejemplo un archivo de contabilidad, de partida doble, o de direcciones. - Asociación mediante una propiedad.
Algunas Extensiones están diseñadas para ejecutarse únicamente si en las Propiedades del archivo > sección Otro, se indica la palabra requerida.
Por ejemplo, las impresiones de la Lista de ciudadanos, con campos específicos, requieren la propiedad Ciudadanía.
Suscripción al plan Advanced necesaria
Algunas extensiones están disponibles en los planes Free y Professional, mientras que varias otras requieren el plan Advanced.
La información sobre el plan requerido está indicada en la propia extensión.
Además:
- El plan Advanced es necesario para ejecutar extensiones locales y descargadas desde la web.
- Algunas extensiones que requieren el plan Advanced pueden usarse también con otros planes solo mientras la contabilidad tenga un número de asientos inferior a 70 líneas.
Desarrollar una Extensión propia
Cualquier persona puede crear Extensiones que amplíen las funcionalidades del programa:
- Se requieren conocimientos de programación.
- Es necesario tener el plan Advanced de Banana Contabilidad Plus.
Para desarrollar una Extensión de Banana, lo mejor es empezar desde un proyecto existente. Aquí algunos consejos:
- Comience con un ejemplo disponible en el sitio github.com\\BananaAccounting
- Consulte la documentación para desarrolladores, disponible en inglés.
- Instale la Extensión desde el menú Extensiones > Administrar Extensiones.
Administrar Estensiones
Este diálogo permite instalar, modificar la configuración y desinstalar las Extensiones.
Para utilizar una Extensión, primero debe instalarse.
Instalación de una nueva Extensión
Para instalar una Extensión proceda de la siguiente manera:
- Utilice el menú Extensiones > Administrar extensiones.
- Seleccione el idioma y el país.
- Seleccione en el menú de la izquierda Online.
- Seleccione el tipo de Extensión (por ejemplo, productividad).
- Busque la extensión deseada entre las listadas; o bien, en el campo Buscar escriba el nombre de la extensión que desea.
- Haga clic en el botón Instalar.
- Haga clic en el botón Cerrar.
También puede utilizar el campo de búsqueda de la parte superior derecha e introducir la palabra clave relacionada con una extensión que esté buscando.
A continuación se muestran las Extensiones disponibles:

Las Extensiones instaladas son visibles en el menú Extensiones.
Nota
Si en la ventana Extensiones no aparece la lista completa de extensiones, es necesario actualizarlas o ampliar la búsqueda seleccionando cualquier país, cualquier idioma y todo.
- Si se activa Incluir extensiones universales, en la lista aparecen las extensiones válidas para cualquier país.
Si en la lista completa no se encuentra el formato de su banco, es necesario solicitar el extracto bancario en el formato universal ISO 20022. Pronto, todos los bancos sustituirán los distintos formatos (csv, MT940...) por el formato estándar europeo ISO 20022.
Lista de Extensiones
Se muestra la lista de las Extensiones instaladas y de las disponibles para su instalación.
- El visto indica que la Extensión está instalada.
- Título de la Extensión.
- Las extensiones que comienzan con "x" (por ej. "[xCH01]...", "[xUNI02]...") son extensiones consideradas "obsoletas", es decir, extensiones superadas que nacieron con versiones antiguas de Banana y que luego han sido reemplazadas por extensiones más recientes para Banana+.
- Información sobre las Extensiones:
- Descripción
- Enlace a más información, abre la página web correspondiente.
- Última actualización
Fecha y hora de la Extensión.
Para las Extensiones locales (añadidas desde archivo) la fecha y hora del archivo. - Categoría
El tipo de la Extensión. - País
El país en el que se puede utilizar. Internacional significa que puede usarse en varios países. - Botón Instalar
Descarga la Extensión y la pone a disposición localmente.
- Información para las Extensiones instaladas:
- El símbolo ">" antes del visto indica que es un paquete de Extensiones que contiene varios comandos.
- Habilitado
Si no está marcada, la Extensión no aparece en el menú. En un paquete se puede desactivar también un solo comando. - Actualizar automáticamente
Cuando hay una nueva versión disponible, se descarga automáticamente. - Última actualización
La fecha de publicación de la extensión. - Categoría
La categoría de la extensión. - País
El país de la extensión. Universal significa que no está vinculada a ningún país específico. - Idioma
El idioma de la interfaz de la extensión. - Canal preferido (*)
La versión de la extensión. Se puede elegir entre:- Canal estable
Versiones publicadas de forma definitiva. - Canal beta
Versiones de prueba antes de ser definitivas, aún en ajuste. - Canal de desarrollo
Versiones en fase de desarrollo.
- Canal estable
- Canales disponibles (*)
Qué versiones están disponibles para esta extensión. - Canal usado (*)
La versión en uso.
Si la versión del canal preferido no está disponible, el programa elegirá la versión del canal según el orden: Estable, Beta, y luego Desarrollador.
- URL
- Si la extensión está instalada localmente, muestra la ubicación local.
- Si la extensión es remota y no ha sido instalada, muestra la URL remota.
- fuente de URL
Si la extensión ha sido instalada desde internet, muestra la URL del repositorio remoto. - Propiedades requeridas
Para que la extensión pueda ejecutarse, se requiere que en el menú Archivo > Propiedades del archivo (datos base) > Otro estén definidas las propiedades Extensiones. - Botón Aplicar propiedades
Inserta la propiedad indicada en las propiedades del archivo actual. - Botón Ejecutar
Ejecuta la extensión.
Este botón es visible solo si el comando puede ejecutarse en el contexto actual.
Por ejemplo, un comando que requiere una contabilidad multimoneda solo puede ejecutarse en un archivo multimoneda.
Para ejecutar una extensión propia es necesario tener una suscripción al plan Advanced de Banana Contabilidad Plus. - Botón Configuración
Algunas Extensiones permiten establecer parámetros de ejecución. La configuración es específica para el archivo actual. Si se usa la misma Extensión con otro archivo, se deben introducir nuevamente los parámetros.
Por ejemplo, en los reportes de facturas se indican los elementos necesarios para la impresión. - Botón Desinstalar
Desinstala la Extensión o el paquete.
Usar una versión de desarrollo
Para una determinada extensión, puede que estén disponibles varias versiones.
- Si para la extensión hay varias versiones disponibles, se indica en los "Canales disponibles".
- Las opciones posibles son:
- Estable. La versión normal.
- Beta. La versión con nuevas funcionalidades disponibles antes de convertirse en Estable.
- Developer. La versión con funcionalidades de prueba, que podrían no estar completamente implementadas.
- En el "Canal predeterminado" se puede definir el canal que se desea utilizar entre Estable, Beta o Developer.
- En el "Canal en uso" se muestra el canal de desarrollo efectivamente utilizado.
Si el canal seleccionado no está disponible, se utilizará la versión del siguiente canal disponible. Si no está Developer, se usará Beta, y si tampoco está este, se usará Estable. - Si se cambia de versión, se recomienda utilizar el botón actualizar para asegurarse de que se descarga la última versión.
Buscar Extensiones
En la lista se muestran las Extensiones que corresponden a los criterios seleccionados:
- Idioma
- País
- Texto
- Instaladas
Se muestran las Extensiones instaladas localmente. - Online
La lista de Extensiones disponibles en línea. - De sistema
La lista de Extensiones. Estas pueden habilitarse o deshabilitarse.
Detalles
Se muestra un cuadro de diálogo con la siguiente información:
- El archivo de origen donde se encuentra la Extensión.
- El tipo de Extensión.
- La fecha de la Extensión.
Parámetros
Si la Extensión permite establecer parámetros a nivel de programación, el botón está activo.
Cada extensión tiene sus propios parámetros. Los parámetros introducidos se guardan dentro del archivo de contabilidad.
Modificar
Permite modificar la Extensión seleccionada. Abre la carpeta donde se encuentra el archivo de la Extensión.
Eliminar
Elimina definitivamente la Extensión seleccionada. No es posible eliminar los filtros instalados a nivel de sistema o para todos los usuarios.
Por el momento, tampoco es posible eliminar Extensiones que están contenidas en un archivo con extensión .sbaa. Para eliminar la Extensión, debe borrarse el archivo correspondiente.
Ayuda (a la derecha)
Lleva a la página web con información sobre la Extensión seleccionada.
Agregar desde el archivo
Permite instalar una Extensión desde un archivo local. Es útil especialmente para el desarrollo de nuevas Extensiones.
Para crear una Extensión propia, es necesario tener una suscripción al plan Advanced de Banana Contabilidad Plus.
- El archivo debe permanecer siempre en la misma carpeta.
- Si se modifica la Extensión, el programa usará siempre la versión más reciente.
Agregar desde el url
Agrega una nueva Extensión a partir de un enlace a un documento disponible en internet.
Para crear una Extensión propia es necesario tener una suscripción al plan Advanced de Banana Contabilidad Plus.
- El archivo se descarga desde internet.
- El archivo se guarda en la carpeta de datos del usuario.
Actualizar Extensiones
Descarga la última versión de los filtros desde el servidor de Banana Contabilidad.
Las Extensiones descargadas no deben modificarse, ya que serán sobrescritas al actualizarse.
Si hay nuevas Extensiones, estas se añaden a la lista. Los filtros importados no se modifican.
Las Extensiones se instalan en la carpeta del usuario. Solo el usuario que importó o realizó la actualización puede ver las nuevas Extensiones.
Para instalar Extensiones para todos los usuarios o a nivel de sistema, se requiere un procedimiento manual.
Banana Contabilidad, al iniciar la aplicación, realiza automáticamente la actualización de las Extensiones instaladas. El control automático se ejecuta solo una vez al día, al primer inicio.
Extension Settings
Some extensions allow you to set parameters that are used by the extension.
- The parameters can be set and changed with the dialog.
- At startup, the parameters are set with default values.
- The parameters are related to the accounting file..
- An extension package can contain multiple extensions and therefore there may be multiple parameters per package.
Extensions Setup Dialogue
The content of the dialogue is different for each extension.The UNI10 invoice layout is shown below.

Value insertion area
The settings dialog is structured as elements that contain sub-elements, each with:
- Property column.
- This is the name of the property.
- Value column.
- It's the value of the property, Value column. By clicking you can enter a value, change a predefined one or delete an existing one.
Buttons
At the end of the dialogue there are the following buttons:
- Help.
- The help button takes you to the documentation page of the extension you are using.
- Restore defaults..
- By clicking on this button all the default values of the Value column are restored.
- Cancel.
- Cancel and close the dialog without any changes being made.
- Ok.
- Confirm and save the entered parameters.If you have saved it by mistake, you can go back to the previous situation with the cancel operation command.
Access the settings dialog
You can access the settings dial in the following ways:
- From the >Manage Extensions, by clicking on the Settings button located on the right.
- From the Settings button in the Printouts/Preview of the report generated by the extension.
- For invoices, via Reports → Customers → print invoices, Layout section, Settings button.
Installing an Extension offline
In order to install an Extension in an offline mode proceed as follows:
- Connect yourself to our Extensions webpage, using a different computer connected to the internet
- Download the Extension that you need (a .js or .sba file ) and save it on a USB key or other device
- Copy the Extension on the computer without internet connection
- Open Banana Accounting from your computer without internet connection and open your accounting file
- Click Extensions → Manage Extensions
- Click on the Add from file button and select the path were you saved the Extension
- The Extension will now be included in the installed Apps and in the Extensions menu
Print label
Via the Extensions → Labels → Print command you can print the addresses. In the different tabs you can choose different settings, from the label format to le selection of the addresses to be sorted and printed. Each setting can be saved with the Customizations.

For the explanations of the different tabs, please consult the following pages.
Print example
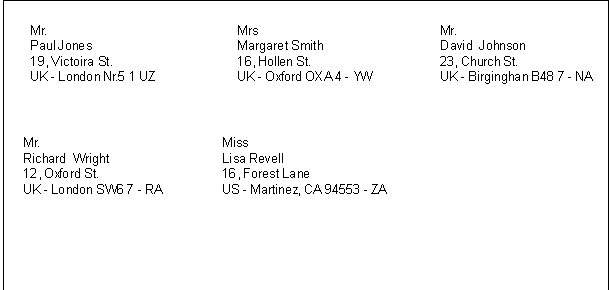
Options
First label starting position
Decide on the position of the first label. For example, if 1 is entered in the horizontal and vertical fields, it refers to the upper left-hand corner of the page.
Number of copies for each label
The value of 1, in this field, means only one copy of each label is wanted.
Warning if text exceeds label
If the text runs beyond the margins for the label, the program will warn the user by sending an error message if this cell is activated.
Label format
You can choose between the label formats available in the list.
If the list doesn't have the format you wish, through the Change button, you can access the Label format dialogue windows where you can choose your desired settings.
Data
Indicate the data source for the labels to be printed:
- Table - the current table (Accounts, Transactions, Budget, Totals, VAT code) data will be printed. If a data extraction occurred, only the extracted data will be printed.
- Selected rows only - only the earlier selected addresses will be printed.
Label

Field list
This is a list of all possible label fields; to insert a field, it is possible to work in two ways:
- Double-click on an element from the list
- Click on an element from the list, confirming with the Add Field key.
The field selected will be inserted at the position of the cursor in the View labels area. One can directly insert fields by writing the field name between the < Less and > Greater symbols.
View labels
Shows the disposition of the fields. The entries "<NAME FIELD>" will be replaced with the corresponding value of the table.
The symbols Greater and Less are considered field delimiters. In order to make them appear in the text
write "\<" for "<";
write "\>" for ">"
and write "\\" for "\"
Preserve line feeds and spaces.
In case this option is deactivated, the program does not take eventual spaces and empty rows in consideration.
Extract

Sort

Customization

Labels format
Via Extensions → Labels → Formats option, you can access the labels setup.
The program already offers many predefined label formats; it is however possible to setup or edit the default parameters, as well as your customized ones, through the Customization (Default) command.
Page settings - Options

Page
Left Margin, Right Margin, To Margin, Bottom Margin
Input the size in centimeters; if no size is entered, the margin sizes will be zero.
Number of horizontal labels
Input the number of horizontal labels there are on the page.
Number of vertical labels
Input the number of vertical labels there are on the page.
Print Landscape
The page will be printed horizontally if this cell is activated.
Arrange labels from right to left
The labels will be printed from right to left and from top to bottom.
Label
Left Margin, Right Margin, To Margin, Bottom Margin
It is possible to input a margin for each label; the values for the label margins must be input in centimeters.
Center text horizontally
Select this option to horizontally center the text for each label in the cell.
Center text vertically
Select this option to vertically center the text for each label in the cell.
Font size
Base size
This field shows the default font size.
Reduce to fit, but no less than
The program calculates the maximum font size possible for a given label, starting from 14 points all the way down to 8 points. The calculation is made taking into account both the height and width of the label. If a label has a line that is too long (or has too many rows) to be printed, then an error message will appear in the message window. Even if it is incomplete, the label will still be printed.
Note:
the printers will not print on the whole surface of a page because they need minimum margins. The program tries to adapt the single labels to the margin values required by the printer.
Page settings - Customization

All the settings that have been activated in the Options tab can be saved by using Customization and can be displayed when needed.
For more information on this section, consult the Customization page.
Extensions Commit Changes Dialog
This dialog asks the user for approval for changes the extension wants to make to the data.
The dialog displays:
- The list of the affected tables
- The list of data changes with the new content:
- Rows added (green)
- Rows deleted (red)
- Rows modified (yellow)
- Rows moved, sequence is changed (blue)
- Rows replaced (magenta)
If you approve the change you can always rollback the changes with the undo.

For Developers: See also the DocumentChange API
Favorites menu
Favorites are displays of printouts or reports with customized settings.
The Favorites menu will display list all the Customizations created and can be recalled if and when necessary.
The Favorites menu is not displayed by default, but appears when the user creates customizations (the first time the accounting file must be closed and reopened), indicating that they must appear in the menu.

Customization
Customization is a display or printout with customized settings that can stored. If necessary, customized documents can be resumed without repeating the settings.
Customizations is obtained from the following menus and for the following documents:
- Report for:
- Account cards
- Enhanced Balance Sheet
- Enhanced Balance Sheet with groups
- Accounting reports
- VAT reports
- File for:
- Create Pdf dossier
- Export file
- Data for:
- Extract and sort rows
- Sort rows
- Export rows
- Extensions - for Addresses customization.
How to proceed
Depending on the document to be created, start by clicking on the menu and on the appropriate command (Account cards, Financial statements, Export file ...).
From the dialogue that appears:
- Click in the Customization section.
- Click on the New button.
- Enter the name of the new customization.
- Activate the appropriate options in the various sections.
- Click on the Apply button.
Each customization, once created, will appear in the menu of the corresponding command and can be edited, renamed, duplicated or deleted.
Name
Enter a name to identify the customization (for instance, Quarterly Report).
Description
Enter the description for the customization.
Show this window every time
If activated, when selecting a customization from the menu, the dialogue for editing the settings will be shown. If not activated, the preview of the requested report (Balance sheet, report, etc.) will be shown directly.
Show in menu... (depending on the menu/command in which one is being positioned)
If this option is activated, the customization will appear in the menu of the command.
Show in 'Favorites' menu
If this option is activated, the customization will appear in the Favorites menu.
Read only
If this option is activated, it will not be possible to edit the settings.
New
This button allows you to create a new customization.
Delete
This button allows you to delete an existing customization.
Duplicate
This button allows you to create an identical copy (a duplicate) of an existing customization.
Import
This button allows the import of an existing customization from another Banana accounting file (.ac2).
Apply
This button allows you to save the chosen settings for the new customization.
Display in the starting menu
According to the menu you are in, the Default customization and your personal saved customization will be shown.
Customization (Default)
This is the customization used by default from the program, if no other customization has been created.
In the following example the menu of the Accounting reports is shown.

Direct access to the customizations
In the tables where the customization are being shown and in the previews, the customization menu and the settings icon are being displayed. These make it possible to easily move from one customization to the next and provide rapid access to the settings in case you want to edit these.

Window menu
The Window menu in Banana Accounting helps you manage the display and organization of your work on the screen. It allows you to open new windows, arrange files side by side, quickly switch between documents, and customize the interface according to your preferences (editor, status bar, information window, light or dark theme).
It also includes commands to manage messages, access print preview, show or hide the start page, and view the list of recently opened files. This way, you can work more comfortably, neatly, and efficiently.
New Window
The command opens a new window with the same contents as the already open window.
Arrange side by side
With this command you can see, within the Banana Accounting program, the various files open at the same time, arranged side by side. If you have two screens, it is also very practical to open the Banana Accounting program have an accounting file open and in each one; this way you will have more visual space. For more information see below.
View two files simultaneously
The two files are displayed within the same program. The Info window at the bottom changes according to the file in which you are working with the cursor.
There are two ways to view two or more files at the same time.
Open the two files side by side in Banana Accounting
- Open the two files via the File > Open.
- Click Window > Tile menu.
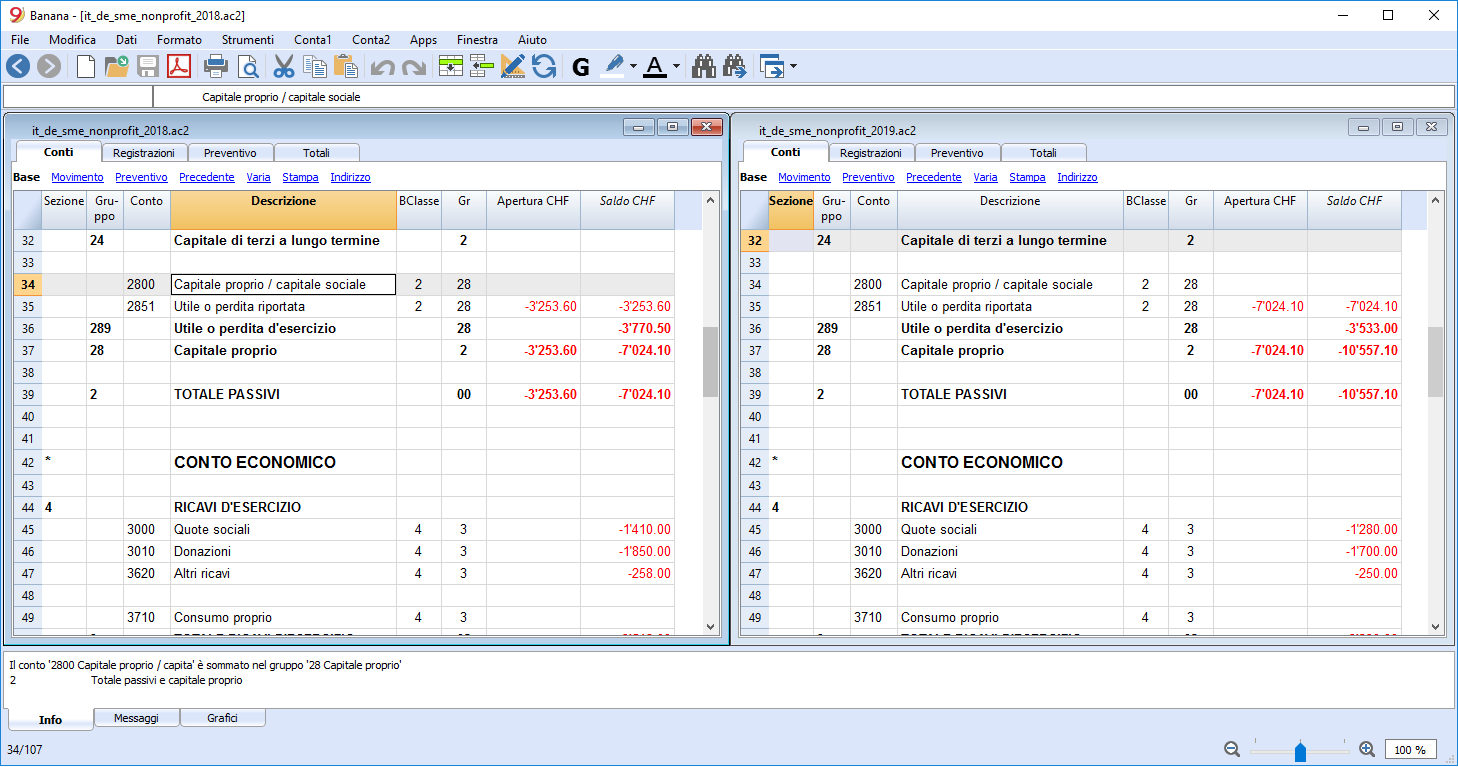
Open the Banana Accounting program twice simultaneously
- Open the Banana Accounting program twice, starting from Windows startup.
- Open an accounting file in each of the programs,
This is a great solution if you have a large screen or two screens connected to the same computer.
Next window or Previous window
When multiple files are open, they are listed in the Next window command menu.
This command allows you to switch from one file to another. The Ctrl+Tab keyboard shortcut is also very useful.
By clicking the small downward arrow next to the icon, a list appears from which you can directly select the file to view. Alternatively, by clicking the icon itself, you switch to the next file in the listed order.
Warning messages, Acoustic signal, Clear messages
In the section reserved for messages, you can choose whether and how they should be reported. If you activate Empty messages, all messages in the information window below are deleted.
Appearance
The command allows you to customize the Interface and you have the following options:
- Show Develop Menu
See more information on the page Develop Menu - Show Cell Editor
If the display is disabled, the editor for writing text does not appear at the top below the toolbar, but you can still write text within each cell. - Show row editor key
If activated, the button to edit the row contents will be displayed. By clicking on the row editor button at the bottom right, a window will be displayed in which it will be possible to edit the single rows through a form view. This mode has been designed to facilitate the input of texts on tablet or mobile devices. - Show Info Window
If disabled, the bottom information window, graphics and error messages are not displayed. - Show Status Bar
If disabled, the status bar at the bottom of the window is not displayed, where the row number and zoom setting is shown. - Display theme
This option allows setting the dark mode functionality in the following modes:- System default - the setting is taken over from your operating system.
- Dark - the dark mode is set.
- Light - the light mode is set.
Preview
The command allows you to preview the document.
Start Page
With the command you can choose whether or not to display the home page.
Recently opened file list
Recently opened files are listed at the bottom of the Window menu. The file in use is selected, the others remain in the background.
Develop Menu
In Banana Accounting Plus this feature is only available with the Advanced plan> Upgrade now to the Advanced plan.
The developer Menu can be made visible with the command:
Development options
Contains useful options for developers of scripts, apps or http pages for Banana Accounting.
Enable Screenshots (Ctrl + 3)
When the function is activated, with the combination of the keys Ctrl + 3 you can take screenshots and save the images of the tables and dialog boxes of the program.
Also refer to Enable sreenshots.
Show Debug output window
If activated, the 'Debug output' panel appears at the bottom of the program’s main window. This panel displays all debug messages. Debug messages make it possible to check correct functioning during the execution of scripts, extensions, or web server calls. They are intended for developers of scripts, extensions, or HTTP sheets. For more information, see the Debugging page.
By right-clicking, you can activate different display modes:
- Warning level
- Debug level
Also displays programming messages. - Info level
Displays the main messages.
System info
Opens the System Info dialog.
Taking screenshots
This feature is available by using the key Ctrl+3. Facilitates the capture and saving of a program image.
In order to use this feature you need to activate it via Window-> Develop -> Enable screenshot (Ctrl + 3)
It is useful for preparing documentation, as it only captures the part of the program windows that you are interested in.
Capturing the image
When capturing an image we advise you to use a 90% zoom, so more data will fit in the image but you still get readable texts.
- Capture all
It creates an image of the full Banana window. - Capture table and info window
It only captures the table and the info window below the table (without menus, toolbar and status bar). - Capture table
It only capture the table - Capture columns
It only captures the table, and only up to the maximum columns width (it doesn't include the white spaces).
Resize window (pixel)
It resizes the program window to a pre-defined size, so if you take multiple shots you always have the same size.
Hide / Show window's components
It allows you to see more table rows, by hiding the toolbar, the info window and the status bar.
Windows - How to remove the dialogue windows shadow
Windows 8 e 10 "enhance" their dialog windows by adding a shadow to them. When capturing the window image you therefore also see the background.
In order to avoid this you can proceed as follows:
- From the Windows search box type Sysdm.cpl
- Go to the Advanced section
- Visual effects Settings
- Uncheck the option Show shadow
System info
This section displays information about the operating system and working environment. Information can be requested from technical support. In this case, click on the Copy to clipboard button and paste the data into the e-mail message or into the contact form.

Help Menu
The Help menu gives access to the followings commands:
- User's guide - gives access to the documentation that explains the various functions of the program and the accounting issues.
- Keyboard shortcuts - contains the list of all keyboard shortcuts with detailed use description.
- Check for updates - connects to our website to check if there are newer versions of the software
- Support center - access to the Banana Accounting support web page
- Manage subscription
The dialogue box to manage your subscription, indicating the following information:- Email with which you registered and the possibility to remove it.
- Version in use and expiration.
- Link to unlock your version with a product key.
- Link to purchase a subscription.
- Link that checks the availability of an updated subscription.
- About Banana Accounting
Opens a window that shows technical information about the program such as version number, serial number, Copyright.....
Keyboard shortcuts
You can also consult the list of keyboard shortcuts directly from the program, by choosing Keyboard shortcuts from the Help menu.
Keyboard shortcuts for Windows computers
Accounting Keys | Description |
F9 | Perform simple recheck. |
Shift+F9 | Perform global recheck. |
F6 | This key executes different functions depending on the column the user is working on. The functions are explained in the information window. |
Alt+ Left click | Display the Extract rows table or the Account card table when clicking on an account number. |
. (Full stop/Period) | On a date column insert the current date. |
Editing Keys | Description |
Enter, Tab | Confirming keyed-in text and advance one cell. |
Alt+Enter | Confirming keyed-in text and advance one row. |
Shift+Tab | Confirming keyed-in text and return to previous cell. |
F2 | Edit content of cell. |
Double click | Edit content of cell. Under the program options you can select to edit content of cell with a single click. |
Backspace, Space | Delete content of current cell and edit the content. |
Backspace | Delete preceding character. |
Del | Delete subsequent characters. |
Ctrl+C | Copy selected text or cells. |
Ctrl+V | Paste copied text or cells. |
Del | Delete content of selection. |
not assigned | Delete text from the cursor point to the end of the cell. |
F4 | Copy previous cell from same column. |
Shift+F4 | Copy previous cell from same column and advance one cell. |
Ctrl+Shift+C | Copy selected rows. |
Ctrl+Shift+V | Insert copied rows. |
Ctrl+- | Delete selected rows. |
| Ctrl+D | Duplicate selected rows. |
Ctrl++ | Insert rows before position of cursor. |
Ctrl+Enter, Ctrl+Return | Add one row below position of cursor. |
Moving keys | Description |
Left | Scroll towards left. |
Right | Scroll towards right. |
Up | Scroll up. |
Down | Scroll down. |
PgUp | Scroll up one screen page. |
PgDown | Scroll down one screen page. |
Home | Scroll to beginning of row. |
End | Scroll to end of row. |
Ctrl+Home | Scroll to top-left angle of table. |
Ctrl+End | Scroll to bottom-right angle of table. |
Ctrl+Left | Moves towards left to the edge of the current data region. |
Ctrl+Right | Moves towards right to the edge of the current data region. |
| Alt+Up | Move rows up. |
| Alt+Down | Move rows down. |
| Alt + Left Arrow | Move cursor to previous position |
| Alt + Right Arrow | Move cursor to next position |
Ctrl+Up | Moves up to the edge of the current data region. |
Ctrl+Down | Moves down to the edge of the current data region. |
Alt+PgDown | Next view. |
Alt+PgUp | Previous view. |
Ctrl+PgDown | Next table. |
Ctrl+PgUp | Previous table. |
Ctrl+Tab | Next window. |
Ctrl+Shift+Backtab | Previous window. |
F5 | Scroll to desired row by keying in row number in active window. |
Shift+F5 | Go to original row. |
Selection Keys | Description |
Shift+PgUp | Select column moving upwards, page by page. |
Shift+PgDown | Select column moving downwards, page by page. |
Shift+Left | Select row to left. |
Shift+Right | Select row to right. |
Shift+Up | Select upper column. |
Shift+Down | Select lower column. |
Shift+Home | Select back to start of row. |
Shift+End | Select forward to end of row. |
Ctrl+Shift+Home | Select back to top of table. |
Ctrl+Shift+End | Select forward to end of table. |
Ctrl+A | Select entire table. |
Other Keys | Description |
Ctrl+F4 | Close active window. |
not assigned | Exit program. |
Ctrl+N | New file. |
Ctrl+S | Save. |
Ctrl+O | Open. |
Ctrl+P | Print. |
Esc | Cancel operation. |
Ctrl+Z | Undo operation. |
Ctrl+Y | Redo operation. |
Ctrl+F | Find. |
F3 | Find next. |
Ctrl+B | Bold text. |
Ctrl+I | Italic text. |
F1 | View help. |
Multimedia keyboard | Is performed by |
Function key (eg. F6) | Press the fn key as well as the corresponding function key (e.g. Fn+F6). |
Keyboard shortcuts for Mac (Apple) computers
Keyboard shortcuts on Apple computers are slightly different from those on Windows. The main difference is that instead of the Crtrl key on the Mac keyboard there is the Command key. You can find the complete list under Help → Keyboard shortcuts.
Accounting Keys | Description |
⌘9 | Perform simple recheck. |
⇧⌘9 | Perform global recheck. |
⌘6 | This key executes different functions depending on the column the user is working on. The functions are explained in the information window. |
⌥ Left click | Display the Extract rows table or the Account card table when clicking on an account number. |
. (Full stop/Period) | On a date column insert the current date. |
Editing Keys | Description |
⌤, ⇥ | Confirming keyed-in text and advance one cell. |
⌥⌤ | Confirming keyed-in text and advance one row. |
⇧⇥ | Confirming keyed-in text and return to previous cell. |
⌘2 | Edit content of cell. |
Double click | Edit content of cell. Under the program options you can select to edit content of cell with a single click. |
⌫, Space | Delete content of current cell and edit the content. |
⌫ | Delete preceding character. |
⌦ | Delete subsequent characters. |
⌘C | Copy selected text or cells. |
⌘V | Paste copied text or cells. |
⌦ | Delete content of selection. |
not assigned | Delete text from the cursor point to the end of the cell. |
⌘4 | Copy previous cell from same column. |
⇧⌘4 | Copy previous cell from same column and advance one cell. |
⇧⌘C | Copy selected rows. |
⇧⌘V | Insert copied rows. |
⌘- | Delete selected rows. |
⌘D | Duplicate selected rows. |
⌘+ | Insert rows before position of cursor. |
⌘⌤, ⌘↵ | Add one row below position of cursor. |
Moving keys | Description |
← | Scroll towards left. |
→ | Scroll towards right. |
↑ | Scroll up. |
↓ | Scroll down. |
⇞ | Scroll up one screen page. |
⇟ | Scroll down one screen page. |
↖ | Scroll to beginning of row. |
↘ | Scroll to end of row. |
⌘↖ | Scroll to top-left angle of table. |
⌘↘ | Scroll to bottom-right angle of table. |
⌥← | Move towards left to the edge of the current data region. |
⌥→ | Move towards right to the edge of the current data region. |
⌥↑ | Move rows up. |
⌥↓ | Move rows down. |
⌥← | Move cursor to previous cursor position. |
⌥→ | Move cursor to next cursor position. |
⌘↑ | Move up to the edge of the current data region. |
⌘↓ | Move down to the edge of the current data region. |
⌥⇟ | Next view. |
⌥⇞ | Previous view. |
⌘⇟ | Next table. |
⌘⇞ | Previous table. |
⌘} | Next window. |
⌘{ | Previous window. |
⌘5 | Scroll to desired row by keying in row number in active window. |
⇧⌘5 | Go to original row. |
Selection Keys | Description |
⇧⇞ | Select column moving upwards, page by page. |
⇧⇟ | Select column moving downwards, page by page. |
⇧← | Select row to left. |
⇧→ | Select row to right. |
⇧↑ | Select upper column. |
⇧↓ | Select lower column. |
⇧↖ | Select back to start of row. |
⇧↘ | Select forward to end of row. |
⇧⌘↖ | Select back to top of table. |
⇧⌘↘ | Select forward to end of table. |
⌘A | Select entire table. |
Other Keys | Description |
⌘W | Close active window. |
⌘Q | Exit program. |
⌘N | New file. |
⌘S | Save. |
⌘O | Open. |
⌘P | Print. |
⎋ | Cancel operation. |
⌘Z | Undo operation. |
⇧⌘Z | Redo operation. |
⌘F | Find. |
⌘G | Find next. |
⇧⌘G | Find previous. |
⌘B | Bold text. |
⌘I | Italic text. |
⌘? | View help. |
⌘3 | Save screenshot of current dialog or table. |
MacBook keyboard | Is performed by |
⌦ | fn⌫ |
↖ | fn← |
↘ | fn→ |
⇞ | fn↑ |
⇟ | fn↓ |
⌘↖ | fn⌘↖ |
⌘↘ | fn⌘↘ |
About Banana Accounting+
In the About dialog window (menu Help → About Banana Accounting+), you will find various information about the program.
Version
The version number you are using (eg 10.0.4) of Banana Accounting + is clearly visible. Banana Accounting Plus, numerically it is version 10, which will be continuously improved, so there will be additional version numbers, eg10.0.1, 10.0.2, etc. for each subsequent release.
Important: for any technical question, before contacting the support service, make sure you have the latest release (by downloading it from our download page)
Along with the version number you will also find the serial number, web address and Copyright information.
Patents and legal notices
In this tab you will find again the Copyright information, the Banana Accounting patents and the trademark declarations. You will also find the indication of all the programming platforms that the software uses with the relative licenses and copyrights.
Credits
In this section, acknowledgments and credits are given to all those who have participated and still actively participate in the development, maintenance and promotion of our program.
Error messages
When the programme encounters errors, a dialogue box appears to report them:
- Select the OK button to display each individual message.
- By activating the Do not report option, all error messages reported by the programme are saved in the Error messages window.
- Information on the Help button can be found under Contextual Help.
Warnings and error messages
- Complete list of error messages
- For further information on the Message Error window refer to the Interface page.
If the program displays error messages
- Revert to the the help page for the reported error: in the 'Info' and 'Messages' (where the error messages appear), next to the error message, the
 symbol will show. By clicking on this symbol, you will be connected directly to the online page corresponding to the error, containing the possible causes and solutions.
- If the error persists:
- Update your software to the latest available version, by downloading it at the following page Download.
- Check Accounting (menu Actions).
- In Multi-currency Accounting, ensure that Exchange Rate differences have been generated and applied (menu Actions).
Deactivate and Reactivate error messages
To deactivate/reactivate the display of the dialogue of messages:
- from the Window menu, put or remove the check mark on the Warning messages command.
- from the Actions menu launch the Check accounting command.