Double-entry accounting
The professional tool to manage assets, liabilities, expenses and income according to the international rules of the Double-entry (debit and credit) and to obtain a Balance Sheet and a Profit/loss Statement.
The double-entry accounting application is available with or without the VAT management option.
Characteristics
- Manages the estate accounts and the profit/loss accounts (assets, liabilities, expenses and revenue)
- The accounting type with VAT features the VAT calculations and VAT reports
- Produces all the accounting extracts: journal, account cards, balances by period and annual balances
- Allows Cost Centers and Segments management
- Offers different ways of data presentation
- Exports data to Excel, Html, Xml, Pdf
- Imports data from different files formats
Tables and File properties
The double-entry accounting is composed by the following tables:
- Accounts table
Where the accounting plan is located with opening balances, and where groups and subgroups can be defined along with cost centers and segments. - Transactions table
Where the accounting transactions are entered. - VAT Codes table
Where the VAT/Sales tax codes are set, only if the VAT management option has been chosen. - Exchange rates table
Where the different currencies are defined, only if the multi-currency accounting option has been chosen. - File properties
Where the accounting general settings are defined.
Changing accounting type
In order to change your file language, rounding system, or in order to add VAT or multicurrency columns, please refer to the Convert to new file command, from the Tools menu.
Learn more
- Learn Accounting
- Elements of Accounting
- Mathematical basis
- Organizing your accounting documents
- Debit and Credit
- Accounting on turnover or collected
Starting a Double-entry accounting
Video Double-entry accounting: video tutorial that shows you how to easily set up a Double-entry accounting, adapt the Accounts table, set a budget, enter the transactions and print reports.
Creating an accounting file, starting from a template
Proceed as follows:
- File menu, New command
- Select the region, the language, the category and the accounting type
- From the list of the templates that appears, select the template that is closest to your own needs.
- Click on the Create Button
In the Search area, when entering a key word, the program displays the templates that contain the entered key word.
It is equally possible to start from a blank file, by activating the Create blank file option. In any case, in order to facilitate the start and avoid grouping errors, we recommend that you always start from an existing model.

More information on how to create a new file is available on the Create New File page.
Setting up the file properties (basic data)
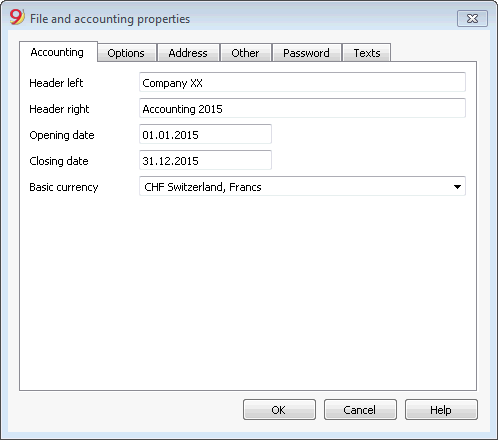
- From the File menu, File properties command, indicate the company name that will appear in the headers of the printouts and on the other data.
- Select the basic currency, with which the accounting will be kept.
Save to disk
With the File-> Save As command, save the data and also assign an name to the file. The typical save dialog of your operating system appears.
- It is advisable to use the name of the company followed by the year "Company-2020." to distinguish it from other accounting files.
The program will add the "ac2" extension. - You can keep as many accounting files as you need, each will have its own name.
- You can choose the folder you want, (for example, Documents -> Accounting) or the support you want like a disk, usb or cloud.
If you also expect to have documents linked to the current year's accounts, it is suggested that you create a separate directory for each accounting year having to group all the files.
General use of the program
Banana Accounting inspires itself from Excel. The user directions and the commands are kept as similar as possible to the ones of Microsoft Office.
For more information on the general use of the program, we refer to the explanations on our page Program interface.
The accounting is being contained in tables; all of them have the same way of operating.
Customizing the Chart of accounts
In the Accounts table, customize the Chart of accounts and adapt it to your own needs:
- Add new accounts and /or delete existing ones (see Adding new rows)
- Modify the account numbers, the descriptions (for example, enter the name of your own Bank account), enter other groups, etc.
- To create subgroups, please consult our Groups page.
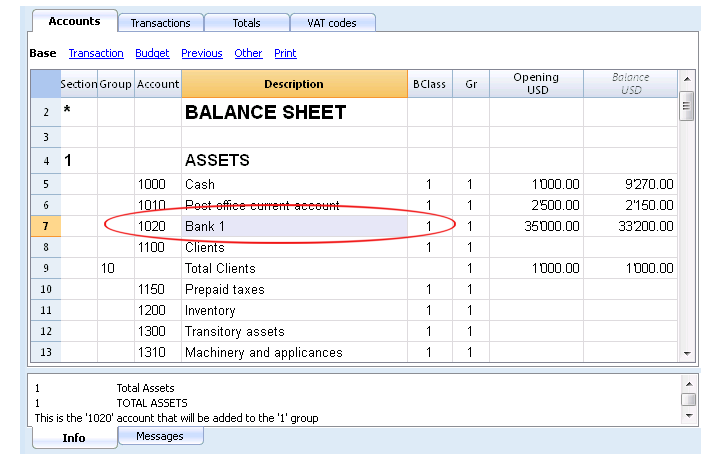
In the Chart of accounts, you can also define Cost centers or Segments, used to attribute the amounts in a more detailed or specific way.
The Transactions
The Transactions have to be entered into the Transactions table; together they compose the Journal.
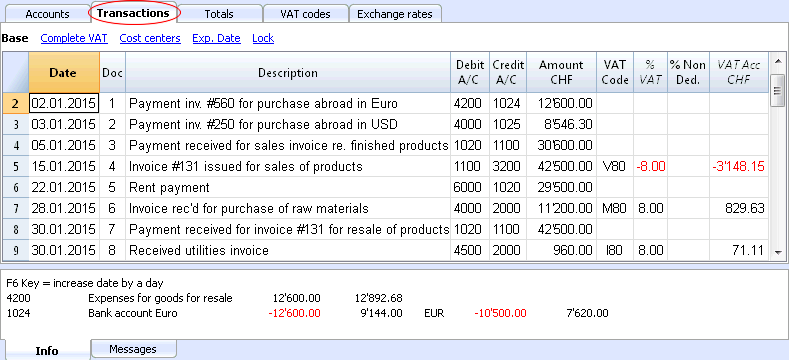
In the specific columns:
- Enter the Date
- Enter the Document number, manually assigned to the paper document. This makes it possible to easily locate the documents once the accounting transaction has been entered.
- Enter the Description
- Into the Debit account column, enter the destination account
- Into the Credit account column, enter the account of origin.
- Enter the Amount. In the accounting with VAT, enter the gross amount, VAT included. The program will separate the VAT, splitting the net cost or net income.
Speeding up the recording of the transactions
In order to accelarate the recording of the transactions, you can use
- the Smart fill function that allows the automatic autocomplete of data that have already been entered at an earlier date.
- the Recurring transactions function, used to memorize recurring transactions into a separate table.
- importing your bank or postal account statement from the e-banking.
Transactions with VAT
In order to enter transactions with VAT please proceed as follows:
- from the File menu, choose New command and choose Double-entry accounting with VAT/Sales taxes
- Choose one of the existing templates for your nation with double-entry accounting with VAT codes and VAT Codes table.
In order to enter transactions with VAT, please visit the Transactions page.
Transactions on multiple rows
Transactions on multiple rows or Composed transactions are transactions involving more than two accounts and credits/debits on multiple accounts (for example when you pay different invoices from the bank account). In this case you need to enter the transaction on multiple rows:
- in the first row enter the total amount and the account debited or credited
- when all the individual debit and credit rows are entered there shouldn't be any difference
For more details, consult the page Composed transactions.
Checking customer and supplier invoices
Banana allows you to keep an eye on the invoices to be paid and the receivable, issued invoices. Please consult:
The Account card
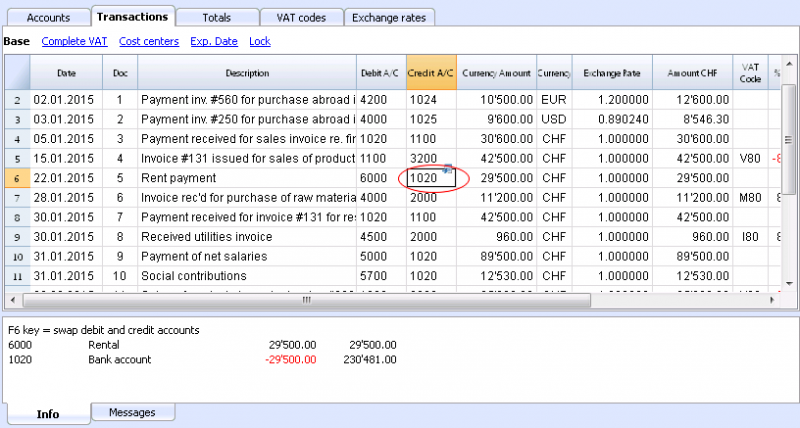
The Account card automatically displays all the transactions that have been recorded on the same account (for example, cash, bank, clients, etc).
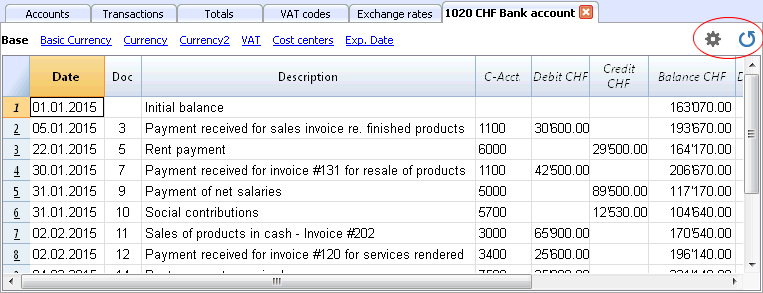
To display an account card, just position yourself with the mouse on the account number and click on the small blue symbol that appears.
Account card by period
To display the account card with the balances referring to a specific period, click on the Account1 menu, Account card command, and in the Period section, activate Period Selected, entering the Start and the End date of the period.
For more details, consult the Period page.
Printing the Account card
In order to print one account card, just display the card from the Accounts or the Transactions table and launch the print from on the File menu.
To print several or all account cards, click on the Account1 menu, Account card command, and select the account cards that need to be printed. By means of the Filter, all the account cards, or only a part of all of them (for example, only accounts, cost centers, segments), that need to be printed can be automatically selected.
For more details, consult the Account Card page.
The Balance Sheet and Profit and Loss Statement
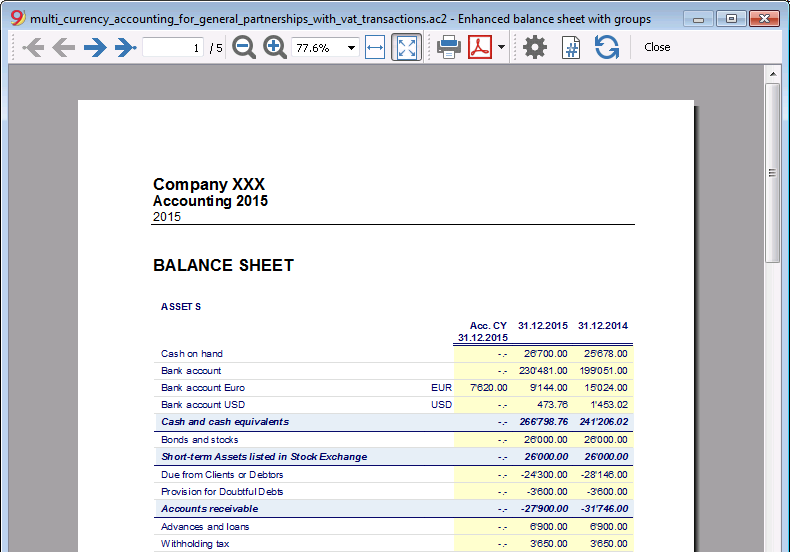
The Balance sheet shows the balances of all the estate accounts, Assets & Liabilities. The difference between the Assets and the Liabilities determines the Share capital.
The Profit & Loss statement shows all the Expense & Revenue accounts. The difference between the Expenses & Revenue determines the Profit or Loss of the Accounting year.
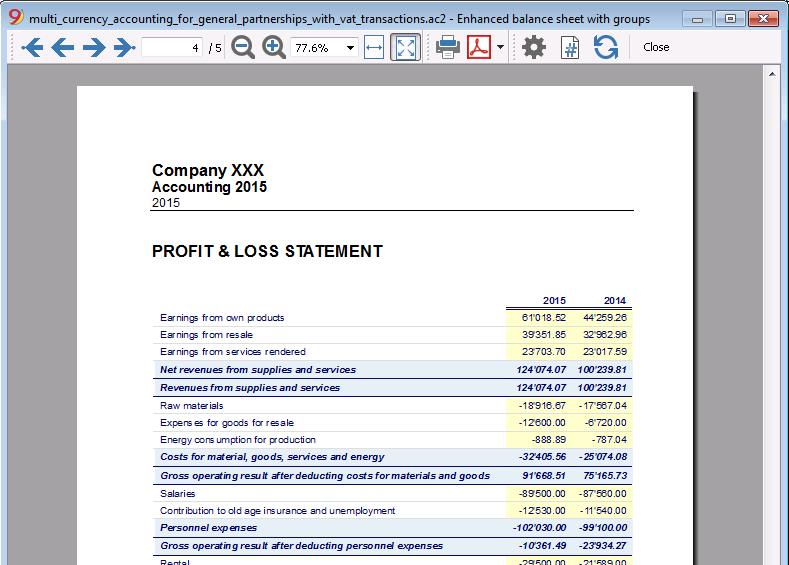
The display and the printing of the Balance Sheet is being executed from the Account1 menu, Enhanced Balance Sheet and Enhanced Balance Sheet with groups commands.
- The Enhanced Balance Sheet command simply lists all the accounts without distinguishing Groups and Subgroups
- The Enhanced Balance Sheet with groups command lists all the accounts while subdividing Groups and Subgroups; besides, it presents numerous features to customize the presentation, functions that are not provided in the Enhanced Balance Sheet.
Data archiving in PDF format
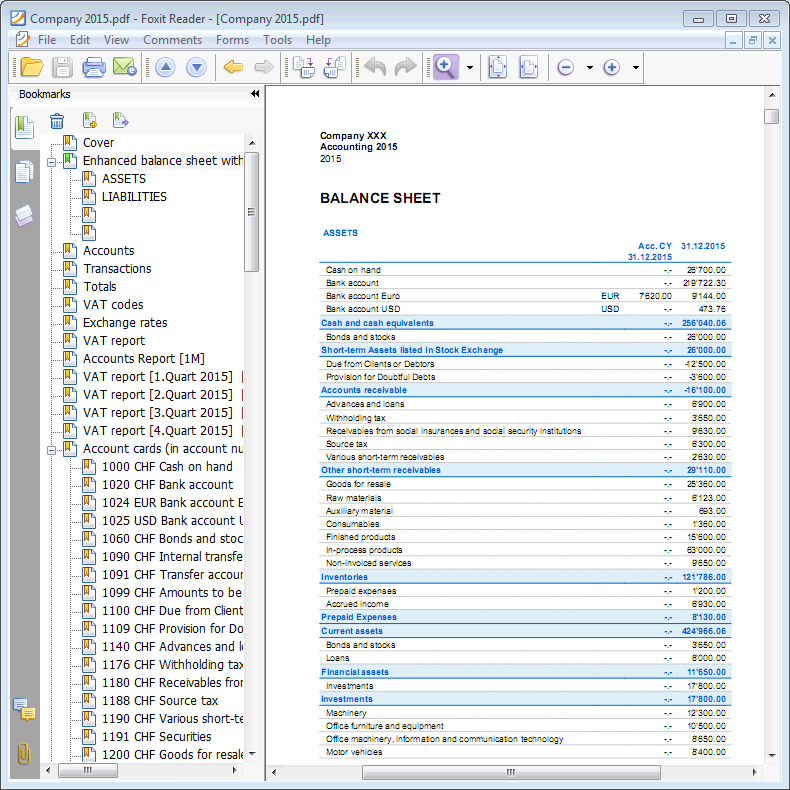
At the end of the year, when the entire accounting has been completed, corrected and audited, all the accounting data can be archived with the Create PDF dossier command of the File menu.
The Budget
- Accounts table, Budget column. For each account, the annual budget amount is being indicated.
In this case, when you set up the Budget from the Account1 menu, Enhanced Balance Sheet with groups command, the Budget column displays the amounts that refer to the entire year. - In the Budget table, that can be activated through the Tools menu, Add new functionalities command.
In this table, you can enter all the budgeted costs and revenue by means of entering transactions. If you activate this table, the column of the accounts table will be automatically deactivated.In this case you can set up a detailed budget, taking into account the possible variations over the year and in different periods of the year.
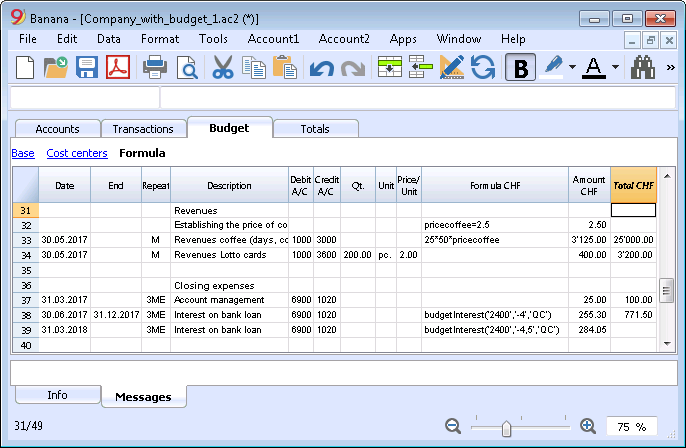
For more details, consult the page Budget.
Caratteristiche Contabilità in partita doppia
L'applicativo Contabilità in partita doppia soddisfa i criteri professionali per le società ed enti di qualsiasi genere dove è richiesta per legge la tenuta della contabilità.
- È uno strumento molto potente, ma anche flessibile e facile da usare, perché le diverse funzionalità sono attivabili e disattivabili. Questo ti permette di gestire sia contabilità essenziali, sia altre con piani conti strutturati su più livelli: con IVA, controllo clienti e fornitori, fatturazione, centri di costo e segmenti.
- Puoi sempre modificare, per cui tutti possono avere risultati perfetti. È ideale per il contabile esperto che vuole lavorare velocemente e per chi inizia. Per questo motivo è usato per insegnare la contabilità in molte scuole.
Simile a Excel
Funzionalità e comandi simili a Excel
- Tutti i dati che inserisci nelle tabelle sono sempre visibili e a portata di mano.
- Lavori velocemente perché puoi selezionare, copiare e incollare, su più celle e più righe le registrazioni che si ripetono.
- Se sbagli puoi correggere annullando o ripristinando le operazioni.
- Aggiungi quante righe vuoi senza limiti, o elimina le righe che non hai bisogno.
- Se hai sbagliato un valore, un conto, un codice IVA, una descrizione, con la funzione Cerca e sostituisci correggi in un attimo
- Non hai bisogno d'inserire formule perché i calcoli vengono aggiornati immediatamente e hai una visualizzazione contestuale (come nei fogli di calcolo).
- Tutto quello che si vede può essere stampato o esportato in pdf o altri formati.
- Puoi impostare il logo della tua azienda per personalizzare le intestazioni di stampa.
- Le colonne sono personalizzabili, puoi spostarle di posizione, aggiungerne nuove e cambiarne la larghezza.
- Lavora con il formato che ti è più congeniale.
- Colora le righe per individuare subito le registrazioni che devi rivedere o fare vedere al commercialista o da completare.
Basato su tabelle
La gestione della contabilità si concentra in due tabelle, che si usano in modo simile alle tabelle di Excel, ma che sono già completamente impostate e programmate con tutto quanto serve per tenere la contabilità in modo veloce e sicuro.
- Tabella Conti.
Imposti tutti i conti della liquidità, dei clienti, dei fornitori, ecc. e inserisci i saldi iniziali senza doverli registrare manualmente nella tabella registrazioni. Puoi raggruppare più conti insieme, come per esempio la cassa, la banca o la posta nel gruppo della liquidità, così in un attimo hai i saldi aggiornati che puoi verificare immediatamente. - Tabella Registrazioni.
Il cuore della tenuta contabile, dove si inseriscono o importano i movimenti. Le registrazioni dare e avere, possono essere completate con ulteriori informazioni per gestire clienti e fornitori, emettere fatture, gestire centri di costo/profitto, segmenti, quantità e prezzi e quant'altro si necessita. Scorrendo la tabella si ha una visione completa di tutti gli accadimenti. Si può modificare in modo da avere una contabilità sempre perfetta. - Tabella Totali.
Presenta i totali per Gruppo e serve per controllare la quadratura contabile.
Ulteriori tabelle che si possono aggiungere e che supportano ulteriori funzionalità.
- Tabella Preventivo.
Per allestire previsioni finanziarie, con il metodo della partita doppia. Quindi complete di piano della liquidità, bilancio e conto economico previsionale, previsioni clienti, fornitori, investimenti, progetti, segmenti per uno o più anni. - Tabella Codici IVA.
Per impostare le aliquote e i parametri necessari da usare nella tabella Registrazioni per il calcolo automatico dell'IVA e i rendiconti da presentare alle autorità fiscali. - Tabella Articoli.
Per impostare un elenco di articoli da usare per la fatturazione. Il programma tiene nota delle entrate e uscite. - Tabelle libere.
Per fare fronte a ulteriori necessità.
Inizio veloce
Modelli
La gestione della contabilità si concentra principalmente su tre tabelle, che si usano in modo simile alle tabelle di Excel, ma che sono già completamente impostate e programmate con tutto quanto serve per tenere la contabilità in modo veloce e sicuro:
- Avvio facile e immediato, creando il file della tua contabilità partendo da un modello.
- Se hai già un modello tuo in Banana Contabilità puoi riprenderlo con tutte le impostazioni e utilizzarlo per una seconda contabilità.
- Oltre 1000 modelli suddivisi per nazione e tipologia di utenza, personalizzabili e con documentazione d'uso.
- Ricerca facile e uso modelli direttamente nel programma.
Impostazione contabile
- Per la tua contabilità imposta liberamente la moneta, la puoi scegliere da un elenco di monete mondiali o impostata liberamente (cripto monete).
- Imposta liberamente un periodo contabile, anche su più anni e non legato al classico periodo dal 1 di gennaio al 31 di dicembre.
- Intestazioni e dati base contabilità impostate in un'unica finestra di dialogo, facile da visualizzare.
- Inserisci quanti decimali vuoi, da 0 a 27 (scelti al momento della creazione della contabilità).
- Puoi cambiare il numero dei decimali della contabilità durante l'anno senza problemi.
Multi-lingue
- Hai libertà di scelta della lingua della contabilità, quando crei il tuo file.
- Personalizza le intestazioni delle colonne come desideri.
- Puoi avere contabilità in più lingue contemporaneamente.
- Personalizza le Stampe anche per più lingue.
File e salvataggio dati
- Hai tutti i dati salvati in un unico file, dove trovi facilmente tutto senza perdite di tempo.
- Per ogni anno crei un File separato. Tutti i dati sono riferiti all'anno e non ci sono confusioni.
- Attribuisci al file il nome che desideri.
- Con una sola licenza puoi gestire un numero illimitato di contabilità.
- I dati rimangono in tuo completo possesso.
- Salva i dati del su qualsiasi supporto, computer, rete, cloud o inviato per email. Puoi accedervi ovunque sei.
- Accesso in contemporanea da più utenti, ma solo una persona può invece aprire il file in modifica.
- Rendi più sicura la tua contabilità inserendo una protezione con password.
Pianifica-Esegui-Controlla
Con lo stesso file e sempre con il metodo della partita doppia, puoi fare la contabilità, oppure le tue previsioni o entrambi. Puoi facilmente usare il potente approccio gestionale Pianifica - Esegui - Controlla.
Metodo contabilità in partita doppia
- Banana Contabilità ti permette di tenere la contabilità con il metodo internazionale della partita doppia, conforme agli standard internazionali.
- Soddisfa i criteri per la tenuta di qualsiasi contabilità.
- Utilizzabile in qualsiasi nazione.
- Registrazioni con colonne Dare e Avere.
- Se nelle registrazioni ci sono degli sbilanci, hai la segnalazione della differenza.
Nelle colonne hai la visualizzazione degli importi nel formato usato dal tuo computer, senza doverti abituare ad altri formati a te non congeniali.- Importi in dare in positivo e in avere in negativo.
- Calcoli secondo l'equazione Dare - Avere = 0.
- Bilancio, Conto Economico e tutte le tipiche stampe contabili.
- Stampe tutte personalizzabili.
- Formato di visualizzazione a scelta.
- Registrazioni secondo il principio di cassa o di competenza .
- Proteggi i tuoi dati con la tecnologia all'avanguardia del blockchain (metodo brevettato).
- Il metodo della partita doppia è usato da molte scuole in tutto il mondo, per insegnare la contabilità.
Piano dei conti
- Piano conti completamente personalizzabile per rispondere meglio alle tue necessità.
- Lo stesso piano conti lo utilizzi per la contabilità e per le previsioni finanziarie, patrimoniali e di reddito.
- Schema di Bilancio e Conto economico adattabili secondo la struttura e i contenuti che hai bisogno.
- Supporta qualsiasi schema di raggruppamento nazionale, internazionale o libero.
- Conti fuori bilancio per la gestione delle partite che non devono essere incluse nel Bilancio, ma che hai bisogno di annotare.
- Scegli tu l'identificativo del conto liberamente (conto numerico o alfa-numerico, fino a 256 caratteri).
- La descrizione del testo puoi inserirla liberamente fino a 256 caratteri.
- Non serve più inserire il bilancio iniziale e finale nelle scritture contabili
Inserisci i saldi direttamente nella colonna Apertura della tabella Conti e solo la prima volta che usi Banana Contabilità. Negli anni successivi il riporto è automatico. - Saldo, movimento conto e totali visualizzati contestualmente e sempre aggiornati.
- Ad ogni conto del cliente, fornitore, socio hai le colonne per inserire gli indirizzi e altri dati utili che necessiti.
- Aggiunta di altre colonne per note, raggruppamento o importi.
- Se aggiungi delle colonne di tipo importo, queste sono totalizzate automaticamente.
Hai così la possibilità di creare delle colonne con dati propri e avere dettagli molto selettivi.
Registrazioni
- Puoi inserire Registrazioni singole o composte.
Quelle singole le registri su un'unica riga, mentre quelle composte ti permettono di registrare senza problemi operazioni che toccano più conti. - Puoi registrare sia con il Metodo di competenza o con quello di Cassa.
- Quando registri ti vengono proposti i testi già inseriti. Basta un click per completare la registrazione (auto-completamento).
- Segnalazione immediata di errore e differenze, con possibilità di completarli successivamente.
- Memorizza le operazioni ripetitive per riprenderle quando si ripresentano senza doverle riscrivere.
- In tutte le tabelle hai delle colonne colonne predefinite che può rendere visibili a scelta.
- Colonne quantità e prezzo, per fatturazione o controllo costi.
- Auto-numerazione documenti con numerazioni diverse contemporaneamente.
- Per avere documenti in ordine e sempre a portata di mano, collega ai file i giustificativi digitali (pdf, immagini), e aprili con un click.
- Inserisci testi liberi fino a 256 caratteri e anche su più righe.
- Colora le righe per cercare subito le registrazioni che devi verificare o correggere in seguito, oppure per segnalarle al revisore.
- Aggiunta di colonne per inserire qualsiasi ulteriore informazione.
- Salva la disposizioni delle colonne (viste) per visualizzare i contenuti per te più importanti.
- Informazioni contestuali circa saldo del conto, differenze o errori.
- Prima delle chiusure periodiche o di fine anno puoi usare le Registrazione di verifica saldo.
Potrai individuare errori tra i saldi effettivi (es. saldi bancari fornite dall'estratto, e quelli della contabilità). Ti accorgerai subito degli errori e puoi correggere per avere tutto in perfetto ordine. - Importazione movimenti:
- Velocizza l'inserimento delle registrazioni importando i dati dagli estratti bancari digitali.
- Puoi importare i movimenti nei diversi formati bancari.
- Le righe importate possono essere modificate, completate o rimosse.
- Importa anche dati fatture o da altri programmi.
Previsione finanziaria
- Se necessiti di creare un preventivo puoi attivare la funzione aggiungendo la tabella Preventivo.
- Lavori senza difficolta con la stessa metodologia a cui sei già abituato, basata sul metodo della partita doppia.
- Previsioni finanziarie completi di piano della liquidità
- Previsioni di Bilancio.
- Previsioni di Conto economico.
- Proiezioni automatica per più anni.
- Inserimento della pianificazione tramite registrazioni di preventivo.
- Entrate e uscite ricorrenti impostate con una sola registrazione.
- Tutte le funzionalità disponibili in contabilità:
- Formule di calcolo in Javascript con accesso ai valori della previsione in corso:
- Valori di previsioni disponibili nelle stampe contabili:
- Scheda conto con movimenti di previsione per conto o gruppo.
Bilancio e Conto Economico
- Rendiconti con dati consuntivi, o preventivi oppure con entrambi i dati e con indicazione degli scostamenti.
- Disposizione libera con gruppi e sottogruppi.
- Risultati aggiornati visibili direttamente nella tabella conti.
- Stampe personalizzabili:
- Aggiunta del proprio logo.
- Scelta delle colonne da includere.
- Scelta delle sezioni da includere.
- Stampa dettagliata o raggruppata.
- Stampe per solo un periodo.
- Colonne con suddivisione per periodo (mese, trimestre, semestre, anno).
- Valori anno precedente.
- Valore di previsione confronto.
- Colonne con suddivisione per segmento.
- Aggiunta note allegate.
- Raggruppamento come nel piano dei conti o secondo un proprio schema.
- Salvataggio della personalizzazione.
- Report tabellare (simile alle stampe personalizzabili, ma con i dati presenti nella tabella).
- Esportazione in pdf per la conservazione dei dati ed esportazione in altri formati per una rielaborazione dati.
Altre stampe contabili
- Contenuto tabelle completamente stampabile o stampa anche solo per selezione.
- Aggiunta del proprio logo per una personalizzazione dei documenti e delle stampe.
- Giornale.
- Schede con movimenti conto e gruppi:
- Con i movimenti contabili o quelli di previsione.
- Per periodo.
- Per Conto, Gruppo, Centro di Costo o Segmento.
- Dati contabili o di previsione.
- Disposizione colonne personalizzabile.
- Esportazione in pdf o altri formati.
Grafici
- Contestuali, a piè di tabella.
- Diverse disposizioni.
- Evoluzione dei conti e gruppi.
- Valori contabili.
- Previsione.
- Anno precedente.
- Scelta del tipo di grafico.
Ulteriori gestioni
Il programma ti consente anche di aggiungere ulteriori informazioni alle registrazioni, in modo che gli stessi dati ti servono anche per la gestione IVA, per il controllo dei clienti e fornitori, emissione di fatture, avere rendiconti per progetti o settori d'attività e fare fronte ai diversi adempimenti societari e fiscali.
Gestione IVA
- Funzione attivabile a scelta (quando si crea una contabilità).
- Tabella codici IVA per indicare le diverse aliquote e casistiche IVA.
- Supporta qualsiasi specifica nazionale.
- Può essere usato anche per gestire altri tipi di tasse di vendita (p.es. Sales tax Americana).
- Inserimento in registrazione del Codice IVA.
- Funzionalità di storno IVA (usando il Codice IVA preceduto dal segno meno).
- Calcolo IVA dal netto o dal lordo.
- Scomposizione e registrazione automatica sui conti IVA indicati.
- Rendiconti IVA di controllo:
- Per periodo o completo.
- Con o senza movimenti.
- A scelta con totali per aliquota, codice IVA, conto.
- Estensioni nazionali per rendicontazione IVA in base ai requisiti delle autorità fiscali.
Gestione e controllo clienti
- Funzione attivabile a scelta (aggiungendo i conti nel piano dei conti).
- Controllo fatture e pagamento dei clienti.
- Anagrafica cliente impostata nel piano dei conti.
- Crea gruppi e totali per clienti in gruppi diversi.
- Fatture aperte per cliente o completa.
- Estratto conto movimento cliente e fatture aperte.
- Riconciliazione automatica, fatture aperte.
- Gestione clienti anche come Centri di costo (per principio di cassa).
Fatture ai clienti
- Funzione attivabile a scelta (utilizzando la colonna numero fattura nella tabella registrazione)
- Inserimento fatture direttamente nella tabella Registrazioni.
- Richiede l'impostazione dell'anagrafica clienti.
- Inserimento dei dati fatture come normali righe di registrazioni.
- Vedi emissione e stampa fatture ai clienti.
- Colonna per indicare quantità e prezzi.
- Con o senza IVA.
- Possibilità di modifica, correzione.
- Stampa della singola fattura con un click o di diverse fatture assieme.
- Scelta fra diversi layout di stampa.
- Personalizzazione della fattura in base alle proprie preferenze.
- Esportazioni in formato digitale tramite estensioni.
- Richiami personalizzabili con estensioni.
- Estratti conto clienti personalizzabili con estensioni.
Gestione fornitori
- Funzione attivabile a scelta (aggiungendo i conti nel piano dei conti).
- Anagrafica fornitori impostata nel piano dei conti.
Possibilità di raggruppare i fornitori in gruppi diversi. - Controllo fatture e pagamento ai fornitori.
- Fatture aperte per fornitore o report completo.
Estratto conto movimento fornitore e fatture ancore aperte. - Riconciliazione automatica, fatture aperte.
Centri di costo e di profitto
- Funzione attivabile a scelta (aggiungendo i conti centri di costo e profitto).
- Per progetti, contabilità costi o di redditività.
- Impostazione dei centri di costo direttamente nel piano dei conti.
- Raggruppamento multi-livello.
- Tre livelli di centri di costo e profitto.
- Numero illimitato di centri di costo per livello.
- Registrazione in negativo (con segno meno).
- Reportistica come i conti di bilancio e conto economico:
- Saldo costantemente aggiornato.
- Report personalizzabili.
- Scheda di tutti i movimenti con saldo progressivo.
- Grafico contestuale.
Segmenti
- Funzione attivabile a scelta (aggiungendo i conti segmenti).
- Per avere il bilancio e il conto economico di uno o più settori aziendali.
- Impostazione dei segmenti direttamente nel piano dei conti.
- Raggruppamento multi-livello.
- Fino a 10 livelli di segmento.
- Numero illimitato di segmenti per livello.
- Saldo costantemente aggiornato.
- Reportistica come i conti di bilancio e conto economico:
- Bilancio e Conto economico per ogni segmento.
Tabella Articoli
- Per fatture e con gestione integrata di magazzino o dei titoli.
- Collegamento degli articoli ai movimenti della tabella Registrazioni.
- Aggiornamento automatico movimenti in entrate e uscita.
- Valore iniziale e finale.
- Aggiunta di ulteriore colonne.
Controllo e chiusura
Segnalazioni errori e controllo contabilità
- Comando per controllare la contabilità.
In un attimo, la contabilità viene ricalcolata come se si inserissero tutte le operazioni nuovamente. - Segnalazione di eventuali impostazioni sbagliate, differenze o errori.
- Ogni segnalazione è collegata a una pagina di aiuto che spiega le cause e la soluzione.
- Verifica se il saldo del conto corrisponde a quello reale (cassa, banca, IVA).
- Possibilità di correggere.
Protezione delle registrazioni
- Protezione righe.
- Blocco dei movimenti inseriti con tecnologia di certificazione dati digitale (tipo Bitcoin).
- Protezione con password.
- Conforme ai requisiti di legge.
- Invio dati al revisore con la certezza dell'impossibilità di manomissioni.
- Sblocco movimenti con data.
Chiusura e nuovo anno
- Procedura automatica per creare il file del nuovo anno.
- Riporto dei saldi e attribuzione dell'utile.
- Si può iniziare a lavorare sul nuovo anno, anche se non è stato chiuso il precedente.
- Comando per riprendere i saldi definitivi quando è stato chiuso l'anno precedente.
Esportazione e archiviazione dati
- Copia e incolla direttamente da e per Excel.
- Esportazione tabelle in pdf e diversi altri formati.
- Archiviazione delle stampe e dei dati contabili in pdf o altri formati.
- Estensioni per creare gli Standard Audit File.
- Salvataggio del file contabile su qualsiasi supporto.
Estensioni e altre funzionalità
Aggiunta funzionalità
- Aggiunta di nuove funzionalità.
- Rimozione di funzionalità non più necessarie.
- Conversione da un tipo contabile a un altro:
- A contabilità con o senza IVA.
- A contabilità con multi-moneta o viceversa.
- Da contabilità entrata e uscite a doppia o viceversa.
Tabella Documenti
Altre Tabelle aggiuntive
- Aggiunta di altre tabelle dove inserire delle note o altre informazioni.
- Le tabelle possono essere personalizzate aggiungendovi colonne.
Estensioni
- Estensioni predefinite per diverse stampe e altre funzionalità.
- Ricerca e istallazione veloce.
- Estensioni personalizzabili.
- Aggiornamento automatico.
- Possibilità di creare e istallare delle proprie estensioni locali.
Documentazione completa
- Ogni dialogo ed errore ha una propria pagina di documentazione accessibile con un click.
- Documentazione aggiornata costantemente.
- Domande e risposte.
- Documentazione disponibile anche in formato Pdf.
File and accounting properties
This is where the main data of the accounting file are entered, such as the printout heading, the opening and closing dates, the basic currency, the company address, the profit and loss from exchange rate variation account (if you have a multicurrency accounting file), the VAT account (if you have chosen the VAT management option), the password, …
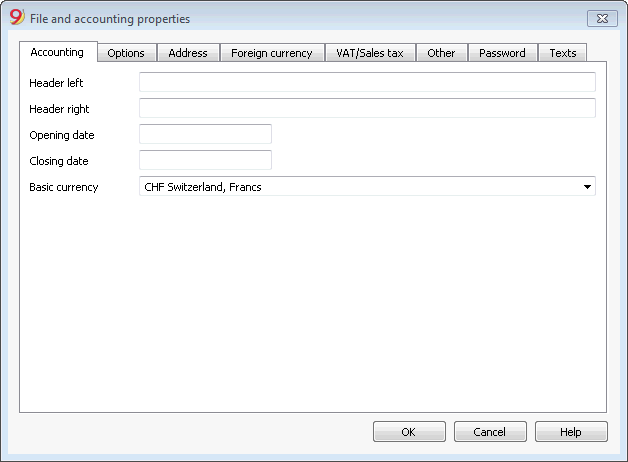
The File and accounting properties window has the following tabs:
- Accounting tab
- Options tab
- Address tab
- VAT/ICMS tab
- Foreign currency tab
- Texts tab
- Password tab
- Other tab
Chart of accounts
Financial situation under control
You need to setup you chart of accounts in the Accounts table: setup the accounts and the groups where the accounts must be totalized. With this operation you create the accouts that will be used when entering the transactions. The chart of accounts structure is the same that will show in all Balanche sheet and Profit & Loss statement presentations.
In the Accounts table there are also the columns of the initial balances, movements and current balance, which are automatically updated by the program.
The chats of accounts therefore provides an immediate and complete view of your financial situation.
- Liquidity accounts
- Balance sheet
- Profit & Loss statement
- Result of the current year
- Clients and Suppliers register
- Cost and Profit Centers
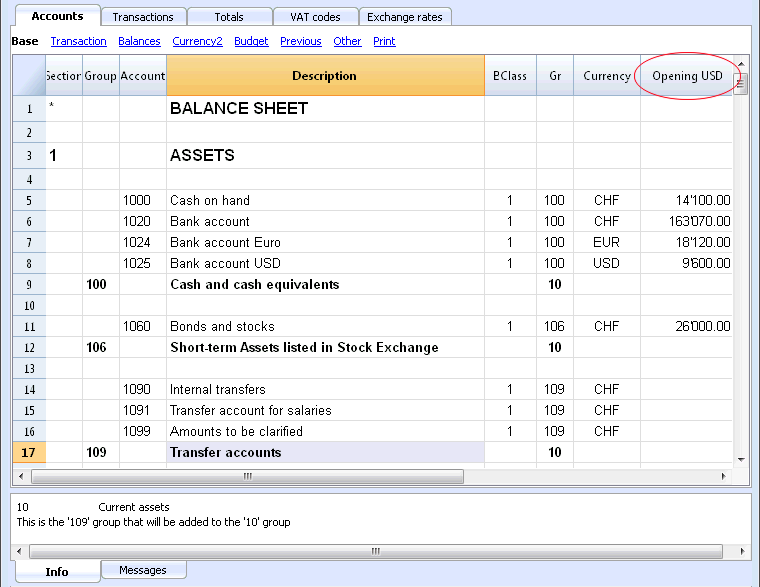
Different kinds of rows and sections
The Accounts table (charts of accounts) is both the setup tool and the viewing tool for the economic and financial situation.
In the chart of accounts (Accounts table) all data necerrary to group the mouvements are entered:
- Accounts
They indicate on what account (debit ore credit) the transactions must be registered.
Each account has a code or number (account number), a description, a class and a group to which it belongs; they also have an opening balance, the current balance, the budget, etc... - Costs and Profits centers
They are special accounts whose number is preceded by a full stop ".", a comma "," or by a semi-colon ";". Their purpose is to be able to assign some amounts to special accounts other than the basic accounting accounts. - Segments
They are a sort of sub-accounts who's number is preceded by a ":". Their purpose is to be able to assign some transactions to subcategories of the accounting plan. - Groups
Their purpose is to create rows where the program adds up the amounts of other rows. - Sections
They indicate the accounting plan divisions for the Balance Sheet and Profit and Loss Statement printouts, ...
Trial Balance sheet
At any time, positioning yourself in the Accounts table and using the Print or Print preview commands (from the File menu), you can view and print the account plan or part of it.
Also from the Accounts table, if you select Movement view, you can view and print your trial balance sheet.
Advanced printouts
- Accounting report
It is possible to select just the accounts with transactions, to obtain temporary groupings or accounts grouped according to the BClass or an external grouping scheme. - Enhanced Balance sheet
Prints all the accounts of the accounting divided by Assets, Liabilities, Expenses and Revenue - Enhanced Balance sheet by groups
Allows the user to obtain customized printouts with groups - Specific advanced printouts are available using the BananaApps
The columns of the double-entry Accounts Table
- Section
Codes are being entered that allow the user to only print determined parts of the Chart of accounts, when printing the Enhanced Balance sheet by groups. - Group
Contains the code that defines that this is a group row. The group code is then used in the GR column to indicate the totalization of an account or group.
- Account
The account number, cost center or segment is being entered. - Description
A text to indicate the name of the account, group, or section. - Disable (only visible in the Other view)
By entering 1, the account does not appear in the autocomplete list, but can be used in the Transactions table;
By entering 2, the account is disabled and can not be used. - BClass
It indicates whether the account is 1 = Assets, 2 = Liabilities, 3 = Expenses, 4 = Revenue, see the Accounts
- Gr (Totalize in)
It indicates a group so that the program can totalize this line in the group. - Gr1 and Gr2
Additional grouping codes to use with external accounting report files.
- Opening balance
Insert the account balance at the beginning of the year.The amounts in credit must be entered preceded by a minus sign. The total of the debit amounts (positive) and those in credit (negative) must balance and result in zero. If the opening balances do not balance a difference is shown in the information window.If you have added or pasted accounts and the difference is not correct, proceed with a Recheck of the accounting (Shift + F9)
- Movement Debit and Movement Credit (Protected columns)
The total of the debit and credit movements included in the Transactions table.
- Balance (Protected column)
The balance of the account includes the opening balance and the movements in debit and credit.The balance in debit is positive, while a credit balance is negative (minus sign). - Budget
The budget amount for the current year is being entered.The budget amount for the Expenses (debit) must be inserted in positive, the Revenue in negative (credit). -
Difference Budget (Protected column)
The difference between Balance and Budget amount. - Previous
The balance of the account at the end of the preceding year.
With the command "Create new year" or "Update opening balances", the values in the Balance column of the file of the preceding year are being carried forward.
When a new accounting is being created and the user wants to obtain printouts with the amounts of the preceding year, the values of that year have to be entered manually. - Prev. yr. Difference (Protected column)
The difference between the Balance and the amount of last year. - VATNumber
The VAT number in case this account is linked to a client or a supplier. - VATCode
The VAT code that needs to be applied automatically, when this account is being entered in the debit A/c or credit A/c column of the Transactions. - Adresses columns
It is possible to have the program add addresses columns in order to manage customers or suppliers data.
Adding or moving columns
- When an Amount column is being added in the Chart of accounts, the program composes the total of the amounts according to the selected grouping scheme
-
Added columns of the Number type, on the contrary, are not being totaled.
- With the Columns setup command, the columns can be made visible, the sequences can be altered and it is also possible to add other columns.
- With the Page setup command one can also define the layout of the print (portrait or landscape) and the zoom.
Accounts list ordered by description or other criteria
In you need to order your accounts in a different way, use the Extract and sort rows command from the Data menu.
Views
- Base Displayed are the principal columns, the grouping columns and the balances
- Transaction Displayed are the columns with the Debit and Credit transactions.
- Budget Displayed are the Budget column and the Difference Budget column.
- Previous Displayed are the Previous column and the Difference Prior columns regarding the previous year
- Other The Disable column, the VAT number and the Fiscal number column are being displayed.
- Print Just the Account column, the Description and the Balance is being displayed.
The views can be customized and others can be added with the command Views setup.
Accounts
Bookkeeping accounts
In order to create an account, go to the Accounts table and enter a number or a code in the Account column.
This same number is then used in the Transactions table as Debit or Credit account.
- The account number can be composed by numbers, letter and separations characters.
- It is not possible to have more than one account with the same number.
- Each account must have a BClass and must belong to a group.
The BClass
Each account must belong to one of the following BClasses:
- 1 for Assets
- 2 for Liabilities
- 3 for Expenses
- 4 for Income
The BClasse number must be as indicated, regardless the account or group code. It is also possible to create Off Balance Sheet accounts (for example for warranty down payments, e conditional committments), that must have the following BClass:
- 5 for Off Balance Sheet: Assets
- 6 for Off Balance Sheet: Liabilities
Opening balances
The opening balance of each account is entered in the Opening + currency symbol column.
- The Assets balances are shown normally
- The Liabilities balances are entered with the minus sign (negative)
- Usually only the Assets and Liabilities opening balances are entered.
In order to automatically transfer the opening balances for the following year, please visit the Create New Year lesson.
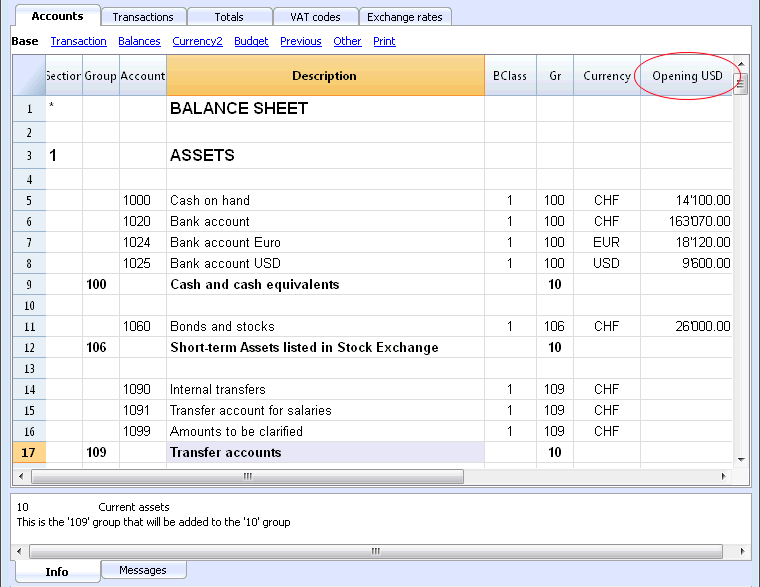
Opening balances differences
In a correct accounting file, the total of the Assets opening balance should be equal to the total of the Liabilities opening balance, so no differences are shown.
If the totals do not match, the program will show a warning message telling you that there is a opening balances difference (Information window).
If you have changed some account numbers and you think the error message is not correct, please Recheck the accounting.
When using Banana Accounting for the first time, the opening balances must be entered manually.
Accounts with addresses
It is possible to add a few columns in the chart of accounts, to include the addresses management:
Tools menu -> Add new functionalities command
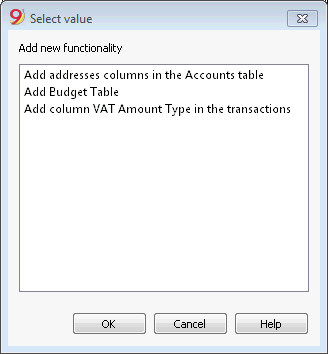
This command will add in the Chart of accounts the following things:
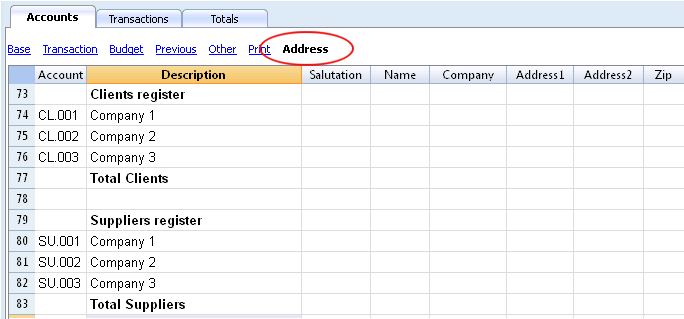
- several columns (name, last name, company, town, ...) where you can enter the client / supplier / member address and data
- the Address view where you can see the added columns (in order to change the view or the views organization please consult the Tables setup page)
Clients/supplier register
When in the accounting plan you need to manage a clients/supplier register, meaning a specific account list for all clients, you need to have complete data with address, phone number, email, VAT number, etc. in this case adding the columns of the Address view is very useful.
Groups
The grouping and totaling system
Banana has developed a very practical and immediate grouping system, which allows you to set in the Accounts table all the information necessary to define the structure of the balance sheet, profit & statement and other reports. You can therefore setup:
- Titles
- All the needed accounts, including client and customer records, cost centers and segments
- All groups and totaling levels you need (up to 100)
The grouping system is flexible; it allows you to implement any national chart of accounts and at the same time to adapt it to the specific needs of your business. Both very simple and very complex plans and presentations can be created.
Another advantage of this system is that it allows you to see the results immediately. Next to each account and group, you immediately see balance, movement and budget. Totals are updated istantly as you edit your file.
How the grouping system works
The Banana grouping and totaling system is based on the following columns of the Accounts table:
- Group (Total row)
When, in a row, a group identifier is being entered, the row becomes a TOTAL row.
In this row the amounts of the Gr column, that contain the same identifier, are being totaled.
When a group is present, there cannot be an account. - Gr (Adds this row into the TOTAL row)
The number here must be one of the numbers defined in the Group column.
With this system, an account can be totaled in a group row, the group in another group and so on... in order to create different totaling levels.
This totaling system is very flexible, but it takes some "getting used" to, in order to be able use it well.
Examples of the main groups in the Double-entry accounting
Every accounting file template uses its own totaling system. Hereunder the main groupes of the Double-entry accounting are being explained.
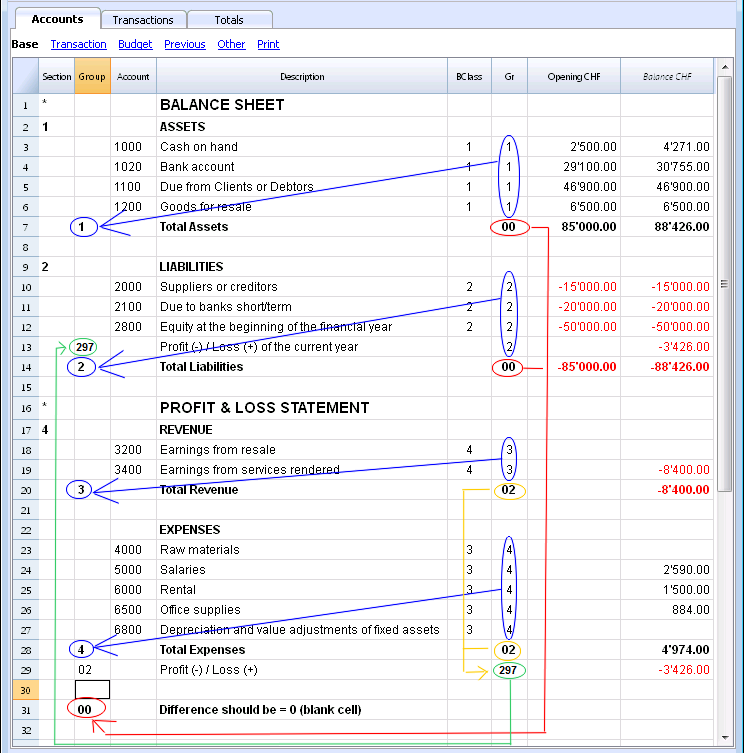
In the Double-entry accounting, the total of the Debit balances (positive) together with the Credit balances (negative) have to result in 0 (zero).
- The 00 is the row where all the amounts are being added together.
It is the grand total of all the Debit & Credit balances.
In case the Balances columns do not amount to zero, it means there is a Debit/Credit difference and thus most likely a mistake. In these cases it is useful to proceed with a checking of the accounting
In the Debit and Credit columns of the Transactions view (Accounts table), there are only positive amounts, so also in the row of the 00 group, there will be the total of the transctions not equal to zero.
The calculation sequence to arrive at 00 is therefore as follows:
- The 1000 account -> group 1 (Total Assets)-> Group 00
- The 2000 account -> group 2 (Total Liabilities) -> Group 00
- The 3000 account -> group 3 (Total Revenue) -> Group 02 (result Profit & Loss Statement) -> Group 297 (Profit/Loss of the current year in the Balance Sheet) -> Group 2 (Total Liabilities) -> Group 00.
- The 4000 account -> group 4 (Total Expenses) -> Group 02 (result Profit & Loss Statement) -> Group 297 (Profit/Loss of the current year in the Balance Sheet) -> Group 2 (Total Liabilities) -> Group 00.
The result of profit & loss statement is added in equity
As you can see in the example, the Group 02 (Profit /Loss from Profit & Loss statement) is totalized in the 297 liabilities group (current year result).
With this group organization, we have several advantages:
- In current year operating result is displayed in the balance sheet
- The Total Liabilities will match the Total Assets (provided that there is no accounting error).
Adding or deleting subgroups
Adding a totaling level
With this system it is easy to add totaling levels.
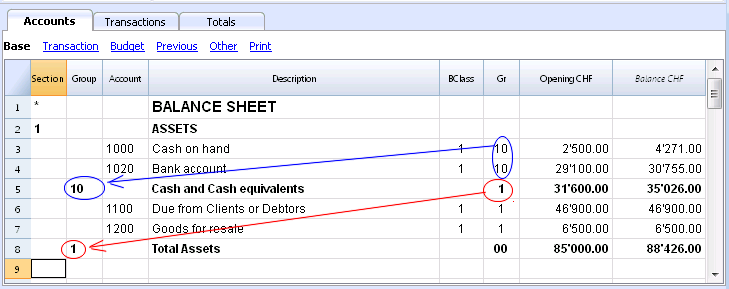
When we want to create a subgroup for the Cash & Cash equivalents accounts:
- Enter an empty row after the bank account
- Enter the value 10 into the Group column
- Enter the value 1 into the Gr column
- Indicate the Gr 10 in the accounts 1000 et 1020
- The sequence for the calculation becomes:
The 1000 account -> Group 10 (Cash & Cash equivalents) -> Group 1 (Total Assets) -> Group 00.
In case you want to insert another subgroup, "Current Assets", proceed in the same way.
- Add an empty row above the row of the Total Assets.
- In the new row:
- Indicate the number 11 in the Group column
- Indicate the number 1 in the Gr column
- In the Clients and Goods for resale (inventory) rows, indicate the Gr 11.
Deleting subgroups
In case the Chart of accounts shows subgroups that are no longer needed or not wanted, these can be deleted. Just delete the row of the subgroup and modify the Gr of every account that was part of that subgroup.
Checking of the structure
Once the Chart of accounts has been set up, execute the Check accounting command of the Account1 menu. In case there are errors, the program issues a warning.
Infinite loop error
This warning appears when a Group is being totaled in a Group of a lower level, reason for which an infinite error loop is being created.
There would be an infinite loop when, in the preceding example, the Assets Group (1) would be totaled in Group 10.
The program, after having calculated the Group 1, would total the amount in Group 10, which in turn would total the amount in Group 1, and then again in 10 without ending.
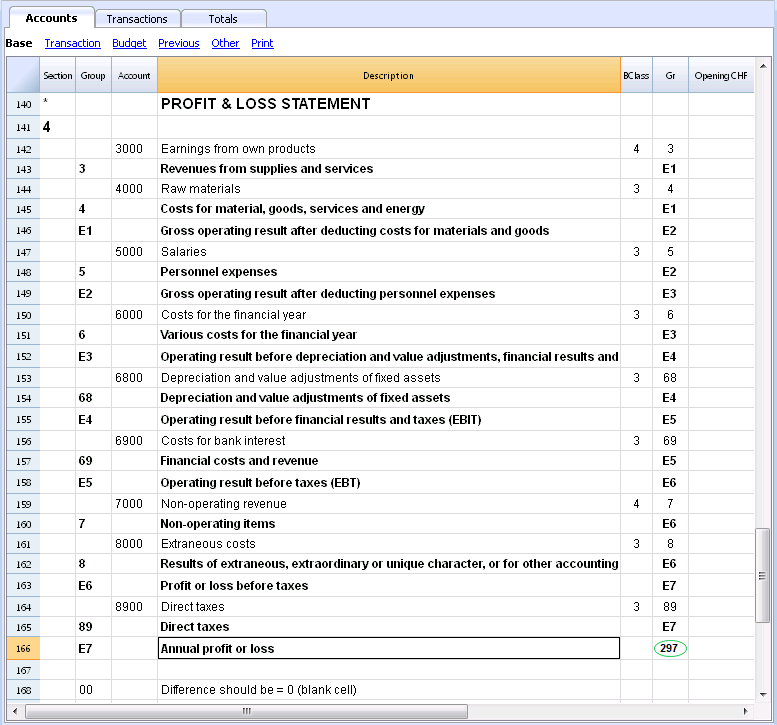
Profit & Loss Statement with Gross Profit
It is also possible to use a Profit & Loss Statement that starts with the total Business result and that subtracts the costs.
Hereunder the example of the Swiss PME Chart of Accounts is shown.
Extended use of the totaling system
The totaling system is very flexible:
- In one Group, it is possible to add Groups as well as Accounts
This can be seen in the earlier shown example where the Group Cash & cash equivalents (10) and the accounts (1100 and 1300) are being totaled in the Assets - You can use whatever kind of numbering
- You can create up to a hundred totaling levels
- The Total row can be after the rows
- The Total row can be before the rows
- The Total row can be completely elsewhere, in a separate position
This is being used to create registers (for example, a client register)
- The accounts and the Groups can be totaled in one single other Group.
It is not possible to total one and the same account at the same time in two groups. - This system is also being used to total the Cost centers and the Segments
Pay attention though to not use different groups for normal accounts and for cost centers, because the resulting amounts will not be correct.
Totaling of the Amount columns
The calculation procedure totals the amount columns
- The amount columns defined by the system are being totaled.
- The amount columns added by the user are being totaled.
The sequence of the calculation
The programme calculates the totals in the following manner:
- Sets the values of the Amount columns of the Groups rows on zero
- Totals the amounts of the Account rows into the Group rows (first calculation level)
- Adds the balance of the Group rows into the Group(s) of a superior level
Repeats the operation until all the levels have been calculated.
Related Documents
Sections
In order to create automatically an Enhanced Balance Sheet with groups, the chart of accounts needs to be configured with special codes that are to be entered in the Section column:
| * | Title 1 | the asterisk separates the sections and indicates the main headers |
| ** | Title 2 | to be entered for the secondary headers |
| 1 | Assets | to be entered in the row of the Assets title |
| 2 | Liabilities | to be entered in the row of the Liabilities title |
| 3 | Expenses | to be entered in the row of the Expenses title |
| 4 | Revenue | to be entered in the row of the Revenue title |
| 01 | Client's Register | to be entered in the row of the Client's Register title |
| 02 | Supplier's Register | to be entered in the row of the Supplier's Register title |
| 03 | Cost Centers | to be entered in the row of the Cost Centers title |
| 04 | Profit Centers | to be entered in the row of the Profit Centers title |
| # | Notes | to be entered in the row of the Notes title |
| #X | Hidden data |
to be entered in the row from whereon the data have to be hidden |
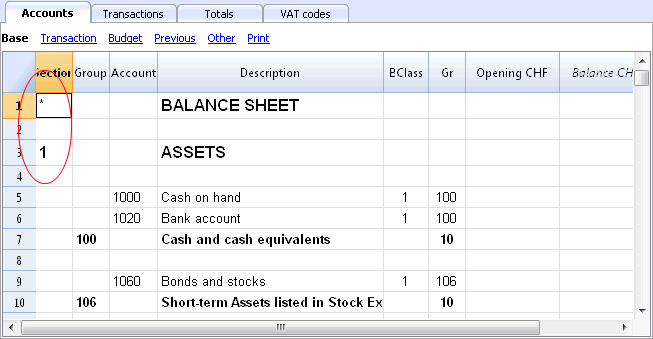
Sections in the Assets
- Enter a * on the same row as the Balance Sheet title
- Enter 1 on the same row as the Assets title
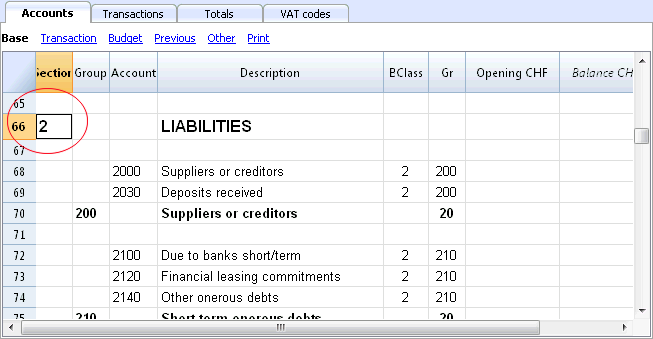
Sections in the Liabilities
- Enter 2 on the same row as the Liabilities title
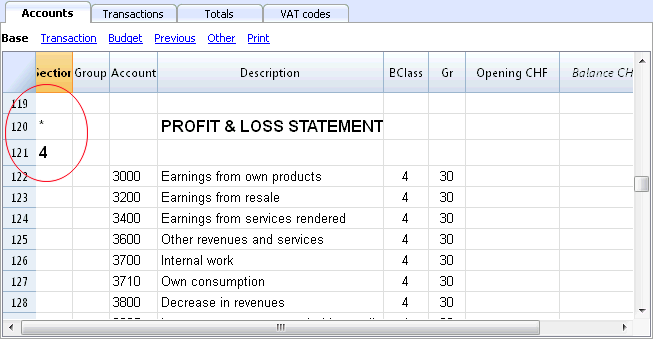
Sections in the Profit & Loss Statement
- Enter a * on the same row as the Profit/Loss Statement title
- Enter 4 on the empty row below the Profit/Loss Statement title
Note: when there is a clear distintion between Revenue and Expenses in the Chart of accounts, you need to:
- Enter 3 on the same row as the Expenses title
- Enter 4 on the same row as the Revenue (Income) title .
Sections in the clients/suppliers register
- Enter * in the same row as the Clients/Suppliers register title or on a empty row (as in the following example)
- Enter 01 on the same row as the Clients register title
- Enter 02 on the same row as the Suppliers register title
The amounts will be shown in the same way as for the Assets and the Liabilities.
This encoding is also valid when the clients and suppliers are configured as cost centers.
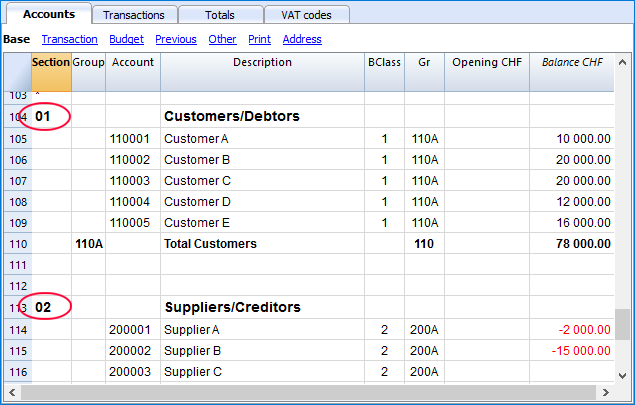
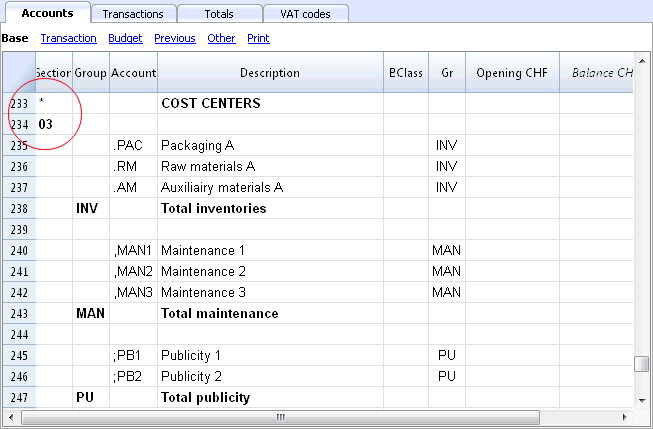
In case there are cost or profit centers configured, enter the following elements
- An * on the row of the Costs and Profit Centers title, or on a empty row
- 03 on the same row as the Cost centers title or on an empty row preceeding the Cost Centers
- 04 on the same row as the Profit centers title or on an empty row preceeding the Profit Centers
The Cost Centers amounts will be shown as positive (in black) like the expenses; the Profit Centers amounts will be shown in negative (in red) like the revenue;
For more information please vist the Sections logic page
Related document: Enhanced Balance Sheet with groups
The Sections logic
The sections different encoding entered in the Section column determines how the printout will come out.
Each section is printed as a separate table.
The directories
- * Title 1 creates a level 1 directory.
It can contain level 2 sections or directories.
It is useful to group sections that need to be printed together, such as the Balance sheet, which contains Assets and Liabilities. - ** Title 2 creates a level 2 directory.
The Base sections
The section number or code determines:
- how the amounts are printed; the amounts can be visualized just like in the Balance sheet or inverted.
If the Credit amounts (in negative) are inverted, they will be visualized in positive, and the positive amounts will be visualized in negative. - which amount columns will be used; the Balance column or the Period Movement column are used.
The Balance column indicates the account balance at a specific date (balance at Jun 30th).
The Total Period Movement column indicates the movement amount on the indicated period.
It is used for the Profit and Loss Statement and indicates the costs or the revenues for a certain period.
Here is the explanation of the different sections
- 1 Assets (amounts as in the accounting plan, balance column)
- 2 Liabilities (inverted amounts, balance column)
- 3 Costs (amounts as in the accounting plan, total movement column)
- 4 Revenues (inverted amounts, total movement column)
This section can be also used alone and it can include both costs and revenues (in case of a Profit & Loss Statement that starts with the total Business result and that subtracts the costs). In this case revenues would be displayed in positive and costs in negative.
These sections must be unique. Therefore there can only be one 1 Assets, or one 2 Liabilities section. For other sections, like clients/suppliers register or cost center similar sections can be used.
Derivatives Sections
Those are Sections that are similar to the Base Sections
- 01 Similar to Assets (amounts as in the accounting plan, balance column)
It is used for the clients register. - 02 Similar to Liabilities (inverted amounts, balance column)
It is used for the suppliers register. - 03 Similar to Costs (amounts as in the accounting plan, total movement column)
It is used for Cost Centers. - 04 Similar to Revenues (inverted amounts, total movement column)
It is used for Profit Centers.
Other Sections
There are other kinds of sections
- # Indicates a Notes Section (it prints only the Description column)
It is used for the Balance sheet attachments - #X Hidden Section. This section is not included in the sections selection and it is not printed.
It is used to indicate parts not to be printed.
Column width in printout
The columns width is automatically set by the program.
Sections 1, 2, 01, 02 have the same column width
Sections 3, 4, 03, 04 have the same column width.
Add / Rename
Adding a new account or category
- Position yourself in the row above the one where you want to add the new account
- Add a new empty row with the command Add rows from the Edit menu
- In the columns, insert the account number, the description, the BClass (1 for the Assets, 2 for the Liabilities, 3 for the Expenses and 4 for the Revenue), and the Gr which needs to be the same as the one inserted for the accounts belonging to the same Group.
Note: If you first enter a transaction with a non existing account and later you create the new account in the accounting plan, you will first get an error message, that will go away only if you recheck the accounting with the Shift + F9 key, or the Recheck accounting command from the Account1 menu.
Adding a new group
- Position yourself in the row above the one where you want to add the new group
- Add a new empty row with the command Add rows from the Edit menu
- In the columns, insert the group number, the description and the Gr which needs to be the same as the group you wish this group to be totalized.
Renaming an account or a group
- Position yourself in the Account or Group column in the Accounts table, or in the Category column of the Categories table (or in the VAT code column in the VAT codes table)
- Choose the Rename command from the Data menu
- Enter the new account, group, category or code number
The program will automatically update the Transactions table with the new number or code.
Deleting an account or a group
- Position yourself on the row number that contains the account that is to be deleted
- From the Edit menu, click on the Delete rows command
- Enter the number of rows that you wish to delete
After deleting an account, a category or a group it is necessary to use the Recheck accounting command from the Account1 menu. The program will give you a warning message if the deleted account, category or group was used in the Transactions table.
Opening balances | Double-entry accounting
Avoid mistakes with Banana Accounting Plus
In order to facilitate checking your accounting work and to immediately find differences, in Banana Accounting Plus, our new version, we added the Balance column in the Transaction table. You can now see potential differences on each row and you can correct them right away. It is a very useful feature when closing the accounting period.
Many of our clients have already tried it and are enthusiastic about it. We advise you to switch now to Banana Accounting Plus and take advantage of the many new features.
When using Banana Accounting for the first time, the opening balances need to be inserted manually in order to create the opening balance sheet.
After having set up the Chart of Accounts, proceed as follows:
- Place yourself in the Accounts table, Base view, Opening column.
- Manually enter the opening balances of the Assets and Liabilities accounts. The Liabilities are entered preceded by the minus (-) sign.
- Check if the total Assets equals the total Liabilities so that your accounting balances. If there are differences in the opening balances you need to check and correct them.
Differences in the opening balances
At the opening of the Accounting year, in the Opening columns the amounts of the Total Assets (positive) should correspond to the Total Liabilities (negative) should arrive at zero.
If the Debit and Credit values do not result in zero, the accounting will not be correct and the program will report an error in the Info window.
Recheck and correct the amounts until the value is zero.
If you have entered and deleted accounts, changed groups or anything else, it is useful to use the Check accounting command. (Account1 menu). This recalculates all the values and lets you know if there are any errors.
In the following example the program shows an error message reporting a difference of 150.- CHF.
It is possible to check the balancing in the Totals Table.
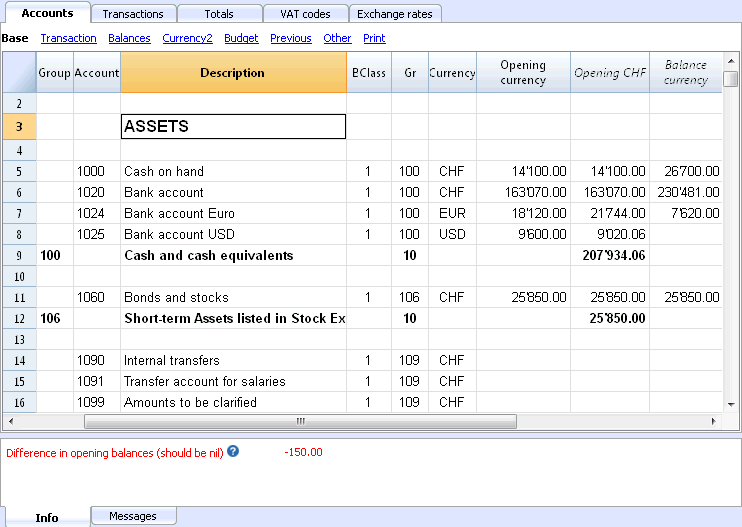
Starting the accounting during the year
If you start a new accounting, you have two options if you resume the work already done:
- Start the accounting from the beginning of the year by entering the opening balances at the beginning of the year and the transactions that have already been recorded previously in other programs (see also Transferring data from other software).
This way you have all the accounting details in one file. - Start from when you resume the accounting.
- Enter the opening balances in the Opening column, taking the values of the other accounting.
You have to enter the opening balances not only of the Assets and the Liabilities, but also of the Expenses (Debit, amounts in positive) and Revenues (Credit, amounts in negative). - The result for the year to date must be entered in the account Profit/Loss carried forward.
If it is a profit, the opening balance is to be entered in the negative, if it is a loss in the positive. - You must verify that the balance of the opening balances results in zero, so that the program does not indicate any differences.
- You can start entering new transactions in the Transactions table.
- Enter the opening balances in the Opening column, taking the values of the other accounting.
Balances of the previous year
If you start a new accounting by taking over an existing accounting and you want the previous year's values to appear on the printouts, it is necessary to enter the previous year's balances in the Previous view, Previous Year column. For the previous year, Balance sheet and Profit/Loss statement balances are usually entered.
The previous amounts are displayed in the printouts of the Enhanced balance sheet in the Previous Year column.
Create new year
When you start the new year, the program automatically carries over the opening balances for the following year.
Consult the lesson Create New Year.
Differences in the opening balances
Avoid mistakes with Banana Accounting Plus
In order to facilitate checking your accounting work and to immediately find differences, in Banana Accounting Plus, our new version, we added the Balance column in the Transaction table. You can now see potential differences on each row and you can correct them right away. It is a very useful feature when closing the accounting period.
Many of our clients have already tried it and are enthusiastic about it. We advise you to switch now to Banana Accounting Plus and take advantage of the many new features.
At the opening of the Accounting year, the amounts of the Total Assets should correspond to the Total Liabilities, otherwise it is not possible to have a correct balancing. You need to check that in the information window there is no Opening balances difference message. If there is, you first need to correct the opening balances of the Balance Sheet so that the Total Assets balances the Total Liabilities (Opening balance column).
In the following example the program shows an error message reporting a difference of 150.- CHF.

After having corrected the opening balances the Total Assets must correspond to the Total Liabilities.
It is also possible to check the balancing in the Totals Table.
Transactions | Double-entry accounting
Avoid mistakes with Banana Accounting Plus
In order to facilitate checking your accounting work and to immediately find differences, in Banana Accounting Plus, our new version, we added the Balance column in the Transaction table. You can now see potential differences on each row and you can correct them right away. It is a very useful feature when closing the accounting period.
Many of our clients have already tried it and are enthusiastic about it. We advise you to switch now to Banana Accounting Plus and take advantage of the many new features.
The Transactions table
Transactions must be entered in the Transactions table.
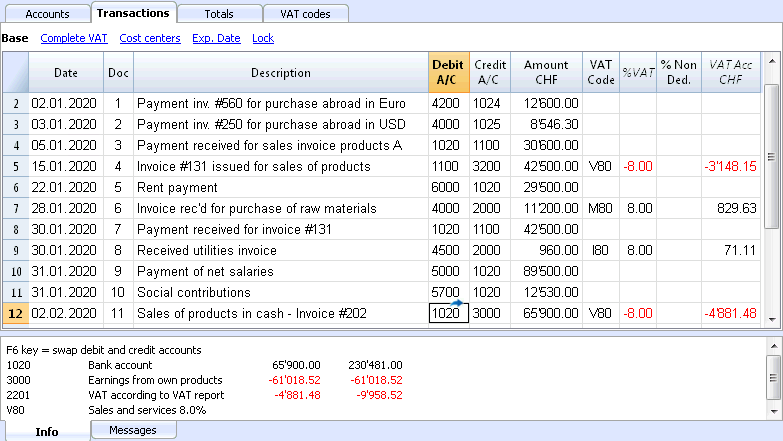
Info window
In the Information window at the bottom part of the screen, error messages and extra information about the used accounts and VAT codes are being displayed.
For the accounts, the Account number, the Description, the Amount of the transaction (debit or credit) and the Current balance of the account is being indicated.
The columns of the Transactions table - Double entry
The Transactions table has a series of columns and views already set.
The columns of the Transactions table
The columns listed hereunder and preceded by an * are usually not visible.
In order to make them visible, use the Columns setup command from the Data menu.
Date
The date the program uses to attribute the transaction to a certain time frame. The date should be within the limits of the accounting period defined in the Basic data of the accounting. In the Options tab, one can indicate whether the transaction date is required, if not this value can also be left empty.
If there are locked transactions, the program gives an error message when an equal or earlier date than the one of the lock is being entered.
*Date Document
The date of the document can be entered, for example the date of issue for an invoice.
*Date Value
The value date of the bank operation can be indicated. This value is being imported from an electronic bank statement.
Document
The number of the voucher that serves as a base for the accounting transaction. When entering transactions, it is advisable to indicate a progressive number on the document, so that the accounting document can be easily traced from the transaction.
The autocomplete feature proposes progressive values as well as transaction codes that have been defined earlier in the Recurring transactions table.
The program proposes the next document number, that can be resumed with the F6 key.
-
In case of a numeric numbering, the program simply increases the highest value found in the Doc column.
- Alphanumeric numbering: the program increases the final numeric part; this is useful when one would like to keep a separate numbering for cash and bank movements.
If earlier Doc number C-01 has been entered, and one starts to type C, the program proposes C-02.
If earlier Doc number B104 has been entered, and one starts to type B, the program proposes B-105.
If earlier Doc number D10-04 has been entered, and one starts to type D, the program proposes D10-05.
In the recurring transactions you can setup transactions groups that can be reloaded with a single code.
In order to add a large number of document numbers, you can also use Excel. You can create in Excel the desired quantity of document numbers and then copy and paste it into Banana, in the column of the Transactions Table.
*Document Protocol
An extra column in case an alternative numbering for the transactions or for the document is needed.
The autocomplete feature proposes progressive values that function in the same way as the ones in the Document column.
*Document Type
Contains a code that the program uses to identify a type of transaction. If you prefer to use your own codes, it is advisable to add a new column.
- 01 In the reports, this transaction is considered an opening transaction, so it doesn't show in the period but in the opening balances.
- from 10 to 19: codes for customers' invoices
- from 20 to 29: codes for suppliers' invoices
- from 30 to 1000: codes reserved for future purposes.
*Document Invoice
A number of an issued or paid invoice that will be used together with the invoice control feature for customers/suppliers
*Document Original
The reference number present on a document, to enter, for example, the number of a credit note.
*Link to external file
Serves to enter a link to an external file, usually the accounting voucher.
Pressing on the little arrow on the upper part of the cell, the program opens the document.
*External reference
Any reference number all allocated by a program that generated this operation. This value can be used to check whether a given task is imported twice.
Description
The text of the transaction.
The autocomplete feature proposes the text of an already entered transaction, or of one that has been entered in the preceding year when the appropriate option has been activated. When pressing the F6 key, the program retrieves the data of the preceding row with the same description and completes the columns of the active row.
In case the description begins with #CheckBalance, the transaction is being considered as one that serves to checkup the balance.
Please consult our page Check accounting for more information on the subject.
*Notes
Useful to add notes to the transaction.
Debit Account
The account that will be charged.
It is possible to also enter a segment in the Debit account column. These are usually separated by a ":" or a "-".
In the accounts list, pressing the key with the segment separator symbol, one goes immediately to the next segment.
If instead the Enter key is being pressed, the input finishes and one moves to the next column.
The autocomplete feature proposes the accounts and segments. One can also enter a search text and the program shows all the accounts that contain that text in one of the columns.
*Debit Account Description
The description of the entered account retrieved from the Chart of accounts.
Credit Account
The account that will be credited. We refer to the explanation under Debit account for the rest of the information.
*Credit Account Description
The description of the entered account retrieved from the Chart of accounts.
Amount
The amount that will be entered unto the debit- and credit account.
VAT columns
Information on the VAT columns can be found att the VAT columns in the Transactions table page
CC1
The Cost center account preceded by "."
*CC1 Description
The description of the Cost centre, retrieved from the Chart of accounts.
CC2
The Cost center account preceded by ","
*CC2 Description
The description of the Cost centre, retrieved from the Chart of accounts.
CC3
The Cost center account preceded by ";"
*CC3 Description
The description of the Cost centre, retrieved from the Chart of accounts.
*Expiry date
The date before which the invoice has to be paid.
*Payment date
Used in combination with the Show Expiry dates command.
When instead using the invoices customers/suppliers control feature in order to check on the payments, a transaction has to be entered for an issued invoice and another one for the payment thereof.
*Lock Number, Lock Amount, Lock Progressive, Lock Line
More information at the Lock Transactions page.
Additional columns
The following columns are added with the 'Tools' -> 'Add new functionality command, Add items columns in the Transactions table' (Refer to the Items columns in the Transactions table documentation for further information:
Item
Quantity
The quantity multiplied by the unit price will produce the total amount (can also be a negative number).
Unit
A description referring to the quantity, for example: mq, ton, pz.
Unit/Price
The unit price multiplied by the quantity, will produce the total amount (can also be a negative number).
If a value is entered in the Quantity or Unit Price columns, the amount is calculated on the basis of the contents in these two columns and converted to a positive value.
Adding new columns
With the Columns setup command, it is possible to display, hide or move the order of columns, add new ones, or indicate that a column should not be included in the printout.
- The added columns in the Transactions table will be added also in the Recurring transactions table, in the Account card and in the VAT report, without being made visible.
In order to display these columns in the other tables, use the Columns setup command. - If a column of the "amount" type is being added, the entered amounts will be added up in the Account card.
Views
When a new accounting is being created, the following views are being automatically created as well:
- Base: the main columns are being displayed
- Cost centres: the CC1, CC2 and CC3 columns are being displayed
- Expiry dates: the columns Expiry date and Payment date are being displayed
- Lock: the columns relative to the Lock function are being displayed.
With the Views setup command, the views can be customized and personal, added views can be created.
With the Page setup command, you can modify the print mode of the view.
Transaction types
Simple transactions
Simple transactions are the ones regarding two accounts (one Debit account and one Credit account) and entered in one single row. Each transaction has its own document number.
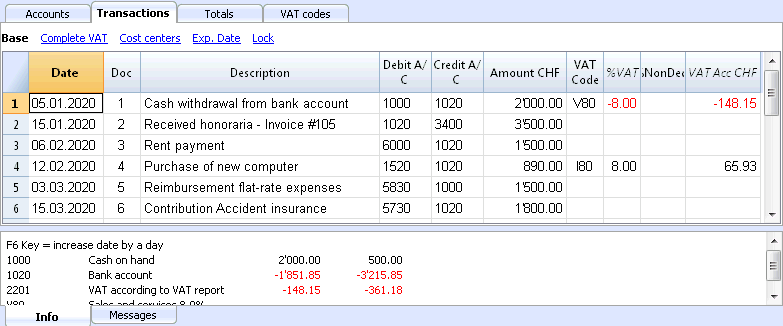
Composed transactions
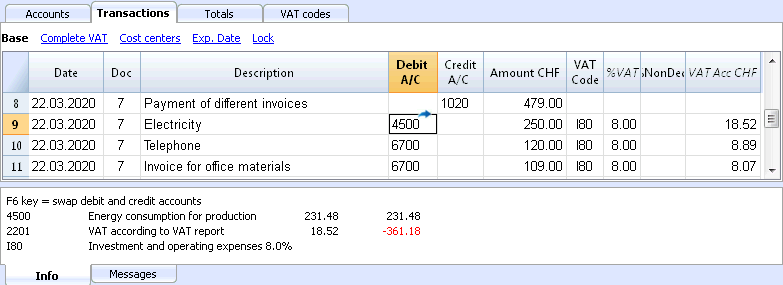
Composed transactions with more than two accounts involved, have to be entered on several rows. The user should enter one account per row. The counterpart account for the entire transaction has to be entered on the first row.
The document number, entered on the different rows, is the same because we are dealing with one and the same transaction.
Note:
In composed transactions, the dates of the transaction rows should be the same, otherwise, when doing calculations by period, there may be differences in the accounting.
Recurring Transactions
Recurring Transactions table
In order to avoid rewriting always the same texts, it is possible to store transaction groups in the Recurring transactions table (Account2 menu). These groups are identified with a code and can be retrieved and entered into the Transactions table just by entering the corresponding code.
When positioned on the Doc column of the Transactions table, the program proposes the list of the recurring transactions, grouped bycode. If one of these codes is selected:
- the program enters the recurring rows that have the same code
- the program completes the entered rows with the date and other values that have been entered earlier
- the program enters the progressive number in the Doc column (based on earlier entered values)
Entering recurring transactions
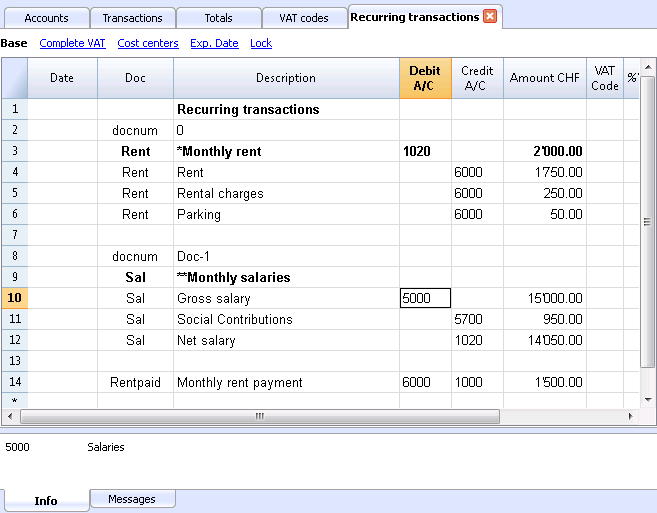
- You need to enter into the Recurring transactions table (or copy from the Transactions table) the transaction rows that should be retrieved regularly.
- Enter the code related to the recurring transactions group into the Doc column.
Rows with the same group code will be retrieved together (transaction on multiple rows).
- Progressive numbering of documents "docnum"
If, when retrieving recurring transactions, you wish to have a Doc number different from the automatic one, you need to create a row containing the code "docnum" in the Doc column, and your desired text in the Description column. For the following rows, the text specified in the Description column, will be applied in the Doc column when retrieving the transactions- "0" when no automatic numbering is desired
- "1" progressive numbering
- "cash-1" progressive numbering with the prefix "cash-" (cash-2, cash-3)
The program replaces the number indicated at the end of the text with the next progressive number.
- If you wish the program to suggest just one row per code, the description has to be preceded by:
- An "*": displays just this row and not the others with the same code.
- An "**" displays just this row, but don't retrieve this row (only title row).
- An "\*" allows the user to start the description with an asterisk, without it being interpreted as a command.
It is not possible to save customized setups in the Recurring transactions table; it uses the views and columns setup of the Transactions table.
Retrieving the recurring transactions into the Transactions table
- Enter the date and the information of the other columns that should not be modified
- In the Doc column, choose one of the codes defined in the Recurring Transactions table and press Enter.
- The program enters all the transactions with the same code, repeating the data column and other already entered values.
- In the Doc column, a progressive number is being inserted or one as specified in the docnum
- Or indicate the code in the Doc column and press F6
Copying transaction rows into the Recurring Transactions table
In order to copy rows from the Transactions table into the Recurring transactions table:
- In the Transactions table, select the rows that need to be copied;
- Edit menu -> Copy rows command;
- Go into the Recurring transactions table;
- Edit menu -> Insert copied rows command;
Formatting columns and views
The Recurring transactions table uses the same formats and views as the Transactions table.
It is not possible to have a separate format only for the Recurring transactions table.
It is however possible, from the Transactions table, to add a new View, setup a new columns format, and use this same view in the Recurring transactions table.
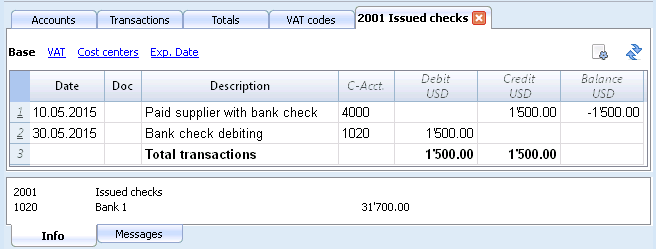
Bank checks
To enter issued bank checks, the user needs to insert an Issued checks account in the Liabilities.
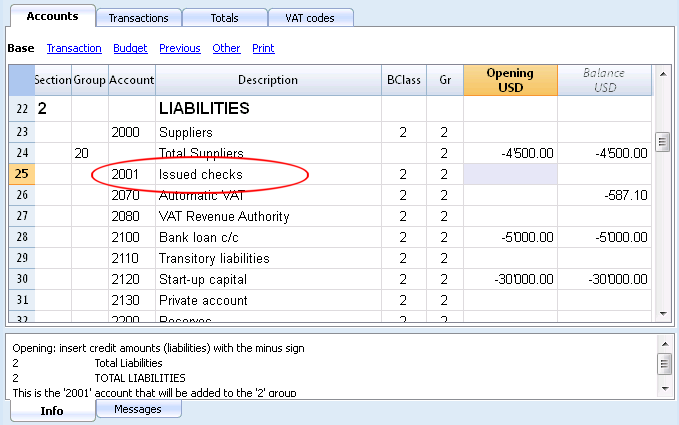
The check is issued at the moment of paying a supplier and later on is being debited from the Bank current account.
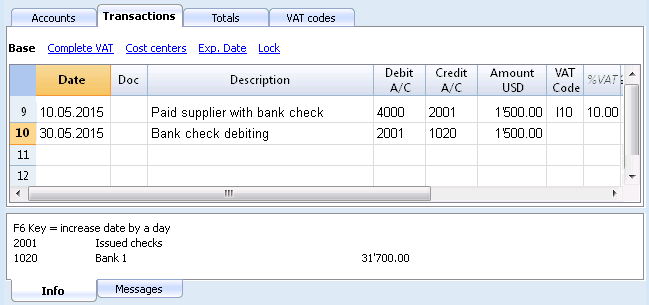
The Issued checks account card after the transactions.
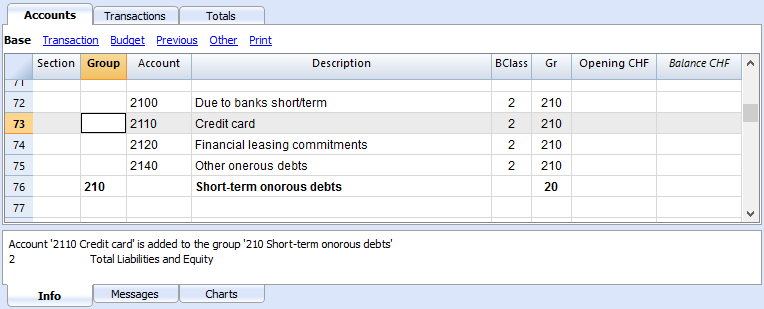
Credit card registration with advance payment
Advance payment on Credit cards
Before taking you through the procedure, check that an account for Credit card exists in the liabilites part of the Chart of Accounts. Create it if that is not the case.
The credit card account is added to the group or sub-group of short-term debts, as long as this is pre-requisite in the chosen Chart of Accounts.If there are no sub-groups, it must be listed in the liabilities section.
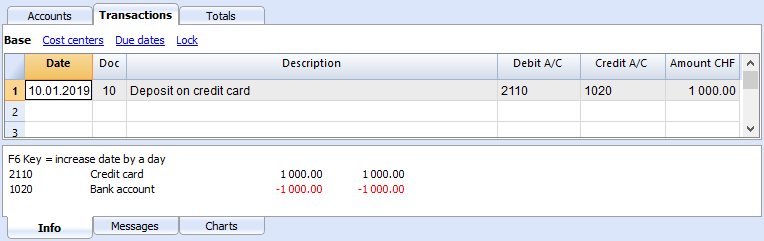
Example:
As per 10.01.2019 CHF 1'000.- are transferred from the bank account to the credit card.
- The bank account is credited and the Credit card account is debited.
Register your credit card bill
Upon reception of the credit card bill, you must record all the costs listed on the credit card.
Example:
On 15.02.2019 we receive the January credit card bill for a total of CHF 790.- (details: CHF 560.- for computer purchases, CHF 150.- for hotel expenses, CHF 80.- purchase of office supplies) (Doc.25)
- It will be registered on several rows. All the costs relating to the expenses listed in the credit card are recorded in the Debit column; we register one expense per row; in Credit, the credit card account is registered (total of the bill).
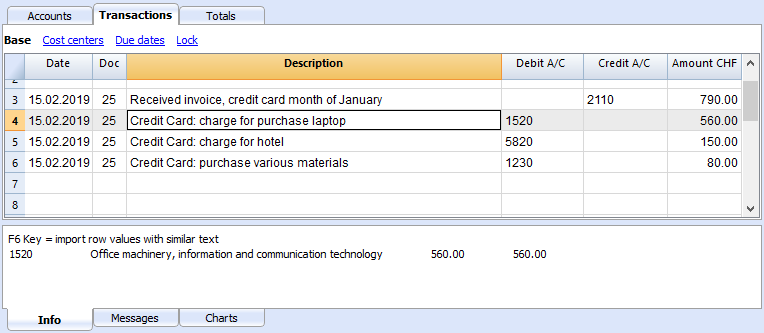
Check the credit card account balance
Each time you pay an advance towards the credit card and once all the costs listed on the credit card have been recorded, you must verify that the credit card balance matches the balance stated on the credit card.
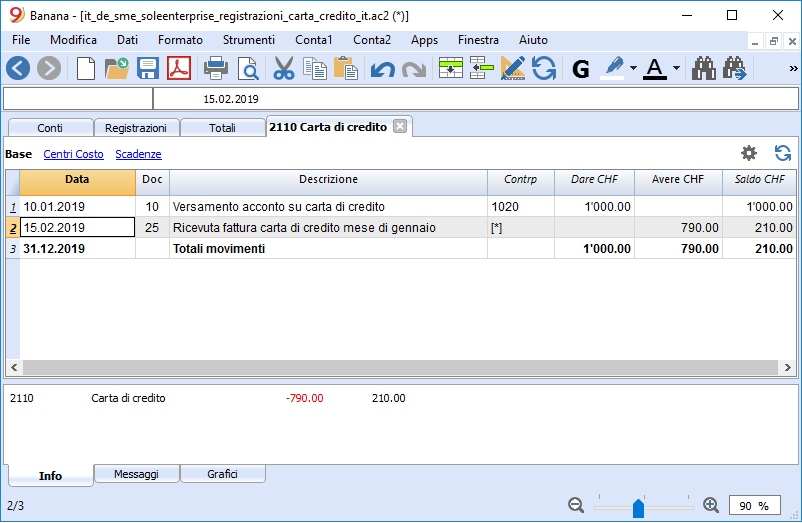
Register your credit card transactions
Credit Card with an accounting using the Cash principle
If no down payments are made on the credit card and the invoice is paid in full with the bank, you should record the credit card invoice at the time of payment when the costs also should be recorded.
You need to record in several rows:
- Enter the same date and document number for each movement on all rows that make up the registration.
- In the Debit A/C column enter the cost account, depending on the type of purchase (even those made abroad). One cost per row is recorded.
- In the Credit A/C column enter the bank or post account used to pay the invoice.
- In the Amount column enter the total amount of the credit card invoice.
After recording all movements, check your credit card balance by opening the credit card account card.
Credit Card with an accounting using the Accrual principle
If you have a turnover accounting, based on the accrual principle, all costs relating to credit card purchases are recorded when you receive the invoice:
- All costs are recorded in the Debit A/C column
- On the Credit A/C column you register the card debt, just like any other supplier
When the credit card invoice is paid, you need to register as follows:
- In the Debit A/C column you enter the credit card debit account
- Credit A/C column enter the bank account or post account used to pay the credit card invoice.
Importing transactions from your credit card
Banana Accounting allows the importation of movements from the credit card into the main accounting file.
A couple of requirements are necessary to perform the import:
- The giro account must have been set up in the Chart of Accounts.
- The format of data provided by the credit card issuing bank must be compatible with the formats provided by Banana Accounting.
To find and determine the formats you need to:
- Open BananaApps in the Account1 menu → Import to accounting ..., click on the Manage Apps... button, select Import.
- Select the bank that issued the credit card and click on the Install button. The format will be displayed in the Import to Accounting dialog.
When data from the credit card, and even bank transactions, are imported, the problem of recorded down payments needs to be addressed. In this case, two registrations are created on the credit card account:
- Presence of a credit card account as a counterpart to bank charges for credit card payments.
- Presence of the credit card account in the movements imported from the credit card.
To avoid any overlap, the giro account is used at the moment of import.
How to perform the import:
- From the Account 1 menu → Import to accounting... select Transactions.
- Select the type of format of the credit card issuing bank.
- Using the Browse button, select the file provided by the bank and confirm with OK.
-
Enter the period and indicate the giro account. Confirm with OK. All movements will be imported into the Transactions table.
- Indicate the cost account for each row.
Totals Table
The Totals table presents the totals by Group and is used to check the accounting balance.
It is processed automatically by the program and cannot be modified by the user.
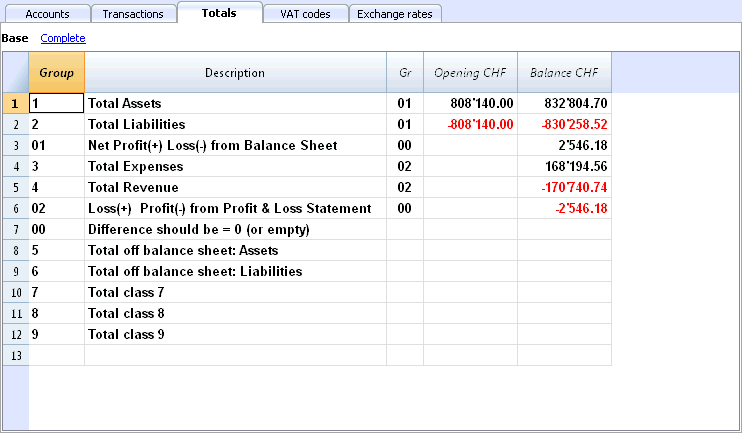
In the Totals table it is possible, at a glance, to get an idea of the situation of one's own activity. You see the totals of assets, liabilities, costs and revenues and above all you see if you have a profit or a loss.
The 00 group is very important because it allows you to immediately see if everything is in place or if there are differences in the balances.
Budget
In der Tabelle Budget findet die Finanzplanung statt und funktioniert wie die Tabelle Buchungen.
Es gibt Spalten für das Budget je nach Art von Buchhaltung.
Sie können auch Mengen und Preise sowie Berechnungsformeln eingeben.
Mehr Informationen betreffend Budget finden Sie auf der Seite Tabelle Budget.
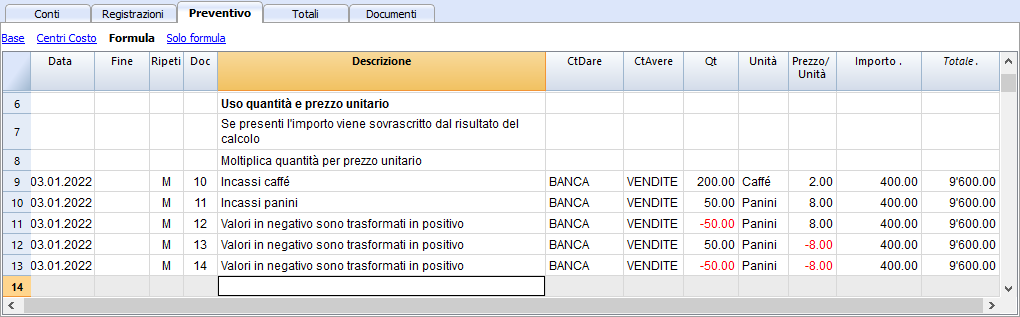
Printouts
Enhanced Balance sheet with groups - colored columns
This example has been realized with the following features:
- Enhanced Balance sheet with groups
- Columns setup to indicate which columns are to be displayed (in the example the columns of the Current and the Preceding year are being displayed)
- Colors (Column properties) to indicate the color of a column.
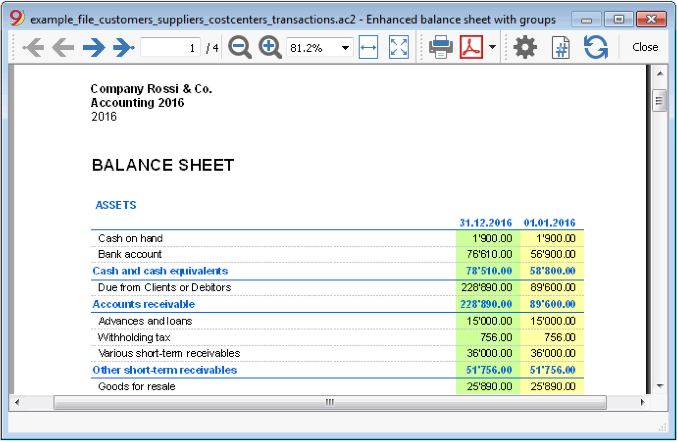
Profit & Loss Statement with budget
This example has been realized with the following features:
- Enhanced Balance sheet with groups
- Columns setup to indicate which columns are to be displayed (in the example the columns of the Current year, the Budget and the Preceding year are being displayed)
- Colors (Column properties) to indicate the color of a column.
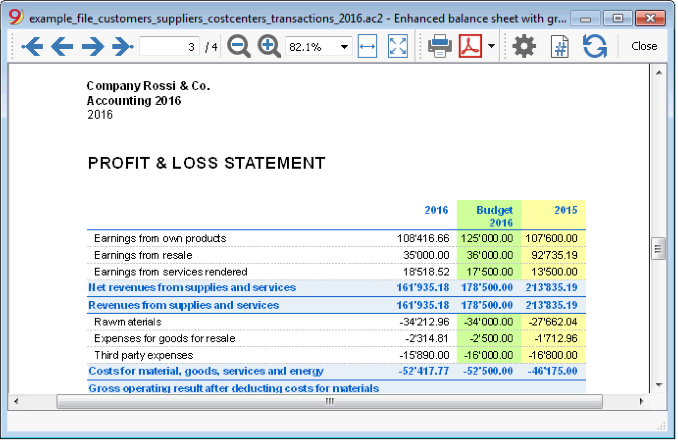
Enhanced Balance sheet
This example has been realized with the following features:
- Enhanced Balance sheet- Base tab
- Style setup (for this printout the Berlin style has been chosen)
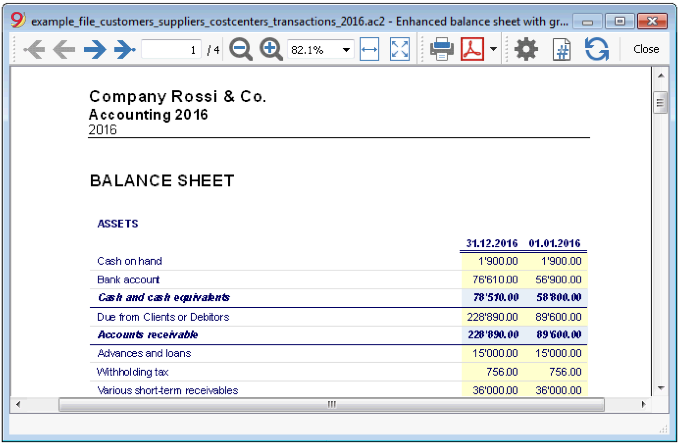
Subdivision by quarter
This example has been realized with the following features:
- Enhanced Balance sheet with groups
- Subdivision -> Subdivision by period in order to set up the subdivsion by period
- Columns setup to indicate which columns are to be displayed
- Colors (Column properties) to assign different colors to the columns.
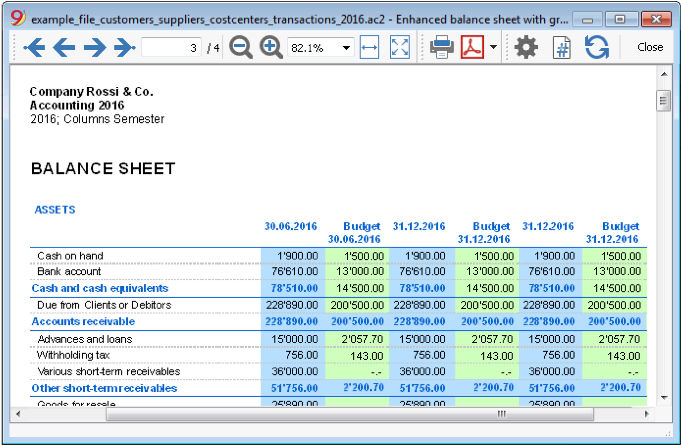
Subdivision by segment
This example has been realized with the following features:
- Enhanced Balance sheet with groups
- Subdivision -> Subdivision by segment in order to choose the segment level to be displayed.
- Print style
When printing the segments, it is not possible to set up the colors of the columns.
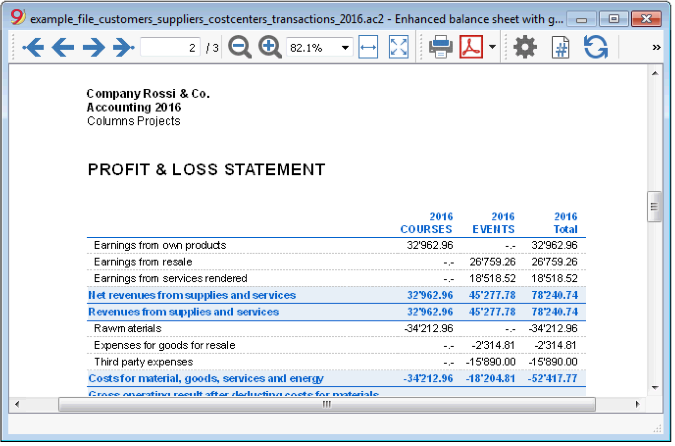
Pdf dossier with all the accounting data
The file is being created with a summary that gives access to the different printouts in an easy way.
The following data can be saved in Pdf
- Balance sheet and Profit & Loss statement
- Accounts table, Transactions, VAT Codes, Totals
- VAT reports
- Account cards
If you save this file on a non-rewritable CD (to keep together with your accounting documents), this satisfies the legal requirements for archiving the accounting data.
This example has been realized with the following features:
File menu, Create Pdf dossier command
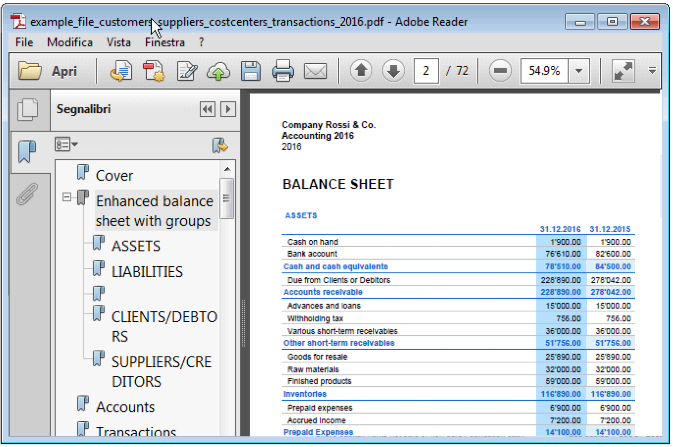
Printing an extra column
In order to print, in the Balance sheet, an extra column, the following features have been used:
- Columns setup, Data menu, in order to display or add a new column in the Accounts table
- Enhanced Balance sheet with groups
- Columns - advanced, to make the column visible.
Enhanced Balance Sheet
- The Balance Sheet represents all the Assets, Liabilities, Expenses and Income in a specific moment. The difference between Assets and Liabilities gives the personal capital.
- The grouping of the accounts is done according to the contents of the BClass column.
- The Enhanced Balance Sheet, shown in the preview, can be saved in different formats (PDF, HTML, MS Excel) and can be copied in the clipboard.
- In order to calculate, display and print it at the end of year or the end of a period, activate the Enhanced balance sheet command from the Account1 menu.
- Transactions without date are being considered as opening transactions and will not appear in the printouts of the Profit & Loss Statement.
Including a logo in the Enhanced Balance Sheet
From the Banana version 9.0.3 it is possible to include a logo and to define its settings (width, height, position) from the File meu > Logo setup command. It is also possible to create and save Compositions with different logo settings.
This feature is a simpler alternative to the logo setting with the Documents Table.
From the following window several printing options can be activated, appears.
See also Print Examples.
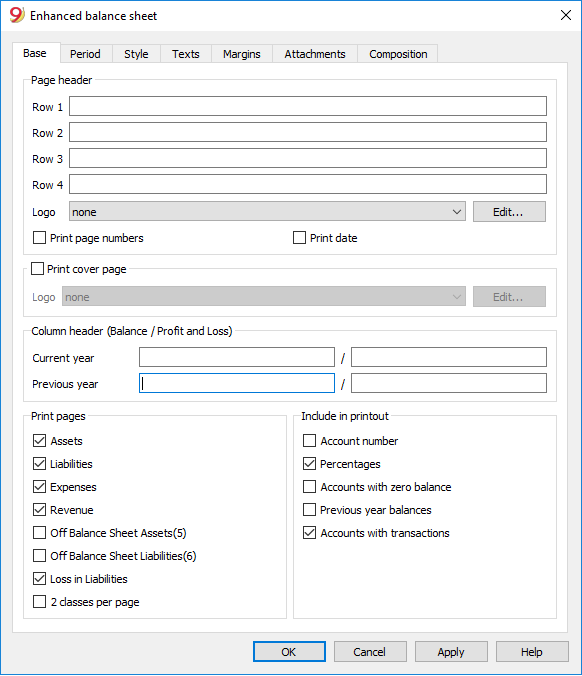
Page header
Rows 1 thru 4
In this field, enter texts to use as headers when printing.
Print cover page / Print date / Print page numbers
The activated options will be shown in the print-out.
Column header (Balance / Profit and Loss)
The first two vertical fields refer to the Balance Sheet, the two second ones refer to the Profit and Loss Statement.
Current year
Insert the final date of the current accounting.
Previous year
In this field, enter the final date of the previous year's accounting.
Print pages / Include in printout
By selecting the appropriate cells, it is possible to choose the options that should be activated in the printouts.
Other tabs
The explanations for the other tabs are available at the following pages:
Results
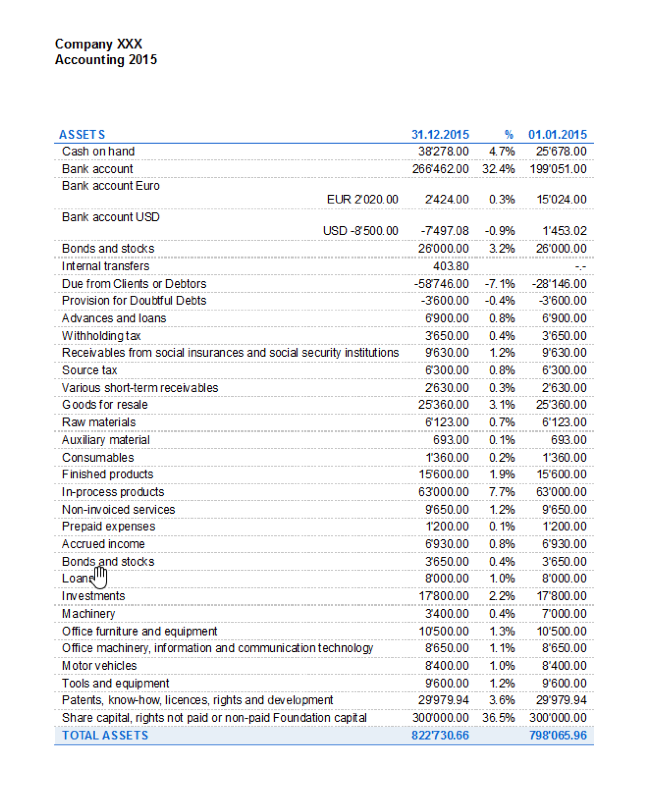
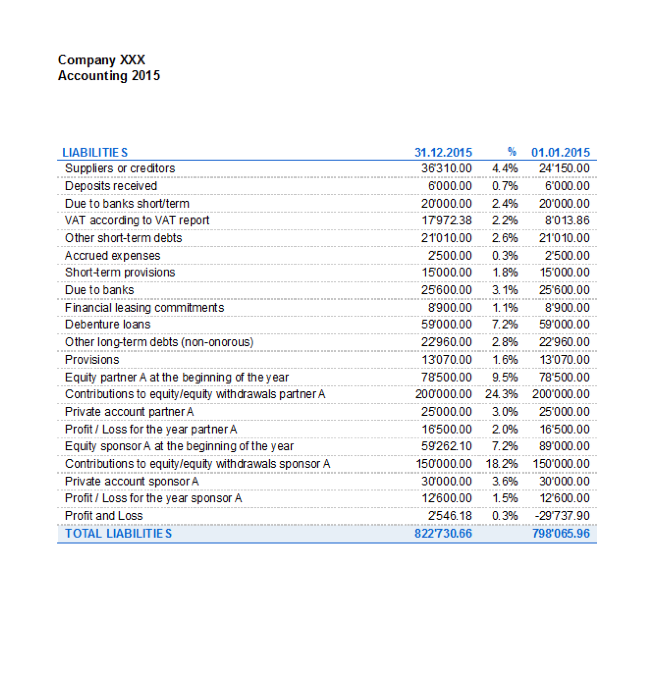
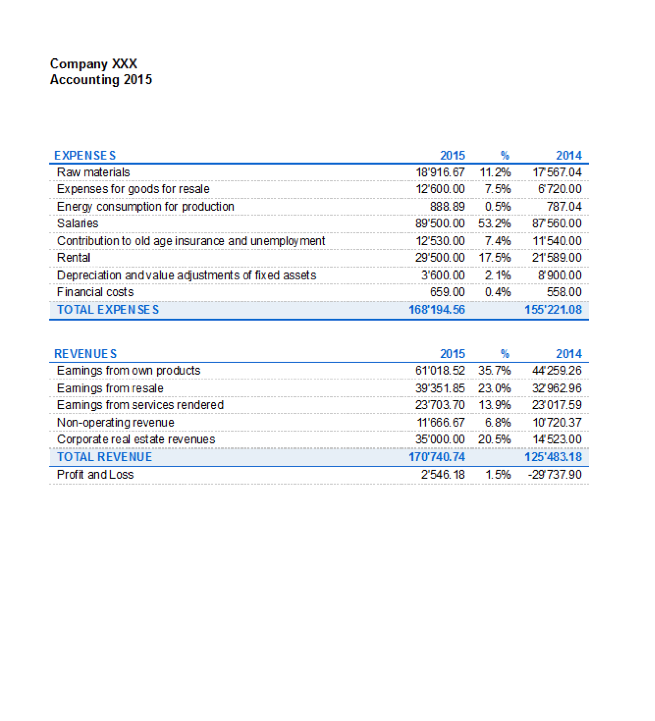
Enhanced Balance Sheet with groups
The Balance sheet with groups differs from the Balance sheet for the following characteristics:
- Includes also subgroups in the printout, as in the chart of accounts (and not only groups).
- Offers the possibility to exclude groups or accounts (for instance, to display only the total of the group and not the accounts of which the total is composed).
- In the Chart of accounts - Sections it is possible to select which accounts to include or leave out in the printouts
- It is possible to choose, for a given period, what kind of subdivision you want (for example in the first semester, you can choose wether to obtain the data by month or by quarter)
- It is possible to have a subdivision by segment
- ... and much more!
In order to calculate, display and print the Enhanced Balance sheet by groups, click on the Enhanced balance sheet with groups command from the Account1 menu; a window appears, with different sections that allow the user to define the print setup.
See also Print Examples.
FAQ
- If I exclude the groups with a zero balance, the title rows that refer to the excluded groups are still being displayed; how can I erase them?
Go to Sections and activate Hide current row on the title rows that you wish to exclude. - I would like to exclude the display of the period in the titles of the printouts ("1st Semester 2013"); how can i do it?
Go to the Headers section and deactivate the Print period option. - On the cover page, when there are long titles, I would like to be able to choose how to subdivide the texts on two rows and whether I wish to apply bold print. Is it possible?
It is impossible to change the fonts on the cover page. - Some amounts are not included in the indicated period. Why?
Transactions without a date are being counted as openings and do not appear in the printouts of the Profit & Loss statement. Be sure to enter the date into all the transactions. - The Total groups that contain all the accounts of the classes 3 and 4 are being renamed with the text Profit or Loss, depending on the result of the accounting period. Can I change that?
Go to the Sections and overwrite the original text in the Alternate text zone of the active row. - In case the Show previous year option is being activated, and in the previous year file there are groups that are no longer present in the current year, the program will give error messages. Can I do something about it?
In order to print the Balance sheet with data of the previous and the current year, the groups of the previous year have to also be present in the current year.
Headers
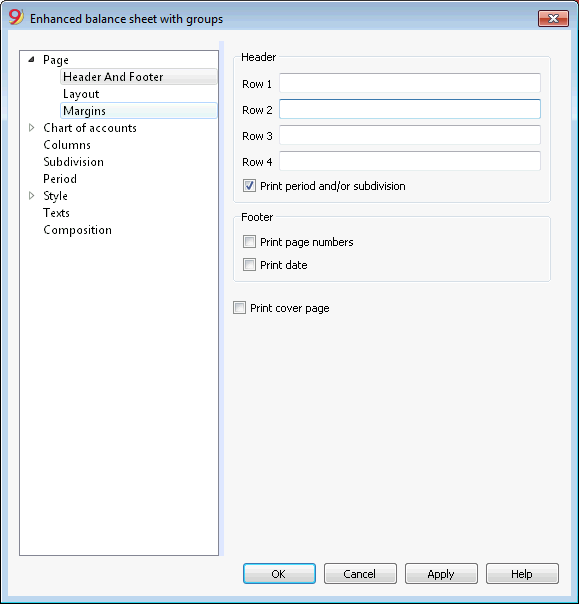
Header 1, Header 2, Header 3, Header 4
Enter as headers the text you wish appearing in the printouts. They will be on the cover page and on each page headings.
Print period and/or subdivision
This option is active only when a specific period has been defined. When you deactivate this option, the period will not be indicated in the titles of the printouts.
Footer
Print page numbers
By activating this function, page numbers will be printed.
Print date
By activating this function the date will be printed.
Print cover page
By activating this function the cover page will be printed.
Layout
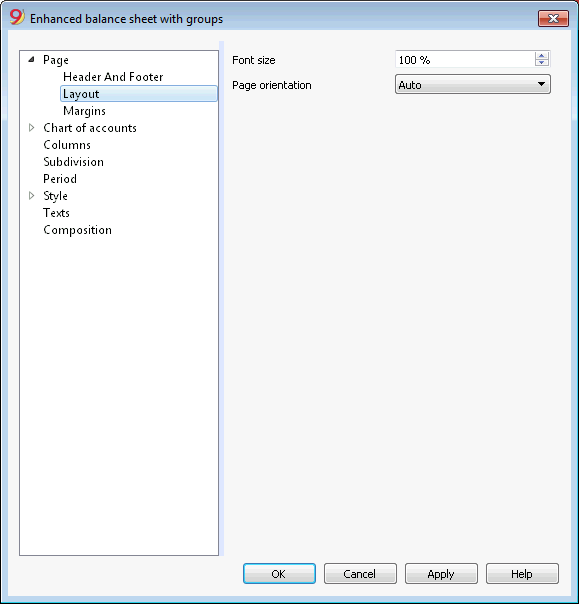
Zoom
The printout layout will change according to the entered value.
Page orientation
You can select the page orientation: automatic, landscape and portrait.
Logo
From the Banana version 9.0.3 it is possible to include a logo and to define its settings (width, height, position) from the File meu > Logo setup command. It is also possible to create and save Compositions with different logo settings.
This feature is a simpler alternative to the logo setting with the Documents Table.
When you print the Balance sheet with groups - Account1 menu -> Balance sheet with groups command, Header and footer tab -> Header, as Logo you can select your own image (with the Edit button), instead of the none option.
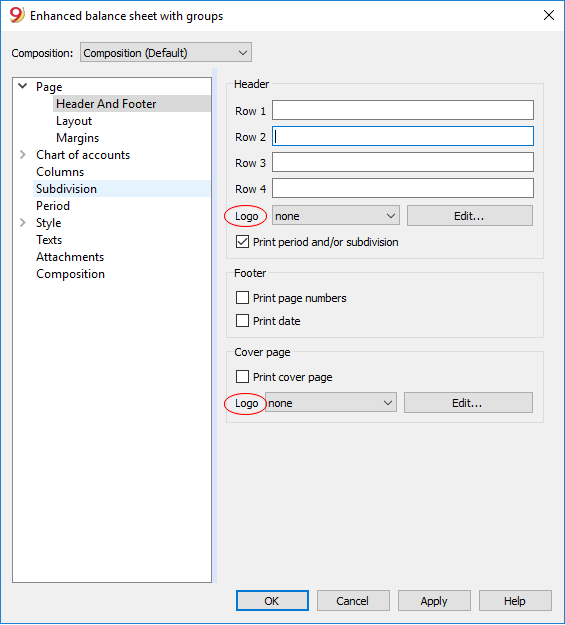
Margins
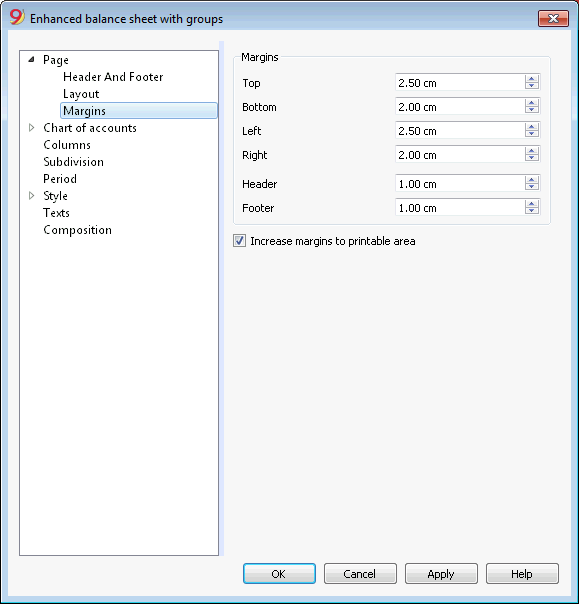
Top, Bottom, Left, Right
It's the distance between the page border and the content.
Header
It's the distance between the page header and the content.
Footer
It's the distance between the page footer and the content.
Increase margins to printable area
If the content exceeds the page margins it will be automatically adjusted to fit the printable area.
Sections
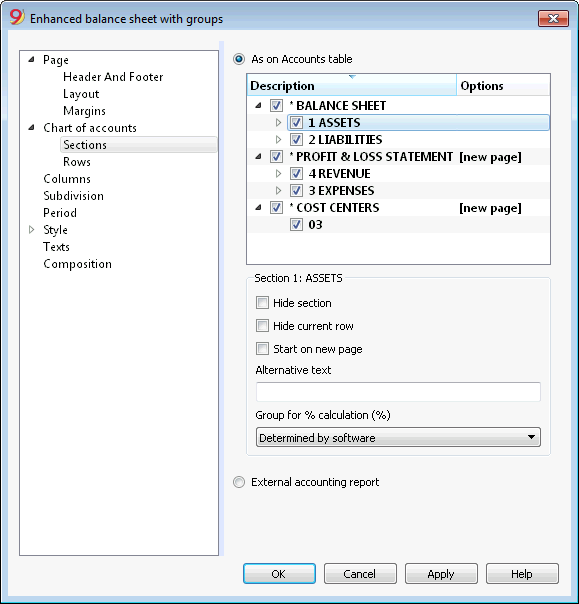
This section can vary depending on the settings of the Section column of the accounting plan - See the related document: Sections in the accounting plan
As on Accounts table
The display and the printout settings of the Enhanced Balance Sheet with groups, are the same as in the Accounts table.
Depending on the selection, there are different sections with different options:
- sections 1, 2, 3, 4, 01, 02, 03, 04... refer to the main items of the Balance Sheet
- account sections refer to the selected account
- group sections refer to the selected group
Section*
If you select a section with an asterisk, you will have the following options:
Hide section
Click on the section that you wish to hide.
Hide current row
Click on the row that you wish to hide.
Start on new page
Click on the header that you want to have on a new page and activate the option.
Alternative text
Enter an alternative text if you want to have a different one for the selected section or row.
If you select a number or a group section (1, 2, 3, 4.....), there are extra options:
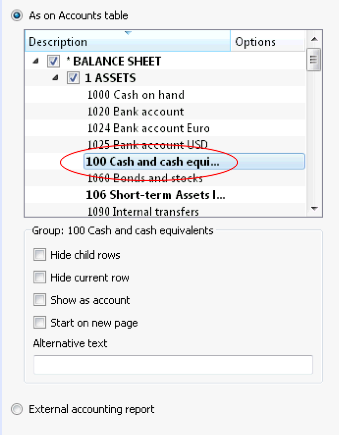
Group for % calculation (%)
This option is visible when selecting a section (Assets, Liabilities, ...). It is possible to indicate which group the % calculation should be based on.
Hide child rows
If you select a group and you activate this function, child rows of this group won't be printed in the Enhanced Balance Sheet.
Show as account
If you select a group and you activate this function, the group will be displayed as an account in the Balance sheet.
External accounting report
Print the Enhanced Balance Sheet by groups, based on the structure of the Accounting report file.
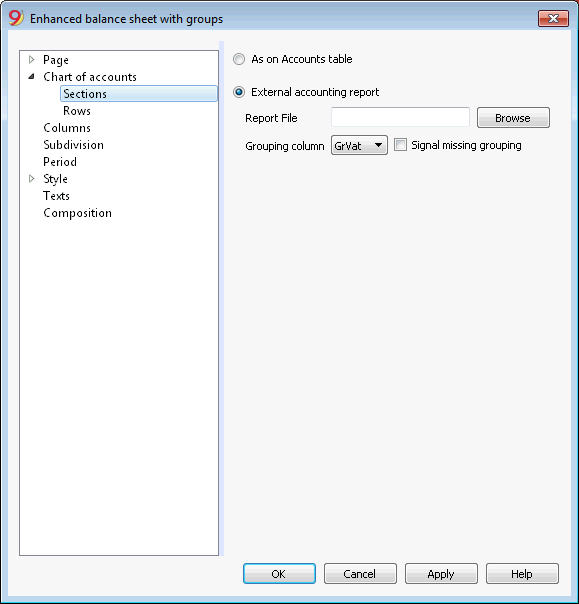
Report File
You can select the file of the External Accounting report with the Browse button.
Grouping column
Column in which the accounts refer to the groups defined in the External Accounting report. Available columns: Gr1, Gr2, Gr, BClasse and GrVat.
Signal missing grouping
Checks whether all accounts belong to a group in the External Accounting report.
Rows
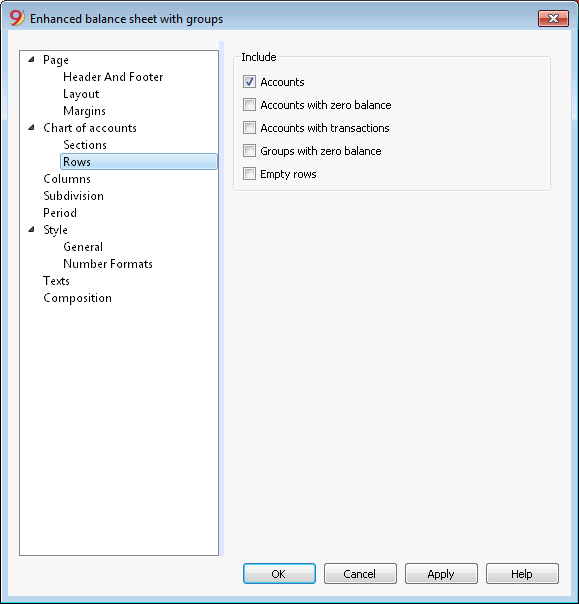
Accounts, accounts with zero balance, accounts with transactions, groups with zero balance, empty rows.
By activating the different options, you can include them in the printouts.
Columns
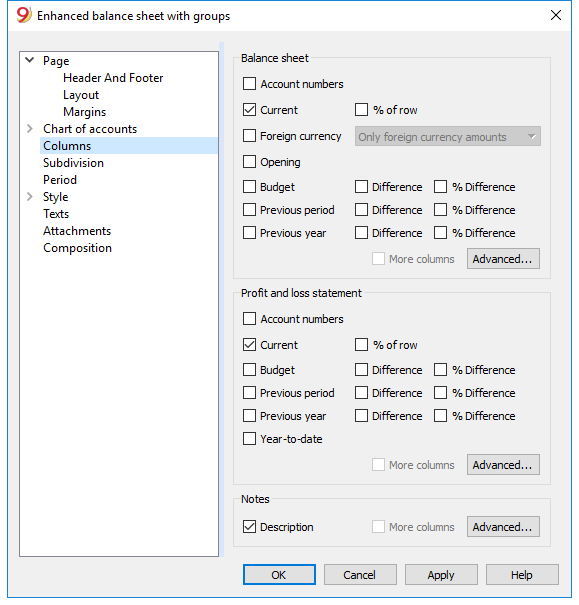
Balance Sheet, Profit & Loss Statement and Notes
You can choose the options you wish to include in the Balance Sheet, in the Profit and Loss Statement and in the Notes:
- Account number
- Current: the balance or movement in basic currency referred to the selected period or period subdivision
- Foreign currency: the balance in the account currency referred to the selected period or period subdivision
- % of row: includes the column with the percentage referring to the total (for example, % total Assets)
- Opening: opening balance at the beginning of the period
- Budget: budget amount referred to the selected period or period subdivision
- Previous period: the amount of the period previous to the selected period or period subdivision
- Previous year: the amount of the same period in the previous year
- Difference: the difference between the amounts of the current period and the other column (Budget, Previous period, Previous year)
- % Difference: is the difference, expressed in percentage, between the current period and the other column (Budget, Previous period, Previous year)
- Year-to-date: the balance or movement from the beginning of the accounting until the date of the last transaction.
Headers editing, color or display change of the columns
Each section has the Advanced button from where it is possible to change the column's settings and options.
Columns (Advanced)
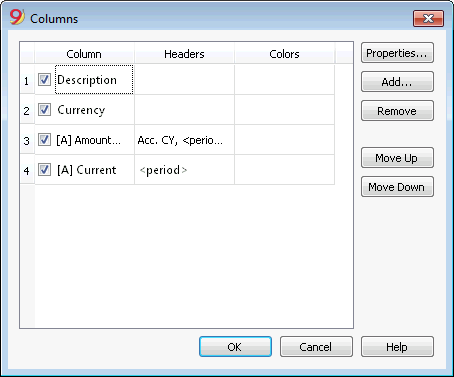
By pressing the Advanced button, it is possible to change the column's header:
- in order to make the column visible in the printout, check che corresponding checkbox
- in order to change the sequence of the columns, drag up or down the name of the column you wish to move, or use the Move Up and Move Down buttons
- In order to add new columns to be shown in the report (choosing them from a list) use the Add button
- In order to remove some columns from the list, use the Remove button
- In order to edit the display properties of a column (colors, headers, etc.) use the Properties button
Columns - add
In the Balance sheet, Profit and Loss Statement and in the Notes, it is possible to add new columns (from the ones included in the list), or to delete the undesired ones. Starting from the Account1 menu -> Enhanced Balance sheet with groups -> Columns -> Advanced button -> Add button.
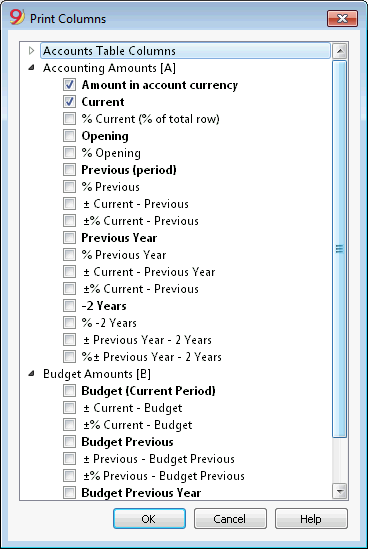
If one or more options are being activated, the program includes:
Accounts Table Columns
If you click on the header a list of all the columns of the Accounts Table will be shown:
You can then inlcude in the printout any column existing in the Accounts Table
Accounting amounts
These are the columns with the amounts calculated by the program, the opening balances and the entered transactions, for the indicated period or for the subdivision period
Amount in the Account currency
The account balances in foreign currencies will also be displayed.
Current
The balances of the current year will be displayed.
Opening
The Opening balances will be displayed.
Previous (period)
The balances of the previous period are being displayed (month, quarter, semester, etc).
Previous Year
The balances of the previous year are being displayed.
YTD (Year To Date)
This column is only available in the Profit & Loss Statement. The balances from the beginning of the year until the last transaction date are being displayed.
Budget amounts
See also Budget information. These are the columns with the amounts calculated by the program based on the budget amounts entered in the Accounts Table or in the Budget Table. If you created the Budget table and if some rows have been entered, the program will use the data of this table for its calculation, even if there are values in the Budget column of the Accounts Table.
Budget (Current period)
The amounts related to the foreseen budget of the current period are being displayed.
Budget Previous
The amounts related to the foreseen budget of the previous period are being displayed.
Budget Previous Year
The amounts related to the foreseen budget of the previous year are being displayed.
Notes on calculation period
The program cannot calculate amounts for periods overlapping between several accounting years or years with initial and final accounting dates that do not match.
Headers and options (Columns properties)
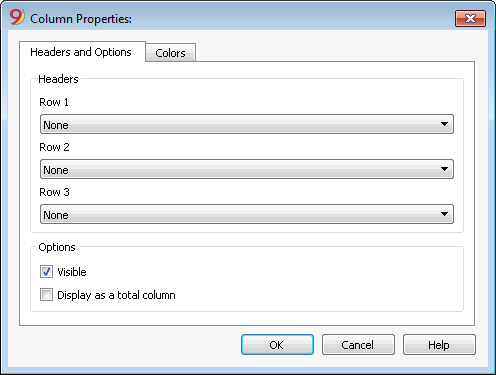
Headers
Row 1/ Row 2 / Row 3
It is possible to change the columns headers by selecting the Text option (from the drop down menu) and by entering the new header. If you select the Column option, the column name of the selected column will be shown.
Options
Visible
If this cell is activated, the column header will be shown.
Display as a total column
If activated, this option only shows the amounts in the Totals column.
Colors (Columns properties)
You can access this window by pressing on the Properties button, Colors tab (from the Enhanced balance sheet by groups command - Columns, from the Account1 menu)
Change
With this button you can change the text or the background color
Default color
With this button you can restore the default color for the text or the background.
Subdivision
From the Account1 menu choose the Enhanced Balance Sheet with groups command and select the Subdivision tab.
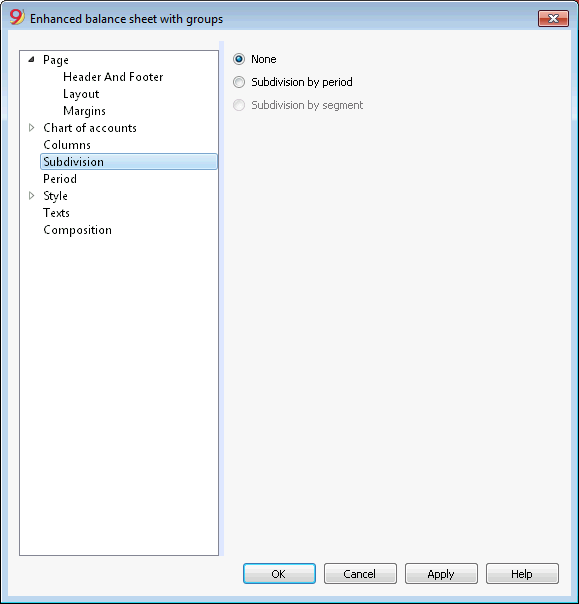
None
The whole period is shown.
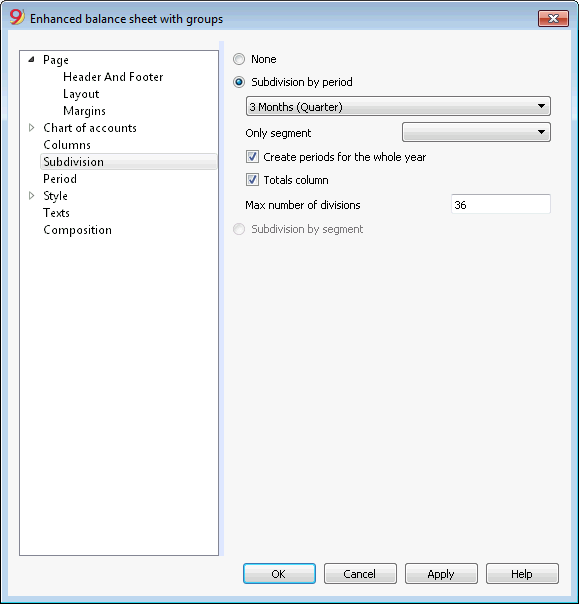
Subdivision by period
This function makes it possible to display the dates of the selected period per day, month, bi-monthly, per quarter, per 4 months, per semester or per year. The selected period will be shown in the column headers.
Only segment
Only the data related to the selected segment are being shown.
Create periods for the whole year
When the accounting period is not the same as the solar year, but when the user still wants to see all months, this function needs to be activated.
Totals column
This function creates a Totals column for the selected periods in the Profit / Loss Statement and in the Totals view of the Accounting reports command (Account1 menu).
Max number of divisions
The default maximum number of periods is 36. In particular cases, if the user would want to obtain special and very detailed statistics over a long time span, this value can be changed manually. A very high maximum number of periods can slow down the program.
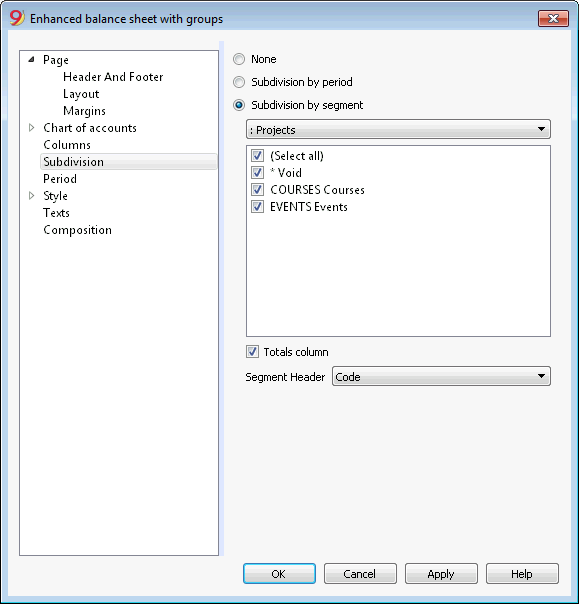
Subdivision by segment
The data related to the selected segment are being shown. This option is only available if segments have been set.
- Select all - all options will are selected
- Void - only the amount not assigned to any segment is shown
- Segments subdivision - Each subdivision will have the header given in the accounting plan. The data of the selected subdivision are shown.
Totals column
When this option is being activated, the totals for the selected segment will be obtained.
Segment header
You can choose the text to be displayed as column header for the segments.
Period
Explanations on the Period tab are available at the following link:
https://www.banana.ch/doc/en/node/2602
Style Tab
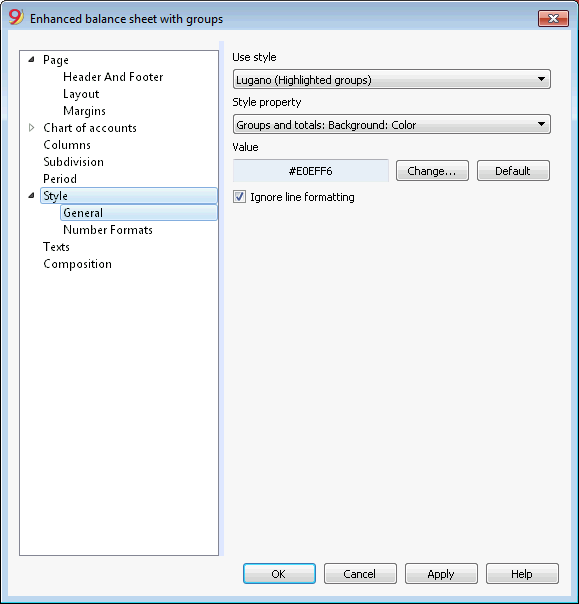
Use style
There are different models of the Enhanced balance sheet provided. By selecting one, the user can obtain the Enhanced balance sheet of his choice.
Style property
For each style, the color of the fonts and the backgrounds can be defined.
Value / Change... / Default
These functions allow the user to change style or to restore the default style.
Ignore line formatting
If this function is activated, the formatting will not be maintained.
Number formats
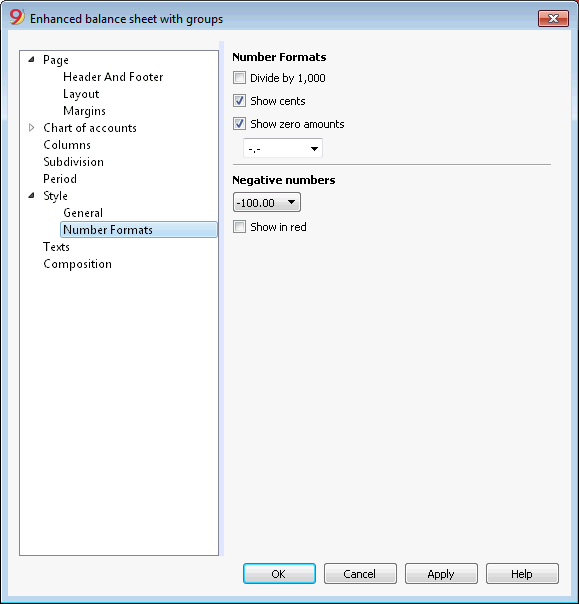
Divide by 1'000
If there are big amounts, by activating this option, three zeros will be taken off.
Show cents
By activating this option the cents will be shown.
Show zero amounts
By activating this option it is possible to choose between having the zero amounts shown with the 0,00 number or with the -,- symbol.
Negative numbers
Negative amounts can be shown with a minus sign before the amount, after the amount or the amount can be shown between parenthesis. You can also activate the option to have the negative numbers shown in red.
Texts
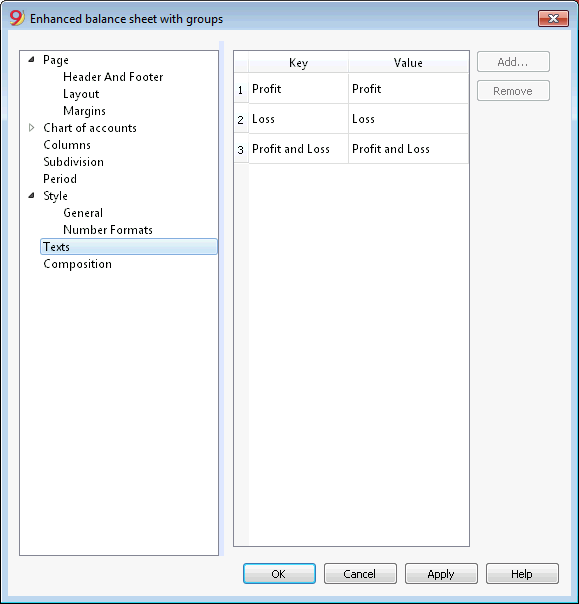
This tab is used to alter the texts of the program columns headers for print-outs.
In order to change the Value column you just have to double-click on the cell you want to edit.
Attachments
This sections allows you to add text that will be printent with the Balance sheet and Profit & Loss statement.
- texts are printed after the Balance sheet and Profit & Loss statement.
- each document begins on a new page
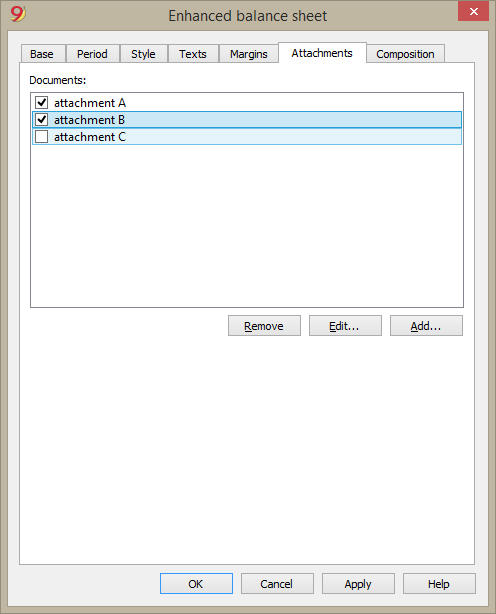
Documents
All documents listed in the Documents table (Html or text format) are listed here.
- You can change the report sequence, just by dragging the item with your mouse
- All documents with a check mark will be printed.
Edit...
A text editor will open allowing you to enter new text or edit the existing one.
Add
This button will open a text editor where you can add new text.
If you haven't created the Documents table yet, the programm will automatically add it.
Remove
This button will remove the selected element and its content.
Notes
- This feature is not available in previous versions.
If the file is open with a previous version of the Banana Accounting software, you will get a message that the file is not totally compatible. - If you edit this section and you press OK, in order to undo the operation you need to give the Undo command more that once.
Composition
Explanations on the Composition section are available at the following link:
https://www.banana.ch/doc9/en/node/2768
Journal
With Banana Accounting the Journal corresponds to the Transactions table. It is possible to print the whole journal or just a part of it, selecting the rows that you wish to print.
In order to personalize the journal printout you can change the columns order and headings: you can find all the information on how to proceed in the Columns setup page; you can also choose several options in the printout; please visit the Page setup page.
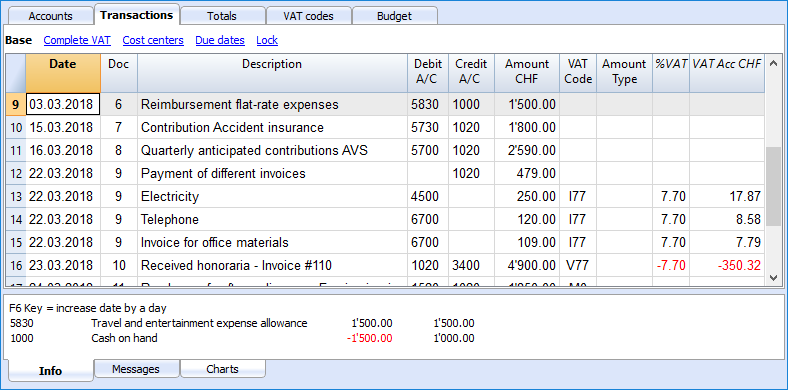
There are different ways to print:
- place yourself in the Transactions table and click on the Print icon
- place yourself in the Transactions table and launch the Print command form the File menu
- from the Account1 menu click on the Print journal by period command; in this case you should then indicate if you wish to print the whole table or just a specific period
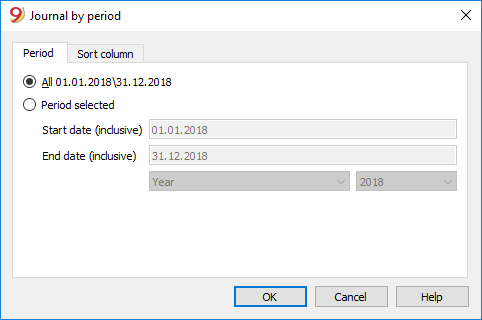
The information on the Period tab are explained in detail in the Period page of the General settings.
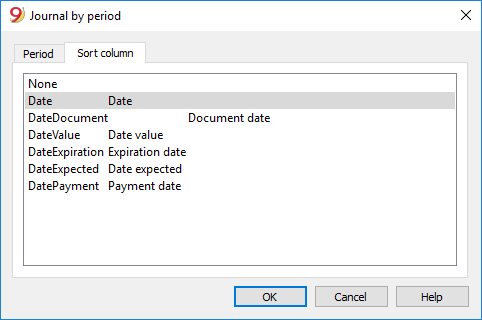
In the Sort column tab in is possible to choose the criteria the journal should be sorted and printed.
Accounting report
- This command allows the user to visualize the amounts of accounts with a specific grouping, for a specific period or with a specific subdivision.
- In order to calculate, obtaine and print reports, choose the Accounting reports command form the Account1 menu.
- Transactions without date are being considered as opening transactions and will not appear in the printouts of the Profit & Loss Statement.
Include a logo in the accounting report printout
From Banana Accounting 9 it is possible to include a logo in the accounting report printout as well. After obtaining your accounting report , go to File menu -> Print preview command. From the print preview click on the the Setup icon, and in the dialog window that will open, in the Logo option, seleg your logo insted of the none option.
You can also check the how to setup a logo page.
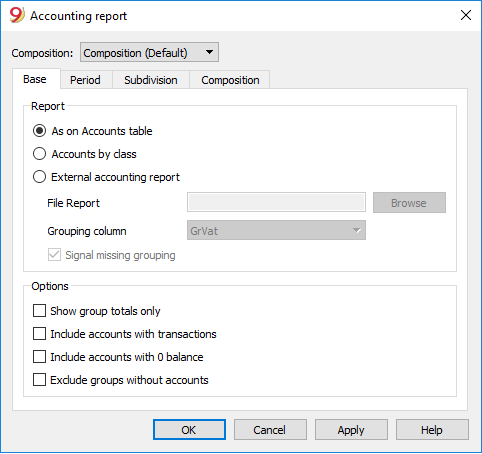
Base tab
Report
You can select the desired grouping scheme:
- As on Accounts table - the Report will show a list of all accounts just as in the Accounts table with the Opening balance and Balance columns
- Accounts by class - the Report will show the list of the accounts but without subgroups
- External accounting report - the Report will show the data according to a grouping system preset in a separate file (File menu, New command, Double-entry accounting group, Accounting Report).
Options
You can select the accounts to be included or excluded:
- Show group totals only - only the group totals will be shown
- Include accounts with transactions - only accounts with transactions will be printed
- Include accounts with 0 balance - accounts with zero balance will be printed as well
- Exclude groups without accounts - groups that contain only accounts with zero balance will not be printed.
Other tabs
The explanations for the other tabs are available at the following pages:
Report result
A new table is created where the results are shown.
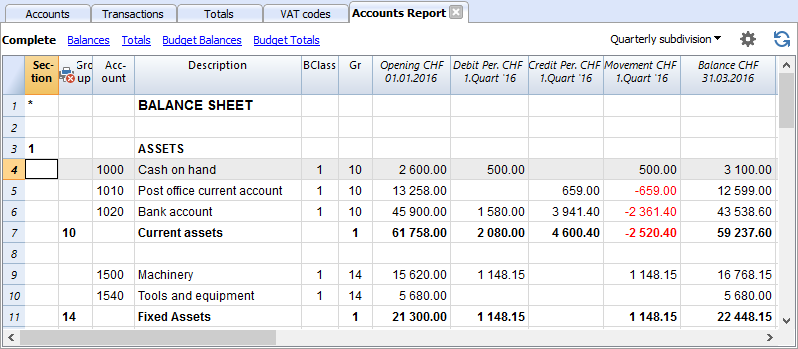
Account cards / Ledger
The account card corresponds to the Ledger and allows you to have a complete list of accounting movements concerning the same account, the same categories (income & expense accounting and cash manager), a cost centre, segments and groups.
Opening the Account card
There are two methods to open an account card or a category card:
- Select the Account/category Card (Cash book and Income & Expense accounting) command or the Account card (Double-entry accounting) command of the Account1 menu in order to open and print several or all account cards.
- On the account number cell there is a small blue symbol; click on it just once in order to obtain the account card.
The groups of the Chart of accounts have the same symbol available as well, in order to display the account card.
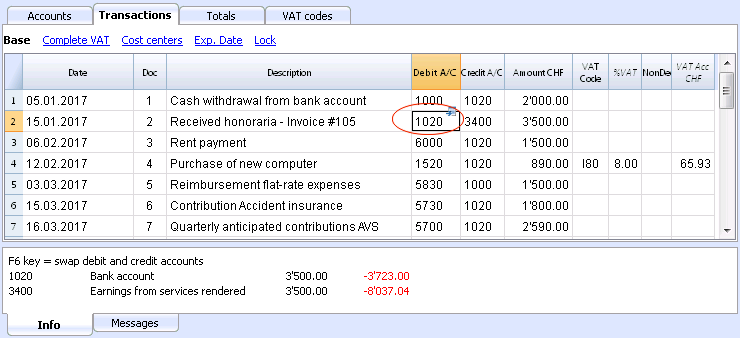
Updating the accounting card
The account card table is temporary and it is calculated when the command is given to do so. If, in the Transactions table, transactions are altered or added, they are not automatically updated on the account card - the user needs to select the Account Cards command again or click, in the Transactions table, once more on the account number's blue symbol, or in case the account card is still open, click on the small Refresh button on the right side (see image hereunder).
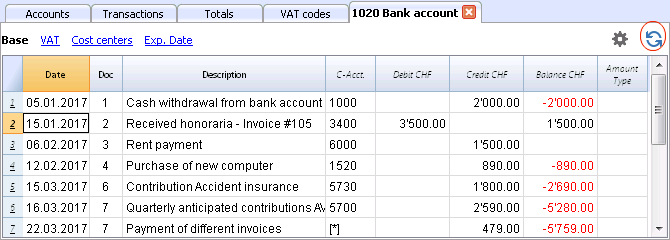
Note:
It is not possible to modify the data in the Account card. Double-click on the row number to go back to the original corresponding row of the Transactions or Budget table.
The AccountSelected column
In the AccountSelected column, which can be made visible, starting from any Account card, through the Data menu -> Columns setup, the account on which the transaction took place is being displayed.
When you get an account card of one or more accounts, groups and segments, you will see the exact account that has been used.
The contra account in the account cards
In the Account cards, the Contra Account column (C-Acct.), which indicates the account that completes the transaction, is being shown.
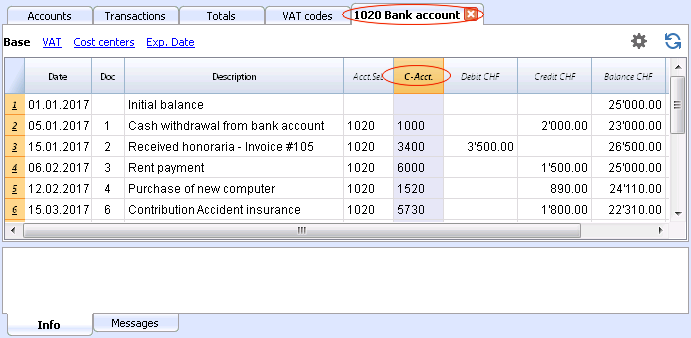
When there are transactions on multiple accounts (transactions on multiple rows) as in the example hereunder, and there is one account entered in debit and several accounts in credit, or the other way around, the software deducts the possible contra account using the following logic:
- In the first transaction row, the 1020 account is considered the common contra account of the transactions that follow.
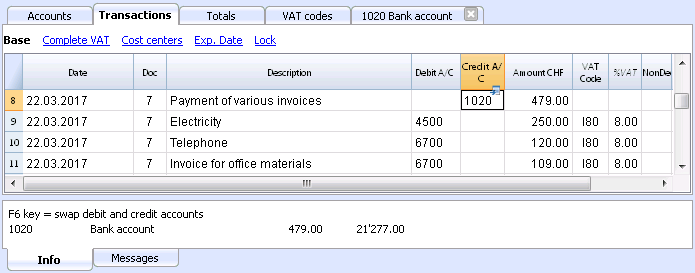
- On the Account card 1020, the composed transaction (Payment various invoices) shows the contra account indicated by the [*] symbol. It is impossible to have the indication of the contra accounts directly in the account card, because the account has several contra accounts (4500, 6700, 6700). For this reason the program indicates the [*] symbol in the C-Acct (Conta-Account) column, which means that we are dealing with a transaction on multiple accounts.
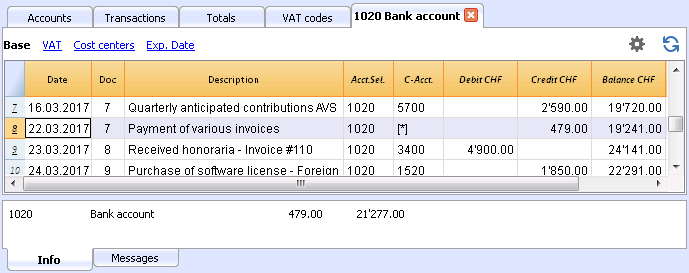
- On the Account cards of the next transaction rows (4500, 6700, 6700), the common contra account is indicated between square brackets ("[1020]"), and indicates a deducted contra account.
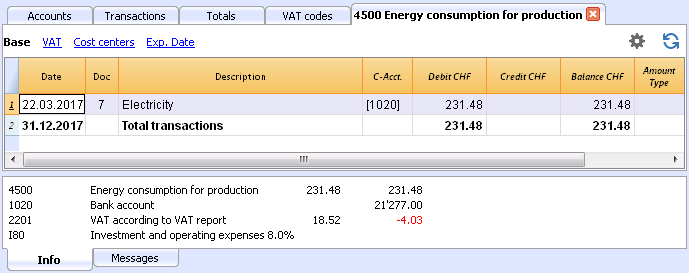
Cards of groups and classes
In the Account card of a group or a class, all the transactions of the accounts that belong to the selected group or class are being grouped together.
The accounts of the group or the class can be displayed by making the AccountSelected column visible.
Print the Ledger (all account cards)
To print the Account cards:
- Account1 menu, Account cards command
- By means of the Filter, all the account cards that need to be printed completely or partially (for example, only accounts, cost centers, segments) can be automatically selected
- In the various sections Period, Options, Composition, activate the desired options (for ex. period, 1 account per page, ...)
- Press OK to confirm, after having selected the desired options.
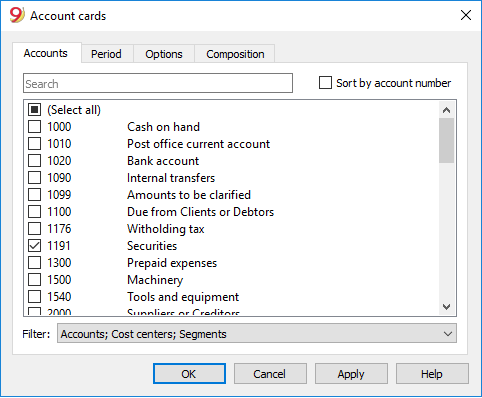
For the explanations of the different tabs, please visit the next few pages: Accounts/Categories tab, Period and Options.
The program will show the selected account cards.
In order to print, choose the Print command from the File menu.
When you have activated the Budget table in your file, you may choose which transactions you want to see (actual transactions or budget transactions).
Include a logo in the account cards
From Banana Accounting 9 it is possible to include a logo in the account cards printout as well. After obtaining your account cards details (with the Account1 -> Account cards command), go to File menu -> Print preview command. From the print preview click on the the Setup icon, and in the dialog window that will open, in the Logo option, seleg your logo insted of the none option.
You can also check the how to setup a logo page.
Save the settings
In case you regularly print the account cards of specific accounts, for example, all those that concern the Sales accounts, it is useful to create a specific composition.
- Go to the Composition tab
- Create a new composition, using the New button
- Indicate the name of the composition, for example "Sales accounts", in the Description field of the window
- Select the accounts that you want to be printed.
Every time you wish to print these accounts, you can select the composition that you created.
Page setup
In Page setup, you can specify the margins & other settings of the page.
Accounts/Categories tab
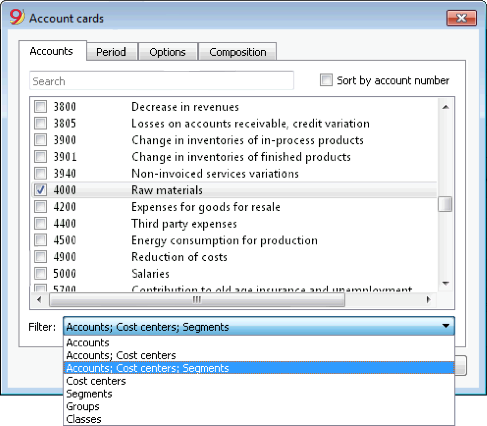
You can access this windows by choosing the Account1 menu -> Account cards command (see the Account cards page)
Search
Enter the account or the description in order to filter the accounts list.
You can also enter the account to be displayed with segments.
Accounts and segments can be combined (see developer explanations):.
- 10000:01 will show all transactions of the 1000 account with the 01 segment.
- 1000|1001will show the transactions for account 1000 and 1001.
Accounts
The list of all available accounts appears.
If you wish to print one or more account cards activate only the desired accounts.
- (Select All)
By activating this option, all the accounts that are part of the Chart of accounts are automatically selected. - Filter
This function allows you to filter all account cards or just a selection, specifically:- Accounts, cost centre and segments - if no selection is made they are filtered by default
- Accounts/categories (existing cost centres and segments are excluded)
- Accounts, Cost centres (only segments are excluded)
- Cost centres (accounts and/or categories and segments are excluded)
- Segments (accounts and/or categories and cost centres are excluded)
- Groups - existing groups will be shown - you need to select the ones to be printed
- Classes - all classes will be shown - you need to select the ones to be printed.
Actual or Budget
When you have activated the Budget table in your file, you may select:
- Actual transactions
The entries in the Transaction tab will be processed. - Budget transactions
The entries in the Budget tab will be processed.
In the absence of the Budget tab, the amounts in the budget column of the account card, will be converted to monthly amounts on the basis of the opening and closing dates of the accounting file (if this one year, will be devided by 12 monthly instalments).
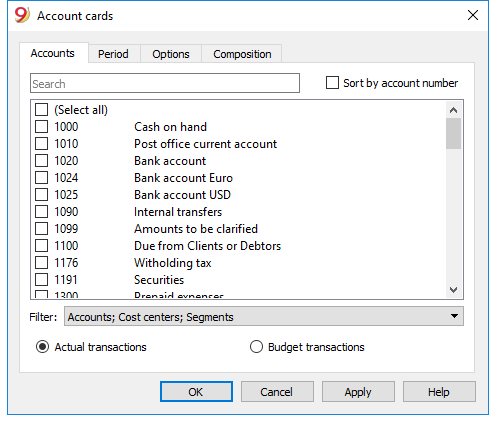
Differences in accounting entries (account card 00)
If differences in accounting entries occur (refer to the DEBIT - CREDIT difference error page), open the Group 00 account card (or the one in your Chart of Accounts that contains all the accounts of BClass 1,2,3,4).
You will have a list of all transactions with the successive balances, which after each entering should equal zero. The row which balance is not at zero contains the error.
Period Accounting Card
The explanations of the Period tab are the same as those for the Enhanced Balance Sheet with Groups.
Options tab
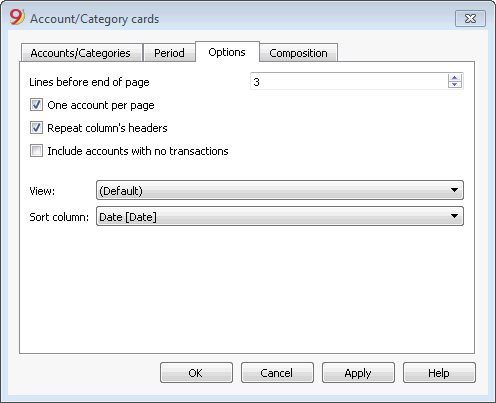
Lines before end of page
This function was created in order to avoid printing an account partially on one page and partially on the following. If the account card to be printed doesn't have at least a number of lines correspondent to the number input in this field, printing the whole card will be moved to the next page.
One account per page
By activating this function, each card will be printed on a separate page (even those with few transactions).
Repeat column's headers
By activating this function, the column headers will be repeated for each account, within the page.
Include accounts with no transactions
By activating this function, cards without transactions will be printed as well.
View
You can select the columns view to be included in the account cards display and printout:
- Base
- VAT
- Cost centers
- Expiration dates
If no criteria is specified the program will keep the order present in the transactions table.
Sort column
In the account card, transactions can be sorted according to different data criteria:
- Document date
- Value date
- Expiration date
- Payment date
End of Year PDF printouts
From the print preview of a document, you can save in PDF format and print.
You can save in a PDF format the following documents:
- Balance sheet and Profit and Loss Statement
- Accounts, Transactions, VAT, Totals tables
- VAT Reports
- Account cards
This PDF file will have an index that will allow to access easily the different printouts.
If you save this file on a non rewritable CD (to be kept along with the accounting documents), you will meet the law requirements for accounting data archiving.
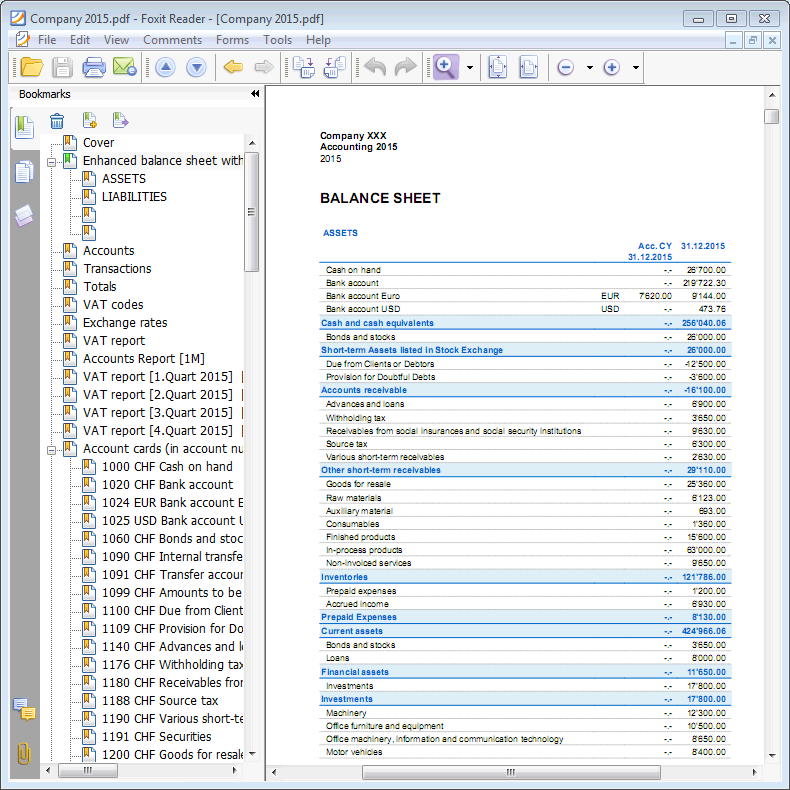
Reports over several years
A statement over several years allows a simple and immediate comparison of the evolution of your business. Banana Accounting can display the balances up to two previous years in the same report, so for example the balances of the years 2019, 2018 and 2017 on a single page.
In order to use this feature though, you need to make sure that in the basic accounting data the "previous year's file" option is activated and that the correct file is entered (File menu -> File properties (Basic data) -> Options tabn -> Previous year file), otherwise Banana Accounting cannot recover the balances of the previous accounting periods, and they won't appear in the report.
In the following example we will show you how to obtain a report over the years 2017, 2018 and 2019. Here is how to proceed:
- from the Account1 menu choose the Enhanced balance sheet with groups...
- from the Columns section, check the Current and Previous year boxes
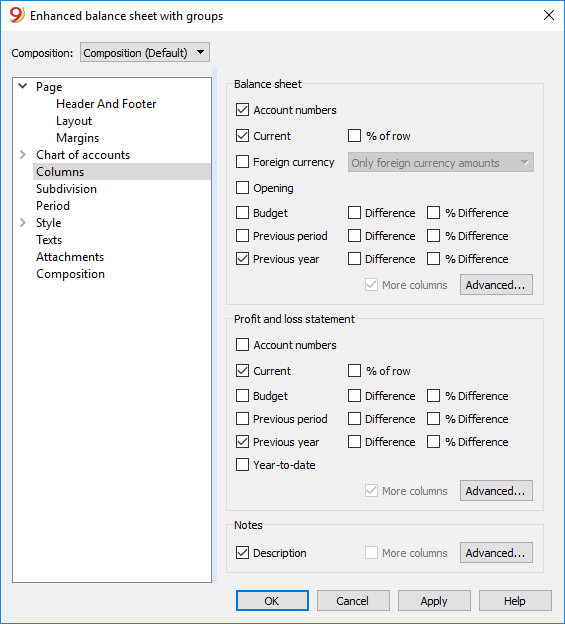
- then click on the Advanced button (this operation must be done both for the Balance sheet and for the Profit & Loss statement) and,
from the dialog window that opens, click on the Add button to add a column - scroll down the list of possibilities until you reach -2 Years - we are indeed in the year 2019 and in order to have a 2017 report we have to go 2 years back
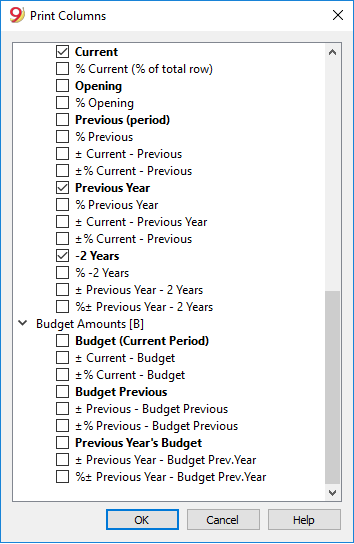
- confirm with OK and enjoy your report
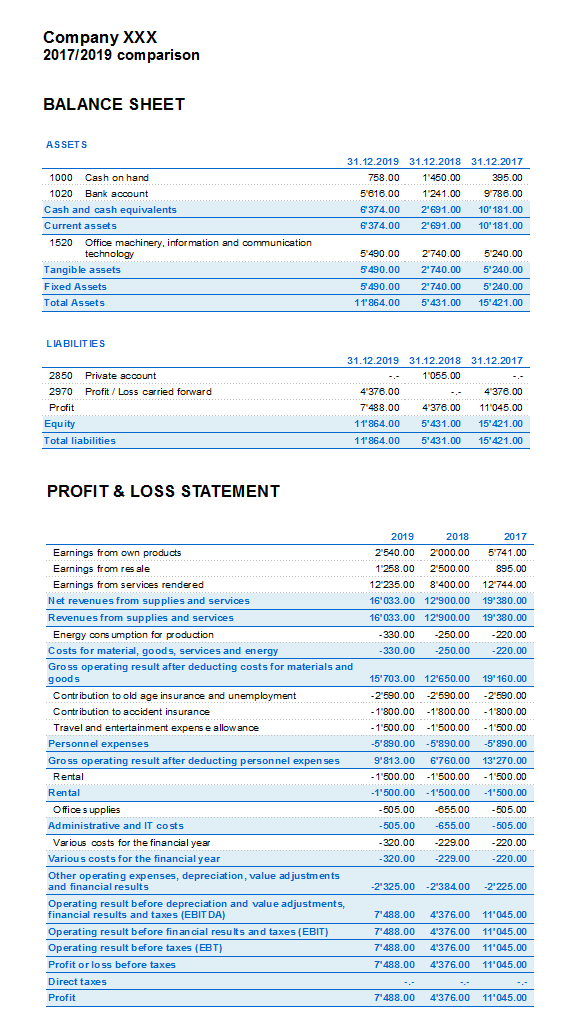
End of Year and New Year | Double-entry accounting
Avoid mistakes with Banana Accounting Plus
In order to facilitate checking your accounting work and to immediately find differences, in Banana Accounting Plus, our new version, we added the Balance column in the Transaction table. You can now see potential differences on each row and you can correct them right away. It is a very useful feature when closing the accounting period.
Many of our clients have already tried it and are enthusiastic about it. We advise you to switch now to Banana Accounting Plus and take advantage of the many new features.
At the end of every accounting year, before printing and filing the Balance Sheet and the Profit & Loss Statement, it is necessary to recheck the accounting file.
Please visit the Recheck the accounting page.
Tax aspects
Before closing the accounting, is is necessary to proceed with a series of operations that have fiscal implications. The merchandise account needs to be adapted, the transactions for depreciations need to be entered, the accrued income and liabilities, the VAT declaration needs to be completed, establish how and unto which accounts the profit or loss has to be attributed and there are many other operations for verification and checking.
From the program's point of view, there is no difference whether the profit is high or low. However, from a fiscal point of view, it implies a lot. These aspects need to be verified with your own tax advisor or accountant. It can be very useful, especially when you manage an accounting for the first the time and before you proceed with the closing of the books, to consult a specialist in order to understand what is required. The accountants are very busy at the beginning of the year and during the period preceding the deadline for the tax declaration. It can therefore be useful to meet with your accountant - or send him the accounting file - a few months before the closing of the books, so that you can inform yourself on how to proceed.
Create a New Year
Generally a different file is used for each accounting year. In order to start recording in the new year, with the Create New Year command of the Account2 menu and starting from the current year's file, a new accounting file is being created. Once the new year has been created and the file has been saved under a new name, the user can work in the file of the new year, but also in the one of the preceding year.
You can thus create the file of the new year, even before having closed the year in which you are still working. After having entered the last modifications in the previous year, use the Update Opening balances command of the Account2 menu, to retrieve the opening balances and again attribute the profit of the last year.
Performed Operations
The Create New Year command:
- Creates a new file (with no name) with the chart of accounts and all the settings identical to your current file, but without transactions.
- Copies the data from the Balance column of your current file to the Opening column of the new file (only for the selected classes)
- Adds the selected amount to the opening balance of the Profit or Loss from previous year account(s) in the new file.
- Copies the data from the Balance column of your current file to the Previous Year column of the new file (for all the accounts).
- Updates the opening and closing dates in the File and accounting Properties of the new file.
- In the Multi-currency accounting, enters the closing exchange rates of the previous year as opening exchange rates.
- If there is a Budget table, it brings over the rows in the new year taking into account the settings.
Create New Year command
- Open the current file and click on the Create New Year command from the Account2 menu: a window, that shows a difference corresponding to the profit or loss that has not yet been allocated, will appear. There may also be differences due to accounting errors.
- From the list that appears, the user can select the account to which the result of the accounting period has to be allocated, or one can directly confirm with OK if the allocation of the result has to be postponed.
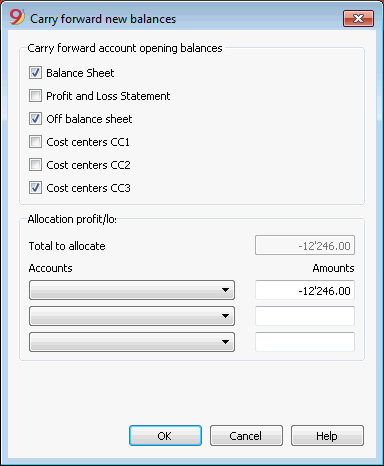
Carry forward account opening balances
The opening balances of the selected options are carried forward.
Indicate which accounts are required to have opening balances carried forward. Usually the Profit and Loss Statements balances are not carried forward. For specific needs you can always activate the option.
Allocation profit/loss
Total to allocate
The program will indicate the profit/loss that needs to be shared between various accounts.
Accounts/Amounts
If only one account is selected, the amount will automatically entered. Select the account or accounts (up to three) in which the result of the accounting period has to be allocated. In case there are several destination accounts for the result of the accounting period, the amounts should be inserted manually in the different boxes. The program will automatically update the opening balances. The Total Assets will exactly match the Total Liabilities.
Allocation of the result of the accounting period on more than three accounts.
In this case, allocate the result of the accounting period automatically on the Profit or loss brought forward account as usual, and continue to proceed with the creation of the new year.
In the new year (new file), Transactions table, proceed with a composed transaction in order to allocate the result of the accounting period from the Profit or loss brought forward account to the different destination accounts.
- Confirm the File and accounting properties for the new year.
- From the File menu, activate the Save as... command, indicating the folder where the new accounting file needs to be saved.
Updating opening balances command
The Updating Opening Balances command:
- Retrieves the closing data of the indicated file
- Copies them as data of the previous year in the current file (see Create New Year command).
This command doesn't influence the already entered recordings. In fact, it is like when creating a new year, as if you are recording in the current year.
Opening balances must be updated in the following situations:
- When you have created the new year and afterwards you entered more transactions - or made corrections - in the previous year
- When the profit/loss of the previous year has not been allocated.
Here is how to proceed to make the update:
- Open the current year accounting file and choose the Update opening balances command from the Account2 menu
- Select the previous year accounting file through the Browse button
- Follow the same steps as the ones of the Create New Year command (see top of the page)
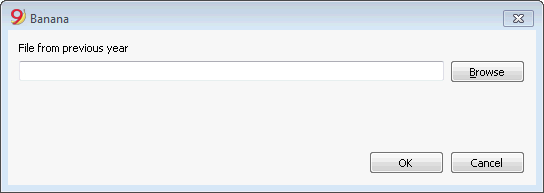
Recommended operations at year-end
- Create a Pdf dossier for the entire accounting
- Lock transactions with the Lock transactions command
- In case of a multi-currency accounting, record the exchange differences at 31.12, using the official exchange rate.
Accounting report file
The Accounting Report is a file type in which the presentation of a report is being set up, indicating the way in which the accounts are being grouped.
Thereafter, the Accounting report can be executed through the commands of the accounting:
- Enhanced balance sheet with groups (Chart of accounts, Sections, External accounting report)
- Accounting report (External accounting report section).
The grouping system, created in this manner, can be linked to the accounting to extract and totalize the accounts.
There are two ways of doing this:
- Grouping based on the indicated groups
This manner is useful when one wants to group the accounts according to different criteria, for example, present the Balance sheet and the Profit/Loss statement according to a grouping system that is different than the one set up in the Accounts table. -
- In the Report, the grouping system is being created.
- For each account of the Accounts table in the accounting, in the GR1 column (or another column), indicate the group in which the account has to be grouped.
- When the Report is being executed, all the accounts that are marked with groups in the report file are being carried forward.
- Grouping based on the indicated accounts
This manner is useful when one doesn't want a report with all the accounts but with only a few selected accounts.- In the Report, indicate the accounts of the Accounts table from the Accounting file that should be included.
- When the Report is being executed, only the indicated accounts are being carried forward.
How to create an Accounting report file
In order to create an Accounting report file: i
- File menu, New ->
- Double-entry accounting -> Accounting Report
- It is possible to choose an existing model or get started with a new one
- Once created, save the file under a new name.
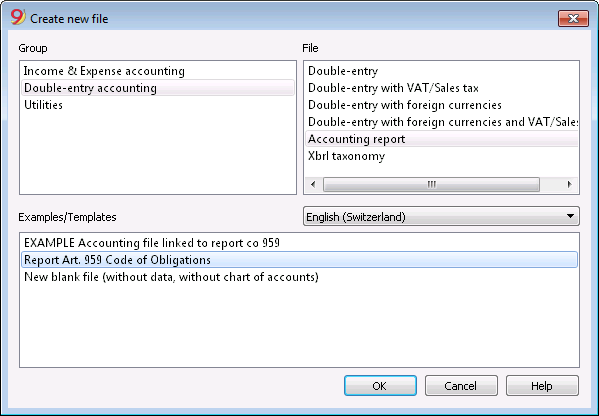
The columns of the Accounting report
The Accounting report file includes the same columns as those in the Chart of accounts of the accountiung file. They make it possible to create the groupings and the totals.
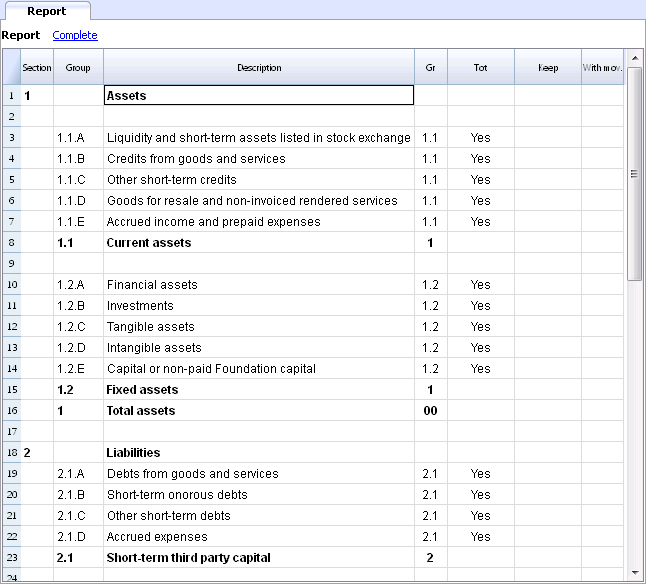
Sections
This column is being used to indicate the value that is to be used in the presentation.
For the different possibilities, see the documentation about the Sections.
Group
The group in which the accounts of the accounting have to be totalized or a group of the report.
Account (only visible in the Complete view)
The account that has to be included in the report.
- If there are accounts, when the report is executed only those indicated will be carried forward.
- In case no account has been indicated, the accounts that have been linked through a group will be carried forward.
Description
Description for the grouping or of the row itself.
Gr
In the Gr column, one indicates the total in which the row has to be totalized.
Tot
If the word "Yes" is being entered, only the Total row is being displayed and not the accounts that are a part of this total.
Please look at 'Show groups' totals only' in the Accounting report.
Keep
Usually, the totalization rows that have accounts with balances are included in the report.
If you indicate "Yes" in this column, the row is in any case always displayed. This can be applied to both the totals and to the accounts.
With mov.
This applies to groups that have a zero balance.
The row will only be displayed if there have been transactions (movements) during the time period.
Creating a Report linked through the group
- In the Report, create a system of groups and subgroups as desired.
- In the Accounts table one indicates, in the Gr1 or Gr2 column, the group in which the account has to be totalized.
In case the Gr1 column (or another preferred one) is not visible, make it visible with the Columns setup command. - The accounts that are not being linked will not be included in the Report.
- Execute the Report through the commands:
- Enhanced balance sheet with groups
- Accounting report.
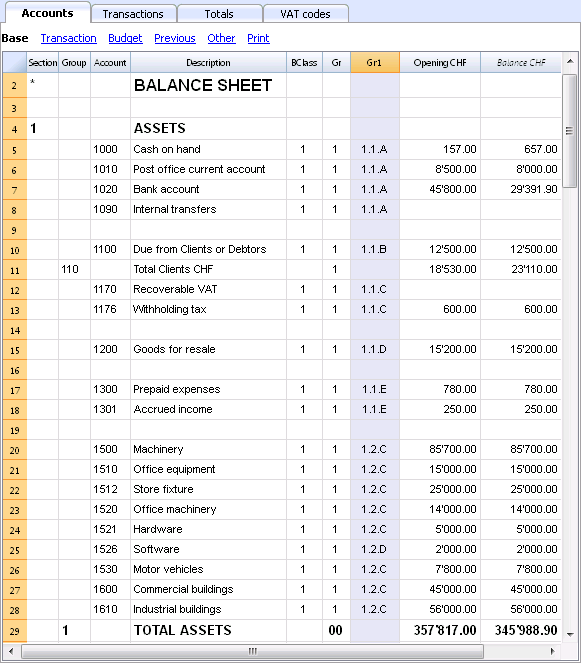
Creating a report that groups only some selected accounts of the accounting
This modality is active even when in the report only one account has been indicated.
Do not indicate any account, if you wish that the report is being executed in the group modality.
In the report are being indicated:
- The accounts of the accounting that have to grouped together.
Only the indicated accounts will be included in the report. - The groups in which the accounts have to be grouped together.
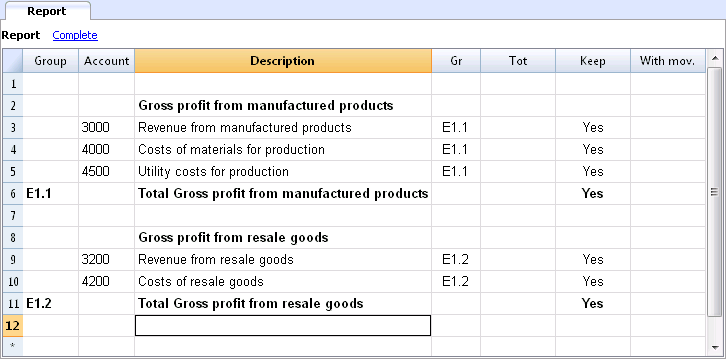
Execute the Report using the commands:
- Enhanced balance sheet with groups from the Account1 menu (then Chart of accounts -> Sections -> External accounting report)
- Accounting report from the Account1 menu (then choose the Base section and the External accounting report option).