In this article
You can easily customise and adapt invoice printing to suit your needs.
Set your company address (sender)
In the File menu > File and accounting properties (Basic data) > Address , set the address of your company.
Set the customer number and the invoice number
It is important that the customer number and the invoice number comply with certain requirements: see how to correctly create the customer number and the invoice number.
Set customer language
You can print invoices in the language of your customers. For each customer set the language in the Contacts table. You can also change it from the Edit Invoice dialog.
Retrieving customer addresses from Excel
When customer data are on an Excel file, they can be easily transferred to the Contacts table.
Proceed as follows:
- Select from Excel the column with the data to be copied and use the Copy (Ctrl+C) command.
- Go to Banana, Contacts table, position yourself in the corresponding column and issue the Paste (Ctrl+V or Paste) command from the Edit menu.
- Repeat this operation for all address columns (Account, First Name, Last Name, Organisation, Street, Zip, Country Code, Language).
The data corresponding to the mentioned columns are required for printing the invoice. - If you do not have all the columns mentioned in the Excel file, you must add the missing information manually.
Logo setup position and sender address
To set the logo, you must:
- Upload the logo image in the menu File > Logo setup.
- To use the logo in the invoice, in the Invoice Settings you must activate the Logo box and enter the name of the customisation you used, respecting upper and lower case, in the Logo Name field.
For example, you can place the logo on the left and the address on the right and change the size of the logo.
The address is automatically taken from the file basic data.
The sender's address, if the default settings are not changed, is entered on the right, regardless of the presence of the logo.
If you want to set the sender address on the left without any logo, please see the following page:
If you want to enter a different address, via the Invoice Settings:
- Enter the texts you want using the Line 1 Text , Line 2 Text, Line 3 Text, Line 4 Text, and Line 5 Text.
Set the logo without the sender's address
On the Logo setup page you will find information on how to add and place the logo.
Through the Invoice Settings:
- Uncheck the Page header option to exclude the address in the header from printing.
- View the Logo option to include the logo in the printout.
Customise address in invoice header
The style of the sender's address in the invoice header (colour, size, font..) is set by default by the program.
The Advanced Plan of Banana Accounting Plus allows you to customize the style of the address. For more information see the Examples page.
Set invoice information
Invoice information is information about the date, customer number, due date, etc., which is usually located just below the header and next to the customer address.
The CH10 and UNI11 layouts allow you to define which invoice information to include and which to exclude from printing. You can find instructions on the Invoice Settings page.
For the other print layouts (CH01-CH09 / UNI01-UNI08), the information cannot be modified.
Add a new invoice information field
In addition to the default information fields (invoice number, date, customer number, etc.), you can also enter other custom fields.
In the Invoice section of the Invoice dialog:
- Go to the Complete view (top).
- Use the fields Additional info 1... Additional info 8 to add your own additional information fields.
- In the Information section of the Invoice Layout settings, view the Custom fields field.
- The new additional information fields are added at the end. It is not possible to change the order.
In the Settings section of the Invoice Dialog:
- Edit the texts of the Invoice User Fields as you wish.
- You can enter translations for each language.
Set the payment term
The payment term for invoices by default is 30 days.
To change the payment term you have two options:
- Change the default settings for all new invoices.
- Go to the Settings section of the Invoice dialog.
- In the New documents > Invoice Payment term(days) section set the value you want (e.g. 10).
- The invoice due date will be recalculated with the new payment term.
- Change the payment term individually for each invoice.
- Go to the Invoice dialog.
- In the Due date field enter the payment deadline date (e.g. 31.12.2022).
- The invoice due date will be replaced with the new payment term.
Set customer address position and composition
The CH10 and UNI11 layouts allow you to define:
- The location of the customer address.
- The elements of the address.
On the Invoice Settings page > Customer address section:
- In the Address composition field:
- Choose how to compose the address by entering the XML names of the columns in the Contacts table.
- You can use only the following columns (XML names):
NamePrefix, OrganizationName, FirstName, FamilyName, Street, AddressExtra, POBox, PostalCode, Locality, Region, Country, CountryCode. - Change the location of the address using the Move horizontally and Move vertically options.
For other print layouts (CH01-CH09 / UNI01-UNI08), the location and composition of the customer address cannot be changed.
If you need more than one line to print your customer's address, see print customer/company address on four lines.
Set title/object
To enter the title/object of the invoice, you have two options:
- Enter the text in the Invoice dialog > Object field.
- For each invoice you can define a title.
- If you leave the field empty, the default text is used.
- This title always has priority over entering the title in the layout settings (see next point).
- With the CH10 and UNI11 layouts, you can enter the text in the invoice Settings > Texts section > Invoice title.
- The title applies to all invoices printed with this layout.
- The title applies only if no title has been defined as per the first point.
Set initial text
To enter the title/object of the invoice, you have two options:
- Enter the text in the Invoice dialog > Begin text field.
- For each invoice you can define a title.
- If you leave the field empty, the default text is used.
- This title always has priority over entering the title in the layout settings (see next point).
- With the CH10 and UNI11 layouts, you can enter the text in the invoice Settings > Texts section > Begin text.
- The title applies to all invoices printed with this layout.
- The title applies only if no title has been defined as per the first point.
Setting up the invoice details table
The Invoice Details Table is the central table in the invoice where the invoiced items/services appear, with quantities, unit prices, totals, etc.
Use the Invoice dialogue to enter items or other items to be invoiced.
See also pages:
Set invoice item columns
With the CH10 and UNI11 layouts, you decide which columns to display in the printout. See how to do it in the page Invoice Settings > Invoice Details.
For the other print layouts (CH01-CH09 / UNI01-UNI08), the columns are not editable.
Create a Credit Note
To create a credit note:
- In the Invoices table, add a new invoice for the credit note.
The invoice can be created as new or you can copy an existing invoice and then modify it. - Open the newly created invoice for editing.
- Change the title/subject to "Credit Note."
- In the details table, add a row and set the quantity with a negative sign. This way, the total for the row will be negative.
Set final texts
To enter the final text of the invoice, you have several options:
- Enter the text in the Invoice dialog > End Text field.
- It is applied to any print layout.
- The text is inserted just below the invoice details.
- Enter the text in the Invoice Print Dialog > Options section > Final text.
- It is applied to any print layout.
- If you have already entered text as per step 1, the new text is added right after the previous one.
- Enter the text in Invoice Settings > Texts section > End text field.
- This text has priority over the text entered as per step 2.
- If you have already entered text as per step 1, the new text is added right after the previous one.
Set bank account number
If you don't use the QR-Code, you need to enter the bank account number as a reference for the invoice payment.
You have three ways to enter the bank account number as the final text:
- Invoice dialog > End text field.
- The bank account number appears in the printout only for the invoice you are creating/editing.
- It is applied to any print layout.
- The text is inserted just below the invoice details.
- Print Invoice dialog > Options > Final text.
- In this case, the bank account is inserted in all invoices you create.
- It is applied to any print layout.
- If you have already inserted text as per step 1, in this case the new text is added right after the previous one.
- Invoice Settings > Texts > End text.
- In this case the bank account is inserted in all invoices you create using this layout.
- This text has priority over the text entered as per step 2.
- If you have already entered text as per step 1, the new text is added right after the previous one.
Set IBAN for Swiss QR-Code printing
If you want to create QR invoices with IBAN account, you need to:
On the QR-Invoice with IBAN account page you will find more information for setting up QR-invoices with IBAN account.
Set up QR-IBAN for Swiss QR-Code printing
If you want to create QR-invoices with QR-IBAN account, you have to:
On the QR-Invoice with QR-IBAN page you can find more information about the settings of QR-invoices with QR-IBAN account.
Print QR form without amount and address
If you want to print only the QR-bill without amount and customer address, you have to:
- Use the QR-Invoice extension without amount and address.
- Set the currency, address and IBAN account.
- Create the bulletin with QR code.
See also how to print an Invoice without amount.
Set styles and colors
On the Invoice Settings page you will find instructions for defining:
- Font and font size.
- Colors.
Set Bold texts
In the Invoice settings page you will find information on how to apply bold style to invoice texts.
Add images in Offers or Invoices
The Advanced Plan of Banana Accounting Plus, with the new application Offers and Invoices, allows you to add images to the offers and invoices to be sent to customers.
This functionality makes the invoice even more customisable and the client who receives it has a more complete and direct vision of the invoicing of the items.
See our information pages on how to add images:
Print customer/company address on four lines
When the addressee is a company with several sectors/departments or a customer living in a housing complex with interiors, it may be necessary to have several lines available for printing the address.
This option is only available with the Advanced Plan of Banana Accounting Plus.
To activate the possibility of printing the recipient address on several lines, proceed as follows:
- Update extensions from the Extensions menu > Manage extensions > Update extensions.
- Open the invoice under Edit and in the Settings dialogue > Address section, make the fields Sector 1 ... 4 visible for the Basic view.
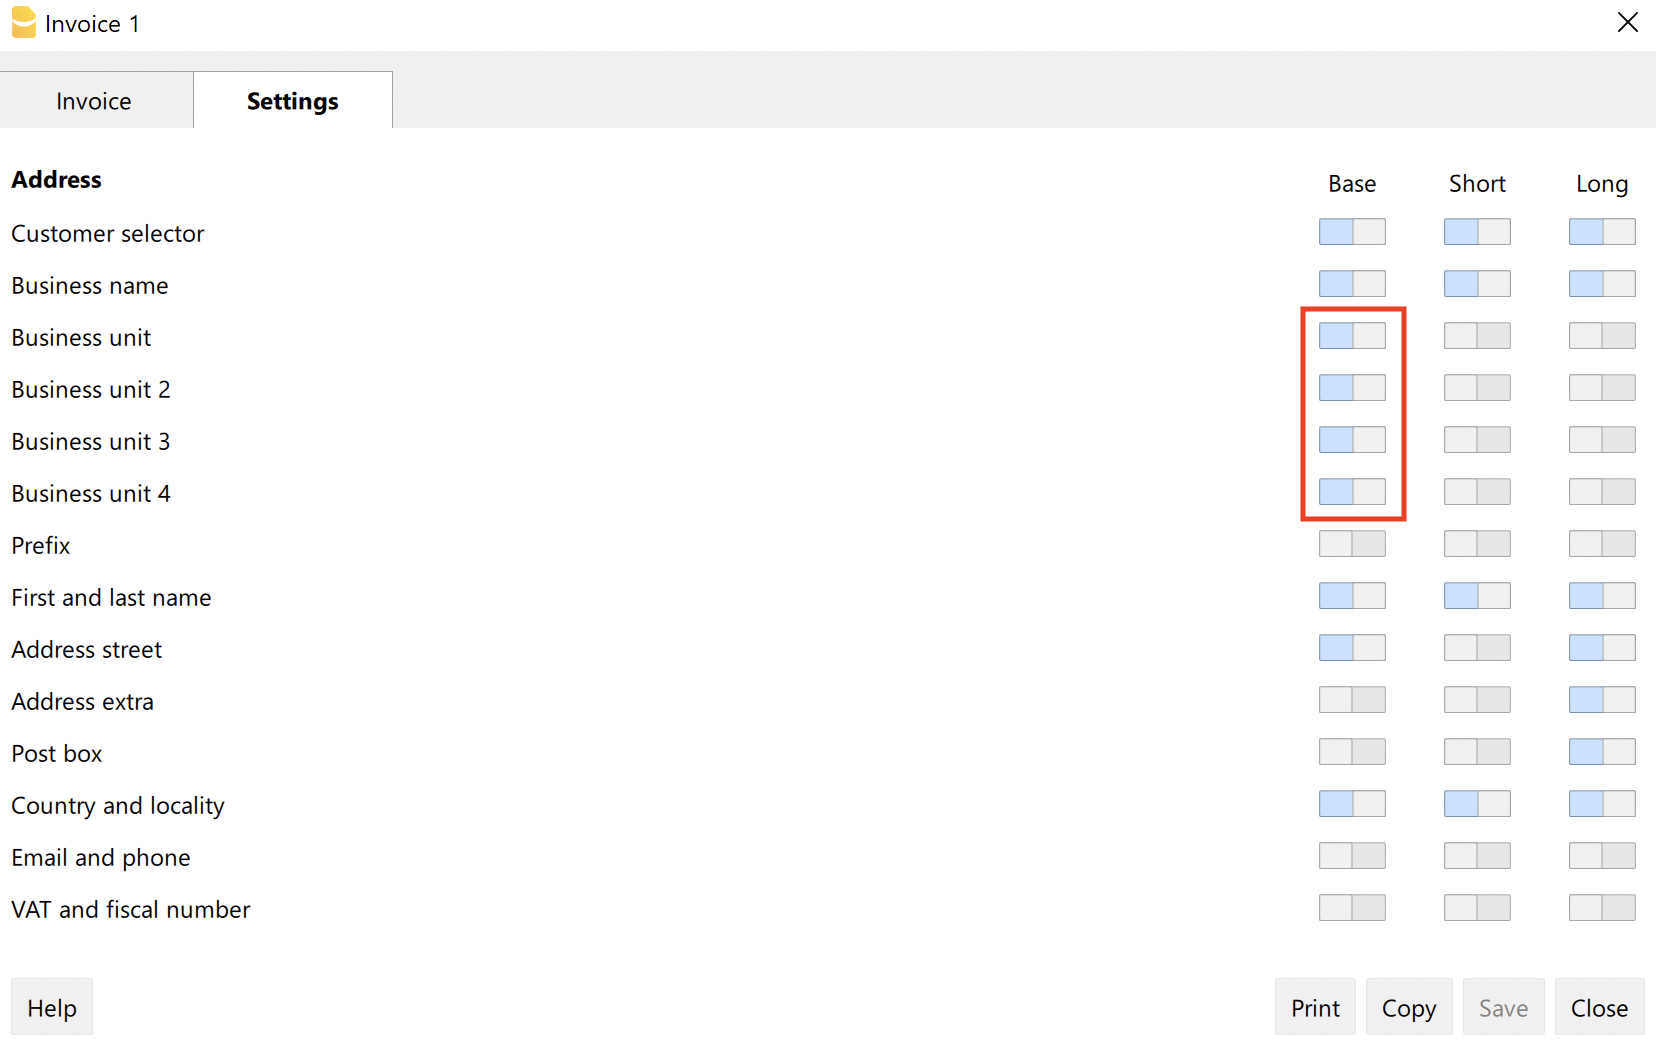
- Possibly switch from the Basic view to the Complete view without making the fields visible (in the Complete view all fields are visible).
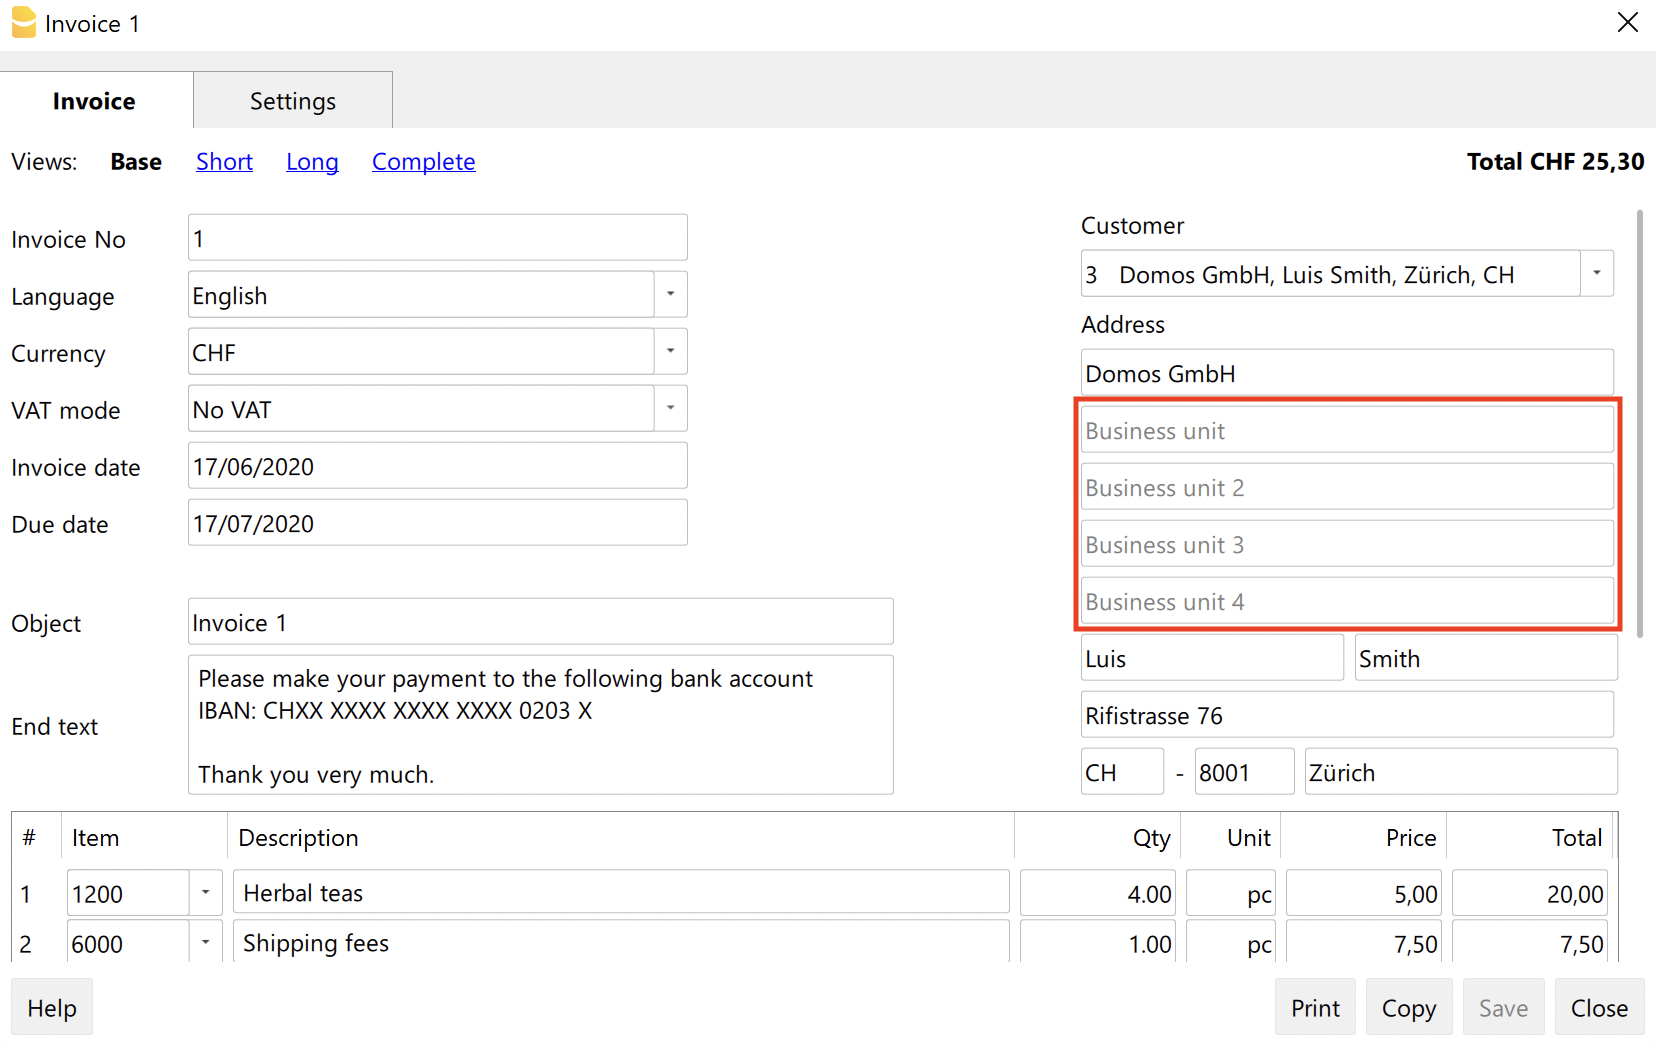
- In the invoice address, enter text in the sector fields.
- In the print layout settings, add the Sector fields to the customer address composition.
The content will be as follows:
<OrganisationName>
<OrganisationUnit>
<OrganisationUnit2>
<OrganisationUnit3>
<OrganisationUnit4>
<NamePrefix>
<FirstName> <FamilyName>
<Street> <AddressExtra>
<POBox>
<PostalCode> <Locality>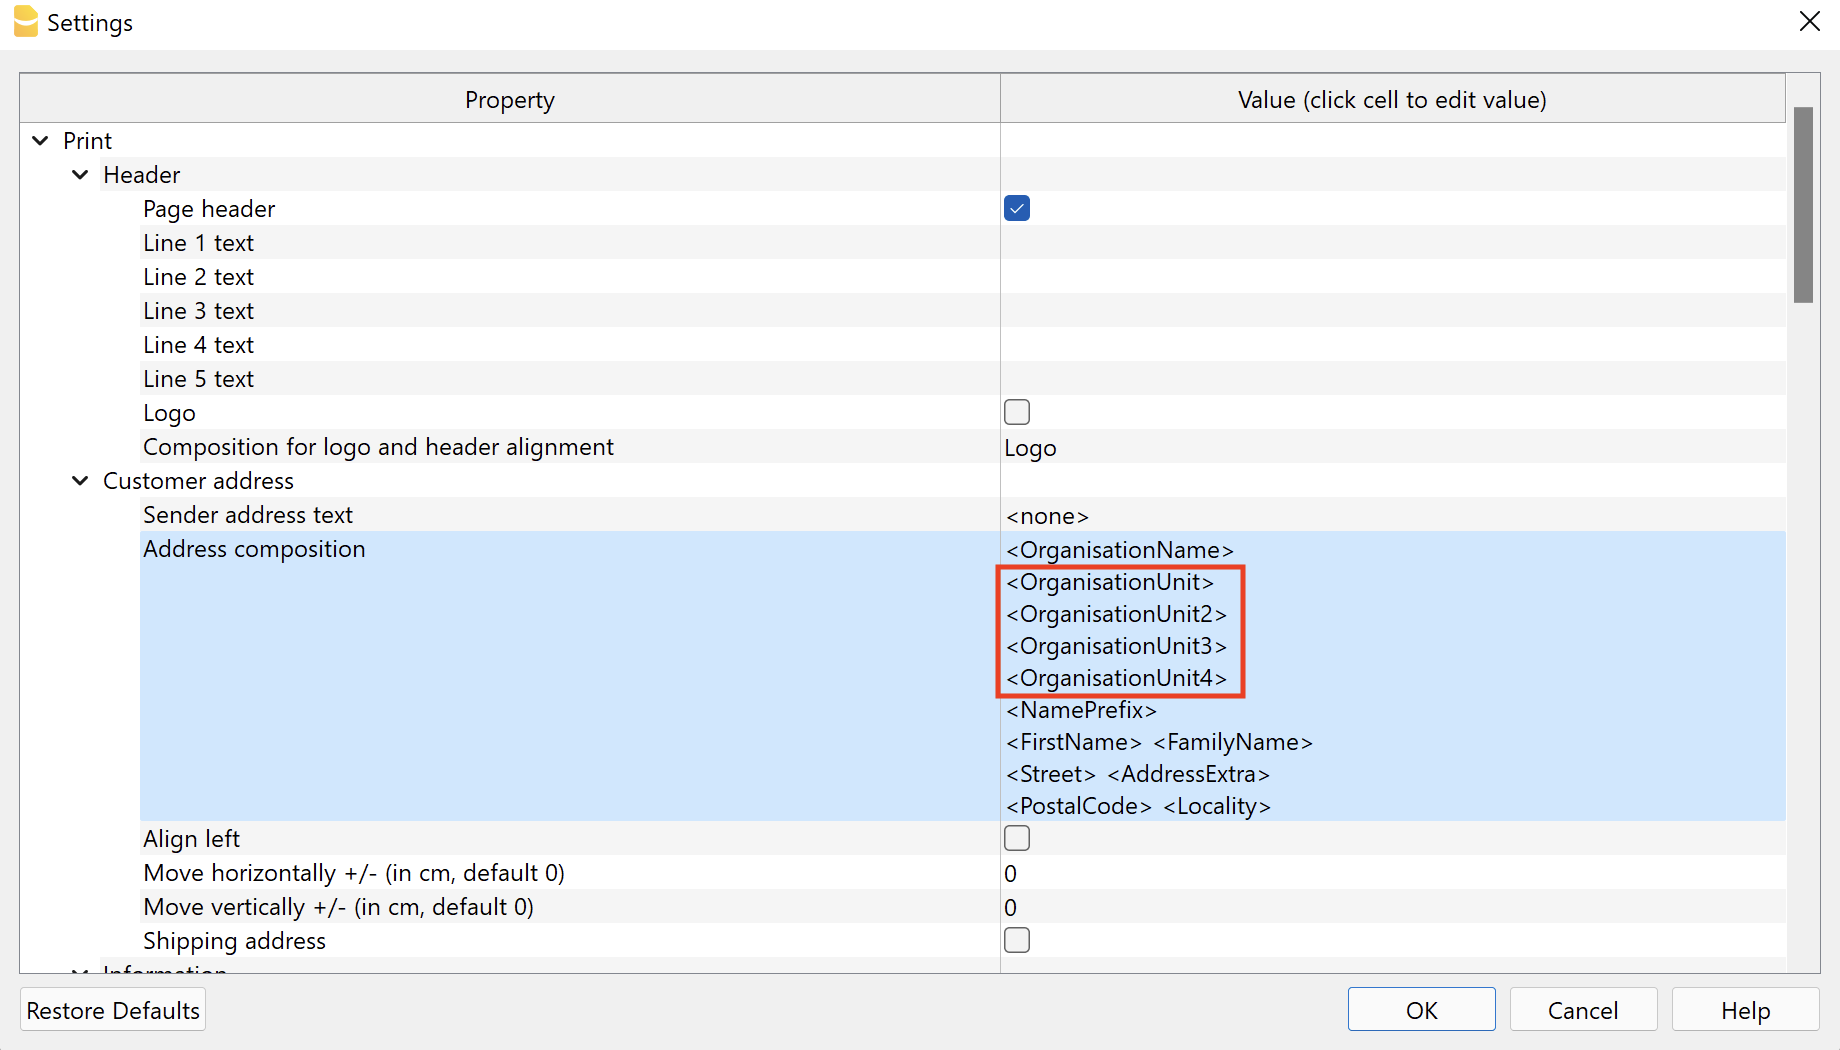
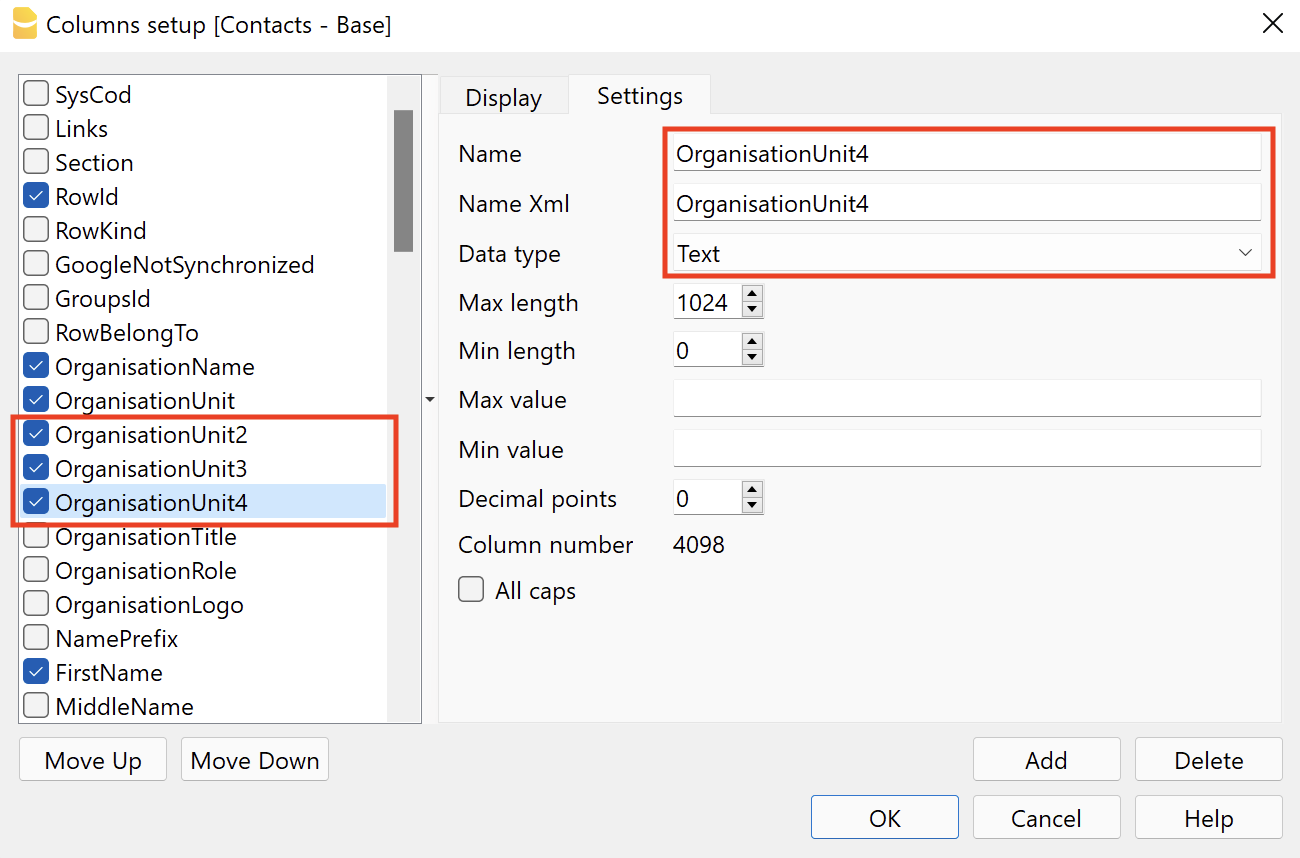
- If you wish to take these fields automatically from the Contacts table, add columns OrganisationUnit2, OrganisationUnit3 e OrganisationUnit4 to the Contacts table.