Accounting
Banana accounting makes different types of accounting available. Each user can choose the type he needs.
With the Convert to new file command of the Tools menu, the user can go from one accounting type to another.
Double-entry accounting
The professional tool to manage assets, liabilities, expenses and income according to the international rules of the Double-entry (debit and credit) and to obtain a Balance Sheet and a Profit/loss Statement.
The double-entry accounting application is available with or without the VAT management option.
Characteristics
- Manages the estate accounts and the profit/loss accounts (assets, liabilities, expenses and revenue)
- The accounting type with VAT features the VAT calculations and VAT reports
- Produces all the accounting extracts: journal, account cards, balances by period and annual balances
- Allows Cost Centers and Segments management
- Offers different ways of data presentation
- Exports data to Excel, Html, Xml, Pdf
- Imports data from different files formats
Tables and File properties
The double-entry accounting is composed by the following tables:
- Accounts table
Where the accounting plan is located with opening balances, and where groups and subgroups can be defined along with cost centers and segments. - Transactions table
Where the accounting transactions are entered. - VAT Codes table
Where the VAT/Sales tax codes are set, only if the VAT management option has been chosen. - Exchange rates table
Where the different currencies are defined, only if the multi-currency accounting option has been chosen. - File properties
Where the accounting general settings are defined.
Changing accounting type
In order to change your file language, rounding system, or in order to add VAT or multicurrency columns, please refer to the Convert to new file command, from the Tools menu.
Theoretical part
In this chapter, the basic theory of the Double-entry accounting is being explained.
Organize yourself
At the basis of the accounting, there are the accounting documents and receipts.
The type of one's organizing with regard to the accounting, depends on the size of the activity and the amount of documents.
The way one organizes things has to be adapted to what is needed.
We are listing down below an indication of possibilities that have proven to be very useful.
The different types of documents
It is important to distinguish and organize specifically the different types of documents.
- Basic documents: contracts for rent, telephone subscriptions, statutes, insurance contracts and everything that gets signed only once and is valid for several years. These documents need to be kept in a separate folder or binder, containing just this type of documents. For some of these very important documents (like receipts for down payments, etc.) it may be useful to make a photocopy and keep the original in a safe or a safe place. Don't make holes in important documents, but put them in transparent plastic folders. This binder is the basis of your activity/company and you need to handle it carefully.
- Documents related to employees: Contracts, insurances related to personnel, and other; it is useful to keep these in a separate binder.
If there are lots of documents, we advise you to use one binder per theme. - VAT Declarations: it is good to keep a special binder with the different declarations that you present at a regular basis (quarterly, by semester or yearly). For your VAT inscription or other general documents, it is better to keep them together with the basic documents.
- Accounting receipts and documents of the year: these are receipts, invoices or other items that are related to an expense or a receipt. These have to be kept separately, year by year. For every year you will have a binder with these kinds of documents.
Accounting documents
A good day- to-day order is needed in order to enter the accounting transactions and to control the situation of the company, such as the cash flow, the totals of debtors and creditors, etc.
- All accounting documents (receipts, invoices, tickets) usually have to be kept for a minimum of ten years.
- Classify and put the accounting documents in order by date, together with the related bank statements for the payment or the receipt.
- Write a progressive number on the accounting documents (statements and others). With this number, that should be inserted in the Doc column, you can locate the accounting document, with the accounting as a starting point.
- At the end of the year, print a copy of the journal and keep it together with the accounting documents.
- Usually a new binder is being used for each year for the accounting documents.
Issued invoices or receipts with an accounting at the moment of payment
Small companies and associations enter the invoices only in the accounting at the moment of payment (cash method).
- Separate the issued invoices and those for which you have received the payment.
- Verify regularly the invoices on hold for which payment still needs to be received. As soon as the due date for the payment has passed, it is useful to send a payment reminder. Don't let too much time pass by, make sure you receive the payment for unpaid invoices. This takes time, but is it important.
- Once these invoices are paid, put them together with the normal accounting documents.
Issued invoices or receipts with an accounting on the sales volume
The invoices are being registered at the moment they are issued as well as at the time of payment.
See also: Clients/Suppliers Registers
- Separate the issued invoices and those for which you have received the payment.
- Verify regularly the invoices on hold for which payment still needs to be received.
As soon as the due date for the payment has passed, it is useful to send a payment reminder.
Don't let too much time pass by, make sure you receive the payment for unpaid invoices. This takes time, but is it important. - When you enter the issuing of the invoice in the accounting, make note of the registration on the invoice. On the transaction row, use the "Doc. Original" column to insert the invoice number.
- Once the are invoices are paid, move them over to the "paid" section, and enter them in the accounting.
- When you have entered them, make note of the accounting transaction on the invoice (for example with a "checked" sign)
Transactions / frequency
- It is good to regularly enter the transactions in the accounting (daily, weekly, monthly).
- We strongly advise you to not neglect entering the accounting transactions, so that you always have updated information and can evaluate the progress of your activity.
- By going over the different expenses account numbers, you can easily have an overview of the different expenses that you made.
- The accounting is not just done for the tax authority.
Mathematical basis
For the user of Banana's Double-entry accounting, it may seem strange that the revenue/income (sales) and the liabilities (start-up capital) appear in negative, while normally one expects that the sales appear in positive and the expenses in negative.
The double-entry accounting is based on the debit and credit principle that usually appear in two seperate columns. If the amounts in debit and in credit appear in one column, the mathematics of the Double-entry accounting anticipates the use of the minus sign (-), so that the amounts in debit can be easily distinguished from the amounts in credit.
Banana goes completely with the mathematical logic of the Double-entry accounting and thus indicates the amounts with the minus sign (and in red print to let the user distinguish even better the amounts in debit and in credit). In the Double-entry accounting the amounts in negative (credit) don't have the same meaning as in the accounting that is based on income and expenses.
The indication of the credit amounts in negative is a much more efficient system than other ones that add codes to amounts, such CR, DEB, CR or brackets.
This system is based on simple mathematical equations which assure that the accounting is correct. It is not by accident that the Double-entry accounting method has in fact been encoded by Luca Pacioli in 1494, one of the most illustrious mathematicians of the Italian Renaissance (he taught mathematics to Leonardo da Vinci). In his "Summa de arithmetica, geometria, proportioni et proportionalita", Luca Pacioli didn't just deal with the Double-entry accounting, but also with other mathematical questions.
In the Renaissance there were no electronic calculators, and so they used to indicate the amounts in debit and in credit in separate columns. The result was that it became easier to totalize the amounts. Today, with the computers, no calculations need to be made and the principal issue is to use a user-friendly system which is at the same time easy and correct.
For those interested in accounting mathematics and the equations on which Banana accounting is based, the following explanation can be interesting.
Debit/Credit
The Double-entry accounting leans on the principle that each movement is noted in debit as well as in credit and the amounts have to match.
Debit = Credit
The balance (the total difference between debit and credit) has to always be equal to zero
Debit - Credit = 0
In order to easily distinguish (very useful while working on the screen), the amounts in credit are indicated in red, preceded by the minus sign
Debit + (-Credit) = 0
|
Two transaction examples |
Debit |
Credit |
|
Debit + (- Credit) |
|
Cash income |
200 |
|
|
200 |
|
for product sales |
|
200 |
|
-200 |
|
|
|
|
|
|
|
Several cash payments |
|
170 |
|
-170 |
|
for purchase of merchandise |
100 |
|
|
100 |
|
for office supplies |
50 |
|
|
50 |
|
small expenses |
20 |
|
|
20 |
|
Total |
370 |
370 |
|
0 |
|
Balance (Debit - Credit) |
0 |
|
0 |
|
Balance Sheet and Profit/Loss Statement
The mathematics of the Double-entry accounting anticipates the use of two "accounts".
- Balance Sheet Account (Balance Sheet) keeps note of the financial state at a certain moment.
- Debit represents the Assets
- Credit represents the Liabilities (here will always means including the Equity)
- Profit/Loss Account (Profit and Loss) keeps note of the progress.
- Debit represents the Expenses
- Credit represents the Revenue
The transactions are entered in debit and in credit in the appropriate accounts of the Balance Sheet and the Profit/Loss statement.
|
|
Balance Sheet |
|
Profit/Loss Statement |
||
|
Registrazioni |
Assets |
Liabilities |
|
Expenses |
Revenue |
|
Cash income |
200 |
|
|
|
|
|
for product sales |
|
|
|
|
200 |
|
|
|
|
|
|
|
|
Several cash payments |
|
170 |
|
|
|
|
for purchase of merchandise |
|
|
|
100 |
|
|
for office supplies |
|
|
|
50 |
|
|
small expenses |
|
|
|
20 |
|
|
Total |
200 |
170 |
|
170 |
200 |
|
Balance (difference debit - credit) |
30 |
|
30 |
||
|
Equations with two columns |
|
|
Debit = Credit |
370 = 370 |
|
Assets + Expenses = Liabilities + Revenue |
200 + 170 = 170 + 200 |
|
Assets - Liabilities = Revenue - Expenses |
200 - 170 = 200 - 170 |
|
Balance = Balance |
30 = 30 |
|
|
|
The same transactions can be represented in a single column (credit in negative)
The result is, of course, the same.
|
Transactions |
Balance Sheet |
|
Profit/Loss Statement |
|
Cash income |
200 |
|
|
|
for product sales |
|
|
-200 |
|
|
|
|
|
|
Several cash payments |
-170 |
|
|
|
for purchase of merchandise |
|
|
100 |
|
for office supplies |
|
|
50 |
|
small expenses |
|
|
20 |
|
|
|
|
|
|
Balence (debit - credit) |
30 |
|
-30 |
|
Equations single column (credit in negative) |
|
|
Debit - Credit = 0 |
270 - 270 = 0 |
|
Assets + Expenses - Liabilities - Revenue = 0 |
200 + 170 - 170 - 200 = 0 |
|
Assets - Liabilities - Revenue + Expenses |
200 - 170 - 200 + 170 = 0 |
|
Balance - Balance = 0 |
30 - 30 = 0 |
Equations for the business results
The business result is the balance (Debit - Credit) of the Balance Sheet and the Profit/Loss Statement.
|
Equations double column |
|
|
Assets - Liabilities = Revenue - Expenses |
200 - 170 = 200 - 170 |
|
Balance of the Balance Sheet = Balance of Profit/Loss Statement |
30 |
|
Balance of the Balance Sheet = Assets - Liabilities |
30 |
|
Equations for the determination of the result (in two columns) |
||
|
Profit |
Assets > Liabilities |
Expenses < Revenue |
|
Balance |
Assets = Liabilities |
Expenses = Revenue |
|
Loss |
Assets < Liabilities |
Expenses > Revenue |
One has a profit when the assets are higher than the liabilities and the revenue more than the expenses.
One has a loss when the liabilities are higher than the assets and the revenue is lower than the expenses.
|
Equations single column (credit in negative) |
|
|
Assets - Liabilities - (Revenue - Expenses) = 0 |
200 - 170 - (-200 - 170) = 0 |
|
Balance of the Balance Sheet - Balance of Profit/Loss Statement = 0 |
30 - 30 = 0 |
|
Balance of the Balance Sheet |
30 |
|
Balance of Profit/Loss Statement |
-30 |
|
Equations for the determination of the result in a single column |
||
|
Profit |
Assets - Liabilities > 0 |
Expenses - Revenue < 0 |
|
Balance |
Assets - Liabilities = 0 |
Expenses - Revenue = 0 |
|
Loss |
Assets - Liabilities <0 |
Expenses - Revenue > 0 |
One has a profit, when the balance of the Balance Sheet is positive and the balance of the Profit/Loss Statement negative.
One has a loss, when the balance of the Balance Sheet is negative and the balance of the Profit/Loss Statement positive.
Use of noting in a single column
Noting the data in double columns is ideal for transactions in paper books. The amounts in debit and in credit are inscribed in separate columns. The totals are being calculated at the end of the page and the totals and calculation of the results are being done at the end of the period.
Computerized systems offer the possibility to keep the balances of the accounts constantly updated. For the calculations, the software therefore normally use noting in a single column, with the amounts in debit in positive and the amounts in credit in negative. In order to use noting in double columns, the software would have to register the credit amounts in the Balance sheet in negative, and, in the Profit/loss Statement, register the credit amounts in positive and the debit amounts in negative.
For the programmer's point of view, this solution is more complicated, and thus the majority of the software use internally the mathematics of the single column and noting in double columns only for the presentation.
Banana Accounting instead systematically uses the minus sign to indicate the credit amounts. Initially, the user has to get used to this system, but it has the advantage of being linear and allows for a better understanding of the mathematics on which the Double-entry accounting is based, especially when more complicated operations are being required like write-off's, profit at the end of the year or VAT due/recoverable.
For the presentation of the Balance Sheet and the Profit/loss Statement, the logic of the double columns is however more adapted.
Thus the print-outs of the Balance Sheet and the Profit/Loss Statement that are used for the presentation of the results are edited with Assets, Liabilities, Expenses and Revenue always in positive. When the Profit/Loss Statement is presented in a scalar format (Revenue minus Expenses), the Revenue is indicated in positive and the Expenses in negative.
Debit and Credit
Double-Entry Accounting in Practice
Main rules to learn how to manage double-entry accounting Double-entry accounting is based on four main account categories:
| ASSETS | The accounts that represent the positive elements of the estate |
| LIABILITIES | The accounts that represent the negative elements of the estate |
| COSTS | The accounts that represent the costs (but not those related to the purchase of estate goods) |
| REVENUES | The accounts that represent the earnings (not those obtained by the sale of estate goods) |
- The account is an entity that groups the amounts that belong to the same transaction category.
- Every account must be registered as debit or credit depending on the type of accounting transaction.
- Double-entry accounting uses debit and credit instead of income and expenses.
The General Rule
|
ASSETS |
→ | DEBIT |
|
LIABILITIES |
→ | CREDIT |
|
COSTS |
→ | DEBIT |
|
REVENUES |
→ | CREDIT |
- The assets, liabilities, costs and revenues are subject to continuous variations: increases and decreases.
The increasing variations
|
INCREASE IN ASSETS |
→ |
DEBIT |
|
INCREASE IN LIABILITIES |
→ |
CREDIT |
|
INCREASE IN COSTS |
→ |
DEBIT |
|
INCREASE IN REVENUES |
→ |
CREDIT |
The decreasing variations
|
DECREASE IN ASSETS |
→ |
CREDIT |
|
DECREASE IN LIABILITIES |
→ |
DEBIT |
|
DECREASE IN COSTS |
→ |
CREDIT |
|
DECREASE IN REVENUES |
→ |
DEBIT |
Instruments in Double-entry Accounting
Double-entry accounting uses the following principal instruments: the Chart of Accounts, Journal, Balance Sheet and Profit and Loss Statement.
| Chart /Accounts |
This is the list of all the accounts that group the different transactions categories together (ex. cash book, bank, purchases, sales, etc.).
-
To use Banana Accounting, one must simply take an already predefined accounting plan, adapt it to the proper requirements and insert the transactions. The rest will be executed by the program.
| Journal |
This is the list of all the operations that influence the activity daily (withdrawals, deposits, purchases, sales, salaries, rent, etc.) It corresponds to that which the larger part of the small businesses already have even if it’s only on paper or Excel, to then give to the accountant.
| Balance Sheet |
This is a summary outline of the assets and liabilities. The difference between the assets and liabilities represents the net capital amount of the firm.
| Profit and Loss Statement |
This is a summary outline of all the costs and revenues. The balance represents the operational result (profit or loss).
Starting Accounting
Procedure to start accounting with Banana Accounting
|
1 |
Take an existing accounting model with a predefined chart of accounts. |
|
2 |
Adapt the chart of accounts to the proper requirements. |
|
3 |
Insert the transactions in the journal. |
Starting a new accounting file
An even easier start with the new templates
In the new Banana Accounting Plus version, the start of a new accounting is made easier because many predefined templates for every need are included directly in the program. If you don't have specific accounting knowledge, you can use the new Income/Expense templates or the Cash Manager with descriptive accounts. The work will be intuitive, fast and professional.
We advise you to immediately switch to Banana Accounting Plus and take advantage of the many new features.
In order to create a new accounting file, there are different modes.
Creating an accounting file, starting from a template included in the program
Here we explain how to start an accounting file, starting from an existing template included in the program.
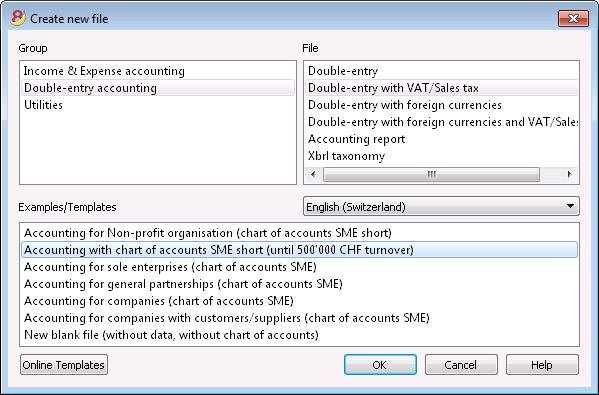
- File menu, New command
- From the Group section, select Double-entry accounting
- In the File section, select Double-entry accounting or Double-entry accounting with VAT/Sales tax.
- In the Examples/Templates section, select the language/nation and choose one of the templates that is closest to your own needs.
- By clicking on the Online Templates button you can access our website where we published all templates available for free.
Setting up the file properties (basic data)
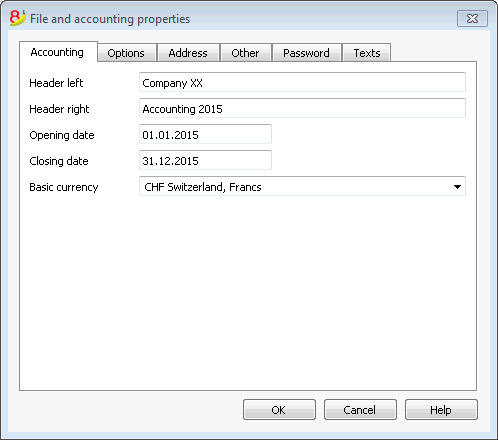
- From the File menu, File properties command, indicate the company name that will appear in the headers of the printouts and on the other data.
- Select the basic currency, with which the accounting will be kept.
General use of the program
Banana Accounting inspires itself from Excel. The user directions and the commands are kept as similar as possible to the ones of Microsoft Office.
For more information on the general use of the program, we refer to the explanations on our page Program interface.
The accounting is being contained in tables; all of them have the same way of operating.
Saving the file
- From the File menu choose the Save as... command, preferably indicating the name of the company and the current year (for example, "company_2017")
- Choose the folder where the file should be saved (for example, Documents -> Accounting)
- The program will add the "ac2" extension.
Customizing the Chart of accounts
In the Accounts table, customize the Chart of accounts and adapt it to your own needs:
- Add new accounts and /or delete existing ones (see Adding new rows)
- Modify the account numbers, the descriptions (for example, enter the name of your own Bank account), enter other groups, etc.
- To create subgroups, please consult our Groups page.
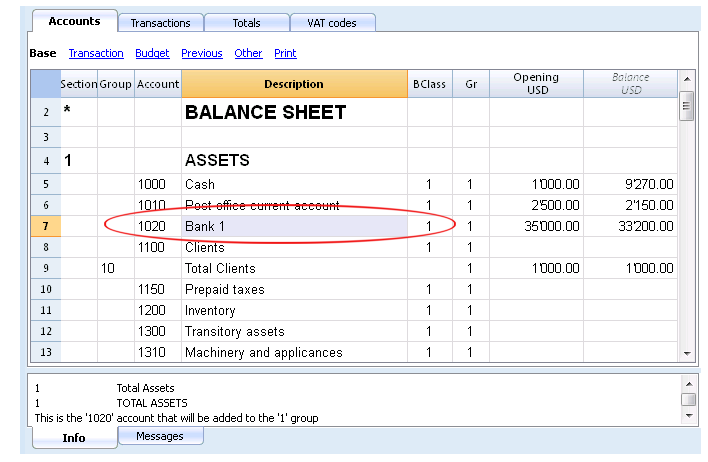
In the Chart of accounts, you can also define Cost centers or Segments, used to attribute the amounts in a more detailed or specific way.
The Transactions
The Transactions have to be entered into the Transactions table; together they compose the Journal.
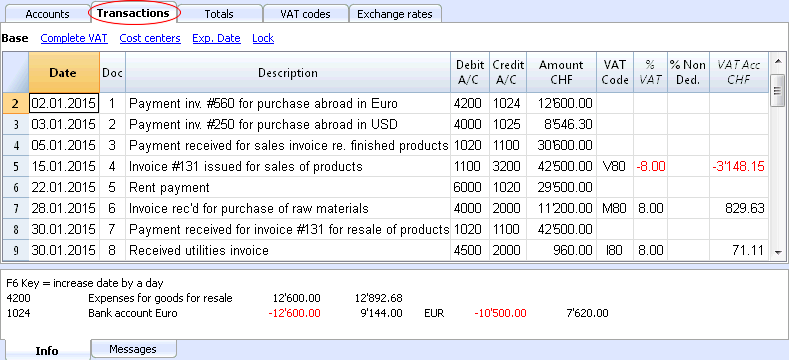
In the specific columns:
- Enter the Date
- Enter the Document number, manually assigned to the paper document. This makes it possible to easily locate the documents once the accounting transaction has been entered.
- Enter the Description
- Into the Debit account column, enter the destination account
- Into the Credit account column, enter the account of origin.
- Enter the Amount. In the accounting with VAT, enter the gross amount, VAT included. The program will separate the VAT, splitting the net cost or net income.
Speeding up the recording of the transactions
In order to accelarate the recording of the transactions, you can use
- the Smart fill function that allows the automatic autocomplete of data that have already been entered at an earlier date.
- the Recurring transactions function, used to memorize recurring transactions into a separate table.
- importing your bank or post office statement from the e-banking.
Transactions with VAT
In order to enter transactions with VAT please proceed as follows:
- from the File menu, choose New command and choose Double-entry accounting with VAT/Sales taxes
- Choose one of the existing templates for your nation with double-entry accounting with VAT codes and VAT Codes table.
In order to enter transactions with VAT, please visit the Transactions page.
Transactions on multiple rows
Transactions on multiple rows or Composed transactions are transactions involving more than two accounts and credits/debits on multiple accounts (for example when you pay different invoices from the bank account). In this case you need to enter the transaction on multiple rows:
- in the first row enter the total amount and the account debited or credited
- when all the individual debit and credit rows are entered there shouldn't be any difference
For more details, consult the page Composed transactions.
Checking customer and supplier invoices
Banana allows you to keep an eye on the invoices to be paid and the receivable, issued invoices. Please consult:
The Account card
The Account card automatically displays all the transactions that have been recorded on the same account (for example, cash, bank, clients, etc).
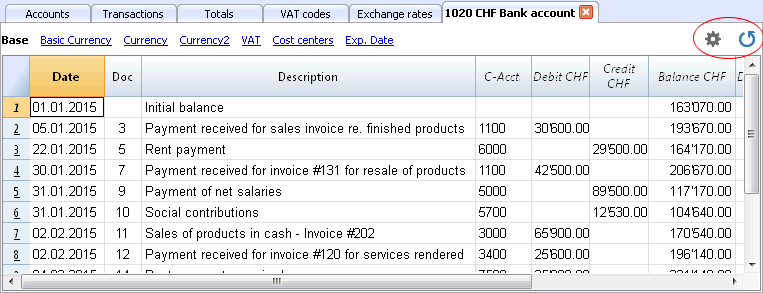
To display an account card, just position yourself with the mouse on the account number and click on the small blue symbol that appears.
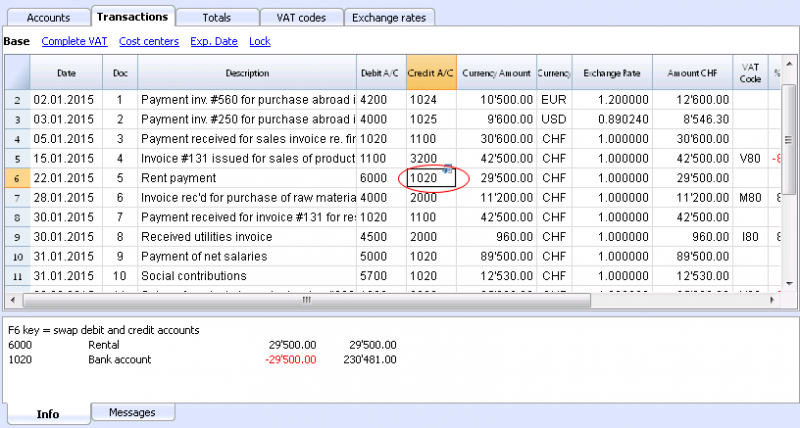
Account card by period
To display the account card with the balances referring to a specific period, click on the Account1 menu, Account card command, and in the Period section, activate Period Selected, entering the Start and the End date of the period.
For more details, consult the Period page.
Printing the Account card
In order to print one account card, just display the card from the Accounts or the Transactions table and launch the print from on the File menu.
To print several or all account cards, click on the Account1 menu, Account card command, and select the account cards that need to be printed. By means of the Filter, all the account cards, or only a part of all of them (for example, only accounts, cost centers, segments), that need to be printed can be automatically selected.
For more details, consult the Account Card page.
The Balance Sheet and Profit and Loss Statement
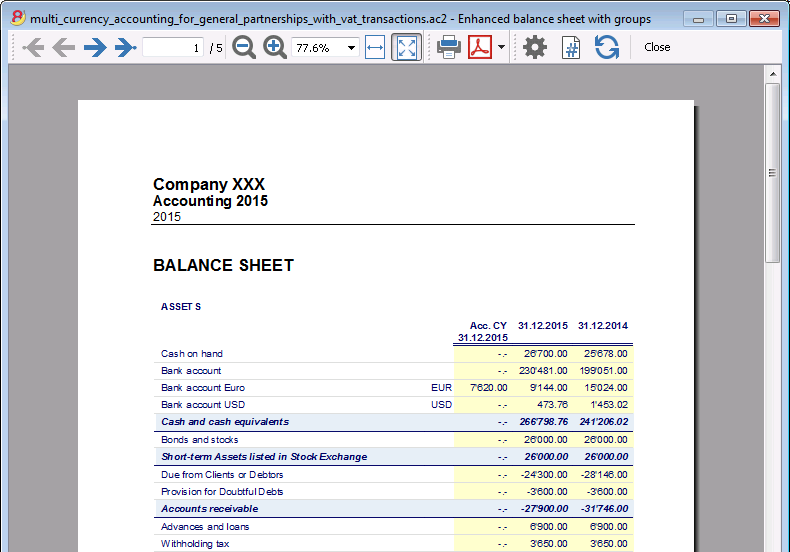
The Balance sheet shows the balances of all the estate accounts, Assets & Liabilities. The difference between the Assets and the Liabilities determines the Share capital.
The Profit & Loss statement shows all the Expense & Revenue accounts. The difference between the Expenses & Revenue determines the Profit or Loss of the Accounting year.
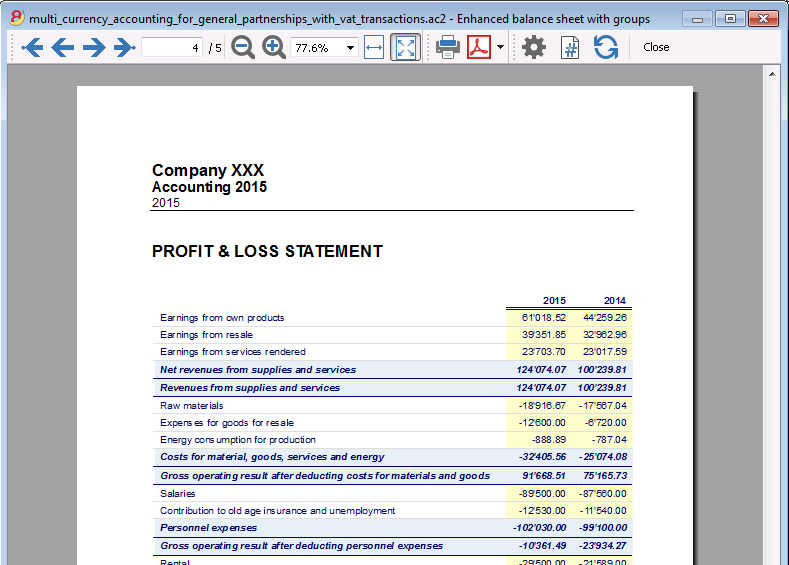
The display and the printing of the Balance Sheet is being executed from the Account1 menu, Enhanced Balance Sheet and Enhanced Balance Sheet with groups commands.
- The Enhanced Balance Sheet command simply lists all the accounts without distinguishing Groups and Subgroups
- The Enhanced Balance Sheet with groups command lists all the accounts while subdividing Groups and Subgroups; besides, it presents numerous features to customize the presentation, functions that are not provided in the Enhanced Balance Sheet.
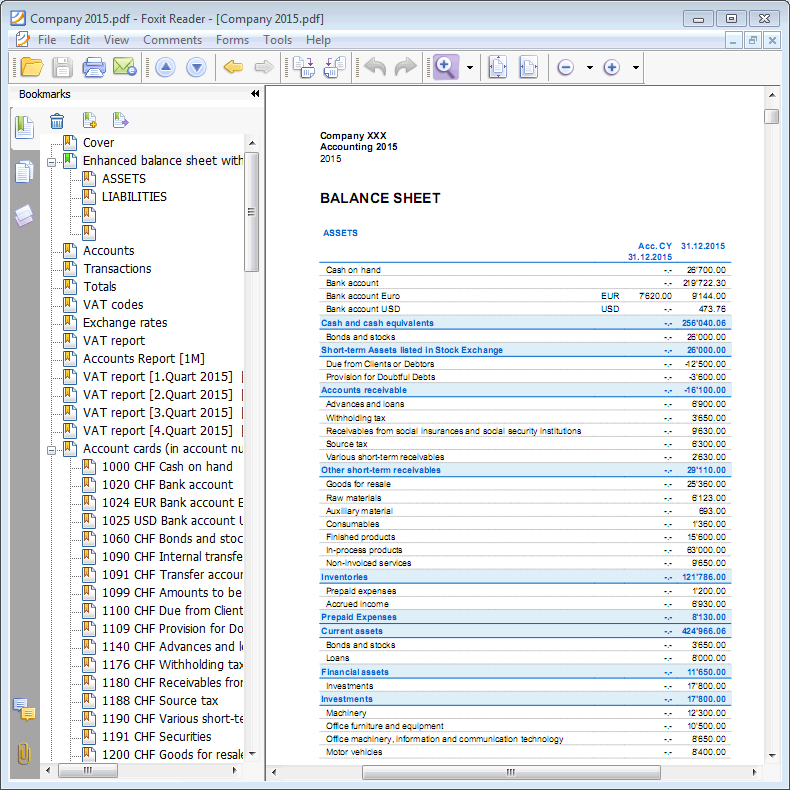
Data archiving in PDF format
At the end of the year, when the entire accounting has been completed, corrected and audited, all the accounting data can be archived with the Create PDF dossier command of the File menu.
The Budget
- Accounts table, Budget column. For each account, the annual budget amount is being indicated.
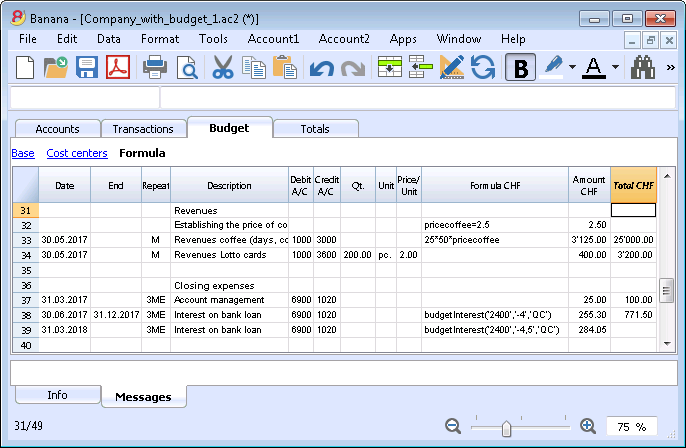
In this case, when you set up the Budget from the Account1 menu, Enhanced Balance Sheet with groups command, the Budget column displays the amounts that refer to the entire year. - In the Budget table, that can be activated through the Tools menu, Add new functionalities command.
In this table, you can enter all the budgeted costs and revenue by means of entering transactions. If you activate this table, the column of the accounts table will be automatically deactivated.In this case you can set up a detailed budget, taking into account the possible variations over the year and in different periods of the year.
For more details, consult the page Budget.
Chart of accounts
Financial situation under control
You need to setup you chart of accounts in the Accounts table: setup the accounts and the groups where the accounts must be totalized. With this operation you create the accouts that will be used when entering the transactions. The chart of accounts structure is the same that will show in all Balanche sheet and Profit & Loss statement presentations.
In the Accounts table there are also the columns of the initial balances, movements and current balance, which are automatically updated by the program.
The chats of accounts therefore provides an immediate and complete view of your financial situation.
- Liquidity accounts
- Balance sheet
- Profit & Loss statement
- Result of the current year
- Clients and Suppliers register
- Cost and Profit Centers
Different kinds of rows and sections
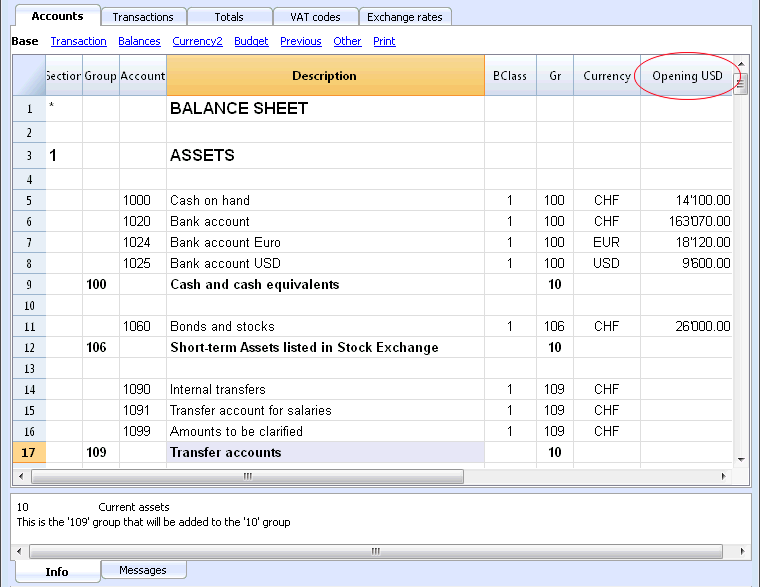
The Accounts table (charts of accounts) is both the setup tool and the viewing tool for the economic and financial situation.
In the chart of accounts (Accounts table) all data necerrary to group the mouvements are entered:
- Accounts
They indicate on what account (debit ore credit) the transactions must be registered.
Each account has a code or number (account number), a description, a class and a group to which it belongs; they also have an opening balance, the current balance, the budget, etc... - Costs and Profits centers
They are special accounts whose number is preceded by a full stop ".", a comma "," or by a semi-colon ";". Their purpose is to be able to assign some amounts to special accounts other than the basic accounting accounts. - Segments
They are a sort of sub-accounts who's number is preceded by a ":". Their purpose is to be able to assign some transactions to subcategories of the accounting plan. - Groups
Their purpose is to create rows where the program adds up the amounts of other rows. - Sections
They indicate the accounting plan divisions for the Balance Sheet and Profit and Loss Statement printouts, ...
The columns of the double-entry accounting charts of accounts
- Section
Codes are being entered that allow the user to only print determined parts of the Chart of accounts, when printing the Enhanced Balance sheet by groups. - Group
Contains the code that defines that this is a group row. The group code is then used in the GR column to indicate the totalization of an account or group.
- Account
The account number, cost center or segment is being entered. - Description
A text to indicate the name of the account, group, or section. - Disable (only visible in the Other view)
By entering 1, the account does not appear in the autocomplete list, but can be used in the Transactions table;
By entering 2, the account is disabled and can not be used. - BClass
It indicates whether the account is 1 = Assets, 2 = Liabilities, 3 = Expenses, 4 = Revenue, see the Accounts
- Gr (Totalize in)
It indicates a group so that the program can totalize this line in the group. - Gr1 and Gr2
Additional grouping codes to use with external accounting report files.
- Opening balance
Insert the account balance at the beginning of the year.The amounts in credit must be entered preceded by a minus sign. The total of the debit amounts (positive) and those in credit (negative) must balance and result in zero. If the opening balances do not balance a difference is shown in the information window.If you have added or pasted accounts and the difference is not correct, proceed with a Recheck of the accounting (Shift + F9)
- Movement Debit and Movement Credit (Protected columns)
The total of the debit and credit movements included in the Transactions table.
- Balance (Protected column)
The balance of the account includes the opening balance and the movements in debit and credit.The balance in debit is positive, while a credit balance is negative (minus sign). - Budget
The budget amount for the current year is being entered.The budget amount for the Expenses (debit) must be inserted in positive, the Revenue in negative (credit). -
Difference Budget (Protected column)
The difference between Balance and Budget amount. - Previous
The balance of the account at the end of the preceding year.
With the command "Create new year" or "Update opening balances", the values in the Balance column of the file of the preceding year are being carried forward.
When a new accounting is being created and the user wants to obtain printouts with the amounts of the preceding year, the values of that year have to be entered manually. - Prev. yr. Difference (Protected column)
The difference between the Balance and the amount of last year. - VATNumber
The VAT number in case this account is linked to a client or a supplier. - VATCode
The VAT code that needs to be applied automatically, when this account is being entered in the debit A/c or credit A/c column of the Transactions. - Adresses columns
It is possible to have the program add addresses columns in order to manage customers or suppliers data.
Adding or moving columns
- When an Amount column is being added in the Chart of accounts, the program composes the total of the amounts according to the selected grouping scheme
-
Added columns of the Number type, on the contrary, are not being totaled.
- With the Columns setup command, the columns can be made visible, the sequences can be altered and it is also possible to add other columns.
- With the Page setup command one can also define the layout of the print (portrait or landscape) and the zoom.
Accounts list ordered by description or other criteria
In you need to order your accounts in a different way, use the Extract and sort rows command from the Data menu.
Views
- Base Displayed are the principal columns, the grouping columns and the balances
- Transaction Displayed are the columns with the Debit and Credit transactions.
- Budget Displayed are the Budget column and the Difference Budget column.
- Previous Displayed are the Previous column and the Difference Prior columns regarding the previous year
- Other The Disable column, the VAT number and the Fiscal number column are being displayed.
- Print Just the Account column, the Description and the Balance is being displayed.
The views can be customized and others can be added with the command Views setup.
Trial Balance sheet
At any time, positioning yourself in the Accounts table and using the Print or Print preview commands (from the File menu), you can view and print the account plan or part of it.
Also from the Accounts table, if you select Movement view, you can view and print your trial balance sheet.
Advanced printouts
- Accounting report
It is possible to select just the accounts with transactions, to obtain temporary groupings or accounts grouped according to the BClass or an external grouping scheme. - Enhanced Balance sheet
Prints all the accounts of the accounting divided by Assets, Liabilities, Expenses and Revenue - Enhanced Balance sheet by groups
Allows the user to obtain customized printouts with groups - Specific advanced printouts are available using the BananaApps
Accounts
Bookkeeping accounts
In order to create an account, go to the Accounts table and enter a number or a code in the Account column.
This same number is then used in the Transactions table as Debit or Credit account.
- The account number can be composed by numbers, letter and separations characters.
- It is not possible to have more than one account with the same number.
- Each account must have a BClass and must belong to a group.
The BClasse
Each account must belong to one of the following BClasses:
- 1 for Assets
- 2 for Liabilities
- 3 for Expenses
- 4 for Income
The BClasse number must be as indicated, regardless the account or group code. It is also possible to create Off Balance Sheet accounts (for example for warranty down payments, e conditional committments), that must have the following BClass:
- 5 for Off Balance Sheet: Assets
- 6 for Off Balance Sheet: Liabilities
Opening balances
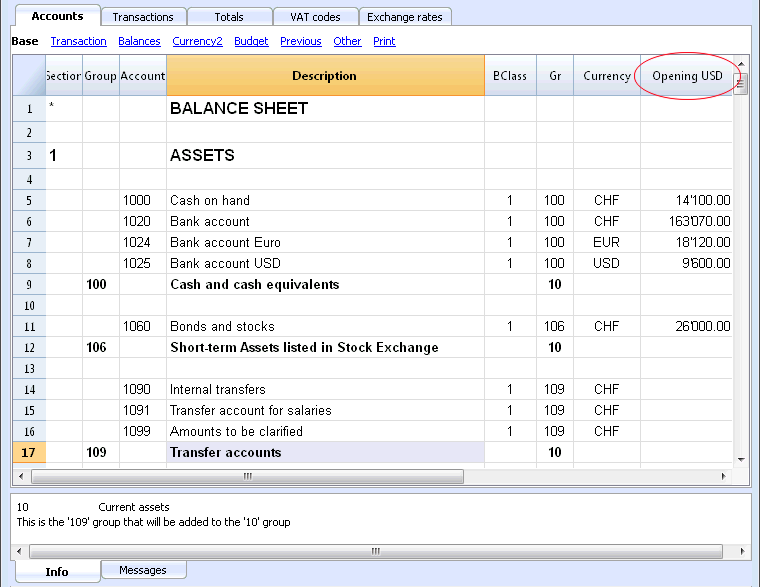
The opening balance of each account is entered in the Opening + currency symbol column.
- The Assets balances are shown normally
- The Liabilities balances are entered with the minus sign (negative)
- Usually only the Assets and Liabilities opening balances are entered.
In order to automatically transfer the opening balances for the following year, please visit the Create New Year lesson.
Opening balances differences
In a correct accounting file, the total of the Assets opening balance should be equal to the total of the Liabilities opening balance, so no differences are shown.
If the totals do not match, the program will show a warning message telling you that there is a opening balances difference (Information window).
If you have changed some account numbers and you think the error message is not correct, please Recheck the accounting.
When using Banana Accounting for the first time, the opening balances must be entered manually.
Accounts with addresses
It is possible to add a few columns in the chart of accounts, to include the addresses management:
Tools menu -> Add new functionalities command
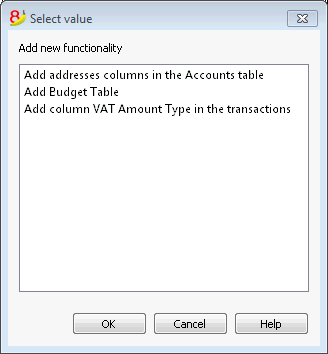
This command will add in the Chart of accounts the following things:
- several columns (name, last name, company, town, ...) where you can enter the client / supplier / member address and data
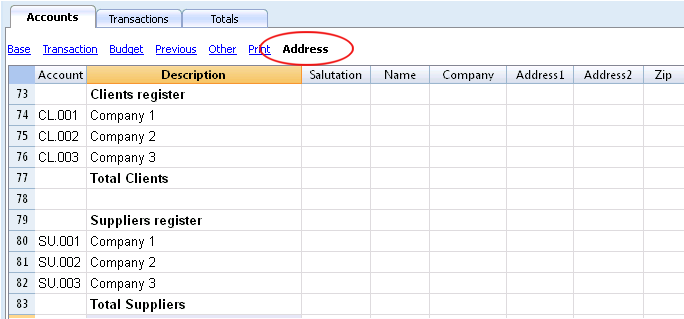
- the Address view where you can see the added columns (in order to change the view or the views organization please consult the Tables setup page)
Clients/supplier register
When in the accounting plan you need to manage a clients/supplier register, meaning a specific account list for all clients, you need to have complete data with address, phone number, email, VAT number, etc. in this case adding the columns of the Address view is very useful.
Groups
The grouping and totaling system
The Banana grouping and totaling system is based on the following columns:
- Group (TOTAL row)
When, in a row, a group identifier is being entered, the row becomes a TOTAL row.
In this row the amounts of the Gr column, that contain the same identifier, are being totaled.
When a group is present, there cannot be an account. . - Gr (Adds this row into the TOTAL row)
The number here must be one of the numbers defined in the Group column.
With this system, an account can be totaled in a group row, the group in another group and so on... in order to create different totaling levels.
This totaling system is very powerful and flexible, but it takes some "getting used" to it, in order to be able use it well.
Examples of the main groupes in the Double-entry accounting
Every Chart of accounts uses its own totaling system. Hereunder the main groupes of the Double-entry accounting are being explained.
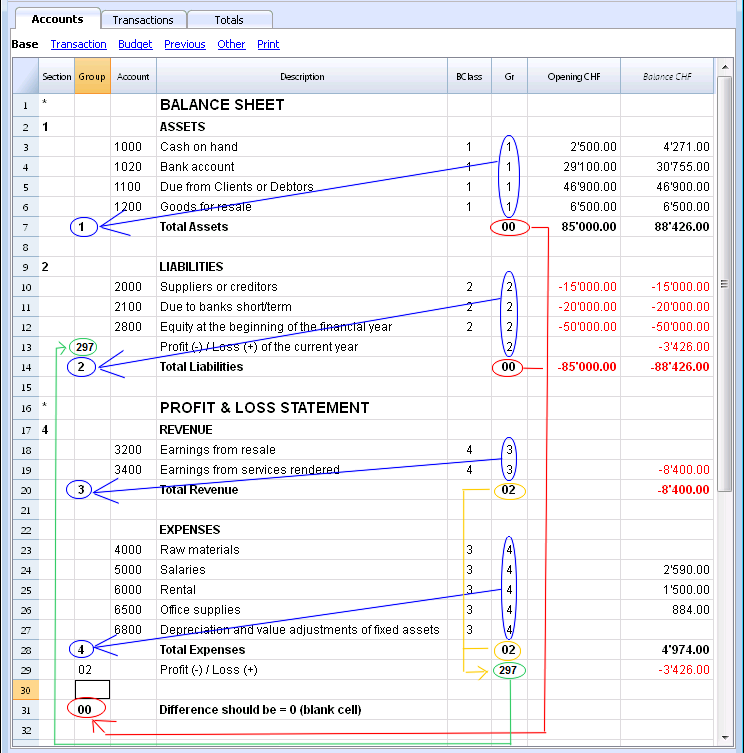
In the Double-entry accounting, the total of the Debit balances (positive) together with the Credit balances (negative) have to result in 0 (zero).
- The 00 is the row where all the amounts are being added together.
It is the "Summa summarum" of all the Debit & Credit balances.
In case the Balances columns do not amount to zero, it means there is a Debit/Credit difference and thus most likely a mistake. In these cases it is useful to proceed with a checking of the accounting (see next point).
In the Debit and Credit columns of the Transactions view (Accounts table), there are only positive amounts, so also in the row of the 00 group, there will be the total of the transctions not equal to zero.
The calculation sequence to arrive at 00 is therefore as follows:
- The 1000 account -> group 1 (Total Assets)-> Group 00
- The 2000 account -> group 2 (Total Liabilities) -> Group 00
- The 3000 account -> group 3 (Total Revenue) -> Group 02 (result Profit & Loss Statement) -> Group 297 (Profit/Loss of the current year in the Balance Sheet) -> Group 2 (Total Liabilities) -> Group 00.
- The 4000 account -> group 4 (Total Expenses) -> Group 02 (result Profit & Loss Statement) -> Group 297 (Profit/Loss of the current year in the Balance Sheet) -> Group 2 (Total Liabilities) -> Group 00.
The result of profit & loss statement is added in equity
As you can see in the example, the Group 02 (Profit /Loss from Profit & Loss statement) is totalized in the 297 liabilities group (current year result).
With this group organization, we have several advantages:
- In current year operating result is displayed in the balance sheet
- The Total Liabilities will match the Total Assets (provided that there is no accounting error).
Adding or deleting subgroups
Adding a totaling level
With this system it is easy to add totaling levels.
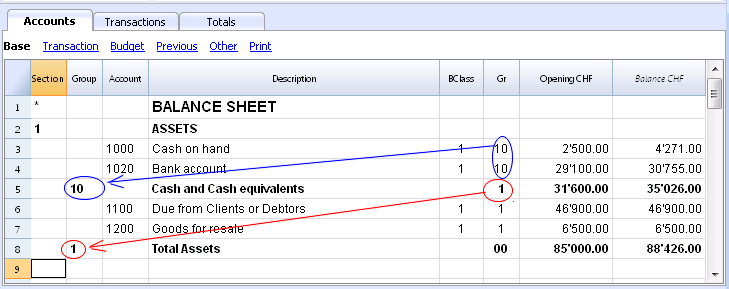
When we want to create a subgroup for the Cash & Cash equivalents accounts:
- Enter an empty row after the bank account
- Enter the value 10 into the Group column
- Enter the value 1 into the Gr column
- Indicate the Gr 10 in the accounts 1000 et 1020
- The sequence for the calculation becomes:
The 1000 account -> Group 10 (Cash & Cash equivalents) -> Group 1 (Total Assets) -> Group 00.
In case you want to insert another subgroup, "Current Assets", proceed in the same way.
- Add an empty row above the row of the Total Assets.
- In the new row:
- Indicate the number 11 in the Group column
- Indicate the number 1 in the Gr column
- In the Clients and Goods for resale (inventory) rows, indicate the Gr 11.
Deleting subgroups
In case the Chart of accounts shows subgroups that are no longer needed or not wanted, these can be deleted. Just delete the row of the subgroup and modify the Gr of every account that was part of that subgroup.
Checking of the structure
Once the Chart of accounts has been set up, execute the Check accounting command of the Account1 menu. In case there are errors, the program issues a warning.
Infinite loop error
This warning appears when a Group is being totaled in a Group of a lower level, reason for which an infinite error loop is being created.
There would be an infinite loop when, in the preceding example, the Assets Group (1) would be totaled in Group 10.
The program, after having calculated the Group 1, would total the amount in Group 10, which in turn would total the amount in Group 1, and then again in 10 without ending.
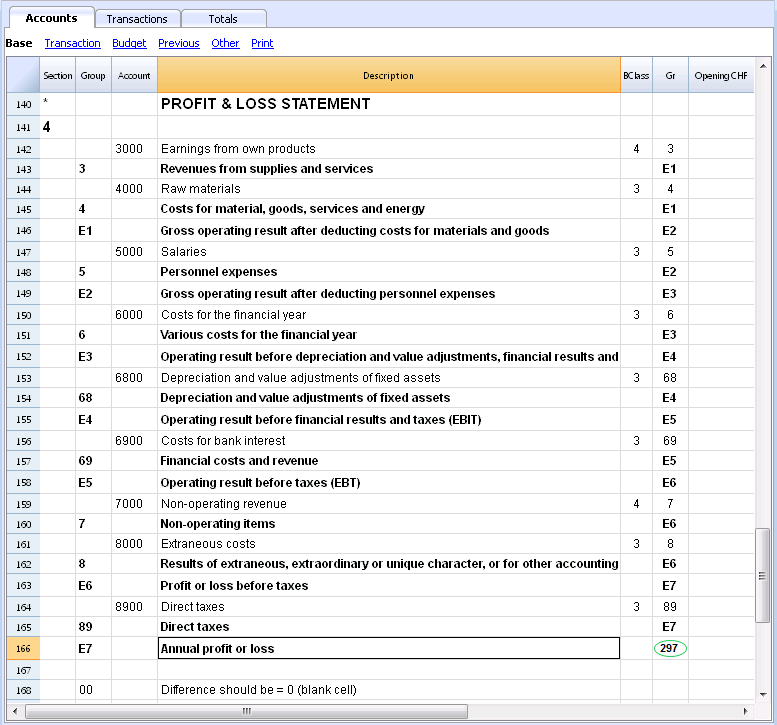
Profit & Loss Statement with Gross Profit
It is also possible to use a Profit & Loss Statement that starts with the total Business result and that subtracts the costs.
Hereunder the example of the Swiss PME Chart of Accounts is shown.
Extended use of the totaling system
The totaling system is very flexible:
- In one Group, it is possible to add Groups as well as Accounts
This can be seen in the earlier shown example where the Group Cash & cash equivalents (10) and the accounts (1100 and 1300) are being totaled in the Assets - You can use whatever kind of numbering
- You can create up to a hundred totaling levels
- The Total row can be after the rows
- The Total row can be before the rows
- The Total row can be completely elsewhere, in a separate position
This is being used to create registers (for example, a client register)
- The accounts and the Groups can be totaled in one single other Group.
It is not possible to total one and the same account at the same time in two groups. - This system is also being used to total the Cost centers and the Segments
Pay attention though to not use different groups for normal accounts and for cost centers, because the resulting amounts will not be correct.
Totaling of the Amount columns
The calculation procedure totals the amount columns
- The amount columns defined by the system are being totaled.
- The amount columns added by the user are being totaled.
The sequence of the calculation
The programme calculates the totals in the following manner:
- Sets the values of the Amount columns of the Groups rows on zero
- Totals the amounts of the Account rows into the Group rows (first calculation level)
- Adds the balance of the Group rows into the Group(s) of a superior level
Repeats the operation until all the levels have been calculated.
Related Documents
Sections
In order to create automatically an Enhanced Balance Sheet with groups, the chart of accounts needs to be configured with special codes that are to be entered in the Section column:
| * | Title 1 | the asterisk separates the sections and indicates the main headers |
| ** | Title 2 | to be entered for the secondary headers |
| 1 | Assets | to be entered in the row of the Assets title |
| 2 | Liabilities | to be entered in the row of the Liabilities title |
| 3 | Expenses | to be entered in the row of the Expenses title |
| 4 | Revenue | to be entered in the row of the Revenue title |
| 01 | Client's Register | to be entered in the row of the Client's Register title |
| 02 | Supplier's Register | to be entered in the row of the Supplier's Register title |
| 03 | Cost Centers | to be entered in the row of the Cost Centers title |
| 04 | Profit Centers | to be entered in the row of the Profit Centers title |
| # | Notes | to be entered in the row of the Notes title |
| #X | Hidden data |
to be entered in the row from whereon the data have to be hidden |
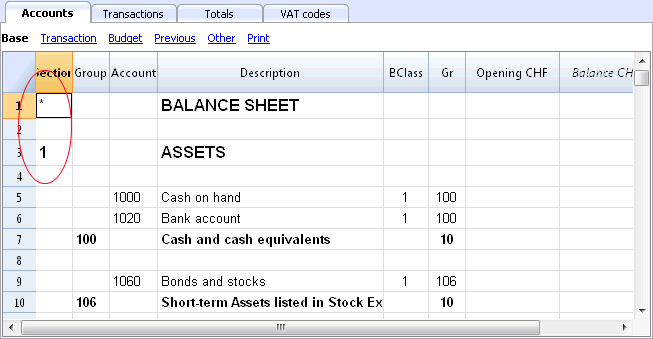
Sections in the Assets
- Enter a * on the same row as the Balance Sheet title
- Enter 1 on the same row as the Assets title
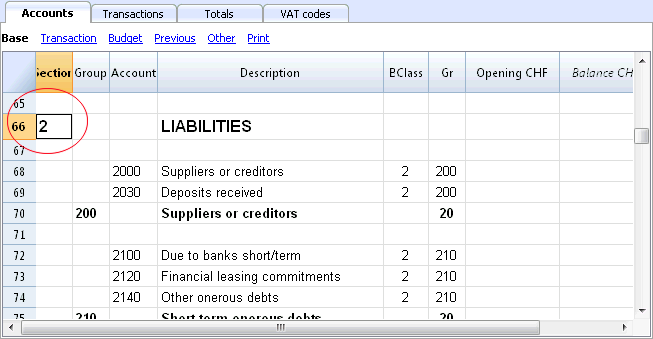
Sections in the Liabilities
- Enter 2 on the same row as the Liabilities title
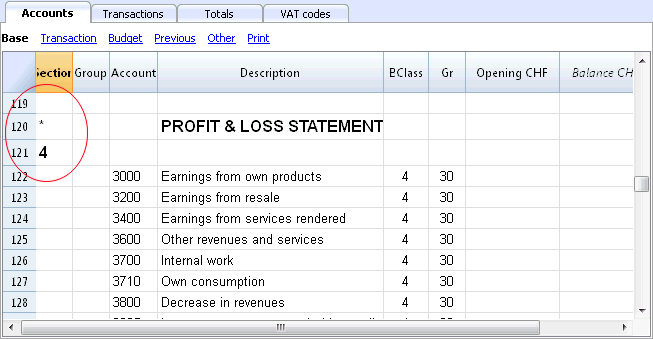
Sections in the Profit & Loss Statement
- Enter a * on the same row as the Profit/Loss Statement title
- Enter 4 on the empty row below the Profit/Loss Statement title
Note: when there is a clear distintion between Revenue and Expenses in the Chart of accounts, you need to:
- Enter 3 on the same row as the Expenses title
- Enter 4 on the same row as the Revenue (Income) title .
Sections in the clients/suppliers register
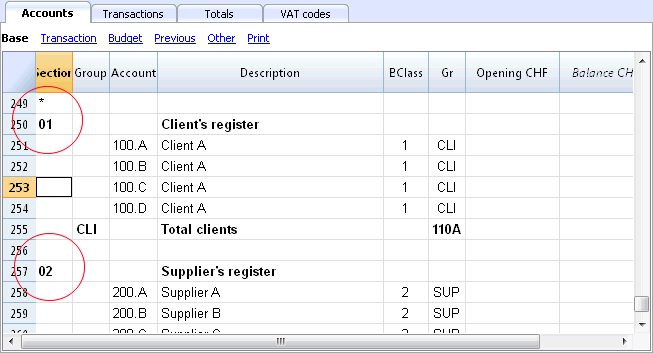
- Enter * in the same row as the Clients/Suppliers register title or on a empty row (as in the following example)
- Enter 01 on the same row as the Clients register title
- Enter 02 on the same row as the Suppliers register title
The amounts will be shown in the same way as for the Assets and the Liabilities.
This encoding is also valid when the clients and suppliers are configured as cost centers.
In case there are cost or profit centers configured, enter the following elements
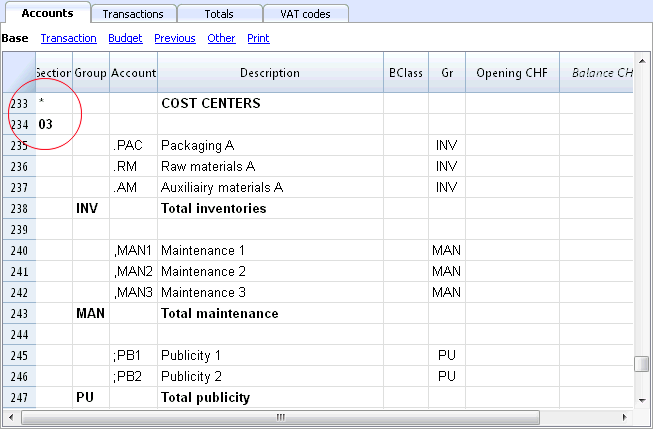
- An * on the row of the Costs and Profit Centers title, or on a empty row
- 03 on the same row as the Cost centers title or on an empty row preceeding the Cost Centers
- 04 on the same row as the Profit centers title or on an empty row preceeding the Profit Centers
The Cost Centers amounts will be shown as positive (in black) like the expenses; the Profit Centers amounts will be shown in negative (in red) like the revenue;
For more information please vist the Sections logic page
Related document: Enhanced Balance Sheet with groups
The Sections logic
The sections different encoding entered in the Section column determines how the printout will come out.
Each section is printed as a separate table.
The directories
- * Title 1 creates a level 1 directory.
It can contain level 2 sections or directories.
It is useful to group sections that need to be printed together, such as the Balance sheet, which contains Assets and Liabilities. - ** Title 2 creates a level 2 directory.
The Base sections
The section number or code determines:
- how the amounts are printed; the amounts can be visualized just like in the Balance sheet or inverted.
If the Credit amounts (in negative) are inverted, they will be visualized in positive, and the positive amounts will be visualized in negative. - which amount columns will be used; the Balance column or the Period Movement column are used.
The Balance column indicates the account balance at a specific date (balance at Jun 30th).
The Total Period Movement column indicates the movement amount on the indicated period.
It is used for the Profit and Loss Statement and indicates the costs or the revenues for a certain period.
Here is the explanation of the different sections
- 1 Assets (amounts as in the accounting plan, balance column)
- 2 Liabilities (inverted amounts, balance column)
- 3 Costs (amounts as in the accounting plan, total movement column)
- 4 Revenues (inverted amounts, total movement column)
This section can be also used alone and it can include both costs and revenues (in case of a Profit & Loss Statement that starts with the total Business result and that subtracts the costs). In this case revenues would be displayed in positive and costs in negative.
These sections must be unique. Therefore there can only be one 1 Assets, or one 2 Liabilities section. For other sections, like clients/suppliers register or cost center similar sections can be used.
Derivatives Sections
Those are Sections that are similar to the Base Sections
- 01 Similar to Assets (amounts as in the accounting plan, balance column)
It is used for the clients register. - 02 Similar to Liabilities (inverted amounts, balance column)
It is used for the suppliers register. - 03 Similar to Costs (amounts as in the accounting plan, total movement column)
It is used for Cost Centers. - 04 Similar to Revenues (inverted amounts, total movement column)
It is used for Profit Centers.
Other Sections
There are other kinds of sections
- # Indicates a Notes Section (it prints only the Description column)
It is used for the Balance sheet attachments - #X Hidden Section. This section is not included in the sections selection and it is not printed.
It is used to indicate parts not to be printed.
Column width in printout
The columns width is automatically set by the program.
Sections 1, 2, 01, 02 have the same column width
Sections 3, 4, 03, 04 have the same column width.
Segments
Introduction
Segments are being used to have a more detailed classification of the costs, also to obtain calculations of components or departments of the company. By using the segments you can obtain a Profit & Loss Statement per unit, department or branch, without having to create specific accounts for each unit.
For example a museum can use the segments in order to know the income, the personnel expenses or the setting up expenses for each exhibit.
Segments are being used when a systematic attribution is necessary, that follows the transaction in debit or credit.
Cost centers, on the contrary, are normally being used for additional cataloging, less structured and when the account sign is not necessarily being followed.
Cost centers and segements can be used at the same time.
Characteristics of the segments
- Segments are accounts preceded by a colon ":".
- Segments codes can consist of numbers or letters.
- There may be up to 10 levels of segments.
- The number of colons preceding the symbol for the segment indicates the number of level.
- :LU segment of level 1
- ::P1 segment of level 2
- :::10 segment of level 3
- For each level there may be an illimited number of segments.
- The different levels of the segment are independent of each other.
- The segments do not have BClasses and do not have a currency symbol
- The calculations for segments are done in basic currency.
- In the transactions, the segment follows the debit and credit account.
It is not possible to record on a segment without having an account. - In the transactions, one can use a "-" as a separator instead of a ":" if on the File properties (Basic data) of the File menu the option Use the minus sign (-) as segments separator has been activated.
- Account cards of the transactions on single segments can be obtained.
Setting up segments
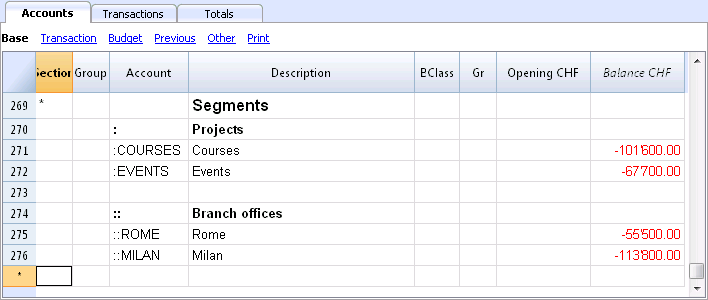
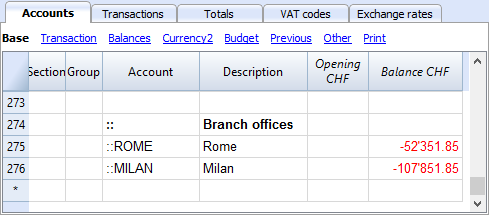
The segments have to be configured in the Accounts table, Account column, at the end of the chart of accounts.
- Insert an asterisk in the Section column in order to define the section relative to the segments
- In the Description column enter the Segments title
- Enter the description of the first-level segments, and in the Account column, insert ":"
- List the segments of the first level, entering an identification code for each one of them in the Account column, preceded by ":"
- Proceed by entering the segments of the second level (and, if necessary, those of the third), in the same way as those of the first level, with the only difference that the segment codes need to be preceded by "::" or by ":::", depending on their level.
Segment balance
The segment is a subdivision of what has been entered on an account. The segment amount is thus always relative to an account, and in order to have the segment total, you need to use an Accounting report (from the Account1 menu), with a subdivision by segment (Subdivision tab).
In the chart of accounts the segment balance is indicated. This balance will be zero if the segment is used in both Debit and Credit accounts, since the amounts compensate themselves). The segment balance will be visible only when using it with the Credit or the Debit account, associated with the Profit and Loss statement account.
Transactions
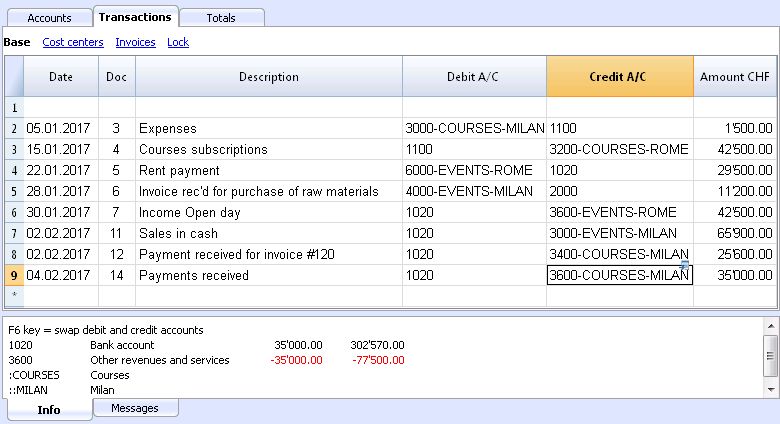
The segments are being entered in the Transactions table, followed by the main account from the account segment.
Each segment is preceded by the colon, or by the minus sign (-), in case the option Use the minus sign (-) as segments separator has been activated in the File and Accounting properties (File menu).
If the chart of accounts contains accounts with "-" or "_", as for example in the clients/suppliers register's accounts), you can't use the same symbols as segments separators; in this case you need to deactivate the corresponding option and use the ":" symbol.
When a segment that belongs to more than one level is being recorded, the segment of the first level needs to be entered right after the main account; then, continue with the code of the second level.
Report
Reports of the segments are obtained with:
- Enhanced balance sheet with groups
- Accounting report.
- Account card
- Multi-level report
In order to obtain reports that combine accounts and segments (for example, all the expenses of the LU Branch for P1), the features of the Banana applications need to be used.
Report subdivision by level
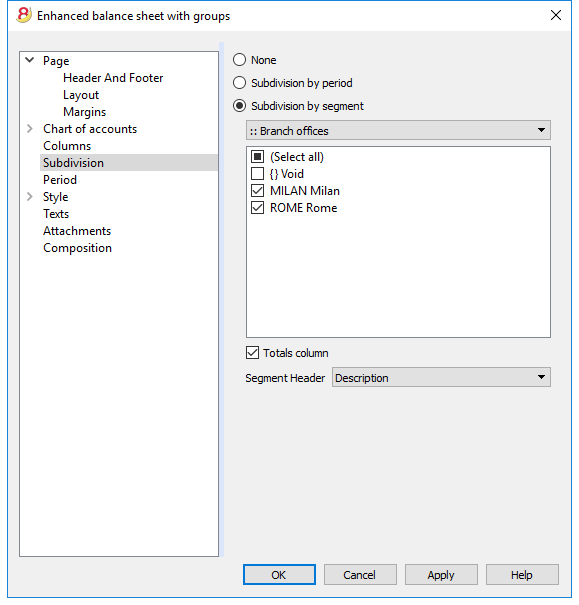
In the Enhanced Balance Sheet with groups, in the Subdivision tab, indicate the segment level to be used.
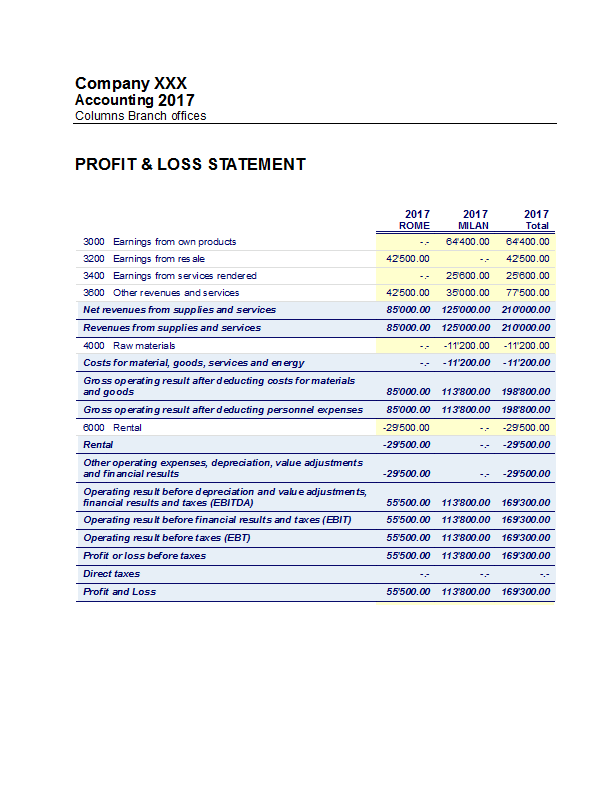
Summary Report
This is a summary with the segment that have been setup in the Accounting plan section, with a possible subdivsion (if desired) by period or by segment.
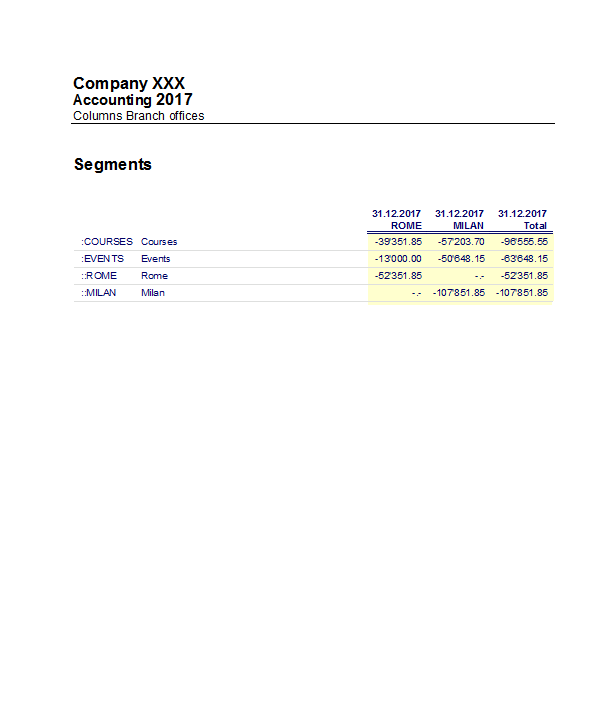
Segment non assigned
The "empy" segment gathers all the amounts that have been recorded without specifying a segment. It is possible to setup the title for this segment in the Accounts table. Please also select the Segment heather: Description option in the Subdivision section.
Related document: Managing different projects
Managing different projects
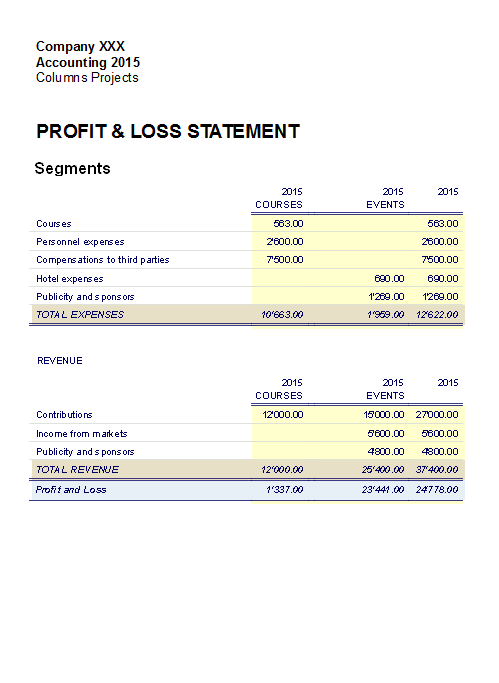
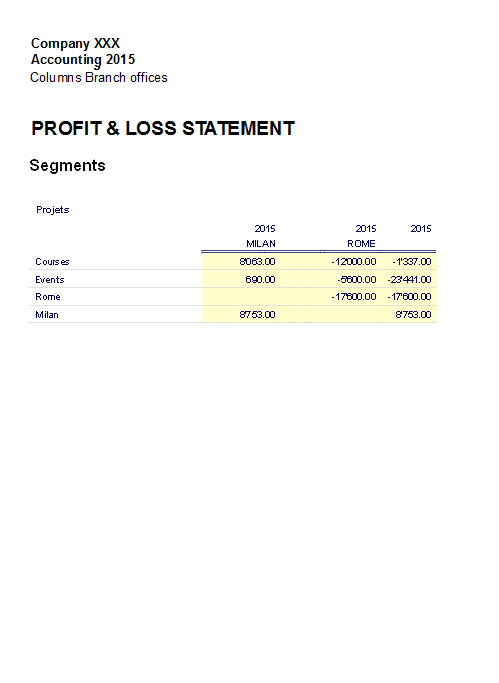
With the Segments feature, it is possible to manage different projects, obtaining balance sheets that determine the profit or the loss of each project.
Example
In an association, there are two projects that need to be managed:
- Courses
- Events
On top of that, there are different branch offices with the same projects to be managed:
- Rome
- Milan
The user wishes to obtain a balance sheet which indicates the profit or the loss of each project and branch office.
How to proceed:
- Insert the segments at the end of the chart of accounts
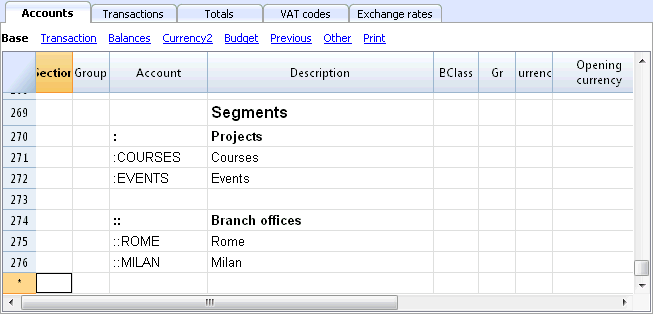
- Enter the transactions, and complete the debit and the credit accounts with the segments
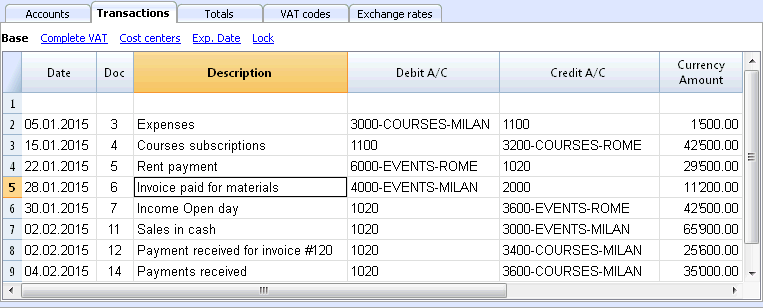
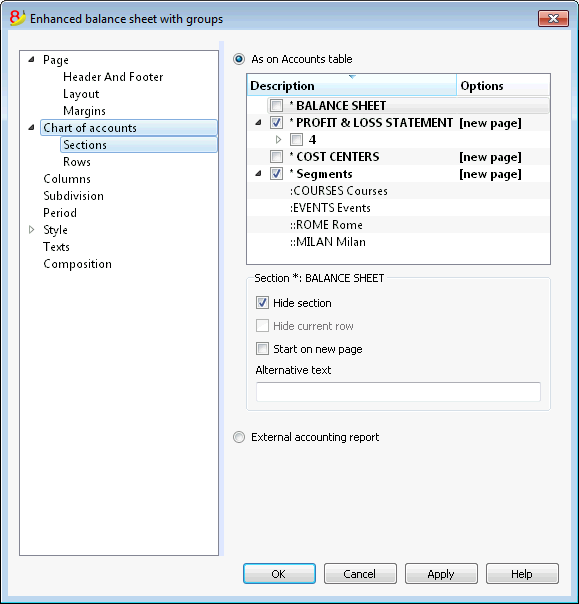
- From the Account1 menu, activate the Enhanced balance sheet with groups command
- Select the available configurations in the different tabs; in the Sections tab in particular, deactivate the display of the Balance sheet accounts, the Client/Suppliers accounts and the Cost centers. The segments usually refer to the accounts of the Profit & Loss statement.
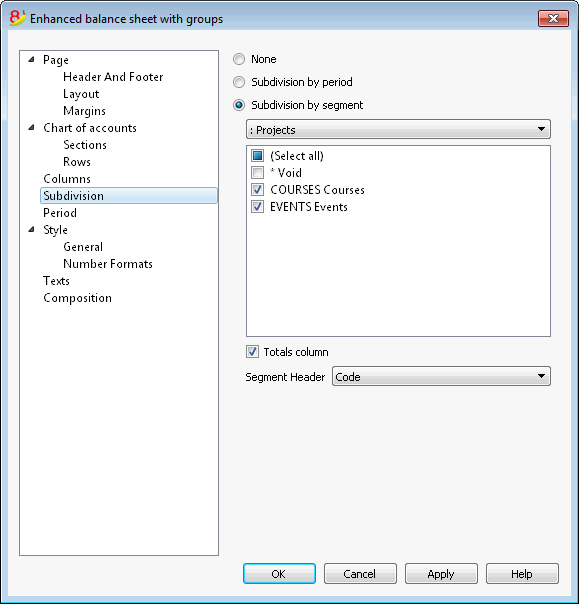
- In the Subdivision tab, activate the Subdivision by segment option
- Select the segment for which the balance sheet should be obtained (by project or by branch office)
- Click on the OK button in order to display the report
Report by projects
Cost and Profit Centers
The Cost and Profit centers (hereunder being indicated as Cost centers) allow the user to catalog the transactions according to different criteria than the usual accounts.
Characteristics of Cost centers
- The Cost and Profit centers (CC) are accounts, preceded by the ".", "," and ";" signs
- There are three cost center levels:
- CC1 preceded by a period "."
- CC2 preceded by a comma ","
- CC3 preceded by a semicolon ";"
- Each level is independant of the other
- For each level, there can be an unlimited number of cost centers.
- A superior level can be used without using an inferior
- Cost center codes can be alphabetic or numeric
- Cost centers can have there own grouping, different than those of normal accounts. For the same level of cost centers, subgroups can be created. Be careful to not mix cost centers groups with other groups of a different level or with normal accounts or segments.
- Each cost and profit center has its own account card, complete with transactions and balance
- Recording on the cost center is independant of the account recorded in debit or credit. One can even record on a cost center without any account in the debit and credit column.
When to use cost centers
Cost centers are usually being used to catalog certain expenses to specific activities, that are not necessarily linked between each other.
- Projects, Events, Construction sites
- Clients and suppliers, Members, Sales agents
- Extra details for certain expenses
The segments, on the contrary, follow the debit and credit accounts, and are being used as further subdivisions for expenses and revenue.
It is possible to use cost centers and segments together at the same time.
Setting up cost centers in the Accounts table
Attention: If you work with a cash book, the cost and profit centers must be set up in the Categories table!
- Create a specific section for the cost centers.
This setup will be necessary for the presentation of the cost centers in the Enhanced Balance Sheet by groups.- Enter a section with an asterisk * for a section change
- In the next row, enter 03 (or 04 for a profit center).
- Add some empty rows for the cost center
- In the Group column, enter the group to which the cost center account belongs
- In the Account column, enter the cost center account precededs by a full stop "." for those to be registered in CC1 column (Transactions table), a comma "," for those to be registered in CC2 column and a semicolon ";" for the ones to be registered in the CC3 column.
- In the Gr column, indicate the group in which the amounts have to be totalized.
- In a Multi-currency accounting, the account currency is also specified.
- Add the cost center groups
- In one and the same group, totalize only one specific level.
- As for normal accounts, different levels can be created.
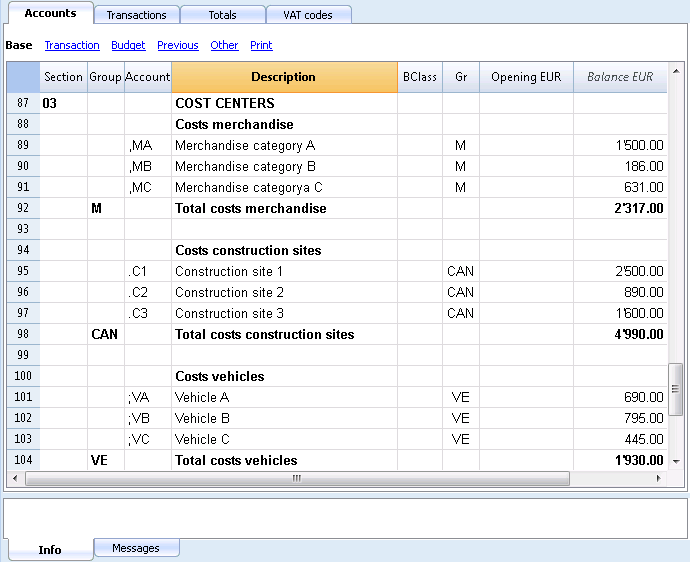
File Properties (VAT amount)
In the File and accounting properties command, in the VAT tab you can set the amount of cost centers with the following options:
- Use transaction amount - The amount of the cost center is registered according the registration amount
- Use amount excluding VAT - The amount of the cost center is registered net of VAT.
- Use amount including VAT - The amount of the cost center is registered inclusing the VAT.
Transactions
In order to register on the cost centers, it is assumed that the cost center accounts have already been entered into the Chart os accounts.
To proceed with the recordings, you need to be in the Transactions table, in the Cost centers view; in the CC1, CC2, CC3 columns, you need to enter the cost center account without the punctuation that precedes it.
- To record on the cost center in credit, the cost center needs to be entered preceded by the minus sign (-).
- For the Income & Expense accounting, in the File and accounting properties, you can define for the cost centers to follow the sign of the category.
- In order to record a global amount on more than one cost center of the same level, a different row needs to be created for each different cost center.
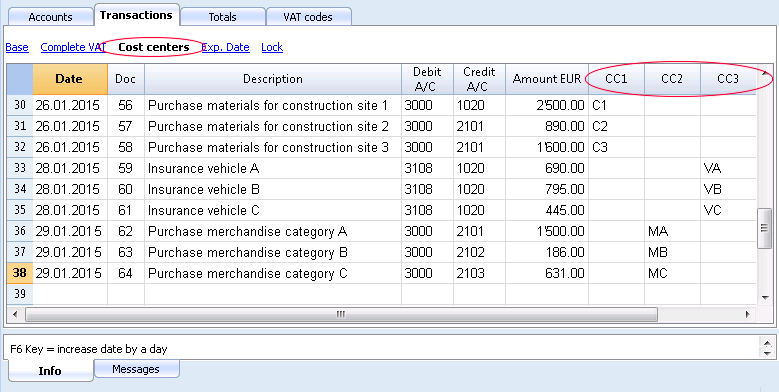
Cost center account card
The cost center is treated as any other account, so each cost center has its own account card with account balance and account transactions.
In order to view all cost center account cards, click on the command Account/Category cards in the Account1, and then on the Cost centers button (Filter option).
Related documents:
Membership list
In order to obtain the membership list with all the data that are useful for an association, the user needs to proceed as follows:
- In the Accounts table, at the end of the Chart of Accounts, the membership list can be created by using the CC3 cost center column.
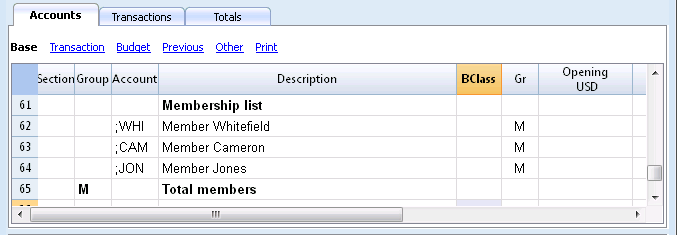
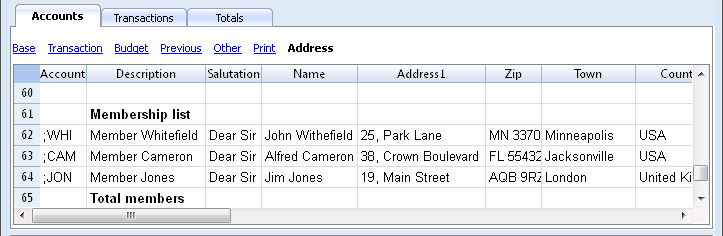
- Activate the Address view, selecting from the Tools menu, the Add new functionalities command
- In the window that appears, confirm the option Add addresses columns in Accounts table
- Insert the data of the members
- For a print-out: select the rows that need to be printed and activate the printing option only Selection.
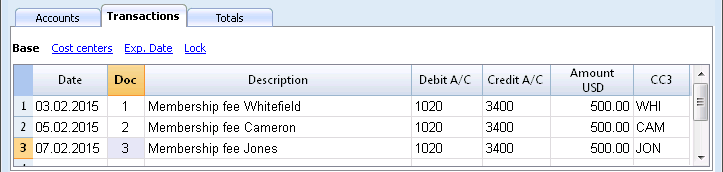
In order to record the transfers from every member in the Transactions table, insert the CC3 account for each member, using the CC3 column. In order to display the CC3 column, click on the Columns setup command of the Data menu; double click on CC3 and activate Visible check box.
In the Accounts table, the balance of the member's transactions is shown.
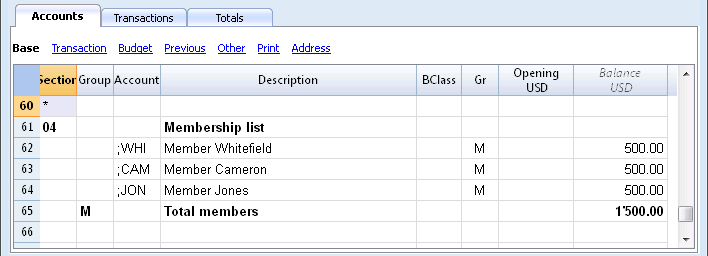
To see all of a member's transactions, double-click on the CC3 account number.
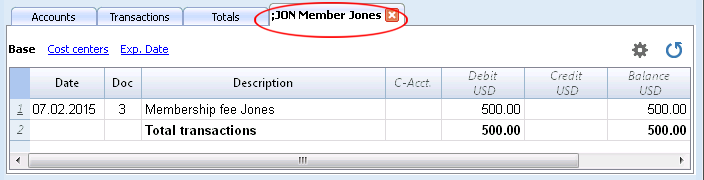
Related document: Cost and Profit centers
Add / Rename
Adding a new account or category
- Position yourself in the row above the one where you want to add the new account
- Add a new empty row with the command Add rows from the Edit menu
- In the columns, insert the account number, the description, the BClass (1 for the Assets, 2 for the Liabilities, 3 for the Expenses and 4 for the Revenue), and the Gr which needs to be the same as the one inserted for the accounts belonging to the same Group.
Note: If you first enter a transaction with a non existing account and later you create the new account in the accounting plan, you will first get an error message, that will go away only if you recheck the accounting with the Shift + F9 key, or the Recheck accounting command from the Account1 menu.
Adding a new group
- Position yourself in the row above the one where you want to add the new group
- Add a new empty row with the command Add rows from the Edit menu
- In the columns, insert the group number, the description and the Gr which needs to be the same as the group you wish this group to be totalized.
Renaming an account or a group
- Position yourself in the Account or Group column in the Accounts table, or in the Category column of the Categories table (or in the VAT code column in the VAT codes table)
- Choose the Rename command from the Data menu
- Enter the new account, group, category or code number
The program will automatically update the Transactions table with the new number or code.
Deleting an account or a group
- Position yourself on the row number that contains the account that is to be deleted
- From the Edit menu, click on the Delete rows command
- Enter the number of rows that you wish to delete
After deleting an account, a category or a group it is necessary to use the Recheck accounting command from the Account1 menu. The program will give you a warning message if the deleted account, category or group was used in the Transactions table.
Opening balances
Avoid mistakes with Banana Accounting Plus
In order to facilitate checking your accounting work and to immediately find differences, in Banana Accounting Plus, our new version, we added the Balance column in the Transaction table. You can now see potential differences on each row and you can correct them right away. It is a very useful feature when closing the accounting period.
Many of our clients have already tried it and are enthusiastic about it. We advise you to switch now to Banana Accounting Plus and take advantage of the many new features.
Opening balances
When using Banana Accounting for the first time, the opening balances need to be inserted manually in order to create the opening balance sheet.
After having set up the Chart of Accounts, proceed as follows:
- Place yourself in the Accounts table, Base view, Opening column.
- Manually enter the opening balances of the Assets and Liabilities accounts. The Liabilities are entered preceded by the minus (-) sign.
- Check if the total Assets equals the total Liabilities so that your accounting balances. If there are differences in the opening balances you need to check and correct them.
In order to automatically transfer the opening balances for the next year, consult the lesson Create New Year
Transactions
Avoid mistakes with Banana Accounting Plus
In order to facilitate checking your accounting work and to immediately find differences, in Banana Accounting Plus, our new version, we added the Balance column in the Transaction table. You can now see potential differences on each row and you can correct them right away. It is a very useful feature when closing the accounting period.
Many of our clients have already tried it and are enthusiastic about it. We advise you to switch now to Banana Accounting Plus and take advantage of the many new features.
Entering Transactions
Transactions must be entered in the Transactions table.
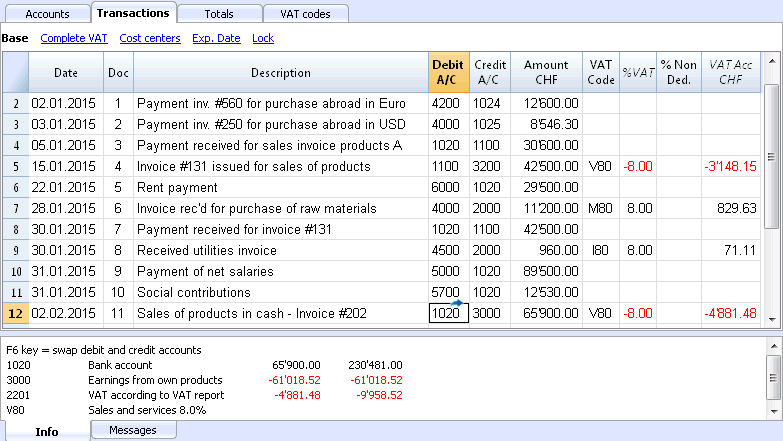
The columns of the Transactions table
The columns listed hereunder and preceded by an * are usually not visible.
In order to make them visible, use the Columns setup command from the Data menu.
Date
The date the program uses to attribute the transaction to a certain time frame. The date should be within the limits of the accounting period defined in the Basic data of the accounting. In the Options tab, one can indicate whether the transaction date is required, if not this value can also be left empty.
If there are locked transactions, the program gives an error message when an equal or earlier date than the one of the lock is being entered.
*Date Document
The date of the document can be entered, for example the date of issue for an invoice.
*Date Value
The value date of the bank operation can be indicated. This value is being imported from an electronic bank statement.
Document
The number of the voucher that serves as a base for the accounting transaction. When entering transactions, it is advisable to indicate a progressive number on the document, so that the accounting document can be easily traced from the transaction.
The autocomplete feature proposes progressive values as well as transaction codes that have been defined earlier in the Recurring transactions table.
The program proposes the next document number, that can be resumed with the F6 key.
-
In case of a numeric numbering, the program simply increases the highest value found in the Doc column.
- Alphanumeric numbering: the program increases the final numeric part; this is useful when one would like to keep a separate numbering for cash and bank movements.
If earlier Doc number C-01 has been entered, and one starts to type C, the program proposes C-02.
If earlier Doc number B104 has been entered, and one starts to type B, the program proposes B-105.
If earlier Doc number D10-04 has been entered, and one starts to type D, the program proposes D10-05.
In the recurring transactions you can setup transactions groups that can be reloaded with a single code.
In order to add a large number of document numbers, you can also use Excel. You can create in Excel the desired quantity of document numbers and then copy and paste it into Banana, in the bcolumn of the Transactions Table.
*Document Protocol
An extra column in case an alternative numbering for the transactions or for the document is needed.
The autocomplete feature proposes progressive values that function in the same way as the ones in the Document column.
*Document Type
Contains a code that the program uses to identify a type of transaction. If you prefer to use your own codes, it is advisable to add a new column.
- 01 In the reports, this transaction is considered an opening transaction, so it doesn't show in the period but in the opening balances.
- from 10 to 19: codes for customers' invoices
- from 20 to 29: codes for suppliers' invoices
- from 30 to 1000: codes reserved for future purposes.
*Document Invoice
A number of an issued or paid invoice that will be used together with the invoice control feature for customers/suppliers
*Document Original
The reference number present on a document, to enter, for example, the number of a credit note.
*Link to external file
Serves to enter a link to an external file, usually the accounting voucher.
Pressing on the little arrow on the upper part of the cell, the program opens the document.
*External reference
Any reference number all ocated by a program that generated this operation. This value can be used to check whether a given task is imported twice.
Description
The text of the transaction.
The autocomplete feature proposes the text of an already entered transaction, or of one that has been entered in the preceding year when the appropriate option has been activated. When pressing the F6 key, the program retrieves the data of the preceding row with the same description and completes the columns of the active row.
In case the description begins with #CheckBalance, the transaction is being considered as one that serves to checkup the balance.
Please consult our page Check accounting for more information on the subject.
*Notes
Useful to add notes to the transaction.
Debit Account
The account that will be charged.
It is possible to also enter a segment in the Debit account column. These are usually separated by a ":" or a "-".
In the accounts list, pressing the key with the segment separator symbol, one goes immediately to the next segment.
If instead the Enter key is being pressed, the input finishes and one moves to the next column.
The autocomplete feature proposes the accounts and segments. One can also enter a search text and the program shows all the accounts that contain that text in one of the columns.
*Debit Account Description
The description of the entered account retrieved from the Chart of accounts.
Credit Account
The account that will be credited. We refer to the explanation under Debit account for the rest of the information.
*Credit Account Description
The description of the entered account retrieved from the Chart of accounts.
Amount
The amount that will be entered unto the debit- and credit account.
VAT columns
Information on the VAT columns can be found att the VAT columns in the Transactions table page
CC1
The Cost center account preceded by "."
*CC1 Description
The description of the Cost center, retrieved from the Chart of accounts.
CC2
The Cost center account preceded by ","
*CC2 Description
The description of the Cost center, retrieved from the Chart of accounts.
CC3
The Cost center account preceded by ";"
*CC3 Description
The description of the Cost center, retrieved from the Chart of accounts.
*Expiry date
The date before which the invoice has to be paid.
*Payment date
Used in combination with the Show Expiry dates command.
When instead using the invoices customers/suppliers control feature in order to check on the payments, a transaction has to be entered for an issued invoice and another one for the payment thereof.
*Lock Number, Lock Amount, Lock Progressive, Lock Line
More information at the Lock Transactions page.
Adding new columns
With the Columns setup command, it is possible to display, hide or move the order of columns, add new ones, or indicate that a column should not be included in the printout.
- The added columns in the Transactions table will be added also in the Recurring transactions table, in the Account card and in the VAT report, without being made visible.
In order to display these columns in the other tables, use the Columns setup command. - If a column of the "amount" type is being added, the entered amounts will be added up in the Account card.
Views
When a new accounting is being created, the following views are being automatically created as well:
- Base: the main columns are being displayed
- Cost centers: the CC1, CC2 and CC3 columns are being displayed
- Expiry dates: the columns Expiry date and Payment date are being displayed
- Lock: the columns relative to the Lock function are being displayed.
With the Views setup command, the views can be customized and personal, added views can be created.
With the Page setup command, you can modify the print mode of the view.
Info window
In the Information window at the bottom part of the screen, error messages and extra information about the used accounts and VAT codes are being displayed.
For the accounts, the Account number, the Description, the Amount of the transaction (debit or credit) and the Current balance of the account is being indicated.
Transaction types
Avoid mistakes with Banana Accounting Plus
In order to facilitate checking your accounting work and to immediately find differences, in Banana Accounting Plus, our new version, we added the Balance column in the Transaction table. You can now see potential differences on each row and you can correct them right away. It is a very useful feature when closing the accounting period.
Many of our clients have already tried it and are enthusiastic about it. We advise you to switch now to Banana Accounting Plus and take advantage of the many new features.
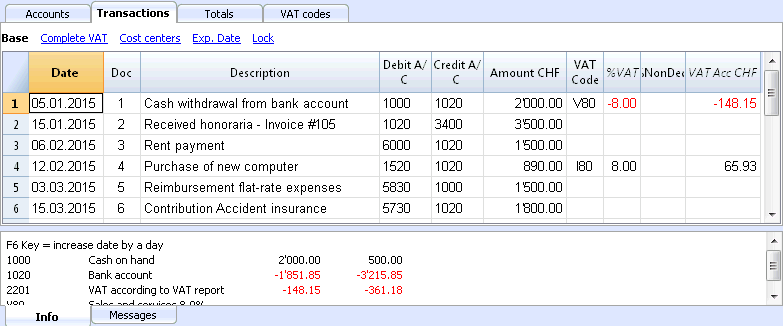
Simple transactions
Simple transactions are the ones regarding two accounts (one Debit account and one Credit account) and entered in one single row. Each transaction has its own document number.
Composed transactions
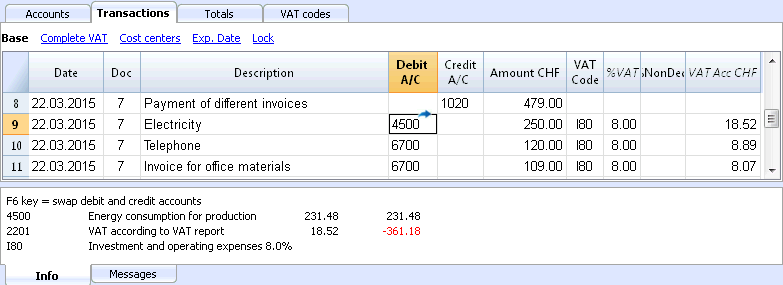
Composed transactions with more than two accounts involved, have to be entered on several rows. The user should enter one account per row. The counterpart account for the entire transaction has to be entered on the first row.
The document number, entered on the different rows, is the same because we are dealing with one and the same transaction.
Note:
In composed transactions, the dates of the transaction rows should be the same, otherwise, when doing calculations by period, there may be differences in the accounting.
Recurring Transactions
Recurring Transactions table
In order to avoid rewriting always the same texts, it is possible to store transaction groups in the Recurring transactions table (Account2 menu). These groups are identified with a code and can be retrieved and entered into the Transactions table just by entering the corresponding code.
When positioned on the Doc column of the Transactions table, the program proposes the list of the recurring transactions, grouped bycode. If one of these codes is selected:
- the program enters the recurring rows that have the same code
- the program completes the entered rows with the date and other values that have been entered earlier
- the program enters the progressif number in the Doc column (based on earlier entered values)
Entering recurring transactions
- You need to enter into the Recurring transactions table (or copy from the Transactions table) the transaction rows that should be retrieved regurlarly.
- Enter the code related to the recurring transactions group into the Doc column.
Rows with the same group code will be retrieved together (transaction on multiple rows).
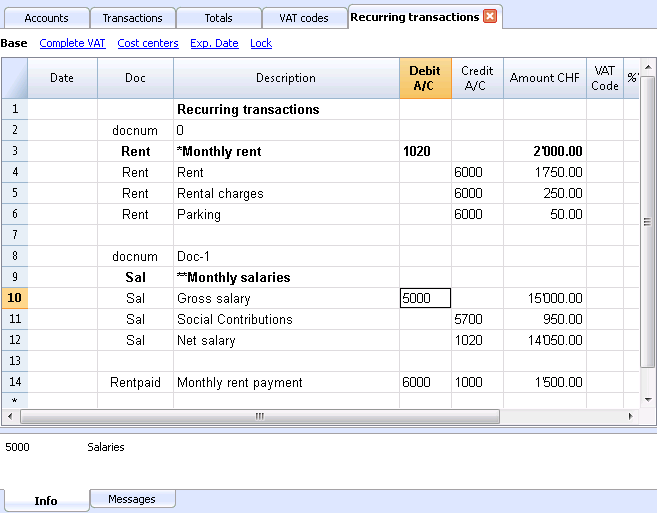
- Progressive numbering of documents "docnum"
If, when retrieving recurring transactions, you wish to have a Doc number different from the automatic one, you need to create a row containing the code "docnum" in the Doc column, and your desired text in the Description column. For the following rows, the text specified in the Description column, will be applied in the Doc column when retrieving the transactions- "0" when no automatic numberting is desired
- "1" progressive numbering
- "cash-1" progressive numbering with the prefix "cash-" (cash-2, cash-3)
The program replaces the number indicated at the end of the text with the next progressive number.
- If you wish the program to suggest just one row per code, the description has to be preceded by:
- An "*": displays just this row and not the others with the same code.
- An "**" displays just this row, but don't retrieve this row (only title row).
- An "\*" allows the user to start the description with an asterisk, without it being interpretated as a command.
It is not possible to save customized setups in the Recurring transactions table; it uses the views and columns setup of the Transactions table.
Retrieving the recurring transactions into the Transactions table
- Enter the date and the information of the other columns that should not be modified
- In the Doc column, choose one of the codes defined in the Recurring Transactions table and press Enter.
- The program enters all the transactions with the same code, repeating the data column and other already entered values.
- In the Doc column, a progressive number is being inserted or one as specified in the docnum
- Or indicate the code in the Doc column and press F6
Copying transaction rows into the Recurring Transactions table
In order to copy rows from the Transactions table into the Recurring transactions table:
- In the Transactions table, select the rows that need to be copied;
- Edit menu -> Copy rows command;
- Go into the Recurring transactions table;
- Edit menu -> Insert copied rows command;
Bank checks
To enter issued bank checks, the user needs to insert an Issued checks account in the Liabilities.
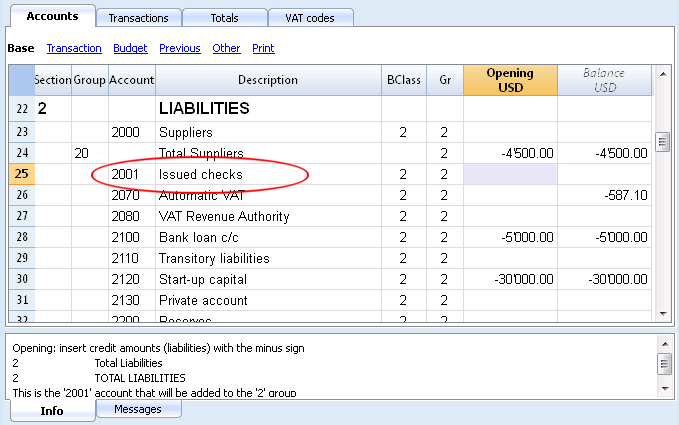
The check is issued at the moment of paying a supplier and later on is being debited from the Bank current account.
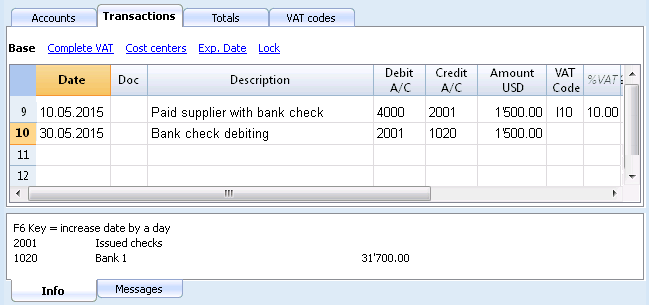
The Issued checks account card after the transactions.
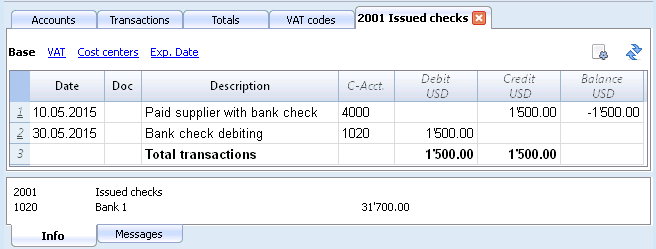
Displaying expiry dates
Customers & Suppliers Management
In order to manage the invoices issued or received, we advise you to use the Customers Menu and the Suppliers Menu.
Associate an expiry date to a transaction
As an alternative to the customers and suppliers management, or for simpler checking purposes, you can also enter the payment date in the transaction row.
This is an operating mode that consents simplified checkup.
With the Columns Setup command (from the Data menu), you should make visible the Date Exp. and Date Pay columns.
You should then enter the invoice expiration date in the Date Exp. column, and the invoice payment date in the Date Pay. column.
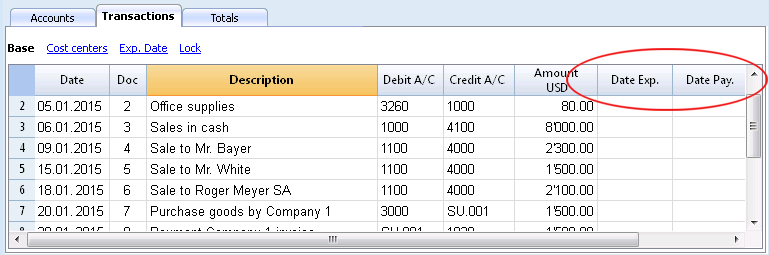
Show expiry dates
With the Show expiry dates command from the Account2 menu, the program displays the transaction rows that have an expiry date but no payment date.
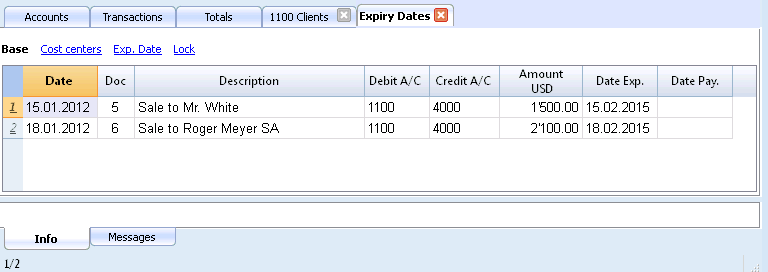
Link to a document
Connecting digital documents to your accounting transactions
- Arrange a folder where you will save all your digital documents. It can be the folder where you keep your accounting file or subfolder.
- Use this folder to save all files containing documents, invoices, receipts, etc.
- Link the transaction to the digital document.
- From the Account 2 menu choose the Link -> Open Link command to view the contents of the digital document.
The DocLink Column
The DocLink column (Transactions table) makes it possible to enter a link to an external file (usually a scan of a receipt or an invoice).
- The DocLink column is usually not visible.
In order to display it, use the Columns setup function. - Once the Link column is visible, you can directly edit the file name.
- The file name is related to the accounting file; if the documents are in a sub-folder, the file name - in the DocLink column - will be preceded by the directory name.
- It is equally possible to manually enter a web address in the Link cell.
In order to open the linked document, click on the Open link command of the Account2 menu, or click on the small square that appears on the upper right hand corner of the cell that contains the link.
Entering a link to a file
There are two ways to enter a link to a document:
- Place yourself on the row of the Transactions table and the activate the Add link command from the Account2 menu -> Links;
- Select the file that corresponds to the document which needs to be linked and click on the Open button; the program inserts the link automatically.
The program enters the file name in the DocLink column, even if this last one would be invisible.
Or
- Display the DocLink column in the Transactions table. See: Columns setup;
- Click on the small square at the upper right hand corner of the cell;
- Indicate the path where the file can be found and select it.
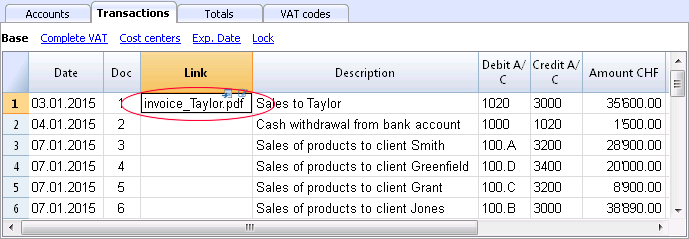
Editing a link
Proceed in the same way as when entering a new link.
Open link
There are two ways to open the link:
- Place yourself on the row of the Transactions table and the activate the Open link command from the Account2 menu -> Links;
- Place yourself on the DocLink cell and click on the icon to open the link.
For security reasons, the program opens only files with an extension that is considered secure, see Program Options -> Advanced, from the Tools menu.
Remove link
There are two ways to remove the link:
- Place yourself on the row of the Transactions table and the activate the Remove link command from the Account2 menu -> Links;
- Delete the contents of the DocLink cell.
Lock transactions
Blockchain certification
Banana uses a digital certification system for the accounting data, using what is now called blockchain technology. Transactions can be locked and marked with digital codes that can guarantee, even after many years, that the accounting data are authentic. They also allow the user to make sure that the accounting data have not been modified.
Banana.ch was the first company in the world to use the blockchain technology in the accounting field. This method (US Patent No. 7,020,640) was developped and patented in 2002..
This method guarantees one of the highest levels of data integrity and conformity to international law prescriptions. You can also see the evaluations on this matter of the audit company Ernst&Young, who verified the system conformity to the legislation requirements. The new versions of the Banana Accounting software don't use the MD5 method anymore (the one mentioned in the documents), but use the Hash SH256 method.
- Ernst&Young, compatibility check to Swiss legislation (pdf in German)
See also: Verordnung über die Führung und Aufbewahrung der Geschaftsbücher, 24.04.2002 (in German) - Ernst&Young, compatibility check to German legislation (pdf in German)
This method, based on the blockchain calculation system, is considered so reliable that it is employed to ensure the validity of the bitcoin and of all other modern crypto-currency.
The lock transactions command
With the Lock transactions command of the Account2 menu, the accounting transactions are locked and marked with control codes that can certify, over the years, that the transactions have not been modified.
- The validity of a possible already existing lock is being verified
- The transactions until the lock date are being numbered progressively and are being locked. For each transaction, the digital code of the row and the progressive one are being calculated.
The calculation of the digital codes is being done according to the sequence of the columns. - In the accounting is being indicated that transactions with an equal or earlier date than the lock date will no longer be accepted.
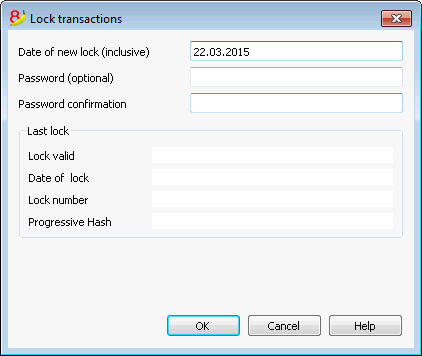
Date of new lock (inclusive)
Specify the date up until when the transactions will be locked.
Password (optional)
It is possible to insert a password to eventually unlock the transactions or to carry out a new lock in the future.
If the program finds no errors in the transactions included in the lock date, it will lock the transactions, calculate and assign individual numbers and codes to each row of transactions which can be viewed in the Lock view on the Transactions table.
Last lock
The data of the following fields are automatically filled out by the program based on the last executed lock.
Lock valid
A "Yes" is shown if the lock is valid.
Date of lock
The date of the last executed lock is shown.
Lock number
This is the value automatically entered by the program in the last row of the LockNum column.
When the lock is repeated, if the value of the last row lock number is unchanged, it means that the lock is valid and that the data have not been altered; if however the value is changed, the program shows the following codes:
- (-1) if the lock is invalid from the first row
- (-2) if there are rows that have the same LockNum.
Progressive Hash
This is the control code present in the last transaction.
Lock View
All digital codes are shown along with all the information that the program used to create the digital signature.
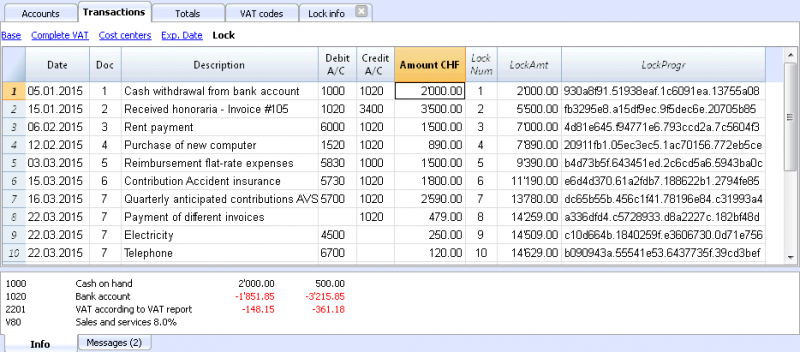
- LockNum: the progressive number that identifies the row
- LockAmt: the cumulative transactions total, similar to the total at the end of the page, as required by some national regulations
- LockLine (hidden column): the digital code calculated according to the row values.
- LockProg: the global electronic signature (SHA-256).
The digital code LockProg
This is the main element of the certification; it uses the blockchain methodology.
The digital code is calculated according to the following values:
- The contents of the current entry, including amounts, descriptions and the description of the account at the moment of the lock
- The progressive number (LockNum)
- The cumulative balance (LockAmt)
- The progressive code of the preceding entry (LockProg).
In case the accounting data undergo even the slightest modification (for example, a date or an amount is changed), the digital code will be different. If the control number remains the same, it implies that the data are original and therefore have not been changed.
Check Lock
With the Check lock info command of the Account2 menu, the program verifies the validity of the lock and displays the data.
- The program recalculates the digital control codes and verifies if they correspond with the ones related to the transactions.
- If the codes correspond, the lock is considered valid, and therefore the data are original
- If they do not correspond, it means that the data have been changed and that they are not the original ones calculated at the time of the lock.
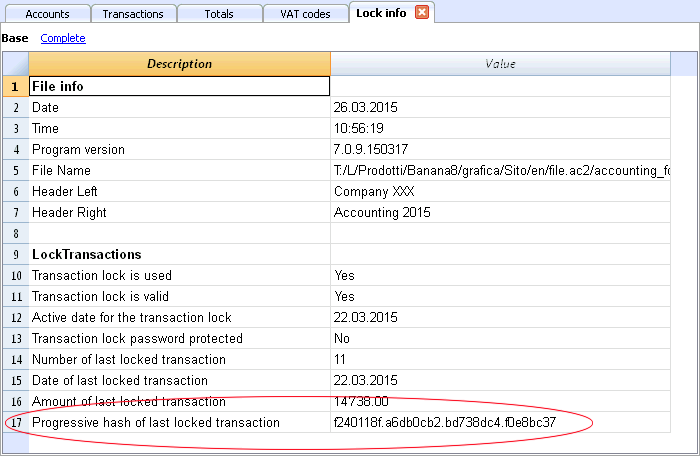
Unlock transactions
The Unlock transactions command removes the lock and the control codes. If the lock was set with a password it will be necessary to reenter the password in order to remove the lock.
If later on you want to relock the transactions, and they have not been modified, the control numbers will be the same as the ones of the earlier lock; if however some data have been changed, the control numbers will be different.
Partial lock
If the transactions have been locked, it is possible to unlock them even partially, from a specified date. If a lock password has been set, in order proceed unlocking the transactions, you need to enter it in the specific field.
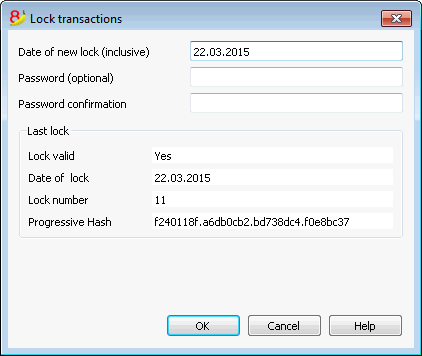
Why unlock the accounting?
In principle, the locked accounting should not be unlocked. It might happen that, after the lock, you find errors in the accounting and see the need to make corrections.
To have the opportunity to make further changes, users kept a copy of the file before the lock. If they found errors, they would restore the previous situation. In the meantime other transactions had perhaps been made, so often it happened that restoring previous versions of the accounting proved wrong. To avoid this unnecessary waste of time it was decided to make the Unlock transactions command available.
The certification must not be confused with data security. The data certification is a methodology that ensures that the accounting data are original. To prevent data from being modified, the methodology is the one related to data security. Data security procedures, however, can only be implemented in an environment that limits data access.
If the file is fully available to the user, such as when it is on a PC, people have complete control of the data. They can thus replace files easily. With a certification one cannot prevent that the data are being altered, but it will allow you to know if the data are the original ones.
The person who keeps the books is responsible for the accounting and decides whether a change is permissible or not.
Organizing the certification and data verification
Once you locked the transactions of the period, you need to:
- Print the lock information or print the last certified transaction row with its specific certification number (LockProgr).
- Sign and store this information along with the accounting documentation or in any other safe place.
In order to check that the accounting data are the original ones, you need to proceed as follows:
- Impart the Show lock info command.
- Go back to the document that shows the digital control number
- Check whether the row identified with the LockNum still has the same digital control number
- If the number matches , the accounting data are the same as those certified
- If the number does not match , it means that the accounting data have been modified.
Banana works on developing applications that make it possible to compare two files and obtain indications regarding data that have been altered.
Data security
Digital certification ensures that the data are still the original ones. It does not prevent the modification of data.
It is the responsability of the accountant to ensure that the data are not altered. Each administration must be organized according to its size and needs.
Those who want to make sure that the data are not being altered by unauthorized persons , must employ other methods and tools, such as :
- Save the data to a secure system (protected network drive), password protected.
- Keep the copies of the data.
- Encrypt archives.
Long-term archiving
The accounting file contains the entered data. In order to open the file and obtain a report or an account card, you need to have the program at your disposition.
Banana Accounting gives the possibility to export all the accounting data, and its printouts as well, to Pdf, Html and Xml.
The generated file can be saved on a CD and accessed on any computer even after many years, even by persons who do not have the Banana Accounting software.
File and accounting properties
This is where the main data of the accounting file are entered, such as the printout heading, the opening and closing dates, the basic currency, the company address, the profit and loss from exchange rate variation account (if you have a multicurrency accounting file), the VAT account (if you have chosen the VAT management option), the password, …
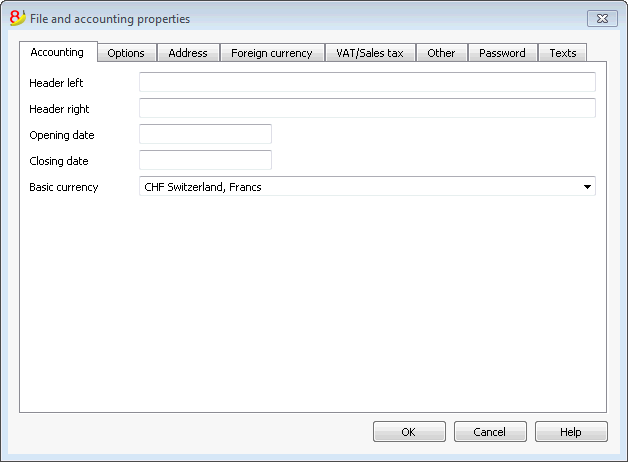
The File and accounting properties window has the following tabs:
- Accounting tab
- Options tab
- Address tab
- VAT/ICMS tab
- Foreign currency tab
- Texts tab
- Password tab
- Other tab
Printouts
New customization possibilities
In the new Banana Accounting Plus version, the printing has been improved thanks to new possibilities of customization. Moreover, you can print the invoice with the QR code and other predefined and customizable layouts.
We advise you to immediately switch to Banana Accounting Plus and take advantage of the many new features.
Enhanced Balance sheet with groups - colored columns
This example has been realized with the following features:
- Enhanced Balance sheet with groups
- Columns setup to indicate which columns are to be displayed (in the example the columns of the Current and the Preceding year are being displayed)
- Colors (Column properties) to indicate the color of a column.
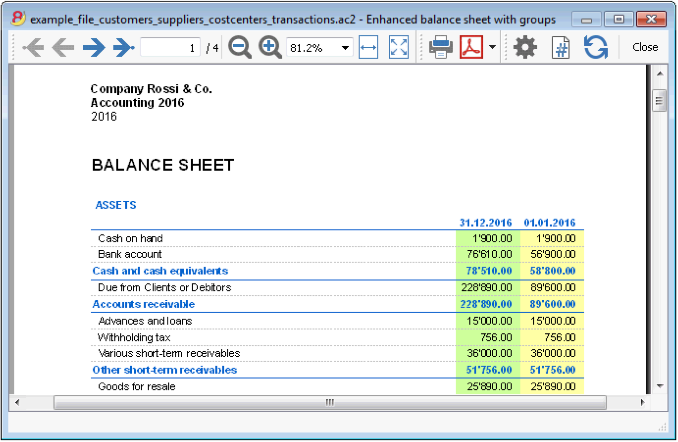
Profit & Loss Statement with budget
This example has been realized with the following features:
- Enhanced Balance sheet with groups
- Columns setup to indicate which columns are to be displayed (in the example the columns of the Current year, the Budget and the Preceding year are being displayed)
- Colors (Column properties) to indicate the color of a column.
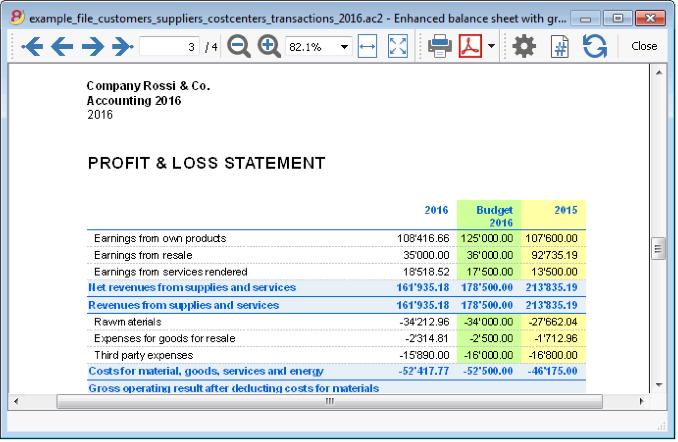
Enhanced Balance sheet
This example has been realized with the following features:
- Enhanced Balance sheet- Base tab
- Style setup (for this printout the Berlin style has been chosen)
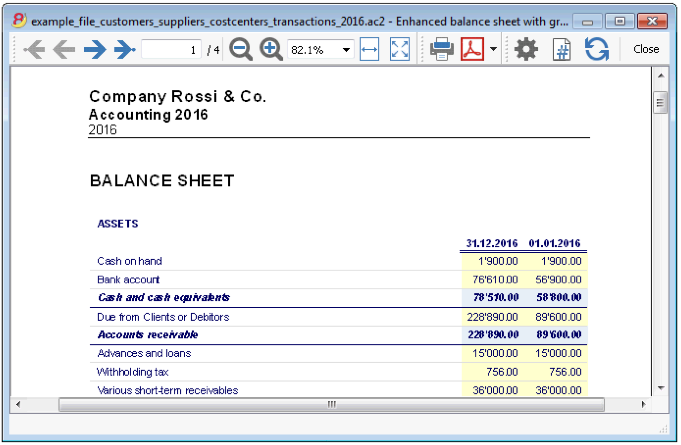
Subdivision by quarter
This example has been realized with the following features:
- Enhanced Balance sheet with groups
- Subdivision -> Subdivision by period in order to set up the subdivsion by period
- Columns setup to indicate which columns are to be displayed
- Colors (Column properties) to assign different colors to the columns.
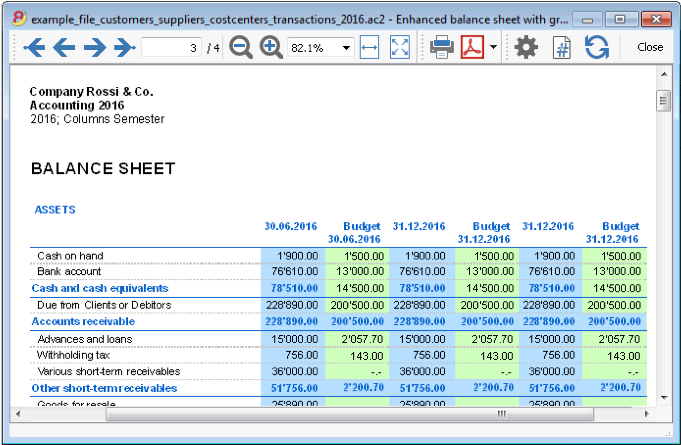
Subdivision by segment
This example has been realized with the following features:
- Enhanced Balance sheet with groups
- Subdivision -> Subdivision by segment in order to choose the segment level to be displayed.
- Print style
When printing the segments, it is not possible to set up the colors of the columns.
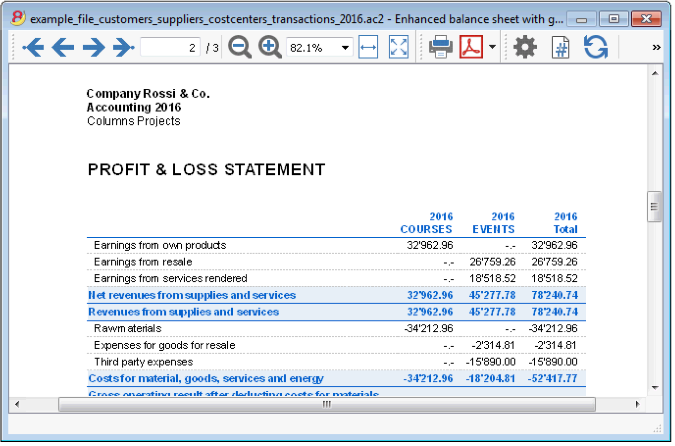
Pdf dossier with all the accounting data
The file is being created with a summary that gives access to the different printouts in an easy way.
The following data can be saved in PDF
- Balance sheet and Profit & Loss statement
- Accounts table, Transactions, VAT Codes, Totals
- VAT reports
- Account cards
If you save this file on a non-rewritable CD (to keep together with your accounting documents), this satisfies the legal requirements for archiving the accounting data.
This example has been realized with the following features:
File menu, Create Pdf dossier command
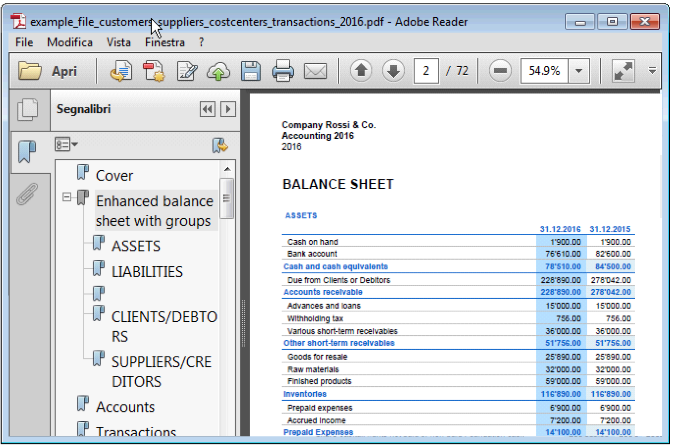
Printing an extra column
In order to print, in the Balance sheet, an extra column, the following features have been used:
- Columns setup, Data menu, in order to display or add a new column in the Accounts table
- Enhanced Balance sheet with groups
- Columns - advanced, to make the column visible.
Enhanced Balance Sheet
Print the Balance Sheet with your logo
In the new Banana Accounting Plus version, the Balance Sheet with groups printout has been improved with new customization possibilities. Among the new features, the possibility to insert your logo.
We advise you to immediately switch to Banana Accounting Plus and take advantage of the many new features.
- The Balance Sheet represents all the Assets, Liabilities, Expenses and Income in a specific moment. The difference between Assets and Liabilities gives the personal capital.
- The grouping of the accounts is done according to the contents of the BClass column.
- The Enhanced Balance Sheet, shown in the preview, can be saved in different formats (PDF, HTML, MS Excel) and can be copied in the clipboard.
- In order to calculate, display and print it at the end of year or the end of a period, activate the Enhanced balance sheet command from the Account1 menu.
- Transactions without date are being considered as opening transactions and will not appear in the printouts of the Profit & Loss Statement.
- The following window, in which several printing options can be activated, appears.
See also Print Examples.
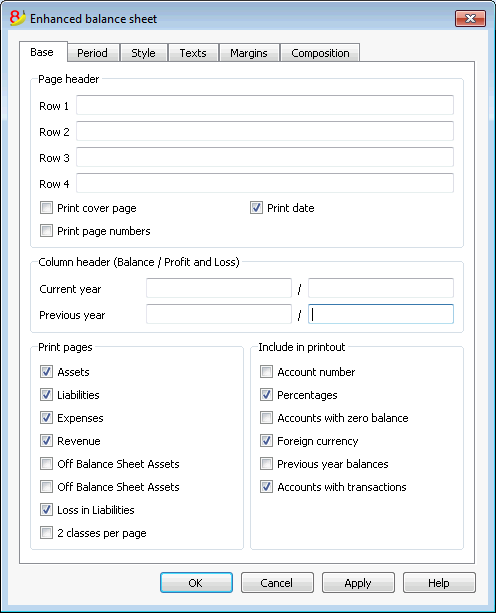
Page header
Rows 1 thru 4
In this field, enter texts to use as headers when printing.
Print cover page / Print date / Print page numbers
The activated options will be shown in the print-out.
Column header (Balance / Profit and Loss)
The first two vertical fields refer to the Balance Sheet, the two second ones refer to the Profit and Loss Statement.
Current year
Insert the final date of the current accounting.
Previous year
In this field, enter the final date of the previous year's accounting.
Print pages / Include in printout
By selecting the appropriate cells, it is possible to choose the options that should be activated in the printouts.
Other tabs
The explanations for the other tabs are available at the following pages:
Results
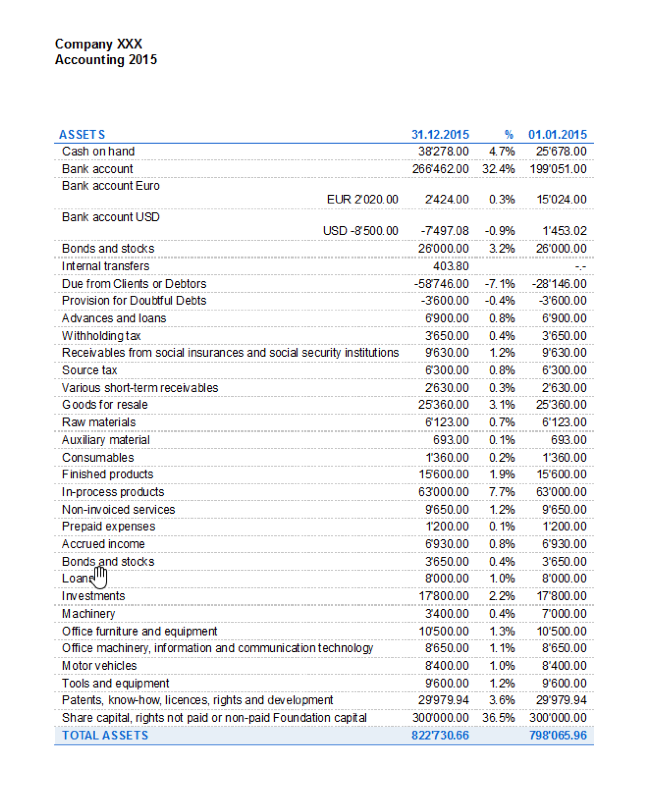
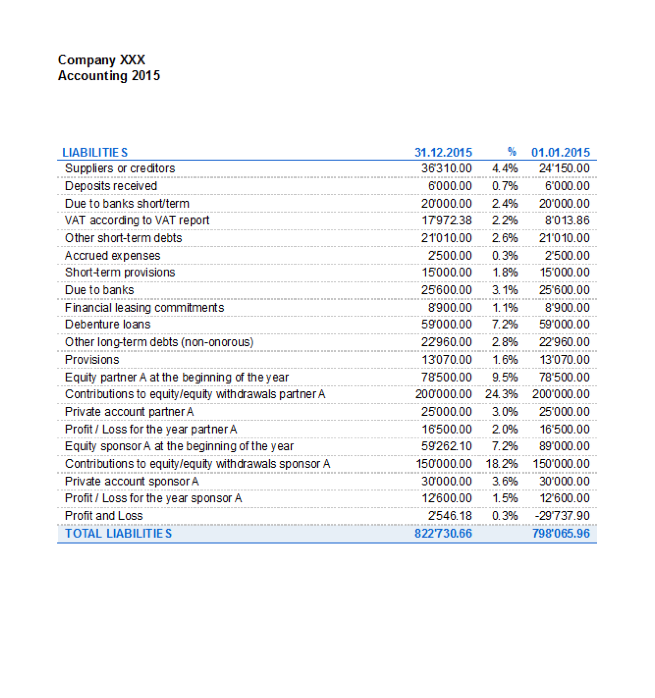
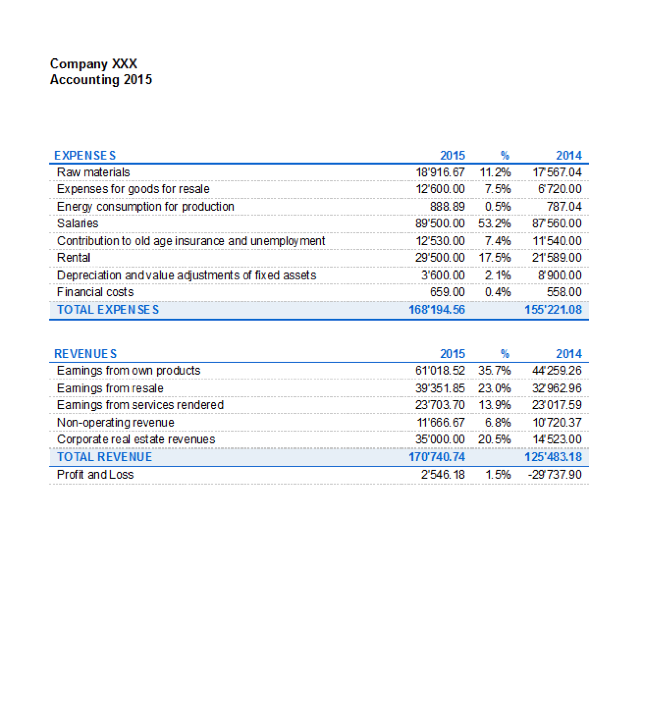
Enhanced Balance Sheet with groups
Print the Balance Sheet with your logo
In the new Banana Accounting Plus version, the Balance Sheet with groups printout has been improved with new customization possibilities. Among the new features, the possibility to insert your logo.
We advise you to immediately switch to Banana Accounting Plus and take advantage of the many new features.
The Balance sheet with groups differs from the Balance sheet for the following characteristics:
- Includes also subgroups in the printout, as in the chart of accounts (and not only groups).
- Offers the possibility to exclude groups or accounts (for instance, to display only the total of the group and not the accounts of which the total is composed).
- In the Chart of accounts - Sections it is possible to select which accounts to include or leave out in the printouts
- It is possible to choose, for a given period, what kind of subdivision you want (for example in the first semester, you can choose wether to obtain the data by month or by quarter)
- It is possible to have a subdivision by segment
- ... and much more!
In order to calculate, display and print the Enhanced Balance sheet by groups, click on the Enhanced balance sheet with groups command from the Account1 menu; a window appears, with different sections that allow the user to define the print setup.
See also Print Examples.
FAQ
- If I exclude the groups with a zero balance, the title rows that refer to the excluded groups are still being displayed; how can I erase them?
Go to Sections and activate Hide current row on the title rows that you wish to exclude. - I would like to exclude the display of the period in the titles of the printouts ("1st Semester 2013"); how can i do it?
Go to the Headers section and deactivate the Print period option. - On the cover page, when there are long titles, I would like to be able to choose how to subdivide the texts on two rows and whether I wish to apply bold print. Is it possible?
It is impossible to change the fonts on the cover page. - Some amounts are not included in the indicated period. Why?
Transactions without a date are being counted as openings and do not appear in the printouts of the Profit & Loss statement. Be sure to enter the date into all the transactions. - The Total groups that contain all the accounts of the classes 3 and 4 are being renamed with the text Profit or Loss, depending on the result of the accounting period. Can I change that?
Go to the Sections and overwrite the original text in the Alternate text zone of the active row. - In case the Show previous year option is being activated, and in the previous year file there are groups that are no longer present in the current year, the program will give error messages. Can I do something about it?
In order to print the Balance sheet with data of the previous and the current year, the groups of the previous year have to also be present in the current year.
Headers
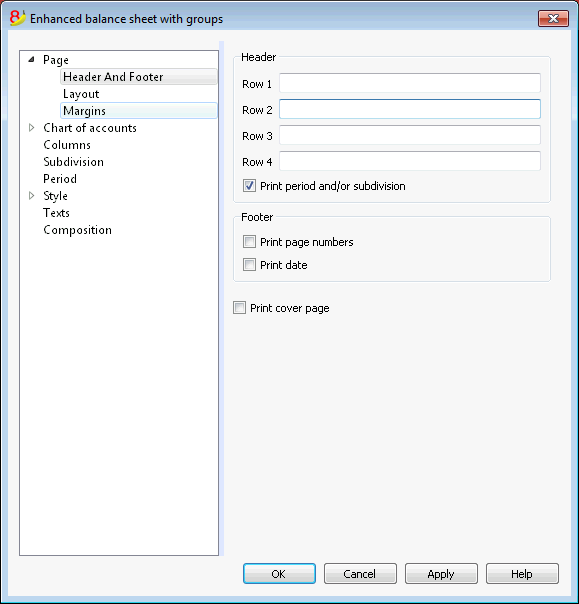
Header 1, Header 2, Header 3, Header 4
Enter as headers the text you wish appearing in the printouts. They will be on the cover page and on each page headings.
Print period and/or subdivision
This option is active only when a specific period has been defined. When you deactivate this option, the period will not be indicated in the titles of the printouts.
Footer
Print page numbers
By activating this function, page numbers will be printed.
Print date
By activating this function the date will be printed.
Print cover page
By activating this function the cover page will be printed.
Layout
Zoom
The printout layout will change according to the entered value.
Page orientation
You can select the page orientation: automatic, landscape and portrait.
Margins
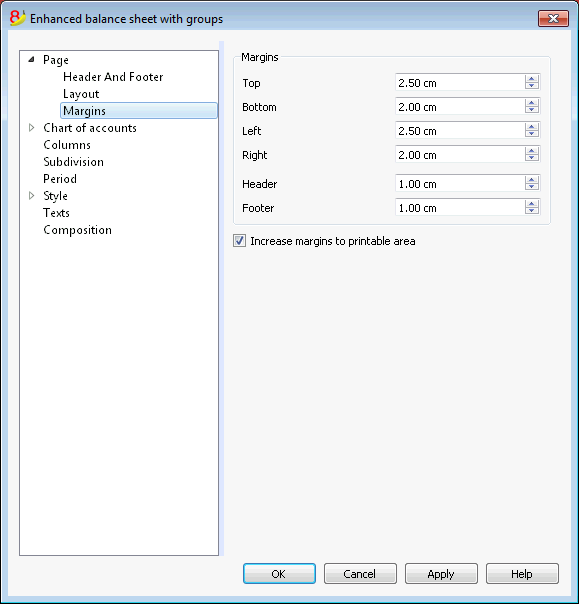
Top, Bottom, Left, Right
It's the distance between the page border and the content.
Header
It's the distance between the page header and the content.
Footer
It's the distance between the page footer and the content.
Increase margins to printable area
If the content exceeds the page margins it will be automatically adjusted to fit the printable area.
Sections
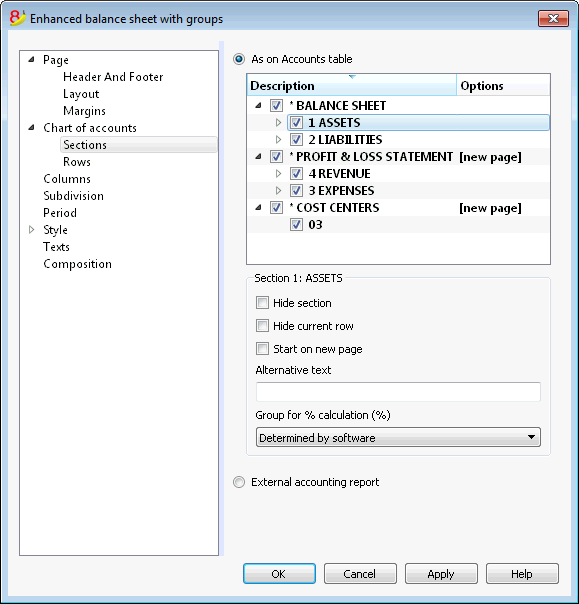
This section can vary depending on the settings of the Section column of the accounting plan - See the related document: Sections in the accounting plan
As on Accounts table
The display and the printout settings of the Enhanced Balance Sheet with groups, are the same as in the Accounts table.
Depending on the selection, there are different sections with different options:
- sections 1, 2, 3, 4, 01, 02, 03, 04... refer to the main items of the Balance Sheet
- account sections refer to the selected account
- group sections refer to the selected group
Section*
If you select a section with an asterisk, you will have the following options:
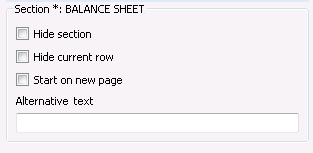
Hide section
Click on the section that you wish to hide.
Hide current row
Click on the row that you wish to hide.
Start on new page
Click on the header that you want to have on a new page and activate the option.
Alternative text
Enter an alternative text if you want to have a different one for the selected section or row.
If you select a number or a group section (1, 2, 3, 4.....), there are extra options:
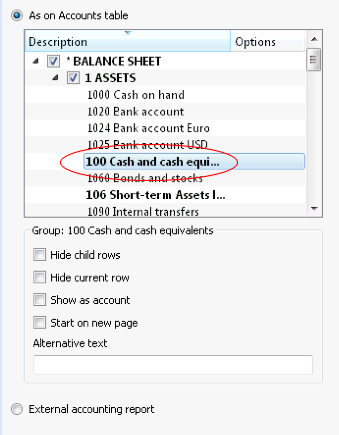
Group for % calculation (%)
This option is visible when selecting a section (Assets, Liabilities, ...). It is possible to indicate which group the % calculation should be based on.
Hide child rows
If you select a group and you activate this function, child rows of this group won't be printed in the Enhanced Balance Sheet.
Show as account
If you select a group and you activate this function, the group will be displayed as an account in the Balance sheet.
External accounting report
Print the Enhanced Balance Sheet by groups, based on the structure of the Accounting report file.
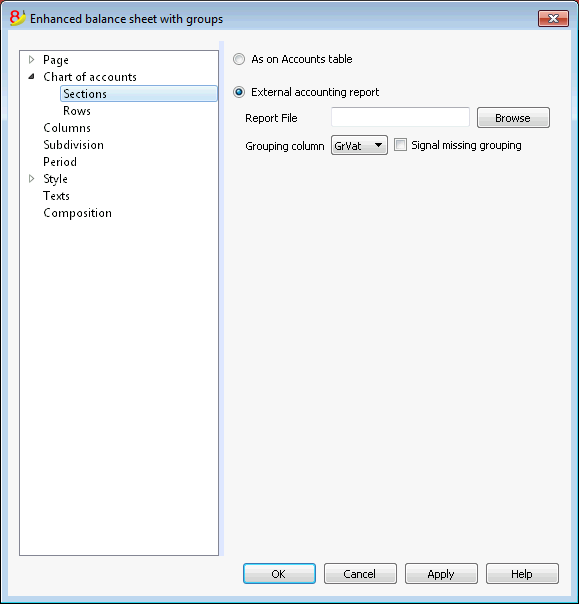
Report File
You can select the file of the External Accounting report with the Browse button.
Grouping column
Column in which the accounts refer to the groups defined in the External Accounting report. Available columns: Gr1, Gr2, Gr, BClasse and GrVat.
Signal missing grouping
Checks whether all accounts belong to a group in the External Accounting report.
Rows
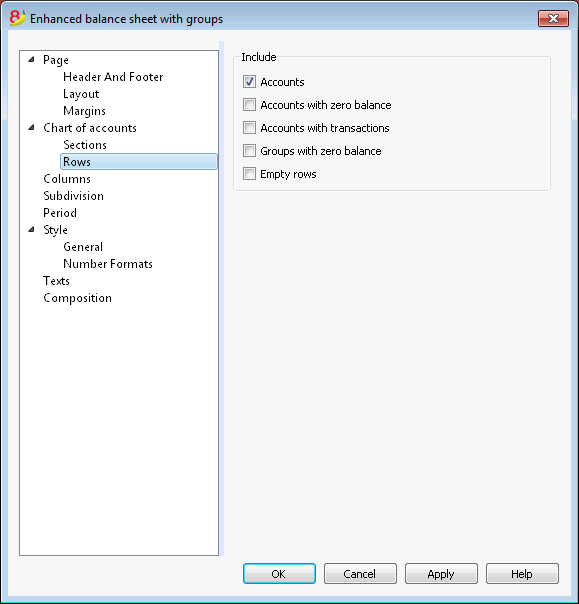
Accounts, accounts with zero balance, accounts with transactions, groups with zero balance, empty rows.
By activating the different options, you can include them in the printouts.
Columns
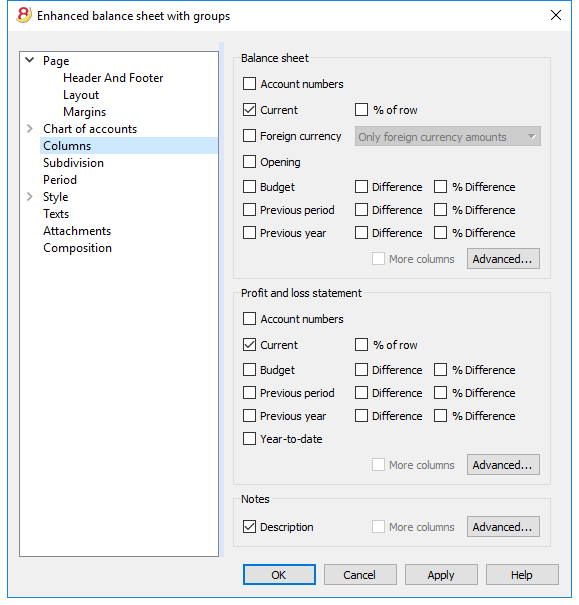
Balance Sheet, Profit & Loss Statement and Notes
You can choose the options you wish to include in the Balance Sheet, in the Profit and Loss Statement and in the Notes:
- Account number
- Current: the balance or movement in basic currency referred to the selected period or period subdivision
- Foreign currency: the balance in the account currency referred to the selected period or period subdivision
- % of row: includes the column with the percentage referring to the total (for example, % total Assets)
- Opening: opening balance at the beginning of the period
- Budget: budget amount referred to the selected period or period subdivision
- Previous period: the amount of the period previous to the selected period or period subdivision
- Previous year: the amount of the same period in the previous year
- Difference: the difference between the amounts of the current period and the other column (Budget, Previous period, Previous year)
- % Difference: is the difference, expressed in percentage, between the current period and the other column (Budget, Previous period, Previous year)
- Year-to-date: the balance or movement from the beginning of the accounting until the date of the last transaction.
Headers editing, color or display change of the columns
Each section has the Advanced button from where it is possible to change the column's settings and options.
Columns (Advanced)
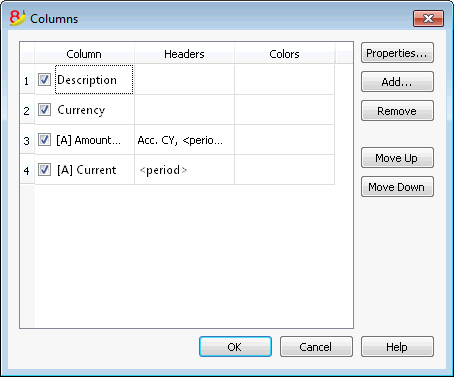
By pressing the Advanced button, it is possible to change the column's header:
- in order to make the column visible in the printout, check che corresponding checkbox
- in order to change the sequence of the columns, drag up or down the name of the column you wish to move, or use the Move Up and Move Down buttons
- In order to add new columns to be shown in the report (choosing them from a list) use the Add button
- In order to remove some columns from the list, use the Remove button
- In order to edit the display properties of a column (colors, headers, etc.) use the Properties button
Headers and options (Columns properties)
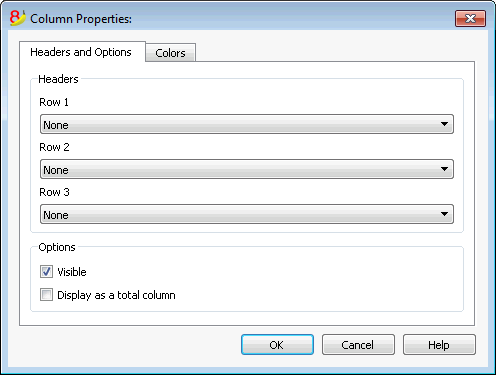
Headers
Row 1/ Row 2 / Row 3
It is possible to change the columns headers by selecting the Text option (from the drop down menu) and by entering the new header. If you select the Column option, the column name of the selected column will be shown.
Options
Visible
If this cell is activated, the column header will be shown.
Display as a total column
If activated, this option only shows the amounts in the Totals column.
Columns - add
Add / Delete
In the Balance sheet, Profit and Loss Statement and in the Notes, it is possible to add new columns (from the ones included in the list), or to delete the undesired ones. Starting from the Account1 menu -> Enhanced Balance sheet with groups -> Columns -> Advanced button -> Add button.
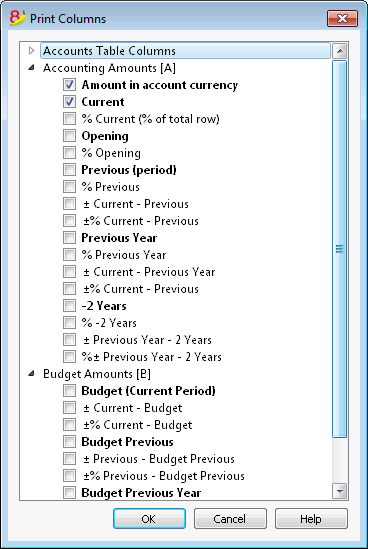
If one or more options are being activated, the program includes:
Accounts Table Columns
If you click on the header a list of all the columns of the Accounts Table will be shown:
You can then inlcude in the printout any column existing in the Accounts Table
Accounting amounts
These are the columns with the amounts calculated by the program, the opening balances and the entered transactions, for the indicated period or for the subdivision period
Amount in the Account currency
The account balances in foreign currencies will also be displayed.
Current
The balances of the current year will be displayed.
Opening
The Opening balances will be displayed.
Previous (period)
The balances of the previous period are being displayed (month, quarter, semester, etc).
Previous Year
The balances of the previous year are being displayed.
YTD (Year To Date)
This column is only available in the Profit & Loss Statement. The balances from the beginning of the year until the last transaction date are being displayed.
Budget amounts
See also Budget information. These are the columns with the amounts calculated by the program based on the budget amounts entered in the Accounts Table or in the Budget Table. If you created the Budget table and if some rows have been entered, the program will use the data of this table for its calculation, even if there are values in the Budget column of the Accounts Table.
Budget (Current period)
The amounts related to the foreseen budget of the current period are being displayed.
Budget Previous
The amounts related to the foreseen budget of the previous period are being displayed.
Budget Previous Year
The amounts related to the foreseen budget of the previous year are being displayed.
Notes on calculation period
The program cannot calculate amounts for periods overlapping between several accounting years or years with initial and final accounting dates that do not match.
Colors (Columns properties)
You can access this window by pressing on the Properties button, Colors tab (from the Enhanced balance sheet by groups command - Columns, from the Account1 menu)
Change
With this button you can change the text or the background color
Default color
With this button you can restore the default color for the text or the background.
Subdivision
From the Account1 menu choose the Enhanced Balance Sheet with groups command and select the Subdivision tab.
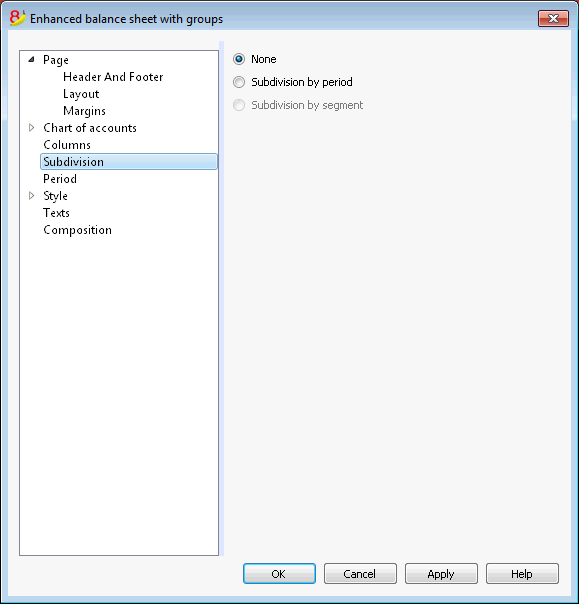
None
The whole period is shown.
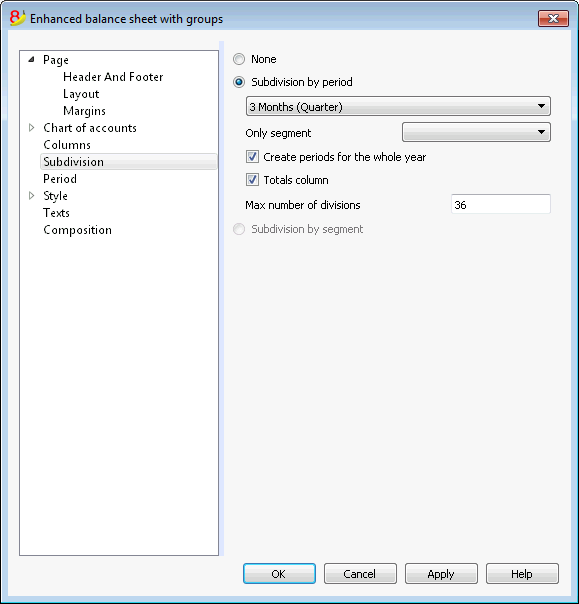
Subdivision by period
This function makes it possible to display the dates of the selected period per day, month, bi-monthly, per quarter, per 4 months, per semester or per year. The selected period will be shown in the column headers.
Only segment
Only the data related to the selected segment are being shown.
Create periods for the whole year
When the accounting period is not the same as the solar year, but when the user still wants to see all months, this function needs to be activated.
Totals column
This function creates a Totals column for the selected periods in the Profit / Loss Statement and in the Totals view of the Accounting reports command (Account1 menu).
Max number of divisions
The default maximum number of periods is 36. In particular cases, if the user would want to obtain special and very detailed statistics over a long time span, this value can be changed manually. A very high maximum number of periods can slow down the program.
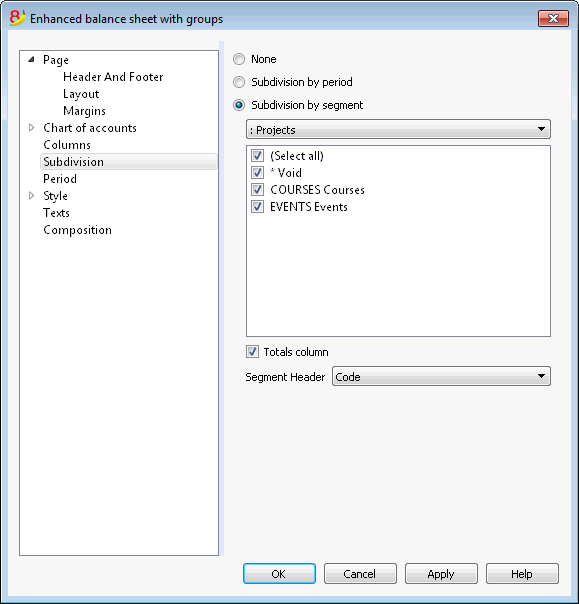
Subdivision by segment
The data related to the selected segment are being shown. This option is only available if segments have been set.
- Select all - all options will are selected
- Void - only the amount not assigned to any segment is shown
- Segments subdivision - Each subdivision will have the header given in the accounting plan. The data of the selected subdivision are shown.
Totals column
When this option is being activated, the totals for the selected segment will be obtained.
Segment header
You can choose the text to be displayed as column header for the segments.
Period
Explanation on the Period tab are available at the following link:
https://www.banana.ch/doc8/en/node/2766
Style Tab
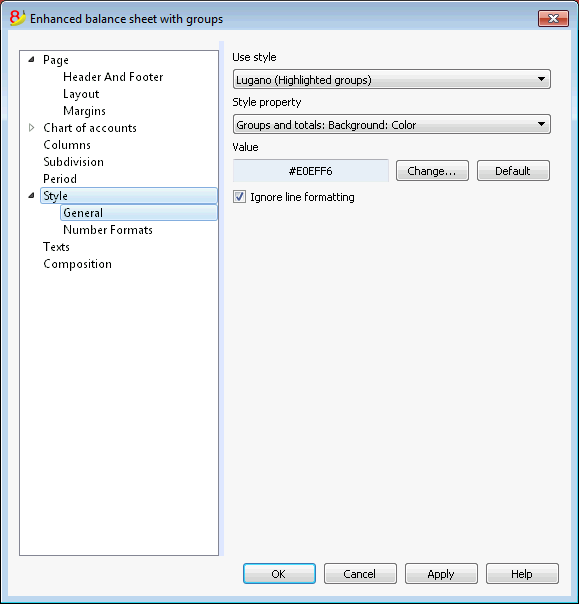
Use style
There are different models of the Enhanced balance sheet provided. By selecting one, the user can obtain the Enhanced balance sheet of his choice.
Style property
For each style, the color of the fonts and the backgrounds can be defined.
Value / Change... / Default
These functions allow the user to change style or to restore the default style.
Ignore line formatting
If this function is activated, the formatting will not be maintained.
Number formats
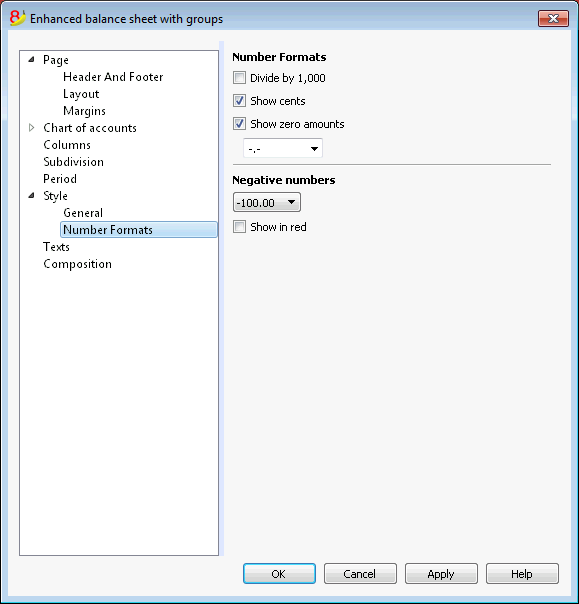
Divide by 1'000
If there are big amounts, by activating this option, three zeros will be taken off.
Show cents
By activating this option the cents will be shown.
Show zero amounts
By activating this option it is possible to choose between having the zero amounts shown with the 0,00 number or with the -,- symbol.
Negative numbers
Negative amounts can be shown with a minus sign before the amount, after the amount or the amount can be shown between parenthesis. You can also activate the option to have the negative numbers shown in red.
Texts
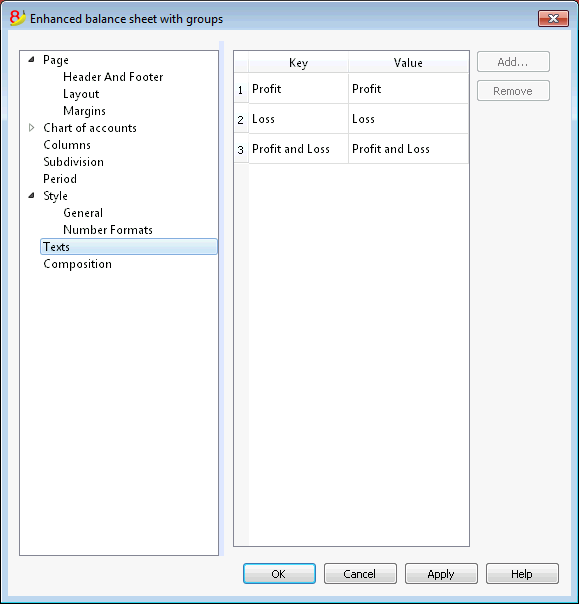
This tab is used to alter the texts of the program columns headers for print-outs.
In order to change the Value column you just have to double-click on the cell you want to edit.
Attachments
This sections allows you to add text that will be printent with the Balance sheet and Profit & Loss statement.
- texts are printed after the Balance sheet and Profit & Loss statement.
- each document begins on a new page
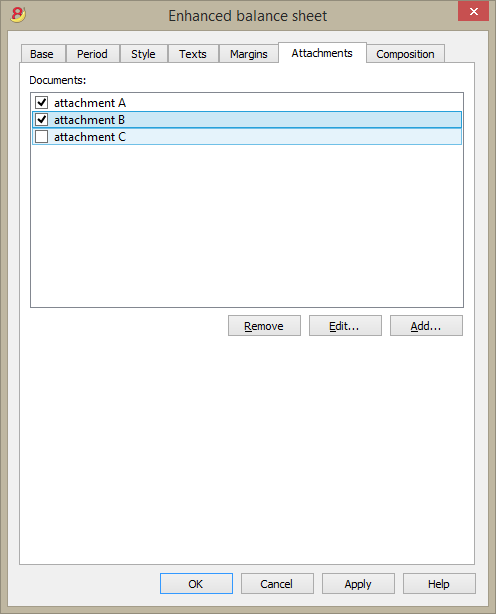
Documents
All documents listed in the Documents table (Html or text format) are listed here.
- You can change the report sequence, just by dragging the item with your mouse
- All documents with a check mark will be printed.
Edit...
A text editor will open allowing you to enter new text or edit the existing one.
Add
This button will open a text editor where you can add new text.
If you haven't created the Documents table yet, the programm will automatically add it.
Remove
This button will remove the selected element and its content.
Notes
- This feature is not available in previous versions.
If the file is open with a previous version of the Banana Accounting software, you will get a message that the file is not totally compatible. - If you edit this section and you press OK, in order to undo the operation you need to give the Undo command more that once.
Composition
Explanations on the Composition section are available at the following link:
http://doc8.banana.ch/en/node/2768
Account/Category cards
The account card gives a complete list of the accounting transactions for one or several accounts, cost centers, segments and groupes.
Opening the Account card
There are two methods to open an account card or a category card:
- Select the Account/category Card (Cash book and Income & Expense accounting) command or the Account card (Double-entry accounting) command of the Account1 menu in order to open and print several or all account cards.
- On the account number cell there is a small blue symbol; click on it just once in order to obtain the account card.
The groups of the Chart of accounts have the same symbol available as well, in order to display the account card.
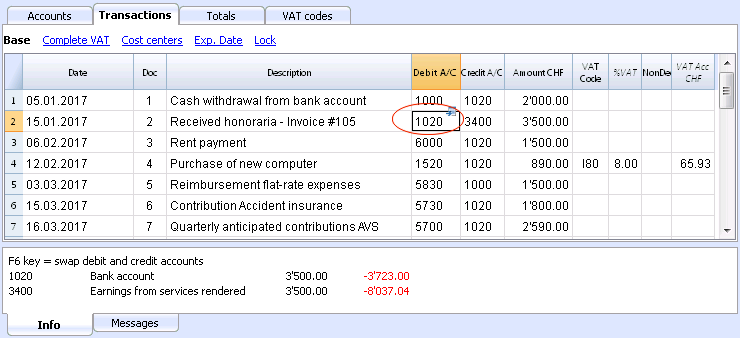
Updating the accounting card
The account card table is temporary and it is calculated when the command is given to do so. If, in the Transactions table, transactions are altered or added, they are not automatically updated on the account card - the user needs to select the Account Cards command again or click, in the Transactions table, once more on the account number's blue symbol, or in case the account card is still open, click on the small Refresh button on the right side (see image hereunder).
It is not possible to modify the data in the Account card. Double-click on the row number to go back to the original corresponding row of the Transactions or Budget table.
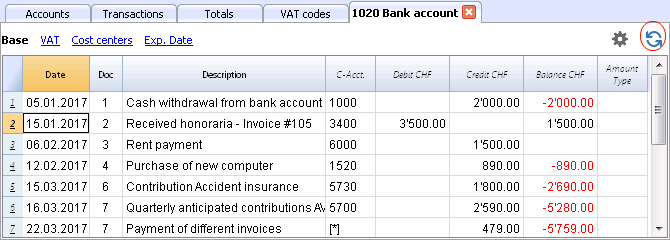
The AccountSelected column
In the AccountSelected column, which can be made visible, starting from any account card, through the Data menu -> Columns setup, the account on which the transaction took place is being displayed.
When you get an account card of one or more accounts, groups and segments, you will see the exact account that has been used.
The contra account in the account cards
In the Account cards, the Contra Account column (C-Acct.), which indicates the account that completes the transaction, is being shown.
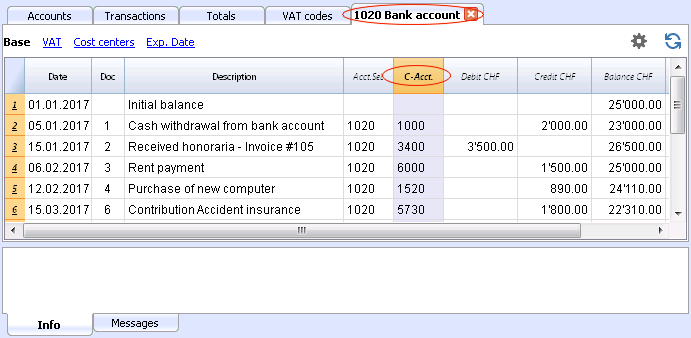
When there are transactions on multiple accounts (transactions on multiple rows) as in the example hereunder, and there is one account entered in debit and several accounts in credit, or the other way around, the software deducts the possible contra account using the following logic:
- In the first transaction row, the 1020 account is considered the common contra account of the transactions that follow.
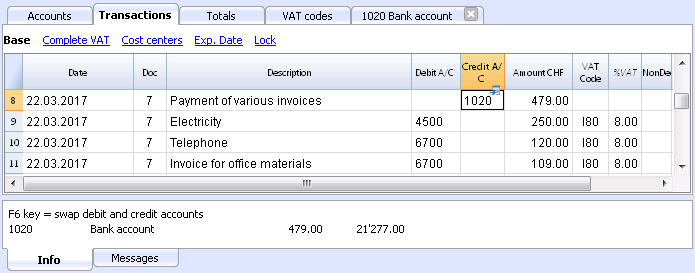
- On the Account card 1020, the composed transaction (Payment various invoices) shows the contra account indicated by the [*] symbol. It is impossible to have the indication of the contra accounts directly in the account card, because the account has several contra accounts (4500, 6700, 6700). For this reason the program indicates the [*] symbol in the C-Acct (Conta-Account) column, which means that we are dealing with a transaction on multiple accounts.
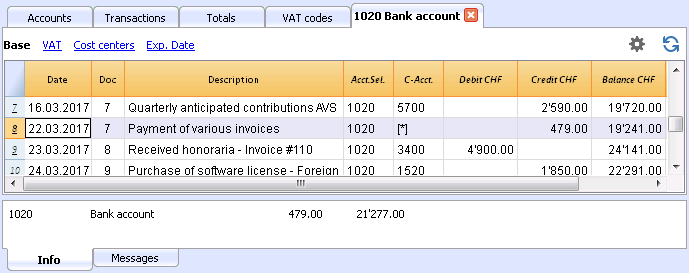
- On the Account cards of the next transaction rows (4500, 6700, 6700), the common contra account is indicated between square brackets ("[1020]"), and indicates a deducted contra account.
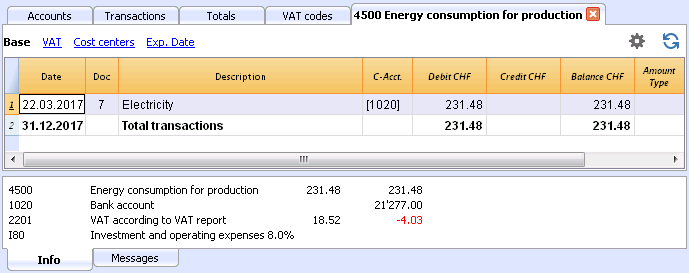
Cards of groups and classes
In the Account card of a group or a class, all the transactions of the accounts that belong to the selected group or class are being grouped together.
The accounts of the group or the class can be displayed by making the AccountSelected column visible.
Print all account cards
To print the Account cards:
- Account1 menu, Account cards command
- By means of the Filter, all the account cards that need to be printed completely or partially (for example, only accounts, cost centers, segments) can be automatically selected
- In the various sections Period, Options, Composition, activate the desired options (for ex. period, 1 account per page, ...)
- Press OK to confirm, after having selected the desired options.
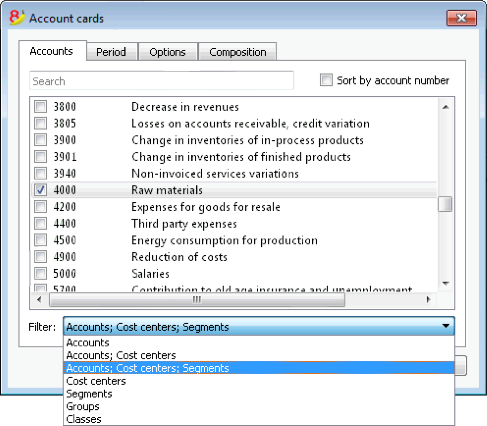
For the explanations of the different tabs, please visit the next few pages: Accounts/Categories tab, Period and Options.
The program will show the selected account cards.
In order to print, choose the Print command from the File menu.
When you have activated the Budget table in your file, you may choose which transactions you want to see (actual transactions or budget transactions).
Save the settings
In case you regularly print the account cards of specific accounts, for example, all those that concern the Sales accounts, it is useful to create a specific composition.
- Go to the Composition tab
- Create a new composition, using the New button
- Indicate the name of the composition, for example "Sales accounts", in the Description field of the window
- Select the accounts that you want to be printed.
Every time you wish to print these accounts, you can select the composition that you created.
Page setup
In Page setup, you can specify the margins & other settings of the page.
Accounts/Categories tab
You can access this windows by choosing the Account1 menu -> Account cards command (see the Account cards page)
Search
Enter the account or the description in order to filter the accounts list.
You can also enter the account to be displayed with segments (only experimental version).
Accounts and segments can be combined (see developer explanations):.
- 10000:01 will show all transactions of the 1000 account with the 01 segment.
- 1000|1001will show the transactions for account 1000 and 1001.
Accounts
The list of all available accounts appears.
If you wish to print one or more account cards activate only the desired accounts.
- (Select All)
By activating this option, all the accounts that are part of the Chart of accounts are automatically selected. - Filter
This function allows you to filter all account cards or just a selection, specifically:- Accounts, cost centre and segments - if no selection is made they are filtered by default
- Accounts/categories (existing cost centres and segments are excluded)
- Accounts, Cost centres (only segments are excluded)
- Cost centres (accounts and/or categories and segments are excluded)
- Segments (accounts and/or categories and cost centres are excluded)
- Groups - existing groups will be shown - you need to select the ones to be printed
- Classes - all classes will be shown - you need to select the ones to be printed.
Actual or Budget
When you have activated the Budget table in your file, you may select:
- Actual transactions
The entries in the Transaction tab will be processed. - Budget transactions
The entries in the Budget tab will be processed.
In the absence of the Budget tab, the amounts in the budget column of the account card, will be converted to monthly amounts on the basis of the opening and closing dates of the accounting file (if this one year, will be devided by 12 monthly instalments).
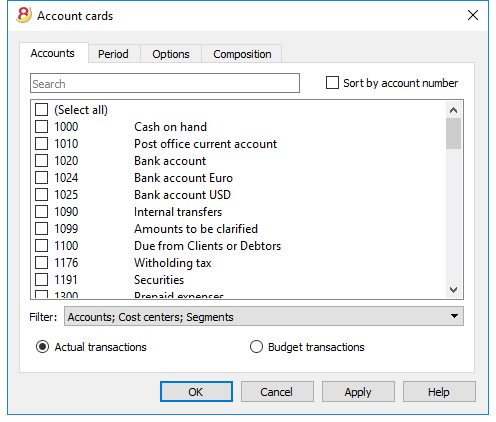
Differences in accounting entries (account card 00)
If differences in accounting entries occur (refer to the DEBIT - CREDIT difference error page), open the Group 00 account card (or the one in your Chart of Accounts that contains all the accounts of BClass 1,2,3,4).
You will have a list of all transactions with the successive balances, which after each entering should equal zero. The row which balance is not at zero contains the error.
Period tab
The explanations of the Period tab are the same as those for the Save file in Pdf - Period tab.
Options tab
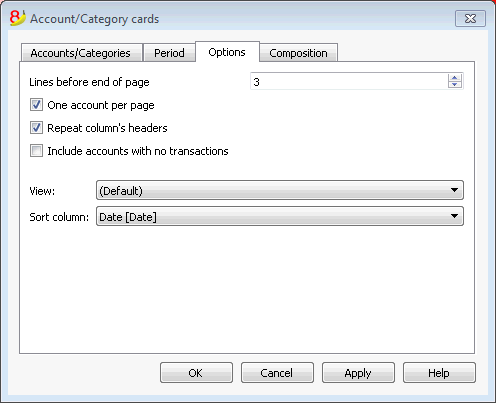
Lines before end of page
This function was created in order to avoid printing an account partially on one page and partially on the following. If the account card to be printed doesn't have at least a number of lines correspondent to the number input in this field, printing the whole card will be moved to the next page.
One account per page
By activating this function, each card will be printed on a separate page (even those with few transactions).
Repeat column's headers
By activating this function, the column headers will be repeated for each account, within the page.
Include accounts with no transactions
By activating this function, cards without transactions will be printed as well.
View
You can select the columns view to be included in the account cards display and printout:
- Base
- VAT
- Cost centers
- Expiration dates
If no criteria is specified the program will keep the order present in the transactions table.
Sort column
In the account card, transactions can be sorted according to different data criteria:
- Document date
- Value date
- Expiration date
- Payment date
Journal
With Banana Accounting the Journal corresponds to the Transactions table. It is possible to print the whole journal or just a part of it, selecting the rows that you wish to print.
In order to personalize the journal printout you can change the columns order and headings: you can find all the information on how to proceed in the Columns setup page; you can also choose several options in the printout; please visit the Page setup page.
There are different ways to print:
- place yourself in the Transactions table and click on the Print icon
- place yourself in the Transactions table and launch the Print command form the File menu
- from the Account1 menu click on the Print journal by period command; in this case you should then indicate if you wish to print the whole table or just a specific period
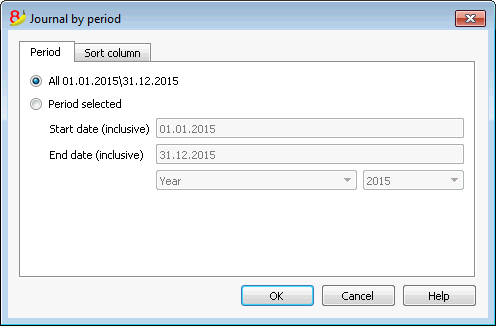
The information on the Period tab are explained in detail in the Period page of the General settings.
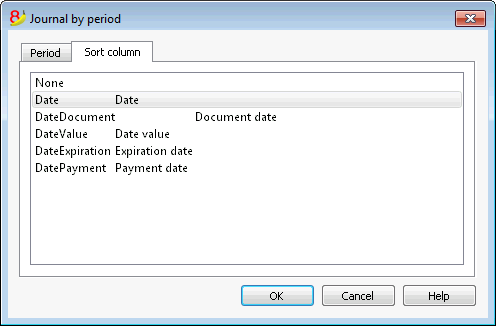
In the Sort column tab in is possible to choose the criteria the journal should be sorted and printed.
Accounting report
New Customization possibilities
In the new Banana Accounting Plus version the Printouts have been improved thanks to the possibility of new customization possibilities.
We advise you to immediately switch to Banana Accounting Plus and take advantage of the many new features.
- This command allows the user to visualize the amounts of accounts with a specific grouping, for a specific period or with a specific subdivision.
- In order to calculate, obtain and print reports, choose the Accounting reports command form the Account1 menu.
- Transactions without date are being considered as opening transactions and will not appear in the printouts of the Profit & Loss Statement.
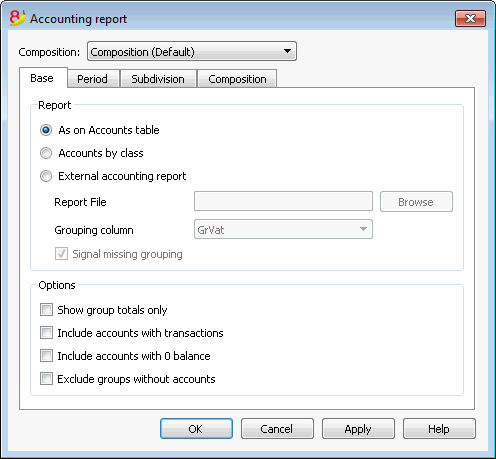
Base tab
Report
You can select the desired grouping scheme:
- As on Accounts table - the Report will show a list of all accounts just as in the Accounts table with the Opening balance and Balance columns
- Accounts by class - the Report will show the list of the accounts but without subgroups
- External accounting report - the Report will show the data according to a grouping system preset in a separate file (File menu, New command, Double-entry accounting group, Accounting Report).
Options
You can select the accounts to be included or excluded:
- Show group totals only - only the group totals will be shown
- Include accounts with transactions - only accounts with transactions will be printed
- Include accounts with 0 balance - accounts with zero balance will be printed as well
- Exclude groups without accounts - groups that contain only accounts with zero balance will not be printed.
Other tabs
The explanations for the other tabs are available at the following pages:
Report result
A new table is created where the results are shown.
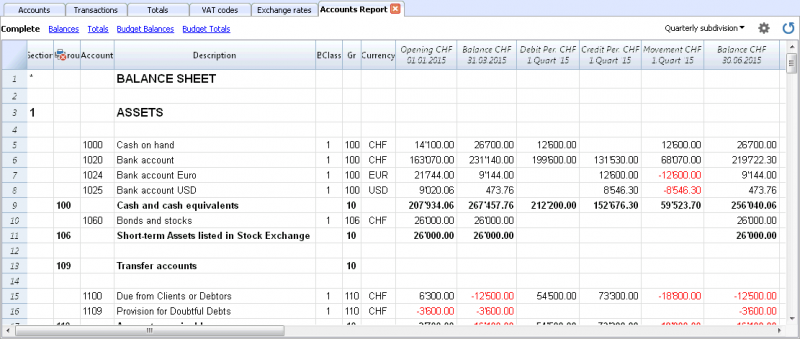
Budget
Budget amounts entered in the Accounts table
In the Accounts table, there is a Budget column where the budget for the current year can be entered.
The Budget table, on the contrary, offers many more possibilities, and allows you to enter budget transactions, creating a detailed planning of your financial and cash (or cash equivalent) situation.
For more information and examples please visit the Financial planning page.
Adding the Budget table
If your accounting file doesn't have the Budget table yet, proceed as follows.
- Go to the Tools menu
- Add new functionalities command
- Choose Add Budget table
Attention: this operation cannot be undone; if you want to go back to the previous situation, keep a copy of the pre-existing file.
Thereafter, the program will:
- Add the Budget table, carrying forward the budget values indicated in the Accounts table.
- Lock the Budget column in the Accounts table.
The values of this column are being calculated according to the budget transactions, using the period defined in the accounting tab basic data.
Preparing the budget
- Enter the individual budget transactions in the Budget table
Enter future operations as if they were normal transactions, but with a future date.
For example:- If you want to have a budget for the monthly sales, enter a sale transaction: enter your cash or cash equivalent account in the Debit account column and enter the sales account in the Credit account column, for each month. As date you can enter a date around the end of each month and as amount you can enter the amount you expect it to be.
If you want to have a budget for each product sale, enter some sale transactions for each product with your expected sale volume. - For your expenses budget, enter some transactions entering your expense account in the Debit account column your cash or cash equivalent account in the Credit account column.
If there are recurring operations, you can use the Repeat column to specify the repetition pattern.
- If you want to have a budget for the monthly sales, enter a sale transaction: enter your cash or cash equivalent account in the Debit account column and enter the sales account in the Credit account column, for each month. As date you can enter a date around the end of each month and as amount you can enter the amount you expect it to be.
- Display the budget data
- Go to the charts of accounts, and then into the Budget view, where you can view the total budget for your accounting period.
- You can also use the Balance sheet with groups print option and check the Budget column option, which will display budgeted date next to the actually registered data.
Budget table columns
The Budget table columns are very similar to the Transactions table columns. In the following example, to make it easier to understand, we used accounts with letters. Normally you would use your own account numbers.
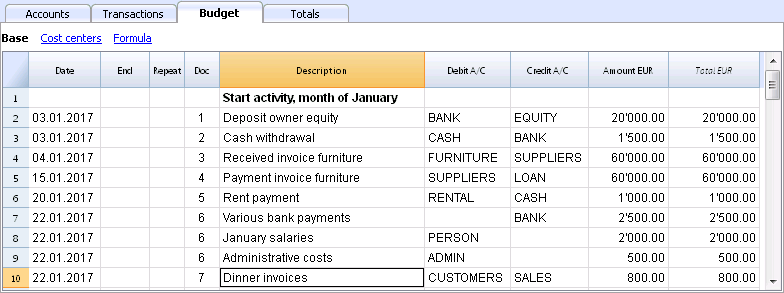
In order to prepare a budget is normally enough the amount column.
For more elaborate budgets you can also indicate the quantity, the unit prices, or you can enter a formula. The program will automatically calculate the amount in the Amount column.
Entering the Budget transaction rows
In the Budget table, the transactions can be entered in exactly the same way as in the Transactions table, indicating the date of the operation, the Debit and the Credit accounts and the amount.
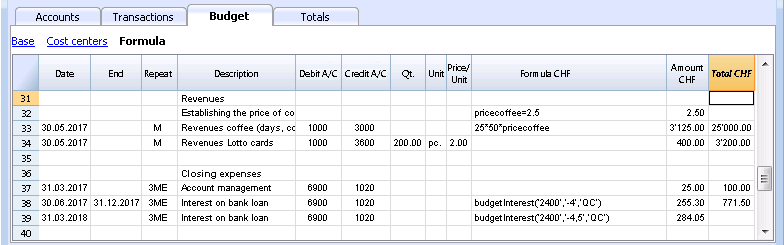
You will here find the budget columns explanations (not all columns are visible in the image above):
- Date column
The future date when you expect the operation to take place:
If you cannot precisely define the date, for example a monthly sales budget, enter the end of the month date. - Repeat column
A repetition code can be entered, possibly preceded by a number
(3M quarterly, 6M per semester, 7D weekly, 3ME quarterly end of month)- Empty: no repetition is taking place
- "D" for a daily repetition (Day)
- "W" for a weekly repetition (Week)
- "M" for a monthly repetition (Month)
- "ME" monthly repetition, but with a date at the end of the month.
If started the 28.02.2017, the next date will be 31.03.2017 - "Y" for a yearly repetition (Year)
- "YE" yearly, but with a date at the end of the month.
If started the 28.02.2015, the next date will be 29.02.2016.
- End column
The date beyond which no more repetition should appear is being indicated. - Variant column
A possible variant form of the budget can be indicated here, in combination with the Apps. - ForNewYear column
Here you can indicate how the transfer is to take place when Creating the New Year- No value: the date is being augmented by a year
- "1" The date remains the same
- "2" The operation is not being transferred to the new year
- Debit account and Credit account, CC1, CC2, CC3 columns
Just as in the Transactions table, you use these columns to define on which accounts the operation should be registered.
You can also use segments and cost centers, to obtain a budget by segment or cost center. - Quantity column
In this column you should enter the quantity description, for example sqm, ton, pc, .. - Price/Unit column
The unit price that, multiplied by the quantity, should give the total amount.- In the Income & Expenses accounting files, you should enter the price unit in negative (with a minus sign), so the amount will be entered in the Expenses column
- Amount column (in basic currency)
The amount to be recorded.
If the row has a repetition, the amount is indicated only in the first transaction; the amounts of the following transactions is shown in the account card.
The program will automatically calculate the amount in the following cases:- If there is a value in the Quantity or Price/Unit columns, the amount is automatically calculated according to the content of these two columns.
- In a double-entry accounting file the result will be a positive amount
- In an Income & Expenses accounting file, if the result is positive it will be considered an income, if it is negative it will be considered an expense.
- In case a formula was entered, the amount will be the result of the formula.
Formulas have priority over quantity and price/unit.
- If there is a value in the Quantity or Price/Unit columns, the amount is automatically calculated according to the content of these two columns.
- Total column
This is the sum of the amounts of the repetitive rows that are part of the specific accounting period.
To display the different amounts, use the Account cards command. - Formula column (in basic currency)
This column gives the user the possibility to enter calculation formulas, of the javascript language, plus the programming functions of the Banana Apps as well.
If there is a formula (or whichever text) the value of the Amount column is being set up according to the result of the formula. See below how to use it.- In a double-entry accounting file the formula result must always be a positive amount
- In an Income & Expenses accounting file, if the result is positive it will be considered an income, if it is negative it will be considered an expense.
- Amount in account currency column
This is the transaction amount in account currency (see multi-currency transactions).
This amount is necessary to calculate the value in basic currency, at the indicated exchange rate.
If there is a formula, the value is the result of the calculation of the formula.
In case of repetition, the first amount is being indicated. - Formula amount in account currency column
A calculation formula can be entered.
In case of repetition, the first amount is being indicated; the amounts of the following transactions is shown in the account card. - Total amount in account currency column
This is the sum of the amounts in account currency of the repetitive rows that are part of the specific accounting period.
If there is no date or if the initial or final date are not part of the accounting period, this column will be empty.
Functions you can use in the Formula column
If you want to see examples about formulas, please visit the following pages:
- Transactions template with use of Quantity and Formula columns.
- Transactions template for the multi-currency accounting with use of the Formula column in basic currency.
In the Formula column you can enter a formula in JavaScript language, plus the Banana Apps programming functions.
If there is a formula (or any text), the value in the Amount column is set according to the formula result.
It allows you to enter calculation formulas, in the JavaScript language, plus the Banana Apps programming functions.
- Last operation result.
The formula is executed and the result displayed.
10*3 //30 will be returned
If there is a sequence of several operations separated by a semicolon ";", the last operation will be resumed.
10*3;7;
7 will be returned - Decimal separator.
As decimal separator JavaScript only uses the point "."
If you use a different separator, the number is likely to be truncated. - DEBUG is a variable that can be true or false.
- If true, in the messages, all the results of the formulas are being displayed.
- row
Is a javascript object that refers to the current row.
The values of the cells can be retrieved with the value function ("columnNameXml").
row.value("date") returns to the date of the transaction.- row.value ("JRepeatNumber") returns the progressive of the repetition.
The first repetition is 0.
- row.value ("JRepeatNumber") returns the progressive of the repetition.
- budgetCurrent
It is a table that contains the budget rows after the repetitions creation. - budgetExchangeDifference (account, [date, exchangeRate])
This formula recalls the Banana.document.budgetExchangeDifference function. - BudgetGetPeriod(tDate, period)
Returns to the start date (startDate) and the end date (endtDate) relative to the date and the period where the period can be:- "MC", "QC", "YC" to indicate the month, the quarter or the current year.
- "MP", "QP", "YP" to indicate the month, the quarter or the previous year.
- t = BudgetGetPeriod('2015-01-01', 'MP') returns
t.strartDate // 2014-12-01
t.endtDate // 2014-12-31
- The following functions are similar to those available with Banana.document, however, with the added possibility to indicate as startDate the period of BudgetGetPeriod so that the function uses the current date and as a start date and end date the date returned of BudgetGetPeriod.
budgetBalance('1000', 'MP'); //returns the balance of 1000 to the end of the previous month
budgetTotal('1000', 'MC'); //returns the total movement of the 1000 account for the current month.- budgetBalance(account, startDate, endDate, extraParam)
- budgetOpening(account, startDate, endDate, extraParam)
- budgetTotal(account, startDate, endDate, extraParam)
- budgetBalanceCurrency(account, startDate, endDate, extraParam)
- budgetOpeningCurrency(account, startDate, endDate, extraParam)
- budgetTotalCurrency(account, startDate, endDate, extraParam)
- budgetInterest( account, interest, startDate, endDate, extraParam)
- credit(amount)
If the amount is under 0 returns the amount in positive, if not 0 returns. - debit(amount)
If the amount is greater than 0 returns the amount, if not 0 returns. - include
Includes and executes a javascript file, with the possibility to create its own functions and variables that can be recalled in the script.- include "file:test.js"
Executes the contents of the indicated file. The name refers to the file on which one is working. - include "documents:test.js"
Executes the contents of the text document contained in the documents table.
This has to be a file of the "text/javascript" type.
- include "file:test.js"
Variables
It is possible to define and use variables directly in the rows.
The variable must have been previously defined.
price = 10;
total = price * 5;
User defined functions
The user can define personal function with the JavaScript language, and recall them in the formulas.
It is possibile to define functions:
- Directly in a formula
- In a JavaScript coded attachment; this attachment must have as row id the "_budget.js" name
- In a text of the Documents table, that needs to be included with the Include command
function Taxcalculation(profit)
{
   var percentage = 10;
   if (profit > 50000)
      percentage = 10;
   else if (profit > 100000)
      percentage =20;
   return profit * percentage / 100;
}
Calculation and recalculation sequence
Each time that you change an amount in the Budget table, or that you manually recalculate the file (Shift+F9), the program:
- If it exists, first of all the program executes the "_budget.js" document content.
- It recalculates the Budget table rows:
- The program generates the repetitive row according to the Initial Date, Final Date and Repetition columns.
If there is in January a row with a monthly repetition, 12 identical rows will be created, each one with a date of a different month. - The budget rows are sorted by date (if they have the same date they will be listed in the order they were entered)
- The transaction amount is calculated according to the quantity and unit price or, if there is a formula, according to the formula result.
- For the multi-currency accounting, the program executes first the formula in the account currency, and then in the basic currency.
If there is no formula for the basic currency, the program will use the historic exchange rate and calculates the value in the basic currency. - For the accounting files with VAT, the VAT is calculated according to the transaction's amount.
- Rows previously processed will be used for the calculation of the following rows.
The accounts balance, at the budget row's date, will include the amounts previously processed.
If for example, in a February transaction you enter a formula to calculate the balance for the whole year, you will only get the balance up to the end of February.
- The program generates the repetitive row according to the Initial Date, Final Date and Repetition columns.
- It recalculates the budget values in the Accounts column, according to the budget transactions and to the opening balances.
- It updates the Total column amount in the Budget table.
If the initial or final date of the accounting is modified, as well as other values that are used for the calculation of the budget amounts (for example the VAT table), you need to operate a manual recalculation (Check accounting command from the Account1 menu).
If you have many rows, with many recurring transactions and with a long calculation period, the program may slow down when recalculation the Budget table. In this case we suggest you to uncheck the manual recalculation in the File & accounting properties (File menu).
Printing a budget
In order to print your budget, use the Balance sheet with groups command from the Account1 menu. In the Columns section, activate the Budget column.
If the budget was entered in the Budget table, you can also print the budget by period.
Creating the New Year
When creating the New Year, the program automatically recreates the budget transactions for the new year, according to the values of the New Year column in the Budget table. If this column is not visible you can activate it using the Columns setup command from the Data menu.
End of the Year closure and New Year
Avoid mistakes with Banana Accounting Plus
In order to have continuity and serenity of work, it is also worth starting the New Year with an updated software.
Facilitate checking your accounting work and immediately find differences: in Banana Accounting Plus, our new version, try the Balance column in the Transaction table. You can now see potential differences on each row and you can correct them right away. It is a very useful feature when closing the accounting period.
Many of our clients have already tried it and are enthusiastic about it. We advise you to switch now to Banana Accounting Plus and take advantage of the many new features.
Other resources: How to close and open the accounting year
End of the Year closure and New Year
At the end of every accounting year, before printing and filing the Balance Sheet and the Profit & Loss Statement, it is necessary to recheck the accounting file.
Please visit the Recheck the accounting page.
Tax aspects
Before closing the accounting, is is necessary to proceed with a series of operations that have fiscal implications. The marchandise account needs to be adapted, the transactions for depreciations need to be entered, the accrued income and liabilities, the VAT declaration needs to be completed, establish how and unto which accounts the profit or loss has to be attributed and there are many other operations for verification and checking.
From the program's point of view, there is no difference whether the profit is high or low. However, from a fiscal point of view, it implies a lot. These aspects need to be verified with your own tax advisor or accountant. It can be very useful, especially when you manage an accounting for the first the time and before you proceed with the closing of the books, to consult a specialist in order to understand what is required. The accountants are very busy at the beginning of the year and during the period preceding the deadline for the tax declaration. It can therefore be useful to meet with your accountant - or send him the accounting file - a few monts before the closing of the books, so that you can inform yourself on how to proceed.
Create a New Year
In order to start recording in the new year, with the Create New Year command of the Account2 menu and starting from the current year's file, a new accounting file is being created. Once the new year has been created and the file has been saved under a new name, the user can work in the file of the new year, but also in the one of the preceding year.
You can thus create the file of the new year, even before having closed the year in which you are still working. After having entered the last modifications in the previous year, use the Update Opening balances command of the Account2 menu, to retrieve the opening balances and again attribute the profit of the last year.
Performed Operations
The Create New Year command:
- Creates a new file (with no name) with the chart of accounts and all the settings identical to your current file, but without transactions.
- Copies the data from the Balance column of your current file to the Opening column of the new file (only for the selected classes)
- Adds the selected amount to the opening balance of the Profit or Loss from previous year account(s) in the new file.
- Copies the data from the Balance column of your current file to the Previous Year column of the new file (for all the accounts).
- Updates the opening and closing dates in the File and accounting Properties of the new file.
- In the Multi-currency accounting, enters the closing exchange rates of the previous year as opening exchange rates.
Create New Year command
- Open the current file and click on the Create New Year command from the Account2 menu: a window, that shows a difference corresponding to the profit or loss that has not yet been allocated, will appear. There may also be differences due to accounting errors.
- From the list that appears, the user can select the account to which the result of the accounting period has to be allocated, or one can directly confirm with OK if the allocation of the result has to be postponed.
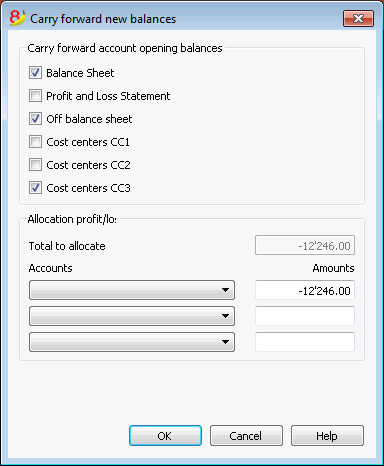
Carry forward account opening balances
The opening balances of the selected options are carried forward.
Indicate which accounts are required to have opening balances carried forward. Usually the Profit and Loss Statements balances are not carried forward. For specific needs you can always activate the option.
Allocation profit/loss
Total to allocate
The program will indicate the profit/loss that needs to be shared between various accounts.
Accounts/Amounts
If only one account is selected, the amount will automatically entered. Select the account or accounts (up to three) in which the result of the accounting period has to be allocated. In case there are several destination accounts for the result of the accounting period, the amounts should be inserted manually in the different boxes. The program will automatically update the opening balances. The Total Assets will exactly match the Total Liabilities.
Allocation of the result of the accounting period on more than three accounts.
In this case, allocate the result of the accounting period automatically on the Profit or loss brought forward account as usual, and continue to proceed with the creation of the new year.
In the new year (new file), Transactions table, proceed with a composed transaction in order to allocate the result of the accounting period from the Profit or loss brought forward account to the different destination accounts.
- Confirm the File and accounting properties for the new year.
- From the File menu, activate the Save as... command, indicating the folder where the new accounting file needs to be saved.
Updating opening balances command
The Updating Opening Balances command:
- Retrieves the closing data of the indicated file
- Copies them as data of the previous year in the current file (see Create New Year command).
This command doesn't influence the already entered recordings. Infact, it is like when creating a new year, as if you are recording in the current year.
Opening balances must be updated in the following situations:
- When you have created the new year and afterwards you entered more transactions - or made corrections - in the previous year
- When the profit/loss of the previous year has not been allocated.
Here is how to proceed to make the update:
- Open the current year accounting file and choose the Update opening balances command from the Account2 menu
- Select the previous year accounting file through the Browse button
- Follow the same steps as the ones of the Create New Year command (see top of the page)
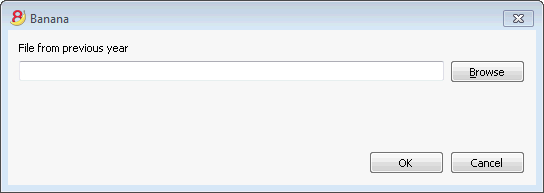
Differences in the opening balances
Avoid mistakes with Banana Accounting Plus
In order to facilitate checking your accounting work and to immediately find differences, in Banana Accounting Plus, our new version, we added the Balance column in the Transaction table. You can now see potential differences on each row and you can correct them right away. It is a very useful feature when closing the accounting period.
Many of our clients have already tried it and are enthusiastic about it. We advise you to switch now to Banana Accounting Plus and take advantage of the many new features.
Differences in the opening balances
At the opening of the Accounting year, the amounts of the Total Assets should correspond to the Total Liabilities, otherwise it is not possible to have a correct balancing. You need to check that in the information window there is no Opening balances difference message. If there is, you first need to correct the opening balances of the Balance Sheet so that the Total Assets balances the Total Liabilities (Opening balance column).
In the following example the program shows an error message reporting a difference of 150.- CHF.

After having corrected the opening balances the Total Assets must correspond to the Total Liabilities.
It is also possible to check the balancing in the Totals table.
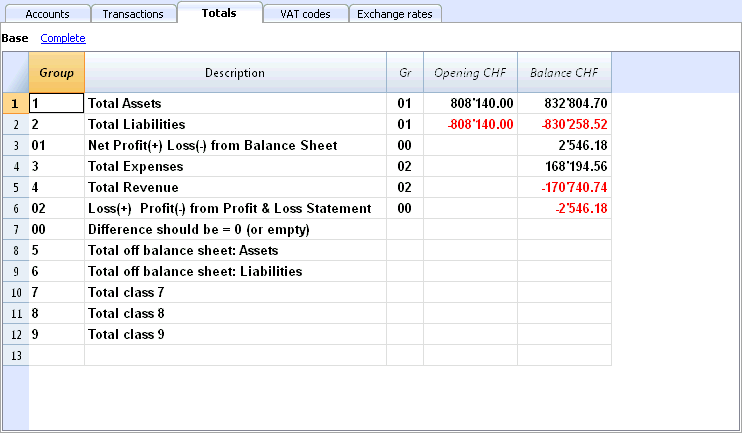
Multi-currency accounting
Multi-currency accounting is based on the double-entry accounting method and can also manage accounts and transactions in foreign currencies.
Many topics of the multicurrency accounting are the same as the double-entry accounting. In order to find missing lessons or in-depth information, we advice you to consult our internet pages on the Double-entry accounting.
Characteristics
- Manages the accounts also in foreign currency.
- Calculates the conversion automatically, based on the exchange rate inserted in the Exchange rate table
- Calculates the exchange rate differences automatically
- Offers Balance Sheets and Profit and Loss Statements in a second currency as well.
In order to change from a double-entry accounting file to a multi-currency accounting file, check the Convert to new file command
Information
Chart of accounts, file properties and exchange rates table
We suggest to choose one of the already configured examples and to personalize it according to your needs. Please note that the chart of accounts must include the account for profit and loss from exchange rate variation and there must be accounts in foreign currencies.
- Setup the chart of accounts
- Groups and subgroups
- File properties - foreign currencies tab
- Setup the Exchange rate table
Transactions
Accounting transactions must be entered in the same way as the double-entry accounting transactions
Printouts
Conversion
In order to add multicurrency features to a double entry accounting file, please visit the Convert to new file page.
If you want to change the basic currency of an existing accounting file (for example if your accounting file is in EUR and you want it in USD), proceed as follows:
- Save the file under a different name
- In the File properties
- Indicate the new basic currency
- Delete the reference to the previous year file
- In the Exchange rates table enter the exchange rates referred to the basic currency
- If there are many transactions to be converted, in the exchange table you can enter intermediate exchange rates (for examble for each month, indicating the beginning of the month's date). The program will use the historic exchange rate in the transactions.
- In the accounting plan
- Replace the old currency with the new one
You can use the Find and Replace function also (selected area only) - If there are opening balances, you need to re-enter them in the new currency
- Also the Previous year balance, budget and other columns must be converted
- Replace the old currency with the new one
- In the Transactions table
If there are trasactions, you need to correct them row by row:- For those transactions that are already in the right currency, with the F6 key the program recalculates the amount in the new basic currency.
- For other transactions you need to enter the right amount tin the basic currency and then press F6
- In the Budget table
Proceed just as in the Transactions table - Use the Check accounting command, fix possible errors, and keep using the Check accounting command until there are no more error messages.
Theoretical part
In this part, the basic theoretical notions about currency exchange are being explained.
Exchange rates and accounting issues
Every nation has its own currency and to obtain another currency it is necessary to buy it using the appropriate exchange. The price of a currency compared to another is called the exchange rate. To change money means to convert the amounts of one currency to another. The exchange (exchange rate) varies constantly and indicates the rate of conversion.
For example, on January 1st
- 1 Euro (EUR) was equal to 1.32030 US Dollar (USD)
- 1 US Dollar was equal to 0.7580 Euro
- 1 EUR was equal to 1.60970 Swiss Franc (CHF)
- 1 EUR was equal to 157.2030 Japanese Yen (JPY)
Multi-currency Accounting One talks about multi-currency accounting or multi-value accounting when accounts in different currencies are kept. It is necessary to have multi-currency accounting when a company has bank, cash, and debtors’ accounts in more than one currency. Even if just one account is in a foreign currency it is necessary to administer a multi-currency accounting.
Basic Currency
The amounts referring to different currencies cannot be totaled directly. It is necessary to have a basic currency to refer to and to use for the totals. The main point of accounting is that the totals of the “Debit” balances must correspond to the totals of the “Credit” balances. To verify that the accounting is balanced, there must be a single currency with which to do the totals. If there are different currencies, the basic currency must be indicated before anything else. Once the basic currency has been chosen and some operations have been executed, the basic currency can no longer be changed. To change the basic currency, the accounting must be closed and another opened with a different basic currency. The basic currency is also used to establish the Balance Sheet and to calculate the profit or loss of theoperation.
Each amount has its equivalent in basic currency
To be able to add the totals and verify that the operations balance, it is necessary to have the equivalent in basic currency for every transaction. In this way you can check that the total of the Debit entries is the same as the total of the Credit ones. If the basic currency is Euros and there are transactions in US Dollars, there needs to be an exchange value in Euros for every transaction in US Dollars. All the Euro amounts will be totaled to verify that the accounting balances.
Account currency
Each account has its own currency symbol which indicates in which currency the account will be administered. You must therefore indicate what the currency of the account will be. Each account will then have its own balance expressed in its own currency. Only entries in this currency will be permitted on this account. If the account is in Euro, then there can only be Euro entries on this account; if the account is in USD, then there can only be entries in the specified USD currency on this account. When you have to administer entries in YEN, then you have to have an account whose symbol is the YEN.
Account Balance in basic curency
For each account, alongside the balance in the account’s own currency, the balance in basic currency will also be kept, in order to calculate the balance sheet in basic currency.
The account card for the USD bank account has to correspond exactly to the bank statement as far as the USD amounts are concerned.
The value in basic currency will always be specified for each accounting entry. If the account is in USD, in the entries there will be, beyond the amounts in USD, also its value in EUR. The EUR balance will be given by the sum of all the entries expressed in EUR. The actual balance in basic currency will depend on the exchange rate factors used to calculate the exchange value of each, single entry to EUR.
If on a given day you take the actual balance in USD and convert it to EUR at the daily exchange rate, you will get an exchange value that differs from the balance of the account in basic currency. This difference is due to the fact that the exchange rate used for entries on a daily basis is different from the actual daily exchange rate.
Thus there is a difference between the actual value at the daily exchange rate and the accounting balance in basic currency. This accounting difference is called the exchange rate difference.
The difference between the balance in basic currency and the calculated value has to be registered, when the accounting is closed, as an exchange rate profit or loss.
Balances in another currency (currency2)
All the accounting reports will be calculated in basic currency. If you take the basic currency values and change them to another currency, you will get the balance in another currency. The program has a Currency2 column where all the values are automatically entered and presented in the currency specified as Currency2. The logic for the conversion of the amounts is the following:
- If Currency2 is the same as the account or operation currency, then the original value will be used.
- If the account is in USD and Currency2 is USD, the USD amount will be used.
- In all other cases the basic currency amount will be used and changed into Currency2.
- The daily exchange rate is used. Even for past entries, the exchange value in Currency2 will be expressed on the basis of the most recent exchange rate, and not on the historical one used on the day of the entry.
You need to pay attention to the fact that a balance converted to another currency will show small differences in the totals. Often the converted value of a total is not equal to the sum of split exchange values, as can be seen from the following example:
|
Moneta base EUR |
Moneta 2 USD |
|
|
Cash |
1.08 |
1.42 |
|
Bank |
1.08 |
1.42 |
|
Total Assets |
2.16 |
2.84 |
|
Personal capital |
2.16 |
2.85 |
|
Total Liabilities |
2.16 |
2.85 |
In the basic currency, total assets are equal to total liabilities. It is permitted to present a Balance Sheet that contains differences only if they are understandable and if it is indicated that they were due to calculations from another currency.
Accounts table, Currency 2 view
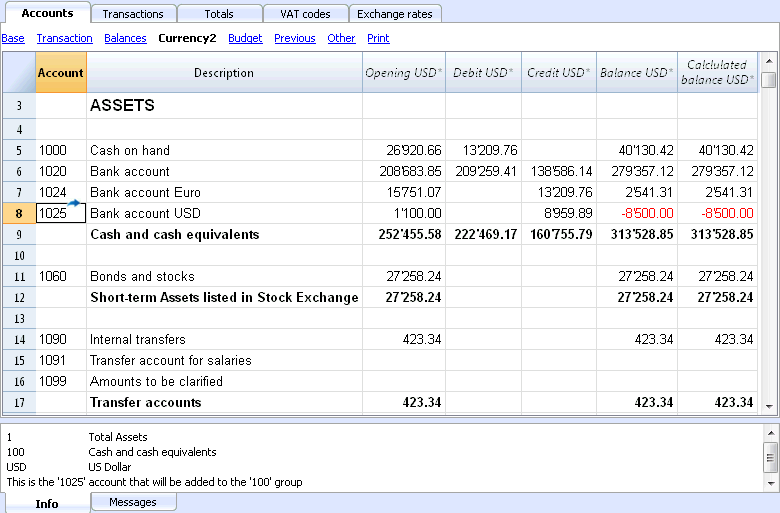
Converting currencies
Variability of exchange rates
The purchase/sale of currencies occurs in a free market. The price (exchange rate) is based on the law of supply and demand. The differences in the exchange value can be more or less important according to the fluctuations of the exchange rate.
|
Date |
Exchange rate EUR/USD |
Equivalent in EUR |
Equivalent value difference compared to 01-01 |
|
01-01 |
1.32030 |
1'320.03 |
|
|
31-03 |
1.33350 |
1'333.50 |
13.47 |
|
30-06 |
1.34750 |
1'347.50 |
27.47 |
|
30-09 |
1.42720 |
1'427.20 |
107.17 |
The exchange rate
The exchange rate refers to the basic currency. There are always two different exchange values between two currencies, according to the currency that is used as the basic currency.
For the USD and Euro currency, there are therefore two different exchange rates:
- If the basic currency of the exchange is EUR then the exchange rate is 1.32030
1 Euro (EUR) corresponds to 1.32030 US Dollars (USD) - If the basic currency of the exchange is USD then the exchange rate is 0.75800
1 US Dollar corresponds to 0.75800 Euros
In the current document, the Euro will be regularly used as the basic currency, to which other currencies will be compared.
Inverse exchange rate
Having the exchange of EUR/USD at 1.32030, it is possible to find the exchange rate of USD/EUR by dividing 1 by the exchange rate.
| Exchange rate |
Inverse exchange rate 1/exchange rate |
Inverse exchange rate rounded to 6 digits |
|
EUR/USD 1.32030 |
0.75800 |
0.758000 |
The exchange values calculated with an inverse exchange can turn out to be different from the originals because of the roundings.
| Exchange rate |
Inverse exchange rate |
Exchange value 10000 x original exchange rate |
Exchange value 10000 x inverse exchange rate |
Difference |
|
EUR/USD 1.32030 |
0.75800 |
13'203.00 |
13'192.61 |
10.39 |
Don't use inverse exchanges rates in order to avoid differences.
For example, for the transition to Euros, it was prohibited to use inverse exchange rates.
Multiplier
There are currencies that have very large exchange rates.
Always on January 1st
- 1 US Dollar = 670,800 Turkish Lira
- 1 Turkish Lira (TRL) = 0.00000149 US Dollar (USD)
Instead of using so many zeros, it can be said that
- 1000 Turkish Lira (TRL) = 0.00149 US Dollar (USD)
In this case, the multiplier is 1000 instead of 1.
Precision
As a rule, an exchange rate is specified with a precision of at least 6 figures after the decimal.
There are, however, cases where it is necessary to use more precision.
- 1 Turkish Lira (TRL) = 0.00000149 US Dollar (USD)
When the precision is changed and the exchange is rounded in a different way, the amounts also change. The precision with which the exchange is specified is very important.
Lowest denomination
For coin and paper money, especially, low denominations are used. As a rule the lowest denomination for Swiss francs is five centimes (0.05). When an exchange occurs, for example EUR/CHF:
1 EUR = 1.60970 CHF
| EUR |
Exchange rate |
Actual exchange value in CHF |
Rounded to lowest CHF denomination |
Difference |
Effective exchange rate |
|
10.00 |
1.60970 |
16.09 |
16.10 |
0.01 |
1.61 |
Calculation of exchange rates and values
When the Euro is the basic currency
The exchange factor for EUR/USD is1.32030
1 Euro (EUR) is equal to 1.32030 US Dollars (USD).
Calculation of the exchange value:
Multiply the basic currency amount by the exchange factor:
EUR 100 x 1.32030 = USD 132.03
Calculate the basic currency amount:
Divide the destination currency by the exchange rate:
USD 132.03 / 1.32030 = EUR 100
Calculate the exchange factor:
Divide the basic currency amount by the destination currency amount:
EUR 100 / USD 132.03 = 0.7574
Exchange rates for purchases and sales
Banks carry out the purchase and sale of currencies and maintain a margin of earnings. They apply different exchange rates depending on whether a determined value is being bought or sold.
Sale: the bank receives domestic money and gives (sells) foreign money.
Purchase: the bank receives (purchases) foreign money and gives domestic money.
Currency exchange and banknotes exchange (premium)
Currency exchange: exchange for written transactions (from one account to the other).
Banknote exchange: exchange for banknotes.
Premium: commission for converting a written amount to cash.
To exchange currency, the banks maintain a lesser margin (the difference between purchase/sale) compared to exchanging banknotes. When a written value is to be transformed (credit on the account) into cash currency, the bank applies a commission, called a premium.
Differences when changing back to basic currency
When an amount is exchanged into another currency, it is expected that the reverse exchange will render the same amount as it was originally.
| Basic amount |
Exchange rate |
Exchange value |
Return |
|
100.00 |
1.32030 |
132.03 |
100.00 |
However, you do not always come up with the same amount when converting currency back. Because of rounding errors, there can be cases where the same return value cannot be obtained.
| Basi amount EUR |
Exchange rate |
Exchange value in USD |
Retourn in EUR |
Differece in EUR |
|
328.67 |
1.32030 |
433.94 |
328.66 |
|
|
328.68 |
1.32030 |
433.95 |
328.67 |
0.01 |
|
328.69 |
1.32030 |
433.96 |
328.68 |
0.01 |
Differences of totals through splitting
The total exchange value of the components of an amount does not always give the same exchange value as the overall amount.
In this example, the amount of 2.16 EUR gives an exchange value in USD of 2.03. By splitting the amount and adding the two exchange values, 2.04 can be obtained.
| Amount in EUR |
Exchange rate |
Exchange value in USD |
|
2.16 |
1.32030 |
2.85
|
|
|
|
|
|
1.08 |
1.32030 |
1.42 |
|
1.08 |
1.32030 |
1.42 |
|
Totale 2.16 |
|
2.84 |
|
Differenza |
|
0.01 |
These mathematic differences cannot be eliminated if they are not recorded properly.
Revaluations and exchange rate differences
Exchange rates vary all the time and therefore also the exchange value to basic currency varies. Between one period and another, there will inevitably be exchange rate differences.
Exchange rate differences are not accounting errors but simple adjustments of the values made necessary in order to keep the accounting figures in step with normal fluctuations.
As you open the accounting, the figures in the balance column are equal to those present in the opening column. When there are entries, these will update the figures in the balance column.
The calculated balance column contains the exchange value to basic currency for the account balance, at the daily exchange (on the exchange rate table). The difference between the balance in basic currency and the calculated balance is the exchange rate difference.
|
|
Currency at opening |
Exchange value at opening in EUR |
Basic currency balance in EUR |
Calculate balance at 30.03.200xx in EUR |
Exchange rate difference |
||
|
Exchange rate |
|
|
1.32030 |
1.32030 |
1.30150 |
|
|
|
|
|
|
|
|
|
||
|
Cash |
EUR |
93.80 |
93.80 |
93.80 |
93.80 |
|
|
|
Bank |
USD |
100.00 |
75.74 |
75.74 |
76.83 |
1.09 |
|
|
Real estate |
EUR |
1'000.00 |
1'000.00 |
1'000.00 |
1'000.00 |
|
|
|
Total Assets |
|
|
1'169.54 |
1'169.54 |
1'170.63 |
|
|
|
|
|
|
|
|
|
|
|
|
|
|
|
|
|
|
|
|
|
Loan |
USD |
-500.00 |
-378.70 |
-378.70 |
-384.17 |
-5.47 |
|
|
Personal capital |
EUR |
-790.84 |
790.84 |
-790.84 |
-790.84 |
|
|
|
Total Liabelities |
|
|
-1'169.54 |
-1'169.54 |
-1'175.01 |
|
|
|
|
|
|
|
|
|
|
|
|
|
|
|
|
|
|
|
|
|
Loss |
|
|
|
|
-4.38 |
|
|
At March 30th the EUR/USD exchange rate is different from the one at the beginning of the year. In the above example there were no accounting entries during the three-month period. The situation, from an accounting point of view, has not changed since the beginning of the year. Despite this the total of the updated balance, using the rate at the end of March, is different when compared to the beginning of the year. The credit bank balance and the loan in USD have a different value in EUR. There are therefore consequences for the accounting even though there have been no entries.
In the above example, you will notice that the Euro is now worth less against the dollar compared to the beginning of the year. The dollar is therefore worth more against the Euro.
The exchange value of the balance on the account in USD is greater than it was at the beginning of the year. You have a greater estate and therefore a profit on the exchange rate.
On the debit side there is a USD 500.00 loan. Now the exchange value in EUR is greater compared to the value input at the beginning of the year. The value of the loan has increased and brings about a loss due to the exchange rate difference.
In the following example we shall use the hypothesis that there has been the opposite development. We imagine that the Euro has increased in value and is therefore worth more against the USD. The exchange value in EUR of an amount in dollars is less than the one at the beginning of the year.
|
|
|
Currency at opening |
Exchange value at opening EUR
|
Calculate balance at 30.03.20XX Eur (Hypothetical) |
Exchange rate differece |
|
Cambio |
|
|
1.32030 |
1.36150 |
|
|
|
|
|
|
|
|
|
Cash |
EUR |
93.80 |
93.80 |
93.80 |
|
|
Bank |
USD |
100.00 |
75.74 |
73.44 |
-2.30 |
|
Real estate |
EUR |
1'000.00 |
1'000.00 |
1'000.00 |
|
|
Total Assets |
|
|
1’169.54 |
1'167.24 |
|
|
|
|
|
|
|
|
|
|
|
|
|
|
|
|
Loan |
USD |
-500.00 |
-378.70 |
-367.24 |
11.46 |
|
Personal capital |
EUR |
-790.84 |
-790.84 |
-790.84 |
|
|
Totale Liabelities |
|
|
-1’169.54 |
-1'158.08 |
|
|
|
|
|
|
|
|
|
|
|
|
|
|
|
|
Profit |
|
|
|
9.16 |
9.16 |
As a consequence of an increase in the Euro/dollar exchange rate, you have a USD bank deposit with an exchange value in EUR which is less than at the beginning of the year. The total worth has diminished and there is therefore a loss.
The USD loan has a lower exchange value in EUR. A lesser liability is an advantage for the company and there is thus an exchange rate profit.
Exchange rate profit
You have an exchange rate profit when:
- The exchange value of your assets increases (increase of the investments)
- The exchange value of the liabilities decreases (decrease of the loans).
Exchange rate losses
You have an exchange rate loss when:
- The exchange value of your assets decreases (decrease of the investments)
- The exchange value of the liabilities increases (increase of the loans).
Accounting features foe exchange rate differences
Exchange rates can evolve in different ways. Often they rise, only to fall again. The principle rule for accounting is that the figures written on the Balance Sheet must be true ones. When you present your Balance Sheet, the exchange values of foreign currency accounts must be made at the exchange rate on the day of presentation.
The exchange rate difference is calculated as if you had to definitively convert the amount to basic currency. In reality there is no definitive conversion so you are only dealing with a correction to the accounting.
Closing exchange rate
At the end of each year it is necessary to prepare the complete Balance Sheet. The exchange rates thus have to be updated with the closing exchange rates. It is also necessary to enter the exchange rate differences once and for all; if these are not entered, then there will be differences in the opening balances.
Enter the exchange rate diferences
|
|
|
Currency balance |
Account balance EUR |
Calculate balance at 30.03.200xx EUR (hypothetical) |
Exchange rate difference |
|
Exchange |
|
|
1.32030 |
1.36150 |
|
|
|
|
|
|
|
|
|
Bank |
USD |
100.00 |
75.74 |
73.44 |
-2.30 |
|
|
|
|
|
|
|
|
Exchange rate difference |
EUR |
|
-2.30 |
|
|
|
|
|
|
|
|
|
|
Bank |
USD |
100.00 |
73.44 |
73.44 |
0.00 |
As can be seen from the above example, the bank balance is USD 100.00. For the accounting it has been valued at 75.74 EUR. Today’s actual exchange, though, is only EUR 73.44. There is a difference of EUR 2.30 EUR in basic currency. The entry must therefore decrease the EUR amount. You proceed with a transaction that debits the bank account and credits the exchange rate loss account by EUR 2.30. As you can see, the actual bank account balance of USD 100.00 has not been altered. The entry only alters the basic currency balance.
When entering the exchange rate difference, you need to be sure that the exchange value in basic currency corresponds to the actual exchange value, calculated at either the daily exchange rate or the closing one.
The figures in the account currency must not be altered. You must therefore proceed to make an entry that only alters the basic currency balance on the specific account.
As the account on the other side you will have the exchange rate profit or loss account.
Transactions with exchange rates at the time of purchase
Enties on account valued with the exchange rate of the time of purchase
When the positions, valued with exchange rates of the time of purchase (historical ones) are increased or decreased, you have to calculate the exchange of the exchange rate table, taking into account the development of the amounts being brought forward.
|
|
USD amount |
Exchange |
EUR exchange value |
Total USD |
Total EUR |
Historical Exchange |
|
Acquisition of shares |
100'000.00 |
0.9416 |
106'202.00 |
100'000.00 |
106'202.00 |
0.9416 |
|
Increase of shares |
50'000.00 |
0.8792 |
56'870.00 |
150'000.00 |
163'072.00 |
0.919839 |
Investiments and special exchange rates
Investments valued at the exchange rate of the time purchase
Certain investments (shares, real estate abroad) are valued using the exchange rate of the time of purchase (historical exchange) and not the current one. The exchange rate profit and loss is not accounted for until it is actually realized. You must therefore make certain these accounts do not get valued using the current exchange rate.
In order to input a fixed, historical exchange, you need to create a supplementary currency on the account table (e.g. USD1) with a fixed exchange rate. This currency will then only be used for this account with a fixed rate. If you have to make a transfer from the USD account to the USD1 account, you proceed exactly as if you were working with two different currencies. For this reason you will have to use a two-line entry.
Opening with special exchange rates
Inputting the opening balances in the “opening” column, foreign currency amounts will be converted to basic currency at the opening exchange rate.
If this system proves not to be flexible enough (you need various special rates or there are rounding differences) the opening can be done manually by making normal entries, indicating the amounts and the exchange rates you want for each account. In this case, the “opening” column of the Accounts table will be left blank.
Starting a multi-currency accounting
Creating an accounting file, starting from a template included in the program
In order to create a new accounting file, there are different modes.
Here we explain how to start an accounting, starting from an existing template included in the program.
- File menu, New command
- From the Group section, select Double-entry accounting
- In the File section, select Double-entry accounting or Double-entry accounting with VAT/Sales tax.
- In the Examples/Templates section, select the language/nation and choose one of the templates that is closest to your own needs
- By clicking on the Online Templates button you can access our website where we published all templates available for free.
- Select the language and the country for the templates.
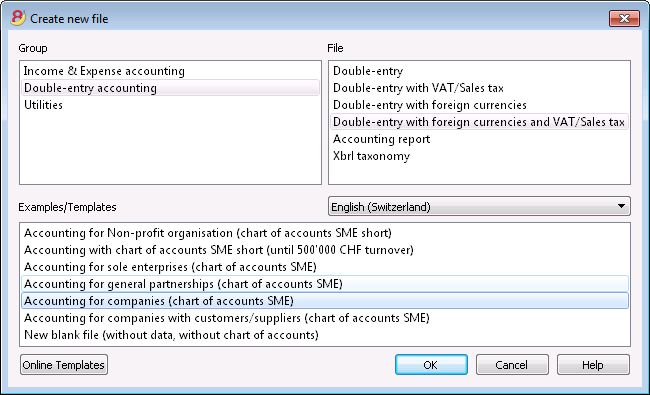
Setting up the file properties (basic data)
- From the File menu, File properties command,
Accounting tab
- Indicate the company name that will appear in the headers of the printouts and on the other data.
- Select the basic currency, with which the accounting will be kept.

General use of the program
Banana Accounting inspires itself from Excel. The user directions and the commands are kept as similar as possible to the ones of Microsoft Office.
For more information on the general use of the program, we refer to the explanations on our page Program interface.
The accounting is being contained in tables; all of them have the same way of operating.
Saving the file
- From the File menu choose the Save as... command, preferably indicating the name of the company and the current year (for example, "company_2017")
- Choose the folder where the file should be saved (for example, Documents -> Accounting)
- The program will add the "ac2" extension.
Exchange rates table
Before entering multi-currency transactions it is necessary to define the parameters of the used currencies in the Exchange rates table.

Customizing the Chart of accounts
In the Accounts table, customize the Chart of accounts and adapt it to your own needs:
- Add accounts and /or delete existing accounts (see Adding new rows)
- Modify the account numbers, the descriptions (for example, enter the name of your own Bank account), enter other groups, etc.
- To create subgroups, please consult our Groups page.

In the Chart of accounts, you can also define Cost centers or Segments, used to attribute the amounts in a more detailed or specific way.
The Transactions table
The multicurrency transactions have to be entered into the Transactions table; together they compose the Journal.

Speeding up the recording of the transactions
In order to accelerate the recording of the transactions, you can use
- the Smart fill function that allows the automatic autocomplete of data that have already been entered at an earlier date
- the Recurring transactions function, used to memorize recurring transactions into a separate table
- the import of your bank or post statement from e-banking
Checking customer and supplier invoices
Banana allows you to keep an eye on the invoices to be paid and the receivable, issued invoices. Please consult:
The Account card
The Account card automatically displays all the transactions that have been recorded on the same account (for example, cash, bank, clients, etc).

To display an account card, just position yourself with the mouse on the account number and click on the small blue symbol that appears.
Account card by period
To display the account card with the balances referring to a specific period, click on the Account1 menu, Account card command, and in the Period section, activate Period Selected, entering the Start and the End date of the period.
For more details, consult the page Period.
Printing the Account card
In order to print one account card, just display the card from the Accounts or the Transactions table and launch the print from on the File menu.
To print several or all account cards, click on the Account1 menu, Account card command, and select the account cards that need to be printed. By means of the Filter, all the account cards, or only a part of all of them (for example, only accounts, cost centers, segments), that need to be printed can be automatically selected.
For more details, consult the page Account Card.
The Balance Sheet and Profit and Loss Statement
The Balance sheet shows the balances of all the estate accounts, Assets & Liabilities. The difference between the Assets and the Liabilities determines the Share capital.

The display and the printing of the Balance Sheet is being executed from the Account1 menu, commands Enhanced Balance Sheet or Enhanced Balance Sheet with groups.
- The Enhanced Balance Sheet command simply lists all the accounts without distinguishing Groups and Subgroups
- The Enhanced Balance Sheet with groups command lists all the accounts while subdividing Groups and Subgroups; besides, it presents numerous features to customize the presentation, functions that are not provided in the Enhanced Balance Sheet.
Data archiving in PDF format
At the end of the year, when the entire accounting has been completed, corrected and audited, all the accounting data can be archived with the Create PDF dossier command of the File menu.

The Budget
- Accounts table, Budget column. For each account, the annual budget amount is being indicated.
In this case, when you set up the Budget from the Account1 menu, Enhanced Balance Sheet with groups command, the Budget column displays the amounts that refer to the entire year. - In the Budget table, that can be activated through the Tools menu, Add new functionalities command.
In this table, you can enter all the budgeted costs and revenue by means of entering transactions. If you activate this table, the column of the accounts table will be automatically deactivated.In this case you can set up a detailed budget, taking into account the possible variations over the year and in different periods of the year.

For more details, consult the Budget page.
File properties (Foreign currency)

Account for exchange rate profit
From the accounts list, select the one for the exchange rate profit present in the Chart of Accounts.
Account for exchange rate loss
From the accounts list, select the one for the exchange rate loss present in the Chart of Accounts.
Currency 2
It is possible to select a second currency in order to view the balances in a currency different from the basic one.
Exchange Rate valid even from basic currency
If this option is checked, the program will use the last entered exchange rate in the Exchange rate table (Exchange rate column).
The multi-currency chart of accounts
The Chart of accounts of the multi-currency accounting is the same as the one of an accounting without foreign currency, except for the specifics that are indicated here below.
Basic currency
In the File and accounting properties, the basic currency should be defined and in the Exchange rate table, the foreign currencies should be defined.
In the example here below, the basic currency is the CHF, which, as can be seen, appears in the column headers with the amounts in basic currency.
Account currency
- The Assets and the Liabilities (Balance sheet accounts) can be in basic currency or in foreign currency.
-
The Costs (Expenses) and Revenue accounts must be in basic currency.
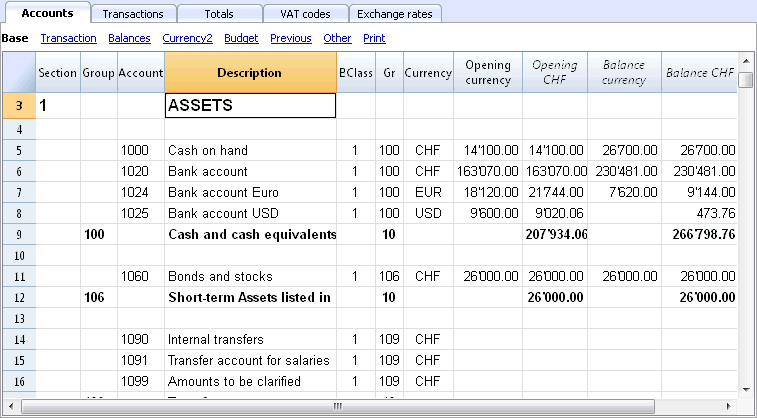
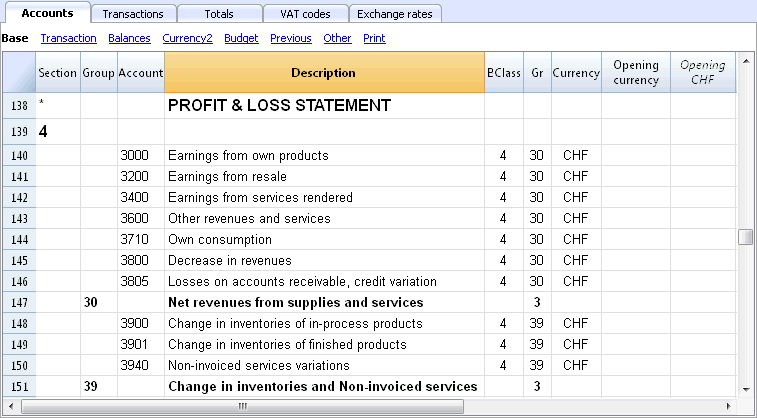
Explanation of the columns of the multicurrency accounting
- The opening balance in basic currency.
A protected column, calculated by the program based on the opening balance in currency and the opening exchange rate (exchange rate of the exchange rate table indicated in a row without date). - The current balance in currency.
Calculated by the program, using the opening balance in currency and the currency amount indicated in the transaction rows. - The current balance in basic currency.
Calculated by the program, using the opening balance in basic currency and the amount in basic currency indicated in the transaction rows. - The calculated balance
Is the balance in the account currency converted at the current exchange rate (exchange rate of the exchange rate table indicated in a row without date).
-
In the Other view from the Account table, there is the Exch. rate Diff. Acct.
In this column, for specific account/accounts, you can enter an account (or several accounts, separated by a semicolon) in order to enter the exchange rate differences. These are different accounts from those in the File and accounting properties (account for exchange rate profit and loss).
If in the Exch. rate Diff. Account column there are no accounts, the program will register exchange rate differences on the accounts indicated in the File and accounting properties; if however accounts are indicated both in the File and accounting properties and in the Exch.rate Diff.Acct. (Other view), the program will only consider the accounts indicated in the Exch.rate Diff.Acct., and ignore the File and accounting properties indications.
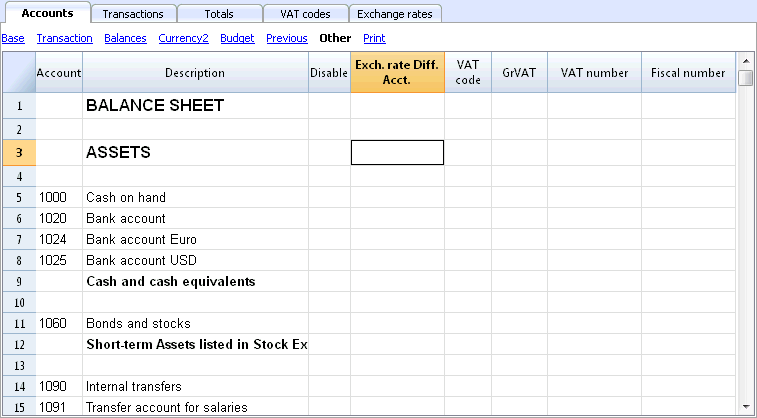
Opening Balances
- Before entering the opening balances, the opening exchange rates for the different currencies have to be indicated in the Exchange rate table.
The opening exchange rate is the one indicated in the Rate Opening column in the row of the exchange rate without date.
The opening exchange rate must be equal to the closing exchange rate of the preceding year. See Differences in the Opening Balances. - The Opening balances have to be inserted in the Accounts table, in the Opening currency column, Base view. This operation needs to be done for both basic currency and foreign currency accounts.
- The Opening Basic currency column is protected; the program automatically calculates the value in the basic currency on the basis of the opening exchange rate shown in the Exchange rate table.
- The opening balances for the liabilities have to be entered with the minus sign (-) in front of the amount.
- The opening balances of assets and liabilities have to balance out; for more information please visit the Recheck the accounting page.
Revaluation accounts and historical exchange rates
The basic currency amount of an account is being calculated using the opening exchange rate and the exchange rates that are indicated in the transactions. Because this value corresponds to equivalent of today's exchange rate, it is necessary to revaluate the account.
The revaluation takes place by calculating the exchange rate differences. We need to record on the account just an amount in basic currency (exchange rate difference), so that the balance in basic currency results equal to the equivalent (calculated balance)
There are accounts (related to, for example, investments) for which a so-called historic exchange rate is being used. By an historical exchange rate we mean un exchange rate that doesn't vary over time.
In order to have exchange rates that don't change, an extra currency symbol (for example EUR2) must be created in the Exchange rate table. To this currency, the same exchange rate is always being applied.
You can create as many currency symbols as you need for the different accounts with historic exchange rates.
Group totals in foreign currency
Normally, the columns with amounts in foreign currency don't have totals, as it has little sense to calculate totals for values in different currency.
If you have a group that includes only accounts in a specific currency, the currency symbol can be indicated at a group level and, in the Accounts table, the program totalizes these amounts. If there would be accounts with various currency symbols, there would be no amount indicated (the program would not report an error either).
Differences in the opening balances
When, in the preceding year, the exchange rate differences have not been calculated, the program signals, in the New Year, a difference in the opening balances.
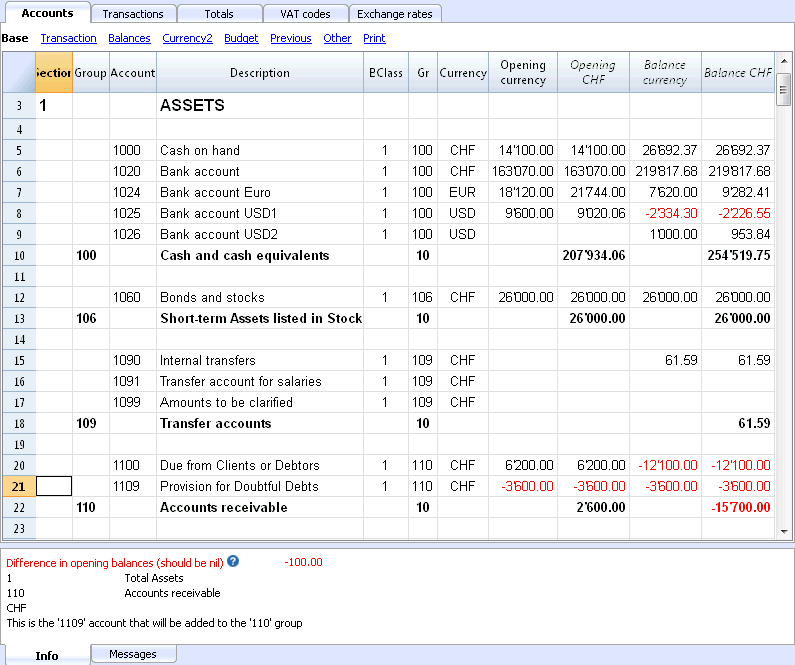
In order to resolve this problem, there are two possibilities:
- Insert in the Exchange rate table, Exchange rate column, the official exchange rates at 31.12
- Activate, from the Account2 menu, the Create transaction for exchange rate variation command.
- Open the file for the New Year and update the opening balances.
- Open the file of the New Year
- Insert in the Assets or the Liabilities (Accounts table), according to the situation, a new account Unrecorded Exchange rate differences or record the amount in the 1090 Internal tranfers account (as in the following example)
- In the Opening Currency column, insert the amount corresponding to the exchange rate difference.
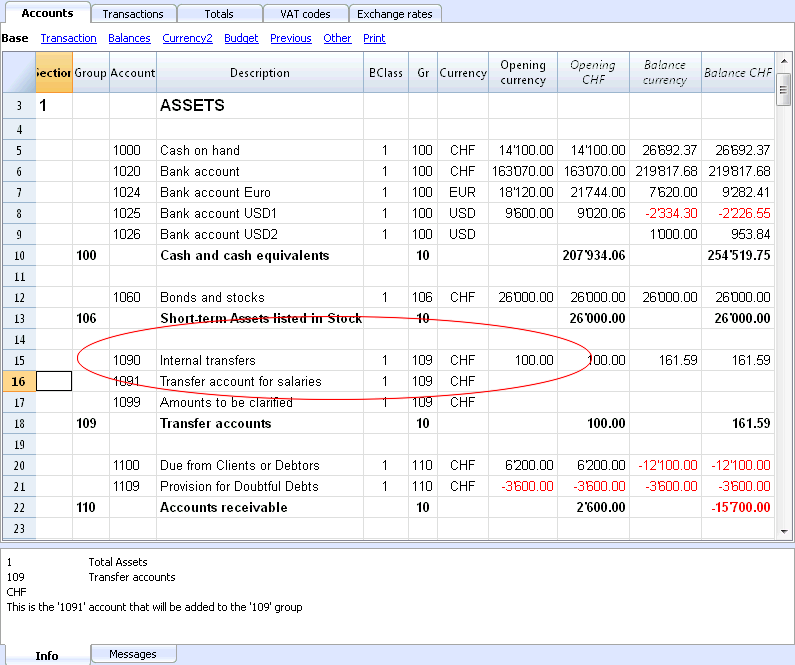
- At 01.01, the exchange rate difference account has to be put to zero by means of a transaction (Transactions table), using the account related to the exchange rate differences (Exchange rate profit/loss) of the profit/loss statement as its counterpart.
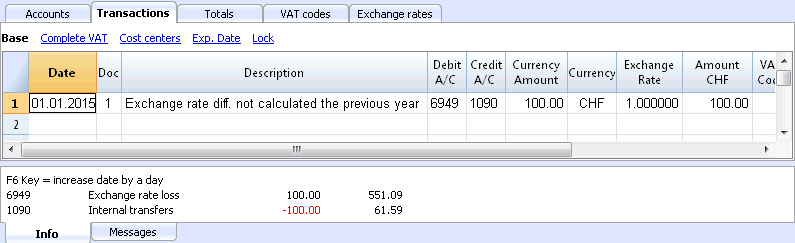
After the transaction to arrange the exchange rate differences has been made, the account that has been used should have a balance of zero, or equal to the amount corresponding to the balance prior to the transaction.
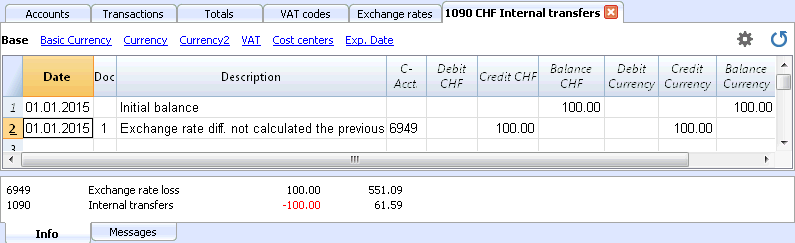
Exchange rates table
Before entering multi-currency transactions it is necessary to define the parameters of the used currencies in the Exchange rates table.
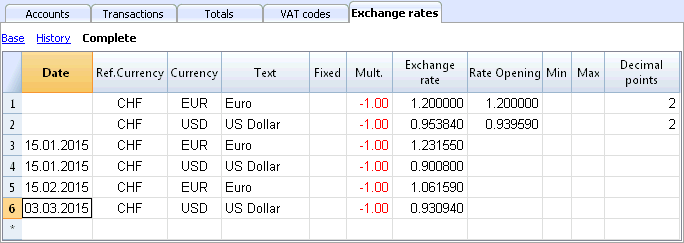
Columns of the Exchange rate table
Date
The date for the exchange rate.
-
Exchange rate rows without date. Actual and Opening exchange rate.
For each used foreign currency, it is necessary to have a row in the Exchange rate table with an exchange rate and without a date.- Exchange rate
This is the one that is considered to be the most recent and also the closing exchange rate.
It is being used for the calculation of the Balance Calculated column (Accounts table) and always when there is no historical exchange rate. - Rate Opening
It is being used to convert the opening balance amounts of foreign currencies into the opening balance amounts of the basic currency of the accounting.
- Exchange rate
-
Rows with a data (historical exchange rates)
In the here indicated cases, the program chooses the exchange rate with a the date equal to the transaction row or with the closest preceding date to that row.- If you have an historical exchange rate, the value in the Exchange rate column will be proposed as default change when you insert a new transaction;
- When transactions for exchange rate variations are being created and the option to use the historical exchange rate is being activated;
- When entering an exchange rate with a date, an Opening exchange rate should not be indicated.
Ref. Currency
This is the currency that serves as the basis for the exchange rate (the CHF in our example.)
Currency
This is the destination currency, the one into which the value of the “Ref. Currency” will be converted.
Text
A text to indicate the foreign currency that we are dealing with.
Fixed
True or false. If there is a fixed exchange rate, enter Yes in this column. The used exchange rate is specified in the Exchange Rate column.
Mult.
The multiplier is usually 1, 100 or 1000 and is used to obtain the effective exchange rate. The multiplier is used for currencies which have a very low unit value in order to avoid having to insert exchange rates with many zeros. The multiplier can also be negative (-1). In this case, the program will use an inverted exchange rate or else it will act as if the currencies inserted in the Currency and Reference Currency columns had actually been inverted. Do not alter the multiplier once there are already transactions in the same currency, otherwise the program will signal a transaction error due to erroneous exchange rates.
Exchange rate
This column shows the actual exchange rate or the closing exchange rate for the currency compared to the reference currency.
It is also being used for calculating the exchange rate differences. Before calculating the exchange rate differences or closing the accounting, this value must be updated by entering the closing exchange rate.
The exchange rate and the multiplier are being applied according to the following formulas
- With multiplier > 0
Currency amount = Ref. currency amount* (exchange rate / |mult.|)
- With multiplier < 0
Ref. currency amount = Currency amount * (exchange rate / |mult.|)
Opening Exchange rate
This is the exchange rate at the moment the accounting is opened. To be indicated only on a row without date.
- It is used to convert the opening amount of the foreign currency into the opening amount of the accounting’s basic currency.
- Should be corresponding to the closing exchange rate of the preceding year.
If the closing exchange rates are not equal to the opening exchange rates, the Assets and Liabilities might result into different totals; see Differences in the Opening Balances. - The opening exchange rate should never be changed in the course of the year, otherwise exchange rate differences are being created in the total of the opening balances.
- When creating a new year or when updating the opening balances, the program defines the opening exchange rate with the value indicated in the Exchange rate column (row without date) of the accounting of the previous year.
Minimum
This column shows the minimum exchange rate accepted. If a lesser exchange rate is used during the entry, there will be a warning.
Maximum
This column shows the maximum exchange rate accepted. If a greater exchange rate is used during the entry, there will be a warning.
Decimal Points
This column shows the number of decimal points to be used when rounding the amounts in currency2.
Modifications in the Exchange rate table
- Modification of the Opening exchange rate
The next time you recalculate the accounting, the balances in basic currency of the accounts will be recalculated with the new exchange rate. Therefore, pay attention when modifying the Opening exchange rates once you have inserted the opening balances.If you modify the Opening exchange rates and there are opening balances, it is important to recalculate the accounting.
- Modifying the multiplier
-
When changing the multiplier of a currency already used in the Transactions table, the program will report a warning as soon as the accounting is being recalculated or will move to the transaction row.The transaction amount and the correct amount in the basic currency will have to be reentered.
- When the accounting is being recalculated, as a result the opening balances in basic currency will be recalculated.
-
Direct an indirect exchange rates
- Direct exchange rates are those where the basic currency and the foreign currency are being indicated on the same row.
In the example below there are direct exchange rates USD->EUR and USD->TRL.
- Indirect exchange rates are those where a direct exchange between two currencies is not being indicated (not recommended).
The exchange rate is deducted by the programn based on other combinations of entered exchage ratesIn this example, the EUR->TRL exchange rate has not been defined, and the program relies on combining the USD-EUR and USD-TRL.
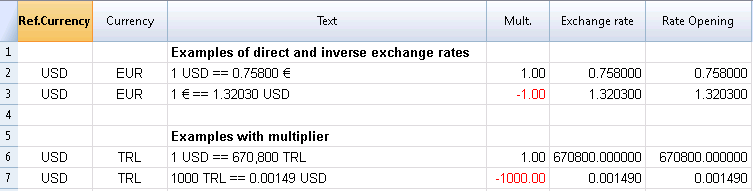
Incompatible exchange rates from previous versions
When the basic currency is entered as the reference currency, the exchange rates with a multiplier greater than 1 can present calculation differences between Banana 8 and the previous versions. In these rare cases, while opening an accounting file of a previous version, a warning message appears and the file is being opened as "read only".
- Open the file in Banana 8 and confirm the warning message;
- Recheck the accounting (Shift + F9);
- The warning messages "Transaction multiplier is not the same as the one in the Exchange rate table" can be ignored;
- Verify whether the balances and the result of the accounting period present differences compared to those displayed in earlier versions. If there are no differences, just save the accounting under a new name; otherwise, it is necessary to proceed as follows:
- In the Exchange rate table, for the exchange rates with a multiplier greater than 1, correct the exchage rate by multiplying it with the value of the multiplier and define the multiplier as 1. For example, if we have a multiplier of 100 and an exchange rate of 0.9944608, correct the exchange rate to 99.44608 and the multiplier to 1;
- Recheck the accounting (Shift + F9);
- The warning messages "Transaction multiplier is not the same as the one in the Exchange rate table" can be ignored, or it is possible to delete them by clicking, in the corresponding transaction row, on the amount in basic currency and by pressing the F6 key;
- Verify whether the balances and the result of the accounting period correspond with the ones indicated in earlier versions;
- Save the file under a new name;
- At this time, you can define the exchange rates and the multiplier in the preferred format, reverse or direct, with or without multiplier, verifying the balances and the result of the accounting period after each modification.
Transactions
Explanations of the columns
In the Transactions Table of the multi-currency accounting, other than the columns of the double-entry accounting, there are the following extra columns:
- Currency amount
This is the amount of the currency specified in the column with the currency symbol.
This amount is used by the program to update the balance of the related account in currency. - Currency
This is the currency symbol of the currency to which the amount refers.
The currency symbol has to be the Basic currency, specified in the File and accounting properties, or the currency symbol of an annount indicated in the columns Debit A/C or Credit A/C.You can also use a different currency as long as the indicated Debit A/C and the Credit A/C are Basic currency accounts.In this case the amount in currency is used as a reference, but will not be used for accounting purposes - Exchange rate
Used to convert the foreign currency amount in its Basic currency equivalent. - Amount in Basic currency
The transaction amount, expressed in Basic currency.
This amount is used by the program to update the balance of the related account in Basic currency - Exchange rate multiplier
Normally not visible in the view, this value is multiplied by the exchange rate.
Types of entries in the multicurrency accounting
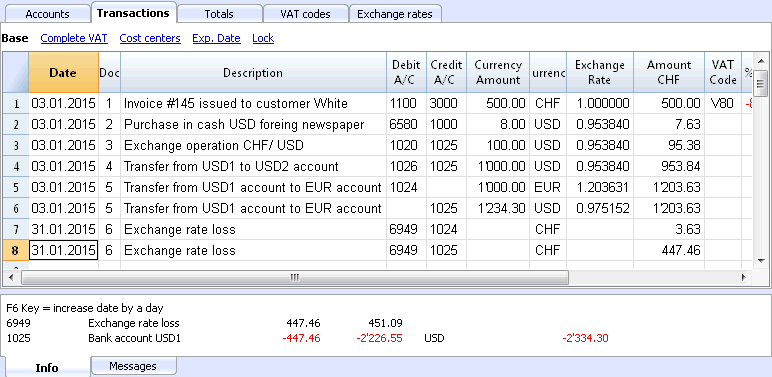
Please note
All amounts, those in basic currency as well as those in foreign currency, have to always be entered into the Currency Amount column.
For each transaction, there are two accounts (debit account and credit account). In the program, only one foreign curency per transaction row can be used. So there can be the following direct combinations:
- Entries between two accounts in basic currency with the amount in basic currency. (in the image, transactions n.1 in the Doc column)
The account currency is the basic currency. - Entries between two accounts in basic currency with the amount in foreign currency (Doc 2)
The indicated accounts are in basic currency, but the currency symbol and the amount in currency, indicated in the transaction row, are not in basic currency, but in a different currency.To insert the different currency, the user has to manually change the currency symbol.This is being used when one goes abroad and money is being changed in order to pay in local currency. In this case we do not have a specific account.For the calculation of the balance (both accounts being in basic currency) only the amount of basic currency column is being used. - Entries between an account in foreign currency and one in basic currency (Doc 3)
The currency needs to be the one of the account in foreign currency.
For the calculation of the balance of the account in foreign currency, the program uses the amount in foreign currency and for the balance in basic currency, the program uses the amount in basic currency. - Entries between two accounts with the same foreign currency (Doc 4)
The currency needs to be the same as account currency of both accounts. - Entries with two accounts in different foreign currencies (Doc 5)
For example, the bank makes an exchange operation between two foreign currencies:
In this case, the transaction needs to be recorded on two rows.
The amount in basic currency needs to be the same. It is useful to use an amount close to the current exchange rate to avoid excessive exchange rate differences.
In order for the amounts in basic currency to be equal, the amount in basic currency needs to be indicated manually, and the program will calculate the exchange rate. - Exchange rate differences (Doc 6)
The goal of this transaction is to realign the balance of the Basic currency account with the equivalent of the Foreign currency account at today's exchange rate.
On the Foreign currency account, only the amount in Basic currency related to the exchange rate differences is being recorded.
They are automatically generated with the Create transaction for exchange rate variation command.- For the exchange rate profits, the program automatically indicates the account to be revaluated in debit and the exchange rate profit account in credit. The exchange rate profit account is indicated in the File and Accounting properties (Basic Data), or in the specified account -> Exchange rate differences account column of the "Other" view (intended for one or several specific accounts).
- For the exchange rate losses, the program automatically indicates the account to be revaluated in credit and the exchange rate loss account in debit. The exchange rate loss account is indicated in the File and Accounting properties (Basic Data), or in the specified account -> Exchange rate differences account column of the "Other" view (intended for one or several specific accounts).
- The Currency amount is being left empty
- The Curency symbol is the basic currency
- In the Basic currency amount column, the amount of the revaluation of the account (profit or loss) is being indicated.
Establishing the exchange rate
The accountant is the one who decides which exchange rate to use for each single operation. Generally, the following rusles are being applied:
- For normal operations, the exchange rate of the day is being used
- For buying or selling currency, the values indicated by a money exchange office or a bank are being used.
First the amount in foreign currency is being indicated in the program and then the amount in basic currency. The program calculates the exchange rate. The exchange rate indicated by the bank can be slightly different, because banks specify exchange rates with few figures after the decimal point and often round the amounts. - When several operations with the same exchange rate are being recorded, it is useful to update the exchange rate in the Exchange rate table, so that the program can automatically apply it.
- For operations from abroad that are subject to VAT, the national authority might impose a standard exchange rate. In this case, that exchange rate should be inserted in the Exchange rate column of the transaction
- To purchase real estate or equity investments, an historical exchange rate is being used. In that case, a currency symbol needs to be created in the Exchange rate table (for example USD1) with an historical exchange rate, that is not being subject to the fluctuations of the exchange rate.
One can create as many currency symbols as desired for all historical exchange rates.
Transactions with VAT
The VAT account and the account from which the VAT is being deducted have to be in basic currency. It is impossible to use a VAT code to deduct the VAT from a foreign currency account. In order to record operations with VAT that have accounts in foreign currency as their counterpart, two transaction rows have to be used:
- First, the amount of the purchase is being recorded on an Internal transfers account in basic currency and the related VAT code is being applied. The amount in basic currency has to be calculated using an exchange rate in accordance with the requirements of the Tax administration.
- In a second row, the balance of the Internal transfers account is being put to zero; as its counterpart, the account in foreign currency should be entered.
The amount used for this transaction, both in basic currency and in foreign currency, has to be excluding VAT. Obviously, the exchange rate that has to be used is the same one as the one being used in the preceding transaction.
In the example, the basic currency is the CHF. We are dealing with a national purchase, but paid from a foreign curency account (EUR).
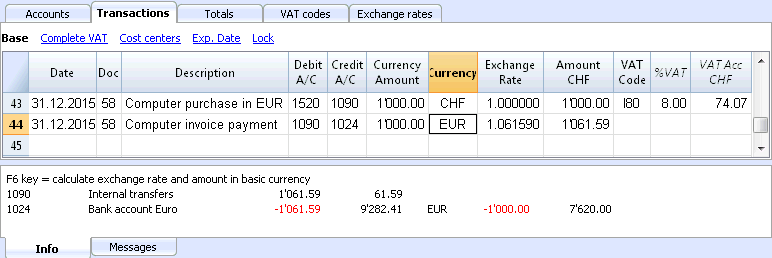
Automatisms while entering multicurrency transactions
When a new transaction is being entered, the data in the above mentioned columns have to be completed.
When some values of the transaction row are modified, the program completes the transaction with the predefined values. If these values do not satisfy the user's requirements, these have to be modified in the transaction row.
The modification of the values in the Exchange rate table have no effect on already entered transaction rows. Thus, when the exchange rate in the Exchange rate table is modified, this has no influence whatsoever on already inserted transactions.
- When the amount in currency is entered and there is either a Debit A/C or a Credit A/C, and no other values are entered, the program operates as follows:
- the currency symbol is retrieved from the account in use, giving priority to the account that is not in basic currency;
- the exchange rate, defined in the Exchange rate table, is applied with the following logic:
- the historical exchange rate is applied, with a date earlier or equal to the transaction date
- tf there is no historical exchange rate to be found, the exchange rate from the row without date is applied.
- the multiplier, defined in the Exchange rate table, is applied or the number 1 if it is the basic currency;
- the amount in basic currency is calculated.
- When the amount in currency is modified (and there are already other values present), the program operates as follows:
- the amount in basic currency is calculated with the existing exchange rate
- If the currency symbol is modified the program operates as follows:
- the exchange rate with the multiplier is applied and the amount in basic currency is calculated (like above)
- If the exchange rate is modified the program operates as follows:
- the amount in basic currency is calculated using the entered exchange rate
- When the amount in basic currency is modified the program operates as follows:
- the exchange rate is recalculated.
More help
- While being positioned on the Currency Amount column and pressing the F6 key, the program rewrites all values with the earlier explained logic, as if there were no values present. This feature is useful when the Debit A/C or the Credit A/C is modified.
- If there is a registration with a single account in basis currency (in 'Multiple transcations' - see Transaction types) and its value of the column 'Currency' has been changed manualy in a currency symbol of a foreign currency, it is necessary to be positioned on the cell of the column 'Currency' and press the F6 key in order to update the Exchange rate and calculate the amount in basis currency.
- Smart fill for the Exchange rate column
The program suggests several exchange rates, picking them up from the Exchange rates table or from exchange rates previously used in the transactions.
Info window
In the info window, the program indicates:
- Differences, if any, between the Debit and Credit total movements in baskic currency
- Explanation on the different uses of the F6 key
For the accounts related to the transaction row on which one is positioned, the program always indicates in the Info windows:
- the account number
- the account description
- the transaction's amount in basic currency
- the current account balance in basic currency
- the account currency symbol
- the transaction's amount in the account currency (if different from the basic currency)
- the current account balance in currency (if different from the basic currency)
Data transfer from earlier versions
In version 4 or earlier, the absence of a currency symbol in the Transactions table was being interpreted as a transaction in basic currency.
In version 7 and in version 8, each transaction needs to have its own currency symbol. Therefore, when you update from version 4 to version 7 or 8, in the accounting file, the transactions without a currency symbol need to be completed.
Exchange rate differences
At the latest when the accounting period is being closed, the currencies need to revaluated in Basic currency, creating adjustment transactions for exchange rate loss or gain, due to the fluctuations of the exchange rates (for the theoretical aspects, please check Revaluations and exchange rate differences).
The Create transaction for exchange rate variation... command, from the Account2 menu, calculates the revaluations for the foreign currencies accounts.
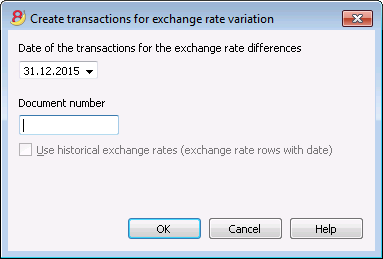
Date of the transactions for the exchange rate differences
Enter the date your exchange rate differences transactions should have.
The program will suggest the final date of the current month, related to the last entered transaction.
If there are transactions for exchange rate differences with the same date, the program asks whether they should be replaced.
The program considers the transactions for the exchange rates differences as existing if they have the same date, doc, description, accounts and currency and when there is no amount in the account currency.
Document number
Enter the document number your exchange rate differences transactions should have.
Use historical exchange rates (exchange rate rows with date)
For the calculation of the exchange rate differences, the program uses the exchange rates of the Exchange rate table without a date (the most recent exchange rates). With the option Use historical Exchange rates, the program instead uses the exchange rates of the Exchange rate table with an equal or earlier date than the one indicated.
Values used to create the transactions
For more information, we refer to our page Multi-currency transactions.
Amount of the transaction
- Transactions for exchange rate differences are being created only for the accounts in foreign currency which, at the specified date, have a different balance in basic currency compared to the calculated one.
- For the amount in basic currency, the difference between the account balance in basic currency and the account balance in foreign currency converted in basic currency is being used.
Account balance
For the calculation of the exchange rate differences, the balances in the account currency and in basic currency are being used, at the specified date.
Exchange rate profit and exchange rate loss accounts
As exchange rate profit and loss accounts are being used, in order of priority:
- The indicated accounts entered in the specific column of the chart of accounts.
- The exchange rate profit & loss accounts indicated in the File and Accounting properties.
Position of inserted rows
If, while imparting the command, you find yourself in the Transactions table, the rows are being inserted at the position of the cursor.
Otherwise, they will be inserted at the end or at the previous position in case they are replacing existing transactions.
Before using the command
- In the File and Accounting properties of the File menu, Foreign Currency section, make sure that the Exchange rate profit and loss accounts are being indicated. It is equally possible to indicate the same account for both the exchange rate profits or losses.
- Make sure that the accounts in foreign currency are being updated and that the balances in foreign currency of these accounts (for exemple bank accounts) correspond with the balance indicated by the bank.
- Update the current exchange rates of the Exchange rate table.
You should indicate the closing exchange rates or those of a period's end in the rows without a date, in the Exchange Rate column (do not modify the opening exchange rate in the Rate Opening column). In order to calculate the Exchange rate differences, the program uses the exchange rates of the rows without a date. If these last ones are absent, the program gives an error message.
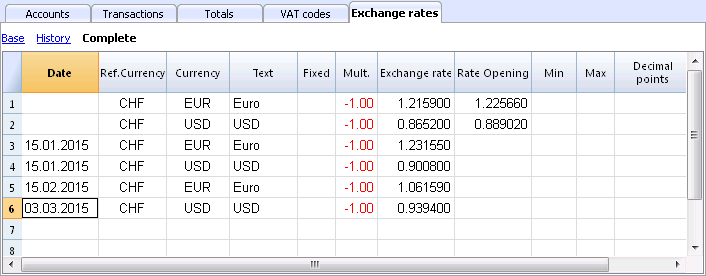
Exchange rates for the New Year
To have the Opening balances of the New Year in Basic currency correspond exactly with the closing balances of the preceding year, the Opening Exchange rates of the New Year, indicated in the Exchange Rate table, have to be the same as those being used for the closing of the accounting, so:
- The closing exchange rates have to be indicated in the Exchange rate column of the rows without a date;
- The opening exchange rates have to be indicated in the Rate Opening columns of the roes without a date.
The procedure of creating a new year or of the updating of the opening balances, copies the closing balances (Exchange rate column, rows without date) of the previous year into the opening exchange rates (Exchange rate table, Rate Opening column, rows without date) of the new year's file.
Account card
Columns and views of the account card
In the Account card, there are three groups with of columns with transactions Debit, transactions Credit and the Balance in different currencies.
- Basic currency
Indicated are the Opening Balance, the Transactions, and the Balance in Basic currency. - Account currency
The Transactions in the Account currency are being indicated.
When the accounts are in Basic currency, these values are identical to those of the Basic currency. - Currency2
For every transaction, the amount in Currency2 is being indicated. The amount in Currency2 is the equivalent of the amount in Basic currency, converted at the actual rate for the Currency2 currency symbol.
Please consult Exchange rates and accounting issues. - Base view
At the same time, the columns in Basic currency and the columns in the Account currency are visible.
In the column headers, the related currencies are being indicated.
With the appropriate commands, it is possible to modify the disposition of the columns and create other views.
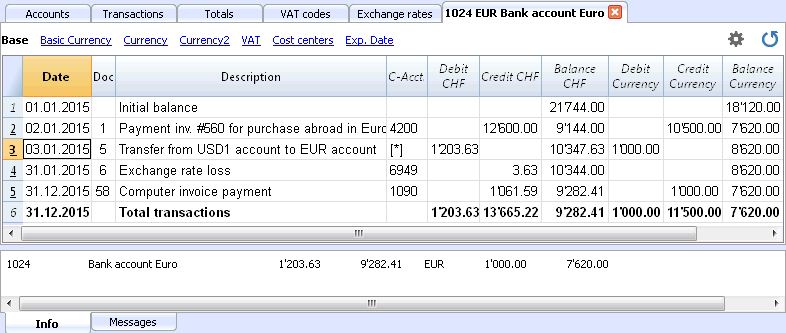
Data editing
It is not possible to modify the data in the Account card. Double-click on the (underlined) row number to go back to the original corresponding row of the Transactions or Budget table. More details are available on the Account card page (paragraphe Updating the Account card).
Info Window
In the lower part of the screen, the Info window, the values of the accounts related to the active transaction are being indicated.
- Account number
- Account description
- Transaction amount of the account in Basic currency
- Actual Account Balance in Basic currency
- Account's currency symbol
- Transaction amount of the account in the Account currency
- Actual Account Balance in Account currency
Enhanced Balance Sheet
The Enhanced Balance Sheet in the multi-currency accounting is done the same way as the one in double-entry bookkeeping. Information is available at the following link: Enhanced Balance Sheet.
The difference consists in the fact that the foreign currency accounts report the amounts in foreign currency as well as in the basis currency (amount converted).
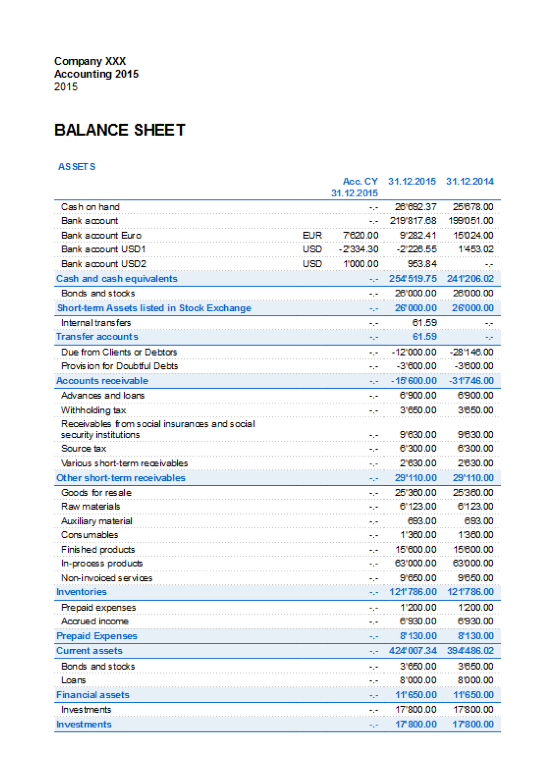
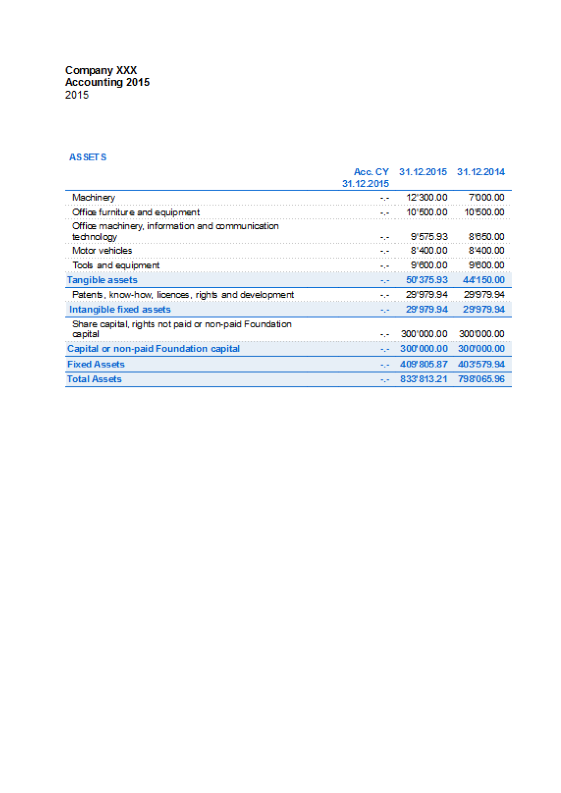
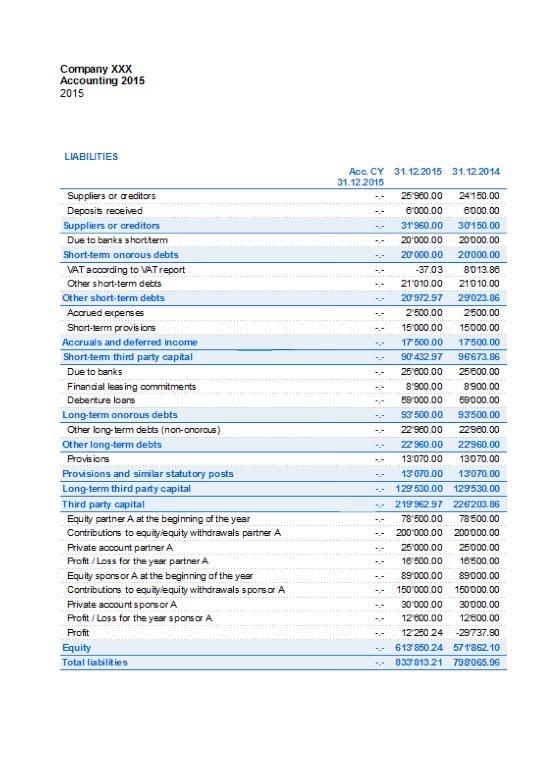
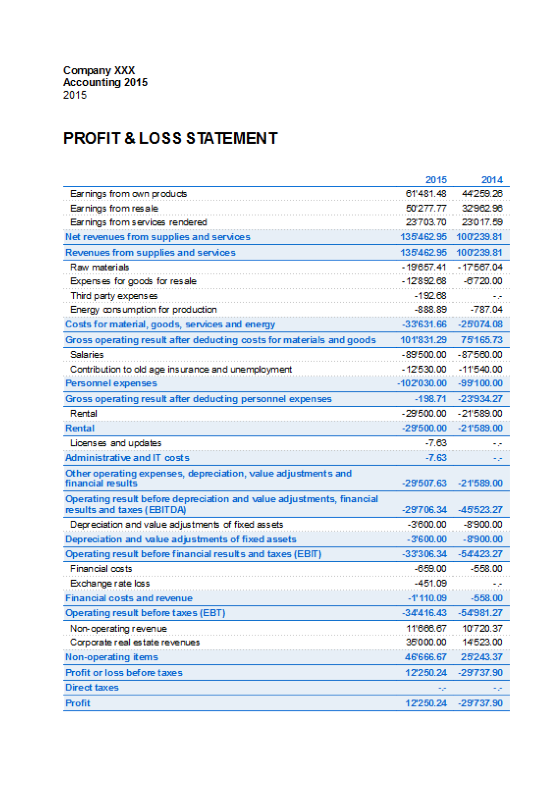
Enhanced Balance Sheet by groups
The Enhanced Balance Sheet by groups in multi-currency accounting is done the same way as the one in double-entry bookkeeping. Information is available at the following link: Enhanced Balance Sheet by groups.
The difference consists in the fact that the foreign currency accounts report the amounts in foreign currency as well as in the basis currency (amount converted).
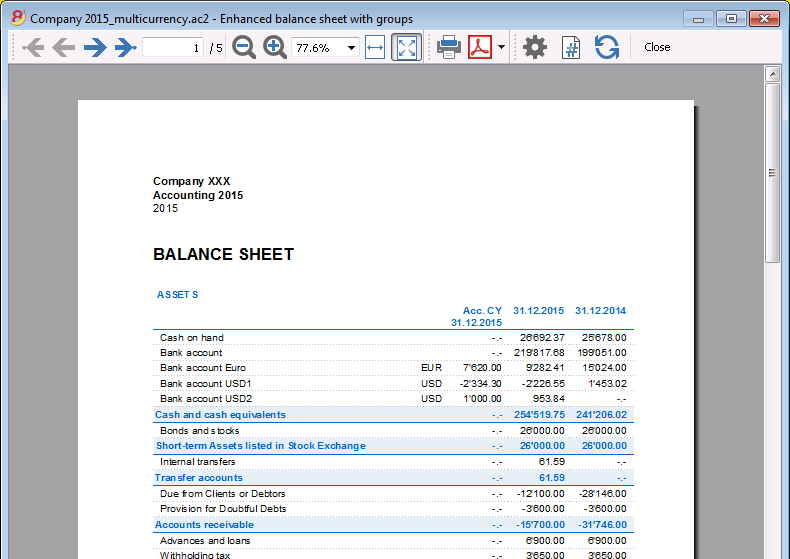
Accounting Reports
Accounting Reports in multi-currency accounting are done the same way as the ones in double-entry bookkeeping. Information is available at the following links: Accounting report; External accounting report.
Income & Expense accounting
Introduction
Income & Expense accounting is the ideal tool to manage the accounts of small to medium size companies, associations, private enterprise or project planning. It can be configured with or without VAT. On the other hand, it does not have the multi-currency options, that you will find in the double-entry book keeping version.
It does include:
- Income & Expense - allows you to manage income and expense for several accounts.
- Cash book - used to keep track of the income and expenses of one single account .
Features
- Manages your balance sheet and income statement (assets, liabilities, income and expense)
- VAT option allows VAT calculations and VAT tax returns
- Process all your accounting records: accounting journal, account cards, periodical and annual reporting
- Lets you manage your Cost Centres and their Segments
- Multiple options to present your data
- Export to Excel, Html, Xml, Pdf
- Import various types of data files.
Tables and Properties files
Income & Expense accounting contains the following tables:
- Accounts
Where you find the Chart of Accounts, the opening balances and define your groupings. - Categories
Define the categories of Income & Expense here, the cost centres and segments. - Transactions
Record your transactions here. - VAT Codes
If you have selected the VAT option, enter your VAT codes here. By selecting one of the VAT templates, VAT codes will be allocated correctly, allowing you to have a facsimile of your official VAT statement. - File and accounting properties
- Manage the general settings of your accounting here.
Immediate information
The account balances will be displayed instantly in the Accounts and Categories tables, after the income and expense recordings. Balances will be adjusted automatically after each registration of a transaction and you will not need to require a specific report to have an overview of your accounts, which you can call up via the Accounts and Categories tabs.
Support
- Detailed information on the different functionalities of the program, with concrete examples and screenshots of the software, for your use
- Free support for one year included.
Topics similar to Double-entry accounting
Commands
Printouts
Getting started
In order to start working with your Income & Expense accounting, proceed as follows:
- Download the Banana Accounting 8 software
- Install Banana Accounting 8 software by entering your license key.
Creating a new accounting file
- From the File menu, activate the New command
- Select the Income & Expense accounting group and the Income & Expense accounting File (with or without VAT)
- Select the Examples/Templates according to your language and nation
Banana provides predefined templates.
You may download:
- from the program - select the language / country and choose the model that suits you
- Clicking the button Online Templates - you will access our Apps page internet site, where all existing accounting templates are available free of charge. You can run a detailed search by entering the language, country, and category of activity (company type, non-profit, independent ...).
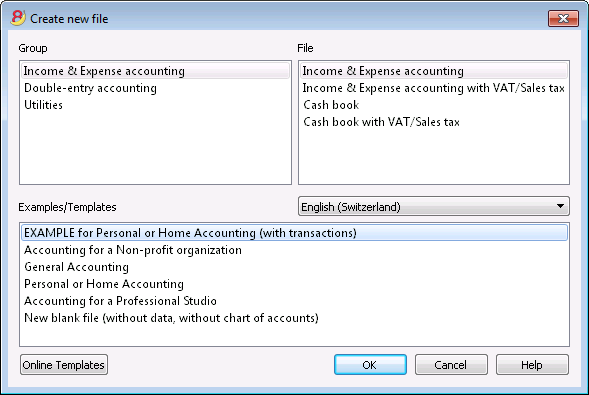
Setting up the File properties
Set up your own data from the File and Accounting properties command and save with your own file name.
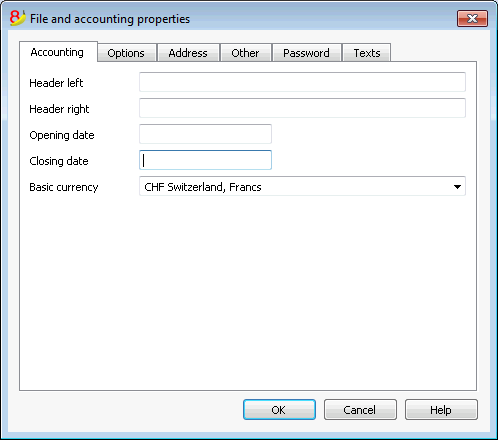
Customize the Accounts table
In the Accounts table, you can customize the estate accounts, according to your own needs:
- you can change the account numbers
- you can change the Description
- In the Opening column you need to enter your opening balances
Please remember, that for the Liabilities' accounts (f.ex. debts), the opening balance should be preceded by the minus (-) sign.
This operation needs to be executed only the first time using Banana Accounting, since from then on, every end of the year, when creating a New Year (Account2 menu, Create New Year command), the opening balance will be automatically transferred.
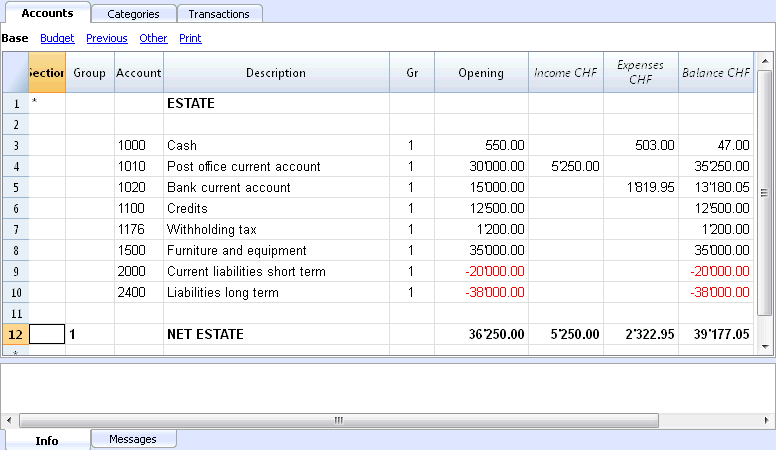
Customize the Categories table
In the Categories table, customize the income (earnings/revenue) and expense (expenses/costs) categories.
The Category numbers can be amended, as well as the Description.
The categories don't and must not contain an opening balance, in order to determine the result of the accounting year.
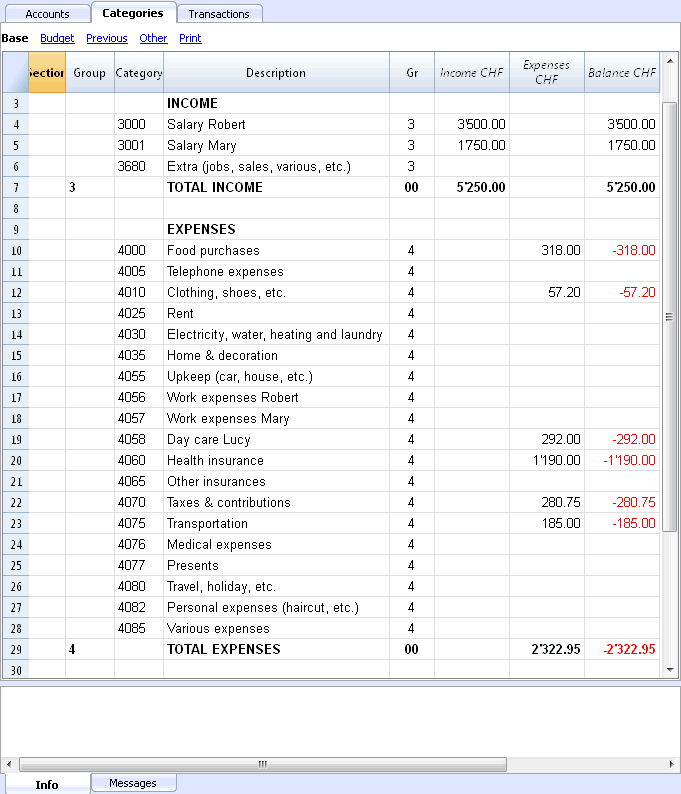
Transactions table
In the Transactions table, the daily income and expense transactions are entered, indicating the account, for which the transaction was made and the category to which the income or expense is attributed.
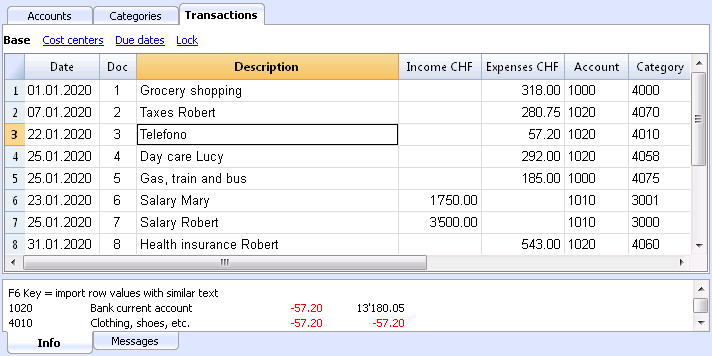
In the appropriate columns:
- Enter the date
- Enter the document number that is manually assigned to the paper document. This allows you to easily find documents, once the accounting transaction has been entered.
- Enter a description
- In the Income columns enter the income amount
- In the Expenses column, enter the expense amount
- In the Account column enter the account number (it has to be an existing account in the Accounts table, ex. Bank)
- In the Category column enter the expense or income category (it has to be an existing category in the Category table).
Speeding up the recording of the transactions
In order to speed up the recording of your transactions, you can use:
- the Smart fill function that allows the automatic autocomplete of data that have already been entered at an earlier date.
- the Recurring transactions function (Account2 menu), used to memorize recurring transactions into a separate table.
- import of your bank or post office statement.
Transactions with VAT
In order to enter transactions with VAT please proceed as follows:
- from the File menu, choose New command and choose Income /Expenses accounting with VAT/Sales taxes
- Choose one of the existing templates for your nation of the Income/expenses accounting with VAT type
In order to enter transactions with VAT, please refer to the Transactions page.
Transactions on multiple rows
Transactions on multiple rows, or Composed transactions are transactions involving more than two accounts and credits/debits on multiple accounts or categories (for example when you pay different invoices from the bank account). In this case you need to enter the transaction on multiple rows:
- in the first row enter the total amount of the income or expense and the account from which this amount is debited or credited
- in each subsequent row, enter the income or expense amount in the category column, and enter the appropriate category number.
Each individual amount is recorded on different row. When all the individual income and expenses rows are entered there shouldn't be any differences.
The Account card
The Account card allows you to have a complete list of entries relating to the same account or the same group.
- To open an account card you click once on the account number cell and then click once on the small blue arrow appearing in the upper right corner of the cell.
- To open multiple account cards you must select the Account cards command from Account1 menu.
- To update the account cards, following changes in the Transactions table, you must click on the two circular arrows symbol, located at the top right of the account card.
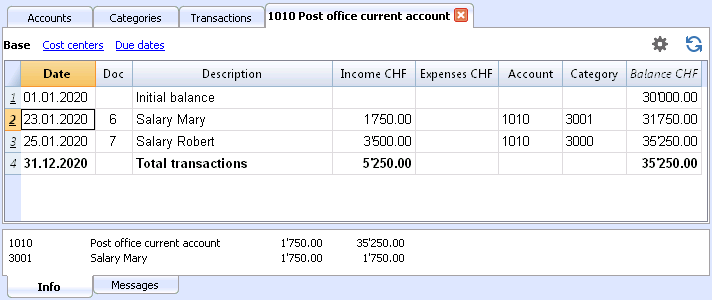
The category card
The Category card allows you to have a complete list of entries relating to the same category.
- To open a category card you click on the account number cell and then click once on the small blue arrow appearing in the upper right corner of the cell.
- To open multiple category cards you must select the Account cards command from Account1 menu.
- To update the category cards, following changes in the Transactions table, you must click on the two circular arrows symbol, located at the top right of the category card.
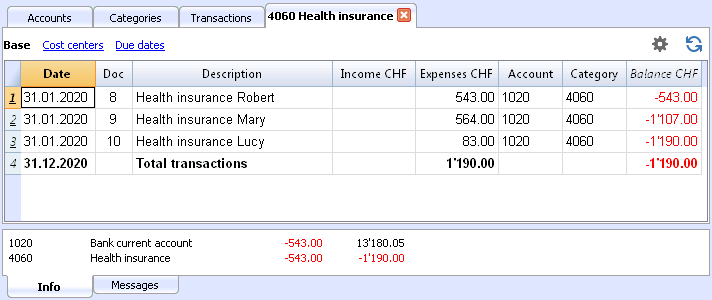
Account cards per period
To open an account card with account balances at predefined dates, click on Account1 in the menu, Account cards ... and click Period selected in the Period tab to insert your selected period.
Consult the Period page for further information.
Print the Account cards
To print an Account card, open it from any table (Accounts or Transactions) and start printing from the File menu.
To print out several or all the Account cards, click Account1 menu, select Account cards and select the Accounts you wish to print. The filter in the window allows you to select automatic selection of all accounts, cost centers, segments, groups etc ...
For further information refer to the Account Cards page.
Enhanced Statement
To view the Enhanced Statement and the Enhanced Statement with groups, choose the Account1 menu and then the Enhanced statement or Enhanced statement with groups command. You can also obtain statements by period.
- The Enhanced statements displays all accounts and categories without any subgroups
- The Enhanced statements with groups displays all accounts and categories also with subgroups
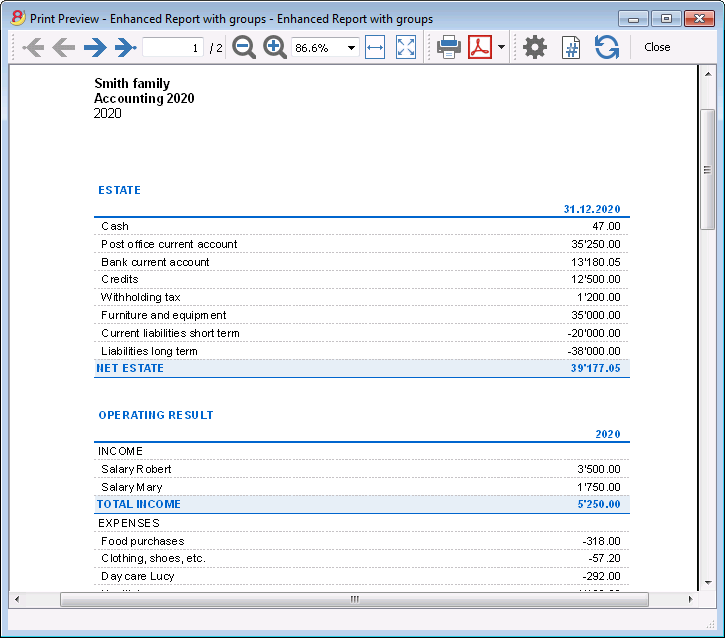
Archive data in PDF format
At the end of the year, when the accounting is done, corrected and revised, you can store all accounting data with the Create Pdf dossier command from the File menu.
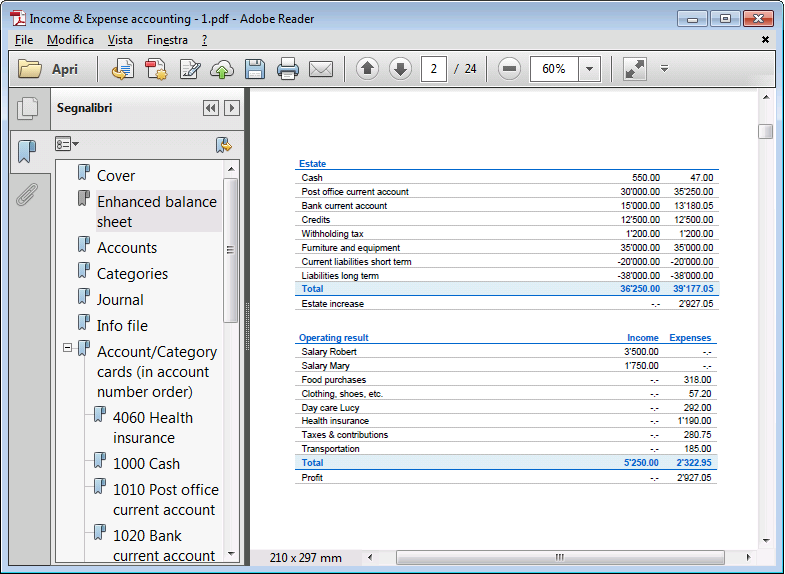
The Budget
Before starting your accounting year, you can create a budget with your assumed expenses and revenue, in order to have control over the financial and economic situation of your company.
The budget can be set in two different ways:
- From the Budget column of the Categories table. For each account the yearly budget is indicated.
In this case, when you process the budget from the Account1 menu, Enhanced statement with groups command, the Budget column shows the amounts that relate to the entire year. - From the Budget table, that you need to manually activate using the Add new functionalities command from the Tools menu.
In this table all estimates are entered as budget transactions, either income or expenses. If you activate this table, the Budget column of the Accounts table is automatically deactivated.
In the Budget table you can setup a detailed budget that takes into account possible variations during the year and in different periods of the year.
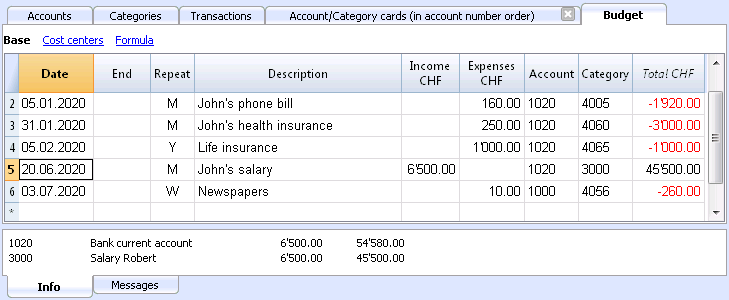
Related document: Transactions, Enhanced statement.
Accounts
Estate accounts are entered in the Accounts table. Only one account is entered in the cash register (cash, bank, postal account ...); In Income/Expense accounting more accounts are entered (cash, customers, suppliers ...) and the accounts that refer to existing debt must have the opening amount with preceded by the minus sign (-).
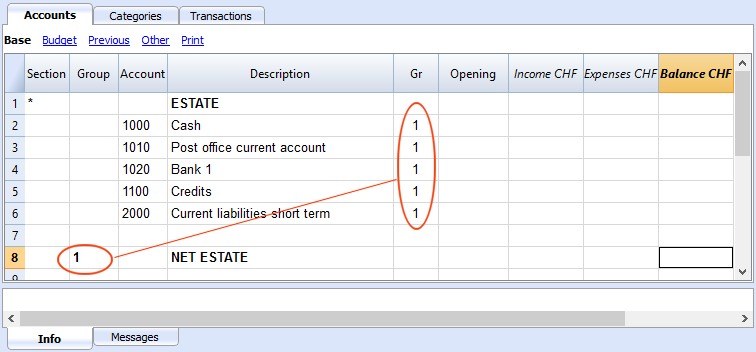
The columns of the Accounts table:
Section
Enter an asterisk to signal a section change. For example, to distinguish Total Assets from Cost Centers.
Values must be entered in the Sections table for presenting the enhanced Statement with groups.
Refer to the Sections page for further details and information.
Group
Values are added up for the categories that have the same GR. They are fundamental for totalization.
Account
Enter the number or initials of the account to be managed (cash, bank, post).
Description
Enter a description for the relative account.
Gr
Enter a value that identifies the category belonging to a specific group.
Opening
Entering an account balance is only necessary if a new file is opened or Banana Accounting 8 software is used for the first time. When creating a new accounting year, balances will be generated automatically.
Income
This locked column displays the balance of incoming entries. The balance will be updated automatically after each registration.
Expenses
This locked column displays the balance of expenses. The balance will be updated automatically after each registration.
Balance
This locked column displays the balance resulting after income and expenses. The balance will be updated automatically after each registration.
Opening balance
The first time Banana Accounting 8 software is used and new file is created, opening an account balances must be entered manually in the Accounts table Opening column.
Balances for Liabilites accounts must be entered preceeded by a minus (-) sign.
When creating a new accounting year, balances for the new year will be generated automatically.
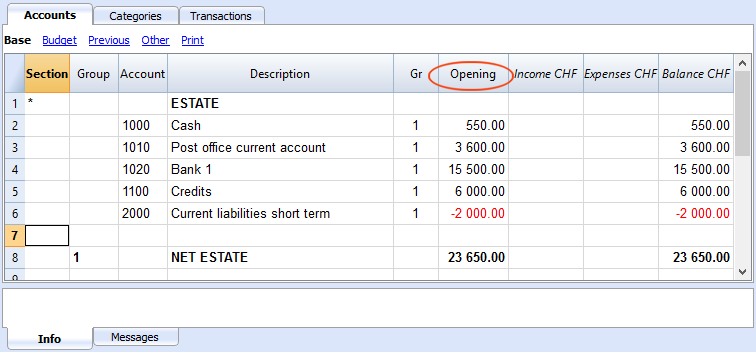
Categories
The headings for Income and Expenses are entered in the Categories table via two principal groupings, which may - in their turn - contain subgroups. The set of categories will determine the profit or loss for the accounting period.
Groupings:
In the example below, there are three principal groupings:
- Group 3 - Total for Categories that have 3 in their Gr column (total Income)
- Group 4 - Total for Categories that have 4 in their Gr column (total Expenses)
- Group 00 - Total for groups 3 and 4 (Total Income and Expenses), which will determine the result for the accounting period.
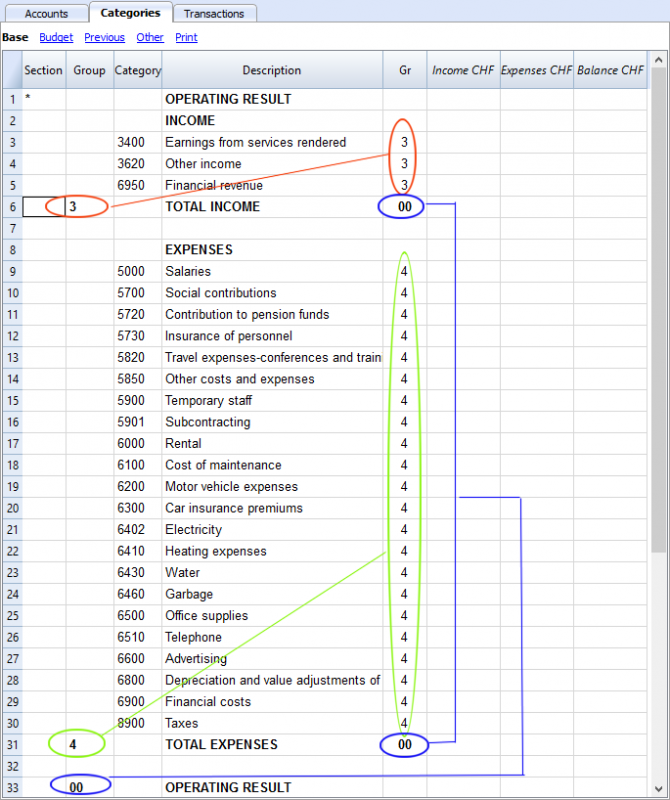
The columns of the Categories table:
Section
Enter an asterisk in the row that contains the title, to signal a section change, that will be displayed in the enhanced Statement with groups.
(the asterisk is inserted in the "Operating Result" title row in our example).
If different sections than Income and Expense are planned, such as Cost and Profit centers, another asterisk may be entered on the respective title row. Refer to the Sections page for further details and information.
Group
Enter an identifier (numerical or sign) identical to the one entered for each category in the GR column. The totals for each category belonging to the same GR will then be added up (in our example, Group 3 totals the Income Category and group 4 the Expenses category)
Description
Enter a description for the relative Income or Expense Category.
GR
Each Category has an identifier that allows the establishment of the totals for the relevant Group (in our example all categories of Income are GR3, because they will be total in Group 3, Total Income.
Income
This locked column displays the balance of incoming entries. The balance will be updated automatically after each registration.
Expenses
This locked column displays the balance of expenses. The balance will be updated automatically after each registration.
Balance
This locked column displays the balance resulting after income and expenses. The balance will be updated automatically after each registration.
Printouts
Instant information
Account balances, income and expense are on ready display in the Accounts and Category tables.
After each entry of a transaction, balances are adjusted automatically and there is no need to run a report, as you can simply display the Accounts or Categories tables.
Advanced printouts
All printing is run from the Account1 menu, where the different functions for prining are located:
-
Journal by period command. You can display and print the whole table or just a specified period.
-
Account/Category cards command. You may select all cards or define your selection.
Define the required period in the Period tab and click the required settings in the Options tab. Print settings can be saved in the Composition tab so they can be resumed without them to be having defined again. -
Enhanced statement command. You may also print a defined period and various options and compositions may be included.
-
Enhanced statement with groups command. You may also print a defined period and various options and compositions may be included.
-
Accounting report command. The required options are displayed in the Accounts table. Reports are possible for current, previous periods or previous years; each period may contain subdivisions and the compositions can be saved.
Example of printout of Enhanced statement with groups
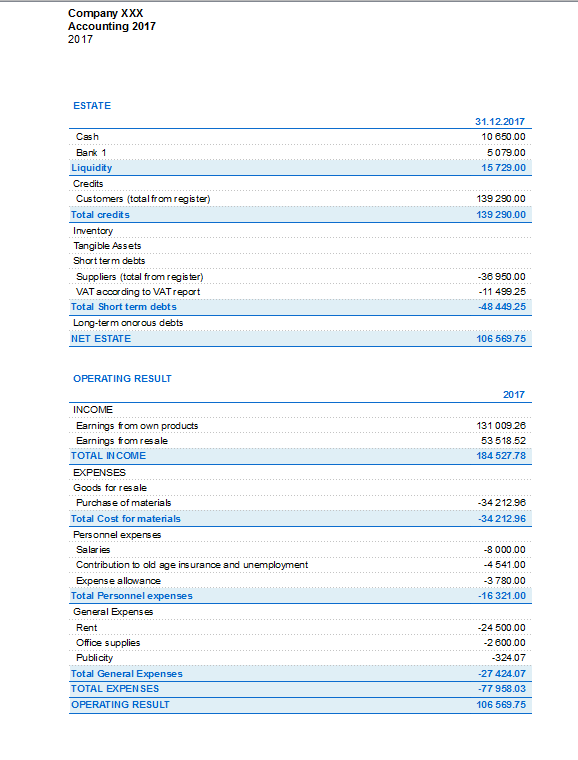
Enhanced statement with groups
This feature is only available in version 7.0.4 or higher. It allows the user to obtain the Enhanced statement with groups, with all the options that are available in the Double-entry accounting.
The Enhanced statement with groups makes it possible to:
- Include all the groups that are present in the Accounts- and the Categories tables nn the printout,
- Exclude groups or accounts individually
- Select a subdivision by period
(for example, in the first semester, one can select to have a subdivision by month or per quarter) - Select a subdivision by segment.
Sections
The sections present in the Accounts- and/or Categories table make it possible to define a set of accounts and categories to be printed with the 'Enhanced statement with groups' command from the 'Account1' menu.
- The sections are indicated in the Sections column of the Accounts- and the Categories table
- An * (asterisk) indicates the beginning of a section
- A ** (double asterisk) indicates the beginning of a subsection
- A # indicates the beginning of the Notes section
- A section ends once the next one begins
- Contrary to the Double-entry accounting, it is not possible to use numerical identications for the sections
- In case no section has been indicated, the program will enter them automatically when the command is used for the first time
- In the Accounts table "Estate"
- In the Categories table "Operating result"
- It is recommended to create separate sections if there are cost centers, segments or clients/suppliers registers.
In this way, it is possible to print reports with just the information that concerns the user.
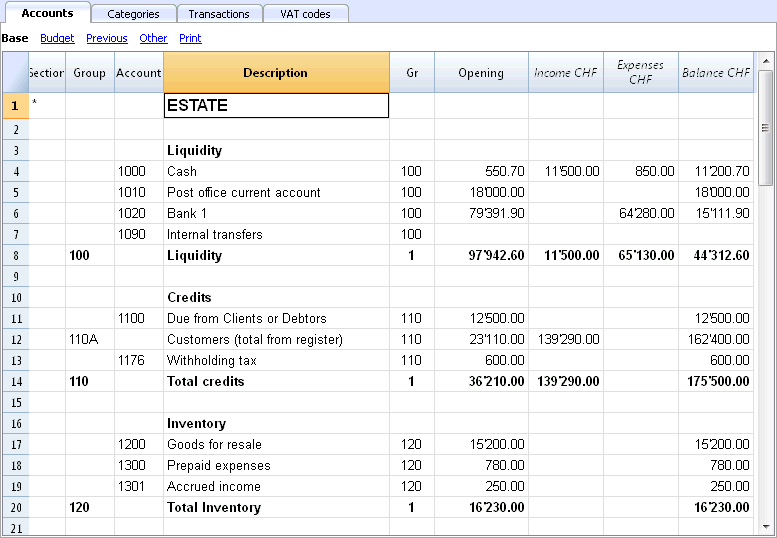
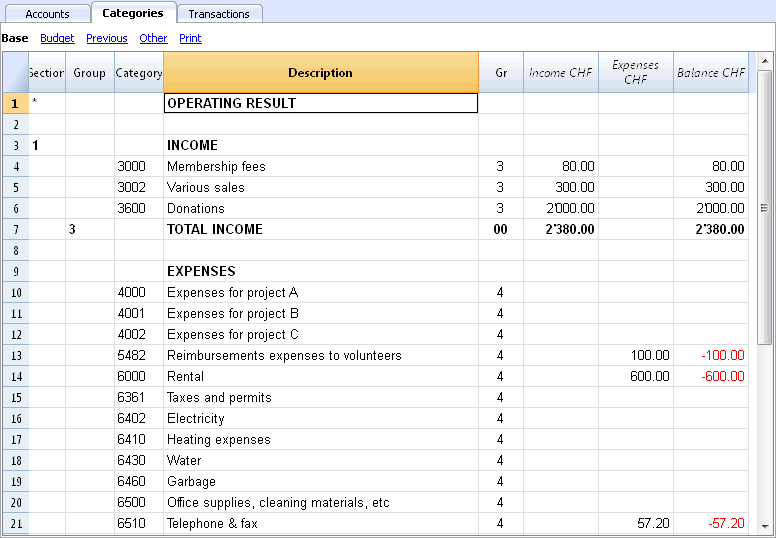
Configurations of Accounts & Categories
In the dialogue window, you can define how to print the accounts and the categories.
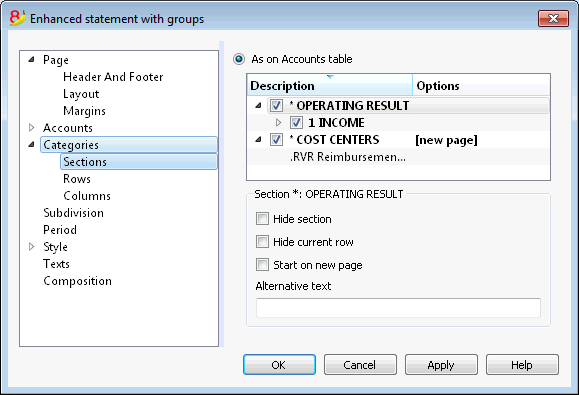
- The accounts, present in the Accounts table, will always be printed with the balances at the end of the indicated period.
- The categories will always be printed with the movements of the indicated period.
Enhanced Statement
- The Enhanced Statement gives an overview of the progression of the Estate situation and the operating result of the year. This function is present in the Income & Expense accounting.
- The Enhanced Statement is calculated and displayed by means of the Enhanced Statement command, from the Account1 menu.
- In the window that pops up, you have the possibility to insert the header that will display on the first page of the Enhanced Statement; furthermore, a series of options can be selected in order to include further details in the printout.
- Transactions without date are being considered as opening transactions and will not appear in the printouts of the Profit & Loss Statement.
See also Print Example.
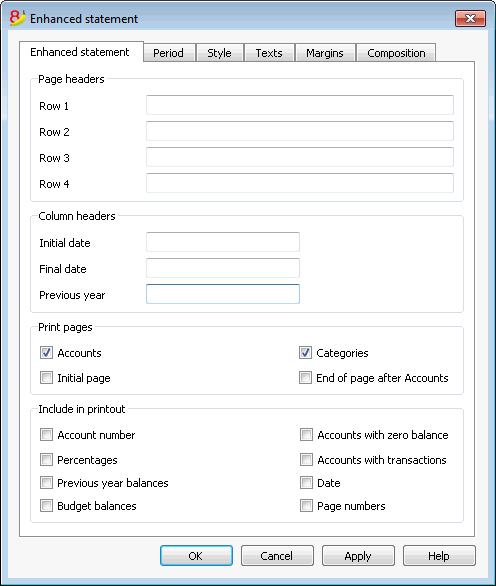
Page headers
Rows 1-4
These rows allow the definition of the Staement's headers.
Column heade
Initial date
Insert the initial date of the accounting.
Data finale
Insert the final date of the accounting.
Previous year
Insert the final date of the previous year's accounting.
Print pages
Checking the boxes you define the options you desire to appear in the statement printout:
Accounts
The accounts will be printed..
Initial page
The initial page of the document with the file headers will be printed.
Categories
The categories will be printed.
End of page after Accounts
The accounts and the categories will be printed on two different pages..
Include in printout
By selecting the boxes, you choose the options that must appear in the printout.
Other Tabs
The explanations for the other tabs are available at the following pages:
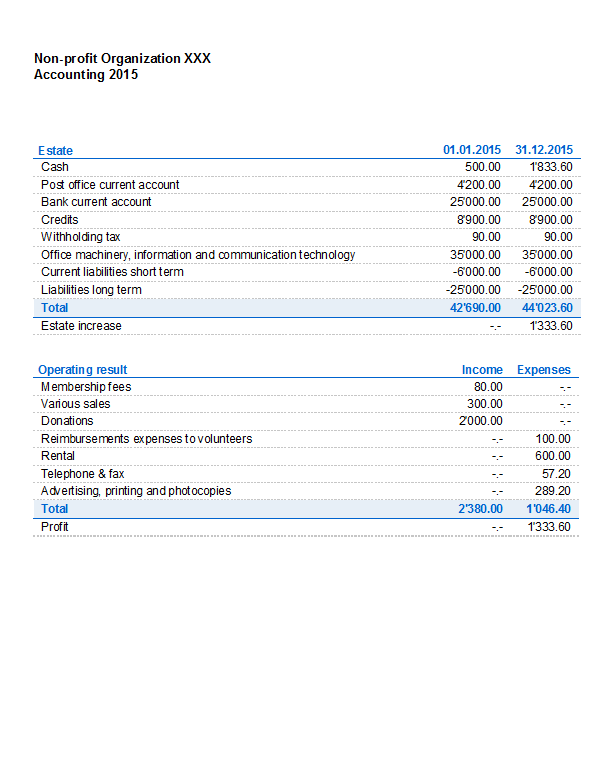
Accounting report
- This command displays the amounts of accounts according to a certain grouping, for a specified period or per subdivision.
- Transactions without date are being considered as opening transactions and will not appear in the printouts of the Profit & Loss Statement.
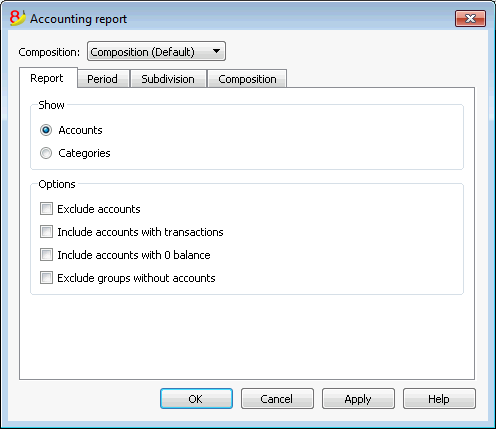
Display
You select the desired grouping scheme:
- Accounts - the Report will show a list of all accounts with the following columns: opening balance, income, expenses and account balance
- Categories - the Report will show a list of all categories with the following columns: opening balance, income, expenses and account balance.
Options
You select the accounts to be included or excluded:
- Exclude accounts - only the categories will be printed
- Include accounts with no transactions - accounts with no transactions will be printed as well
- Include accounts with 0 balance - accounts with zero balance will be printed as well
- Exclude groups without accounts - groups of accounts with zero balance will not be printed.
Other Tabs
The explanations for the other tabs are available at the following pages:
Transactions
Avoid mistakes with Banana Accounting Plus
In order to facilitate checking your accounting work and to immediately find differences, in Banana Accounting Plus, our new version, we added the Balance column in the Transaction table. You can now see potential differences on each row and you can correct them right away. It is a very useful feature when closing the accounting period.
Many of our clients have already tried it and are enthusiastic about it. We advise you to switch now to Banana Accounting Plus and take advantage of the many new features.
The transactions are entered in the Transactions table.
For every transaction enter the date, document number, description, incoming or expense, the account and the category.
- Income/Expenses: enter the amount coming in or going out.
- Account: enter one of the Estate accounts (cash, bank, post, clients, suppliers...).
- Category: enter an income or expense category.
Speeding up the recording of the transactions
In order to accelerate the recording of the transactions, you can use
- the Smart fill function that allows the automatic autocomplete of data that have already been entered at an earlier date.
- the Recurring transactions function, used to memorize recurring transactions into an appropriate table.
- importing bank or post office statement.
Examples of transactions without VAT
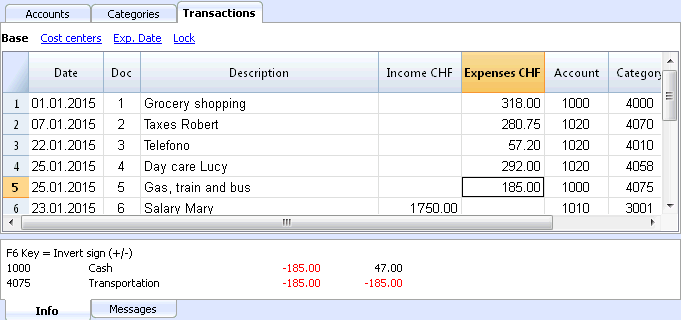
The columns of the Transactions table
Date
Enter the date for the transaction of Income or Expense
Doc
Enter Doc number. The number of the paper document is normally assigned here; this will facilitate retrieval of documents at later dates.
Description
Enter a description for the relative Income or Expense.
Income
Enter Income amount.
Expenses
Enter Expense amount.
Account
Enter the Estate account (cash, bank, Post, clients, suppliers..).
Category
Enter a category of Income or Expense, as defined in the Category table.
Examples of transactions with VAT
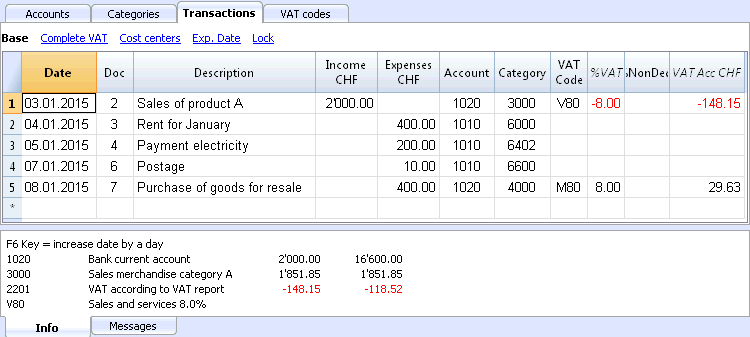
Additional columns
Depending on the type of Income / Expense accounts setup (with or without VAT) there are additional columns where VAT data is entered.
VAT Code
Enter the VAT code referring to a sale or a cost. There must be a code in the VAT Codes table.
Refer to the Transactions page for explanations of VAT codes and further information.
In the Account and Category columns, instead of entering the account and category number you can also write the text you wish to find.
The software will show you the list with all the accounts and categories containing the entered text. With the Arrow down key you can move directly in the list and select the desired account number by pressing the Enter key.
In order to display the movements of an account or a category, after entering the transactions, click on the small blue symbol in the account/category cell (top right corner of the selected cell).
Account and category card
In the account or category card, the presentation of the transactions is very similar to the ones of the Transactions table. If you enter further transactions or make changes (always operated in the Transactions table), you can update the account/category card by clicking the Refresh icon on the right side of the screen.
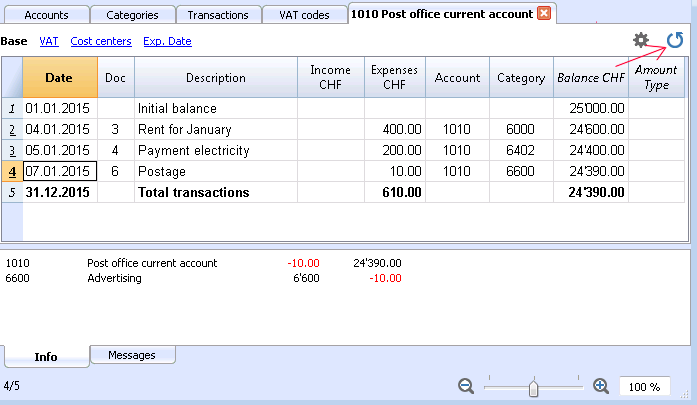
New Year
You can automatically transfer to the New Year in the following ways:
- Open the file of the terminated year and click on the Create New Year command from the Account2 menu.
- Confirm the basic data of the Accounting properties.
- Save the file under a new name.
The program will automatically carry forward :
- The accounts, the opening balances
- The categories will be carried forward without an opening balance, because you start from scratch, in order to determine the business result for the New Year.
Cash book
Introduction
The ideal tool to manage the cash account of small sized companies, associations, private enterprises or project planning.
It can be configured with or without VAT. On the other hand, it does not have the multi-currency functions.
Features
- Manages your cash account, or another estate account and income and expenses
- VAT option allows VAT calculations and VAT tax returns
- Process all your accounting records: accounting journal, account cards, periodical and annual reporting
- Manage the Cost Centers and Segments
- Several possibilites to submit and present your data
- Export to Excel, Html, Xml, Pdf
- Import various types of data files.
Tables and Properties files
The Cash book is part of the Income & Expense accounting type. It contains the following tables:
- Accounts
Where you find the Cash account or another estate account you manage and the relative opening balance. - Categories
Define the categories of Income & Expense here, the Cost Centres and their segments. - Transactions
Record your transactions here. - VAT Codes
If you have selected the VAT option, enter your VAT codes here. By selecting one of the VAT templates, VAT codes will be allocated correctly, allowing you to have a facsimile of your official VAT statement. - File and accounting properties
Manage the general settings of your accounting here.
Immediate information
The account balances will be displayed instantly in the Accounts and Categories tables, after the income and expense recordings.
Balances will be adjusted automatically after each registration of a transaction and you will not need to require a specific report to have an overview of your financial situation, which you can call up via the Accounts and Categories tabs.
Support
- Detailed information on the different functionalities of the program, with concrete examples and screenshots of the software, for your use
- Free support for one year included.
Topics similar to Double-entry accounting
Commands
Printouts
Getting started
To start working with Banana Accounting 8 software, proceed as follows:
- Download Banana Accounting 8 software
- Install Banana Accounting 8 software by inserting the license key.
Creating a new accounting file
- From the File menu, activate the New command
- Select the Income & Expense accounting group and the Cash Book File (with or without VAT)
- Select the Examples/Templates according to your language and nation
Banana provides predefined templates.
You may download:
- from the program - select the language / country and choose the model that suits you
- Clicking the button Online Templates - you will access our Apps page internet site, where all existing accounting templates are available free of charge. You can run a detailed search by entering the language, country, and category of activity (company type, non-profit, independent ...).
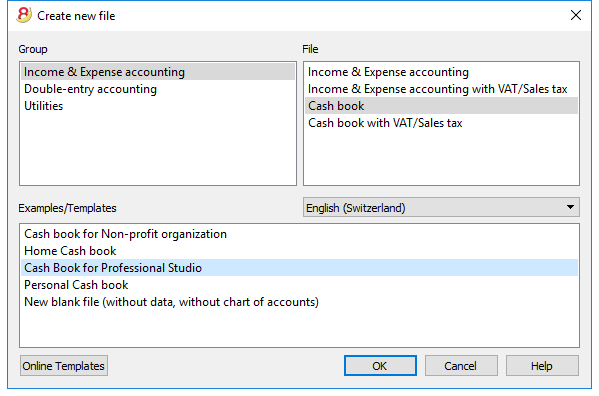
Setting up the File properties
Set up your own data from the File and Accounting properties command and save with your own file name.
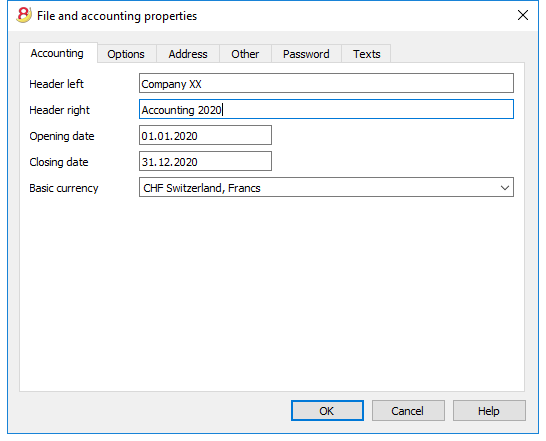
Inserting the opening balance of the account
Enter the account you wish to manage in the Accounts table of the Cash book and the initial amount in the Opening column.N. Activating the Creating a new year ... command in the Account2 menu will automatically generate the opening balances to be carried forward.
Only one account can be entered at a time.
Customizing the Categories table
In the Categories table, customize the income and expense categories, according to your own needs. It is possible to:
- change the category numbers
- change the description
- delete categories
- add categories
- insert subgroups
- delete subgroups
All balances of the categories will determine the result of the accounting year (profit or loss) and must therefore not contain any balances.
Add new categories
If new categories need to be added in an already existing group, proceed as follows:
- Insert an empty row (Edit menu, Insert rows ... command) before the Total of the Group
- Insert the number or sign for the category in the Category column
- Insert the Description that identifies the category
- Insert the identical Gr of the other categories belonging to the Group Total in the Gr column.
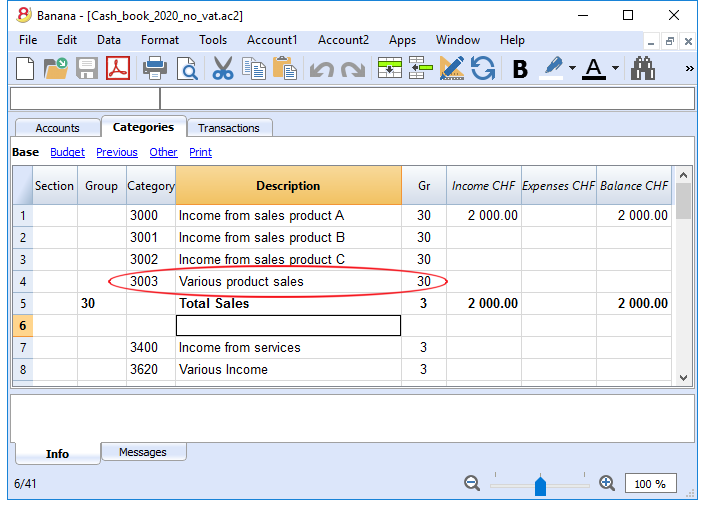
Add subgroups
To add new subgroups, proceed as follows:
- Insert an empty row (Edit menu, Insert rows ... command) where wish to add a new subgroup
- Insert a number or sign in the last empty row of the Group column (in our example 31 - Other income)
- Insert the Description that identifies the new subgroup
- Insert the Group Total number in the Gr column (in our example 3 - Total sales).
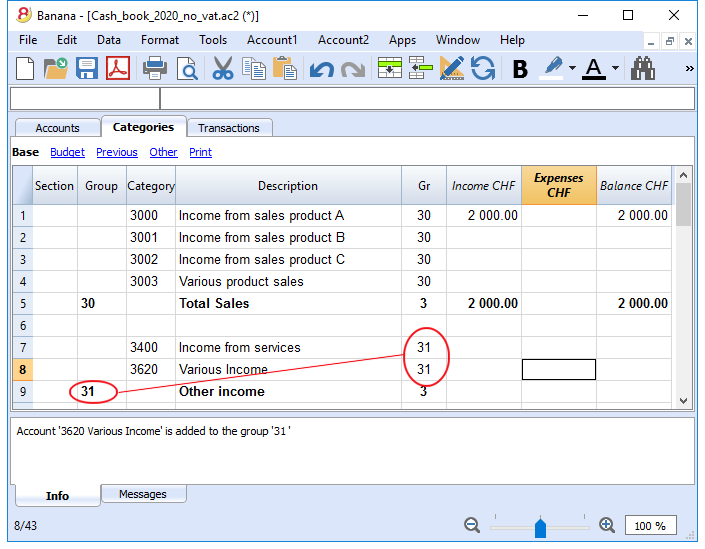
Delete categories or subgroups
Select the categories or subgroups you wish to delete and proceed in the Edit menu, Delete rows ... command to eliminate.
Transactions
In the Transactions table, income and expense transactions are entered, indicating the category to which the income or expense is attributed.
Speeding up the recording of the transactions
In order to speed up the recording of your transactions, you can use:
- the Smart fill function that allows the automatic autocomplete of data that have already been entered at an earlier date.
- the Recurring transactions function (Account2 menu), used to memorize recurring transactions into a separate table.
- import of your bank or post office statement.
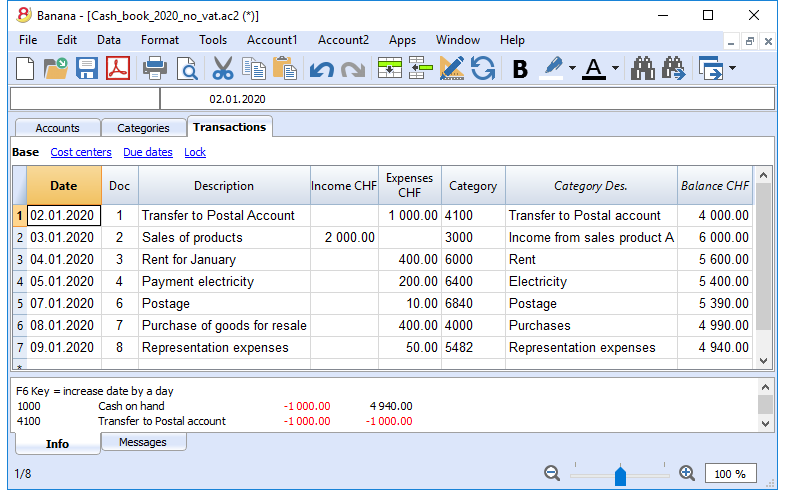
Transactions with VAT
In order to enter transactions with VAT please proceed as follows:
- from the File menu, choose New command and choose Income /Expenses accounting - Cash book with VAT/Sales tax
- Choose one of the existing templates for your nation.In order to enter transactions with VAT, please refer to the Transactions page.
The Category or Group card
The Category or Group card allows you to have a complete list of accounting entries relating to the same category or group.
- To open an category or group card you click once on the account number cell and then click once on the small blue arrow appearing in the upper right corner of the cell.
- To open multiple category or group cards you must select the Account cards command from Account1 menu.
- To update the category or group cards, following changes in the Transactions table, you must click on the two circular arrows symbol, located at the top right corner of the account card.
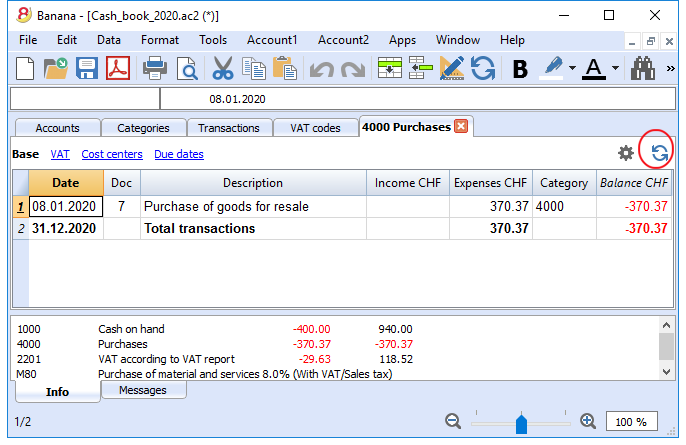
Account cards per period
To open an category cards with account balances at predefined dates, click on Account1 in the menu, Account/Category cards ... and click Period selected in the Period tab to insert your selected period.
Consult the Period page for further information.
Print the Category card
To print a Category card, open it from any table (Accounts or Transactions) and start printing from the File menu.
To print out several or all the Account/category cards, click Account1 menu, select Account/category cards and select the accounts/categories you wish to print. The filter in the window allows you to select automatic selection of all categories, cost centers, segments, groups etc ...
For further information refer to the Account Cards page.
Enhanced Statement
To view the Enhanced Statement and the Enhanced Statement with groups, choose the Account1 menu and then the Enhanced statement or Enhanced statement with groups command. You can also obtain statements by period.
- The Enhanced statements displays all accounts and categories without any subgroups
- The Enhanced statements with groups displays all accounts and categories also with subgroups
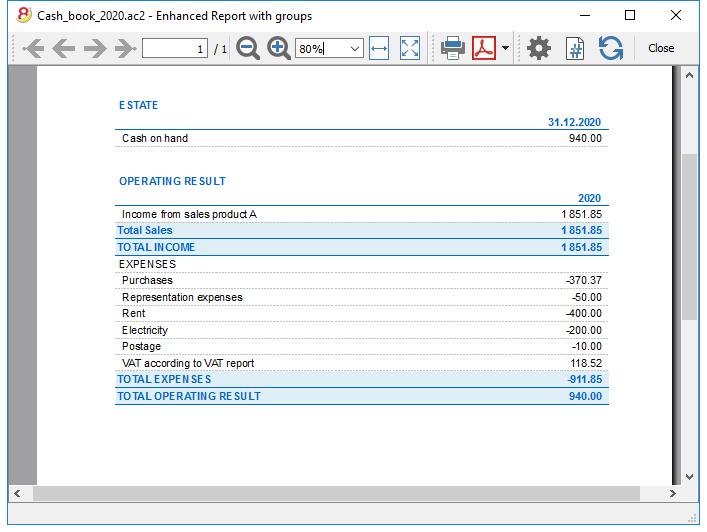
Archive data in PDF format
At the end of the year, when the accounting is done, corrected and revised, you can store all accounting data with the Create Pdf dossier command from the File menu.
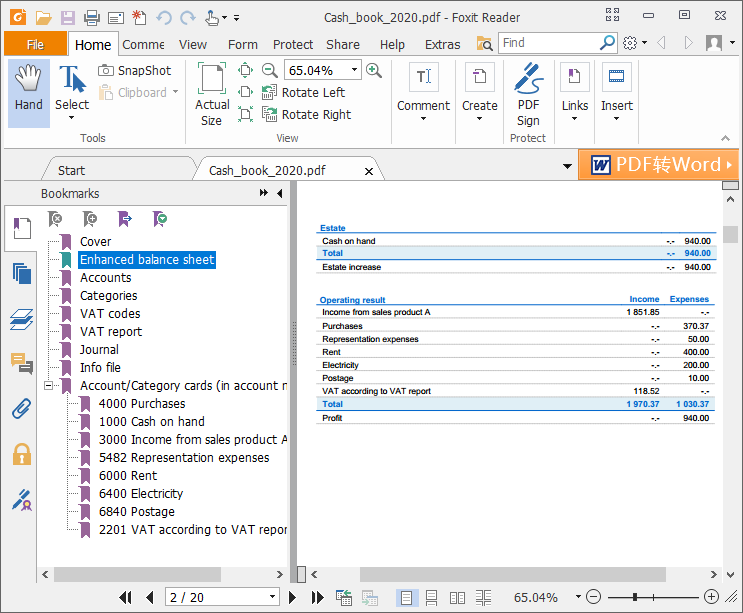
The Budget
Before starting your accounting year, you can create a budget with your assumed expenses and revenue, in order to have control over the financial and economic situation of your company.
The budget can be set in two different ways:
- From the Budget column of the Categories table. For each account the yearly budget is indicated.
In this case, when you process the budget from the Account1 menu, Enhanced statement with groups command, the Budget column shows the amounts that relate to the entire year. - From the Budget table, that you need to manually activate using the Add new functionalities command from the Tools menu.
In this table all estimates are entered as budget transactions, either income or expenses. If you activate this table, the Budget column of the Accounts table is automatically deactivated.
In the Budget table you can setup a detailed budget that takes into account possible variations during the year and in different periods of the year.
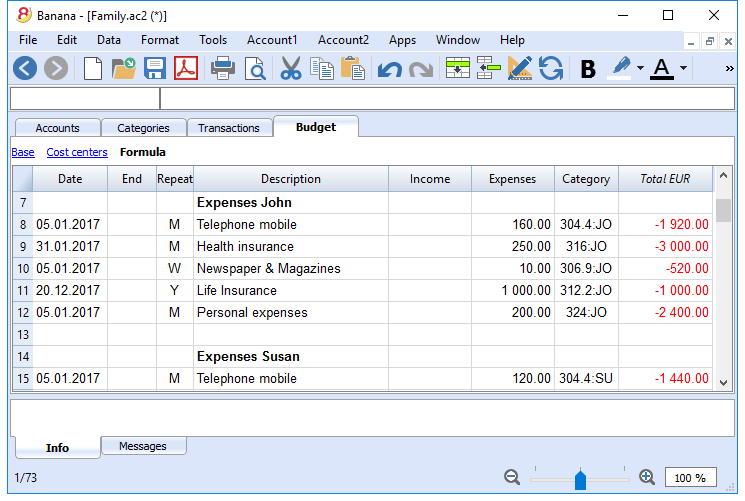
Printouts
Instant information
The account balance and those of the income and expense categories are on ready display in the Accounts and Category tables.
After each entry of a transaction, balances are adjusted automatically and there is no need to run a report, as you can simply display the Accounts or Categories tables.
Advanced printouts
All printing is run from the Account1 menu, where the different functions for prining are located:
-
Journal - command to define the period. You can display and print the whole table or just a specified period.
-
Account/Category cards command. You may select all cards or define your selection.
Define the required period in the Period tab and click the required settings in the Options tab. Print settings can be saved in the Composition tab so they can be resumed without them to be having defined again. -
Enhanced statement command. You may also print a defined period and various options and compositions may be included.
-
Enhanced statement with groups command. You may also print a defined period and various options and compositions may be included.
-
Accounting report command. The required options are displayed in the Accounts table. Reports are possible for current, previous periods or previous years; each period may contain subdivisions and the compositions can be saved.
Example of printout of Enhanced statement with groups
Transactions
The transactions are entered in the Transactions table.
For further information relative to the columns used in the Transactions table of the Cash book, refer to the Transctions (Income & Expense accounting) page.
For each operation enter the following:
- the date
- the document number
- the description
- the income or expense amount
- the category relevant to the income or expense in the Category table
- should the transaction be subject to VAT tax, enter the VAT code in the VAT code column.
The VAT codes are listed in the VAT codes table.
Speeding up the recording of the transactions
In order to accelerate the recording of the transactions, you can use
- the Smart fill function that allows the automatic autocomplete of data that have already been entered at an earlier date.
- the Recurring transactions function, used to memorize recurring transactions into an appropriate table.
- importing bank or post office statement.
Examples of transactions without VAT
Examples of transactions with VAT
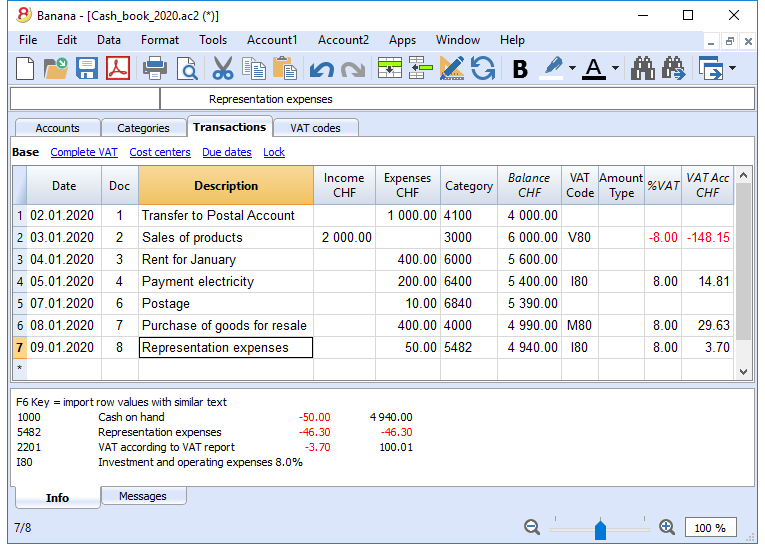
Category card
To display the entries of a category, click once on the small blue arrow appearing in the upper right corner of the cell.
The display of entries in the Categories table is identical to the one in the Transactions table.
To update the category or group cards, following new entries or changes in the Transactions table, you must click on the two circular arrows symbol, located at the top right corner of the category or group card.
Customers sub-menu
New settings and documentation
In the new Banana Accounting Plus version, in the Accounts table, new columns have been added in order to allow you to enter more information about your customers and, new features automatically resume the data in the Invoicing. Moreover, you will find a new and in-depth documentation to work in a very professional way:
- Set up customer accounts on a cash method
- Set up customer accounts on a accrual method
- Automatic invoice closing
We advise you to immediately switch to Banana Accounting Plus and take advantage of the many new features.
Customers' register and checking of open invoices
Directly in the accounting you can:
- Prepare customers' accounts, with the related addresses and other customers' data.
- Enter into the transactions:
- The data related to the issued invoices (invoice number, customer, amount, due date).
- The data related to the payment for the invoices and the issuing of credit notes, if any.
- Obtain the following lists/reports
Features under development, only available in the Experimental version:
Setting up and using the customers and invoices features
- Setting up the register and the customers' accounts in the Chart of Accounts
- Setting up the Customers' & suppliers' settings
- Setting up the Transactions table and entering the invoices
- Reports Open, overdue and issued invoices
- Printing invoices (Experimental version).
Notes for the use of multi-currency
- The Reports are based on the customer's account currency balances; possible exchange rate differences will not be taken into account.
In the Issued invoices table, the recordings of exchange rate differences are also listed, while in other prints only the customer's currency amount is used. - The reports Description column will reproduce the first row description for each invoice.
- For the accounting files based ont cash received you can setup a customers register with the Cost Centers.
Example file
Setting up the accounts
New settings and documentation
In the new Banana Accounting Plus version, in the Accounts table, new columns have been added in order to allow you to enter more information about your customers and, new features automatically resume the data in the Invoicing. Moreover, you will find a new and in-depth documentation to work in a very professional way:
- Set up customer accounts on a cash method
- Set up customer accounts on a accrual method
- Automatic invoice closing
We advise you to immediately switch to Banana Accounting Plus and take advantage of the many new features.
Introduction
The following explains how to set up separate accounts for each customer and a group for customers, so that you can have a list of separate invoices per customer.
In case you only have a few invoices and don't want to keep a detail per customer, you can also have just one account to record all customer invoices.
The list of invoices will then be for all customers and not for individual customers.
Setting up the Clients' register
- Each client is a separate row in the chart of accounts and has its own account number
- There is a group that groups all the customers accounts
This group is then grouped in a group present in the Assets.
At the end of the Chart of accounts, add:
- A * section (header) (see Sections)
- A 01 section for the Clients (see Sections)
- The Clients' accounts that are needed (see Adding a new account). The account numbering can be freely chosen (see Accounts)
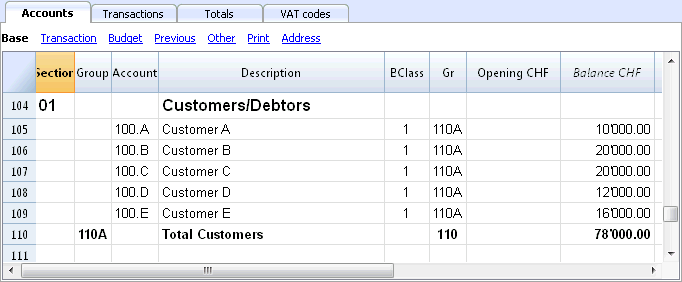
- The total Clients will be totalized in the summary groupe 110A of the Gr column.
- The same code or number used for the Gr (110A), must be used in the Assets Group column, in the row corresponding to the Total Customers of the Balance Sheet.
The groups' numbering can be freely chosen (see Groups).
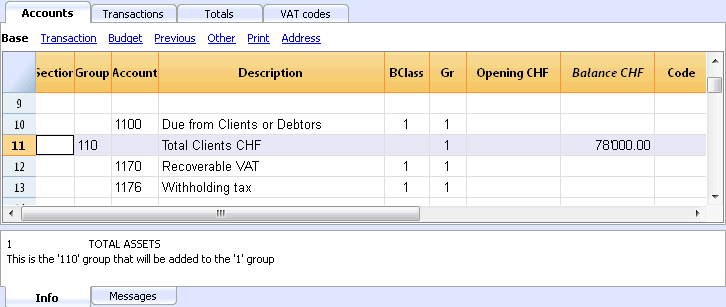
Managing the Customers' register with the Cost centers
In case you don't want customers to be visible on the Balance Sheet (for example, for transactions with VAT on cash received), customer accounts can be created by using the Cost centers (CC3).
Setting up the clients/suppliers register with cost centers
For all Swiss users who manage the VAT on cash received, this setup is the best to manage the VAT.
It is possible to manage the customers/suppliers register as cost centers (see also the Cost and Profit Centers page):
- we advise you to use the CC3 cost centers (the one where the accounts are preceeded by a semi-colon ";")
- the cost center balances for customers and suppliers will not appear in the Balance Sheet.
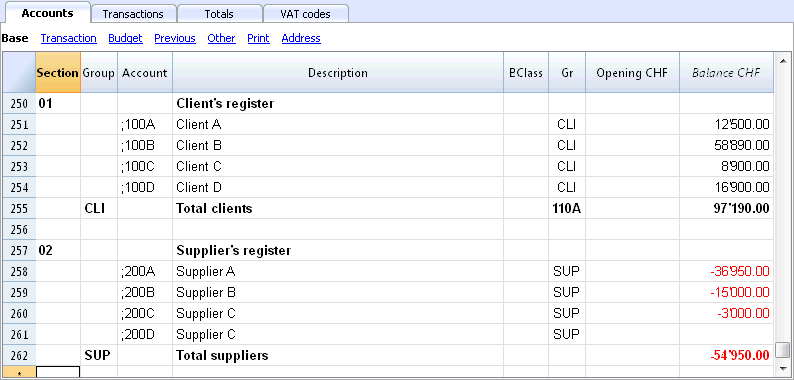
Transactions
More information is available at the page Clients and Suppliers with VAT on Cash received.
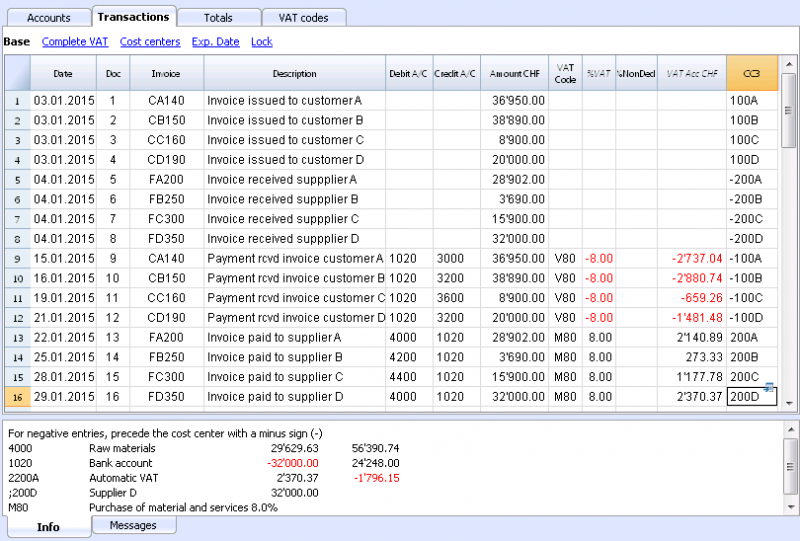
Without register
The customers accounts and groups can be entered as normal accounts into the Assets section.
Activating the Address columns (optional)
It is possible to add some specific columns in the Chart of accounts, to insert the address and other customers data:
- Choose the Add new functionalities command from the Tools menu
- Choose the Add addresses columns in the Accounts table command
(If you don't see this option in the list, it means that this function has already been activated).
The program adds in the Accounts table:
- An Address view where the added columns are visible.
- The columns that allow to insert the address data and other information.
- To display one or more of these columns, use the Columns setup command from the Data menu, also in the other views.
- To create other views with only certain columns, use the Views setup command (Data menu).
Select the Accounts table, Address view and add the desired information to the customers' accounts.
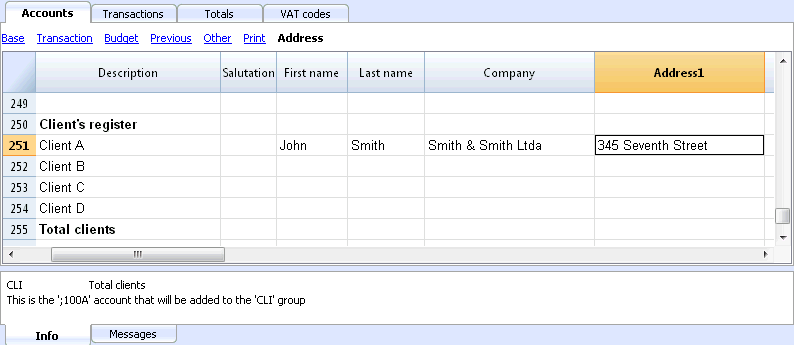
Setting up the Customers' parameters
- Select the Account2 - Customers - Settings command
- Please indicate in "Group or account", the group of the Chart of accounts in which the different customers' accounts are grouped.
- For an explanation of the different options, go to Customers and Suppliers settings.
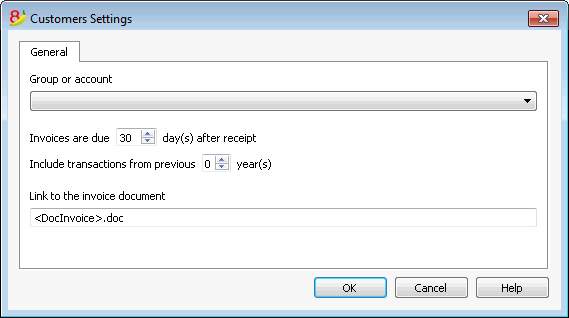
Customers' & suppliers' settings
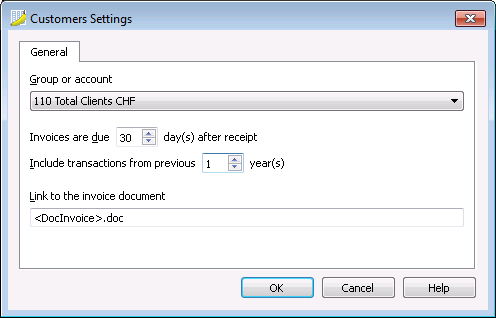
This dialogue is identical for both customers and suppliers functions.
The following explains the functions related to customers, but they also apply to suppliers.
As long as you have not indicated the customer or supplier group, the customer menu choices are disabled.
Group or account
Select the generic group or account that contains the Customers or Suppliers list. The group or the account needs to be already present in the Accounts table. See Setting up the Customers' register and Setting up the Suppliers' register.
Due date invoices (in days)
The program uses the following order of priority to calculate the invoice deadline:
- The due date if you entered it into the transaction row.
If there is more than one date for the same invoice number, the most recent one. - If the number of days is indicated in the PaymentTermInDays column of the Accounts' table, the date of the transaction increased by the number of days.
- The date of the transaction is increased by the days indicated in the settings dialogue.
Include transactions from previous (..) years (in years)
- If 0, the program will not display invoices from the previous year, but only the opening balances of the customer account.
- If 1, the program will also include the invoices of the previous year in the customer card.
- If 2 or more, the program will also include invoices from the years before in the customer card.
Link to the invoice document
You can insert a link to an invoice file (pdf, doc or other). When the link is being opened, the program substitutes the value <DocInvoice> with the invoice number present in the row.
The link can contain:
- The XML name <DocInvoice> or the name of another column contained between <>.
If you use the "<DocInvoice>.pdf" command and you are on the row with invoice number 100, the program tries to open the "100.pdf" file. You can also precede the filename with the name of a directory. -
You can use any file name extension. This extension must, however, be included in the list of file extensions considered safe (Tools- Program options-Advanced).
- It is also possibile to indicate a path preceding the field name that contains the name of the document that has to be opened.
With the link "c:\temp\<DocInvoice>.pdf" and the invoice number 100, the program proceeds to open the file c:\temp\100.pdf.
The name of the directory is relative to the directory where the file is located.
Opening an invoice document
- Place yourself in the Invoice column of the transaction row related to the invoice you want to open
- Use the right mouse button to open the context menu
- Choose the command Open invoice link.
Entering transactions
Displaying the Invoice column in the Transactions table
The invoice number has to be entered in the Invoice column (DocInvoice) which, in the default settings, is not visble in the Transactions table.
In order to display the column:
- Select the Transactions table
- Data menu
- Columns setup command
- Activate the Visible option for the DocInvoice column
The Invoice columns becomes visible.
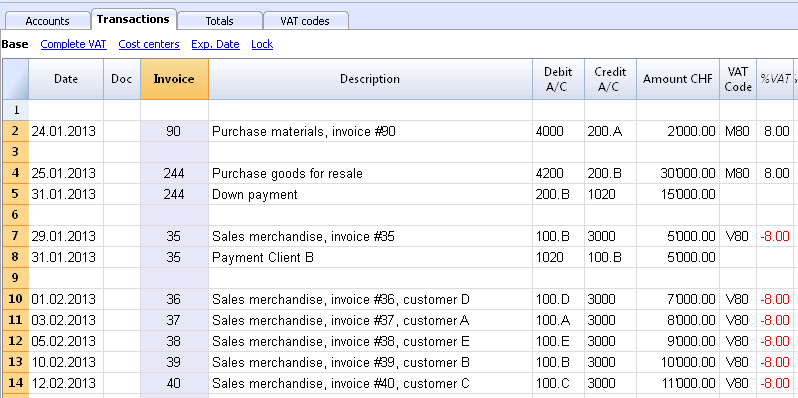
The Open Invoice link and Extract invoice rows commands, described hereunder, are linked to the Invoice column (right click on the Invoice column's cell).
Autocomplete of invoice data
When a payment is being recorded or an issued invoice is being corrected, the program proposes suggestions to complete the transaction automatically. Proceed as follows:
- Create a new transaction row and add the date
- In the Invoice column, press the F2 key; the list of open invoices will appear. If you write an invoice number or an account number, the list will be filtered based on the entered text.
- Select the desired invoice and press Enter. The program automatically completes the transaction with the description, debit or credit account and the amount. As usual, these data can be manually modified.
- Apart from the date, it is possible to also indicate the Customer account before pressing F2 in order to display the list of open invoices; in this case the list will be filtered based on the Customers account of the transaction row.
Note
The list displayed in the Invoice column includes both the Customers' and Suppliers' invoices. A supplier's invoice can have the same number as the invoice of another supplier, because the display criterium takes, apart from the invoice number, also the number of the Supplier's acccount into consideration.
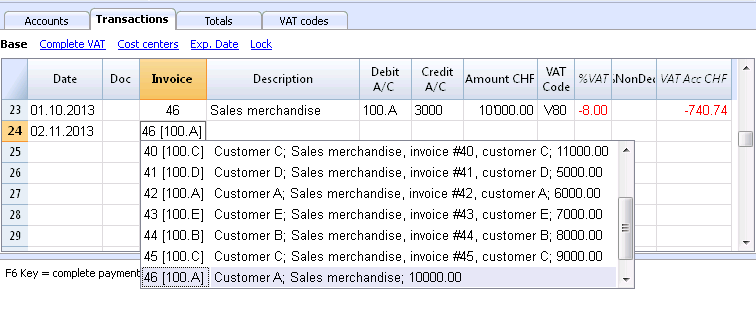
The Open Invoice link and Extract invoice rows commands, described hereunder, are linked to the Invoice column (right click on the Invoice column's cell).
Recording an issued invoice
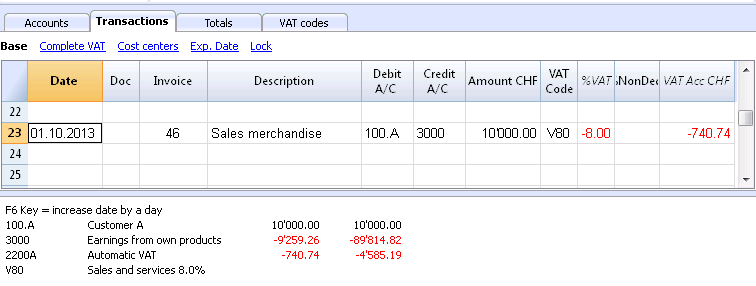
Recording a payment
- Insert the transaction date
- Place yourself in the Invoice column cell and click on the F2 button. If the F2 button doesn't work, you need to activate your customers/suppliers settings, by entering your register's group (ex.: Account2 menu, Customers, Settings). A list of all open invoices will appear.
- As an alternative you can also start to enter the invoice number, the customer/supplier name or the amount, and the program will show you the list of the open invoices according to your search data.
- Select the desired invoice and press Enter.
- The program completes the Transaction with the Description column, the Credit account and the Amount.
Enter the account into which the invoice amount has been transferred
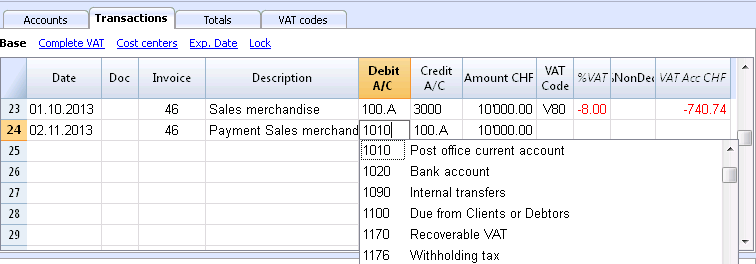
Recording a credit note
In order for the amount to be deducted from the original invoice, the same invoice number needs to be used. If the corrective document (for example, a credit note) presents a different number that needs to remain available, such a reference can be entered in another column, like Doc. Original.
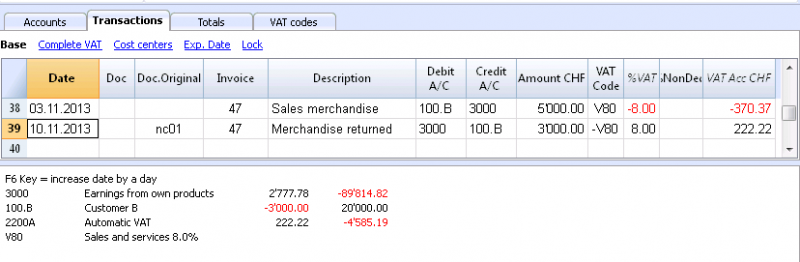
Extract invoice rows and Open invoice link commands
The Extract invoice rows command displays the transactions of the selected invoice.
The command is available by clicking on the small blue arrow at the upper right corner of the cell or with the right mouse button.
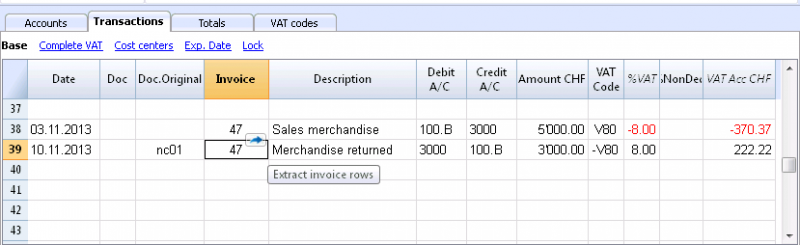
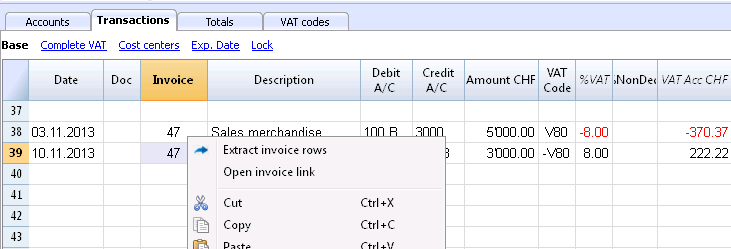
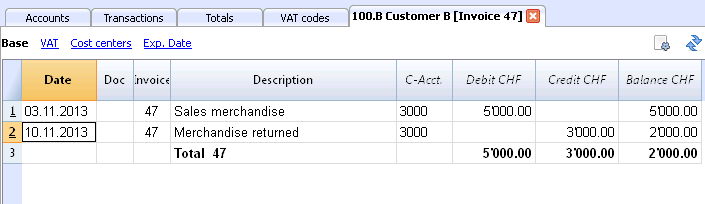
The Open Invoice link command establishes the text that has been defined in the Customers' settings (Account 2 - Customers - Settings - Link to the Invoice document).
For example, if the invoices have been created with Winword and saved in the Documents folder, these files can directly be opened by setting up the command line with the text 'C:\Users\myname\Documents\<DocInvoice>.doc' . The program substitutes <DocInvoice> with the text corresponding to the column and executes the command.
In the command line, it is possible to also indicate other columns of the table by using their XML names.
If the message 'File with extension considered unsecure' appears, add the extension (for example .doc) through the command Tools - Program Options, Advanced, File extension.
Customers' invoices lists
Displaying the invoices issued to customers
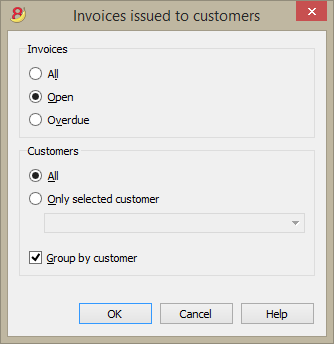
This dialogue is identical for both customers and suppliers functions.
The following explains the functions related to customers, but they also apply to suppliers.
All customers (suppliers)
Displays the Customers' Balance detail of all customers that belong to the group defined in the Customers and Suppliers settings.
Only selected customer (supplier)
Displays the Customers' Balance detail of a selected customer that belongs to the group defined in the Customers and Suppliers settings.
Example of a Customers Balance detail (Account2 menu - Customers command - Invoices issued to customers...)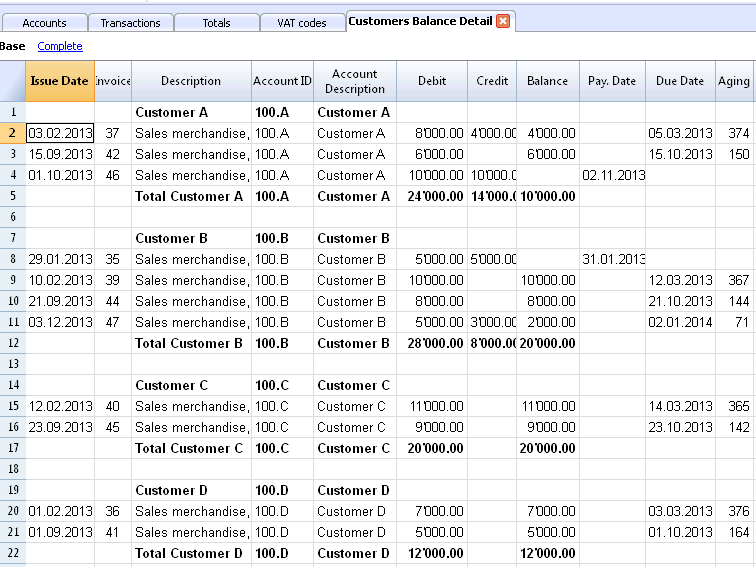
Displaying the open invoices
Command: Account2 - Customers - Open invoices by customer
In this table, the invoices that have an open balance are being listed.
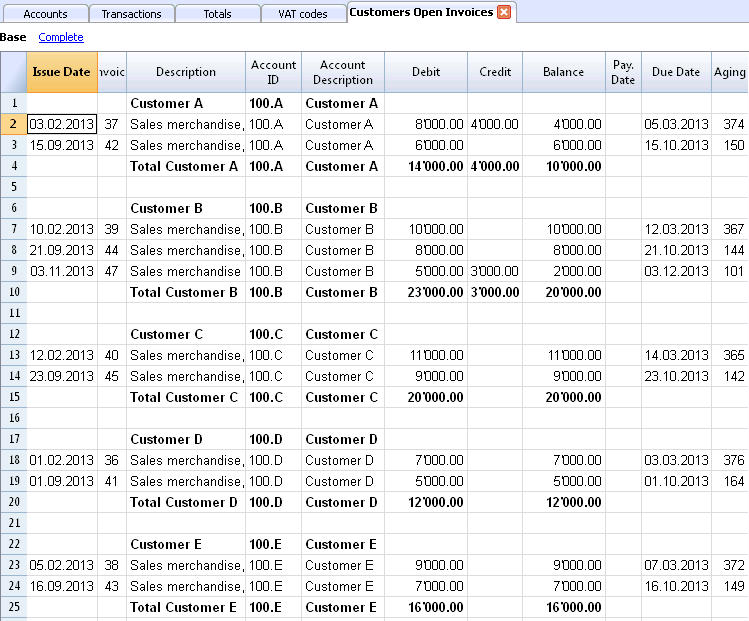
Displaying the overdue invoices
Command: Account2 - Customers - Open invoices by due date
In this table, the invoices that have an open balance are being listed, grouped by aging period.
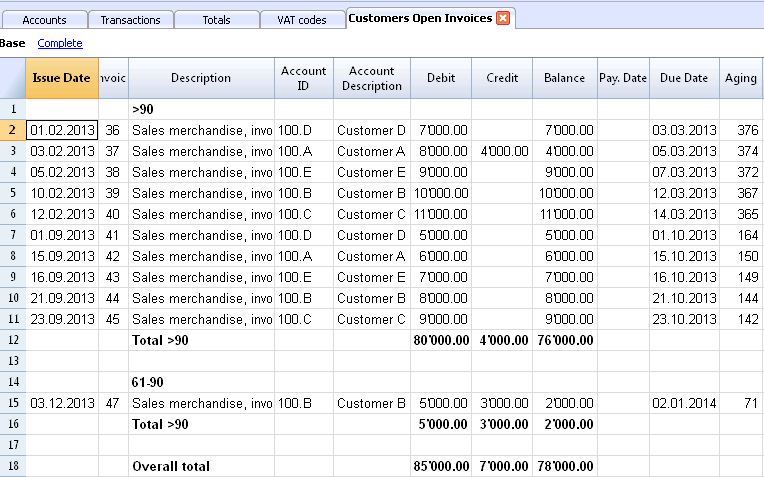
Creating invoices
New layouts
In the new Banana Accounting Plus version, two new highly customizable layouts have been added:
- The CH10 layout for all users in Switzerland (with or without QR invoice)
- The UNI11 layout for all users in other countries.
We advise you to switch now to Banana Accounting Plus and take advantage of the many new features.
This Functionality is currently only available with Banana Accounting 9.
For more information, please refer to the corresponding Banana 9 documentation.
Suppliers sub-menu
New settings and documentation
In the new Banana Accounting Plus version, in the Accounts table, new columns have been added in order to allow you to enter more information about your customers and, new features automatically resume the data in the Invoicing. Moreover, you will find a new and in-depth documentation to work in a very professional way:
- Set up suppliers accounts on a cash method
- Set up suppliers accounts on a accrual method
- Automatic invoice closing
We advise you to immediately switch to Banana Accounting Plus and take advantage of the many new features.
Suppliers sub-menu
The features, present in the Suppliers sub-menu (from the Account2 menu), allow you to obtain the following lists:
Logic for checking Suppliers' invoices
In order for the program to be able to prepare the lists of received invoices:
- In the Invoice column of the Transactions table, indicate the invoice number.
- In the Debit or Credit column of the Transactions table, indicate the account number of the Supplier
Also, before entering the transactions:
- In the Chart of accounts, Supplier accounts and/or groups need to be created
- If desired, address columns can be added
- In the Suppliers set up, indicate the Suppliers group or the general Suppliers account.
You also need to choose if, in the Chart of accounts, you need to have:
- An account for each Supplier.
This is necessary when the list of invoices needs to be presented separately by supplier.
In this case, a row needs to be created for the Suppliers and each supplier account refers to this group in the GR column (see hereunder). - One single account in which all the Suppliers are contained
The list of the open, expired invoices will be for all the Suppliers together and not per each individual Supplier.
Notes:
- Reports are based on the account currency balances; possible exchange rate differences will not be taken into account.
- The reports Description column will reproduce the first row description for each invoice.
- For the accounting files based ont cash received you can setup a suppliers register with the Cost Centers.
Detailed explanations
Setting up Suppliers accounts
- Setting up the register
- Activating the address columns (optional)
- Setting up the suppliers' settings
Entering transactions
- Displaying the Invoice column in the Transactions table
- Entering the invoice that is being issued
- Entering a payment
- Entering a credit note
- The Extract invoice rows and Open invoice link commands
Reports and printouts
- Displaying the open invoices
- Displaying the expired invoices
- Displaying the Invoices received from Suppliers
Automatic autocomplete
Example file
Setting up the accounts
- Setting up the register
- Activating the Address columns (optional)
- Setting up the Suppliers' parameters
Setting up the Suppliers' register
To create the Suppliers' register, add at the end of the Chart of accounts:
- A * section (header) (see Sections)
- A 02 section for the Suppliers (see Sections)
- The Suppliers' accounts that are needed (see Adding a new account). The account numbering can be freely chosen.
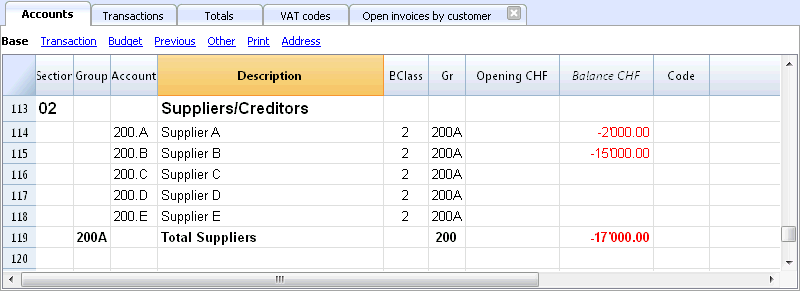
- The total Suppliers will be totalized in the summary groupe 200A of the Gr column.
- The same code or number used for the Gr (200A), must be used in the Liabilities Group column, in the row corresponding to the Total Suppliers. The groups numbering can be freely chosen (see Groups).
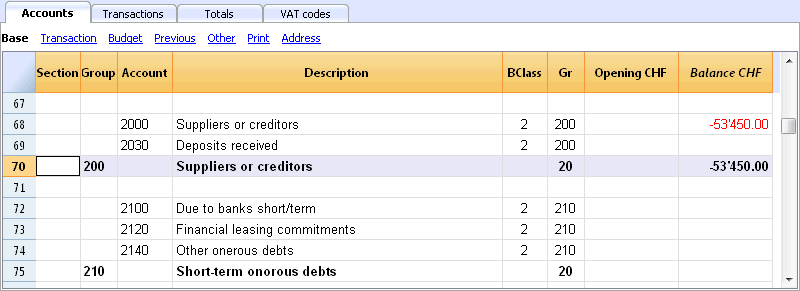
Managing the Suppliers' register with the Cost centers
In case you don't want Suppliers to be visible on the Balance Sheet (for example, for transactions with VAT on cash received), Suppliers accounts can be created by using the Cost centers (CC3). This process is similar to the Clients cost centers.
Activating the Address columns (optional)
It is possible to add some specific columns in the Chart of accounts, to insert the address and other Supplier data:
- Choose the Add new functionalities command from the Tools menu
- Choose the Add addresses columns in the Accounts table command
(If you don't see this option in the list, it means that this function has already been activated).
The programme adds in the Accounts table:
- An Address view where the added columns are visible.
- The columns that allow to insert the address data and other information.
- To display one or more of these columns, use the Columns setup command from the Data menu, also in the other views.
- To create other views with only certain columns, use the Views setup command.
Select the Accounts table, Address view and add the desired information to the Suppliers accounts.
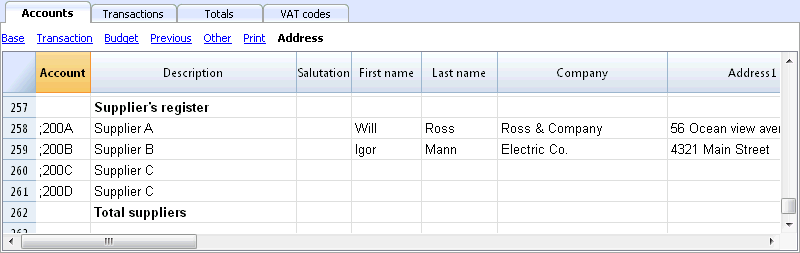
Setting up the Suppliers' parameters
- Select the Account2 - Suppliers - Settings command
- Please indicate in "Group or account", the group of the Chart of accounts in which the different Suppliers' accounts are grouped.
- For an explanation of the different options, go to Customers and Suppliers settings.
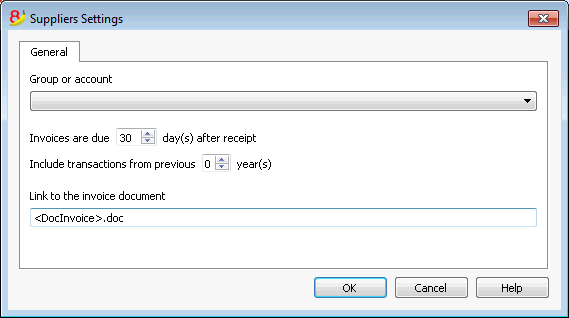
Entering transactions
- Displaying the Invoice column in the Transactions table
- Recording an received invoice
- Recording a payment
- Recording a credit note
- Supplier Balance detail and Open invoices commands
Displaying the Invoice column in the Transactions table
The invoice number has to be entered in the Invoice column (DocInvoice) which, in the default settings, is not visible in the Transactions table.
In order to dispaly the column:
- Select the Transactions table
- Data menu
- Columns setup command
- Activate the Visible option for the DocInvoice column
The Open Invoice link and Extract invoice rows commands, described hereunder, are linked to the Invoice column.
Recording a received invoice
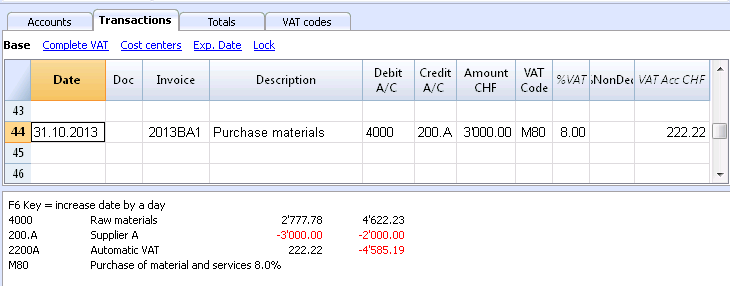
Recording a payment
- Insert the Transaction date
- Place yourself on the Invoice column and press the F2 key
The list of Open invoices will be opened. - Select the desired invoice and press Enter.
The program completes the Transaction with the Description column, the Debit account and the Amount.
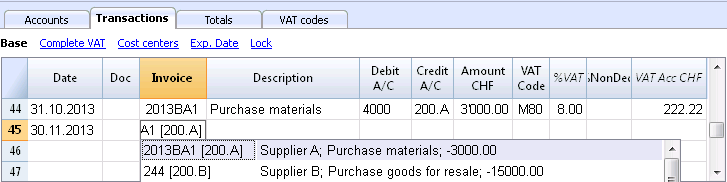
Enter the account used to pay the invoice.
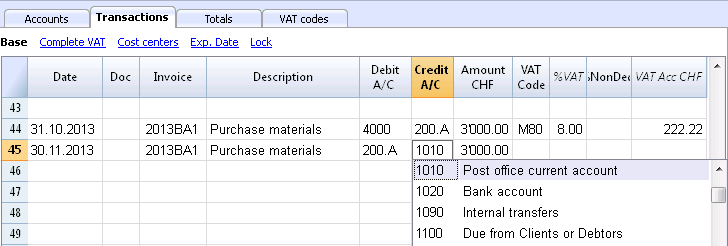
Recording a credit note
In order for the amount to be deducted from the original invoice, the same invoice number needs to be used. If the corrective document (for example, a credit note) presents a different number that needs to remain available, such a reference can be entered in another column, like Doc. Original.
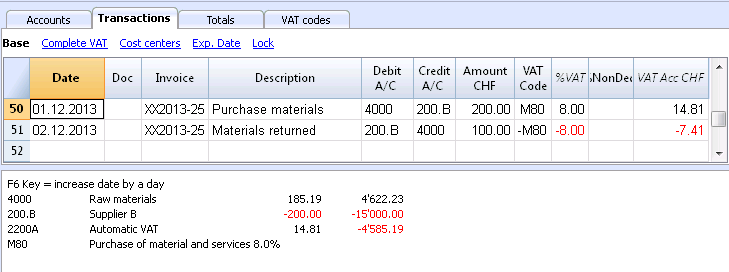
Extract invoice rows command and Open invoice link
The Extract invoice rows command displays the transactions of the selected invoice.
The command is available by clicking on the small blue symbol above at the upper right coner of the cell or with the right mouse button.
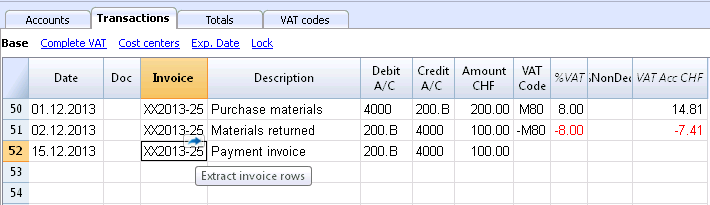
The invoice rows can also be extracted by clicking on the invoice number with the right mouse button, Extract invoice rows command.
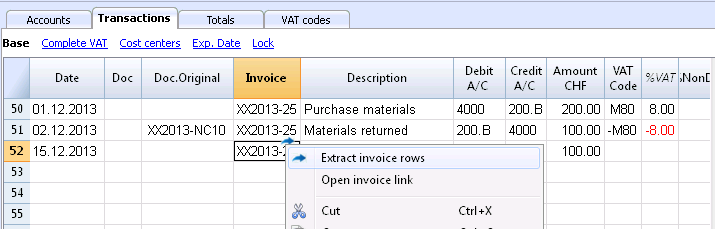
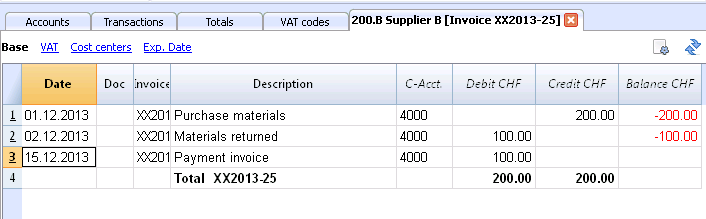
The Open Invoice link command establishes the text that has been defined in the Suppliers' settings (Account 2 - Suppliers - Settings - Link to the Invoice document).
For example, if the invoices have been created with Winword and saved in the Documents folder, these files can directly be opened by setting up the command line with the text 'C:\Users\myname\Documents\<DocInvoice>.doc' . The program substitutes <DocInvoice> with the text corresponding to the column and executes the command.
In the command line, it is possible to also indicate other columns of the table by using their XML names.
If the message 'File with extension considered unsecure' appears, add the extension (for example .doc) through the command Tools - Program Options, Advanced, File extension.
Reports and printouts
- Displaying the open invoices
- Displaying the overdue invoices
- Displaying the Invoices received from suppliers
Displaying the open invoices
Command: Account2 - Suppliers - Open invoices by supplier
In this table, the invoices that have an open balance are being listed.
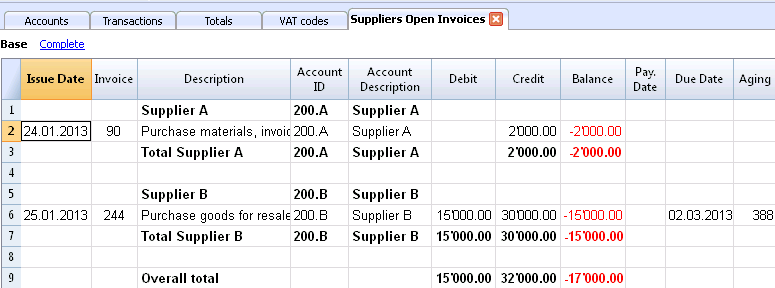
Displaying the overdue invoices
Command: Account2 - Suppliers - Open invoices by due date
In this table, the invoices that have an open balance are being listed, grouped by aging period.
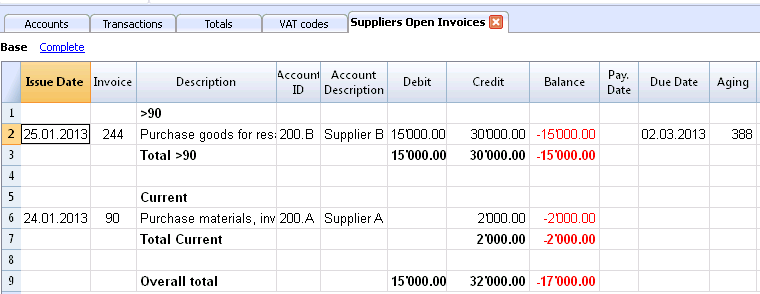
Displaying the Invoices received from suppliers
Command: Account2 - Suppliers - Invoices received from Suppliers
In this table, all the invoices that are part of the Suppliers' register, or that belong to an individual supplier, are being listed
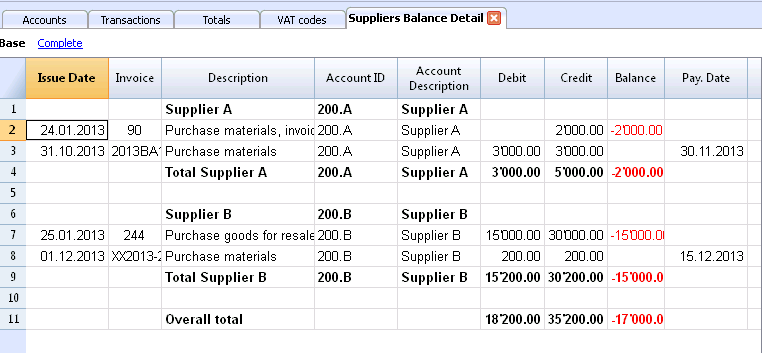
Autocomplete of invoice data
Please consult our page Customers menu - Automatic completion of invoice data.
VAT Management
Pages with more in-depth information:
- VAT management in Switzerland
There are several pages with specific information for Switzerland, for example on how to set up the VAT codes table, enter the VAT transactions and prepare the declaration. - VAT management in Italy - this page is in Italian
- Import VAT codes
Theory
VAT (Value-added Tax) is a tax that weighs on the final consumer. Every VAT subject must calculate and periodically deposit the tax to the Revenues Authority.
Every country has its own VAT rates that are established in different percentages depending on the type of merchandise or service. Certain merchandise and services are exempt or excluded.
The percentages vary according to the financial necessity of the country; therefore, there can be changes over the years.
VAT rate
In this document, to make calculations easier, we will use the following rates:
- 10 % normal rate
- 5% reduced rate
- 0% excluded operations or exempt operations
VAT calculation
Net Price x VAT Percentage / 100 = VAT Amount
Example:
Net price 300
Tax rate 10%
VAT amount = 300 x 10 / 100 = 30
Gross price calculation
Net price + VAT Amount = Gross Price
Example:
300 + 30 = 330
Sometimes the gross amount is known and it is necessary to find the net and VAT amounts.
Net price calculation
Gross Price / (100 + VAT rate) x 100 = Net Price
Example:
330 / (100 + 10) x 100 = 300
The net price represents the cost (purchase) or the revenue (sale) of the company
VAT amount calculation
Gross Price - Net Price = VAT Amount
Example:
330 - 300 = 30
or
330 - [330 / (100 + 10) x 100] = 30
The VAT amount represents the debit (sales) or the credit (purchases) towards the Revenues Authority.
VAT rate calculation
VAT Amount / Net Amount x 100 = VAT Rate
Example:
30 / 300 x 100 = 10%
or
[330 - 330 / (100 + 10) x 100]/100 = 10%
Another example:
20 / 400 x 100 = 5%
This way of calculating is used when the rate is not known.
VAT Codes Table
The VAT Code table setup allows the definition of all the parameters that are necessary to manage the transactions with VAT. The setup refers to:
- VAT due or recoverable
- Transaction amount recorded as net, gross, or VAT amount at 100% (Customs VAT)
- Freely definable applicable VAT rates
- Freely definable account in which VAT must be recorded
- Special rounding off for each code
- Definable grouping and totaling method
The VAT Codes table has a Base view and a Complete view (see top of the table hereunder). The difference between the two is the fact that the Complete view presents several columns that are not available in the Base view. These columns serve to accommodate some specific options.
How to calculate
The parameters indicated in the VAT Codes table are being used to calculate the VAT of the individual transactions. The parameters established in the VAT Codes table cannot be changed in the transactions. This modality guarantees that the VAT calculations are correct and uniform.
Please note: if the values of a VAT Code, which has already been used in the transactions, are being modified, the changes are not active immediately; in this case it is necessary to activate the Recheck accounting command (Account1 menu -> Recheck accounting). When the VAT Codes table is being modified, the program invites the user, through a message in the Info window, to execute a complete recalculation as a precaution.
The following table refers to the codes being used according to the Swiss legislation:
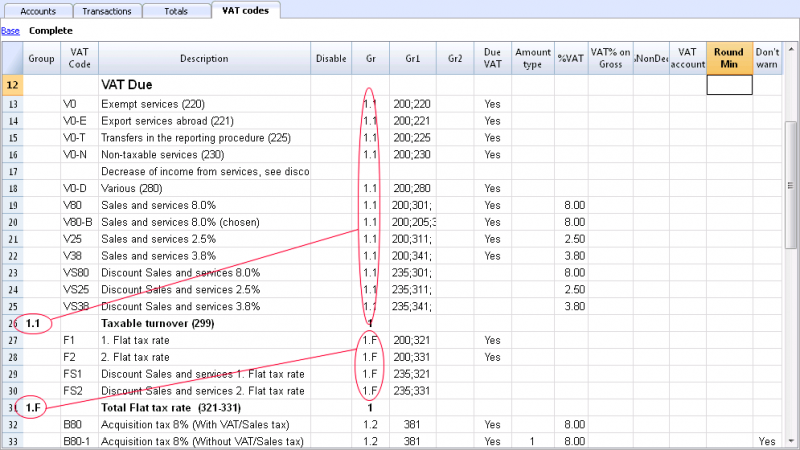
Detailed description of the columns
In the following columns, insert the following data:
- Group: a code or number that identifies the group to which the code belongs. In the example we have inserted 1 for the sales, 2 for the purchases, T for the total.
- VAT Code: the code to identify and carry forward the VAT code in the transactions.
- Description: a text for the description of the VAT Code or the group.
- Disable:
- Entering 1, the VAT code isn't displayed in the autcomplete list (Transactions table), but can still be used;
- Entering 2, the VAT code is disabled and cannot be used. - Gr: code of the "Group" in which the row has to be added.
- Gr1: In the image of the table above, the grouping codes representing the numbers for the Swiss VAT declaration are being shown.
- Gr2: code for additional groupings.
- Due VAT:
If the word Yes is being inserted, this means that the VAT is at debit (due to the State)
If the cell is empty, this means that the VAT is at credit (recoverable) - Amount type: indicates how the software considers the transaction amount:
0 (or empty cell) with VAT/sales tax (the transaction amount is considered VAT included)
1 = without VAT/Sales tax (the transaction amount is considered VAT excluded)
2 = VAT amount (the transaction amount is considered the VAT amount) - % VAT: VAT code percentage
- Non ded.: if, for a VAT code, it is not possible to deduct the full 100%, enter the non deductible percentage here (example 100%)
- VAT% on gross: is usually being left empty. In special cases, the word "Yes" has to be inserted only if the VAT percentage has to be applied on the gross amount (VAT included) and not on the taxable amount.
- VAT account: the account on which the calculated VAT is being automatically.
In the File and Accounting properties (File menu), a general account, that will be used as the VAT account, can be defined.
It is also possible to set up a specific account for every individual VAT code. - Round Min: minimum value for rounding, to be used only in particular cases. By preference, the rounding indicated in the basic data of the accounting (f.i. minimum rounding value 0.05) is being used.
- Don't warn: there are particular transactions that the software could interpret as mistaken, but which, in reality, are correct. In order to avoid for the software to signal error messages, insert the word Yes for the code that is concerned.
When the transactions with VAT are inserted, by applying the VAT Code in the VAT Code column, the software calculates automatically all the amounts related to the VAT and transfers them in the VAT account.
Rechecking of the accounting file
When rechecking the accounting file, if transactions are not locked, the program will reload the VAT parameters assigned to each code. If a VAT code setting has been changed, the change will be taken into account in the corresponding transactions columns (that cannot be edited by the user).
For this reason, when editing the VAT table, the program suggests to operate a full accounting recheck.
Adding a new percentage
When a new percentage is added, a new row has to be added; in the new row, insert the data of the new VAT code with the new percentage, while paying attention to insert the correct grouping. Don't change a code that has already been used in the transactions.
Groupings
By creating groups with multiple totaling levels, the user can obtain the totals that are necessary for the VAT declaration.
In the VAT report, by activating the option Use own grouping scheme, the software calculates the totals exactly as indicated in the sequence of the indicated groupings in the VAT Codes table.
The groupings are being used to obtain totals for groups of transactions, for example, the totals for all exportations or importations.
Related document: Import VAT codes
File properties (VAT/Sales tax tab)
This tab only appears if an accounting with VAT/Sales tax management is chosen.
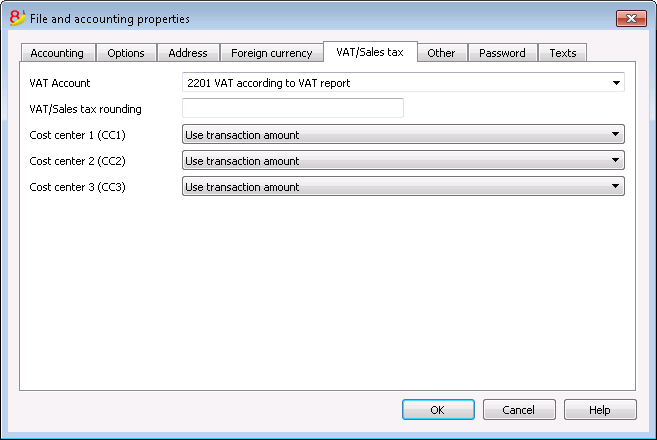
VAT Account
The Automatic VAT account, that is present in the chart of accounts, is defined here as default. In this case, the VAT account does not need to be inserted in the VAT Codes Table.
VAT/Sales tax rounding
This is where the user inserts how the VAT/Sales tax amounts should be rounded; if, for example, the user inputs 0.05, the VAT/Sales tax amounts will round to multiples of 0.05.
Cost Centers 1 (CC1), 2 (CC2), 3 (CC3)
For each type of Cost Center, the user can select which amount to use for the transaction in the cost center.
- Use transaction amount
- Use amount inclusive VAT/Sales tax
(When cost centers are being used for Client/Suppliers accounts) - Use amount without VAT/Sales tax
(When cost centers are being used for Revenue and Expenses)
Note: If one of these parameters is modified, the accounting must be recalculated.
Related documents: VAT Management, Cost and Profit Centers
Arrondi IVA
Le système TVA suisse prévoit pour le calcul de la TVA que celle-ci se fait calculé au centime, sans arrondi.
Pour ceux qui ont la nécessité d'avoir un arrondi des montants TVA pour les centimes, la procédure suivante a été prévue:
- Dans le tableau Écritures, insérer les Écritures comme d'habitude, en appliquant le code TVA approprié
- Dans la ligne suivante, enregistrer le compte des charges ou des produits, utilisé dans la ligne précédente, en débit et en crédit
- Dans la colonne montant, enregister les centimes de l'arrondi
- Dans la colonne Code TVA, insérer un code TVA avec type montant 2 (montant TVA au 100%) par exemple M80-2
- Quand les centimes doivent être déduits, insérer le code précédé par le signe moins "-M80-2".
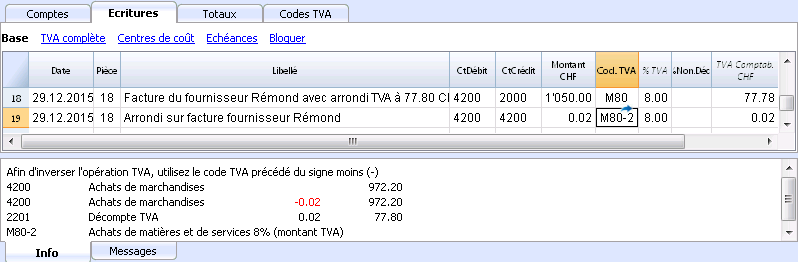
Associate VAT code to the account
In an accounting with VAT, in the Accounts table, it is possible to associate a VAT code to the income/expense accounts, so that, when the sales and purchases are being recorded, the program automatically inserts the VAT code and completes the columns with the VAT data while entering the account number.
In order to associate the codes:
- Click on the Other view. In this view, the VAT code column is visible by default.
In case you wish to display the VAT code column in the Base view, click on the Data menu, Columns setup command (see Related document at bottom of this page). - Insert the VAT codes for the income/expenses in the VAT code column.
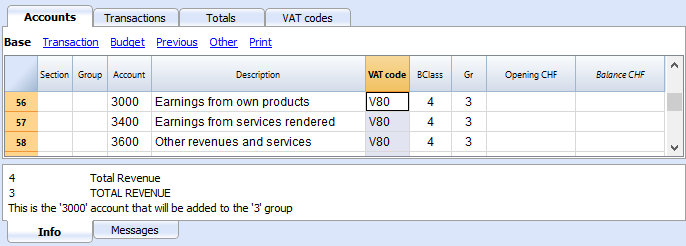 .
.
Related document: Columns setup
Configurer les comptes TVA
Quels sont les comptes TVA?
Les comptes TVA sont des fiches comptables d'où on enregistre les montants TVA, calculés selon les configurations des codes TVA.
Quand on utilise un code TVA, le programme calcule automatiquement, selon les valeurs de l'écriture:
- le montant imposable et le montant TVA
- le montant qui doit être enregistré sur le compte Débit
- le montant qui doit être enregistré sur le compte Crédit
- le montant qui doit être enregistré sur le compte TVA
- comment doit être enregistré le montant TVA (en Débit ou en Crédit)
En déplaçant le curseur sur l'écriture, en bas de la fenêtre d'information, le programme affiche les montants enregistrés sur les différents comptes.
Configurer les comptes TVA
Compte TVA général (automatique)
Si configuré dans les Propriétés fichier (menu Fichier) comme prédéfini, ce compte TVA est utilisé à chaque fois qu'il y a une écriture pour un code TVA qui n'a pas de compte TVA défini.
Compte TVA pour le code TVA
Pour chaque code TVA, dans le tableau Codes TVA, colonne Compte TVA, on indique le compte qui doit être utilisé pour les écritures qui utilisent ce code TVA.
Utiliser un seul compte TVA ou plusieurs comptes?
Dans la comptabilité, il faut séparer la partie Actifs des Passifs. Toutefois, si la TVA récupérable est compensée par le montant de la TVA due, seulement le montant TVA effectivement dû est affiché dans le Bilan.
Du point de vue comptable réel, dans la plupart des cas il n’est pas indispensable d'avoir plusieurs comptes TVA; en fait il est préférable d’avoir un seul compte TVA.
Pour l’application de la déclaration, cependant, il est utile d’avoir différents types d’opérations de TVA distinctes. Dans les programmes qui n’utilisent pas les codes TVA, il faut séparer chaque opération sur des comptes séparés. Avec Banana, grâce aux codes TVA et au Résumé TVA, il est possible d'obtenir des détails beaucoup plus importants :
- mouvements et totaux (TVA imposable, TVA, TVA comptabilisée)
- mouvements et totaux par pourcentage TVA
- mouvements et totaux par compte TVA
- mouvements et totaux regroupés selon TVA due et selon TVA récupérable.
Pour des contrôles d'opérations TVA, il n'est pas nécessaire d'utiliser plusieurs comptes TVA séparés.
Banana Comptabilité laisse donc le choix d’utiliser le compte général ou plusieurs comptes TVA.
Avantages d’utiliser un seul compte TVA
- Bilan et compte de résultat beaucoup plus facile à lire (il n’ya pas beaucoup de comptes TVA).
- Possibilité d'avoir des comptes (par exemples, des produits) d'où enregistrer des opérations avec plusieurs taux TVA.
- Connaître immédiatement la TVA due, sans avoir à additionner les différents comptes.
-
Vue immédiate de toutes les transactions TVALa fiche Décompte TVA montre toutes les opérations TVA en Débit et en Crédit.
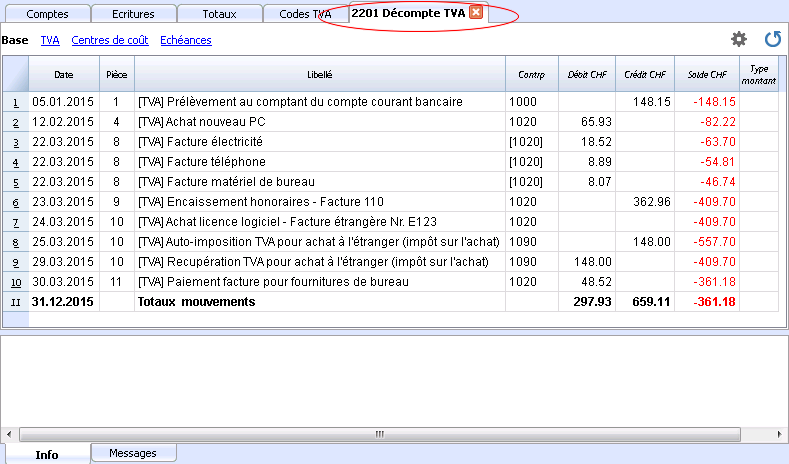
Avantages de l’utilisation de plusieurs comptes de TVA
Comme dit, si l'on utilise des codes TVA, l'enregistrement sur un compte TVA spécifique est une répétition des informations qui sont déjà disponibles grâce aux codes TVA et leur Résumé TVA detaillé.
Dans les pays tels que l’Allemagne, il est habituel d'avoir un compte TVA différent pour chaque type d'opération, afin que la déclaration TVA puisse être faite à l’aide des soldes des différents fiches de compte TVA.
Dans ces cas, pour assurer la compatibilité avec ce système, on peut considérer qu'il est utile d’avoir des comptes TVA différents pour chaque code TVA.
Clôture comptes TVA à la fin d'une période
À la fin de la période de calcul pour la TVA, il est utile de clôturer les comptes TVA de Débit et de Crédit et de déplacer le solde sur un compte unique:
- On voit, de façon comptable, quel est exactement le solde dû
- Le compte "2201, Décompte TVA" recommence avec un solde zéro pour chaque période. Il est donc plus facile d'avoir le contrôle sur d'éventuelles différences et erreurs.
Pour la clôture périodique du compte "2201, Décompte TVA", consulter la page Clôture périodique et paiement TVA.
Transactions
Accounting Charts templates included in Banana Accounting are already set with the VAT accounts, the VAT according to VAT report account (automatic), both in the chart of accounts and in the File and accounting properties of the File menu - VAT tab (in this case you don't need to enter any VAT account into the VAT codes table).
In case you are not using the Charts of accounts already available in Banana, make sure that the necessary VAT accounts are present in your own Chart of accounts. Our advice is to use a "VAT according to VAT report" account and to enter it into the File and Accounting properties, VAT/Sales tax Tab.
In the VAT codes table, there are codes both for the sales and the purchases. When entering the transactions, use the appropriate VAT code.
The software automatically splits the VAT amounts and records them in the "VAT according to VAT report" account or in the VAT account that has been indicated by the user in the File and Accounting properties.
VAT columns in the Transactions table (Complete VAT view)
You can find the full explanation of the main Transactions table columns in the Transactions page.
In the Double-entry accounting files with VAT or in those of the Income & Expense accounting with VAT, you will find the following VAT columns:
- VAT Code: for each transaction with VAT you need to enter one of the VAT codes from the VAT codes table
- VAT %: the program automatically enters the VAT percentage associated with the VAT code you entered
- VATExtraInfo: A code related to extra info about the VAT, to be used only in very exceptional cases.
It is possible to enter a symbol to identify specific VAT cases. The program suggests options, corresponding to the VAT Codes that start with a colon ":". - %Eff.: the program automatically enters the VAT percentage referred to the net amount. This percentage is different from the normal percentage when this one is referred to the gross amount.
- Taxable: once you enter the VAT code, the software automatically indicates the taxable amount (without VAT)
- VAT amount: the program automatically indicates the VAT amount
- VAT A/C: the account where the VAT is registered is automatically indicated (for Switzerland normally is the 2201 VAT report account); this account was previously entered in the File Properties, VAT tab (from the File menu).
- Amount type: this is a code that indicates how the software considers the transaction amount:
- 0 (or empty cell) with VAT/sales tax, the transaction amount is VAT included
- 1 = without VAT/Sales tax, the transaction amount is VAT excluded
- 2 = VAT amount, the transaction amount is considered the VAT amount at 100%
- Amount type not editable: Default mode.
- The column is protected
- The program uses the associated value of the VAT Codes table
- When you edit the value in the VAT Codes table and you recalculate the accounting, the program uses the new value associated with this VAT Code.
- Amount type editable: this option can be activated with the Add new functionalities command. The activation of the option cannot be undone.
- When you edit the VAT Code, the program uses the Amount type associated with this code.
- The value can be edited manually
- When the accounting is being recalculated, the value indicated in the Transactions table is being maintained.
- Non. Ded. %: this indicates the non deductible %.
- When you enter or change the VAT Code, the program uses the Non. Ded. % associated to this VAT Code in the VAT Codes table.
- You can manually edit the value
- VAT Acc.: this is the VAT amount registered in the VAT account.
It is calculated by the program according to the Transaction amount, the Amount type and the non deductable percentage. - VAT number: this is the code or VAT number of your client/supplier.
When you enter a transaction with VAT, it is possible to enter the VAT number of your counterparty. If in the Accounts table, in your clients/suppliers register, you also enter their VAT number, this is automatically loaded in the Transactions table, in the VAT number column.
Transactions with VAT
Before entering transactions with VAT, we advise you to visit the Transactions page.
The most common way of entering a VAT transactions is to enter the gross amount (amount including VAT), then apply to it the appropriate VAT code, choosing it among the ones included in the VAT codes table and according to your transaction type (Purchase, Sale, Discount, ...).
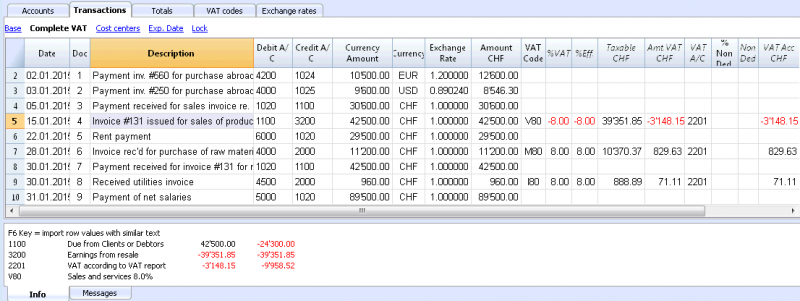
How to correct VAT transactions
If you see the mistake right away, you can just edit the transaction row; this is only possible if you haven't sent your VAT report yet and if there is no transactions lock.
If however your accounting file is locked or if you have already sent your VAT report, you cannot simply delete the wrong transaction, but you need to operate some cancellation-transaction and then re-enter the correct transaction.
In order to rectify VAT operation you need to:
- make a new transaction by inverting the Debit and Credit accounts used in the wrong transaction
- enter the same amount
- enter the same VAT code but preceeded by the minus sign (ex.: -V80)
- enter a new transaction with the correct accounts, amount and VAT code
Depending on the entity of the mistake, you should consider informing your local VAT office; usually they ask you to download a specific form for correcting mistakes in the previous VAT period.
Transactions with different VAT codes
When the total amount of an invoice is composed by several amounts with different VAT percentages, you need to register as follows:
- each amount with a specific VAT percentage needs to be entered on a different row with its own VAT code (enter the gross amount)
- once you finish the multiple registration, check that the sum of the differents amount and the VAT amounts correspond to the invoice total.
Here is an example:
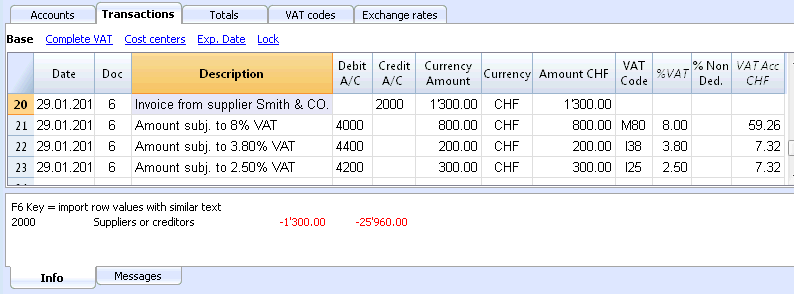
VAT EXEMPTION
If in your invoice you also have some items VAT exempt, you need to operate as above, choosing the VAT exempt code from the VAT Codes table.
Credit note
In case an operation, that has been entered at an earlier date, needs to be cancelled, the same VAT code that has been used for the initial operation needs to be entered with the minus sign (-). In this way the VAT is being rectified.
Instead of using the minus sign prior to the VAT code, it is also possible to use the specific VAT codes for discounts that have been configured in the VAT Codes table.
Example of a credit note on a sale
When a client finds a defect on a sold product, usually a credit note on his behalf is being issued. The credit note implies a decrease of the income and as a result a recovery of the VAT (Sales tax).
For example, we enter a sale amount of 12'000 including a 8% VAT. We then issue on the client's behalf a credit note of CHF 200.- for a product defect.
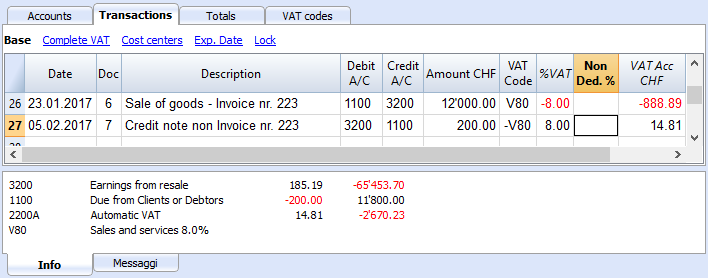
For a recovery of the VAT on the amount of the credit note, the VAT code of the sales has to be entered with a minus (-) sign.
Example of a credit note on a purchase
When we receive a credit note from a supplier, the same process as explained above applies: we use the same account codes but reverted, and we use the same VAT code with the minus (-) sign.
For example, we enter a purchase amount of 3'000 (invoice payment) including a 8% VAT. We then receive a credit note of CHF 300.- from our supplier for a product defect.
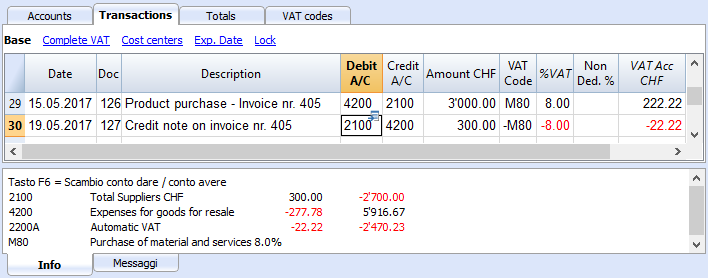
Period closing and VAT payment
VAT account reset at the end of the quarter report
At the end of the period, the VAT account balance will be charged to the Due VAT account (or to the Treasury VAT account).
VAT account card before charging the period balance to the Due VAT account
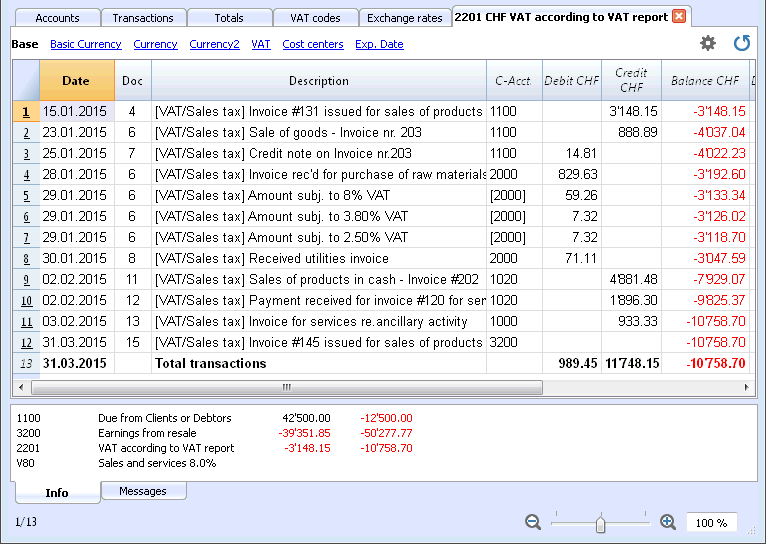
Transaction for charging the quarter balance to the Due VAT account
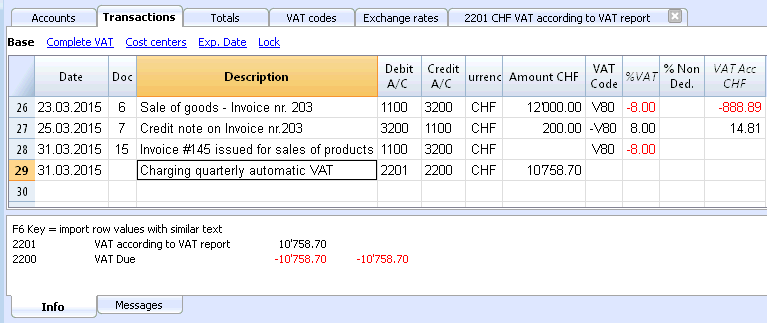
VAT account card after charging the period balance to the Due VAT account
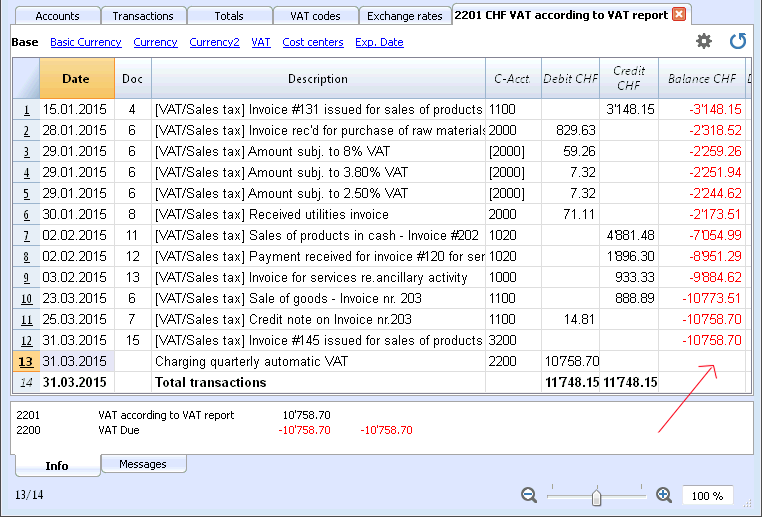
VAT payment
The Due VAT account (or the Treasury VAT account) will have a zero balance when you pay the due VAT.
With this system you can control your balance each quarter and in case of mistakes you can find in which period the balance does not correspond any more.
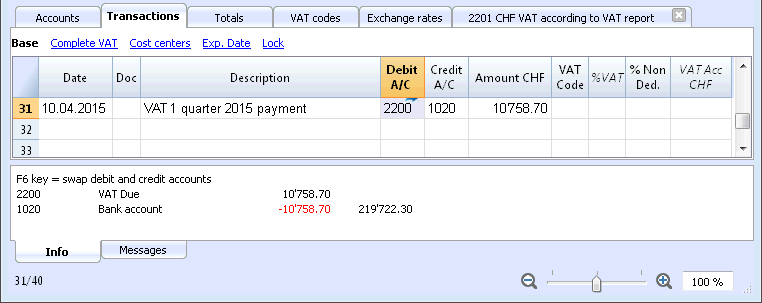
Due VAT account card after quarter payment
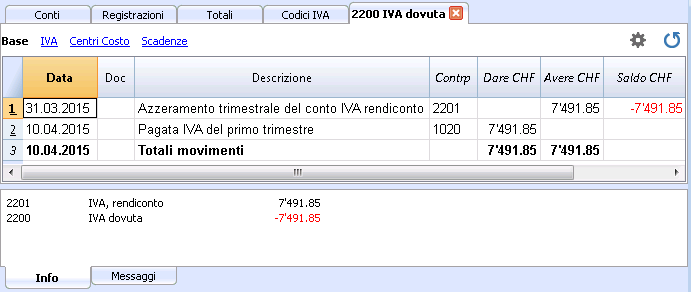
Note: the VAT payment process we just explained refers to the Swiss effective VAT payment method and the Swiss flat rate payment method with VAT separation.
If you use the Swiss flat rate payment methos without VAT separation, you can find specific information on the VAT payment and accounting assestment page (available only in Italian, German or French).
How to register a credit note (Switzerland)
If at the end of a period, when calculating the VAT report, the previous VAT is bigger than the due VAT, your VAT report has a Debit balance.
In order to charge the VAT report account you need to enter a transaction as follows:
- put in Debit A/C the Due VAT account
- put in Credit A/C the VAT report account
Usually in Switzerland the VAT credit is reimbursed, without having to move the credit to the following period.
When your VAT is reimbursed you need to enter a transaction as follows:
- put in Debit A/C your equity account
- put in Credit A/C your Due VAT account (where the balance should go to zero)
VAT Report
The VAT Report elaborates and displays the VAT calculation according to the selected period and parameters.
Procedure:
- Select, from the Account1 menu, the VAT report command
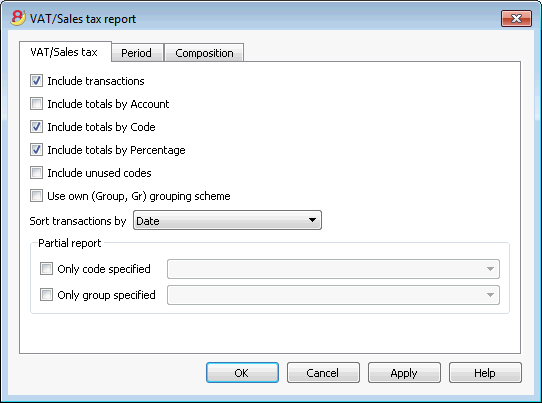
When activated, the following options allow the user to include the following data in the VAT report:
All the transactions with VAT/Sales tax are included.
Include totals by Account
All totals of operations with VAT/Sales tax, grouped per individual account, are included.
All totals of operations with VAT/Sales tax, grouped per individual VAT code, are included.
Include totals by Percentage
All totals of operations with VAT/Sales tax, grouped per individual percentage, are included.
Include unused codes
Also the unused codes of the VAT Codes table will be listed.
Use own (Group, Gr) grouping scheme
The operations with VAT/Sales tax are grouped according to the groupings of VAT Codes table.
Sort transactions by
By activating this cell, the transactions are sorted on the basis of a preselected option (Date, Doc., Description, etc….).
- only code specified (by selecting from the list)
- only group specified (by selecting from the list).
Other sections
The information relating to the other sections are available on the following internet pages:
VAT Report / transactions with totals by code
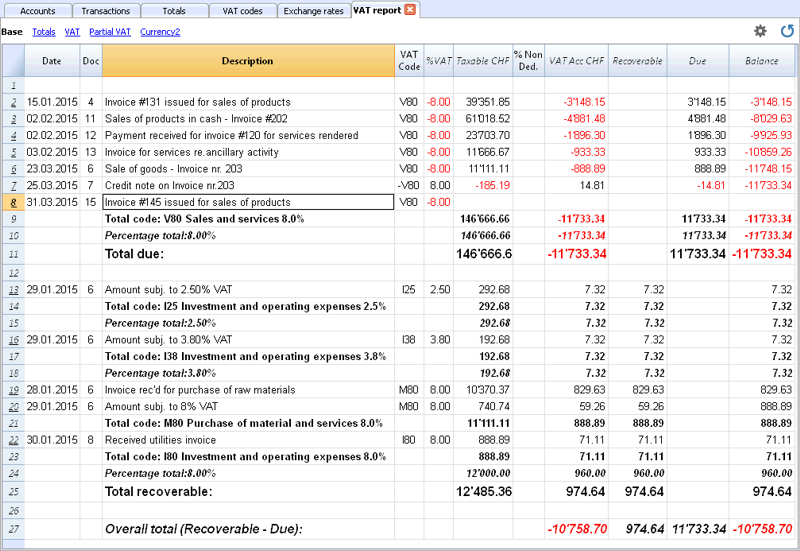
The overall total in the last row of the VAT report has to correspond with the amount for the end of period of the Automatic VAT account, Balance column, on the condition that both of them refer to the same period.
The data of the VAT report can also be transferred to and elaborated by other programs (f.i. Excel, XSLT) and be presented in formats that are similar to the forms of the tax authority
For Switzerland, one can automatically obtain a document similar to the form that has to be sent to the VAT office. This form shows the amount to enter for each number. Please consult (in German, French, or Italian) Swiss VAT Report.
Check accounting
Avoid mistakes with Banana Accounting Plus
In order to facilitate checking your accounting work and to immediately find differences, in Banana Accounting Plus, our new version, we added the Balance column in the Transaction table. You can now see potential differences on each row and you can correct them right away. It is a very useful feature when closing the accounting period.
Many of our clients have already tried it and are enthusiastic about it. We advise you to switch now to Banana Accounting Plus and take advantage of the many new features.
You can recalculate and check your accounting in different ways:
- with the Shift + F9 keys (Windows and Mac) or Cmd + 9 (Mac)
Primary accounting recheck - with the Check accounting command from the Account1 menu
this solution includes several extensive control options - Extensive accounting recheck
If there are error messages or differences you should correct them.
Primary accounting recheck
This command will execute the following operations:
- it will reset the accounts balances, as well as the cost centers and segment balances
- it will verify and report if there are errors in the various tables (Accounts, Transactions, VAT Codes and Exchange rates tables)
- it will re-enter all the operations as if they were being entered for the first time
- for the multi-currency accounting, it will recalculate the opening balances in the basic currency using the latest exchange rates
- if the transactions rows are not locked, it will recalculate all transaction rows:
- the VAT percentages are taken from the VAT Codes table and the VAT amounts are recalculated again
- it will update the account balances, as well as the cost centers and the segment balances
- in the Cashbook the progressive account balance in the Transactions table is recalculated
- it will recalculate the Accounts and Categories table totals (income and expenses)
- it will update the Diff. Budget and the Previous year columns
- in the multi-currency accounting, it will update the Calculated balance with the latest exchange rate and the exchange rate difference
Extensive accounting recheck - the Check Accounting window
On top of the basic accounting recheck, additional checks are executed.
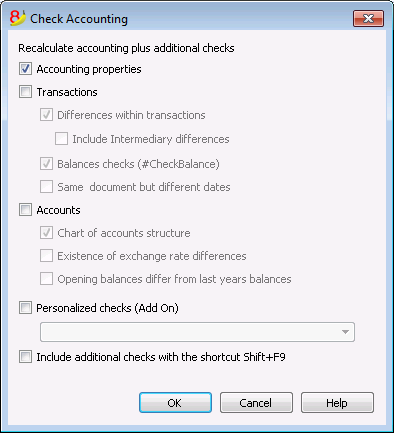
Recalculate accounting plus additional checks
This is one of the most useful features: the entire accounting file is being rechecked, all the balances are recalculated and the user is notified if errors are found.
Accounting properties
This option is being activated by default. The program verifies whether the data entered into the File and accounting properties correspond to the actual accounting (for example: opening and closing date, VAT account, accounts for exchange rate differences, etc.).
Transactions
Differences within transactions
If this option is activated, the program verifies whether there are differences between Debit and Credit or between Accounts and Categories in the Income & Expense Accounting. The rows where the differences occur are being indicated in the Messages Window. Also, the program shows the total difference amount in the Information window at the bottom of the screen (only when being positioned in the Transaction table).
Include intermediary differences
If this option is activated, the program verifies whether there are differences between Debit and Credit, in composed transactions (transactions over multiple rows). Often differences are caused by incomplete entries or errors in the amounts (as for example in the following example, in the transaction n. 8).
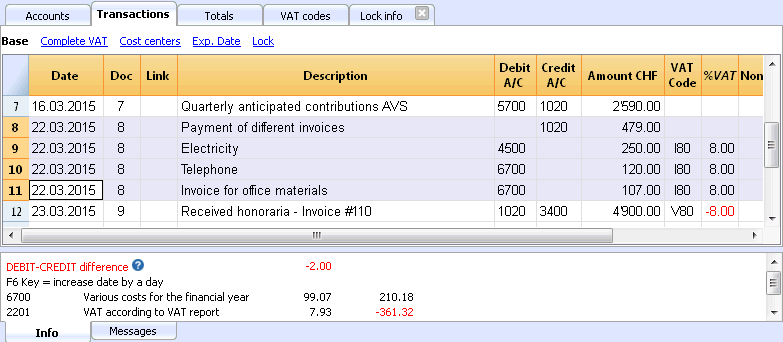
Balances checks (#CheckBalance)
By activating the Transactions option as well as this one, The program checks whether an account balance is equal to the one being inserted for verification (for example, between the bank account balance on the bank statement and the balance of that same account in the accounting file). In case the balances don't match, the program indicates the error.
In order to proceed with this check, one has to:
- In the Transactions table: enter #CheckBalance in the Description column, as well as the currency code and the balance of the account (example: #CheckBalance CHF 28'000..00). Into the Debit column, enter the account to be checked. The Amount column remains empty. The amount to be checked has to be entered with the same number of decimals as the one of the account to be checked.
- Activate the option through the Account1 menu
- While the accounting is being checked, when there are differences between the checking balance and the account balance, the program shows the error while indicating the row.
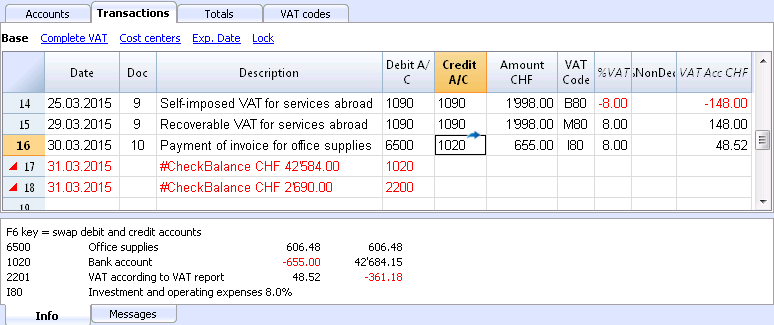
The program has detected a difference between the checking balance and the account balance in the file
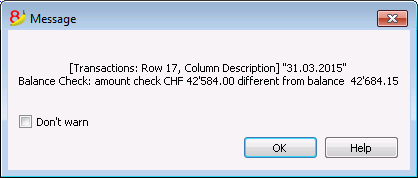
Same document with different dates
f this option is activated, the program will alert if transactions with the same Doc number have a different date. On composed transactions (=transaction on more than one row), where there is no correspondence between Doc and Date, the program cannot correctly determine the counterparty.
Accounts
Chart of accounts structure
If this option is activated, the program checks whether the chart of accounts structure is correct.
Existence of exchange rate differences
If this option is activated, the program checks whether there are unrecorded exchange rate differences.
Opening balances differ from last year's balances
If this option is activated, the program verifies whether the opening balances of the new year match with the closing ones of the previous year.
Personalized checks (Add On)
If this option is activated, the program runs checks on the functions that have been added by user (Add Ons), for customized verifications.
Include additional checks with the shortcut Shift + F9
When this option is activated, the program will run all the checks activated in the dialog window, when pressing Shift+F9. Otherwise only an accounting recalculation will be done (Mac version: Shift + Cmd + 9).
Accounting report file
The Accounting Report is a file type in which the presentation of a report is being set up, indicating the way in which the accounts are being grouped.
Thereafter, the Accounting report can be executed through the commands of the accounting:
- Enhanced balance sheet with groups (Chart of accounts, Sections, External accounting report)
- Accounting report (External accounting report section).
The grouping system, created in this manner, can be linked to the accounting to extract and totalize the accounts.
There are two ways of doing this:
- Grouping based on the indicated groups
This manner is useful when one wants to group the accounts according to different criteria, for example, present the Balance sheet and the Profit/Loss statement according to a grouping system that is different than the one set up in the Accounts table. -
- In the Report, the grouping system is being created.
- For each account of the Accounts table in the accounting, in the GR1 column (or another column), indicate the group in which the account has to be grouped.
- When the Report is being executed, all the accounts that are marked with groups in the report file are being carried forward.
- Grouping based on the indicated accounts
This manner is useful when one doesn't want a report with all the accounts but with only a few selected accounts.- In the Report, indicate the accounts of the Accounts table from the Accounting file that should be included.
- When the Report is being executed, only the indicated accounts are being carried forward.
How to create an Accounting report file
In order to create an Accounting report file: i
- File menu, New ->
- Double-entry accounting -> Accounting Report
- It is possible to choose an existing model or get started with a new one
- Once created, save the file under a new name.
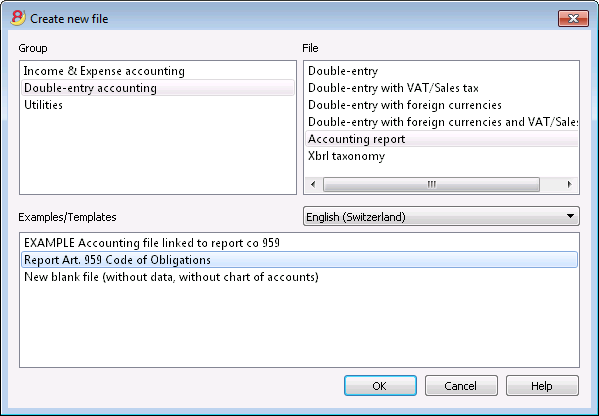
The columns of the Accounting report
The Accounting report file includes the same columns as those in the Chart of accounts of the accountiung file. They make it possible to create the groupings and the totals.
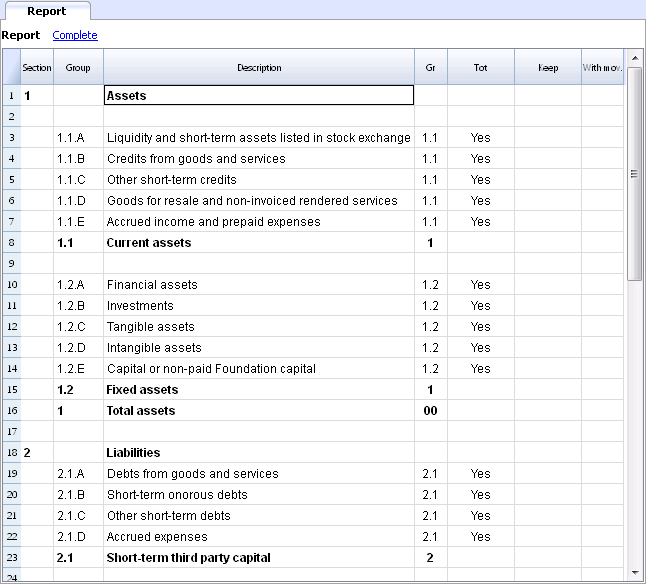
Sections
This column is being used to indicate the value that is to be used in the presentation.
For the different possibilities, see the documentation about the Sections.
Group
The group in which the accounts of the accounting have to be totalized or a group of the report.
Account (only visible in the Complete view)
The account that has to be included in the report.
- If there are accounts, when the report is executed only those indicated will be carried forward.
- In case no account has been indicated, the accounts that have been linked through a group will be carried forward.
Description
Description for the grouping or of the row itself.
Gr
In the Gr column, one indicates the total in which the row has to be totalized.
Tot
If the word "Yes" is being entered, only the Total row is being displayed and not the accounts that are a part of this total.
Please look at 'Show groups' totals only' in the Accounting report.
Keep
Usually, the totalization rows that have accounts with balances are included in the report.
If you indicate "Yes" in this column, the row is in any case always displayed. This can be applied to both the totals and to the accounts.
With mov.
This applies to groups that have a zero balance.
The row will only be displayed if there have been transactions (movements) during the time period.
Creating a Report linked through the group
- In the Report, create a system of groups and subgroups as desired.
- In the Accounts table one indicates, in the Gr1 or Gr2 column, the group in which the account has to be totalized.
In case the Gr1 column (or another preferred one) is not visible, make it visible with the Columns setup command. - The accounts that are not being linked will not be included in the Report.
- Execute the Report through the commands:
- Enhanced balance sheet with groups
- Accounting report.
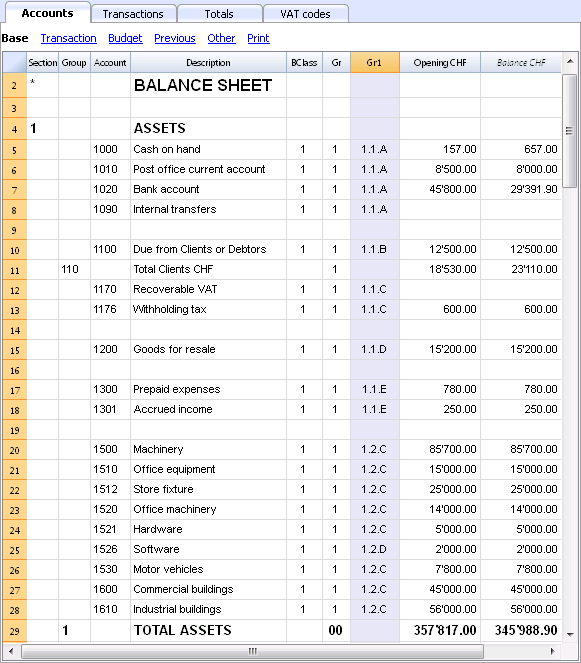
Creating a report that groups only some selected accounts of the accounting
This modality is active even when in the report only one account has been indicated.
Do not indicate any account, if you wish that the report is being executed in the group modality.
In the report are being indicated:
- The accounts of the accounting that have to grouped together.
Only the indicated accounts will be included in the report. - The groups in which the accounts have to be grouped together.
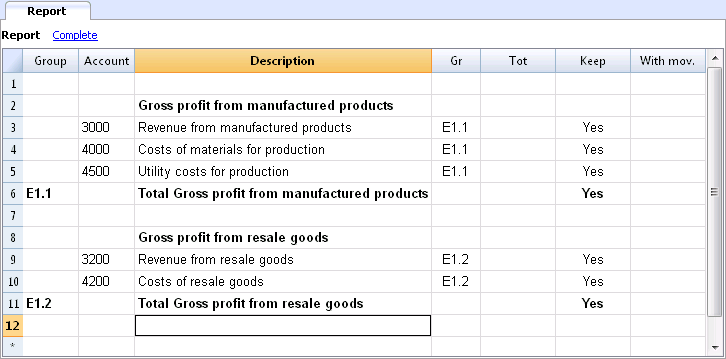
Execute the Report using the commands:
- Enhanced balance sheet with groups from the Account1 menu (then Chart of accounts -> Sections -> External accounting report)
- Accounting report from the Account1 menu (then choose the Base section and the External accounting report option).
Documents table
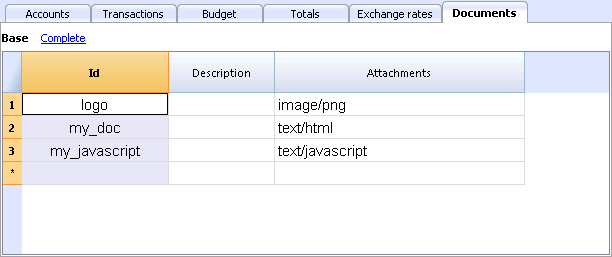
The new Documents table allows you to include texts, images or programming codes (scripts) into your accounting file.
This table is normally automatically created when attaching some documents to the Balance sheet, using the Account1 - Balance sheet command or the Account1 - Balance sheet with groups command -> Attachments section.
The Documents table has the following columns:
- Id column
This is the document's name.
Documents beginning with the "_" sign have specific meanings.- "_budget.js"
You can enter specific functions created for the Budget table.
- "_budget.js"
- Description
A short file description (optional) - Attachments
Contains the file.
If you click on the cell, an icon will appear to add or edit the file content.
Including a logo when printing the invoices
- Add a new row
- In the Id column, write 'logo'
- In the Attachment column, double-click on the cell, or select the Edit symbol, select the type of Image document and select the picture you want to insert in the printout.
The logo must be an image with a width of 120px and height of 100px.
You can also add other images, to be used in customized templates.
HTML Editor
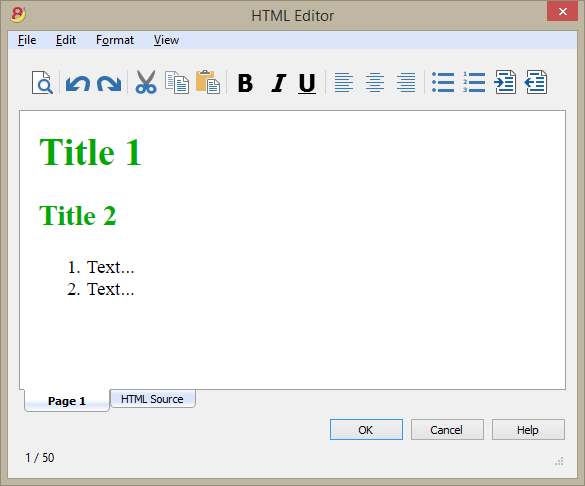
Adding the ${...} field
The ${...} field allows the user to add dynamic text to the document, for instance an account's balance or a Banana table. The Banana API interface is available at the following web address https://www.banana.ch/doc8/en/node/4714
The command can be added manually or through the command Edit - Add script
Printing the current balance of account 1020
${Banana.Converter.toLocaleNumberFormat(Banana.document.currentBalance('1020','','').balance);}
Output of the Accounts table, columns: Account, Group, Description, Balance (command not yet available)
${HTML Banana.document.table("Accounts").toHtml(['Account','Group','Description','Balance'],true);}
It is possible to write the javascript code in a separate document and include the script through the command Banana.include.
The scripts can be saved in the Documents table or in a local file.
${Banana.include("documents:myscript1");rtnValue}
${Banana.include("c://temp//myscript16.js");rtnValue}
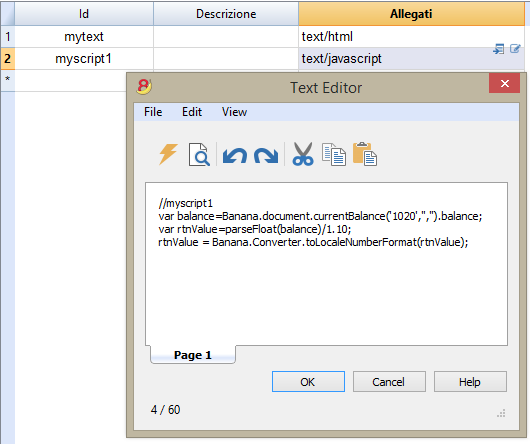
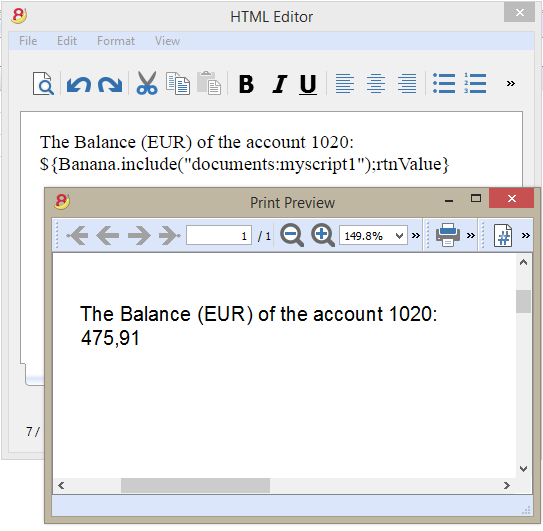
Adding a page break
The command can be added manually or through the comand Edit - Add page break
Text in the first page
${PAGEBREAK}
Text in the second page
The command ${PAGEBREAK} is not yet available, the current command to add a page break is:
<!--pagebreak-->
Aggiungi funzionalità contabilità
Aggiungi colonne Indirizzi nella tabella Conti
Per i file di contabilità.
Questa funzione permette di aggiungere, nella tabella conti, le colonne che servono per inserire gli indirizzi dei clienti, dei fornitori, dei soci o altro.
Il programma aggiunge nella tabella conti:
- la vista Indirizzi dove sono visibili le colonne aggiunte.
- Le colonne che permettono di inserire i dati dell'indirizzo e altre informazioni.
- Per rendere visibili una o più di queste colonne anche nelle altre viste usare il comando Disponi colonne del menu Dati.
- Per creare altre viste con delle colonne specifiche, usare il comando Disponi Viste.
Aggiungi tabella preventivo
Per i file di contabilità.
Questa funzione aggiunge la tabella Preventivo dove si possono inserire le registrazioni che riguardano il preventivo.
Il programma aggiunge:
- La tabella preventivo, riprendendo i valori di preventivo indicati nella tabella conti (se esistono)
- Blocca la colonna preventivo nella tabella conti
I valori di questa colonna saranno calcolati in base alle registrazioni di preventivo e come periodo, quello definito nei dati base contabilità.
Maggiori informazioni sono disponibili alla pagina Preventivo.
Modifica colonna tipo importo IVA nelle registrazioni
Per i file di contabilità, con IVA.
Questa funzione permette di rendere modificabile la colonna Tipo imp. (Tipo importo IVA) nella tabella Registrazioni.
La colonna permette di inserire per ogni registrazione, quando occorre, uno dei seguenti tipi di importo IVA:
0 (o cella vuota), si intende IVA inclusa
1 = IVA esclusa, si intende IVA esclusa
2 = importo IVA, l'importo della registrazione è considerato importo IVA al 100 %
Per ogni registrazione, il programma immette in automatico nella colonna Tipo importo i dati predefiniti della tabella Codici IVA (per ogni codice). Se eccezionalmente, per un codice IVA cambia il tipo di importo, è possibile inserire manualmente 1 o 2.
Nota
Utilizzando questa funzionalità ci sono delle incompatibilità dei dati IVA con le versioni precedenti che non avevano questa funzionalità.