Dans cet article
Le tableau Écritures est le cœur de la comptabilité : c’est ici que vous saisissez tous les mouvements d’entrée (encaissements) et de sortie (paiements). Après chaque enregistrement, le montant est automatiquement mis à jour dans les fiches de compte et de catégorie, vous permettant ainsi de toujours garder le contrôle des totaux.
Vous pouvez saisir les mouvements de deux manières :
Saisie automatique des données
Avec Banana Comptabilité Plus, vous ne perdez plus de temps avec des saisies manuelles : grâce aux fonctions d’automatisation, vous pouvez enregistrer les données automatiquement, avec rapidité et précision.
Accélérez la saisie
Pour accélérer la saisie des écritures, utilisez les fonctions d’automatisation suivantes :
- Saisie avec auto-complétion – permet de reprendre automatiquement les données déjà saisies auparavant.
- Écritures répétées – permet de mémoriser les écritures répétitives dans un tableau spécifique.
Importer les données de l’extrait de compte
Avec Banana Comptabilité, vous pouvez accélérer le travail en saisissant les mouvements directement depuis l’extrait de compte bancaire. Au lieu de saisir chaque opération manuellement, il suffit d’importer le fichier téléchargé depuis votre banque (généralement au format CSV ou ISO20022). Pour plus d’informations, consultez la page Importation de données de l’extrait bancaire ou postal.
Appliquer des Règles aux mouvements importés
Écritures avec Règles – Vous pouvez définir des instructions pour que le programme complète automatiquement les mouvements importés des extraits de compte, avec compte de contrepartie, centres de coût, segments et, si nécessaire, le code TVA.
Saisie manuelle
La saisie manuelle est assez intuitive. Nous expliquons néanmoins les opérations les plus courantes.
Saisie manuelle d'une entrée
Voici un exemple pratique d'une entrée. Il s'agit ici d'une vente de marchandises.
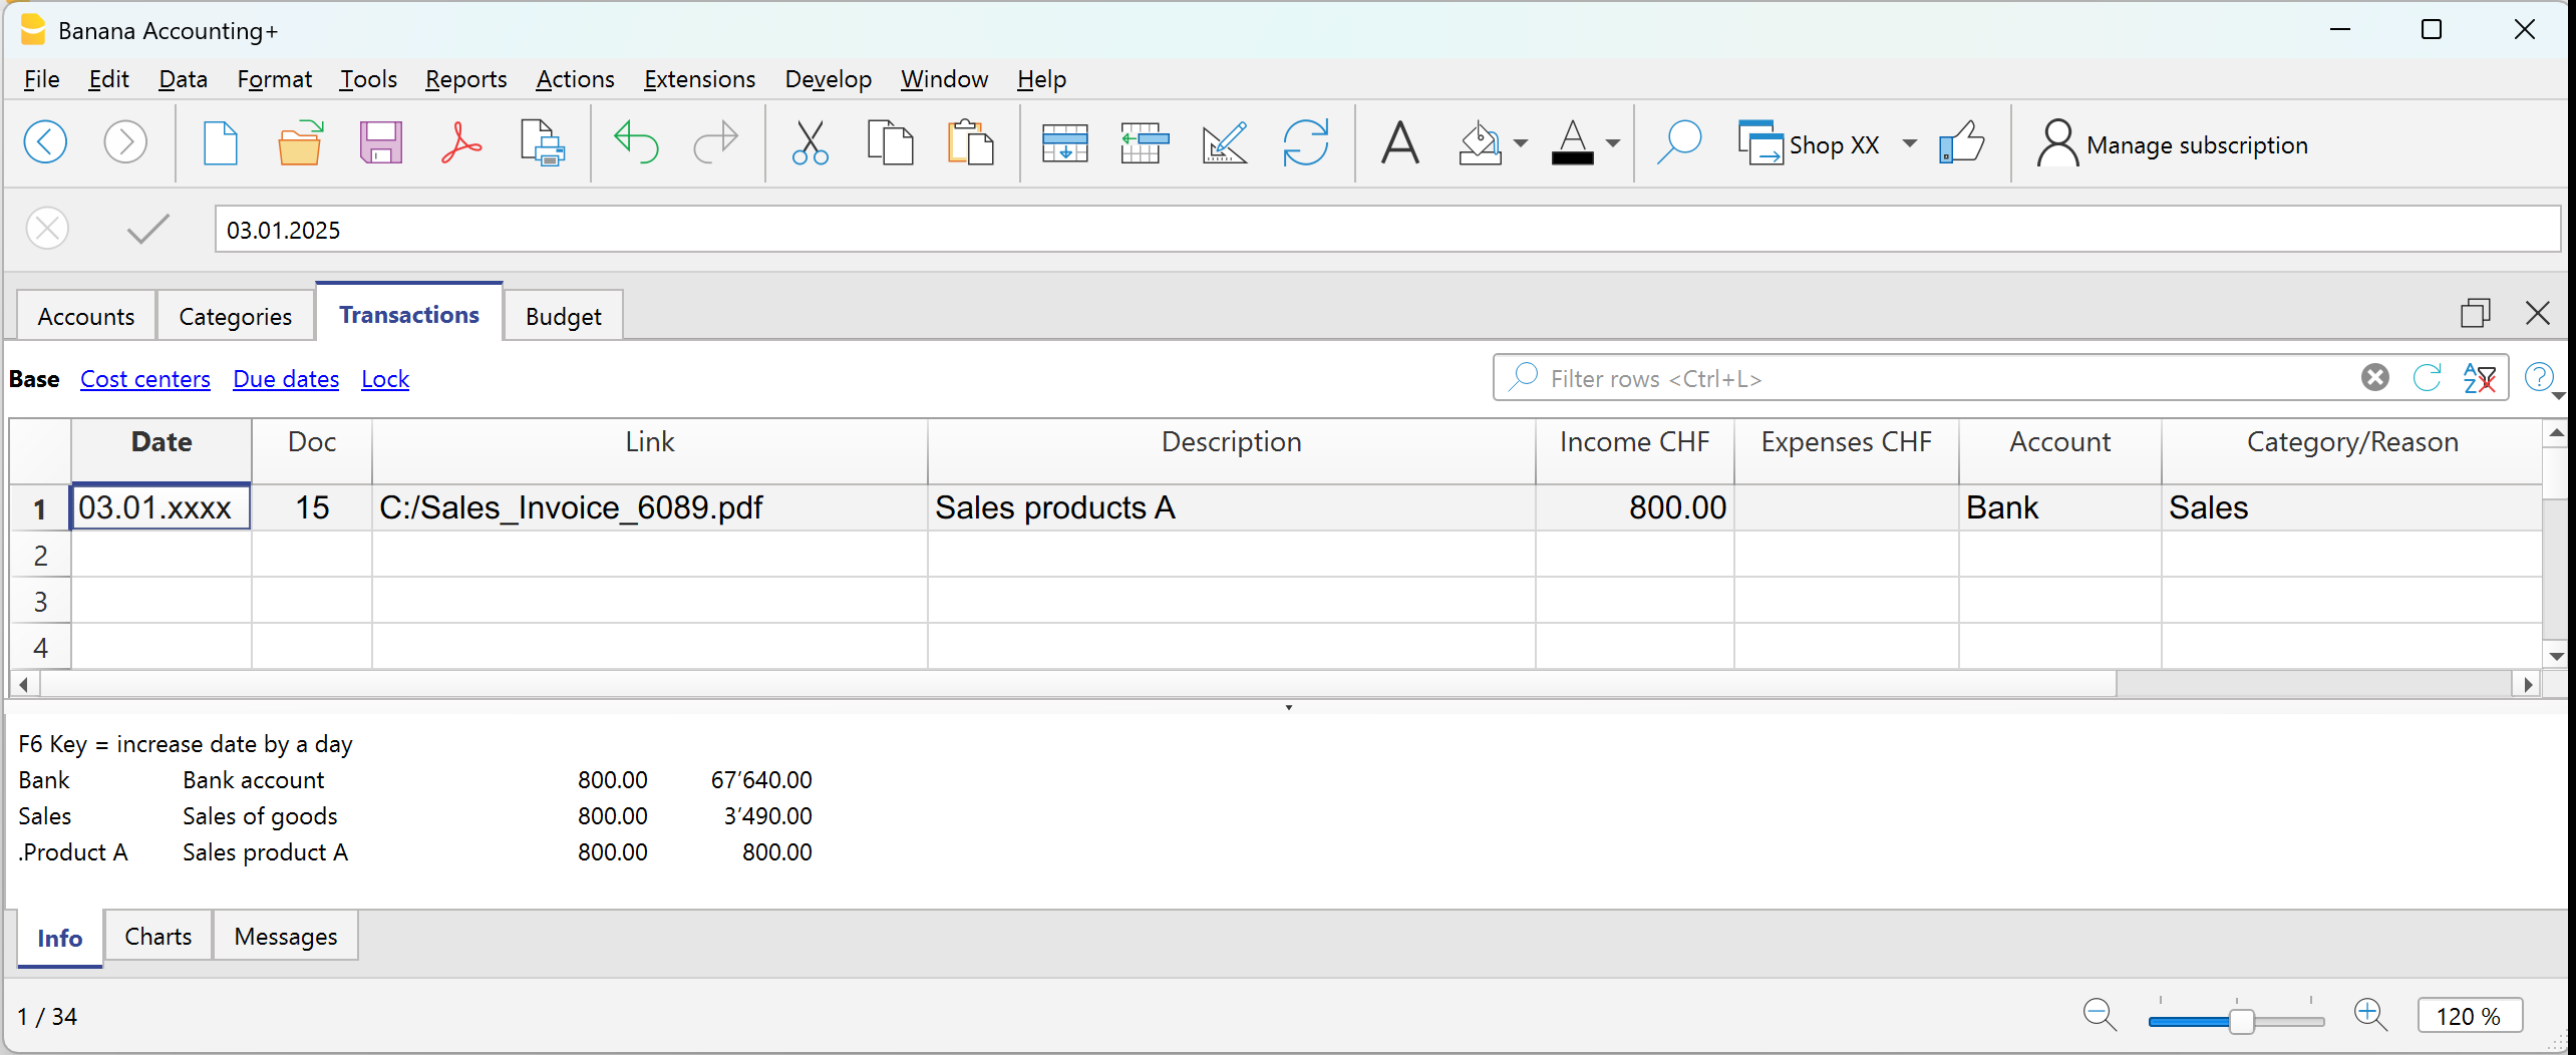
Exemple : encaissement d'une vente via la banque.
- Date → entrez la date du document (ex. date de la facture).
- Pièce → numéro du document (optionnel).
- Pièce Lien → lien vers le document numérique (si disponible).
- Libellé → brève description (ex. Vente de marchandises au client Rossi).
- Recettes → montant encaissé.
- Compte → compte de liquidité utilisé (ex. Banque).
- Catégorie → raison de l’entrée (ex. Ventes).
Le montant sera affiché comme positif
Saisie manuelle d'une sortie
Voici un exemple pratique d'une sortie. Il s'agit ici d'un achat de marchandises.
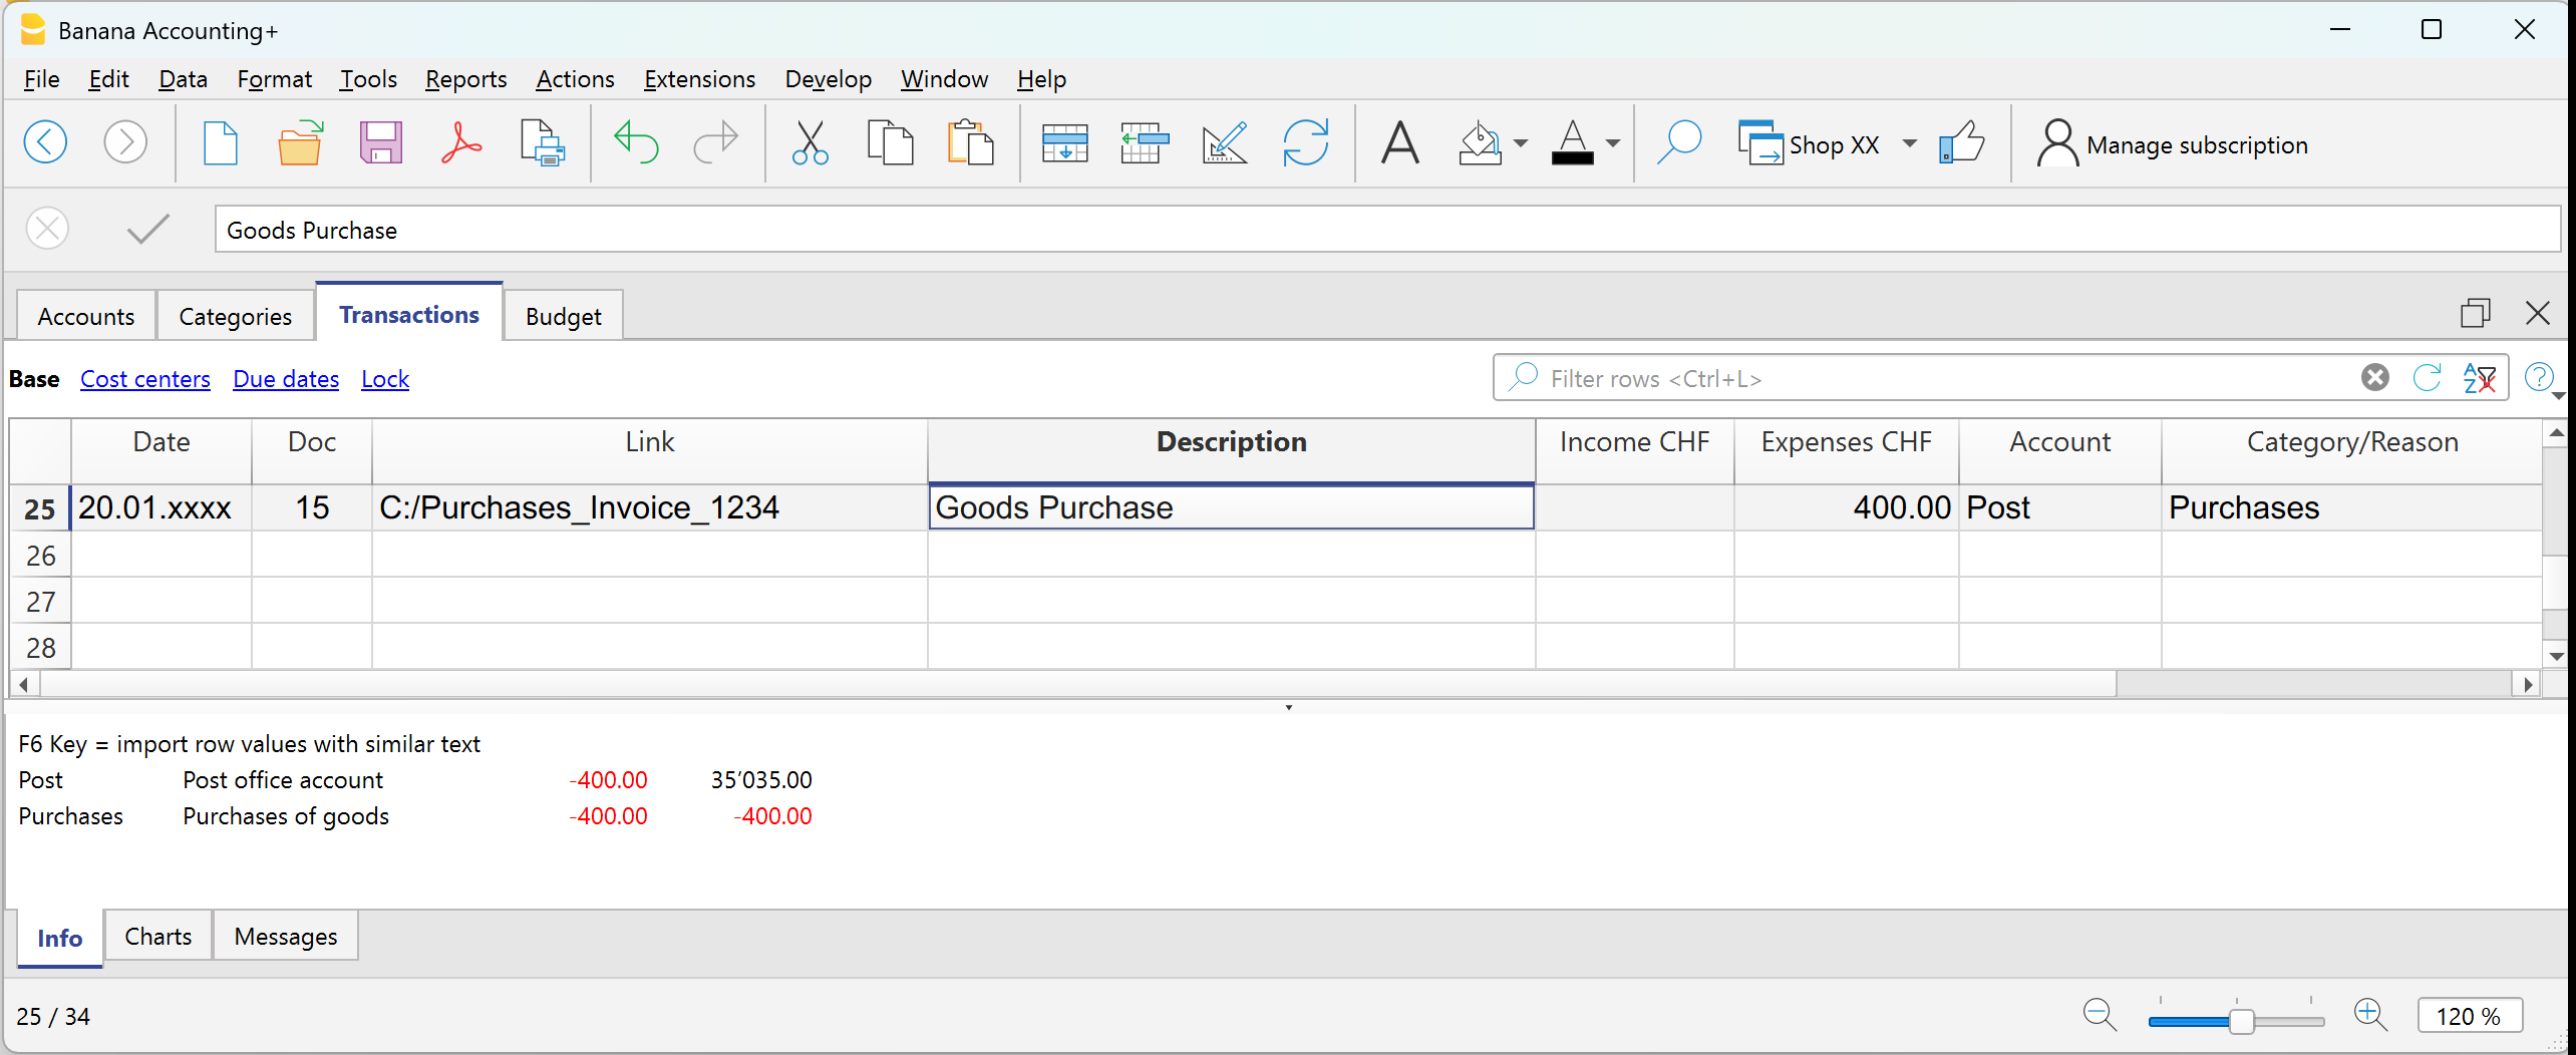
Exemple : paiement d'une facture d'achat via la banque.
- Date → entrez la date du document.
- Pièce → numéro du document (optionnel).
- Pièce Lien → lien vers le document numérique.
- Libellé → brève description (ex. Achat de marchandises auprès du fournisseur Bianchi).
- Dépenses → montant payé.
- Compte → compte de liquidité utilisé (ex. Banque).
- Catégorie → raison de la dépense (ex. Achats).
Le montant sera affiché comme négatif à la fois dans la fiche de compte et dans la fiche de catégorie.
Écriture sur plusieurs lignes
Lorsqu'une écriture concerne plusieurs comptes et/ou catégories, elle doit être saisie sur plusieurs lignes.
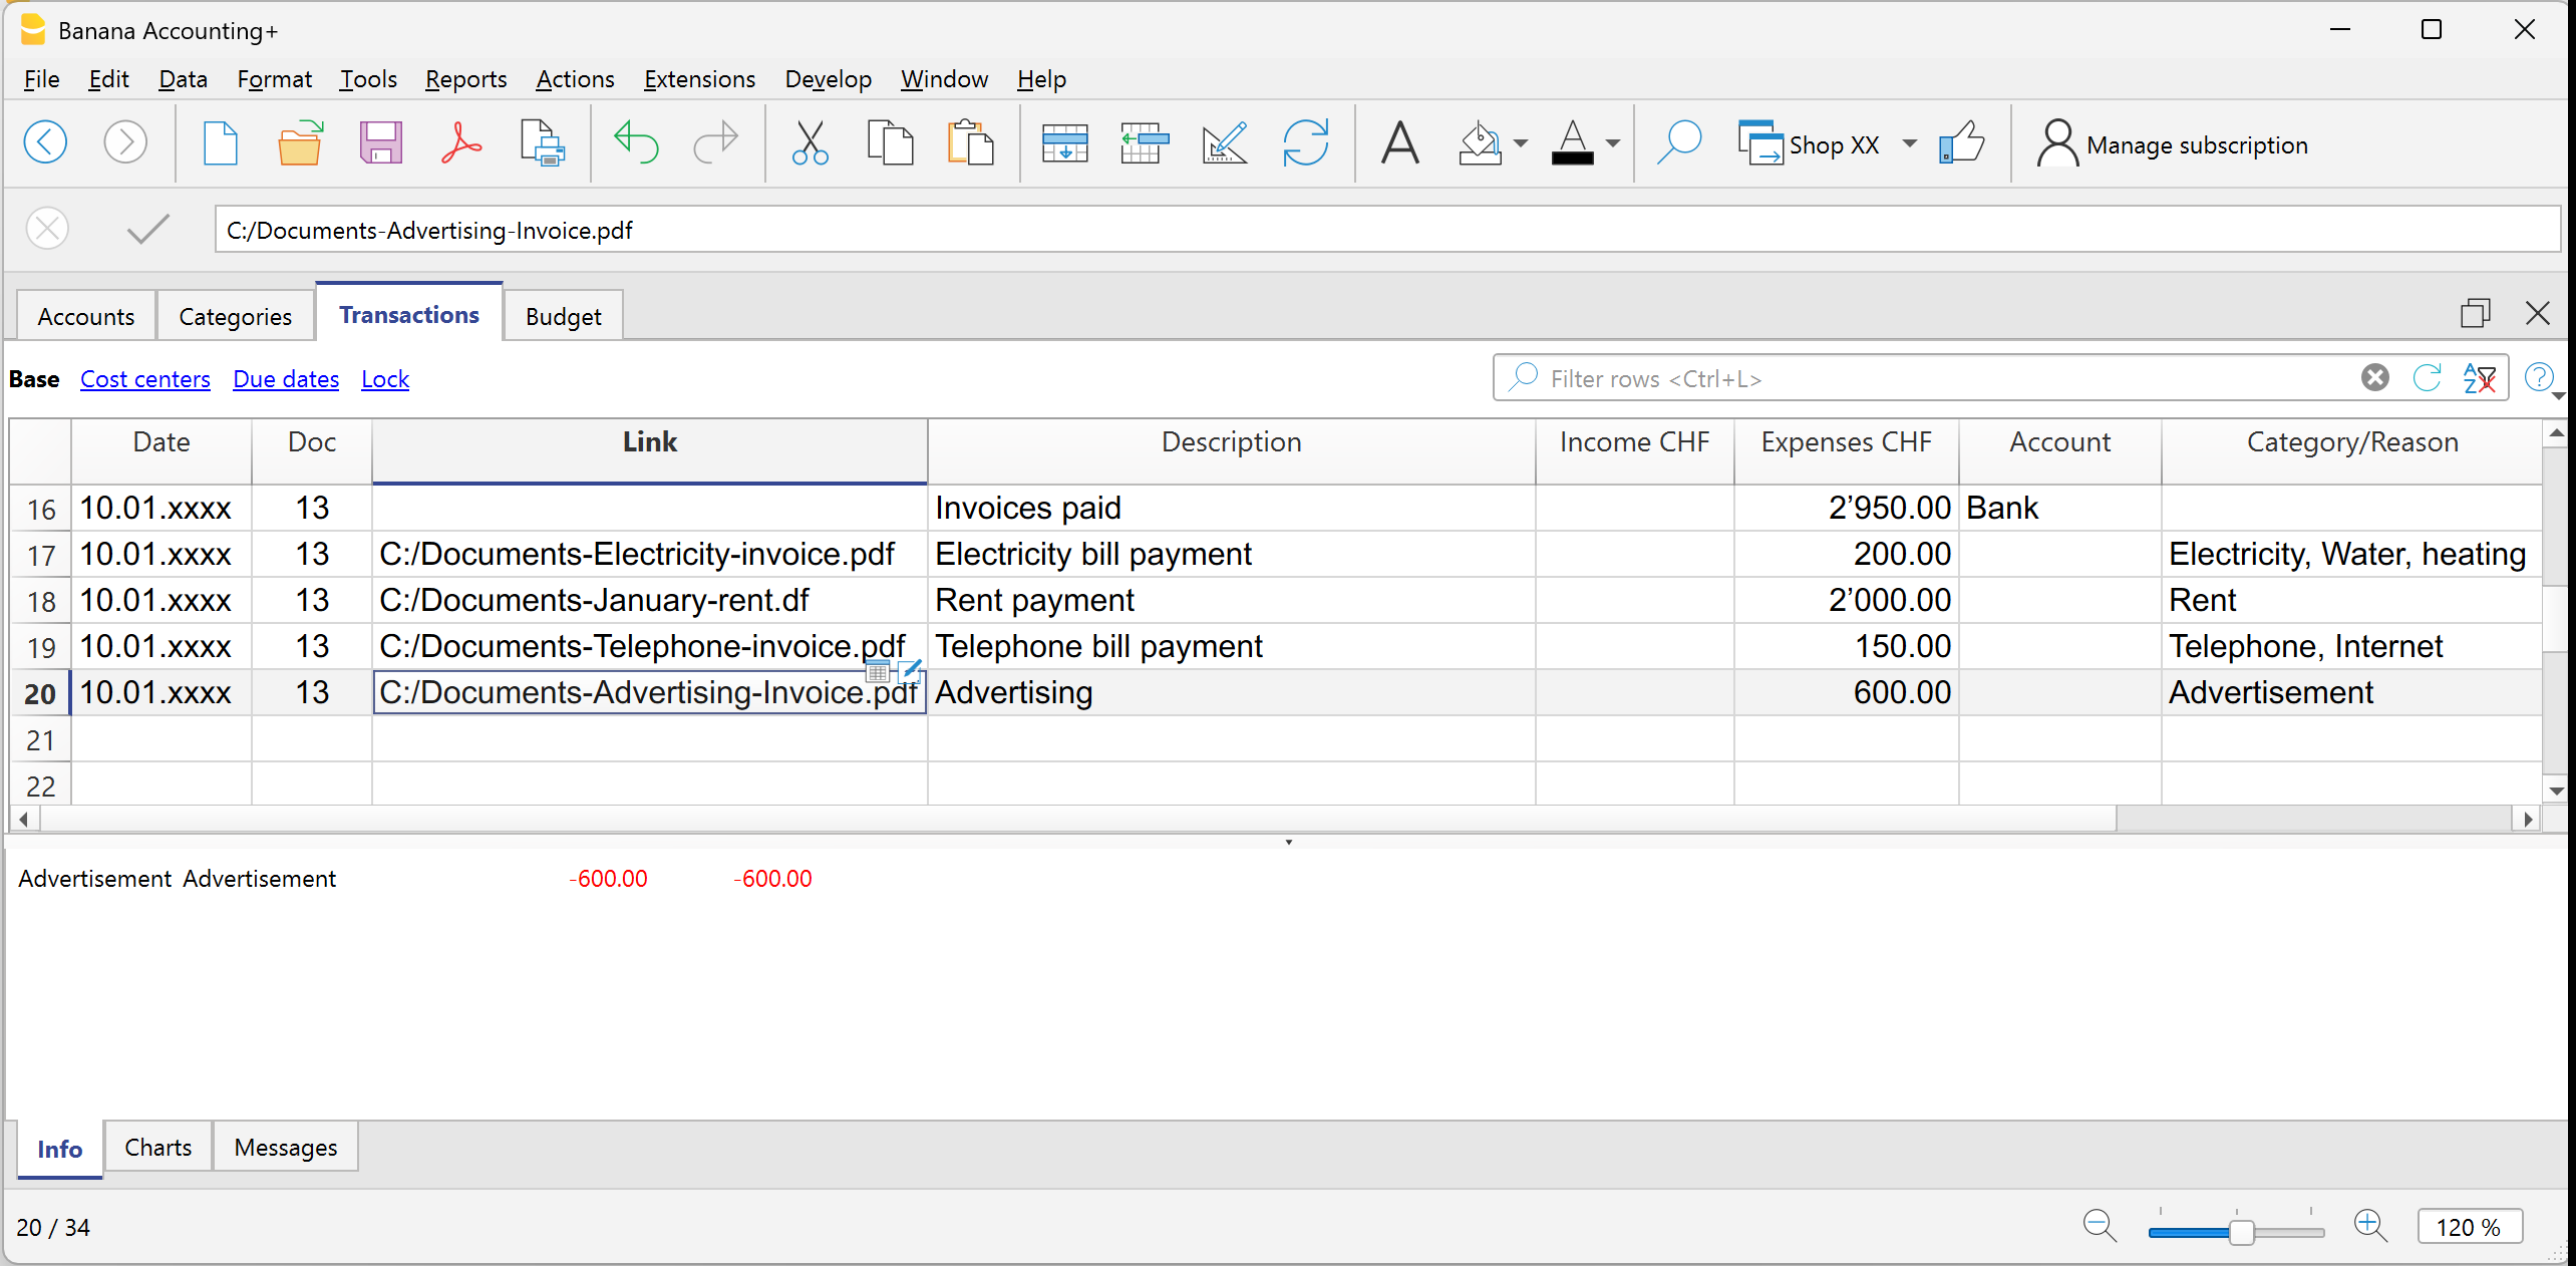
Exemple : paiement de plusieurs factures en espèces.
- Utilisez la même date et le même numéro de document pour toutes les lignes.
Première ligne :
- Entrez le montant total payé dans la colonne Dépenses.
- Dans la colonne Compte, indiquez le compte de liquidité utilisé (ex. Caisse).
- Laissez vide la colonne Catégorie.
Lignes suivantes :
- Saisissez chaque facture payée sur une ligne distincte, avec le montant dans la colonne Dépenses.
- La colonne Compte reste vide.
- Dans la colonne Catégorie, indiquez le poste de dépense correspondant.
Si vous avez activé la colonne Solde, vous verrez que le total restant diminue ligne après ligne, jusqu'à atteindre zéro.