In this article
▶ Video: How to start a Multi-currency accounting file. Learn how to set up a professional Multi-currency Accounting. Quickly get detailed cash, balance sheet and profit and loss forecasts for the days, months and years to come.
Creating an accounting file, starting from a template
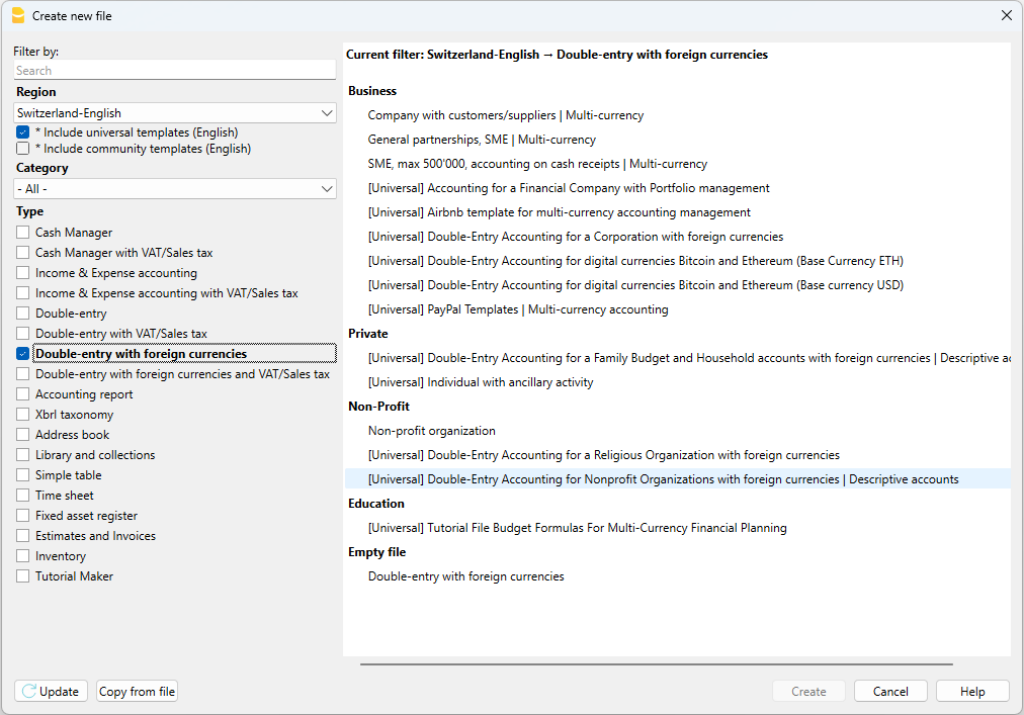
Banana Accounting Plus includes templates for all legal forms, divided by country and by category. They can be opened directly in the program, from the File menu, New... command, or they can be downloaded from our Templates page.
Here is how to start choosing a template directly from the program:
- File menu > New command
- Select the Region, the category and the accounting type (with or without VAT).
- From the list of the templates that appears, select the template that is closest to your own needs.
- Click on the Create button.
You can search for a template by entering a keyword in the Search box; the program displays the templates containing the keyword entered.
It is equally possible to start from a blank file, by activating the Create blank file option. In any case, in order to facilitate the start and avoid grouping errors, we recommend that you always start from an existing template.
More information on how to create a new file is available on the Create New File page.
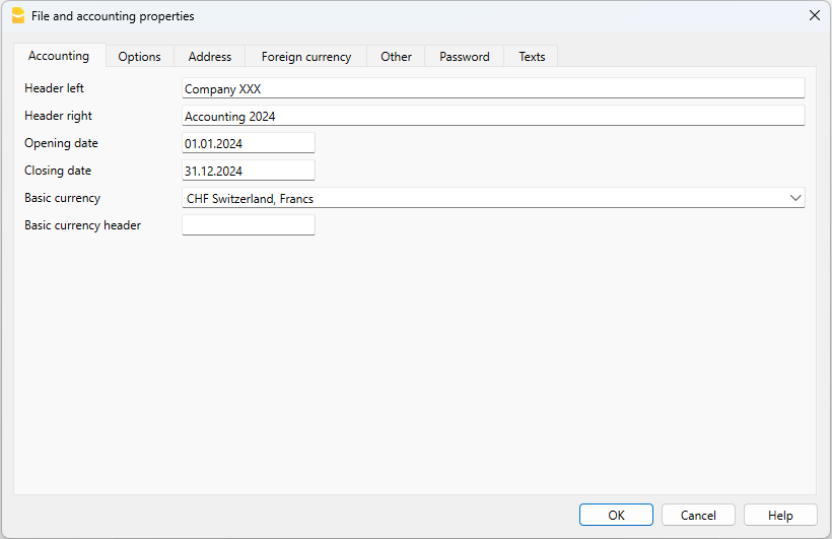
Setting up the file properties (basic data)
- Set up the various data sections required via the File > File properties command.
Accounting tab
- Indicate the company name that will appear in the headers of the printouts and on the other data.
- Select the basic currency, with which the accounting will be kept. You can enter it manually or choose it from the list.
Save to disk
Via the File > Save As command, save the data and also assign a name to the file. The typical save dialog of your operating system is displayed.
- It is advisable to use the name of the company followed by the year "Company-20xx.ac2" to distinguish it from other accounting files.
- You can keep as many accounting files as you need and each one will have its own name.
- You can choose the path or support you want (save on drive, USB or cloud).
If you also expect to have documents linked to the current year's accounts, it is suggested that you create a separate directory for each accounting year where all the files are to be grouped. Please also visit the Organizing your files page.
General use of the program
Banana Accounting Plus is Excel-inspired. User commands are kept as similar as possible to the ones of Microsoft Office.
For more information on the general use of the program, please visit our Program interface page.
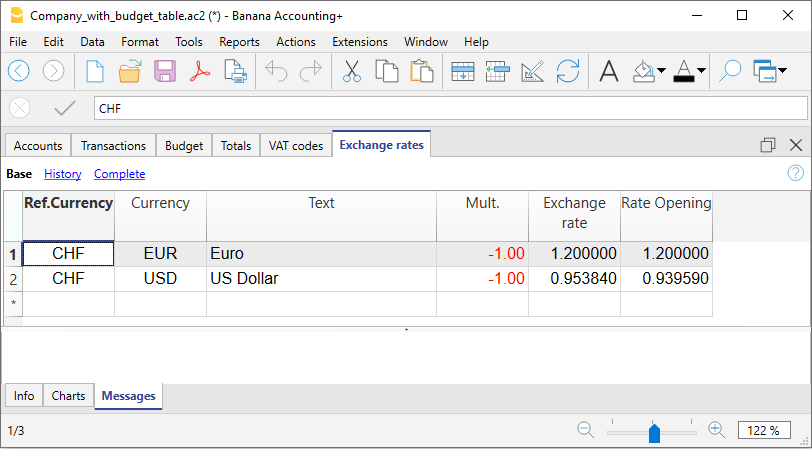
Exchange rates table
In the Exchange rates table, you set the currency codes and the exchange rates that will be used in the Account and Transactions tables.
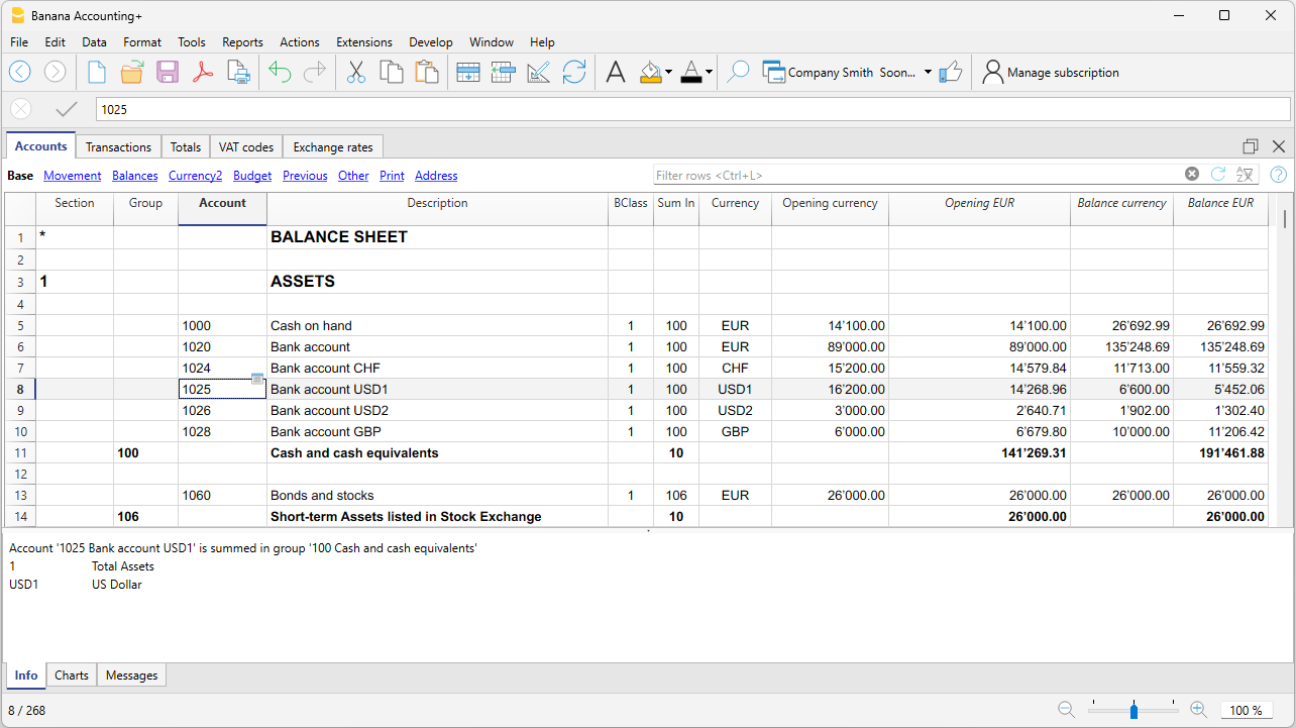
Customising the Chart of accounts
In the Accounts table, customise the Chart of accounts and adapt it to your own requirements:
- Add accounts and /or delete existing accounts (see Adding new rows)
- Modify the account numbers, the descriptions (for example, enter the name of your own Bank account), enter other groups, etc.
- To create subgroups, please consult our Groups page.
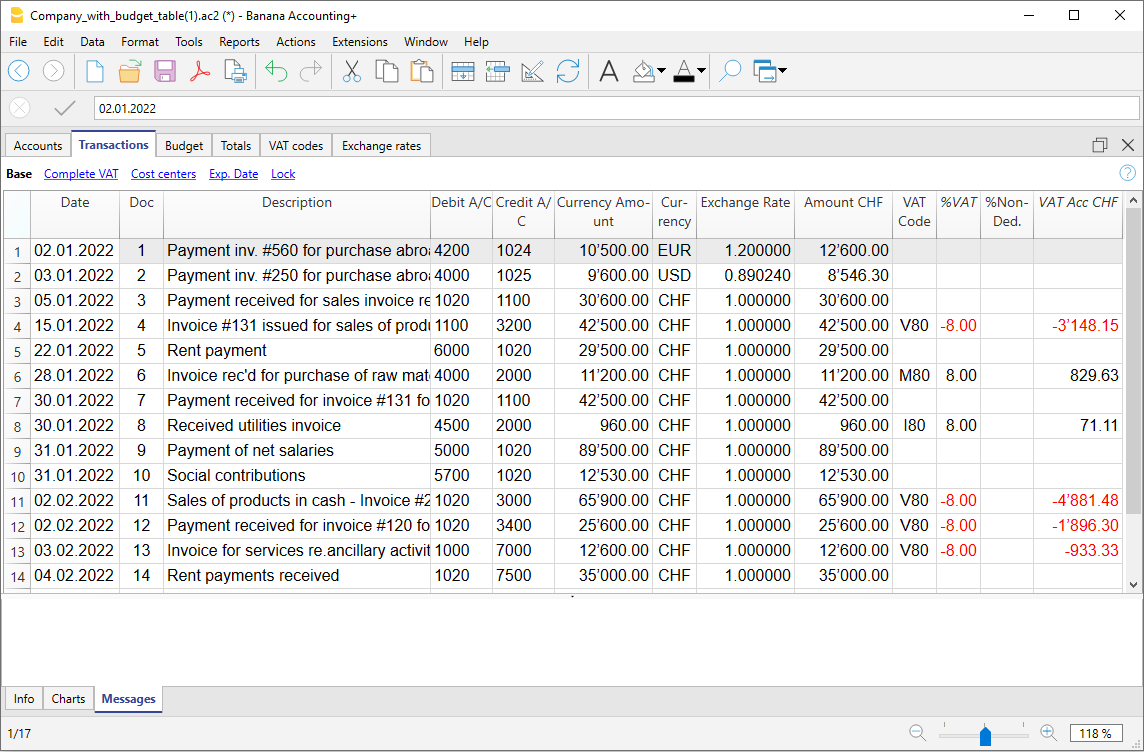
The Transactions table
Multi-currency transactions need to be entered into the Transactions table; together they make up the Journal.
Speeding up the recording of the Transactions
In order to accelerate the recording of the transactions, you can use the following functions:
- Text auto-completion - allows the automatic auto-complete of data that have already been entered at an earlier date
- Recurring transactions - used to memorize recurring transactions into a separate table
- Import Transactions from your bank statement - for automatic import of your bank, post account or credit card statement.
Make visible the Balance column in the Transactions table
The new Balance column is a very useful feature: it allows you to immediately spot possible differences.
The Balance column is not visible by default: you can make it visible via the Data > Columns setup menu.
Checking customer and supplier invoices
Banana allows you to keep an eye on the invoices to be paid and the receivable, issued invoices. Please refer to:
The Account cards
The Account card automatically displays all the transactions that have been recorded on the same account (for example, cash, bank, clients, etc).

To display an account card, just position yourself with the mouse on the account number and click on the small blue icon that appears.
Account cards by period
To display the account card with the balances referring to a specific period, click on:
- Reports menu > Account card > Period section > Selected
- Enter the Start and the End date of the period.
For further details, consult the page Period.
Printing the Account cards
In order to print one account card, just display the card from the Accounts or the Transactions table and launch the print from on the File menu.
To print several or all account cards, click on the Reports menu > Account card command and select the account cards to be printed. By using the Filter in the window, you can automatically select all accounts, cost centers, segments, groups, etc.
For further details, consult the page Account Card.
The Balance Sheet and Profit and Loss Statement
The Balance sheet shows the balances of all the Balance sheet accounts, Assets and Liabilities. The difference between the Assets and the Liabilities determines the Share capital.
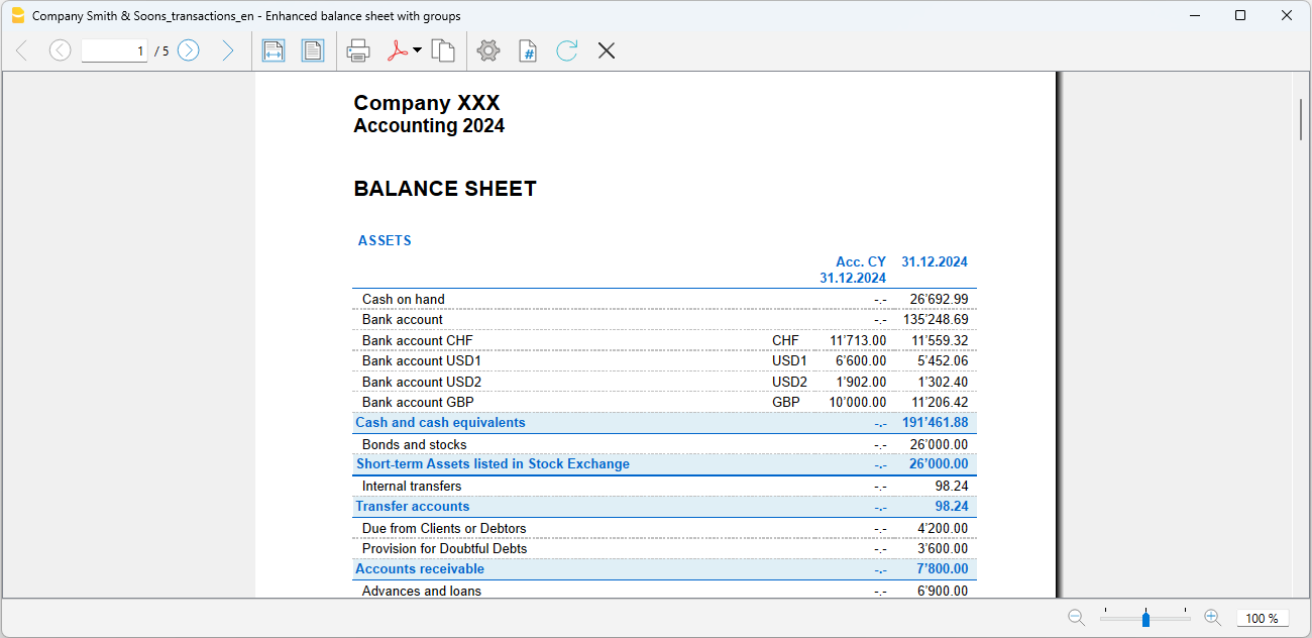
The display and the printing of the Balance Sheet is being executed from the menu Report > Enhanced statement or Enhanced statement with groups.
- The Enhanced statement command simply lists all the accounts without distinguishing Groups and Subgroups
- The Enhanced statement with groups command lists all the accounts whilst subdividing groups and subgroups; besides, it presents numerous features to customize the presentation, functions that are not provided in the Enhanced statement.
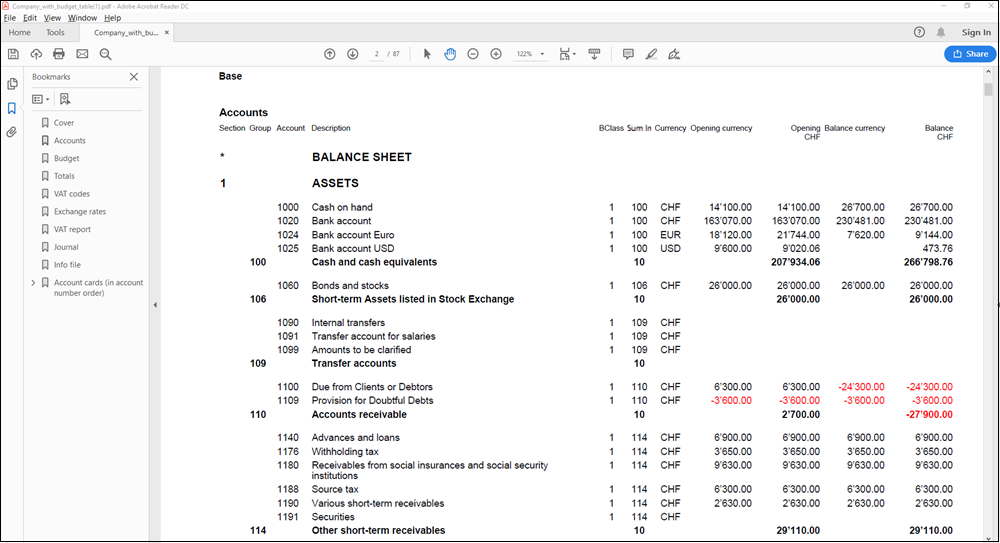
Data archiving in PDF format
At the end of the year, when the entire accounting has been completed, corrected and audited, all the accounting data can be archived via the Create PDF dossier command.
The Budget
The budget can be set up in two different ways:
- Accounts table, Budget column. For each account, the annual budget amount is being indicated.
In this case, when you set up the Budget from the Reports > Enhanced statement with groups command, the Budget column displays the amounts that refer to the entire year. In the Budget table, that can be activated via the Tools > Add new functionalities command.
In this table, you can enter all the budgeted costs and revenue by means of entering transactions. If you activate this table, the Budget column of the Accounts table will be automatically deactivated.In this case you can set up a detailed budget, taking into account the possible variations over the year and in different periods of the year.
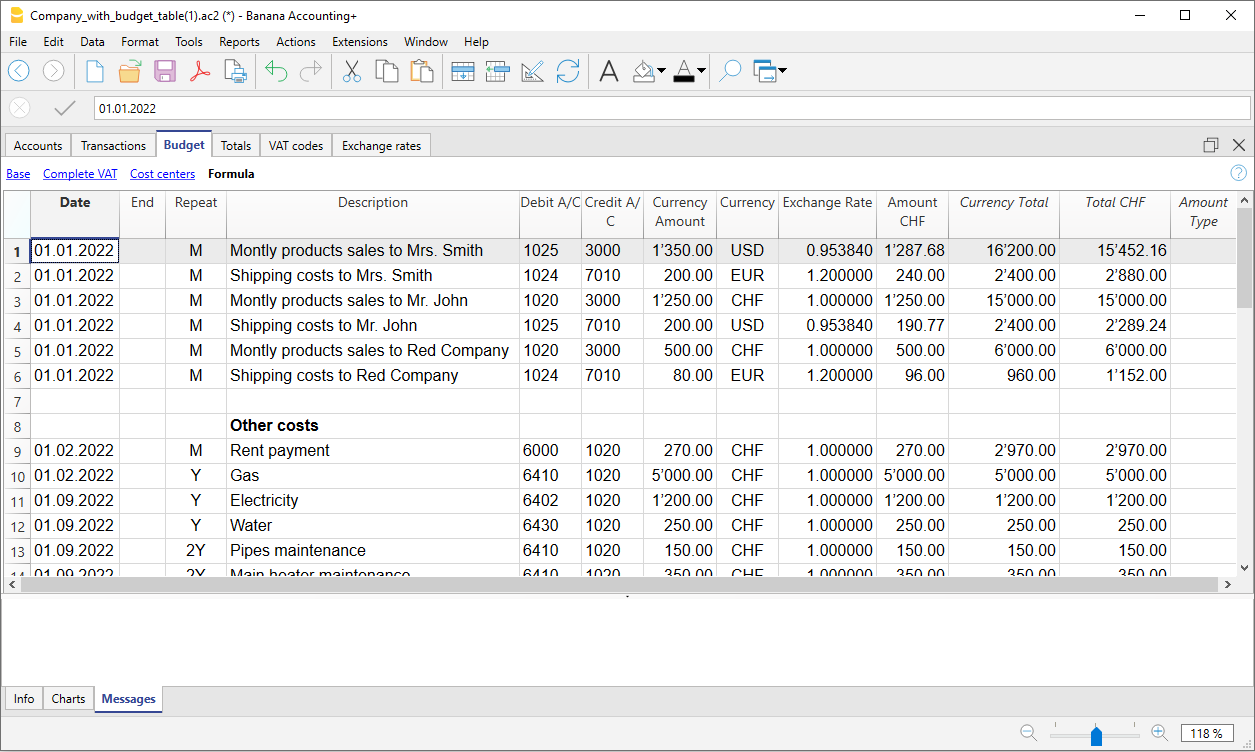
For more details, consult the Budget page.