In this article
This document describe how to set up the development environment and build a BananaPlus Extension in packaged format with Visual Studio Code and CMake. Visual Studio Code and CMake are the recommended tools to develop extensions for Banana Plus.
After reading this document you will be able to:
- Setup your development environment
- Create a CMake project
- Build and create the packaged extension
- Run tests
- Deploy the extension
You find a working example with the code on this page on our GitHub Repository at: Simple project template.
Set up development environment
To build the extension and run tests we need the following applications:
- Visual Studio Code;
- CMake;
- CMake Extensions for Visual Studio Code;
- Compiler toolset.
Install Visual Studio Code
Download and install Visual Studio Code from https://code.visualstudio.com.
Install+CMake
Download and install CMake from https://cmake.org.+Verify that the installed version is in your PATH, if not open CMake go to Menu Tools -> "How to install CMake for command line use" and follow the instructions.
Install VS Code extensions for CMake
Click on the Extensions button and install the following extensions:
- twxs.cmake
CMake language support for Visual Studio Code (twsx). This is used for syntax highligh. - ms-vscode.cmake-tools
CMake Tools (microsoft). This is used for enabling the cmake pane, where you can build the targets.

Install compiler toolset
If you have already a compiler on your machine you can skip this step.
For Windows
You can see how to configure in this link: Configure VS Code for Microsoft C++.
The steps are:
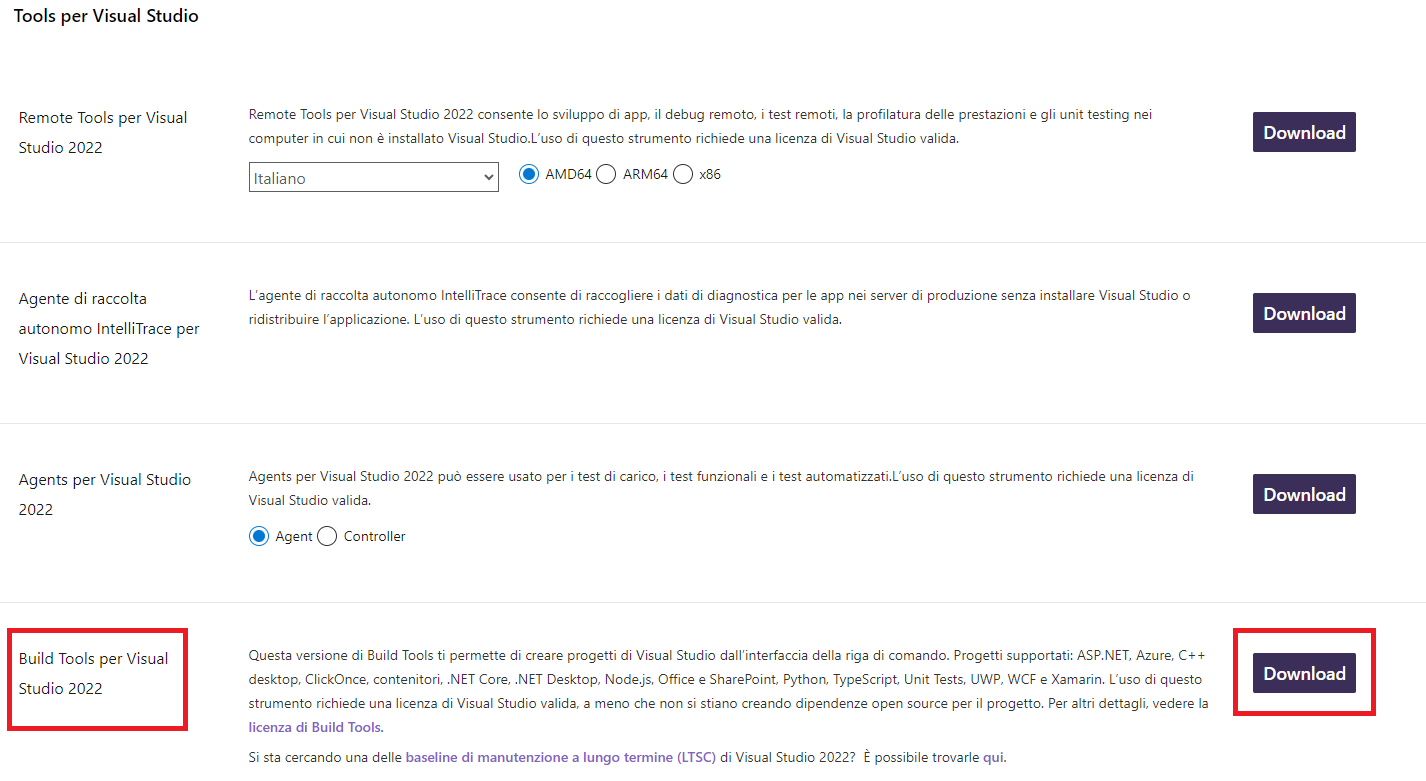
- Go to website: https://visualstudio.microsoft.com/it/downloads/
At+the bottom of the website, you need to download and install the Tools per Visual Studio: "Build Tools per Visual Studio 2022" as indicated in the image below.
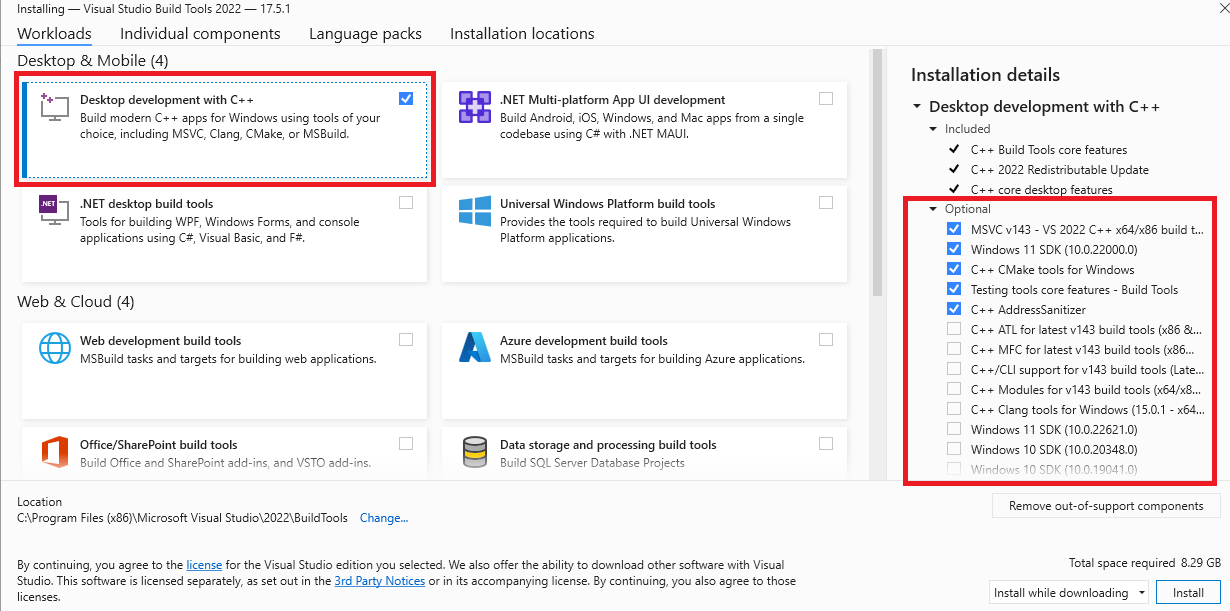
- On the installation screen you must select and install what is indicated in the image, "Desktop development with C++" and the Optional as selected by default.
For macOS
Install XCode from Apple Store.
For linux
Install a gcc or clang compiler.
Set paths to Qt tools and Banana Plus
In Visual Studio Code, create under the extension's main folder a file named .vscode/settings.json and set the following CMake options:
- BAN_QT_RCC: path to the Qt rcc tool. The rcc Tool is used to compile the extension to a sbaa package.
- BAN_EXE_ PATH: path to the BananaPlus executable. The BananaPlus executable is used to run the tests defined in the project.
You can copy the content from the following example and modify the paths depending on your system and Qt's version you have installed on your system.
Example for Windows:
{
     "cmake.configureSettings": {
         "BAN_QT_RCC": "C:/users/user_name/AppData/Local/Programs/BananaPlusDev/rcc.exe",
         "BAN_EXE_PATH": "C:/users/user_name/AppData/Local/Programs/BananaPlusDev/BananaPlusDev.exe",
     }
}
Replace "user_name" with the appropriate user name.
Example for macOS:
{
    "cmake.configureSettings": {
        "BAN_QT_RCC": "/Applications/BananaPlusDev.app/Contents/MacOS/rcc",
        "BAN_EXE_PATH": "/Applications/BananaPlusDev.app/Contents/MacOS/BananaPlusDev"
    }
}
Folder structure of CMake project file and configuring the files that compiles CMake
For creation the folder structure and the configuration of individual project files there is the following page that explains the topics Extension Package page.
Build the extension
1. Open your folder of the project in Visual Studio Code;

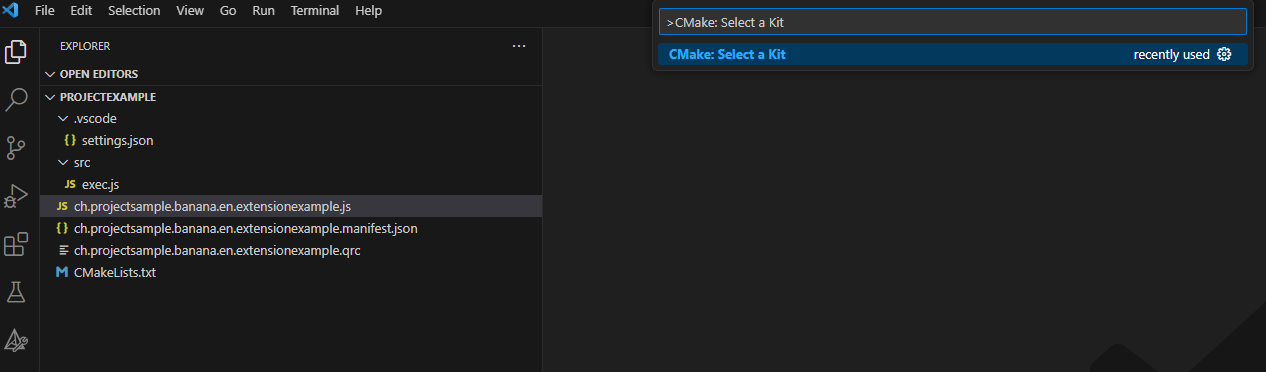
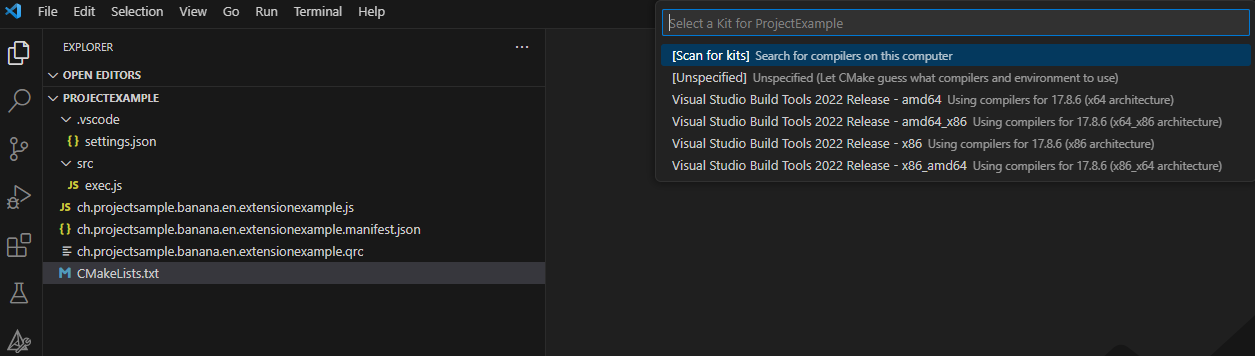
2. Press press Ctrl+Shift+P, enter "CMake: Select a Kit" and press return, select the kit you want to use. Do not select the "[Scan for kits]" or "[Unspecified]";
3. If your configuration is correct, you see the messagge "Configuring done" and "Generating done". You see the path of your file building in the output of terminal of Visual Studio Code;
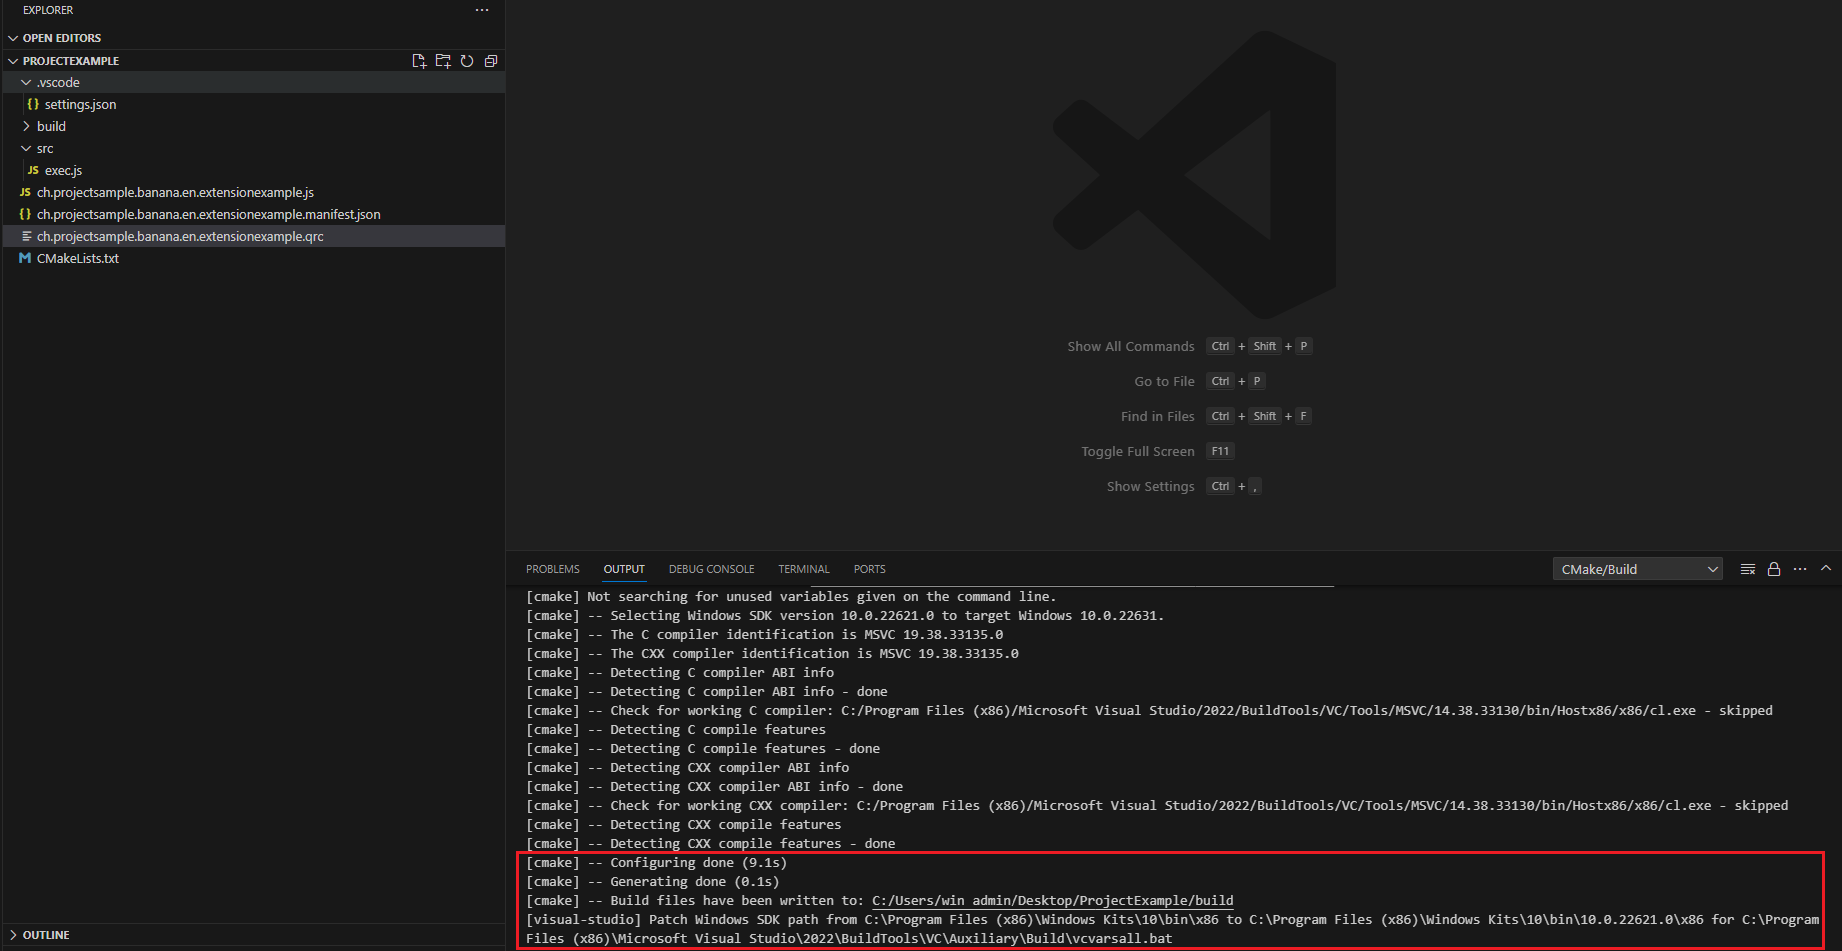
4. If the previous compilation was correct, appears in the Activity bar (on the left) the new icon that need to create building, press this icon and you see the main project;
![]()
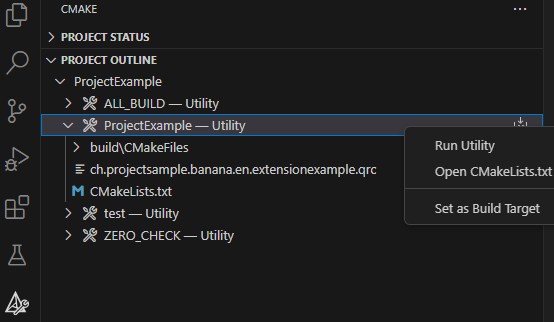
5. Right click on the main project and select Run utility.
Possible solutions for "CMake: Select a Kit" command not available in Visual Studio Code
For Windows operating system:
- Check in the manifest file and QRC file that have listed all files necessary to create the extension's;
- Check that the CMake file name matches "CMakeLists.txt" in your project (the file name must be exactly as mentioned). If it's not the same, even with all the toolsets and extensions installed, Visual Studio Code won't recognize the command;
Correct icon:
![]()
Wrong icon (because the file name is wrong):
![]()
- If the issue persists and is hard to identify, you can try using the "CMake (CMake-gui)" program. Build binaries by selecting the source code folder, choosing the build location, clicking "Generate," specifying the Visual Studio version for the project, using default conditions, and clicking "Finish". If the operation fails, error messages will provide clues. If successful, the program will display the message "Generating done."
- Configure the paths of source code and build location and click generate:
![]()
2. Specifying the Visual Studio version for the project (use default conditions):

3. Verify the results of operations:
Successful operation:

Operation with errors:

Run the tests
- Select CMake from the Activity bar (on the left)
- Right click on the test project and select Run utility
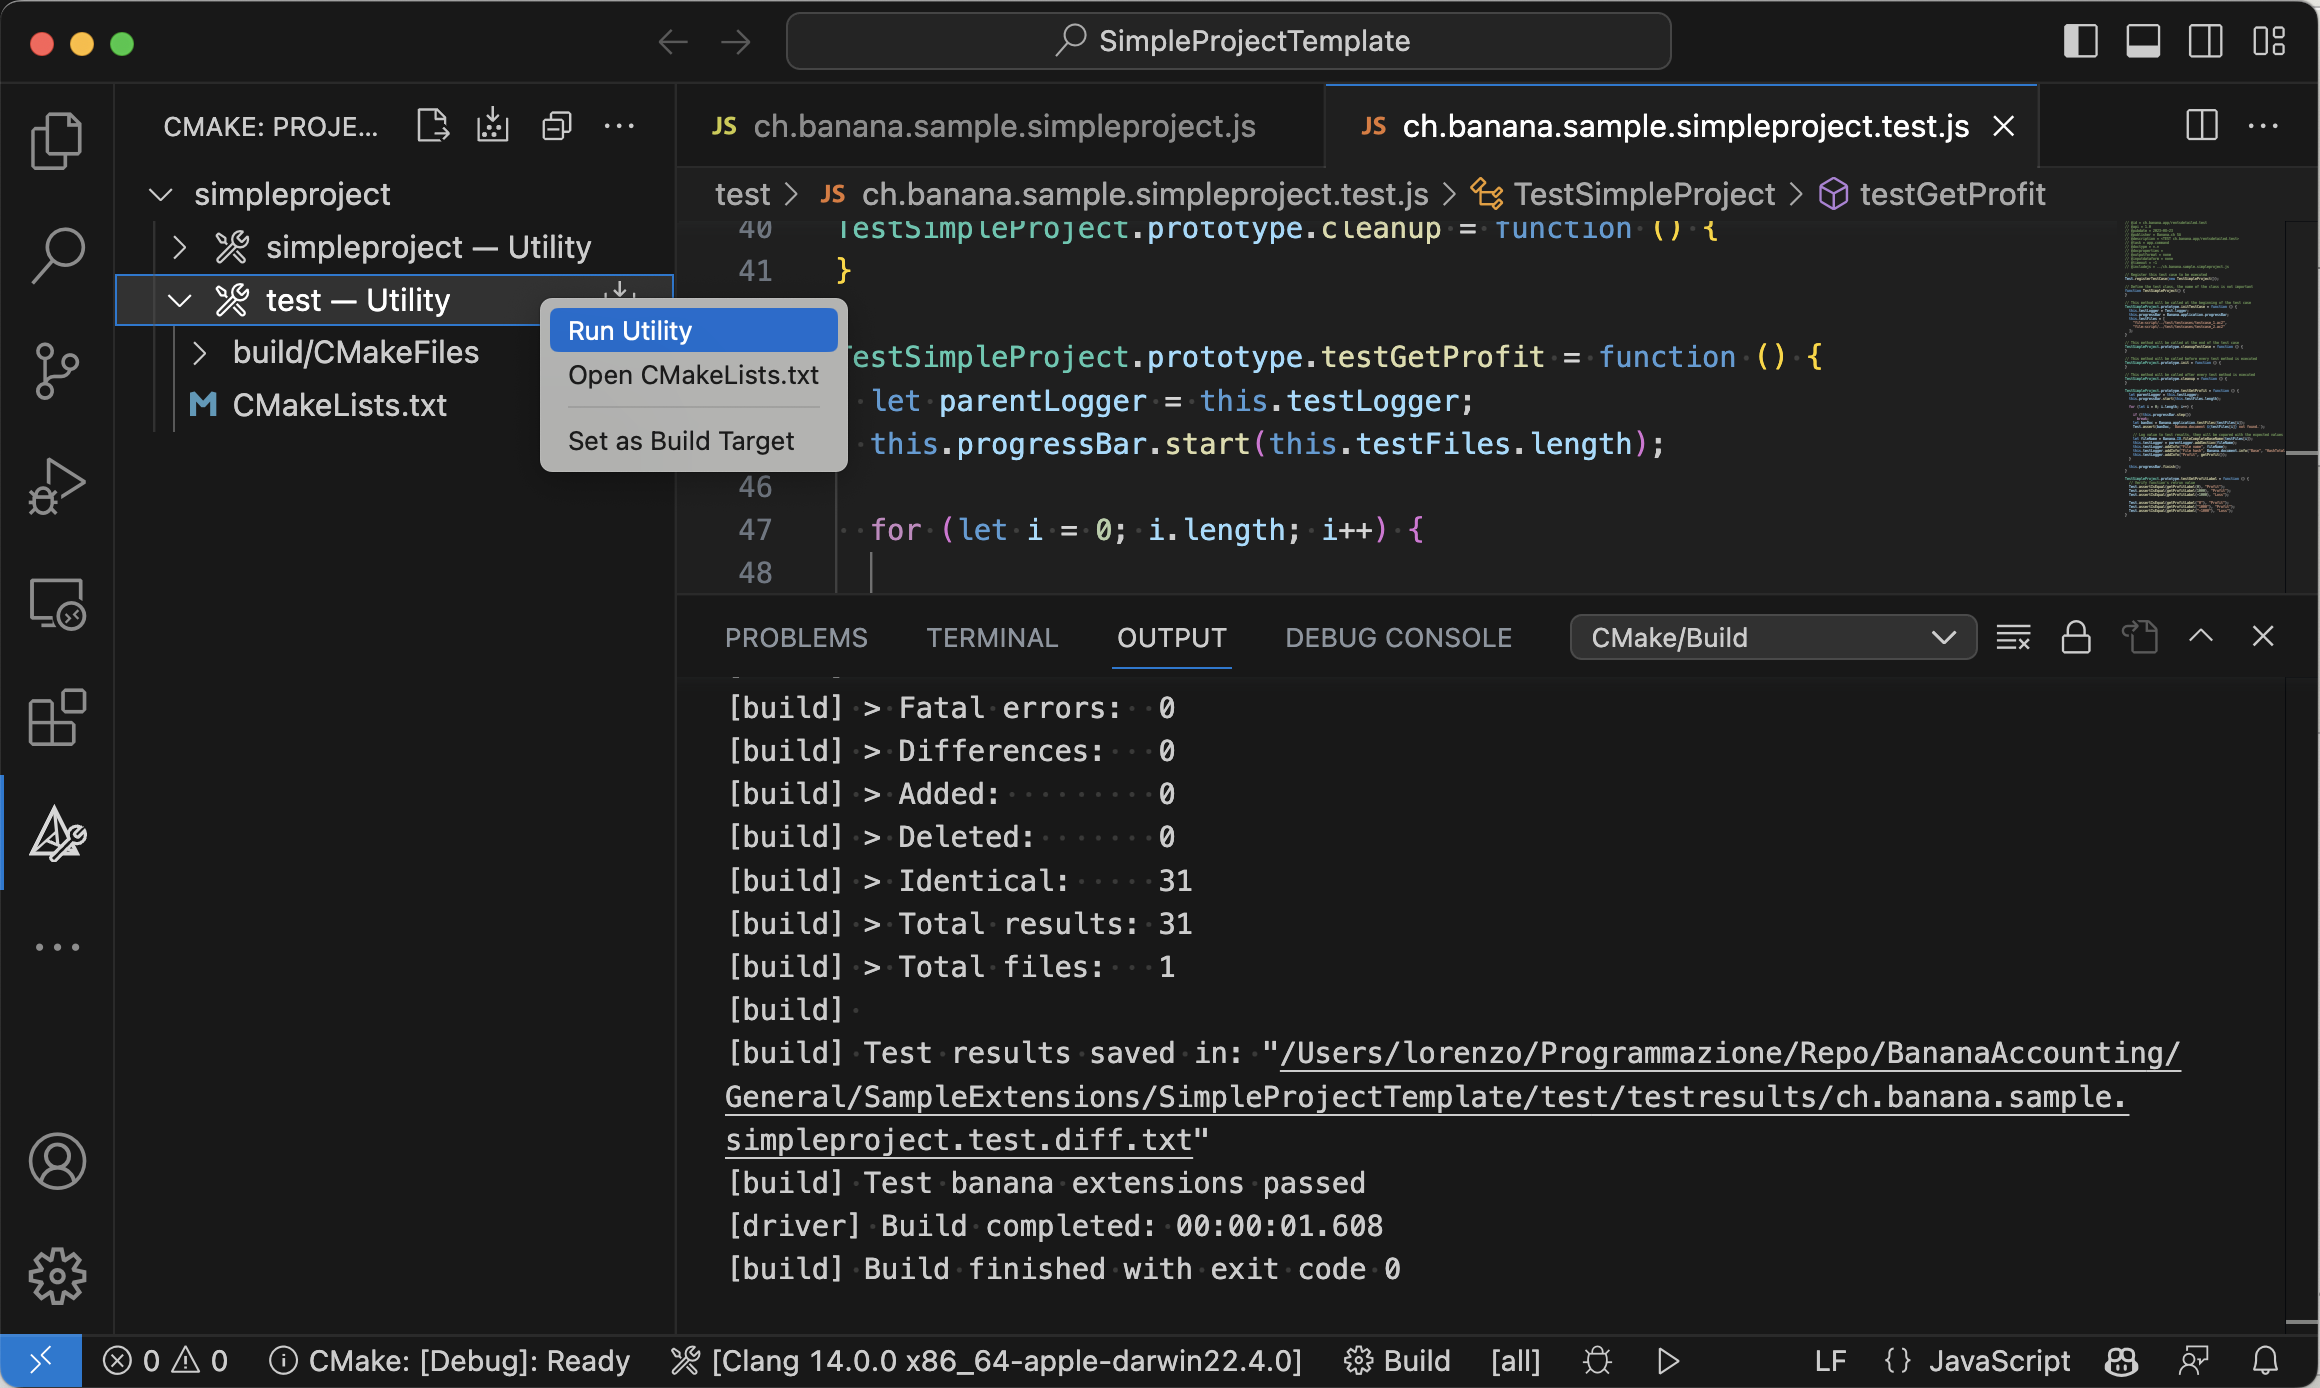
- Check the test results
NB.: to run tests you need BananaPlus Insider version
Deploy the extension
- Build the extension;
- The translations files *.qm are automatically released and included in the package;
- Copy the generated *.sbaa file to the destination folder;
- Add the extension in Banana AccountingPlus (see installing an'extension);
- Test it.