In this article
You can print two different types of labels:
- Small labels (containing the book code) for use on the spine of the book, so that they are visible on the bookshelves
- Larger labels are used on the inside of the cover, mentioning that the book belongs to the library and has to be returned at a specified date
Labels can be printed either on the basis of the Banana file, where you have registered all the books in the library, or from an empty file in case you wish to print a list with codes, that you will then assign to the books.
Creating a file to print library labels
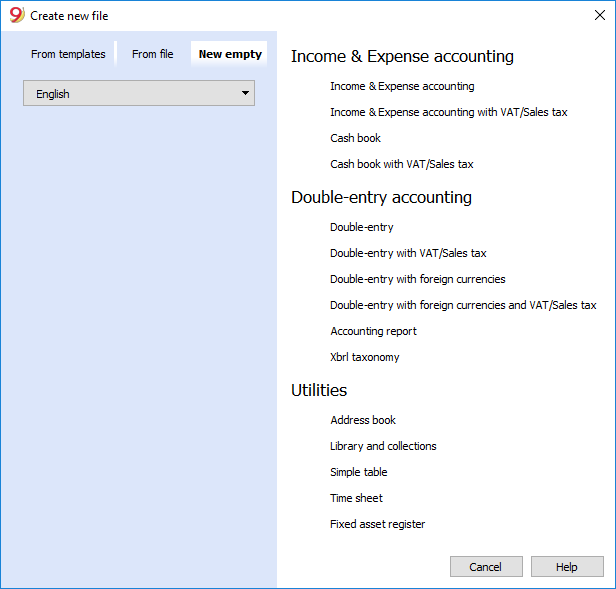
Via the File menu -> New... in the Filter by box : enter the the text "library" and select the Banana Library - printing book labels template (also make sure you have selected English as search language).
You can also find the template directly at this link: Banana Library - printing book labels
Printing labels for the spine of the book
In order to print the labels, you can open a new blank file in Banana, containing no data (File menu -> New), but, as stated, you may wish to start from an existing, as explained earlier.
There is a useful Excel function to generate a large amount of codes in a speedy manner, rather than entering them manually or than using F6 key. Here is how you do it:
- Open a new Excel file; in cell A1 entere the library code that suited your purpose (any combination of letters followed by numbers will do) - for example B1000.
- Choose the bottom right angle of your cell with your mouse (the point will now be a cross), and, while holding down the right click, drag down along the column; Excel will automatically generate autoprogressive numbers.
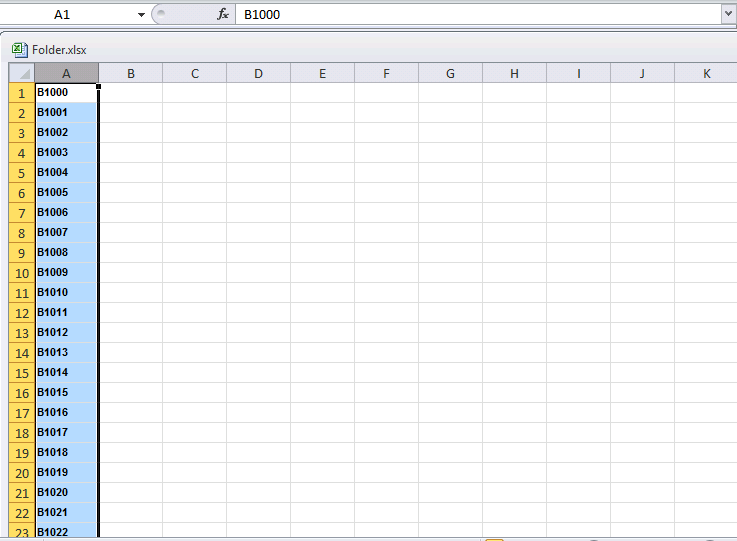
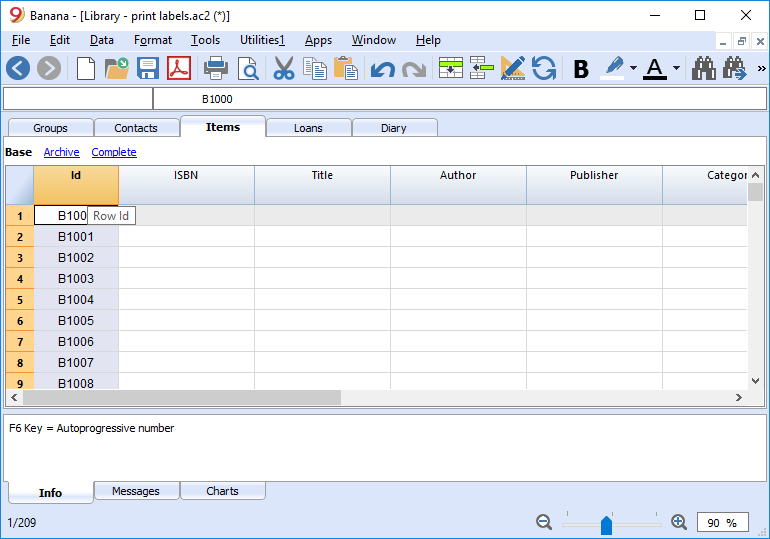
- Now copy (Ctrl + C keys) the codes that have been generated into Banana's Items table, in the Id column (Ctrl + V keys).
- You can now create the label. Choose the Labels -> Print command from the Extensions menu. This window will be shown:
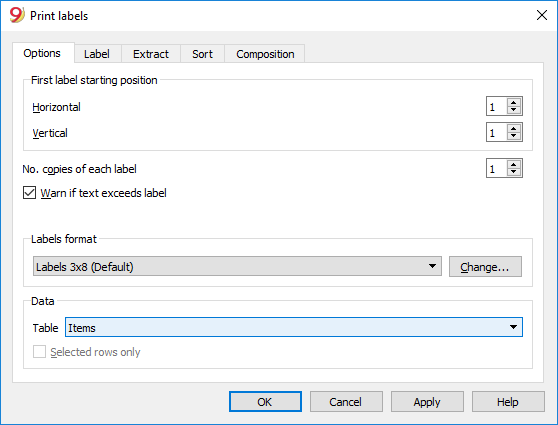
- It is important to have the Items table selected as the source for Data
- Now you can define your label by pressing the Extensions menu -> Labels -> format command.
I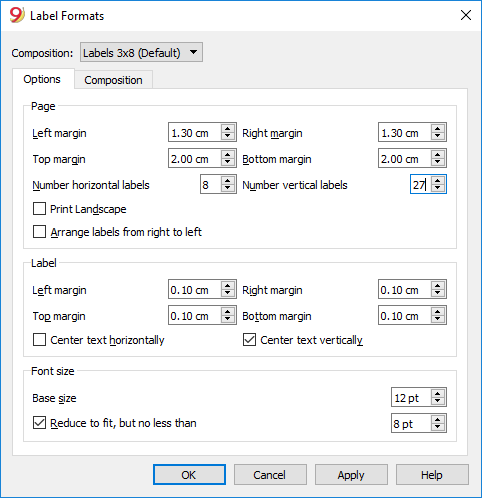
-
In the window now shown, enter the margins and other characteristics of your chosen label, Herma 10001 in this case.
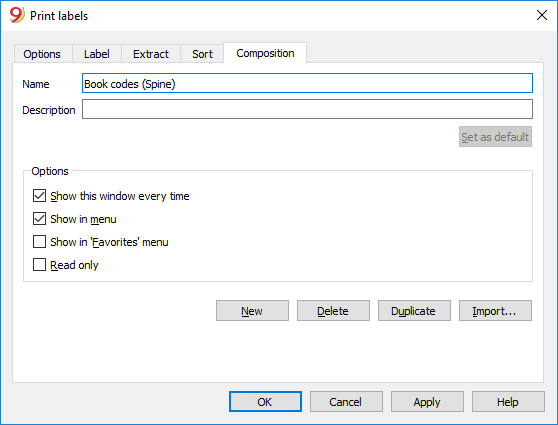
- Before hitting the OK key, open the Customization tab, where you can assign a name to your custom settings (so they can be used in the future). In this case it's Book codes (Spine).
- Hit the OK key
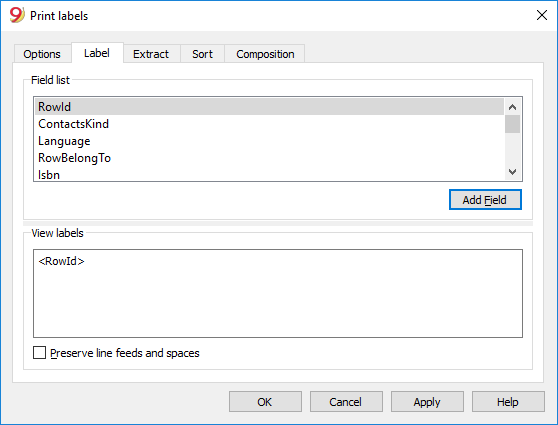
- In the Label section select RowId to indicate the contents of the label (in the example you indicate the book code) and press the Add field button. The RowId appears in the View Labels field.
- Pressing the OK button will generate a preview of your label.
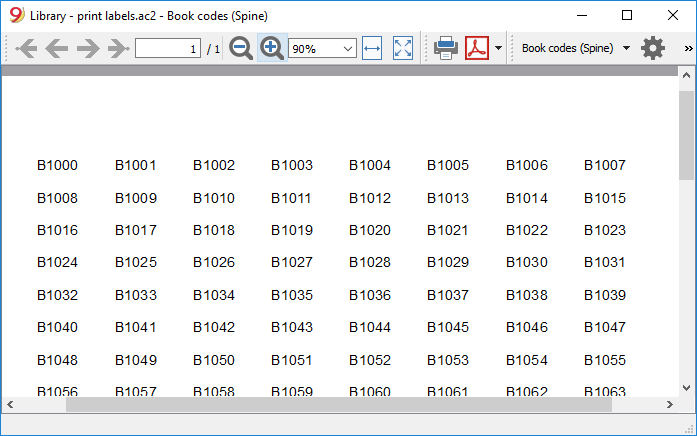
You may now print using your Herma sheets.
Printing labels for the inside cover
Choose your label format. In the example a 70x36mm (Herma 4630 or Avery 3490) format hase been chosen. The steps to follow are identical to the previous example::
- First, choose the Labels -> Print command from the Extensions menu
- Enter the margins for your new label in Extensions -> Labels -> format window.
- Before hitting the OK key, open the Customization tab, where you can assign a name for your new custom settings (Inside Cover label, for example), than hit OK.
- Select Label in the Print label section to add the content of your label.
You may enter text, other than the available fields, as well.
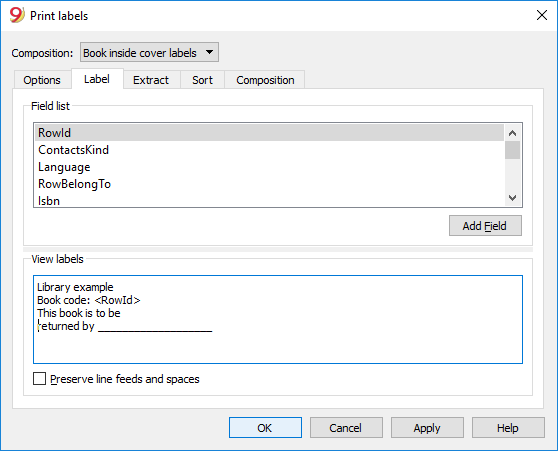
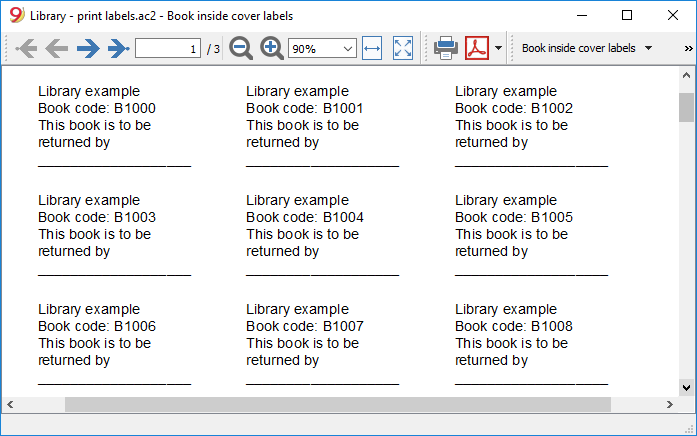
Pressing the OK button will generate a preview of your label.
Note:
The template available in Banana already includes the two mentioned label formats: label for the spine of the book and label for the inside of the cover.
Related features:
Management of yearly membership fees
If you run a library requiring an annual membership fee, or if fees are charged for the loan of individual books, it is useful to use the accounting functions of Banana Accounting.
Please check our page Accounting templates.