En este artículo
Introduction
This walkthrough provides step-by-step guidance for creating a simple test case example that uses Extensions Test Framework to run unit tests of Extensions.
The steps in order to experiment with Extensions Test Framework are the following:
- Download and use the Banana Experimental version
- Create a Extension to be tested
- Create a test case
- Run the test
- Verify the test results
Create an Extension to be tested
A test case is related to a working Extension.
For this example we use a modified version of "Hello World!" Extension example (see Build your first Extension).
Copy the code below, paste it on your text editor and save the file as helloworld2.js
// @id = ch.banana.app.helloworldexample
// @api = 1.0
// @pubdate = 2018-10-23
// @publisher = Banana.ch SA
// @description = Example Hello world 2
// @task = app.command
// @doctype = *.*
// @docproperties =
// @outputformat = none
// @inputdataform = none
// @timeout = -1
function exec() {
   //Call the function to create the report
   var report = createReport();

   //Print the report
   var stylesheet = Banana.Report.newStyleSheet();
   Banana.Report.preview(report, stylesheet);
}

function createReport() {
    //Create the report
    var report = Banana.Report.newReport("Report title");

    //Add a paragraph with the "hello world" text
    report.addParagraph("Hello World!");

    //Return the report
    return report;
}
Create a test case
Follow the instructions below to create a working test case:
- Create a folder test in the same folder where the Extension helloworld2.js is located.
Copy the following JavaScript code and paste it into a text editor.
// @id = ch.banana.app.helloworld2example.test // @api = 1.0 // @pubdate = 2018-10-30 // @publisher = Banana.ch SA // @description = [Test] Example Hello world 2 // @task = app.command // @doctype = *.* // @docproperties = // @outputformat = none // @inputdataform = none // @timeout = -1 // @includejs = ../helloworld2.js // Register this test case to be executed Test.registerTestCase(new TestFrameworkExample()); // Define the test class, the name of the class is not important function TestFrameworkExample() { } // This method will be called at the beginning of the test case TestFrameworkExample.prototype.initTestCase = function() { this.progressBar = Banana.application.progressBar; } // This method will be called at the end of the test case TestFrameworkExample.prototype.cleanupTestCase = function() { } // This method will be called before every test method is executed TestFrameworkExample.prototype.init = function() { } // This method will be called after every test method is executed TestFrameworkExample.prototype.cleanup = function() { } // Every method with the prefix 'test' are executed automatically as test method // You can defiend as many test methods as you need TestFrameworkExample.prototype.testVerifyMethods = function() { Test.logger.addText("The object Test defines methods to verify conditions."); // This method verify that the condition is true Test.assert(true); Test.assert(true, "message"); // You can specify a message to be logged in case of failure // This method verify that the two parameters are equals Test.assertIsEqual("Same text", "Same text"); } TestFrameworkExample.prototype.testBananaApps = function() { Test.logger.addText("This test will tests the BananaApp helloworld.js"); var document = Banana.application.openDocument("file:script/../test/testcases/accounting_file.ac2"); Test.assert(document, "File ac2 not found"); // Add the report content text to the result txt file var report = createReport(); Test.logger.addReport("ReportName", report); }- Modify the script: find the row "var document = Banana.application.openDocument("file:script/../test/testcases/accounting_file.ac2")" and replace "accounting_file.ac2" with the name of your Banana accounting file.
- Save the file into test folder as helloworld2.test.js (the file name must always be <same_name_bananaapp>.test.js).
- Create a folder test/testcases and copy there your file .ac2.
- Now you should have something like this:

- helloworld2.js: the BananaApp
- test: the test folder
- helloworld2.test.js: the test script for the Extension
- testcases: the folder for test ac2 files
- xxx.ac2: your Banana accounting file
Run the test case
Finally, now it is possible to run the test case and see the results.
To run the test:
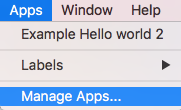
- In Banana select from the menu Extensions the command Manage Extensions...
- Select from the Installed element the “Example Hello World 2” Extension
- Click on the button Run tests

Test case results
The test compare the current results with the expected results and checks if there are differences.
If differences are found a dialog message warn you. All the details can be found inside the .test.diff.txt file.
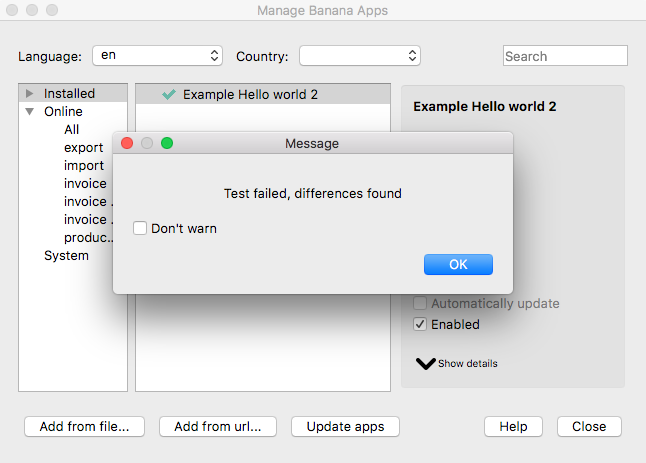
The first time you run a test probably you will see the following "Test failed" dialog message:
In your test folder you can see two new auto generated folders:
- test/testresults:
contains the helloworld2.test folder with a helloworld2.test.txt file with the results of the test.
When the test is run, the folder and the file are automatically generated. - test/testexpected:
contains the helloworld2.test folder that should contain a helloworld2.test.txt file with the expected results.
When the test is run, the folder is automatically generated, but the file NOT. The first time you run the test the folder is empty. This is why the test fails.
You now should have something like that:

Inside the test/testresults/helloworld2.test folder there is the helloworld2.test.txt file with all the results of the test, like the following one:

The file helloworld2.test.diff.txt is a resume of the results, with all the differences the test has found.
The image below shows an example of test summary with differences:
- with the sign "+" are indicated the rows added to the .txt file of the test/testresults folder (compared with the testexpected folder)
- with the sign "-" are indicated the rows removed from the .txt file of the test/testresults folder (compared with the testexpected folder)

As mentioned above, the folder test/testexpected is empty. This is why we can see a lot of added rows to the .txt file of the test/testresults folder.
If you have differences and and you know these differences are correct (like in this case):
- copy the test results .txt file from the folder test/testresults to the folder test/testexpected.
You should have a structure like this:

Note that the helloworld2.test.txt file is now located in both folders, in the test/testresults/helloworld2.test folder and in the test/testexpected/helloworld2.test folder.
If you run again the test, this time the result is different. You now should see a positive message from the dialog:

This means that the results .txt file generated from the test, is perfectly identical of the expected .txt file. So, the test is successfully passed.
You can also check the helloworld2.test.diff.txt file of the test/testresults/helloworld2.test folder to see the differences results, and there should not be differences found.

From that point, every time you do changes to the Extension you can test it and see if the changes you made works as you expected.
Remember: if you have differences and you know these differences are correct, you have to replace the expected .txt file.
More about Extensions Test
- Extension Test Framework
- TestFramework GitHub documentation
- JavaScript code example (ch.banana.script.testframework.test.js)