In Banana Accounting Plus to insert a logo go to the menu File → Logo setup.
Option tab
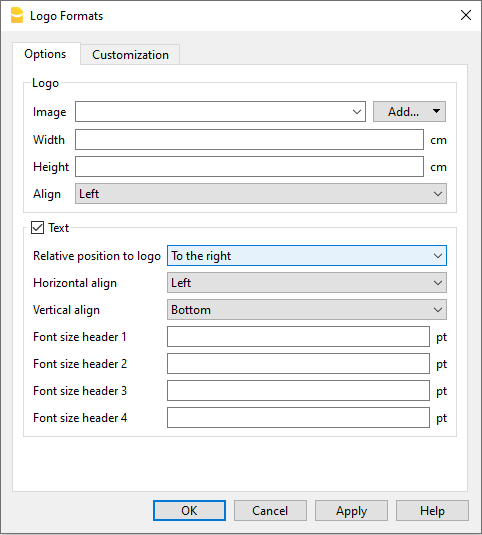
You can insert images, size and alignment of the logo and text in the header.

Logo
- Image. Allows you to add, edit and delete a logo.
- Add a logo:
- Insert a logo image via the Add button.
- Multiple images can be added.
- Edit or replace a logo:
- Select an image from the list.
- Edit or replace the selected image via the Edit button.
- Delete a logo
- Select an image from the list.
- Delete the selected image via the Delete button.
- Add a logo:
- Width.
- Enter the width in centimetres of the logo.
- Height.
- Enter the height in centimetres of the logo.
- Alignment.
- Select the position of the logo: left, centre or right.
Text
- When you activate the Text field:
- The header of the various accounting documents is inserted next to the logo image, provided the option to print the logo is activated in the report settings.
- When you deactivate the Text field:
- The logo is simply inserted without the report header information, again provided that the option to print the logo is activated in the report settings.
- Position relative to logo:
- You can choose where to position the text relative to the logo: below, on the left, above, on the right.
- Horizontal Alignment:
- You can choose to align the text left, centre, right relative to the logo.
- Vertical Alignment:
- You can choose to align the text top, centre, bottom in relation to the logo.
- Header font size:
- For printing reports or accounting documents, you can choose to set the font size for each header line.
- For invoicing, the font size can only be set by script.
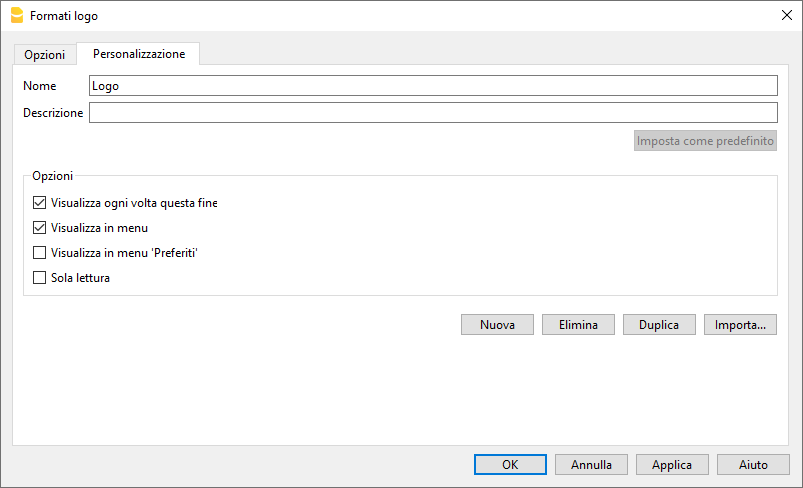
Customization tab
Through this section you can customise and store various settings for your logo and texts.
If necessary, you can call them up by selecting the name of the desired customisation.
To print an invoice with the logo it is necessary to use a customization with the Logo name, to be entered in the Name box.
To print an enhanced balance sheet or an invoice with a different logo, a new customisation must be created (e.g. the name Logo_balancesheet, this name must be selected in the Embellished balance sheet setup or entered manually in the field Logo name in the Setup of the invoice layout.
Name
The name of your customisation (e.g. Logo1, Logo2,...).
Description
Enter a description for reference of the settings (e.g. 'Logo left, text right',..).
Set as default
With the set as default button you can set a customisation as default.
Options
For further information, see the Customisation page.

Add logo to all printouts
The logo can be inserted in the various printouts. Click on the links below to access information on how to insert the logo.
- Enhanced balance sheet
- Enhanced balance sheet by groups
- Invoices
- In the invoice header of the CH10 and UNI11 layout via the Invoice Settings → Logo option.
From the Print Preview of the Embellished Balance Sheet and the Embellished balance sheet by groups, the settings for the logo can also be accessed by clicking on the Settings icon (cogwheel).