In dit artikel
The Transactions table is the core of accounting: here you enter all incoming (income) and outgoing (payments) transactions. After each entry, the amount is automatically updated in the account and category cards, so you always have totals under control.
You can enter transactions in two ways:
Record data automatically
With Banana Accounting Plus you no longer need to waste time with manual entries: thanks to automation features you can record data automatically, quickly and accurately.
Speed up data entry
To speed up transaction entry, use the following automation features:
- Data entry with auto-completion – automatically retrieves previously entered data.
- Recurring transactions – allows you to store recurring entries in a dedicated table.
Import data from bank statement
With Banana Accounting, you can speed up your work by entering transactions directly from your bank statement. Instead of recording each operation manually, simply import the file you downloaded from your bank (usually in CSV or ISO20022 format). For more information, visit the page Importing data from bank or postal statements.
Apply Rules to imported transactions
Transactions with Rules – You can define instructions for the software to automatically complete imported transactions from bank statements, with contra account, cost centers, segments, and VAT code if needed.
Manual entry
Manual entry is quite intuitive. However, we explain the most common operations.
Manual entry of an income
Below is a practical example of an income. Specifically, it's a merchandise sale.
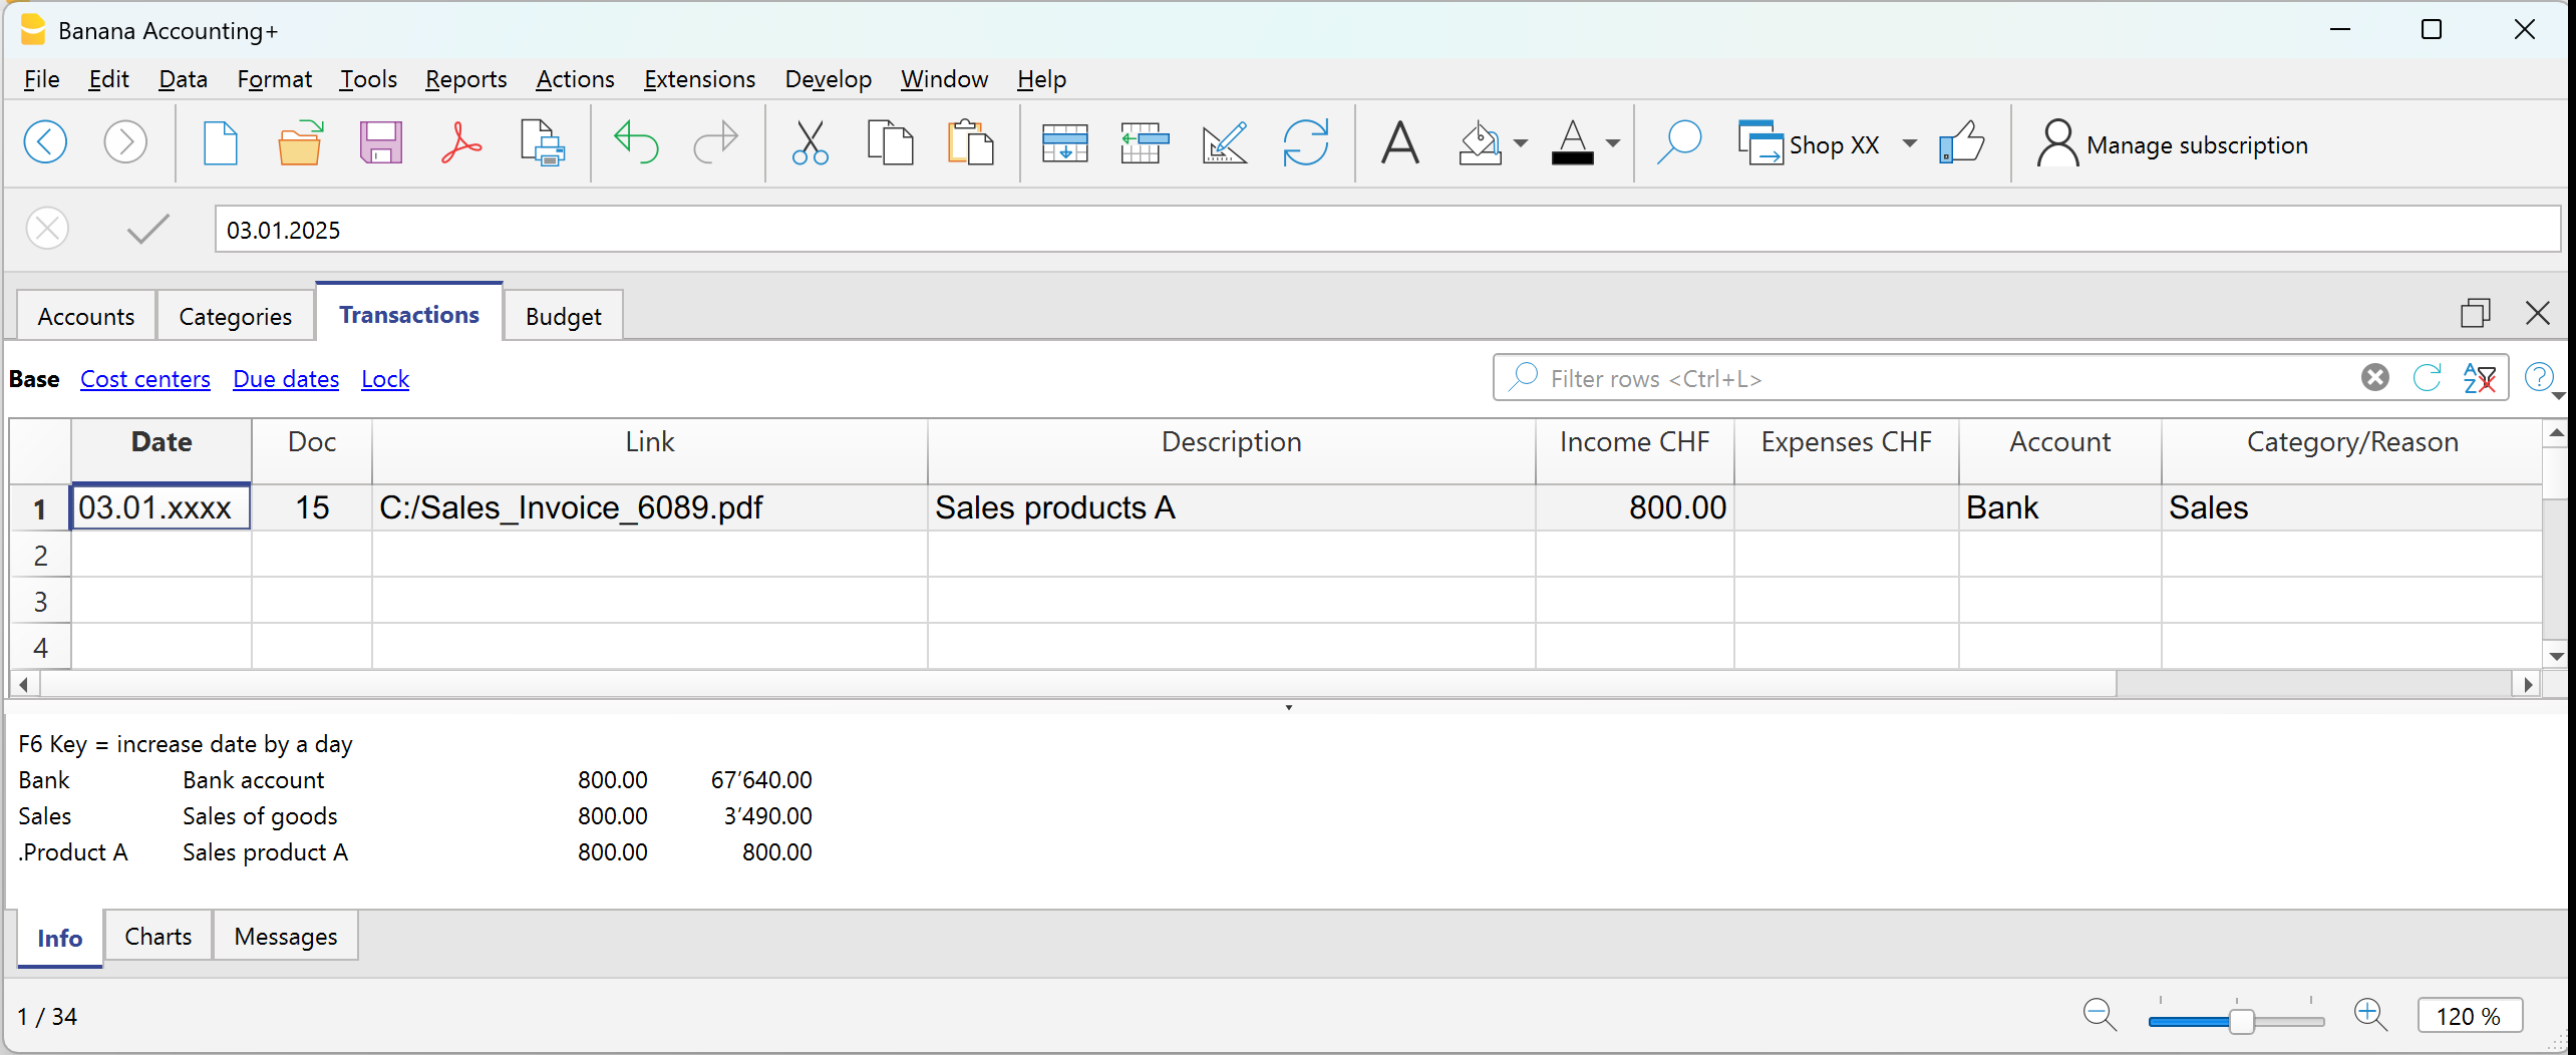
Example: payment received for a sale via bank.
- Date → enter the date of the document (e.g. invoice date).
- Doc → document number (optional).
- DocLink → link to the digital document (if available).
- Description → short description (e.g. Sale of goods to customer Rossi).
- Income → amount received.
- Account → liquidity account used (e.g. Bank).
- Category → reason for the income (e.g. Sales).
The amount will be shown as positive both in the account card and the category card.
Manual entry of an expense
Below is a practical example of an expense. Specifically, it's a merchandise purchase.
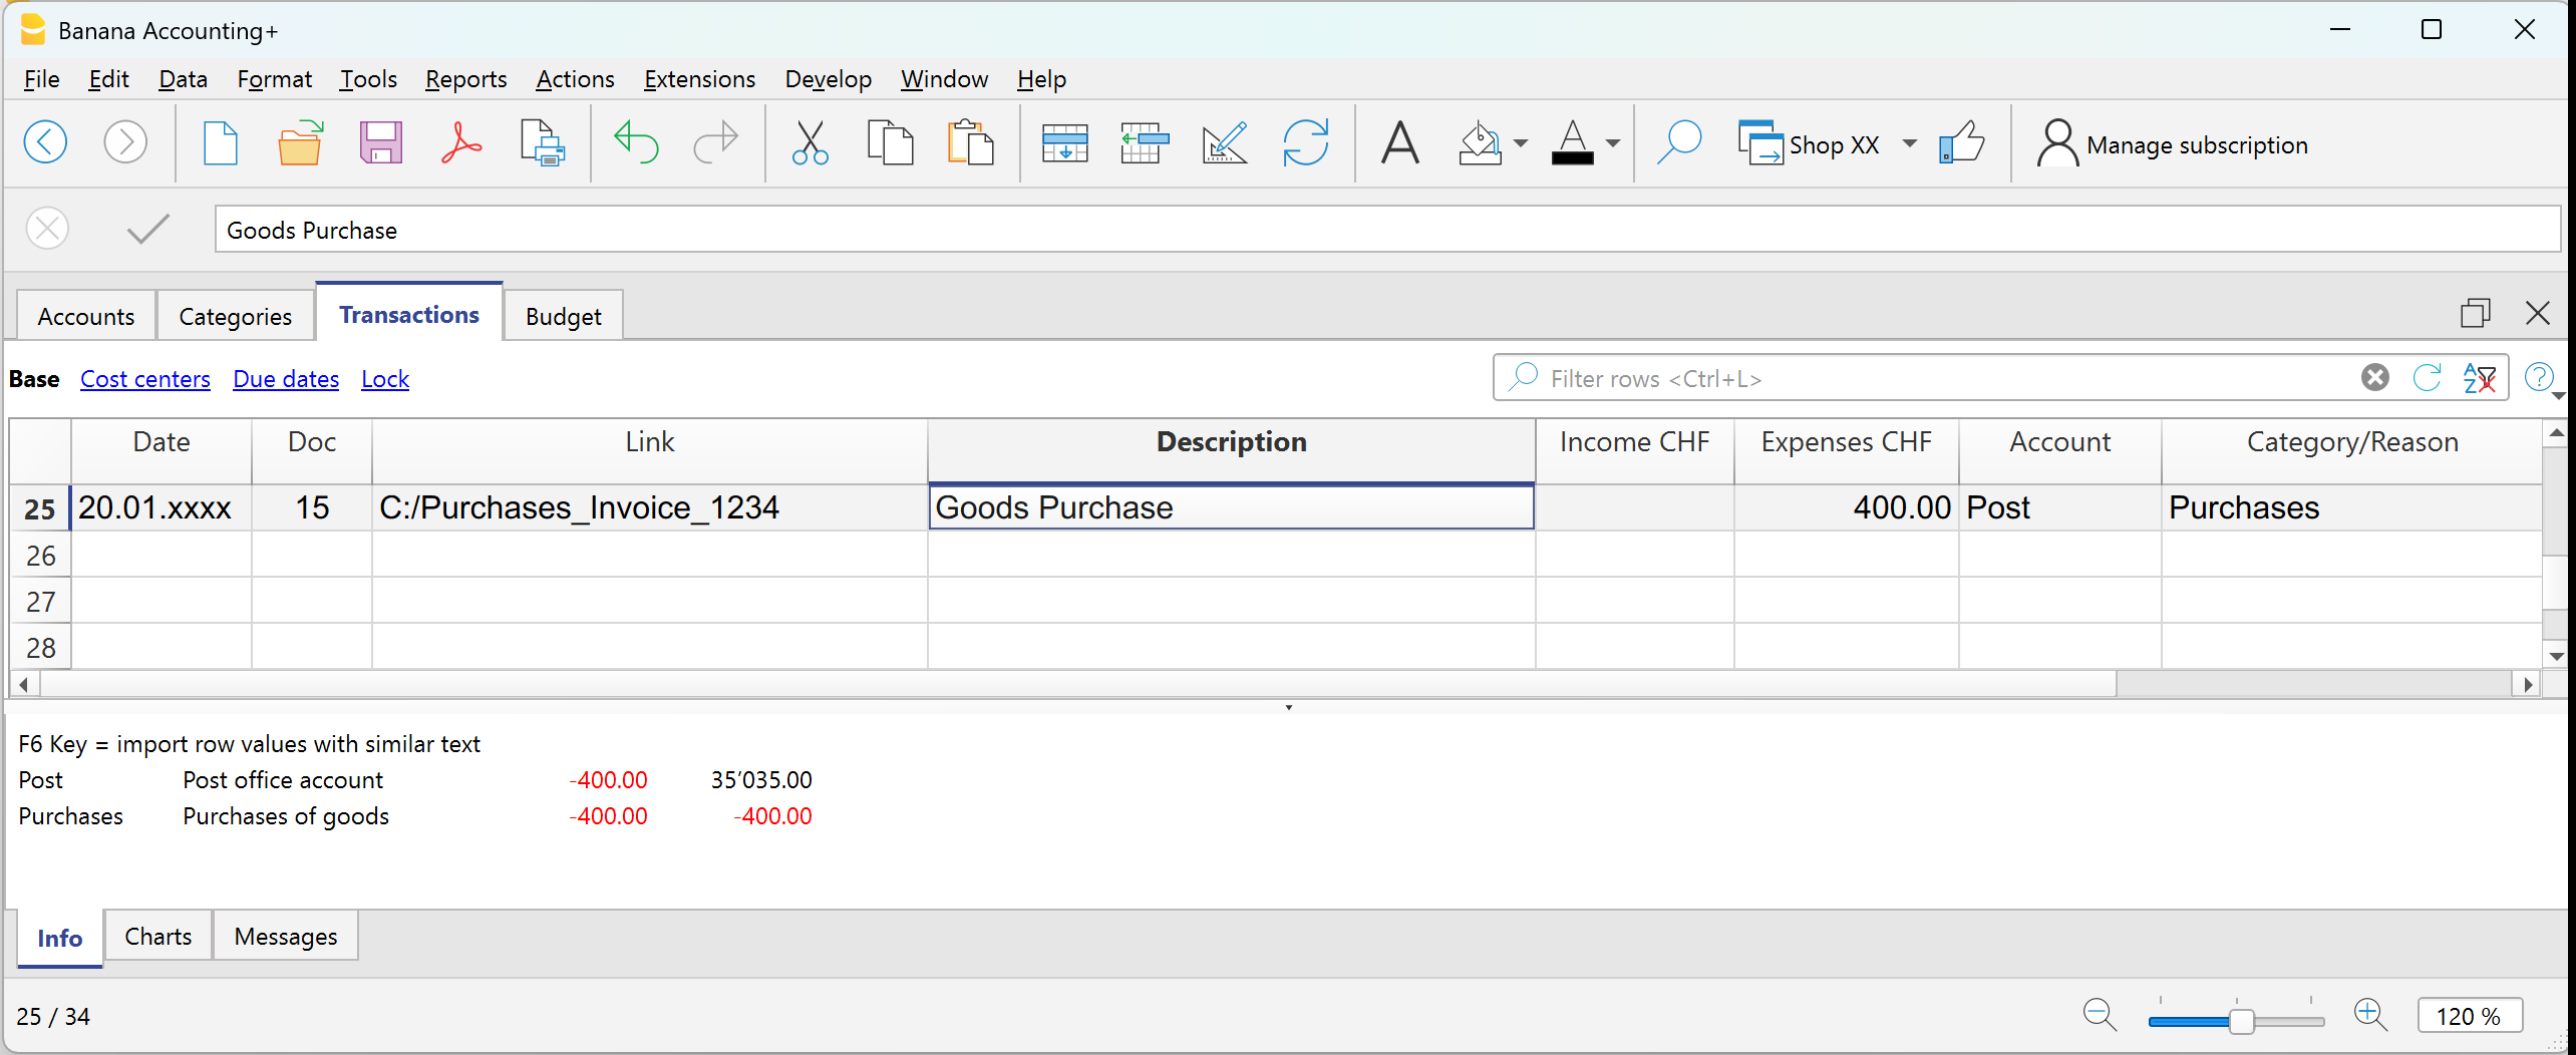
Example: paid invoice for merchandise purchase via bank.
- Date → enter the date of the document.
- Doc → document number (optional).
- DocLink → link to the digital document.
- Description → short description (e.g. Purchase of goods from supplier Bianchi).
- Expenses → amount paid.
- Account → liquidity account used (e.g. Bank).
- Category → reason for the expense (e.g. Purchases).
The amount will be shown as negative both in the account card and in the category card.
Multi-row transaction
When you have a transaction that involves multiple accounts and/or categories, you must enter it using multiple rows.
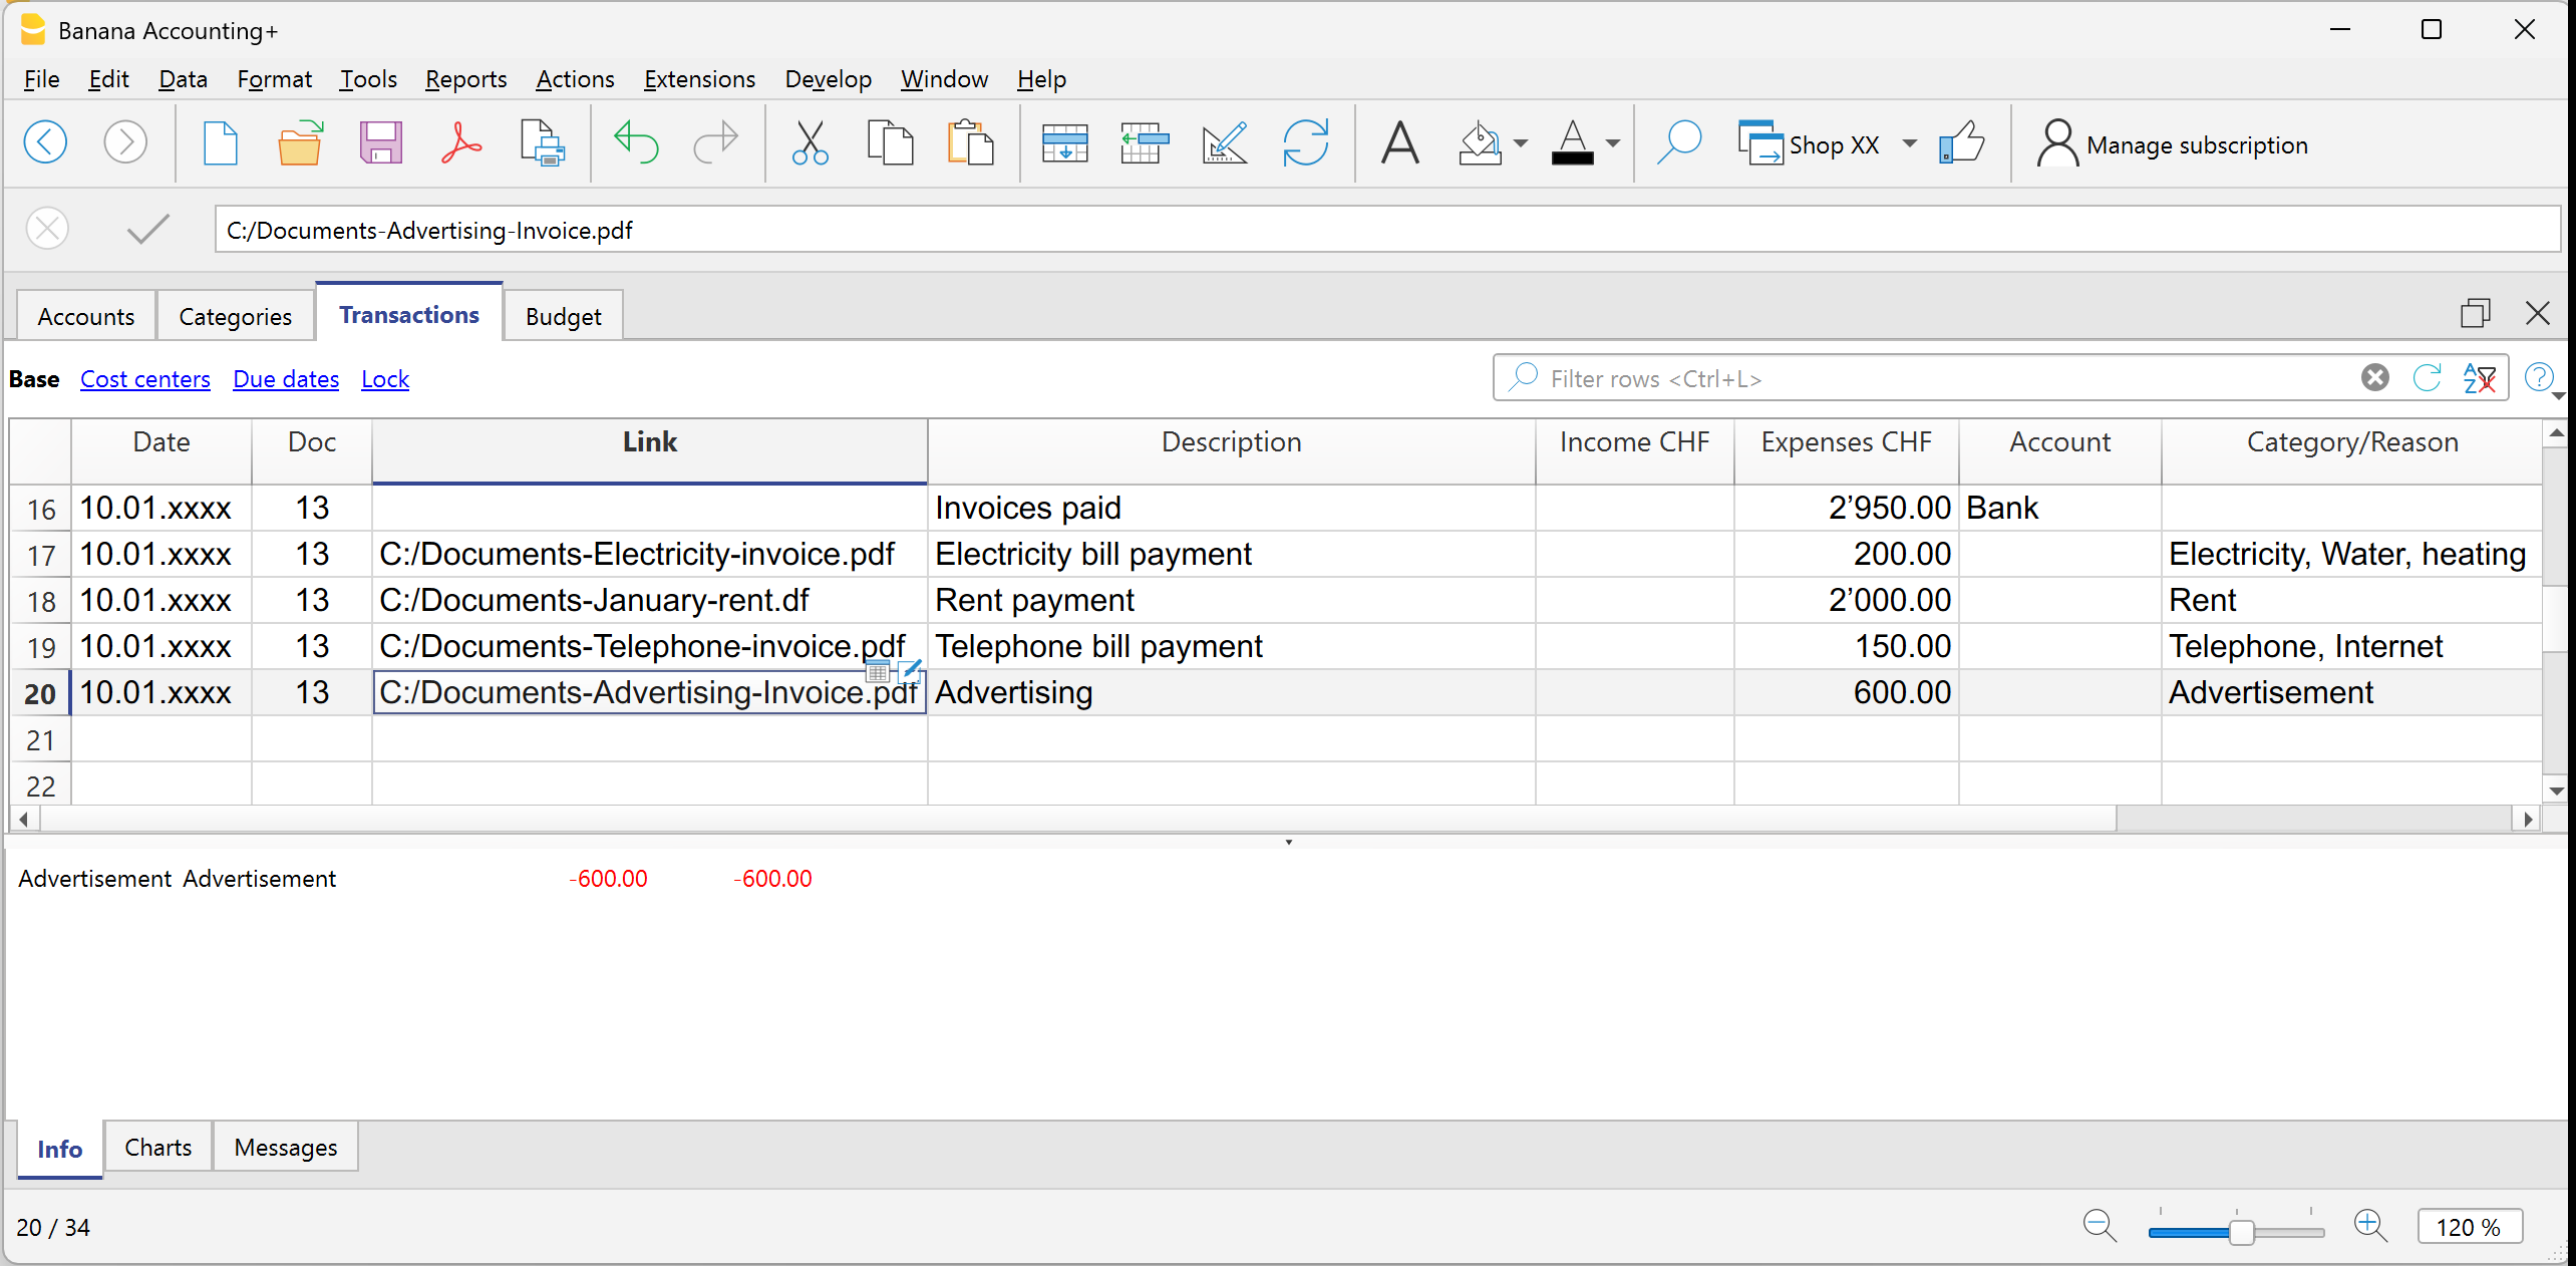
Example: payment of several invoices using cash.
- Use the same date and document number for all rows.
First row:
- Enter the total amount paid in the Expenses column.
- In the Account column, indicate the liquidity account used (e.g. Cash).
- Leave the Category column empty.
Following rows:
- Enter each paid invoice in a separate row, with the amount in the Expenses column.
- The Account column remains empty.
- In the Category column, indicate the corresponding expense item.
If you have enabled the Balance column, you will see that the remaining total decreases row by row, until it reaches zero.