Data Menu
The Data menu in Banana Accounting provides the commands to search, edit, and organize information within the tables. From here, you can perform searches and replacements, rename items, manage links, and quickly navigate through the data.
You also have tools to extract, sort, import, and export rows, as well as to arrange columns and tables according to your needs. This way, you have full control over the management and organization of your accounting data.
For detailed explanations of the commands, click on the links in the menu on the left.
Find
The Find function is located in the Data > Find menu. The section for the options for searching for data are displayed at the bottom of the table you are in.

Find text
Enter the text or value to search for. The amounts must be entered without the thousands separator.
Entire words only
Search for entire words only: For example, if the search word is Tot, it will not find Totals.
Uppercase / Lowercase
When this option is activated, the program distinguishes between uppercase and lowercase letters.
Selected zone only
With this option, the information is searched only in the previously selected area.
To start the search you need to click on the Find Next button. The first information corresponding to the request is located; to continue the search and find subsequent matches, repeat the Find next command, or use the F3 key.
Find and Replace
The Replace function, linked to the Find function, is activated by clicking on the Data → Replace ... menu. You will find the options for searching and replacing data appears in the section at the bottom of the table you are in.
 The text to search for and the text to replace must be entered in the same format as they appear in the input field. The amounts must be entered without the thousands separator.
Find text
Enter the reference you are searching for.
Replace with
Enter the new reference.
Options
Complete words only
Search for complete words only: For example, if the search word is Tot, it will not find Totals.
Uppercase / Lowercase
When this option is activated, the program distinguishes between uppercase and lowercase letters
Search in the selected zone only
With this option, the information is searched only in the previously selected area.
Replace all
This key performs the replacement of all data at the same time. It is used when a change in the Accounts, Categories, Transactions or VAT Codes table (for example an account number, a VAT code) is necessary. For change of data to be repeated, you can also use the Rename function.
Replace
Replace one item at a time.
Find all
It searches for all the information, based on the entered keyword, and displays it in the information window below.
Find next
Next available information.
Add links to digital documents
The function of linking a digital document, saved on your computer or on the Internet, to an transaction line allows you to open a receipt, invoice or other document directly in the accounting file with a simple click. Your documents will always be just a click away and you can say goodbye to paper and switch to fully digital accounting.
Also refer to Organise accounting files locally, online or in the cloud.
- The function of linking a digital document to a row is available in all tables, also for the Accounts, Items and Other tables.
- From the print preview, with Export to PDF, the programme also allows you to include the linked digital document files in PDF. When auditing, the auditor can also open the attached document (invoice, receipt, other PDF document) in the accounting file.

File names and paths
When entering a path to a file this can be of two types:
- Absolute path.
- An absolute path file name, or more simply 'absolute file name', specifies the complete path to a file, including the disk drive, folders and the name of the file itself.
- It describes exactly where the file is located in the file system.
- Examples of absolute file names:
- "C:/Documents/Images/Photo.jpg"
- "/Documents/Images/Photo.jpg"
- If the accounts folder is moved to another computer with a different path, the file will not be found.
- Relative path to the accounting file folder (Recommended).
- Relative path or more simply 'relative file name' refers to file names that are not absolute, i.e. do NOT begin with a '/'.
- Links with relative paths are understood to be relative to the folder where the accounting file is located.
- Links remain valid even if folders are moved or synchronised to other computers that have different locations, as long as the file remains in the same location relative to the accounts file.
- Does not include details of the disk drive or main folders. The name begins without a slash.
- If the file is in the same folder, only the file name 'invoice.pdf' will appear
- If the file is in the 'attachments' subfolder, it will be 'attachments/invoice.pdf'.
- If the file is in the top folder it will be "../invoice.pdf".
- The symbol '../' means upper folder.
- "../attachments/invoice.pdf' means that the file is in the 'attachments' subfolder of the top folder.
- ".../.../attachments/invoice.pdf' means that the file is in the 'attachments' subfolder of the top two-level folder.
Error File Not Found
If the programme reports that it cannot find the file, the reason may be one of the following:
- The file has been deleted or moved.
- Files have been copied or synchronised to another computer and the path name to the file is absolute.
- The accounting file has been moved and the file names contain relative files.
- The file name contains invalid characters on other operating systems:
- The programme uses the '/' character as path separator, but also accepts '\'.
- Characters such as '*' may not be used in file names.
- Care must also be taken not to use characters such as '*&%'. which are valid on MAC or Linux, but not for Windows.
The Links Column
The DocLink column (in the Transactions table) and the Links column (in all other tables) make it possible to enter a link to an external file (usually a scan of a receipt or an invoice).
- The Links column is usually not visible.
In order to display it, use the Columns setup command from the Data menu. - Once the Links column appears, you can add the link to the digital document; you can also edit the file name directly in the cell where the link has been inserted, without having to edit the file in the folder where it is located.
- It is best to use file names related to the accounting folder (see previous section File names and paths).
- In the Links cell you can enter different types of content:
- The relative or absolute file name.
- A link to an Internet page or file, preceded by 'https://' or 'http://'.
- A customised Url schema.
- A link to a resource contained in the program resources, e.g. ":/image.png".
- A link to a resource contained in the Documents table, e.g. ":documents:doc.pdf".
- A text beginning with an exclamation mark '!', to indicate in the auto-completion in which path to search for files (see the following section Auto-completion in the Links column).
- A text in square brackets [ ], which is used as an auto-complete search when editing.
Useful when creating rules and wanting to indicate the text to insert the link and facilitate searching.
To open the linked document, click on the menu Data > Links > Open Link, or click on the icon that appears in the top right-hand corner of the cell containing the link.

Entering a link to a file
There are three ways to enter a link to a document:
Add Link command
- Place yourself on the row of the table where you wish to create a link and the choose the Data menu > Links > Add link.
- Select the document file that you want to link and click on the Open button (the program inserts the link automatically).
- The program enters the path to the digital file in the Links column, even if the column is not visible.
- The file path is converted into a form relative to the accounting file.

Add Link Icon
- In the table, make the Links column visible. Also see: Columns setup.
- Click on the small icon at the top right of the cell.

- Indicate the path where the chosen file is located.
Directly enter the file name into the cell
The file name of the digital document can be entered directly in the DocLink column cell, without having to select the file in the folder where it is located.
This mode allows you to speed up the insertion work even more.
- Double-click on cell to edit it .
- Type in the file name or enter it using copy and paste.
- The auto-complete function lists the files of documents that are not yet linked.
- To get a list of available files, at least the name of a file must be entered with the file selection dialogue.
Note: It is not possible to insert a link via Drag & Drop.
Auto-completion in the Links column
When you are editing in the Links column, the programme proposes a list of files, according to the following logic:
- Only files whose extension is included among the safe extensions are proposed.
- The file name contains the text entered in the editor.
- If the text contains text separated by a space, all text must appear in the file name.
- If the text is included in square brackets [ ] only the text without the brackets is used.
- If the file is already used in the column, it is not proposed again.
You can start with '*' to ensure that all files are proposed, even those already used.
This way you can search for files that have already been included in the list. - Files contained in search folders.
- Files contained in folders already used.
If you enter the file 'attachments/invoice.pdf', it will propose the documents that are in the 'attachments' subfolder. - Files containing the text you are inserting.
- The folder was not excluded with the commands indicated below.
- Files that do not exceed the Smartfill limit.
Special names for auto-completion
You can change the search logic by entering file names that begin with an exclamation mark '!'.
- !-**1
Disables auto-completion and does not propose any files.
Use this command if, for technical reasons, access to directories is slow. - !attachments
Search for files only in the indicated subfolder - !+attachments
The '+' sign also searches in the indicated folder. - !-attachments
A '-' sign excludes the indicated folder. It takes precedence over other indications.
Serves to exclude a used file folder or the accounting file folder. - Special symbols:
- !.
The dot "." indicates the current folder where the accounting file is located.
To exclude the folder use "!-.". - !folder1*
"*" at the end of the folder name also means including all sub-folders.
If there are many sub-folders with many files, the search may be slowed down. - !*
Includes the folder where the accounting file is located and all sub-folders. - !folder1;folder2
the semicolon ';' is used to include multiple folders.
!../folder1
The ".." refers to the parent folder.
- !.
Texts for inclusion or exclusion folders for self-completion:
- They must be entered in the column where the document link is inserted.
- They can be entered in any row.
- They determine the search for all cells, even those that come before.
Edit a link
Proceed in the same way as when entering a new link.
Rename a link
This feature allows you to change/rename the link. The program will also automatically:
- Rename the file name in its original directory
- Rename all the links to that document recurring in the accounting file.
This way you can change file names without having to open the file manager.
Requirements
- The Rename function from the Data menu is only available with the Advanced plan of Banana Accounting Plus > switch now to the Advanced plan.
More info on the Rename feature.
Opening the link
There are two ways to open the link:
- Position yourself on the row and follow the Data > Links > Open link command
- Or position yourself on the cell of the Links column and click on the icon to open the link.
For security reasons, the program only opens files with an extension that is considered secure, see Program Options > File handling section, from the Tools menu.
Remove a link
There are two ways to delete a link:
- Position yourself on the row and follow via the Data menu > Links > Remove link.
- Clear the contents of the Links cell with Delete.
Export to PDF (Include attachments)
When exporting to PDF, the programme offers the possibility of also including attached files.
Please refer to the Export to PDF documentation regarding this functionality and limitations.
Other useful resources:
Scan documents with Dropbox or other Apps
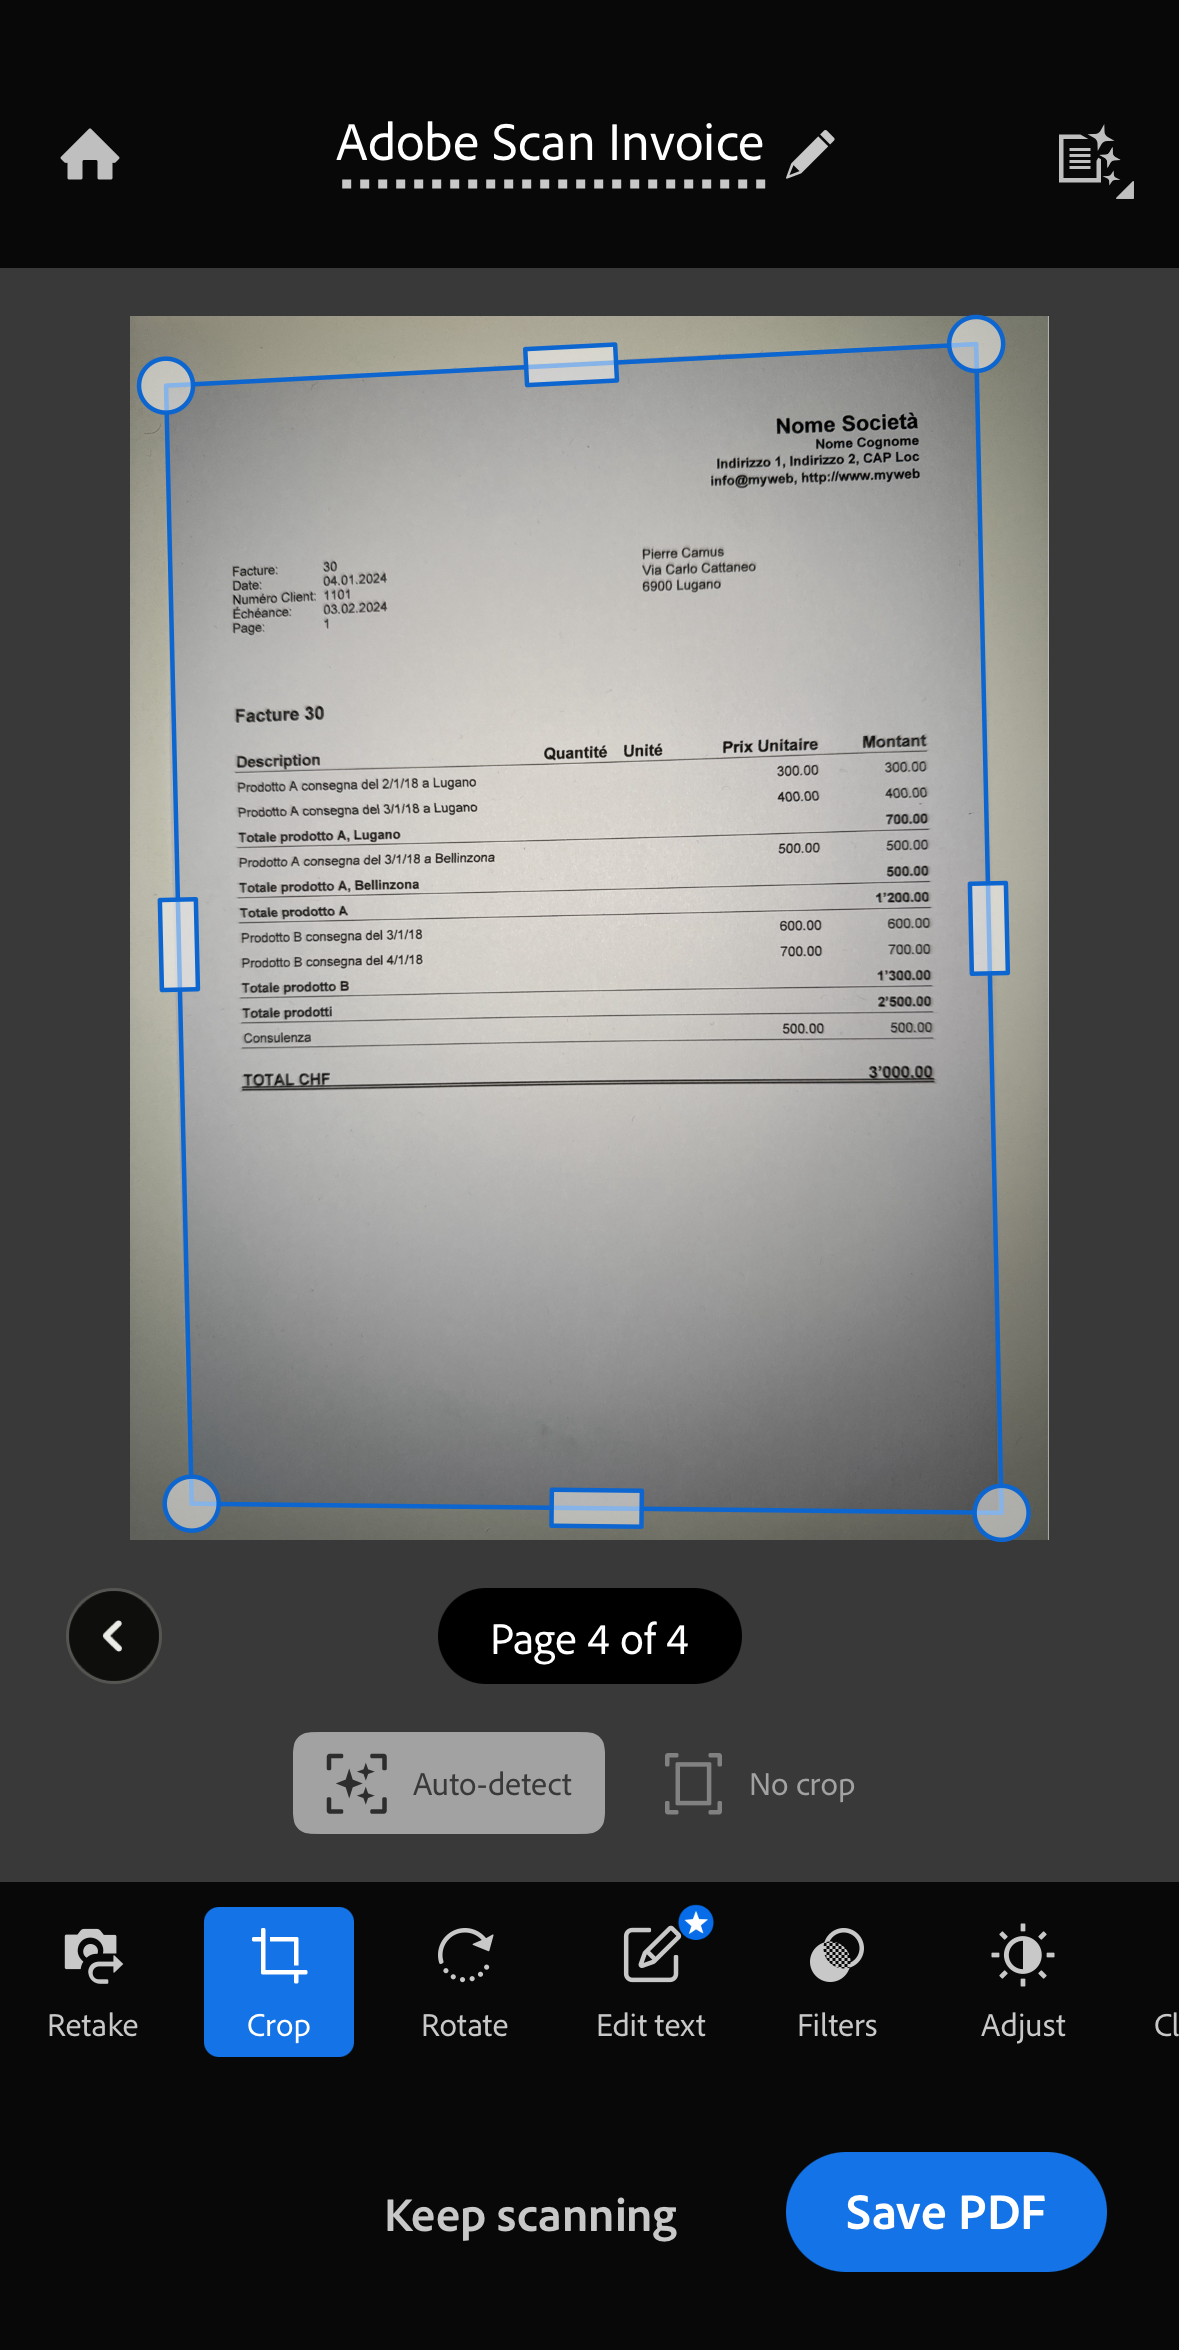
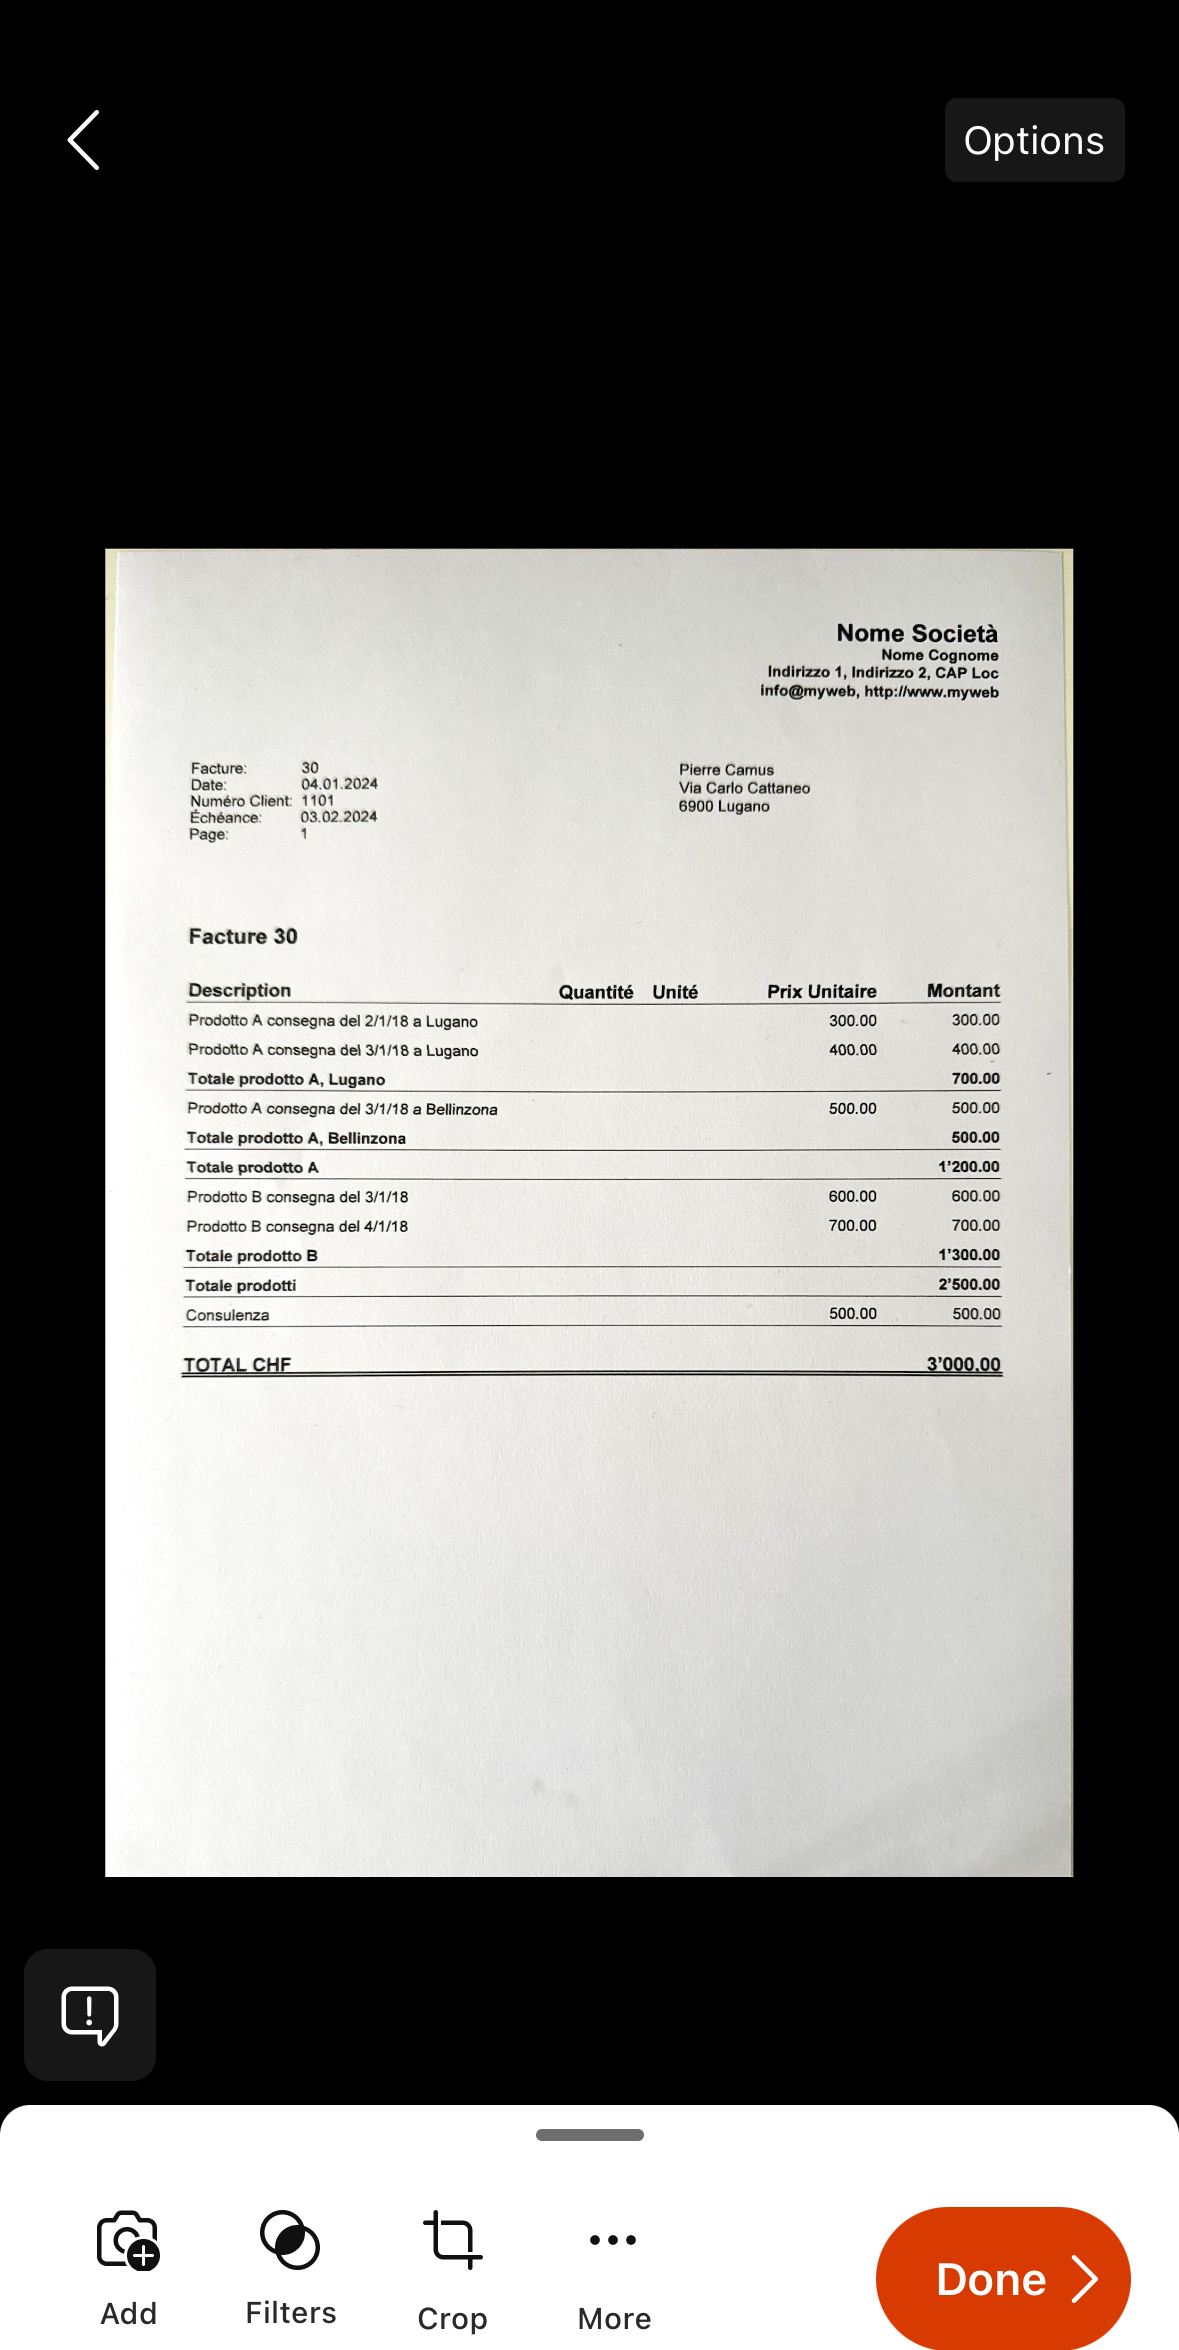
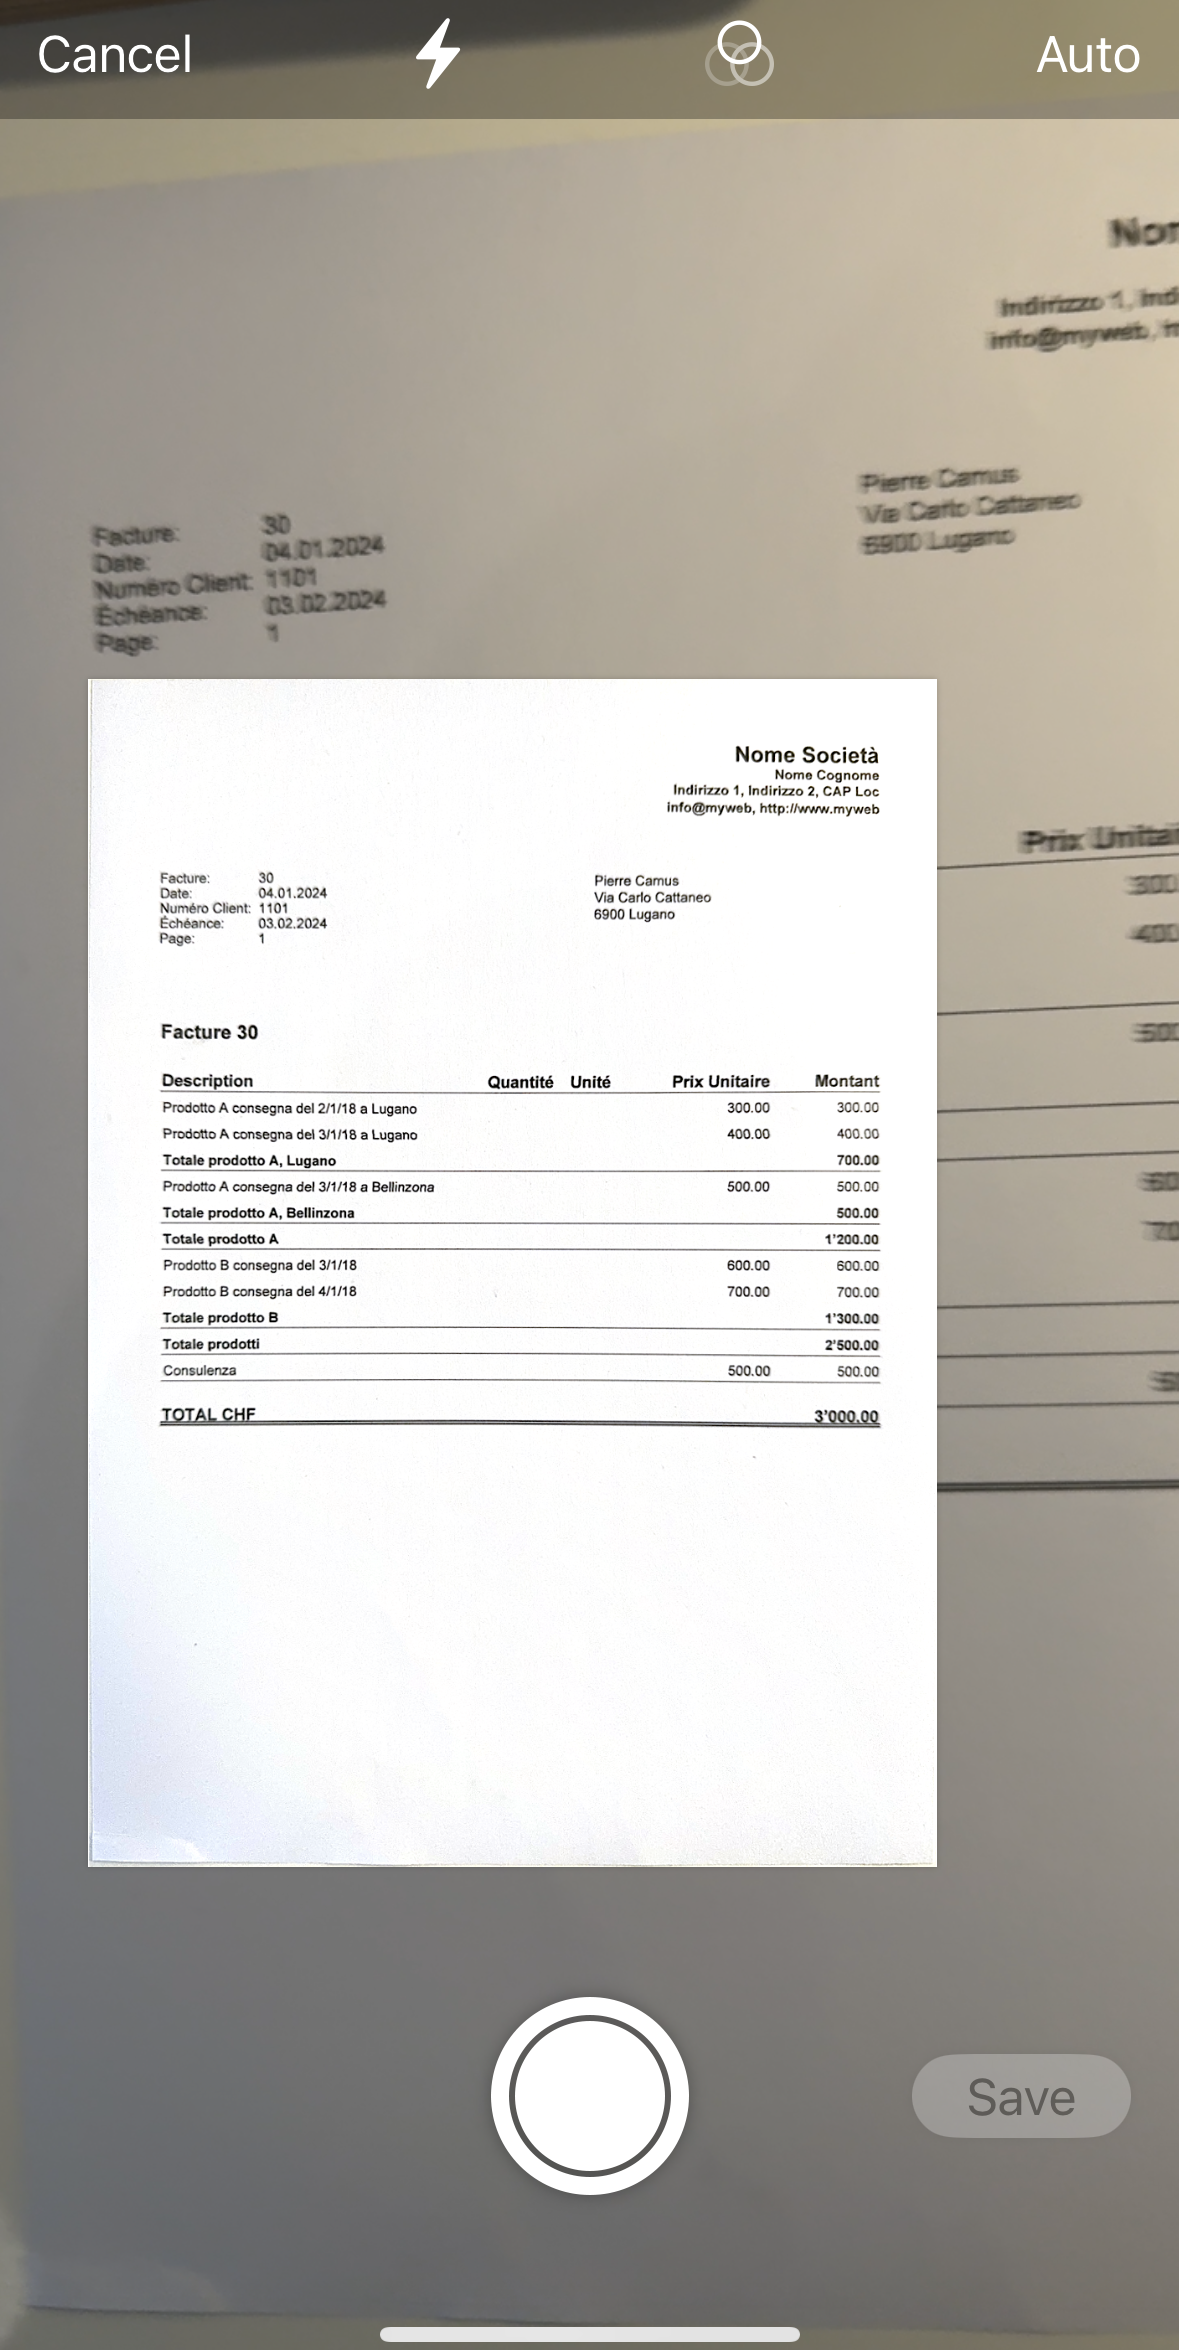
Smartphone apps like Adobe Scan, Microsoft Lens, Dropbox, and other applications allow you to scan receipts and invoices and save them directly in PDF format. Afterwards, you can transfer them to the desired folder through the smartphone app of the cloud service being used. Compared to a simple photo, they crop the contents, use PDF format, and allow you to insert multiple pages into the same file.

- Start the Dropbox application (other systems have equivalent functions, which you can easily research on your mobile).
- Use the "Scan Document" command.
- Take a picture of the document. To facilitate automatic cropping, insert the receipt in a transparent map that contains a coloured or black sheet.
- Several commands are at your disposal in the preview
- If necessary, use the Rotate Image command to be vertical.
- You can add another page by repeating the scan.
- Choose the pdf format.
- Type the file name using the date you find on the document.
If you do not have your own filing system, use the year-month-day format, the name of the counterparty and a possible observation (ex.: 2022-01-15-Telecom-invoice.pdf ". - When the file is synchronized on your computer.
- Copy it to the accounting documents directory.
- In your accounting file, go to the Transaction table, go on the appropriate row and add the link to the digital document you just scanned.
The Open link command opens the digital document
We advise you to create the accounting documents folder in a child location compared to where your accounting file is located.Here below we include similar screenshots for Adobe Scan, Microsoft Lens and iCloud Drive:
Other useful resources
Go to
The command opens a dialog box that allows you to move to the desired row.

When you are in a selection table (for example in an account card), with the Go to source line command, the program automatically returns to the corresponding row of the Transactions table.
The Rename command in Banana Accounting Plus
The Rename command is a tool in Banana Accounting Plus that allows you to quickly modify:
- an account or category number
- a VAT code
- an item number
- a link (Link or DocLink).
It is accessible from the Data menu and allows you to update a reference automatically, without having to manually search and replace every occurrence in the file.
Warning
The Data > Rename command changes references within the accounting file (accounts, VAT codes, items, links).
It should not be confused with the Rename file function of the operating system, which only changes the name of the accounting file.
Available in Banana Accounting Plus only with the Advanced plan. Switch now from the Professional plan to the Advanced plan, or purchase it directly.
When to use the Rename command
When you need to change an account number, a VAT code or a Link, the command replaces the selected value with the new value and automatically changes it in all tables where it has been used:
- Accounts and Categories table
- VAT Codes table
- Items table
- Transactions tables
- File properties (Basic data)
In the case of links (Link or DocLink), the program also automatically updates the name of the linked file in the folder where it is located.
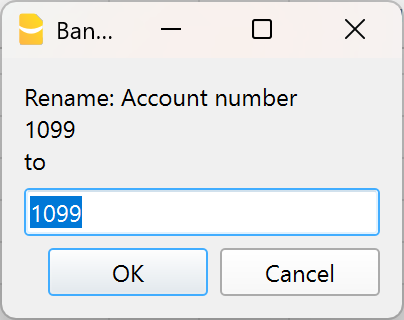
Example - Change account number in the Accounts column, Accounts table.
Example - Change link name, in the Doc.Link column of the Transactions table.
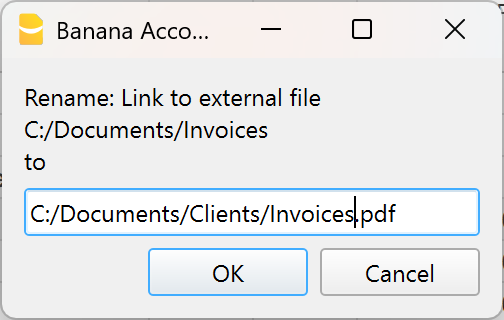
How to rename
- Position yourself on the cell to be modified (account number, category, VAT code, item number or link).
- Select Data > Rename.
- In the window that appears, enter the new reference.
The program automatically performs some checks:
Check for duplicates
It verifies that an identical account or group number does not already exist.
If it exists, a warning message is displayed. If you confirm the operation anyway, the error will be reported.
Check for protected or locked rows
It verifies that the rows where the account is used are not protected or locked. Otherwise, the program indicates that it cannot proceed with the renaming.
Automatic replacement
If there are no obstacles, the value is replaced in all tables and in the Basic data.
NOTE
In the chart of accounts it is not possible to have two identical account numbers. The command does not perform any recalculation: it simply replaces the reference wherever it is used.
Rename a link (Link)
In Banana Accounting Plus it is possible to insert, in the Link column of the Transactions table, links to digital supporting documents (receipts, invoices, tickets, etc.).
The Rename command allows you to modify the link text and automatically updates:
- the file name in the folder where it is saved
- all links to that document present in the accounting
In this way, consistency is maintained between accounting and archived documents.
For more information, see the page dedicated to digital supporting documents.
Import rows
In order to import the rows, click on Data → Import Rows command.
Activate the options of your choice in the following window:

File name
Using the Browse button, select the file from which to extract the data.
Format
This area contains the list of formats with which it is possible to import the data to the table. These include: ASCII format, Text, CSV.
Select what you need.
Options
Import data from clipboard
By selecting this box, the user can import data from the Windows clipboard.
Autocomplete values
It is advisable to select this function when it is necessary to import rows from a less complex accounting file into a more complex one. In this case, in the imported rows, some columns will stay blank. By selecting this function, the program will automatically complete the missing values with those from the current accounting.
Column headers
By selecting this box, not only data, but field headers will be included in the import.
Unicode (Utf-8)
By selecting this box, all the data will be imported in a format readable by Unicode programs.
Extract and sort rows (Extract)
This function is available vie the Data → Extract and sort rows menu ...

Contrary to the Sort rows command, the program creates a separate table where the extracted rows are displayed. Therefore, the rows of the main table are not changed.
Extract tab
In the extract table, you can click on the row number (underlined) to return to the row of the source table.
Column
You have to select the column from which you want to extract the rows.
Condition
You must select the conditions to be applied for the extraction of the lines (eg greater, less, equal, contains text, begins with, ends with ....).
Value
In this field it is necessary to enter the text to be used as a comparison, in relation to the condition (for example, if the condition is = equal, entering 25.01.2022 as the comparison value, the program extracts all the transactions with the date 25 January 2022).
The text is a date if the chosen field is Date, a numeric value if the field is an Amount, a word if the column is a Description.
Add
The button allows you to add other fields for the search.
Clear all
The button allows you to delete the settings chosen for data extraction in the various lists.
Selected rows only
This option is active only when rows have been previously selected and allows the sorting of the selected rows.
Total row
If the function is activated, the program displays the total for the extracted rows that have an amount or a time counter.
Sort tab
The sorting columns are indicated. The options are the same as the Sort rows commands.
Customization tab
Explications for this window are available on the following web page: Customization.
Account list example
It sometimes happens that you require a list containing only the accounts:
- Go to the Accounts table.
- Select Extract and sort command.
- Select Account in the the columns box
- Select Not empty in the the conditions box
If you want to extract the accounts sorted by description:
- Select Order section
- Select Order by button and select Description
If you want to display only certain columns, you can create a new view with the Tables setup command.
Sort rows Dialog
This command changes the sorting of rows permanently.
It is therefore advisable to be very careful before sorting, especially when in the Accounts Table, as it may upset the structure of the chart of accounts.
If you only wish to sort rows temporarily use:
- Temporary Filter and Sort rows.
- Extract and Sort rows that copies the data into a temporary table .
Sort Rows Dialog
This function is activated via the Data > Sort rows menu.

The rows of the table can be sorted according to the contents of the columns. Up to three sorting can be set.
Sort by
Select the type of order you need from the list that appears.
Then by
Allows you to define an additional type of sorting than the main one.
Ascending
The rows are sorted in ascending order, taking into account the type of sorting chosen (date, doc ...).
Descending
The rows are sorted in descending order, taking into account the type of sorting chosen (date, doc ...)
Number
Enable this option if the column chosen as the search condition contains only numbers.
Clear all
The button allows you to delete the settings chosen for sorting the data in the various lists.
Selected rows only
This option is active only when rows have been previously selected and allows the sorting of the selected rows
Customization Section
Through this section, you can customize and save various sorting settings for the rows.
You can choose to sort by Amount, Description, or other criteria, and save the sort settings with different names.
When needed, you can recall the sort settings by selecting the name of the desired sort.
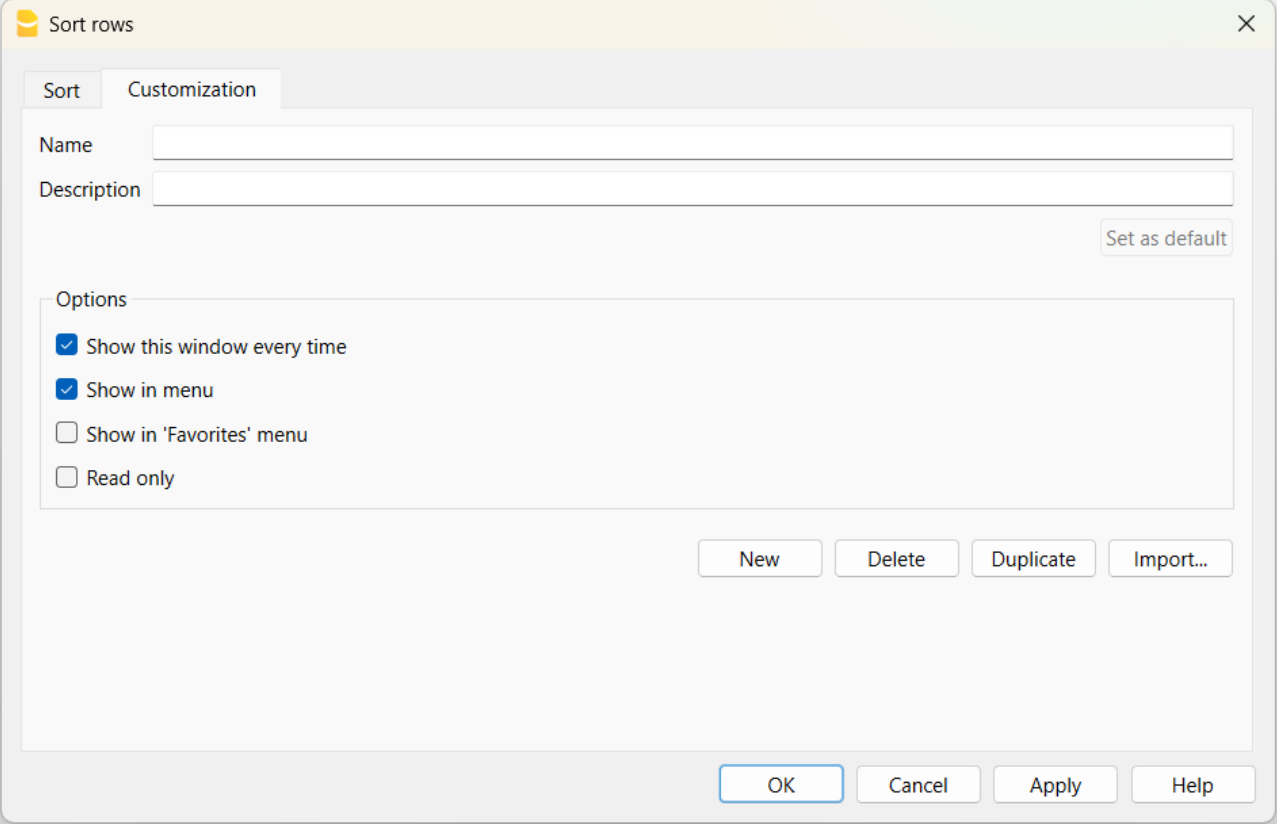
Name
The name of your customization (e.g., Sort by Description, Sort by Amount, etc.).
Description
Enter a description to reference the settings (e.g., "sorting type 1, sorting type 2", etc.).
Set as Default
With the "Set as Default" button, you can set a sort as the default.
Options
For more information, refer to the Customization page.
Columns setup
The command can be activated via the Data > Columns setup menu. With this command, columns can be:
- Displayed
- Hidden
- Renamed
- Moved left or right in the various tables.

Display Tab
Header
This is the column header.
Header 2
This header is used by the program for only a few fields (e.g. Amount column).
Description
This is the column description field. This description will be shown as a tooltip.
Format
This is the format to show numbers, date and time (refer to Columns setup page for specific information).
Width
This section defines the horizontal size of the column.
Column Style
This is a drop-down menu that indicates the style to be used. This style has priority over the style of the row.
Alignment
The user can choose whether to align the text right, left or center.
Wrap text
This option allows the user to view the input text on more than one line.
Protected
This option allows the user to protect the entire column so that no data can be input or edited.
Exclude from printing
When this option is activated, the field will be excluded from printing.
Visible
This option allows the user to make column visible.
The tables can be modified. Columns can be added, headers can be changed, and column sizes and the order in which they are displayed can be altered.
Move up, Move down
The columns can be moved to the right or to the left.
- Just click on the name of the column:
- with the Move up button, the column is moved to the left.
- with the Move down button, the column is moved to the right
- Columns can also be moved simply by dragging them with the mouse.
Add
Add columns in the active table. The columns added by the user have a purely informative function and the program does not perform calculations on any numeric data.
If you add a column of type Amount in some cases, the data entered by the user is used in the calculations. Amount columns are summed only in the following tables:
- Accounts table,
- Account cards table,
- Extract rows table.
Delete
This function is used to delete a column from the list. A system column, however, cannot be deleted.
Settings
Name
Enter the name of the column field to add. The program automatically adds the new column to the list.
XML name
The column name for XML storage and for extensions.
Data type
You can choose from the following predefined data types:
- Text
- You can enter any kind of text, without a line break.
- Comment:
Element in square brackets not considered by the program as a value.
In certain contexts, in the Transactions table, columns Debit account or VAT code, you can enter a commented value, which is not treated as a value, for example: Commented account [1000], Commented VAT code [V10].
- Number
- Numbers with decimal and thousands separators.
- positive "+1'234.00"
- negative "-1'234.00"
- neutral "±1'234.00"
Except for special cases, the entered value equals "0".
You can write "+-" before the amount and the program replaces it with the "±" symbol.
- Comments, text in square brackets [comment]
- Numbers with decimal and thousands separators.
- Amount
- Numbers with decimal and thousands separators.
- positive "+1'234.00"
- negative "-1'234.00"
- neutral "±1'234.00"
Except for special cases, the entered value equals "0". - In tables with totals (Accounts table) the amounts are summed.
- Comments, text in square brackets [comment]
- Numbers with decimal and thousands separators.
- Date
- Dates in the format defined by the operating system.
- Comment, text in square brackets [comment].
- Time
- Time of day in the format defined by the operating system.
- Comment, text in square brackets [comment].
- True / False
- A value is present (Yes) or empty (No).
- Comment, text in square brackets [comment].
- Date/Time (Timestamp)
- Date and time in the international format "2025-09-24T03:49:42.000Z"
- Comment, text in square brackets [comment].
- Time counter
- Hours:Minutes:Seconds.Milliseconds "36:10:02.100".
- Comment, text in square brackets [comment].
- Links (Link)
- A link to a document or a web page.
- Comment, text in square brackets [comment].
- Multi-line text
- Text with line breaks.
- You must also enable the "Wrap text" option.
- Alt+Enter to insert a line break.
- Menu > Format > Calculate row height, to display the full text.
- Markdown
- Like Multi-line text, but assumed to be in markdown format.
- MIME
- Columns with special contents.
- Protected text
- Text not displayed.
Max and min length
Maximum and minimum length of the column.
Max and min value
You can enter maximum and minimum values (numbers and characters).
Decimals
You can define the number of decimals of the column.
Column number
It is a number that is automatically assigned to the column, but it has a purely technical purpose.
All uppercase
When you click this option, all data in the column are converted to uppercase.
Default date and number format on your computer
After installation, the program uses your operating system settings by default.
If you want to change the date, time and number formats in the program, you must change the settings in the Control Panel (Windows) or in System Preferences (Mac).
Detailed instructions for Windows:
- Start > Control Panel
- Under Regional options, click Change the date, time, or number format
- In the dialog that appears, in the Formats section, you can change the date format
- To change the number or currency format, in the same dialog, click the Additional settings button and then the Numbers or Currency sections.
Detailed instructions for Mac OS X:
- From Apple’s apple symbol (top left) choose the System Preferences command
- In the dialog that appears choose Date & Time
- From the window that appears click Open Language & Region... > Advanced > (General), Date and Time
where you can change the number format.
Settings Tab
Name
Enter the field name of the column to add. The program automatically inserts the new column in the list.
Xml name
This is the name of the active field in the Xml format and it is automatically inserted by the program.
Data type
It is possible to choose between the following preset types: Text, Number, Amount, Date, Time.
Max and Min length
Maximun and minimum field length.
Max and Min Value
It is possible to enter minimum and maximum values (numbers or characters).
Decimal points
It is possible to define the field decimal points
Column number
This is a number automatically attributed to a column, and has uniquely a technical purpose.
All caps
By clicking this option all column data will be converted to capital characters.
Date and numbers format by default
Once the program is installed, it automatically uses as default your operating system settings.
If you wish to change your operating system settings, you should go to your Control Panel (Windows) or your System Preferences (Mac).
Here is the step by step process on Windows 8 and Windows 10:
- from the Start → Control Panel menu
- click on International options and then on Change date, time or numbers format
- a dialog window will appear where you can change your data format (in the Format tab)
- in order to change your numbers or currency format, from the same window you can click on the Additional settings button and then on the Numbers or currency tab.
Here is the step by step process on Mac OS X 10.9.5:
- from the Apple logo (on the top left of your screen) click on System Preferences
- from the dialog window that appears choose the Date & time icon
- a new window will appear where you can choose Open language & Region...
- a new window will appear where you can click on the Advanced button
- finally a new window will appear where you can change the numbers format (General tab), date or time format (Date and Time tabs).
Date, time, numbers and links format in Banana Accounting Plus
When no particular formats are specified for the date, time and numbers, they are displayed in the formats specific to the operating system.
- Within Banana, only the display format can be changed.
- To change the input format (when changing a value) you must change the settings of your operating system.
To change the format, click on Data → Columns setup and enter the desired format type in the Format box. The format types are listed below with some explanatory examples:
| Date format | Examples for date |
| d mm yy | 1 01 15 |
| dd m yy | 01 1 15 |
| ddd mmm yyyy | Fri Jan 2015 |
| dddd mmmm yyyy | Friday January 2015 |
| The letter “d” (day) indicates the day, the “m” (month) indicates the month, and the “y” (year) indicates the year. | |
| Time format | Time examples |
| hh:mm:ss:zzz | 04:04:36:089 |
| h:m:ss:zz | 4:4:36:89 |
| Naturally the user can also invert the order of the elements making up the date or the time as desired (e.g.: mm dd yyyy). | |
| As far as the separators are concerned, the user can choose between all of those available on the keyboard (for example: #, @, -, /, ., etc.). | |
| Numbers Format | Example for numbers |
| 0. | 259 |
| 0.00 | 258.85 |
| 0.000 | 258.848 |
| The number of decimal spaces in a number field can be edited according to the user’s needs. Actual calculations are made using all the inserted decimal numbers. Rounding is only done for what is shown on screen. | |
| Link format | Link example | What it does |
| :link: | "receipts/office electricity october.pdf" | shows the full file path |
| :file: | "office electricity october.pdf" | shows the file name |
| :file:16: | "office electrici" | shows the first 16 characters of the file name |
| :file:16:ellipsis: | "office electr..." | shows the first 13 characters of the file name followed by ... (= total 16 characters) |
| :file:-24:ellipsis: | "...electricity october.pdf" | shows the last 21 characters of the file name preceded by ... (= total 24 characters) |
| :link:symbol: | ">>" | shows the >> symbol indicating that a file is linked |
| NB: The link format is applied only when printing on paper or to a PDF file and does not affect the on-screen display. | ||
New column
In each table, you can add new columns.
From the menu Data > Arrange columns > Add button.
Via Data > Columns setup > Add button.
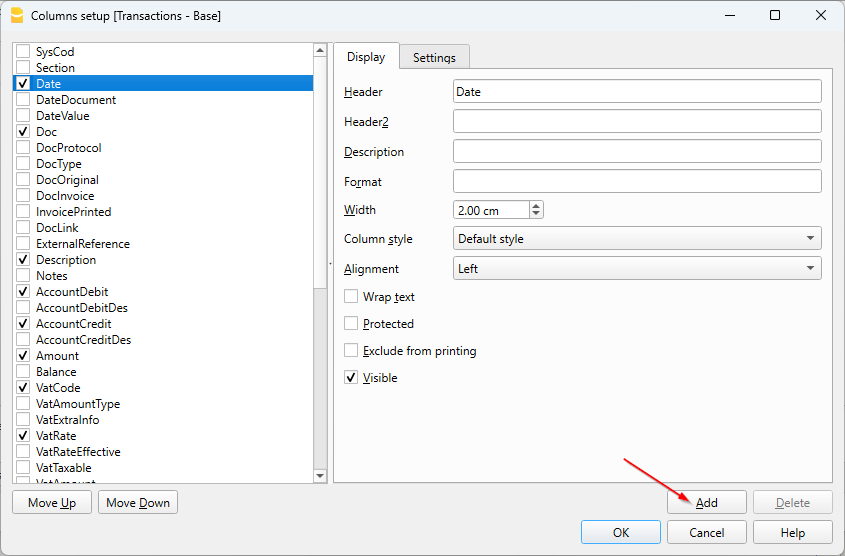

Field name
Enter the field name of the column to add.
Field name Xml
The name of the column to export in Xml and in scripts.
Data type
It is possible to choose between the following predefined types: Text, Number, Amount, Date, Time.
Tables setup
This command is activated via Data > Tables setup menu.
The Tables
These are the elements that contain the data in a format or rows and columns.
- The order of the tables cannot be modified.
- Additional tables are placed at the end of the existing ones.
- The headers of the predefined tables in Banana Accounting cannot be modified.
- The headers of user-added tables (e.g. the Internal notes table) can be modified:
- Go to the table where you want to change the header
- From the Data > Tables setup menu, enter the new name.
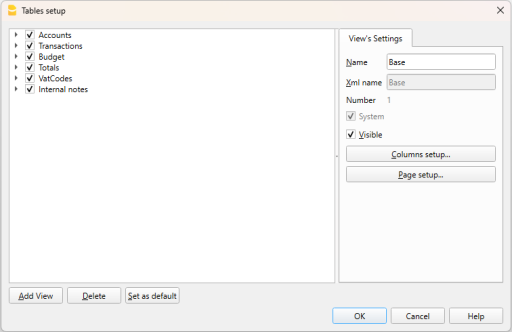
Views
They are indicated below each table.
They are the elements that define how the columns are displayed in the table.
Through the Views, you can define which columns should be visible, the display order, and how the columns are shown.

In order to add tables, please go to the Add new functionalities command.
View Settings
For each table, you can define:
- Name
The name of the table in the file language. This field cannot contain spaces or special characters.
It can only be changed for added tables. - Xml name
The name this is being used for the programming. This field cannot contain spaces or special characters.
It can only be changed for additional tables. - Header
The name that appears in the tables list - Visible
Indicates whether the table is visible or not.
Manage Views
Name
It is possible to enter a new name for the selected View.
Xml name
This is the View name for the Xml export. For system Views this name cannot be changed.
Number
This is a number automatically assigned to the View by the program.
Visible
When this box is checked the View will be visible.
System
When this box is checked the View is a system View and cannot be deleted or edited.
Columns setup
Displays the Columns setup page that allows to edit them, both in displaying them as well as in setting them up.
Page setup
This button leads to the page format settings.
Add
This button adds a new View to the active table.
Delete
This button deletes a View.
Set as default
Defines the View that is being used.
New view
From the menu Data > Tables setup > button Add View, you can add your own views (not provided for account cards).

View name
Enter the name of the view you want to add.
View name Xml
This is the view name for the Xml export.
After its creation, the new view is displayed in the same place as the existing views and will be added at the right side of the others.