Interface
Improved interface
In the new version Banana Accounting Plus, you will find an updated interface, with very intuitive and functional menus, so you can access the commands much more quickly.
We advise you to switch now to Banana Accounting Plus and take advantage of the many new features.
When a new file is being created or an existing one is opened, the software presents a structure that is characterized by the following elements
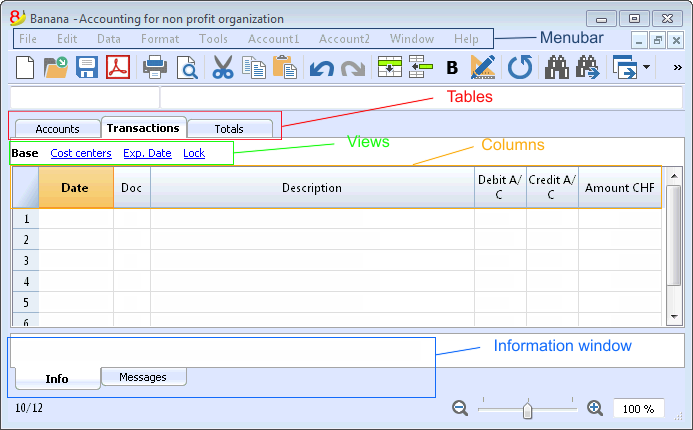
The menubar
The menubar contains all commands grouped by menus. The menubar changes depending on the chosen accounting type.

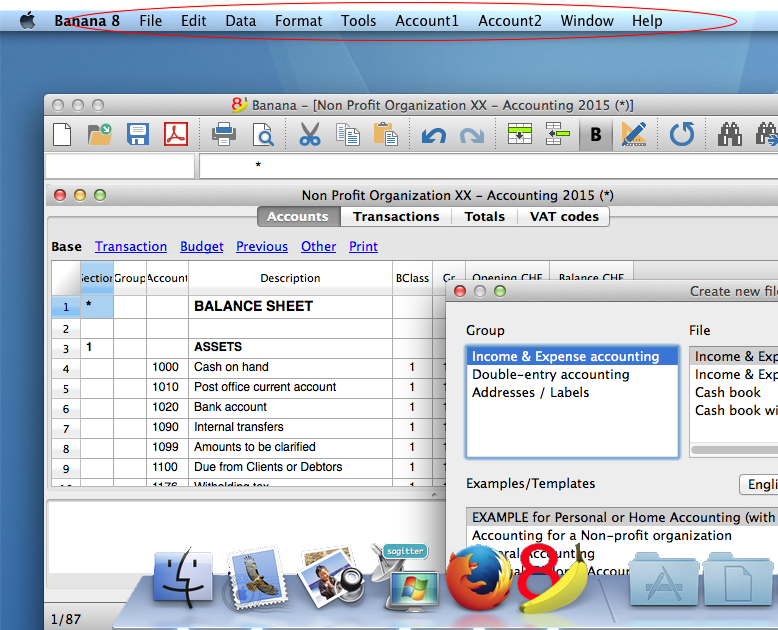
Attention: in the Mac operating system, the Banana menu bar is located on the top of the screen, at the rightside of the apple logo:
The toolbar
The toolbar contains icons that allow you to acces the most used commands and dialogs.
If you go over the icon with your mouse a command description will be displayed.

Text imput area
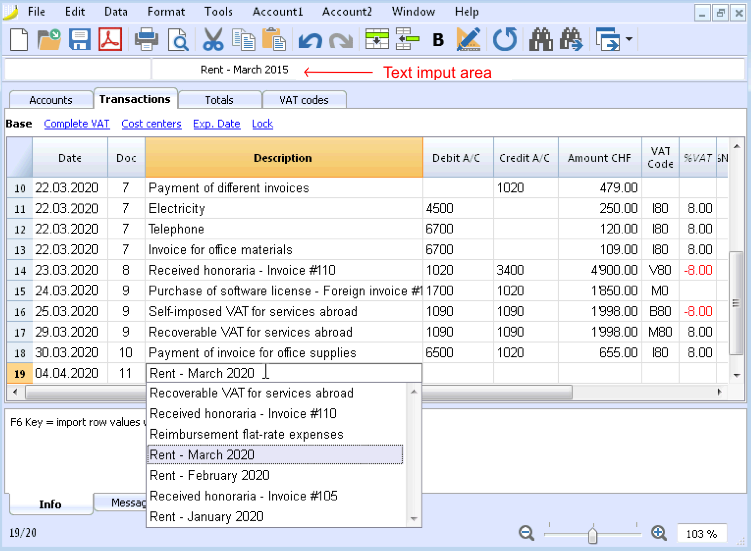
Text are entered directy in the cell. The entered text is also shown in the text imput area, right below the toolbar. The text can be edited in the text imput area, or direcly in the cell, by double clicking on it or by pressing the F2 key.
If the Smart fill option is activated (Program Options command from the Tools menu), a drop-down menu will be shown with all the possible text choices; just select the chosen text and press the Enter or the F6 key.
Smart fill (autocomplete)
When you enter a text, the program suggests different choices:
- Texts of similar transactions
- Accounts list. By entering a text the program will list all the accounts containing that text.
Execute command
Some columns are associated with certain actions that can be executed with the Execute command (from the Edit menu) or relative touch key, as indicated in the information window.
Some examples:
- Doc column: recovery of recurring rows or progressive number
- Description column: recovery of similar row data
The tables
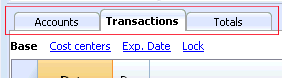
Each accounting file has various tables. Some of them are main tables and others are optional. Tables vary depending on the chosen accounting type.
The views
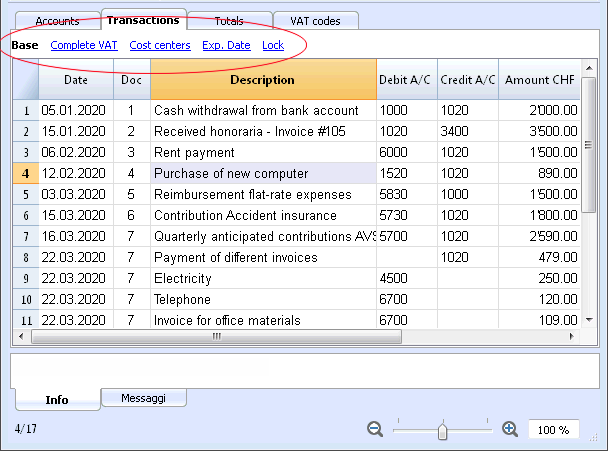
The views are ways of showing the accounting data with specific columns. For each table there are different views and they are very useful when you want to show your data in different ways, without altering your basic settings.
Views are located right below the tables and can be personalized using the Tables setup command from the Data menu.
Related document: Tables setup; New view
The columns
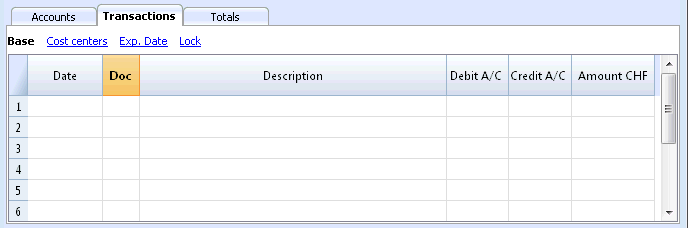
Columns are the table vertical elements. Each table has specific columns with specific heathers. The display, size, description, format, width, style, alignment can be edited thorough the Columns Setup command from the Data menu.
Some columns contain data entered by the user, and some others can only be used by the program and cannot be edited by the user (for example the account cards columns).
Users can add new columns in order to include additional information (always with the Columns Setup command from the Data menu), but the data entered will not be processed by the program.
A group of specific columns composes a view that displays only specific data.
Related document: Columns setup
The information window
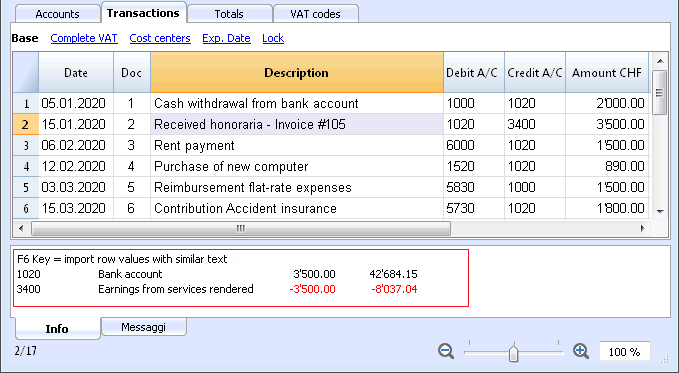
This is a window located in the lower part of the screen, where the program displays useful information related to the active table and cell. Error messages are shown in red.
The error messages window
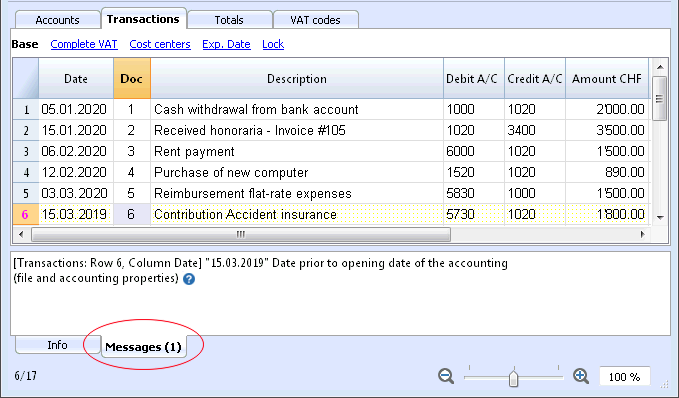
The Messages windows contains a list of the errors found by the program.
In order to read the messages click on the Messages tab.
From the Messages window, by double clicking on the error message, you will be taken to the row that generated the error.
Date and numbers format by per default
Once the program is installed, it automatically uses as default your operating system settings.
If you wish to change your operating system settings, you sould go in your Control Panel (Windows) or your System Preferences (Mac).
Here is the step by step process on Windows 8 and Windows 10:
- from the Start menu, go to the Control Panel
- click on International options and then on Change date, time or numbers format
- a dialog window will appear where you can change your data format (in the Format tab)
- in order to change your numbers or currency format, from the same window you can click on the Additional settings button and then on the Numbers or currency tab.
Here is the step by step process on Mac OS X 10.9.5:
- from the Apple logo (on the top left of your screen) click on System Preferences
- from the dialog window that appears choose the Date and time icon
- a new window will appear where you can choose Open language and zone...
- a new window will appear where you can click on the Advanced button
- finally a new window will appear where you can change the numbers format (General tab), date or time format (Date and Time tabs)
Format and numbers in Banana Accounting
Cells
Copy, Cut and Paste
It is possible to copy/paste cells, rows or selected text just as it is possible to do with any normal Windows program:
- Select the line or the area of data to be copied
- In the Edit menu, select the Copy or Cut command
- Move to the row or the area where the information should be copied
- From the Edit menu, select Paste
The user can also copy/paste by using the following icons  or press Ctrl+C to copy, Ctrl+X to cut and Ctrl+V to paste.
There are also commands such as Copy rows, Delete rows and Paste rows: in this case they refer to a full row or rows and not to a cell selection. For this purpose the commands Copy, Cut and Paste should not be used.
Entering a text
In order to enter a text position yourself in the cell you wish to write in. With a double click on the cell a drop down menu will appear with all the text previously entered; as you start writing the program automatically suggest similar text previously entered; select the appropriate text and:
- press Enter - in order to automatically enter the selected text
- press the F6 key - in order to automatically enter the selected text + all other row data (debit account, credit account, amount, ...)
Editing a text
From the version 7 of Banana Accounting it is possible to edit the text directly in the cell; just double-click in the appropriate cell (or press the F2 key) and enter the new text. Also when editing the texts, the Smart fill and autocomplete texts feature suggests earlier entered texts.
It is also possible to edit a text selecting the cell and entering the new text in the text imput area, under the toolbar. On the left side of this area, two icons will appear to undo or accept the entered text.
Wrap text
When the text for a row is very long, the Calculate row height command from the Format menu allows the user to view it completely, adapting the height of the row.
To adapt the height of the row to the text, the user should:
-
choose the Columns setup command from the Data menu;
-
select the appropriate field name;
-
activate the option Wrap text in the Display tab;
-
recall the Calculate row height command from the Format menu each time it is necessary.
The Calculate all row heights command is equal to the one described above, with the difference that it operates on all rows of the table.
Entering an account number
Position yourself in the Debit or Credit account column and start entering the account number or account description; the program will suggest you all the accounts with a similar number or description. Choose the appropriate one with the Down arrow key or Up arrow and press Enter.
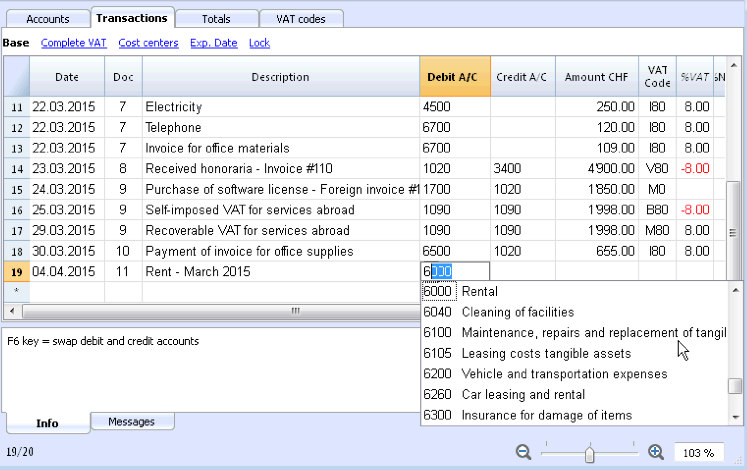
Attention: to deactivate last year's smart fill, you must deactivate the Smart fill with transactions from previous year option from the File and accounting properties command (Options tab - File menu).
File Menu
Banana files are compatible with versions from all operating systems and with syncronization systems (Dropbox, ICloud, ...)
For more information please visit the File Saving page.
Create new file
There are different ways to create a new file:
- from one of the templates included in the program
- from one of the online templates available on our website
- from an existing file or template (without editing it):
- copying the file with your operating system
- using the Save as command from the File menu
- using the Create file copy command from the Tools menu, that allows you to choose what data to keep.
- using the Convert to new file command from the Tools menu; this command will reate a new file with different characteristics but keeping the existing data.
This command is usually userd to add the VAT management or the multicurrency feature to an existing accounting file, or to change a file language.
- creating a new empty file
- creating a new file and loading the data froma an accounting file, but with a different chart of accounts.
Transfering to a new year
When transfering to a new year, there is a specific procedure to follow, in order to create a new year's file and automatically carry forward the opening balances.
New file settings
When creating a new file with new characteristics, you need to setup the outline of the new file.
Create new
Related documents
- Start a new Income and expenses accounting and Cashbook file
- Start a new Double-entry accounting file
- Start a new Double-entry accounting with multicurrency file
- Utilities documents
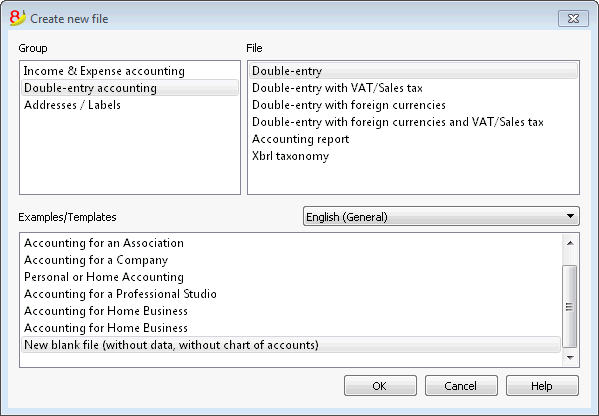
Choose the initial model
This procedure creates a new accounting file, starting from an existing template (New command from the File menu)
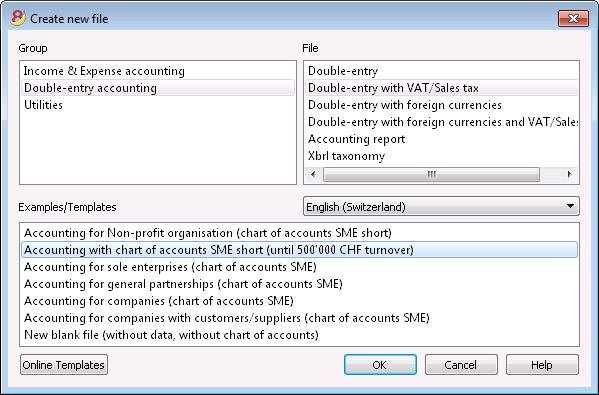
Group
In the Group section all the different applications are listed. Choose the one that meets your needs.
File
In this section you can select the characteristics of the chosen application. You can choose between the plain version, with the VAT management, with a second currency or with more than one currency.
Examples/Templates
By selecting the language you will see predefined example/models that you can use to start and that can be personalized. All the template data and settings (language, decimal rounding, ..) will be used.
Once you have personalized the template you need to save the file with a new name.
Online Templates
Clicking on the Online Templates button you can access our website where we published all templates available for free.
Create file copy
Create a new file from an existing one
- Open the source file
This file will not be changed or edited. - Use the Create file copy from the Tools menu
- Choose the data that you want to keep.
For accounting files choose if you want to keep the existing amounts.
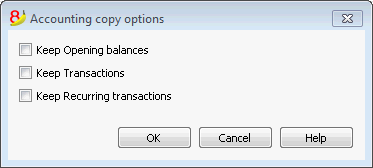
- Save the file in the folder where you wish to keep the data (normally in the documents folder)
- Enter the company name and the accounting year as file name, for example smith_company_2017.
New file from an internet template
Download and open the file with Banana
There are different ways to download the file, depending of what internet browser you are using.
- Click on the file link
- With the mouse right click choose the Save file command from the menu that appears
- Open Banana and drag the file or the file link into it.
Save the file with a name
Once you have opend the template with Banana you need to use the Save as command from the File menu
- Chose the destination folder
- It can be useful to create a separate folder for each year so you can also store there other documents related to that year.
- Chose a file name containing the company name and the accounting year, for example smith_company_2017
- The software will add the .ac2 extention, typical for the Banana files
Adapt the template
- Edit the File properties
- Enter the headings and the accounting period
- Enter the address
- You can now adapt your chart of accounts
- Enter your bank accounts
- Enter or edit the chart of account to fit it to your needs
You will still be able to add or edit it as you work, if new needs arise.
- If you are taking over an existing accounting file, you will also need to enter the opening balances in the Opening column.
- If you are working in a multicurrency file, you need to update the opening exchange rates.
Convert to new file
This command converts an existing file (which will not be modified) into another one with different characteristics:
- Change language
- Change the roundings
- Change the file type. For example:
- Pass from an accounting without VAT to one with VAT
- Pass from a Double-entry accounting to a Multi-currency accounting
It is as if you have created a new blank file and then have manually transferred the data.
The existing file characteristics can be consulted by executing the command Tools -> File Info
Creation and data transfer
The Convert to new file command, from the Tools menu:
- Creates a new file of the specified type with the predefined columns setup
- Transfers the data into the new file, proceding with the necessary conversions
- Saves and indicates the name of the new file.
When converting a file with more options into one with fewer options, part of the data will be lost during conversion. If, for example, an accounting file with VAT/Sales tax is converted into an accounting file without VAT/Sales tax, all data in the VAT columns will be lost during conversion.
Passing from a Double-entry accounting to a Multi-currency accounting file
- Make sure that in the File and accounting properties the currency symbol is being specified (which will become the basic currency)
- Choose the Multi-currency accounting as destination
- The program creates a Multi-currency accounting, recovering the existing data:
- The Transactions table includes the columns for managing the Multi-currency accounting, as a currency the basic currency and the exchange rate 1.000
- The existing accounts in the Accounts table are being completed with the basic currency symbol
- You have to add the predefined accounts for exchange rate profit & loss.
- In the File and accounting properties, you have to indicate the predefined accounts for exchange rate profit & loss.
- The Exchange rate table will be empty; it is therefore necessary to add the currencies and exchange rates used in the transactions
- In the Accounts table, the accounts in foreign currency have to be added.
In order to change the currency of an accounting file, see the Accounting tab of the File and accounting properties.
Passing from an accounting without VAT to one with VAT
- Choose the desired type of accounting with VAT as the destination
- The program creates an accounting with the VAT columns, recovering the existing data:
- Add the VAT accounts into the Chart of accounts
- The File properties regarding the VAT need to be completed, and the default acccount on which the VAT must be recorded needs to be indicated
- The VAT Codes table has to be completed with the necessary VAT Codes
With the Import to accounting command -> VAT codes, the VAT codes table of an existing accounting can be imported (for example it can be imported from a default VAT acccounting template).
Dialog
- The file type, in which the user is working, is being indicated
- For more information on the language, roundings and decimals, go to the File and accounting properties (from the File menu)
- A list with different options appears
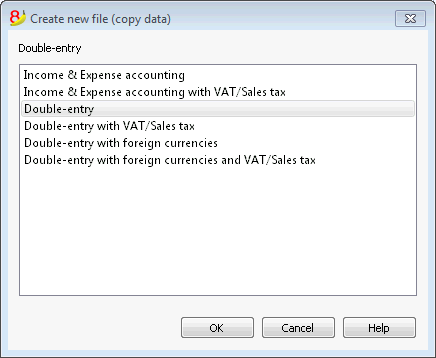
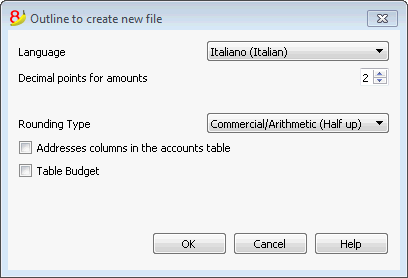
Outline to create new file
For more information, please consult the specific page.
Transfer to a new accounting plan
Hereunder we explain how to proceed when:
- passing to a chart of accounts with a different numbering
- retrieve and convert the data of an existing accounting, including the transactions.
Converting for the new year
The program will convert the file for the choosen year. If you have already entered the year 2014 you can convert the 2014 file.
If you wish to start a new year with a new chart of accounts, there are two possibilities (for example considering the year 2015 as the new year):
- converting the previous year (2014) and then creating the new year (2015)
You will have two different files for the year 2014 (the one with the old chart of accounts, and the new one), and a single file for the year 2015, with the new chart of accounts. This procedure is useful when you need to have both years with the same chart of accounts - creating the new year's file (2015), and then converting it the new system.
In this case the year 2014 will remain unchanged. For the year 2015 you will have a transition file, with the old chart of accounts, but with the updated opening balances. The conversion of the 2015 file can be done right at the beginning, but also after some transactions have been entered.
Step 1: Creating a new accounting file
- Create a new accounting file, choosing the desidered type.
- Adapt the chart of accounting to your own needs
Step 2: Adding the matching accounts
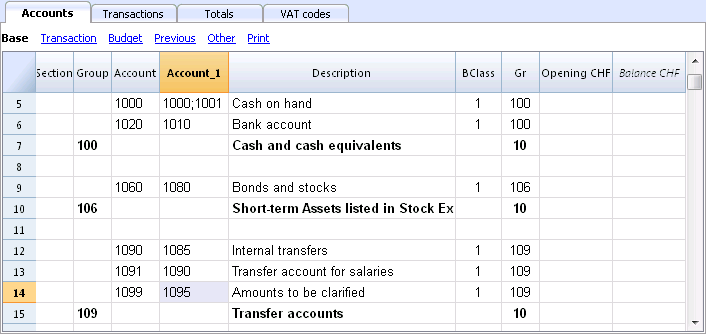
- Position yourself in the Accounts table and add a new column called Account_1 (Data menu; click on the Add button of the Columns Setup window and then enter the Account_1 description);
- For each new account, in the Account_1 column, enter the corresponding account in the old chart of accounts;
In case the account remains the same, you can also choose to not indicate it. - In case several accounts need to be grouped in one, enter the separated accounts with a semi-colon "1000;1001".
- In case one account needs to be subdivided on several accounts, you need to proceed manually, see herunder.
Step 3: Starting the import operation
For more information, please check the related pages Import to Accounting and Import File.
- From the Account1 menu, choose the Import to accounting and then Import File commands
- Using the Browse button, select the file of your old accounting plan
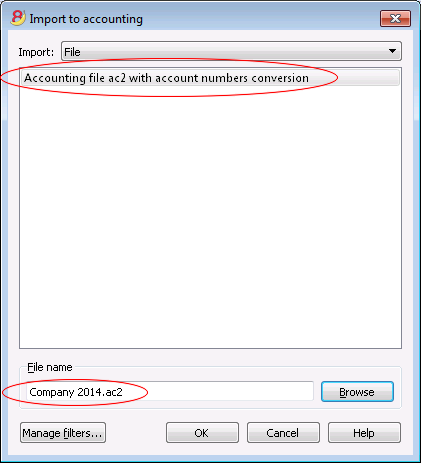
- Confirm by clicking on the OK button and pass on to the next window
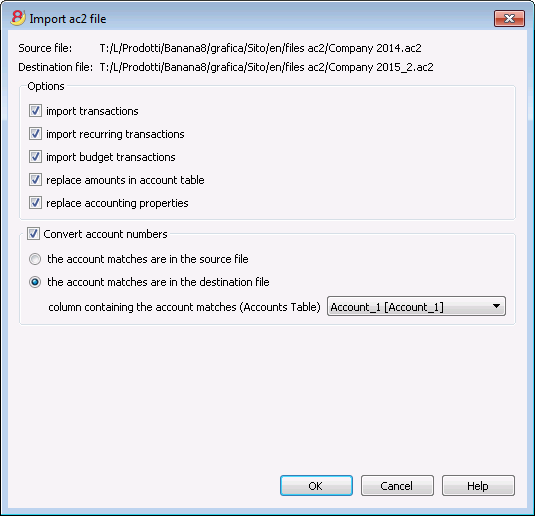
- Define the import options
- Activate the Activate account numbers option, indicating that the account matches are in the destination file.
Subdivision of one account into several accounts
When one transfers to a more detailed chart of accounts, it is probably necessary to subdivide one account into several accounts.
After the import operation, proceed manually in the following way:
- In the Chart of accounts, subdivide the opening amounts, budget amounts and previous amounts of one account into several accounts;
- Go over the transactions, one by one, of the account that needs to be subdivided and assign them to the more specific account, or create extra transactions if it is necessary to subdivide one amount into more detailed amounts;
- Proceed in the same way for the transactions of the Budget table.
Results and possible errors
In case the program reports mistakes (absence of accounts or others), the import operation probably needs to be cancelled and the matches need to be completed;then repeat the import operation.
The program, confronted with different charts of accounts, cannot automatically do extensive verifications and guarantee that all the data have been imported and grouped correctly.
It is therefore strongly advised to manually check the result, making sure that the totals of the Balance Sheet and the Profit & Loss Statement are correct.
Outline to create new file
Language
The language used for the columns headers of the various tables.
Decimal points for amounts
In order to avoid accounting differences, the number of decimal points for the amounts is fixed for each file. Two decimal points are normally used, but there are currencies where decimal points are not required so 0 needs to be inserted.
Decimal points for amounts in foreign currency
If using multi-currency accounting, then it is necessary to define the number of decimal points for the amounts in the foreign currency as well.
Rounding type
The amounts are rounded up or down to the closest whole number. In the case of exactly half (for example: 100.5 / 101.5 / 102.5 / 103.5) the following systems are being used:
- Banking (Half at even) is being rounded up or down towards the nearest even number (100 / 102 / 102 / 104).
- Commercial/Arithmetic (Half up) is being rounded up to the next whole number (101 / 102 / 103 / 104). In accounting, this is the system most used.
- Compatible version 4. A minor precision is being used, which in very special cases, can bring forth a different rounding.
Address fields in accounts table
When this option is activated, the Address view is created in the Accounts table. In this view, the user can enter the addresses of clients, suppliers and members.
Budget Table
When this option is activated a Budget Table is created, where the user can enter his budget transactions.
The user can thus create different accounting files, in different languages, and with different decimal points. In order to change the language or the decimal points once the accounting file has been created, the accounting type must be converted by selecting Convert to new file from the Tools menu.
Create new empty file
In the Examples/Templates section, choose the language/nation and select the New blank file (without data, without chart of accounts)
In this case the file doesn't contain any data. You will need to create a new accounting file starting from zero.
Open, save, copy and backup
Opening a file
- Accounting files can be opened in Banana Accounting if they are on the local computer or if they are accessible through a network.
If they have been sent by email, before opening them you need to move them in a computer folder - Only one user at a time can edit a file
If you edit a protected file or a file already in use by other users, you need to save the file with another name in order to save your changes. - The Banana Accounting program, notifies that you have opened a read-only file in the following cases:
- the file is located on a non-writable disk (CD-ROM)
- the file is located on a temporary non-writable folder
- the file is protected or the user doesn't not have rights to edit it
- the file has already been opened by another user
- the file has already been opened from the same user but in another session
How to look for *.ac2 files
If you don't remember in which directory your accounting files are located, you can use the search Windows Explorer box or the Mac finder search tool.
Find your accounting file on a Windows computer
Banana Accounting files have an .ac2 or .sba extention. The Windows search tool will vary depending on your Windows version.
- Windows 10: click on the search icon on the Applications bar and enter "ac2" or "sba" or your file name and click on the Documents arrow.
- From the Explorer File Manager enter the "*.ac2" extension, the "*.sba" extension or your file name and let Windows look for it.
- When in Banana you get to the Open file dialog window (File menu -> Open), enter the "*.ac2" or "*.sba" extension in the top right search box and then click on the look in the whole PC icon, or select the directory where you want Windows to look for your file.
Find your accounting file on a Mac computer
- When in Banana you get to the Open file dialog window (File menu -> Open), enter "ac2" or "sba" or a word that is part of the file name in the top right search box. With the icons, select where you want to look for your file (in the entire computer or in selected folders).
- Open the Finder and enter "ac2" or "sba"or a word belonging to the file name in the search box.
- Right click on the Finder icon, then click on Search, and then enter "ac2" or "sba" or a word belonging to the file name.
Saving a file
With the Save or Save as... command, the data are saved onto the hard disk. Pre-existing disk data are replaced with the new ones.
- A single file can be saved by one user at a time
The file can be saved by the user only if it is not also being used by other users - Files can be saved anywhere.
You can enter the file name and destination when saving it for the first time or when using the Save as command from the File menu
As a first option, Banana Accounting suggest the Documents folder as destination folder for the .ac2 files, but it can be changed with the Browse button. - If you are managing different accounting files, we suggest you to create a separate folder for each company and for each accounting year.
- Each file can be password protected.
Accounting files (*.ac2)
- Files created with Banana Accounting have an .ac2 extension, regardless the operating system used.
The .ac2 file format is specific for Banana. When saving, all data are compacted and saved in bulk. - Ac2 files are compatible between different operating systems (Windows, Mac and Linux)
You can save a file with Windows, then open it and edit it on a Mac, and then reopen in on a Linux or Windows computer. - Each file can be sent as an email attachment, edited on different operating system and resent to the sender.
- Accounting files are completely separated from the software Banana itself, that has an .exe extension for Windows,
- The installation files for Mac have a .dmg extension and a .deb, .rmp .run .tgz or .appimage extension for Linux.
Automatic saving
Banana Accounting automatically creates and saves your work in a temporary file that ends with ".autosave" . When you press the Save button or you exit the program, this temporary file is deleted. In case your computer should crash or turn off in the middle of your work, it would be possible to recover your data by opening this file.
In order to have the program automatically create this temporary autosave file, the corresponding option should be active (it usually is by default) in the Program Options (you can access them from the Tools menu).
How to copy or move your accounting files
Banana can save your files on any unit seen by the operating system or on a rewritable disc.
From non-rewritable discs (CDs or DVDs) Banana can open the files on a "read only" mode.
All .ac2 files can be moved in different ways:
from one directory to another:
- using Windows Explorer or Mac Finder to locate the directory where your files have been saved
- copying and pasting them in the new destination directory (once you pasted them you can delete from the original directory)
from one computer to another:
- saving the files on a memory stick and then saving them on the new computer:
- open the file to be moved
- from the File menu choose the Save as command, choosing the memory stick as destination unit
- this copy can also be made from Explorer by dragging the accounting file into the memory stick unit
- by sending them as email attachments and then saving them on the new computer
DropBox, Google Drive and other synchronization systems
Banana is compatible with systems such as DropBox and Google that keep files synchronized with cloud storage services.
Banana overwrites *.ac2 files and deletes the *.ac2.bak files. In the deleted files list you will find all *.ac2.bak files previous versions.
Viewing changes
Banana Android works directly with Dropbox servers. If you make changes on your PC, usually you have to wait a few seconds before you see the changes on the server, so also on Banana.
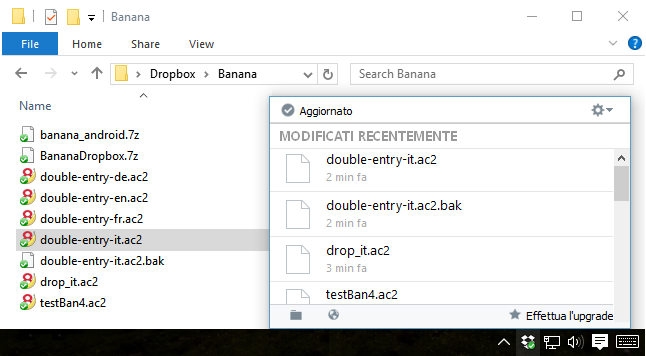
To ensure that the file is properly synchronized with the server, the file on your PC must be marked with the green check mark.
If you do not see the sync symbols (green, red, blue), you have to update the Dropbox application installed on your PC.
Another way to check the synchronization status from your PC, is to click on the Dropbox icon in the bottom bar:
In addition, Android synchronization does not occur while you are working with the app. You must close and reopen it.
Attention: Banana cannot realize if some files are opened simultaneously on more than one computer. It could thus happen that someone erases some data or that someone else adds some new data. Only the more recent copy of the saved file is kept. For this reason we strongly advise to avoid working at the same time on the same file.
Security copies (backup)
We strongly advise you to create external backup copies of your accounting files, in order to prevent a possible data loss, due for example to a computer crash or other causes.
- if you have a Mac computer you can use "Time Machine"
- if you have a Windows computer you can use the "File history" function
You can find other programs on the market that allow you to automatically create a backup of your data.
Saving and .bak files
When saving, Banana Accounting replaces the contents of the existing file, with the more recent data, only if the saving process is successfull:
- Data are saved on a temporary file
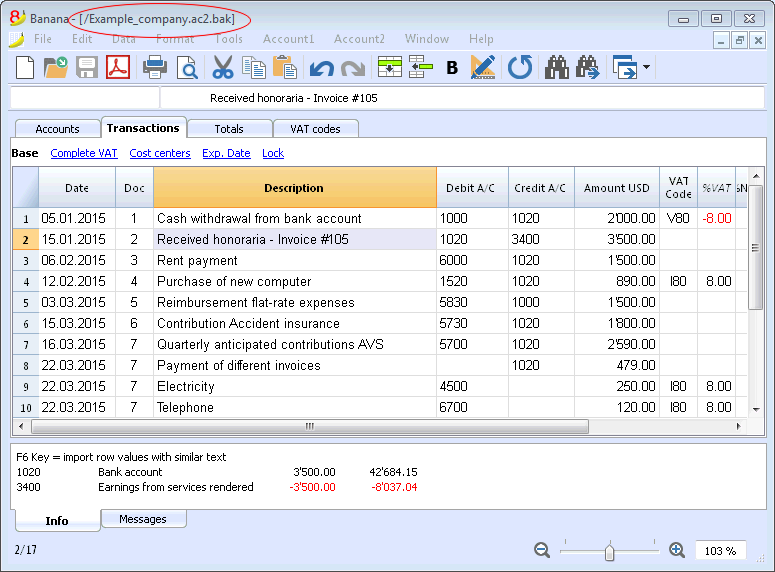
Only if the saving process is successfull the data on your disk are replaced to the existing ones. - If the Create backup copy (.bak) option is activated (Tools menu -> Program options command -> Avanced tab) the program renames the pre-existing file with the same name, adding the .bak extension.
A new file named "filename.ac2.bak" is created, containing the data before the saving process.
If an error occurs during the saving process, if for example the network disk is no longer available, choose another file name for saving your data.
Recover your data from a .bak file
When for a number of reasons you cannot find your accounting file, you can recover your data from the backup copy automatically created by the program. Here is how to proceed:
- open the directory where your accounting file was located
- open the file with a .bak extension. If it is not shown in the dialog window, you need to select the "show all files (*.*)" option at the bottom right of the window
- once the file is opened, save it with a name. Usually the same name as the lost file is chosen.
Damaged .ac2 files
Sometimes a computer crashes due to technical problems or viruses. Sometimes data received by email are compromised or damaged. For these reasons we strongly suggest you to make copies of your files.
If, for technical reasons you have a damaged file, our support team can verify, for a fee, if there are data that can be recovered.
Recover autosave file
This dialog appears when the program closes unexpectedly, and it was not possible to save changes made to the file.
When the program is reopened, it detects that the autosave file (temporary file) has not been canceled, and then asks if you want to retrieve the file.
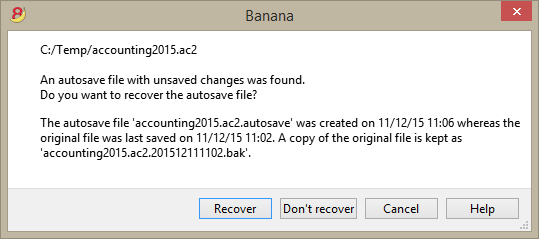
You can choose from the following options:
- Recover
- The autosave file is copied replacing the original file
- The original file is renamed as indicated in the dialog window
- Don't recover
- Both the original file and the autosave file are kept
- The program will not warn you anymore that the autosave file was kept
- Cancel
- Both the original file and the autosave file are kept
- Next time you open this file, the program will warn you that an autosave file with unsaved changes was found
The autosave files that were not recovered will be kept, and will have to be deleted manually.
If the program stops working
If the program is closed normally, it asks whether to save the modified data, and the autosave file is deleted.
However that program may be unexpectedly closed for a number of reasons:
- A power outage or another event that caused an immediate arrest of the operating system
- A problem that led to the crash of the program
- Due to another program or to a situation of the operating system or driver that caused the program to stop.
Try to restart your computer and use the program without other programs.- A flaw in the operating system or a faulty program can cause an interruption of Banana.
- Problem with some Dell computers.
- A computer fault (memory error)
- A virus or some other problem
- A flaw in the operating system or a faulty program can cause an interruption of Banana.
- A problem in the Banana Accounting software
Usually when, repeating the same command always causes the program to crash.
If the program stops in completely different situations, is more likely that the problem is due to a computer or operating system problema (see above)- First of all make sure that you have the latest version of the program
Install the updates if necessary. The problem could have been solved in the meantime
- First of all make sure that you have the latest version of the program
- Due to another program or to a situation of the operating system or driver that caused the program to stop.
Contact technical support
Verify the situation in which the program stops.
- It is important to understand in what situations the program stops, so that technicians can replicate the problem.
- When you contact the technical service:
- Describe the problem and how it can be reproduced - describe the error.
- Enter your system details (you can copy them under Tools -> Program Options -> Info System.
- If the problem occurs in relation to a file, send a copy of the file (removing confidential data).
File properties
When a new file is created, the basic data need to be entered in the File menu, using the File and accounting properties command.
The file properties can vary depending on the chosen accounting type.
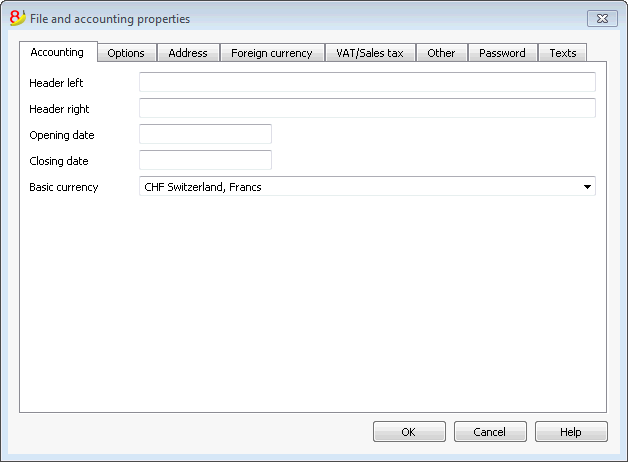
For the explanations of the different tabs please visit the pages hereunder.
Accounting Tab
Left and right headers
These are the two empty cells at the top where any desired text can be inserted which will be used as a header for print-outs (left and right).
Opening date
The opening date is the date when the accounting begins. It can also be left blank. If a date prior to the opening date is inserted when entries are made, the program will give an error message.
Closing date
This is the closing date of the accounting. It can also be left blank. If a date greater than the closing date is inserted when entries are made, the program will give an error message.
Basic currency
The code of the currency in which the accounting is being handled. You can enter any currency code, even the one that are not in the list. When the code of the basic currency is being changed, the program changes the column headers for the amounts in basic currency using the new code.
In the multicurrency accounting files it is mandatory to select the basic currency, which will work as the funcional currency, the one used for the calculation of the Balance sheet and Profit & Loss statement.
Changing the basic currency symbol
If you change the basic currency symbol the program will not change the existing amounts. We advise you to change your basic currency symbol only if you don't have yet entered any opening balances and any transactions.
Accounting file WITHOUT foreign currencies
You can replace the basic currency symbol with the new symbol.
Accounting file WITH foreign currencies
- Replace the currency symbol in the File properties dialog (from the File menu)
- in the Accounts table
- Select the whole Currency column (click on the column's header)
- Use the Find and replace command from the Data menu and enter the old and the new currency symbol - make sure to check the Selected area only option. Replace all the symbols found.
- in the Exchange rates table
Enter the new exchange rates for all the currencies. - Give the Check accounting command from the Account1 menu.
- If there are opening balances or transactions, the amounts and the exchange rates will have to be manually updated.
Options Tab
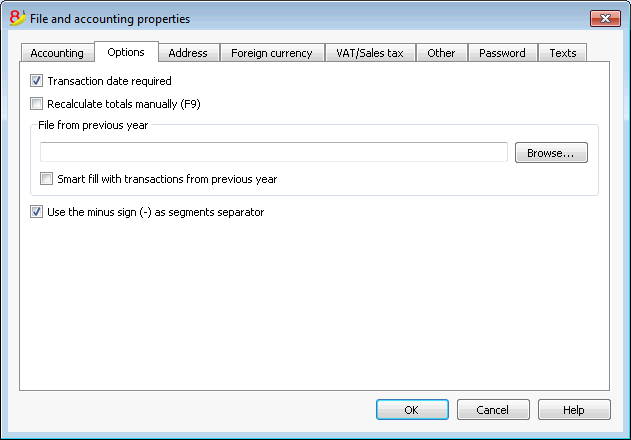
Transaction date required
If this option is activated and then a transaction is entered without a date, there will be an error message.
Recalculate totals manually (F9)
If this option is activated, the program will not automatically recalculate the principal groups of the accounting file, but the user needs to use the F9 key.
File from previous year
By using the Browse button, the user can select a file from the previous year.
Smart fill with transactions from previous year
If this cell is checked, the program keeps the transactions from the previous year in memory, and offers them as Smart Fill while the user inputs new entries.
Use the minus sign (-) as segments separator
When this option is activated, the segments have to be entered in the Transactions table with the minus (-) sign preceding the segment code. When this option is deactivated, the segments need to be entered with the colon sign (:), as in the chart of accounts. The colon needs to always preced the segment code.
Records (+/-) cost centers according to the category
This function is active only for Simple accounting and Cash book. By activating this box, the amount is entered in the cost center (positive or negative) according to the category.
If, instead, this option is not active, in order to enter a negative value, it is necessary to enter a minus sign before the cost center (-CC).
Related document: Text imput, edit and Smart fill
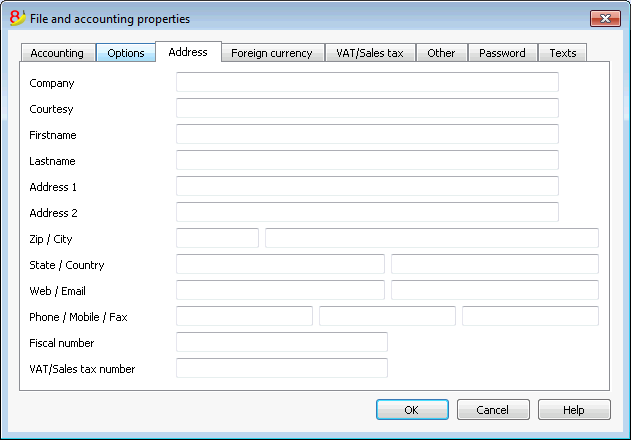
Address Tab
In this tab data about the company or the individual whose accounting is being handled can be entered.
Foreign currency
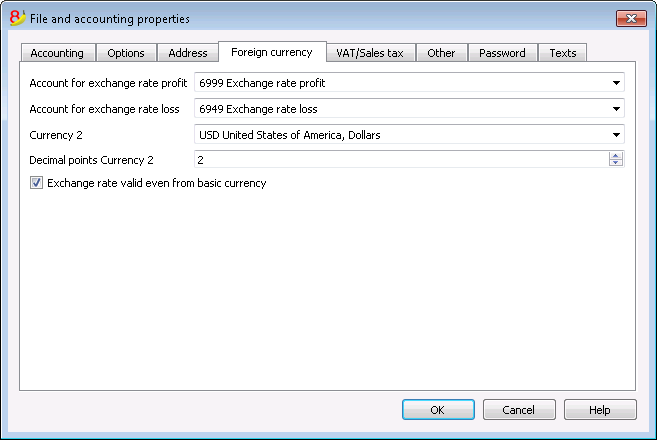
For the explanations of the different tabs please visit the corresponding page Starting a multi-currency accounting.
VAT/Sales tax
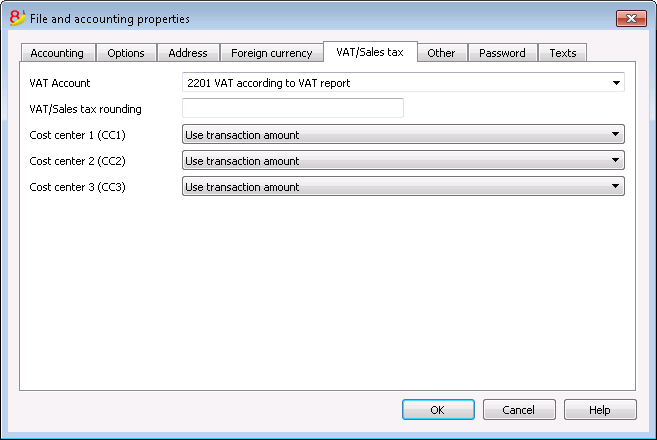
For the explanations of the different tabs please visit the corresponding page File properties (VAT/Sales tax tab).
Other Tab
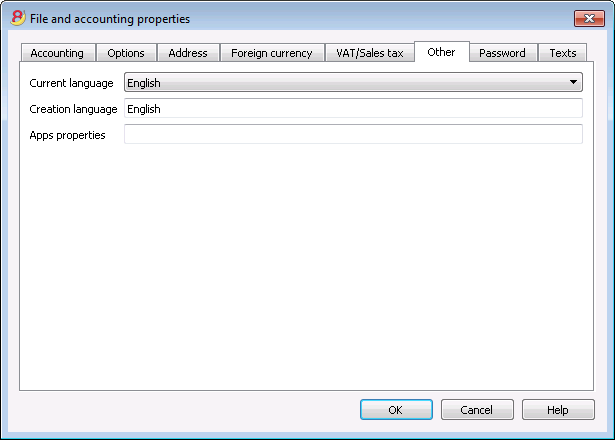
Current language
There are some file texts that the program generates automatically, (e.g. the lines of the Totals table, the transactions on the account card, and the printout of the Enhanced balance sheet); in this tab, the user can indicate the language for these texts (usually the same as the creation language).
Creation language
This is the language chosen and selected when the user creates an accounting file; this language is used for the column headers. If the user wants to change the creation language, then it is necessary to convert the file to a new one using the Convert to new file command in the Tools menu.
Apps properties
List of the activated properties in the Manage Apps dialog. In order to remove an App, delete the corresponding property.
Password Tab
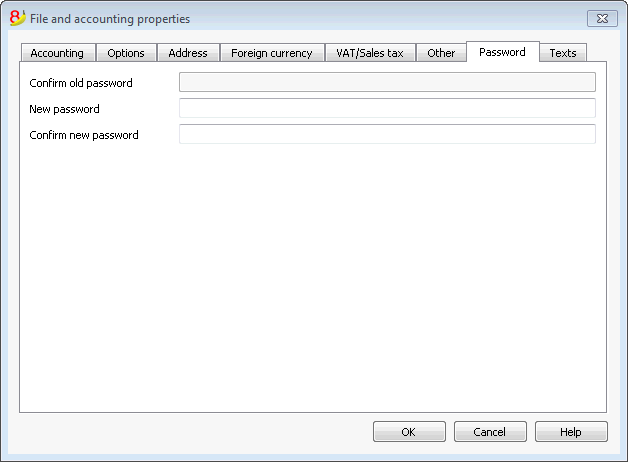
The files can be protected by using a password.
Entering a password in a file that doesn't have a password
- The box Confirm old password is shown in gray.
- Indicate your new password twice (New password and Confirm new password).
- Confirm with OK.
Changing an existing password
- Enter the existing password.
- Indicate your new password twice.
- Confirm with OK.
How to cancel a password
- Enter the existing password.
- Leave the boxes for the new password empty.
- Confirm with OK.
Note
Using a password does not give a high level of protection. In order to render the data truly inaccessible to third parties, it is necessary to have the appropriate cryptographic software.
Text Tab
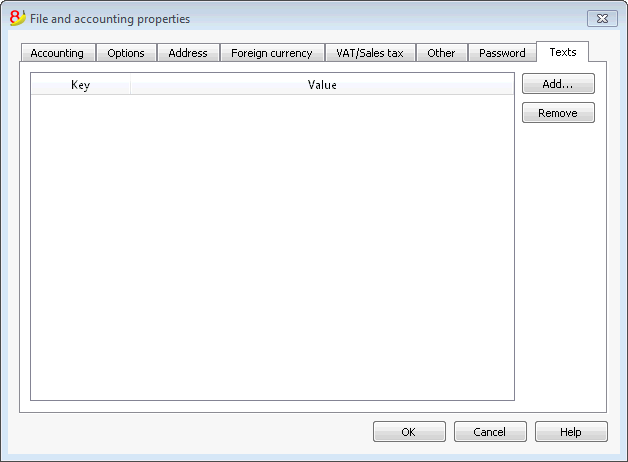
In this tab it is possible to enter different keys in order to save extra information, such as the accountant name, for example.
Key
In this field, input the reference text (e.g.: Address).
Value
In this field, it is necessary to input the value related to the key (e.g.: Ocean Avenue, ...).
Add
This button saves the new entered data.
Remove
This button removes the selected Key.
Create Pdf dossier
In order to create a Pdf file choose the Create Pdf dossier from the File menu (or click on the corresponding icon on the Toolbar).
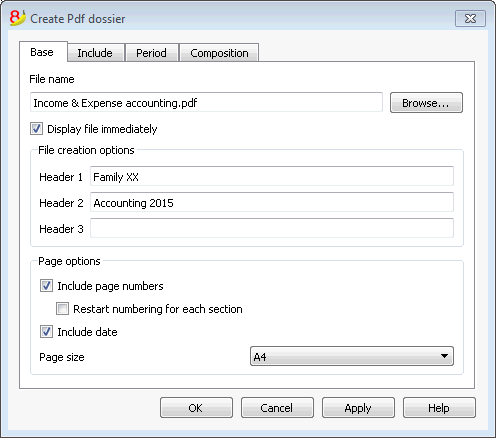
File Name
In this area you need to enter the name of the new file that the program will create to export the data. If, however, an existing file is selected by using the Browse button, the program will overwrite it with the new data.
Display file immediately
As soon as the Pdf file has been created, the software to view it will be launched. In this way, the result of the export can be seen immediately. It is best to remember that browsers like Mozilla and MS Explorer use a cache mechanism for files. When the export is made for a second time, it is possible that the user will see the previous version until the browser Reload button is pressed.
Table creation options
Headers 1, 2 and 3
These are the table headers.
Page options
By activating the page options it is possible to include:
- page numbers
- page progressive numbering
- date
Page size
You can select the page format
Other Tabs
For the explanations of the other tabs, please visit the following pages:
Recent / Favorite files
These commands display the list of recently used files and the favorite files.
In order to eliminate the list of recently used files, click on the File menu, Recent files, and on Clear list recent files.
In order to remove just one single file from the Recent Files list of the Favorites (Start page), position the cursor on the file name, proceed with a right mouse click and select Remove (Mac users should use the key combination Ctrl + right mouse button).
To make a file Favorite:
- Open the desired file
- Click on Favorite files
- Click on Add to list
To edit the list of favorites, click on:
- Favorite files
- Edit list..
- In the window that appears, edit the favorites, by using the buttons: Add, Remove, Open folder.
Associate .ac2 files with the most recent Banana version
When the Banana Accounting program is being installed, the "Associate Banana Accounting 8 with the AC2 file extension" option is activated by default; as a result all the accounting files will be opened with the new version.
If, when clicking directly on the file before opening the program, it should occur that the file gets opened with a previous version of Banana Accounting, this problem can be solved in the following way:
Windows:
- right-click on the file icon
- on the menu that appears select "Open with" and then "Choose Default Program..."
- choose the Banana program, the latest installed version.
Mac:
- right-click (or "ctrl "+ click) on the file icon
- on the menu that appears select "Get Info"
- under "Open with..." choose the latest installed version of Banana, click then on "Change All..." option.
Edit Menu
Adding and deleting rows
To insert blank rows below the selected row, follow these steps:
- Move the cursor above the row where additional rows need to be inserted
- From the Edit menu, select the Add rows command
- In the window that appears, key in the number of rows to insert
- Confirm by clicking on OK
There is still another procedure to add blank rows:
- Move the cursor above the row where additional rows need to be inserted
-
Click on the following icon
 on the Tool bar, one time for each row that you want to add. This procedure is advised when the amount of rows to be added is rather limited. The sequence for the shortcut key is: Ctrl+Enter.
To insert blank rows above the selected row, follow these steps:
- Move the cursor below the row where additional rows need to be inserted
- From the Edit menu, select the Insert rows command
- In the window that appears, key in the number of rows to insert
- Confirm by clicking on OK.
In order to delete one or more rows, select the row or rows that need to be deleted and from the Edit menu, click on the Delete rows command.
Protecting the rows
Using the Protect rows command, from the Edit menu, the user activates row protection to avoid making any changes by mistake.
The protected rows cannot be edited until, by using the Unprotect rows command, the protection is being removed.
To put protection into effect:
- Select the desired row(s) to protect
- From the Edit menu, select the Protect rows command
- Confirm the number of rows to be protected by clicking on OK.
Protected rows have light grey row numbers. In order to edit them again, first remove the protection by the Unprotect rows command in the Edit menu.
Data Menu
Find and Replace
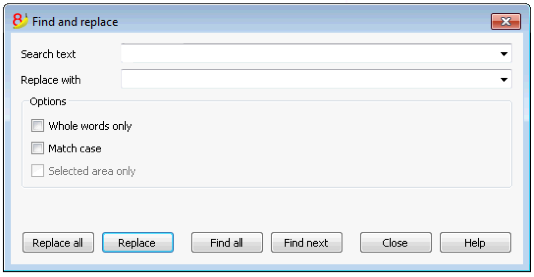
The text to be searched and the text to be used as a replacement should be inserted in the same format as the one displayed in the input field. For example, the amounts should be inserted without the separator for the thousands.
Search text
Enter the text to be searched.
Replace with
Enter the replacement text.
Options
Whole words only
If this box is activated, the program will find whole words only. For example, if the word being searched is Tot, it will not find Totals.
Match case
If this box is activated, the program will make a distinction between capital letters and small letters.
Selected area only
If this box is activated, the program will only search the information in the selected area.
Replace all
This key will replace the desired data throughout the whole document at once. When you need to change data that are being repeated in the Accounts, Categories, Transactions and VAT codes tables (for example, an account number or a VAT code), you can also use the Rename function.
Replace
This key will replace one data at a time.
Find all
Looks for all the information, according to the entered keyword, and displays it in the Information window in the lower part of the screen.
Find next
Looks for the following information item.
Find
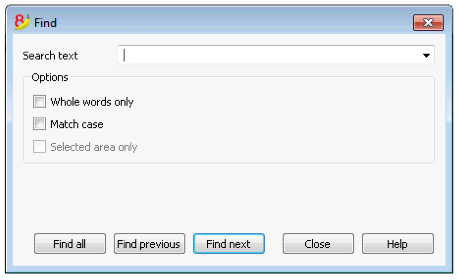
Search text
Enter the text to be searched. Amounts must be entered without separators.
Options
Whole words only
If this box is activated, the program will find whole words only. For example, if the word being searched is Tot, it will not find Totals.
Match case
If this box is activated, the program will make a distinction between capital letters and small letters.
Selected area only
If this box is activated, the program will only search the information in the selected area.
In order to begin the search, click on the Find button. The first piece of information corresponding to the request will be selected. To continue the search and find the next piece of information, select the Search next command from the Data menu, or else use the F3 key.
Rename
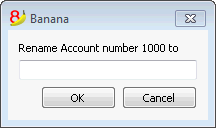
This command allows the user to change the account or category number (accounts or categories table) and the VAT code (VAT Codes table), without having to enter the necessary modifications in the transactions.
In order to rename, you need to:
- position yourself with the mouse on the cell that has to be changed (account/category number, VAT code);
- click on the Rename command from the Data menu;
- enter the new name in the appearing window.
Then, the software operates as follows (for example if you rename an account):
- verifies that there is no other account or group with the same number; if there is it the software will alert and ask if you want to proceed anyway. Please note that it is not possible to have to identical account numbers in the accounting plan;
- verifies where the account to be renamed has been used and makes sure that the rows are not protected or blocked; if they are it will alert that the rename operation cannot be carried forward;
- substitues the account number wherever it has been used, in the tables and in the File properties, with the new account number.
The software does not recalculate any total, simply renames the account number.
Go to
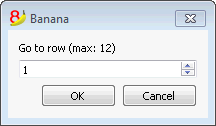
Select the Go to... command from the Data menu to open a window allowing the user to move to a desired row. When a selection table is active (for example, an account card), by using the Go to original row command, the program automatically takes the user to the corresponding row of the Transactions table.
Extract and sort rows (Extract)
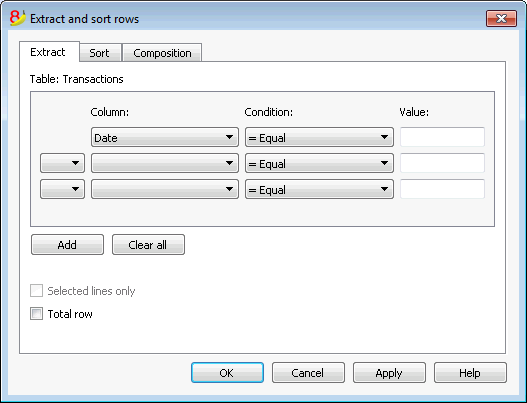
The Extract and sort rows command is available from the Data menu. This command is different from the Sort rows command, since it creates a new table where the result of the extraction or the sort is shown. The rows of the original table will not be changed.
Extract
In the Extract table you can click on the row number (underlined) to return to the row of the original table.
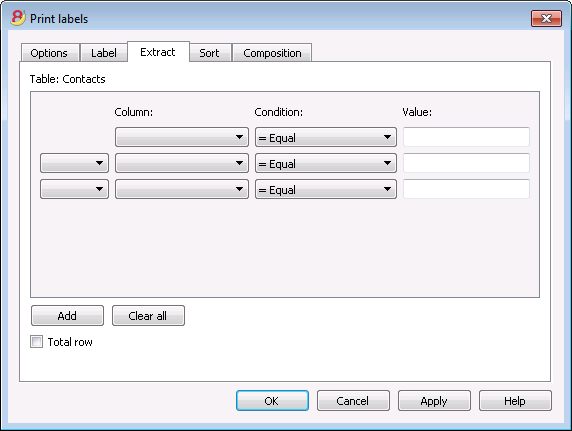
Column
You need to select the column you wish to extract the data from.
Condition
You need to select the condition for the extraction (ex. Greater, less, contains text, starts with, ends with, ...)
Value
In this field you must enter the text you want to use as comparison in relation to the condition (for example, if the condition is = Equal, entering 25.01.2015 as value, the program will extract all transactions with date January 25, 2015).
The value is a date if the selected column was Date, a numeric value if the selected field was Amount, a text if the selected columns was Description.
Add
This button allows you to add new fields for the extraction.
Clear all
This button allows you to clear all the settings you have entered for the extraction.
Sort selected rows only
This option is only available when rows have been pre-selected. If activated, only the selected rows will be sorted.
Total row
If this option is activated, the program will show the total row for the extracted rows with an amount.
Sort
The sorting columns are being indicated. The options are the same as for the Sort rows command.
Composition
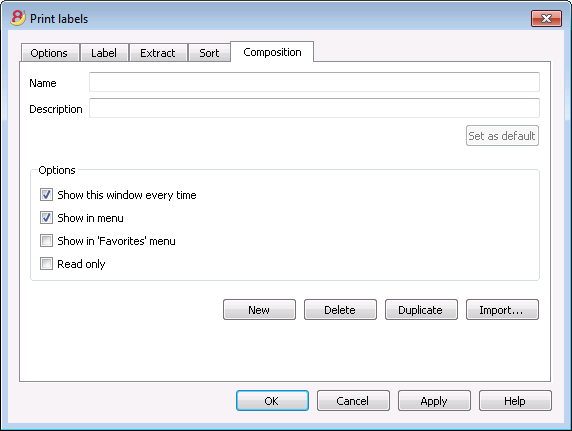
The explanations of this window are available on the following web page: Composition.
Example accounts list
It happens sometimes that you want to have a list with only the accounts.
- Put yourself in the Accounts table.
- Impart the "Extract and Sort" command
- In column, choose "Account"
- Under condition, indicate "Not empty"
In case you wish to have accounts sorted by description
- Put yourself on the "Sort" section
- In the "Sort by" box, indicate the "Description" column
If you want to display only certain columns, you can create a new view with the Tables setup command.
Extract and sort rows (Sort)
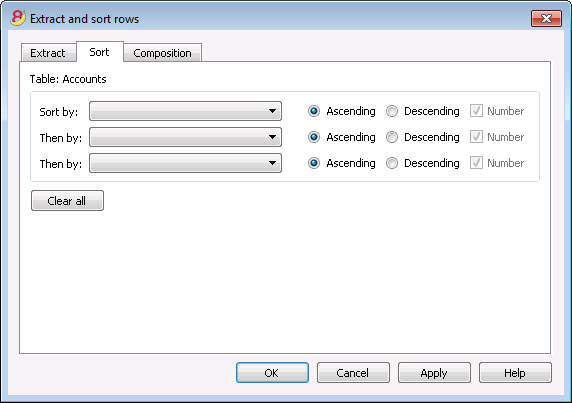
The Extract and sort rows command is available from the Data menu. This command is different from the Sort rows command, since it creates a new table where the result of the extraction or the sort is shown. The rows of the original table will not be changed.
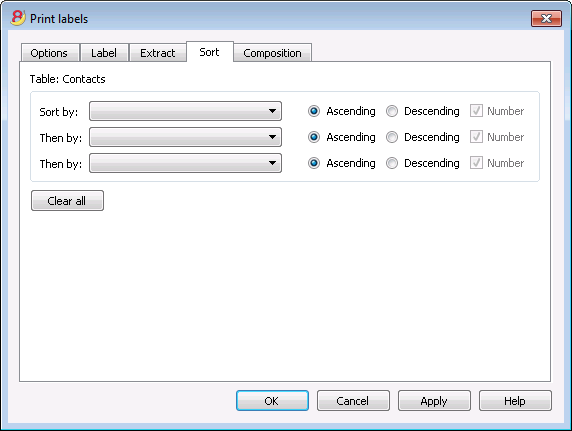
Sort by
You can choose the desired sorting criteria.
Then by
The program allows you to choose two other sorting criteria other than the main one.
Ascending
The rows sorting is done in an ascending order, taking into consideration the selected sorting criteria (date, doc, ...)
Descending
The rows sorting is done in a descending order, taking into consideration the selected sorting criteria (date, doc, ...)
Number
If the column chosen as sorting criteria only contains numbers, you need to check this option.
Clear all
This button allows you to clear all the settings you have entered for the extraction.
Sort rows
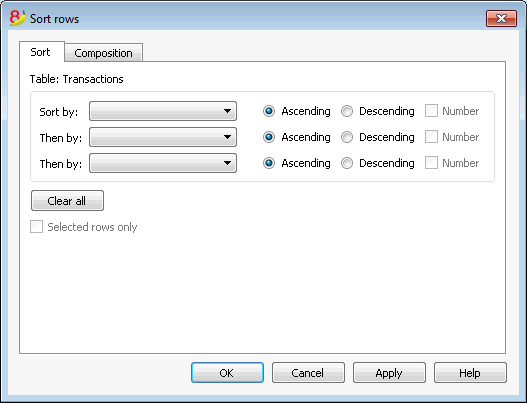
The Sort rows command is available from the Data menu. Please take note of the fact that the Sort rows command is different from the Extract and sort rows... command, since it changes the order of the rows in the table you are currently working on, according to the sort keys you entered. We advise you to be very careful before pressing the OK button, especially if you are working in the Accounts Table, because you might completely change your accounting plan structure.
The rows on the table can be sorted according to the content of the columns. It is possible to enter up to three sorting keys:
Sort by
From the dropdown list choose the desiderd sorting key
Then by
You can here choose an additional sorting key other than the first one
Ascending
The rows sorting will be in an ascending order, according to the selected sorting key (date, doc, ...)
Descending
The rows sorting will be in a descending order, according to the selected sorting key (date, doc, ...)
Number
You need to activate this option if the sorting key you chose only contains numbers
Clear all
This button allows your to clear all settings previously chosen as sorting criteria
Selected rows only
This option is only available when rows have been pre-selected. If activated, only the selected rows will be sorted.
Tables setup
This command allows you to manage
- The Tables:
These are the elements that contain the data in a format or rows and columns.
- The Views:
Indicated under every table.
These are the elements that define the way in which the columns of the table are displayed.
Thanks to the views, one can define which columns need to be visible, the sequence of the displayed columns and the way in which they are displayed.
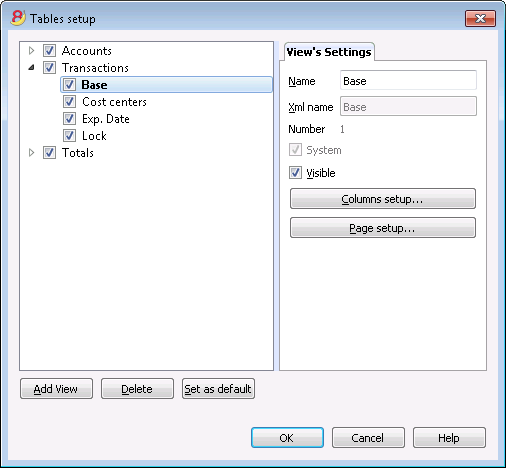
View's Settings
In order to add tables, please go to the Add new functionalities command.
For each table, you can define:
- Name
The name of the table in the file language. This field cannot contain spaces or special characters.
It can only be changed for added tables. - Xml name
The name this is being used for the programming. This field cannot contain spaces or special characters.
It can only be changed for added tables. - Header
The name that appears in thetables list - Visibile
Indicates whether the table is visible or not.
Manage Views
Name
It is possible to enter a new name for the selected View.
Xml name
This is the View name for the Xml export. For system Views this name cannot be changed.
Number
This is a number automatically given to the View by the program.
Visible
When selecting this checkbox the View will be visible.
System
If this checkbox is selected the View is a system View and cannot be deleted or edited.
Columns setup...
Displays the Columns setup page that allows to edit them, both in displaying them as well as in setting them up.
Page setup...
This button leads to the page format settings.
Add...
This button adds a new View to the active table.
Delete...
This button deletes a View.
Set as default
Defines the View that is being used.
Columns setup
New columns
In the new version Banana Accounting Plus, in the Transactions table, we have added new columns for the integrated Invoicing and the new Balance column that identifies on each row, any differences so you can immediately correct them.
We advise you to switch now to Banana Accounting Plus and take advantage of the many new features.
Display Tab
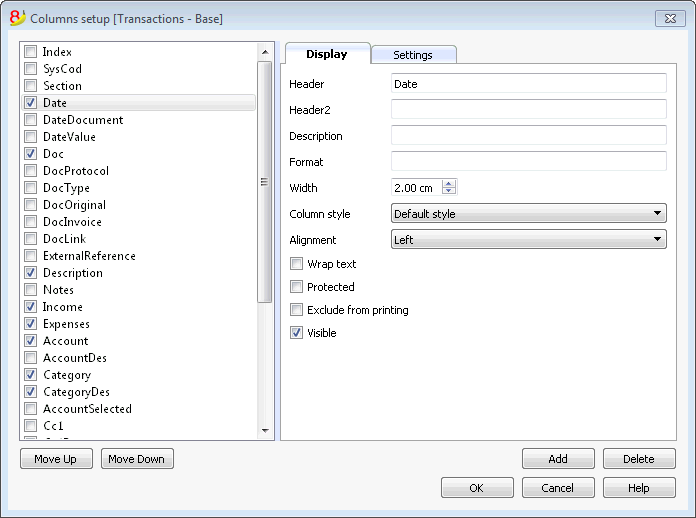
Header
This is the column header.
Header 2
This header is used by the program for only a few fields (e.g. Amount column).
Description
This is the description of the field. This description will be shown as a tooltip.
Format
This is the format to show numbers, date and time (see chapter at the end of this page).
Width
This section defines the horizontal size of the column.
Column Style
This is a drop-down menu that indicates the style to be used (Format, menu, see sub chapters). This style has priority over the style of the row.
Alignment
The user can choose whether to align the text right, left or center in this drop-down menu.
Wrap text
This option allows the user to view the input text on more than one line.
Protected
This option allows the user to protect the entire column so that no data can be input or edited.
Exclude from printing
When this option is activated, the field will be excluded from printing.
Visible
This option allows the user to make column visible.
The tables can be altered. Fields can be added, headers can be changed, and column sizes and the order in which they are shown can be altered.
Move up, Move down
The fields are listed in the order in which they appear on the table being used. The visible fields are the ones with a checkmark.
In order to alter the order in which they appear simply select the field you wish to move and drag it up or down.
Add
This button adds new fields (columns) to the current table. Field added by the user are just information fields; the program does not make any calculation on numeric data.
Delete
This function is used to delete a field (column) from the list. A system field, however, cannot be deleted.
Settings Tab
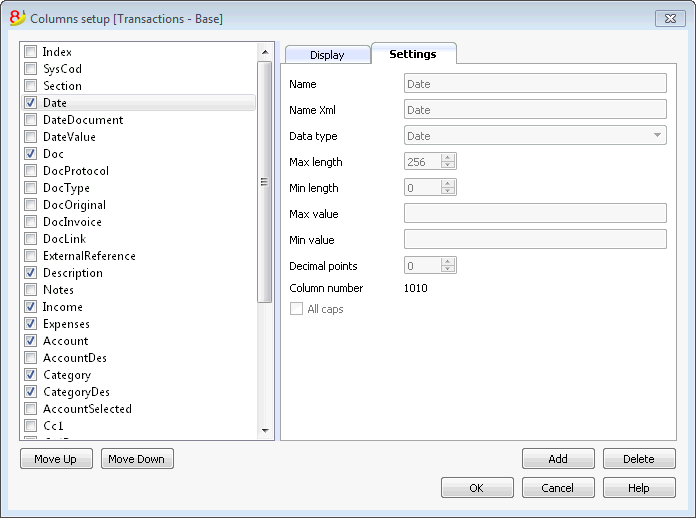
Field name
This is the name of the active field and it is automatically inserted by the program. It cannot be modified.
Field name Xml
This is the name of the active field in the Xml format and it is automatically inserted by the program. It cannot be modified.
Data type
It is possible to choose between the following predefined types: Text, Number, Amount, Date, Time.
Max and Min length
Maximun and minimum field length.
Max and Min Value
It is possible to enter minimum and maximum values (numbers or characters).
Decimal points
It is possible to define the field decimal points
Field number
This is a number automatically given to the field, and has uniquely a technical purpose.
All caps
By clicking this options all fields data will be shown in caps characters.
Date, hour and number format
When the format is modified, the way the date, time and numbers are shown, changes.
If no specific format is specified, the default format of your operating system will be used (date, time and numbers as indicated on the control panel).
In the Format area of the Set up fields/Edit attributes command (Data menu) the user can use other formats. Types of formats, with some examples, are listed below:
|
Date format |
Examples for date |
|
d mm yy |
1 01 15 |
|
dd m yy |
01 1 15 |
|
ddd mmm yyyy |
Fri Jan 2015 |
|
dddd mmmm yyyy |
Friday January 2015 |
|
The letter “d” (day) indicates the day, the “m” (month) indicates the month, and the “y” (year) indicates the year. |
|
|
Time format |
Examples for time |
|
hh:mm:ss:zzz |
04:04:36:089 |
|
h:m:ss:zz |
4:4:36:89 |
|
Naturally the user can also invert the order of the elements making up the date or the time as desired (e.g.: mm dd yyyy). |
|
|
As far as the separators are concerned, the user can choose between all of those available on the keyboard (for example: #, @, -, /, ., etc.). |
|
|
Numbers Format |
Example for numbers |
|
0. |
259 |
|
0.00 |
258.85 |
|
0.000 |
258.848 |
|
The number of decimal spaces in a number field can be edited according to the user’s needs. Actual calculations are made using all the inserted decimal numbers. Rounding is only done for what is shown on screen. |
|
New column
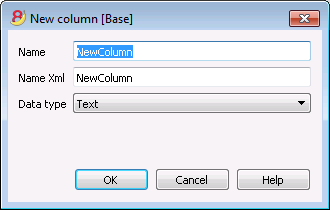
Field name
Enter the field name of the column to add.
Field name Xml
The name of the column to export in Xml and in scripts.
Data type
It is possible to choose between the following predefined types: Text, Number, Amount, Date, Time.
New view
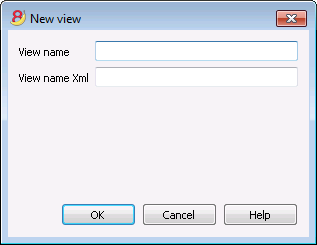
View name
Enter the name of the view you want to add.
View name Xml
This is the view name for the Xml export.
Format Menu
In the Format menu the following commands are present:
Default style
This is the default style for the whole file.
Points
Use different points to define the font size.
Bold and Italic
Modify default style
In order to change the default style:
- attribute the desired style to a row;
- select the Modify default style command from the Format menu
All the rows with the original defaul t style will then be shown in the new default style.
Calculate row height
When the text for a row is very long, the Calculate row height command from the Format menu allows the user to view it completely, adapting the height of the row. Activate this function on condition that, in the field attributes (Data menu, Set up fields command – Edit attributes button), the Wrap text option has been selected.
Calculate all row heights
This command operates in the same way as the previous command except that it works on all the rows in a table instead of only one.
Page break
At any point in a file, the user can insert a page break
To insert a page break:
- place the cursor on the first row where the new page is to be created;
- open the Format menu;
- select the Page break command
To remove a page break:
- place the cursor on the row with the page break;
- open the Format menu;
- select the Page break command again
Highlight rows with colors
In order to highlight the rows:
- Select the rows to be highlighted and on the icon
 , click on the first symbol if you want to color the background, and on the second one if you want to color the text.
- In order to deactivate the color, select the row(s) and click on No color (present in the menu of each color).
Tools Menu
File info
The File info command, from the Tools menu, displays the characteristics of a file.
Columns
By activating the Complete view also the Xml columns are displayed, through which it is possible to transfer the values automatically when exporting the table.
- Section: the Group name of the values
- ID: the specific and explicit identification of the value
- Description: contains an explanation of the value
- The rows in bold print are the section titles that group the different elements together
- Value: the formatted value
- Section XML: The name of the section in English
- ID XML: the identification in English
- Value Xml: the field contents in Xml format.
The Section XML and the ID Xml identify the value unambiguously.
Add new functionalities
The Add new functionalities command is in the Tools menu. ff
The available option may differ according to the file type.
Add a new simple table
It allows you to add tables completely manage by the user.
Once is added, the table cannot be removed anymore.
You need to indicate the table's name.
The table will have two predefined columns:
- Id column - to indicate a selection group
- Description column - to enter a text
Inside the table you can add new columns with the Columns setup command from the Data menu.
New Documents table
Information are available at the Documents Table page.
Add addresses columns in the Accounts table
For accounting files.
This functions allows you to add, in the Accounts table, specific columns to enter clients, suppliers, or members addresses.
The program will add in the Accounts table the following items:
- the Addresses view, where the addes columns are visible
- the columns that allow you to enter addresses data and other information
- In order to make one or more of these columns visible also in other views, you need to use the Columns setup command from the Data menu.
- In order to create views with specific columns, you need to use the Tables setup command from the Data menu.
Add Budget table
For accounting files.
This function adds a Budget table, where you can enter budget transactions.
The program will do the following operations:
- Add the budget table, that will show the budget data indicated in the Accounts table (if present)
- Lock the budget column in the Accounts table
From now on, the amounts contained in this column, will be calculated based on the budget transactions and on the period defined in the File and accounting properties.
More information are available at the Budget page.
Edit the VAT Amount type column in the transactions
For accounting files with VAT management.
This function allows you to edit the Amount type (VAT amount type) in the Transactions table.
This column allows you to enter, for each transactions, when it is necessary, one of the following VAT amount types:
0 (or empty cell) - it means VAT included (with VAT/taxes)
1 = VAT excluded - it means VAT excluded (without VAT/taxes)
2 = Tax amount - the transaction amount is considered 100% VAT/taxes amount
For each transaction, the programs automatically fills in the data as setup in the VAT Codes table (for each code). If however, exceptionally, this needs to be changed, you can manually enter 1 or 2 in the Amount type column.
Program options
In the Program options window, several technical options are possible for the accounting file.
In the following pages you will find more detailed information.
Interface
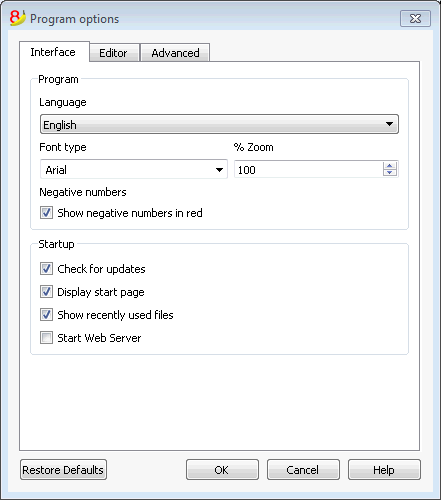
Program
Language
The Program Language is the language used by the program. Use this drop-down menu to select a language if the user wants to use a language different from the default or if the default is not available.
Font type
This drop-down menu allows the user to select the desired font.
%Zoom
If the user wants the data on the table to be shown in another size, adjust the percentage of Zoom here.
Show negative numbers in red
The negative numbers and amounts will be shown in red in the tables.
Startup
Check for updates
This option establishes a connection to the Banana.ch SA website and checks if there is an update compared to the version that is used.
Display start page
The news start page is shown.
Show recently used files
In the File menu, all the most recently used files are listed.
Start Web server
Makes it possible to access Banana Accounting data through external programs.
Editor
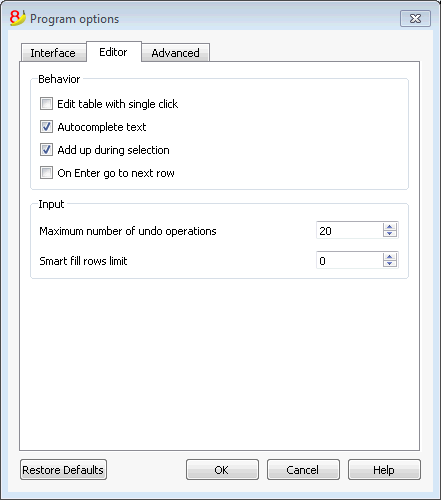
Behavior
Edit table with single click
By activating this option, a single click on the selected cell is sufficient to enter in the modification mode. If the function is not activated, you have to double-click on the cell in order to enter in the modification mode.
Autocomplete text (Smart fill)
By activating this option, the program automatically selects the first draft text in the drop down list and automatically fills it in the row where you are.
Add up during selection
By activating this option, the program will add up the selected amounts. Deactivate this function if this instantaneous addition slows certain operations down. One can select non-adjacent amounts by holding down the Ctrl key while selecting individual cells with the left mouse button.
On Enter go to the next row
By activating this option, the cursor will place itself on the next row when pressing the Enter key.
Input
Maximum number of undo operations
Insert the maximum number of undo operations (one at a time) when using the Undo command from the Edit menu.
Smart fill rows limit
When inserting data, the program reads the data that has already been entered and tries to suggest how to complete an entry. In cases where there are many rows, this function could slow down the process.
The user can define a limit for the number of rows, above which the smart fill will not be used. If there is no value entered or zero, smart fill will always be used.
Advanced
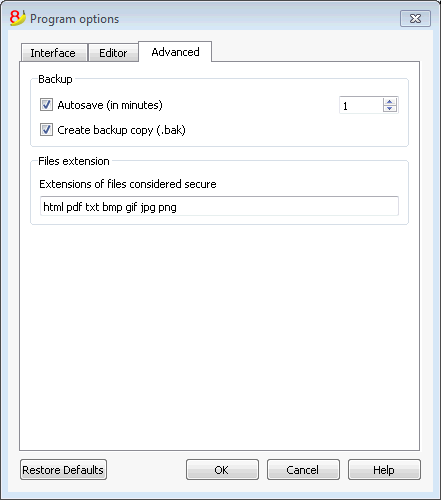
Backup
Autosave (in minutes)
This option allows saving the file automatically according to the desired frequency (in minutes). The program saves the data in a file called auto backup + file name. If the program or the computer crashes, the data can be recuperated by opening this file and saving it with a name (Save as...) from the File menu.
Create backup copy (.bak)
When the user saves to disk using the same name, the version of the file that already existed is renamed with a .BAK extension.
Files extension
Extensions of files considered secure
This option defines the file types that the software consents to open with a double click on the DocLink column of the Transactions table. This prevents from opening non-secure files by the program.
Restore Defaults
If some settings have been altered, by using this button, the default settings will be restored.
Developer
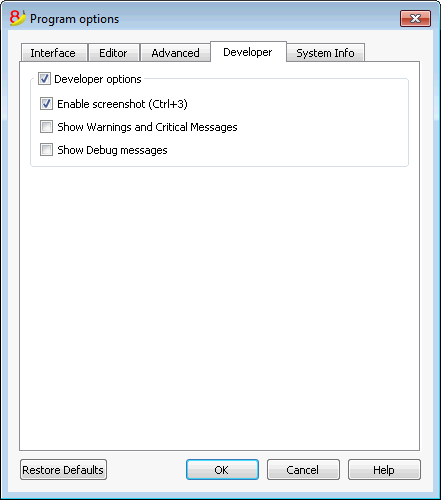
Developer options
This tab includes useful options fors cripts, apps and http pages developers for Banana Accounting.
Enable Screenshots (Ctrl+3)
If this option is activated, with the key combination Ctrl + 3 it will be possible to save screenshots of the program tables and dialog windows.
Show Warnings and Critical Messages
If this option is activated the program will show warning and critical messages.
Warning and critical messages allow to check that the program is working properly during scripts or add-ons execution or during web server calls. This option is meant for scripts, add-ons or http sheets developers.
Show Debug messages
If this option is activated Debug messages will be shown to the user.
This option needs to be activated only if asked by the Banana Accounting technical support.
System Info
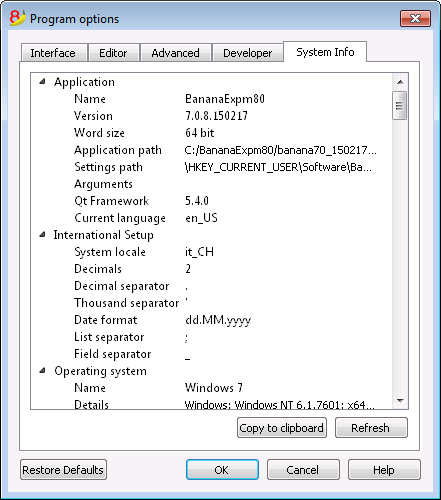
The System Info card displays information on the Operating System and the work environment. Our technical support might ask for this information. In this case, click on the "Copy to Clipboard" button and paste the data in the e-mail or the contact form.
Apps Menu
Banana Accounting applications are Javascript applications that use Banana specific programming interfaces (API Application Program Interface).
Thanks to the Banana applications, users have the ability to add new extensions that cover a wide range of needs: reporting, calculating, export, import and much more.
In order to see all available Apps and for more information, please visit the BananaApps list page.
Apps Menu
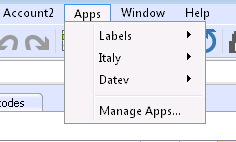
The Apps menu allows you to run the applications and manage them (add, remove, enable, ...).
Only applications that fulfill the necessary requirements are listed in the Apps menu:
- Applications of the same type of the current file
- In the File properties, they should have the properties required by the Banana application
You can assign the required properties to the current file with the Apply property button.
Add/Install a Banana App by downloading the file
In order to use a Banana application, you first need to add it in the Info window list of the Apps menu::
- Download and save the application file on your computer
- You can choose freely where to save the Banana App file. Usually:
- Use the Accounting directory, in case the file relates to a specific accounting file
- Create a directory for the BananaApps, where the applications that are being used for more than one accounting can be saved.
- The Banana application is a text file
If you click on the link containing a Banana application, you will see the Javascript program.- Use the Save page as command from your browser
- Or, instead of clicking on the link, place yourself on the link, right click and choose the Save destination command
- You can choose freely where to save the Banana App file. Usually:
- Add the Banana application to the list of available applications:
- Apps menu -> Manage Apps...
- Manage Apps button (at the bottom of the dialog window)
- Add from file button (at the bottom of the dialog window) and select the previously saved file (file with .js extension)
- Click on the Open button.
How to execute a Banana application
- Start Banana Accounting 8
- Open the desired accounting file
- Click on the Apps Menu
- Click on the application that appears in the menu
The program executes the application automatically.
Develop/Create a new application
You need to create a text Javascript file matching the requirements for the Banana applications.
In order to write the text file we advise you to use a Text Editor specific for programming, also available for free (such as, for example, Notepad++).
In order to develop a Banana application, it is better to start from an existing project.
- Start from an existing project form the github.com\BananaAccounting site
- Refer to the documentation for developpers on our website
- Install the application with the Manage Apps command
Manage Apps
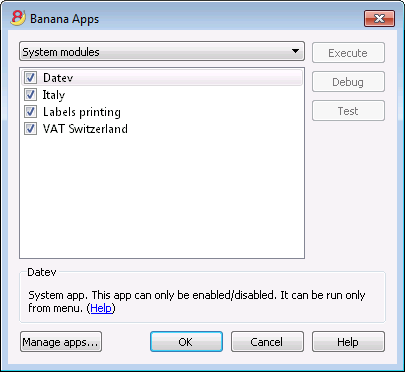
This dialog window allows you to install, remove and execute Banana applications.
List of available applications
In this list you can find all the application that you added (installed).
Enable/Disable
By activating/deactivating the checkbox next to the application name, you will enable (disable) the applications.
Only enabled application will be visible in the Apps menu.
If an application appears in a light grey color, it means that the program does not find the Banana application file. If the file has been moved, you need to remove the application and add it again.
Information on the selected application
The program gives the following information:
System applications
The system applications are those included in the software that can be enabled or disabled:
The other applications listed are the ones installed by the user.
Application ID
The internal application ID used to save the application settings
The required file type
The file type that the application requires to be executed.
This is the directory number. 100.* means that the application requires a double entry accounting file.
Properties of the required file
A text that must be entered with the Apply properties button or manually in the File properties.
Apply properties
Enters, in the Properties of the active file, the property required by the application.
If the button is not active, it means that the current file type is not supported by this application.
Side buttons
Execute
Runs the selected application.
Debug
Run the selected app in debug modus.
Test
Opens a dialogue with details such as id, date, author, etc. of the App.
Lower buttons
Manage Apps
Opens a dialog window where you can add or remove the Apps.
Help
Opens the Help page of the App.
Notes
The Apps management is not yet as smooth as we would like it to be; we are working to improve it.
Print label
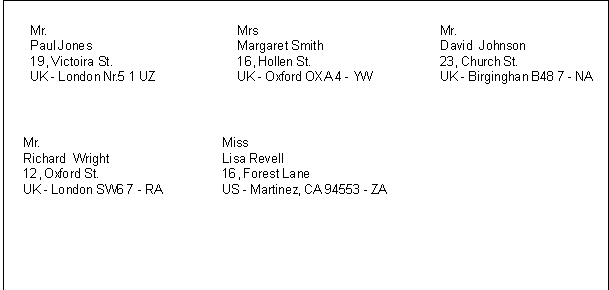
From the Labels -> Print command from the Apps menu, you can print the addresses. In the different tabs you can choose different settings, from the label format to le selection of the addresses to be sorted and printed. Each setting can be saved with the Compositions.
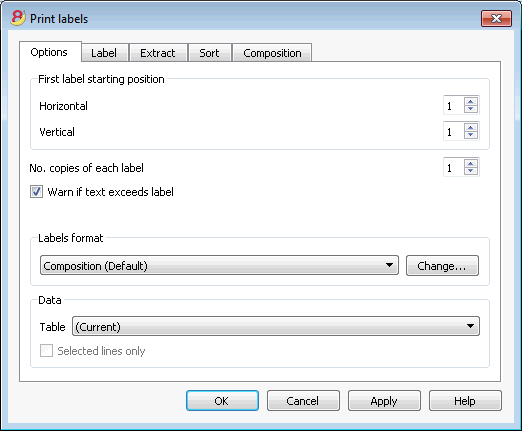
For the explanations of the different tabs, please consult the following pages.
Options
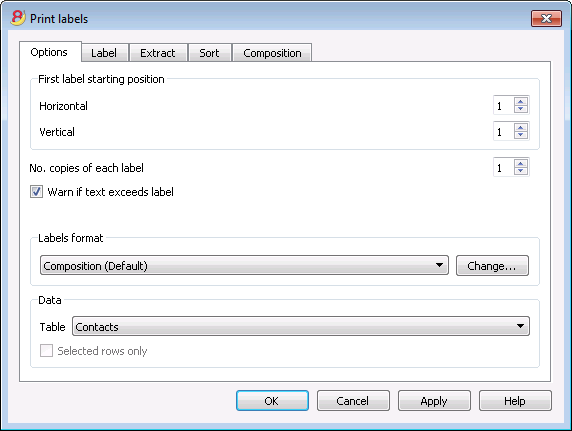
First label starting position
Decide on the position of the first label. For example, if 1 is entered in the horizontal and vertical fields, it refers to the upper left-hand corner of the page.
Number of copies for each label
The value of 1, in this field, means only one copy of each label is wanted.
Warn if text exceeds label
If the text goes beyond the margins for the label, the program will warn the user by sending an error message if this cell is activated.
Labels format
You can choose between the label formats available in the list.
If the list doesn't have the format you wish, through the Change button, you can access the Label format dialog windos where you can choose your desired settings.
Data
Indicate the data source for the labels to be printed:
- Table - the current table data will be printed. If a data extraction occurred, only the extracted data will be printed.
- Addresses - all table addresses will be printed
- Selected rows only - only the earlier selected addresses will be printed.
Label
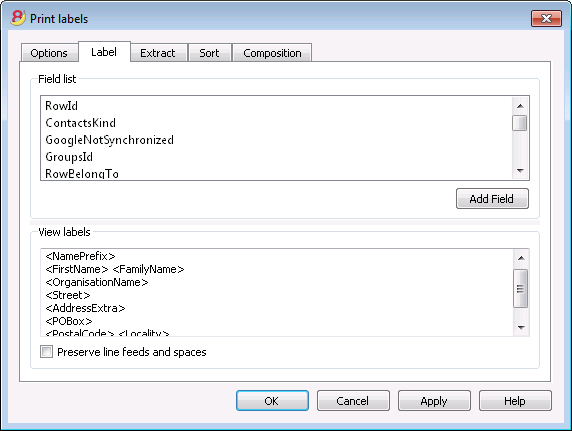
Field list
This is a list of all possible label fields; to insert a field, it is possible to work in two ways:
- Double-click on an element from the list
- Click on an element from the list, confirming with the Add Field key.
The field selected will be inserted at the position of the cursor in the View labels area. One can directly insert fields by writing the field name between the < Less and > Greater symbols.
View labels
Shows the disposition of the fields. The entries "<NAME FIELD>" will be replaced with the corresponding value of the table.
The symbols Greater and Less are considered field delimiters. In order to make them appear in the text
write "\<" for "<";
write "\>" for ">"
and write "\\" for "\"
Preserve line feeds and spaces.
In case this option is deactivated, the program does not take eventual spaces and empty rows in consideration.
Extract
Sort
Composition
Labels format
From the Apps menu, Labels command, Formats option, you can access the labels setup.
The program already offers many predefined label formats; it is however possible to setup personalized parameters through the Default command.
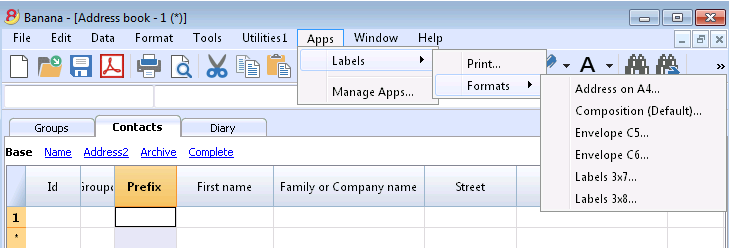
The program already offers many predefined label formats; it is however possible to setup or edit the default parameters, as well as your customized ones, through the Composition (Default) command.
Page settings - Options
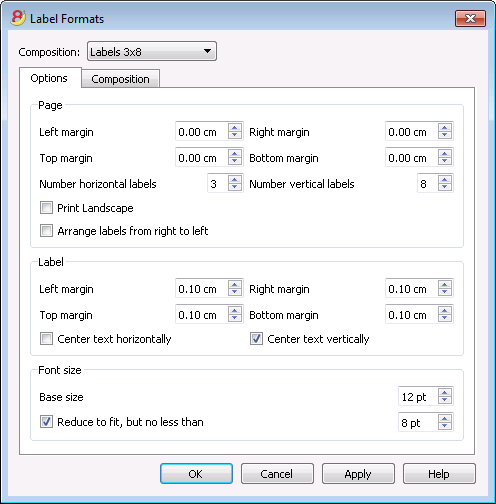
Page
Margins
Input the size in centimeters; if no size is entered, the margin sizes will be zero.
Number of horizontal labels
Input the number of horizontal labels there are on the page.
Number of vertical labels
Input the number of vertical labels there are on the page.
Print Landscape
The page will be printed horizontally if this cell is activated.
Arrange labels from right to left
The labels will be printed from right to left and from top to bottom.
Label
Margins
It is possible to input a margin for each label; the values for the label margins must be input in centimeters.
Center text horizontally
Select this option to horizontally center the text for each label in the cell.
Center text vertically
Select this option to vertically center the text for each label in the cell.
Font size
Base size
This field shows the default font size.
Reduce to fit, but no less than
The program calculates the maximum font size possible for a given label, starting from 14 points all the way down to 8 points. The calculation is made taking into account both the height and width of the label. If a label has a line that is too long (or has too many rows) to be printed, then an error message will appear in the message window. Even if it is incomplete, the label will still be printed.
Note:
the printers will not print on the whole surface of a page because they need minimum margins. The program tries to adapt the single labels to the margin values required by the printer.
Page settings - Composition
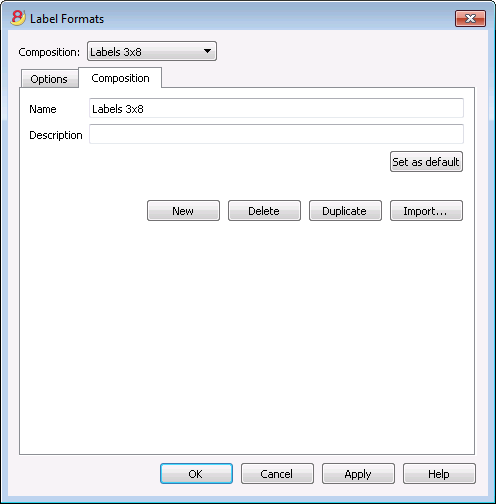
All the settings that have been activated in the "Options" tab can be saved by using the Compositions and can be displayed when needed.
For more information on this section, consult the Composition page.
Help Menu
The Help menu gives access to the followings commands:
- User's guide - access to all documentations and explanation of all technical and accounting topics
- Keyboard shortcuts - list of all keyboard shortcuts with detailed use description
- Check for updates... - access to our website to check if there are newer versions of the software
- Support center - access to Banana support web page
- Feedback - link to our website contact form where you can leave a feedback
- Register - access to Banana web page for users registration
- Manage license key - allows to enter the license key for the program
- About Banana Accounting - access to technical information about the program such as version number, serial number, Copyright.....
Keyboard shortcuts
You can also consult the list of keyboard shortcuts directly from the program, by choosing Keyboard shortcuts from the Help menu.
Short-cut Keys
|
Accounting Keys |
Description |
|
F9 |
Perform simple recheck. |
|
Shift+F9 |
Perform global recheck. |
|
F6 |
This key executes different functions depending on the column the user is working on. The functions are explained in the information window. |
|
Alt+ Left click |
Display the Extract rows table or the Account card table when clicking on an account number. |
|
. (Full stop/Period) |
On a date column insert the current date. |
|
Editing Keys |
Description |
|
Enter, Tab |
Confirming keyed-in text and advance one cell. |
|
Alt+Enter |
Confirming keyed-in text and advance one row. |
|
Shift+Tab |
Confirming keyed-in text and return to previous cell. |
|
F2 |
Edit content of cell. |
|
Double click |
Edit content of cell. Under the program options you can select to edit content of cell with a single click. |
|
Backspace, Space |
Delete content of current cell and edit the content. |
|
Backspace |
Delete preceding character. |
|
Del |
Delete subsequent characters. |
|
Ctrl+C |
Copy selected text or cells. |
|
Ctrl+V |
Paste copied text or cells. |
|
Del |
Delete content of selection. |
|
not assigned |
Delete text from the cursor point to the end of the cell. |
|
F4 |
Copy previous cell from same column. |
|
Shift+F4 |
Copy previous cell from same column and advance one cell. |
|
Ctrl+Shift+C |
Copy selected rows. |
|
Ctrl+Shift+V |
Insert copied rows. |
|
Ctrl+- |
Delete selected rows. |
|
Ctrl++ |
Insert rows before position of cursor. |
|
Ctrl+Enter, Ctrl+Return |
Add one row below position of cursor. |
|
Moving keys |
Description |
|
Left |
Scroll towards left. |
|
Right |
Scroll towards right. |
|
Up |
Scroll up. |
|
Down |
Scroll down. |
|
PgUp |
Scroll up one screen page. |
|
PgDown |
Scroll down one screen page. |
|
Home |
Scroll to beginning of row. |
|
End |
Scroll to end of row. |
|
Ctrl+Home |
Scroll to top-left angle of table. |
|
Ctrl+End |
Scroll to bottom-right angle of table. |
|
Ctrl+Left |
Moves towards left to the edge of the current data region. |
|
Ctrl+Right |
Moves towards right to the edge of the current data region. |
|
Ctrl+Up |
Moves up to the edge of the current data region. |
|
Ctrl+Down |
Moves down to the edge of the current data region. |
|
Alt+PgDown |
Next view. |
|
Alt+PgUp |
Previous view. |
|
Ctrl+PgDown |
Next table. |
|
Ctrl+PgUp |
Previous table. |
|
Ctrl+Tab |
Next window. |
|
Ctrl+Shift+Backtab |
Previous window. |
|
F5 |
Scroll to desired row by keying in row number in active window. |
|
Shift+F5 |
Go to original row. |
|
Selection Keys |
Description |
|
Shift+PgUp |
Select column moving upwards, page by page. |
|
Shift+PgDown |
Select column moving downwards, page by page. |
|
Shift+Left |
Select row to left. |
|
Shift+Right |
Select row to right. |
|
Shift+Up |
Select upper column. |
|
Shift+Down |
Select lower column. |
|
Shift+Home |
Select back to start of row. |
|
Shift+End |
Select forward to end of row. |
|
Ctrl+Shift+Home |
Select back to top of table. |
|
Ctrl+Shift+End |
Select forward to end of table. |
|
Ctrl+A |
Select entire table. |
|
Other Keys |
Description |
|
Ctrl+F4 |
Close active window. |
|
not assigned |
Exit program. |
|
Ctrl+N |
New file. |
|
Ctrl+S |
Save. |
|
Ctrl+O |
Open. |
|
Ctrl+P |
Print. |
|
Esc |
Cancel operation. |
|
Ctrl+Z |
Undo operation. |
|
Ctrl+Y |
Redo operation. |
|
Ctrl+F |
Find. |
|
F3 |
Find next. |
|
Ctrl+B |
Bold text. |
|
Ctrl+I |
Italic text. |
|
F1 |
View help. |
|
Multimedia keyboard |
Is performed by |
|
Function key (eg. F6) |
Press the fn key as well as the corresponding function key (e.g. Fn+F6). |
Error messages
If the program shows error messages:
- Update your software to the latest available version, by downloading it at the following page:
http://www.banana.ch/en/node/3215 - Check that the opening balances are correct
- Recheck the accounting file by pressing Shift+F9
- If you have a multi-currency accounting, check that the exchange rate differences have been calculated
- Search for differences in the transactions with the Search for transaction differences command from the Account1 menu.
Favorites menu
The names of all the created Compositions appear in the list of the "Favorites menu". When it is necessary to display or print a favorite, just select it from the list of the Favorites menu, without having to edit or modify its configurations.
When you have created compositions for the first time, in order to display them in the Favorites menu, you have to close and reopen the accounting file.
Composition
Compositions are saved personalized settings that can be used at a later date.
It is possible to create Compositions for the following accounting data:
- Account cards
- VAT report
- Enhanced Balance Sheet
- Enhanced Balance Sheed by groups
- Reports
- PDF dossier
- File export
- Extract and Sort rows
- Addresses / Labels
How to obtain Compositions
Compositions can been obtained mainly through the Account1 menu when it is about the Accounting cards, the Enhanced Balance sheet, the Enhanced Balance sheet with groups, the Reports and the VAT report, and from the File menu for the compositions concerning Create Pdf dossier and Export file.
- Once the document to be created has been chosen, start from the corresponding menu (Ex. Account cards or Enhanced balance sheet by groups...) and click on Default
- from the dialog windows that appears click on Composition and on the New button
- enter the name of the new composition
- check the desired options
- click on the Apply button
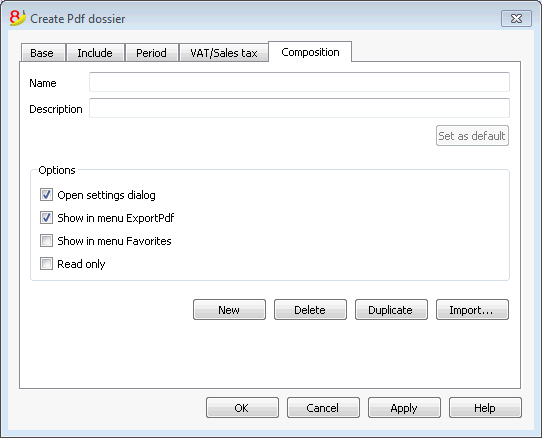
Each composition, once created, will appear in the menu of the corresponding command and can be edited, renamed, duplicated or deleted.
Name
Enter a name to identify the composition (for instance, Quarterly Report).
Description
Enter the description for the composition.
Show this window every time
If activated (default), when selecting a composition from the menu, the dialogue for editing the settings will be shown. If not activated, the preview of the requested report (Balance sheet, report, etc.) will be shown directly.
Show in menu... (depending on the menu/command in which one is being positioned)
If this option is activated, the composition will appear in the menu of the command.
Show in 'Favorites' menu
If this option is activated, the composition will appear in the Favorites menu.
Read only
If this option is activated, it will not be possible to edit the settings.
New
This button allows you to create a new composition.
Delete
This button allows you to delete an existing composition.
Duplicate
This button allows you to duplicate a composition.
Import
This button allows you to import a composition from another Banana Accounting file.
Apply
This button allows you to save the chosen settings for the new composition.
Display in the starting menu
According to the menu you are in, the Default composition and your personal saved compositions will be shown.
Composition (Default)
This is the composition used by default from the program, if no other composition has been created.
In the following example the menu of the Accounting reports is shown.
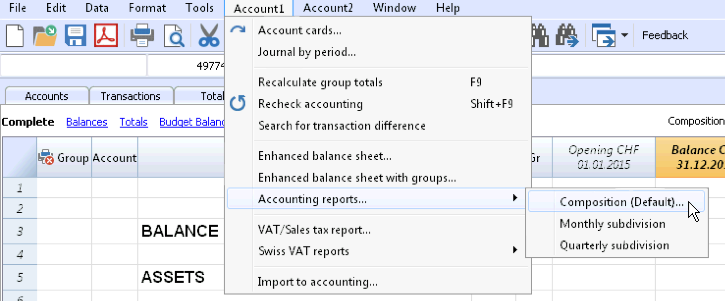
Direct access to the compositions
In the tables where the compositions are being shown and in the previews, the composition menu and the settings icon are being displayed. These make it possible to easily move from one composition to the next and provide rapid access to the settings in case you want to edit these.
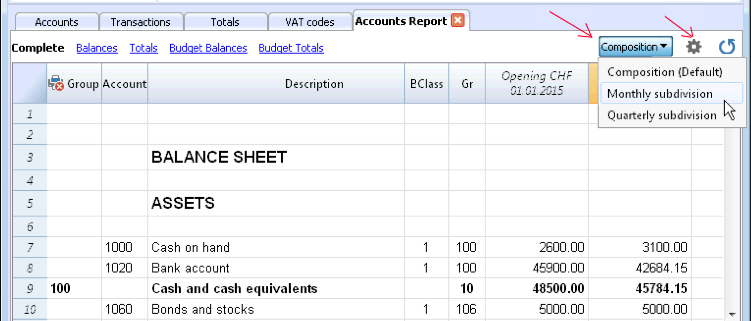
Export
With Banana accounting you can export in different formats, either the data of a single table of the whole file:
Export rows
Choose the Export rows command from the Data menu in order to export the content of a single table.
If you select some rows before launching the command, then the Export selection only option will be activated.
Export file
Chose the Export file command from the File menu in order to export more than one table. In the dialog windows that appears you will find the following tabs:
- Specific tabs of the exporting format
- Include tab, to define the tables and the reports that must be included in the export
- Period (Accounting) tab, to define the period
- VAT tab (in the accounting files with VAT management)
- Composition tab
Export formats
There are different formats available, each with its own specific options:
- Pdf
This format allows to export all accounting file content in a unique pdf file. - Excel
This format allows to create Excel spread sheets, comparisons, budgets, index calculations, Balance Sheet analysis, charts directly linked to accounting values. - HTML
With this format the data and accounting statements can be easily accessed with an Internet browser (Explorer, Mozilla, Opera).
This format fully complies with the legal requirements related to long-term archiving of accounting data. - XML
This format is the standard used for exchanging data. The accounting data can be easily read and reused with other programs or with XSLT style sheets. - Export rows in TXT
This format allows to export the table rows in a text format.
Export in Excel
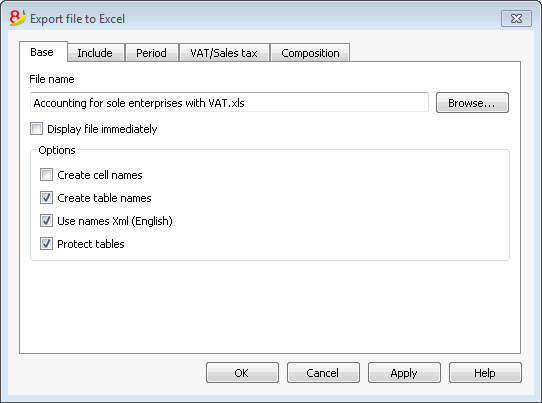
Export selection only
When activating this option, the program exports only the selected area.
File Name
In this area it is necessary to insert the name of the new file that the program will create to export the data. If, however, an existing file is selected by using the Browse button, the program will overwrite it with the new data.
Display file immediately
As soon as the MS Excel file has been created, the software to view it will be launched. In this way, the result of the export can be seen immediately.
Options
Create cell names
This option will automatically give a name to each cell as the file is exported. For example, the cell that contains the balance for account 1000 will receive the name: "Accounts_1000_Balance" in Excel. This means the user can univocally identify each cell independently from its position on the sheet and thus create Excel reports that don't have to be corrected if the account plan is changed. The user thus saves having to manually carry forward any accounting data to Excel. However, inserting the names of the cells does slow down the opening of the Excel file.
Create table names
With this option, the program will automatically give a name to the whole area of the cells belonging to a table, at the moment the file is exported. For example, the area formed by the cells belonging to the Accounts table will be identified by the name DB_Accounts. This option is necessary if, when creating reports in Excel, database functions are used.
Use names Xml (English)
The cell names can either be defined in their original accounting language, or with their English name. In the original language, the names will be understandable to someone who speaks that language, but they will not be universally understood like a name in English would be. By selecting this option the user would have, for example, "Accounts_1000_Balance" instead of "Conti_1000_Saldo".
Protect tables
The entire content of cells is locked when selecting this option so that it is only possible to edit the format. This prevents the possibility of making any unintentional changes to the exported data. The user can remove this protection at any time by using the appropriate command in Excel.
Export selection only
If this cell if activated, only the selected area is exported.
Other Tabs
For the explanations of the other tabs, please visit the following pages:
Export result
Each accounting table is displayed in a different sheet in the Excel file
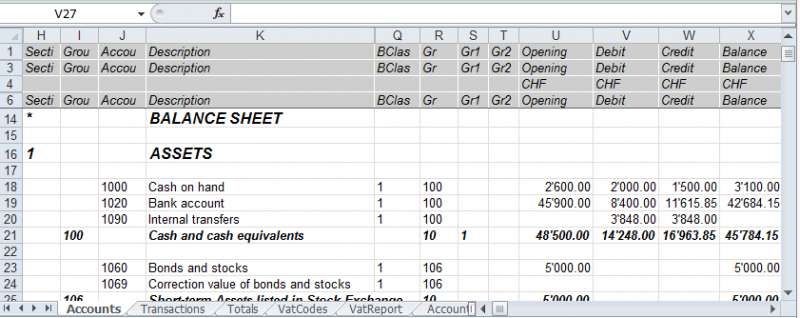
Use the cell names instead of the row/column references:
- The names return the desired value even when a new row or column is being entered.
- The names are easy to use and understand
"Accounts_1000_Balance" refers to the balance of the 1000 account
"Accounts_1000_Description" returns the value of the cell that contains the description of the 1000 account - The names can be used in the formulas
"=Accounts_1000_Balance" returns the value of the cell that contains the balance of the 1000 account
"=Accounts_1000_Balance/1000" divides the balance of the 1000 account by 1000 - By using the names, it is possible to create links to various files.
A link to a cell is being composed of:
- File name
- Table name
- Cell name

Include Tab
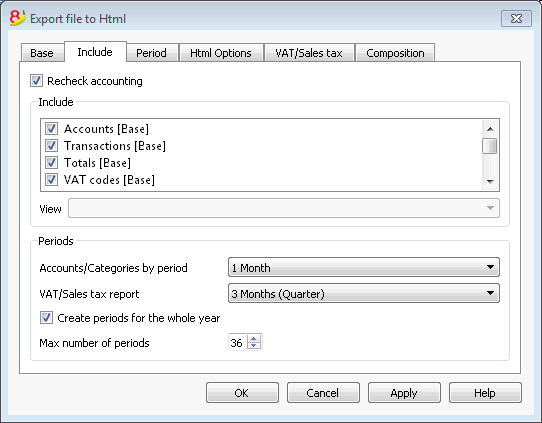
Recheck accounting
By ticking this box, the accounting will be rechecked before it is exported.
Include
By ticking the different boxes, the user can export in MS Excel Xml the various tables and/or all the account cards and the VAT/Sales tax Report.
View
It is possible to select the view where the data are to be imported. This option is available for the export in PDF, Html and Xml format.
Periods
This function lets the user export the accounting data subdivided by period.
Accounts/Categories by period
This option allows to export the accounts and categories balances according to the selected period.
VAT/Sales tax report
This option allows to export the VAT/Sales tax report according to the selected period.
Create periods for the whole year
By selecting this function, the partial balances for the whole year will be exported, and not only the ones of the specified accounting period or the selected export period.
Max number of periods
The maximum possible number of periods.
Export in Html
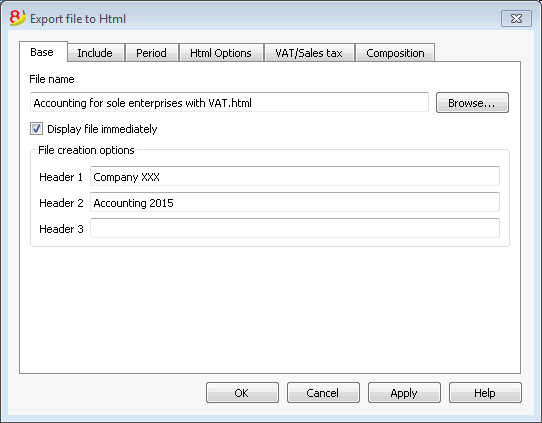
File Name
In this area, the user must insert the name of the new Html file that the program will create to export the data. If however the user selects an existing file through the Browse button, the program will overwrite it with the new data.
Display file immediately
As soon as the Html file has been created, the software to view it will be launched. In this way, the result of the export can be seen immediately. It is best to remember that browsers like Mozilla and MS Explorer use a cache mechanism for files. When the export is made for a second time, it is possible that the user will see the previous version until the browser Reload button is pressed.
File creation options
Headers 1, 2 and 3
These are the file headers.
Other Tabs
For the explanations of the other tabs, please visit the following pages:
Html Options Tab
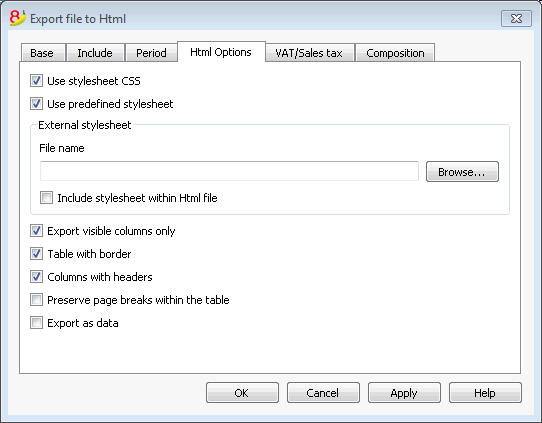
Use style sheet CSS
Selecting this cell will allow the user to connect a style sheet to the exported file. By default the program will automatically use its own style sheets and incorporate it into the document.
Use predefined style sheet
The program's default style sheet will be used.
Deactivating the cell will automatically activate the External style sheet option. The user can then select the name of a personal style sheet.
External style sheet
File name
In case an external style sheet is being used, select the file name of the style sheet with the Browse button.
Include style sheet within html file
When data is sent in Html format, the style sheet file must also be sent. To avoid sending two separate files the user can incorporate the style sheet to the Html accounting file by activating this cell.
Selecting the cells will allow the program to file the data with various graphic options:
- Export visible columns only
- Table with border
- Columns with headers
- Preserve page breaks within the table
If there are page breaks on the original accounting file, these will be carried over in the export as well. - Export as data - data will be exported without any formatting
Export in Xml
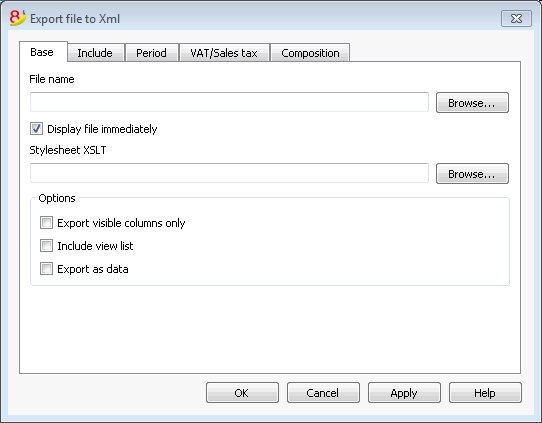
File Name
In this area it is necessary to insert the name of the new file that the program will create to export the data. If, however, an existing file is selected by using the Browse button, the program will overwrite it with the new data.
Display file immediately
As soon as the file has been created, the software to view it will be launched. In this way, the result of the export can be seen immediately.
Style sheet XSLT
In this area, the user can select the style sheet according to which the program should organize the graphic display of the accounting data. Thanks to the style sheets, the user can input his/her own data and conform to the print-outs required by the authorities. On the www.banana.ch various examples and further information on style sheets are available.
Options
It is possible to choose between the following options:
- Export visible columns only
- Include view list
Export selection only
If this option is activated, only the selected area will be exported.
Other Tabs
For the explanations of the other tabs, please visit the following pages:
Export rows in txt
In order to export rows, please select the Export rows command from the Data menu. Different options are available:
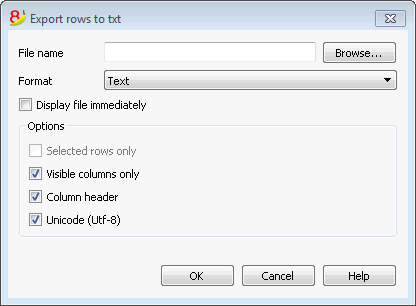
File name
Enter the file name or select an existing one using the Browse button
Format
Select the desired format.
Display file immediately
As soon as the file has been created, the software to view it will be launched. In this way, the result of the export can be seen immediately. Please notice that browsers such as Mozilla or MS-Explorer have a documents cache mechanism. It is then possible that, when exporting a second time, you will still see the previous version if you don't use the Refresh browser's button.
Options
If activated, different options will allow the export of:
- selected rows only
- visible columns only
- columns header
- unicode (Utf-8)
Save
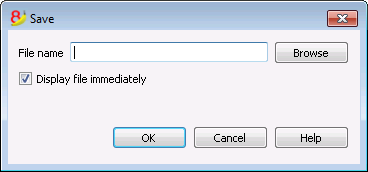
This window is shown when you need to create a PDF file, export in Html or Excel format, or copy into the clipboard.
File Name
In this area it is necessary to insert the name of the new file that the program will create to export the data. If, however, an existing file is selected by using the Browse button, the program will overwrite it with the new data.
Display file immediately
As soon as the file has been created, the software to view it will be launched. In this way, the result of the export can be seen immediately.
Import
Information on import are available in the single online lessons, listed in the left side menu.
Import transactions from Paypal
On the page web filter for PayPal transactions you will find the information about the new feature that makes it possible to import all the Paypal transactions directly into Banana Accounting and the instructions on how to proceed.
We have also prepared specific predefined templates for double-entry or multi-currency accounting that you can look at as an example or use as a separate accounting file just for the accounting transactions from Paypal.
More information about all types of import filters can be found on the Import filters page.
- BananaApp for importing Paypal transactions
- examples for the Double-entry accounting
- examples for the Multi-currency accounting
Merge file
Il is possible to merge two files, but they have to belong to the same group (for example two double-entry accounting files). It is not possible to merge files belonging to different groups (for example one double-entry accounting file and one simple accounting file).
In order to successfully merge two files, it is crucial that they have the same accounts numbering. Proceed as follows:
- Open the file which will contain the data of both files
- Select the Merge File command from the Tools menu
- Select the path and the name of the file to be merged
- Confirm the merge operation
- If the files are not the same, even though they belong to the same group, (for example, accounting with VAT/Sales tax and accounting without VAT/Sales tax), a message will appear advising the probable loss of data.
Import into accounting
New import extensions
In the new version Banana Accounting Plus, you will find new extensions for importing data from SmartBusiness and also files in .zip format.
We advise you to switch now to Banana Accounting Plus and take advantage of the many new features.
Supported import formats
With Banana, one can import from whatever format (see the list of current supported formats). In case you should need to import from other file types that are not included in the list, specific Banana Import Apps can be developed.
The Import to accounting command
The Import to accounting command from the Account1 menu makes it possible to import the following data:
- Transactions - to transfer the transactions from another Banana file or from the bank statement
- Accounts - to transfer the accounts from another Banana or a text file
- VAT codes - to transfer the VAT codes from another Banana file or from a text file
- Files - to transfer a complete file in order to convert the Chart of accounts
In order to transfer data just one single time, please consult Transferring data from other accounting software.
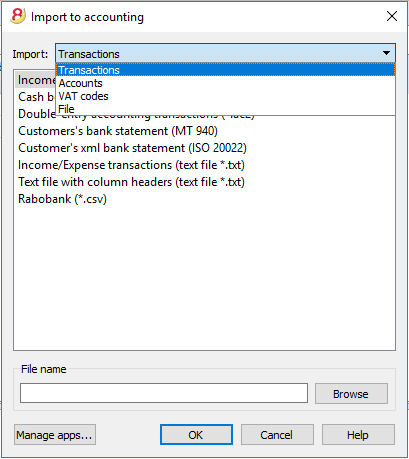
Procedure for importing
- Choose the destination table of the data
- Choose the file type from which to import
- Indicate the file name
- Choose the transactions to be imported
Destination table
For each data type, there are specifique pages
Import formats
According to the type of destination table, different import formats are availbale.
However, the following formats are available for all options:
- Text file with column headers
These are files that are especially created with other programs (for example, a program that creates invoices) so that the data can be transferred into Banana Accounting.
Technical indications on how to prepare these type of files can be found here. - There are also other file types for which a specific import filter exists or has been created.
File name
- The name of the file of which the data need to be imported needs to be indicated here.
Manage apps...
- To add or to update import filters.
Scripts that decode file types can be created.
Ok Button
- Starts the import.
Error messages
In case error messages appear during an import operation, update, first of all, the Import App.
Import transactions
New import extensions
In the new version Banana Accounting Plus, you will find new extensions for importing data from SmartBusiness and also files in .zip format.
We advise you to switch now to Banana Accounting Plus and take advantage of the many new features.
Import procedure
- From the drop down menu, choose Import transactions
- Choose the file type from which to import (Cash book transactions, Double-entry accoutning transactions)
- With the Browse button, choose the file from which to import the transactions
More information about all types of import filters can be found on the Banana Apps page.
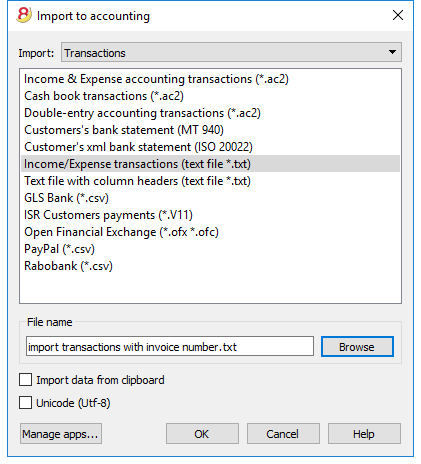
File types that can be imported
- Import transactions from an Income & Expenses accounting file
In order to import transactions from an Income & Expenses accounting file into a double-entry accounting file, it is necessary that the categories of the Income & Expenses file correspond to the accounts of the Double-entry accounting file. - Import Cash book transactions
Apart from importing the transactions, an import summary per month or quarter can also be obtained.
See the specific page Import Cash book transactions. - Import Double-entry accounting transactions
In order to import transactions from a Double-entry accounting file into another Double-entry accounting file, it is necessary that the accounts correspond. - Import transactions from Bank statement ISO 20022 or MT 940
See page Bank Statement ISO 20022 - Import data in Txt
This file type is being used to import data from other programs, such for example:- in order to import monthly transaction from your salaries software
- in order to import the invoices issued with a invoicing software
- in order to import the payments made with your invoicing software
- in order to import your sales transactions from your online shop
- in order to import data from another accounting software
- in order to import data from another cashbook management software (for example a restaurants or a hotel).
- For more information on how to create a file to be imported in Banana, please consult the technical information.
- BananaApps for importing
- Banana allows for import from several other formats.
- Please take a look at the updated list of Banana Import Apps.
- It is possible to create one's own scripts that uncode the data contained in one's own files, more info here.
Choice of rows to be imported
After having elaborated the rows to be imported, the program displays a dialog, in which the user can indicate further options.
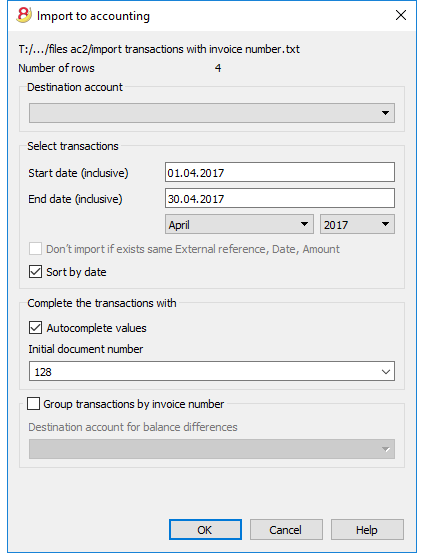
Destination account
This option is present when data of the bank account (or postal account) statement, or an account's income & expense transactions in a text format, are being imported.
Insert the bank account number of the chart of accounts, related to the imported statement.
Select transactions
Start date, End date
Insert the start and end dates of the period related to the transfer of the transactions. The period can also be selected automatically in the boxes under the dates area.
Don't import if exists same ExternalReference, Date, Amount
If activated, this function allows the user to not import already entered transactions, in order to avoid recording transactions twice. This option can only be activated when the column "ExternalRef" is present in the transactions that are going to be imported. If not, this option will be deactivated.
Complete the transactions with
Autocomplete values
The option is only necessary for accounting with VAT/Sales tax and multi-currency. If activated, it allows the automatic completion of values that are missing in the imported data (for example, the exchange rate in the exchange rate table).
Initial document number
This option is present when data of the bank account (or postal account) statement, or an account's income & expense transactions in a text format, are being imported. This is the document number assigned to the first imported transaction.
Group transactions by invoice number
If the import file contains values in the "DocInvoice" column, it is possible to indicate in the dialogue:
- Group transactions by invoice number
In this case, the rows of the same invoice are being grouped in such a way that there is only one transaction for the same account and the same VAT code. Please check the explanation Import invoice data.
- Destination account for balance differences
When VAT codes are being applied, there may be rounding differences of just a few cents.
In this case, Banana creates an additional transaction for every invoice into which this difference can be recorded.
Of course, it is necessary to pay attention that the data to be imported obtain a balance between debit and credit. If not, the transaction row will contain the difference between debit and credit.
Edit the imported transactions
The program creates some transactions and adds them to the Transactons table.
Transactions can be edited or deleted.
In a double-entry accounting file, the program adds some symbols in the Debit/Account and Credit/Accounts columns, where in an income and expenses file, the program adds them in the Account and Category columns.
Symbols should be replaced with the appropriate account or category.
- [A]
This symbol is indicated when no account has been indicated in the dialog.
You need to replace the [A] with the appropriate bank account.
[CA] - When ths symbol appears, you need to replace it with the appropriate contra-account, so that the Credit transactions will be balanced with the Debit transactons.
In rows with only one contra-account, you will find both the [A] and the [CA] symbols in the same row.
In rows with multiple contra-accounts, each row will have its own [CA] symbol. Without the [CA] symbol, it would be impossible to understand if the transactions is a Debit or Credit one.
Frequently Asked Questions
I see don't see the format for the bank statement of my bank
Click on "Manage apps...", followed by "Update apps" and enable the filter for the desired format.
I see don't see the format for the Xml account statement of the Postfinance (file .tgz)
This format is no longer supported. Please contact the Postfinance and ask to receive the statements in ISO 20022 format.
The following message appears 'This ISO 20022 file doesn't contain a bank statement (camt.052/053/054)'
This error message is being displayed when the ISO 20022 file doesn't contain a bank statement. The ISO 20022 format is a generic format that can contain different types of information, like the bank statement and the payment confirmations In Banana Accounting, only the bank statements can be imported (camt.052/053/054).
My bank is not in the list of supported formats
It is possible to create apps for formats that have not yet been implemented. We have also paid support available for the implementation of customized formats.
I can only import collective orders and I cannot see the details (the individual orders)
When executing a payment in the e-banking (for example in the Raiffeisen bank), you need to choose the option 'individual order' instead of the 'collective order' Only by doing so you will be then be able to import the payments as individual orders.
Import ISO 20022 file
ISO 20022 is an international standard for the transmission of financial data.
The CAMT category regroups the formats used for the account statement, reporting of account transactions and account balance confirmation:
- camt052: Account Reporting
- camt053 (including version 4): Account Statement
- camt054: Credit / Debit Notification
Preview the ISO-20022 file
Banana. offers the possibility to preview contents of a camt file.
Data importing into the current accounting
Proceed as indicated with the Import into accounting ( Account1 menu) command.
Compressed files can also be opened with this function. In this case, the program will prompt the user to select the file from which to import the data of the compressed file.
Technical notes on converting ISO 20022 files
Banana, when reading the file, tries to adapt itself to the ways in which the ISO 20022 file has been prearranged.
- Reads as opening balance the similar encodings
- Reads as closing balance the similar encodings
-
All contents are read and converted into transactions
- Transaction date (Date)
- Valuta date
- Transaction amount (positive or negative)
- Description (Banana - for now - displays the various descriptions as a single text)
In the future, it will be possible to extract this information on a distinctive basis and indicate the columns where to allocate data. - Distinction of transactions between one single and detailed lines.
For transactions that are to be detailed, there will be a row for the sum and separate rows for the singular transactions that will constitute the total.
Swiss Specificities
Specifications for the use of ISO 20022 have been issued for the Swiss banking system.
Formats have been standardised as follows:
- camt053: Account Statement, with detailed transactions.
This is the file that your bank should provide, specifying that it does also include payments received.
A summary file (without any details) might be asked for, in which case camt054 form will also have to be requested, detailing the receipts. - camt054:
Transactions detailed by type (such as bills payments received for bills issued).
If detailed cash receipts are required, the bank will provide the dates in a camt054 file (as a substitute for V11).
This results in two files:- camt053 file (Account Statement) with the several payments and the daily total of cashed bills, which details are contained in the camt054 file.
- camt054 file, detailing all transactions for cashed bills with their reference number.
- camt052: Account Reporting.
Is only used in special situations, to monitor transactions for a specific day.
Import data from a Cash book file
When managing your accounting work, it is possible to manage the cashbook separately and regularly import the transactions in the main accounting file, grouped according to a selected period.
In this case there are two separate files: a file containing all the data of the general accounting, and a second file containing only the data Cash book management. In order to be able to import data from the Cash book file into the main accounting file, those files need to be linked. This can take place in two different ways:
- Attribute to the categories of the cashbook file the same account numbers (for Double-entry accounting), or, the same category numbers (for Income & Expense accounting) as the ones used in the main accounting file.
-
In the cashbook file, in the Category2 column of the Categories table, enter the same account numbers as the main accounting file (if double-entry accounting) or the same categories numbers (if Income & Expense accounting). If the Category2 column isn't visible, you need to visualize it by selecting the Columns setup command from the Data menu, and double clicking on Category2.
Example:
In this example, the account numbers referring to the main accounting file have been entered in the Category2 column.
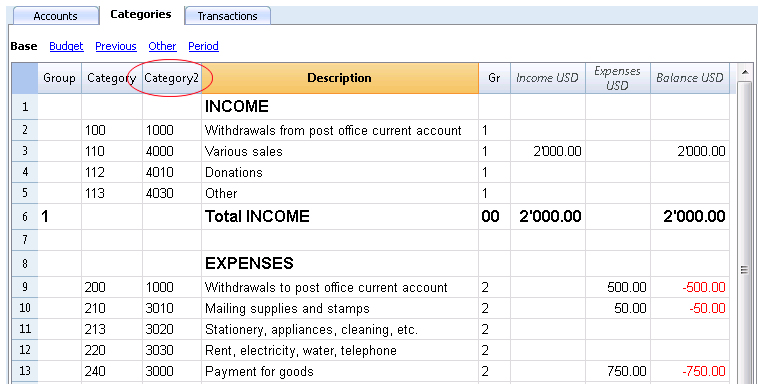
In order to import the data, do as follows:
- open the main accounting file and choose the Import to accounting command from the Account1 menu
- in the dialogue window that appears, select Transactions from the Import drop-down menu; then, click on Cash book transactions (*.ac2) and with the Browse button, select the cash book file.
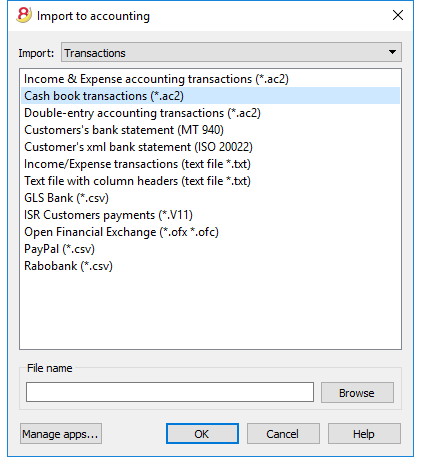
You can find the explanations of this window at the Import to accounting page
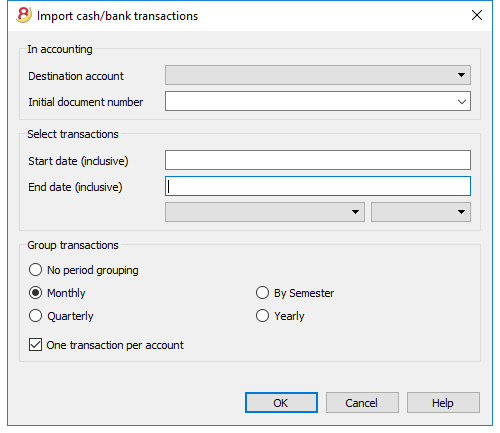
In accounting
Destination account
You have to select the account number (Double-entry or Income & Expense Accounting) to which the data will be carried over.
Initial document number
This is the document number given to the transactions carried over.
Select transactions
Start date / End date
These drop-down menus specify the start and end dates of the period to which the imported data refer.
Group Transactions
In this section the user specifies, by activating the different options, how the transactions of the period must be grouped:
- No period grouping
All the rows are being imported, with the related contents of the columns. The Doc number of the Cash book account is also being imported. If, in the main accounting, you wish to use a different number and at the same time keep the document number of the Cash book, enter the document number in the DocProtocol column of the Cash book. - Monthly - transactions are grouped by month
- Quarterly - transactions are grouped by quarter
- By semester - transactions are grouped by semester
- Yearly - transactions are grouped per year
One transaction per account
If more than one category is grouped on a single account but the user needs separate transactions for each category, this cell must be activated; then the program will create transactions for each category. When VAT codes are used, transactions will be created not only by category, but also for each different VAT code in the same category.
Note:
When the user is working on an accounting file with VAT, the calculations of the VAT may result slightly different. If the transaction amounts have been inserted as net amounts, the balance of the cash account may also be different because of rounding differences.
The accounting file is updated with the data of the Cash book.
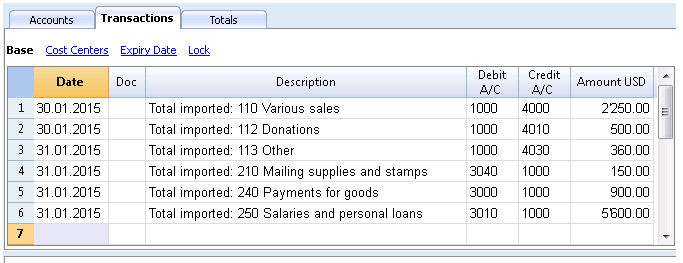
Import VAT codes
This function is only available in the Accounting with VAT management, and allows the user to import VAT codes from:
- Other accounting files (*.ac2)
- A text file with column headers (text file *.txt)
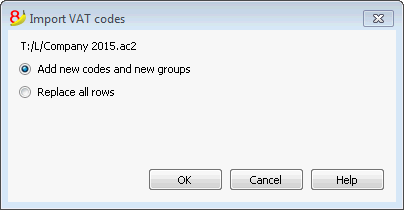
Add new codes and new groupes
The new codes and new VAT groups are being added, without eliminating the ones that are presently in the VAT codes tabel.
Replace all rows
The complete VAT codes table is being subsituted.
Note: if, after the import, you receive the error message VAT account not found, you need to select the VAT according to VAT report account in the VAT/Sales tax section of the File and accounting properties (File menu).
Update VAT Codes for Switzerland
See the pages for Switzerland in French, German or Italian.
Import file
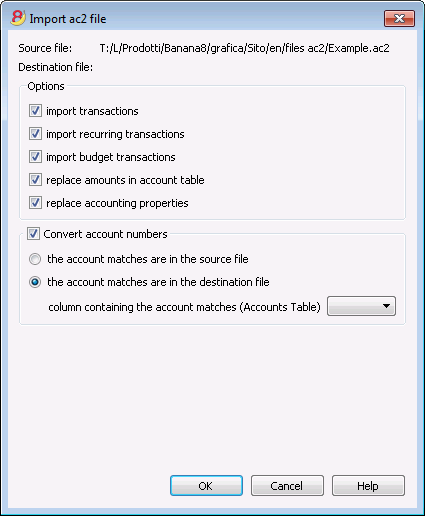
Source file
This is the file from the which the data are being taken.
Destination file
The file that "receives" the data.
Options
Import transactions
All the rows of the Transactions table, present in the source file, will be imported.
Import recurring transactions
All the rows of the Recurring Transactions table, present in the source file, will be imported
Import budget transactions
All the rows of the Budget table, present in the source file, will be imported.
Replace amounts in Account table
The amounts of the Opening, Budget and Previous columns of the Accounts table of the destination file are being deleted and replaced with the amounts that are present in the source file.
The accounts need to correspond, thanks to the same account numbers, or when there is a replacement, in that case the option "Convert account numbers" should be used.
Replace accounting properties (basic data)
The File and accounting properties of the destination file will be replaced by the ones of the source file.
Convert account numbers
Using this function, the imported account numbers will be replaced with those indicated in the alternative column.
If you use this function, you must also specify the column that contains the account numbers to be used in the import instead of the existing ones.
Next to the account number column, there should be a column that indicates the alternative number to be used when importing. If no alternative number is specified, the original account number of the source file will be used.
- The account matches are in the source file
This option is to be used when for example you keep an accounting file in a country, with a specific number system, and then you need to regularly import your transactions in a different accounting file, that uses a chart of accounts with a different numbering system.- You need to add a new text column in the accounting plan (Columns setup command)
- For each account, indicate the destination account number in the tabel.
- The account matches are in the destination file
This option is used when for example you want to switch to a chart of accounts with a new numbering and grouping- You create a new accounting file with the new chart of accounts.
- In the chart of accounts, you create a new column where you indicate the account matches (Columns setup command).
- In this column, indicate the account numbers of the source file.
Separate the accounts with a semi-colon "1000;1001" to indicate that several accounts need to be grouped into this account.
- Column containing the account matches (Accounts table)
Indicate a column of the chart of accounts that has been added by the user and that contains the account matches.
Results and possible errors
The program will have carried forward all the data of the previous accounting, converting the account numbers.
In case the program indicates errors (absence of accounts or other), it might very well be necessary to cancel the import operation, complete the account matches and repeat the import operation.
The program, finding different charts of accounts, cannot automatically execute extended check-ups to make sure that all the data have been imported and grouped correctly.
It is therefore advised to check the result manually, verifying that the totals of the Balance sheet and the Profit and Loss statement are indeed correct.
Advanced import options
For different and more complex and automated conversion needs, we suggest to use the scripts, that allow a total customization of the conversion and the import.
Manage Apps
New Extensions
In the new Banana Accounting Plus version you will find new Extensions, always up-to-date in order to obtain:
- More personalized Financial Statements and Reports in compliance with the regulations in force
- Imports from bank and credit cards statements
- Imports from other programs, such as Smart Business
- Imports from multiple files or in .zip format
Filters are extensions that make it possible to add new formats into the Import into accounting dialog window: Account1 menu -> Import into accounting -> Manage Apps... button.
In Banana Accounting 8, it is possible extend some of the functions by means of small javascript programs. In order to create your own import filters, see the Banana Apps info page.
More information about all types of import filters can be found on the Banana Apps page.
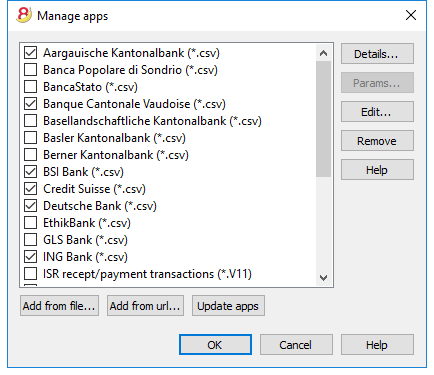
Details
A dialogue window is opened with
- the source file where the Banana App is located
- the App type
- the App date
Parameters
If the BananaApp allows the individual setup of the programming parameters, the button is active.
In that case, dialogues will be visible in which fixed parameters can be entered that will be used for this App.
The parameters are related to each file.
Edit
It allows you to edit and make changes to the selected App. It will bring you to the directory where the App file is stored.
Remove
Permanently deletes the selected App. It is not possible to delete files that are installed at the system level or that are for all users.
For the time being it is also not possible to remove Apps contained in files with an sbaa extension. If you want to remove the App you should delete the App file.
Help (side button)
It leads to the internet page with info on the selected App.
Add from file
Adds a new App from an existing file.
The file should always be available.
Add from url
Adds a new App from a link to a document available online.
- the file is downloaded from the internet
- the file is saved in the user's data folder
Update Apps
Downloads the filter's most recent version from Banana Accounting's server.
The downloaded Apps should not be modified because they will be overwritten when updated.
If there are new Apps, they will be added to the list. The imported filters will not be modified.
The Apps will be installed in the user folder. Thus only the user who imported the new Apps or updated the available ones will see them. To install Apps for all users or at a system level, a manual procedure for installing the Apps would need to be followed.
Help (bottom button)
It links to this page.
Import rows
In order to import the rows, click on the Import Rows command of the Data menu.
Activate the options of your choice in the following window:
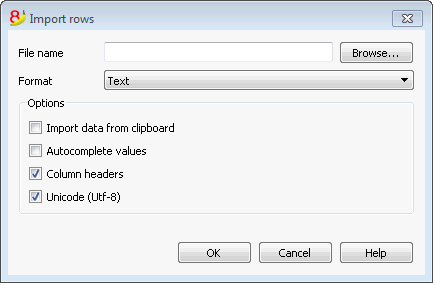
File name
Using the Browse button, select the file from which to extract the data. By clicking on the OK button, confirm the options selected.
Format
This area contains the list of formats with which it is possible to import the data to the table. These include: ASCII format, Text, CSV.
Options
Import data from clipboard
By selecting this box, the user can import data from the Windows clipboard.
Autocomplete values
It is advisable to select this function when it is necessary to import rows from a less complex accounting file into a more complex one. In this case, in the imported rows, some columns will stay blank. By selecting this function, the program will automatically complete the missing values with those from the current accounting.
Fields header
By selecting this box, not only data, but field headers will be included in the import.
Unicode (Utf-8)
By selecting this box, all the data will be imported in a format readable by Unicode programs.
Transferring data from other accounting software
New import extensions
In the new version Banana Accounting Plus, you will find new extensions for importing data from SmartBusiness and also files in .zip format.
We advise you to switch now to Banana Accounting Plus and take advantage of the many new features.
Recurring data importing from other programs
It can often happen to be regularly needing to import data from other programs.
For example:
- in order to import monthly transaction from your salaries software
- in order to import the invoices issued with a invoicing software
- in order to import the payments made with your invoicing software
- in order to import your sales transactions from your online shop
- in order to import data from another accounting software
- in order to import data from another cashbook management software (for example a restaurants or a hotel).
In these cases you can proceed in two different ways:
- adapt your data generating application by creating a txt file specifically set to be imported in Banana.
For more information please consult the technical information on how to create a file to be imported in Banana; - create an import script that will transform data exported from another program so that they can be imported in Banana; depending on the installed import filters (see the Manage filters page), many formats can be available. See also how to create filters (Banana App)
One time data importing from other programs
If you are starting to work with Banana for the first time and you need to import your data from another software, you can easily transfer data from any accounting program, passing through MS-Excel.
- With your old accounting software, export the data in a format that can be read by Excel (CSV, txt, ...)
- Open the exported file with Excel
- In Excel, organize the data (columns) in the same order as they appear in the Banana tables (Accounts, Transactions)
- Open your new accounting file in Banana
- In the Accounts or Transactions table, add as many empty rows as there are rows to transfer from Excel.
- In Excel, select the data to be copied and use the Copy command
- Go in Banana and execute the Paste command.
This method is useful to transfer data from MS-Money, Intuit Quicken and Quickbooks, and from most other accounting programs.
Printouts/preview
Print preview
All the printouts of the various accounting documents can be saved in PDF, HTML, MS Excel and copied to the Clipboard, allowing the user to also access them many years later.
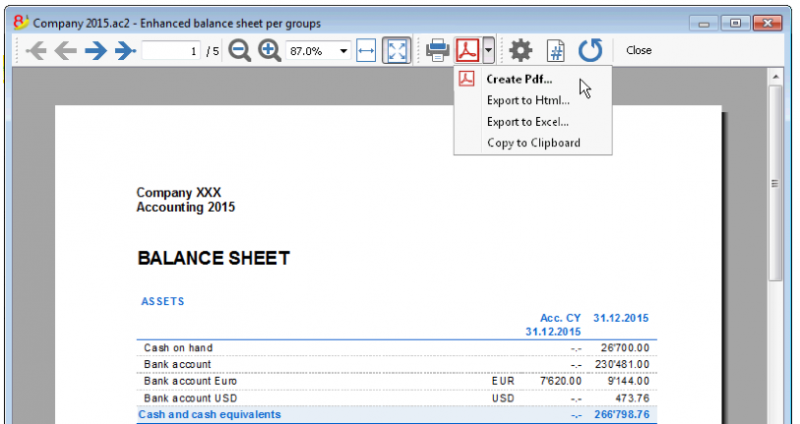
Print
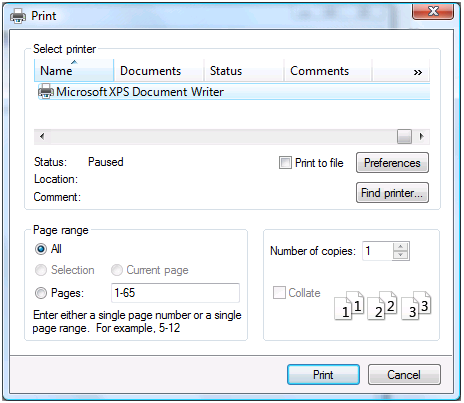
The button pulls up the Printer Setup window from Windows. The selections are only valid for the current working session. Permanent alterations need to be input using the Windows control panel. Horizontal or vertical printing needs to be input under Page Setup and is only valid for each view.
Accounting printouts
You can find information on specific printouts for the different accounting types at the following pages:
- Double-entry accounting
- Multi-currency accounting
- Cashbook and Income & Expense accounting
- VAT Report
- Swiss VAT form - page in Italian, German or French
Page numbering
You can access the page numbering feature by clicking on the  icon on the Print Preview toolbar.
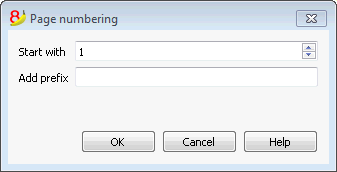
In this dialog box are set the options for page numbering. The printing of the page number is enabled or disabled by using the settings of page setup or report.
Start with
The starting number for page numbering.
Add prefix
The prefix to insert to the page numbering.
Page setup
Allows to define the printing properties. Each view has its own printing setup.
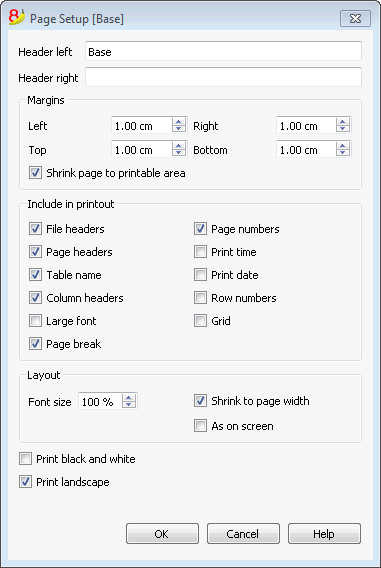
Header left
This is where the title for the current view is shown. The title can be edited to appear at the top left of the printed page.
Header right
It is possible to enter a different text that will be printed at the top right-hand side of the page.
Margins
It is possible to input the page margins here: Left, Right, Top, Bottom. Measurements are in centimeters.
Shrink page to printable area
This function makes it possible to adapt the printable area when the print goes past the earlier defined page margins.
Include in print
When these functions are being activated, they allow to display the following data:
File Headers
This is the text that is being entered in the File and Accounting properties found in the File menu.
Page Headers
The page header will also be included in the printout.
Table Name
The table header (f.i. Accounts, Transactions, etc.) is also being included in the printout.
Column headers
These are the headers for the various table columns.
Large font
The program prints the headers using a slightly larger font.
Page break
When activated, this option maintains the entered page breaks; if not, they will be ignored, even if they are present.
Page numbers
Activate this option to request that the pages be numbered.
Print time
Activate this option to include the hour when the page was printed.
Print date
Activate this option to include the date when the page was printed.
Row number
Activate this option if a progressive number is to be given to each row.
Grid
The grid can be printed just as it is viewed on screen.
Layout
The program automatically adapts the page dimension.
Font size %
This allows the increase or decrease, on a percentage basis, of the size of the font to be printed.
Reduce to page width
If some columns exceed the width of the page, the program reduces the columns or reduces the zoom so that all the columns will be printed correctly on the page.
As on screen
The print-out will be carried out exactly as presented on the screen.
In case the contents goes past the page dimension:
- If the option "Reduce to page width" is being activated, the font size will be reduced;
- If the option "Reduce to page width" is not being activated, the part that goes past the paper will not be printed.
Print black and whilte
All colors will be converted in grey scales.
Print landscape
To print in landscape format which makes the page read horizontal.
Period
This tab appears in many dialogs (for example the Account card) and can specify the period to be show or to be calculated.
If for example a quarter is selected: in the account card only the transactions of the selected quarter will be shown, and in the balance sheet only the results for the selected quarter will be calculated.
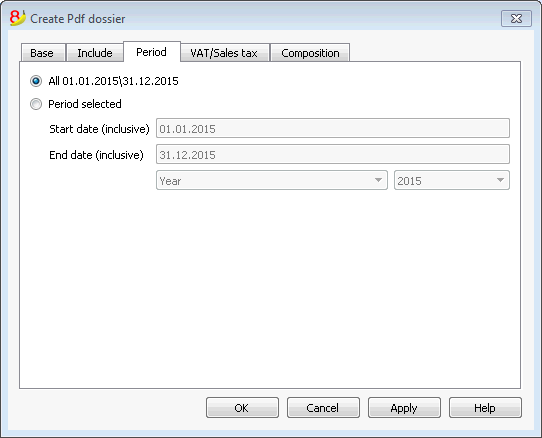
All
If this option is selected, the entire accounting period is included.
Period selected
If a specified period is desired, indicate the start and end dates.
Transactions with no date
If there are transactions with no date, they will be considered only if you chose the whole period (All...)
If however you enter the initial and final dates January 1sr and December 31, the transactions with no date will not be included in the report.