In this article
This page explains how to set up printing of the Swiss QR-Code on invoices and also refers to technical information on customisation possibilities, use of address formats and more.
For technical specifications please refer to the QR-Code References and Standards.
QR Section
In the Invoice settings there is a special section for data entry for the QR section printing.
- To print the QR on the invoice you must check the "Print QR Code" box.
There is then a very important choice to be made. The QR-Code system has two main modes depending on the type of account you want to use. In the Reference Type you have to indicate the system you want to use .
- Print QR-bills with the IBAN account.
You can immediately start printing invoices with the QR. The bank statement will show the account number of the customer and the invoice. In this way you will have immediate and automated control of payments. Print QR-bills with the QR-IBAN account.
If you want an ISR-compatible system or if you want your invoice payment data to be received in a different data file than the account statement.Your bank must give you a QR-IBAN account number and the individual payment data will not appear on the normal account statement, but on a separate one.
Then follow the available settings regardless of the chosen QR Reference Type.

Change Issuer address
- Address payable to
The program sets the address of the recipient of the payment using the address data in the File properties (from the File menu).
You can indicate another address, by completing the fields in the Payable to section.
Include / exclude from printing
Include additional information (XML column name )
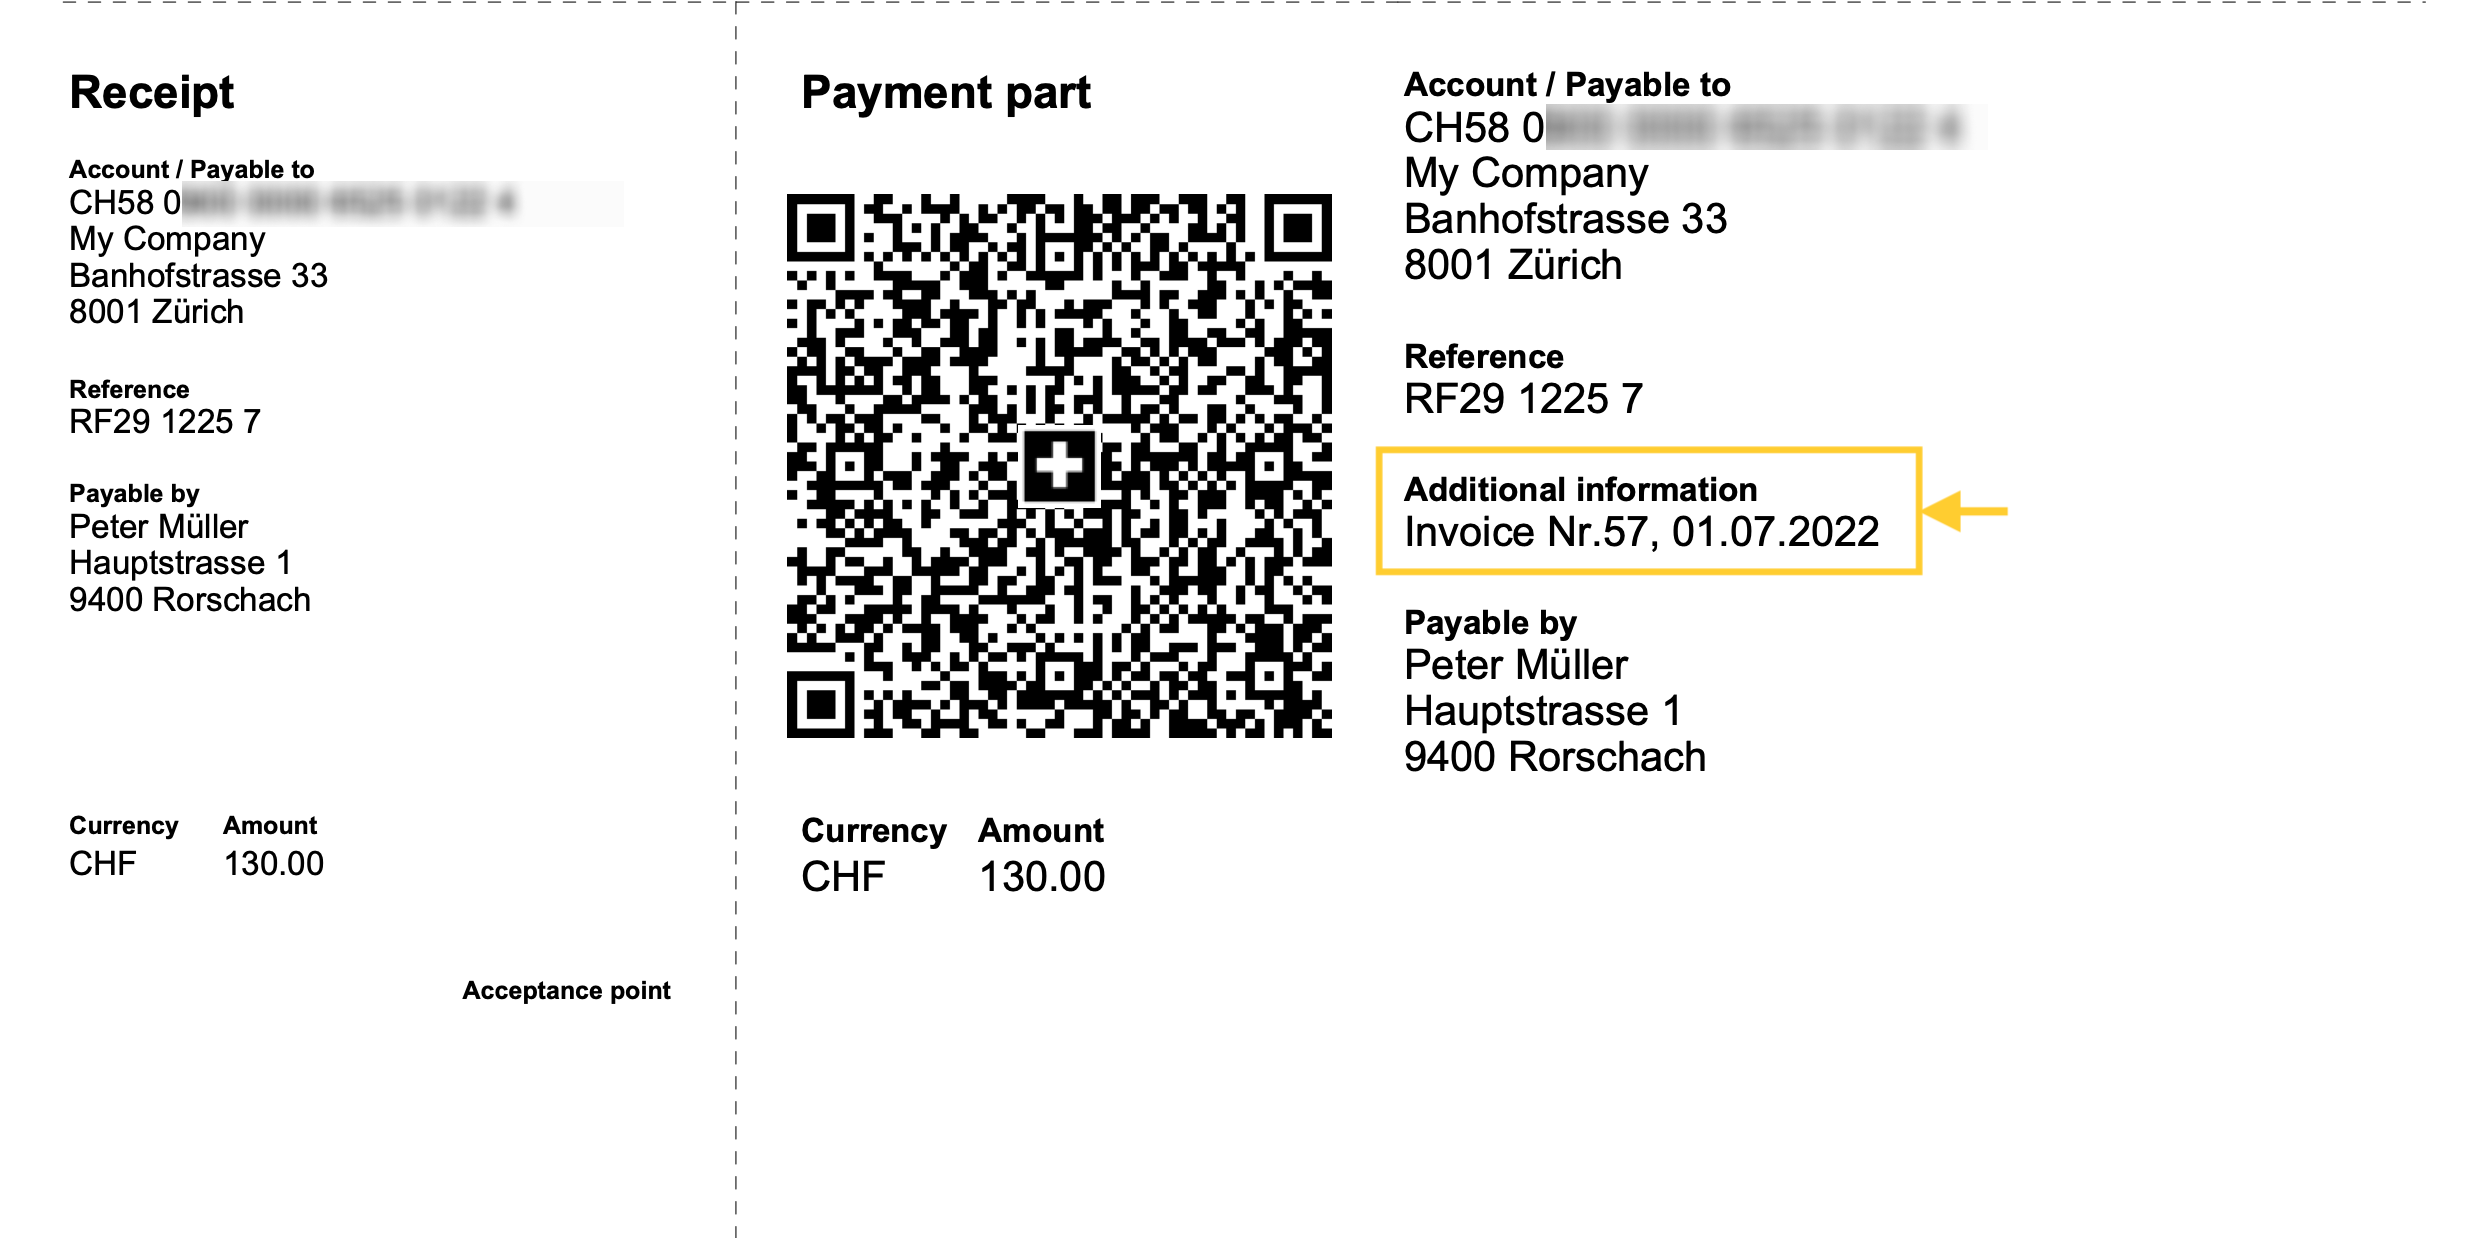
You can enter additional invoice information to be displayed on the QR slip in the 'Additional Information' section.
In the Invoice settings dialogue → QR section → Include additional information, enter the XML name of the column used from where the additional information is taken.
See how to display XML column names.
See how to add new columns.
- Integrated invoicing
In the Transactions table, add a new column where the additional information is to be entered, or use an existing column such as the Notes column.
- Estimates and Invoices application
In the Invoices table add a new column where you can enter additional information, e.g. Info.
Do not use the Notes column as this is used to display the final text of the invoice.
- Include billing information (optional).
Add automatically generated structured billing information.
If present, they are added after the additional information (see previous point). - Exclude invoice address.
Exclude the customer's billing address and leave an empty box to enter the address by hand. - Exclude invoice amount.
Exclude the invoice amount and leave an empty box to enter the amount by hand.
To be used when the customer can choose the amount to be paid.
QR section print format
- QR on separate page.
Print the payment and receipt sections of the QR-bill on a separate page.
This way there is more space for the invoice. - Separation border print.
Print a dashed separation border to separate the invoice from the payment and receipt sections. - Print scissors symbol.
Print the scissors symbol on the separating border. - QR X position and QR Y position (optional).
Change the horizontal and vertical position of the QR Code section - usually there is no need to change the default values.
Other information
- The addresses that appear on the payment and receipt sections must contain:
- Name and surname or company name (the company name has priority in case both are defined).
- Address.
- Postcode and town.
- Country code (is not on the print but is included in the QR code).
- The country code is a two-character code according to the specifications of the ISO 3166-1 standard (eg CH, LI, AT, DE, IT, FR).
- The country code of the invoice sender can be set via File → File and accounting properties → Address section, Country field.
- The customer's country code is set in the Country Code column of the Accounts table, Address view.
Technical information
In the QR code of the QR-Invoice, the addresses of both the invoice issuer and the customer are always of the structured type (S). The type defines how the address data is represented within the QR code image.
The printing of the address on the QR invoice, both in the receipt section and in the payment section, will be the same.
Structured address details
The lines of the structured address in the QR code are composed as follows:
| Position | Element | Information |
| Line 1 | company name or customer’s first and last name | - mandatory, maximum 70 characters |
| Line 2 | street / P.O. box | - optional, maximum 70 characters - may include the building number if not written on line 3 |
| Line 3 | building number | - optional, maximum 16 characters - if not written on line 2 |
| Line 4 | postal code | - optional, maximum 16 characters |
| Line 5 | city | - mandatory, maximum 35 characters |
| Line 6 | country code | - mandatory, maximum two characters - compliant with ISO 3166-1 standard |
The addresses in the QR must always contain either the name of the organization or the first name and last name.
The name of the organization has priority over the name / last name: if it is present then the name of the organization will be entered, otherwise the name / last name will be entered.
Entering both is not possible as the rows are limited and each row must contain precise information.
On the printed invoice, the address structure is as follows:
- organization name or first / last name
- street and house number
- postal code and city
The addresses in the "Payable to" and "Payable by" sections of the QR follow the rules of the Swiss QR standard.
It is not possible to add rows or change the composition of the addresses on the QR.
Issuer address (beneficiary)
The invoice issuer’s address can be defined in two ways:
- From the file properties
- The address is taken from File > File and accounting properties > Address.
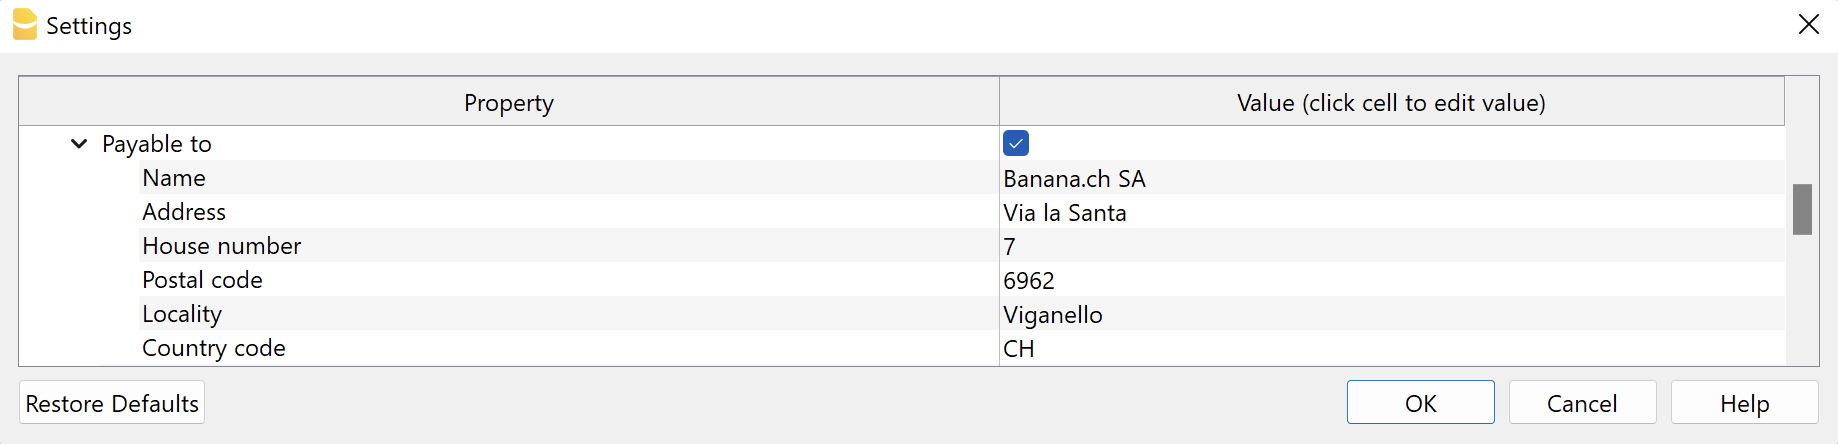
- From the invoice settings
- The address is taken from the Invoice settings, section QR Code > Payable to.
- Check the section QR Code > Payable to.
- Enter the address data in the fields below.
Customer address
The customer address on the invoice is entered in the Accounts table (integrated invoicing) or in the Contacts table (Offers and Invoices application).
The building number can be entered in either the Street column or the Building Number column. Both options are correct.
The Building Number column accepts any character up to a maximum of 16 characters:
The Street column accepts any character up to a maximum of 70 characters:

Printing and sending in paper format
The QR-invoice can be printed and sent in paper format. To do so, it is necessary to use a special perforated sheet of white paper.
Testing QR-Code
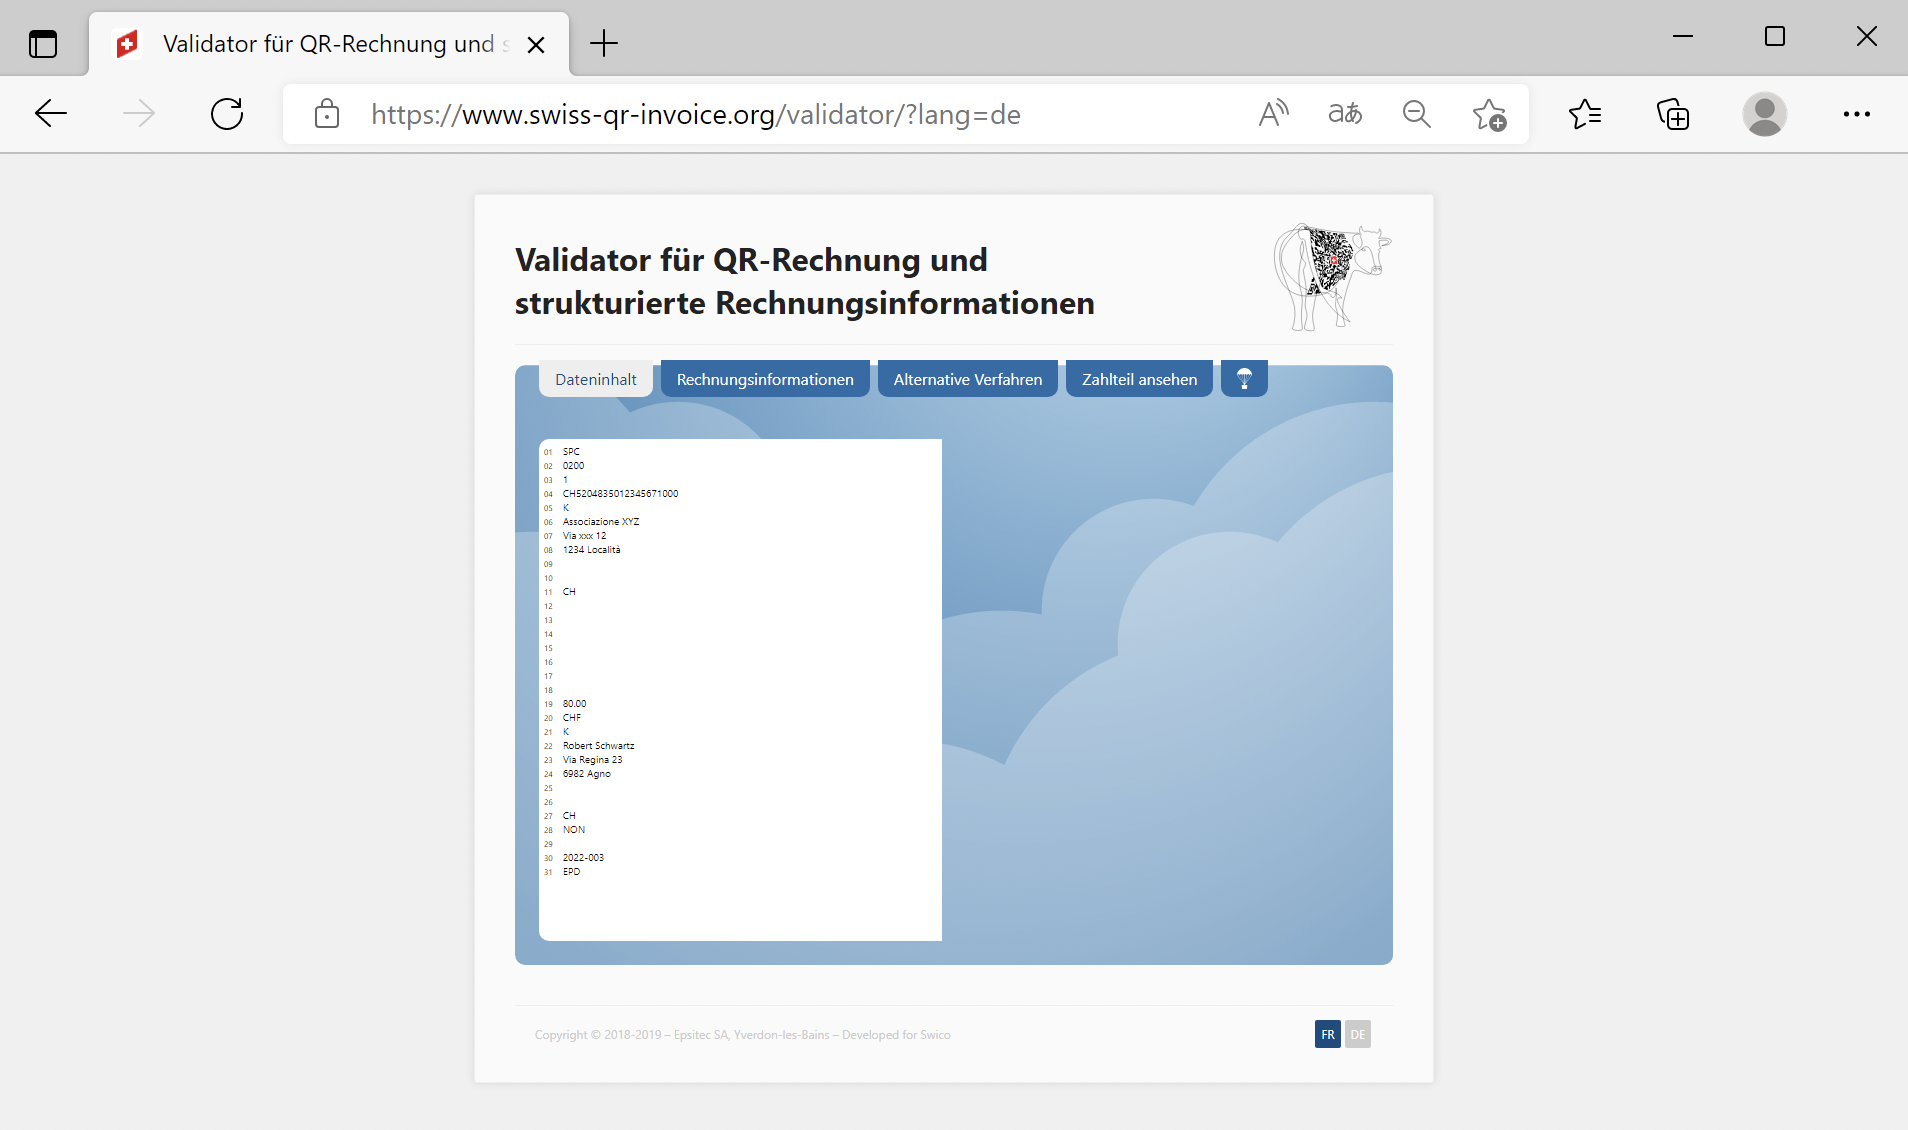
The invoice PDFs with QR codes can be tested with the official validation page as described below:
- Create and save the QR invoice PDF.
- Visit the official validation page https://www.swiss-qr-invoice.org/validator
- Drag the PDF file to the blue area.
If the code is correct, the page will display the content of the QR code. On the other hand, if there are any problems, they will be displayed in red.
If no red messages are shown, the QR is considered correct (see example below).