Printouts/preview
Print everything you see on the screen
In addition to the various reports available, Banana Accounting allows you to print everything you see on the screen, in any table.
You can simply use the Print command from the File menu.

Print preview
All the printouts of the various accounting documents can be saved in PDF, HTML, MS Excel and copied to the Clipboard, allowing the user to also access them many years later.
- Selected cells only.
When you have a selection of cells in the table, the preview displays only the selected cells.
Remove the selection to preview the entire table.
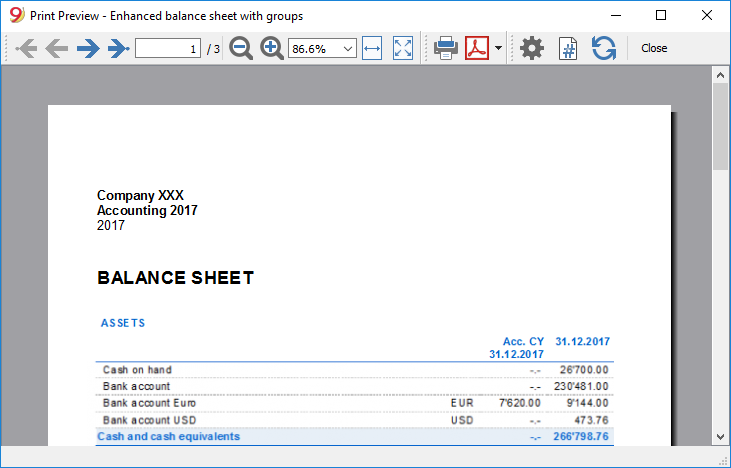
The button pulls up the Printer Setup window from Windows. The selections are only valid for the current working session. Permanent alterations need to be input using the Windows control panel.
Horizontal or vertical printing needs to be input under Page Setup and is only valid for each view.
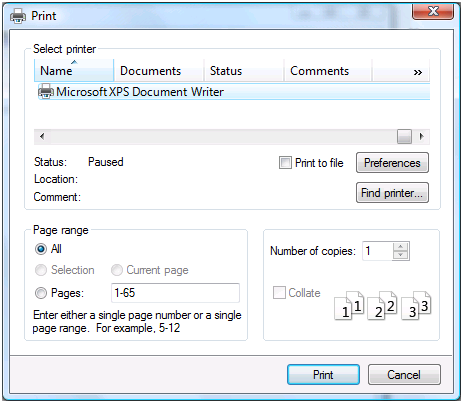
- Print selected cells only.
If more than one cell is selected in the table, the choice "Selection" is active, to print only the selected cells.
Exporting in other formats
Printouts can be exported in different formats:
- Pdf
The print format. - Html
Pages that you can open with your internet browser. - Excel
The data is not really exported to Excel, but the file is exported in html format, with the extension .xls.
Excel indicates that the data is not in Excel format, but opens the file anyway and also takes some, but unfortunately not all, formatting. - Latex
Presentation format. - Copy in the clipboard
All the report is copied to the clipboard, so you can paste it into Excel or other programs.
Accounting printouts
You can find information on specific printouts for the different accounting types at the following pages:
- Double-entry accounting
- Multi-currency accounting
- Cashbook and Income & Expense accounting
- VAT Report
- Swiss VAT form - page in Italian, German or French
Page setup
Allows to define the Printing properties.
Each View of the table has its own own print setting. The name of the view is indicated in the dialogue title.
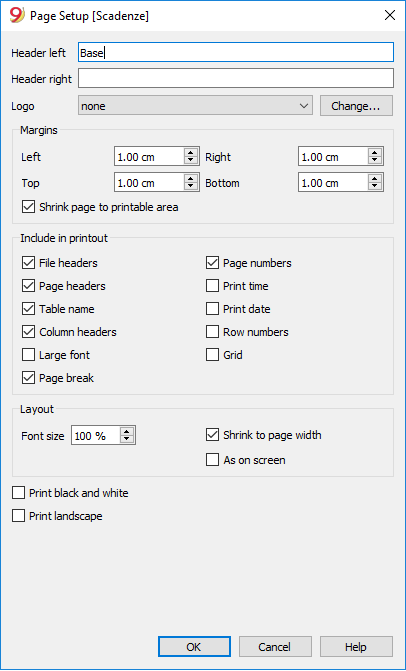
Header left
This is where the title for the current view is shown. The title can be edited to appear at the top left of the printed page.
Header right
It is possible to enter a different text that will be printed at the top right-hand side of the page.
Logo
Press the Change button on the right and then select Add, as we also explain in the Setup a logo page; add your own logo.
Back to the Page setup window, choose Logo instead of none.
Margins
It is possible to input the page margins here: Left, Right, Top, Bottom. Measurements are in centimeters.
Shrink page to printable area
This function makes it possible to adapt the printable area when the print goes past the earlier defined page margins.
Include in print
When these functions are being activated, they allow to display the following data:
File Headers
This is the text that is being entered in the File and Accounting properties found in the File menu.
Page Headers
The page header will also be included in the printout.
Table Name
The table header (f.i. Accounts, Transactions, etc.) is also being included in the printout.
Column headers
These are the headers for the various table columns.
Large font
The program prints the headers using a slightly larger font.
Page break
When activated, this option maintains the entered page breaks; if not, they will be ignored, even if they are present.
Page numbers
Activate this option to request that the pages be numbered.
Print time
Activate this option to include the hour when the page was printed.
Print date
Activate this option to include the date when the page was printed.
Row number
Activate this option if a progressive number is to be given to each row.
Grid
The grid can be printed just as it is viewed on screen.
Layout
The program automatically adapts the page dimension.
Font size %
This allows the increase or decrease, on a percentage basis, of the size of the font to be printed.
Reduce to page width
If some columns exceed the width of the page, the program reduces the columns or reduces the zoom so that all the columns will be printed correctly on the page.
As on screen
The print-out will be carried out exactly as presented on the screen.
In case the contents goes past the page dimension:
- If the option "Reduce to page width" is being activated, the font size will be reduced;
- If the option "Reduce to page width" is not being activated, the part that goes past the paper will not be printed.
Print black and white
All colors will be converted in grey scales.
Print landscape
To print in landscape format which makes the page read horizontal.
Page numbering
You can access the page numbering feature by clicking on the  icon on the Print Preview toolbar.
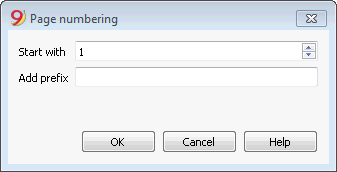
In this dialog box are set the options for page numbering. The printing of the page number is enabled or disabled by using the settings of page setup or report.
Start with
The starting number for page numbering.
Add prefix
The prefix to insert to the page numbering.
Period
This tab appears in many dialogs (for example the Account card) and can specify the period to be show or to be calculated.
If for example a quarter is selected: in the account card only the transactions of the selected quarter will be shown, and in the balance sheet only the results for the selected quarter will be calculated.
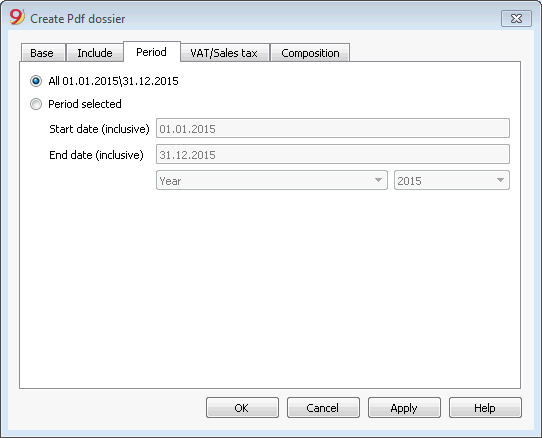
All
If this option is selected, the entire accounting period is included.
Period selected
If a specified period is desired, indicate the start and end dates.
Transactions with no date
If there are transactions with no date, they will be considered only if you chose the whole period (All...)
If however you enter the initial and final dates January 1sr and December 31, the transactions with no date will not be included in the report.