Utilities application
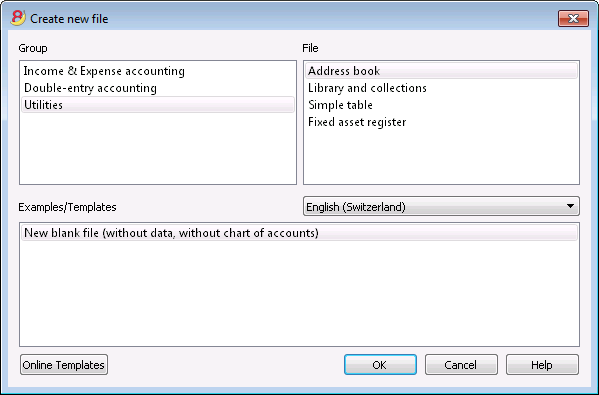
The Utilities application allows you to create the following file types:
- Address book: for addresses and labels management
- Library and collections: for the management of books or other objects (ex.: art collections, jewlery, ...)
- Simple table: the user can create a personalized table
- Depreciable assets register: the user can manage the depreciable assets (only available in the Experimental version)
By clicking on the Online Templates button you can access our website where we published all templates available for free.
Additional functions
The following commands are particularly useful when used with these applications:
- Extract and sort rows
In order to create lists of existing data. - Print labels
In order to print addresses or items labels. - Add new funtionalities
- New table documents (Swiss Balance sheet attachment...)
- New simple table
- App menu
In order to create personalized reports, calculations or else.
Link between tables
You can create a link between a field of one table to another one, through the Id field.
For example:
- Add a new simple table named "Projects"
- In the Id column indicate a project symbol and in the Description column a small explanation.
- In another simple table, add the following text columns:
- ProjectsId (Table name plus "Id")
When you go into edit mode a list of the available projects will be displayed. - ProjectsDescription (Table name plus "Description")
This column must be protected.
When you change the ProjectsId contents, the description text will be displayed.
- ProjectsId (Table name plus "Id")
- When you add a column, proceed with a check of the accounting or close and reopen the file to activate the link.
Address Book
This is an application for managing data lists and printing labels.
Characteristics:
- Free definition of the fields
- Possibility of printing only the selected rows
- Free setting of the label format
- Copy/Paste addresses from other programs (Excel and Word)
The Address Book presents three tables:
- Groups
- Contacts
- Diary
Groups
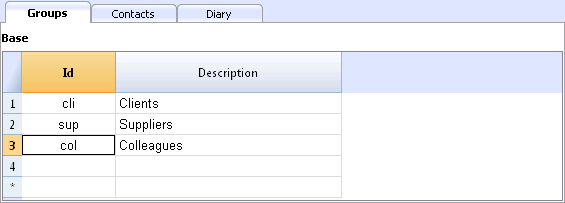
In the Groups table, one can define for each row, in the Id column, an identification code for a Group and enter the corresponding description in the Description column (es. cli - Clients, sup - Suppliers, col - Colleagues, etc.)
Contacts
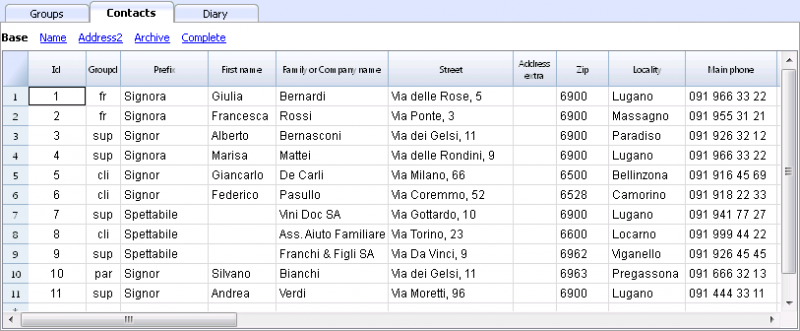
The table presents the columns where the addresses can be entered.
The columns
There are different columns. The biggest part of the columns is invisble. The Colums setup command has to be used in order to:
- Display the columns
- Change the order of the displayed columns
- Add other columns
- Id is the contact number.
This is needed when you want to connect a contact to the diary, to the loans or to another table.
While being on that column and pressing F6, there is an automatic progressive numbering. - Prefix: you can enter "Mr", "Mrs", etc.
- Family or Company name (if it concerns a company).
If the contact is a contact person for a company, you can enter the company or entity to which the contact belongs in the Organisation column.
When pressing F6 on the Name or Family Name column, the program separates or inverts the name and last name.
If there are more than two names, this feature is not able to distinguish which one are the names or family (last) names. - LetterStart: is the greeting that is being used at the beginning of a letter. This is being used for a mail merge.
For example: Dear John or Dear Mr Smith.
The program suggests possible texts according to the contents that have already been entered into the columns.
The views
There are different views available and each view distinguishes itself from another one through the presence of specific columns; in this example (Address Book file), we have the Base, Name, Address2, Archive and Complete views. In the Complete view, all the columns are visible.
Diary
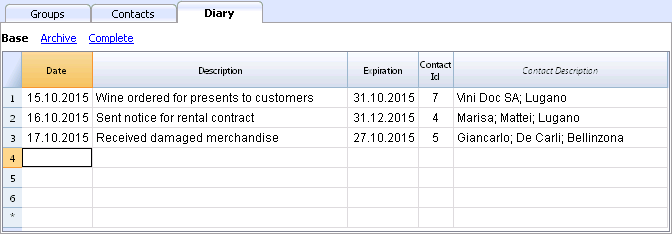
In the Diary table, you can record all kind of notes, day after day and refer to the entered contacts.
Synchronize the data with Google
Manages your own Address book with the Google contacts.
When clicking on the Synchronize with Google (Download) command of the Utilities1 menu, a window appears that displays a Chrome browser page integrated in Banana and that asks for your Google login.
- Enter your email address and the password of your own Google account.
- Banana saves only the email corresponding with the Google account.
The session's data and the password are not being saved in Banana, but are being managed by Google chrome.
Download
This feature takes the contact data from Google into Banana, or updates the Banana contacts.
- In the Groups table, the groups that are present in Google are being resumed.
- In case there are already data in the table, the program merges the different data.
Send
Sends the modified data to Google, or updates the Google contacts.
- If in the "GoogleNotSynchronized" column "Yes" is being indicated, the contact is not being synchronized with Google.
- In order to send the data, these have to be downloaded earlier.
If you have edited the data on your telephone, you need to first download the data and then press Send.
References
For the technical details referring to the connection made, please consult the Google Api documentation.
- https://developers.google.com/google-apps/contacts/v3/
- https://developers.google.com/gdata/docs/2.0/elements#gdReference
Printing Addresses/labels
Information on printing addresses/labels can be found on the following web page Print label.
Library and collections
How to use it / introduction
This is an application that allows you to keep a list of books, objects and contacts, and check on objects borrowed and returned.
There is a free downloadable template for libraries where you can also find all the explanations on how to use it.
Groups table
In this table you can assign to each user a group, for example to partition children between Kindergarten and Primary school users, etc.
You can enter a group Id (Id column). In the Description column you enter a text describing the group.

For a detailed explanation of the columns, please consult the Address Book page.
Contacts table
In the Contacts table you can to enter users data, divided into several customizable columns (you can keep visible only the ones you need and hide all others - you can also add new ones).

For a detailed explanation of the columns, please consult the Address Book page.
Items table
In this table you can enter your items data.
There are different ways of entering the items data: copy and paste from Excel, automatic data retrieving from the Internet, etc.
See detailed explanations below.

Columns
There are various columns and it is also possible to add new ones.
- Id: the item number that has to be attributed.
The F6 key assigns the number progressively.
It is also possible to use a prefix. For example: A-001, after that, the program suggests A-002. - ISBN
The International Standard Book Number.
When entering the ISBN in the Id column and pressing the F6 key, the program automatically completes all the book's data in the other columns, incorporating them from the Google database, provided there is an internet connection available.
Any already present information will be overwritten.
For more information see: Google documentation.- The data in the Google database are not always complete. For example, the title might be present, but the editor or other data might be missing.
- In order to know which data are available on Google, please visit the following page:
https://www.googleapis.com/books/v1/volumes?q=9781906042509, entering after q= the book's ISBN number.
If you see "totalItems: 0" it means that the book is NOT in Google's database
If you see a page in a JSon format (programmers format) with the book's data, it means that the book IS in Google's database.
- Title
Is the title of the work. - Author
There can be several authors entered, separating them with semicolon ";". - Publisher
There can be several editors entered, separating them with semicolon ";". - Return date
The projected return date for this item.
This column is automatically completed according to the checked out item.
Entering books data
Books data can be entered in different ways:
- Manual insertion - You can manually enter the books data in the Items table (see previous paragraph)
- Retrieve data from Excel - If you already have a list of books from another program or Excel, you can simply copy/paste the data.
In order to copy / paste the data you need to make sure the columns in Excel as arranged in the same order as in Banana. If the column order is the same in both programs you can copy the data in block, otherwise you need to proceed column by column. The copy/paste operation is possible from Excel or from txt files. - Retrieve book data automatically from the internet - The ISBN column is very useful if you have an Internet connection: each book has an ISBN code (internationally recognized and generally written on the back of the cover); If you enter a book's ISBN code on the appropriate column in Banana and press the F6 key (or Cmd + 6 for Mac), the program automatically retrieves the books data from the Internet and inserts all data (title, author, publisher, etc. even a small summary).
- If the book has different authors or publishers, just separate the names with a semi-comma ";" - they will also be found individually in searches (for example if you need to find all the books of a certain author).
Loans table
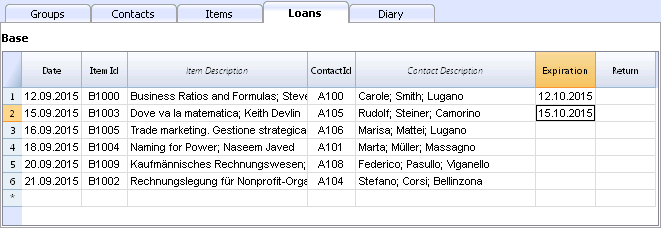
In the Loans table you can enter the checked out items, the expiration date and the return date.
Columns
- Date
The data of the loan. - ItemId
The item number. A search can be made based upon the title. - ContactId
The contact number. A search can be made based upon the name, family name, place. - Expiration date
The projected date for the item's return.
If you enter "+30", the program proposes the date that come 30 days later. - Return date
Enter the return date.
How to manage the loans
Loan of a book
- Add a new line and indicate the date of the loan (useful shortcut: hitting dot "." on your keyboard will automatically generate the current date!)
- In the Item Id column, as you start typing the title of the book or library user, the program will display all choices available in your database; just select the right option and press the F6 key: the program will automatically fill the Item Id and Description cells.
- In the Expiration column (date of return for the book) the program automatically enter a date 30 days after your current date, but you can manually change it: you can enter the number of actual days (for example +40) to generate the correct return date (40 days later).

Return of a book
- From the Utilities1 menu, choose Items return;
- This will open a window where you type the name of the library user. This will display all books on loan to this library user.
- You can now check all returned books (usually a library user returns all the books he has on loan simultaneously).
- Click the Apply button and the program will automatically insert the actual return date in the Date column.
- In case of error, return to the Loans table and click the Undo command.

How to archive data
The Archive feature avoids the adding up of too many transactions of lent and returned books. Outdated data to be archived in hidden tabs without being deleted. This data can be recalled at any time for statistics or any other use.
Store data of returned books
- Choose Archive data from the Utilities1 menu and then Archive table data -> Loans. The program will delete all transactions of already returned books from the Loans table and store them in the Archive table.
- Only books on loan that are not yet returned will be shown in the Loans table.

Store contact information no longer used
As for your books, you can equally archive your old and unused contacts
- Indicate a storage date for all the contacts you wish to archive.
- Choose the Archive data from the Utilities1 menu and then Archive table data -> Contacts..
Diary - organization and internal notes
Diary table
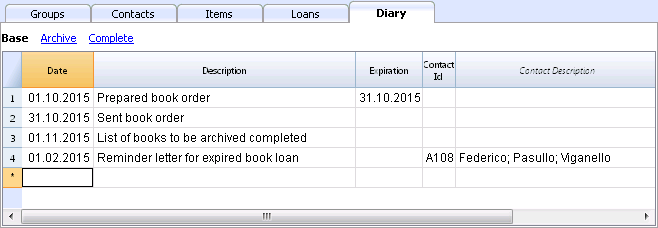
In the Diary table you can enter daily notes and connect them to a specific contact.
You can for example organize the shifts of people working at the library, post notes or important facts, lists of things to do, etc.
Each row of record has it's column for date, description, expiration date, the contact Id of the originator.
Printouts
Everything that you see on screen can be printed or saved in a pdf format.
In the BananaApps section (look for library), you can also find extensions for specific printouts:
- printout of the complete book catalog in pdf, to be published on the internet
- printout of the users details with the books they have loaned and the ones still to be returned
Print library labels
Label printing
You can print two different types of labels:
- small labels (containing the book code) for use on the spine of the book, so that they are visible on the bookshelves
- larger labels are used on the inside of the cover, maybe mentioning that the book has to be returned at a specified date
Labels can be printed either on the basis of the Banana file, where you have registered all the books in the library, or from an empty file in case you wish to print a list with codes, that you will then assign to the books.
Printing labels for the spine of the book
You can choose the format that best suites your needs by consulting the websites of label producers (for example A4 sheets, 25,4 mm x 10 mm - Herma 10001 or Herma 4333 models).
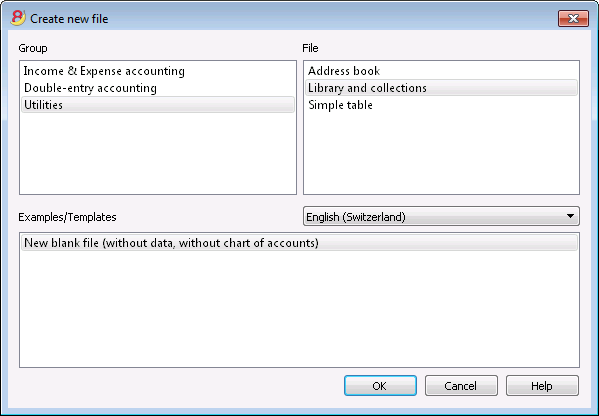
In order to print the labels, you can open a new blank file in Banana, containing no data (File menu -> New), but, as stated, you may wish to start from an existing file in your library.
There is a useful Excel function to generate a large amount of codes in a speedy manner, rather than entering them manually or than using F6 key. Here is how you do it:
Open a new Excel file; in cell A1 entere the library code that suited your purpose (any combination of letters and numbers will do) - for example B-1000.
Choose the bottom right angle of your cell with your mouse (the point will now be a cross), and, while holding down the right click, drag down along the column; Excel will automatically generate autoprogressive numbers.
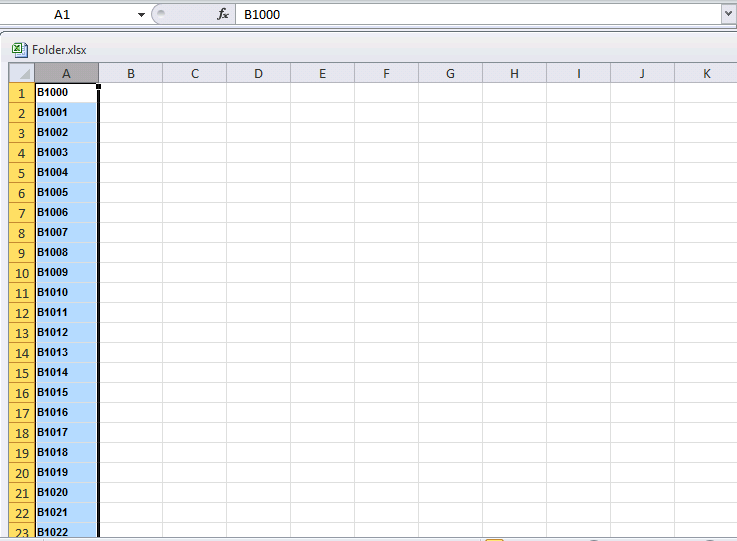
Now copy (Ctrl + C keys) the codes that have been generated into Banana's Items table, in the Id column (Ctrl + V keys).
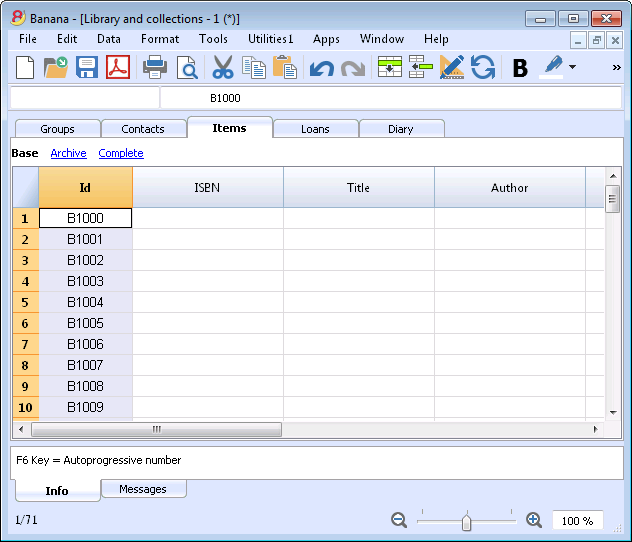
You can now create the label.
Chose the Labels -> Print command from the Apps menu. This window will be shown:
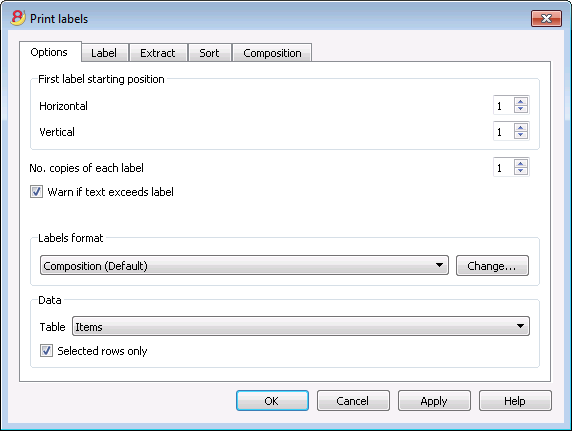
It is important to have the Items table selected as the source for Data; now you can define your label by pressing the Change... key in the Labels format section.
In the window now shown, entere the margins and other characteristics of your chosen label, Herma 10001 in this case.
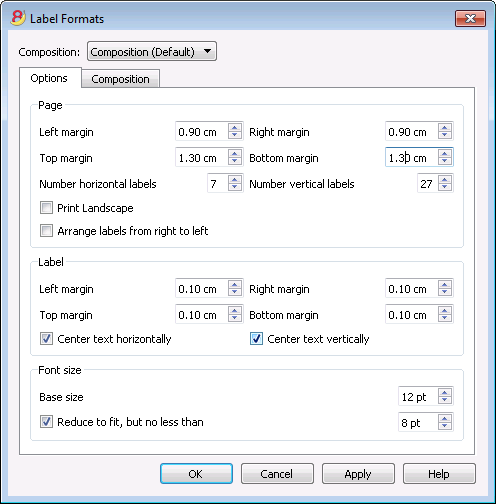
Before hitting the OK key, opene the Composition tab, where you can assign a name to your custom settings (so they can be used in the future). In this case it's Book codes (Spine).
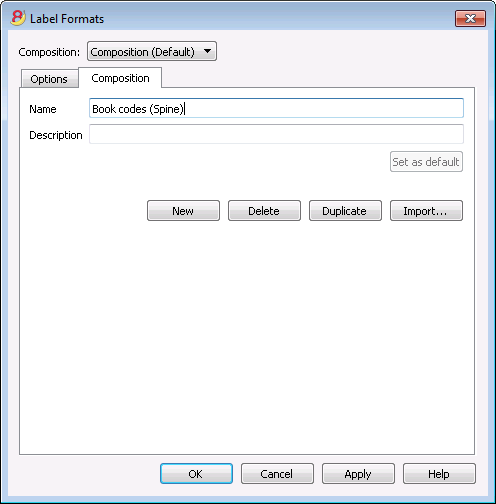
Hitting the OK key will now return you to the Print labels window.
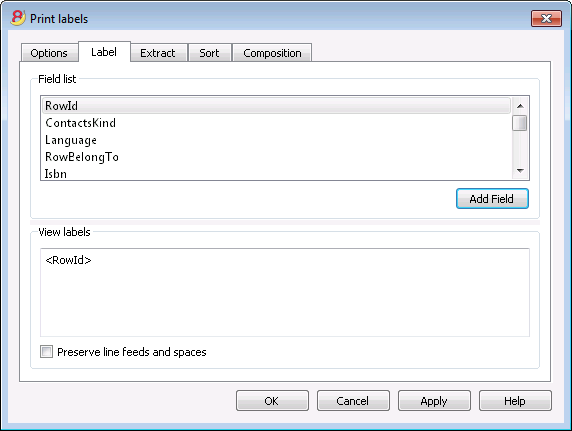
Enter the Label tab to do so.
In the example, the label only needs to indicate the book's code, i.e. the RowId column.
You can therefore select the RowId line in the available list and press the Add Field button.
RowId will show in View labels.
Pressing the OK button will generate a preview of your label.
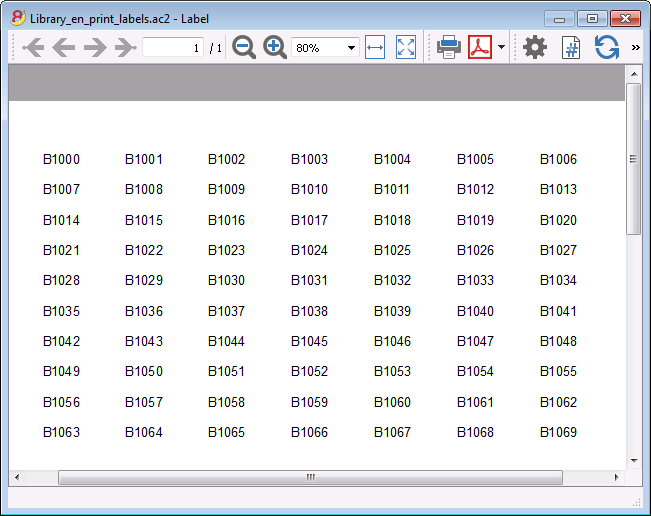
You may now print using your Herma sheets.
Printing labels for the inside cover
Choose your label format. In the example a 70x36mm (Herma 4630 or Avery 3490) format hase been chosen. The steps to follow are identical to the previous example::
- First, choose the Labels -> Print command from the Apps menu
- Click Change in the Labels format section
- Enter the margins for your new label in Labels format window.
- Before hitting the OK key, open the Composition tab, where you can assign a name for your new custom settings (Inside Cover label, for example), than hit OK.
- Select Label in the Print label section to add the content of your label.
You may enter text, other than the available fields, as well.
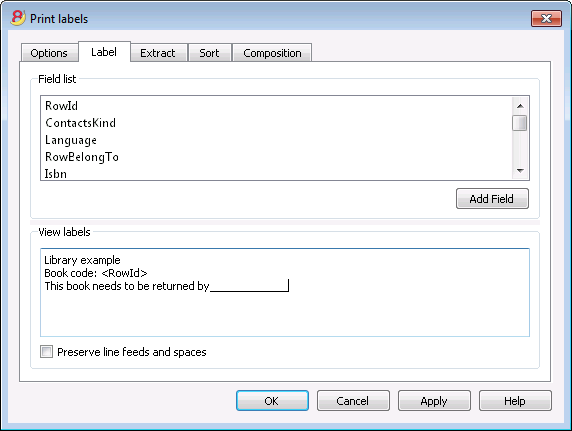
Pressing the OK button will generate a preview of your label.
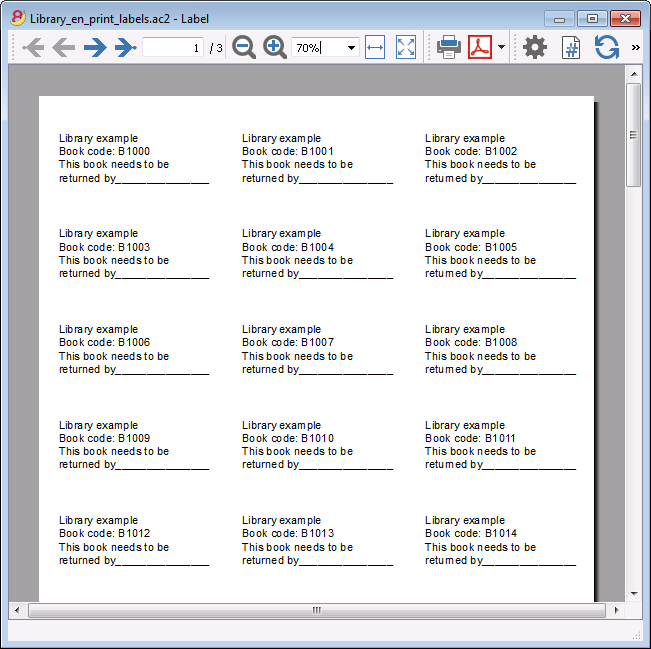
Note:
The models available in Banana already include the two mentioned label formats: label for the spine of the book and label for the inside of the cover.
Related features:
Management of yearly membership fees
If you run a library requiring an annual membership fee, or if fees are charged for the loan of individual books, it is useful to use the accounting functions of Banana Accounting.
Please check our page Accounting templates.
Simple table
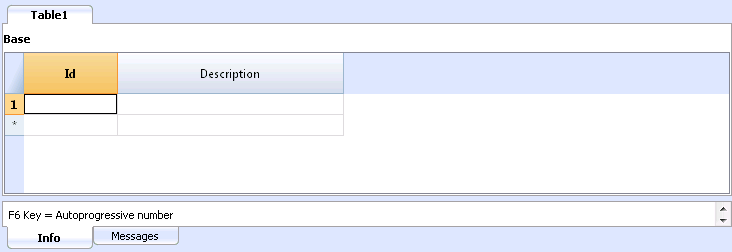
This is a table that can be set up according to the needs of the user. One can add columns and views and give them the most appropriate header, with the Colums setup and Tables setup commands of the Data menu.
Depreciable assets register
New functions for amortizations
In the new Banana Accounting Plus version, the Fixed Assets Register has been improved with new features for an even more complete reporting.
We advise you to immediately switch to Banana Accounting Plus and take advantage of the many new features.
Available for now only in the Experimental version. This feature is under development.
This feature allows you to manage the depreciable assets, and, at the end of the period, automatically creates the depreciation transactions. It has the following tables:
- Items table
Where you list the depreciable assets and the depreciation parameters - Transactions table
Where you enter the depreciation transactions, as well as purchases assessments - Depr. Type table
Indicates the various depreciation types. - Trans. Type table
Indicates the various transaction types
Logic of the Software
The software allows you to track the value of your Assets in your Accounting.
All depreciable assets are entered in the Items table with all the parameters required for the effective calculation of depreciation. The following values figure in the Items table program:
The program uses the following values:
- Asset at purchase value
- Historic value (purchase value +/- assessment of appreciation or depreciation)
- Accounting value (historic value +/- corrections due to depreciations)
- Fiscal value (Accounting value +/- correction of fiscal value).
Variations of value for a specific item are entered in the Transactions table:
- A function for automatic calculation of periodical amortisation of predefined basic values, is integrated. Transaction values can be adjusted manually (as, for instance, in a varying calculation for a first accounting year).
- Transactions can be added manually for appreciation, extraordinary amortization, adjustment of fiscal value and so on.
Items Table
Where you enter assets subject to depreciation and their groups.
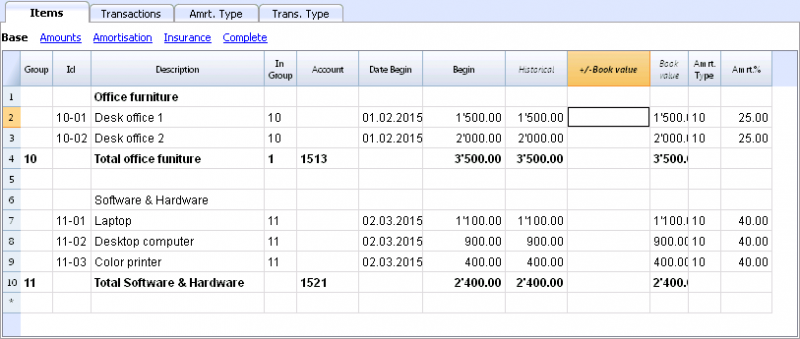
This table contains the following columns; The ones marked with an asterisk (*) are protected and calculated by the program:
- Group
If a value is present it means that the row is a group.
Items and groups values are added up in this row. - Id
The Item Id - Description
The item description. - In Group
The group the row belongs to. This must be a value present in the Group column. - Account
The account to which the item is being attributed in the accounting.
This account can also be a group. - Date Begin
The item purchase date (or at which the item was entered in the accounting file) - Document Date
The date of the item purchase document, if available - Initial value
The purchase value. - Purchase Variation*
The total purchase value, positive or negative, indicated in the transactions. - Purchase Value*
The initial value plus the purchase variation. - Historical Variation*
The positive or negative value of the historical variation (revaluations or write-downs) indicated in the transactions. - Historical Value*
The purchase value plus historical variation. - Book variation*
The positive or negative accounting value (depreciations or reverse depreciation entries) indicated in the transactions. - Book value*
Historical value plus book variations. - Fiscal Variation*
The positive or negative value of the fiscal adjustments indicated in the transactions. - Fiscal Value*
The Book Value plus the fiscal adjustments. - Residual Value
A possible minimal residual value to be indicated.
If the residual value is equal or bigger than the book value, no more depreciation rows are created. - Estimate value
An item's probable estimated value - Depreciation Id Type
The depreciation type applied to this item
The depreciation type can also be indicated for the group. - Depreciation Percentage
The depreciation percentage.
The depreciation percentage can also be indicated for the group. - Depreciation amount
A possible depreciation amount if the depreciation is not specified as a percentage. - Depreciation Percentage 2
The additional depreciation percentage to be applied to this item.The depreciation type can also be indicated for the group. - Depreciation Months First Year
The number of months the item needs to be depreciated in the first year. - Contra Account
The account where the depreciation should be registered
The contra account can also be indicated for the group. - Serial Number
The item's serial number - Warranty Date
The warranty expiration date. - Insurance Value
The value this item or group is insured for. - Insurance name
The insurance company's name. - Insurance number
The insurance policy number. - Insurance expiration
The insurance policy's expiry date. - Insurance cancellation
The date by which legal notice needs to be given to the insurance company if automatic renewal is not desired. - Archive Date and Archive notes
Columns you might use if you need to archive the item.
Transactions table
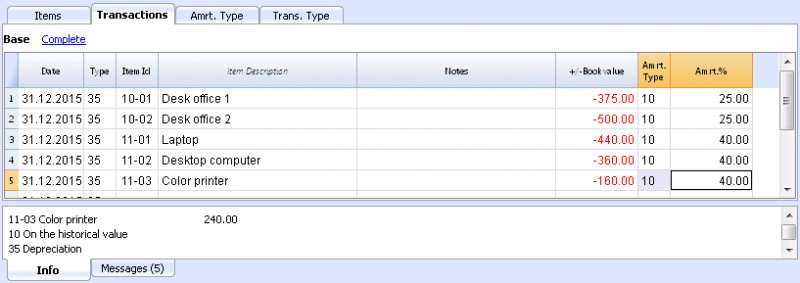
This is the table where you enter the items variations. It has several columns:
- Date
The transaction date - Transaction Type Id
The transactions type, identical to the one in the Transaction table. - Transaction Type Description*
The description from the Items table is displayed. - Item Id
The Item Id. - Items Description*
The items description from the Items table is displayed. - Notes
An additional note concerning the transaction. - Purchase Variation
The item (+/-) variation compared to the purchase or sale. - Historical Variation
The Item (+/-) variation compared to a item revaluation or write-down. - Book Variation
The item (+/-) variation value compared to the book variation.
This is particularly used for negative depreciations - Fiscal Variation
This is the fiscal variation amount. - Depreciation Type Id
The Depreciation type code as shown in the Items table. - Depreciation Type Description
The depreciation code descriptions as per the Items table. - Depreciation Percentage
The depreciation percentage applied. - Account
The Assets account where the operation must be registered - Contra Account
Contra account (for example the depreciation account) where the operation must be registered. - Archive Date and Archive notes
Columns you might use if you need to archive the item.
Depreciation type table
- Id
The depreciation code.
These codes are fixed and must not be modified.
If you change the Id number the program will not operate correctly anymore.- 00 No depreciation. No depreciation will be created.
- 01 Complete depreciation of the item. The item is depreciated all at once.
- 02 Indicated amount. The depreciation is calculated, based on the entered amount.
- 10 On the historical value. The depreciation is calculated as a percentage of the historical value.
- 11 On the book value. The depreciation is calculated on the book value.
- Description
The code explanation
Transactions type table
- Id
The transaction type code
These codes are fixed and must not be modified.
If you change the Id number the program will not operate correctly anymore.- 01 Initial value. Used to enter an initial value, instead of entering the initial value in the Items table
- 11 Purchase or production
- 15 Sale or value reduction.
- 21 Revaluation
- 25 Devaluation
- 31 Reverse depreciation
- 35 Depreciation
- 36 Additional depreciation
- 41 Fiscal value increase
- 45 Fiscal value reduction
- Description
The code explanation
Utilities1 menu
Create depreciation rows
It requires a date.
If you launch this command, the program automatically creates the monthly or yearly depreciation transactions based on the item parameters previously entered in the Items table.
- If the parameters Depr. Type, Percentage, Account or Contra account for the item are not entered, but have been entered for the group the item belongs to, the software will use the group parameters to create the depreciation transactions.
Show Journal
Will display all operations with the variation of values and the cumulative value.
Show items report
Will display the variations for each item and item groups for the selected period.
Planned developments to the software
Transfer of accounting
Under preparation, currently unavailable.
To resume amortization in accounting.
Printing
It is planned to develop printing modules within BananaApps, that will go beyond existing available printing templates, allowing for more flexibility and tailor made solutions.
Do not hesitate to report your needs and requirements to our programmers, possibly by sending an example of the type of report you wish to use, as an Excel table, with columns, totals, header data, and formatting.
Different types of amortization
It is equally planned to develop modules within BananaApps for this feature, to include different types of amortization, aiming to deliver a tailor made solution to you.
Do not hesitate to report your needs and requirements to our programmers.
Utilities1 Menu
The Utilities1 menu includes various commands that are specific for the Utilities applications.
The general commands, available in all the Utilities applications, are explained hereunder.
Other commands, specific for the Address Book and the Library application, are explained in the corresponding documentation.
Recheck all...
Checks everything and gives a warning in case there are errors.
Sort contacts by name
Sorts the rows of the Contacts table in ascending order by Name, Family Name, Second Name, Place.
Archive Data menu
The program keeps a list of the rows that have been archived, for each table.
The archived rows are being shown in the Archived rows table. Select the rows that need to be shown.
Archive data
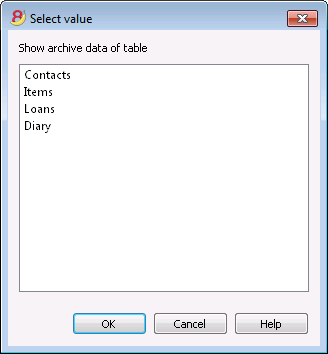
Moves the rows of a table (Contacts, Items, Loans, Diary) to the Archived data table, where:
- The Archive data column is not empty.
- For the Loans table, there should be an expiration date and a return date (a "closed" loan)
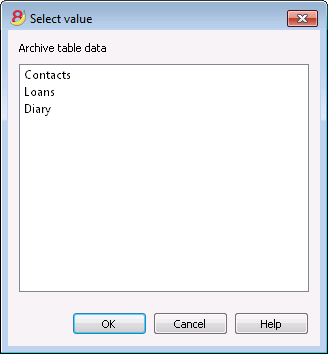
A list of tables is being shown. The tables present on this list contain rows that can be archived.
If there are no tables with rows that can be archived, the selection is empty.
Show archived data
Shows a list of the archived rows of a specific table.