Tutorial Maker Application: Create, Translate, and Enhance Video Tutorials
The Tutorial Maker application, developed by Banana.ch, is a versatile tool for:
- Creating comprehensive video tutorials with speech in multiple languages.
- Adding or modifying speech in various languages to existing videos.
The application, developed primarily for internal use at Banana.ch, plays a vital role in both the production and ongoing enhancement of multilingual Banana Accounting video tutorials. It employs AI-based services to facilitate efficient translation and speech generation.
While the Tutorial Maker application is currently featured in the Dev-Channel version, it has been extended to a select group of partners. You are welcome to try it; however, please be aware that it is not a fully supported product and requires the installation of additional components. Furthermore, its functionalities are subject to change at any time.
How It Works
Creating a Video Tutorial for a Desktop Application
- Capture Screenshots.
Begin by capturing screenshots of the desktop application and saving them to a directory (recommended size: 1920x1080). - Fill in the Clip Table,
Enter all necessary information to create a video:- Select the image to be used.
- Apply effects to the image, such as highlighting a section, adding arrows, or circles.
- Choose the text and voice style for the speech.
- Input the text for titles and/or text-to-speech.
- Translate the text into other languages as needed.
- Build the Video.
On executing the build video command, the program performs the following tasks based on the specified language:- Adds effects, titles, and subtitles to the images.
- Generates speech files using internal or Microsoft or Google voices, as selected.
- Creates a video sequence for each image. The duration of each sequence matches the length of the speech or a duration you specify.
- Final Video Compilation.
The final video is created by combining all the video sequences.
How it works
Assuming you are creating a video tutorial for a desktop application.
- You capture screen shots and save to a directory (size 1920x1080).
- In the Clip table you enter all the information needed to create a video:
- The image to be used.
- Create effects on the image. Like highlighting a part of image, adding an arrow or a circle.
- The text and voice style to use.
- The text to be used for titles and/or for the text to speech.
- The text translated to other languages.
- You give the build video command and the program, based on the language you specify:
- It add effects, titles and subtitles to the images.
- It generates the speech files using the Microsoft or Google voices you choose.
- For each images it create a video sequence.
The duration of the sequence is the duration of the speech, or one you specify. . - A final video is crated by putting together all video sequences.

Optimizing Videos: A Streamlined Approach
This video creation tool specializes in producing straightforward tutorials and translating them into multiple languages through a progressive process. Typically, we develop an initial version and then pass it on for review and translation. Based on user feedback, we continually modify and enhance the content.
The Tutorial Maker significantly eases the effort and time required to alter video content and text, translate, and generate new versions of the tutorial, each tailored in length to the specific language. Consequently, it employs a logic distinctly different from that of traditional video creation tools, which are more focused on creative aspects.
The speech is automatically generated from the input text, allowing for easy modifications of the text, voice-over, and video sequence duration. This feature simplifies the process of refining and creating new versions of the video.
The tool excels in translation. By entering the translated text into a designated field, a corresponding voice-over is automatically generated. The video sequence is also adjusted to match the exact duration of the new speech, streamlining the translation process.
Video tutorial of the Tutorial Maker application
Create video from images, with speech, subtitles and text decorations.
- Watch the video tutorial (03:13).
The video has been created with the Tutorial Maker Application. - Watch the video tutorial in French (text has been automatically translated).
Here is the full project and files on github.com.
Mainly for software developers
The Tutorial Maker Application offers advanced features, specifically tailored for users who are also software developers.
Currently in its alpha phase, the application has been fine-tuned for our internal use. It necessitates a particular setup and is in the early stages of incorporating error controls. Moreover, the interface and messages are exclusively in English. As such, at present, it is predominantly suitable for software developers and highly skilled users.
Be aware that the data's structure and format might evolve over time, and we may not always provide a means for transition. Additionally, both the terms of use and pricing are subject to change. We reserve the right to modify the technical content, availability, terms, and pricing at any moment without prior notice.
We invite you to share your experience using the application and greatly appreciate any feedback or suggestions you may have.
Requirements and setting up the environment for video and speech creation
Requirements
- Internet connection (necessary to create speech files)
- Banana Accounting Dev Channel Version.
- Subscription to the Advanced Plan.
- FFmpeg executables.
- Subscription to a text-to speech service
- Azure cognitive API
- Google text-to- speech service.
Setup the environment
In order to use the Educational Video Maker application.
- For Windows
- Download and Install ffmpeg tools
- Download ffmpeg tools for Windows
- Under "Get packages & executable files" select the Window operating system.
- Download the essential package.
- Unpack the file to a directory for example C:\ffmpeg
Under bin you should have the file ffmpeg.exe and fprobe.exe
- Make sure your antivirus does not block or slow the execution
- Search and go to "Virus Thread and Protection"
- Manage settings
- Add Remove Exclusions.
- Add Exclusion
- Folder
- Select the ffmpeg/bin directory
- Install a video player for mp4 files.
Video are build in mp4 format, the codec is not preinstalled on Window.- Install an alternative Video player like VLC video player.
- Download and Install ffmpeg tools
- MacOS setup (Install Ffmpeg tools)
- Download the ffmpeg and ffprobe binaries
- Under "Get packages & executable files" select the Mac operating system.
Download the - ffmpeg
- ffprobe.
- Unpack the files and copy them to a new directory.
- Make sure the ffmpeg and ffprobe are executable file type.
- Go to the "Get packages & executable files" section of the page.
- Click on macOS icon.
- Click on "Static builds for macOS 64-bit".
- Under "Get packages & executable files" select the Mac operating system.
- Download the ffmpeg and ffprobe binaries
- Setup Banana Accounting.
- Install and run the dev-channel version.
- Run the software
- Make sure you can open MP4 files
- Menu Tools → Program Settings.
- Activate the integrated Screen Capture.
- Windows-Appearance → Show developer Menus.
- Developer menu → Activate ctrl+3.
- Set the default language to English.
- Menu Tools → Program Settings.
- File Handling → Extensions of files conisdered secure
- Add mp4 to the list
- Create an empty video project
- Create a new directory for the video project.
- Download and the Empty educational video file and copy it to the video project directory.
- Setup the Global settings
- Important you need to specify the ffmpeg executable.
- Request the authorization at Banana.ch
Speech generation only work if you have the authorization.
How to for creating and translating video
Setup a video project
A video project is composed of different files. So you should create a new directory where you save all your files.
Structure of a video project
A video project is composed by:
- A directory on your computer where to save all the files relative to the video project.
- The first step is to create a new directory where your file will reside.
- Put all file in project directory unless there is a real necessity to do otherwise.
- A Banana Video Project file (ac2).
You can create a new file by:- Menu File > New file > Tutorial Maker > Create empty file
Save the file to your directory - By copying an existing one to your directory.
- Menu File > New file > Tutorial Maker > Create empty file
- The image files with the screen capture.
When possible create images with size 1920x1080 pixels or else with the 16:9 format. - Other images files that are used for titles or slides.
Image size should be 1920x1080 pixels. - If you are creating a video you can also save in the directory the files that are the base for the video creation(accounting file, presentation file or else).
- Directory for language specific images.
- Assume you have created the clips images in English.
- Create a sub-directory "it" where you will save the captured images in italian.
If the software, when building the "it" video, will find an image with the same name in the directory it will use it instead of the one that is in the main directory.
Example video projects
You can try the following examples
- Demo
A very simple project (see on files on github.com) - A presentation of how the video creation tool works, that has been created used the video creation tool.
Add a speech to a video with subtitles
You can easily add a speech to an existing video.
- The speech is generated automatically by the computer.
- The speech and subtitles remain placed on the same time position.
- If the translated speech does not fit the original video segment, the specific segment will be automatically speed down to fit the speech.
Here we explain how to translate speech of an existing video.
- First you have to setup the environment.
- Create the project and directory.
Prerequisites
- A video file with subtitles in SRT format or with a Youtube transcript.
Add the speech to a Youtube video with subtitles
- Create a new Banana video file (ac2).
- Download the video from youtube.
- In the Table Clips column Clips enter the nave of the original video.
- Copy the the youtube transcript to the clipboard
- Menu Actions>Import subtitles from youtube transcript
- Menu Actions->Build video.
First Video Tutorial Project using Screen shots
Here we explain how to create a video tutorial
- First you have to setup the environment.
- Create the project and directory.
Example video projects
You can try the following examples
- Demo
A very simple project (see on files on github.com) - A presentation of how the video creation tool works, that has been created used the video creation tool.
Create a Tutorial Maker project
- Structure the video and write the text.
- Plan the video objective and content.
- With word processor start writing text part of the video.
Writing and improving the draft is easier with the word processor.- Chapters titles.
- Speech part.
- Setup files.
- Create a video project directory.
- Download and copy on your directory the the Empty Video Tutorial Template and give a new name.
- Enter the content
- Start Banana Accounting Dev-Channel version.
- Open the Educational video file you have just created.
- Menu Actions → Add language column of your desired language.
- Copy the text you have written on Word and paste it in the column language.
- In the column Chapter enter the chapter number.
- In the column Text Style enter the appropriate style.
- In the column Speech Style enter "None" for text that should only be displayed (no audio).
- Apply the color Yellow for chapter titles.
- Build the first video version.
- Actions → Build video and the video will be build with:
- a single still image
- titles
- the speech
- the subtitles
- You will be able to see how long it is the video based on the spoken text, and also listen the high quality audio voice.
- Actions → Build video and the video will be build with:
- You should now capture the images or the video clips with the tool you already use.
Better use size of 1920x1080 px or with 16:9 factor. - Or you can create the image capture in Banana.
- Create the Banana Accounting file with all the data you will need to explain.
- Capture the screen using the ctrl+3 functionalities.
- Set the size of Banana Accounting Windows to 1920x1080 or other size with 16:9 factor.
- Save the file in the project directory.
- Better complete the file name with a numeric sequence corresponding to the chapter number.
- When using number better use 01 instead of 1, so that you get the file listed in numeric order.
- Use fine sequence multiple of 3 or 5 to easily insert other images.
- Complete your project with images.
- In the appropriate row of the column Clip File enter the file name of the images you have saved.
- Add Effects to the images.
- Build again the video .
- Improve the texts, images, effects until you are finished.
Translate the speech and subtitles of a video
You can easily translate the video in another language.
- The speech is generated automatically by the computer.
- The speech and subtitles remain placed on the same time position.
- If the translated speech does not fit in the original video segment, the specific segment will be automatically speed down to fit the speech.
Here we explain how to translate speech of an existing video.
- First you have to setup the environment.
- Create the project and directory.
Prerequisites
- A video file with subtitles in SRT format or with a Youtube transcript.
Translating an existing video with SRT subtitles
- Save the original video in the project directory.
- Create a new Banana video file (ac2).
- In the Table Clips column Clips enter the file name of the original video.
- Menu Actions>Import subtitles.
Choose the subtitle type.
- Menu Action>Add language column.
Enter the 2 letter column - Translate the text to another language with an online translation tool like www.deepl.com/translator.
- Select and copy the text column.
- Past to a translation tools.
- Copy and paste the translated text to added language column.
- Menu Actions->Build video and choose the language.
Translate the text in another language
- Table Clips
Action->Add Language column.
Choose the language.- If the language does not exists in the list.
- Menu Data ->Manage Columns->Add Column.
- Enter the name "Text_"+Language code (2 letters).
"Text_fr"
- If the language does not exists in the list.
- Translate the text to other language.
- Position on the first line of the column with the text to be translated.
- Click on the header of the source language to select all the text.
- Copy the text in the translation service.
- https://translate.google.com/
- https://www.deepl.com/translator
- If the text it to long just copy fewer lines.
- Select the language to translate to.
- Copy the translated text.
- Position the cursor on the column destination.
- Paste the text.
Dialogs for the Video Application
Dialog Video Change Global Settings
The global setting dialog allow to set the environment.
To access the dialog:
- Run Banana Accounting dev-channel version.
- Open the empty project you have just created.
- Menu Actions → Global settings.

You need to setup the
- ffmpeg executable path
- Enter the executable path, including the filename (ffmpeg.exe for windows / ffmpeg for mac).
- Text to speech service
- Internal
It will use the text-to-speech service of the computer. - Banana.ch service
It will use the Banana.ch text to speech service that is based on the Azure service.
Your need to receive a permission from Banana.ch. - Microsoft Azure
You need an Azure account and a API key for the Cognitive text to speech service.
Enter the:- Region name
- The API Key
- Google Service you need the API key
- Internal
- Menu Action → Build video to test if the build process works.
File Properties for Tutorial Maker
When a new file is created, the basic data need to be entered in the File menu → File and accounting properties.
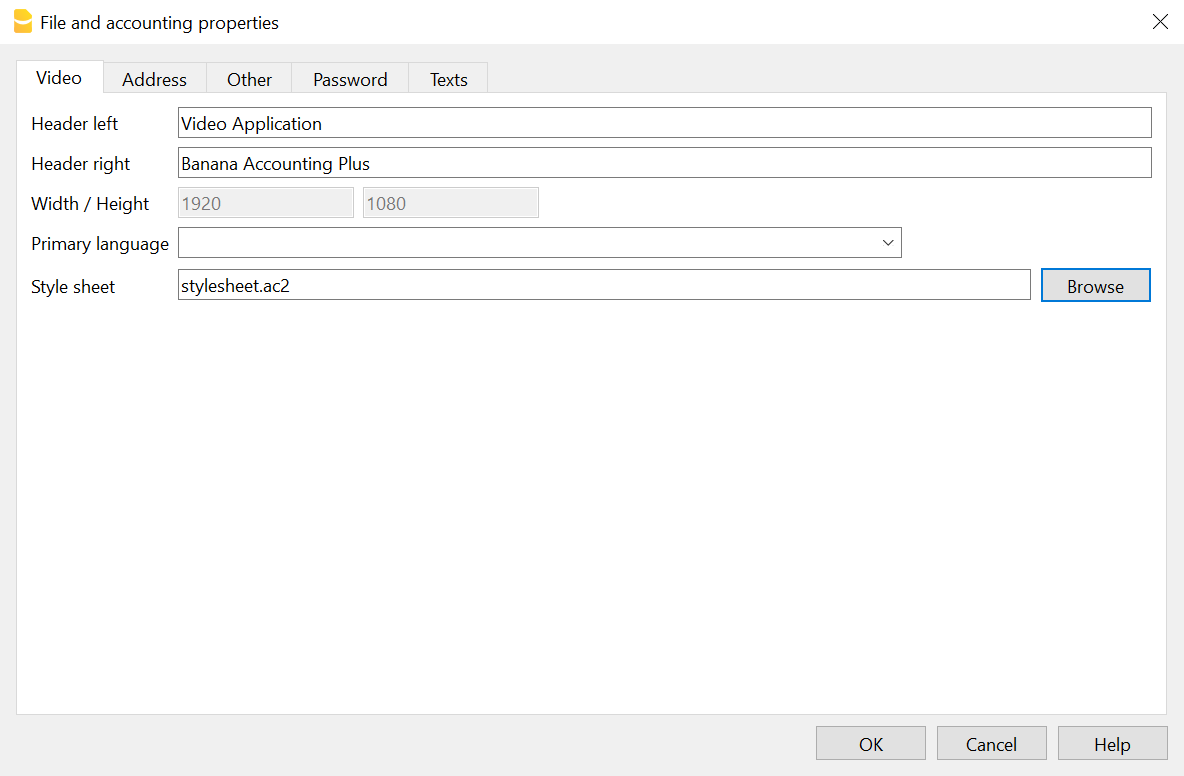
- Header left & Right
Will be displayed on printing. - With and height in pixels of the clips and output.
Currently fixed at 1920 x 1080. - Stylesheet file
Path and file name of a stylesheet.
If present the Text Styles and Voice Styles defined in the stylesheet will be available in this project.
Ideal for creating and reusing styles.
Download the stylesheet.ac2 example and modify it according to your desires.
Import Subtitles
The Actions>Import Subtitles command let you import subtitles. You can choose the available formats.

Imported columns
The commands will import the following columns
- Start Time
- Text
The text will be saved in the current selected language for build.
The lines will be appended at the end of the Clip Table.
YoutubeTranscript
This command allow to import the times and subtitles from the Youtube transcript format.
You should copy the text in the Clipboard.

To copy the transcript text in Youtube
- Clip on the 3 dots button.
- Clip con Show Transcript
Not all video have a transcript. - Select the text inclusive the time and copy to the clipboard.
Eventually save the text to a txt file so that you can easily access lately.
Example of a Youtube Transcript format
0:01
willkommen bei bex dieser folge schauen
0:05
wir uns an wie ich wiederholen die
0:07
aufträge so genannte abos in bex
0:10
erfassen kann
0:12
als erstes erstelle ich mir dafür unter
0:15
dem reiter verkauf einen auftrag auf den
0:18
entsprechenden kontakt aus
SRT Subtitles
The SubRip Subtitles file format is available in most video editing software.
Dialog Build video
Dialog build video
The command "Build Video" give you different choices.

- Build language.
Select the language to use. - Create video file (Always on)
Create the video file with Titles, Voice and Subtitles.- Prepend Chapter to Display titles
Automatically prepend the Chapter number to the Display text.
To be used for titles.
Speech text remain the same - Embed subtitles in the video
The subtitles are embedded in the (style name starting with "Subtitles") in the video.
The build process will also create a *.srt file that you can use to add subtitles. - Add control times
Include information on the clip and text start and duration time.
Useful to check if there are any problem in the sequence.
- Prepend Chapter to Display titles
- Create audio file
It save the audio in separate file. - Create GIF file
It create a GIF animated sequence.- G Width (the height is calculated automatically)
- Add progress bar.
Include a progress bar that show the make the gif look like a video progress bar. - Progress bar color in FFmpeg format
You can also specify the opacity"red@0.4". It use color red with a opacity of 0.4. color of the
- Clear cache.
The program keep a cache with all the the intermediary files. The file are recreated only in case the data change.
In case you change the data, but the audio or video is not updated, you should try clear the cache. Build time will take longer.- Clips.
The video are fully regenerated. - Speeches
All the she speech texts are recreated.
- Clips.
Build process
Once you click build the build process start:
- The audio speech are generated.
- Each row clip is created and the duration is calculated.
- The row clips are concatenated.
In the Out directory you will have:
- A generated .mp4 video file with the speech.
- The srt file with the subtitles.
- The index file with the chapter time and text
Copy the content to youtube to have the chapters. - The audio with the speech (if requested)
- The gif file (if requested)
Output directory structure
When you give a build command a new directory is created on the project directory with the same name as the project file, preceded by the "_" and a sub-directory for the specified language. All temporary data will be stored in the directory.
The directory or any sub-directory can be deleted at any time, but the build will take more time dute to the necessity to rebuild all the intermediary and cache files.
Assuming your project file name is "testvideo.ac2", the resulting directory structure will be:
- _testvideo
- en
the temporary file for the language "en"- build
Where all the intermediary file are stored. - cache
Cache for intermediary files. - out (results)
Where the output video, audio and gif are written.
- build
- it
the temporary file for the language "it". - temp
temporary files not specific to a language.
- en
Table Clips
In this table you enter the data to generate the video.
Columns
- Chapter (Optional)
- Enter a chapter number or letter, that help you organize the video in group of video clip.
- Use [] for automatic chapter numbering (progresssive).
- During build the chapter number is added to the language Text (for display only) if the build option is active.
- Chapter rows should also contain a Clip file name
- Clip File.
- The row that contains a Clip File name will be the start of a Video Clip.
- The Video clip will contains all the rows up to the next row that contains a Clip File name.
- The image file (png or jpg) or clip (mp4).
- If you go in change mode you have the list of files available.
- If you click on the little icon you see the preview and you can change the image.
- Empty.
If the clip file is empty, this row will be added to the previous video clip file. - Automatic file renumbering
Use the file in the specified format to renumber file name based on the chapter number. When you add a new chapter all the existing file with the automatic file format will be renamed.- The automatic file name format is in the form of chapternumber-progressive[-freetext].ext.
The free text is optional.
Examples:- "01-01.png" "101-101.png"
- "01-01-freetext.png" "101-101-freetext.png"
- The automatic file name format is in the form of chapternumber-progressive[-freetext].ext.
- Effects (default is hidden)
You can attach effects to the image that will be applied when the video is build.
For the syntax see the Effects page, - Text Style
The style to be used for showing the text.- Empty.
Same as Subtitles. - None.
Text is not shown. - Any other you define in the Text Style table.
- Empty.
- Speech Style
- Empty.
Default speech style. - None.
Text is not translated to speech. - Any other speech style you define in the Speech Style Table.
- Empty.
- Start (Time Start)
The start time the clip, text or speech start to be shown. Relative to the clip file.
If the time is empty, the start time is calculated based on the speech duration . - Duration
The duration of the clip, text or speech. Relative to the clip file. - Time command.
- Empty
The duration is automatically calculated based on the speech duration. - Duration Time Command
If you specify a Duration command the StartTime of the the next row is ignored.- DurationAdd (AddTime).
The entered duration is added to calculated duration. - DurationFixed (FixedTime),
The entered duration is used. If the speech is longer it will be cut.
Useful for pause. - DurationPause
Same as FixedTime, but with the option to exclude the pause in the build. - DurationPause[XX]
Same as DurationPause, but if the Duration is empty, the duration of the last Duration[XX] is used.
You can create different standard pause "DurationPauseChapter", "DurationPauseImage"
Pause will not be included in build if the option is activated. - DurationSpeech.
The entered duration is used if the calculated speech duration is shorter. - DurationMin (MinTime).
The entered duration is used if the calculated speech duration is shorter.
- DurationAdd (AddTime).
- Time Commands for Title, text or effect rows that have no speech and therefore the duration is zero
In case the rows have the SpeechStyle set to "none" or there is no text and there is no Duration.
These commands allow display the text for a duration of the speech o clip..- SameNextRow (NextRowTime),
The text will display at the same same start time and end time calculated for the next row.
Useful in case you need to use for display and speech different texts. - SamePreviousRow (PreviousRowTime),
The text will display at the same same start time and end time calculated for the previous row.
Useful in case you need to use for display and speech different texts. - SameClip (ClipTime).
The text will display for all the time the clip duration (from begin to end). - SameClipEnd (ClipTimeEnd).
The text will display for up to the end of the clip.
- SameNextRow (NextRowTime),
- Time Command that takes priority over the speech duration
- SameClipVideo (ClipVideoTime)
Only for clip files of type video.
Takes the same duration as the original video clip.
- SameClipVideo (ClipVideoTime)
- Empty
- Text (language)
The text to be displayed or for speech creation.
There is one column for each language.
Use Action->Add Language to add another language.
Structure and logic of a video
These are the basic elements of a FinalVideo.
- Chapter (optional)
It is used to group together a series of Video Clip that together form a unit, exactly as youtube.com chapters.- VideoClip (Clip File)
Start with a row that contains a file name in the column ClipFile
It include all rows up to the next row containing a file name in the column ClipFile- Non-Video Clip Row
- Non-Video Clip Row
- Video Clip
- Non-Video Clip Row
- Non-Video Clip Row
- VideoClip (Clip File)
- Chapter
- VideoClip
- Non-Video Clip Row
- Non-Video Clip Row
- VideoClip
FinalVideo
Is the result of the process of the command Build Video.
- The FinalVideo is the concatenation of the different VideoClips in the same sequence specified in the table Clips.
- The length of the FinalVideo is the sum of the length of the different VideoClips.
VideoClips
Each VideoClip is build separately and once all the VideoClips have been build they are concateneted to form a FinalVideo.
- A VideoClip is based on a ClipFile specified in the column Clip File
- All the rows before a row that contains a ClipFile are used to create the VideoClip.
- The number of Video Clips correspond to the number of Clip Files specified.
A Video clip file and can be of type.
- Image. jpg or png file.
- A video sequence (mp4 o avi file).
Times columns
The times columns (StartTime, Duration and TimeCommand) are used to determine the length of the VideoClip.
- The Time columns are specific to each VideoClip.
The VideoClips are concatenated to form a FinalVideo, so the next VideoClip will start exactly after previous one. - The time of a new VideoClip is not influenced by the times value specified before.
- The duration of a VideoClip is the sum of the duration of the different rows that form the VideoClip.
Start and duration of speech rows
The speech rows are rows that have a text and don't have the SpeechStyle to "none".
- SpeechDuration
The duration of the row is automatically calculated, based on the length of the speech. - If the speech duration is longer then the duration specified, the SpeechDuration is used.
- If the next row has a StartTime, the Duration will be expanded so that the next row will start of the StartTime specified.
- CalculatedStartTime of a row is the the sum of the duration of the previous rows of the VideoClip.
The CalculatedStartTime has precedence over the specified StartTime. - You can change the automatic mode with the Duration TimeCommands ( DurationAdd, DurationFixed, DurationMin, DurationSpeech).
Start and duration of Title rows (non speech rows)
In the VideoClip you can have rows that don't have speech:
- When there is no text
- SpeechStyle "none"
- When the text is a title.
- When the speech text need to be different than the speech.
In this case you need to synchronize the appearance of the text with the speech. So you can use the Sync Time Commands.
StartTime for Video Clip Files (Video Segments)
For Clip File that contains a video the StartTime is used to specify at what exact point a subtitles, title and speech should appears. But, if you build a Video in another language, the SpeechTime can be larger than the original one. In order not to have the speech to be cut fit the video, the program will have slow down a sequence of the video for the time necessary too fit all the speech.
- During the build the Video file is cut in different VideoSegments each one corresponding to the specified StartTime.
- Each segment is than processed separately and the duration adapted to the specific content and time.
- If the speech duration is longer than the original one, the duration of the segment is expanded (the video will be slowed down).
- If there are TimeCommand they will be applied to the row and segment.
- The speech and text are added to each segment so that the speech and titles start always at the original point.
You can control the duration of the different video segments by using the following TimeCommand:
- DurationSpeech.
Use if you want to make the segment not longer than the speech duration.- If the original video segment duration is shorter, the video will be slow down.
- If the original video segment duration is longer the video will be speed up.
- DurationAdd
Add a duration to the DurationSpeech and speed-up or slow-down the video segment. - DurationFixed
Extend or cut the original segment duration of exactly the specified duration and and speed-up or slow-down the video segment.
If there is a speech that it is longer than the specified duration the speech will be cut.
Use mostly in case for segments that have no speech.
Calculated columns
With the command Tools>Add/Remove functionalities you can:
- Add Calculated columns
- Remove Calculated columns
The Add Calculated columns are made available for the developer of the application, but may be interesting also for people creating video.
The command will add the following columns:
- Start Clip
The time when the row will start relative to the Clip. - Start Clip
The time when the row will start relative to the complete Video. - Calculated Duration
The duration taking in consideration also the Time command. - C. Speech
The Duration of the speech in the processed language. - Calculated Fill
The time that will be added to arrive at the specified Start time.

The calculated columns will be updated at the end of the build process.
The change will not change the modified flag of the file, so if you want to save the date you have to modify some text.
Table Text Styles
Define the text style to be used for displaying text on clips.
- Size and margins are defined in pixels, relative to an image size of 1920x1080.
- Colors you can use a name (red, blue, etc) or a symbol.

Use different colors for subtitles
Define the styles for any subtitle type you want to use.
Start from the default subtitle style and adapt it according to your needs.

- Id.
Enter the name of the style.
Use it in the column Text Style of the Table Clips. - Font Name.
Enter the name of the font. - Size.
Enter the size of the text. - Primary Color.
Enter the color of the text. - Outline Color.
Enter teh color of the outline of the text.
You can also change text sizes, bold, outlines, alignments and positions of any text style.
Add new voices in the Table Speech Styles, and combine each voice with a different subtitle style using the Speech Style column of the Table Clips.
Text Style Effects
In the column Effects you can enter commands and element to use in the columns Effects of the Clips table.
You can specify:
- object=RowId
A command with elements.
Example: "DrawRect:pos=800:200,size=500:400,border=red:4,opacity=0.9;Arrow:3:3
The parameters can be modified in the table Clips.
"Object:id=frect,pos=800:300,size=500:300" - style=RowId
Attributes that are used to display a command.
Example: "border=#ffe01b:3:5,fill=blue,opacity=0.1"
Table Voice Styles
Create style to use for creating speech.
If you use a style you should specify also for any language you use.

Columns Speech Styles
- Id.
- default.
The style to be used in case the speech style is not specified. - Any other name for a style.
- default.
- Language
The language code used for the column text in the Clips table. - Voice Language.
Language code and country code.
It should be the same as the one of the Voice name.
Example: "en-US".
For each language and id you should have only one country code. If you have more the program will use the first id it find. - Voice.
The voice name that available in your service.
The software will show to you a list of available voice based on the service you have selected.
Example: "en-US-AriaNeural"- Microsoft azure voices (click on section Text-To-Speech)
- Google voices.
- Rate, Pitch and Volume see Microsoft Azure explanations.
Predefined Speech Styles
If not defined the software will use this speech styles.
The Speech service used (Microsoft Azure or Google) will be automatically selected based on the API key you have entered in the global settings.
Azure and Google have different voice name, so once you enter the one that is specific to the service you use.
Microsoft Azure
Predefined languages for Microsoft Azure Service.
- "de","de-DE","de-DE-KatjaNeural"
- "es","es-ES","es-ES-ElviraNeural"
- "en","en-US","en-US-AriaNeural","cheerful"
- "fr","fr-CH","fr-CH-ArianeNeural"
- "it","it-IT","it-IT-IsabellaNeural"
- "nl","nl-NL","nl-NL-ColetteNeural"
- "pt","pt-BR", "pt-BR-FranciscaNeural"
- "zh","zh-CN","zh-CN-XiaoxiaoNeural"
Google Speech to Text
Predefined languages for Google Text to speech Service.
- "de","de-DE","de-DE-Wavenet-A"
- "es","es-ES","es-ES-Wavenet-C"
- "en","en-US","en-US-Wavenet-A"
- "fr","fr-CH","fr-FR-Wavenet-Al"
- "it","it-IT","it-IT-Wavenet-B"
- "nl","nl-NL","nl-NL-Wavenet-B";
- "pt","pt-BR", "pt-BR-Wavenet-B"
- "zh","zh-CN","cmn-CN-Wavenet-B";
Table Lexicon

Add Effects to Images
This dialog allow to add effects to the image.
Command Syntax
The column Effect support the following syntax (Version 2, from December 2021).
- Levels separated by "|"
Main commands
One per level
- DrawEllipse:
- DrawHtml:
Print the text specified in the Text column.
TextStyle and Speech style should be "none" - DrawImage:
Draw the specified image file.
The image is resized.
Use for inserting a logo. - DrawMarkdown
Convert the markdown text specified in the Text column to html and print.
TextStyle and Speech style should be "none",
See further explanation below. - DrawRect:
Draw a rectangle at the specified position and with specified size. - DrawText:
Draw a text. The text is resized to fit the rectangle. - FFmpeg:
You can enter an FFmpeg command
Examples:- FFmpeg:drawbox=x=400:y=100:w=300:h=200:color=pink@0.5:t=fill
- FFmpeg:scale=4*iw:-1,crop=iw/4:ih/4
- ObjectClip:rowid
It use an object defined in the table Clip column Effects with the RowId specified- Example: ObjectClip:id=001,pos=800:300,size=500:300
Use the object defined, but with a specified size.
- Example: ObjectClip:id=001,pos=800:300,size=500:300
- ObjectStyle:rowid
It use an object defined in the table TextStyle column Effects with the RowId specified- Example: ObjectStyle:id=frect,pos=800:300,size=500:300
Use the object defined, but with a specified size. - Use to automate the object creation and styling.
Create the object in the table Clip and then copy in the TextStyle table.
- Example: ObjectStyle:id=frect,pos=800:300,size=500:300
- Rescale:
- SelectRect:
It makes the rest of the image darker. - VideoCut:
- ZoomIn:
Elements (separated by ";")
Are relative the the commands.
- ;Arrow:
Add and arrow next to the form- ,align= 1 to 9, numeric on the keyboard
- ,dim=1 to 5
- ;Number
- ,text=
- ,align=1 to 9 , numeric on the keyboard
- ,dim= 1 to 5
- ;Grid:numberpixels
Will display a grid every specified pixels.
Example: ";Grid:100,fill=yellow" grid every 100 pixels in yellow.
It use the styles of the main command, unless a different style is specified.
Attributes (separated by comma ",")
Attribute are added to the commands or to the elements.
- ,align=[number 0 to 9)
Used for Elements Number and Arrow.
The position of the elements is as the key on the numeric keyboard. - ,Dim=1 to 5
The size of the Elements Number and Arrow. - ,border=color:[width]
- ,color=color //text color
- ,endtime=hh:mm:ss.mmm
for VideoCut - ,fill=color:[pattern]
- id=RowId
Use the text at the row with the specified RowId
For ObjectStyle it retrieve the effect specified in the table TextStyle - image=filename
for DrawImage - ,opacity=number (0 to 1)
- ,pos=x:y
- seconds=seconds
for ZoomIn - starttime=hh:mm:ss.mmm
for VideoCut - ,size=width:height
- ,style=stylename
Use the content of the column Effects in the table TextStyles at the line with the id stylename.
Examples:- DrawRect:pos=800:200,size=500:400,style=saa,border=blue:30
- ,text=text
Use the text that is specified.
Examples
- SelectRect:pos=800:300,size=500:400,border=red:3;Arrow:align=1,dim=3,fill=yellow;Number,text=1,align=7,dim=3
- DrawImage:pos=900:300,size=200:100,image=filename.png,pen=red
- DrawRect:pos=900:300,size=200:100,border=red:3,fill=yellow;Number:1:9:3;Number:6:5:3;Number:3:7:3
- DrawRect:pos=900:300,size=200:100,border=red:3
DrawMarkdown
Markdown is syntax that can be converted easily to html
You can create slides and reuse.
This is an example of markdown text
# Title 1

## Title 2

### Title 3

Proof of **bold** *italic*

* line 1
* line 2
* line 3
This commands allows to use markdown in the text.
- When using this command the columns TextStyle and SpeechStyle should be set to none.
- The markdown text is rendered in html using the style defined in the file _video.css in the table Documents
- Example:
DrawMarkdown:pos=200:100,size=800:600
With the DrawMarkdown command you can use also this elements:
- ;HtmlSelectLi:2
A class "selected" is added to the specifiend html tags "li" ;
This you can display an item with a different style. - ;HtmlAddClass:classname
A class "classname" is added to all html tags that belong to the markdowns.
You can have styles specific to a single markdown.