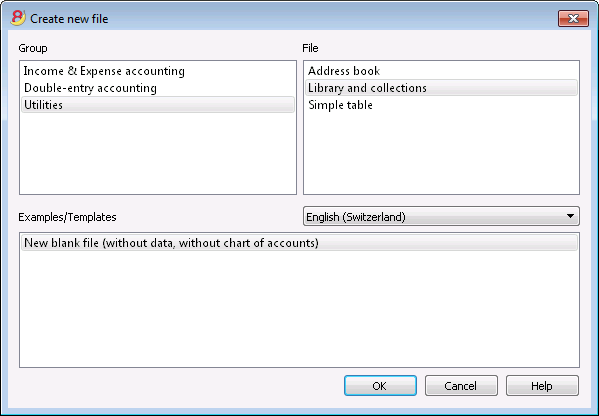
Bibliotheek en collecties
Hoe Bibliotheek en collecties te gebruiken
Dit is een toepassing waarmee u een lijst kunt bijhouden van boeken, voorwerpen en contacten en waarme u uitgeleende en teruggebrachte objecten kunt beheren.
Zie ook de pagina Banana Libraries voor extra uitleg over de functies en de manier om deze toepassing te gebruiken en voor een download van een voorbeeldbestand dat klaar is voor gebruik (Engelstalig).
Groepen en contacten
Voor deze tabellen vindt u informatie op de pagina Adresboek.
- In de tabel Contacten voert u de adressen in van diegenen die een boek of ander object lenen.
Ieder contact moet zijn eigen Id hebben. - In de tabel Groepen voert u de verschillende groepen in waarin contacten verdeeld kunnen worden.
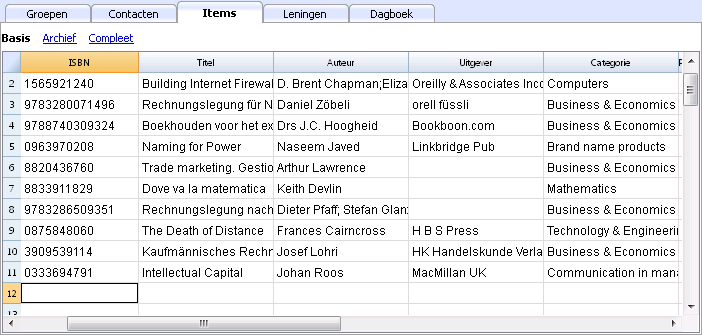
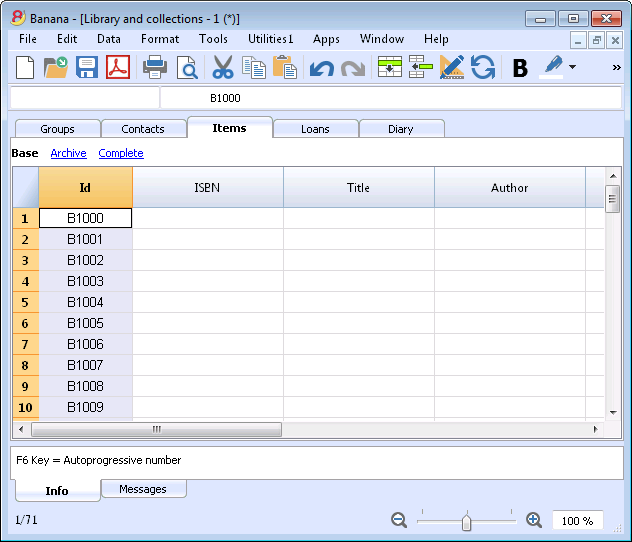
Items
Voer de Items in deze tabel in: deze kunnen verwijzen naar waardevolle voorwerpen, boeken of andere dingen.
Als het over boeken gaat kunnen alle gegevens die met het boek te maken hebben ingevoerd worden en ook de uitleen- en inleverdatum.
Kolommen
Er zijn diverse kolommen en het is mogelijk nieuwe toe te voegen.
- Id: het itemnummer dat toegekend moet worden.
De F6 toets voegt een oplopend nummer toe.
Het is mogelijk een voorvoegsel te gebruiken. Bijvoorbeeld: A-001, als volgende id stelt het programma A-002 voor. - ISBN
Het Internationale Standaard Boek Nummer.
Als na het invoeren van het ISBN in de Id kolom op F6 gedrukt wordt vult het programma automatisch alle boekgegevens, die het in de Google database vindt, in de andere kolommen in. Hiervoor is een internetverbinding nodig.
Voor meer informatie zie: Google documentatie (Engelstalig).- De gegevens in de Google database zijn niet altijd compleet. Bijvoorbeeld, de titel is aanwezig maar de redacteur of andere gegevens ontbreken.
- Als men in dit geval het ontbreken van gegevens wilt controleren ga dan naar de volgende pagina met uw internet browser https://www.googleapis.com/books/v1/volumes?q=9025703356, en voer na de "q=" het ISBN nummer van het boek in.
Een pagina in XML formaat wordt getoond met alle gegevens die beschikbaar zijn.
- Titel
De titel van het boek. - Auteur
De auteur. Er kunnen meerdere auteurs ingevoerd worden, gescheiden door puntkomma's ";". - Uitgever
De uitgever. Er kunnen meerdere uitgevers ingevoerd worden, gescheiden door puntkomma's ";". - Datum terugkomst
De verwachte terugkomstdatum voor dit item.
Deze kolom wordt automatisch aangevuld volgens de gegevens van het uitgeleende item.
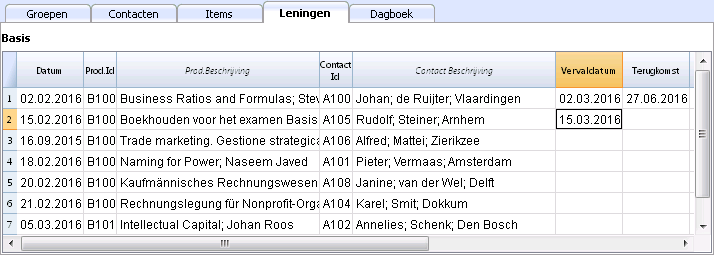
Leningen
De uitgegeven items kunnen hier ingevoerd worden met de vervaldatum en de inleverdatum.
Kolommen
Er zijn diverse kolommen en het is mogelijk nieuwe toe te voegen.
- Datum
De datum van de lening. - Prod.Id
Het item nummer. Door in edit-modus te gaan kan gezocht worden op titel. - Contact Id
Het contactnummer. Door in edit-modus te gaan kan gezocht worden op voornaam, achternaam en plaats. - Vervaldatum
De datum waarop het item terug moet zijn.
Als u "+30" invoert vult het programma een datum in die 30 dagen later dan de huidige datum is. - Terugkomst
Voer de datum van terugkomst in.
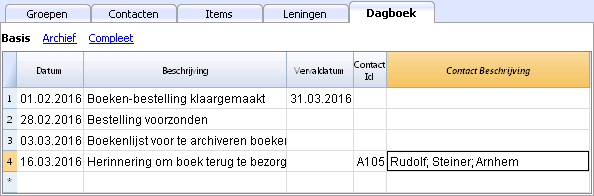
Dagboek
In de tabel Dagboek kunt u dagelijks allerlei notities vastleggen en verwijzen naar contacten uit de tabel Contacten.
Items retour commando
Dit commando wordt gebruikt om de teruggebracht items aan te geven (Menu Hulpprogramma's, commando Items retour...).
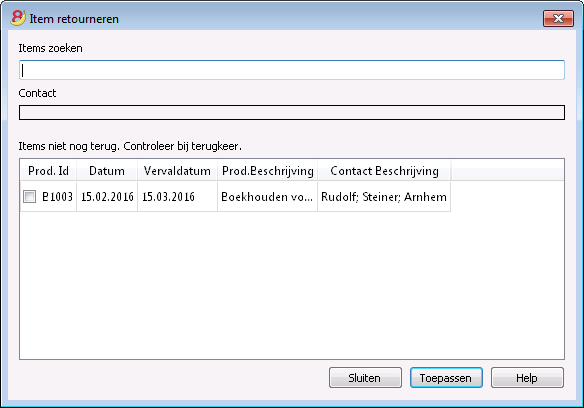
- In deze lijst worden alle items getoond die in de tabel Leningen een vervaldatum maar nog geen terugkomst datum hebben.
- In de cel Items zoeken kan Id ingevoerd worden alsook andere zoektermen (gebruikersnaam, boektitel, etc.). Het programma geeft dan een lijst van items die geen terugkomst datum hebben overeenkomend met de ingevoerde zoekterm.
- Als de Id overeenkomt met een itemnummer wordt in het veld Contact de naam van het contact getoond samen met alle items die dit contact leent. Door te klikken op het Item id wordt deze geselecteerd.
Terugkomst van een item
- Vink het teruggekomen item aan
- Met de knop Toepassen werkt het programma de lijst van ingeleverde boeken bij en vult de inleverdatum in de tabel Leningen in.
Sluit het venster wanneer de boeken inlever procedure is voltooid.
De inleverdatum kan ook direct in de tabel Leningen worden ingevoerd of eruit worden verwijderd.
Print library labels
Label printing
You can print two different types of labels:
- small labels (containing the book code) for use on the spine of the book, so that they are visible on the bookshelves
- larger labels are used on the inside of the cover, maybe mentioning that the book has to be returned at a specified date
Labels can be printed either on the basis of the Banana file, where you have registered all the books in the library, or from an empty file in case you wish to print a list with codes, that you will then assign to the books.
Printing labels for the spine of the book
You can choose the format that best suites your needs by consulting the websites of label producers (for example A4 sheets, 25,4 mm x 10 mm - Herma 10001 or Herma 4333 models).
In order to print the labels, you can open a new blank file in Banana, containing no data (File menu -> New), but, as stated, you may wish to start from an existing file in your library.
There is a useful Excel function to generate a large amount of codes in a speedy manner, rather than entering them manually or than using F6 key. Here is how you do it:
Open a new Excel file; in cell A1 entere the library code that suited your purpose (any combination of letters and numbers will do) - for example B-1000.
Choose the bottom right angle of your cell with your mouse (the point will now be a cross), and, while holding down the right click, drag down along the column; Excel will automatically generate autoprogressive numbers.
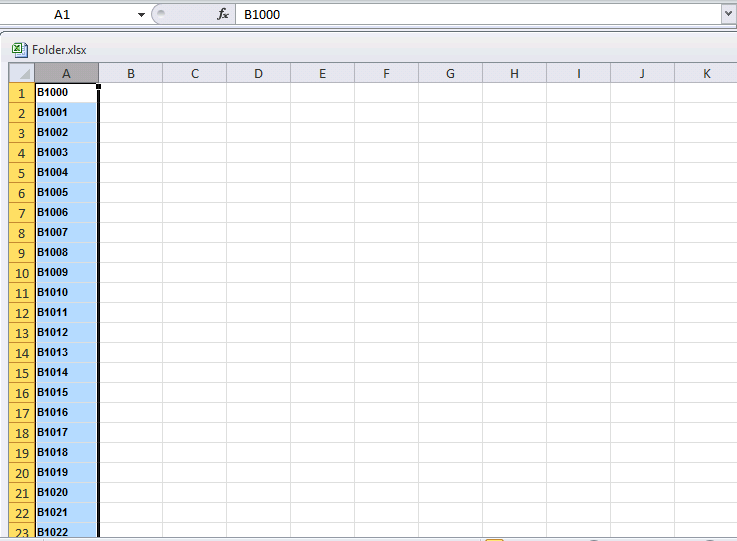
Now copy (Ctrl + C keys) the codes that have been generated into Banana's Items table, in the Id column (Ctrl + V keys).
You can now create the label.
Chose the Labels -> Print command from the Apps menu. This window will be shown:
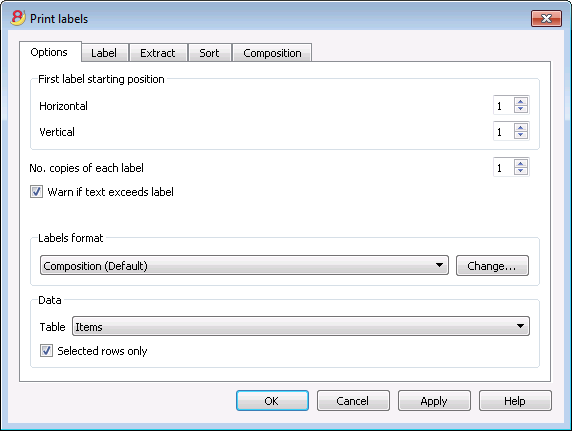
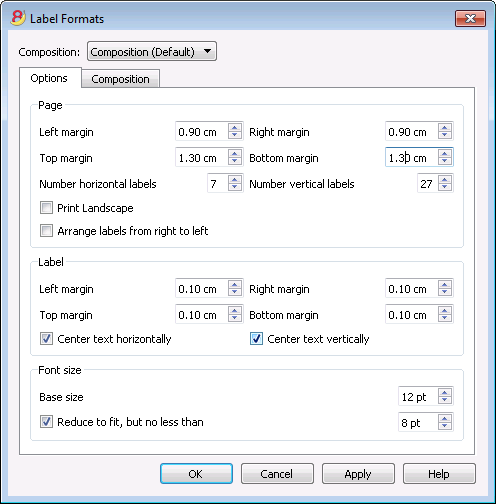
It is important to have the Items table selected as the source for Data; now you can define your label by pressing the Change... key in the Labels format section.
In the window now shown, entere the margins and other characteristics of your chosen label, Herma 10001 in this case.
Before hitting the OK key, opene the Composition tab, where you can assign a name to your custom settings (so they can be used in the future). In this case it's Book codes (Spine).
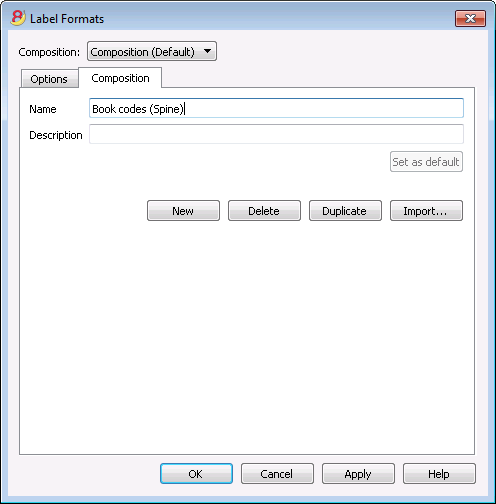
Hitting the OK key will now return you to the Print labels window.
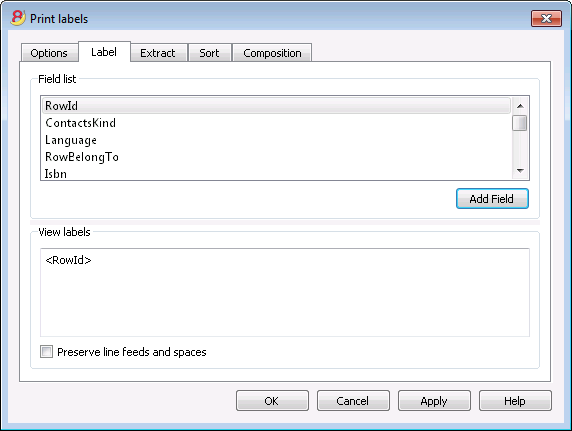
Enter the Label tab to do so.
In the example, the label only needs to indicate the book's code, i.e. the RowId column.
You can therefore select the RowId line in the available list and press the Add Field button.
RowId will show in View labels.
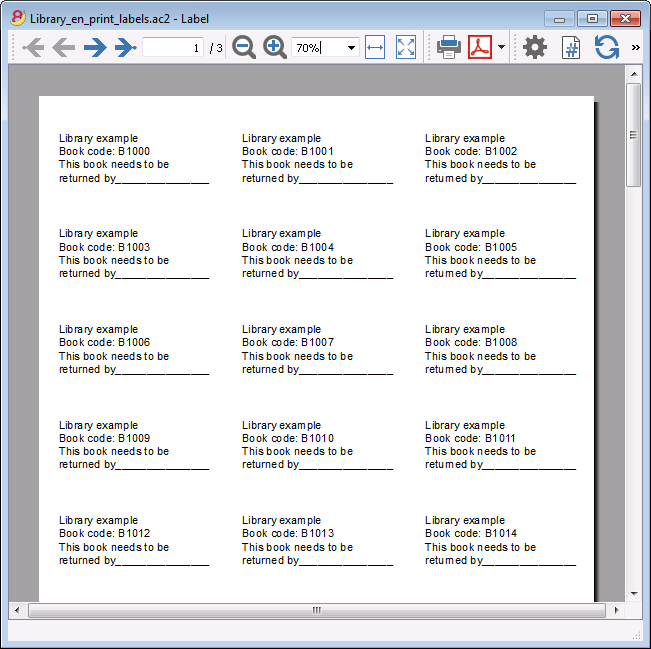
Pressing the OK button will generate a preview of your label.
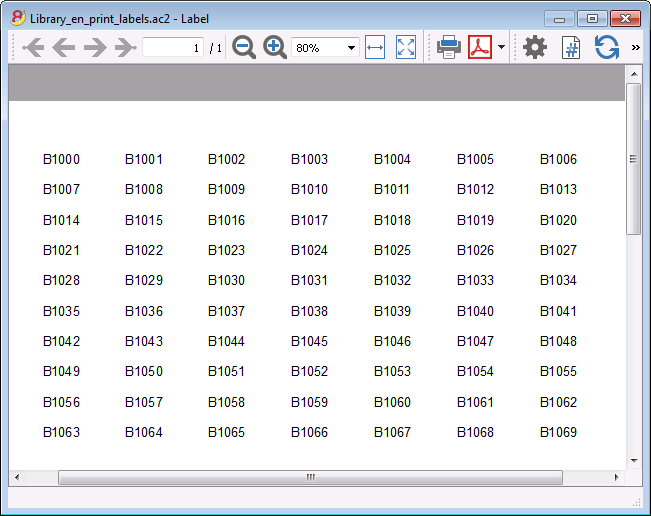
You may now print using your Herma sheets.
Printing labels for the inside cover
Choose your label format. In the example a 70x36mm (Herma 4630 or Avery 3490) format hase been chosen. The steps to follow are identical to the previous example::
- First, choose the Labels -> Print command from the Apps menu
- Click Change in the Labels format section
- Enter the margins for your new label in Labels format window.
- Before hitting the OK key, open the Composition tab, where you can assign a name for your new custom settings (Inside Cover label, for example), than hit OK.
- Select Label in the Print label section to add the content of your label.
You may enter text, other than the available fields, as well.
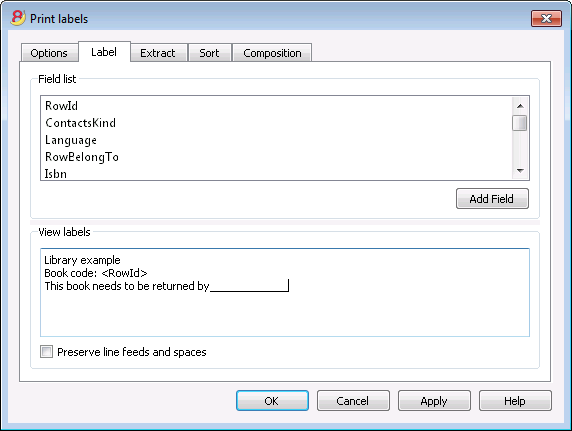
Pressing the OK button will generate a preview of your label.
Note:
The models available in Banana already include the two mentioned label formats: label for the spine of the book and label for the inside of the cover.
Related features:
Management of yearly membership fees
If you run a library requiring an annual membership fee, or if fees are charged for the loan of individual books, it is useful to use the accounting functions of Banana Accounting.
Please check our page Accounting templates.