Tables setup
This command allows you to manage
- The Tables:
These are the elements that contain the data in a format or rows and columns.
- The Views:
Indicated under every table.
These are the elements that define the way in which the columns of the table are displayed.
Thanks to the views, one can define which columns need to be visible, the sequence of the displayed columns and the way in which they are displayed.
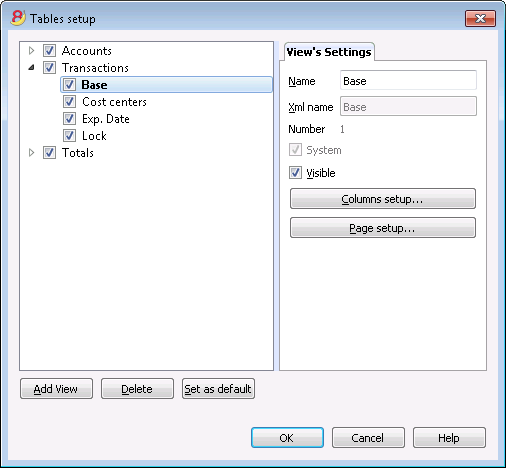
View's Settings
In order to add tables, please go to the Add new functionalities command.
For each table, you can define:
- Name
The name of the table in the file language. This field cannot contain spaces or special characters.
It can only be changed for added tables. - Xml name
The name this is being used for the programming. This field cannot contain spaces or special characters.
It can only be changed for added tables. - Header
The name that appears in thetables list - Visibile
Indicates whether the table is visible or not.
Manage Views
Name
It is possible to enter a new name for the selected View.
Xml name
This is the View name for the Xml export. For system Views this name cannot be changed.
Number
This is a number automatically given to the View by the program.
Visible
When selecting this checkbox the View will be visible.
System
If this checkbox is selected the View is a system View and cannot be deleted or edited.
Columns setup...
Displays the Columns setup page that allows to edit them, both in displaying them as well as in setting them up.
Page setup...
This button leads to the page format settings.
Add...
This button adds a new View to the active table.
Delete...
This button deletes a View.
Set as default
Defines the View that is being used.
Columns setup
New columns
In the new version Banana Accounting Plus, in the Transactions table, we have added new columns for the integrated Invoicing and the new Balance column that identifies on each row, any differences so you can immediately correct them.
We advise you to switch now to Banana Accounting Plus and take advantage of the many new features.
Display Tab
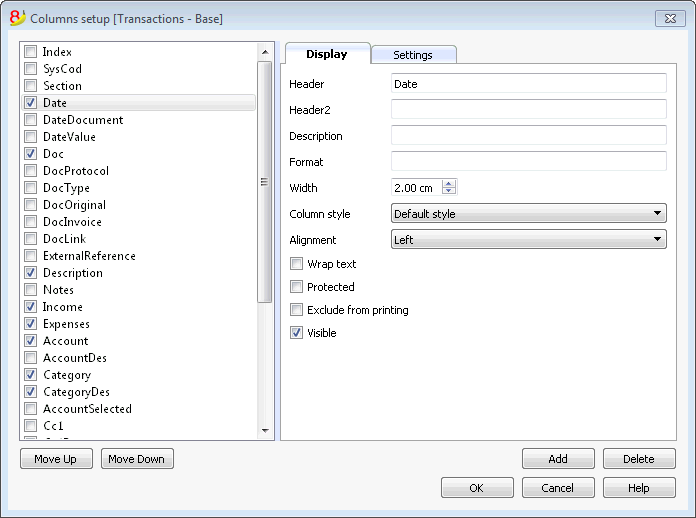
Header
This is the column header.
Header 2
This header is used by the program for only a few fields (e.g. Amount column).
Description
This is the description of the field. This description will be shown as a tooltip.
Format
This is the format to show numbers, date and time (see chapter at the end of this page).
Width
This section defines the horizontal size of the column.
Column Style
This is a drop-down menu that indicates the style to be used (Format, menu, see sub chapters). This style has priority over the style of the row.
Alignment
The user can choose whether to align the text right, left or center in this drop-down menu.
Wrap text
This option allows the user to view the input text on more than one line.
Protected
This option allows the user to protect the entire column so that no data can be input or edited.
Exclude from printing
When this option is activated, the field will be excluded from printing.
Visible
This option allows the user to make column visible.
The tables can be altered. Fields can be added, headers can be changed, and column sizes and the order in which they are shown can be altered.
Move up, Move down
The fields are listed in the order in which they appear on the table being used. The visible fields are the ones with a checkmark.
In order to alter the order in which they appear simply select the field you wish to move and drag it up or down.
Add
This button adds new fields (columns) to the current table. Field added by the user are just information fields; the program does not make any calculation on numeric data.
Delete
This function is used to delete a field (column) from the list. A system field, however, cannot be deleted.
Settings Tab
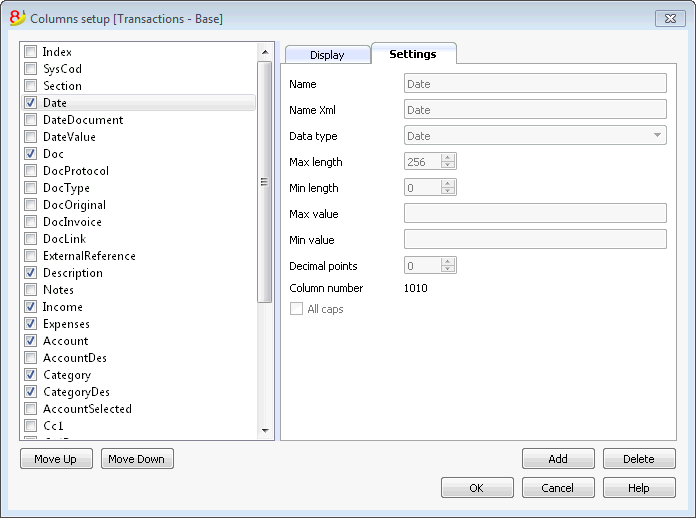
Field name
This is the name of the active field and it is automatically inserted by the program. It cannot be modified.
Field name Xml
This is the name of the active field in the Xml format and it is automatically inserted by the program. It cannot be modified.
Data type
It is possible to choose between the following predefined types: Text, Number, Amount, Date, Time.
Max and Min length
Maximun and minimum field length.
Max and Min Value
It is possible to enter minimum and maximum values (numbers or characters).
Decimal points
It is possible to define the field decimal points
Field number
This is a number automatically given to the field, and has uniquely a technical purpose.
All caps
By clicking this options all fields data will be shown in caps characters.
Date, hour and number format
When the format is modified, the way the date, time and numbers are shown, changes.
If no specific format is specified, the default format of your operating system will be used (date, time and numbers as indicated on the control panel).
In the Format area of the Set up fields/Edit attributes command (Data menu) the user can use other formats. Types of formats, with some examples, are listed below:
|
Date format |
Examples for date |
|
d mm yy |
1 01 15 |
|
dd m yy |
01 1 15 |
|
ddd mmm yyyy |
Fri Jan 2015 |
|
dddd mmmm yyyy |
Friday January 2015 |
|
The letter “d” (day) indicates the day, the “m” (month) indicates the month, and the “y” (year) indicates the year. |
|
|
Time format |
Examples for time |
|
hh:mm:ss:zzz |
04:04:36:089 |
|
h:m:ss:zz |
4:4:36:89 |
|
Naturally the user can also invert the order of the elements making up the date or the time as desired (e.g.: mm dd yyyy). |
|
|
As far as the separators are concerned, the user can choose between all of those available on the keyboard (for example: #, @, -, /, ., etc.). |
|
|
Numbers Format |
Example for numbers |
|
0. |
259 |
|
0.00 |
258.85 |
|
0.000 |
258.848 |
|
The number of decimal spaces in a number field can be edited according to the user’s needs. Actual calculations are made using all the inserted decimal numbers. Rounding is only done for what is shown on screen. |
|
New column
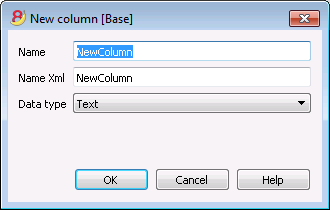
Field name
Enter the field name of the column to add.
Field name Xml
The name of the column to export in Xml and in scripts.
Data type
It is possible to choose between the following predefined types: Text, Number, Amount, Date, Time.
New view
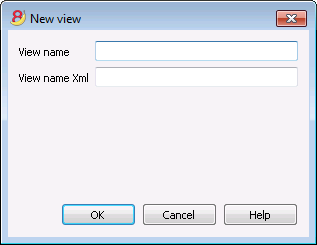
View name
Enter the name of the view you want to add.
View name Xml
This is the view name for the Xml export.