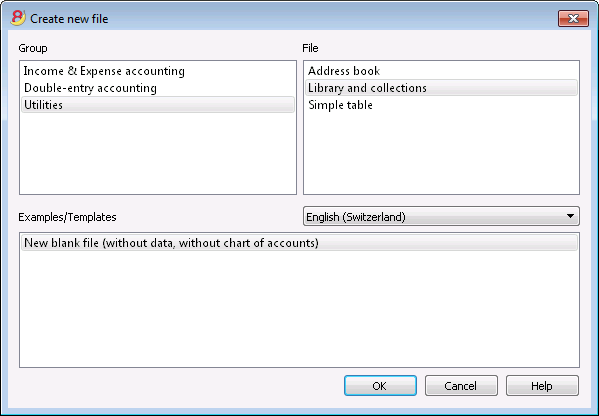
文库与收藏
如何使用
使用文库与收藏的表格可以管理图书的列表,项目和联系人,以及可以检查及控制要返还的书籍。
请您参考 Banana 图书馆关于功能,使用方法和下载已准备使用的模型的解释。
总组和联系人
对于这些表格,请您参照地址簿页面的解释。
- 在联系人表格中,输入检查图书或其它物品的联系人地址。
每个联系人都需要拥有自己的识别号码。 - 在总组中,输入与联系人相关的各种组。
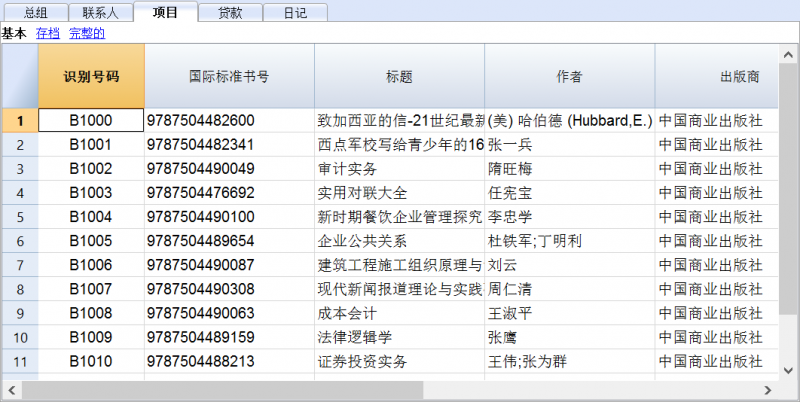
项目
可以在此表格内输入不同的项目: 它们指的可以是有价值的物体,书籍或者其它的项目。
如果指的是书籍,那么关于书籍的任何数据都可以被输入,包括借出的日期和归还的日期。
列
已经存在各种各样的列,也可以添加新列。
- 识别号码: 必须标注的项目编号。
使用F6键可以自动延续项目的编号。
也可以使用一个前缀。例如: A-001, 在此之后的编号您可以使用 A-002。 - 国际标准书号
ISBN是国际标准图书编号。
当您在项目表格中的国际标准书号一列中输入国际标准图书编号后,如果您的电脑已经连接了网联网,使用 F6 键,结合谷歌在线的图书数据库资源,程序会自动的完成对其它列信息的填写。
任何已经存在的信息都将被覆盖。
欲想了解更多的信息,请您查阅: Google documentation。- 在谷歌数据库中的数据并不总是完整的。例如,标题可能存在,但编辑器或其它数据可能会丢失。
- 在这方面,如果您想验证一个缺失的数据,请您在浏览器中输入此链接: https://www.googleapis.com/books/v1/volumes?q=9781906042509, 在最后输入“q=该本书的国际标准图书编号”。 如果您看到“totalItems:0”,则表示该书不在Google的数据库中
如果您看到JSon格式的页面(程序员格式)与本书的数据,则表示该书籍位于Google的数据库中。
- 标题
指的是作品的标题。 - 作者
您可以输入多名作者的名字,只需使用分号 “;” 将其分开。 - 出版商
您可以输入多个出版商的名字,只需使用分号 “;” 将其分开。 - 返回日期
该项目的预计返回日期。
本列将根据已签出的项目自动完成。
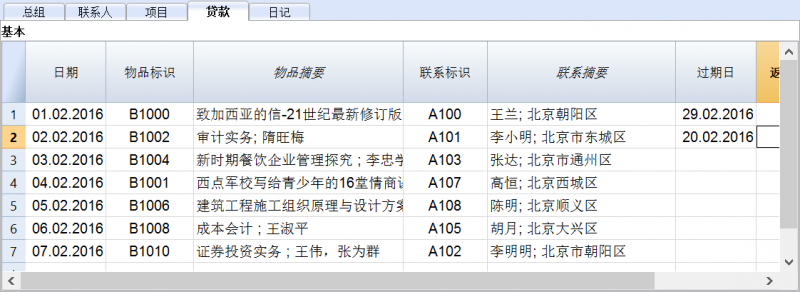
借贷
可以在此表格中输入借出的项目,过期日期和返还日期。
- 日期
借出的日期。 - 物品标识
项目的编号。可以根据标题进行搜索。 - 联系标识
联系人的标识号码。可以根据名称、姓氏、地址进行搜索。 - 过期日
该项目的预计返回日期。
例如: 您在单元格内输入了"+30/20/10/5...", 那么程序会自动计算30/20/10/5...天后的日期, 您可以根据需要随意输入相应的数字。 - 返回日期
输入项目返回的日期。
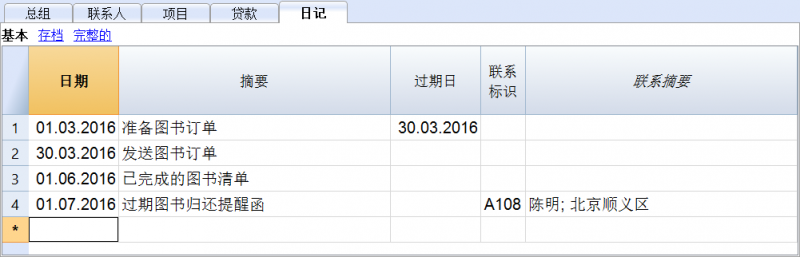
日记
在这些表格中,您可以输入各式各样的(每日)笔记信息,还可以将其链接到一个特定的联系人。
返回项目命令
使用此命令来指示出返还的项目 (实用程序(1)菜单, 返回项目命令)。
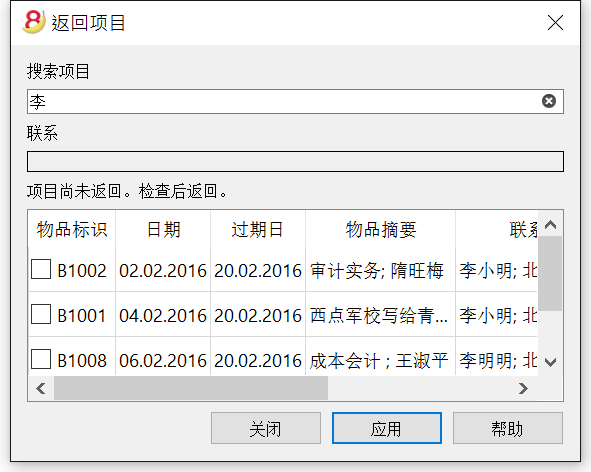
- 在此列表中所显示的物品是在借出列表中所指示的已借出,但过了过期日还没有返还的物品。
- 在物品标识的单元格中,标识码也可以另外一种搜索关键词的方式被输入 (例如用户名,书名,等等)。根据所输入的搜索关键词,程序指示出没有归还日期的物品列表。
- 当标识对应一个项目标号的时候: 在联系人表格中的联系人名称将与其借出的所有物品联系在一起。当您点击物品标识前小方框的时候,该项将被选择。
对物品的返还
- 检查返回的项目
- 使用如上图所示的应用键,程序会更新被返还物品的列表,并且在借贷表格中输入返还的日期。
在完成图书归还程序后关闭窗口。
也可以在借贷表格中直接输入或删除返回日期。
Print library labels
Label printing
You can print two different types of labels:
- small labels (containing the book code) for use on the spine of the book, so that they are visible on the bookshelves
- larger labels are used on the inside of the cover, maybe mentioning that the book has to be returned at a specified date
Labels can be printed either on the basis of the Banana file, where you have registered all the books in the library, or from an empty file in case you wish to print a list with codes, that you will then assign to the books.
Printing labels for the spine of the book
You can choose the format that best suites your needs by consulting the websites of label producers (for example A4 sheets, 25,4 mm x 10 mm - Herma 10001 or Herma 4333 models).
In order to print the labels, you can open a new blank file in Banana, containing no data (File menu -> New), but, as stated, you may wish to start from an existing file in your library.
There is a useful Excel function to generate a large amount of codes in a speedy manner, rather than entering them manually or than using F6 key. Here is how you do it:
Open a new Excel file; in cell A1 entere the library code that suited your purpose (any combination of letters and numbers will do) - for example B-1000.
Choose the bottom right angle of your cell with your mouse (the point will now be a cross), and, while holding down the right click, drag down along the column; Excel will automatically generate autoprogressive numbers.
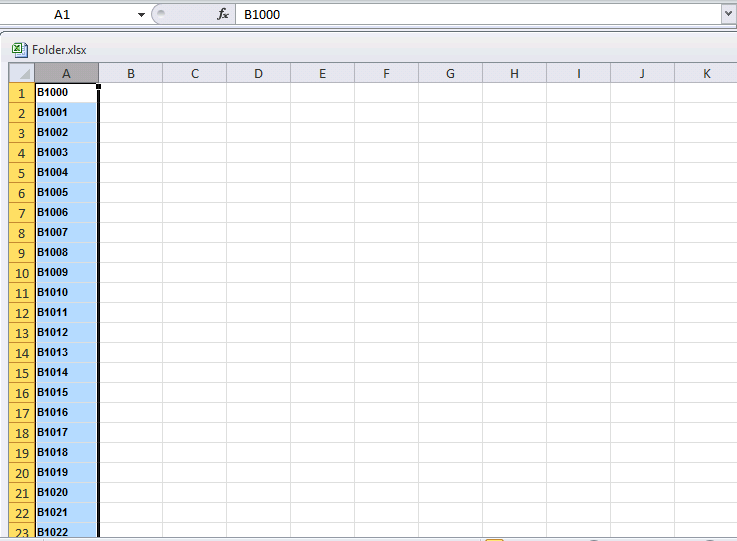
Now copy (Ctrl + C keys) the codes that have been generated into Banana's Items table, in the Id column (Ctrl + V keys).
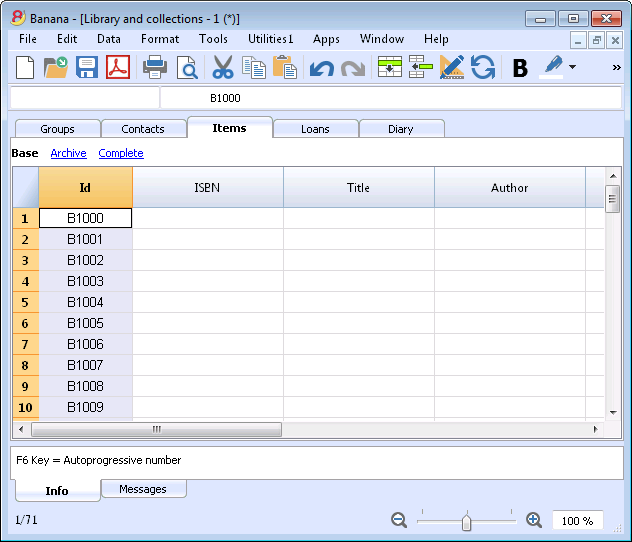
You can now create the label.
Chose the Labels -> Print command from the Apps menu. This window will be shown:
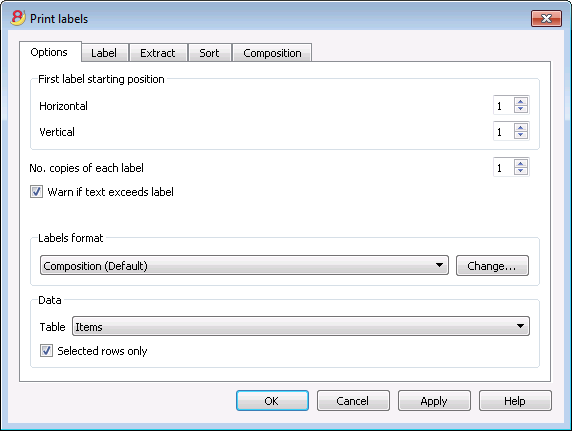
It is important to have the Items table selected as the source for Data; now you can define your label by pressing the Change... key in the Labels format section.
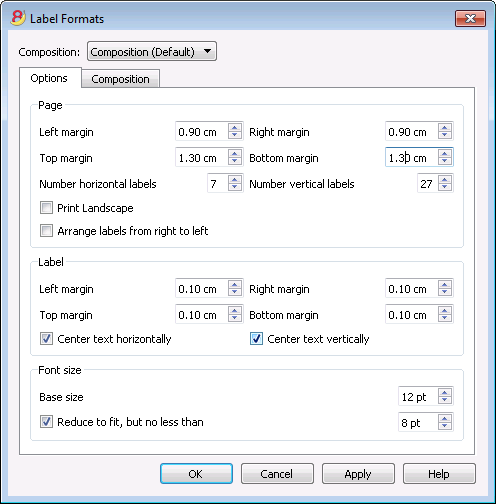
In the window now shown, entere the margins and other characteristics of your chosen label, Herma 10001 in this case.
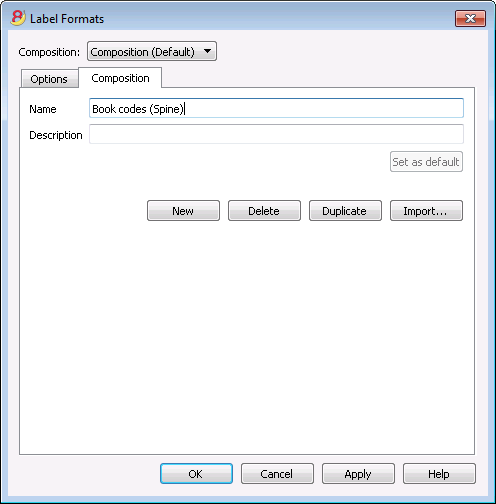
Before hitting the OK key, opene the Composition tab, where you can assign a name to your custom settings (so they can be used in the future). In this case it's Book codes (Spine).
Hitting the OK key will now return you to the Print labels window.
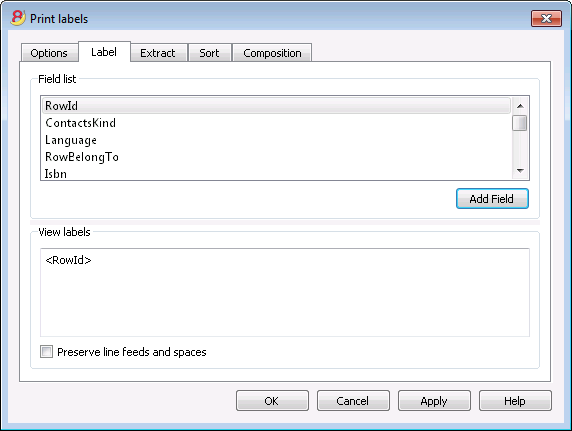
Enter the Label tab to do so.
In the example, the label only needs to indicate the book's code, i.e. the RowId column.
You can therefore select the RowId line in the available list and press the Add Field button.
RowId will show in View labels.
Pressing the OK button will generate a preview of your label.
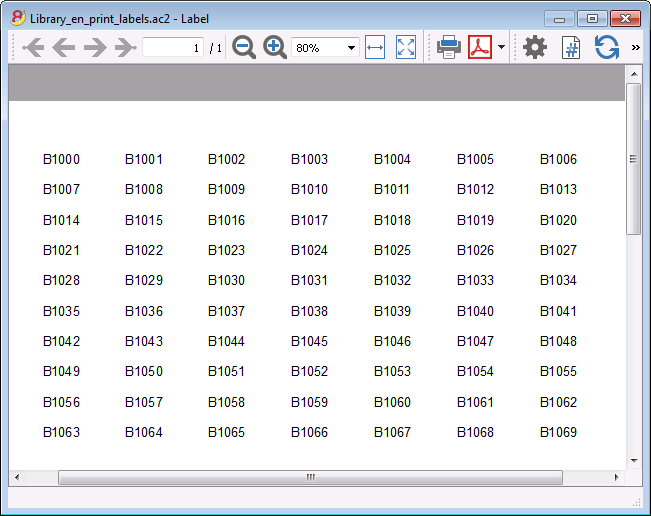
You may now print using your Herma sheets.
Printing labels for the inside cover
Choose your label format. In the example a 70x36mm (Herma 4630 or Avery 3490) format hase been chosen. The steps to follow are identical to the previous example::
- First, choose the Labels -> Print command from the Apps menu
- Click Change in the Labels format section
- Enter the margins for your new label in Labels format window.
- Before hitting the OK key, open the Composition tab, where you can assign a name for your new custom settings (Inside Cover label, for example), than hit OK.
- Select Label in the Print label section to add the content of your label.
You may enter text, other than the available fields, as well.
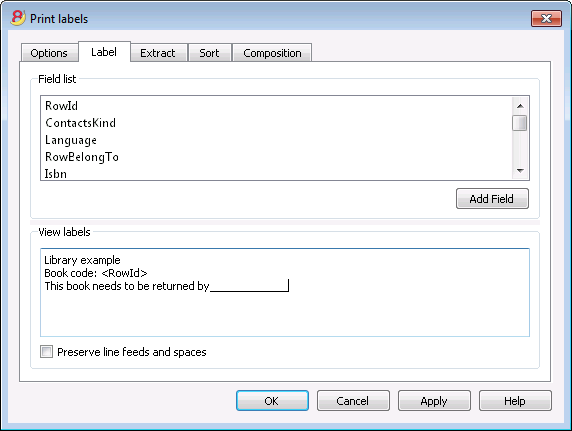
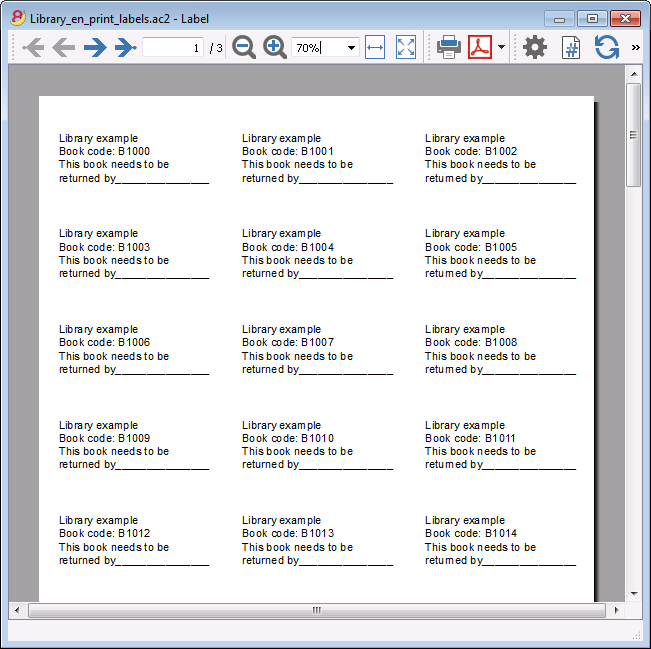
Pressing the OK button will generate a preview of your label.
Note:
The models available in Banana already include the two mentioned label formats: label for the spine of the book and label for the inside of the cover.
Related features:
Management of yearly membership fees
If you run a library requiring an annual membership fee, or if fees are charged for the loan of individual books, it is useful to use the accounting functions of Banana Accounting.
Please check our page Accounting templates.