Dialogs for the Video Application
Dialog Video Change Global Settings
The global setting dialog allow to set the environment.
To access the dialog:
- Run Banana Accounting dev-channel version.
- Open the empty project you have just created.
- Menu Actions → Global settings.

You need to setup the
- ffmpeg executable path
- Enter the executable path, including the filename (ffmpeg.exe for windows / ffmpeg for mac).
- Text to speech service
- Internal
It will use the text-to-speech service of the computer. - Banana.ch service
It will use the Banana.ch text to speech service that is based on the Azure service.
Your need to receive a permission from Banana.ch. - Microsoft Azure
You need an Azure account and a API key for the Cognitive text to speech service.
Enter the:- Region name
- The API Key
- Google Service you need the API key
- Internal
- Menu Action → Build video to test if the build process works.
File Properties for Tutorial Maker
When a new file is created, the basic data need to be entered in the File menu → File and accounting properties.
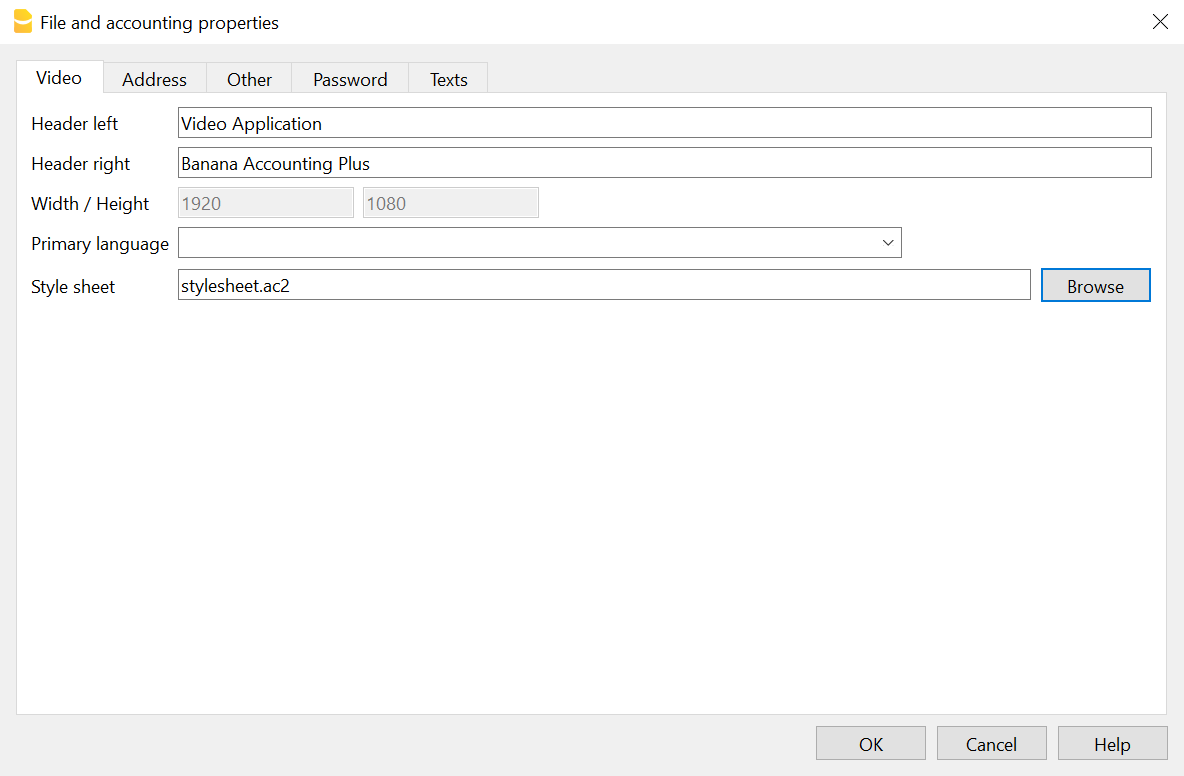
- Header left & Right
Will be displayed on printing. - With and height in pixels of the clips and output.
Currently fixed at 1920 x 1080. - Stylesheet file
Path and file name of a stylesheet.
If present the Text Styles and Voice Styles defined in the stylesheet will be available in this project.
Ideal for creating and reusing styles.
Download the stylesheet.ac2 example and modify it according to your desires.
Import Subtitles
The Actions>Import Subtitles command let you import subtitles. You can choose the available formats.

Imported columns
The commands will import the following columns
- Start Time
- Text
The text will be saved in the current selected language for build.
The lines will be appended at the end of the Clip Table.
YoutubeTranscript
This command allow to import the times and subtitles from the Youtube transcript format.
You should copy the text in the Clipboard.

To copy the transcript text in Youtube
- Clip on the 3 dots button.
- Clip con Show Transcript
Not all video have a transcript. - Select the text inclusive the time and copy to the clipboard.
Eventually save the text to a txt file so that you can easily access lately.
Example of a Youtube Transcript format
0:01
willkommen bei bex dieser folge schauen
0:05
wir uns an wie ich wiederholen die
0:07
aufträge so genannte abos in bex
0:10
erfassen kann
0:12
als erstes erstelle ich mir dafür unter
0:15
dem reiter verkauf einen auftrag auf den
0:18
entsprechenden kontakt aus
SRT Subtitles
The SubRip Subtitles file format is available in most video editing software.
Dialog Build video
Dialog build video
The command "Build Video" give you different choices.

- Build language.
Select the language to use. - Create video file (Always on)
Create the video file with Titles, Voice and Subtitles.- Prepend Chapter to Display titles
Automatically prepend the Chapter number to the Display text.
To be used for titles.
Speech text remain the same - Embed subtitles in the video
The subtitles are embedded in the (style name starting with "Subtitles") in the video.
The build process will also create a *.srt file that you can use to add subtitles. - Add control times
Include information on the clip and text start and duration time.
Useful to check if there are any problem in the sequence.
- Prepend Chapter to Display titles
- Create audio file
It save the audio in separate file. - Create GIF file
It create a GIF animated sequence.- G Width (the height is calculated automatically)
- Add progress bar.
Include a progress bar that show the make the gif look like a video progress bar. - Progress bar color in FFmpeg format
You can also specify the opacity"red@0.4". It use color red with a opacity of 0.4. color of the
- Clear cache.
The program keep a cache with all the the intermediary files. The file are recreated only in case the data change.
In case you change the data, but the audio or video is not updated, you should try clear the cache. Build time will take longer.- Clips.
The video are fully regenerated. - Speeches
All the she speech texts are recreated.
- Clips.
Build process
Once you click build the build process start:
- The audio speech are generated.
- Each row clip is created and the duration is calculated.
- The row clips are concatenated.
In the Out directory you will have:
- A generated .mp4 video file with the speech.
- The srt file with the subtitles.
- The index file with the chapter time and text
Copy the content to youtube to have the chapters. - The audio with the speech (if requested)
- The gif file (if requested)
Output directory structure
When you give a build command a new directory is created on the project directory with the same name as the project file, preceded by the "_" and a sub-directory for the specified language. All temporary data will be stored in the directory.
The directory or any sub-directory can be deleted at any time, but the build will take more time dute to the necessity to rebuild all the intermediary and cache files.
Assuming your project file name is "testvideo.ac2", the resulting directory structure will be:
- _testvideo
- en
the temporary file for the language "en"- build
Where all the intermediary file are stored. - cache
Cache for intermediary files. - out (results)
Where the output video, audio and gif are written.
- build
- it
the temporary file for the language "it". - temp
temporary files not specific to a language.
- en